
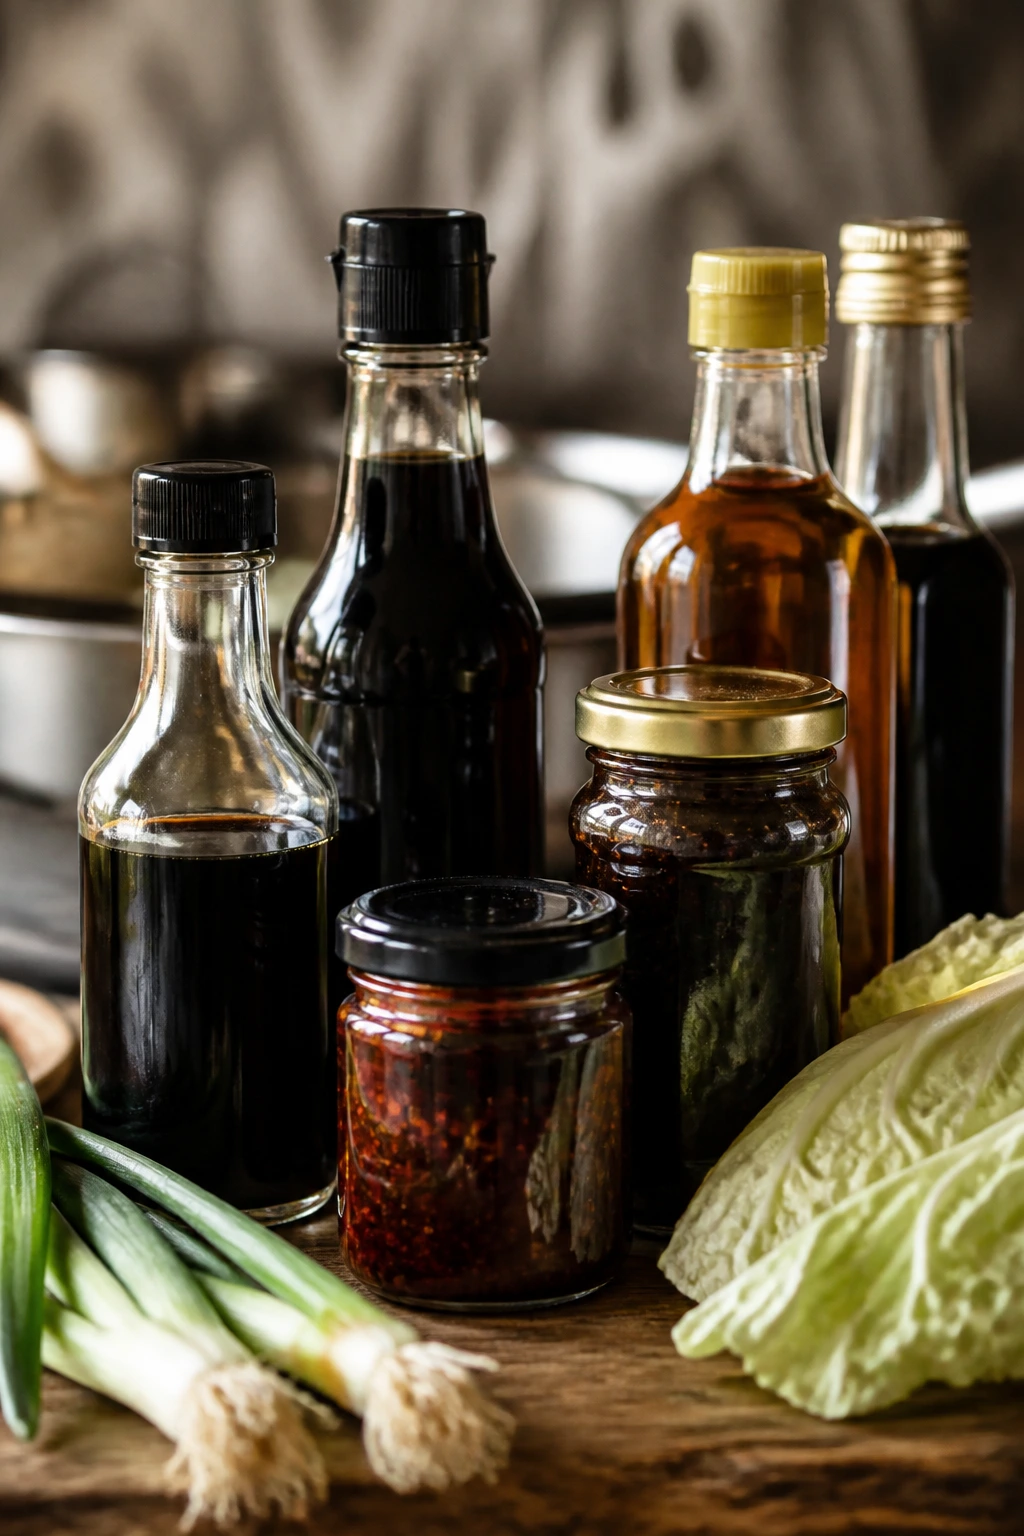
Pantry cooking gets more interesting when you stop treating soy sauce, rice vinegar, sesame oil, noodles, and a bag of frozen vegetables like emergency rations. Put those things together with a hot skillet and a little nerve, and dinner starts tasting deliberate. Not fancy. Deliberate. That’s the difference.
The smartest Asian easy recipes don’t ask for a long grocery list. They ask for timing, heat, and balance. Salt from soy. Brightness from vinegar. Fat from sesame or peanut. A bit of sweetness to round the corners. A hard sear when you want smoke, a gentle simmer when you want silk. Once you learn those levers, the pantry stops feeling sparse and starts feeling useful.
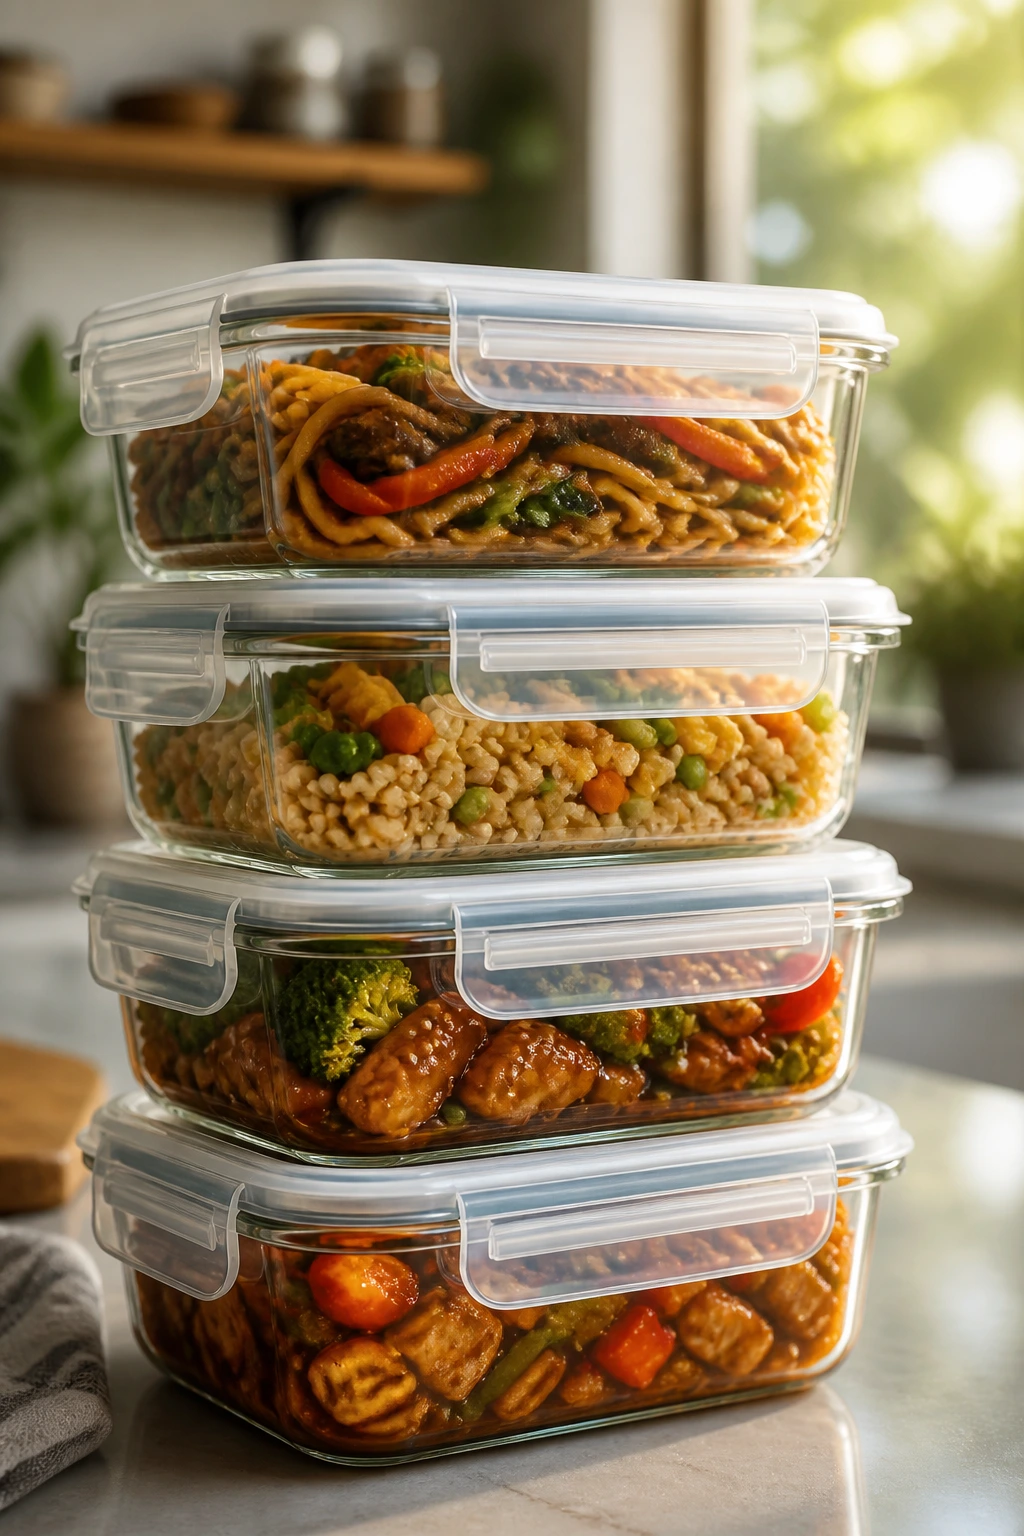
I built this collection around that idea. These are the kinds of dishes I’d make when I want real flavor without a detour to three different stores, and I’ve kept the ingredients grounded in what most kitchens can keep on hand: rice, noodles, canned or frozen vegetables, eggs, tofu, canned coconut milk, ground meat, and a few sauces that do a lot of heavy lifting. Some are fast enough for a Tuesday night. Some make excellent leftovers. None of them depend on a fussy shopping trip.
Why These Pantry Recipes Earn a Place in the Rotation
- They use the same core bottles in different ways: Soy sauce, rice vinegar, sesame oil, and hoisin show up again and again, but each recipe pushes them in a different direction.
- They stretch small ingredients farther: A handful of scallions, half a cabbage, one block of tofu, or a single pound of ground meat becomes dinner for four.
- They reward cold rice and dried noodles: That slightly boring container of leftovers turns into fried rice, noodle bowls, or a soup topper with almost no extra work.
- They leave room for frozen vegetables: Peas, corn, broccoli, spinach, and edamame all behave well here, which matters when the crisper is looking thin.
- They taste built, not cobbled together: A hot pan, a quick sauce, and a finishing splash of acid make these dishes feel like they had intention behind them.
- They’re easy to bend: If you have chicken instead of tofu, mushrooms instead of pork, or ramen instead of udon, there’s usually a clean swap that doesn’t wreck the dish.
1. Garlic Soy Fried Rice with Frozen Vegetables
Cold rice is the whole point here. Fresh rice turns gummy if you shove it into a pan too soon, but day-old grains separate and catch the oil in a way that gives you those little toasted edges I never get tired of. Add eggs, garlic, frozen vegetables, and a glossy soy finish, and you’ve got one of the best pantry dinners around.
Why It Works:
Fried rice is basically a lesson in rescue cooking. The rice is already cooked, so the pan is doing two jobs at once: drying the grains a little and coating them with flavor. Frozen peas and carrots need no apology here; they go from freezer to skillet in minutes and bring color without chopping. High heat matters because it keeps the rice from steaming into paste. A hot pan also gives you those browned bits that taste like you meant to make this all along.
Key Ingredients:
- 4 cups cold cooked white rice, broken up with your fingers if clumped
- 2 tablespoons neutral oil, such as canola or avocado
- 3 large eggs, lightly beaten
- 1 cup frozen peas and diced carrots
- 3 scallions, sliced thin, whites and greens separated
- 3 cloves garlic, minced
- 3 tablespoons soy sauce
- 1 teaspoon toasted sesame oil
- 1 teaspoon sugar
- 1/4 teaspoon white pepper, or black pepper if that’s what you have
Quick Steps:
- Mix the seasoning: Stir the soy sauce, sesame oil, sugar, and pepper in a small bowl so it’s ready when the rice hits the pan.
- Scramble the eggs: Heat 1 tablespoon oil in a large wok or skillet over medium-high heat. Add the eggs and stir just until softly set, then move them to a plate.
- Cook the vegetables: Add the remaining oil, then the frozen peas and carrots, scallion whites, and garlic. Stir for 1 to 2 minutes until the garlic smells sweet, not sharp.
- Fry the rice: Add the cold rice and break up any hard clumps. Press it into the pan, let it sit for 20 to 30 seconds, then toss. Repeat for 3 to 4 minutes.
- Season and finish: Pour in the soy mixture around the edge of the pan, toss until the grains are evenly colored and a few spots look lightly crisp.
- Bring it together: Return the eggs and scallion greens. Taste before adding more soy; sometimes the pan already has enough salt.
Equipment for This Recipe:
- Large wok or 12-inch skillet, for the high-heat toss
- Heatproof spatula, for breaking up rice cleanly
- Small bowl, for mixing the sauce
- Cutting board and knife, for scallions and garlic
How to Serve This Dish:
A bowl of this fried rice looks best with a few green scallion curls on top and maybe a spoonful of chili crisp at the edge. I like it with sliced cucumbers or a handful of quick-pickled carrots if I have them. It’s filling enough on its own, but a fried egg on top never hurts.
Pro Tips for This Recipe:
- Use cold rice from the fridge; warm rice clumps and sticks.
- Keep the pan hot enough that the rice sizzles as soon as it lands.
- Add sesame oil at the end, not at the start. It smells better that way.
- If the rice tastes flat, a tiny splash of rice vinegar wakes it up fast.
Variations on This Dish:
- Shrimp Shortcut Fried Rice: Add 8 ounces of chopped shrimp in the last 2 minutes of cooking and push the rice aside so they sear instead of steam.
- Vegetable-Heavy Pantry Version: Double the frozen peas and carrots and add 1 cup chopped cabbage for more crunch.
- Spicy Chili Crisp Fried Rice: Stir in 1 to 2 teaspoons chili crisp with the soy mixture for a hotter, oilier finish.
Common Mistakes to Avoid with This Dish:
- Using fresh rice straight from the pot: It turns sticky and heavy. Cool it on a tray for 15 minutes, then refrigerate if needed.
- Crowding the skillet: If the rice piles up too thick, it steams. Cook in two batches if your pan is small.
- Drowning it in soy sauce: Start with the measured amount. You can always add another teaspoon, but you cannot undo a salty pan.
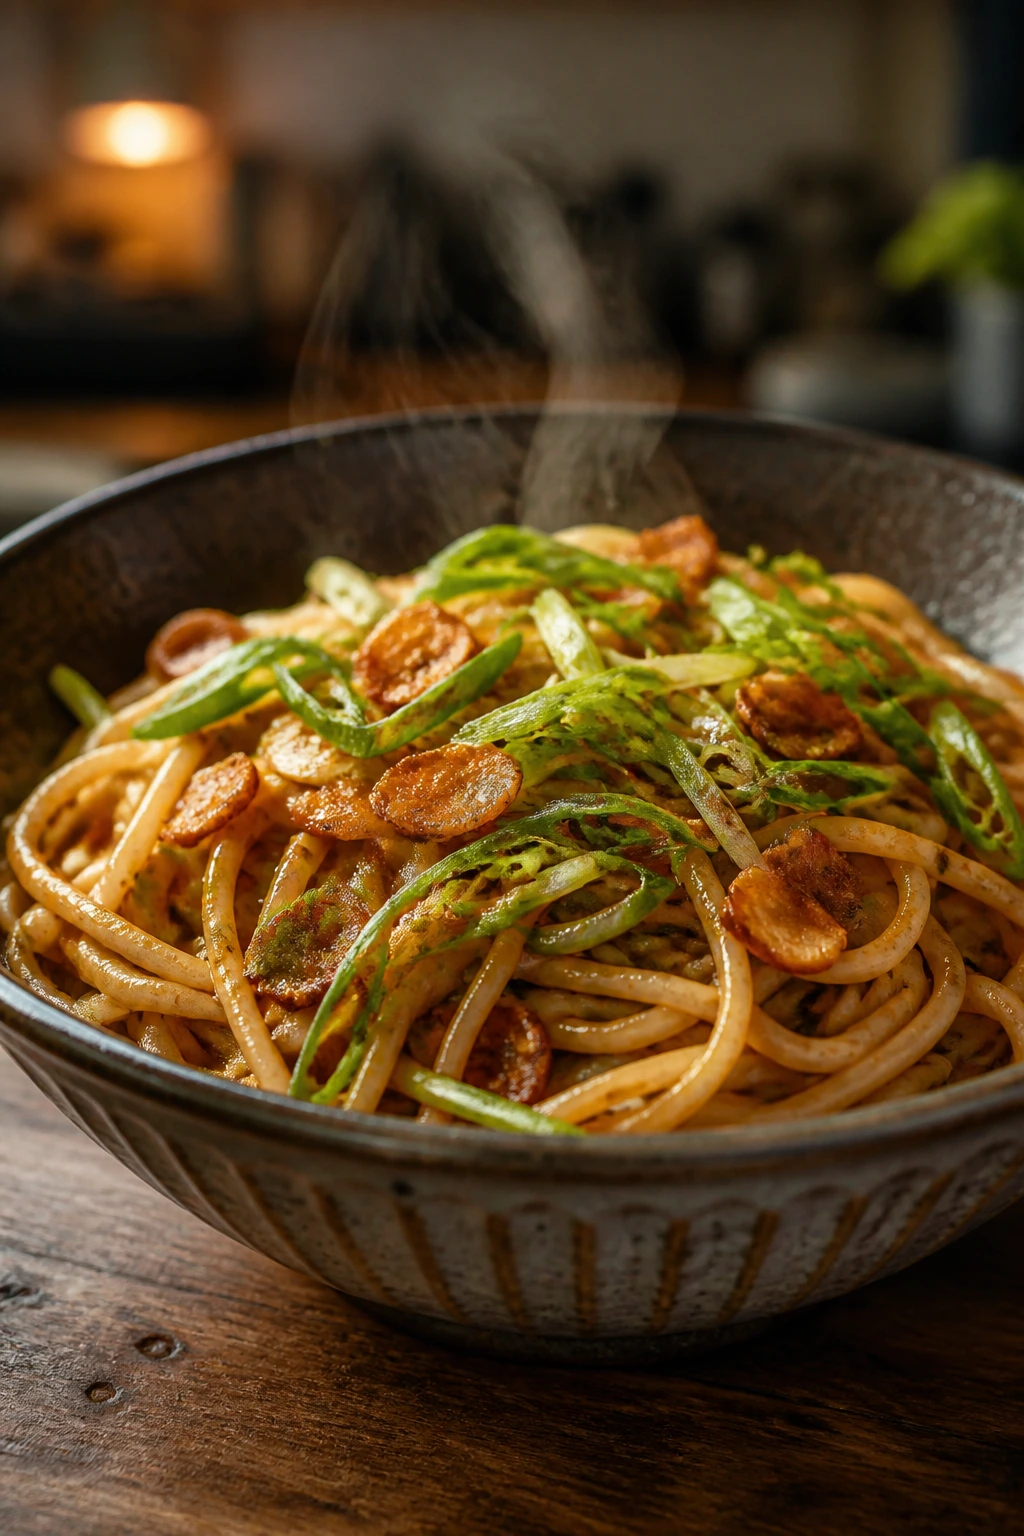
2. Scallion Oil Noodles with Crisp Garlic
This is the kind of dish that makes you wonder why you ever ordered takeout noodles in the first place. The sauce is simple—soy, a little sugar, sesame oil, and scallions—but the real trick is the hot oil poured over the aromatics. That’s where the fragrance blooms. It smells like dinner got serious in the last ten minutes.
Why It Works:
Scallions behave differently when they meet hot oil. The whites soften and taste sweet; the greens stay fresh if you keep them for the end. Garlic adds depth, but only if you stop before it turns brown and bitter. This is one of those recipes where a cheap noodle shape works fine. Spaghetti, ramen, lo mein noodles, even linguine in a pinch—anything that can hold sauce will do the job.
Key Ingredients:
- 8 ounces dried noodles, such as spaghetti, ramen, or Chinese wheat noodles
- 4 scallions, thinly sliced
- 4 cloves garlic, finely minced
- 3 tablespoons neutral oil
- 2 tablespoons soy sauce
- 1 tablespoon oyster sauce, or 1 more tablespoon soy sauce if needed
- 1 teaspoon sugar
- 1 teaspoon toasted sesame oil
- 1 to 2 teaspoons chili crisp, optional but useful
- 1 teaspoon rice vinegar
Quick Steps:
- Boil the noodles: Cook the noodles in salted water until just tender, then reserve 1 cup of the cooking water and drain.
- Build the scallion oil: Heat the neutral oil in a small skillet over medium heat. Add scallion whites and garlic and cook for 1 to 2 minutes until fragrant and just pale gold.
- Mix the sauce: In a bowl, combine soy sauce, oyster sauce, sugar, sesame oil, and rice vinegar.
- Toss the noodles: Put the hot noodles in a large bowl. Pour over the sauce, then add the scallion oil and toss hard.
- Loosen and gloss: Add reserved noodle water a tablespoon at a time until the noodles look slick, not soupy.
- Finish: Top with scallion greens and chili crisp, if using.
Equipment for This Recipe:
- Medium pot, for boiling noodles
- Small skillet, for the scallion oil
- Large mixing bowl, for tossing everything together
- Tongs or chopsticks, to get the noodles coated
How to Serve This Dish:
Pile the noodles high and top them with a few extra green onion slices so the bowl doesn’t look flat. A soft-boiled egg or a fried egg fits well here, and a side of cucumbers tossed with vinegar and salt gives the whole plate some crunch. It’s the kind of meal that disappears before you notice.
Pro Tips for This Recipe:
- Save more noodle water than you think you’ll need. A splash fixes a dry sauce fast.
- Don’t brown the garlic; it should smell warm and sweet, not toasted.
- Mix the sauce before the noodles are ready so nothing overcooks while you’re measuring.
- If you want more body, add 1 tablespoon peanut butter to the sauce.
Variations on This Dish:
- Peanut Scallion Noodles: Stir in peanut butter for a richer, thicker sauce with a little more cling.
- Cold Noodle Lunch Bowl: Chill the noodles after tossing and add shredded cucumber and sesame seeds.
- Extra-Garlic Version: Use 6 cloves instead of 4 and finish with fried garlic chips.
Common Mistakes to Avoid with This Dish:
- Adding sesame oil to the hot skillet too early: It burns fast and gets dull.
- Letting the noodles sit in the bowl without tossing: They glue together in a minute or two.
- Using too little salt in the noodle water: Bland noodles need more sauce later, which throws off the balance.
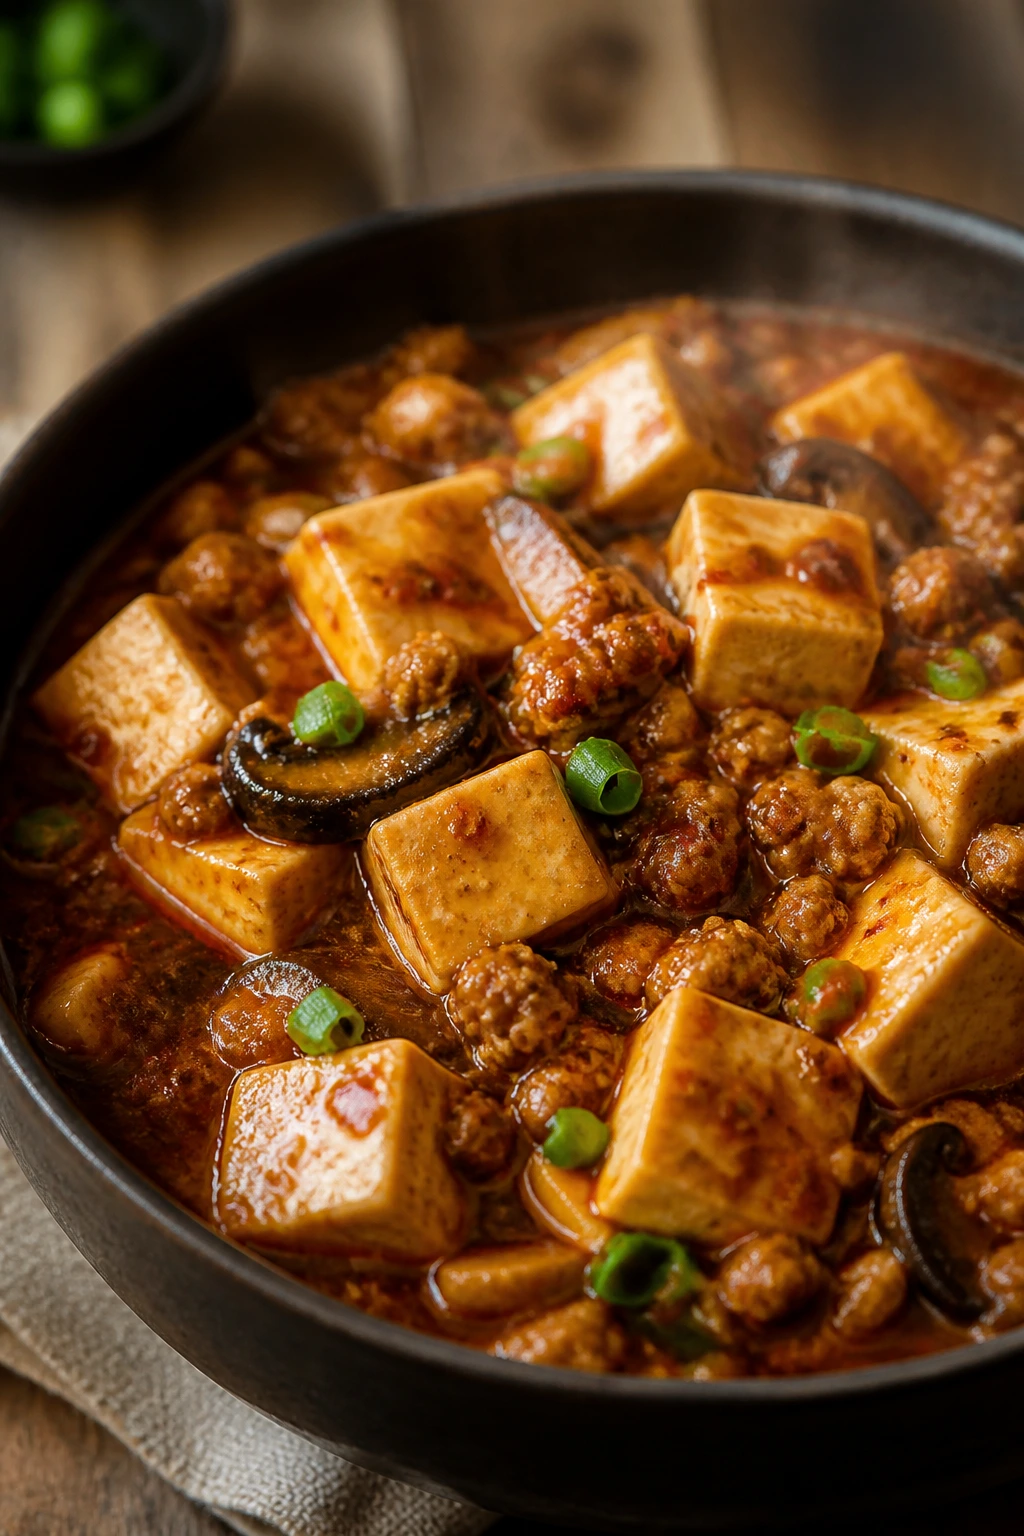
3. Pantry Mapo Tofu
Mapo tofu has a reputation for being intimidating, but the pantry version is much more forgiving than people expect. What you want is soft tofu in a savory, lightly spicy sauce with enough body to cling to rice. Ground pork is traditional, but mushrooms can step in if that’s what the fridge offers. Either way, the tofu should stay tender, almost custardy, under the heat.
Why It Works:
The dish works because it layers texture rather than chasing one giant flavor bomb. The tofu gives you softness. The pork or mushrooms give you something chewy. The sauce gets its depth from soy, chili bean paste or chili garlic sauce, ginger, and garlic. A tiny cornstarch slurry tightens the broth just enough so it coats the tofu without turning gluey. If you’ve ever had a watery tofu stir-fry and wondered what went wrong, this is the fix.
Key Ingredients:
- 14 ounces soft or silken tofu, cut into 1-inch cubes
- 8 ounces ground pork, or 8 ounces finely chopped mushrooms
- 2 tablespoons chili bean paste or chili garlic sauce
- 1 tablespoon miso paste
- 2 cloves garlic, minced
- 1 tablespoon fresh ginger, minced
- 1 cup chicken or vegetable stock
- 1 tablespoon soy sauce
- 1 teaspoon sugar
- 1 tablespoon cornstarch mixed with 2 tablespoons water
- 2 scallions, sliced
- 1/2 teaspoon ground Sichuan peppercorns, optional but excellent
Quick Steps:
- Mix the slurry: Stir the cornstarch and water together and set it near the stove.
- Brown the base: Heat oil in a skillet over medium-high heat. Cook the pork or mushrooms until browned and the moisture has mostly cooked off.
- Add aromatics: Stir in garlic, ginger, chili paste, and miso for 30 seconds until everything smells deep and savory.
- Build the sauce: Pour in stock, soy sauce, and sugar. Bring it to a gentle simmer.
- Add the tofu: Slide the tofu cubes in carefully and simmer 4 to 5 minutes, stirring only with the gentlest motion.
- Thicken and finish: Stir in the slurry, cook until the sauce lightly clings to the tofu, then finish with scallions and Sichuan peppercorns.
Equipment for This Recipe:
- Large skillet or shallow sauté pan
- Small bowl and spoon, for the slurry
- Silicone spatula, for moving tofu without breaking it
- Knife and board, for the aromatics
How to Serve This Dish:
Spoon the tofu over hot rice and let the sauce puddle into the grains. I like a few extra scallions on top and, if the meal needs more crunch, a side of steamed green beans or blanched bok choy. The sauce should look silky, not thick like gravy.
Pro Tips for This Recipe:
- Move the tofu with a spoon, not a spatula. Soft tofu breaks if you bully it.
- If you’re using mushrooms, let them brown before adding liquid so they don’t taste boiled.
- A pinch of Sichuan peppercorn changes the dish from “good” to “oh, there it is.”
- If the sauce gets too thick, loosen it with 2 to 3 tablespoons of water.
Variations on This Dish:
- Mushroom-Forward Mapo: Skip the pork and use shiitake or cremini mushrooms for a meatless version with a darker flavor.
- Extra-Spicy Mapo: Add 1 teaspoon chili crisp at the end and an extra spoon of chili garlic sauce in the base.
- Thicker Rice-Bowl Style: Reduce the stock to 3/4 cup if you want a sauce that clings harder to the rice.
Common Mistakes to Avoid with This Dish:
- Stirring too hard: The tofu turns into rubble. Gentle movement is enough.
- Adding the slurry too early: If the sauce hasn’t simmered first, it can taste pasty.
- Skipping the brown bit on the pork or mushrooms: That browned layer is where a lot of the flavor lives.
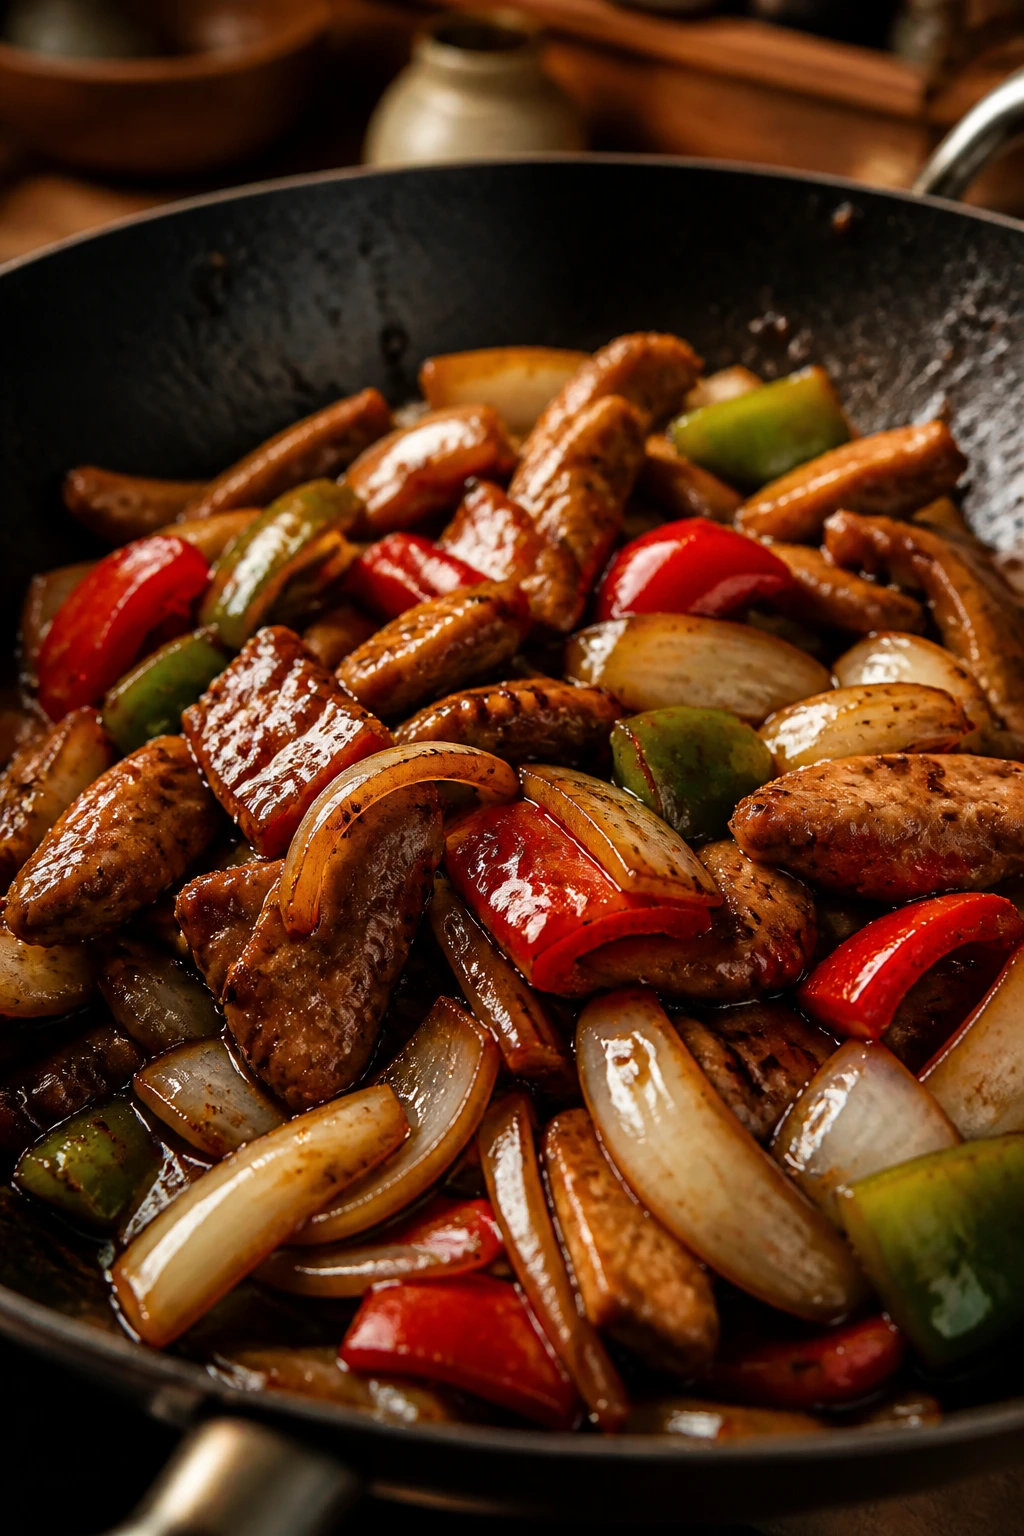
4. Black Pepper Chicken and Onion Stir-Fry
I have a soft spot for black pepper chicken because it tastes like the exact thing you’d order from a good takeout spot when you want something savory and sharp, but it cooks in a single pan with ordinary ingredients. The onions should stay a little crisp. The chicken should pick up a glossy coating without swimming in sauce. That balance is the whole show.
Why It Works:
Chicken thighs stay juicy through a fast stir-fry, which matters because lean breast meat can dry out if you look at it too long. A little cornstarch on the chicken helps the sauce stick and gives the pan a thin, silky finish. Black pepper is the loud voice here, but the oyster sauce or soy sauce keeps it from becoming harsh. If your pepper grinder is weak, this dish will be too. Use the coarse stuff.
Key Ingredients:
- 1 1/2 pounds boneless, skinless chicken thighs, sliced thin
- 1 large onion, cut into wedges
- 1 bell pepper, sliced
- 3 cloves garlic, minced
- 1 tablespoon ginger, minced
- 2 tablespoons soy sauce
- 1 tablespoon oyster sauce
- 1 teaspoon cornstarch
- 2 teaspoons coarse black pepper
- 1 teaspoon rice vinegar
- 2 tablespoons neutral oil
Quick Steps:
- Season the chicken: Toss the sliced chicken with soy sauce and cornstarch so every piece looks lightly coated.
- Make the sauce: Stir the oyster sauce, rice vinegar, black pepper, and 2 tablespoons water in a small bowl.
- Sear the chicken: Heat oil in a large skillet over medium-high heat. Cook the chicken in a single layer for 3 to 4 minutes per side until browned and mostly cooked through. Remove it to a plate.
- Cook the vegetables: Add onion and bell pepper to the pan and stir-fry for 2 to 3 minutes until the edges start to soften but still hold shape.
- Add aromatics and sauce: Stir in garlic and ginger for 30 seconds, then return the chicken and pour in the sauce.
- Finish quickly: Toss until the sauce turns glossy and lightly clings to the chicken, about 1 to 2 minutes.
Equipment for This Recipe:
- Large skillet or wok
- Small bowl, for the sauce
- Sharp knife, for slicing the chicken thin
- Tongs or spatula, for quick tossing
How to Serve This Dish:
Serve it over steamed rice so the sauce has something to soak into. A side of plain broccoli or snap peas works well if you want more vegetables on the plate. I like this one with extra black pepper on the table; the first bite should already taste alive.
Pro Tips for This Recipe:
- Slice the chicken while it’s slightly chilled; it’s easier to keep the pieces even.
- Don’t overcrowd the pan. If needed, sear the chicken in two rounds.
- Add the pepper at the end if you want a sharper nose hit.
- The onions should still have some bite. Soft is fine. Mushy is not.
Variations on This Dish:
- Garlic-Heavy Version: Double the garlic and add a squeeze of lemon or a splash more vinegar at the end.
- Broccoli Swap: Use broccoli florets instead of bell pepper and add 2 tablespoons of water to help them steam briefly in the pan.
- Spicy Black Pepper Chicken: Add 1 teaspoon chili flakes or a spoonful of chili garlic sauce to the sauce bowl.
Common Mistakes to Avoid with This Dish:
- Cutting the chicken too thick: It won’t sear quickly and can end up dry by the time the center cooks.
- Using low heat: Stir-frying needs enough heat to brown the chicken and wake up the onions.
- Letting the sauce reduce forever: Once it coats the meat, stop. Reduced too far, it goes sticky and salty.
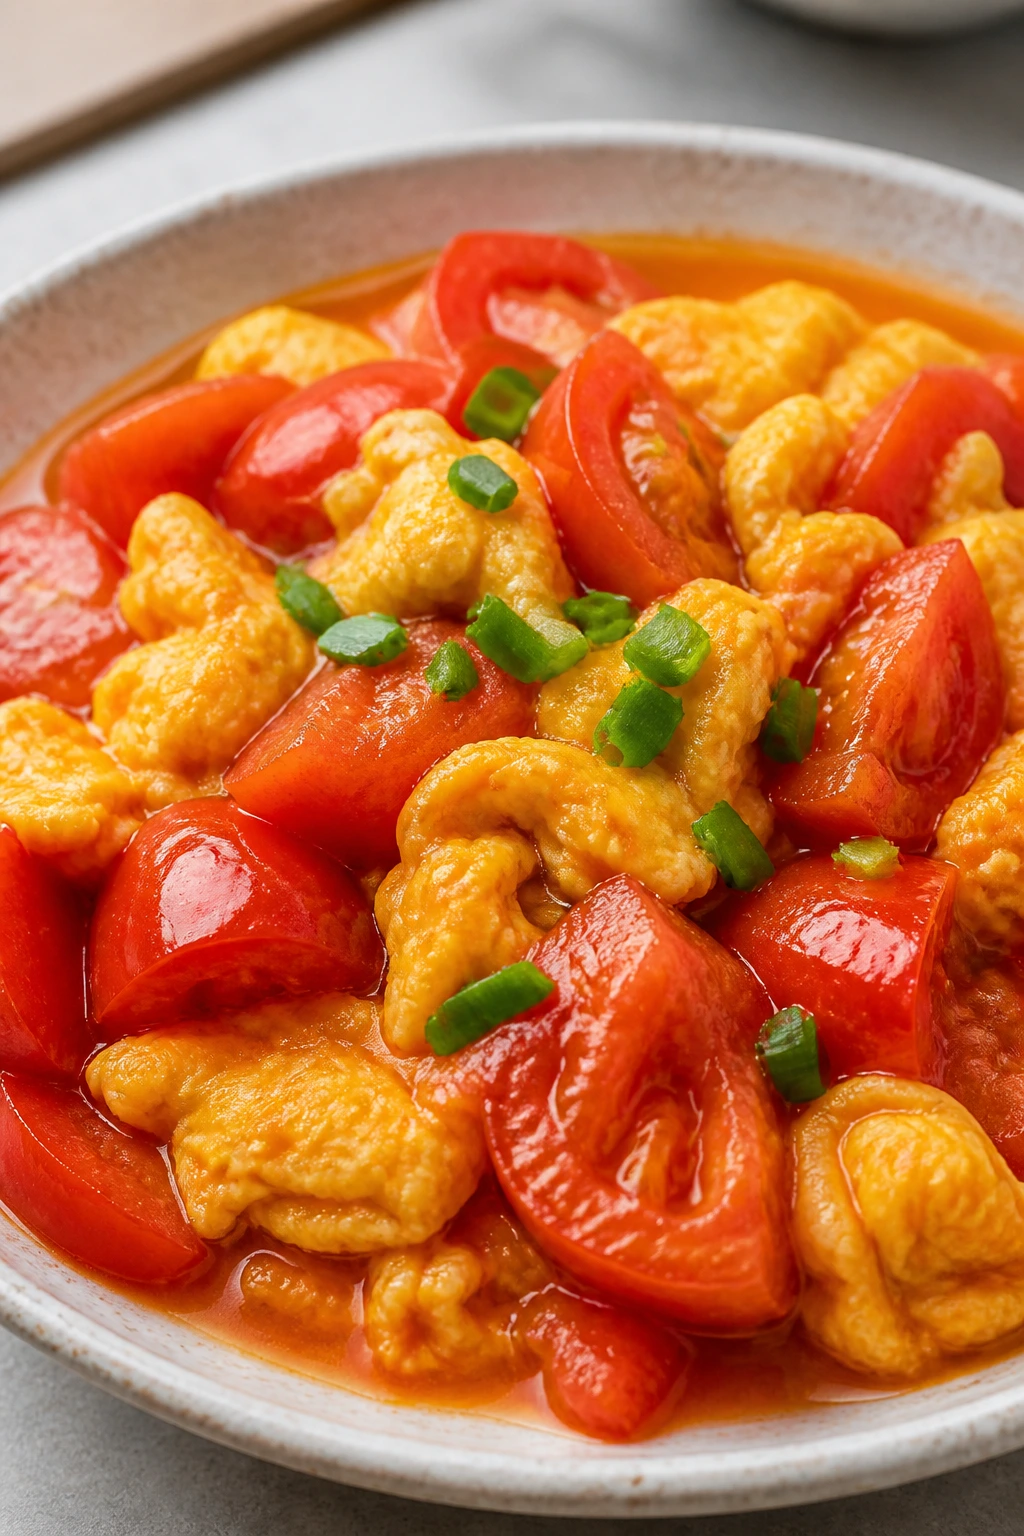
5. Chinese Tomato Egg Stir-Fry
This is one of those homey dishes that tastes better than it has any right to, especially when the tomatoes are juicy and the eggs are softly set. It’s sweet, savory, and a little bit saucy in the best way. If you’ve only ever had scrambled eggs and tomatoes as separate things, the combination may surprise you. It shouldn’t. It just works.
Why It Works:
Tomatoes bring acidity and moisture; eggs bring fat and softness. The sauce doesn’t need much more than soy and a pinch of sugar, though a tiny spoon of ketchup or tomato paste can help if the tomatoes are pale. The magic is in the texture contrast: juicy tomato pieces, tender eggs, and a sheen of sauce that makes rice taste better. It’s fast, cheap, and far more satisfying than the ingredient list suggests.
Key Ingredients:
- 6 large eggs
- 3 medium tomatoes, cut into wedges
- 2 tablespoons neutral oil
- 1 tablespoon soy sauce
- 1 teaspoon sugar
- 1/2 teaspoon salt, divided
- 2 scallions, sliced
- 1 teaspoon ketchup or tomato paste, optional
- 1/4 teaspoon white pepper or black pepper
Quick Steps:
- Beat the eggs: Whisk the eggs with half the salt and the pepper until the yolks and whites look fully blended.
- Soft-scramble the eggs: Heat 1 tablespoon oil in a skillet over medium heat. Cook the eggs until just set and still glossy, then transfer them to a plate.
- Cook the tomatoes: Add the remaining oil, then the tomatoes, remaining salt, sugar, and soy sauce. Cook for 3 to 4 minutes until they release juice and start to break down.
- Boost the sauce: If using ketchup or tomato paste, stir it in now and cook for 30 seconds.
- Return the eggs: Add the eggs back to the pan and fold gently until coated and heated through.
- Finish with scallions: Turn off the heat and add the scallions so they stay bright.
Equipment for This Recipe:
- Medium skillet
- Mixing bowl and fork or whisk
- Spatula, for soft folding
- Knife and board, for the tomatoes and scallions
How to Serve This Dish:
Spoon it over hot rice and let the sauce run into the bowl a little. If you want more texture, add a side of cucumber slices or a handful of wilted greens. The whole thing should look soft and slightly glossy, like breakfast met dinner and settled its differences.
Pro Tips for This Recipe:
- Use ripe tomatoes. If they’re mealy, the sauce will taste flat.
- Pull the eggs while they still look slightly underdone; they’ll finish in the tomato pan.
- A pinch of sugar is not optional. It rounds out the acid and keeps the sauce from tasting sharp.
- Don’t over-stir or the eggs lose their tender curds.
Variations on This Dish:
- Tomato-Paste Deepened Version: Add 1 teaspoon tomato paste with the tomatoes for a richer, darker sauce.
- Chili Oil Finish: Drizzle with 1 teaspoon chili oil right before serving.
- Green Onion Heavy Hand: Double the scallions and fold half into the tomatoes while cooking.
Common Mistakes to Avoid with This Dish:
- Cooking the eggs until dry: They’ll turn rubbery once they hit the tomato pan.
- Under-seasoning the tomatoes: Salt and sugar are the difference between bright and bland.
- Using watery tomatoes without extra simmering: Give them time to cook down so the sauce doesn’t pool on the plate.
6. Sesame Peanut Noodles with Cucumber
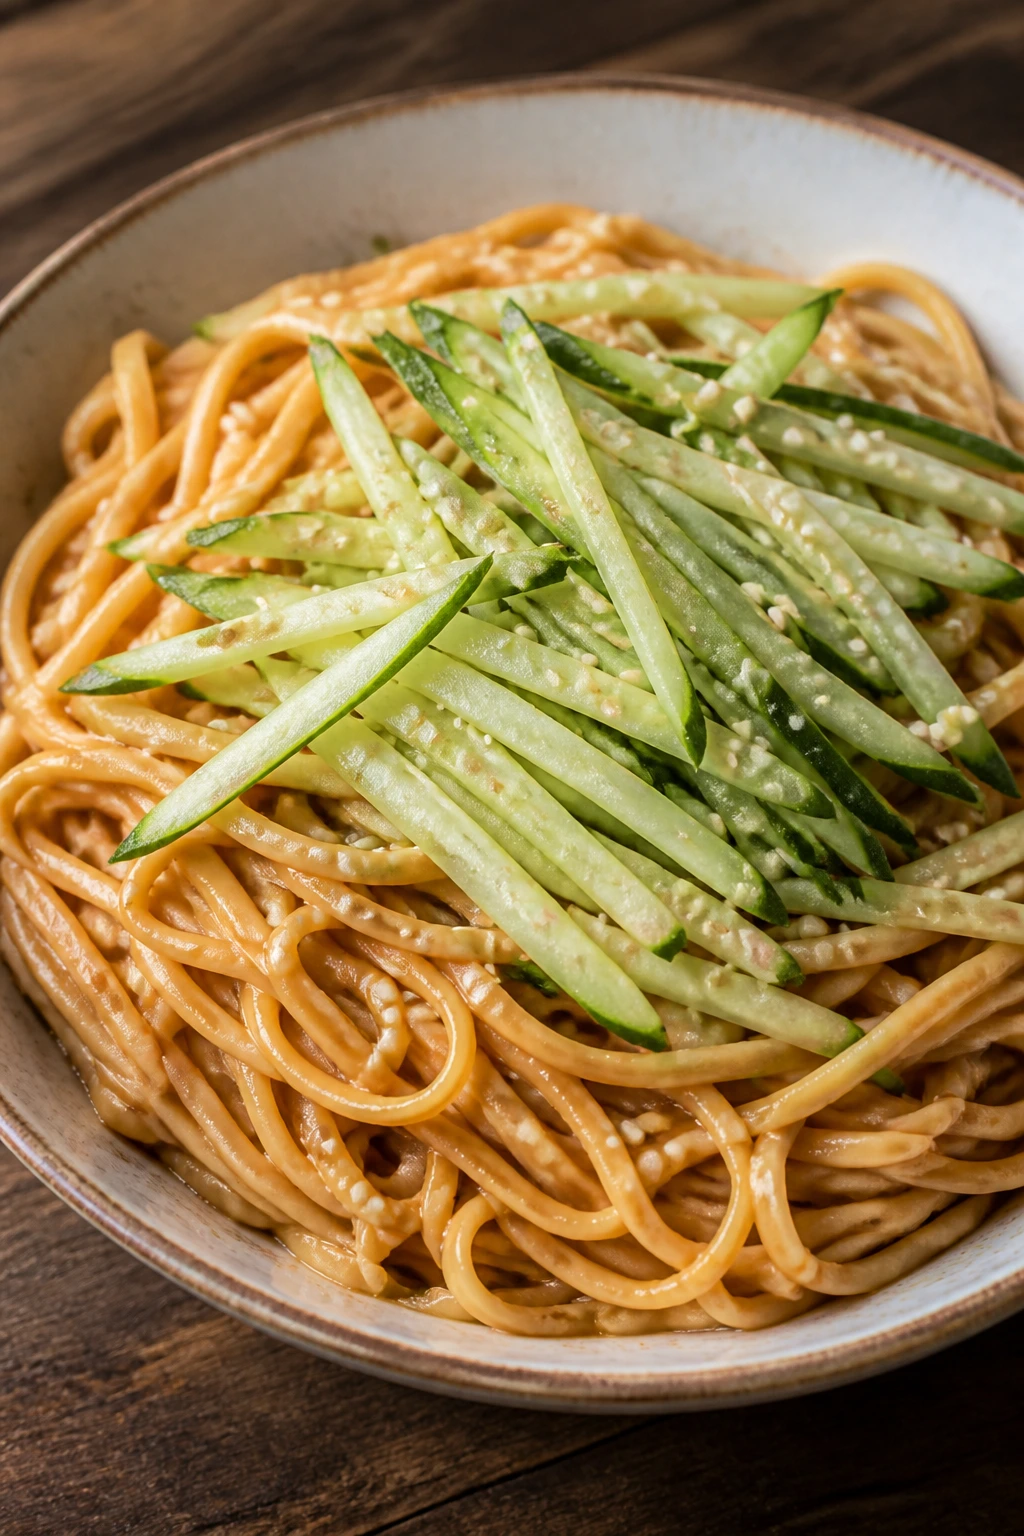
Peanut noodles are the kind of pantry dish that feels almost too easy until you taste them and realize the balance is dead on. Nutty, salty, tangy, and cool from the cucumber. The sauce should coat the noodles in a thick, glossy layer that loosens just enough when you add a splash of hot water. Nothing about this is complicated. That’s part of the appeal.
Why It Works:
Peanut butter brings body. Soy sauce brings salt. Rice vinegar keeps the sauce from clinging too hard to the palate. Sesame oil adds that toasted aroma people always notice even if they can’t name it. Cucumbers cut through the richness, which is important because peanut sauce can get heavy fast if you don’t give it a crisp edge somewhere.
Key Ingredients:
- 8 ounces noodles, such as spaghetti, ramen, or soba
- 1/3 cup creamy peanut butter
- 2 tablespoons soy sauce
- 1 tablespoon rice vinegar
- 1 teaspoon sesame oil
- 1 teaspoon sugar or honey
- 1 clove garlic, finely grated
- 2 to 4 tablespoons hot water, plus more as needed
- 1 cucumber, thinly sliced or julienned
- 2 scallions, sliced
- 2 tablespoons chopped peanuts or sesame seeds
- Chili flakes or chili crisp, to taste
Quick Steps:
- Cook the noodles: Boil them until just tender, then drain and rinse briefly if you want a cold noodle bowl.
- Build the sauce: Whisk the peanut butter, soy sauce, vinegar, sesame oil, sugar, garlic, and hot water until smooth and glossy.
- Loosen carefully: Add more hot water a tablespoon at a time until the sauce looks pourable but still thick.
- Toss the noodles: Mix the noodles with the sauce while they’re still warm so they absorb flavor.
- Add the crunch: Fold in cucumber and scallions just before serving.
- Finish: Top with peanuts or sesame seeds and chili crisp if you want heat.
Equipment for This Recipe:
- Large pot, for the noodles
- Mixing bowl, for the sauce
- Whisk or fork, to break up the peanut butter
- Colander, for draining
How to Serve This Dish:
Serve the noodles in a wide bowl so the cucumber can sit on top without getting buried. I like them warm in colder months and cool when the day is heavy. A few extra peanuts and a little sesame seed scatter make the bowl look intentional.
Pro Tips for This Recipe:
- Warm water helps the peanut butter emulsify faster than cold water.
- If the sauce gets too thick after sitting, stir in another splash of water.
- Keep the cucumber dry so it doesn’t water down the bowl.
- A tiny spoon of chili crisp gives the noodles more personality than extra soy does.
Variations on This Dish:
- Spicy Satay Style: Add 1 teaspoon chili garlic sauce and a squeeze of lime.
- Sesame-Soy Noodles: Swap half the peanut butter for tahini if you want a less sweet, more sesame-heavy sauce.
- Edamame Bowl: Toss in 1 cup thawed edamame for extra protein and a little snap.
Common Mistakes to Avoid with This Dish:
- Dumping in too much water at once: The sauce can go thin and hard to recover. Add it slowly.
- Using crunchy peanut butter if you want a smooth sauce: It can work, but the texture changes fast.
- Skipping the acid: Without vinegar, the sauce tastes heavy and stuck.
7. Soy-Braised Mushrooms and Napa Cabbage

This is the sort of side dish that behaves like a main if you pile it on rice. The mushrooms soak up the braising liquid, the cabbage softens but still keeps a little structure, and the soy-ginger broth turns into a sauce you’ll want to spoon over everything. It’s humble, but not dull. There’s a difference.
Why It Works:
Mushrooms like two things: heat and time. Give them a few minutes in the pan and they go from spongy to deeply savory. Napa cabbage softens quickly, which means the dish doesn’t need a long simmer. Oyster sauce adds the round, almost silky note that makes the braise taste fuller than plain soy alone. The whole thing finishes in under 20 minutes, which is a pretty good argument right there.
Key Ingredients:
- 10 ounces mushrooms, sliced or halved
- 1/2 head Napa cabbage, chopped into 2-inch pieces
- 2 cloves garlic, minced
- 1 tablespoon ginger, minced
- 2 tablespoons soy sauce
- 1 tablespoon oyster sauce
- 3/4 cup stock or water
- 1 teaspoon sugar
- 1 teaspoon toasted sesame oil
- 2 scallions, sliced
- 1 tablespoon neutral oil
Quick Steps:
- Brown the mushrooms: Heat oil in a large skillet over medium-high heat. Cook the mushrooms until they release moisture and start to take on color, about 5 minutes.
- Add aromatics: Stir in garlic and ginger and cook for 30 seconds until fragrant.
- Start the braise: Add cabbage, soy sauce, oyster sauce, stock, and sugar. Stir to combine.
- Simmer gently: Cover and cook for 4 to 5 minutes until the cabbage is tender but still has some body.
- Reduce the sauce: Uncover and cook another 2 minutes so the liquid turns glossy and a little thicker.
- Finish: Turn off the heat, add sesame oil and scallions, and taste for seasoning.
Equipment for This Recipe:
- Large skillet with lid
- Wooden spoon or spatula
- Knife and cutting board
- Small measuring cup, for the stock
How to Serve This Dish:
Serve it over steamed rice or next to noodles if you want a softer meal. A fried egg on top works well because the yolk mixes with the braising liquid and turns it richer. I like this one in a shallow bowl where the sauce can spread a little.
Pro Tips for This Recipe:
- Let the mushrooms brown before you add the cabbage. Pale mushrooms taste flat.
- Don’t overcook the cabbage. You want tender leaves, not collapse.
- If the pan looks dry before the cabbage softens, add 2 tablespoons more water.
- Finish with sesame oil off the heat so the aroma stays bright.
Variations on This Dish:
- Tofu and Mushroom Braise: Add cubes of firm tofu during the last 3 minutes for a fuller main-dish version.
- Ginger-Forward Version: Double the ginger and add a splash of rice vinegar at the end.
- Extra-Saucy Bowl: Increase the stock to 1 cup if you want more liquid for rice.
Common Mistakes to Avoid with This Dish:
- Adding too much stock too early: You’ll end up boiling the cabbage instead of braising it.
- Moving the mushrooms constantly: Let them sit so they can brown.
- Finishing with sesame oil while the pan is still boiling: The smell fades fast.
8. Ginger-Soy Salmon Rice Bowls
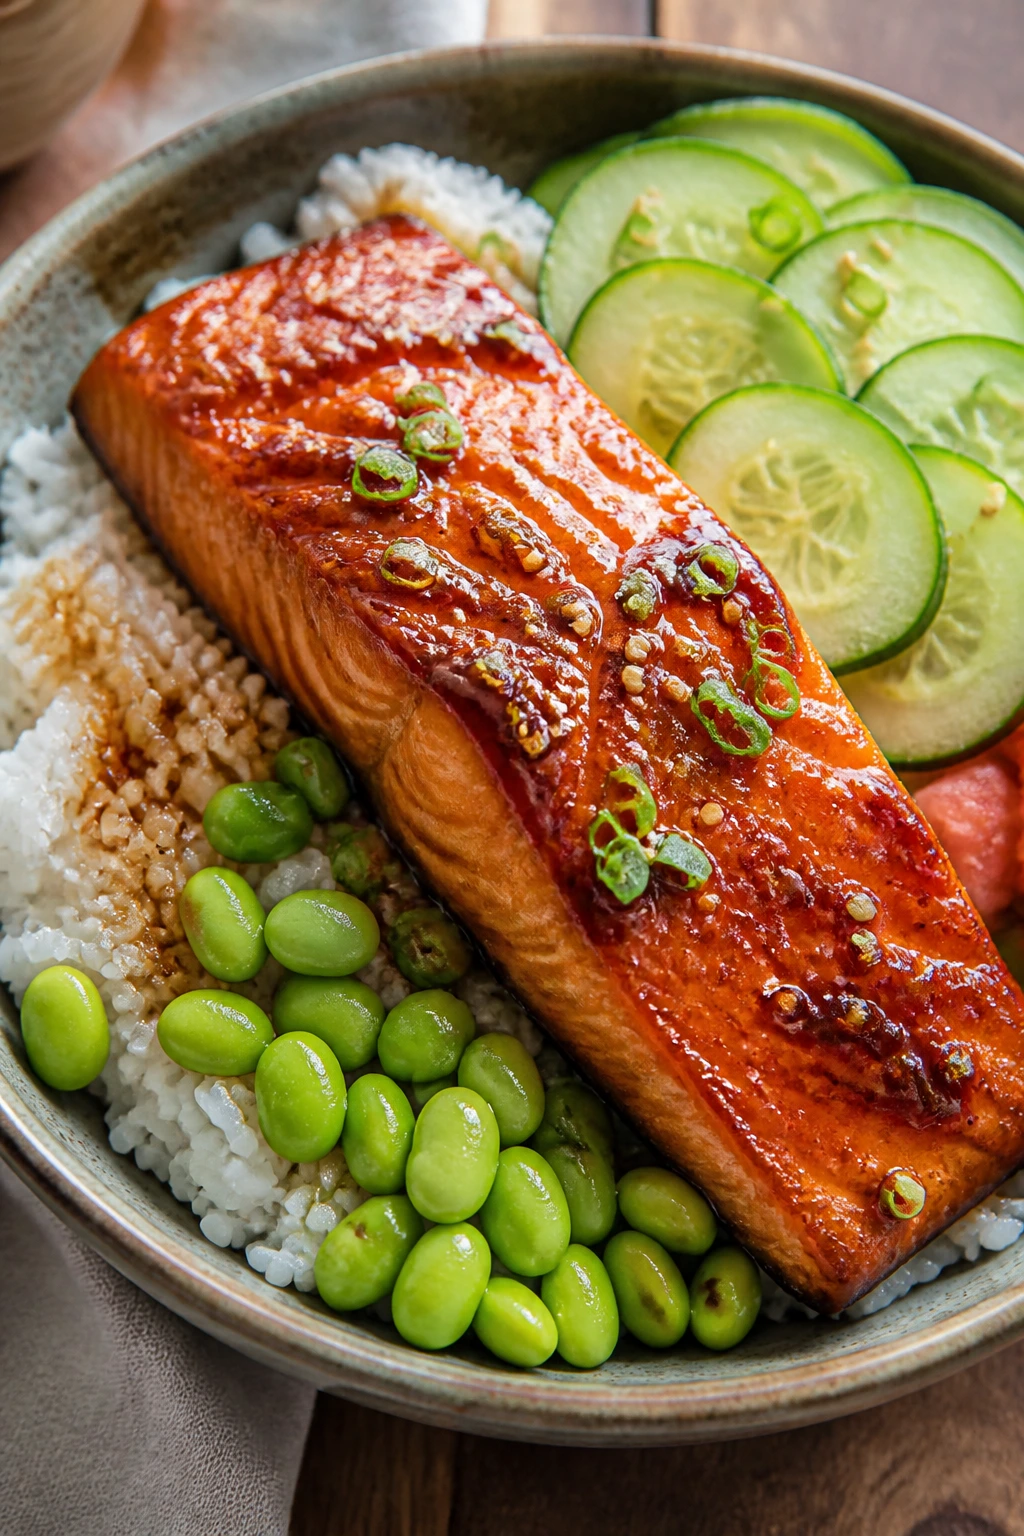
Salmon feels like a splurge even when you buy it in sensible portions, and this bowl makes it stretch. The ginger-soy glaze is sharp enough to cut through the fish’s richness, while rice and cucumber keep the bowl grounded. Edamame or any frozen green bean-like helper gives you another color and another texture. The whole thing eats cleanly, which I appreciate after a long day.
Why It Works:
Salmon cooks fast, which makes it friendly to a pantry-style dinner. The glaze does most of the work: soy for salt, honey for shine, ginger and garlic for bite, and a little vinegar so the fish doesn’t taste sticky-sweet. A quick roast or sear gives you browned edges without drying out the middle. The rice is there to catch the glaze, and that matters more than people think.
Key Ingredients:
- 4 salmon fillets, about 6 ounces each
- 3 tablespoons soy sauce
- 1 tablespoon honey
- 1 tablespoon rice vinegar
- 1 tablespoon grated ginger
- 2 cloves garlic, minced
- 2 cups cooked rice
- 1 cup frozen edamame, thawed
- 1 cucumber, sliced
- 1 teaspoon sesame seeds
- 1 tablespoon neutral oil
Quick Steps:
- Mix the glaze: Stir soy sauce, honey, rice vinegar, ginger, and garlic together.
- Prep the salmon: Pat the fillets dry and brush them lightly with oil.
- Cook the salmon: Roast at 425°F for 10 to 12 minutes, or pan-sear over medium-high heat for about 4 minutes per side, until the fish flakes easily.
- Warm the edamame: Microwave or steam the edamame until hot.
- Build the bowls: Add rice, cucumber, and edamame to each bowl.
- Finish: Spoon the glaze over the salmon and sprinkle with sesame seeds.
Equipment for This Recipe:
- Sheet pan or skillet
- Small bowl, for the glaze
- Rice bowl or serving bowl
- Spatula, if pan-searing
How to Serve This Dish:
Lay the salmon over rice and let the glaze drip down the sides. A few cucumber slices keep the bowl from feeling heavy, and a scattering of sesame seeds gives it some texture. This is one of those meals that looks finished without a lot of garnish because the fish does the visual work.
Pro Tips for This Recipe:
- Pat the salmon dry before cooking or the glaze won’t cling.
- Don’t overcook it. Salmon turns dry fast once it loses its barely translucent center.
- If you roast, line the pan with parchment for easier cleanup.
- Thin cucumber slices are better than thick ones here; they mix with the rice more easily.
Variations on This Dish:
- Broiler Finish: Broil the salmon for the last 1 to 2 minutes to caramelize the glaze.
- Sesame Salmon Bowl: Add 1 teaspoon sesame oil to the glaze and finish with extra sesame seeds.
- Spicy Ginger Bowl: Stir chili crisp into the glaze or spoon it over the rice.
Common Mistakes to Avoid with This Dish:
- Cooking the salmon past the point of flaking: It goes chalky fast.
- Using the glaze as a marinade for too long: The honey can make the surface sticky before cooking. A short brush-on is enough.
- Building the bowl while the rice is cold: Warm rice catches the sauce better and makes the whole bowl taste more cohesive.
9. Chili Crisp Udon with Cabbage
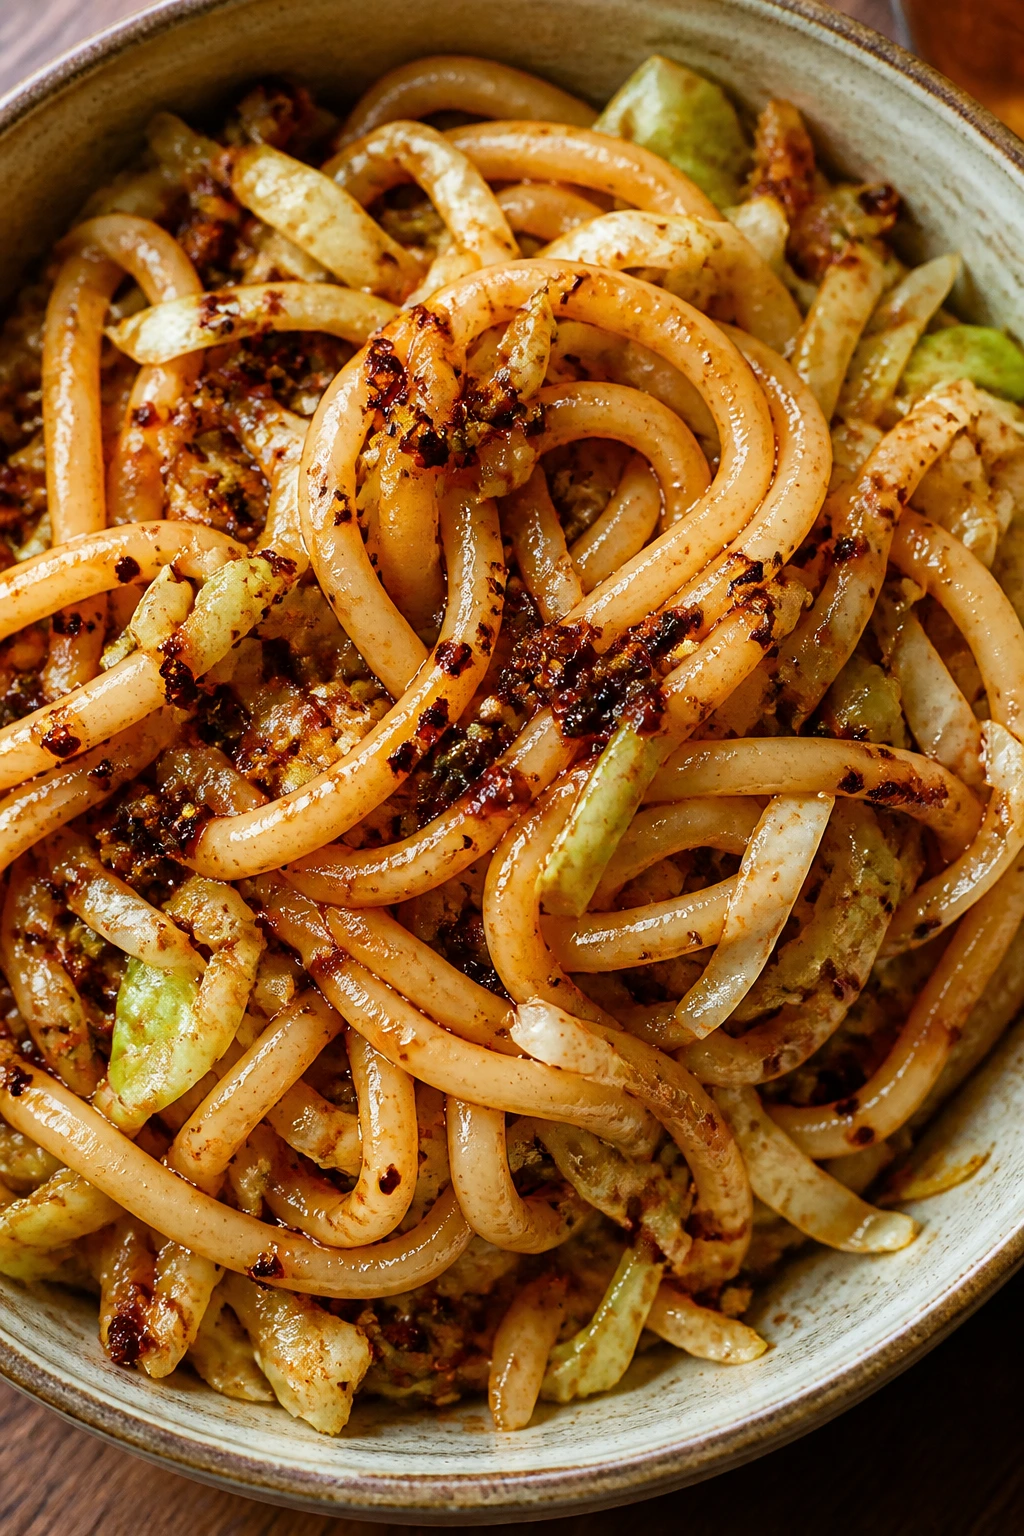
If you want a dinner that hits hard without needing a lot of ingredients, this is a strong move. Udon noodles are thick and slippery in the best way, and cabbage gives them some crunch before it softens. Chili crisp brings oil, garlic, heat, and crunch all at once, which is why people keep jars of it around like a secret handshake. Not much else is required.
Why It Works:
The fat in chili crisp carries flavor across the noodles, while cabbage cooks down just enough to sweeten the bowl. Udon holds sauce better than most noodles because the strands are thick and chewy. A quick sear on the cabbage gives you browned edges, which matter a lot here. If you skip that step, the dish still works, but it tastes flatter.
Key Ingredients:
- 2 packs fresh or frozen udon noodles, about 14 to 16 ounces total
- 2 cups shredded cabbage
- 1 cup sliced mushrooms, optional but helpful
- 2 cloves garlic, minced
- 2 tablespoons chili crisp
- 2 tablespoons soy sauce
- 1 teaspoon sesame oil
- 1 tablespoon neutral oil
- 2 scallions, sliced
- 1 egg, fried or soft-boiled, optional
Quick Steps:
- Cook the udon: Boil or loosen the noodles according to the package directions, then drain.
- Brown the vegetables: Heat neutral oil in a skillet over medium-high heat. Cook the cabbage and mushrooms until the edges start to color, about 4 minutes.
- Add garlic and chili crisp: Stir in the garlic and chili crisp and cook for 30 seconds.
- Season the pan: Add soy sauce and a tablespoon of water so the noodles have something to coat.
- Toss the noodles: Add the udon and toss until everything is glossy and evenly heated.
- Finish: Drizzle with sesame oil, top with scallions, and add a fried egg if you want more richness.
Equipment for This Recipe:
- Medium pot, for the noodles
- Large skillet or wok
- Tongs, for turning the udon
- Spoon, for the chili crisp
How to Serve This Dish:
Serve it in a wide bowl with the egg placed right in the center if you’re using one. A few extra chili crisp bits on top make it look and taste more finished. I’d pair it with nothing more than sliced cucumber or a small salad of chilled greens.
Pro Tips for This Recipe:
- Udon clumps quickly, so have the skillet ready before you drain it.
- Let the cabbage brown a little before you add the noodles.
- Add sesame oil last to keep its aroma from fading.
- If your chili crisp is salty, taste before adding more soy.
Variations on This Dish:
- Eggy Udon Bowl: Stir in one beaten egg at the end and toss quickly so it coats the noodles.
- Bean-Curd Version: Add cubed tofu or fried tofu for more protein.
- Crunchy Cabbage Upgrade: Top with toasted peanuts for a sharper bite.
Common Mistakes to Avoid with This Dish:
- Letting the noodles sit after draining: They stick into one solid rope.
- Using too much soy before tasting the chili crisp: Some jars are saltier than others.
- Skipping the browning step on the cabbage: That browned edge is part of the flavor, not decoration.
10. Egg Drop Soup with Corn and Spinach
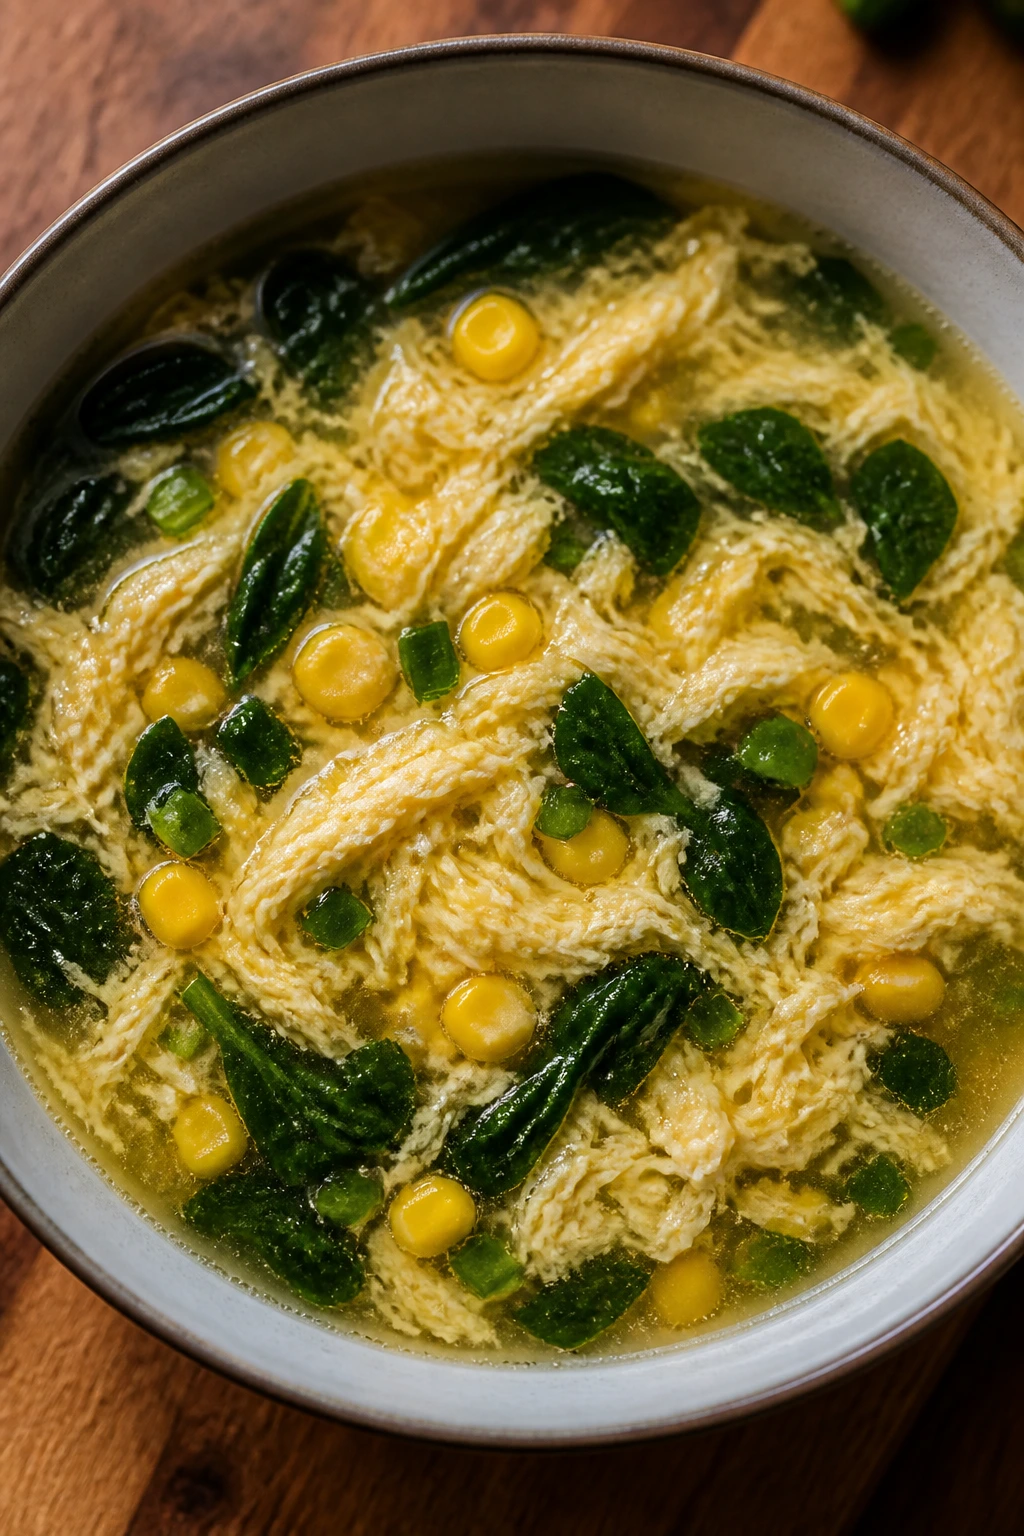
Egg drop soup gets overlooked because it sounds too simple, and that’s a shame. Done well, it has a delicate, savory broth with silky ribbons of egg and little pops of sweet corn. Spinach gives it color and a soft bite. It’s fast, soothing, and far more useful than people give it credit for.
Why It Works:
The broth needs only a few things to feel complete: stock, white pepper, a bit of sesame oil, and just enough cornstarch to give it body. Once the broth is lightly thickened, the eggs set into ribbons instead of disappearing into the soup. Corn brings sweetness without much effort, and spinach wilts in seconds. This is not a soup to fuss over. It rewards a light hand.
Key Ingredients:
- 4 cups chicken or vegetable stock
- 2 eggs, beaten
- 1 cup frozen corn
- 1 cup baby spinach
- 1 tablespoon cornstarch mixed with 2 tablespoons water
- 2 scallions, sliced
- 1 teaspoon toasted sesame oil
- 1/4 teaspoon white pepper
- 1/2 teaspoon salt, or more to taste
- 1 teaspoon grated ginger, optional
Quick Steps:
- Simmer the stock: Bring the stock, corn, ginger if using, salt, and white pepper to a gentle simmer.
- Thicken lightly: Stir in the cornstarch slurry and simmer 1 minute until the broth looks slightly glossy.
- Create the ribbons: Stir the broth in a slow circle, then drizzle in the beaten eggs in a thin stream.
- Stop stirring for a moment: Let the eggs set for 20 to 30 seconds so the ribbons form.
- Add the spinach: Stir in the spinach and scallions just until wilted.
- Finish: Turn off the heat and add sesame oil.
Equipment for This Recipe:
- Medium saucepan
- Small bowl for beating eggs
- Whisk or fork
- Ladle, for serving
How to Serve This Dish:
Serve it hot in small bowls with a few scallions floating on top. If you want a fuller meal, add steamed rice on the side or drop in a handful of cooked noodles. The broth should look pale gold and a little cloudy from the eggs.
Pro Tips for This Recipe:
- Keep the broth at a gentle simmer, not a hard boil.
- Whisk the eggs just enough to blend the whites and yolks.
- Pour the eggs in a thin stream for better ribbons.
- White pepper gives the soup its classic sharp note; black pepper is fine, but it tastes different.
Variations on This Dish:
- Corn-and-Edamame Version: Swap half the corn for edamame for a more filling bowl.
- Extra-Silky Version: Use 2 teaspoons cornstarch instead of 1 tablespoon for a lighter texture.
- Ginger-Forward Soup: Increase the ginger to 2 teaspoons if you want a brighter finish.
Common Mistakes to Avoid with This Dish:
- Boiling the broth hard after adding eggs: The ribbons break apart and turn stringy.
- Using too much cornstarch: The soup turns gluey fast.
- Adding spinach too early: It loses its color and goes limp.
11. Hoisin-Glazed Meatballs with Rice
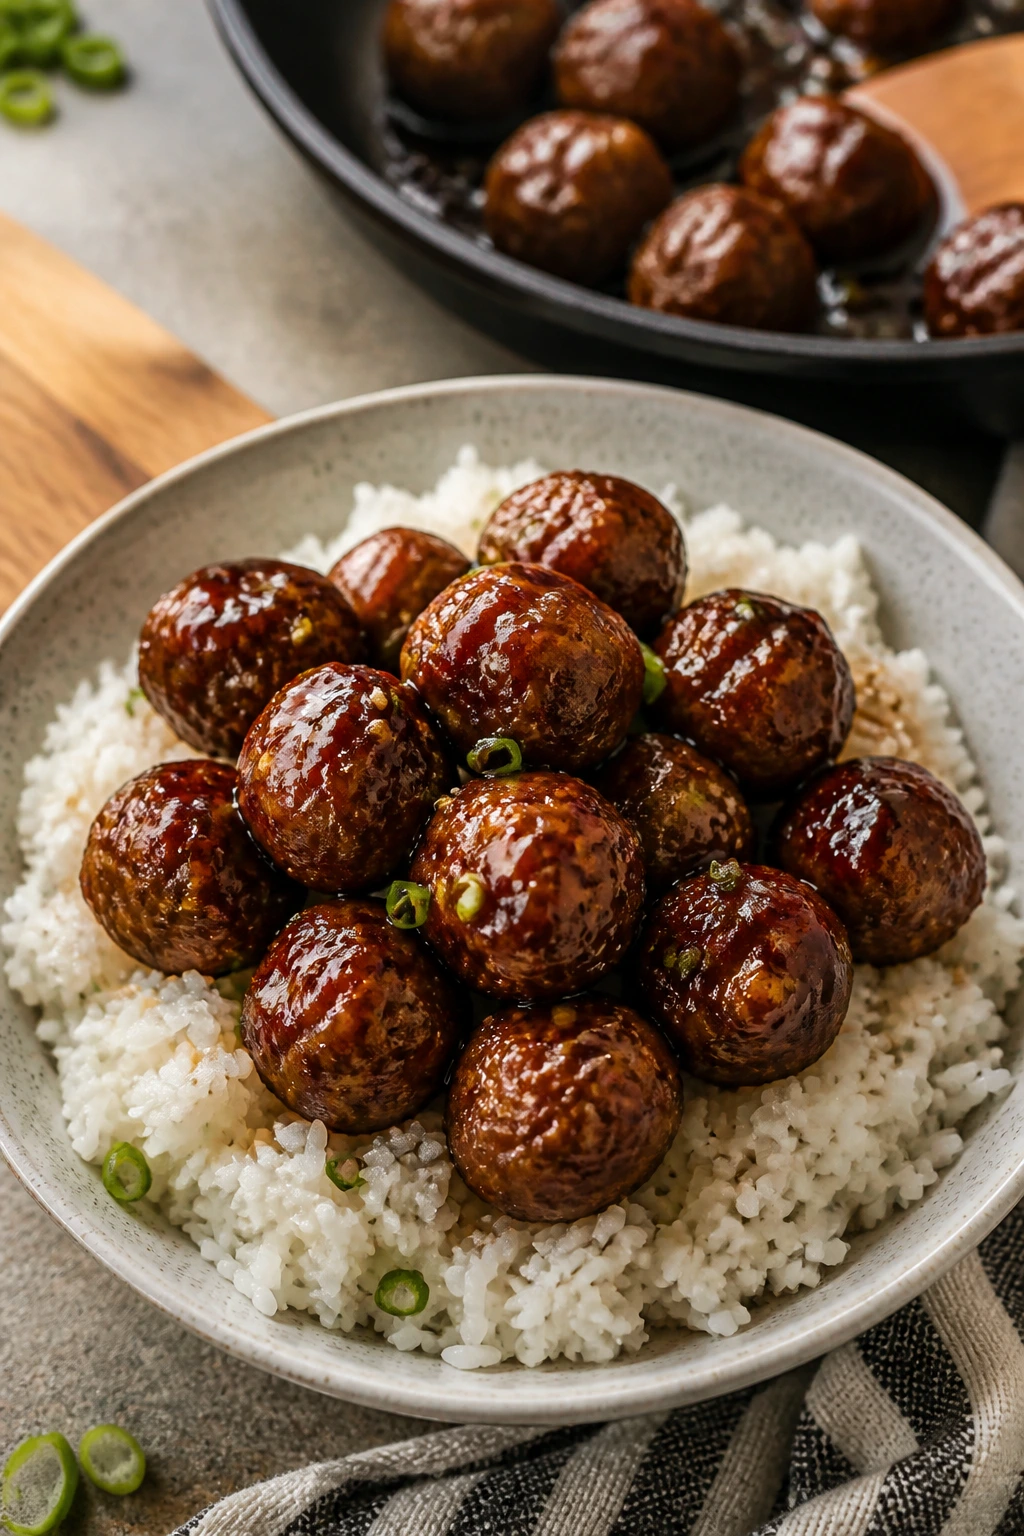
These meatballs are weeknight practical, but the glaze gives them a takeout-style shine that makes them feel more dressed up than they are. Hoisin brings sweetness and depth, soy sharpens it, and a little vinegar keeps the glaze from becoming syrupy. Ground pork is my first choice, though turkey works if that’s what you’ve got.
Why It Works:
Breadcrumbs and egg keep the meatballs tender. Garlic and ginger make sure they don’t taste bland. Baking them first gives you round, browned edges without the babysitting a skillet demands. The glaze goes on after the meatballs have structure, so it sticks instead of sliding off. That’s the part people usually miss.
Key Ingredients:
- 1 pound ground pork or ground turkey
- 1/2 cup breadcrumbs
- 1 large egg
- 2 tablespoons soy sauce
- 2 tablespoons hoisin sauce
- 2 cloves garlic, minced
- 1 tablespoon grated ginger
- 1 teaspoon rice vinegar
- 2 tablespoons water
- 2 scallions, sliced
Quick Steps:
- Mix the meatball base: Combine the pork, breadcrumbs, egg, 1 tablespoon soy sauce, garlic, and ginger in a bowl.
- Shape the meatballs: Form 16 to 18 small meatballs, each about 1 1/2 inches wide.
- Bake: Place them on a lined sheet pan and bake at 425°F for 14 to 16 minutes until browned and cooked through.
- Make the glaze: Stir hoisin, remaining soy sauce, rice vinegar, and water together in a small saucepan.
- Glaze the meatballs: Toss the hot meatballs in the glaze or simmer them in the pan for 2 minutes until coated.
- Finish: Scatter scallions over the top and serve with rice.
Equipment for This Recipe:
- Rimmed baking sheet
- Mixing bowl
- Small saucepan
- Spoon or small scoop, for shaping
How to Serve This Dish:
Spoon the glazed meatballs over rice and let extra sauce pool around the edges. A side of steamed broccoli or green beans keeps the plate from feeling too rich. They also work well tucked into lettuce leaves if you want a lighter meal.
Pro Tips for This Recipe:
- Don’t pack the meatballs too tightly or they’ll turn dense.
- Use a small scoop if you want evenly sized meatballs that cook at the same speed.
- If the glaze gets too thick, add 1 tablespoon water.
- The hoisin should coat, not drown; a thin lacquer is the goal.
Variations on This Dish:
- Turkey-Lighter Version: Use ground turkey and add 1 teaspoon oil to the mix for juicier meatballs.
- Spicy Hoisin Meatballs: Stir chili garlic sauce into the glaze.
- Lettuce Cup Dinner: Serve the meatballs in butter lettuce leaves with shredded carrots.
Common Mistakes to Avoid with This Dish:
- Overmixing the meat: It makes the texture tight and bouncy.
- Overbaking: Meatballs should be cooked through, not dry.
- Using too much glaze too early: It can burn in the oven. Wait until the meatballs are done.
12. Five-Spice Roasted Chickpeas and Broccoli Bowls
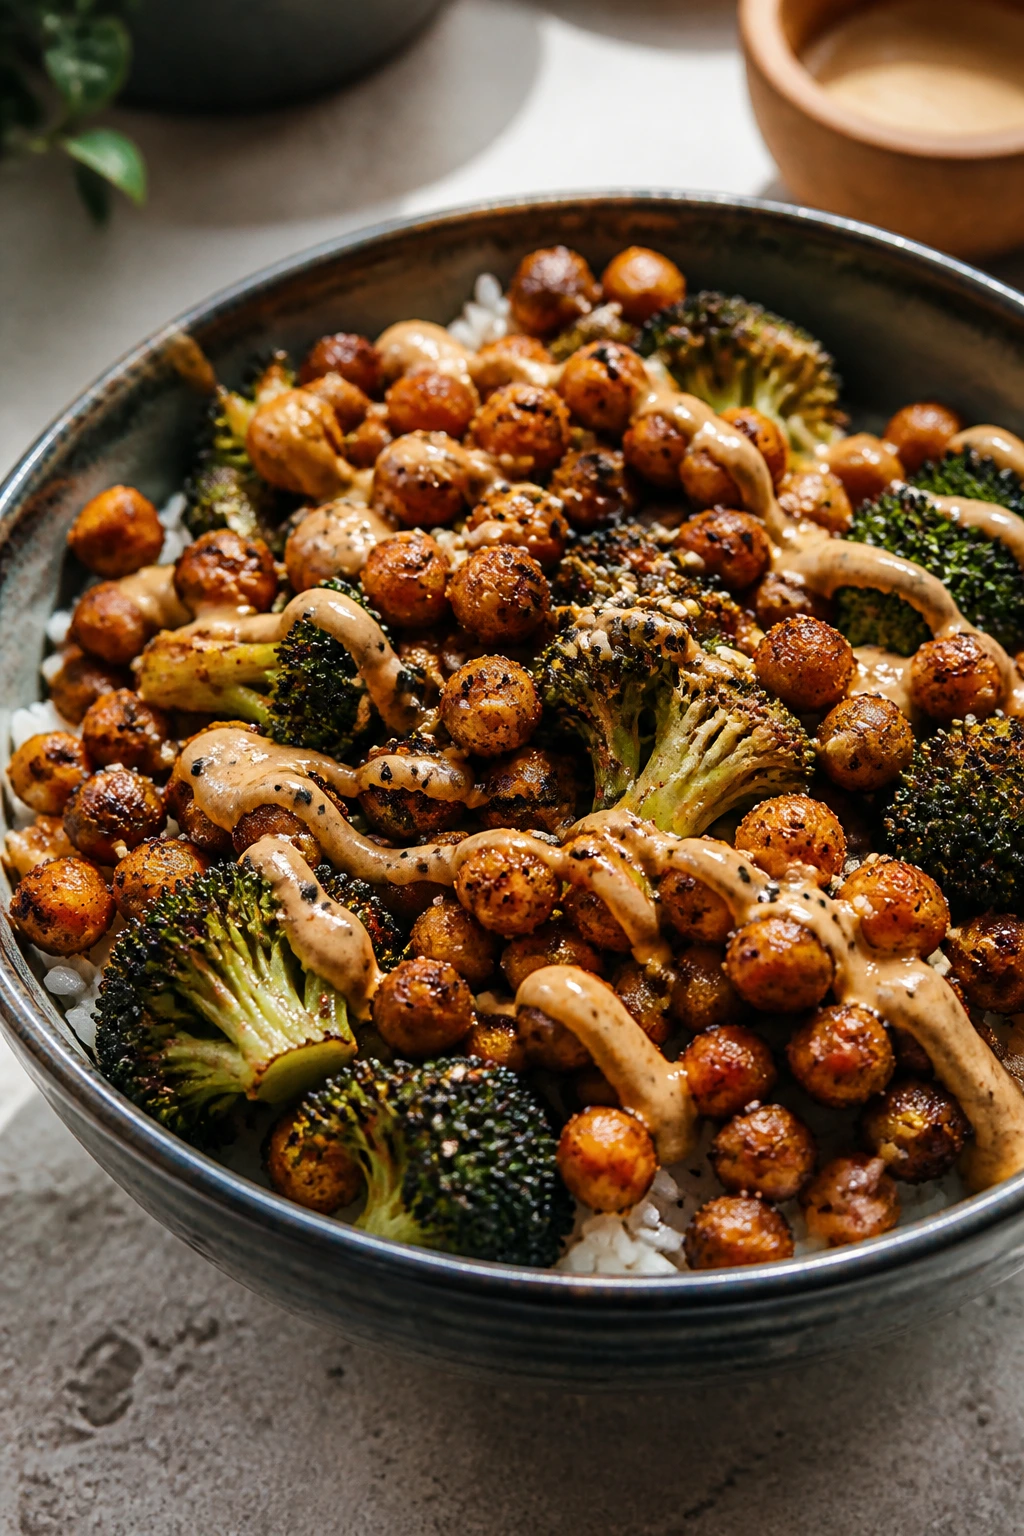
This bowl leans on pantry staples in a way that feels smarter than it sounds. Chickpeas roast into something nutty and crisp, broccoli gets those charred edges that save it from boredom, and a five-spice seasoning blend gives the whole thing a warm, aromatic note. Rice underneath makes the bowl feel like a meal instead of a side dish pile.
Why It Works:
Chickpeas are dry enough to absorb seasoning and sturdy enough to roast without falling apart. Broccoli likes high heat and a little oil; that’s how you get the crisp tips. Five-spice can go strange if you overdo it, so a little goes a long way. The tahini or peanut sauce on top brings creaminess and keeps the bowl from feeling dusty, which roasted bowls often do when they’re under-sauced.
Key Ingredients:
- 1 can chickpeas, drained and patted dry
- 4 cups broccoli florets
- 2 tablespoons neutral oil
- 1 teaspoon Chinese five-spice powder
- 1/2 teaspoon garlic powder
- 2 tablespoons soy sauce
- 1 tablespoon tahini or peanut butter
- 1 tablespoon rice vinegar
- 1 teaspoon honey or sugar
- 2 cups cooked rice
- 1 tablespoon sesame seeds
Quick Steps:
- Dry the chickpeas well: Pat them with a towel so they roast instead of steam.
- Season the tray: Toss chickpeas and broccoli with oil, five-spice, garlic powder, and soy sauce on a lined sheet pan.
- Roast: Bake at 425°F for 20 to 25 minutes, stirring once halfway, until the broccoli edges are browned and the chickpeas are firm.
- Mix the sauce: Whisk tahini or peanut butter with rice vinegar, honey, and 1 to 2 tablespoons water until smooth.
- Build the bowls: Spoon rice into bowls, then add the roasted vegetables and chickpeas.
- Finish: Drizzle with sauce and sprinkle sesame seeds over the top.
Equipment for This Recipe:
- Rimmed sheet pan
- Mixing bowl
- Whisk
- Parchment paper, optional but helpful
How to Serve This Dish:
This looks nicest in a deep bowl where the sauce can stripe across the top instead of sinking immediately. I like it with pickled cucumber or a little shredded cabbage if there’s time. It works as lunch and dinner, which is one reason I keep coming back to it.
Pro Tips for This Recipe:
- Dry chickpeas roast better than damp ones. Moisture is the enemy here.
- Don’t use too much five-spice; the flavor can turn perfumey.
- If the sauce thickens while sitting, add a spoonful of warm water.
- A final squeeze of lime or splash of vinegar can sharpen the whole bowl.
Variations on This Dish:
- Sesame-Tahini Version: Use tahini in the sauce and add more sesame seeds at the end.
- Sweet-Savory Bowl: Add 1 teaspoon extra honey if you like a rounder glaze.
- Cauliflower Swap: Replace half the broccoli with cauliflower florets for a slightly sweeter roast.
Common Mistakes to Avoid with This Dish:
- Skipping the chickpea drying step: They soften instead of crisp.
- Roasting at low heat: You’ll get pale vegetables and no edges.
- Saucing before roasting: The glaze burns and the vegetables steam.
13. Miso Butter Corn Ramen
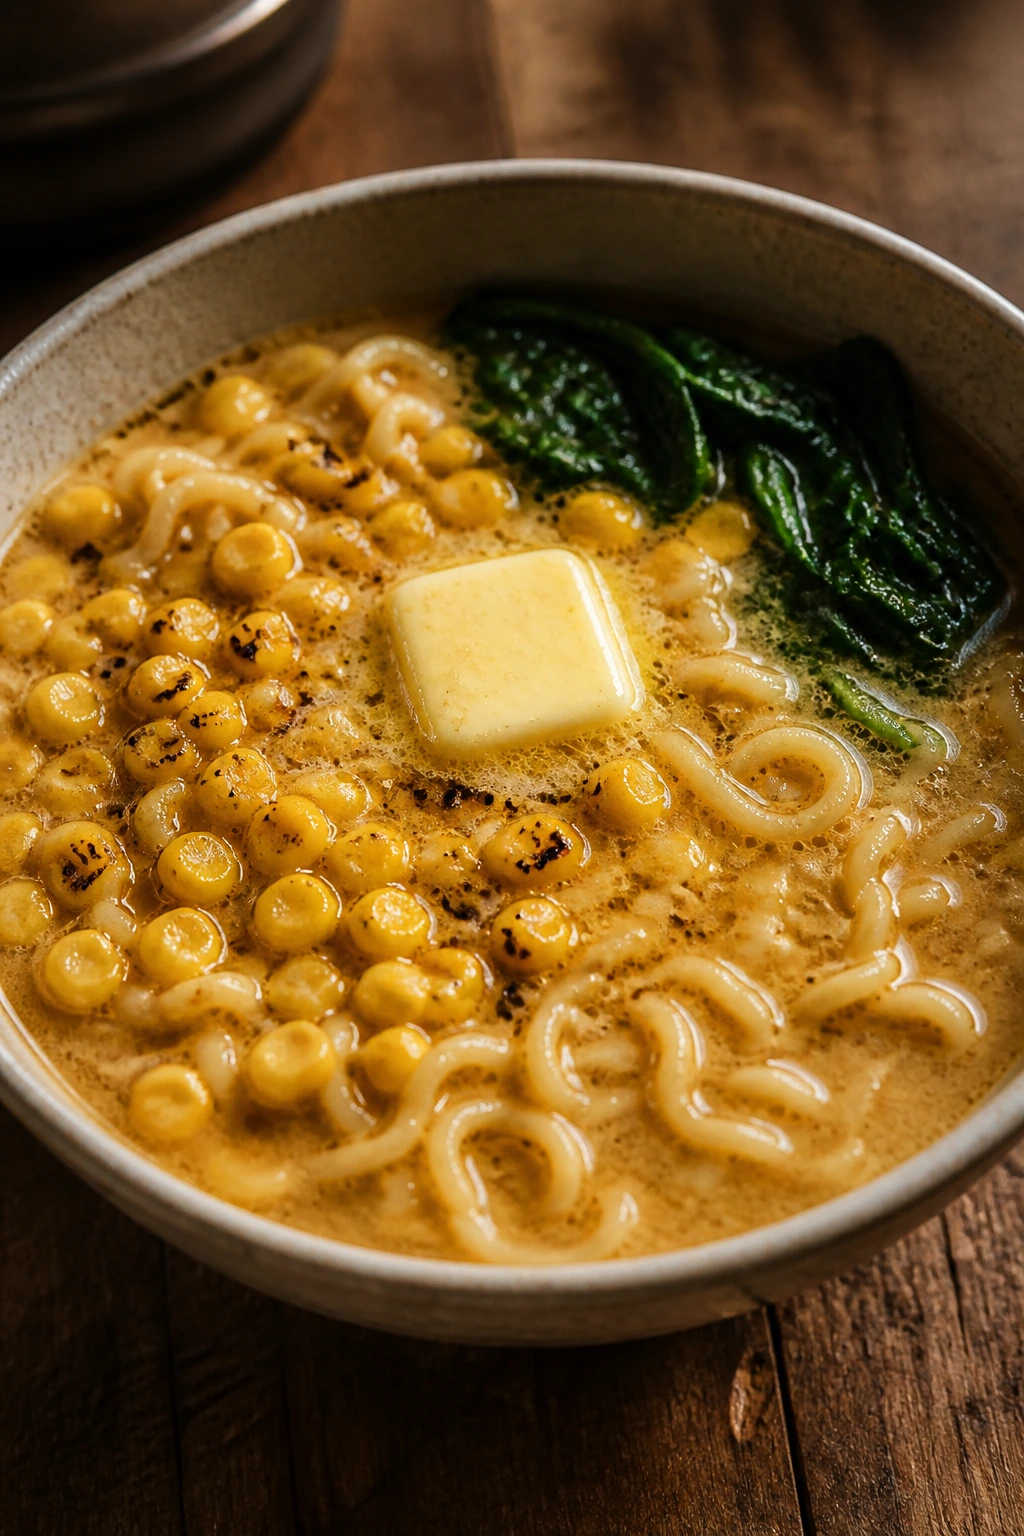
Miso, butter, and corn are one of those combinations that sounds oddly specific until you try it and realize how good the balance is. The ramen noodles stay springy, the broth gets silky from butter and miso, and the corn adds little sweet bursts that keep the bowl from turning one-note. It’s comfort food with a pantry backbone.
Why It Works:
Miso gives you deep savory flavor with very little effort, but it should never be boiled hard or it loses some of its subtlety. Butter rounds out the edges and gives the broth a richer mouthfeel. Corn is a smart partner here because its sweetness plays against the salt and umami. Add an egg if you want, but the bowl already tastes complete even without one.
Key Ingredients:
- 2 packs ramen noodles, seasoning packets discarded
- 2 tablespoons white or yellow miso paste
- 1 tablespoon butter
- 1 cup frozen corn
- 1 cup baby spinach
- 2 eggs, soft-boiled or fried, optional
- 2 scallions, sliced
- 1 teaspoon soy sauce
- 1/2 teaspoon sesame oil
- 3 cups water or stock
- Chili oil, to taste
Quick Steps:
- Heat the broth base: Bring the water or stock to a simmer with soy sauce and corn.
- Cook the noodles: Add the ramen and cook until just tender, usually 2 to 3 minutes.
- Add the spinach: Stir in the spinach at the end so it wilts without collapsing.
- Mix in the miso: Turn off the heat, ladle out a little hot broth, whisk it with the miso until smooth, then stir it back in.
- Finish with butter: Drop in the butter and sesame oil and stir until the broth turns silky.
- Serve: Top with eggs, scallions, and chili oil.
Equipment for This Recipe:
- Medium saucepan
- Small bowl, for dissolving the miso
- Chopsticks or tongs, for lifting noodles
- Ladle, for serving
How to Serve This Dish:
Ramen bowls like height, so build this one with noodles first, then broth, then toppings. A soft egg halves nicely in the center if you’re using one. The surface should look glossy and a little cloudy from the miso and butter.
Pro Tips for This Recipe:
- Dissolve miso in a small bit of hot broth before adding it back to the pot.
- Don’t overcook the noodles; ramen turns soft fast.
- Salt carefully, because miso and soy both carry plenty.
- If you want more body, add a splash of milk or extra butter, but keep it light.
Variations on This Dish:
- Mushroom Miso Ramen: Add sliced mushrooms with the corn and let them simmer for 3 minutes.
- Spicy Butter Ramen: Stir in chili crisp at the end.
- Chicken Broth Version: Use chicken stock if you want a deeper, meatier base.
Common Mistakes to Avoid with This Dish:
- Boiling miso directly for too long: The flavor dulls.
- Letting the noodles sit in broth for ages: They go soft and bloated.
- Over-salting before tasting the miso: The bowl can cross into too much very quickly.
14. Dan Dan-Inspired Noodles with Ground Pork
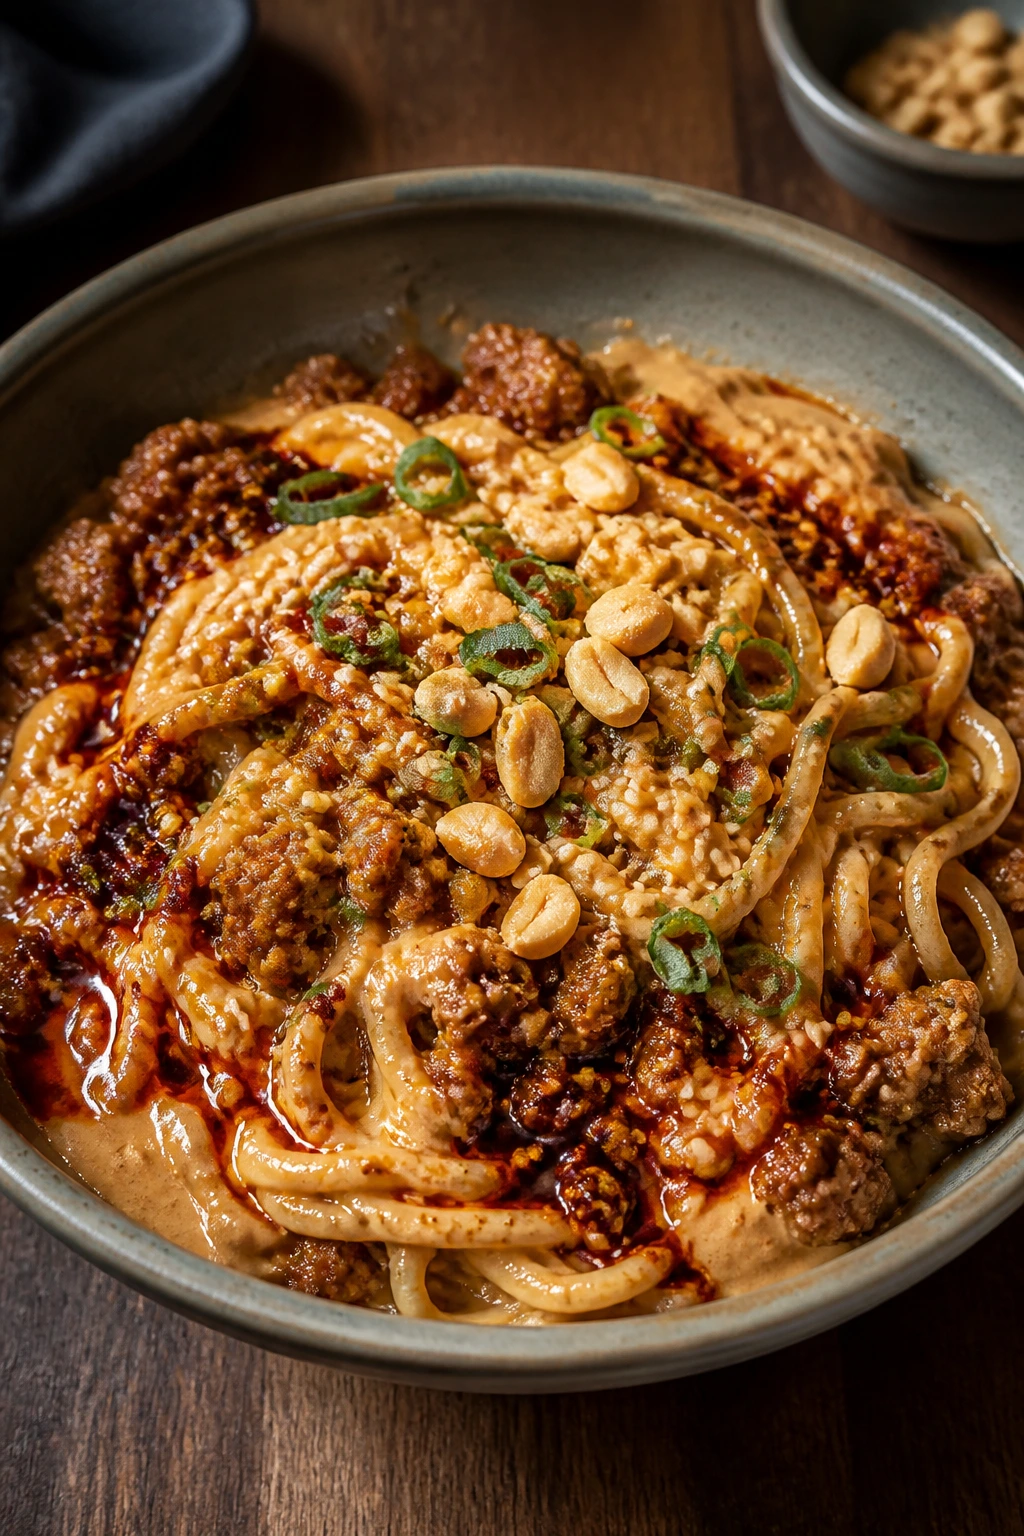
Dan dan noodles should taste bold, a little nutty, and a little sharp, with enough heat to keep you interested through the last bite. This pantry version uses what’s easy to keep around: ground pork, noodles, peanut butter or sesame paste, soy sauce, vinegar, and chili oil. It doesn’t pretend to be the most traditional version on earth. It does taste like a very good bowl of noodles.
Why It Works:
The meat gets browned first, which gives the sauce a savory base. Peanut butter or sesame paste thickens the noodle coating and gives it that earthy, clingy texture. Vinegar matters a lot here; it cuts through the fat and keeps the bowl from tasting heavy. Chili oil or chili crisp brings heat and aroma, and a few chopped peanuts at the end add crunch where you need it.
Key Ingredients:
- 8 ounces dried noodles
- 1 pound ground pork
- 2 cloves garlic, minced
- 1 tablespoon grated ginger
- 3 tablespoons soy sauce
- 2 tablespoons peanut butter or sesame paste
- 1 tablespoon rice vinegar
- 1 to 2 teaspoons chili oil or chili crisp
- 1 teaspoon sugar
- 1/4 cup noodle cooking water
- 2 scallions, sliced
- 2 tablespoons chopped peanuts
Quick Steps:
- Cook the noodles: Boil them until tender, then reserve 1/4 cup cooking water and drain.
- Brown the pork: Cook the pork in a skillet over medium-high heat until browned and crumbly.
- Add aromatics: Stir in garlic and ginger and cook for 30 seconds.
- Build the sauce: Add soy sauce, peanut butter or sesame paste, vinegar, chili oil, sugar, and noodle water. Stir until smooth.
- Toss with noodles: Add the noodles and toss until every strand is coated.
- Finish: Top with scallions and chopped peanuts.
Equipment for This Recipe:
- Medium pot, for the noodles
- Large skillet
- Whisk or spoon, to smooth the sauce
- Tongs, for tossing
How to Serve This Dish:
Serve it in a bowl with the pork gathered in the middle and the peanuts on top. A few cucumber slices or quick-pickled carrots help with the richness. The noodles should look a little dark, a little shiny, and not dry at all.
Pro Tips for This Recipe:
- Use enough noodle water to loosen the peanut sauce, but not so much that it pools.
- Taste for acid before you add more heat. Heat without balance gets old fast.
- If the pork is fatty, drain a little excess grease before adding the sauce.
- A small pinch of Sichuan peppercorn powder can make the bowl pop.
Variations on This Dish:
- Sesame-Paste Version: Use tahini or sesame paste for a deeper nutty flavor.
- Vegetarian Dan Dan Bowl: Swap in chopped mushrooms and crumbled tofu.
- Extra-Crunch Finish: Add shredded cucumber and more peanuts on top.
Common Mistakes to Avoid with This Dish:
- Leaving the pork pale: Browned pork gives the sauce its backbone.
- Making the sauce too thick before the noodles go in: It gets clumpy and hard to distribute.
- Skipping the vinegar: The bowl needs sharpness to stay lively.
15. Teriyaki Tofu and Broccoli Sheet Pan Dinner
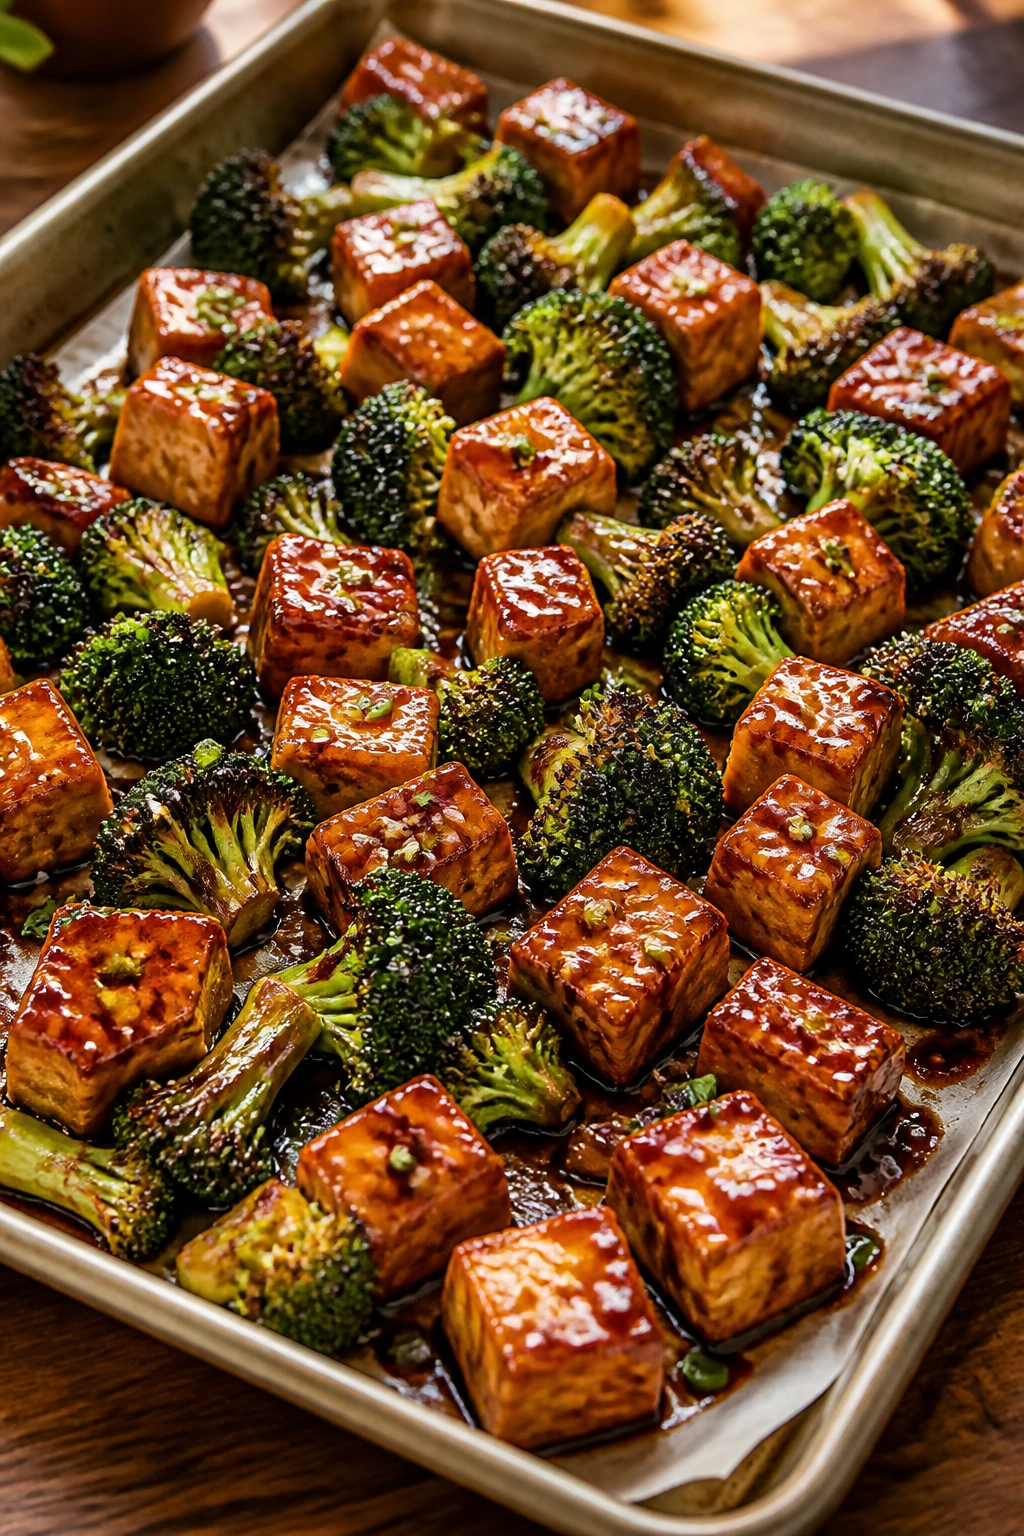
Sheet pan dinners don’t always deserve their reputation, but this one does. Pressed tofu and broccoli roast together, then get glossed with a teriyaki-style sauce that turns sticky in the oven. It’s practical, yes, but also a little polished. The edges brown. The tofu firms up. The broccoli catches a few dark spots. That’s the good stuff.
Why It Works:
Tofu needs moisture squeezed out before it goes in the oven or the crust won’t happen. Broccoli likes high heat and enough oil to blister at the tips. A teriyaki-style sauce with soy, honey, garlic, and ginger gives you sweetness and salt without making the pan watery. Cornstarch helps the sauce cling instead of sliding off into the parchment paper, which is where too many sheet-pan sauces disappear.
Key Ingredients:
- 1 block extra-firm tofu, about 14 to 16 ounces, pressed and cubed
- 4 cups broccoli florets
- 2 tablespoons neutral oil
- 3 tablespoons soy sauce
- 2 tablespoons honey
- 2 cloves garlic, minced
- 1 tablespoon grated ginger
- 1 teaspoon cornstarch
- 2 tablespoons water
- 2 cups cooked rice
- 1 tablespoon sesame seeds
Quick Steps:
- Press the tofu: Wrap it in a towel and press for 10 to 15 minutes, then cube it.
- Season the tray: Toss tofu and broccoli with oil on a lined sheet pan.
- Roast first: Bake at 425°F for 15 minutes, stirring once halfway.
- Make the glaze: Stir soy sauce, honey, garlic, ginger, cornstarch, and water in a small bowl.
- Glaze and finish: Pour the sauce over the tray and roast 5 to 8 more minutes until glossy and lightly sticky.
- Serve: Spoon over rice and finish with sesame seeds.
Equipment for This Recipe:
- Rimmed sheet pan
- Parchment paper
- Small bowl for the glaze
- Towel or tofu press, for draining
How to Serve This Dish:
Serve the tofu and broccoli over rice so the glaze has somewhere to land. I like a few sesame seeds on top and maybe some sliced scallions if they’re around. The pan should come out smelling sweet and garlicky, with browned tofu edges and bright green broccoli.
Pro Tips for This Recipe:
- Dry tofu roasts better than damp tofu. Really dry.
- Don’t add the glaze at the start or it can burn.
- Stir the pan once so the broccoli doesn’t overchar on one side.
- If your tofu is particularly soft, toss it with a teaspoon of cornstarch before roasting.
Variations on This Dish:
- Sesame-Ginger Version: Add 1 teaspoon sesame oil to the glaze after roasting.
- Chicken Swap: Replace tofu with bite-size chicken thighs and roast until they hit 165°F.
- Spicy Teriyaki Tray: Stir chili crisp into the glaze for a hotter finish.
Common Mistakes to Avoid with This Dish:
- Skipping the tofu press: Extra water prevents browning.
- Using too much sauce: The pan turns wet and the broccoli steams.
- Overcrowding the pan: Leave room so the florets and tofu can roast, not sweat.
16. Coconut Curry Lentil Soup with Rice
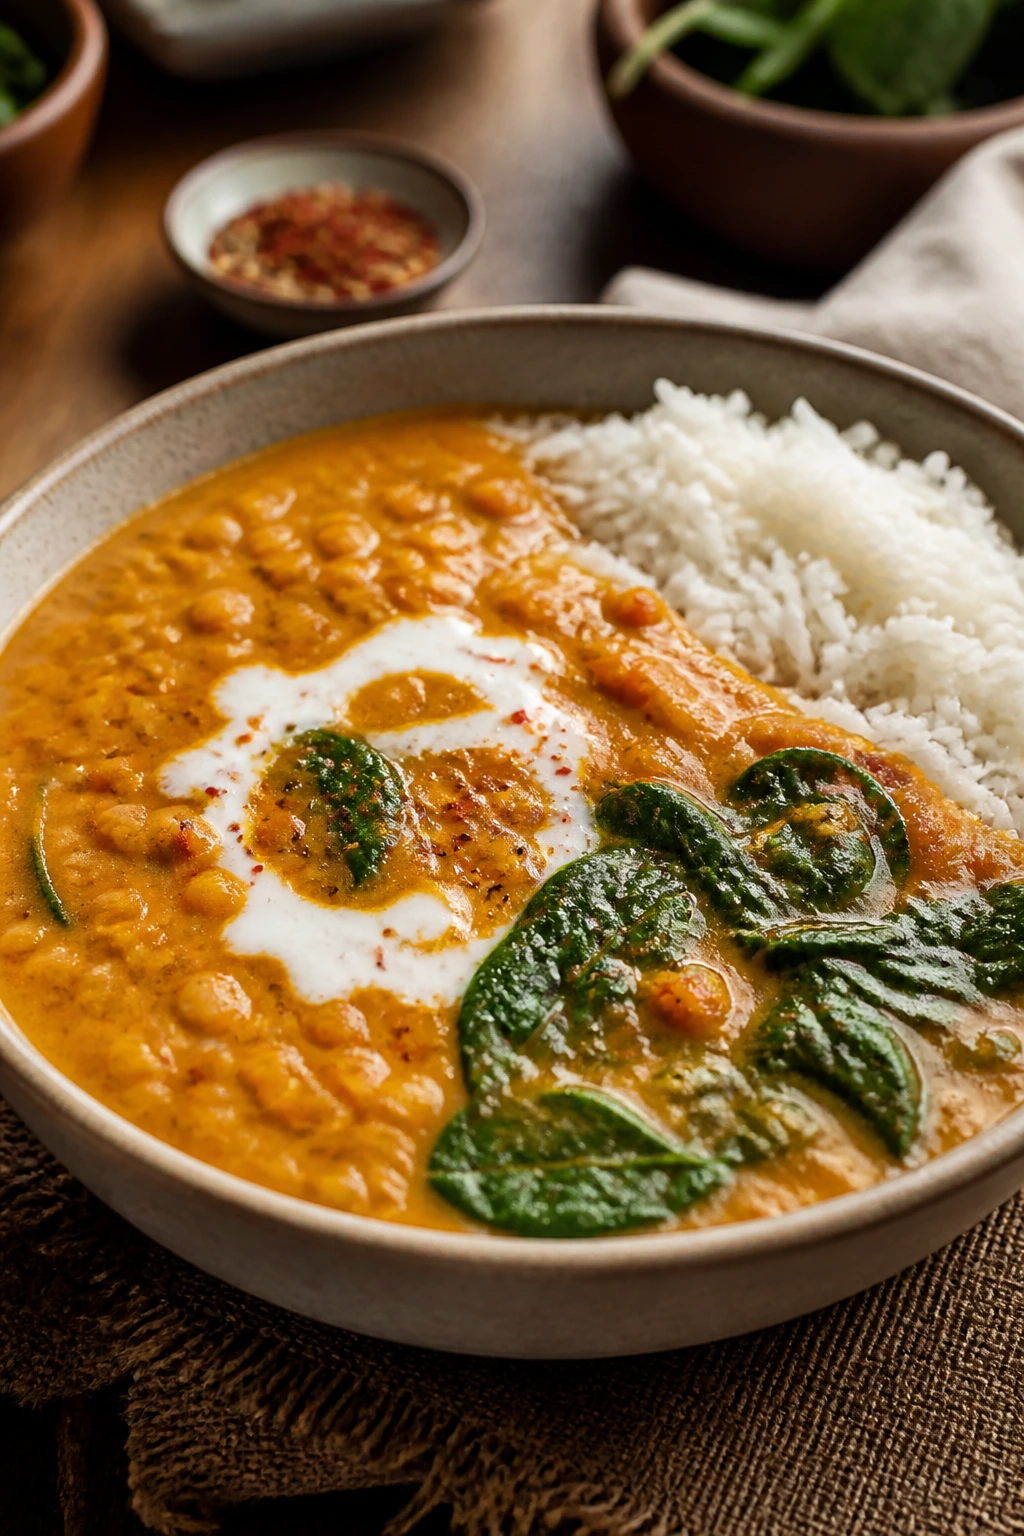
This one lives somewhere between soup and stew, and I mean that as a compliment. Red lentils break down into a creamy base without needing a blender, coconut milk gives the soup body, and curry paste or curry powder brings warmth. Rice on the side or stirred in makes it even more filling. It’s pantry food that eats like comfort, not compromise.
Why It Works:
Red lentils cook quickly and thicken the pot as they go, which is why they’re so useful when you want a rich soup without cream. Coconut milk rounds out the spice and gives you a smoother finish. Onion, garlic, and ginger make the base smell good before the liquid even goes in. If you have canned tomatoes, they help the soup taste fuller; if you don’t, the soup still works. That’s pantry logic at its best.
Key Ingredients:
- 1 tablespoon neutral oil
- 1 onion, diced
- 3 cloves garlic, minced
- 1 tablespoon grated ginger
- 2 tablespoons curry powder or 1 1/2 tablespoons curry paste
- 1 cup red lentils, rinsed
- 1 can coconut milk, 13.5 ounces
- 4 cups vegetable broth or water
- 1 cup canned diced tomatoes, optional but useful
- 2 cups baby spinach
- 1 teaspoon salt, plus more to taste
- 2 cups cooked rice, for serving
- Lime wedges, optional
Quick Steps:
- Cook the aromatics: Heat oil in a pot over medium heat. Add onion and cook until translucent, about 5 minutes.
- Bloom the spices: Stir in garlic, ginger, and curry powder or paste for 30 seconds.
- Add the lentils and liquid: Stir in lentils, coconut milk, broth, and tomatoes if using.
- Simmer: Bring to a gentle simmer and cook 20 to 25 minutes until the lentils are soft and beginning to break down.
- Finish the greens: Stir in spinach and salt until wilted.
- Serve: Spoon into bowls over rice or beside it, with lime if you want extra brightness.
Equipment for This Recipe:
- Medium to large pot
- Wooden spoon
- Ladle
- Cutting board and knife
How to Serve This Dish:
I like this in a deep bowl with a scoop of rice in the center or a small pile on the side. A squeeze of lime at the table sharpens the coconut beautifully. The surface should look creamy, with spinach leaves giving it a dark green contrast.
Pro Tips for This Recipe:
- Rinse the lentils so the soup doesn’t taste dusty.
- Keep the simmer gentle; a hard boil can make the lentils break down unevenly.
- Add salt at the end because curry pastes and coconut milk vary a lot.
- If you want a thicker stew, simmer uncovered for the last 5 minutes.
Variations on This Dish:
- Tomato-Forward Version: Add the canned tomatoes and a pinch of sugar for a brighter, more tomato-heavy soup.
- Extra-Green Bowl: Stir in chopped kale or extra spinach near the end.
- Lighter Coconut Soup: Use half coconut milk and half broth for a thinner, brothier finish.
Common Mistakes to Avoid with This Dish:
- Over-salting early: The broth reduces and gets saltier as it cooks.
- Using green or brown lentils without changing the cook time: They take longer and don’t break down the same way.
- Skipping the aromatics: Onion, garlic, and ginger are the backbone here.
17. Sichuan-Style Green Beans with Ground Pork
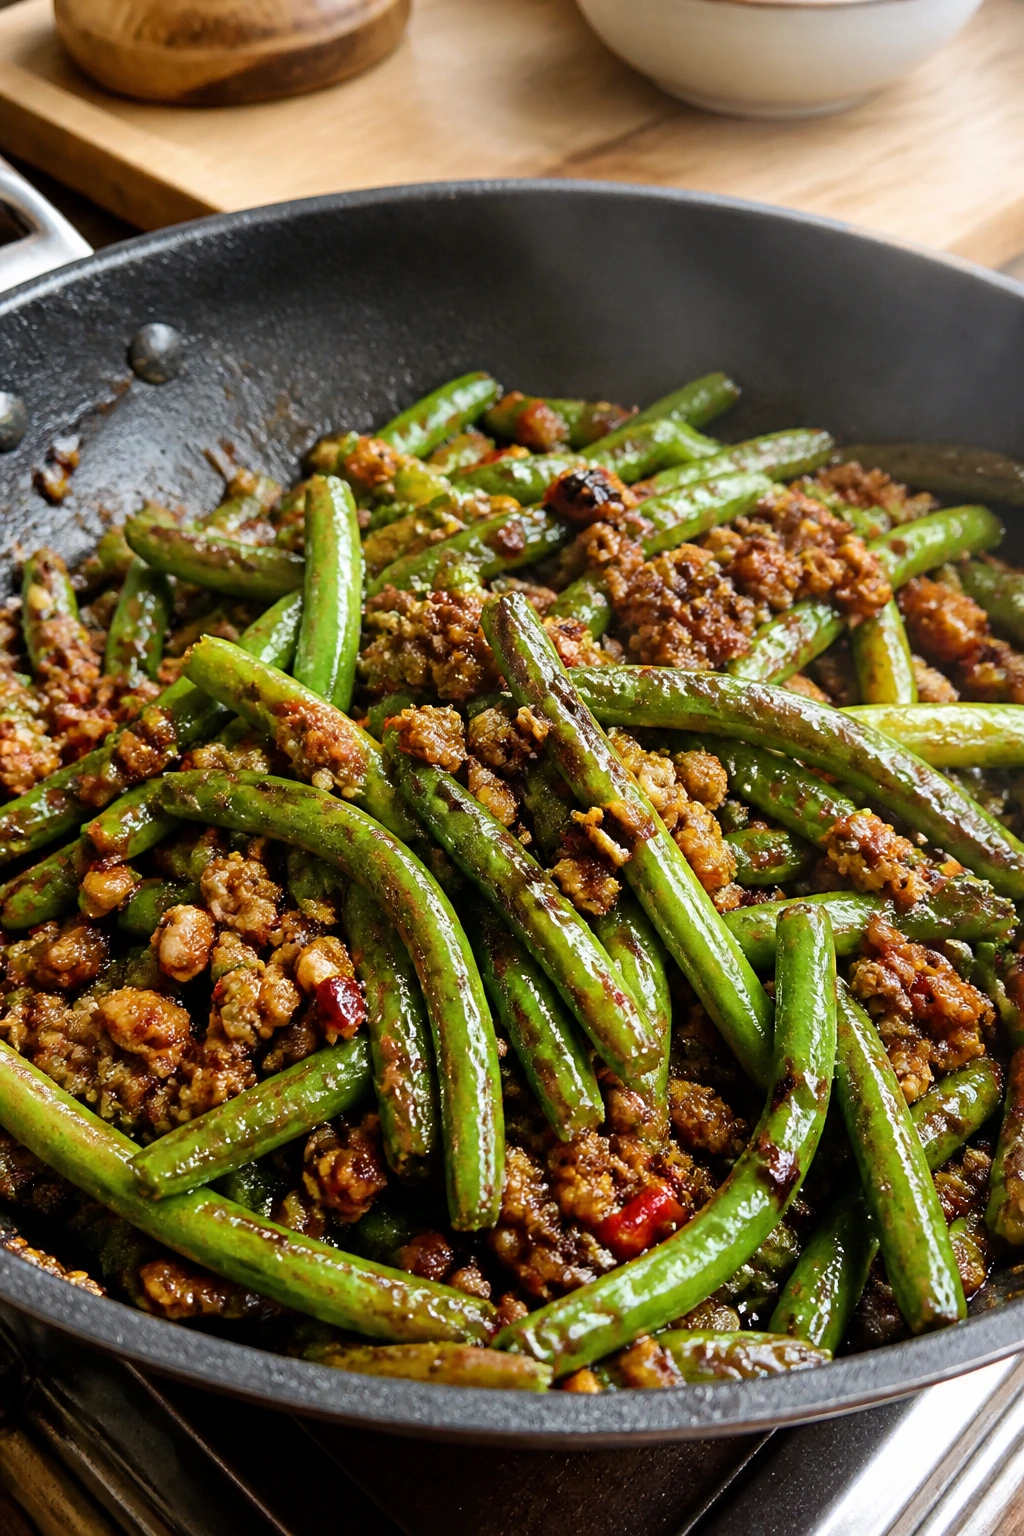
This dish has the kind of savory, slightly smoky edge that makes plain rice feel upgraded. The green beans blister in the pan before they soften, which gives them a flavor boost that’s easy to miss if you just steam them. Ground pork carries the sauce and makes the whole thing feel like a proper dinner instead of a side dish pretending to be a main.
Why It Works:
Green beans take well to high heat if you’re willing to let them sit against the skillet long enough to blister. Ground pork browns quickly and picks up whatever sauce you give it, which makes it ideal for fast stir-fries. Garlic, ginger, chili bean sauce or chili garlic sauce, soy, and a little vinegar create the sharp, salty base. The key is cooking the beans and pork separately enough to give each one a job.
Key Ingredients:
- 1 pound green beans, trimmed
- 1 pound ground pork
- 3 cloves garlic, minced
- 1 tablespoon grated ginger
- 2 tablespoons soy sauce
- 1 tablespoon chili bean sauce or chili garlic sauce
- 1 teaspoon sugar
- 1 tablespoon rice vinegar
- 2 tablespoons neutral oil
- 2 scallions, sliced
- Cooked rice, for serving
Quick Steps:
- Blister the beans: Heat oil in a large skillet over medium-high heat. Add the green beans and cook 5 to 7 minutes, stirring occasionally, until they blister and soften slightly.
- Cook the pork: Push the beans to the edge of the pan or remove them. Add the pork and cook until browned and crumbly.
- Add aromatics: Stir in garlic and ginger for 30 seconds.
- Season: Add soy sauce, chili bean sauce, sugar, and rice vinegar.
- Combine: Return the beans if needed and toss until everything is coated and the sauce clings.
- Finish: Add scallions and serve hot over rice.
Equipment for This Recipe:
- Large skillet or wok
- Spatula
- Knife and cutting board
- Small bowl, if you want to mix the sauce first
How to Serve This Dish:
A bowl of steamed rice is the right landing spot here. The beans and pork should sit on top with a little sauce seeping down into the grains. If you want a second vegetable, keep it simple: sliced cucumber or a quick cabbage slaw.
Pro Tips for This Recipe:
- Dry the green beans before they hit the pan or they’ll steam.
- Let the pork brown before stirring it too much.
- A little vinegar at the end keeps the dish from tasting heavy.
- If your chili bean paste is very salty, reduce the soy sauce slightly.
Variations on This Dish:
- Turkey Bean Bowl: Use ground turkey for a leaner version and add an extra spoon of oil if the pan seems dry.
- Mushroom-Pork Mix: Replace half the pork with chopped mushrooms for a deeper, earthier flavor.
- Extra-Spicy Beans: Add chili crisp at the end for more heat and crunch.
Common Mistakes to Avoid with This Dish:
- Steaming the beans instead of blistering them: Dry pan contact is what gives them their character.
- Using too much sauce: The beans should look coated, not drowned.
- Adding the scallions too early: They lose their bite and turn dull.
18. Char Siu-Style Chicken Thighs
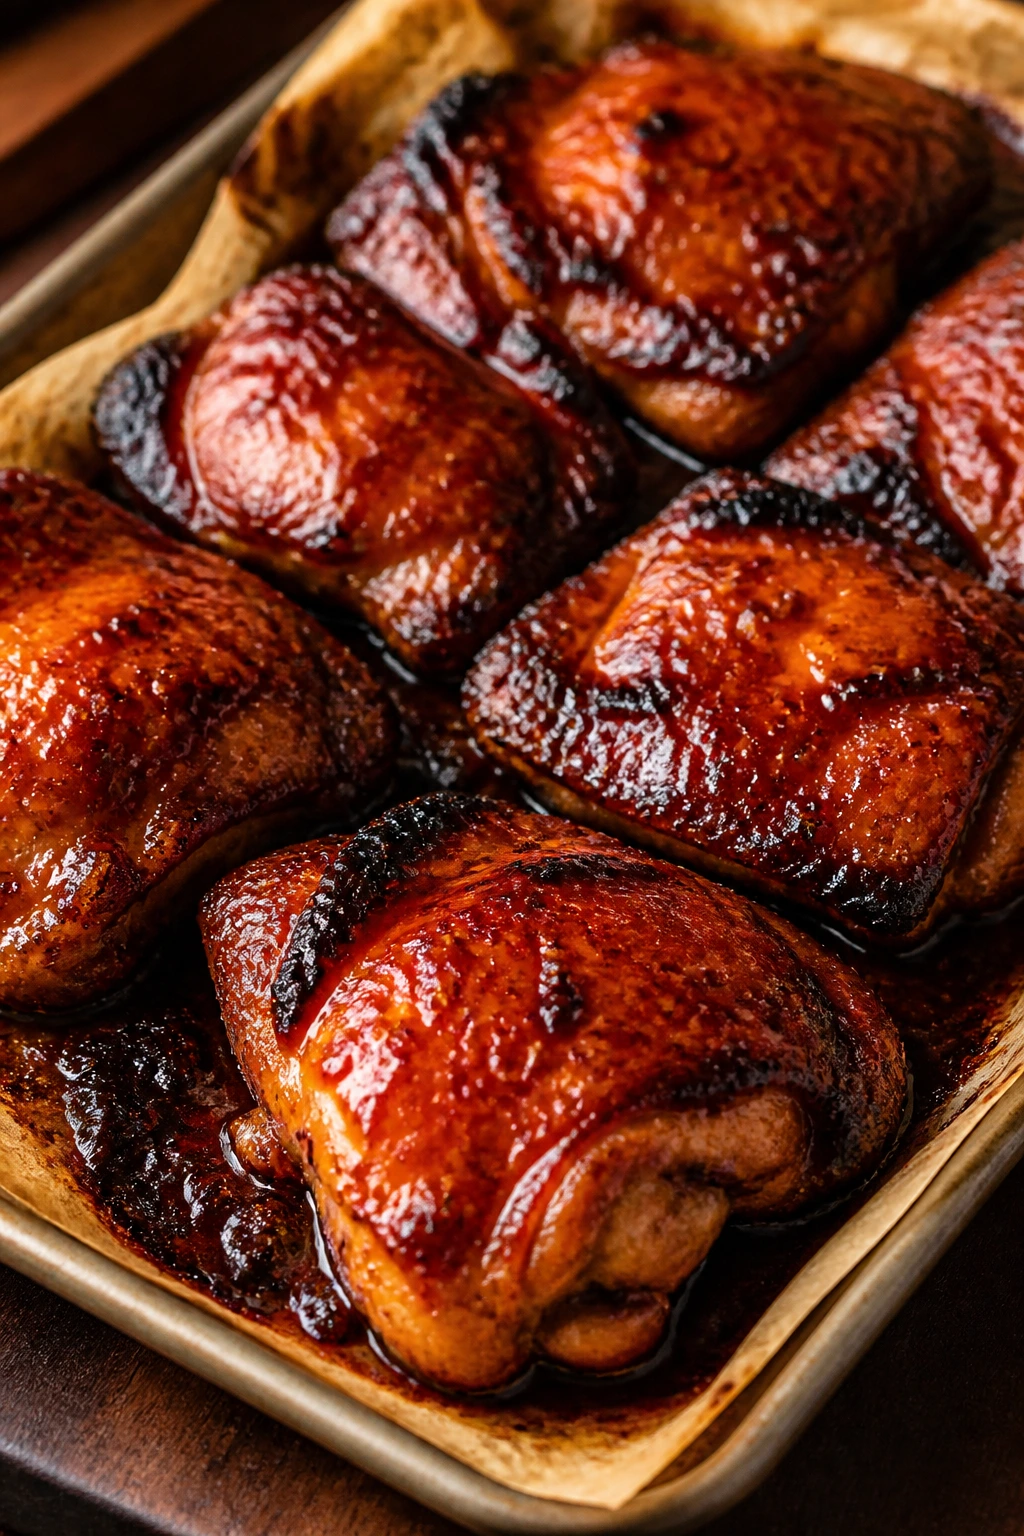
Char siu-style chicken is one of my favorite shortcuts because it gives you sticky, lacquered edges without requiring a long grocery list or a hanging roast in a Chinatown barbecue window. The flavor lands somewhere between sweet, salty, garlicy, and gently spiced. Roasting chicken thighs this way gives you browned skin or browned edges, depending on the cut, and a pan sauce worth spooning over rice.
Why It Works:
Chicken thighs stay juicy under high heat, which is why they’re better than breast here. Hoisin, soy, honey, five-spice, and a little vinegar give you the sweet-salty profile people expect from char siu without asking you to hunt for specialty ingredients. The glaze needs time to caramelize, so a roast plus a short broil gives the edges that glossy, almost sticky finish. That’s the part that makes the dish feel complete.
Key Ingredients:
- 2 pounds boneless, skinless chicken thighs
- 3 tablespoons hoisin sauce
- 2 tablespoons soy sauce
- 2 tablespoons honey
- 1 tablespoon rice vinegar
- 2 cloves garlic, minced
- 1 teaspoon Chinese five-spice powder
- 1 tablespoon neutral oil
- 2 cups cooked rice
- Sliced cucumbers or scallions, for serving
Quick Steps:
- Mix the glaze: Stir hoisin, soy sauce, honey, vinegar, garlic, five-spice, and oil together.
- Marinate the chicken: Coat the thighs in the glaze and let them sit 20 minutes, or up to overnight in the fridge.
- Roast: Place the chicken on a lined sheet pan and roast at 425°F for 20 to 25 minutes, spooning a little glaze over the top halfway through.
- Broil for color: Broil 2 to 3 minutes until the edges darken and turn sticky. Watch it closely.
- Rest and slice: Let the chicken rest 5 minutes, then slice.
- Serve: Spoon over rice and add cucumbers or scallions.
Equipment for This Recipe:
- Rimmed sheet pan
- Parchment paper or foil
- Small bowl for the glaze
- Tongs and a knife
How to Serve This Dish:
This looks best sliced over rice with the glossy glaze dragged across the top of the meat and a few cucumber slices for contrast. Scallions add freshness and keep the plate from feeling too dark. If you want a more complete spread, add steamed broccoli or a simple cucumber salad with vinegar and salt.
Pro Tips for This Recipe:
- Don’t use heat that’s too low or the glaze won’t caramelize.
- Keep a close eye on the broiler; the honey can burn fast.
- If you like more sauce, make an extra half batch and warm it separately.
- Thighs should rest before slicing so the juices stay in the meat.
Variations on This Dish:
- Pork Chop Char Siu Style: Use thick pork chops and reduce the roast time slightly.
- Spicier Char Siu: Add chili garlic sauce to the glaze.
- Honey-Sesame Finish: Sprinkle sesame seeds on top after roasting for a little extra texture.
Common Mistakes to Avoid with This Dish:
- Marinating too little: The glaze needs at least a short rest to cling.
- Broiling without watching: Honey burns quickly and leaves a bitter edge.
- Cutting the chicken too soon: Resting matters here or the juices run out.
Why Asian Pantry Dinners Work So Well
A good pantry dinner is not about making do. It’s about knowing what certain ingredients want to become. Soy sauce wants heat and acid. Sesame oil wants to stay on the finish line. Rice wants to be dry enough to fry or soft enough to absorb sauce. Noodles want a coating that’s salty but not flat. Once you stop thinking of these ingredients as random bottles and start thinking of them as parts of a system, the cooking gets easier.
That system is why these dishes stay useful. A bag of frozen broccoli can become dinner with tofu. A half onion can carry a noodle bowl. A can of chickpeas can act like a protein with some real presence if you roast it hard enough. The details matter, but they’re not fussy details. They’re the kind you can keep in your head while the pan heats.
There’s also a practical reason these recipes work: they don’t ask for a lot of active time. Most of the labor is front-loaded into chopping, whisking, or boiling water. After that, it’s mostly stir, simmer, roast, toss. That rhythm matters on nights when you’re low on energy and high on hunger.
Essential Equipment for These Recipes
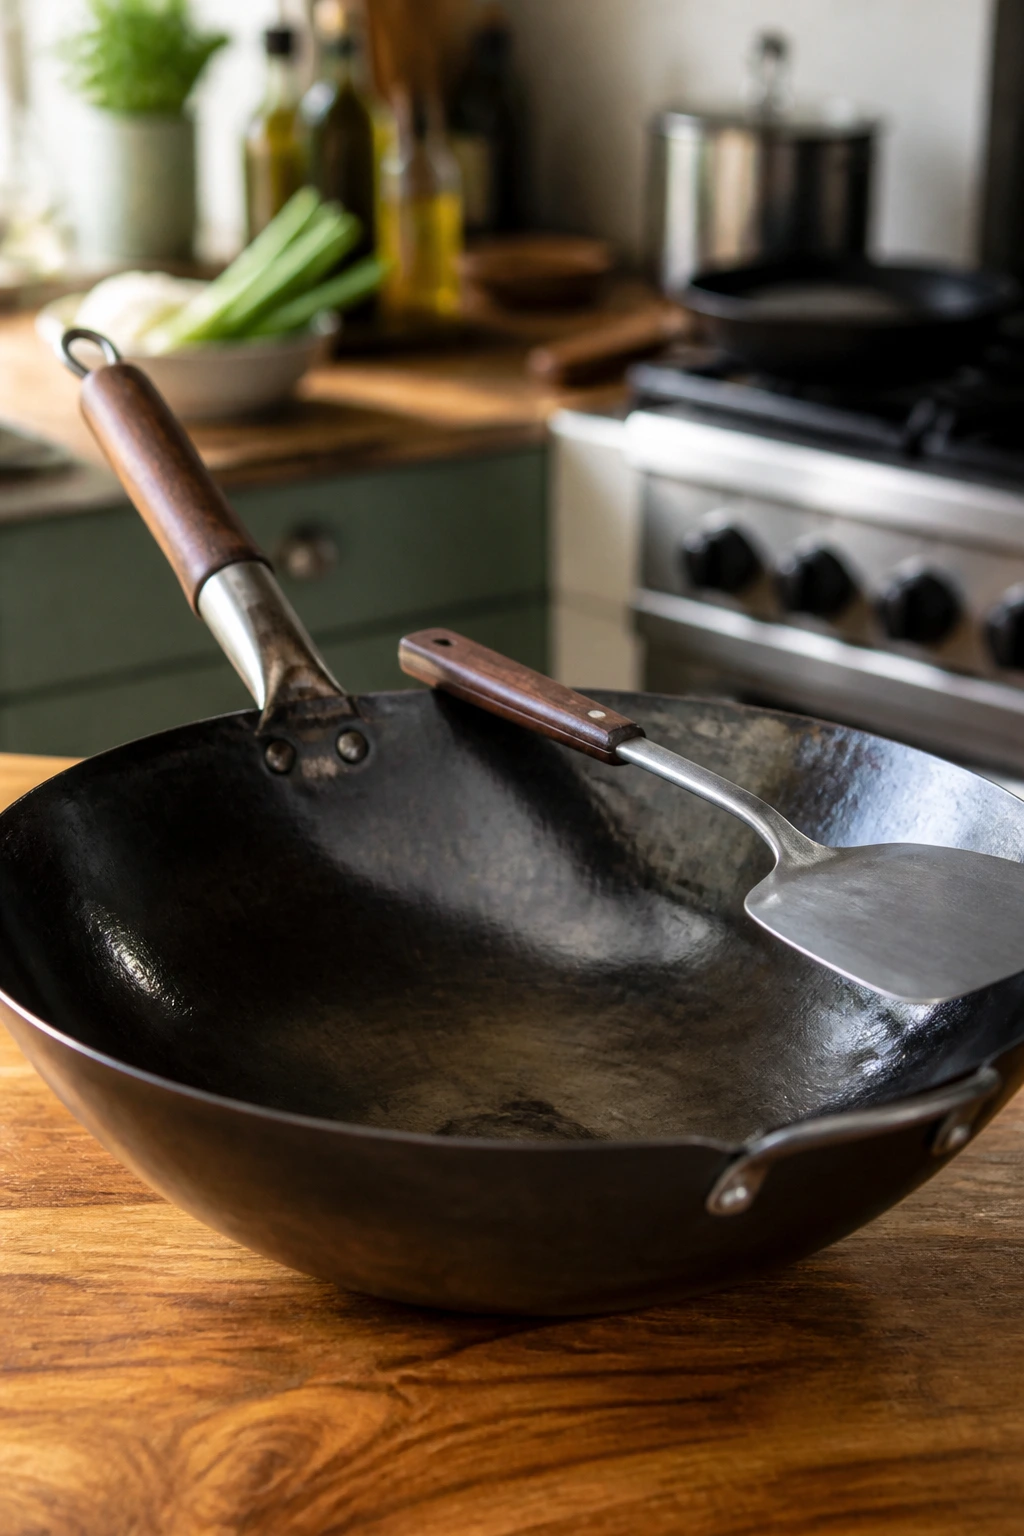
- Large wok or 12-inch skillet: Best for fried rice, stir-fries, noodles, and any dish that needs fast tossing and room to move.
- Medium saucepan: Handy for soups, noodle boiling, and small sauce batches.
- Large pot: Useful for ramen, udon, and bigger noodle boils where you need plenty of water.
- Rimmed sheet pan: Needed for meatballs, roasted tofu, chicken thighs, and tray-style dinners.
- Cutting board and sharp knife: A lot of these recipes hinge on thin slicing, clean chopping, and quick prep.
- Heatproof spatula or wooden spoon: Better than a flimsy spoon when you need to scrape browned bits without wrecking tofu or noodles.
- Tongs: Helpful for noodles, salmon, chicken, and anything you need to turn without breaking apart.
- Fine grater or microplane: Great for garlic, ginger, and making sauces smoother.
- Measuring spoons and cups: These sauces are small but picky; eyeballing soy sauce too loosely is how dinners go sideways.
- Small bowls for sauces and slurries: You’ll use them constantly, especially for cornstarch mixtures and glaze-building.
- Instant-read thermometer: Optional, but useful for salmon and chicken so you don’t guess.
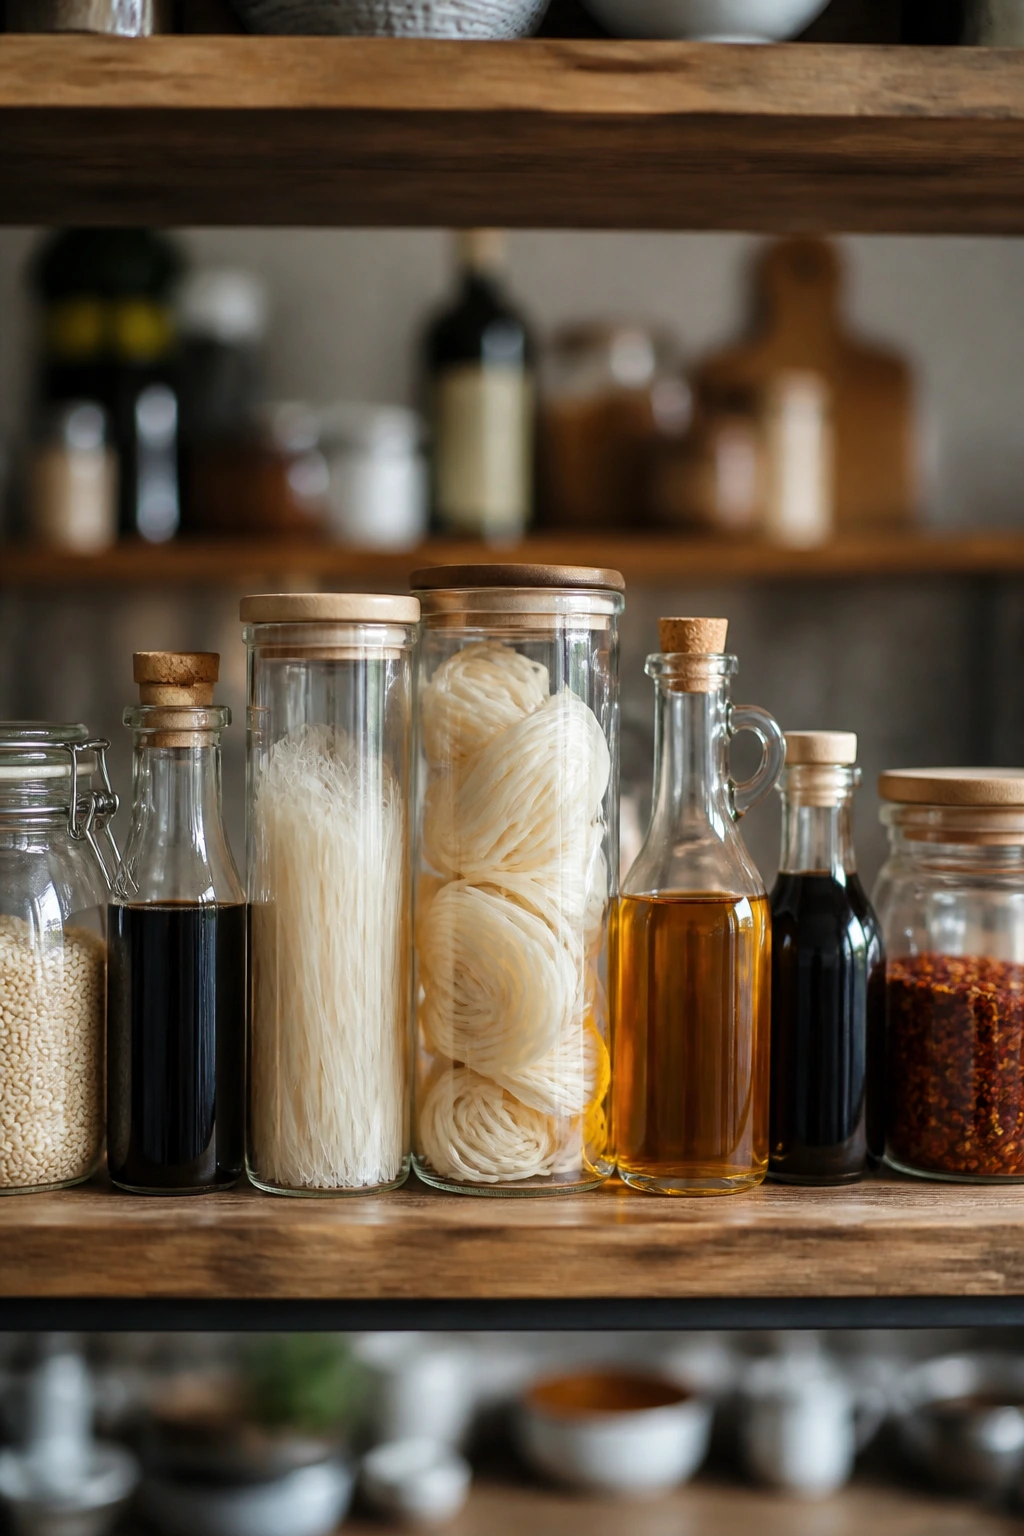
Smart Shopping and Ingredient Tips

If you buy only one soy sauce, make it a regular all-purpose one that tastes balanced on its own. Light soy and dark soy both have their place, but you do not need to start there. A good everyday soy sauce should taste salty, a little sweet, and not harsh on the finish.
Rice vinegar should be unseasoned unless the recipe says otherwise. Seasoned rice vinegar already contains sugar and salt, which can throw off a sauce if you use it as a straight swap. Sesame oil is another one that deserves attention: toasted sesame oil is the one you want for finishing and aroma. Plain sesame oil exists, but it won’t give you that nutty, roasted smell people expect.
Hoisin, oyster sauce, chili crisp, and miso paste are all small jars that pull a lot of weight. Hoisin adds sweetness and depth. Oyster sauce makes stir-fries taste rounder and more polished. Chili crisp gives you heat plus crunchy bits. Miso brings savory backbone to soups, noodles, and glazes. You do not need all of them at once, but keeping two or three on hand makes the pantry feel a lot more capable.
For rice, day-old white rice is easiest for fried rice, but any cooked rice can work if you spread it on a tray and cool it fast. For noodles, dried wheat noodles, ramen, udon, and even spaghetti can cover a lot of ground. Frozen vegetables are not a compromise here; they’re smart shopping. Peas, corn, spinach, broccoli, and edamame all behave well because they’re picked and frozen at a useful stage, not after a long trip to your crisper drawer.
On proteins, thighs tend to forgive mistakes better than breasts, and ground pork or turkey is more flexible than people think. Tofu works best when you choose extra-firm and press it a little. Salmon should look moist and smell clean, not fishy. Chickpeas should be rinsed and dried well if you want them to roast, not steam. These small choices make the difference between “fine” and “I’m making this again.”
How to Serve These Recipes

Presentation:
Serve stir-fries and noodle dishes in wide bowls so the sauce has room to pool slightly instead of disappearing. Fried rice and rice bowls look better with the garnish separated across the top: scallions here, sesame seeds there, a little chili crisp at the edge. If you’re plating salmon or chicken, slice it before serving so the glaze shows and the pieces feel easier to eat.
Accompaniments:
Steamed rice is the obvious anchor, but quick cucumber salad, simple sautéed greens, blanched bok choy, and cabbage slaw all play well with these recipes. For noodles, I like crisp things on the side more than more starch. A fried egg, a soft-boiled egg, or a few roasted sesame seeds can be enough to finish a bowl without crowding it.
Portions:
For rice bowls, figure on about 1 to 1 1/2 cups cooked rice per adult, then top with 4 to 6 ounces of protein or a generous vegetable scoop. Noodle dishes usually land around 2 to 3 cups finished per serving, depending on how saucy they are. Soups work best when you serve them in smaller bowls with a side of rice rather than trying to make the soup do everything.
Beverage Pairing:
Unsweetened green tea fits almost all of these meals because it scrubs the palate clean between salty bites. Cold lager is another easy match for fried rice, chicken, and stir-fries. If you want nonalcoholic and a little brighter, sparkling water with lime or a lightly chilled jasmine tea works well.
Additional Tips and Flavor Boosters
Flavor Enhancement:
Keep a jar of chili crisp nearby. A teaspoon on noodles, fried rice, or soup adds heat, crunch, and a little oil-based aroma that plain hot sauce cannot quite match. A few drops of rice vinegar at the end also lift heavy dishes faster than extra salt ever will.
Customization:
Most of these recipes will take extra vegetables without complaint. Add cabbage to noodles, spinach to soup, broccoli to rice bowls, or mushrooms to just about anything. If you want more protein, eggs, tofu, chicken thighs, and ground pork are easy additions that don’t require you to rethink the whole dish.
Serving Suggestions:
Scallion greens, sesame seeds, crushed peanuts, and a few cucumber slices are the easiest finishing touches in the book. They don’t demand much prep, but they do give you contrast in color and texture. A handful of herbs is welcome too, especially cilantro on dishes that lean peppery or spicy.
Make-It-Yours:
For gluten-free eating, tamari or gluten-free soy sauce and rice noodles cover a lot of the menu. For dairy-free meals, most of these recipes already land there, with butter-based ramen being the obvious exception. Vegetarian versions usually work best when you add mushrooms, tofu, or chickpeas instead of trying to make the sauce carry the whole load. Lower-sodium versions need more acid and fresh aromatics, not just less salt.
Make-Ahead, Storage, and Reheating Guidance
Most of these recipes keep well for 3 to 4 days in the refrigerator if you cool them quickly and store them in airtight containers. Soups can sometimes stretch to 4 days without issue, and meatball or chicken dishes usually hold their texture better than noodle bowls. Fried rice and stir-fries are best within the first couple of days, when the vegetables still have some life.
For the freezer, soups, meatballs, braised mushrooms, and cooked chicken freeze well for up to 2 months. Fried rice and noodle dishes can freeze, but the texture changes enough that I usually avoid it unless I have no choice. If you do freeze rice, spread it flat in a shallow container so it chills and reheats more evenly.
Reheating matters. For fried rice and stir-fries, use a skillet with a teaspoon or two of water and a lid for the first minute, then uncover and stir until hot. That keeps the grains from drying out. For noodles, a splash of water in a skillet works better than microwaving most of the time. For soups, reheat gently on the stove until steaming hot, not boiling hard.
Rice safety is worth handling properly. Cool cooked rice quickly, get it into the fridge within 2 hours, and reheat it until steaming hot all the way through. If the rice smells off or has sat too long at room temperature, toss it. That’s not the place to be sentimental.
A few of these dishes taste better the next day because the sauce has time to settle in. Dan dan noodles, mapo tofu, and braised mushrooms all deepen overnight. The fresher ones—fried rice, salmon bowls, and chicken thighs—still hold up, but they’re at their sharpest the day they’re made.
Variations and Adaptations to Try
Gluten-Free Pantry Lane:
Use tamari instead of soy sauce and rice noodles instead of wheat noodles. Most of the stir-fries, soups, and rice bowls adapt cleanly, and cornstarch still works as the thickener. Check hoisin, oyster sauce, and chili crisp labels if you’re cooking for someone with celiac concerns, because those jars vary more than people expect.
Vegetarian Without the Weak Spot:
Swap tofu, mushrooms, eggs, and chickpeas into the meat dishes instead of trying to mimic meat flavor directly. The best vegetarian versions keep the same structure: a browned element, a sauce, and a fresh finish. Mushrooms are especially good where you want savoriness; tofu is better when you want softness and soak.
Lower-Sodium, Still Tasty:
Use reduced-sodium soy sauce if that’s what you keep, but compensate with more ginger, garlic, vinegar, and scallions. Salt reduction without acid is where blandness creeps in. I’d rather have a brighter bowl with a little less soy than a flat one that hides behind “healthy” labels.
Heat-Level Control:
Chili crisp, chili garlic sauce, black pepper, and white pepper all bring different kinds of fire. Chili crisp is oily and crunchy. Chili garlic sauce is sharper. White pepper gives that old-school soup and noodle heat that shows up quietly. Use the one that fits the dish, not the one that just happens to be open.
Rice, Noodle, or Bowl Swaps:
If a recipe wants rice and you’ve got noodles, switch the base. If it wants noodles and you’ve only got rice, turn it into a bowl. The seasoning usually matters more than the starch. That’s one reason pantry cooking works: the sauce is the fixed point, not the vessel.
Common Mistakes to Avoid
Using low heat for everything:
Stir-fries and fried rice need real heat. If the pan is timid, the food steams and tastes flat. Get the skillet hot first, then add oil, then the ingredients.
Forgetting that sauces change as they cook:
Soy sauce tastes saltier after reduction. Hoisin gets stickier. Miso loses subtlety if boiled too hard. Taste near the end, not only at the start.
Treating sesame oil like a cooking oil:
Toasted sesame oil is a finisher, not your main frying fat. If you cook with it aggressively, the flavor dulls and can turn bitter.
Overcrowding the pan:
Too much food in one skillet drops the temperature and kills browning. That’s especially rough on mushrooms, green beans, tofu, and fried rice. If the pan looks crowded, cook in batches. It’s annoying, but so is soggy dinner.
Ignoring texture contrast:
A bowl of soft noodles, soft sauce, and soft vegetables gets old fast. Crisp scallions, sesame seeds, roasted bits, cucumbers, or blistered beans give the dish somewhere to go. Texture is not garnish. It’s structure.
Skipping acid at the finish:
Rice vinegar, black vinegar, lime, or even a tiny splash of plain vinegar keeps rich dishes from feeling heavy. A lot of home cooks add salt and wonder why the food still tastes dull. Often it needs brightness, not more sodium.
Frequently Asked Questions
Can I use tamari instead of soy sauce in all of these recipes?
Yes, and it’s the easiest swap if you want a gluten-free version. Tamari is usually a little rounder and less sharp than regular soy sauce, so taste as you go. In stir-fries and noodles, the difference is small enough that most people won’t notice.
What kind of rice works best for fried rice?
Medium-grain or long-grain white rice that has been chilled works best because the grains stay separate. Jasmine rice is a strong choice if you like a softer, fragrant result. Fresh rice can work if you spread it out and cool it quickly, but fridge-cold rice is still better.
Can I use spaghetti instead of Asian noodles?
Absolutely. Spaghetti is one of the most reliable stand-ins for saucy noodle dishes, especially when the sauce is strong and the noodle shape is there to carry it. I would not choose it for everything, but for scallion oil noodles, peanut noodles, and even some chili oil bowls, it works fine.
How do I keep tofu from falling apart in stir-fries?
Use extra-firm tofu, press it for at least 10 minutes, and move it gently. If you want more browning, coat the cubes lightly with cornstarch before cooking. The tofu should be turned, not churned.
Can frozen vegetables really stand in for fresh ones?
Yes, and in some recipes they’re better because they’re already cleaned and portioned. Frozen peas, corn, spinach, broccoli, and edamame all do well here. The only trick is to keep them from dumping extra water into the pan, which means high heat and enough room.
What if my sauce is too salty?
Add a little water, a touch of sugar, or a splash of rice vinegar depending on the dish. If the recipe is already cooked, more rice or noodles can help dilute the salt without wrecking the flavor. A fried egg on top can also soften the edge.
Is chili crisp necessary, or can I skip it?
You can skip it, but it does a lot of useful work—heat, aroma, oil, and texture in one spoonful. If you don’t have it, use chili flakes plus a little oil and a few fried scallions or garlic chips. That won’t be identical, but it keeps the dish interesting.
Which recipes are best for meal prep?
Soup, braised mushrooms, meatballs, char siu-style chicken, and mapo tofu all hold up well for a few days. Fried rice is good for one to two days if you reheat it in a skillet. Noodles are the least forgiving, so I usually keep the sauce and noodles separate if I know I’m packing lunches.
Dinner From the Back of the Cabinet
A pantry can do more than bridge the gap between grocery trips. It can carry a meal with actual character if you know how to treat the ingredients. Soy sauce wants a hot pan. Rice wants a second life. Frozen vegetables want some heat and a finishing splash. That’s not a limitation. That’s a method.
Keep a few bottles, a bag of rice, a couple of noodle shapes, and a handful of freezer staples on hand, and the dinner question gets easier. Not because every meal becomes effortless. Because the path from “what’s left?” to “that’ll do” gets shorter, sharper, and a lot more interesting.