
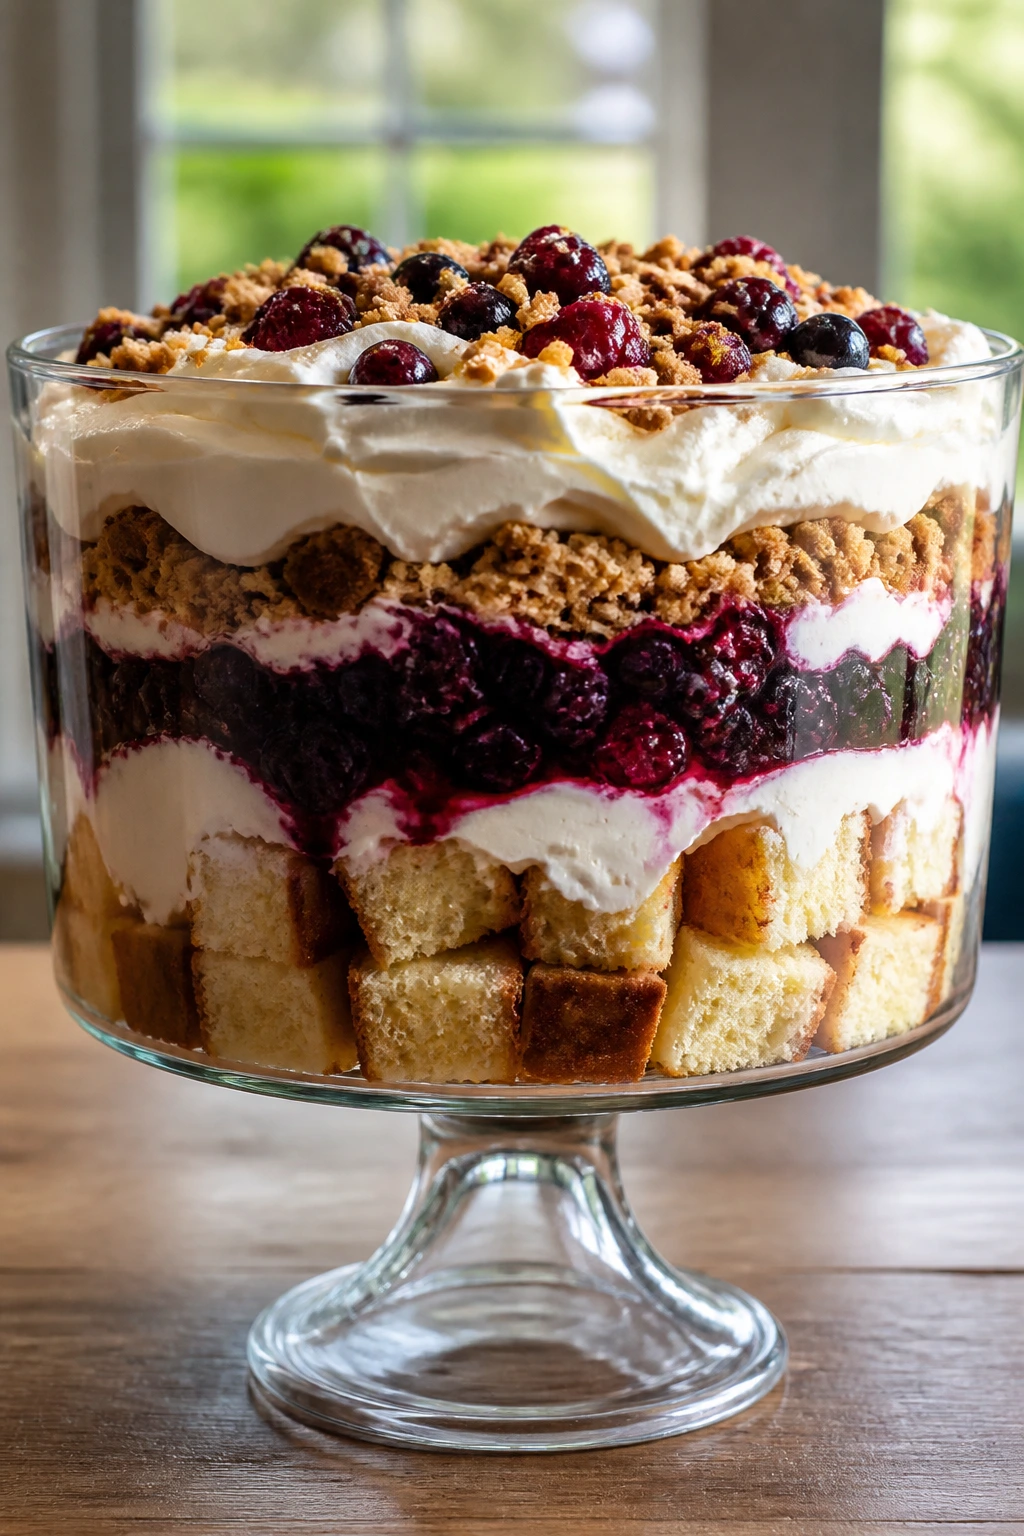
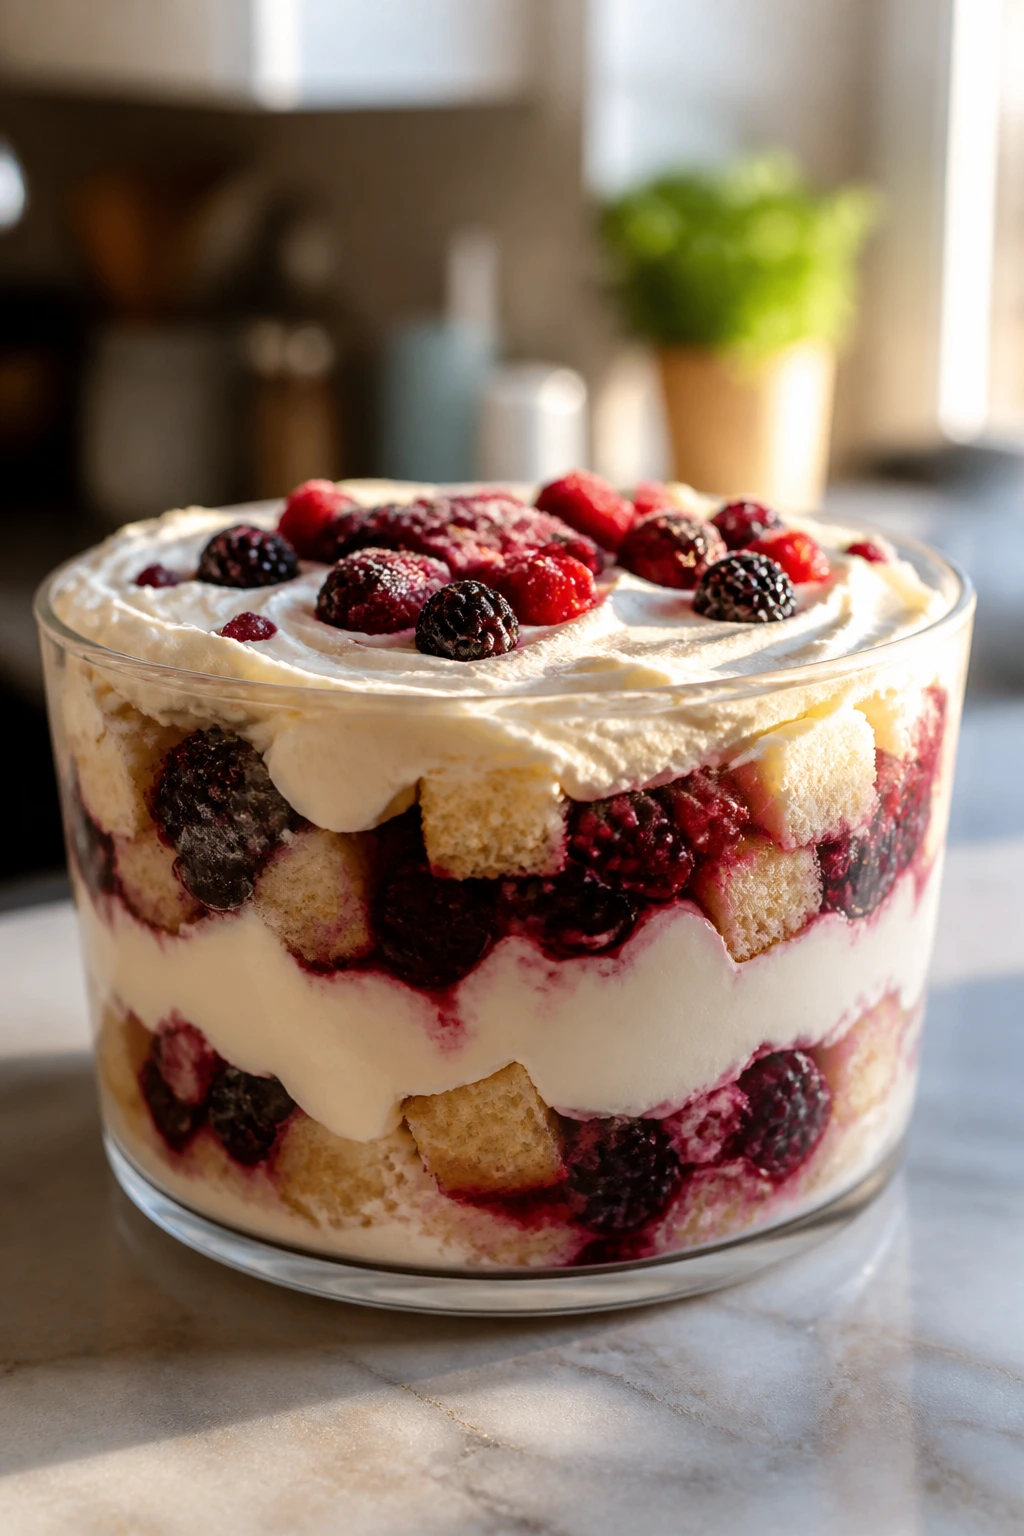
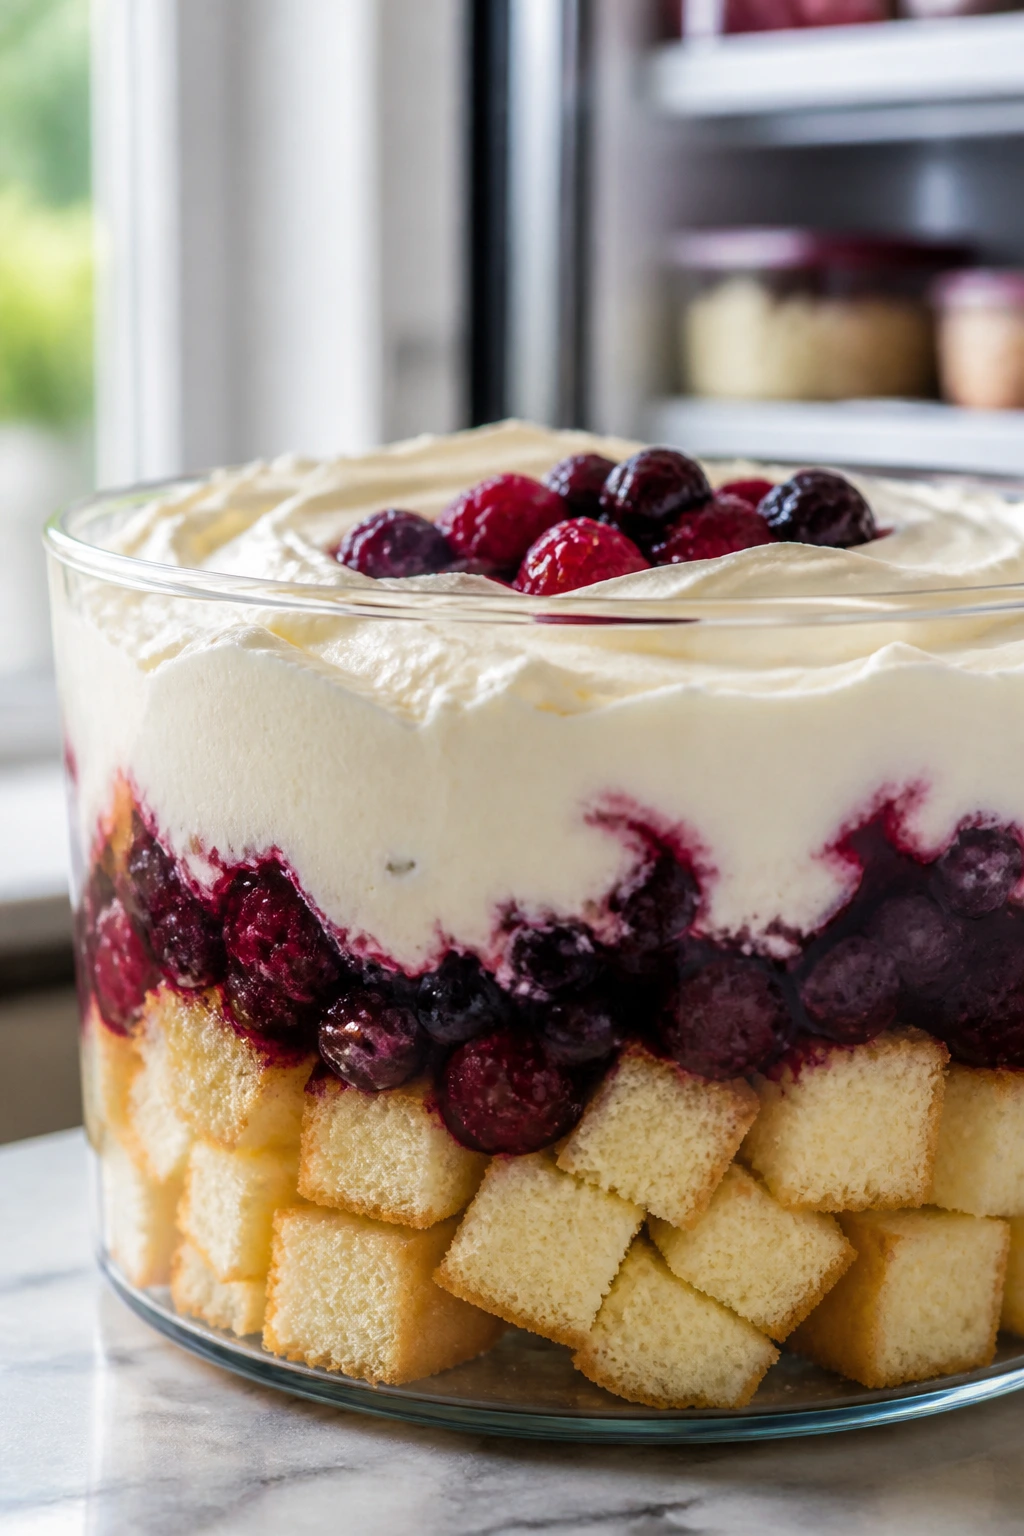
A good cheesecake trifle is a little messy in the best way: soft cake, cold cream cheese frosting, berry juice seeping into the crumbs, and a spoon that keeps finding one more cool, tangy layer. The version I like most is the one that tastes like someone cared about the texture, not just the sugar. You want a cake that stays tender after chilling, a frosting that tastes like cheesecake instead of sweet butter, and fruit that brings enough sharpness to keep the whole bowl from going flat.
That balance matters more than people think. A trifle can go wrong in a hurry if the cake is dry, the frosting is stiff and gritty, or the fruit turns watery and floods the bottom. I’ve had the versions that look pretty for ten minutes and then slide into a pink puddle. No thanks. A better cheesecake trifle with cream cheese frosting should cut through with a spoon cleanly, hold a visible structure in a glass bowl, and still feel soft when you get to the last bite.
The good news is that none of the parts are fussy on their own. You’re baking a simple vanilla sheet cake, cooking a quick berry layer, and whipping together a frosting that tastes more like the top of a cheesecake than a cake finish. Put those pieces together with a little care, and the dessert ends up looking far more polished than the effort suggests.
Why This Cheesecake Trifle Holds Its Shape
Tender cake beats dry cake every time. A trifle needs cake that can absorb berry juices without turning into paste, and the combination of butter, oil, buttermilk, and sour cream gives you that soft, plush crumb.
Tangy frosting keeps the sweetness in line. Cream cheese frosting is doing more than decorating here; it brings the sharp, milky bite that keeps the bowl from tasting like sweetened vanilla mash.
Fruit has a job, not a cameo. The berry layer should be juicy enough to flavor the cake, but thick enough to cling to a spoon instead of running straight to the bottom.
The chill matters. A two-hour rest in the fridge lets the frosting set and the cake soak up just enough moisture to taste unified instead of separate.
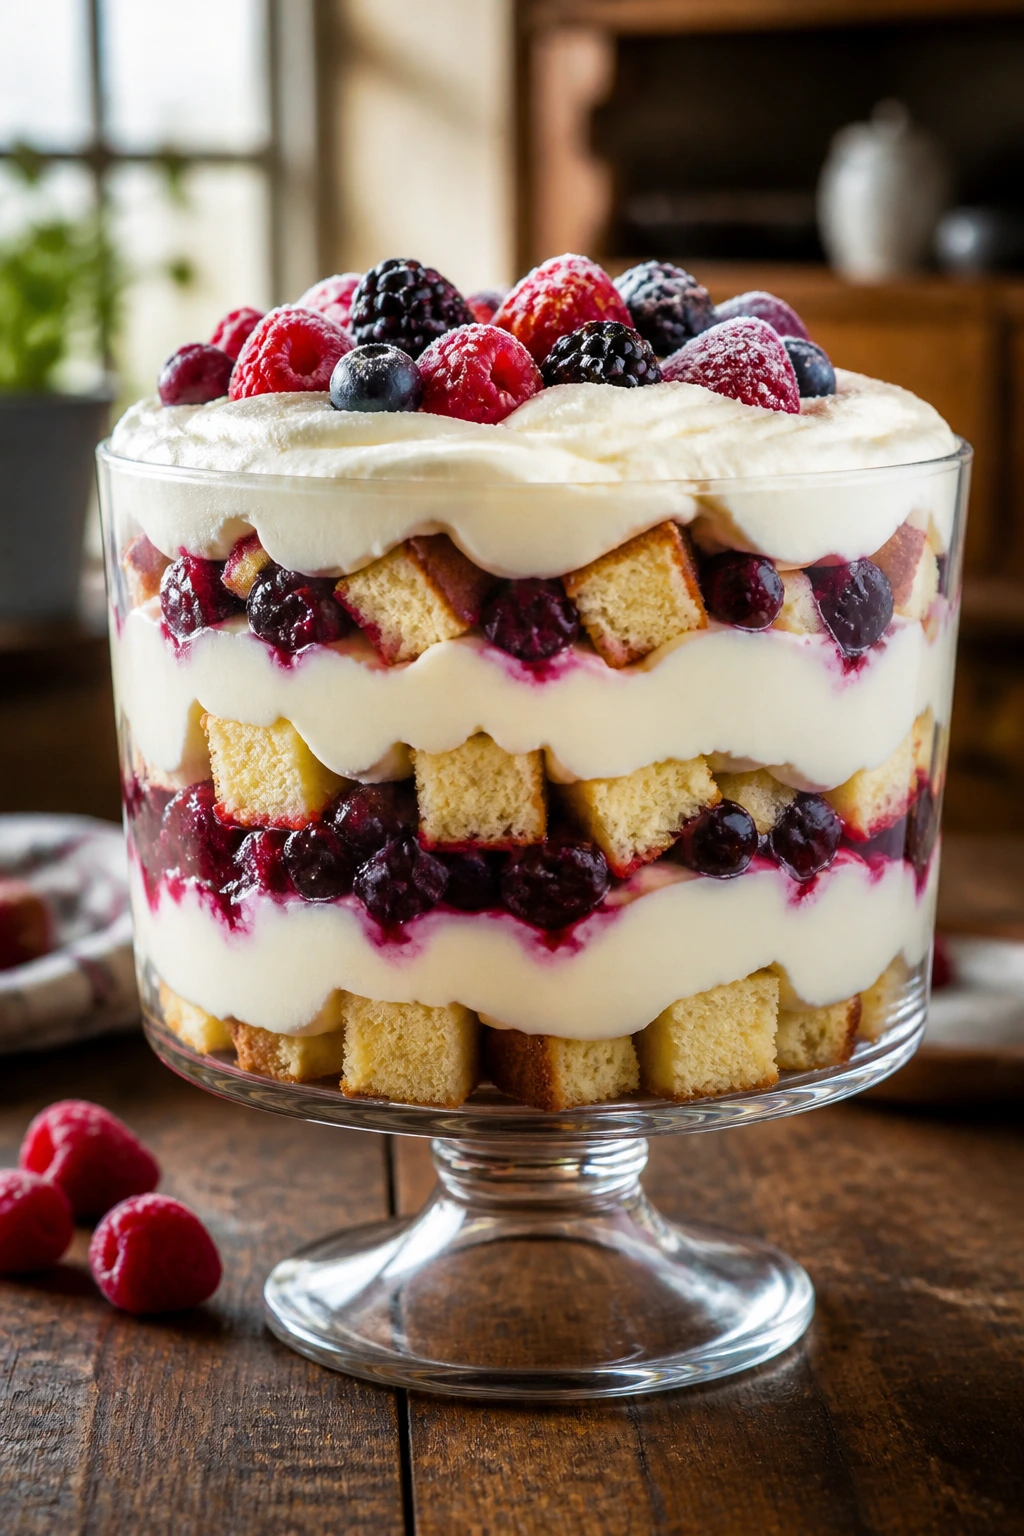
Glass bowls are worth the trouble. A clear trifle dish lets you see whether the layers are even, and that visual cue helps you build the dessert with more control. It’s not vanity. It’s a practical check.
You can make it ahead without losing the point. Bake the cake and cook the fruit early, then assemble later. That’s the sweet spot—calm prep, clean layers, and a dessert that still tastes fresh when you serve it.
Yield, Timing, and the Chill Window That Makes It Best
Yield: Serves 10 to 12
Prep Time: 35 minutes
Cook Time: 30 minutes
Total Time: About 3 hours 5 minutes, including cooling and chilling
Difficulty: Intermediate — the steps are straightforward, but you’re managing three components and you need to respect cooling time.
Chill/Rest Time: 2 hours minimum before serving; 4 hours is even better if you want the layers to settle
Best Served: Cold, within 24 hours of assembly for the cleanest spoonfuls
One thing I’d never skip: the cooling time for the cake. If you assemble while it’s even a little warm, the frosting softens too much and the bowl gets slippery around the edges. That’s the kind of mistake that feels minor for five minutes and then ruins the whole look.
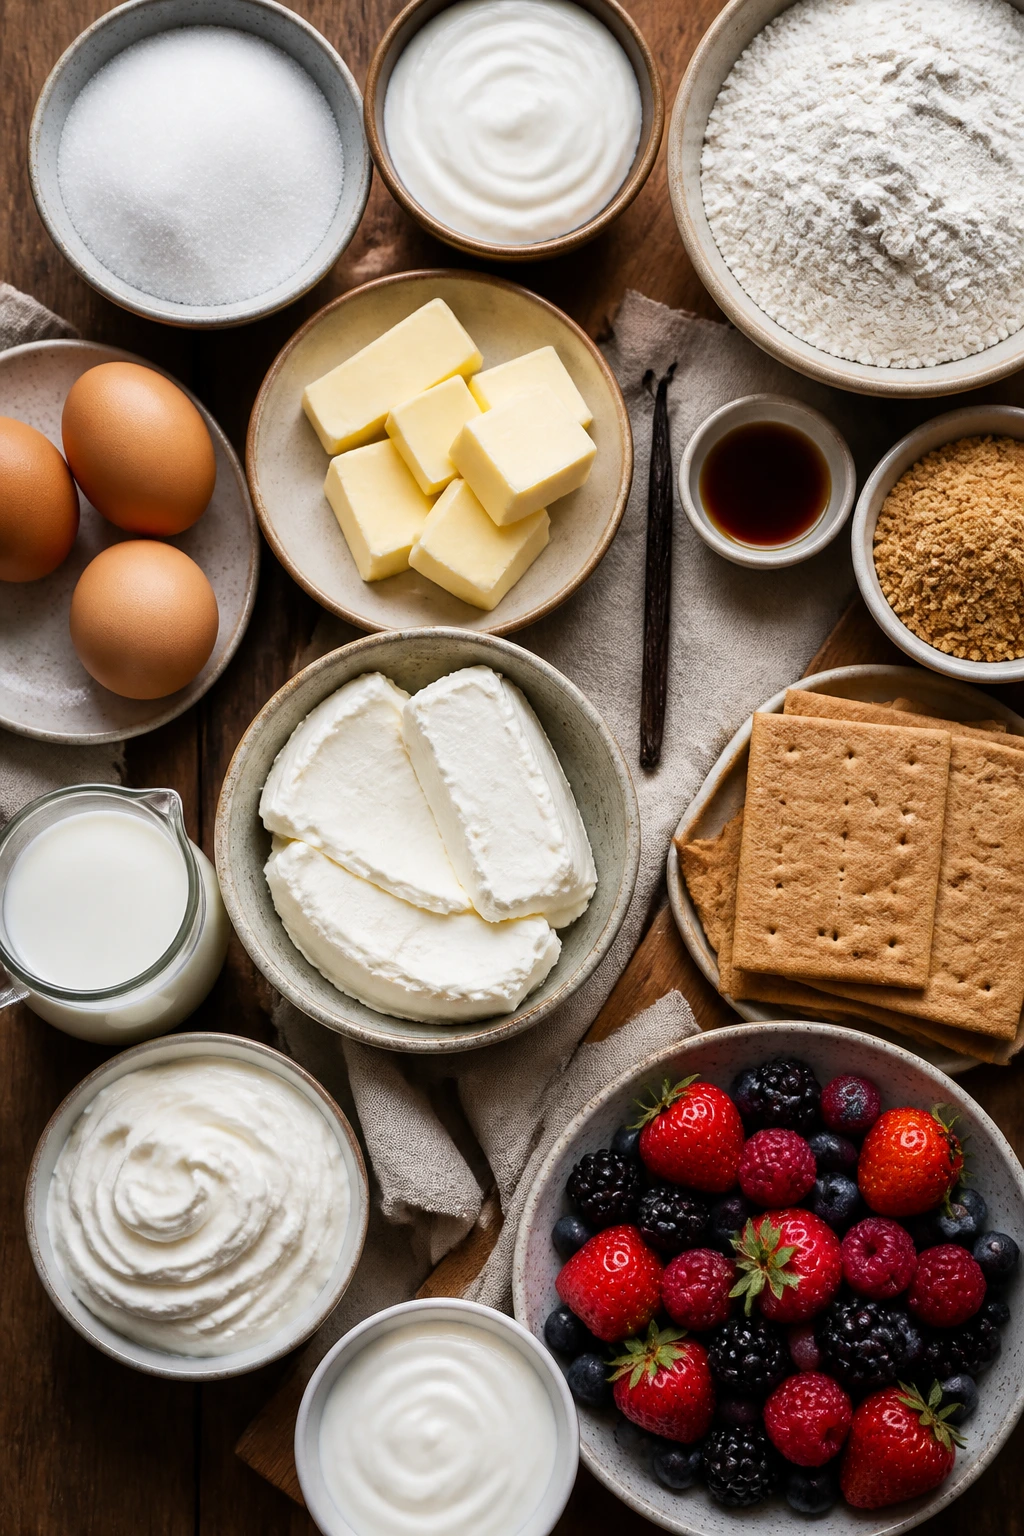
The Full Ingredient List
For the Vanilla Cake
- 2 cups all-purpose flour
- 2 teaspoons baking powder
- 1/2 teaspoon baking soda
- 1/2 teaspoon fine salt
- 1/2 cup unsalted butter, softened
- 1/2 cup neutral oil
- 1 1/4 cups granulated sugar
- 3 large eggs, room temperature
- 2 teaspoons vanilla extract
- 1 cup buttermilk, room temperature
- 1/4 cup sour cream, room temperature
For the Berry Layer
- 3 cups strawberries, hulled and sliced
- 1 cup blueberries
- 3 tablespoons granulated sugar
- 1 tablespoon lemon juice
- 1 teaspoon cornstarch
- 1 tablespoon cold water
For the Graham Crunch
- 1 1/2 cups graham cracker crumbs
- 3 tablespoons unsalted butter, melted
- 1 tablespoon granulated sugar
- 1/2 teaspoon ground cinnamon
For the Cream Cheese Frosting
- 16 ounces cream cheese, softened
- 1/2 cup unsalted butter, softened
- 2 1/2 cups powdered sugar, sifted
- 2 teaspoons vanilla extract
- 1/4 teaspoon fine salt
- 1/4 to 1/2 cup cold heavy cream
For Garnish
- 1 cup strawberries, halved
- 1/2 cup blueberries
- 1 teaspoon finely grated lemon zest
- 1 tablespoon extra graham crumbs
Why Each Layer Matters in a Cheesecake Trifle
The Vanilla Cake Layer
- What to use: 2 cups flour, baking powder, baking soda, salt, butter, oil, sugar, eggs, vanilla, buttermilk, and sour cream.
- Preparation: Bring the dairy and eggs to room temperature before mixing. That keeps the batter smooth and helps the cake rise evenly instead of baking with a dense center.
- Substitutions: Plain Greek yogurt can replace the sour cream, and whole milk plus 1 tablespoon vinegar can stand in for buttermilk if you’re stuck.
- Tips: The oil is not there by accident. It keeps the cake soft after chilling, which is exactly what a trifle needs.
The Berry Layer
- What to use: Strawberries, blueberries, sugar, lemon juice, and a small cornstarch slurry.
- Preparation: Slice the strawberries into pieces about the size of a coin. That gives you juicy pockets without making the layer collapse into soup.
- Substitutions: Raspberries, blackberries, cherries, or a frozen berry blend all work, as long as you cook off extra moisture if the fruit is very wet.
- Tips: The berry layer should be thick enough to cling to a spoon, not jammy. You still want a little movement.
The Graham Crunch
- What to use: Graham crumbs, melted butter, sugar, and cinnamon.
- Preparation: Mix the crumbs with butter and toast them until the kitchen smells like warm cookies. That extra step keeps the crumbs from tasting raw.
- Substitutions: Vanilla wafers, shortbread crumbs, or crushed Biscoff cookies all bring a different note.
- Tips: Let the crumbs cool fully before layering them. Warm crumbs soften faster and lose their snap.
The Cream Cheese Frosting
- What to use: Cream cheese, butter, powdered sugar, vanilla, salt, and a little heavy cream.
- Preparation: Soften the cream cheese and butter until they give slightly when pressed. Cold blocks are where lumps are born.
- Substitutions: Mascarpone can replace half the cream cheese for a milder flavor, and a dairy-free cream cheese can work if it’s firm enough to whip.
- Tips: Add the cream at the end, a tablespoon at a time, until the frosting slides off a spatula slowly. Too much cream and the layers start to slouch.
The Garnish
- What to use: Halved strawberries, blueberries, lemon zest, and a few extra graham crumbs.
- Preparation: Dry the berries well after washing. Water on the surface makes the top layer smear instead of looking crisp.
- Substitutions: Mint leaves, white chocolate shavings, or toasted almonds are all fair game.
- Tips: Save the prettiest fruit for the top. The top layer is what people see first, and this dessert earns its keep there.
Special Equipment for Easier Assembly
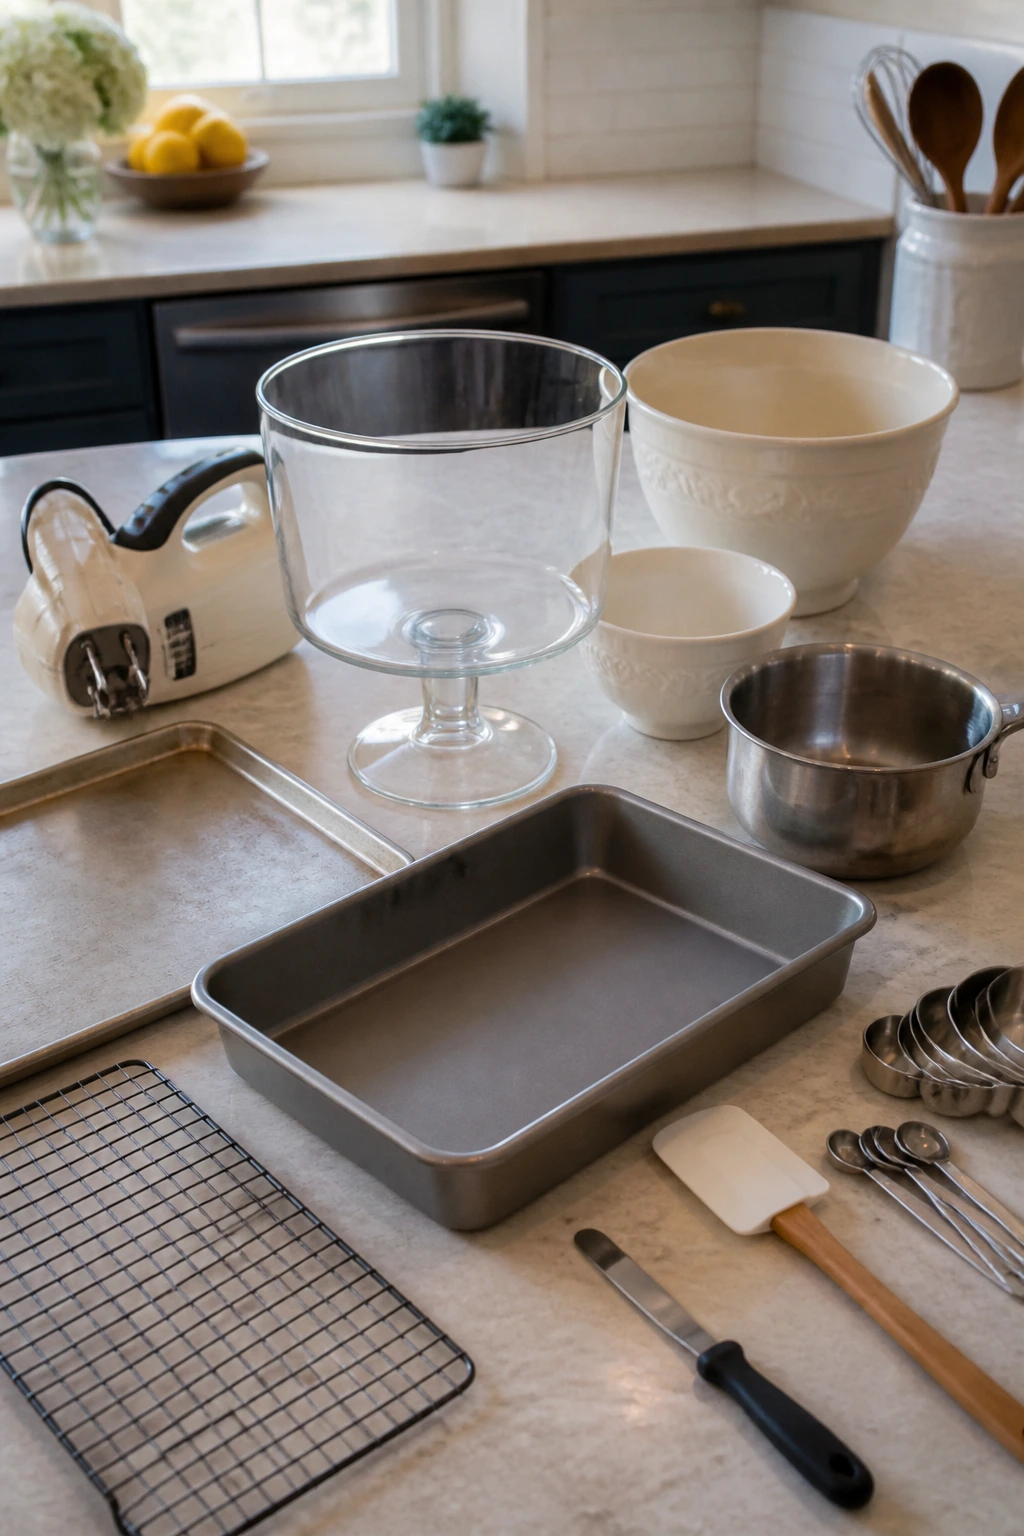
- 9×13-inch baking pan — A straight-sided pan helps the cake bake evenly and makes cube cutting simple.
- Large mixing bowls — You’ll want separate bowls for the batter, frosting, and fruit so nothing gets rushed.
- Hand mixer or stand mixer — Cream cheese frosting needs real mixing time; a whisk alone will test your patience.
- Medium saucepan — For the berry layer, a small saucepan gives you control over the heat.
- Rubber spatula — Best tool for folding batter and scraping frosting into the bowl without waste.
- Measuring cups and spoons — This is not the place for guesswork, especially in the frosting.
- Wire cooling rack — Hot cake trapped in a pan sweats at the bottom, and that moisture works against the trifle later.
- 3- to 4-quart trifle dish or deep glass bowl — Clear sides matter here. Any deep glass bowl works if you don’t own a trifle dish.
- Small baking sheet — Handy for toasting the graham crumbs in the oven.
- Offset spatula or spoon — Helpful for smoothing frosting layers, though a spoon will do fine.
Bake the Cake Until the Middle Springs Back
Prepare the pan and oven first.
- Preheat the oven to 350°F (175°C). Grease a 9×13-inch baking pan, then line it with parchment paper, leaving a little overhang on the long sides if you can. That overhang makes lifting the cake out easier later.
- Set the pan aside while you mix the batter.
Build the batter.
- In a medium bowl, whisk together the flour, baking powder, baking soda, and salt until everything looks evenly mixed.
- In a large bowl, beat the softened butter, oil, and granulated sugar on medium speed for 2 to 3 minutes, until the mixture looks lighter and a little fluffy around the edges. It won’t look like whipped frosting. That’s fine.
- Beat in the eggs one at a time, mixing well after each addition, then add the vanilla and sour cream. The batter may look a little loose at this stage. That’s normal.
Finish and bake.
- Add the dry ingredients in two additions, alternating with the buttermilk, and mix on low speed just until the flour disappears. Stop as soon as the batter looks smooth; overmixing will make the cake chewy and tight.
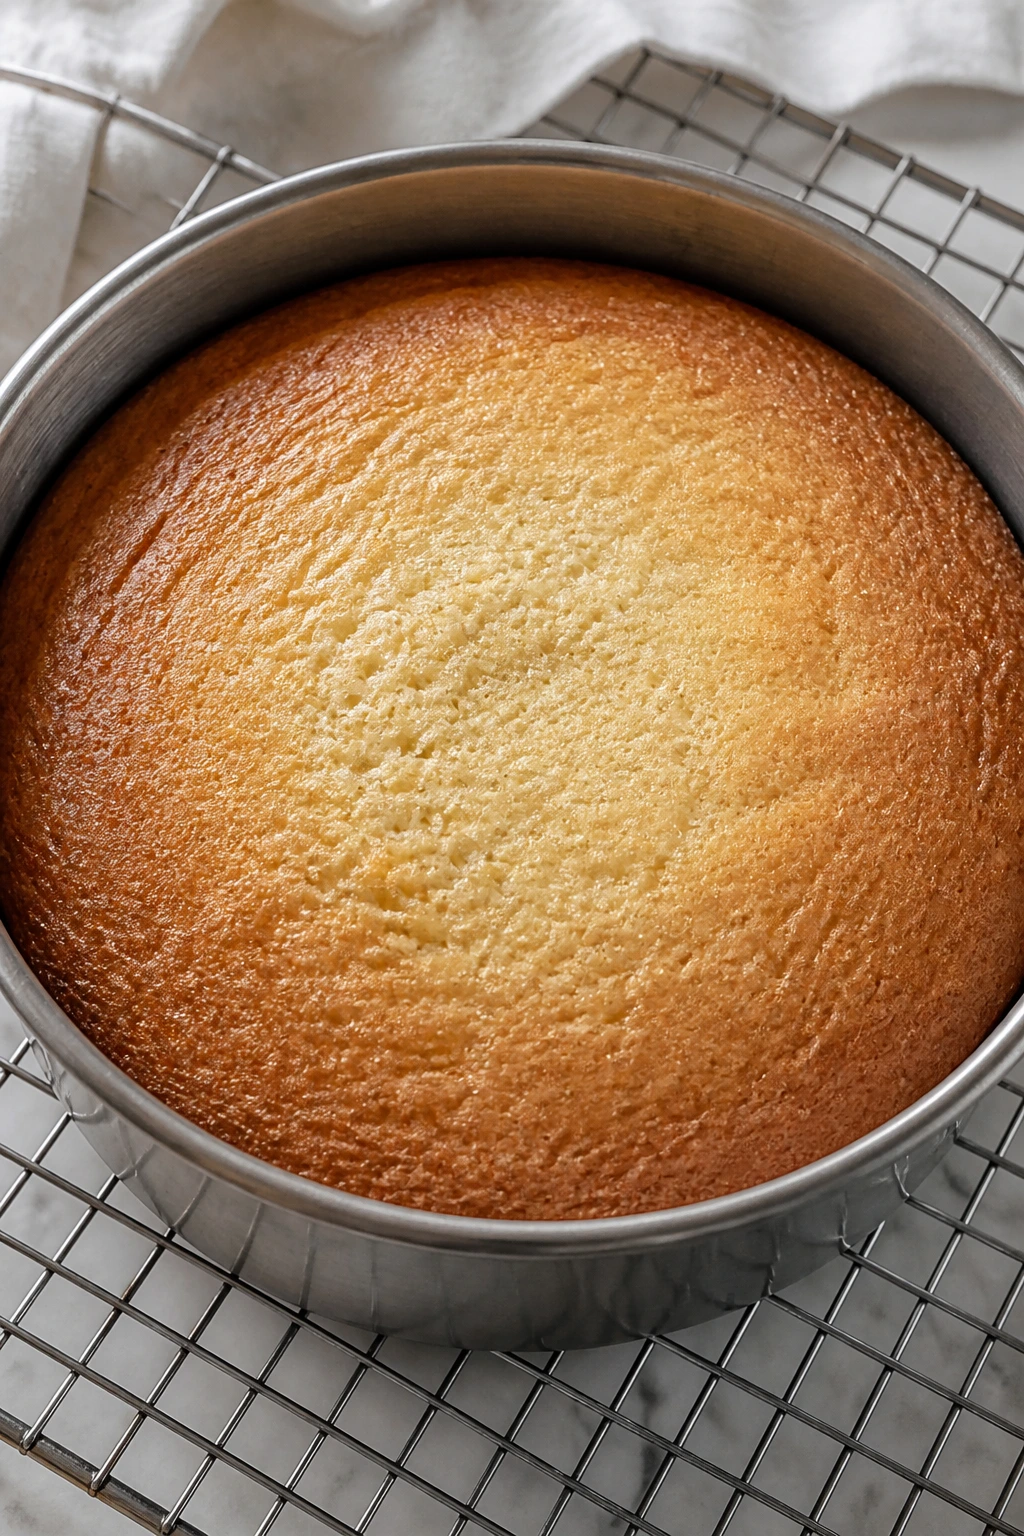
- Spread the batter into the prepared pan and smooth the top with a spatula. Bake for 26 to 32 minutes, until the center springs back when pressed lightly and a toothpick inserted in the middle comes out with a few moist crumbs, not wet batter.
- Cool the cake in the pan for 15 minutes, then lift it out and cool completely on a wire rack. Give it at least 1 hour. Do not cut warm cake for the trifle; warm cubes melt the frosting and turn the bowl slippery.
Cook the Berries and Whip the Cream Cheese Frosting
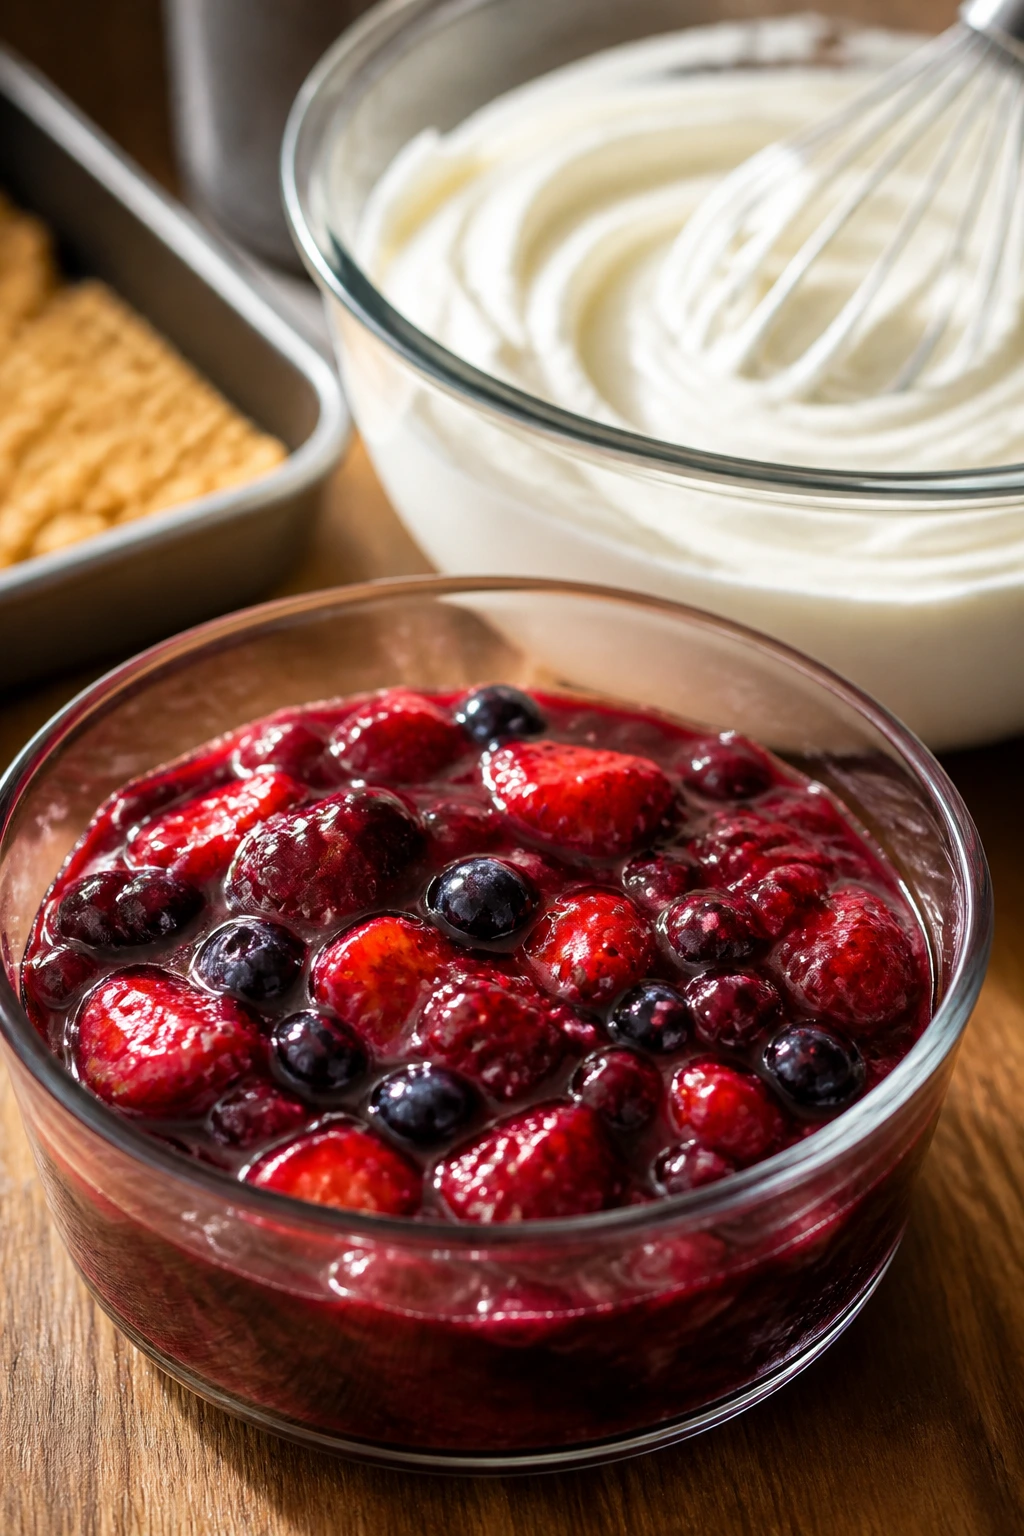
Make the berry layer.
- In a small bowl, stir the cornstarch and cold water together until smooth. Set it aside.
- In a medium saucepan, combine the sliced strawberries, blueberries, sugar, and lemon juice over medium heat. Cook for 4 to 6 minutes, stirring gently, until the berries begin to break down and release juice.
- Stir in the cornstarch slurry and cook for 30 to 60 seconds more, just until the liquid looks lightly thickened and glossy. Remove from the heat and cool the berries to room temperature, then chill them for about 20 minutes. The fruit should be thick enough to mound on a spoon, not run across the pan.
Toast the graham crunch.
- In a bowl, mix the graham crumbs, melted butter, sugar, and cinnamon until the crumbs feel evenly damp.
- Spread the mixture on a small baking sheet and bake at 350°F for 5 to 7 minutes, or toast it in a dry skillet over medium heat for 4 to 5 minutes, stirring often, until it smells nutty and turns a shade darker. Cool completely.
Beat the frosting.
- In a large bowl, beat the softened cream cheese and butter for 2 minutes, until the mixture is smooth and no pale lumps remain.
- Add the powdered sugar, vanilla, and salt, then beat on low at first so the sugar doesn’t fly everywhere, then on medium until smooth.
- Beat in the heavy cream 1 tablespoon at a time until the frosting becomes thick but spoonable. It should hold soft peaks and move slowly when you lift the beaters. If it looks too loose, chill it for 10 to 15 minutes before assembling.
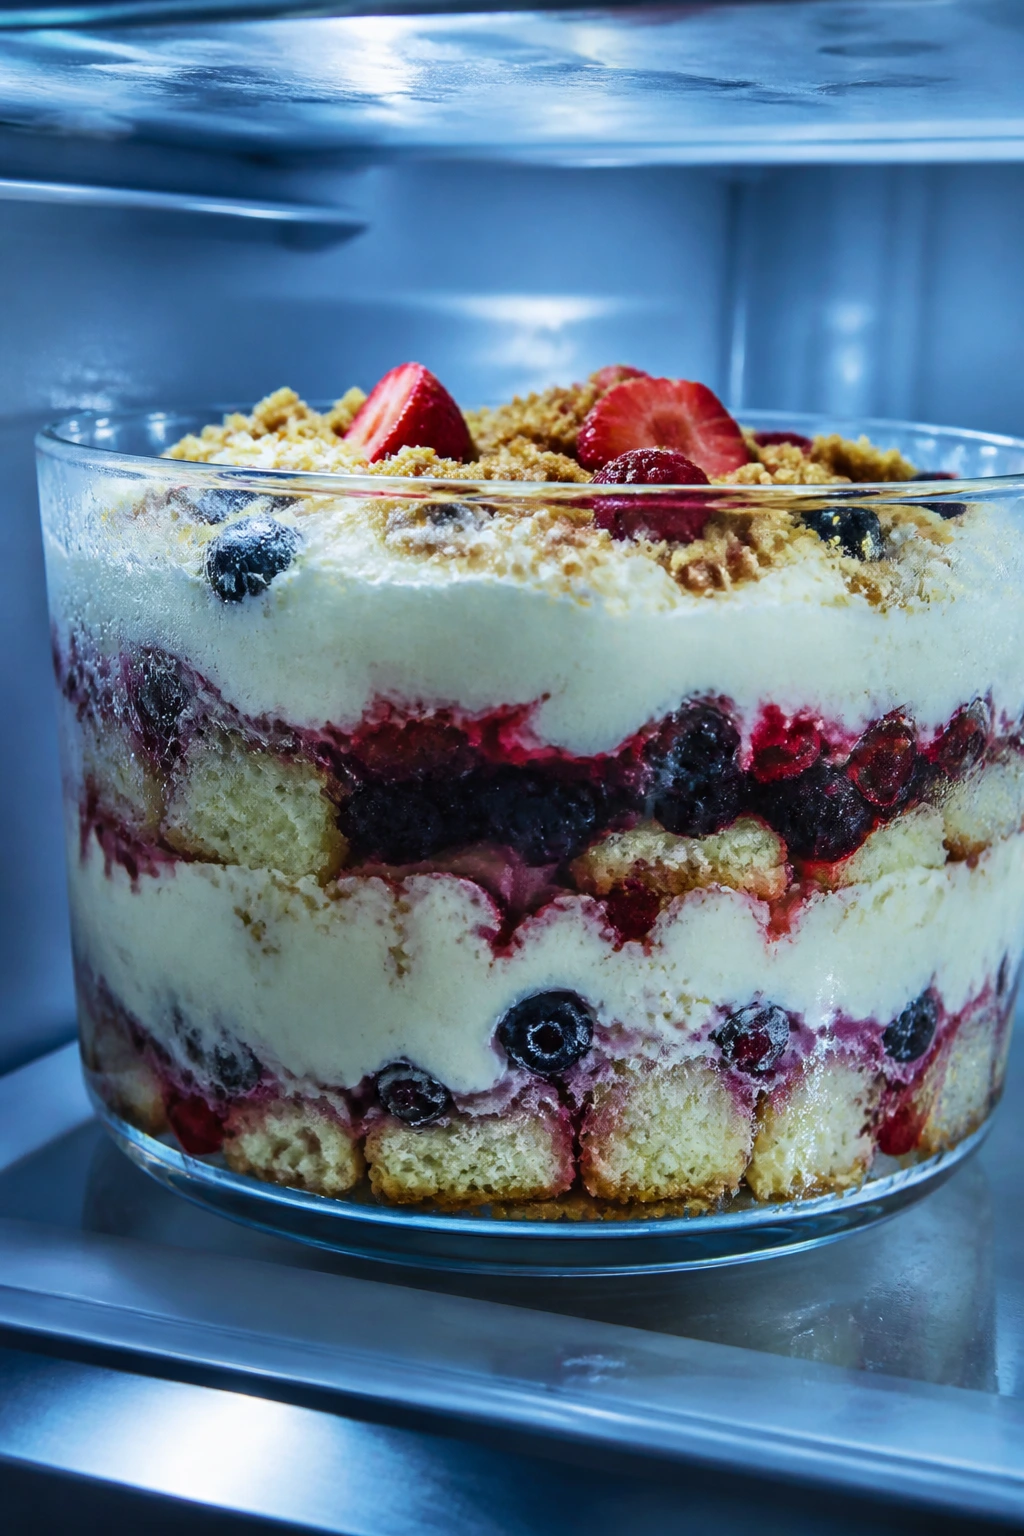
Layer the Cheesecake Trifle So the Bowl Stays Neat

- Cut the cooled cake into 1-inch cubes. Try to keep the pieces similar in size so the layers sit evenly in the bowl.
- Put one-third of the cake cubes into the bottom of a 3- to 4-quart trifle dish or deep glass bowl. Gently press them into a rough even layer, but do not pack them hard.
- Spoon one-third of the berry mixture over the cake, including some of the syrup but not every drop. You want moisture. You do not want a swamp.
- Scatter one-third of the graham crunch over the berries, then dollop one-third of the frosting on top and spread it lightly. Don’t worry if it’s not perfect; the bowl is supposed to look layered, not lacquered.
- Repeat with two more layers, ending with frosting on top. Swirl the top lightly with the back of a spoon.
- Finish with the reserved berries, a small handful of graham crumbs, and the lemon zest. Chill the assembled trifle for at least 2 hours before serving so the layers settle and the frosting firms up.
How to Serve a Cheesecake Trifle Cold
Presentation: Serve the dessert in clear bowls or shallow glass cups so the berry streaks and frosting layers stay visible. A chilled spoon does a better job than a warm one if you want clean scoops. I also like a light scatter of lemon zest over the top right before serving; it wakes up the whole bowl.
Accompaniments: This trifle doesn’t need much beside it. A small cup of black coffee, an espresso, or a mug of strong tea works because the bitter edge balances the cream cheese frosting. If you want a side, keep it plain: extra berries, shortbread fingers, or a crisp almond cookie.
Portions: A 3- to 4-quart bowl usually serves 10 to 12 people, depending on spoon size and how generous the layers are. If you’re feeding a smaller group, build the dessert in two medium glass bowls instead of one huge one. The structure stays prettier that way.
Beverage Pairing: I like this with cold brew, dark roast coffee, or a lightly sweet dessert wine. The fruit and cream need something with backbone. A milk-heavy drink can make the dessert feel flatter.
Extra Tips for Better Texture and Flavor
Flavor Enhancement: Grate 1 teaspoon of lemon zest into the frosting if you want the cheesecake note to lean brighter. It cuts the richness without making the dessert taste lemony. A drop of almond extract in the cake batter also works, but keep it small—half a teaspoon is plenty.
Texture Control: Let every component cool before you assemble. Warm cake causes condensation, and condensation is the enemy of layered desserts. If you want the top to stay tidy for more than a few hours, keep the final crumb layer until just before serving.
Time-Saver: Bake the cake a day early, cool it, wrap it tightly, and cube it when you’re ready. The berry layer can be made ahead too, and the frosting holds well in the fridge for a day. Assembly takes far less time when the pieces are waiting for you.
Presentation: A piping bag gives you cleaner frosting layers, especially if you’re making smaller individual trifles in jars. But a spoon works fine if you keep the frosting chilled and use a light hand. Shallow swirls look better than hard lines; this isn’t a bakery cake, and it doesn’t need to pretend to be one.
Mistakes That Make the Layers Slide
-
Using warm cake straight from the pan. The symptom is obvious: the frosting gets shiny and slumps, and the berry layer starts drifting into the cake. Let the cake cool completely, then cut it only when it feels neutral to the touch.
-
Making the berry layer too thin. If the fruit mixture looks more like sauce than filling, it soaks the cake bottom too quickly. Cook it until it lightly coats a spoon, and if it still seems loose, let it chill longer before assembly.
-
Beating the frosting too much after adding cream. This can make the frosting look airy at first, then soft and unstable after a few minutes. Add the cream slowly and stop as soon as the frosting becomes spoonable and thick.
-
Packing the cake cubes down hard. You end up with a compressed base instead of airy layers, and the trifle loses that soft spoon-through texture. Drop the cubes in gently and nudge them into place instead of smashing them flat.
-
Assembling too far ahead. If you build the dessert two days early, the graham layer goes soft and the fruit loses shape. For the best texture, assemble the trifle the same day you plan to serve it or the night before at most.
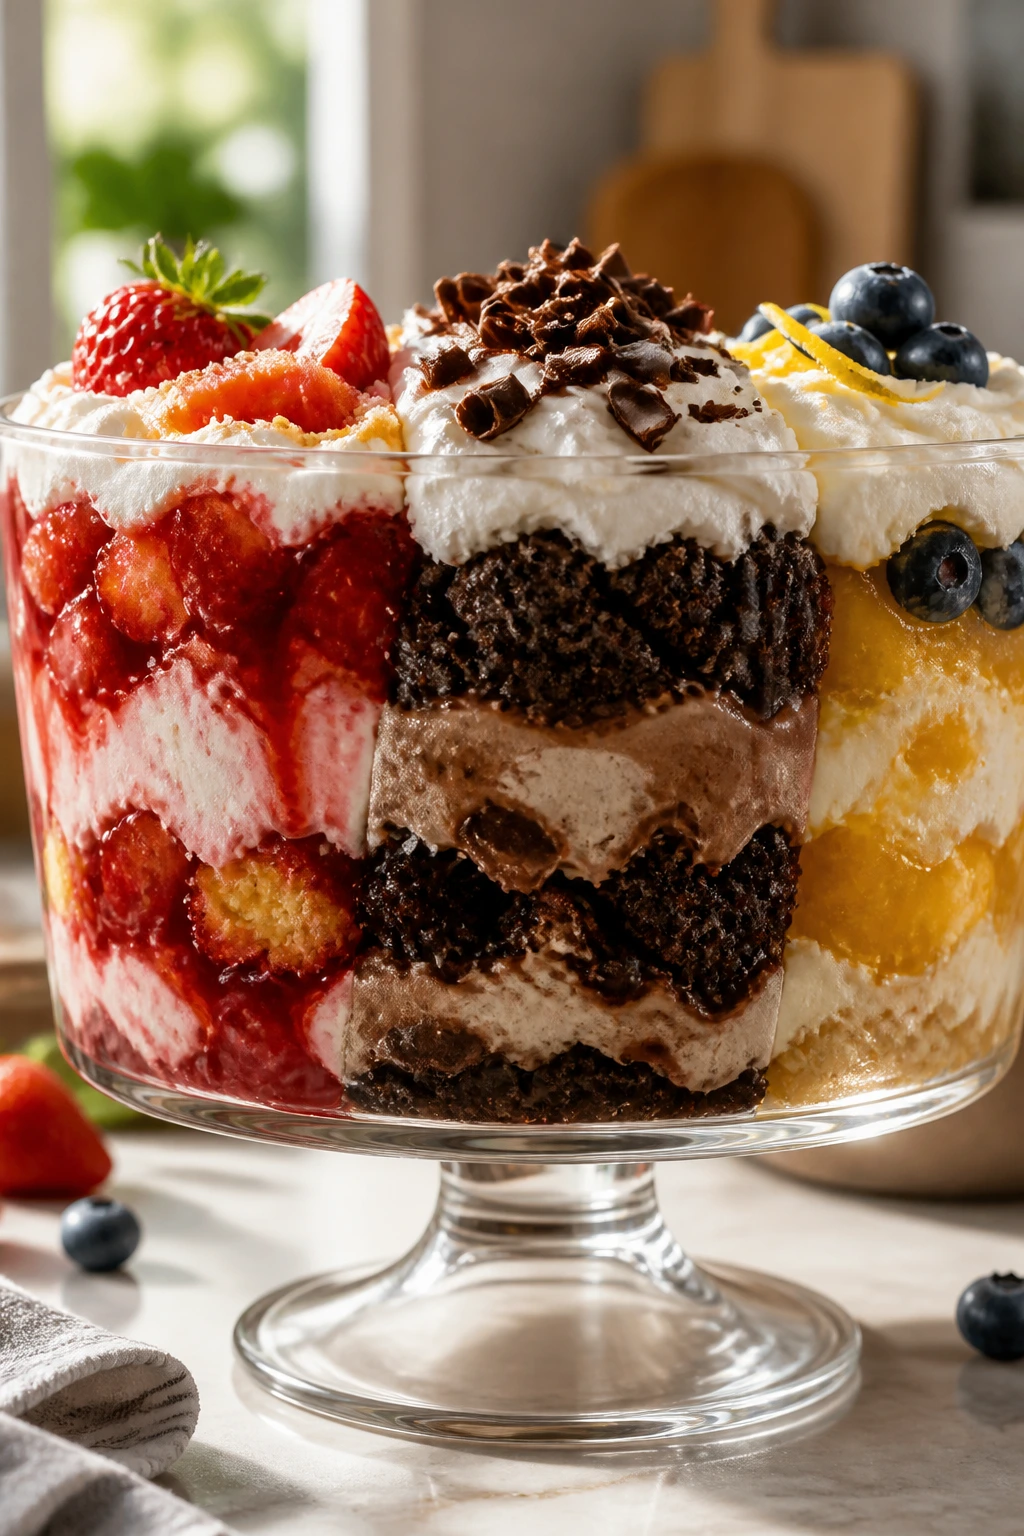
Variations for Fruit, Chocolate, and Shortcut Versions
Strawberry Shortcake Trifle
Swap the blueberries for an extra cup of strawberries and use vanilla wafer crumbs instead of graham crumbs. The result tastes more like a strawberry shortcake turned into a spoon dessert, with a softer, sweeter edge. I’d add a little extra lemon zest to the frosting here so the strawberries do not get buried under sugar.
Chocolate Cookie Cheesecake Trifle
Add 1/4 cup cocoa powder to the cake batter and replace the graham crumbs with crushed chocolate wafer cookies. The berries against the chocolate give the bowl a sharper, darker flavor, and it’s the variation I’d choose when the dessert table already has too many pale things on it. Raspberries work especially well here because they cut through the cocoa.
Lemon Berry Trifle
Mix 1 teaspoon of lemon zest into the frosting and use raspberries with the strawberries for a brighter, more tart bowl. The lemon gives the cream cheese layer a clearer cheesecake edge, which I like because it keeps the dessert from reading as just “cream and fruit.” This version feels lighter on the tongue even though it’s still rich.
Gluten-Free Pantry Bowl
Use a 1:1 gluten-free flour blend in the cake and certified gluten-free graham crumbs or crushed gluten-free cookies for the crunch layer. The texture stays close to the original if you don’t overmix the batter, which matters more here than the flour brand. Let the cake cool fully before cubing; gluten-free cakes can crumble fast when they’re warm.
Pound Cake Shortcut
If you want to cut the baking time, use a sturdy store-bought pound cake and focus your energy on the berries and frosting. I’d still cook the berry layer and toast the crumbs because those two details are what make the trifle taste built, not assembled in a rush. This version is especially handy when you need dessert without starting an oven from scratch.
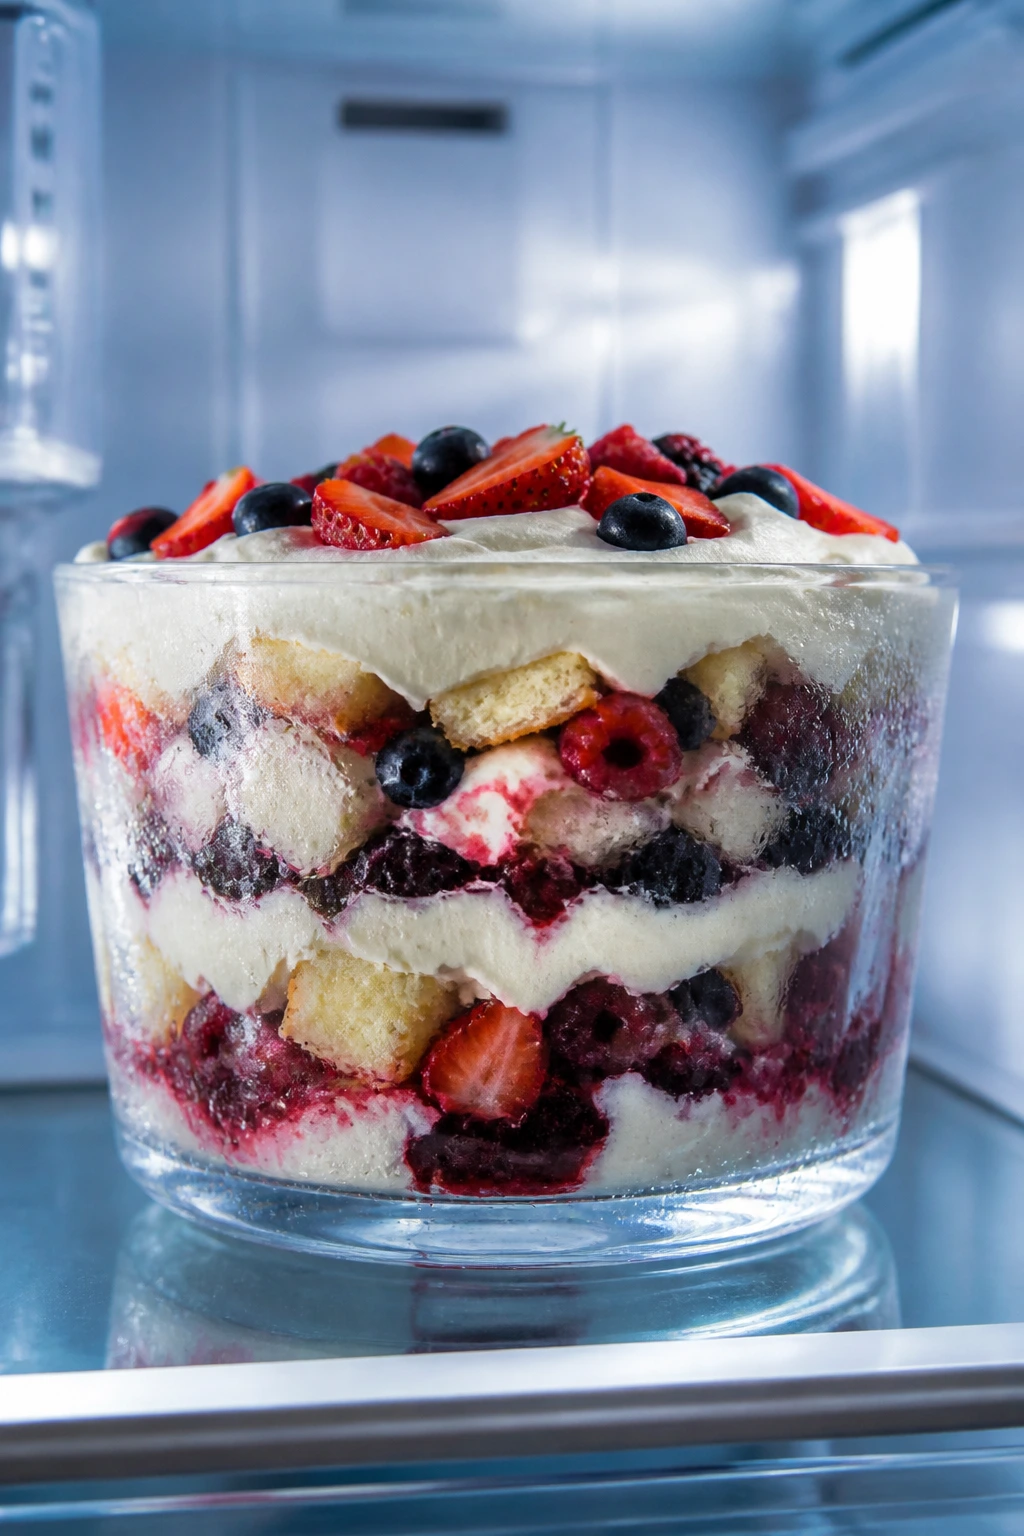
Make-Ahead, Storage, and Fridge Timing
Refrigerator: The assembled trifle keeps for 2 to 3 days in the fridge, though the graham layer softens after the first day. If you like a little crunch, save a small container of crumbs and sprinkle them on individual servings right before eating.
Freezer: The cake cubes freeze well for up to 2 months if they’re wrapped tightly and stored flat. The frosting and finished trifle do not freeze well; cream cheese frosting can turn grainy and the fruit layer gets watery when it thaws.
Make-Ahead: Bake the cake 1 day ahead, cook the berry layer 2 days ahead, and make the frosting up to 1 day ahead. Keep each component covered and chilled, then assemble the trifle 4 to 8 hours before serving if you want the layers to settle but still hold shape. If you assemble the night before, the dessert will be softer by the next day, which some people actually prefer.
No Reheating Needed: This dessert is meant to be served cold. If it has been in the fridge for a long time, let it sit on the counter for 10 to 15 minutes before serving so the frosting loosens slightly and the flavors open up. That small pause helps more than people expect.
Cheesecake Trifle Questions, Answered
Can I use store-bought cake instead of baking the vanilla cake?
Yes, and honestly, that shortcut works well if the cake is sturdy. A plain pound cake or a dense vanilla loaf holds up better than a soft boxed layer cake, which can collapse once the berries go in. Cut it into cubes and let it dry out for 20 minutes before layering if it feels very tender.
Can I make this cheesecake trifle the night before?
You can, and that timing usually works fine. If you like softer layers and a more blended flavor, overnight chilling helps the cake soak up the berry juices and the frosting settle. If you want the crunch layer to stay sharper, add half of it before chilling and the rest right before serving.
What if my cream cheese frosting looks lumpy?
That usually means the cream cheese or butter was too cold. Keep beating on medium speed for another minute or two, pressing the mixer against the sides of the bowl, and the lumps should disappear. If they do not, let the bowl sit at room temperature for 10 minutes and beat again.
Can I use frozen berries?
Yes, but cook them long enough to evaporate extra water. Frozen berries often release more liquid than fresh ones, which can make the trifle bottom too wet if you don’t thicken the mixture. If the berries seem especially juicy, add an extra 1/2 teaspoon cornstarch mixed with water.
Do I need a trifle dish?
No. Any deep glass bowl works, and small glass jars are good for individual servings. The main thing is depth and visibility, because this dessert needs room for layers and it looks better when you can see what’s inside.
How do I keep the bottom from getting soggy?
Use a thick berry layer, not a loose one, and cool the cake completely before assembly. Also, don’t pour every last drop of syrup into the bowl; spoon the fruit over the cake in measured amounts. A little moisture is the point. Flooding is not.
Can I swap the graham crumbs for something else?
Absolutely. Vanilla wafers, shortbread, or crushed Biscoff cookies all bring a different flavor and texture. I’d pick shortbread for a more buttery result and Biscoff if you want a deeper, spiced note that leans away from classic cheesecake.
A Bowl Worth Chilling
A trifle like this works because every layer has a job and none of them are pretending to be something else. The cake stays tender, the frosting brings tang, the berries sharpen the sweetness, and the crumbs keep the spoon moving through different textures instead of one soft blur. That’s why the dessert feels satisfying even after a small serving.
If you keep the cake cool, the fruit thick, and the frosting smooth, the bowl does most of the work for you. The result is a dessert that looks deliberate, tastes balanced, and gives you enough flexibility to adapt it without losing the point. The next time you want something chilled, layered, and worth bringing out the good glass bowl for, this is the one I’d make.
Moist Cheesecake Trifle with Cream Cheese Frosting — Recipe Card
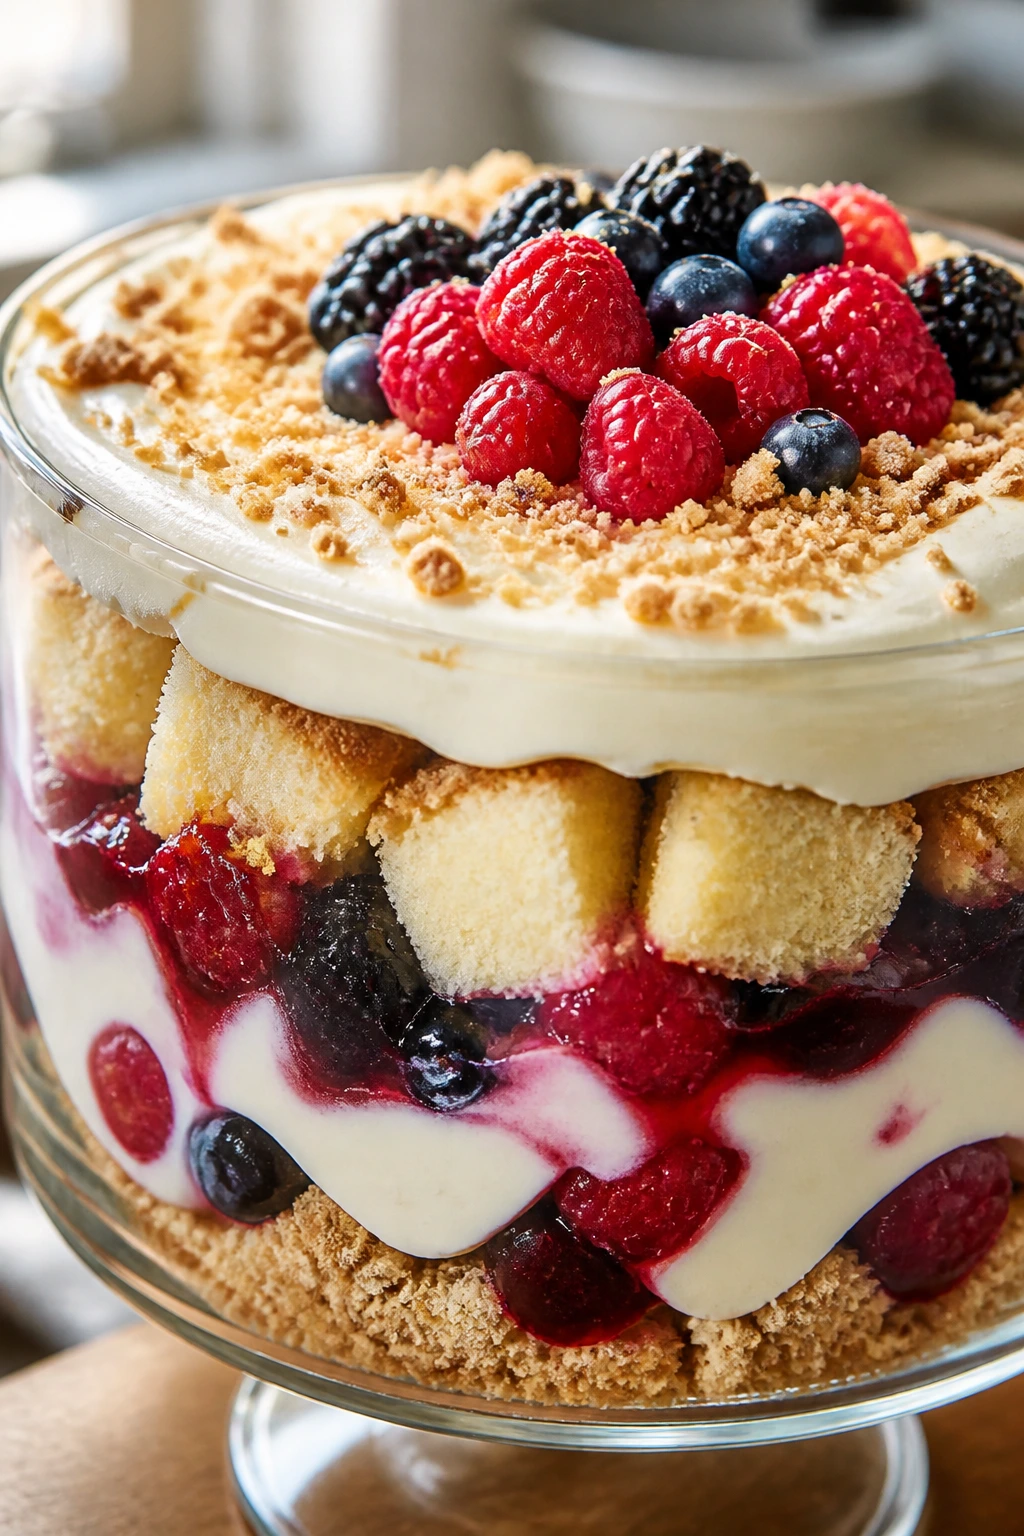
Recipe Name: Moist Cheesecake Trifle with Cream Cheese Frosting
Description: Soft vanilla cake cubes, a tangy cream cheese frosting, cooked berry layers, and buttery graham crumbs built into a chilled glass trifle. The texture is tender, creamy, and lightly crunchy in each spoonful.
Prep Time: 35 minutes
Cook Time: 30 minutes
Total Time: About 3 hours 5 minutes, including cooling and chilling
Course: Dessert
Cuisine: American
Servings: 10 to 12
Calories: About 430 kcal per serving
Ingredients
For the Vanilla Cake
- 2 cups all-purpose flour
- 2 teaspoons baking powder
- 1/2 teaspoon baking soda
- 1/2 teaspoon fine salt
- 1/2 cup unsalted butter, softened
- 1/2 cup neutral oil
- 1 1/4 cups granulated sugar
- 3 large eggs, room temperature
- 2 teaspoons vanilla extract
- 1 cup buttermilk, room temperature
- 1/4 cup sour cream, room temperature
For the Berry Layer
- 3 cups strawberries, hulled and sliced
- 1 cup blueberries
- 3 tablespoons granulated sugar
- 1 tablespoon lemon juice
- 1 teaspoon cornstarch
- 1 tablespoon cold water
For the Graham Crunch
- 1 1/2 cups graham cracker crumbs
- 3 tablespoons unsalted butter, melted
- 1 tablespoon granulated sugar
- 1/2 teaspoon ground cinnamon
For the Cream Cheese Frosting
- 16 ounces cream cheese, softened
- 1/2 cup unsalted butter, softened
- 2 1/2 cups powdered sugar, sifted
- 2 teaspoons vanilla extract
- 1/4 teaspoon fine salt
- 1/4 to 1/2 cup cold heavy cream
For Garnish
- 1 cup strawberries, halved
- 1/2 cup blueberries
- 1 teaspoon finely grated lemon zest
- 1 tablespoon extra graham crumbs
Instructions
- Preheat the oven to 350°F (175°C). Grease and line a 9×13-inch baking pan.
- Whisk the flour, baking powder, baking soda, and salt in a bowl.
- Beat the butter, oil, and sugar until lighter and slightly fluffy. Beat in the eggs, vanilla, and sour cream.
- Add the dry ingredients in two additions, alternating with the buttermilk, mixing just until smooth.
- Spread the batter in the pan and bake for 26 to 32 minutes, until the center springs back. Cool completely.
- Cook the strawberries, blueberries, sugar, and lemon juice over medium heat for 4 to 6 minutes. Stir in the cornstarch slurry and cook until lightly thickened. Cool.
- Mix the graham crumbs, melted butter, sugar, and cinnamon. Toast until fragrant and cool.
- Beat the cream cheese and butter until smooth. Beat in the powdered sugar, vanilla, salt, and enough heavy cream to make a spoonable frosting.
- Cut the cooled cake into 1-inch cubes. Layer cake, berries, crumbs, and frosting in a trifle bowl, repeating until the bowl is full.
- Finish with berries, crumbs, and lemon zest. Chill at least 2 hours before serving.
Notes:
Keep the cake fully cool before assembly. If you want a firmer top, chill overnight and add the final crumb garnish right before serving.