
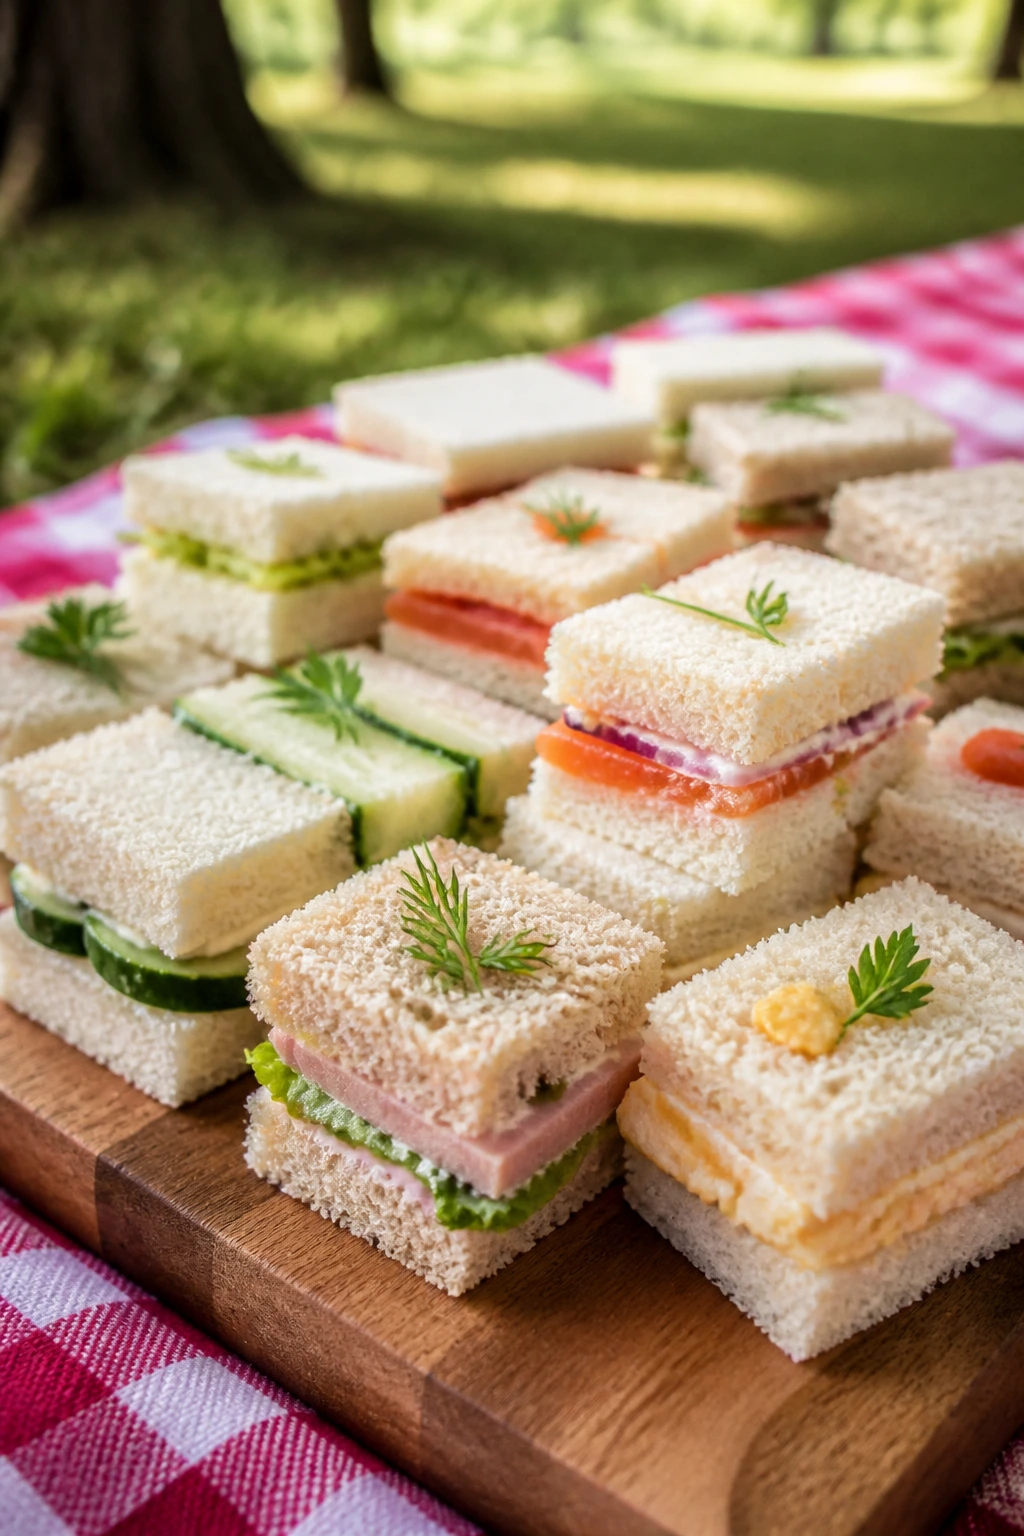
Finger sandwiches for picnic have one job: stay neat after the cooler bag gets opened three times and the ice pack starts sweating. That sounds fussy, but it isn’t. A good picnic sandwich is a study in restraint — soft bread, a filling with enough fat to keep the crumb from drying out, and a little chill so the first bite feels clean instead of sloppy.
Big sandwiches are a problem outdoors. They get squashed, the tomato slides, the lettuce turns limp, and by the time everyone is half done, the back half of the sandwich looks like it went through a small weather event. These little sandwiches solve that with tighter construction and sharper flavor, which is why they sit so well next to iced tea, lemonade, sparkling water, or a cold beer with condensation running down the glass.
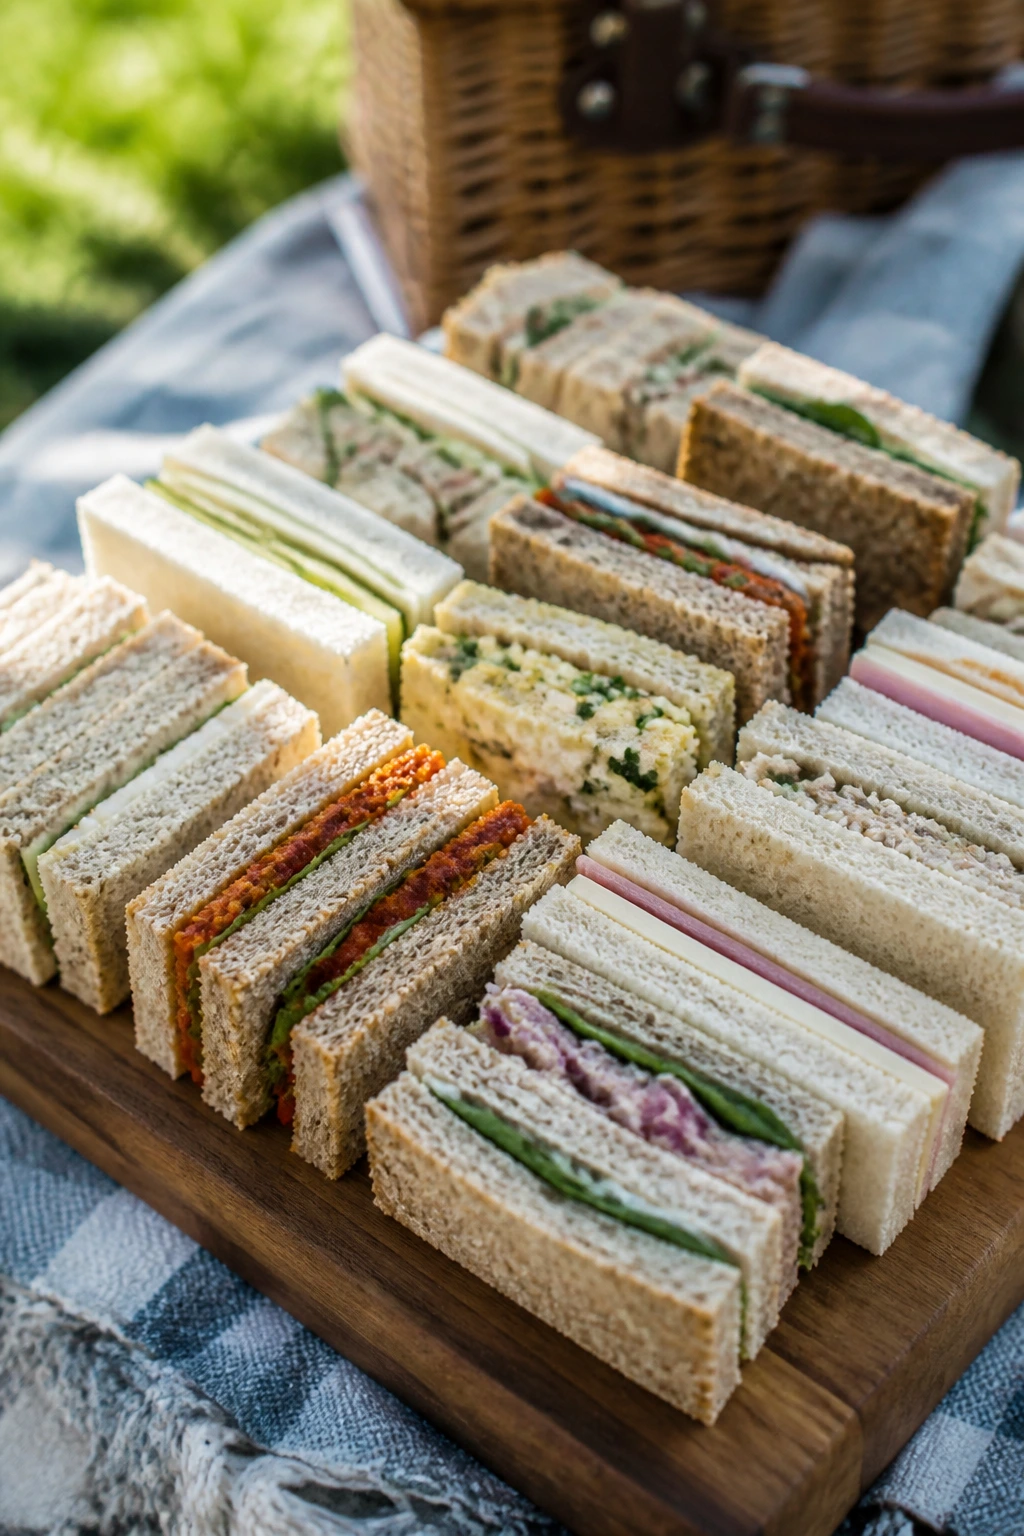
The details matter more than people think. Cucumber slices need blotting. Egg salad needs a proper chill. Tuna salad wants just enough mayo to cling, not pool. Get the ratio right and the tray looks tidy; get it wrong and you’re left chasing fillings across a paper plate. These 18 finger sandwiches cover the useful range — creamy, briny, meaty, herb-heavy, and a few sweet ones that make the whole spread feel finished.
Why These Picnic Finger Sandwiches Earn Their Spot in the Cooler
-
They pack flat and slice cleanly: Soft bread and restrained fillings travel better than piled-high lunch sandwiches, which means fewer crushed corners and less filling on the napkins.
-
They match cold drinks without fighting them: Bright cucumber, salty ham, smoky salmon, and herby chicken all sit nicely beside iced tea, lemonade, seltzer, or a chilled lager.
-
Most of them can be made ahead: Mix the fillings earlier in the day, chill them, and assemble close to serving so the bread stays tender instead of damp.
-
They cover a wide range of tastes: One tray can hold a rich pimento cheese sandwich, a sharp roast beef one, and a fruit-forward sweet version without feeling random.
-
Small size changes the whole mood: A two-bite sandwich feels lighter on a picnic blanket than a full sandwich, and people always seem happier picking through a tray than wrestling with a giant bun.
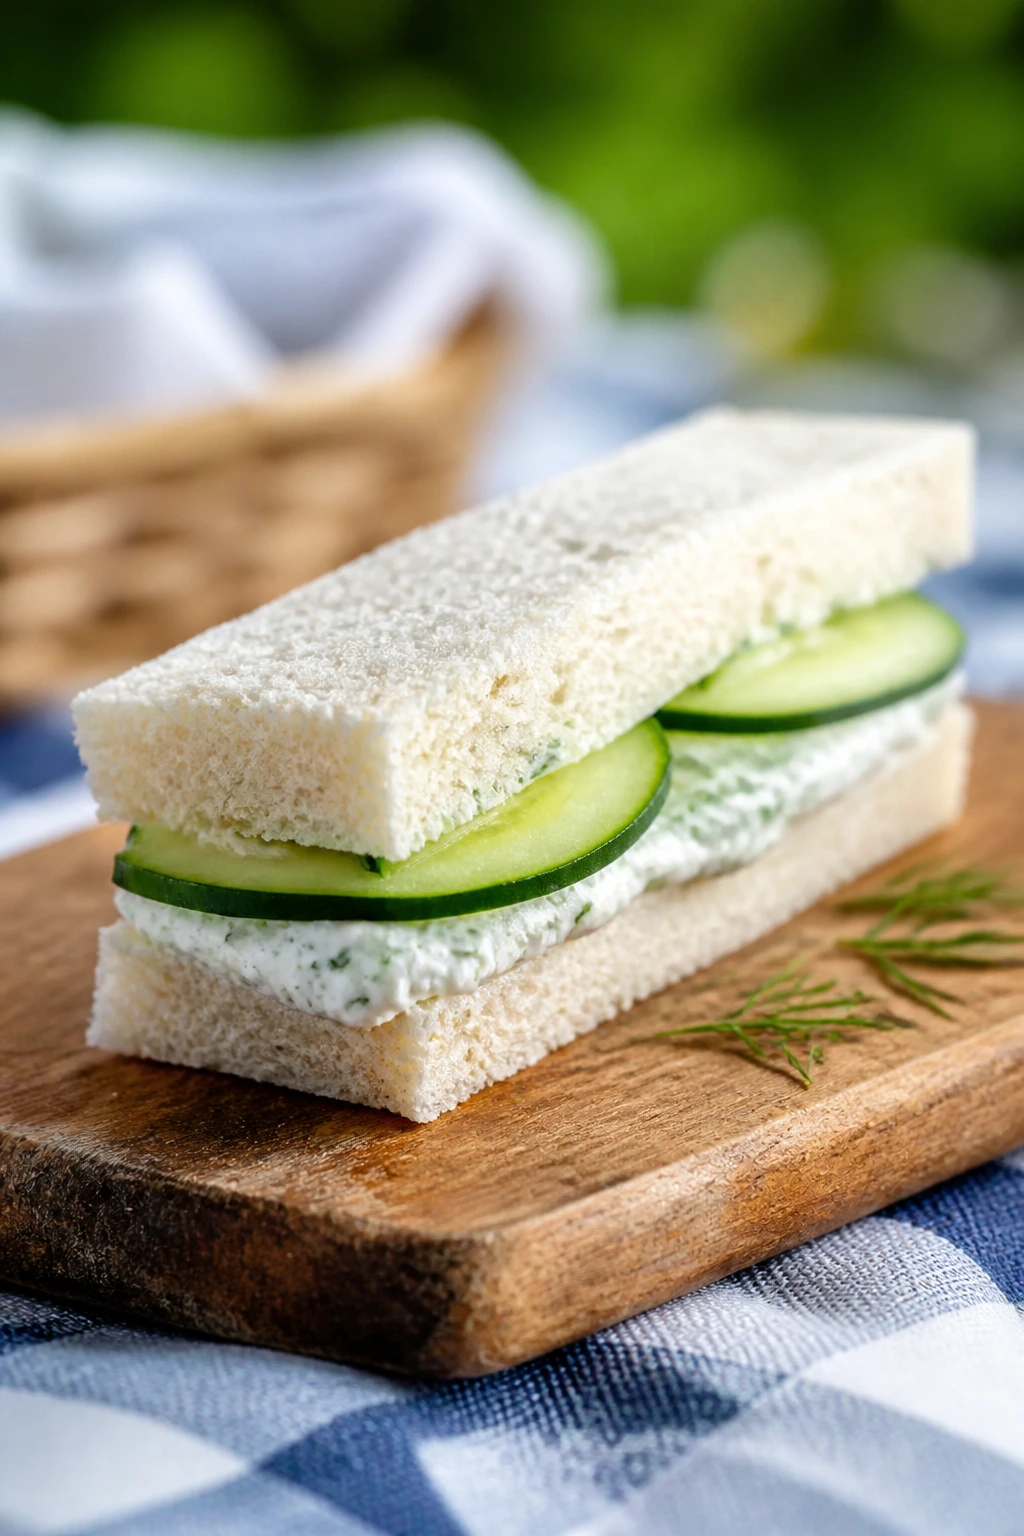
1. Cucumber-Dill Cream Cheese Finger Sandwiches
These are the classic tea-party style sandwiches, but I like them best outdoors, where the cold cucumber and dill taste almost sharper against the heat in the grass. The trick is not to drown the bread. You want a thin layer of cream cheese, cucumber sliced nearly paper-thin, and enough salt to wake the whole thing up.
Why It Works:
The filling is mostly fat and water in a controlled balance, which is why it stays cool and tastes clean after chilling. Cream cheese gives the bread a moisture barrier, while the salted cucumber sheds a little excess water before assembly. That 10-minute blot-and-rest step makes more difference than any fancy herb mix.
Key Ingredients:
- 8 slices soft white sandwich bread, crusts removed
- 4 ounces cream cheese, softened
- 2 tablespoons unsalted butter, softened
- 1 tablespoon mayonnaise
- 1 tablespoon fresh dill, finely chopped
- 1 teaspoon lemon zest
- 1/2 English cucumber, sliced very thin
- 1/4 teaspoon fine salt
- 1/8 teaspoon black pepper
Quick Steps:
- Mix the cream cheese, butter, mayonnaise, dill, lemon zest, salt, and pepper in a small bowl until smooth.
- Lay the cucumber slices on paper towels and sprinkle with a pinch of salt; let them sit for 5 to 10 minutes, then blot dry.
- Spread a thin layer of the cream cheese mixture over all 8 bread slices, edge to edge.
- Arrange the cucumber in a single slightly overlapping layer on 4 slices.
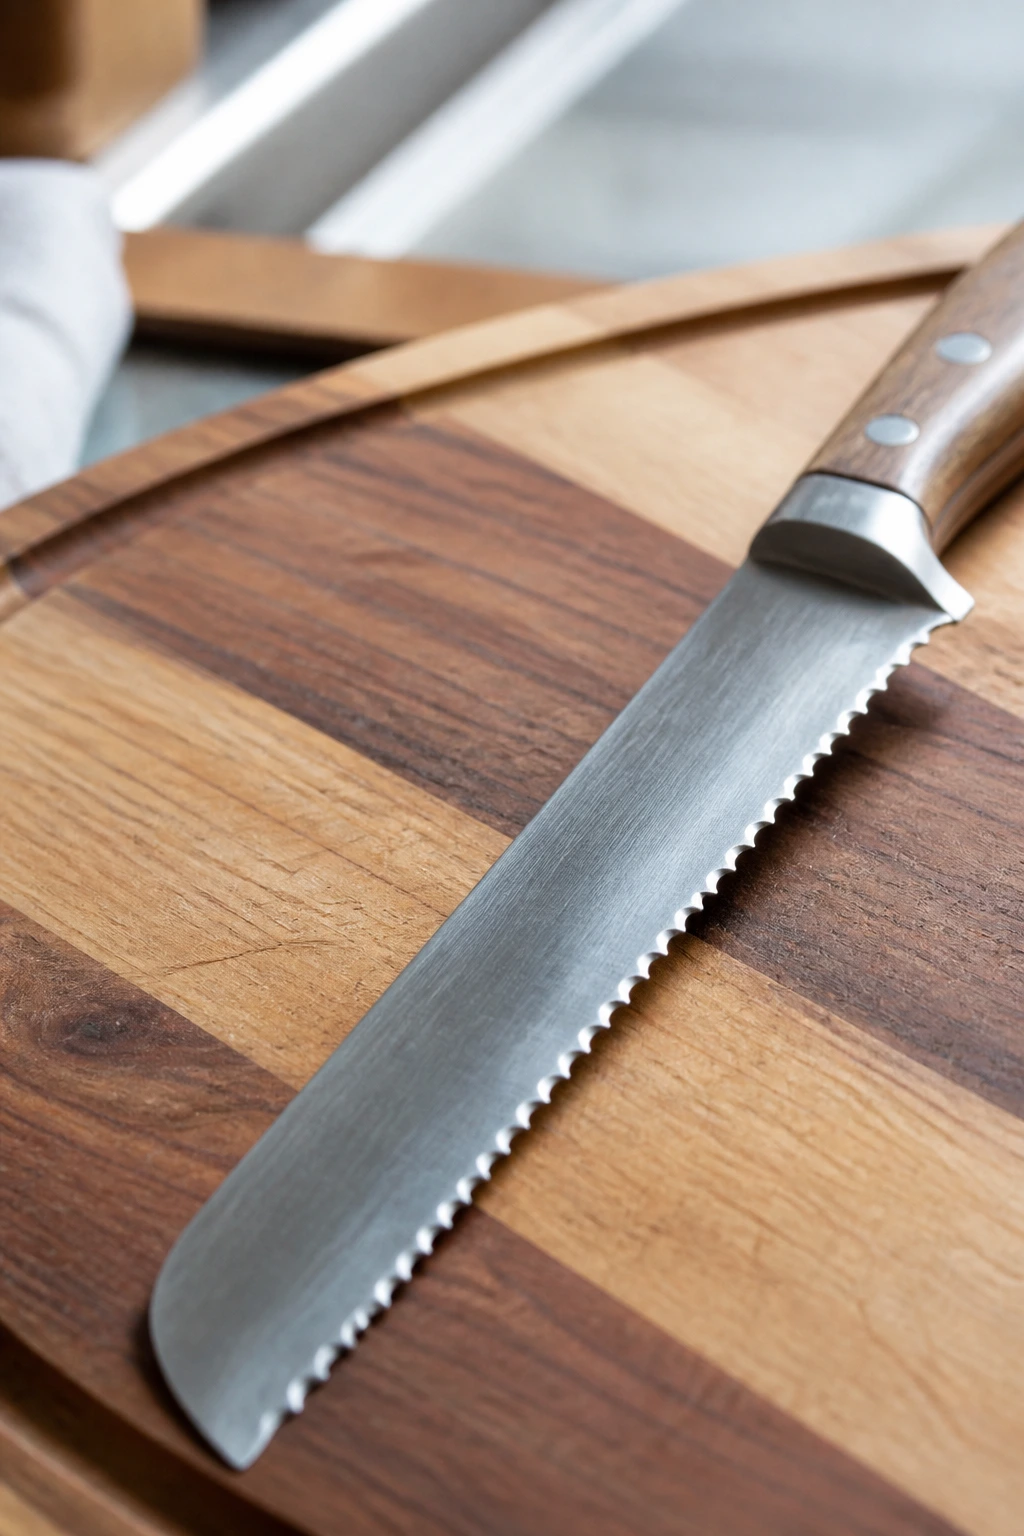
- Top with the remaining bread, press gently, then trim the crusts cleanly with a serrated knife.
- Cut each sandwich into 3 long fingers or 4 small rectangles. Chill for 15 minutes before packing.
Equipment for This Recipe:
- Serrated bread knife, for clean cuts
- Small mixing bowl
- Paper towels, for blotting cucumber
- Cutting board, preferably stable and flat
How to Serve This Dish:
Pile these on a chilled plate with lemon wedges and a few dill sprigs, and they look exactly like the sandwich you want on a hot day. They pair well with iced cucumber water, sparkling lemonade, or plain black tea poured over lots of ice. Keep portions small; one or two fingers per person is enough alongside other picnic food.
Pro Tips for This Recipe:
- Use an English cucumber; the seeds are smaller and the slices stay neater.
- Chill the filling for 10 minutes before spreading if your kitchen is warm.
- If the bread is extra soft, toast it for 30 seconds in a dry skillet, then cool it completely before assembling.
- Cut with a gentle sawing motion. Smashing the bread is how you end up with ragged edges.
Variations on This Dish:
- Mint-Cucumber Cooler: Swap half the dill for minced mint and add a little lime zest.
- Rye Tea Sandwich: Use soft rye instead of white bread for a deeper, more savory edge.
- Dairy-Free Version: Replace the cream cheese and butter with a thick dairy-free spread and skip the mayo.
Common Mistakes to Avoid with This Dish:
- Skipping the cucumber blot: Wet slices make the bread soggy in under an hour.
- Spreading too thickly: A thick layer squeezes out when you cut the sandwiches.
- Assembling too early: These are best within 4 to 6 hours of assembly, not the day before.
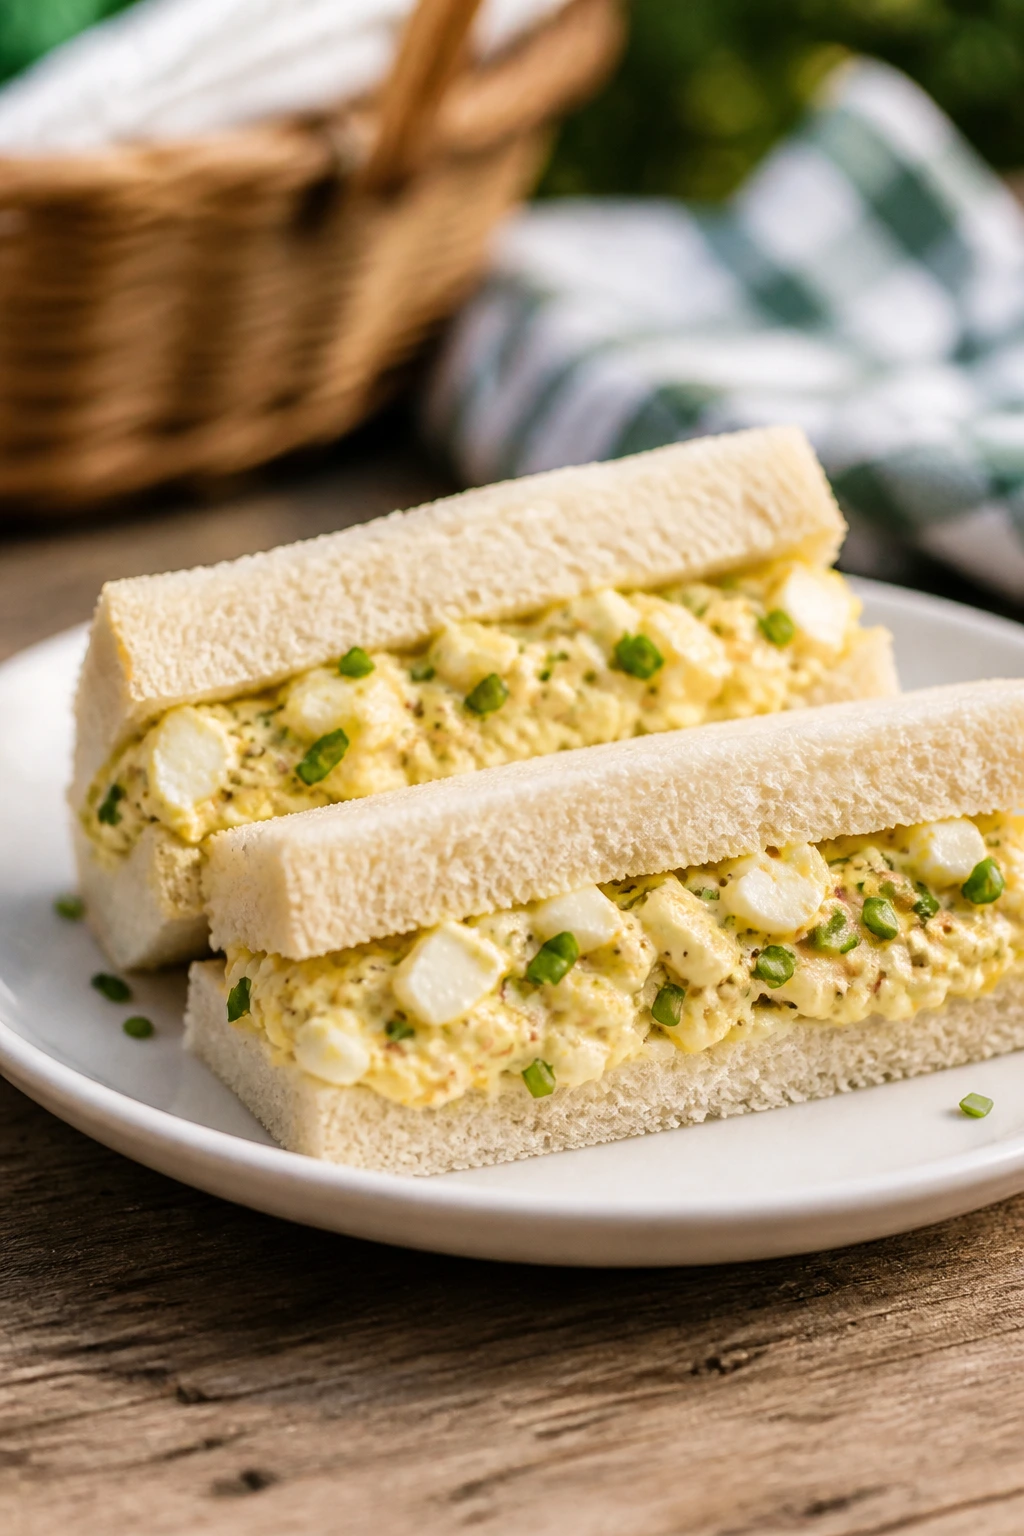
2. Egg Salad with Chives and a Little Dijon
Egg salad can be boring in the wildest way possible, which is exactly why I like pushing it a little. Dijon, chives, and a pinch of paprika give the filling a sharper, more structured taste so it doesn’t melt into one soft note. It’s still creamy. It just has a spine.
Why It Works:
Egg salad needs contrast: soft yolks, a little bite from mustard, and a fresh green note so it doesn’t taste heavy. Chopping the whites small and mashing only part of the yolks gives you texture instead of paste. The short chill after mixing helps the filling firm up, and that’s the difference between a tidy finger sandwich and a squishy one.
Key Ingredients:
- 6 large eggs
- 1/4 cup mayonnaise
- 1 tablespoon plain Greek yogurt
- 1 teaspoon Dijon mustard
- 1 tablespoon finely chopped chives
- 1 teaspoon pickle brine or white wine vinegar
- 1/4 teaspoon paprika
- 1/4 teaspoon fine salt
- 1/8 teaspoon black pepper
- 8 slices sandwich bread, crusts removed
- 2 tablespoons softened butter or mayo, for the bread
Quick Steps:
- Place the eggs in a saucepan, cover with cold water, and bring to a gentle boil over medium heat.
- Once the water boils, reduce to a low simmer and cook for 10 minutes.
- Drain the eggs, transfer them to ice water, and chill for 5 minutes before peeling.
- Chop 4 eggs finely and mash the other 2 eggs with the mayonnaise, yogurt, Dijon, vinegar, paprika, salt, and pepper.
- Fold in the chopped eggs and chives until the mixture holds together but still looks textured.
- Spread the butter or mayo on the bread, add the filling to 4 slices, top with the remaining bread, trim, and cut into fingers. Chill for 20 minutes.
Equipment for This Recipe:
- Medium saucepan
- Slotted spoon
- Small bowl for the filling
- Sharp knife, for chopping eggs cleanly
How to Serve This Dish:
Serve these with iced black tea, lemonade, or a cold lager if your picnic leans more casual. A dusting of paprika on the cut sides makes the tray look deliberate instead of rushed. One sandwich, cut into fingers, pairs well with sliced radishes or a handful of kettle chips.
Pro Tips for This Recipe:
- Use eggs that are not ultra-fresh; they peel easier after boiling.
- Mash only some of the yolks if you want the filling to stay light.
- A tiny bit of pickle brine wakes up the whole bowl.
- Chill the filling before assembly if you want cleaner cuts.
Variations on This Dish:
- Herbed Picnic Egg Salad: Add parsley and tarragon for a greener, more aromatic finish.
- Curry Egg Salad: Replace the paprika with 1/2 teaspoon curry powder and add minced celery.
- Avocado Egg Salad: Swap half the mayo for mashed avocado and eat it the same day.
Common Mistakes to Avoid with This Dish:
- Overcooking the eggs: Gray yolks smell off and taste chalky.
- Turning the filling into soup: Too much mayo makes the bread slide.
- Assembling the night before: Egg salad softens the bread fast, so assemble a few hours ahead at most.
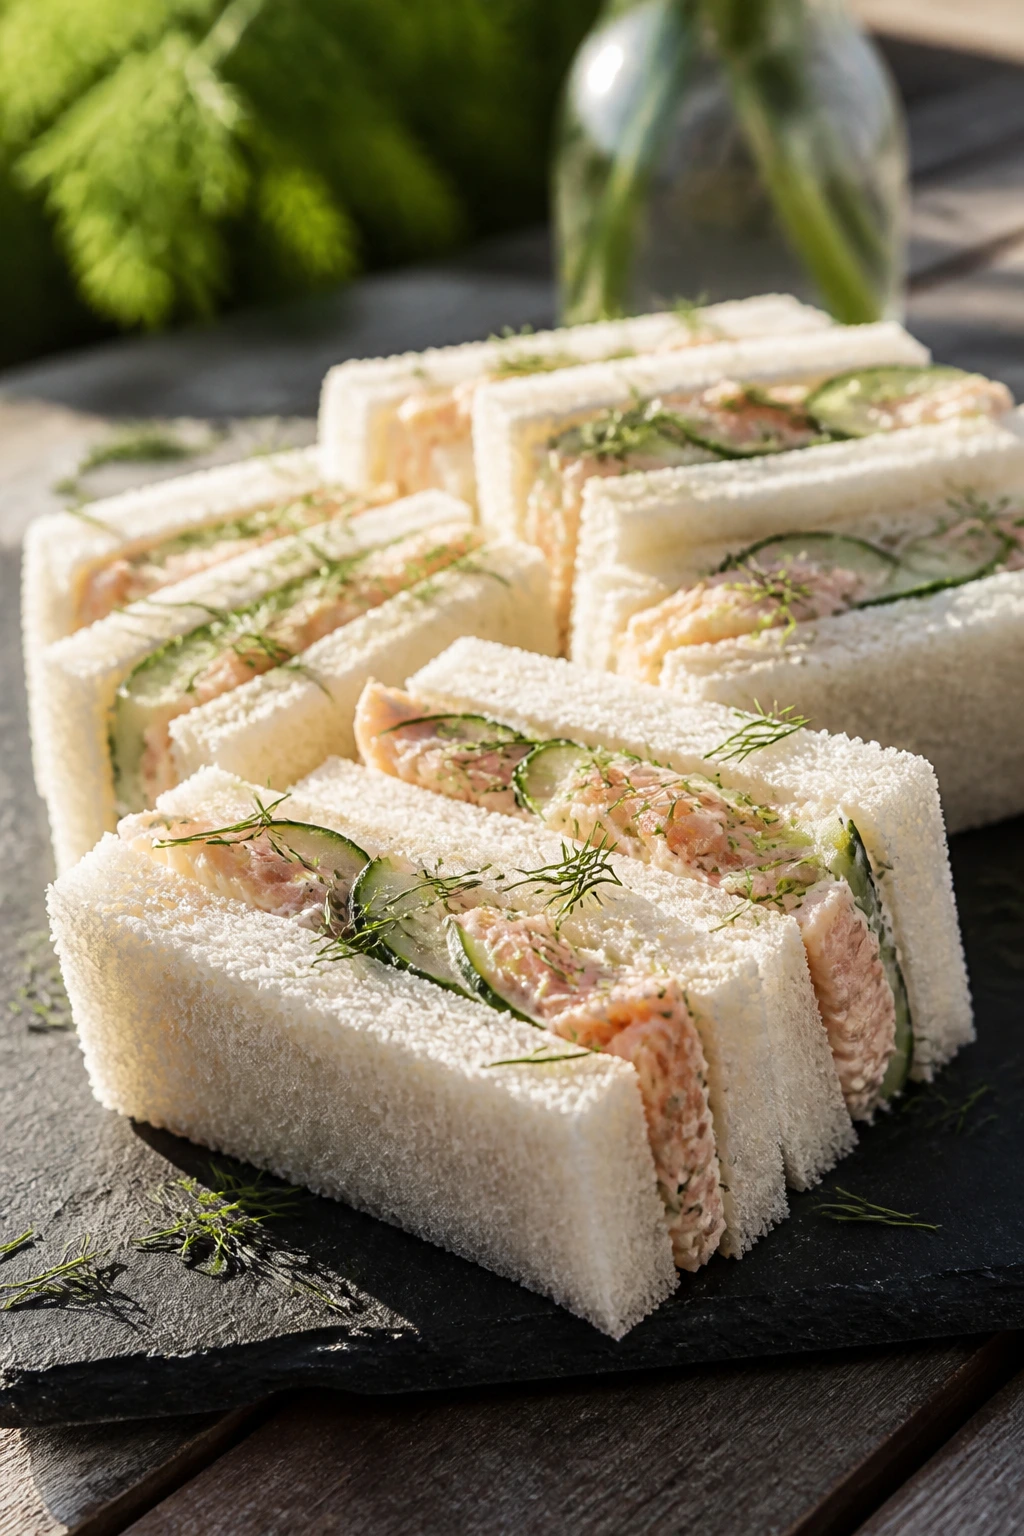
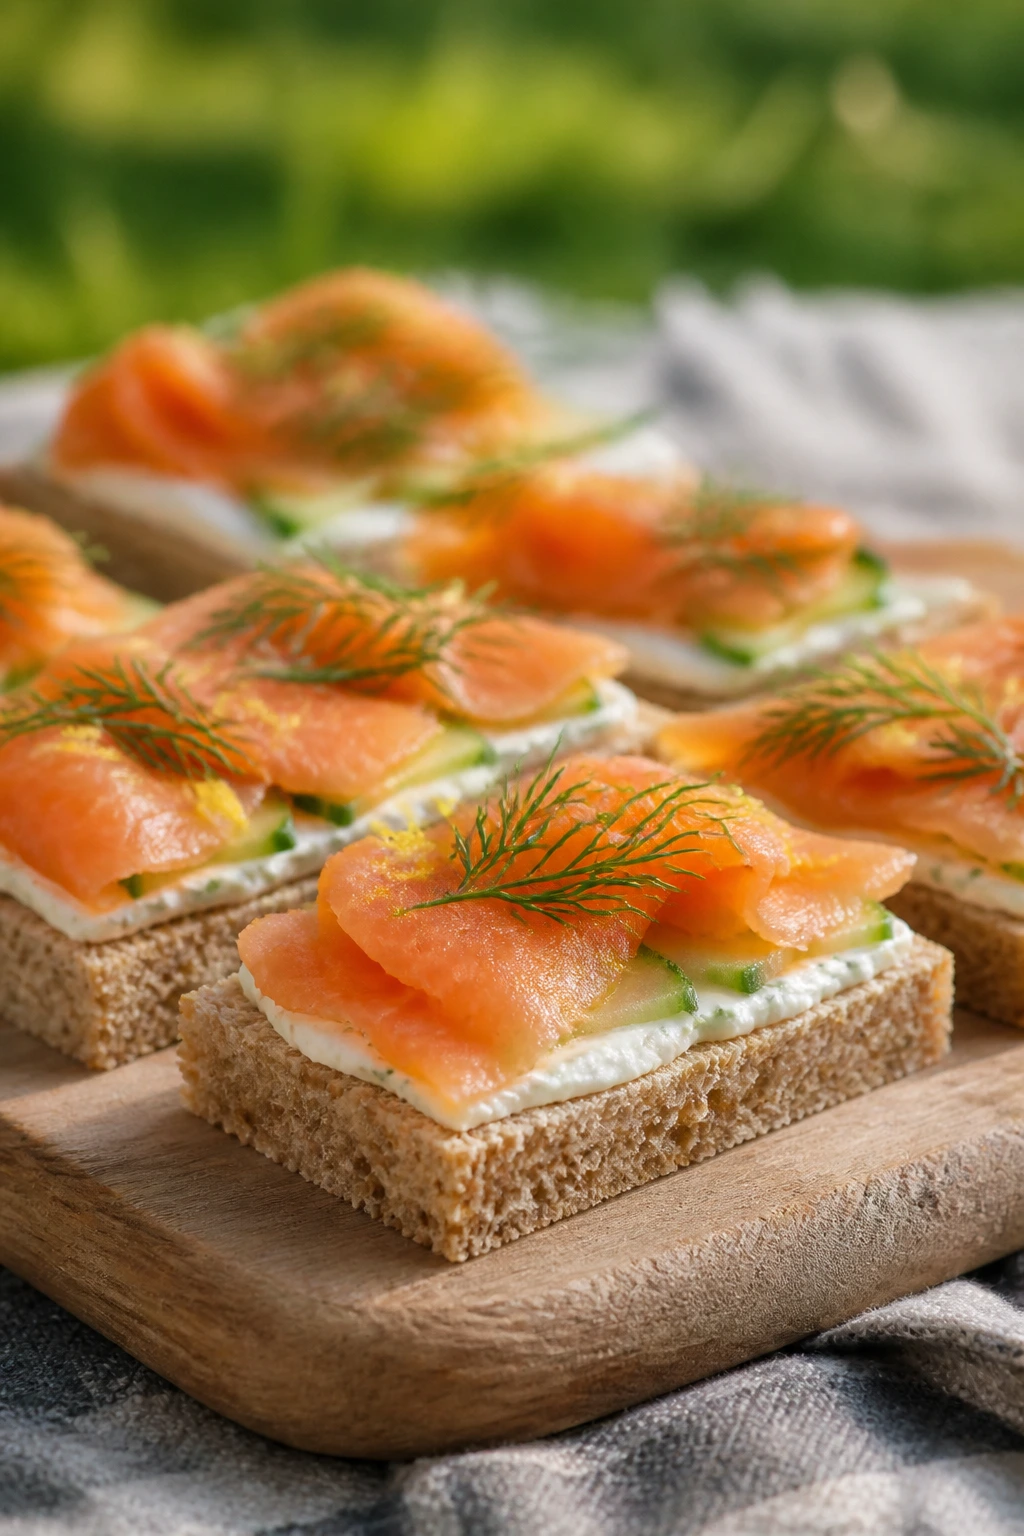
3. Smoked Salmon, Lemon, and Dill Sandwiches
Cold smoked salmon brings a salty, silky bite that feels fancy without requiring any work from you. The combination I like is cream cheese, lemon zest, dill, and thin salmon laid over soft pumpernickel or rye. It tastes clean, but not shy.
Why It Works:
Smoked salmon already carries salt and smoke, so the rest of the sandwich should stay bright and cool. Lemon zest keeps the cream cheese from feeling flat, and dill adds the green, grassy note that salmon seems to want. Thin cucumber slices give you crunch without stealing the show, and rye bread stands up better than standard white bread.
Key Ingredients:
- 8 slices pumpernickel or soft rye bread, crusts removed
- 4 ounces cream cheese, softened
- 2 tablespoons sour cream or crème fraîche
- 1 teaspoon lemon zest
- 1 tablespoon fresh dill, chopped
- 6 ounces cold smoked salmon, sliced thin
- 1/2 English cucumber, sliced paper-thin
- 1 tablespoon capers, drained
- 1/8 teaspoon black pepper
Quick Steps:
- Stir the cream cheese, sour cream, lemon zest, dill, and black pepper together until smooth.
- Spread the mixture thinly over all 8 bread slices.
- Top 4 slices with a layer of cucumber, then lay the smoked salmon over the cucumber in gentle folds.
- Scatter a few capers over the salmon, then close the sandwiches with the remaining bread.
- Press lightly, trim the crusts, and cut into neat fingers or triangles.
- Chill for 10 to 15 minutes before serving so the filling firms up.
Equipment for This Recipe:
- Small mixing bowl
- Serrated knife
- Cutting board
- Offset spatula or butter knife
How to Serve This Dish:
These are sharp and salty enough to stand beside cucumber soda, iced green tea, or a dry sparkling wine if the picnic includes adults. Keep the garnishes sparse; a dill frond and a few extra capers on the plate are enough. They work best as one of the first sandwiches eaten, while the bread is still soft and the salmon is cold.
Pro Tips for This Recipe:
- Buy the salmon in thin slices, not thick flakes.
- Pat the cucumber dry so the bread doesn’t go damp.
- Use soft rye; a dense, dry loaf makes the sandwich feel heavy.
- Do not overdo the capers. The salt stacks up fast.
Variations on This Dish:
- Lox and Cucumber: Add a very thin layer of red onion if you like a sharper bite.
- Everything Seasoning Version: Sprinkle a little everything bagel seasoning over the cream cheese.
- Dairy-Light Version: Use whipped cream cheese and skip the sour cream.
Common Mistakes to Avoid with This Dish:
- Using hot-smoked salmon: It flakes apart and doesn’t slice well for fingers.
- Making it too salty: Capers plus salmon plus seasoned cream cheese can go too far.
- Leaving it warm too long: This one belongs in the cooler until serving time.
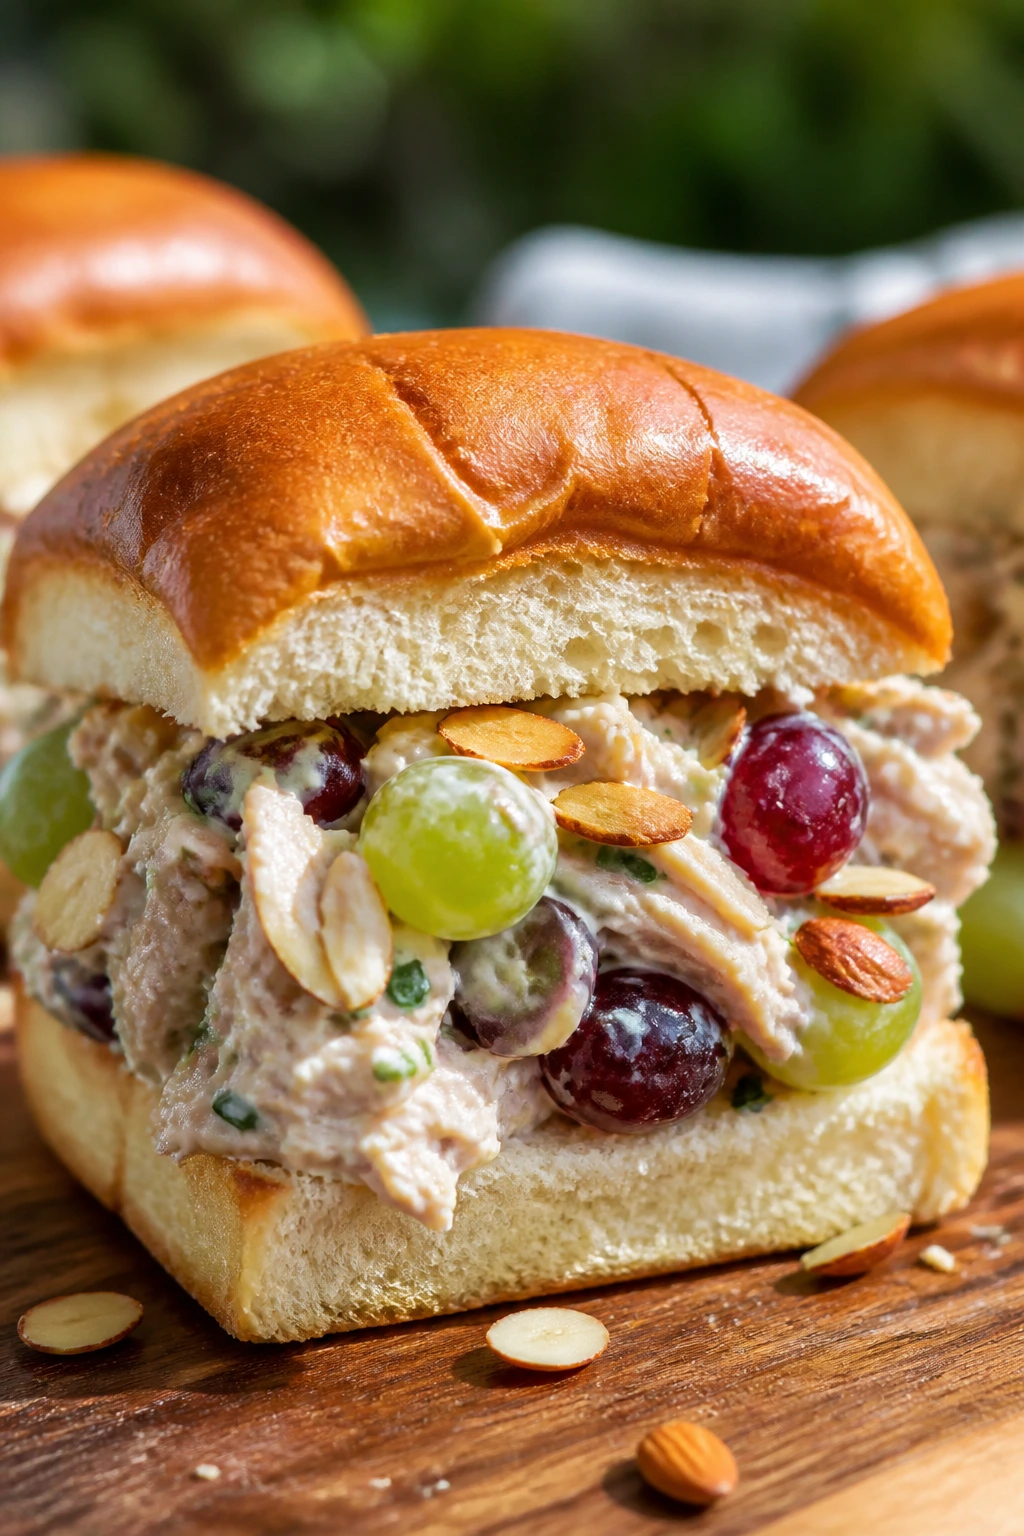
4. Chicken Salad with Grapes and Toasted Almonds
Chicken salad has a reputation for being safe, which usually means bland. Grapes and toasted almonds fix that immediately. The grapes burst with a cold, sweet snap, the almonds bring a dry crunch, and the whole thing tastes better when it’s been properly chilled.
Why It Works:
Chicken salad lives or dies on texture. Shredded chicken gives the filling a loose structure, grapes add pockets of juiciness, and toasted almonds keep every bite from feeling flat. A little Dijon and lemon juice sharpen the mayo so the mixture tastes fresh even after an hour in a cooler.
Key Ingredients:
- 2 cups shredded cooked chicken, chilled
- 1/3 cup mayonnaise
- 1 tablespoon plain Greek yogurt
- 1 teaspoon Dijon mustard
- 1/2 cup red grapes, halved and patted dry
- 1/4 cup celery, finely diced
- 2 tablespoons sliced almonds, toasted
- 1 tablespoon parsley, chopped
- 1 teaspoon lemon juice
- 1/4 teaspoon salt
- 1/8 teaspoon black pepper
- 8 slices brioche or soft wheat bread, crusts removed
Quick Steps:
- Combine the mayonnaise, yogurt, Dijon, lemon juice, salt, and pepper in a bowl.
- Fold in the shredded chicken, celery, grapes, almonds, and parsley until everything is lightly coated.
- Taste and adjust the salt or lemon juice, then chill the mixture for 20 minutes.
- Spread the filling onto 4 slices of bread, keeping it level rather than mounded.
- Top with the remaining bread, press gently, trim the crusts, and cut into fingers.
- Pack the sandwiches in a chilled container with parchment between layers.
Equipment for This Recipe:
- Mixing bowl
- Rubber spatula
- Cutting board
- Serrated bread knife
How to Serve This Dish:
This is the sandwich I reach for when I want something filling without feeling heavy. It pairs well with iced tea, ginger beer, or sparkling water with a squeeze of lemon. Add a few grapes or celery sticks on the side and the plate looks intentional, not random.
Pro Tips for This Recipe:
- Pat the grapes dry after washing so they don’t water down the salad.
- Toast the almonds in a dry skillet for 2 to 3 minutes until they smell nutty.
- Use chilled chicken; warm chicken softens the mayo and makes the filling loose.
- Brioche works, but only if the filling is not overloaded.
Variations on This Dish:
- Tarragon Chicken Salad: Swap parsley for tarragon and add a little extra Dijon.
- Curry Chicken Salad: Add 1/2 teaspoon curry powder and replace the grapes with chopped dried apricots.
- Walnut Version: Use toasted walnuts instead of almonds for a deeper, more earthy crunch.
Common Mistakes to Avoid with This Dish:
- Adding too much mayonnaise: The filling should cling, not drip.
- Skipping the chill: Warm chicken salad tastes looser and spreads badly.
- Using big bread slices: Thick, wide bread can overpower the filling.
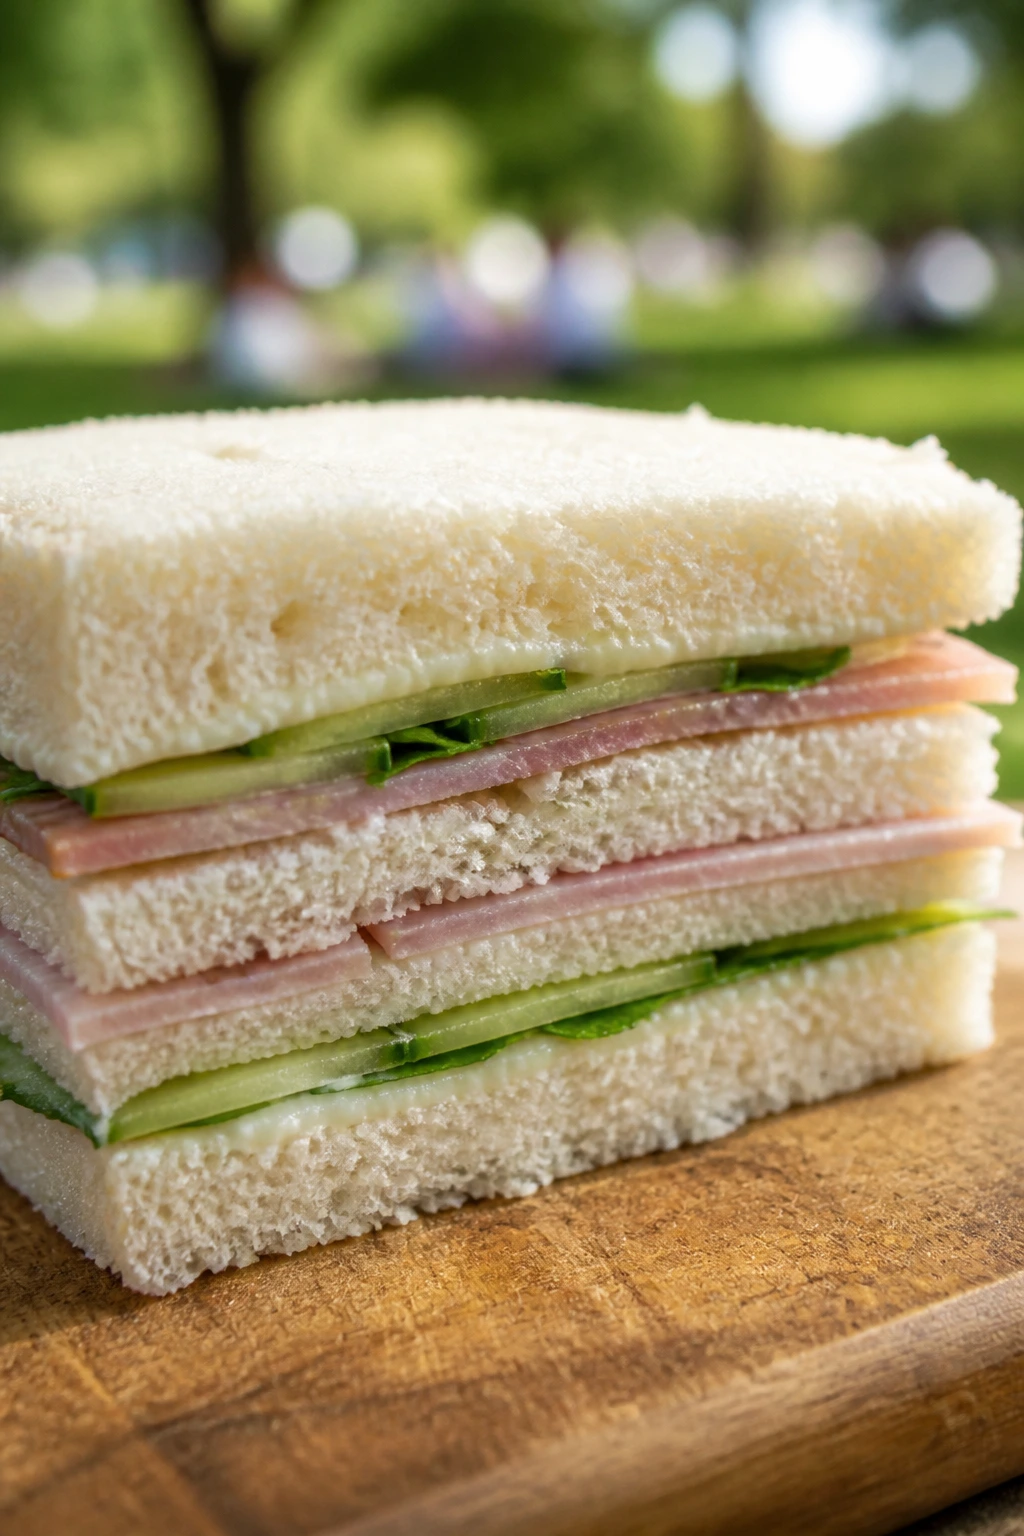
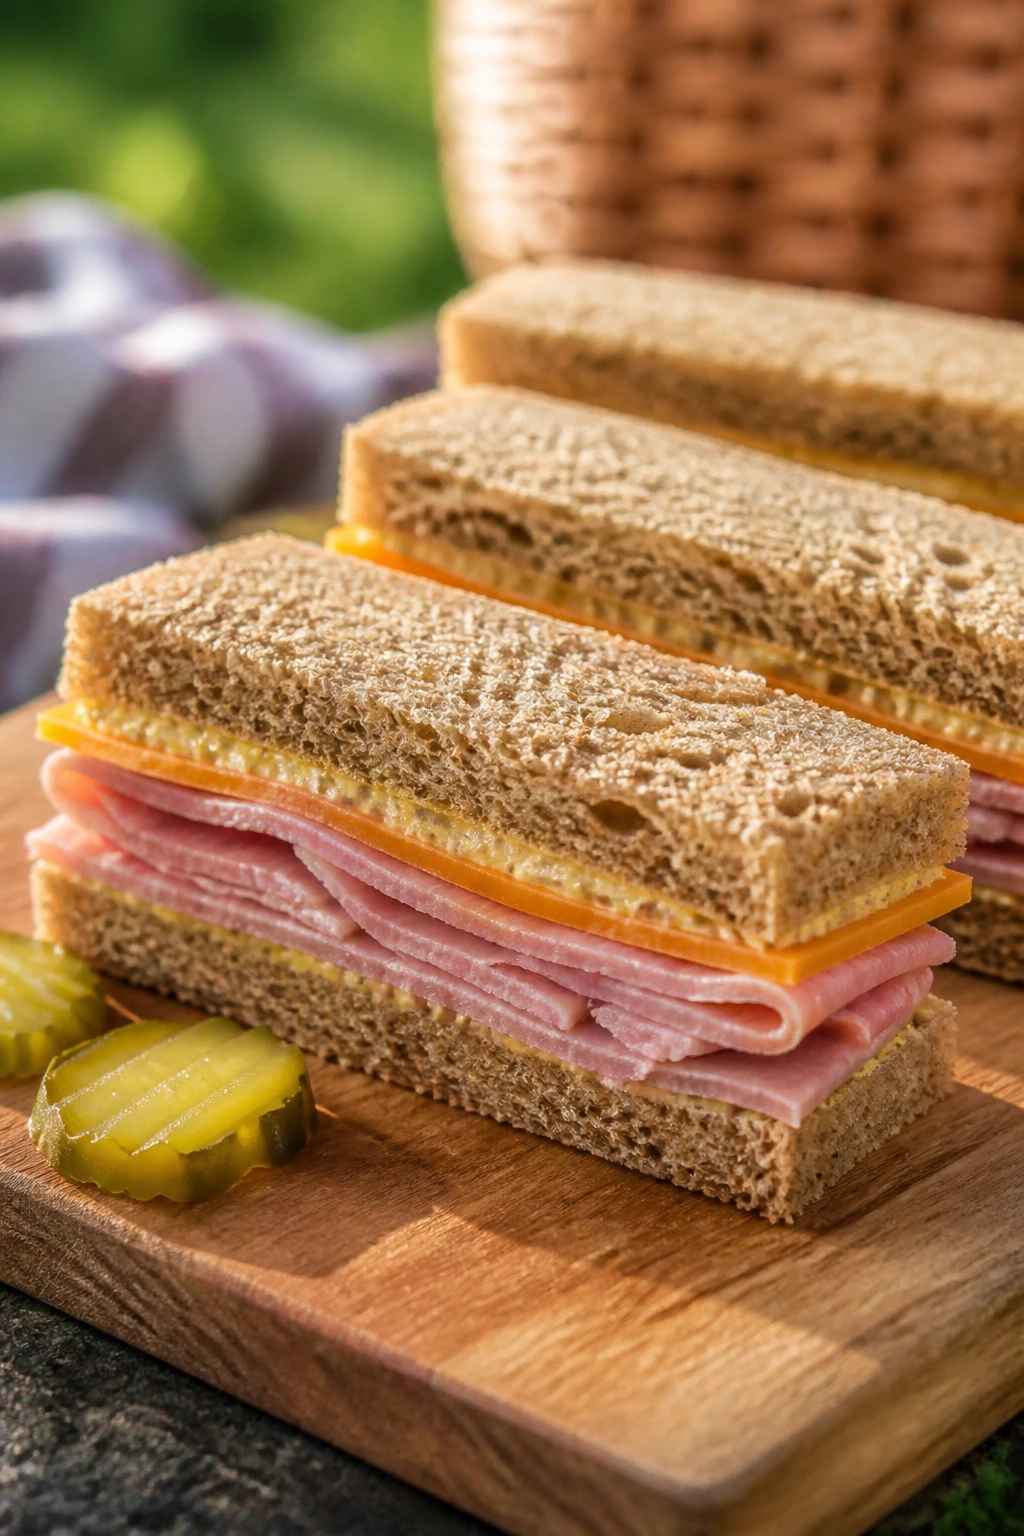
5. Ham, Cheddar, and Dijon Butter Fingers
This is the sandwich tray workhorse. It tastes familiar, but if you slice the ham thin and make a proper Dijon butter, it lands with more snap than the average deli sandwich. The sharp cheddar keeps the richness from getting sleepy.
Why It Works:
Ham and cheddar need a little acid and a little fat to taste balanced, which is exactly what the Dijon butter does. The butter also protects the bread from the slight moisture in the ham. A few thin pickle slices add a clean, briny note that makes the whole thing taste brighter and less heavy.
Key Ingredients:
- 8 slices soft rye or white sandwich bread, crusts removed
- 4 ounces thinly sliced ham
- 4 ounces sharp cheddar, thinly sliced
- 2 tablespoons unsalted butter, softened
- 1 teaspoon Dijon mustard
- 1 teaspoon honey
- 1 teaspoon chopped chives
- 1 small dill pickle, sliced very thin
- 1/8 teaspoon black pepper
Quick Steps:
- Stir the butter, Dijon, honey, chives, and pepper together until smooth.
- Spread the butter mixture over all 8 bread slices, going all the way to the edges.
- Layer the ham and cheddar on 4 slices, then add a few thin pickle slices.
- Close the sandwiches with the remaining bread and press lightly.
- Trim the crusts and cut each sandwich into 3 or 4 fingers.
- Wrap and chill for 15 minutes before packing.
Equipment for This Recipe:
- Small bowl
- Butter knife or spatula
- Serrated knife
- Cutting board
How to Serve This Dish:
Serve these with sparkling apple cider, iced tea, or a cold pilsner. They’re sturdy enough to sit beside chips and pickles without getting lost. If you want the tray to look sharper, cut each finger into clean rectangles instead of triangles.
Pro Tips for This Recipe:
- Choose ham that is sliced thin, not folded into heavy ribbons.
- Sharp cheddar tastes best here; mild cheddar gets buried.
- Use rye if you want the sandwich to feel less sweet and more savory.
- Chill the sandwiches after cutting so the cheese sets slightly.
Variations on This Dish:
- Honey Mustard Ham: Increase the honey and swap Dijon for whole-grain mustard.
- Ham and Swiss Version: Replace cheddar with Swiss for a softer, meltier profile.
- Apple-Ham Twist: Add paper-thin apple slices for a sweeter crunch.
Common Mistakes to Avoid with This Dish:
- Using thick cheese slices: Thick cheddar slides and makes cutting messy.
- Forgetting the butter barrier: Plain bread can get damp from the ham.
- Packing them warm: The butter softens too much and the sandwich loosens.
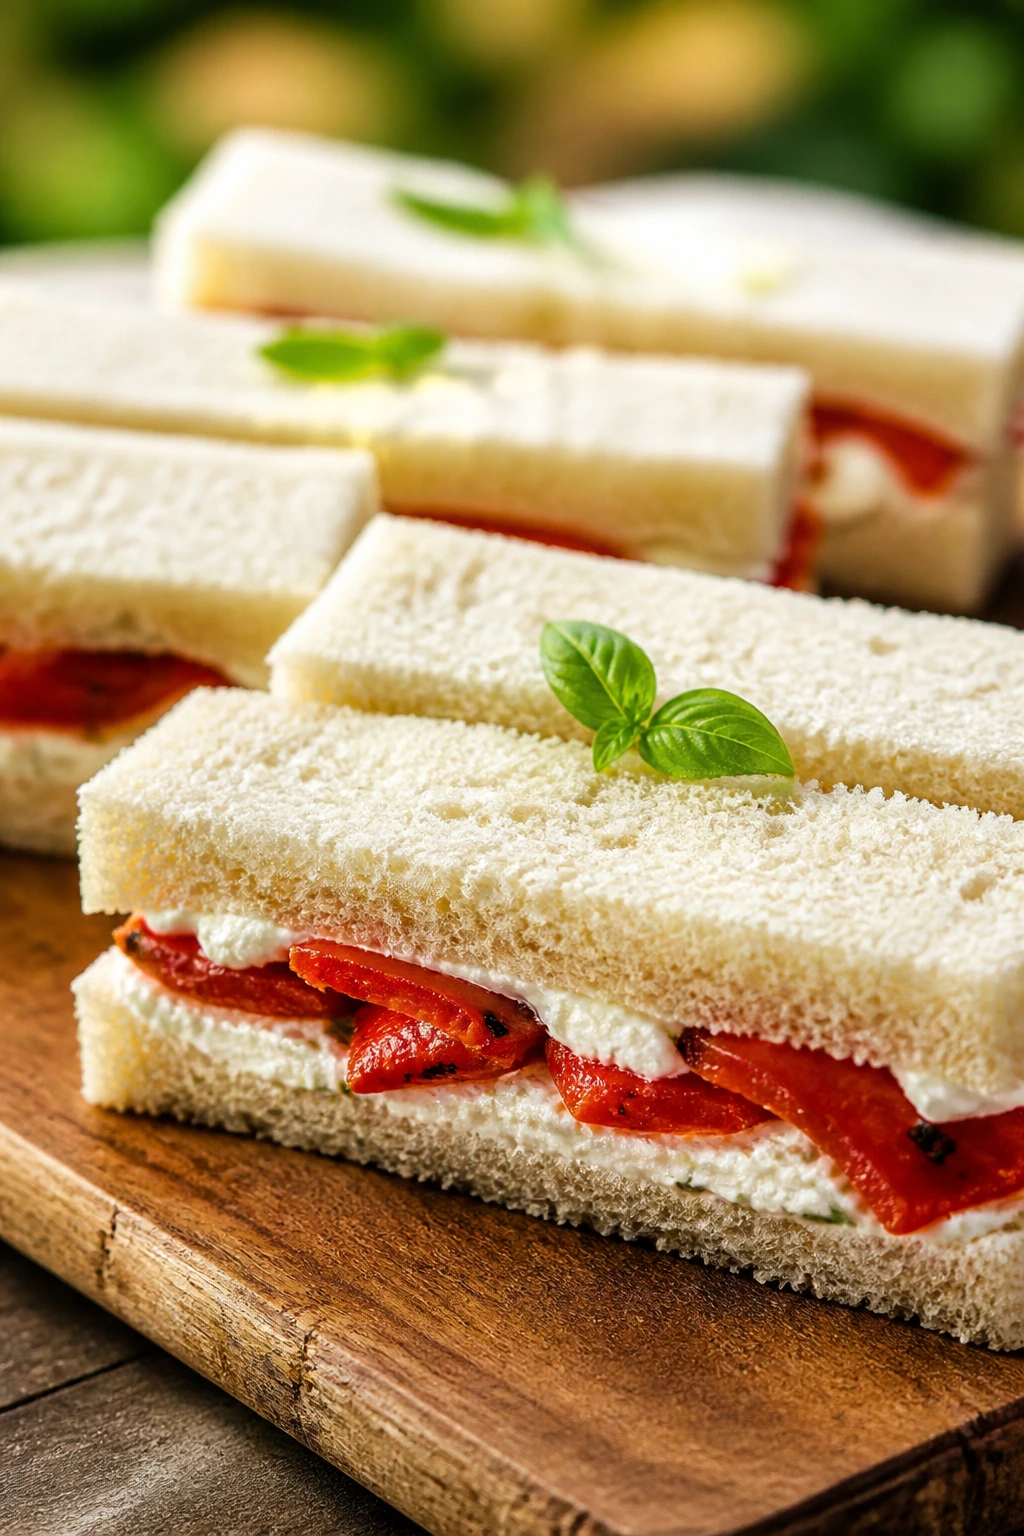
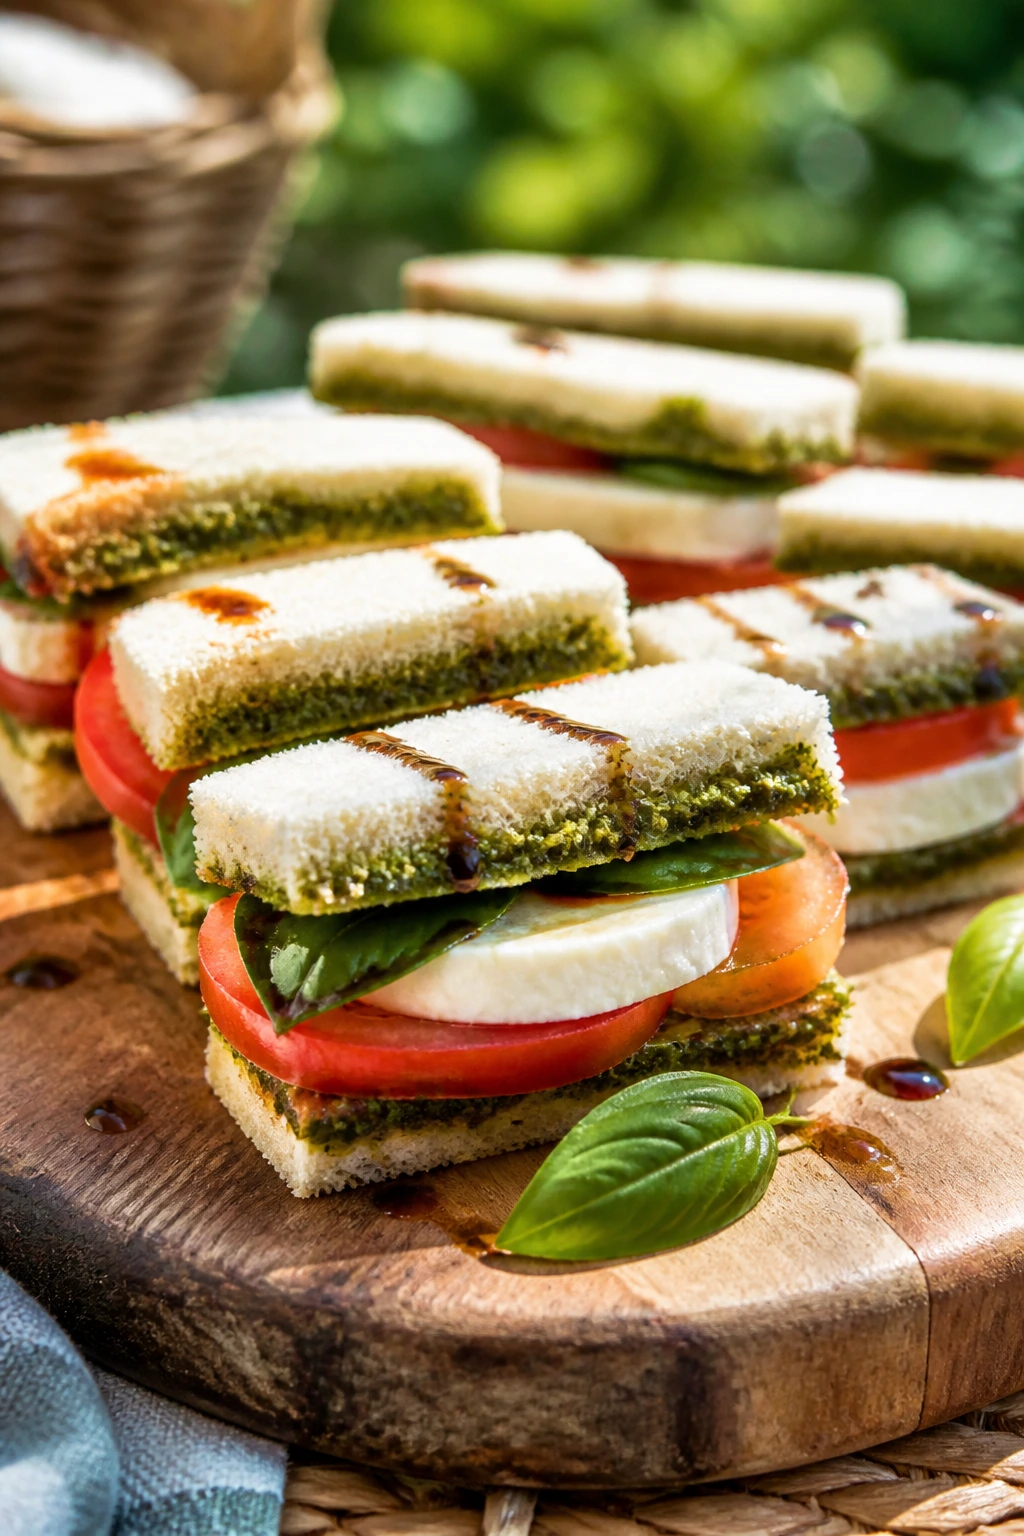
6. Tomato, Basil, and Mozzarella Caprese Fingers
Caprese sounds simple because it is simple, but simple food can be sloppy if you ignore the water in the tomatoes. Drain it well, blot the mozzarella, and use a little pesto or basil spread to stop the bread from soaking up every drop. Then the sandwich tastes like a chilled summer salad that can actually be carried.
Why It Works:
Tomatoes and fresh mozzarella are both high-moisture ingredients, so the sandwich needs a moisture barrier. Pesto helps with that, and it also gives the bread a savory base that plain mayo never could. Basil adds the green herb note, while balsamic glaze gives you a little sweet acidity without turning the bread wet.
Key Ingredients:
- 8 slices soft sandwich bread or milk bread, crusts removed
- 2 tablespoons basil pesto
- 1 large ripe tomato, seeded and sliced thin
- 4 ounces fresh mozzarella, patted dry and sliced thin
- 8 small basil leaves
- 1 tablespoon balsamic glaze
- 1/4 teaspoon salt
- 1/8 teaspoon black pepper
Quick Steps:
- Lay the tomato slices on paper towels, salt them lightly, and let them sit for 10 minutes.
- Pat the tomatoes and mozzarella dry with fresh paper towels.
- Spread pesto over all 8 bread slices.
- Layer mozzarella, tomato, and basil on 4 slices, then drizzle lightly with balsamic glaze and season with pepper.
- Close the sandwiches, press very gently, trim the crusts, and cut into fingers.
- Chill for 15 minutes before serving, but do not leave them long enough for the tomatoes to weep into the bread.
Equipment for This Recipe:
- Sharp knife
- Paper towels
- Small spoon for balsamic glaze
- Cutting board
How to Serve This Dish:
These pair well with iced basil lemonade, sparkling water, or a cold rosé spritz if that’s the mood. A single basil leaf on each cut piece makes the platter look cleaner than a heavy sprinkle of herbs. Eat them early in the picnic, while the tomatoes still taste bright.
Pro Tips for This Recipe:
- Seed the tomato if it’s very juicy.
- Use pesto sparingly; too much oils the bread.
- Buffalo mozzarella tends to be wetter than you want here.
- Chill the tomatoes after salting, but keep the final assembled sandwiches short-lived.
Variations on This Dish:
- Sun-Dried Tomato Caprese: Swap balsamic glaze for a thin layer of chopped sun-dried tomato spread.
- Prosciutto Caprese: Add a slice of prosciutto for more salt and structure.
- Dairy-Free Caprese: Use a firm plant-based mozzarella and a thicker pesto layer.
Common Mistakes to Avoid with This Dish:
- Using wet mozzarella straight from the package: It turns the bread soggy fast.
- Over-drizzling balsamic glaze: Too much makes the sandwich slippery.
- Assembling too far ahead: Caprese wants the shortest possible wait.
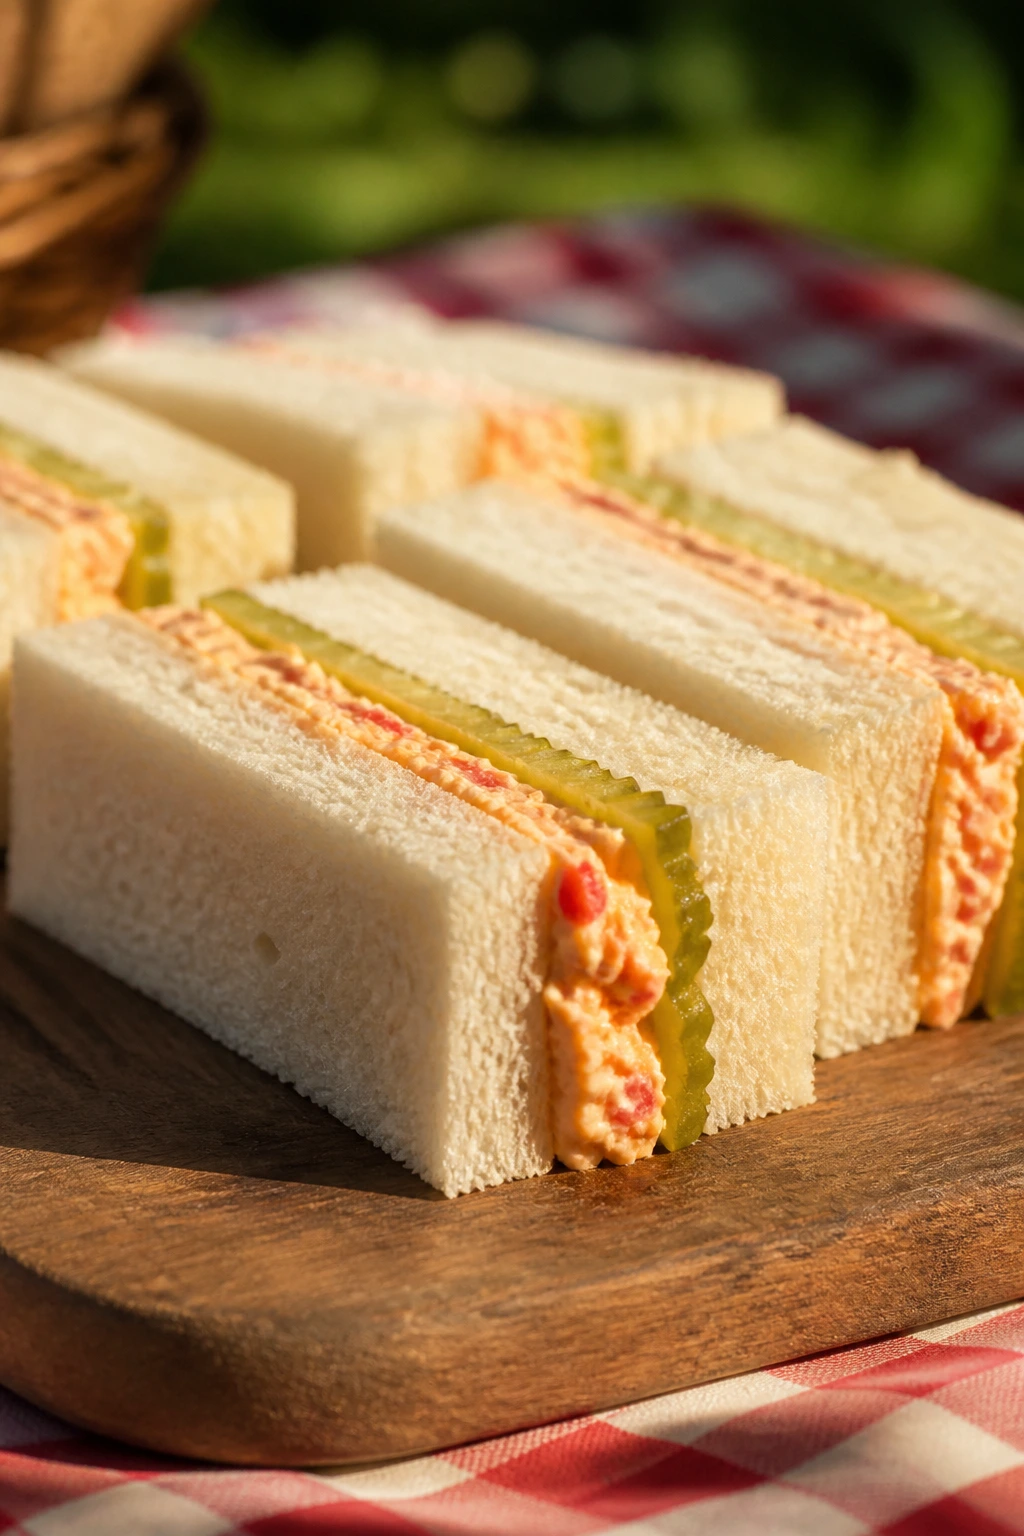
7. Pimento Cheese and Pickles on Soft Bread
Pimento cheese belongs at a picnic the way cold lemonade does — it’s bright, creamy, and a little nostalgic, but the real reason it works is that it travels well. The filling is thick, so it doesn’t leak, and the pickle slice adds just enough crunch to keep the bite from turning one-note.
Why It Works:
Sharp cheddar, cream cheese, and mayo give you a spread that holds its shape even after chilling. Pimentos add sweetness and color, while smoked paprika and hot sauce keep the flavor from going flat. A paper-thin pickle layer cuts through the richness in a way that makes a second sandwich sound reasonable.
Key Ingredients:
- 8 slices white bread or brioche, crusts removed
- 8 ounces sharp cheddar, finely grated
- 4 ounces cream cheese, softened
- 2 tablespoons mayonnaise
- 1/4 cup jarred pimentos, drained and chopped
- 1 teaspoon hot sauce
- 1/4 teaspoon smoked paprika
- 1 small dill pickle, sliced very thin
- 1/8 teaspoon black pepper
Quick Steps:
- Mix the grated cheddar, cream cheese, mayonnaise, pimentos, hot sauce, paprika, and pepper until well combined.
- Taste and adjust the salt only if needed; sharp cheddar often brings enough on its own.
- Spread the pimento cheese over 4 slices of bread.
- Layer a few pickle slices over the filling, then close with the remaining bread.
- Press lightly, trim the crusts, and cut into tidy fingers.
- Chill for 20 minutes so the filling firms up before packing.
Equipment for This Recipe:
- Box grater
- Mixing bowl
- Spatula
- Serrated knife
How to Serve This Dish:
This one likes sweet tea, a cold lager, or fizzy lemonade. It sits nicely on a tray with celery sticks, cherry tomatoes, or a handful of salted crackers. If you want the best texture, keep the pickle slices thin enough that they snap instead of slide.
Pro Tips for This Recipe:
- Grate the cheddar yourself; pre-shredded cheese doesn’t melt into the spread as smoothly.
- Drain the pimentos well, or the filling loosens too much.
- Let the cheese mixture sit 10 minutes before assembling so the flavors settle.
- A tiny spoonful of pickle juice can help if the mixture tastes heavy.
Variations on This Dish:
- Jalapeño Pimento Cheese: Add minced pickled jalapeños for heat.
- Pepper Jack Version: Replace half the cheddar with pepper jack for a sharper bite.
- Herb Pimento Cheese: Fold in chopped chives and parsley for a fresher finish.
Common Mistakes to Avoid with This Dish:
- Using pimentos that still carry brine: The spread gets loose and watery.
- Cutting the bread before chilling: The filling squishes out at the edges.
- Over-salting too soon: Sharp cheddar and pickles can bring more salt than expected.
8. Turkey, Cranberry, and Cream Cheese Fingers

Turkey and cranberry do the holiday thing well, but in finger-sandwich form they get lighter and less fussy. Cream cheese keeps the filling smooth, cranberry sauce gives a tart-sweet hit, and a little orange zest wakes the whole sandwich up. It tastes like a holiday platter that learned how to behave at a picnic.
Why It Works:
This sandwich works because the three main flavors have clear jobs. Turkey gives the body, cranberry gives brightness, and cream cheese keeps everything anchored. Orange zest keeps the cranberry from tasting like jelly out of a jar, and the soft bread makes the whole thing easy to eat with one hand.
Key Ingredients:
- 8 slices soft wheat bread or brioche, crusts removed
- 1/3 cup cream cheese, softened
- 1 tablespoon mayonnaise
- 1 teaspoon orange zest
- 6 ounces thinly sliced turkey
- 1/4 cup thick cranberry sauce
- 1 tablespoon chopped parsley
- 1/8 teaspoon black pepper
Quick Steps:
- Mix the cream cheese, mayonnaise, orange zest, and black pepper until smooth.
- Spread the mixture over all 8 bread slices.
- Layer turkey on 4 slices, then spoon a thin line of cranberry sauce over the turkey.
- Sprinkle with parsley, close the sandwiches, and press gently.
- Trim the crusts and cut into fingers or narrow triangles.
- Chill for 15 minutes before packing, especially if the cranberry sauce is soft.
Equipment for This Recipe:
- Small bowl
- Spoon
- Serrated bread knife
- Cutting board
How to Serve This Dish:
These go well with iced tea, sparkling cranberry juice, or a cold ginger ale. They look neat when cut into narrow rectangles and arranged in two staggered rows. Add a few extra parsley leaves to the plate if you want the color to pop.
Pro Tips for This Recipe:
- Use thick cranberry sauce, not the loose kind that runs everywhere.
- Turkey slices should be thin enough to fold, not stack.
- Orange zest matters more than it sounds like it should.
- Keep the filling layer thin; this is a tidy sandwich, not a stuffed sub.
Variations on This Dish:
- Stuffing-Inspired Version: Add a pinch of sage to the cream cheese.
- Brie-Turkey Upgrade: Replace half the cream cheese with softened brie.
- Apple-Cranberry Version: Add a paper-thin slice of tart apple for crunch.
Common Mistakes to Avoid with This Dish:
- Using runny cranberry sauce: It soaks the bread and slides out at the cut.
- Overfilling with turkey: Too much meat turns the finger sandwich into a thick block.
- Skipping the chill: The cream cheese needs a few minutes to firm up.
9. Tuna Salad with Celery and Capers
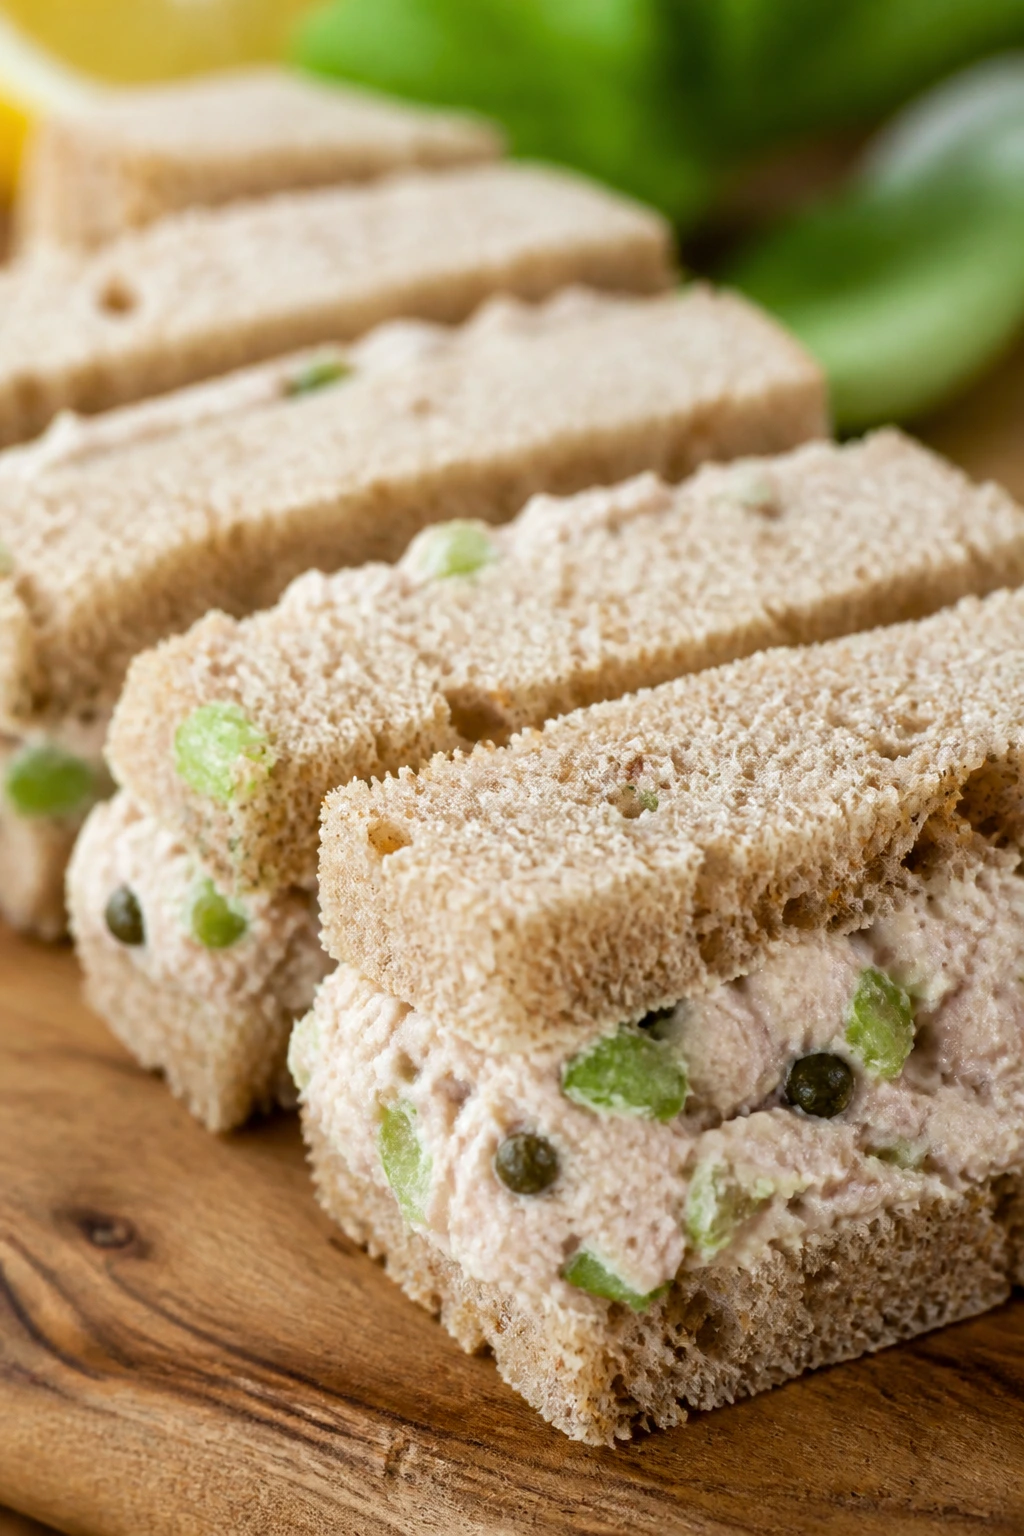
Tuna salad has a bad habit of tasting like a refrigerator if you’re careless. Celery and capers fix that fast. The celery gives a cool snap, the capers give a salty pop, and a little lemon keeps the tuna bright enough to eat in warm weather.
Why It Works:
Good tuna salad needs drainage and restraint. If the tuna is wet, the filling turns mushy; if it’s dry enough and dressed lightly, it stays fluffy and spreads cleanly. Capers bring a briny edge that keeps the sandwich from tasting like plain mayo, and the celery gives you texture that survives the cooler.
Key Ingredients:
- 2 cans tuna, drained well, about 10 ounces total
- 1/4 cup mayonnaise
- 1 tablespoon Dijon mustard
- 1 celery stalk, finely diced
- 1 tablespoon capers, chopped
- 1 tablespoon dill or parsley, chopped
- 1 teaspoon lemon juice
- 1/4 teaspoon salt
- 1/8 teaspoon black pepper
- 8 slices whole wheat bread, crusts removed
- 1 tablespoon butter or mayo, for the bread
Quick Steps:
- Flake the drained tuna into a bowl with a fork.
- Stir in the mayonnaise, Dijon, lemon juice, salt, and pepper.
- Fold in the celery, capers, and herbs until the mixture looks moist but not wet.
- Spread butter or mayo on the bread slices, then divide the tuna mixture between 4 slices.
- Top with the remaining bread, press lightly, trim the crusts, and cut into fingers.
- Chill for 15 to 20 minutes before serving.
Equipment for This Recipe:
- Mixing bowl
- Fork
- Serrated knife
- Cutting board
How to Serve This Dish:
This one likes lemon seltzer, iced black tea, or a cold pale lager. Serve it with lettuce leaves or cucumber coins if you want the tray to feel a little more complete. Tuna salad is one of those fillings that gets better once it has chilled for a short while, but not so long that the bread starts to compress.
Pro Tips for This Recipe:
- Drain the tuna until it looks dry on the surface.
- Chop the capers; whole ones hit too hard in a small sandwich.
- Use whole wheat bread if you want a more savory finish.
- Keep the mayo light. You can always add more, but you cannot pull it back.
Variations on This Dish:
- Mediterranean Tuna: Add chopped parsley, lemon zest, and a few minced olives.
- Curried Tuna: Replace Dijon with curry powder and add a few chopped raisins.
- Crunchier Tuna: Add diced cucumber for a fresher, lighter bite.
Common Mistakes to Avoid with This Dish:
- Leaving tuna too wet: The bread softens and tears.
- Using too much mustard: It overpowers the fish fast.
- Packing without chilling: The filling loosens and becomes hard to slice neatly.
10. Roast Beef, Horseradish, and Watercress Fingers
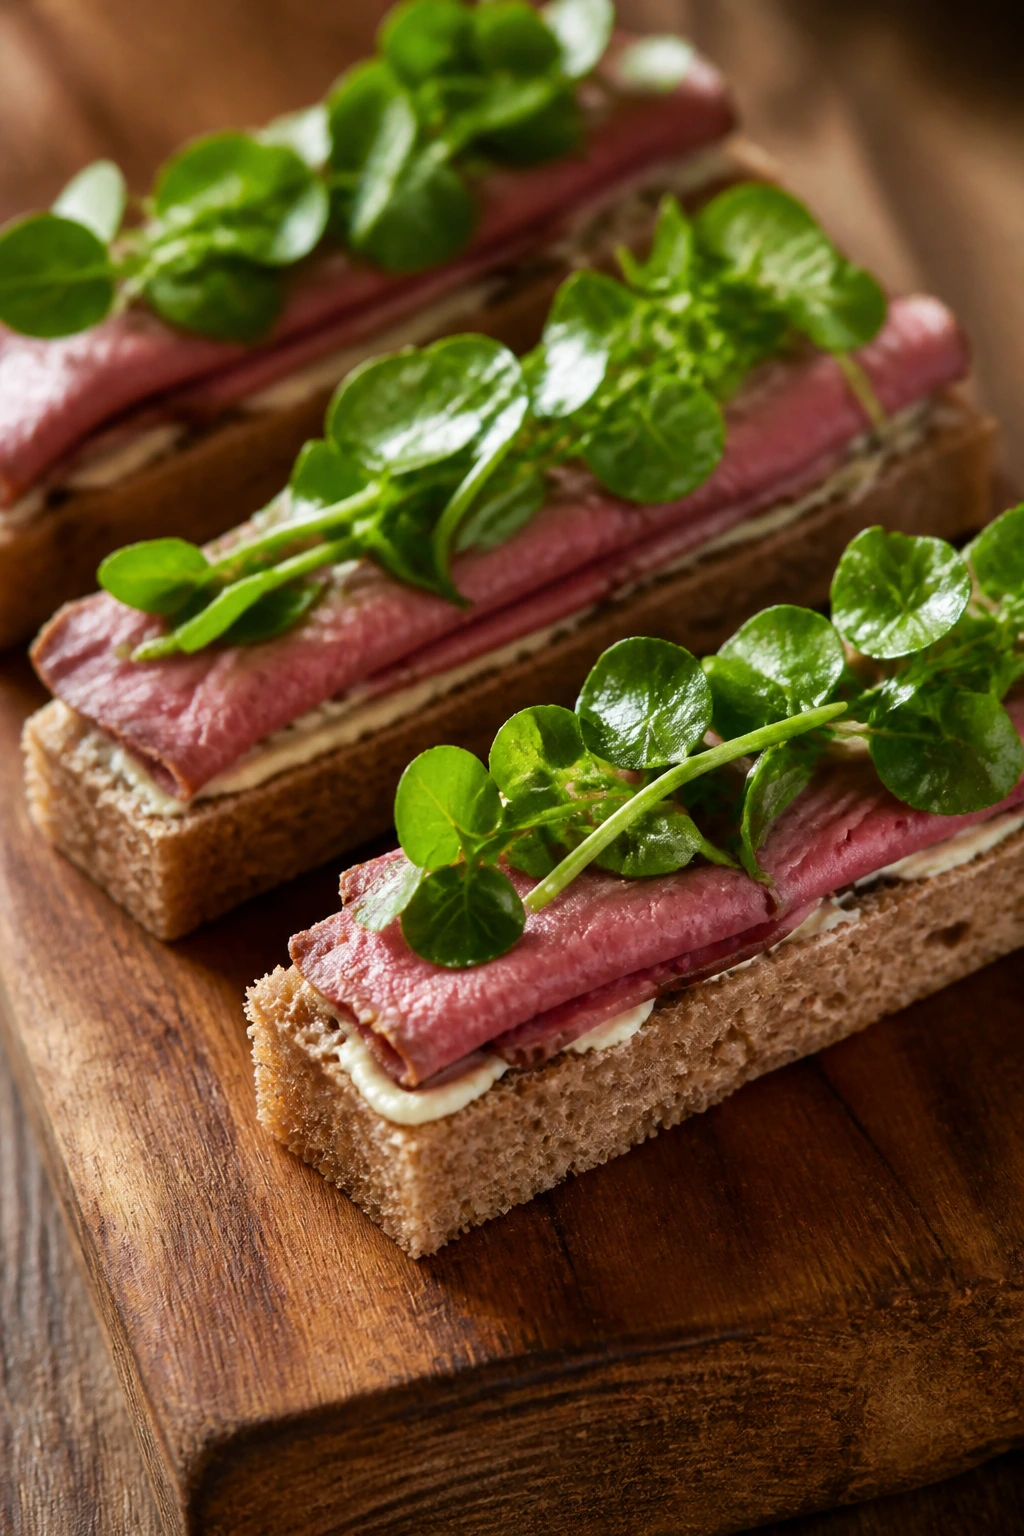
Roast beef is the boldest sandwich in this lineup, and it should be. Sharp horseradish, a little Dijon, and peppery watercress turn thin slices of beef into something with actual bite. This one is for people who want lunch to wake up a bit.
Why It Works:
Roast beef brings salt and depth, but the sandwich needs a bright edge or it can feel heavy. Horseradish gives a clean heat that doesn’t linger like chili, and watercress keeps the bite grassy and fresh. Rye bread helps because its flavor is sturdy enough to hold up to the beef without disappearing.
Key Ingredients:
- 8 slices rye bread, crusts removed
- 6 ounces thinly sliced roast beef
- 2 tablespoons prepared horseradish
- 3 tablespoons mayonnaise
- 1 teaspoon Dijon mustard
- 1 cup watercress or baby arugula
- 1 tablespoon unsalted butter, softened
- 1/8 teaspoon black pepper
Quick Steps:
- Mix the horseradish, mayonnaise, Dijon, and black pepper in a small bowl.
- Spread the butter on the bread slices first, then add a thin layer of the horseradish sauce.
- Layer the roast beef over 4 bread slices, folding the slices loosely so they don’t compact.
- Top with watercress, close the sandwiches, and press gently.
- Trim the crusts and cut into fingers with a sharp serrated knife.
- Chill for 10 minutes, then serve cold.
Equipment for This Recipe:
- Small bowl
- Butter knife
- Serrated knife
- Cutting board
How to Serve This Dish:
Serve these with cold cola, iced tea, or a crisp pilsner. They look especially good cut into narrow rectangles and stacked slightly offset on a dark tray. A few extra watercress stems on the side make the platter look fresh instead of heavy.
Pro Tips for This Recipe:
- Use very thin roast beef; thick slices fight the bread.
- Horseradish strength varies, so taste the spread before assembling.
- Rye brings flavor, but soft rye works better than dense deli rye.
- Keep the watercress dry after rinsing or it will slip.
Variations on This Dish:
- Cheddar Roast Beef: Add a thin slice of sharp cheddar for richness.
- Rye and Pickle Version: Add thin pickle slices for more bite.
- Creamier Spread: Swap half the mayo for sour cream if you want a cooler finish.
Common Mistakes to Avoid with This Dish:
- Too much horseradish: The heat can drown the beef.
- Stacking the meat thick: It makes the sandwich hard to cut cleanly.
- Wet greens: Watercress that isn’t dried well will make the bread slick.
11. Avocado, Sprouts, and Lemon-Salt Fingers
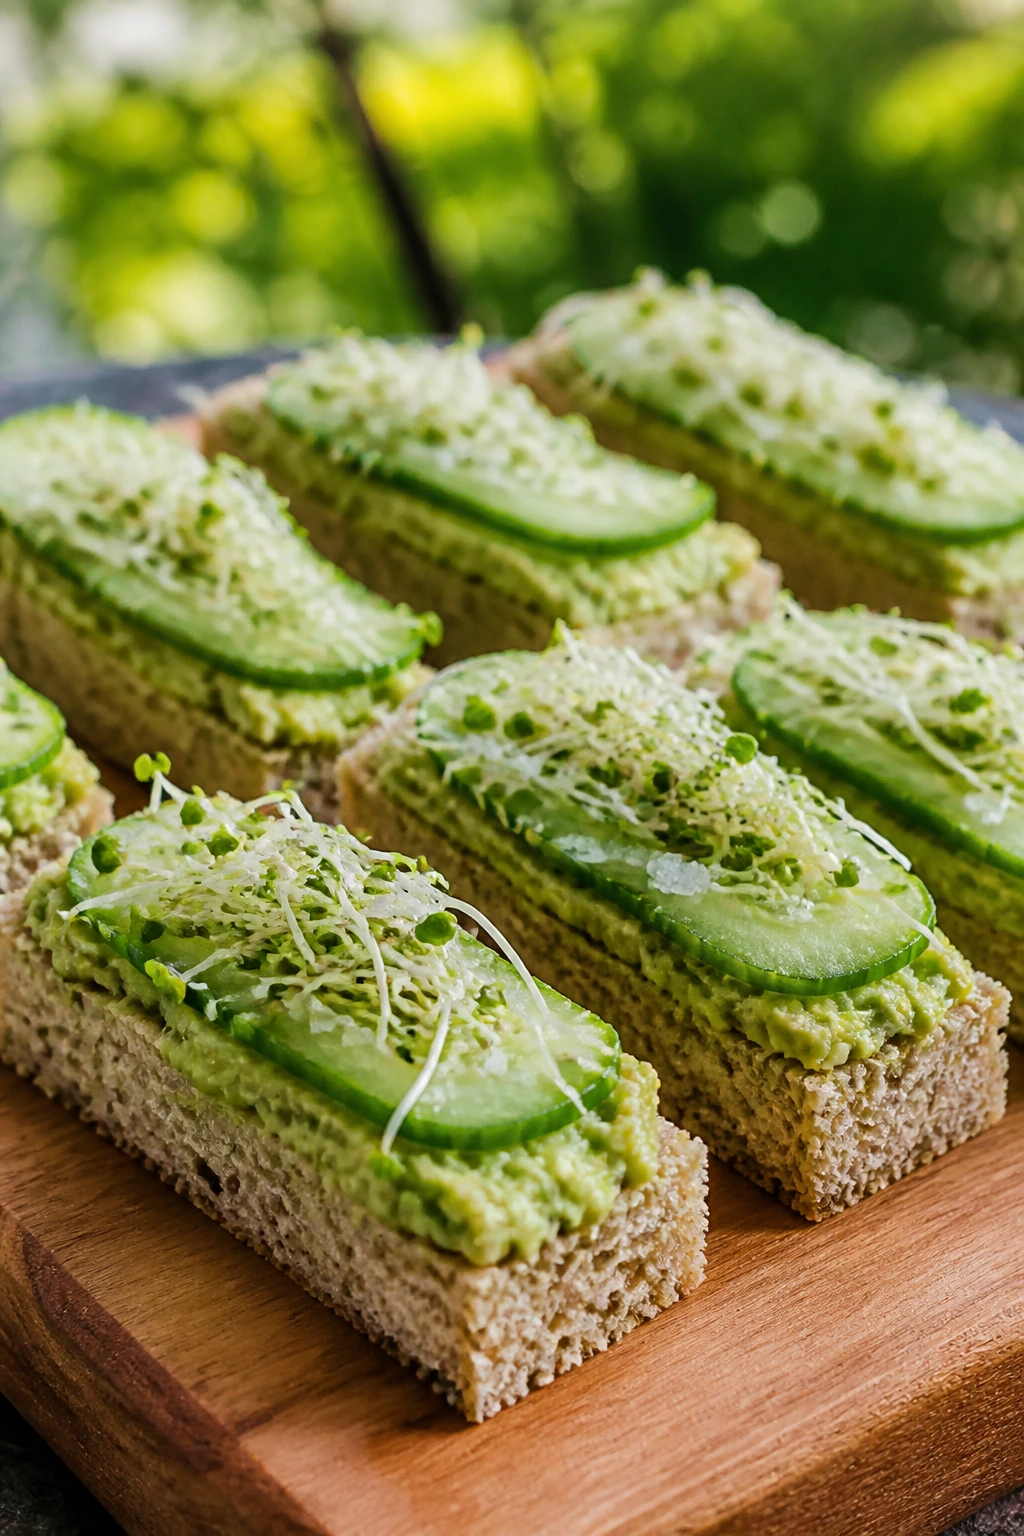
Avocado sandwiches can go wrong fast, which is exactly why they deserve a little care. The filling needs lemon, salt, and a thin barrier on the bread so the avocado doesn’t stain everything green and soggy. Get that right and the result tastes bright, creamy, and oddly refreshing.
Why It Works:
Avocado brings fat and softness, but it needs acid or it tastes flat. Lemon juice slows browning and sharpens the flavor, while sprouts and cucumber add crispness that keeps the sandwich from feeling like a paste. A thin layer of cream cheese or butter helps the bread survive the avocado’s moisture.
Key Ingredients:
- 8 slices sturdy whole wheat or seeded sandwich bread, crusts removed
- 2 ripe avocados
- 1 tablespoon lemon juice
- 1/4 teaspoon fine salt
- 1/8 teaspoon black pepper
- 2 tablespoons softened cream cheese or butter
- 1 small cucumber, sliced paper-thin
- 1/2 cup alfalfa sprouts or radish sprouts
- flaky salt, for finishing
Quick Steps:
- Mash the avocados with lemon juice, salt, and black pepper until mostly smooth but still a little textured.
- Spread the cream cheese or butter over all 8 bread slices.
- Divide the avocado mixture over 4 slices and smooth it into an even layer.
- Add cucumber slices and sprouts, then close with the remaining bread.
- Press gently, trim the crusts, and cut into fingers.
- Finish with a tiny pinch of flaky salt right before serving.
Equipment for This Recipe:
- Fork or small masher
- Mixing bowl
- Serrated knife
- Cutting board
How to Serve This Dish:
These are best with mint lemonade, iced green tea, or sparkling water with lime. They’re the first thing I’d eat from the tray, because avocado browns and softens faster than anything else here. Keep them cool and serve them the same day.
Pro Tips for This Recipe:
- Choose avocados that yield slightly under gentle pressure, not mushy ones.
- Add the sprouts only after the avocado is spread, so they stay crisp.
- If you need an extra barrier, brush the bread with a little olive oil before the cream cheese.
- Cut with a sharp knife in one clean motion to avoid smearing the avocado.
Variations on This Dish:
- Chili-Lime Avocado: Add red pepper flakes and lime zest.
- Pea and Avocado Mix: Mash in a handful of cooked peas for a brighter green filling.
- Smoked Salt Version: Finish with smoked salt instead of flaky salt for more depth.
Common Mistakes to Avoid with This Dish:
- Waiting too long after mashing: Avocado browns and tastes dull.
- Skipping the acid: Lemon keeps the flavor awake.
- Using bread that’s too soft: It collapses under the filling.
12. Goat Cheese and Roasted Red Pepper Fingers
Goat cheese makes a sandwich taste sharper and cleaner than cream cheese alone, and roasted red peppers bring sweetness without the mess of fresh tomato. This is one of those fillings that feels composed without being fussy. A little basil or parsley is enough to pull it together.
Why It Works:
Goat cheese has a tangy edge that stands up to sweet roasted peppers. Because the peppers are cooked and drained, they bring flavor without flooding the bread. A small amount of lemon zest and olive oil smooths the cheese just enough to spread cleanly.
Key Ingredients:
- 8 slices soft country bread or sandwich bread, crusts removed
- 4 ounces goat cheese, softened
- 2 tablespoons cream cheese
- 1/2 cup roasted red peppers, drained and patted dry
- 1 tablespoon olive oil
- 1 teaspoon lemon zest
- 1 tablespoon chopped basil or parsley
- 1 cup baby arugula
- 1/8 teaspoon black pepper
Quick Steps:
- Mix the goat cheese, cream cheese, olive oil, lemon zest, basil, and black pepper until spreadable.
- Spread the cheese mixture over all 8 bread slices.
- Layer arugula on 4 slices, then top with roasted red pepper strips.
- Close the sandwiches, press lightly, trim the crusts, and cut into fingers.
- Chill for 10 to 15 minutes so the filling firms before serving.
Equipment for This Recipe:
- Small mixing bowl
- Spoon or spatula
- Cutting board
- Serrated knife
How to Serve This Dish:
These pair well with sparkling water, iced white tea, or a cold grapefruit soda. They look especially good on a light-colored platter with a few extra pepper strips draped near the edges. The flavor is bright enough to sit beside richer sandwiches without getting lost.
Pro Tips for This Recipe:
- Dry the roasted peppers well; oil and brine are the enemy here.
- Soften the goat cheese before mixing or it tears the bread.
- Use arugula sparingly; too much makes the sandwich peppery and bulky.
- A little extra lemon zest is better than extra salt.
Variations on This Dish:
- Feta-Pepper Version: Swap goat cheese for feta mixed with cream cheese.
- Olive and Pepper Twist: Add finely chopped olives for a saltier profile.
- Grilled Pepper Version: Use charred fresh peppers if you have leftovers from grilling.
Common Mistakes to Avoid with This Dish:
- Using wet peppers: They make the bread slick.
- Leaving the cheese cold and firm: It tears the bread and clumps.
- Packing too much arugula: The sandwich becomes hard to bite through.
13. Prosciutto, Peach, and Ricotta Fingers
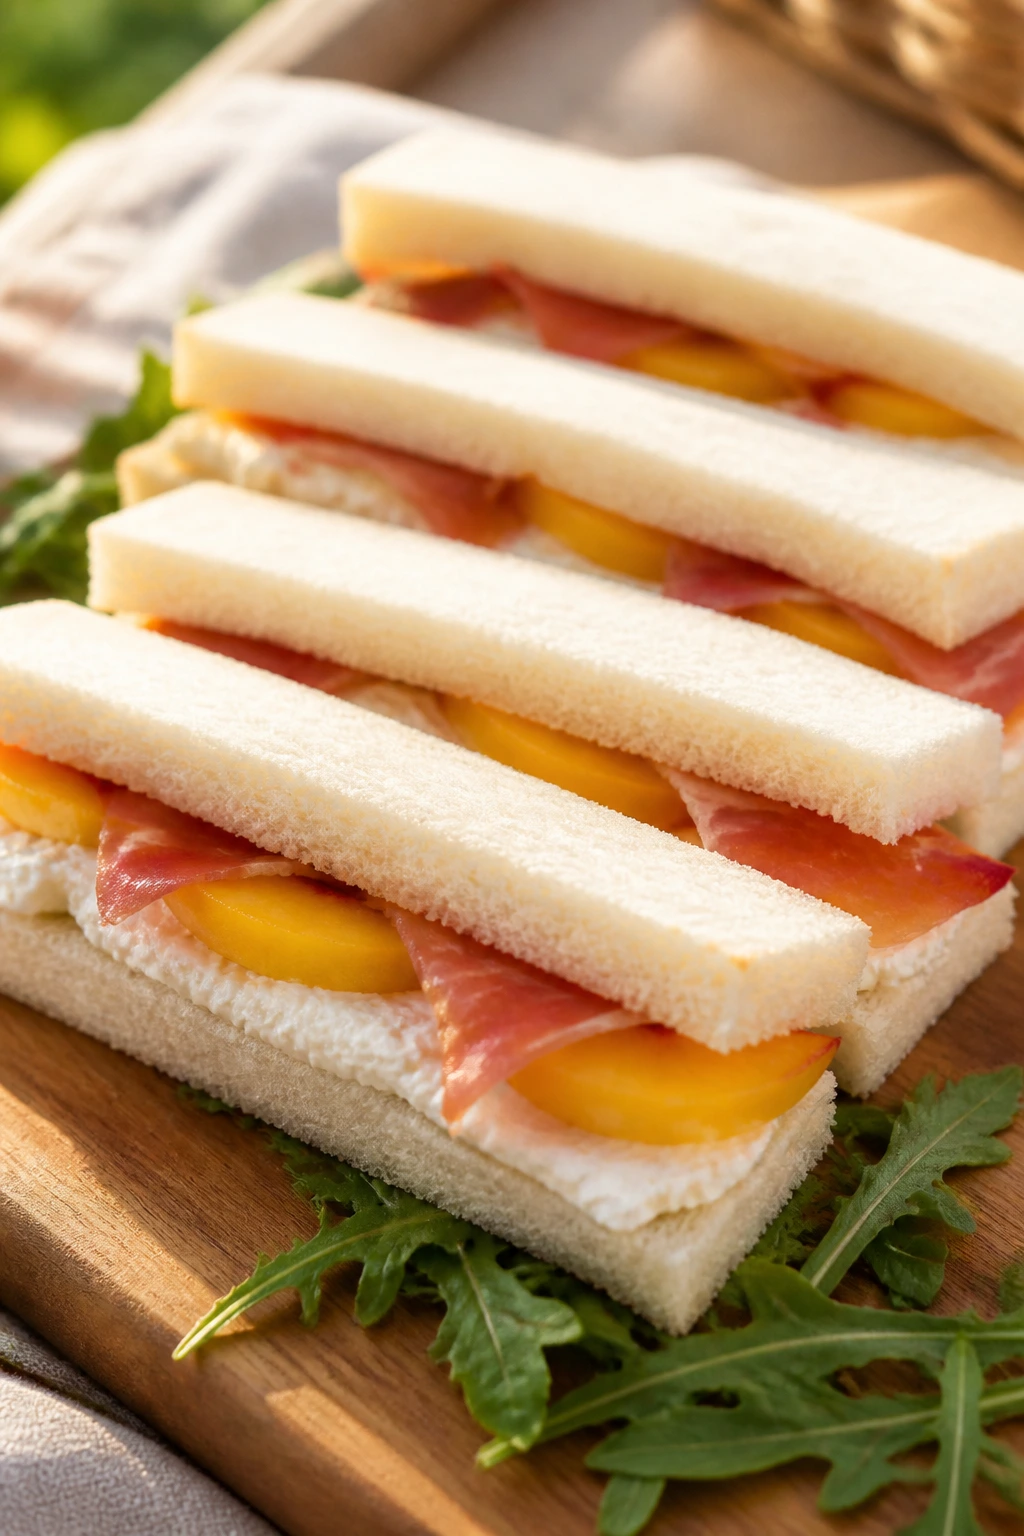
Prosciutto and peach sound like a brunch plate that wandered into a picnic basket, and I mean that as praise. The salt of the ham, the softness of the ricotta, and the perfume of ripe peach give you one of the most useful sweet-savory sandwiches in the whole set. It tastes better cold than you’d expect.
Why It Works:
The salty prosciutto keeps the fruit from tasting sugary, while ricotta gives the bread a cool, creamy base. Honey and lemon zest sharpen the ricotta so it doesn’t feel bland. A few leaves of arugula add a peppery edge that keeps each bite from turning into dessert.
Key Ingredients:
- 8 slices soft brioche or milk bread, crusts removed
- 4 ounces ricotta, drained if wet
- 1 tablespoon honey
- 1 teaspoon lemon zest
- 4 ounces prosciutto, thinly sliced
- 1 small ripe peach, sliced paper-thin
- 1 cup baby arugula
- 1 tablespoon olive oil
- 1/8 teaspoon flaky salt
- 1/8 teaspoon black pepper
Quick Steps:
- Stir the ricotta, honey, lemon zest, salt, and pepper together until smooth.
- Spread the ricotta mixture over all 8 bread slices.
- Layer prosciutto over 4 slices, folding it loosely for texture.
- Add peach slices and a few arugula leaves, then drizzle lightly with olive oil.
- Close the sandwiches, press gently, trim the crusts, and cut into fingers.
- Chill for 10 minutes, then serve cold.
Equipment for This Recipe:
- Small bowl
- Spoon
- Sharp knife
- Cutting board
How to Serve This Dish:
These are lovely with iced peach tea, sparkling water, or a chilled dry rosé if the picnic leans grown-up. Keep the cuts neat and the fillings thin; the sandwich should look delicate, not crowded. A little extra flaky salt on the peaches makes the flavor pop.
Pro Tips for This Recipe:
- Use peaches that are ripe but still firm enough to slice cleanly.
- Drain wet ricotta on paper towels if it seems loose.
- Keep the prosciutto in loose folds so the sandwich doesn’t compress into a slab.
- Assemble close to serving; fruit softens the bread faster than most fillings.
Variations on This Dish:
- Nectarine Version: Swap peaches for nectarines when they slice cleaner.
- Balsamic Peach Twist: Add a tiny drizzle of balsamic glaze if you want more tang.
- Mozzarella Upgrade: Replace half the ricotta with whipped mozzarella for a firmer filling.
Common Mistakes to Avoid with This Dish:
- Using overripe peaches: They smear and leak.
- Skipping the lemon zest: The ricotta tastes flat without it.
- Overstuffing the sandwich: The fruit needs room to sit in a single layer.
14. Curried Chickpea Salad Fingers
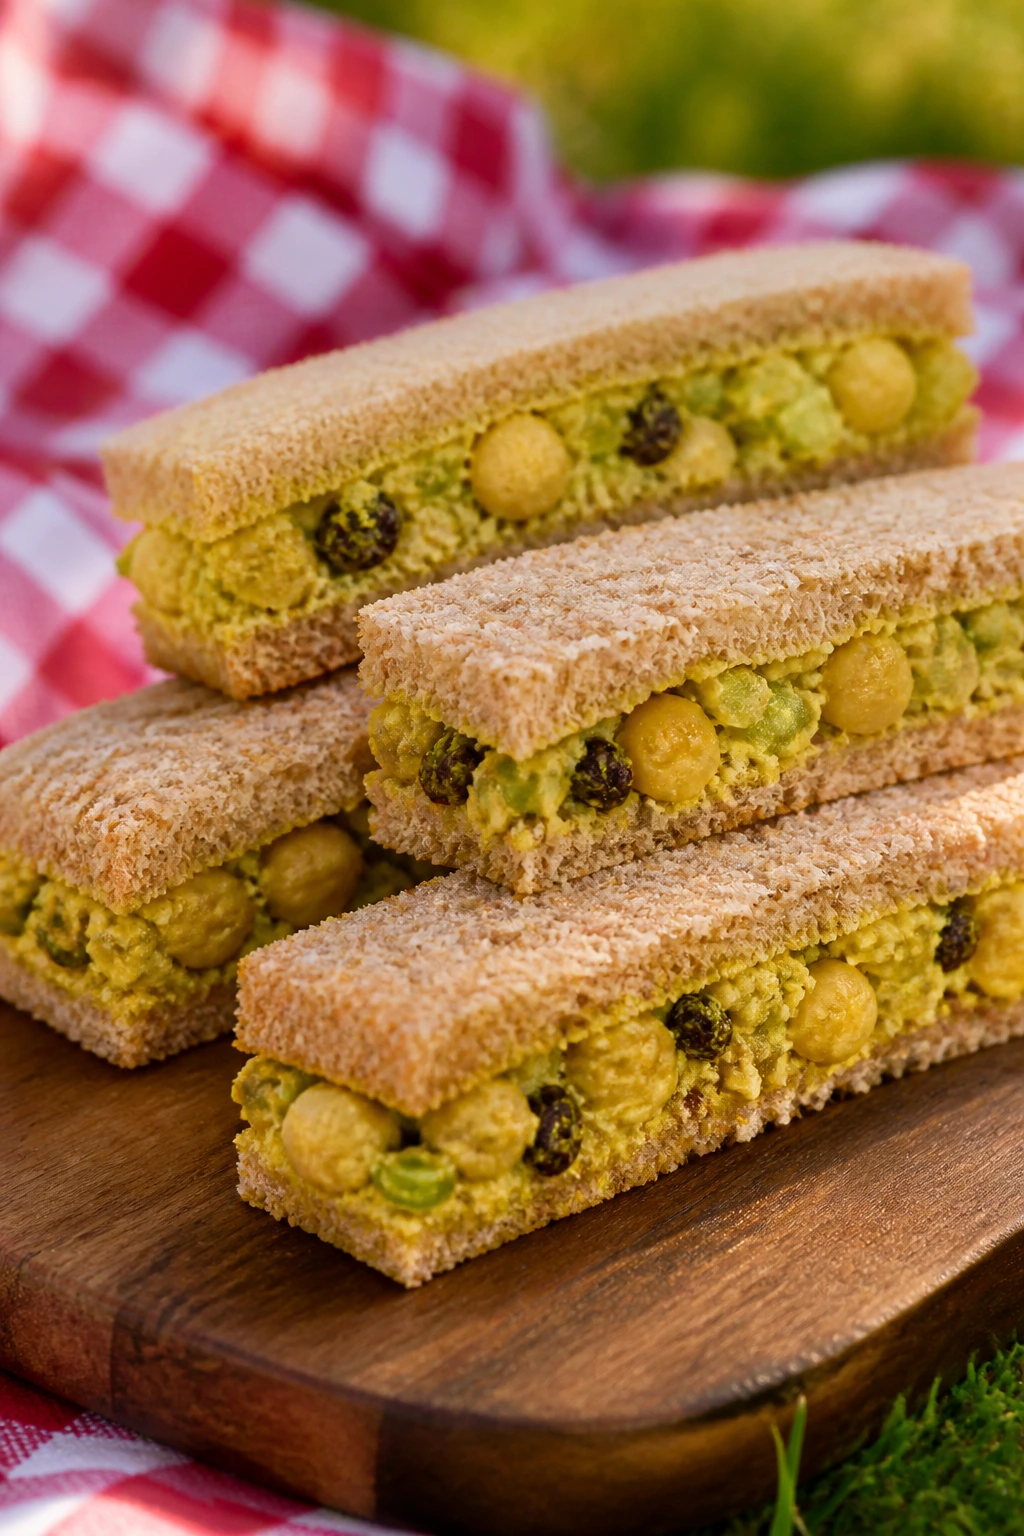
Curried chickpea salad is the vegetarian sandwich that never feels like a compromise. The chickpeas give body, the curry adds warmth without heat overload, and the little hits of celery and raisins keep the texture moving. It’s sturdy enough for a picnic and bright enough to eat cold.
Why It Works:
Partially mashing the chickpeas gives the filling a spreadable base while leaving enough whole pieces for bite. Curry powder brings a warm, toasted note, while lemon and yogurt keep the flavor fresh. Raisins or chopped dried apricots add a sweet burst that plays well with the spices.
Key Ingredients:
- 1 can chickpeas, 15 ounces, drained and rinsed
- 1/4 cup mayonnaise
- 1 tablespoon plain Greek yogurt or tahini
- 1 teaspoon curry powder
- 1 teaspoon lemon juice
- 1 celery stalk, finely diced
- 2 tablespoons golden raisins or chopped dried apricots
- 1 tablespoon chopped cilantro or parsley
- 1/4 teaspoon salt
- 1/8 teaspoon black pepper
- 8 slices whole wheat bread, crusts removed
- 1 tablespoon butter or cream cheese, for the bread
Quick Steps:
- Mash about half the chickpeas with a fork in a bowl, leaving the rest whole.
- Stir in the mayonnaise, yogurt or tahini, curry powder, lemon juice, salt, and pepper.
- Fold in the celery, raisins, and herbs until everything is coated.
- Spread the bread with butter or cream cheese, then divide the chickpea mixture between 4 slices.
- Top, press, trim, and cut into fingers.
- Chill for 20 minutes so the filling firms before the ride to the picnic.
Equipment for This Recipe:
- Mixing bowl
- Fork
- Spatula
- Serrated knife
How to Serve This Dish:
This sandwich likes mango lassi, iced chai, or sparkling water with lime. It’s one of the few picnic sandwiches that can sit beside fruit without feeling mismatched. A few cilantro leaves on the tray make the color feel intentional.
Pro Tips for This Recipe:
- Rinse the chickpeas well and drain them hard.
- Don’t mash them into hummus; the texture is the whole point.
- Add curry powder a little at a time, because some blends are much stronger than others.
- If the filling seems dry, add a teaspoon of mayo, not a splash.
Variations on This Dish:
- Mango Curry Chickpea: Swap raisins for finely diced dried mango.
- Tahini Chickpea Version: Use tahini instead of yogurt for a deeper, nuttier flavor.
- Extra Crunch Version: Add diced cucumber right before assembly.
Common Mistakes to Avoid with This Dish:
- Overmashing the chickpeas: You lose the bite and end up with paste.
- Using too much curry powder: The filling turns bitter.
- Skipping the chill: The salad cuts cleaner after 15 to 20 minutes in the fridge.
15. Smoked Turkey, Swiss, and Apple Fingers
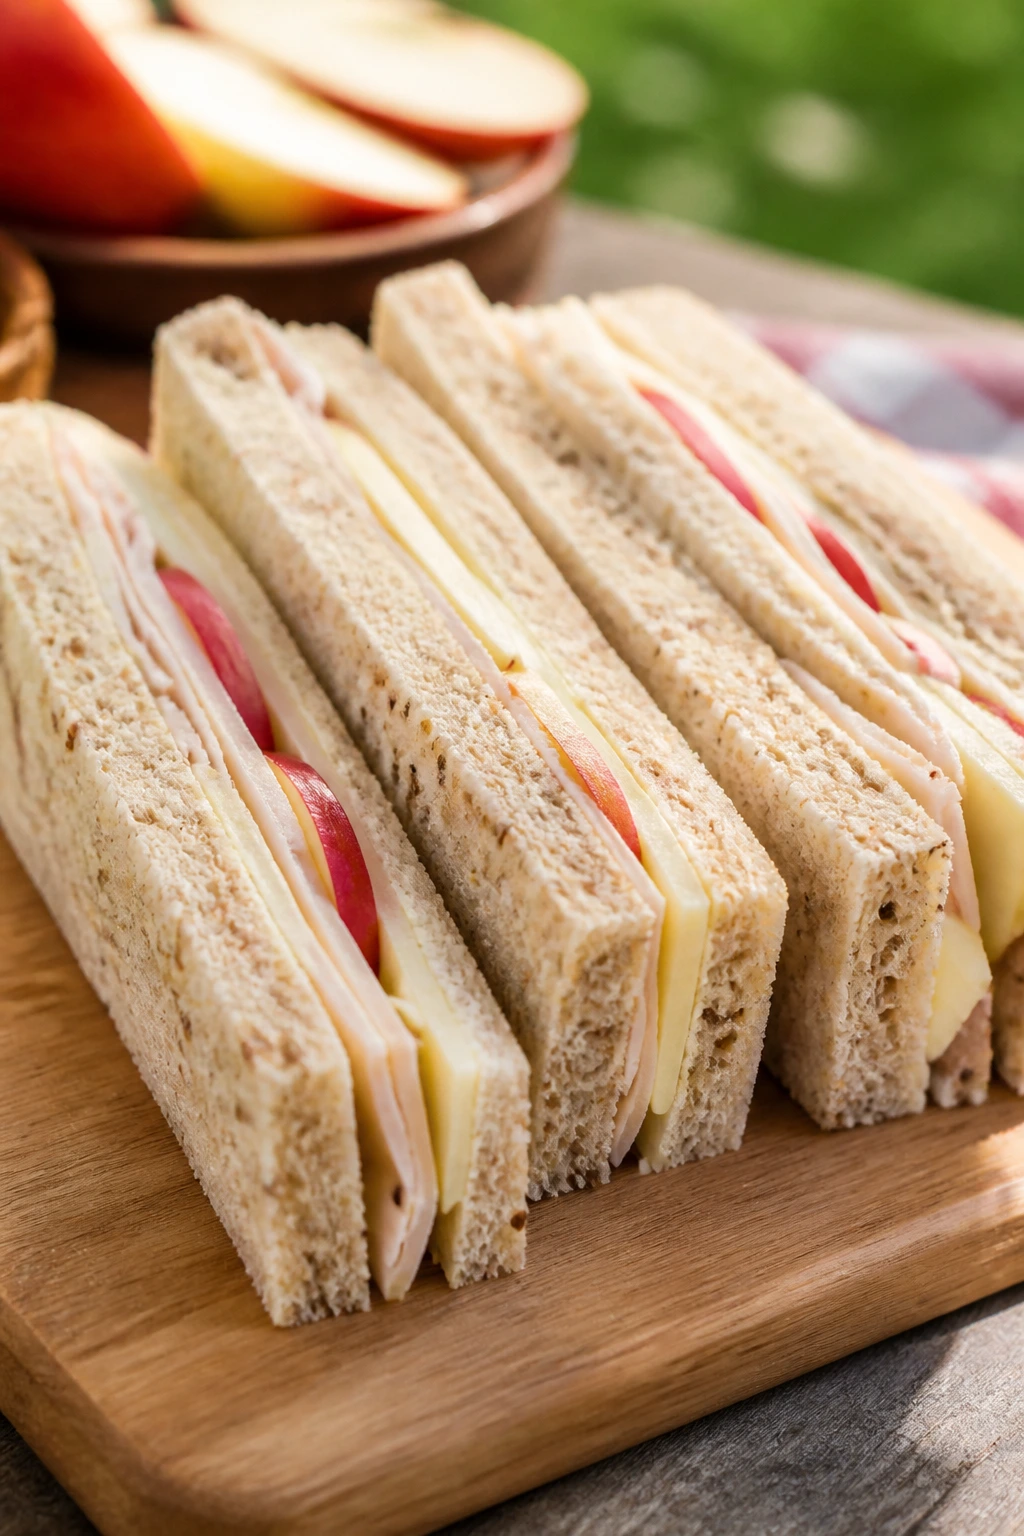
This is the sandwich I make when I want something crisp without making the tray feel heavy. Smoked turkey brings salt and depth, Swiss melts the flavors together even when it’s cold, and thin apple slices keep every bite bright. It tastes like a deli sandwich that learned better manners.
Why It Works:
The apple gives you a juicy crunch that plays against the soft turkey and mild cheese. A light mustard spread keeps the flavors from leaning too sweet, and lemon juice on the apple helps keep it from browning before the picnic even starts. Butter lettuce, if you use it, adds a soft green layer that disappears into the sandwich without getting in the way.
Key Ingredients:
- 8 slices rye or multigrain bread, crusts removed
- 6 ounces smoked turkey or deli turkey
- 4 ounces Swiss cheese, thinly sliced
- 1/2 small crisp apple, sliced very thin
- 2 tablespoons mayonnaise
- 1 teaspoon whole-grain mustard
- 1 teaspoon lemon juice
- 1 cup butter lettuce or baby spinach
- 1 tablespoon unsalted butter, softened
- 1/8 teaspoon black pepper
Quick Steps:
- Stir the mayonnaise, mustard, lemon juice, and black pepper together.
- Brush the apple slices lightly with a little extra lemon juice if they sit out for long.
- Spread the butter on the bread, then add the mayo-mustard mixture over the butter.
- Layer turkey, Swiss, apple, and lettuce on 4 slices.
- Top, press, trim the crusts, and cut into fingers.
- Chill for 10 minutes before packing.
Equipment for This Recipe:
- Small bowl
- Paring knife
- Serrated knife
- Cutting board
How to Serve This Dish:
These sit well beside sparkling apple cider, iced tea, or a cold ginger beer. Cut the apple very thin and the sandwich stays neat instead of bulky. A dusting of black pepper over the cut faces helps the flavor read more sharply.
Pro Tips for This Recipe:
- Choose a crisp apple like Honeycrisp or Pink Lady.
- Slice the apple at the last minute if you can.
- Swiss should be thin, not thick slabs that fight the turkey.
- Rye gives the sandwich a little more backbone than plain white bread.
Variations on This Dish:
- Cheddar Apple Turkey: Replace Swiss with sharp cheddar for more bite.
- Honey Mustard Version: Add a small swipe of honey mustard in place of plain Dijon.
- Smoked Gouda Twist: Use smoked gouda if you want a deeper, woodier flavor.
Common Mistakes to Avoid with This Dish:
- Cutting the apple too thick: Thick slices make the sandwich awkward.
- Using watery lettuce: Dry the leaves well or they slip.
- Assembling too early: Apples brown, and the sandwich loses its freshness.
16. Salmon Salad with Dill and Cucumber
Salmon salad is one of those fillings that gets better when it’s chilled and lightly dressed. The dill and cucumber keep it bright, the mayo gives it body, and the capers add enough salt to make every bite feel finished. It’s a useful bridge between deli salad and something more delicate.
Why It Works:
Cold salmon needs acidity and freshness so it doesn’t taste dense. Lemon juice gives the salad a clean edge, cucumber adds crunch, and dill gives the whole thing a green lift. Using the filling in a finger sandwich rather than a bigger roll keeps the texture from feeling too rich.
Key Ingredients:
- 2 cans salmon, about 10 ounces total, drained well
- 1/4 cup mayonnaise
- 1 tablespoon plain Greek yogurt
- 1 tablespoon lemon juice
- 1 tablespoon fresh dill, chopped
- 1 celery stalk, finely diced
- 1 tablespoon capers, chopped
- 8 slices pumpernickel or rye bread, crusts removed
- 1/2 cucumber, sliced paper-thin
- 1/8 teaspoon black pepper
Quick Steps:
- Flake the drained salmon into a bowl, picking out any large bones if needed.
- Stir in the mayonnaise, yogurt, lemon juice, dill, celery, capers, and pepper.
- Chill the salmon salad for 15 to 20 minutes.
- Spread the mixture onto 4 slices of bread, then layer thin cucumber slices over the filling.
- Close the sandwiches, press lightly, trim the crusts, and cut into fingers.
- Keep cold until serving.
Equipment for This Recipe:
- Mixing bowl
- Fork
- Serrated knife
- Paper towels for the cucumber
How to Serve This Dish:
Serve with cucumber seltzer, iced tea, or a light pilsner. These look best on dark bread with pale cucumber ribbons on top, because the contrast makes the platter easier to read. Add a dill sprig here and there, but don’t bury the filling under garnish.
Pro Tips for This Recipe:
- Drain the salmon until it looks dry at the edges.
- Blot the cucumber so it doesn’t water down the filling.
- Use Greek yogurt only as a small part of the dressing; too much makes the salad loose.
- Let the filling chill before assembly so the flavors settle.
Variations on This Dish:
- Lemon-Dill Salmon: Add extra lemon zest and cut back on capers.
- Smoked Salmon Salad: Use chopped smoked salmon instead of canned salmon for a saltier version.
- Herb Garden Version: Swap dill for a mix of dill, parsley, and chives.
Common Mistakes to Avoid with This Dish:
- Leaving the salmon wet: It makes the salad watery.
- Overloading with mayo: The filling should hold together, not slump.
- Skipping the cucumber blot: The bread softens quickly if the slices are damp.
17. Brie, Fig, and Arugula Fingers
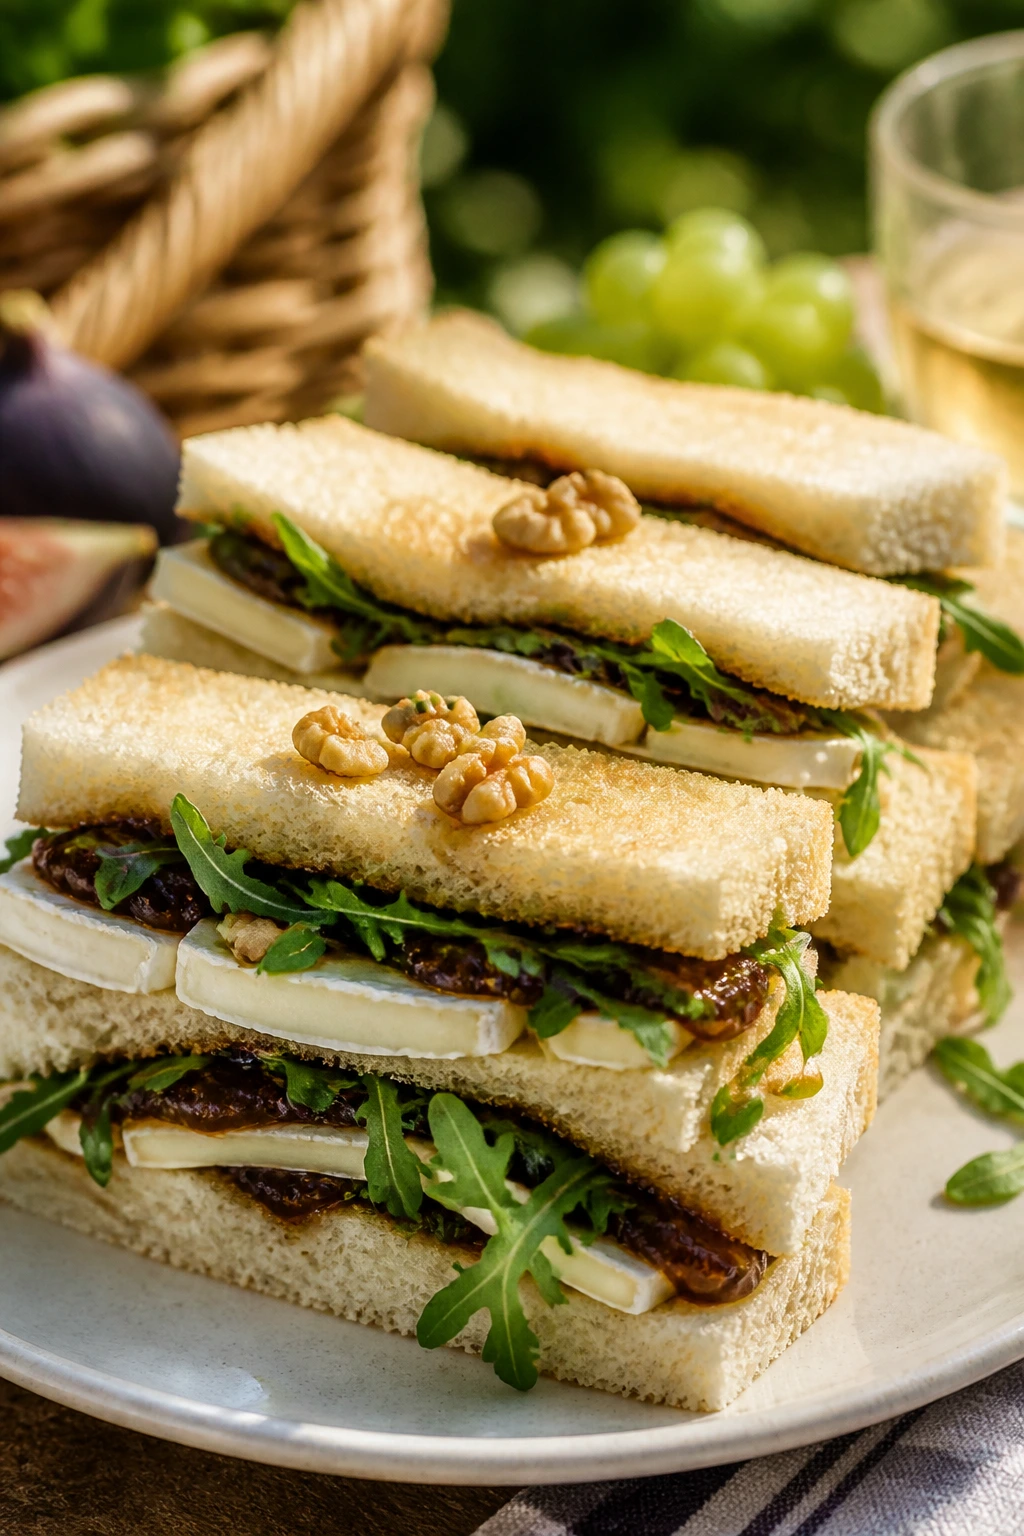
Brie and fig bring a softer, more polished feel to the tray, and I like that contrast when everything else is savory. The cheese is buttery, the fig jam is sweet but not syrupy, and the arugula keeps the sandwich from drifting into dessert territory. It’s the sort of finger sandwich people keep reaching for after they’ve said they’re “just sampling.”
Why It Works:
Brie needs a sweet partner because its flavor is mild and creamy, not loud. Fig jam is thick enough to stay put, which makes it better for picnic bread than fresh fruit compote. Arugula gives the filling a peppery edge, and a few chopped walnuts add just enough crunch to keep the bite from being soft all the way through.
Key Ingredients:
- 8 slices soft brioche or country bread, crusts removed
- 4 ounces brie, sliced thin
- 2 tablespoons fig jam
- 1 cup baby arugula
- 1 small pear, sliced paper-thin
- 1 tablespoon toasted walnuts, chopped
- 1 teaspoon honey
- 1/8 teaspoon black pepper
Quick Steps:
- Spread fig jam over all 8 bread slices in a thin layer.
- Layer brie on 4 slices, then add arugula and pear slices.
- Sprinkle with walnuts, drizzle with honey, and finish with black pepper.
- Close the sandwiches, press gently, trim the crusts, and cut into fingers.
- Chill for 10 minutes so the brie firms slightly and the sandwich cuts more cleanly.
Equipment for This Recipe:
- Sharp knife
- Cutting board
- Spoon for the jam
- Small plate for the nuts
How to Serve This Dish:
These pair well with sparkling grape juice, iced tea, or a chilled white wine spritzer. They belong near the end of the tray, after the sharper savory sandwiches have been eaten. A thin pear slice on the plate looks better than a heavy garnish pile.
Pro Tips for This Recipe:
- Brie cuts better if it’s cold but not hard from the fridge.
- Use a pear that is ripe but still firm.
- Fig jam should be thick; loose jam spreads too far.
- Toast the walnuts lightly so they taste clean instead of stale.
Variations on This Dish:
- Apricot Brie: Swap fig jam for apricot preserves.
- Prosciutto Brie: Add a thin slice of prosciutto for more salt.
- Goat Cheese Fig: Use goat cheese if you want a sharper, tangier filling.
Common Mistakes to Avoid with This Dish:
- Using too much jam: It overwhelms the cheese and slips out.
- Choosing an overripe pear: It turns mushy and browns quickly.
- Cutting the brie too thick: Thick slices make the sandwich hard to close.
18. Strawberry Cream Cheese and Mint Fingers
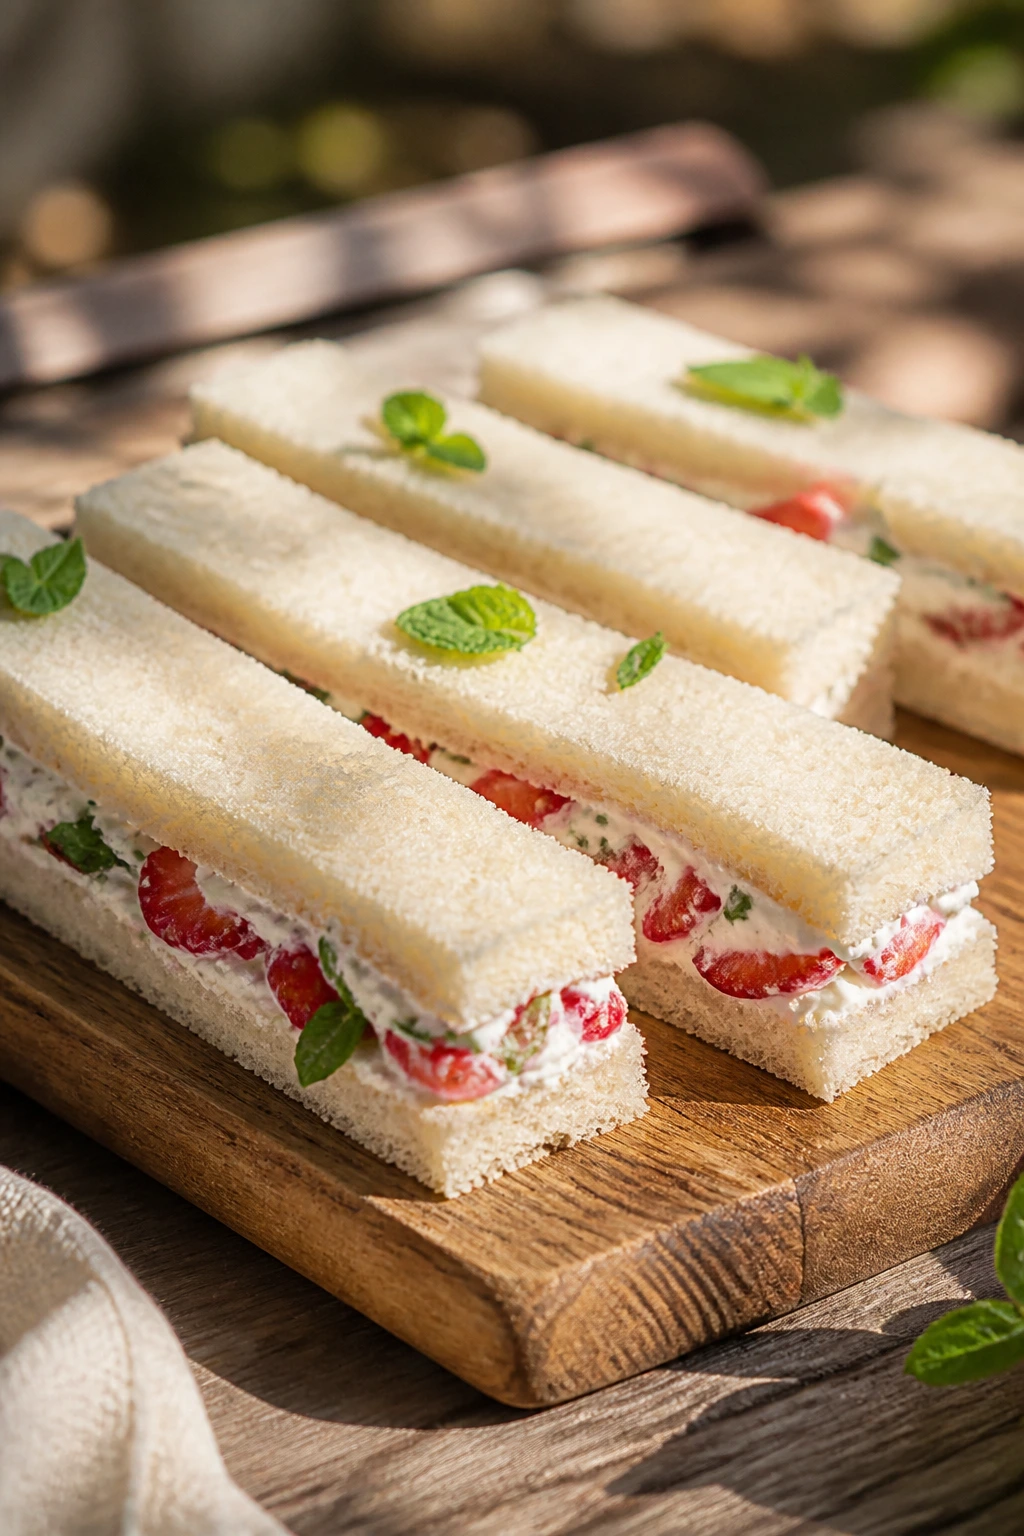
A sweet sandwich at a picnic sounds odd until you bite into one and realize how well it sits beside cold drinks. Cream cheese keeps the bread from going limp, strawberries bring a bright burst, and mint makes the whole thing taste cooler than it should. This is the tray’s lighter, quieter ending.
Why It Works:
Strawberries are juicy, so the filling needs a thick base and a fast assembly. Cream cheese and mascarpone make a spread that stays put, while a little vanilla and lemon zest keep it from tasting like plain frosting. Mint adds freshness that reads clean on the tongue, especially when the sandwich is well chilled.
Key Ingredients:
- 8 slices soft white bread or milk bread, crusts removed
- 4 ounces cream cheese, softened
- 2 tablespoons mascarpone or softened butter
- 1 tablespoon honey or powdered sugar
- 1/2 teaspoon vanilla extract
- 1 teaspoon lemon zest
- 1 cup strawberries, hulled and sliced thin
- 1 tablespoon fresh mint, finely chopped
- 1 tablespoon sliced almonds, optional
- 1/8 teaspoon salt
Quick Steps:
- Mix the cream cheese, mascarpone, honey, vanilla, lemon zest, and salt until smooth.
- Spread the filling over all 8 bread slices.
- Layer the strawberry slices over 4 slices, then sprinkle with mint and almonds if using.
- Close the sandwiches, press gently, trim the crusts, and cut into fingers.
- Chill for 10 minutes, then serve cold.
Equipment for This Recipe:
- Small bowl
- Spoon or spatula
- Sharp serrated knife
- Cutting board
How to Serve This Dish:
These go especially well with iced tea, lemonade, or sparkling water with a squeeze of lemon. They work as the last sandwich on the tray because the flavor is softer and a little sweet. A few mint leaves and sliced berries on the platter make the whole spread feel more complete.
Pro Tips for This Recipe:
- Slice the strawberries thin so they sit flat instead of sliding.
- Use bread with a tight crumb; open holes let the juice escape.
- Add the mint right before serving so it stays bright.
- If the berries are very juicy, blot them briefly before layering.
Variations on This Dish:
- Blueberry Cream Cheese: Swap strawberries for thin-sliced blueberries mixed with a spoon of jam.
- Whipped Ricotta Version: Replace half the cream cheese with whipped ricotta for a lighter filling.
- Basil-Strawberry Twist: Use basil instead of mint for a more savory edge.
Common Mistakes to Avoid with This Dish:
- Using thick strawberry slices: They slide and tear the bread.
- Packing them warm: The filling softens and the fruit weeps.
- Over-sweetening the spread: A little honey is enough; this should not taste like cake.
Why the Picnic Sandwich Formula Holds Up Better Than Big Ones
A picnic sandwich only works if the bread and filling behave like they know they are being carried around. That means thin layers, dry enough ingredients, and enough fat to protect the crumb without making everything greasy. The small format helps because there’s less pressure on the bread and less weight trying to squeeze out the sides.
I’m a fan of chilled fillings here, but not every sandwich should be icy cold. Chicken salad, tuna salad, egg salad, and salmon salad taste better after a short rest in the fridge because the seasoning settles into the mayo. Tomato and cucumber sandwiches are different. They need moisture control more than long chilling. If you remember nothing else, remember that each filling has its own bad habit.
Bread choice matters more than most people admit. Soft white bread gives you that classic tea-sandwich feel, but rye, pumpernickel, brioche, and whole wheat each solve a different problem. Rye handles smoke and salt. Brioche softens sharp edges. Whole wheat gives body to salad fillings. A good tray isn’t random; it’s matched.
Essential Equipment for These Recipes
-
Serrated bread knife: Clean cuts matter here, and a serrated blade keeps the bread from flattening under the pressure.
-
Cutting board with a stable surface: A wobbly board turns neat sandwiches into ragged ones fast.
-
Small mixing bowls: Most fillings are best mixed in small batches so they stay cool and easy to control.
-
Rubber spatula or butter knife: Useful for spreading fillings all the way to the edges without tearing the bread.
-
Paper towels: Essential for blotting cucumber, tomato, peaches, berries, and any other ingredient that brings extra moisture.
-
Paring knife: Handy for trimming fruit, peeling cucumber ribbons, and making small, tidy cuts.
-
Plastic wrap or reusable wrap: Keeps the sandwiches from drying out when you chill them.
-
Shallow storage containers: Better than deep tubs, because the sandwiches don’t get crushed under their own stack.
-
Ice pack or insulated cooler: Picnic sandwiches are meant to stay cool. That part is not optional.
Smart Shopping and Ingredient Tips
Soft bread with a tight crumb is the quiet hero of this whole category. Look for loaves that bend slightly instead of cracking when you press the crust. Sandwich bread that’s too airy leaves holes, and holes become escape routes for creamy fillings. If you want the neatest cuts, buy the bread the day before and keep it sealed so it slices cleanly instead of crumbling.
For creamy fillings, block cream cheese is usually better than whipped tubs because it spreads with more body. The same logic applies to cheddar: buy the block and grate it yourself when you can. Pre-shredded cheese has a coating that keeps it from merging into spreads as smoothly. It isn’t a disaster, but it does give you a grainier result.
Produce should be judged by moisture and firmness, not just color. Cucumbers should feel dense. Tomatoes should be ripe but not collapsing. Peaches and strawberries need to be fragrant and sliceable, not bruised or overly soft. If something is juicy, that’s fine — it just needs blotting, salting, or a thicker barrier on the bread.
Deli meat and fish are better when they are sliced thin enough to fold. Thick slices create a bulky sandwich that fights the bread and won’t cut neatly. Ask for thin slices at the counter if you’re buying from a deli, or choose packaged versions that are already thin. With smoked salmon, the difference between neat and messy is often just a few millimeters.
How to Serve These Recipes
Presentation:
Lay the fingers in alternating directions instead of in a straight line; the tray looks fuller and less stiff that way. A chilled platter helps the sandwiches hold their shape, and a few herb sprigs or fruit slices on the edges are enough to make the whole spread feel deliberate. Keep the cut sides clean and visible. That’s the part people see first.
Accompaniments:
Think in cool, crisp sides: kettle chips, cherry tomatoes, cucumber spears, snap peas, grapes, berries, or a simple green salad with lemony dressing. Bread-heavy trays need something sharp or crunchy nearby, otherwise the whole spread gets soft by the third bite. Pick one or two sides, not five.
Portions:
Two to three finger sandwiches per person is a fair starting point when there are other picnic foods on the blanket. If the sandwiches are the main event, plan on four to five fingers each. For a mixed tray, a dozen fingers can disappear quickly because people like to sample more than one filling.
Beverage Pairing:
Iced black tea, sparkling lemonade, cucumber water, ginger beer, and dry cider all fit this collection without much effort. The richer sandwiches like ham, roast beef, and pimento cheese can handle sharper drinks, while the fruitier ones like peach-prosciutto or strawberry cream cheese do better with lighter, fizzier options. Cold drinks matter here because the sandwiches are built to taste fresher when the whole tray stays chilled.
Additional Tips and Flavor Boosters
Flavor Enhancement:
A tiny swipe of softened butter or cream cheese on the bread is a real moat against soggy fillings. Use it even on sandwiches that already have a creamy spread if the filling is especially wet — tomato, cucumber, and ripe fruit all benefit from that extra barrier.
Customization:
If you like heat, add a thread of hot sauce, a pinch of cayenne, or sliced pickled jalapeños to the sharper sandwiches. If you want them softer and more kid-friendly, reduce the mustard and pickles, then lean into mild cheese, turkey, chicken salad, or strawberry cream cheese. The shape stays the same; the mood changes.
Serving Suggestions:
Finish savory sandwiches with flaky salt, chopped herbs, or a dusting of paprika right before serving. Sweet ones like strawberry, brie and fig, or peach and prosciutto look better with a few extra mint leaves or sliced fruit beside them. A platter with one bright garnish repeated a few times looks tidier than a tray covered in decorations.
Make-It-Yours:
For a dairy-free version, use a firm plant-based spread or hummus in place of cream cheese and butter, then choose fillings that already bring enough moisture, such as chicken salad or chickpea salad. For a gluten-free tray, use sturdy gluten-free sandwich bread and chill it well before cutting; some loaves are fragile when warm, but firm up after 20 minutes in the fridge. For a lower-sodium version, start with unsalted spreads and lean on herbs, lemon, cucumber, and ripe fruit instead of salty pickles or capers.
Make-Ahead, Storage, and Reheating Guidance
Most of these finger sandwiches taste best the day they’re assembled, but the fillings can often be made ahead by a full day. Chicken salad, tuna salad, egg salad, salmon salad, pimento cheese, and curried chickpea salad keep well in the refrigerator for up to 3 days when stored in airtight containers. Smoked salmon and deli-meat fillings are best kept to 1 to 2 days, simply because the bread and texture are better earlier.
Assembled sandwiches should be eaten within 6 to 8 hours for the cleanest texture, though creamier ones can hold a little longer if they’re wrapped tightly and chilled. Tomato, cucumber, avocado, peach, and strawberry versions are the shortest-lived; those are best within 2 to 4 hours of assembly. If you must hold them longer, wrap them snugly in plastic wrap, then place them in a shallow container with an ice pack nearby.
Reheating is not the move for this kind of sandwich. Warmth makes the bread lose its shape and turns the fillings loose. If a sandwich has been chilled hard, let it sit at room temperature for 10 to 15 minutes before serving so the bread softens slightly and the flavors open up. Cold is the goal, but refrigerator-cold can flatten the taste.
For transport, keep the sandwiches in a single layer when possible, with parchment or wax paper between layers if you need to stack them. A cooler with a firm ice pack works better than a loose tote bag because the sandwiches stay level. If you’re packing very moist fillings, such as tomato or avocado, assemble them as close to departure as possible. That one decision saves more sandwiches than any fancy trick.
Variations and Adaptations to Try
Gluten-Free Picnic Tray:
Use a sturdy gluten-free sandwich loaf with a tight crumb, then chill it before slicing. The bread matters more than the filling here, because fragile gluten-free loaves can crumble if you cut them warm. Stick to the drier, thicker fillings first: pimento cheese, egg salad, chicken salad, and tuna salad.
Dairy-Free Cooler Spread:
Replace cream cheese, butter, and mascarpone with dairy-free spreads or hummus, and choose fillings that already have enough richness. Curried chickpea salad, turkey with mustard, roast beef with horseradish, and avocado with cucumber all work well. The trick is not to pile on watery ingredients at the same time.
Low-Salt Picnic Version:
Pull back on capers, pickles, smoked fish, and cured meats, then make the herbs and lemon do more work. Cucumber-dill, avocado-sprout, chickpea salad, and strawberry cream cheese all hold up well when salt is lighter. A squeeze of lemon and a little black pepper help carry flavor without leaning on brine.
Kid-Friendly Sandwich Tray:
Skip the horseradish, capers, and aggressive pickles, then go after softer flavors like turkey cranberry, ham cheddar, strawberry cream cheese, or chicken salad with grapes. Cut the fingers a little shorter so they feel easy to pick up. Kids often prefer clean edges and mild fillings, which is not a bad standard to cook for anyway.
Vegetarian Picnic Mix:
Build the tray around cucumber-dill, tomato basil mozzarella, pimento cheese, avocado-sprout, goat cheese pepper, curried chickpea, brie fig, and strawberry cream cheese. That gives you enough contrast in texture and flavor that the tray doesn’t feel limited. You can always add one sharper sandwich, like roast beef, if the crowd wants more salt and heft.
Brighter, Herbal Summer Version:
Add mint to cucumber and strawberry sandwiches, parsley to chicken and tuna salads, and basil to goat cheese or caprese fillings. Herbs change the whole tone of the tray with almost no effort. Keep the herbs chopped fine so they blend rather than clump.
Common Mistakes to Avoid with Picnic Finger Sandwiches
The biggest mistake is using wet fillings without a barrier. Tomato, cucumber, peach, avocado, and even cranberry sauce can all soften bread fast if they go straight on bare slices. A thin layer of butter, cream cheese, pesto, or mayo acts like insurance. Skipping that step is how you get limp corners and filling sliding out the sides.
Overstuffing is another common problem. A finger sandwich is not supposed to bulge. If the bread bends before you even cut it, the filling is too thick. Thin, even layers slice better and taste cleaner, which matters when people are eating with one hand and talking with the other.
Cutting too soon causes more damage than people expect. Freshly assembled sandwiches need a short rest so the filling settles and the bread firms just enough to cut neatly. Ten to twenty minutes in the fridge usually helps. If you cut them the instant you build them, the edges smear and the tray looks untidy.
Using bread that is too crusty or too airy can ruin the texture. Hard crusts fight the delicate filling, and bread with big holes leaves gaps that let the spread escape. Soft sandwich bread, soft rye, brioche, or milk bread usually behave better for this style.
A final trap: packing everything warm. Warm fillings, warm bread, and a cool picnic cooler do not balance each other out. They create condensation, and condensation is the enemy of clean sandwich edges. Chill the fillings, chill the tray if you can, and keep the cooler closed until it’s time to eat.
Questions People Actually Ask About Picnic Finger Sandwiches
Can I make finger sandwiches the night before?
Some fillings, yes. Chicken salad, tuna salad, egg salad, pimento cheese, and chickpea salad are fine to mix ahead, but I would assemble the sandwiches the same day if possible. If you do build them the night before, choose the driest fillings and wrap them tightly so the bread doesn’t dry out.
What bread works best for picnic finger sandwiches?
Soft sandwich bread with a tight crumb is the easiest to cut and eat. Rye, pumpernickel, brioche, and milk bread all work if they’re soft and not crusty. Very airy breads and hard artisan loaves tend to fight the filling.
How do I keep cucumber sandwiches from getting soggy?
Salt the cucumber lightly, let it sit for 5 to 10 minutes, then blot it dry with paper towels. A layer of cream cheese or butter on the bread also helps protect the crumb. If you want the cleanest result, assemble them within a few hours of serving.
Can I pack these in a cooler for a long drive?
Yes, and you should. Place the sandwiches in a shallow container, keep them in a single layer if possible, and tuck an ice pack beside them. The cooler should stay closed as much as possible so the tray doesn’t warm up and sweat inside the container.
Which fillings hold up longest at a picnic?
Pimento cheese, ham and cheddar, roast beef with horseradish, and curried chickpea salad are some of the sturdier choices. Tomato, avocado, peach, and strawberry versions are better eaten earlier because they release more moisture and soften faster.
Can I use regular sliced sandwich bread instead of trimming crusts off?
You can, but the texture changes. Crustless sandwiches feel softer and more delicate, which is part of the picnic-finger-sandwich style. If you leave the crusts on, cut the sandwiches into smaller pieces so they’re easier to handle.
How do I keep sliced apples or avocados from browning?
Use lemon juice right away. For apples, a quick toss in lemon water or a brush of lemon juice is enough. Avocado needs a little acid mixed directly into the mash, then quick assembly and cold storage.
What if the sandwiches get a little soft before serving?
Let them sit in the cooler for another few minutes and slice them again if needed with a sharp knife. For future batches, use less filling, blot wet ingredients more aggressively, and add a stronger moisture barrier to the bread. Softness is usually a bread problem, not a flavor problem.
A Cooler Full of Neat Bites
The nicest thing about picnic finger sandwiches is that they take small details seriously. A few extra minutes to blot cucumber, drain tuna, or salt tomatoes makes the whole tray behave better. That’s the real reward here: the sandwiches look tidy, taste bright, and don’t force anyone to fight their lunch in the grass.
If you pack the fillings cold, use soft bread with a little structure, and cut the pieces after a short chill, the tray will hold together long enough for the drinks to disappear and the second round of sandwiches to become a very normal idea. That’s the kind of picnic food I trust. The next time the cooler comes out, these little sandwiches will be the first thing I’d make room for.