
Cheap family dinners kids will actually eat usually have one thing in common: they smell familiar before they ever hit the table. That matters more than cleverness. A pan of taco rice, a bubbling casserole, buttered noodles with something tucked in, a tray of potatoes and chicken — those meals don’t ask for a speech. They just get eaten.
The trick isn’t finding the fanciest low-cost recipe. It’s building dinners that feel safe to picky eaters, stretch a modest grocery haul, and still give the grown-ups something worth sitting down for. A little browning here, a proper sauce there, a crisp edge on bread or cheese — that’s where the difference lives. Cheap does not have to mean flat.
And honestly, the best budget dinners are the ones that repeat ingredients smartly. Rice shows up twice. Cheese shows up a lot. So do onions, canned tomatoes, beans, tortillas, and chicken thighs. That isn’t laziness. It’s how you keep the cart light without making dinner feel like a punishment.
Why These Cheap Family Dinners Earn Their Keep
- They start with low-cost staples: Rice, pasta, potatoes, tortillas, eggs, and beans do most of the heavy lifting, so one package of protein goes farther than you’d expect.
- They use familiar flavors on purpose: Mild cheese, tomato sauce, taco seasoning, garlic butter, and broth-based soups tend to land better with kids than anything fussy or sharp.
- They’re flexible with store-brand swaps: Frozen vegetables, canned beans, store-brand marinara, and block cheese all fit right in without wrecking the meal.
- They stretch into leftovers well: Most of these dishes taste fine the next day, and a few — chili mac, casseroles, soups — get even better after they sit overnight.
- They don’t need a second dinner: You can put a salad, fruit, or a slice of garlic bread on the side, but the main dish still does the job on its own.
- They’re easy to customize at the table: Hot sauce, pickles, crushed crackers, extra cheese, or scallions can stay separate so the kids get their plain version and adults can build their own.
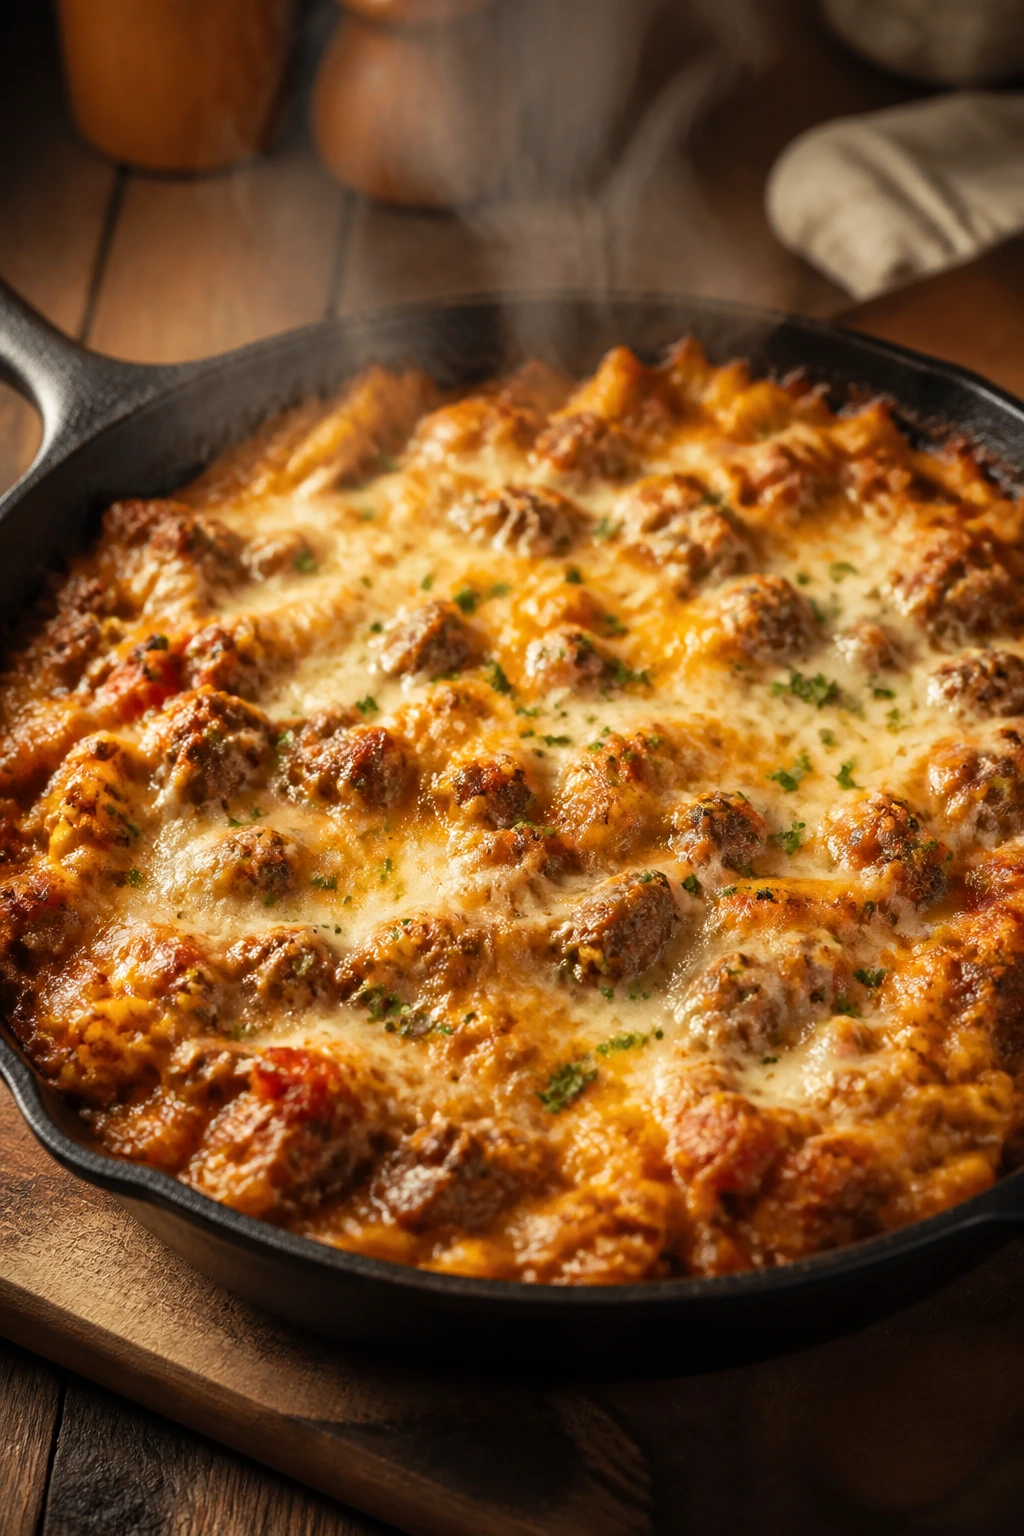
1. Cheesy Taco Rice Skillet
Ground beef, rice, and melted cheddar do a lot of work here, and that’s the point. The whole pan smells like taco night before the rice even finishes simmering, which is exactly why this one usually disappears fast.
Why It Works:
The rice cooks right in the seasoned beef mixture, so it soaks up salsa and broth instead of tasting like a separate side dish. That keeps the ingredient list short and the cost down. A little cheese at the end gives you the sticky, scoopable texture kids tend to go after first.
Key Ingredients:
- 1 lb ground beef or ground turkey
- 1 small yellow onion, diced
- 2 cloves garlic, minced
- 2 tablespoons taco seasoning
- 1 1/2 cups long-grain white rice, rinsed
- 2 1/2 cups low-sodium chicken broth
- 1 cup salsa
- 1 (15-ounce) can black beans, drained and rinsed
- 1 cup shredded cheddar or Monterey Jack
- 2 tablespoons chopped cilantro or sliced green onions, optional
Quick Steps:
- Heat a deep 12-inch skillet over medium-high heat and brown the ground beef with the onion for 6 to 8 minutes, breaking it up until no pink remains.
- Stir in the garlic and taco seasoning and cook for 30 seconds, just until the spices smell warm.
- Add the rinsed rice, broth, salsa, and black beans. Bring everything to a boil.
- Reduce the heat to low, cover tightly, and simmer for 18 to 20 minutes, until the rice is tender and the liquid is mostly absorbed. Do not stir while it simmers or the rice can go gummy.
- Turn off the heat, sprinkle the cheese over the top, cover for 2 minutes, then fluff gently and top with cilantro if you want it.
Equipment for This Recipe:
- Deep 12-inch skillet with a lid
- Wooden spoon or spatula
- Measuring cups
- Fine-mesh strainer for rinsing rice and beans
How to Serve This Dish:
Scoop it into shallow bowls so the cheese sits in one melty layer instead of sinking. A few crushed tortilla chips on top give it crunch, and a spoonful of sour cream softens the seasoning if your kids are spice-shy.
Pro Tips for This Recipe:
- Brown the beef well enough to leave some browned bits in the pan; that flavor carries through the rice.
- Use medium salsa if you want more tomato than heat. Hot salsa can overpower the whole skillet.
- If the rice looks dry before it’s tender, add 2 tablespoons of broth and keep it covered for 3 more minutes.
- Pre-shredded cheese is fine here and often melts more evenly than a block you grated in a hurry.
Variations on This Dish:
- Bean-Heavy Budget Saver: Use only 1/2 lb meat and add an extra can of beans for a cheaper, heartier skillet.
- Mild Taco Bake: Skip the salsa and use 1 cup of mild tomato sauce plus 1/2 cup broth for a gentler flavor.
- Veggie Patch Version: Stir in 1 cup frozen corn or peas in the last 5 minutes of simmering.
Common Mistakes to Avoid with This Dish:
- Using instant rice without changing the liquid: It turns mushy fast. Stick with long-grain white rice, or shorten the cook time and cut back the broth.
- Lifting the lid too often: Steam matters here. Every peek can leave the rice undercooked in the center.
- Adding cheese before the rice is done: It clumps and turns greasy. Wait until the pan is off the heat.
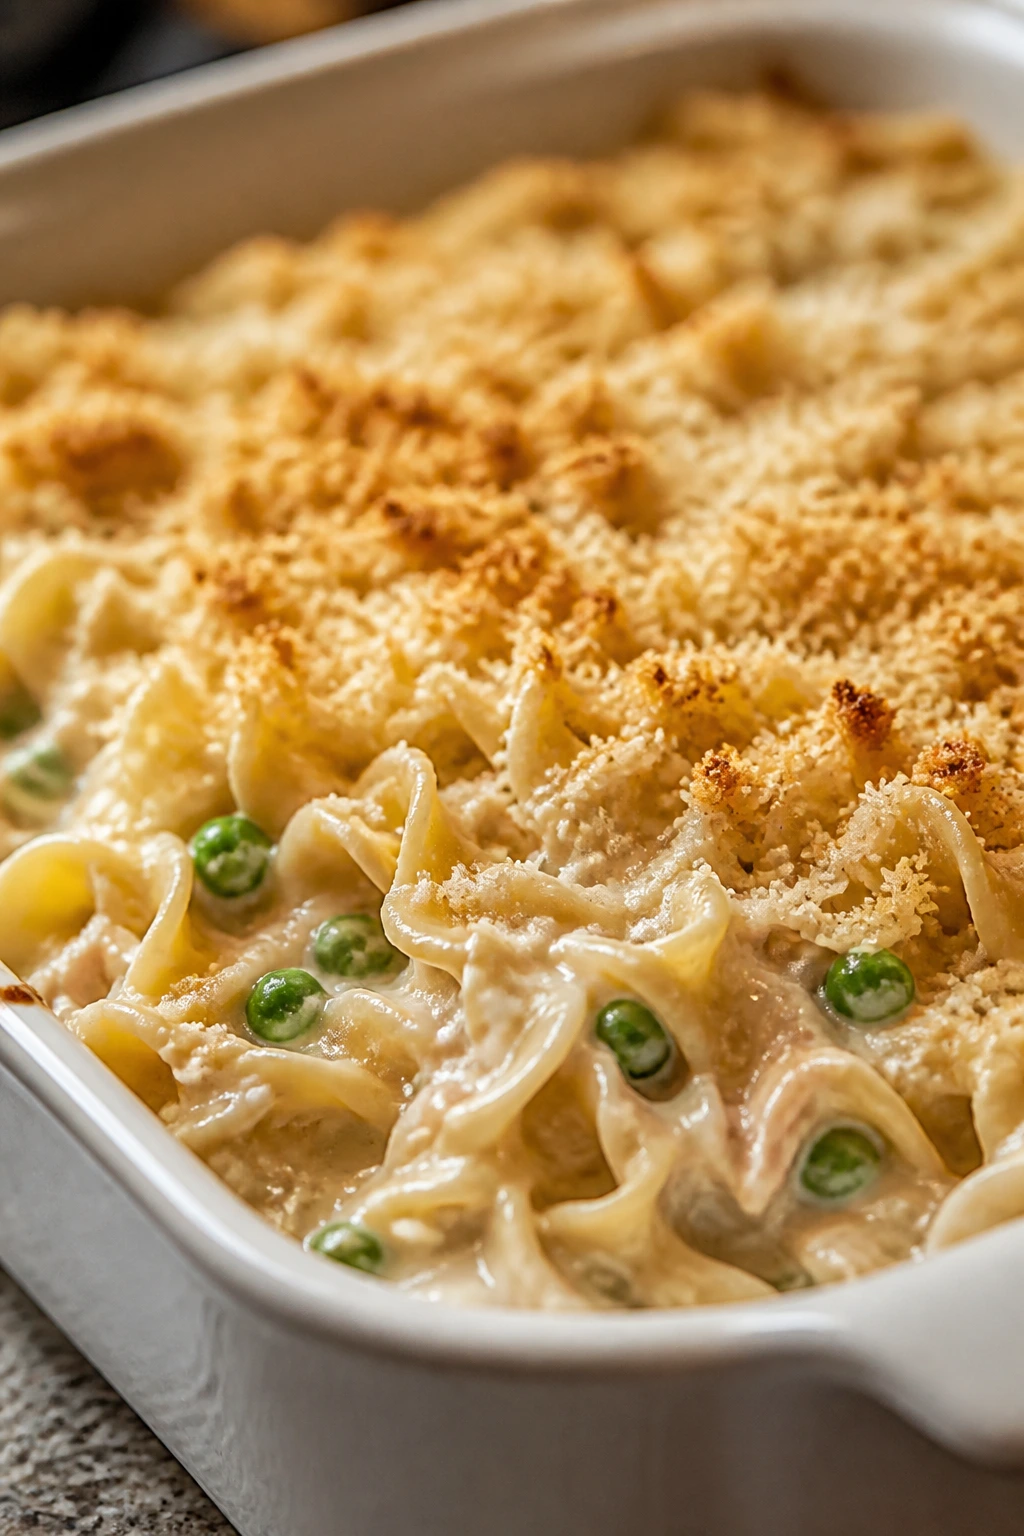
2. Creamy Tuna Noodle Casserole
This is the kind of old-school casserole that earns its place back on the table when the grocery bill gets rude. Mild tuna, soft noodles, peas, and a buttery cracker top make a pan full of familiar, not fussy, dinner.
Why It Works:
Egg noodles cook fast and hold a creamy sauce well, which matters in a bake that has to feed kids without turning into glue. The tuna stays mild, the peas bring little pops of sweetness, and the sauce carries the whole dish without asking for much money.
Key Ingredients:
- 12 ounces egg noodles
- 2 (5-ounce) cans tuna in water, drained well
- 1 (10.5-ounce) can cream of mushroom soup
- 1 cup milk
- 1 cup frozen peas
- 1/2 cup diced onion
- 1 cup shredded cheddar
- 1/2 cup crushed buttery crackers or breadcrumbs
- 2 tablespoons melted butter
- 1/4 teaspoon black pepper
Quick Steps:
- Heat the oven to 375°F and grease a 9×13-inch baking dish.
- Cook the noodles in salted water for 1 minute less than the package says, then drain.
- Stir together the soup, milk, pepper, onion, tuna, peas, and half the cheese in a large bowl.
- Fold in the noodles and spread the mixture into the baking dish.
- Mix the crackers with melted butter and the remaining cheese, then scatter it over the top.
- Bake for 20 to 25 minutes, until the edges bubble and the top is golden. Let it rest 5 minutes before serving so the sauce thickens.
Equipment for This Recipe:
- 9×13-inch baking dish
- Large pot for noodles
- Mixing bowl
- Colander
How to Serve This Dish:
Serve it with something crisp and cold if you can — a simple cucumber salad or sliced apples work better than another soft side. If the kids want extra cheese, let them shake it on at the table.
Pro Tips for This Recipe:
- Drain the tuna thoroughly. Extra water is the fastest way to make the casserole thin and dull.
- Undercook the noodles a touch. They’ll finish in the oven and keep their shape.
- If your family doesn’t love peas, use frozen corn or skip the vegetables and add them on the side.
- A teaspoon of Dijon in the sauce won’t taste sharp; it just makes the casserole taste less canned.
Variations on This Dish:
- Crunchy Pantry Top: Swap crackers for crushed potato chips if that’s what you have.
- Cheddar-and-Corn Swap: Replace peas with 1 cup frozen corn and use sharp cheddar for a sweeter finish.
- Extra-Creamy Version: Stir in 2 tablespoons sour cream before baking.
Common Mistakes to Avoid with This Dish:
- Using dry tuna straight from the can: It needs a little moisture mixed in or the casserole feels dusty.
- Skipping the rest time: Right out of the oven, it looks looser than it really is.
- Overbaking until the noodles dry out: Pull it when the edges bubble and the middle is hot, not after the top goes very dark.
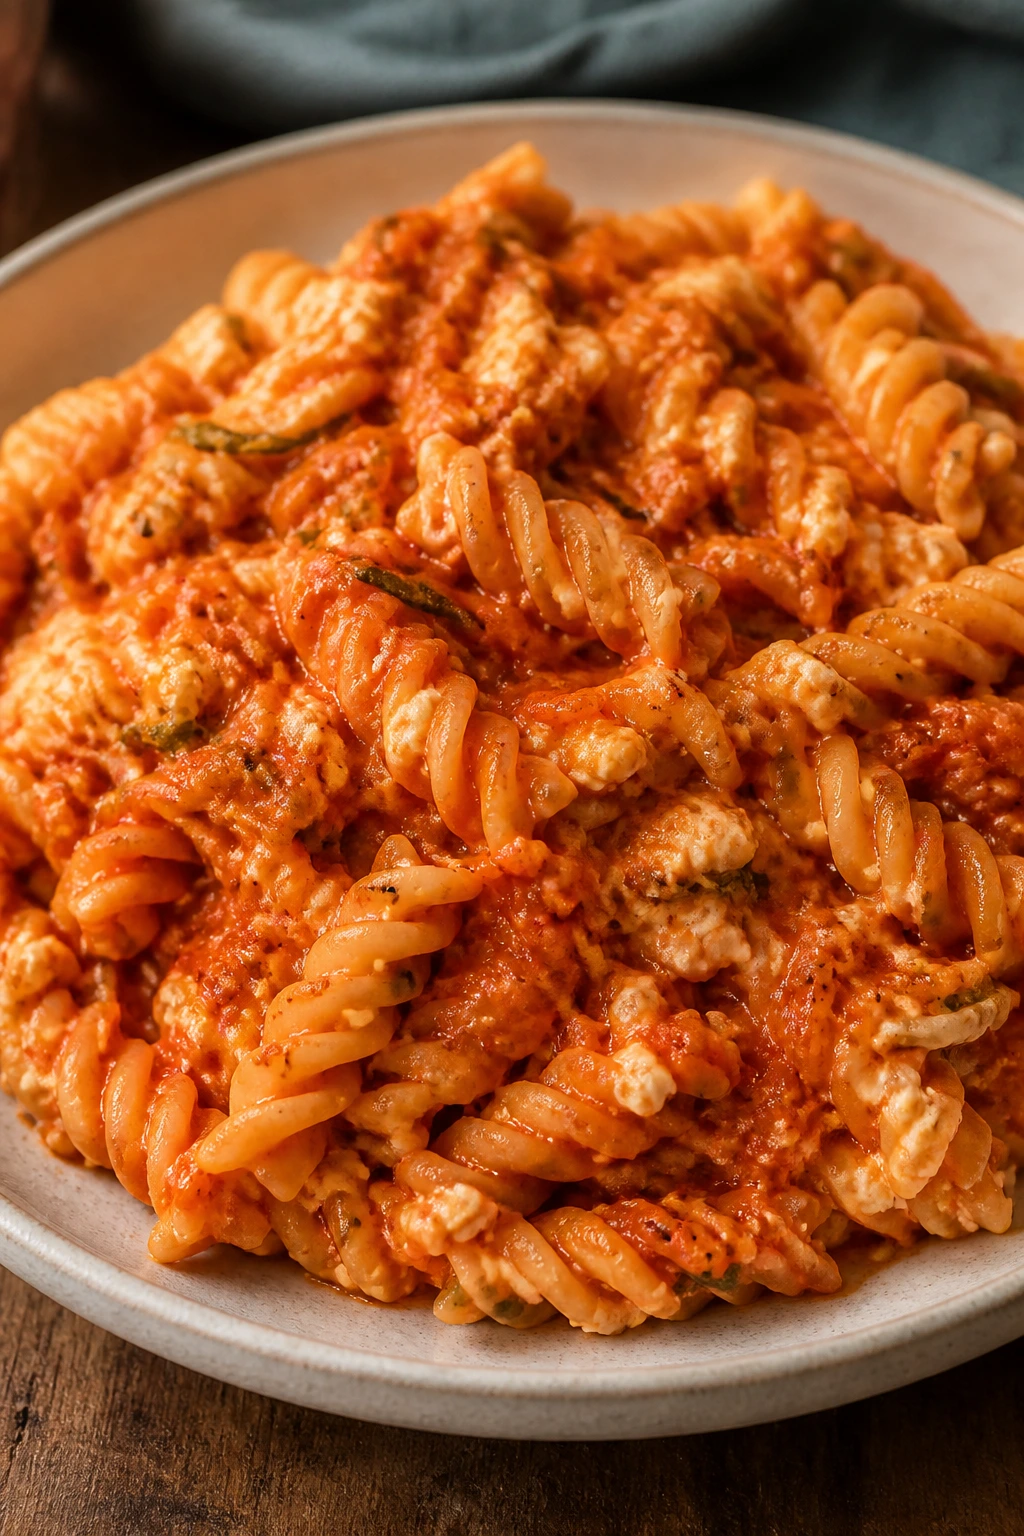
3. Pantry Pasta with Hidden Veggie Sauce
This one looks like plain pasta to a child and like a small victory to the adult holding the spoon. The sauce is tomato-rich, a little sweet from carrots, and soft enough that the vegetables disappear into the background.
Why It Works:
Cheap dinners get easier when the sauce does the work of both flavor and nutrition. Grated carrot and zucchini melt into crushed tomatoes, so you get a thicker, more forgiving sauce without buying anything expensive. Cottage cheese or ricotta at the end gives the whole thing a creamy finish that helps it stick to the pasta.
Key Ingredients:
- 12 ounces penne, rotini, or spaghetti
- 1 tablespoon olive oil
- 1 small onion, finely diced
- 1 medium carrot, grated
- 1 medium zucchini, grated
- 2 cloves garlic, minced
- 1 (28-ounce) can crushed tomatoes
- 2 tablespoons tomato paste
- 1 teaspoon dried oregano
- 1/2 teaspoon sugar
- 1 cup ricotta or cottage cheese
- 1/2 cup grated Parmesan
Quick Steps:
- Cook the pasta in salted water until al dente, then drain and save 1/2 cup of the pasta water.
- Warm the oil in a saucepan over medium heat and cook the onion for 4 minutes until soft.
- Add the carrot and zucchini and cook for another 4 minutes, stirring now and then until they look softer and a little glossy.
- Stir in the garlic and tomato paste for 30 seconds, then add the crushed tomatoes, oregano, and sugar.
- Simmer uncovered for 15 to 20 minutes, stirring occasionally, until the sauce thickens and loses its raw edge.
- Stir in the ricotta and Parmesan, then toss with the pasta and a splash of pasta water if needed.
Equipment for This Recipe:
- Large pot
- Medium saucepan
- Box grater
- Wooden spoon
- Colander
How to Serve This Dish:
Pile it into bowls and add a little extra Parmesan on top if your crowd likes it. Garlic bread is obvious, but a handful of sliced cucumbers or cherry tomatoes on the side keeps the plate from feeling too heavy.
Pro Tips for This Recipe:
- Grate the vegetables finely enough that they disappear into the sauce; big chunks are where the complaints start.
- If the sauce tastes flat, add a pinch of salt before adding more sugar.
- Use a splash of pasta water to loosen the sauce instead of more tomato juice. It clings better.
- Cottage cheese makes this cheaper than ricotta and blends in just fine once it’s stirred through.
Variations on This Dish:
- Meaty Sunday Version: Brown 1/2 to 1 pound of ground beef with the onion if you want more protein.
- Roasted Veggie Swap: Replace the zucchini with a grated bell pepper if that’s what’s in the fridge.
- Baked Pasta Finish: Put it in a casserole dish, top with mozzarella, and bake at 375°F for 15 minutes.
Common Mistakes to Avoid with This Dish:
- Letting the sauce stay thin: It should simmer long enough to coat the spoon, not run off like soup.
- Adding too much sugar: Carrots already bring some sweetness. Taste first.
- Overcooking the pasta before tossing: It gets soft again when you combine it with the hot sauce.
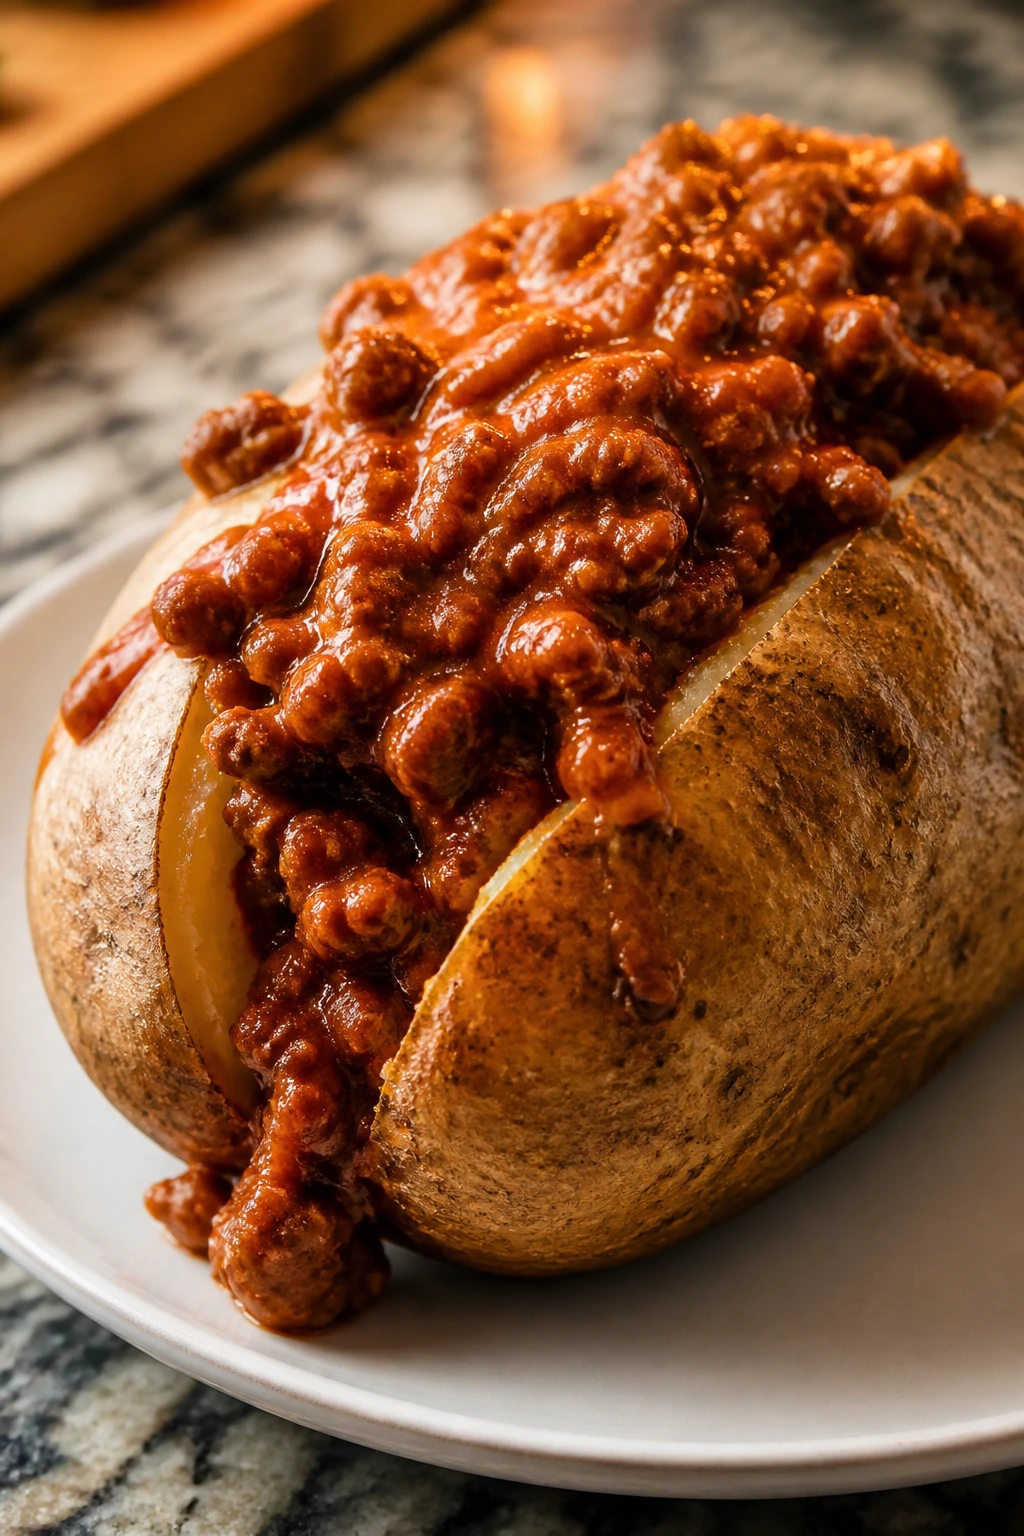
4. Sloppy Joe Baked Potatoes
A baked potato piled with sloppy joe filling sounds almost too plain to be exciting, then you take one bite and realize the combo just works. The potato gives you a cheap, sturdy base, and the saucy beef keeps kids from peeling around the edges looking for the “good part.”
Why It Works:
Potatoes are one of the easiest ways to stretch a pound of ground beef into a real dinner. The filling uses ketchup, tomato paste, Worcestershire, and a little brown sugar, which is the exact sweet-savory profile most kids already trust. The skin gets crisp, the inside stays fluffy, and the whole thing eats like a meal instead of a side dish.
Key Ingredients:
- 4 large russet potatoes
- 1 lb ground beef
- 1 small onion, diced
- 3/4 cup ketchup
- 2 tablespoons tomato paste
- 1 tablespoon brown sugar
- 1 tablespoon Worcestershire sauce
- 1 teaspoon yellow mustard
- 1/2 cup water
- 1 cup shredded cheddar
Quick Steps:
- Bake the potatoes at 425°F for 50 to 60 minutes, or microwave them until tender, then finish them in a hot oven for better skin.
- Brown the beef and onion in a skillet over medium-high heat for 7 to 8 minutes.
- Stir in the ketchup, tomato paste, brown sugar, Worcestershire, mustard, and water.
- Simmer for 6 to 8 minutes until the filling is thick and glossy, not soupy.
- Split the potatoes open, fluff the insides with a fork, and spoon the sloppy joe filling over the top.
- Finish with cheddar and let it melt for 1 minute before serving.
Equipment for This Recipe:
- Baking sheet
- Skillet
- Fork
- Sharp knife
- Spoon
How to Serve This Dish:
Serve each potato on a plate with a little extra filling on the side, because kids always ask for more sauce than you think they will. A green salad or a pile of baby carrots is enough beside it.
Pro Tips for This Recipe:
- Salt the potato skins before baking if you want the outside to taste like something.
- Let the sloppy joe mixture reduce until it clings to the spoon; watery filling soaks the potato too fast.
- If you’re short on time, microwave the potatoes first and crisp them in the oven for 10 minutes.
- Sharp cheddar cuts through the sweet sauce better than mild.
Variations on This Dish:
- BBQ Swap: Use barbecue sauce instead of ketchup for a smokier flavor.
- Turkey Version: Ground turkey works if you add an extra tablespoon of oil at the start.
- Loaded Bake Style: Stir a spoonful of sour cream and sliced scallions into the potato before topping it.
Common Mistakes to Avoid with This Dish:
- Underbaking the potatoes: A firm potato fights back with every forkful. It needs to be tender all the way through.
- Making the filling too sweet: Taste before adding extra brown sugar.
- Skipping the fluff step: Breaking up the potato inside helps the filling settle instead of sliding off.
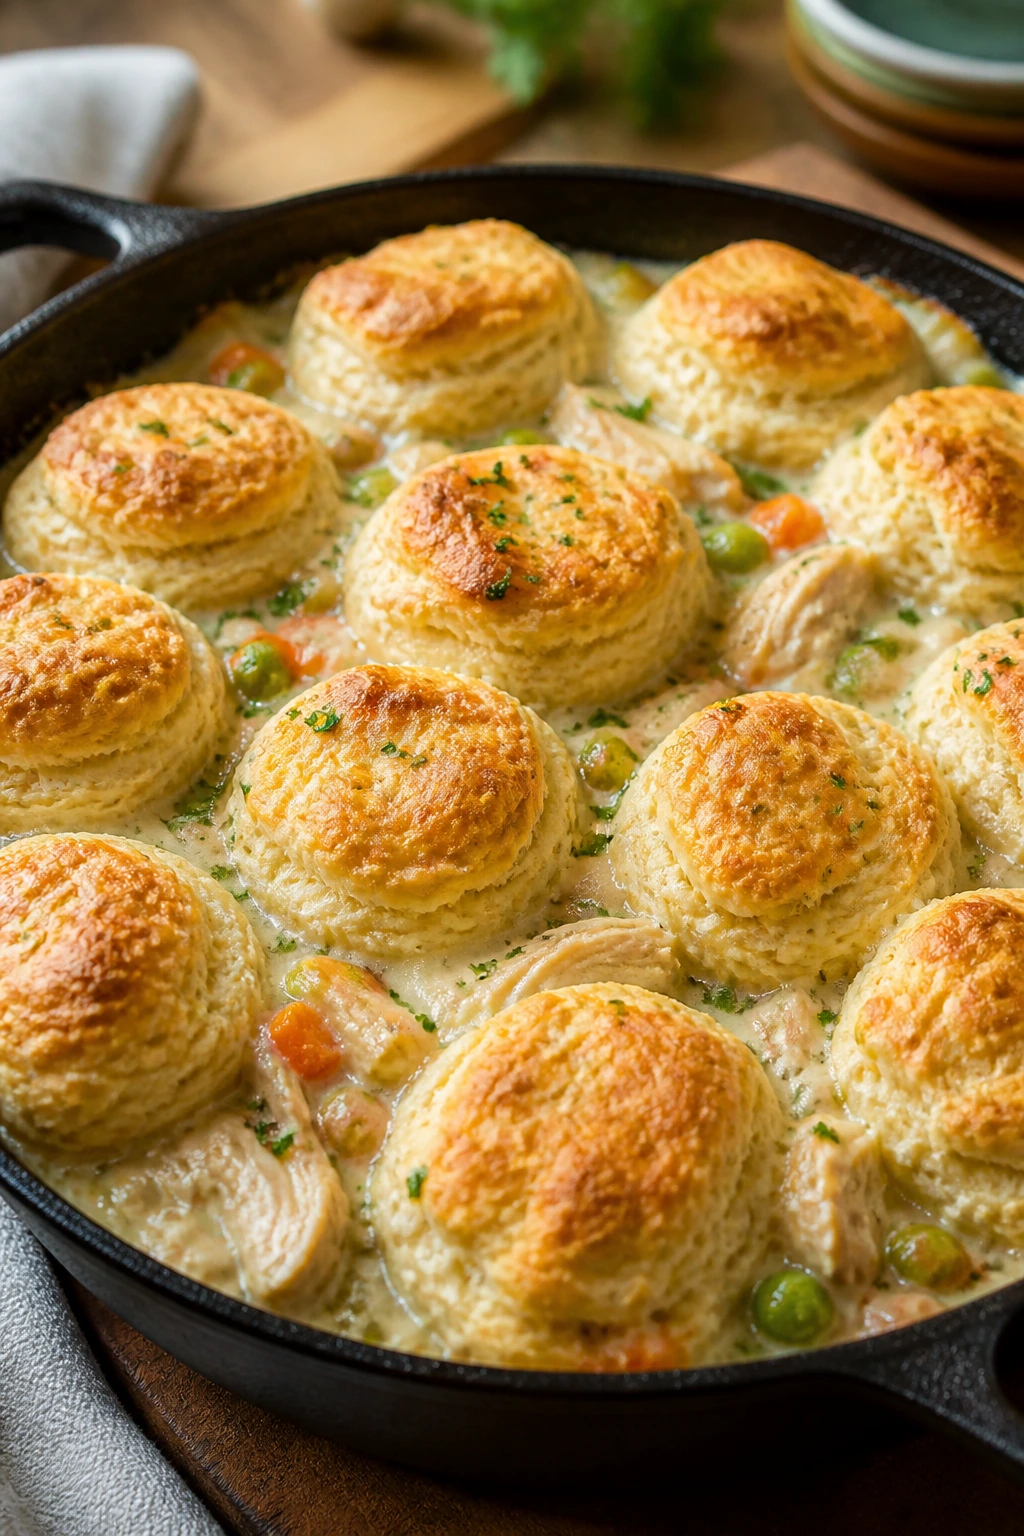
5. Chicken and Biscuit Skillet
This tastes like chicken pot pie after a shortcut took the wheel. The filling is creamy and savory, the biscuits bake right on top, and the whole skillet lands on the table looking far more generous than the grocery bill behind it.
Why It Works:
Chicken thighs are forgiving and cheaper than breasts, which makes them the right move here. The biscuit topping bakes over the filling and soaks up just enough steam to turn golden on top and soft underneath. Kids usually go for the biscuit first, then the chicken hidden below.
Key Ingredients:
- 1 lb boneless, skinless chicken thighs, cut into bite-size pieces
- 1 tablespoon oil
- 1 small onion, diced
- 2 carrots, diced
- 1 cup frozen peas
- 1 (10.5-ounce) can cream of chicken soup
- 1 cup chicken broth
- 1/2 cup milk
- 1 tablespoon flour
- 1 can refrigerated biscuits, 8 count
Quick Steps:
- Heat the oven to 400°F.
- Brown the chicken in an oven-safe skillet with the oil for 4 to 5 minutes, then add the onion and carrots and cook 4 minutes more.
- Stir in the flour, then add the soup, broth, and milk. Simmer 3 minutes until the filling looks creamy and lightly thickened.
- Stir in the peas, then arrange the biscuits over the top.
- Bake for 15 to 18 minutes, until the biscuits are deep golden and the filling bubbles around the edges. If the biscuits brown too fast, lay foil loosely over the skillet for the last 5 minutes.
Equipment for This Recipe:
- Large oven-safe skillet
- Wooden spoon
- Measuring cups
- Oven mitts
How to Serve This Dish:
Bring the skillet to the table and spoon the filling around the biscuits, not just under them. That little bit of drama helps, and it also keeps everyone from stealing the top before the bottom gets served.
Pro Tips for This Recipe:
- Cut the chicken small so it cooks fast and stays easy to scoop.
- Don’t skip the simmer after the soup goes in; that keeps the filling from being runny under the biscuits.
- Split the biscuits in half if you want more browned surface and a little less dough.
- Frozen mixed vegetables can replace the peas and carrots if that’s what you already have.
Variations on This Dish:
- Canned Soup Shortcut: Use cream of mushroom if that’s what’s in the pantry.
- Cheddar Biscuit Top: Sprinkle a little cheddar over the biscuits before baking.
- Herby Version: Add thyme or poultry seasoning to the filling for a more pot-pie feel.
Common Mistakes to Avoid with This Dish:
- Using raw biscuit dough that needs a longer bake than the filling can take: Refrigerated biscuits are the easiest choice here.
- Making the sauce too thin: It should coat the back of a spoon before the biscuits go on.
- Crowding the skillet with too many vegetables: The filling turns watery if the pan is overloaded.
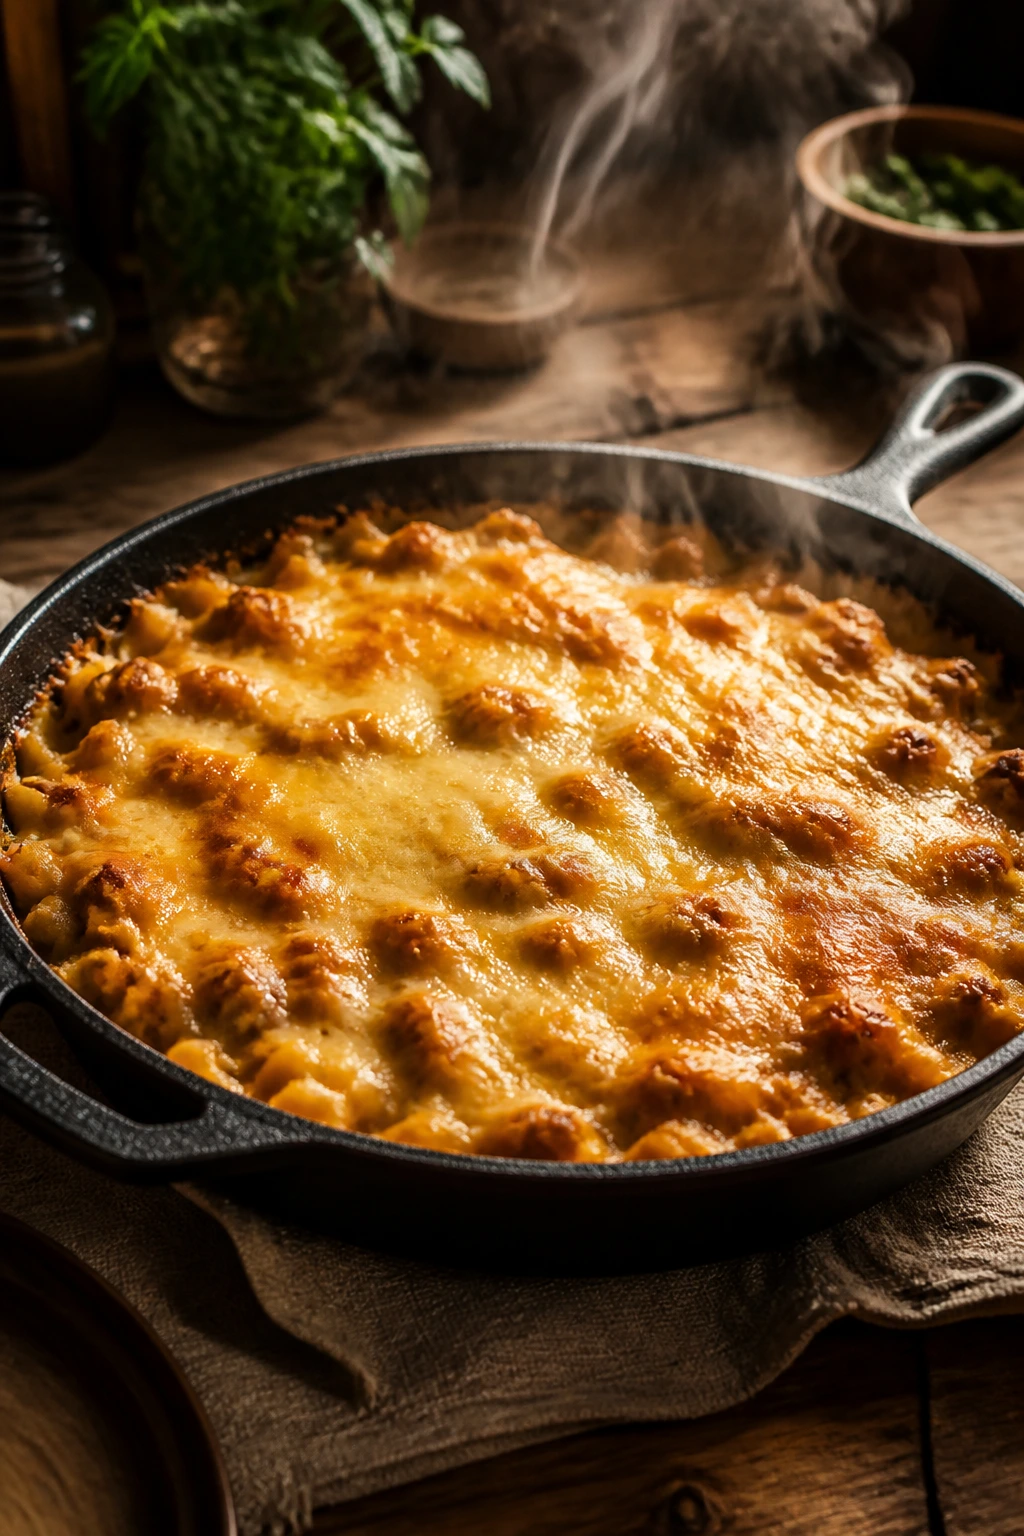
6. Baked Ziti with Cottage Cheese
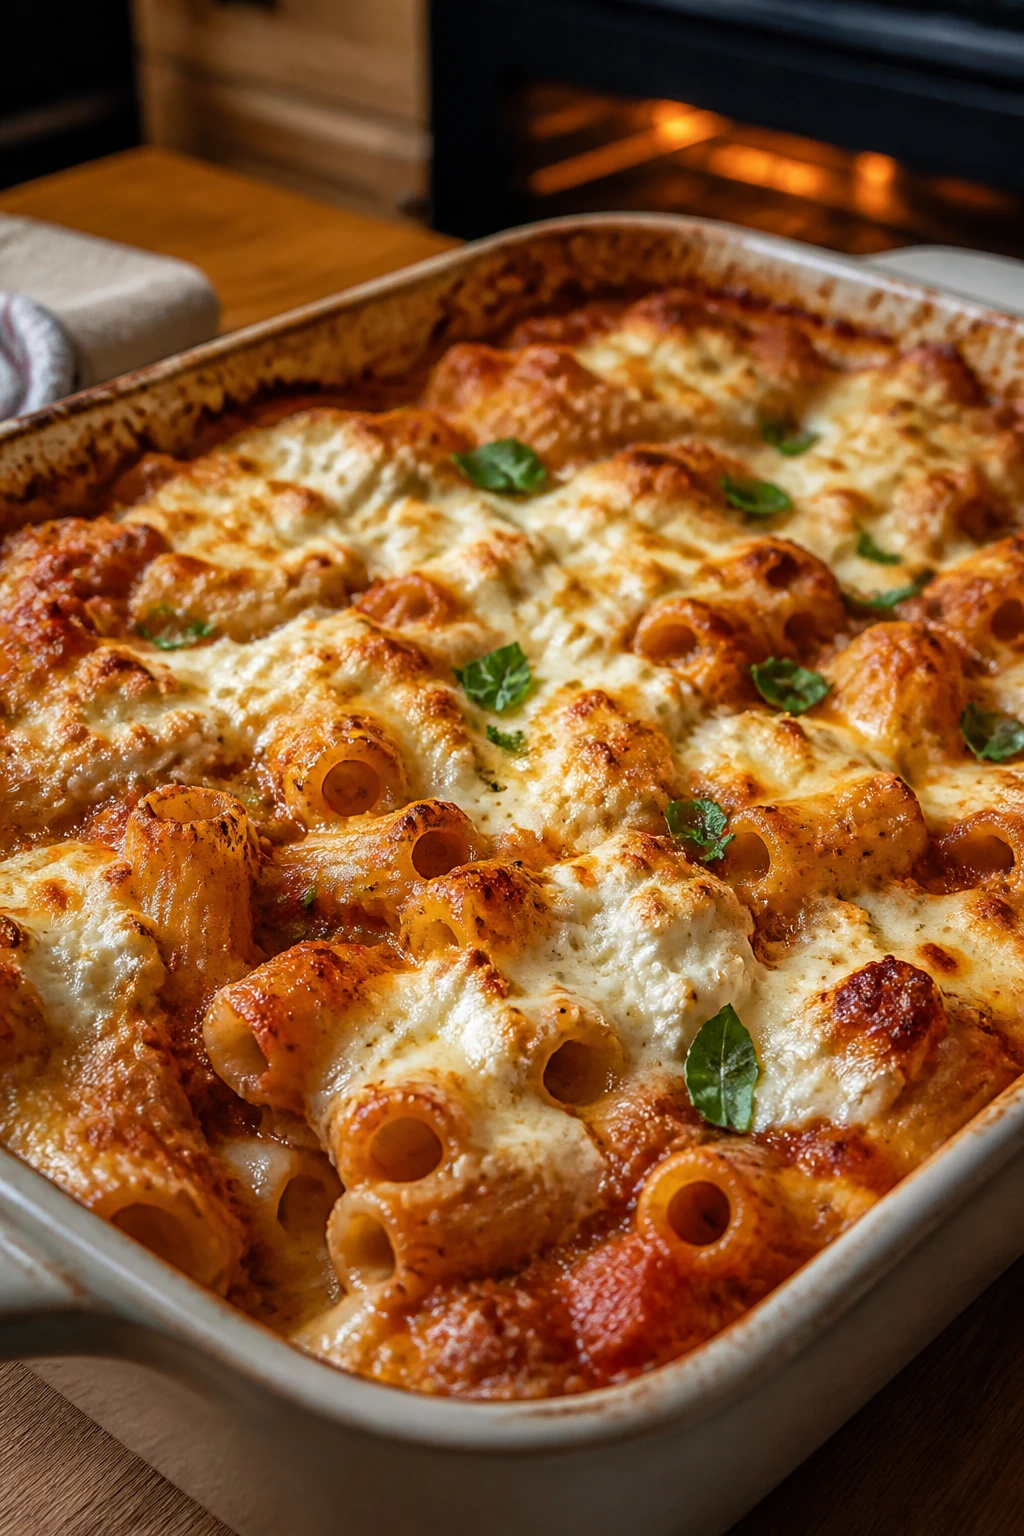
There’s a reason baked pasta keeps showing up in family kitchens: it smells like comfort and it feeds a crowd without a lot of drama. This version uses cottage cheese, which is cheaper than ricotta and works better than people expect once it’s baked.
Why It Works:
The pasta stays in short, sturdy tubes, so each bite catches sauce and cheese instead of falling apart. Cottage cheese gives you creamy pockets without making the filling heavy, and a jar of marinara does the sauce work for you. It’s inexpensive, forgiving, and hard to mess up badly.
Key Ingredients:
- 1 pound ziti or penne
- 1 tablespoon salt for pasta water
- 1 (24-ounce) jar marinara sauce
- 2 cups cottage cheese
- 2 cups shredded mozzarella
- 1/2 cup grated Parmesan
- 1 egg, lightly beaten
- 1 teaspoon Italian seasoning
Quick Steps:
- Heat the oven to 375°F and grease a 9×13-inch dish.
- Cook the pasta until just shy of al dente, then drain.
- Mix the cottage cheese, egg, Italian seasoning, and half the Parmesan in a bowl.
- Toss the pasta with the marinara, then fold in the cottage cheese mixture and half the mozzarella.
- Spread into the dish, top with the rest of the mozzarella and Parmesan, and bake for 25 minutes.
- Broil for 1 to 2 minutes if you want more browning on top, then rest 10 minutes before cutting.
Equipment for This Recipe:
- 9×13-inch baking dish
- Large pot
- Mixing bowl
- Colander
- Spoon or spatula
How to Serve This Dish:
Cut it into square portions and let the cheese settle before lifting each piece. A simple Caesar salad or steamed green beans keeps the plate balanced without adding much cost.
Pro Tips for This Recipe:
- Undercook the pasta by a minute so it doesn’t soften too much in the oven.
- Use a thicker marinara; thin sauce makes baked ziti sloshy.
- If you want more meat, add browned ground beef or sausage to the sauce, but the dish stands on its own without it.
- Let it rest. Really. The first slice always behaves better after 10 minutes.
Variations on This Dish:
- Meat Sauce Version: Stir 1 pound browned ground beef into the marinara.
- Spinach Bake: Fold in 2 cups thawed, squeezed-dry spinach.
- Extra-Cheese Finish: Swap half the mozzarella for provolone.
Common Mistakes to Avoid with This Dish:
- Using watery cottage cheese straight from the tub: If it looks loose, drain it for a few minutes first.
- Skipping the rest time after baking: The layers need time to set.
- Overpacking the pan with sauce: You want coated pasta, not a soup casserole.
7. Bean and Cheese Quesadillas with Salsa Rice

If you need a dinner that feels friendly the second it lands on the table, this is one of the easiest wins in the whole bunch. The tortillas crisp up, the cheese stretches, and the rice on the side makes the plate feel more complete than the ingredient list would suggest.
Why It Works:
Beans and cheese are cheap, filling, and mild enough for most kids to accept without negotiation. The salsa rice turns plain rice into something with color and flavor, which matters when you’re trying to make a dinner look intentional instead of improvised.
Key Ingredients:
- 8 flour tortillas
- 2 (15-ounce) cans refried beans or black beans, drained and mashed
- 2 cups shredded cheddar or Mexican blend cheese
- 1 1/2 cups cooked rice
- 1 cup salsa
- 1 cup frozen corn
- 1 tablespoon butter or oil
- 1 teaspoon ground cumin
- 1/2 teaspoon salt
Quick Steps:
- Warm the butter in a saucepan and stir in the rice, salsa, corn, cumin, and salt; heat for 4 to 5 minutes until hot.
- Spread beans over 4 tortillas and top with cheese, then cover with the remaining tortillas.
- Cook each quesadilla in a dry skillet over medium heat for 2 to 3 minutes per side, pressing lightly until the tortillas are golden and the cheese melts.
- Rest for 1 minute, then cut into wedges.
- Serve with the salsa rice and extra salsa for dipping.
Equipment for This Recipe:
- Large skillet
- Small saucepan
- Spatula
- Knife or pizza cutter
How to Serve This Dish:
Cut the quesadillas into triangles and fan them out over the rice so the plate looks like a proper meal, not just a snack. If you want more color, add sliced avocado when it’s on sale or a handful of shredded lettuce.
Pro Tips for This Recipe:
- Mash black beans with a fork if refried beans aren’t in the pantry; they spread just as well.
- Keep the heat at medium. Too hot, and the tortilla browns before the cheese melts.
- Don’t overfill the tortillas or the filling leaks out and scorches.
- Day-old rice works better than fresh because it fries up instead of steaming.
Variations on This Dish:
- Chicken Add-In: Add 1 cup shredded cooked chicken to the bean layer.
- Breakfast Quesadilla: Scramble 4 eggs and tuck them inside with the beans.
- Mild Taco Style: Use plain rice and let salsa stay on the side for dipping.
Common Mistakes to Avoid with This Dish:
- Using too much filling: It seems generous, then the skillet fights back.
- Cooking on high heat: The tortillas go dark before the cheese melts.
- Serving the rice dry: The salsa is what keeps the side from feeling like an afterthought.
8. Sausage, Cabbage, and Potatoes Skillet
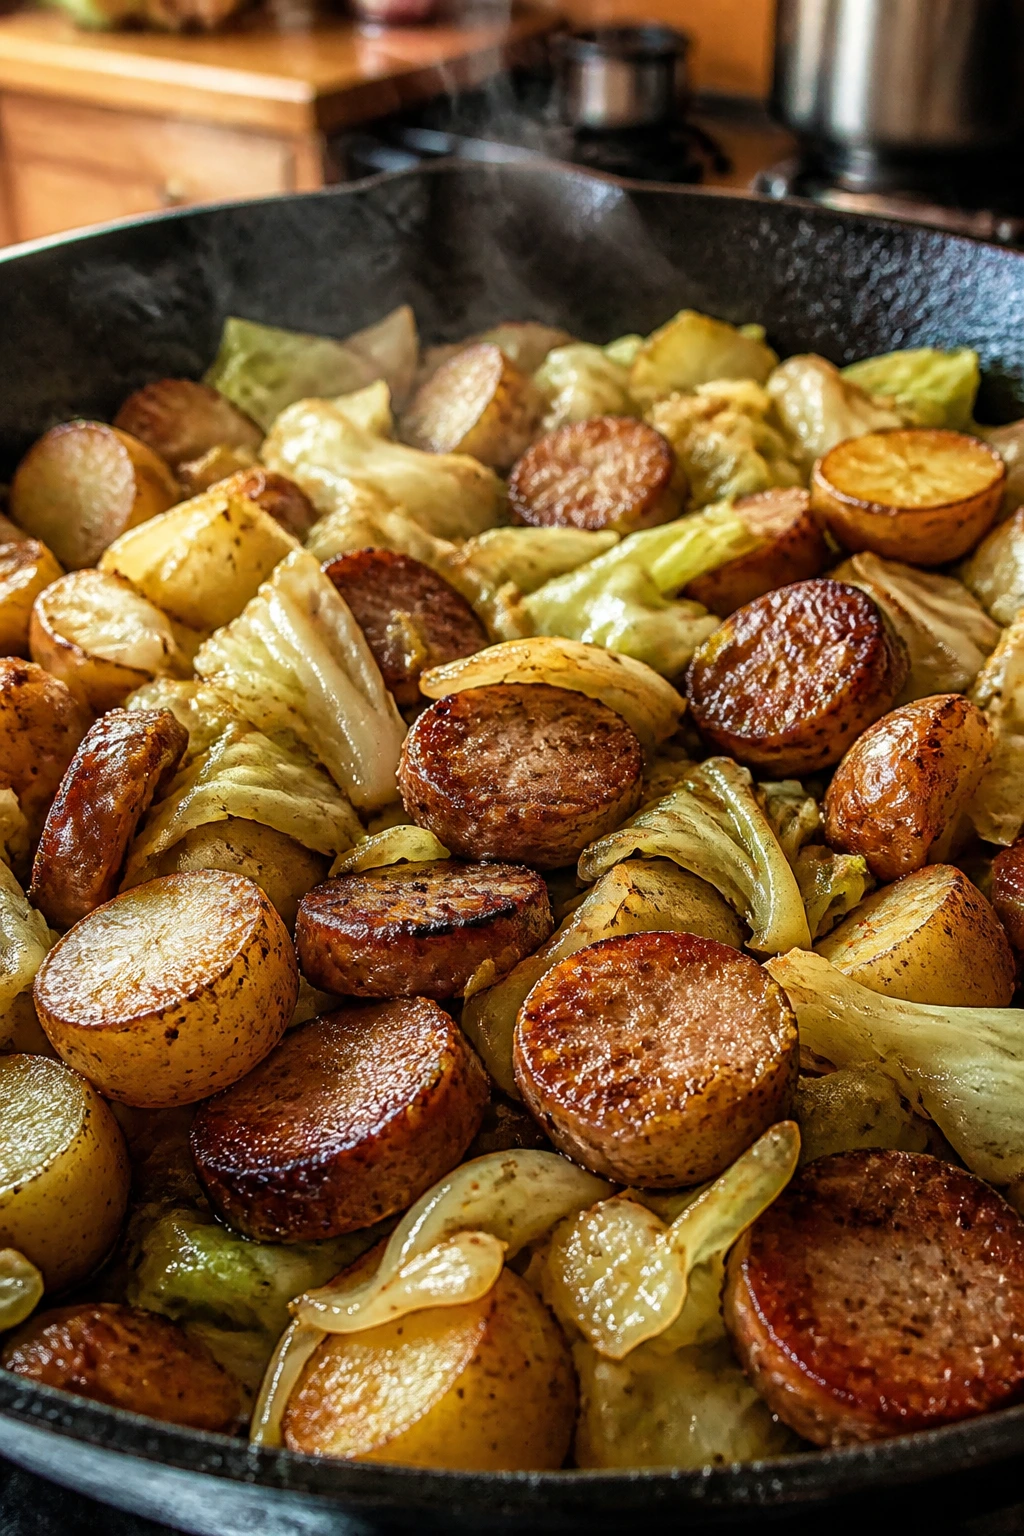
This is the kind of skillet that saves the day when the fridge looks half empty and a grocery run is not happening. The sausage brings the seasoning, the cabbage turns sweet as it cooks, and the potatoes make the whole thing stick to your ribs.
Why It Works:
Smoked sausage is already cooked, so you’re mostly browning and layering flavor rather than babysitting raw meat. Cabbage is cheap, fills the skillet fast, and softens into something mild enough for kids who think they hate cabbage. Potatoes round the dish out into a real dinner instead of a side.
Key Ingredients:
- 14 to 16 ounces smoked sausage, sliced
- 1 small head green cabbage, sliced into ribbons
- 1 large onion, thinly sliced
- 1 pound baby potatoes, halved
- 2 tablespoons oil
- 1 teaspoon paprika
- 1/2 teaspoon garlic powder
- 1/2 cup chicken broth
- Salt and pepper
Quick Steps:
- Parboil the potatoes for 8 minutes until just barely tender, then drain.
- Heat the oil in a large skillet over medium-high heat and brown the sausage for 3 minutes.
- Add the onion and potatoes and cook for 5 minutes, letting the potatoes pick up color.
- Stir in the cabbage, paprika, garlic powder, broth, salt, and pepper.
- Cover and cook over medium-low heat for 10 minutes, then uncover and cook 3 to 5 minutes more until the cabbage is soft and the broth is gone.
Equipment for This Recipe:
- Large skillet with a lid
- Knife
- Cutting board
- Pot for boiling potatoes
How to Serve This Dish:
Serve it in wide bowls so every bite catches sausage, cabbage, and potato together. A spoonful of mustard on the side is not required, but it’s good if the adults want something sharper.
Pro Tips for This Recipe:
- Slice the sausage thin so it browns instead of just warming through.
- Don’t skip the broth; it helps the cabbage soften before it scorches.
- If your kids are suspicious of cabbage, chop it shorter so it mixes better with the potatoes.
- A splash of apple cider vinegar at the end brightens the whole pan.
Variations on This Dish:
- Smoky Paprika Version: Add an extra 1/2 teaspoon smoked paprika.
- Kielbasa and Apple Twist: Use a sweet apple if you want a little more kid-friendly sweetness.
- Onion-Lover’s Skillet: Double the onion if your family likes a softer, sweeter base.
Common Mistakes to Avoid with This Dish:
- Cutting the potatoes too large: They need to cook at the same pace as the cabbage.
- Letting the cabbage dry out: The lid matters here.
- Using fully raw sausage links: This recipe expects smoked or pre-cooked sausage for speed and price.
9. Egg Fried Rice with Frozen Veggies
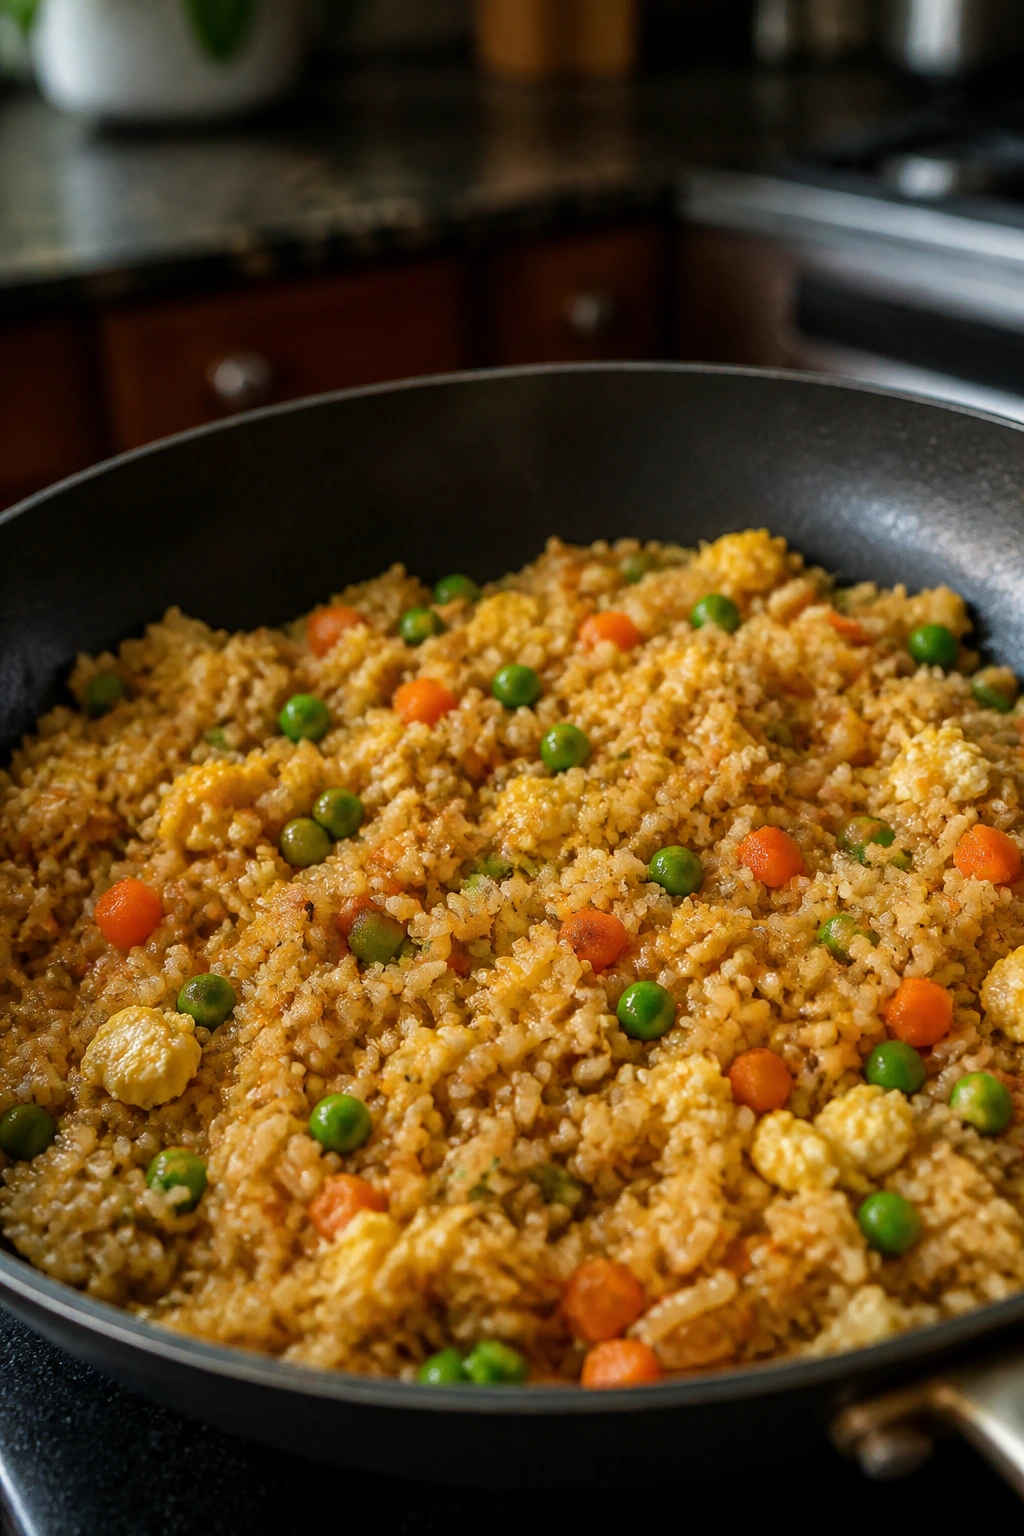
Egg fried rice is one of those rare budget dinners that feels like takeout without the takeout price. The rice gets a little toasty, the eggs stay soft, and the frozen vegetables disappear into the background where they belong.
Why It Works:
Cold rice fries better than fresh rice because it loses some moisture in the fridge and sears instead of steaming. Frozen peas and carrots keep costs low and give the pan enough color to look lively. A little soy sauce and butter go a long way, which is exactly what cheap cooking needs.
Key Ingredients:
- 3 cups cooked, chilled rice
- 4 large eggs
- 2 cups frozen peas and carrots
- 2 tablespoons butter
- 2 tablespoons neutral oil
- 3 tablespoons soy sauce
- 1 clove garlic, minced
- 1 teaspoon sesame oil, optional
- 2 green onions, sliced, optional
Quick Steps:
- Beat the eggs in a bowl with a pinch of salt.
- Heat 1 tablespoon oil in a large skillet or wok over medium-high heat and scramble the eggs until just set, then remove them.
- Add the remaining oil, the frozen vegetables, and garlic; cook for 3 to 4 minutes until hot and no longer icy.
- Add the cold rice and break up any clumps with a spatula.
- Stir in the soy sauce and butter, then cook for 3 to 5 minutes until the rice looks hot and lightly toasted.
- Fold the eggs back in, drizzle with sesame oil if using, and finish with green onions.
Equipment for This Recipe:
- Large skillet or wok
- Spatula
- Mixing bowl
- Fork
How to Serve This Dish:
Serve it straight from the pan in shallow bowls. A little soy sauce on the table helps the grown-ups season theirs more, while kids usually just want extra eggs mixed in.
Pro Tips for This Recipe:
- Use day-old rice. Fresh rice turns sticky and fights the pan.
- Don’t overcrowd the skillet; if you’re doubling it, fry in two batches.
- Butter at the end gives fried rice a softer, more kid-friendly flavor.
- If the pan starts looking dry, add a teaspoon of water and keep moving.
Variations on This Dish:
- Ham-and-Egg Version: Add 1/2 cup diced ham if you have leftovers.
- Corn Swap: Use frozen corn instead of peas and carrots for a sweeter result.
- Spicy Adult Finish: Top individual bowls with chili crisp or hot sauce.
Common Mistakes to Avoid with This Dish:
- Using warm rice: It clumps and steams.
- Adding too much soy sauce at once: Start with less; you can always add more.
- Skipping the egg removal step: Eggs get rubbery if they sit in the pan too long.
10. Meatball Subs with Store-Bought Meatballs
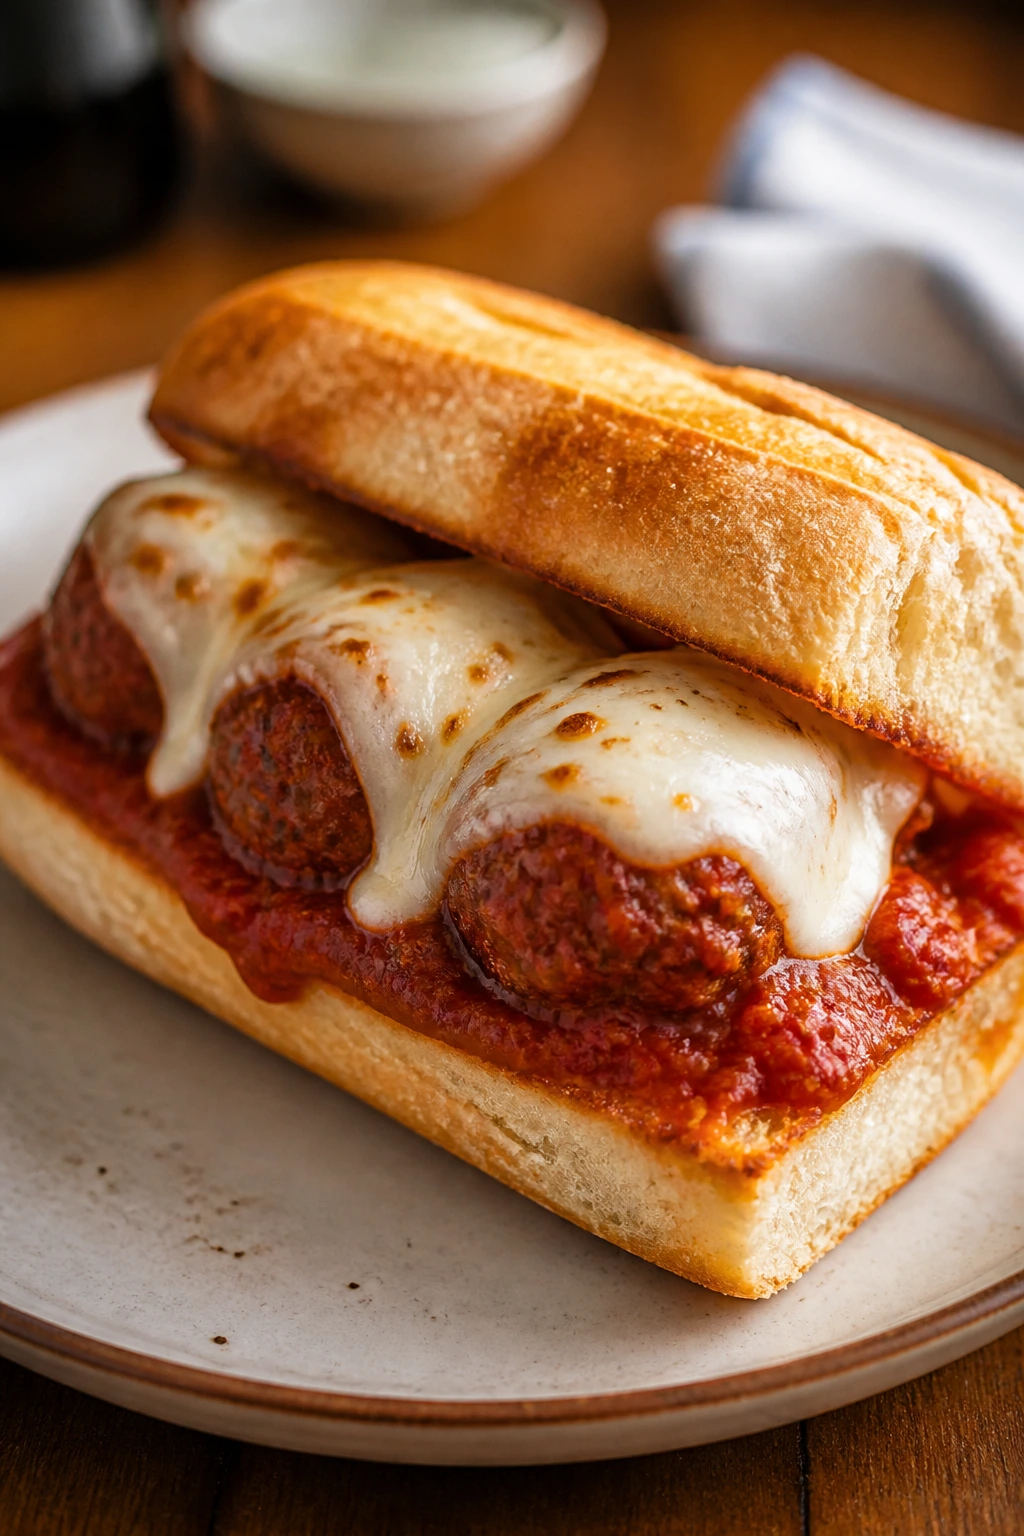
There’s nothing subtle about a meatball sub, and that’s why kids tend to love it. Saucy meatballs tucked into warm rolls, melted cheese, and a little toasted crust — it’s a sandwich that behaves like dinner.
Why It Works:
Frozen or store-brand meatballs cut the prep time and keep the cost predictable. The marinara does the flavor work, and the rolls soak up enough sauce to taste rich without becoming soggy if you toast them first. Handheld dinners also solve half the table fights.
Key Ingredients:
- 1 pound frozen meatballs
- 1 (24-ounce) jar marinara sauce
- 4 sub rolls
- 2 cups shredded mozzarella
- 2 tablespoons butter, softened
- 1 clove garlic, minced
- 1 tablespoon grated Parmesan
Quick Steps:
- Simmer the meatballs in the marinara over medium-low heat for 15 to 20 minutes until hot throughout.
- Mix the butter, garlic, and Parmesan, then spread it on the rolls.
- Toast the rolls under the broiler for 1 to 2 minutes until lightly golden.
- Spoon 3 to 4 meatballs into each roll, add sauce, and top with mozzarella.
- Broil again for 1 to 2 minutes until the cheese melts and bubbles.
Equipment for This Recipe:
- Saucepan
- Baking sheet
- Spoon
- Tongs
How to Serve This Dish:
Wrap each sub in parchment or foil if you need to hand them out without saucy fingers everywhere. A few carrot sticks or a bagged salad keeps the meal from turning into a pure sandwich pile.
Pro Tips for This Recipe:
- Toast the rolls before filling them. It matters more than it sounds.
- If the sauce looks thin, simmer it uncovered for a few extra minutes.
- Use smaller meatballs for easier eating with kids.
- Keep extra sauce in a bowl for dipping; kids always ask for it.
Variations on This Dish:
- Meatball Parm Style: Add a few slices of provolone under the mozzarella.
- Spicy Marinara Version: Stir red pepper flakes into the sauce for the adults.
- Open-Face Bake: Split the rolls, top them on a sheet pan, and broil like mini pizzas.
Common Mistakes to Avoid with This Dish:
- Filling cold rolls with hot sauce immediately: They go soggy fast.
- Overloading the sandwich: The filling spills out before the first bite.
- Using too little sauce: Meatballs need enough moisture to taste like something.
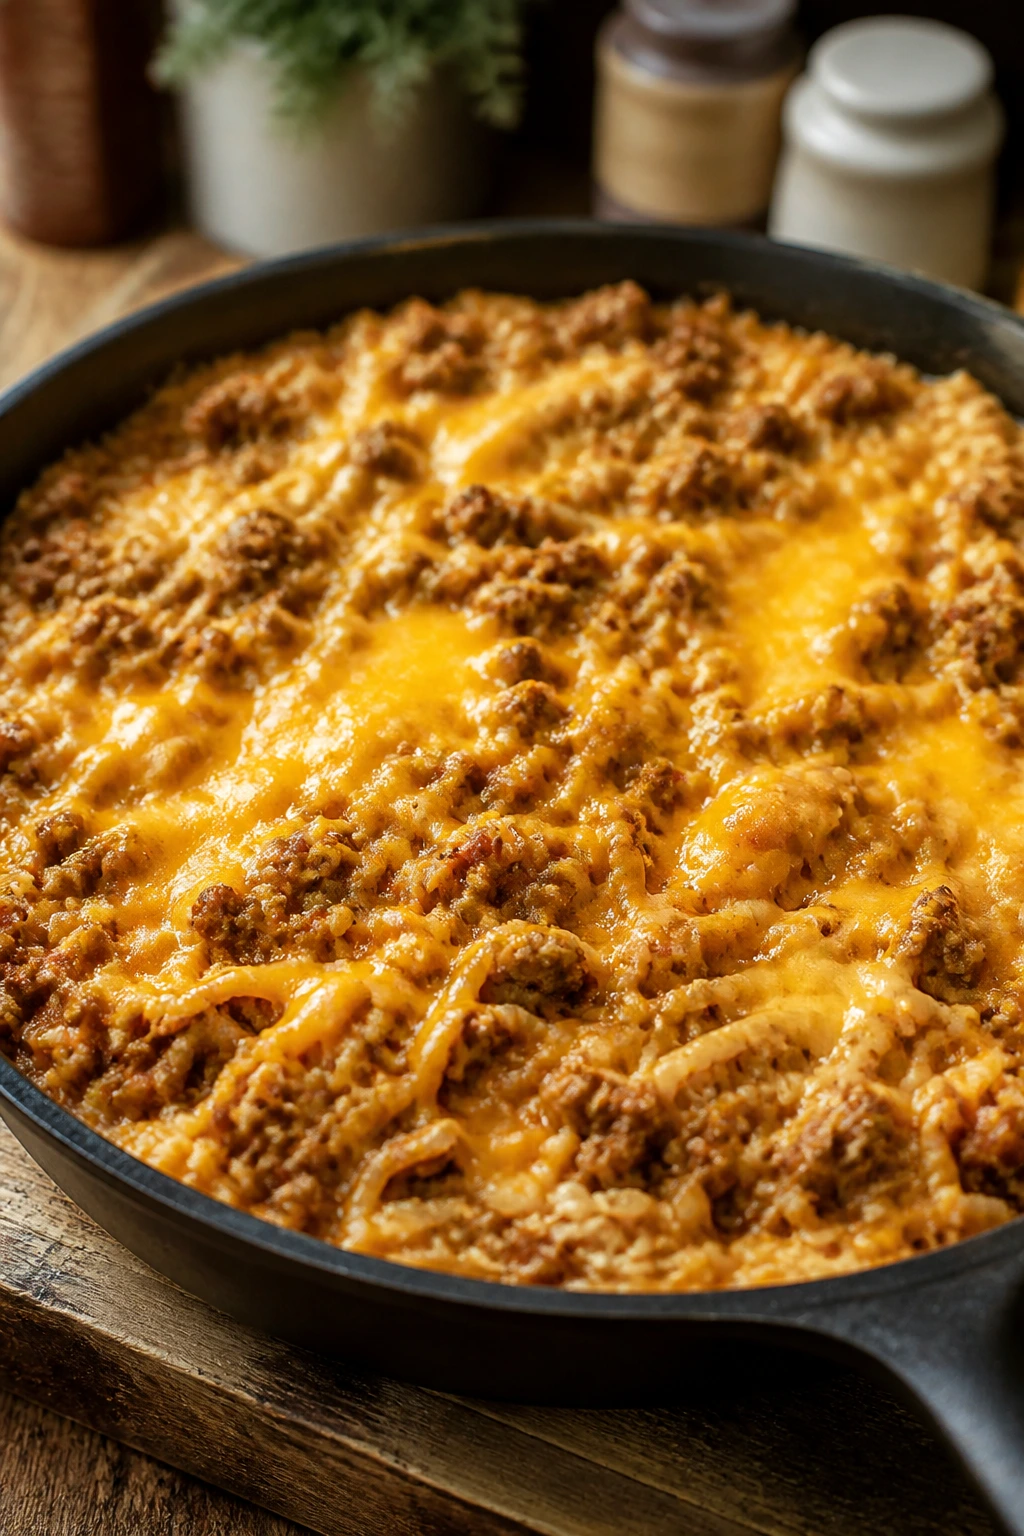
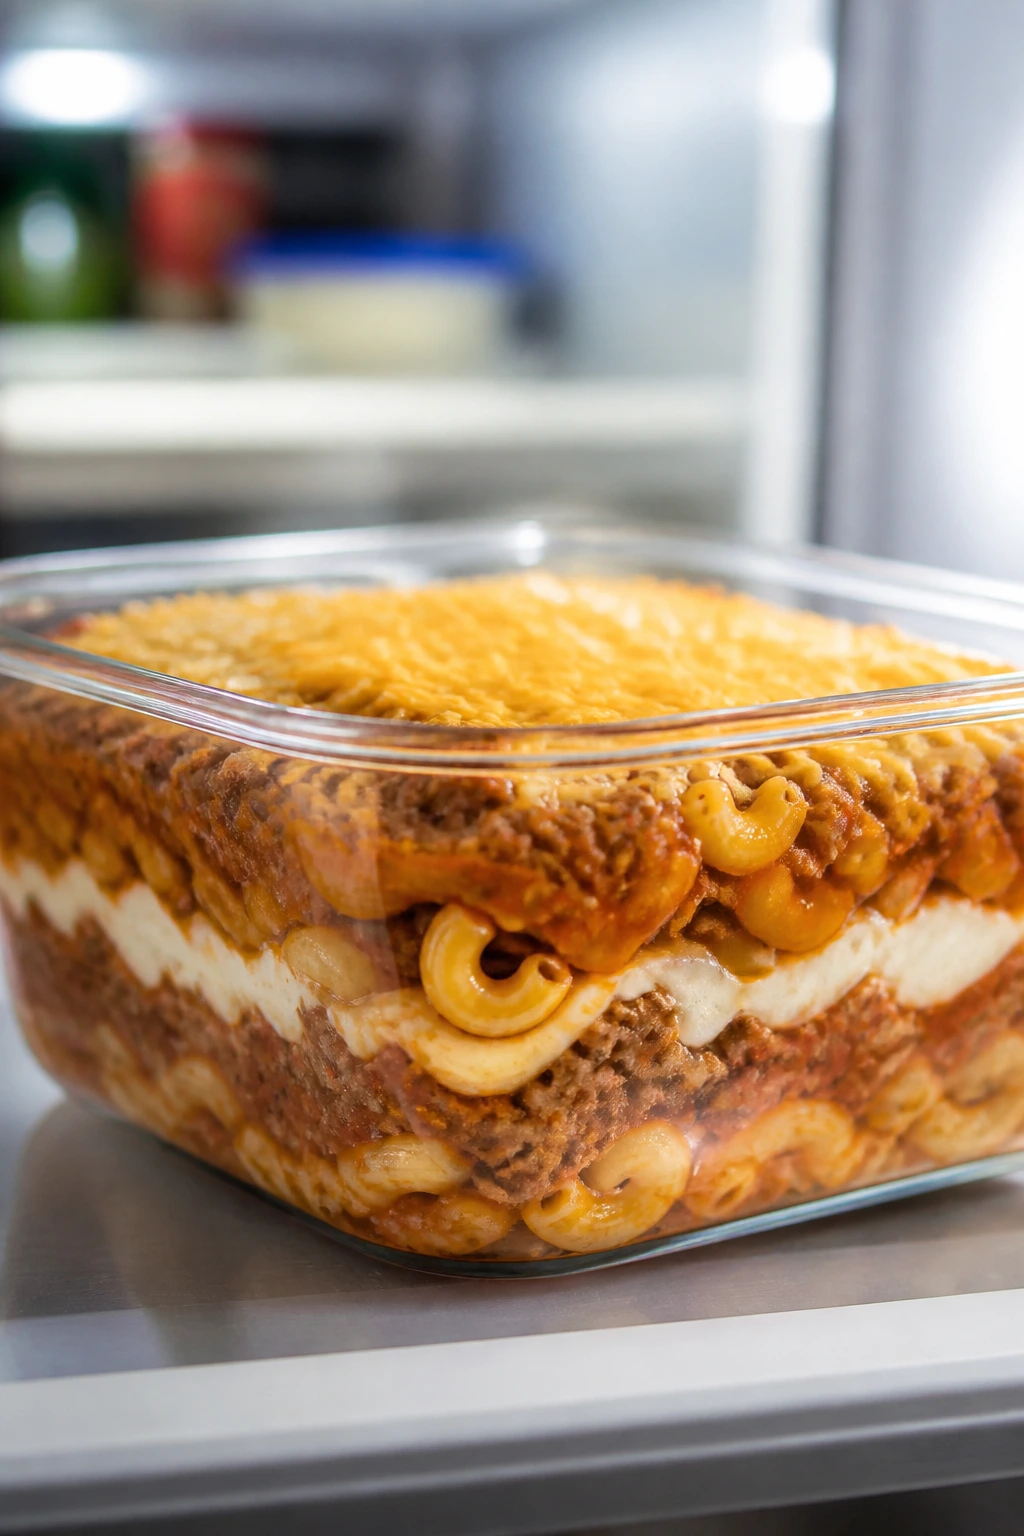
11. Chili Mac
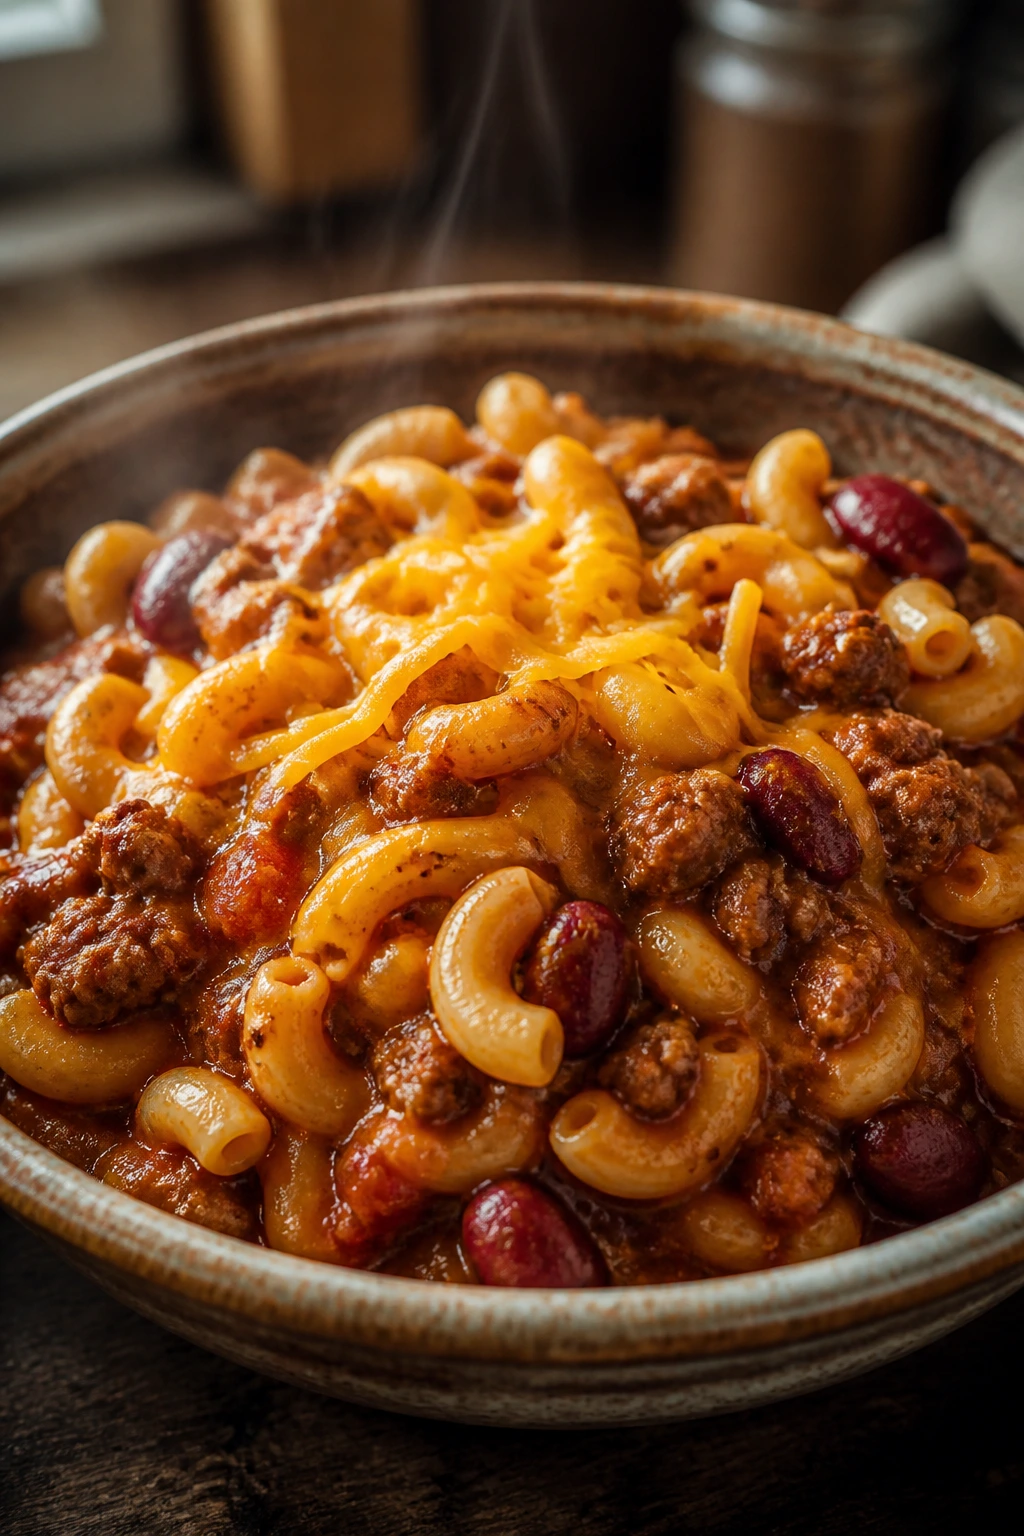
Chili mac is what happens when pasta and chili stop arguing and decide to feed the family together. It’s hearty, cheesy, and one of the best ways to stretch ground beef without making dinner feel skimpy.
Why It Works:
Macaroni cooks right in the chili base, so it soaks up flavor instead of sitting beside it. Beans add bulk without adding much cost, and the cheese on top softens the chili spices enough for kids who want the flavor, not the fire.
Key Ingredients:
- 1 lb ground beef
- 1 small onion, diced
- 2 tablespoons chili powder
- 1 teaspoon cumin
- 1 (15-ounce) can kidney beans, drained
- 1 (14.5-ounce) can diced tomatoes
- 2 cups beef broth
- 2 cups elbow macaroni
- 1 cup shredded cheddar
- Salt to taste
Quick Steps:
- Brown the beef and onion in a deep skillet or Dutch oven over medium-high heat for 6 to 8 minutes.
- Stir in the chili powder and cumin for 30 seconds.
- Add the beans, tomatoes, broth, and macaroni.
- Bring to a boil, then reduce the heat to medium-low, cover, and simmer for 10 to 12 minutes, stirring once or twice, until the macaroni is tender.
- Uncover, stir, and let it sit for 2 minutes to thicken.
- Top with cheddar and cover for 1 minute before serving.
Equipment for This Recipe:
- Deep skillet or Dutch oven
- Wooden spoon
- Measuring cups
- Ladle
How to Serve This Dish:
Serve it in bowls with a little extra cheese and maybe crushed crackers on top if the kids like crunch. A slice of buttered bread on the side is enough to mop up the chili.
Pro Tips for This Recipe:
- Stir once or twice while the pasta cooks so it doesn’t stick to the bottom.
- If the chili gets too thick before the pasta is done, add 1/4 cup broth.
- Mild chili powder keeps this kid-friendly; save the hot stuff for the table.
- A spoonful of sour cream cools the bowl down and smooths the flavor.
Variations on This Dish:
- Bean-Only Version: Skip the beef and add a second can of beans.
- Corny Chili Mac: Stir in 1 cup frozen corn for sweetness.
- Baked Top: Transfer to a dish, add cheese, and bake until the top browns.
Common Mistakes to Avoid with This Dish:
- Using too much liquid: Chili mac should be thick enough to mound on a spoon.
- Cooking the macaroni separately: You lose the flavor-building step.
- Overseasoning too early: Taste after the pasta is tender.
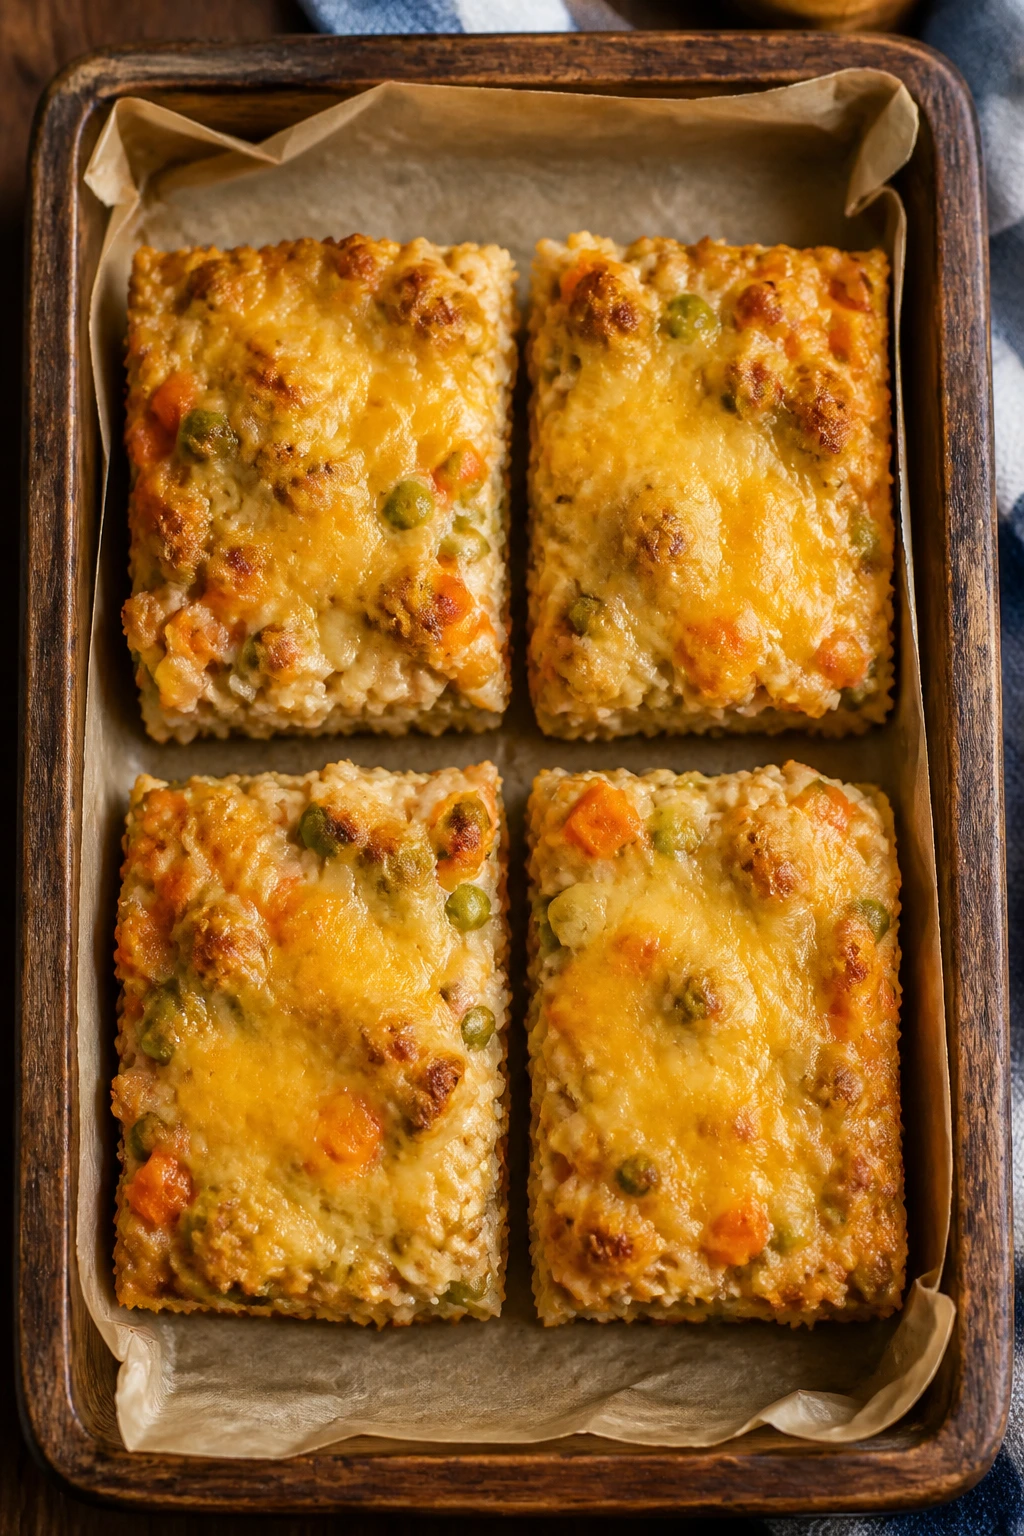
12. Shepherd’s Pie with Ground Turkey
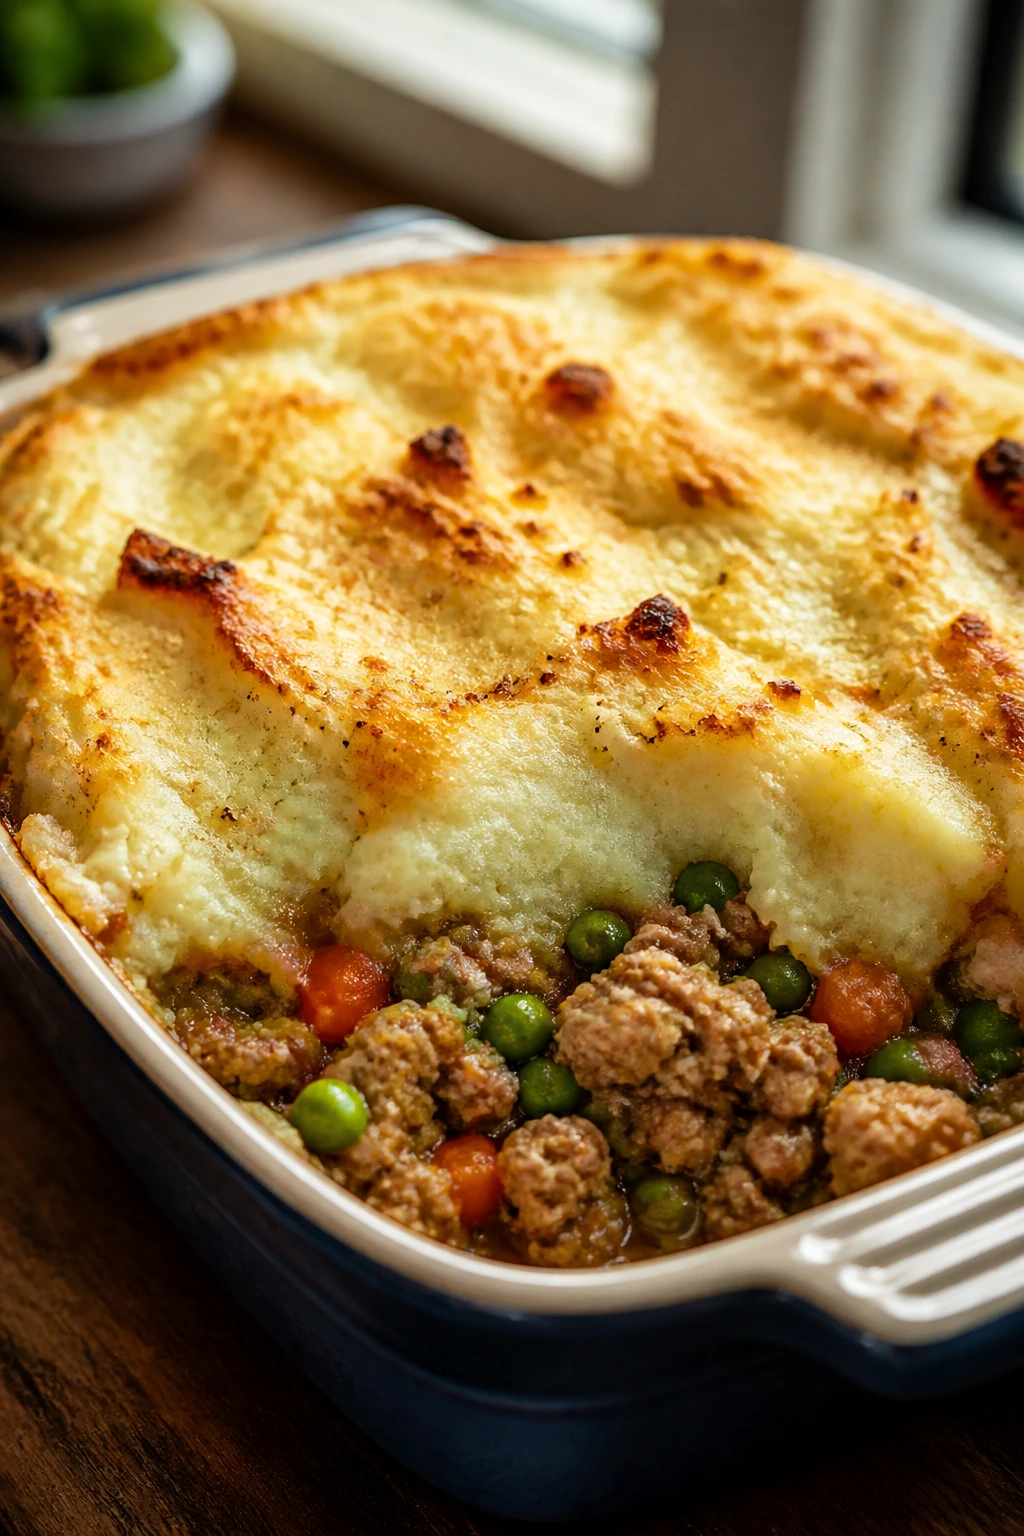
There’s a reason this dish keeps hanging around family tables. It’s soft where kids like soft, savory where adults want more flavor, and cheap enough to make again without a second thought.
Why It Works:
Ground turkey is usually less expensive than a lot of other meats and takes seasoning well. Mashed potatoes on top give the pie a familiar, cozy finish, while carrots and peas sneak in color and texture without asking for a separate side.
Key Ingredients:
- 1 1/4 lb ground turkey
- 1 small onion, diced
- 2 carrots, diced small
- 1 cup frozen peas
- 2 tablespoons flour
- 1 tablespoon tomato paste
- 1 cup chicken broth
- 1 teaspoon Worcestershire sauce
- 4 cups prepared mashed potatoes
- 1 cup shredded cheddar, optional
Quick Steps:
- Heat the oven to 400°F and grease a baking dish.
- Brown the turkey with the onion and carrots for 8 minutes over medium-high heat.
- Stir in the flour and tomato paste, then add the broth and Worcestershire.
- Simmer for 4 to 5 minutes until the filling thickens, then stir in the peas.
- Spread the mixture in the dish, top with mashed potatoes, and rough up the surface with a fork.
- Sprinkle with cheddar if using, then bake for 20 to 25 minutes until the top is golden at the edges.
Equipment for This Recipe:
- Skillet
- Baking dish
- Potato masher if making mash from scratch
- Spoon or spatula
How to Serve This Dish:
Let it cool for 10 minutes so the filling settles and the potatoes don’t slide off the first scoop. A spoonful of ketchup on the side is not fancy, but some households absolutely expect it.
Pro Tips for This Recipe:
- Mash the potatoes a little thicker than you would for serving; loose mash slides.
- Carrots should be diced small so they soften in time.
- If the filling looks thin, simmer it one minute longer before topping.
- Leftover mashed potatoes are perfect here and save time.
Variations on This Dish:
- Beef Version: Swap in ground beef if that’s what’s cheaper that week.
- Sweet Potato Top: Use half sweet potato mash for a little sweetness.
- Corn-Topped Pie: Add a thin layer of corn before the potatoes if you want more texture.
Common Mistakes to Avoid with This Dish:
- Using watery mash: It turns the topping loose.
- Skipping the fork pattern on top: Those ridges brown better.
- Putting it in the oven before the filling thickens: The pie comes out soupy.
13. Loaded Baked Potato Soup

A baked potato turned into soup is still a baked potato at heart — just warmer, creamier, and easier to feed to a crowd. This version stays cheap if you keep the toppings simple and let the potatoes carry the meal.
Why It Works:
Potatoes, broth, milk, and a little cheese make a thick soup without needing a fancy stock or cream base. The flavor is familiar, the texture is soft, and the toppings give kids a little control over their own bowls, which helps more than you’d think.
Key Ingredients:
- 2 pounds russet potatoes, peeled and diced
- 1 small onion, diced
- 4 cups chicken broth
- 2 cups milk
- 1/2 cup sour cream or cream cheese
- 1 cup shredded cheddar
- 4 slices bacon, cooked and crumbled, optional
- 2 tablespoons butter
- Salt and pepper
- Sliced scallions, optional
Quick Steps:
- Melt the butter in a pot and cook the onion for 4 minutes until soft.
- Add the potatoes and broth, bring to a boil, then simmer for 15 to 18 minutes until the potatoes are tender.
- Mash some of the potatoes in the pot to thicken the soup, leaving some chunks for texture.
- Stir in the milk and sour cream or cream cheese over low heat.
- Add the cheddar and stir until melted, then season with salt and pepper.
- Top each bowl with bacon and scallions if using.
Equipment for This Recipe:
- Large soup pot
- Potato masher
- Ladle
- Sharp knife
How to Serve This Dish:
Serve it with bread for dipping or with a few saltines if you want the cheapest possible side. The bowl looks best with the toppings right in the center so the soup underneath still steams up around them.
Pro Tips for This Recipe:
- Don’t boil the milk after it goes in or the soup can break.
- Russets thicken better than waxy potatoes.
- Mash only part of the pot if you want a little texture.
- Bacon is optional; cheese and scallions already carry enough flavor.
Variations on This Dish:
- Broccoli Potato Soup: Add 2 cups chopped broccoli with the potatoes.
- Cheesy Bacon Bar: Put the toppings in small bowls so everyone can build their own.
- Lighter Version: Use extra broth and less milk for a thinner, brothy soup.
Common Mistakes to Avoid with This Dish:
- Not cooking the potatoes all the way through: Hard bits ruin the bowl.
- Adding dairy over high heat: It can separate.
- Under-salting: Potatoes soak up salt like sponges.
14. Teriyaki Chicken Thigh Bowls

This bowl is cheap in the right way: it tastes like you made a plan, even if you just needed dinner to behave. Chicken thighs stay juicy, the sauce is sweet and salty, and rice makes the whole thing feel complete.
Why It Works:
Thighs are usually more budget-friendly than breasts and hold up better to quick cooking. A simple soy-honey sauce thickened with cornstarch coats the chicken instead of pooling underneath it, which gives you that glossy takeout look without paying for takeout.
Key Ingredients:
- 1 1/2 pounds boneless, skinless chicken thighs
- 1 cup rice, cooked
- 2 cups broccoli florets, fresh or frozen
- 1/3 cup soy sauce
- 2 tablespoons honey
- 1 tablespoon cornstarch
- 2 tablespoons water
- 1 clove garlic, minced
- 1 teaspoon grated ginger, optional
- 1 tablespoon oil
Quick Steps:
- Cook the rice according to the package.
- Mix the soy sauce, honey, cornstarch, water, garlic, and ginger in a bowl.
- Heat the oil in a skillet over medium-high heat and cook the chicken thighs for 5 to 6 minutes per side until browned and cooked through.
- Pour in the sauce and simmer for 2 to 3 minutes until thick and shiny.
- Steam or microwave the broccoli until bright green and tender.
- Serve the chicken and sauce over the rice with broccoli on the side.
Equipment for This Recipe:
- Large skillet
- Small bowl
- Whisk or fork
- Rice pot or rice cooker
How to Serve This Dish:
Make the bowl in sections: rice on one side, broccoli on the other, chicken in the middle. That lets kids pick their own path through the plate, which somehow matters more than a lot of adults want to admit.
Pro Tips for This Recipe:
- Pat the chicken dry before it hits the skillet so it browns instead of steaming.
- If the sauce gets too thick, add 1 tablespoon water at a time.
- Frozen broccoli is fine and often cheaper; just don’t overcook it into mush.
- Slice the chicken after cooking if you want easier bites for smaller kids.
Variations on This Dish:
- Sesame Version: Add a teaspoon of sesame oil at the end.
- Orange Twist: Stir in a tablespoon of orange juice for a sweeter sauce.
- Veggie Bowl: Swap chicken for tofu and keep the sauce the same.
Common Mistakes to Avoid with This Recipe:
- Overcrowding the pan: Chicken steams when it can’t touch the heat.
- Adding cornstarch without mixing it first: It clumps immediately.
- Cooking the broccoli too long: Bright green broccoli is part of the appeal.
15. Ramen Stir-Fry with Egg and Veggies
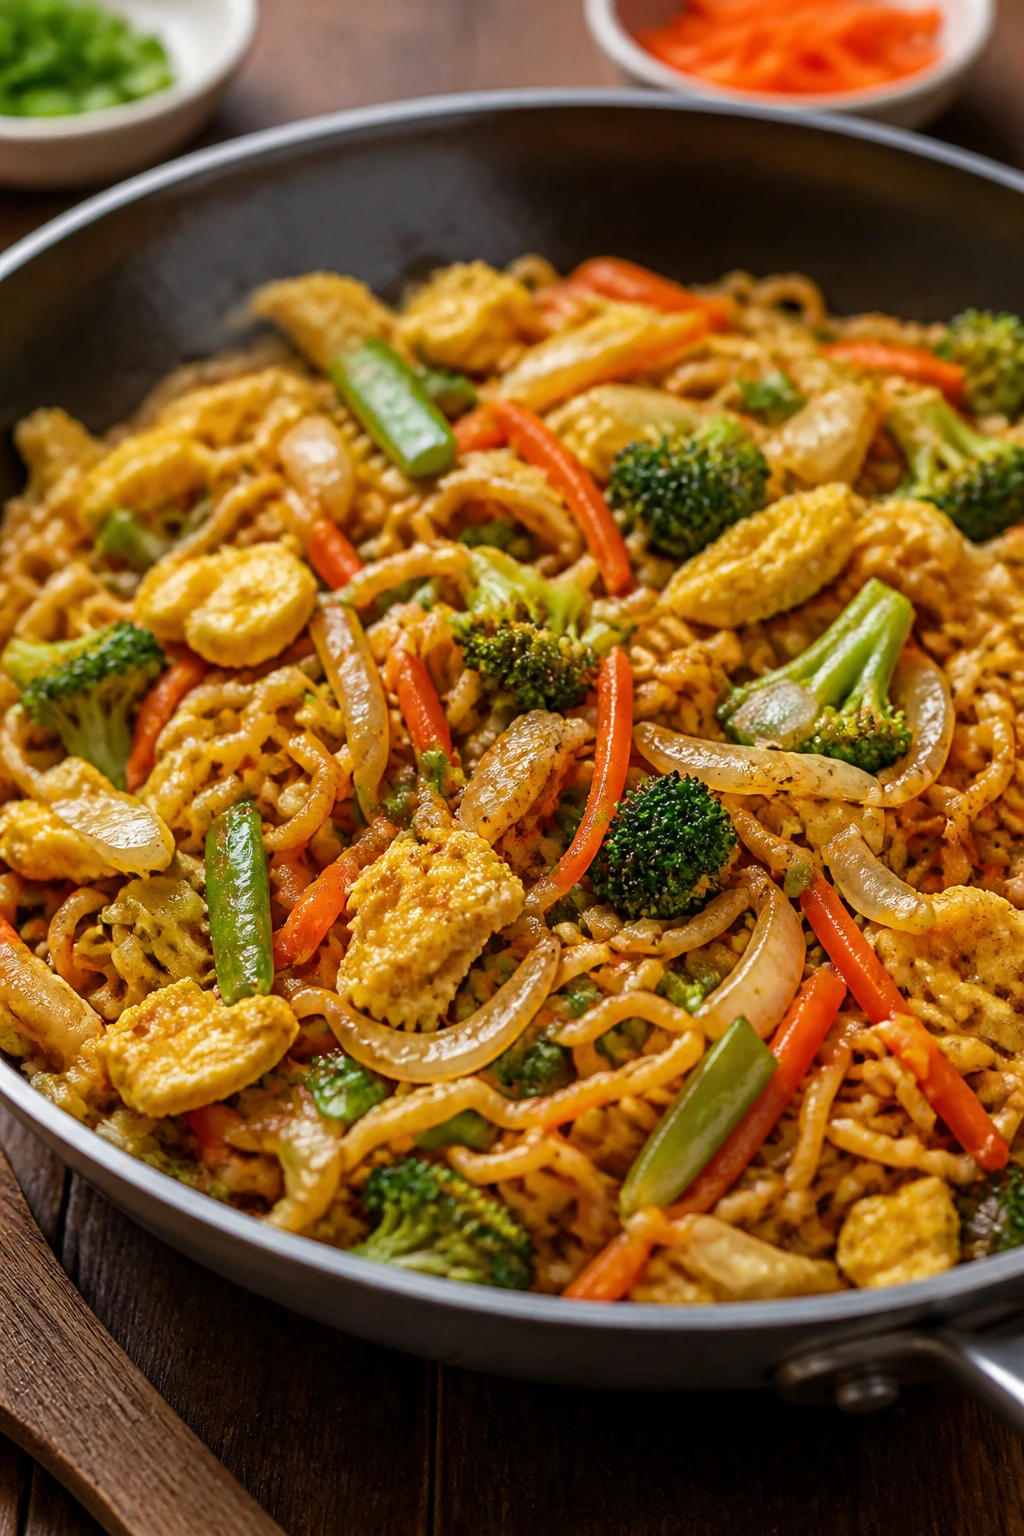
Ramen bricks are cheap, sure, but they’re also useful in a way that plain pasta sometimes isn’t. They bring their own springy texture, and when you toss them with eggs and vegetables, they stop tasting like a survival meal and start tasting like dinner.
Why It Works:
Instant ramen cooks in minutes and stretches with eggs and vegetables beautifully. You can skip the seasoning packet or use part of it, which gives you control over salt and keeps the whole pan from tasting one-note. The finished noodles stay slurpy, soft, and easy for kids to twirl.
Key Ingredients:
- 4 packs instant ramen noodles, seasoning packets removed or saved
- 4 large eggs
- 2 cups coleslaw mix or frozen stir-fry vegetables
- 2 tablespoons butter or oil
- 2 tablespoons soy sauce
- 1 teaspoon minced garlic
- 1 tablespoon water, if needed
- Sliced green onions, optional
Quick Steps:
- Cook the ramen noodles in boiling water for 2 minutes, then drain and rinse lightly so they don’t stick.
- Scramble the eggs in a skillet with 1 tablespoon butter, then remove them.
- Add the remaining butter, the vegetables, and garlic; cook for 3 to 4 minutes until hot.
- Toss in the noodles and soy sauce.
- Return the eggs to the pan and stir for 1 minute until everything is hot and glossy.
- Splash in a tablespoon of water if the pan looks dry.
Equipment for This Recipe:
- Large skillet or wok
- Pot for boiling noodles
- Spatula
- Colander
How to Serve This Dish:
Pile the noodles into bowls and let kids add their own soy sauce or green onions if they want them. If you’ve got leftover cooked chicken, this is one of the easiest places to hide it.
Pro Tips for This Recipe:
- Rinse the noodles briefly after draining if they’re sticking together.
- Coleslaw mix saves chopping time and holds up well in the hot pan.
- Don’t salt aggressively until you taste the finished dish; ramen seasoning and soy sauce already bring plenty.
- A spoonful of peanut butter can make the sauce richer if you want a looser pad-thai feel.
Variations on This Recipe:
- Chicken Ramen Stir-Fry: Add 1 cup chopped cooked chicken.
- Peanut Sauce Version: Stir in 1 tablespoon peanut butter with the soy sauce.
- Fried Egg Topper: Fry one egg per bowl instead of scrambling them in.
Common Mistakes to Avoid with This Recipe:
- Overcooking the noodles: They only need a minute or two.
- Using all the seasoning packets plus soy sauce: The dish gets too salty fast.
- Skipping the final toss: The noodles need that last minute to pick up flavor evenly.
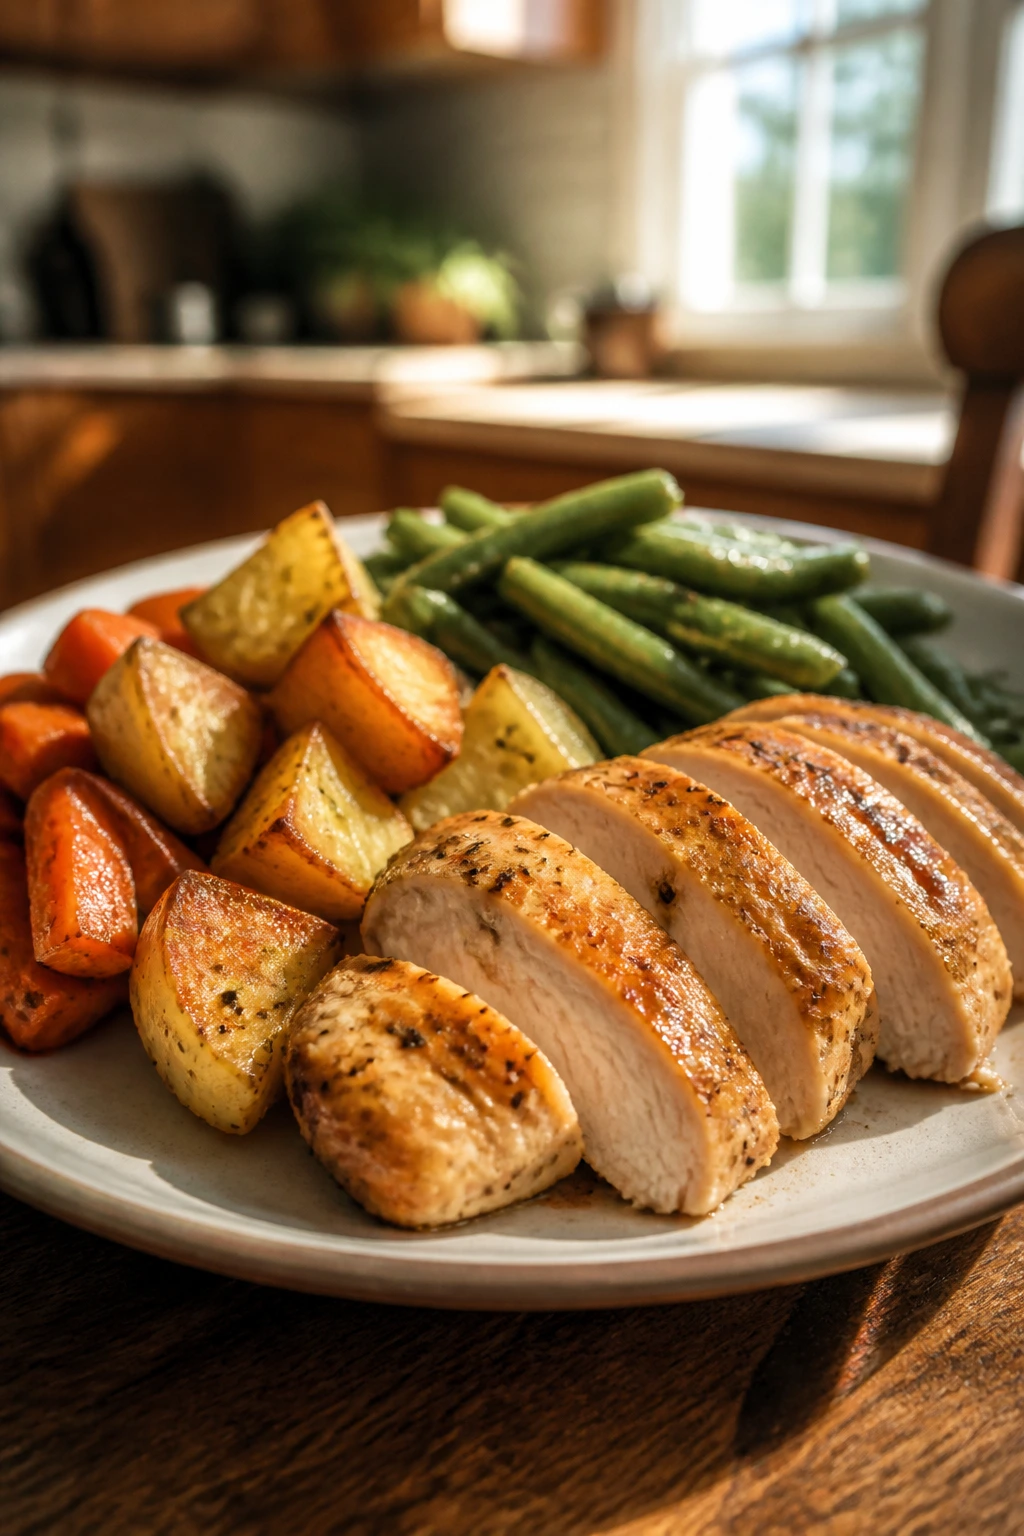
16. Baked Chicken Drumsticks and Carrots
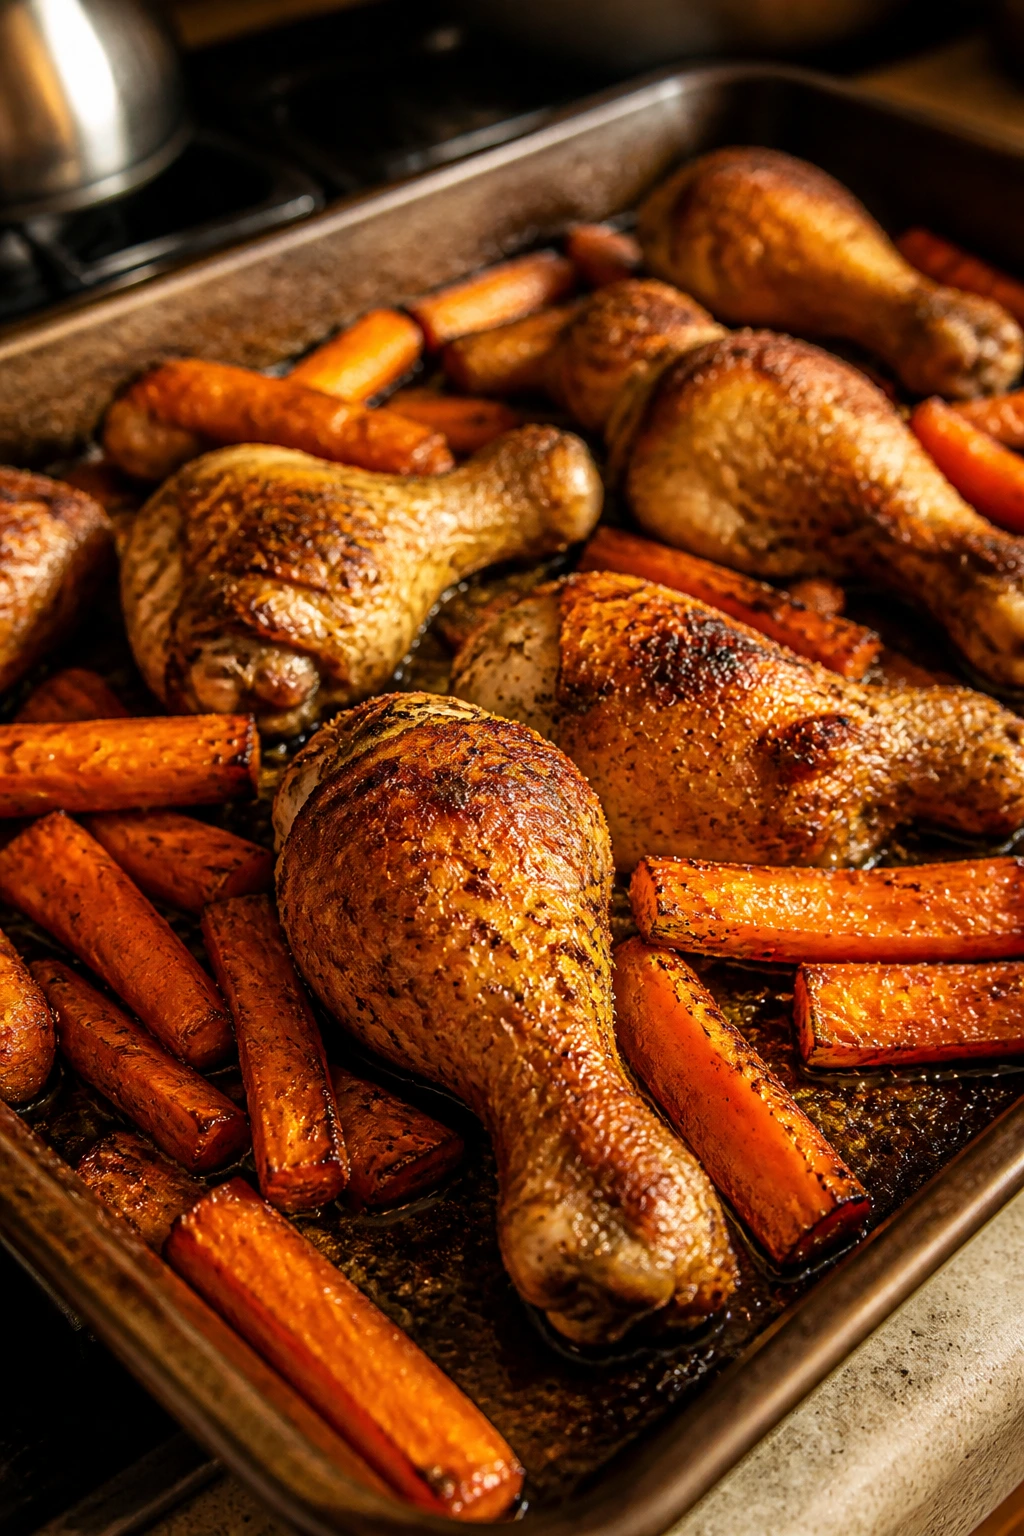
Drumsticks are one of the best budget cuts because they bring their own flavor and don’t dry out as easily as leaner chicken. Roasting them with carrots gives you a sheet pan dinner that looks more planned than it is.
Why It Works:
Bone-in chicken usually costs less than boneless cuts, and drumsticks stay juicy even if you’re a little distracted. Carrots roast sweet and soft in the same pan, so the whole meal builds itself while you do almost nothing. That’s the sort of weeknight math I trust.
Key Ingredients:
- 8 chicken drumsticks
- 1 1/2 pounds carrots, peeled and cut into sticks
- 1 1/2 pounds baby potatoes, halved
- 2 tablespoons oil
- 1 tablespoon paprika
- 1 teaspoon garlic powder
- 1 teaspoon salt
- 1/2 teaspoon black pepper
Quick Steps:
- Heat the oven to 425°F and line a rimmed sheet pan.
- Toss the carrots and potatoes with half the oil, salt, pepper, and half the paprika.
- Rub the drumsticks with the remaining oil, paprika, garlic powder, salt, and pepper.
- Spread everything on the pan with space between the pieces.
- Roast for 35 to 45 minutes, turning the vegetables once, until the chicken reaches 165°F and the skin is browned.
- Rest for 5 minutes before serving.
Equipment for This Recipe:
- Rimmed sheet pan
- Mixing bowl
- Tongs
- Instant-read thermometer, optional but useful
How to Serve This Dish:
Put two drumsticks and a scoop of vegetables on each plate and let the juices from the pan do the rest. If you want a sauce, a little ketchup, honey mustard, or barbecue sauce on the side is enough.
Pro Tips for This Recipe:
- Pat the chicken dry so the skin browns better.
- Cut the potatoes evenly so they finish with the carrots.
- Don’t crowd the pan or the vegetables will steam.
- If the drumsticks are very large, give them 5 extra minutes and check the temperature.
Variations on This Dish:
- Lemon-Garlic Version: Add lemon zest and a squeeze of juice after roasting.
- Barbecue Night: Brush the drumsticks with barbecue sauce during the last 10 minutes.
- Onion Roast: Add wedges of onion for a sweeter pan sauce.
Common Mistakes to Avoid with This Dish:
- Putting cold chicken on the pan and hoping for the best: Drying the skin first helps.
- Removing the chicken too early: Check the thickest part near the bone.
- Using tiny carrot coins: They burn before the chicken is done.
17. Tortellini Soup with Beans
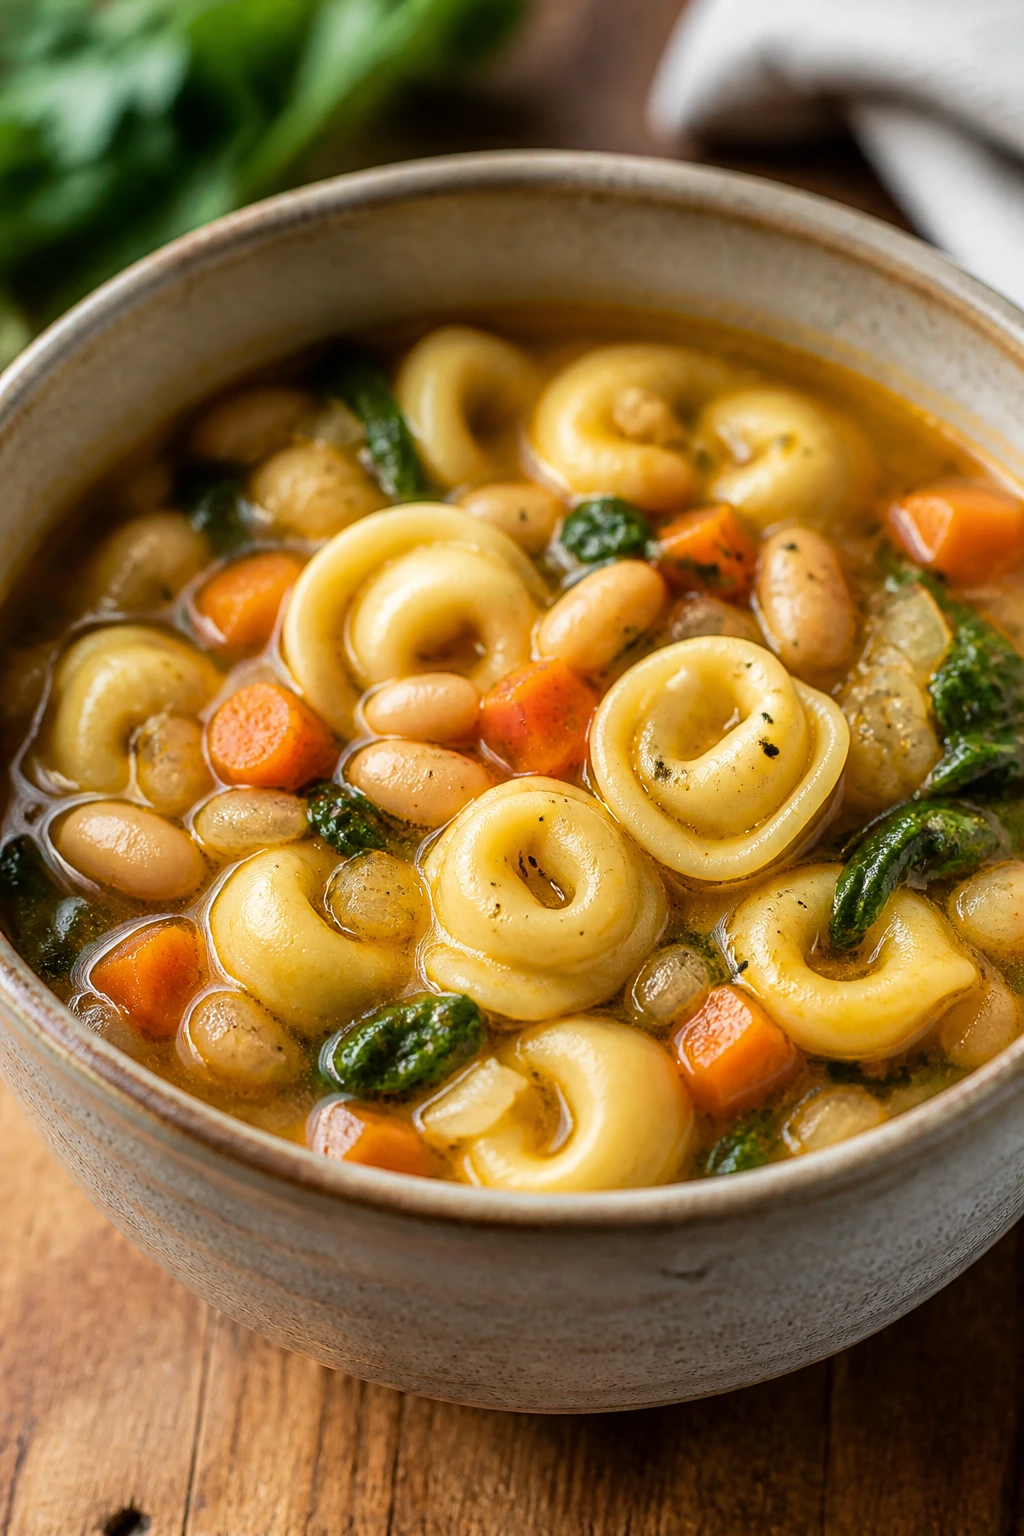
This soup is what you make when you want something warm and filling without spending half the evening hovering over a pot. Cheese tortellini makes it kid-friendly, and beans bulk up the bowl without making it feel stingy.
Why It Works:
Refrigerated tortellini cooks fast and brings its own cheesy flavor, which saves both time and money. White beans melt into the broth a little and make the soup feel thicker than it is. Spinach is optional, but it adds color without changing the flavor much.
Key Ingredients:
- 1 tablespoon olive oil
- 1 small onion, diced
- 2 carrots, diced
- 2 cloves garlic, minced
- 6 cups chicken or vegetable broth
- 1 (15-ounce) can white beans, drained and rinsed
- 1 (14-ounce) can diced tomatoes
- 1 teaspoon Italian seasoning
- 1 (20-ounce) package refrigerated cheese tortellini
- 2 cups baby spinach
- Grated Parmesan, optional
Quick Steps:
- Heat the oil in a soup pot over medium heat and cook the onion and carrots for 5 minutes.
- Add the garlic and cook for 30 seconds.
- Pour in the broth, beans, tomatoes, and Italian seasoning, then bring to a boil.
- Add the tortellini and simmer for 4 to 6 minutes, until they float and feel tender.
- Stir in the spinach and cook for 1 minute until wilted.
- Ladle into bowls and top with Parmesan if you want.
Equipment for This Recipe:
- Large soup pot
- Ladle
- Knife
- Cutting board
How to Serve This Dish:
Serve it with crackers, toast, or a hunk of bread if you want the cheapest side possible. The soup itself is the main event, so the side just needs to give people something to dunk.
Pro Tips for This Recipe:
- Add the tortellini at the end so it doesn’t split open and go soggy.
- Use vegetable broth for a meatless version that still tastes full.
- A pinch of salt at the end matters more than you think; broth varies a lot.
- If you want a thicker soup, mash a few beans against the side of the pot.
Variations on This Dish:
- Sausage Version: Add sliced cooked sausage with the carrots.
- Creamy Finish: Stir in 1/2 cup milk or cream at the end.
- Pesto Swirl: Add a spoonful of pesto to adult bowls only.
Common Mistakes to Avoid with This Dish:
- Boiling the tortellini too long: It breaks apart fast.
- Adding spinach too early: It turns drab and stringy.
- Starting with too little broth: Tortellini absorbs a lot as it sits.
18. Breakfast-for-Dinner Pancakes and Scrambled Eggs
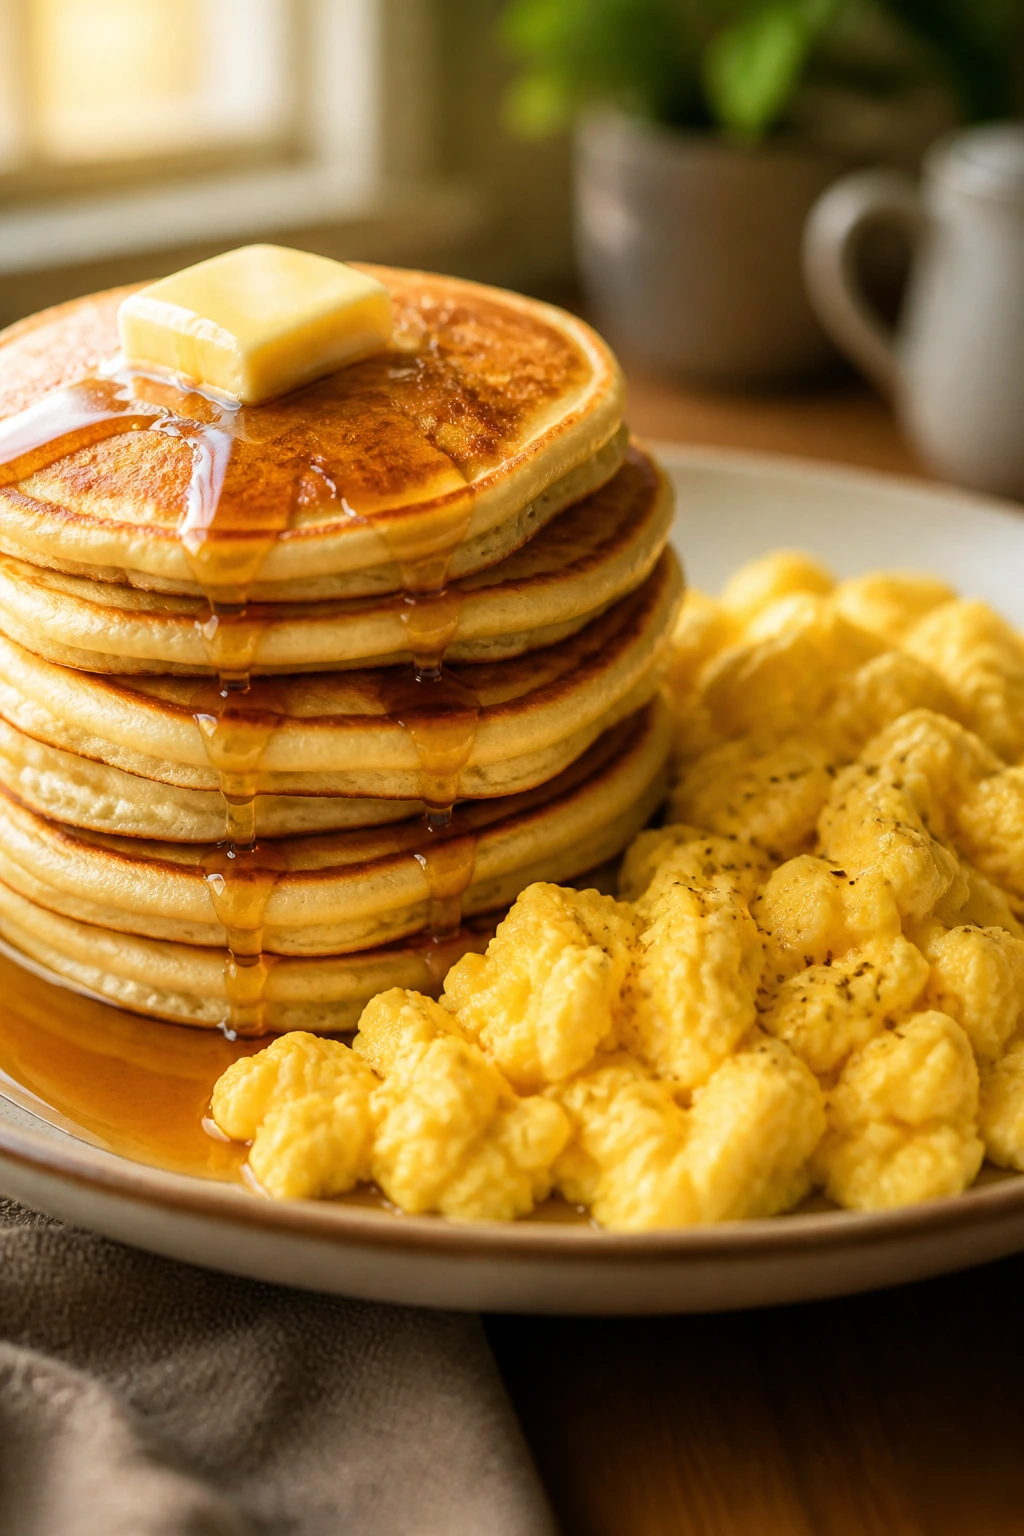
Breakfast for dinner sounds like a backup plan until you sit down to a plate of hot pancakes, soft eggs, and maybe a little sausage on the side. Kids usually treat it like a small celebration, which is useful when everyone is tired and the pantry is thin.
Why It Works:
Eggs are still one of the cheapest proteins around, and pancakes use basic pantry ingredients that most kitchens already have. The sweet-savory combo keeps the meal from feeling repetitive, and you can scale it up with almost no stress.
Key Ingredients:
- 2 cups all-purpose flour
- 2 tablespoons sugar
- 1 tablespoon baking powder
- 1/2 teaspoon salt
- 1 3/4 cups milk
- 2 large eggs
- 2 tablespoons melted butter
- 6 large eggs for scrambling
- 1 tablespoon butter for the eggs
- Maple syrup or fruit, for serving
- Breakfast sausage, optional
Quick Steps:
- Whisk the flour, sugar, baking powder, and salt in a bowl.
- In another bowl, mix the milk, eggs, and melted butter.
- Stir the wet ingredients into the dry ingredients just until combined; a few lumps are fine.
- Cook the pancakes on a lightly greased griddle over medium heat for 2 to 3 minutes per side, until bubbles form and the edges look set.
- Scramble the remaining eggs in butter over low to medium-low heat until soft and just set.
- Serve warm with syrup or fruit.
Equipment for This Recipe:
- Mixing bowls
- Whisk
- Skillet or griddle
- Spatula
How to Serve This Dish:
Stack the pancakes beside the eggs instead of underneath them so the syrup stays where it belongs. If you add sausage, keep the links separate; it makes the plate look intentional.
Pro Tips for This Recipe:
- Don’t beat pancake batter smooth or the pancakes get tough.
- Keep the scrambled eggs soft; dry eggs lose their appeal fast.
- If you need to stretch the meal, add oatmeal or fruit, not more pancake batter.
- Frozen berries warm up well as a cheap topping.
Variations on This Dish:
- Banana Pancake Version: Mash one ripe banana into the batter.
- Savory Plate: Skip syrup and serve the pancakes with cheese and eggs.
- Buttermilk Swap: Use buttermilk for a tangier pancake.
Common Mistakes to Avoid with This Dish:
- Cooking pancakes on high heat: The outside burns before the center sets.
- Overcooking the eggs: Soft scrambled eggs are the point.
- Serving everything cold: Breakfast food gets dull fast once it cools.
19. Homemade Pizza Quesadillas

Pizza quesadillas are not trying to be Italian, and that’s part of the charm. They’re crisp, cheesy, a little saucy, and easy enough to make when the fridge has one lonely tortilla stack and a bag of mozzarella.
Why It Works:
Tortillas cook faster than pizza dough and cost less, which makes them useful for a family dinner that needs to happen quickly. The filling stays mild unless you want pepperoni or vegetables, so picky eaters usually don’t argue with it. It’s pizza energy with less money and less waiting.
Key Ingredients:
- 8 flour tortillas
- 1 cup pizza sauce
- 2 1/2 cups shredded mozzarella
- 1/2 cup mini pepperoni, optional
- 1/2 cup diced bell pepper or mushrooms, optional
- 1 teaspoon Italian seasoning
- 1 tablespoon butter or oil
- Grated Parmesan, optional
Quick Steps:
- Heat a skillet over medium heat and melt a little butter or oil.
- Place one tortilla in the pan and spread a thin layer of pizza sauce over half of it.
- Sprinkle mozzarella over the sauce, then add pepperoni or vegetables and a pinch of Italian seasoning.
- Fold the tortilla over and cook for 2 to 3 minutes per side until the outside is crisp and the cheese melts.
- Repeat with the remaining tortillas, then cut into wedges.
Equipment for This Recipe:
- Large skillet
- Spatula
- Knife or pizza cutter
- Spoon
How to Serve This Dish:
Serve them with extra sauce for dipping and maybe a few cucumber slices or carrot sticks beside the plate. They’re best cut into triangles so small hands can grab them without the filling falling out.
Pro Tips for This Recipe:
- Keep the sauce layer thin or the tortilla will go soft.
- Use pre-shredded mozzarella if you want faster melting.
- Press the quesadilla gently with the spatula to help the cheese bind.
- Let them rest for a minute before cutting so the filling settles.
Variations on This Dish:
- Supreme Version: Add chopped olives and onions for older kids or adults.
- Pepperoni Only: Keep it plain and familiar.
- Breakfast Pizza Quesadilla: Swap pizza sauce for a thin smear of scrambled egg and cheese.
Common Mistakes to Avoid with This Dish:
- Overfilling the tortilla: It leaks and burns.
- Turning the heat up too high: The shell browns before the cheese melts.
- Skipping the resting minute: Hot filling spills out faster than you’d like.
20. Chicken and Rice Bake
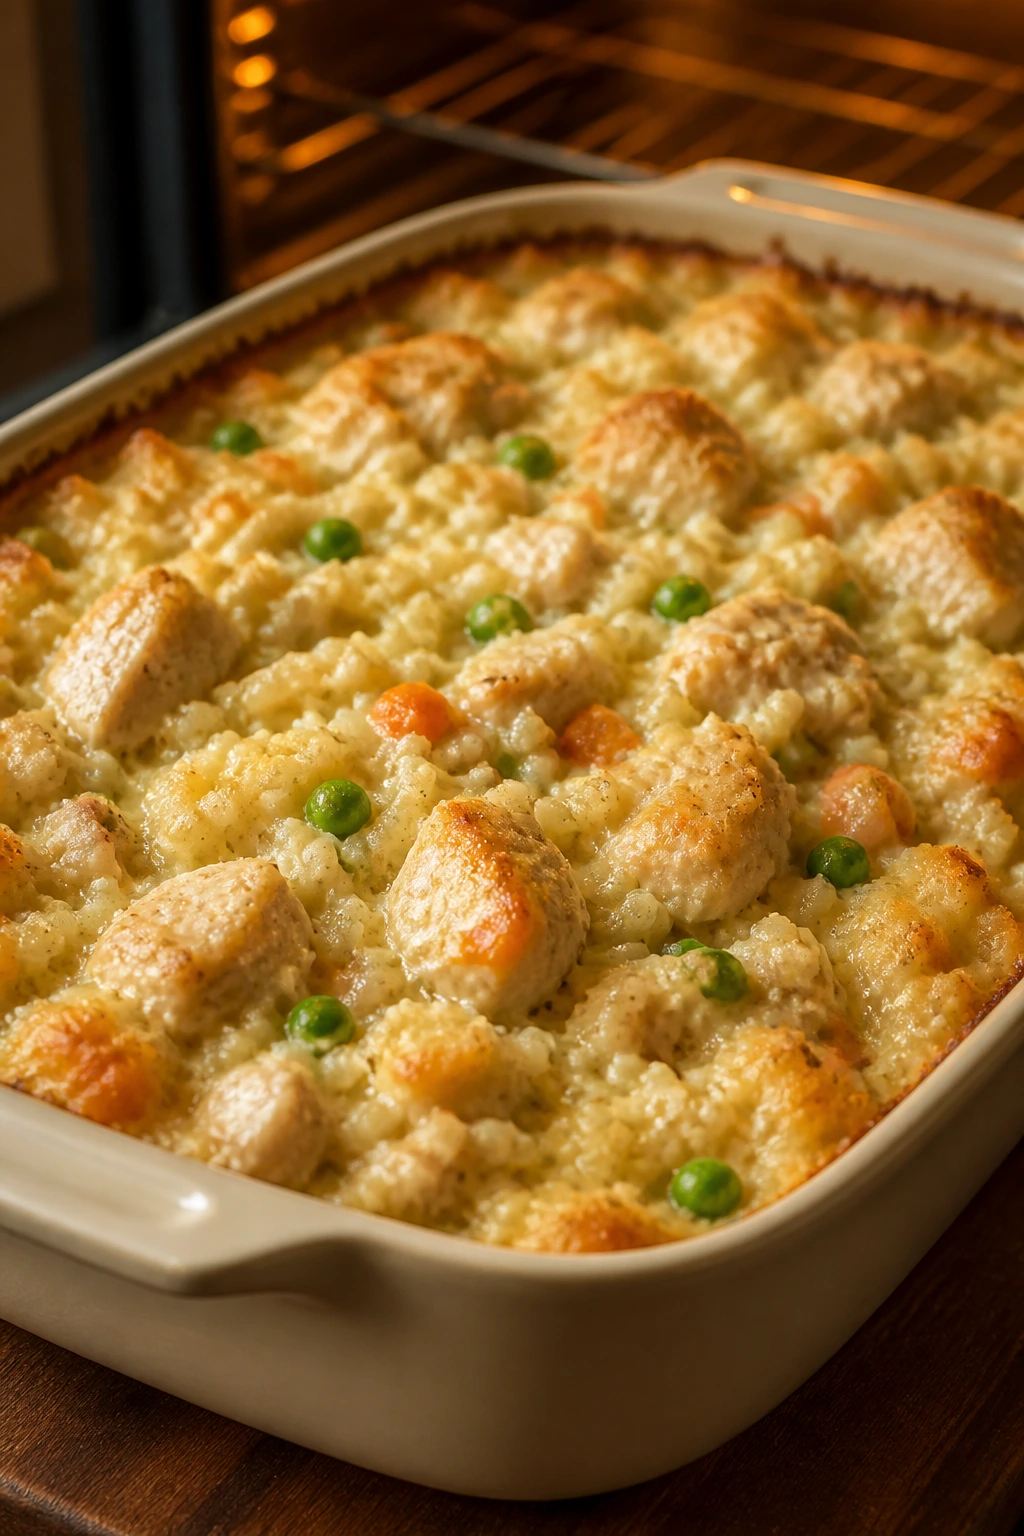
This is the kind of casserole that shows up in real homes because it works, not because it’s glamorous. Rice bakes under chicken in a creamy broth, the edges get a little chewy in the best way, and the whole pan smells like someone actually planned dinner.
Why It Works:
Chicken thighs or drumsticks give you more flavor for the money and stay moist in a long bake. The rice absorbs broth and soup, so every spoonful tastes seasoned from the inside out. Frozen peas or carrots fit right in and keep the dish from becoming one-color beige.
Key Ingredients:
- 1 1/2 pounds bone-in or boneless chicken thighs
- 1 1/2 cups long-grain rice
- 1 (10.5-ounce) can cream of mushroom or cream of chicken soup
- 2 1/2 cups chicken broth
- 1 cup frozen peas and carrots
- 1 small onion, finely diced
- 2 tablespoons butter
- 1 teaspoon garlic powder
- Salt and pepper
Quick Steps:
- Heat the oven to 375°F and grease a 9×13-inch dish.
- Spread the rice, onion, peas and carrots, soup, broth, garlic powder, salt, and pepper in the dish and stir once to combine.
- Nestle the chicken on top and dot the surface with butter.
- Cover tightly with foil and bake for 45 minutes.
- Remove the foil and bake 10 to 15 minutes more until the chicken is cooked through and the rice is tender. If the rice still feels firm, add 1/4 cup broth and bake covered for 5 more minutes.
- Rest for 10 minutes before serving.
Equipment for This Recipe:
- 9×13-inch baking dish
- Aluminum foil
- Measuring cups
- Spoon
- Instant-read thermometer, optional
How to Serve This Dish:
Spoon the rice into bowls first, then set the chicken on top so the juices soak down through the grain. A simple green salad or even sliced tomatoes is enough beside it.
Pro Tips for This Recipe:
- Rinse the rice so it bakes up less sticky.
- Bone-in thighs give you more flavor, but boneless thighs work if you want easier eating.
- Cover tightly or the rice dries out before it softens.
- Let the pan rest before serving; the rice finishes absorbing liquid as it sits.
Variations on This Dish:
- Mushroom Lover’s Bake: Use cream of mushroom soup and add sliced mushrooms.
- Cheesy Finish: Stir 1 cup shredded cheddar into the rice before baking.
- Lemon Herb Version: Add lemon zest and dried thyme for a brighter flavor.
Common Mistakes to Avoid with This Dish:
- Using instant rice without changing the liquid: It overcooks fast in the oven.
- Leaving the dish uncovered too early: The rice needs the trapped steam.
- Serving it straight from the oven: The rice needs a short rest to finish setting.
Why These One-Pan and Casserole Dinners Stretch the Budget So Well
The cheap family dinners kids will actually eat usually share a quiet trick: they let one ingredient do more than one job. Rice becomes the base and the filler. Pasta catches sauce and bulks out meat. Potatoes turn a little bit of beef into a full plate. That’s the real math behind budget cooking, and it’s why these meals work even when the grocery list is short.
One-pan dinners also save money in ways people forget to count. You use fewer pots, which means fewer dishes, less water, and less time standing at the sink wondering why dinner took over the whole evening. More important, you can watch the pan and adjust as you go — add broth if rice looks dry, let a sauce reduce if it seems loose, or throw in frozen vegetables when the skillet needs volume.
I’m a fan of meals that look humble but still feel complete on the plate. A skillet dinner with browned bits around the edges, a casserole with a golden top, a soup with bread beside it — these are not “cheap” in the pejorative sense. They’re efficient. And on the nights when everyone is hungry at once, efficient is a very fine thing.
Essential Equipment for These Recipes
- Large skillet with a lid: Best for rice skillets, chili mac, fried rice, and fast saucy dinners.
- 9×13-inch baking dish: The workhorse for casseroles, baked ziti, and rice bakes.
- Dutch oven or deep soup pot: Handy for soups, chili, and anything that simmers and thickens.
- Rimmed sheet pan: Essential for drumsticks, roasted potatoes, and sheet-pan sides.
- Colander: You’ll use it more than you expect for pasta, beans, and noodles.
- Wooden spoon or heatproof spatula: Better than a flimsy spoon when you need to break up meat or scrape the pan.
- Sharp knife and cutting board: Cheap dinners still need decent knife work, especially onions and carrots.
- Measuring cups and spoons: Budget cooking gets cranky when the broth and rice ratios drift.
- Box grater: Useful for cheese and for hiding vegetables in sauce.
- Instant-read thermometer: Optional, but it takes the guesswork out of chicken and drumsticks.
- Aluminum foil: Not glamorous, but it saves casseroles, roasts, and biscuit tops from overbrowning.
Smart Shopping and Ingredient Tips
The cheapest dinners usually start before you cook. Look for ingredients that carry across several meals in this list: rice, pasta, tortillas, onions, canned tomatoes, shredded cheese, eggs, potatoes, and frozen vegetables. If you build your cart around those, one grocery run can cover several nights without feeling repetitive.
Ground meat is where a lot of families overspend without noticing. Ground beef is fine, but ground turkey, chicken thighs, sausage, and even beans can carry the same dinner with a smaller bill. Bone-in chicken parts — drumsticks and thighs especially — often cost less than boneless breasts and stay juicier in casseroles and sheet-pan meals. That matters more than people think.
For dairy, block cheese usually costs less per ounce than pre-shredded, though pre-shredded is convenient and melts fine in most of these dishes. Store-brand cottage cheese, sour cream, and cream soup are usually good enough here because the recipe is already doing the heavy lifting. Frozen vegetables are another place to save money without losing much texture. In soups, casseroles, stir-fries, and rice dishes, frozen peas, carrots, broccoli, corn, and spinach are reliable.
Canned tomatoes, beans, tuna, and broth are pantry heroes. Buy the plain versions when you can, because you can season them to match the dish instead of paying for a flavored can that may not fit. And if tortillas or bread are on sale, freeze them. That’s not a “later” problem; that’s tomorrow’s quesadillas.
How to Serve These Recipes
Presentation:
Keep the serving style simple and consistent. Spoon skillet dinners into shallow bowls, cut casseroles into clean squares, and set handheld meals like quesadillas and subs on a tray lined with parchment so the table feels planned instead of patched together.
Accompaniments:
A cheap dinner usually needs one fresh or crunchy thing beside it. Think sliced apples, baby carrots, cucumber sticks, bagged salad, green beans, or buttered bread. You do not need three sides. One good side is plenty.
Portions:
Most of these meals feed 4 to 6 people as written, though pasta bakes and soups often stretch farther. For younger kids, start with smaller portions and expect seconds. For bigger appetites, build around rice, potatoes, or bread rather than doubling the protein every time.
Beverage Pairing:
Water does the job, but milk, lemonade, or unsweetened iced tea fits this kind of family dinner well. For soups and casseroles, a cold glass of milk is about as practical as it gets. Nothing fancy. Just something that helps the meal go down easy.
Additional Tips and Flavor Boosters
Flavor Enhancement:
Keep one bright finishing ingredient around: a splash of vinegar, a squeeze of lemon, a spoonful of pickle juice, or a little hot sauce. Cheap dinners often taste round but not sharp, and that tiny hit of acid fixes the problem fast.
Customization:
Frozen peas, corn, spinach, diced carrots, and cabbage are the quiet heroes of budget cooking. You can stir them into rice, pasta, soups, and casseroles without changing the whole meal, which is useful when you want to stretch the pan without starting a family argument.
Serving Suggestions:
Crushed tortilla chips, toasted breadcrumbs, scallions, chopped parsley, and grated cheese are the easiest ways to make a plain dinner feel finished. A crunchy top changes the whole bite. So does a little green color.
Make-It-Yours:
For gluten-free eating, lean on rice, potatoes, beans, corn tortillas, and gluten-free pasta. For dairy-light plates, keep the cheese on the side and build flavor with broth, herbs, and browned onions. For meatless nights, beans, eggs, tortellini, and extra vegetables can carry a meal farther than most people expect.
Make-Ahead, Storage, and Reheating Guidance
Most of these dinners hold well for 3 to 4 days in the refrigerator if you cool them quickly and store them in shallow containers. Soups usually last a little longer — 4 to 5 days — because the broth helps protect the texture. Rice dishes and fried rice are best within 2 to 3 days, since the grains stiffen as they sit.
Freezing works well for chili mac, baked ziti, shepherd’s pie, taco rice, and most soups. Pack them in airtight containers or freezer bags and press out extra air. Two months frozen is a good target for casseroles and pasta bakes; soups can often go a little longer, but the texture is best if you use them sooner. If you’re freezing rice, spread it out thin in a container so it thaws more evenly.
Reheat casseroles covered at 325°F until hot in the middle, usually 20 to 30 minutes for a thawed pan and longer from frozen. Skillet meals and fried rice do better in a pan over medium-low heat with 1 to 2 tablespoons of water or broth to wake the sauce back up. Soups should come back slowly on the stove so the dairy or noodles don’t break apart. If a dish looks dry after chilling, don’t panic. A splash of broth, a bit of water, or a spoonful of sauce usually fixes it.
Variations and Adaptations to Try
Meatless Pantry Night:
Swap meat for beans, eggs, cheese, or lentils wherever it makes sense. Chili mac, taco rice, quesadillas, and pasta sauce all take kindly to a bean-first approach, and the grocery bill usually drops without the plate getting smaller.
Gluten-Free Table Swap:
Use rice instead of pasta where you can, choose corn tortillas over flour, and lean on potatoes, soup, and sheet-pan chicken dinners. Most of these meals are easy to adapt without changing the whole flavor profile.
Lower-Sodium Plan:
Choose low-sodium broth, rinse canned beans, and go lighter on packaged seasoning mixes. Then build flavor with onions, garlic, paprika, oregano, and a little acid at the end. Salt can always be added at the table.
Picky-Eater Soft Landing:
Keep vegetables chopped small, cooked soft, or mixed right into the sauce so they don’t stand out. Put any green garnish, hot sauce, or crunchy topping on the side. Some kids want control more than they want variety.
Budget Stretch Plus:
Add 1 cup of frozen vegetables, 1 extra potato, or another half-cup of rice to nearly any skillet, soup, or casserole. That tiny addition often turns a four-serving pan into a six-serving one without making the meal feel thin.
Regional Flavor Detour:
Shift the seasoning and the dinner changes shape fast. Taco seasoning and salsa make things Tex-Mex. Italian herbs and marinara push them toward pasta night. Soy sauce, ginger, and sesame oil give rice bowls and noodles a different voice entirely.
Common Mistakes to Avoid
Under-seasoning the base:
Cheap ingredients need seasoning more than expensive ones do. If the onions, rice, potatoes, or pasta water are bland, the final dish will taste flat no matter how much cheese you pile on top.
Making everything soft at the same time:
Kids may like tender textures, but mush is not the goal. Keep at least one thing with structure — toasted bread, crisp tortilla edges, browned chicken skin, or a crunchy topping — or the meal starts to feel samey fast.
Choosing the wrong protein for the cooking method:
Lean chicken breasts can dry out in long bakes, and expensive cuts can wreck a budget fast. Chicken thighs, drumsticks, sausage, ground beef, beans, eggs, and tuna are more forgiving choices for these kinds of dinners.
Adding too much liquid:
Soups need broth. Casseroles need enough moisture to cook. But if a pan looks watery before it goes in the oven, it usually comes out watery too. Reduce sauces first. Trust the simmer.
Trying to “hide” vegetables without changing the texture:
If the carrots are huge or the cabbage is stringy, kids notice. Grate, dice small, or cook until soft enough to blend into the meal. That is the whole point.
Forgetting the finishing touch:
A squeeze of lemon, a little cheese, a handful of herbs, or a crunchy topping can make a humble dinner feel finished. Leaving that out is how a good cheap meal ends up tasting merely cheap.
Frequently Asked Questions
Can I really make these cheap family dinners with store-brand ingredients?
Yes, and in a lot of these recipes I’d actively recommend it. Store-brand pasta, broth, canned tomatoes, beans, tortillas, tuna, and cheese usually do the job without any trouble. Save the premium splurges for places where texture matters a lot, like the bread on a sub or the cheese on top of a baked pasta.
What protein gives the best value for family dinners?
Ground turkey, chicken thighs, drumsticks, eggs, canned tuna, sausage, and beans are the usual budget standouts. Ground beef still has a place, especially in chili mac or sloppy joe filling, but you don’t need it every night for dinner to feel satisfying.
How do I keep picky eaters from picking out the vegetables?
Cut vegetables small, cook them soft, and tuck them into sauces, soups, or casseroles where they blend into the background. Grated carrot in pasta sauce, peas in fried rice, and diced onion in meat sauce usually disappear better than big chunks ever will.
Which of these meals works best for meal prep?
Baked ziti, chili mac, taco rice, shepherd’s pie, and chicken and rice bake are strong meal-prep picks because they reheat without falling apart. Fried rice and quesadillas are better fresh, though leftover rice and fillings can still be repurposed the next day.
Can I freeze pasta bakes and casseroles?
Yes. Bake them first or freeze them assembled, then wrap tightly and label them. For best texture, thaw overnight in the fridge before reheating, especially if the dish contains dairy or a lot of sauce.
What if my casserole comes out watery?
That usually means there was too much liquid going in, the pasta or rice was overcooked, or the dish didn’t rest long enough after baking. Next time, reduce the sauce a little before assembly and let the pan sit for 10 minutes before cutting.
How do I stretch one pound of meat to feed more people?
Pair it with rice, pasta, beans, potatoes, or tortillas, and don’t be shy about adding onions or frozen vegetables. A pound of ground beef goes a lot farther in taco rice or chili mac than it does as plain patties.
Is frozen vegetables a bad shortcut?
Not at all. Frozen peas, carrots, broccoli, spinach, corn, and mixed vegetables are some of the best money-saving ingredients in the freezer case. They’re picked and frozen quickly, and in soups, skillets, and casseroles they hold up better than many people expect.
What should I do if the kids hate sauce?
Serve part of the meal with the sauce on the side, or build on dry-to-wet layers: rice under taco meat, noodles under a little cheese, potatoes under sloppy joe filling. Kids often react less to the flavor than to the look of a saucy plate.
Dinner Worth Repeating
The best cheap family dinners are rarely the prettiest thing you’ll make, and that’s fine. They’re the pans that come back empty, the casseroles that disappear before you get a second scoop, the bowls that quiet the room for a few minutes because everyone’s eating instead of negotiating. That’s the win.
If you keep a few of these in rotation, shopping gets calmer and weeknights lose some of their edge. Rice, pasta, potatoes, tortillas, beans, and a sensible amount of cheese can cover a lot of ground when you know how to combine them. And once you’ve got a couple of these down, dinner starts feeling less like a daily emergency and more like something you already know how to handle.