
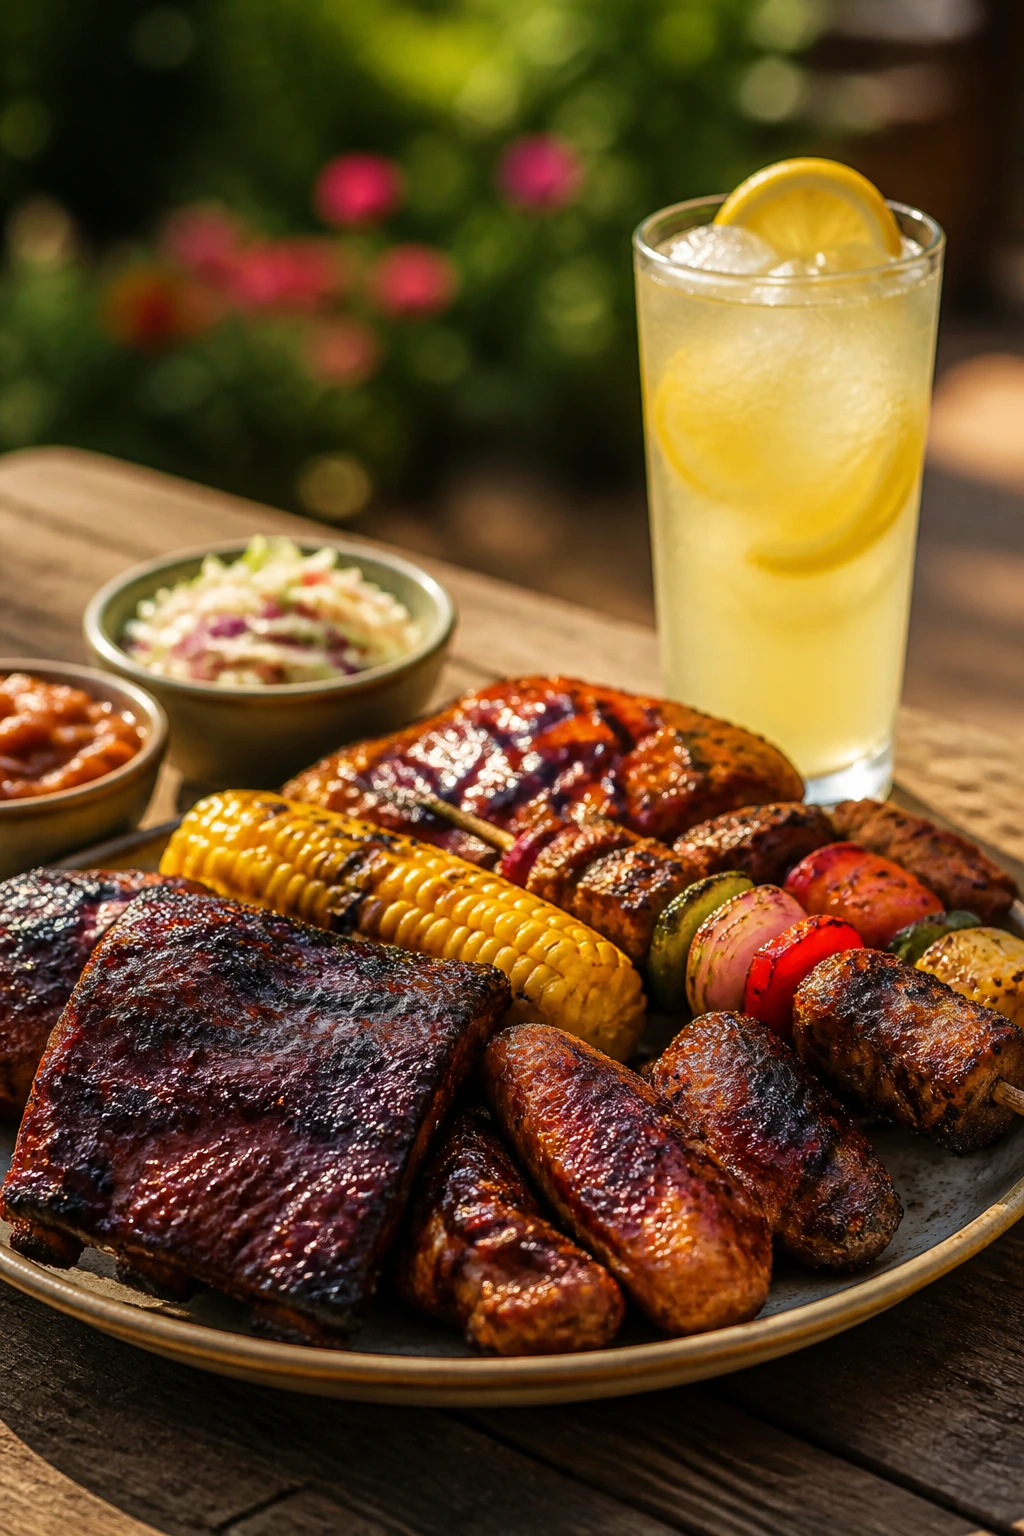
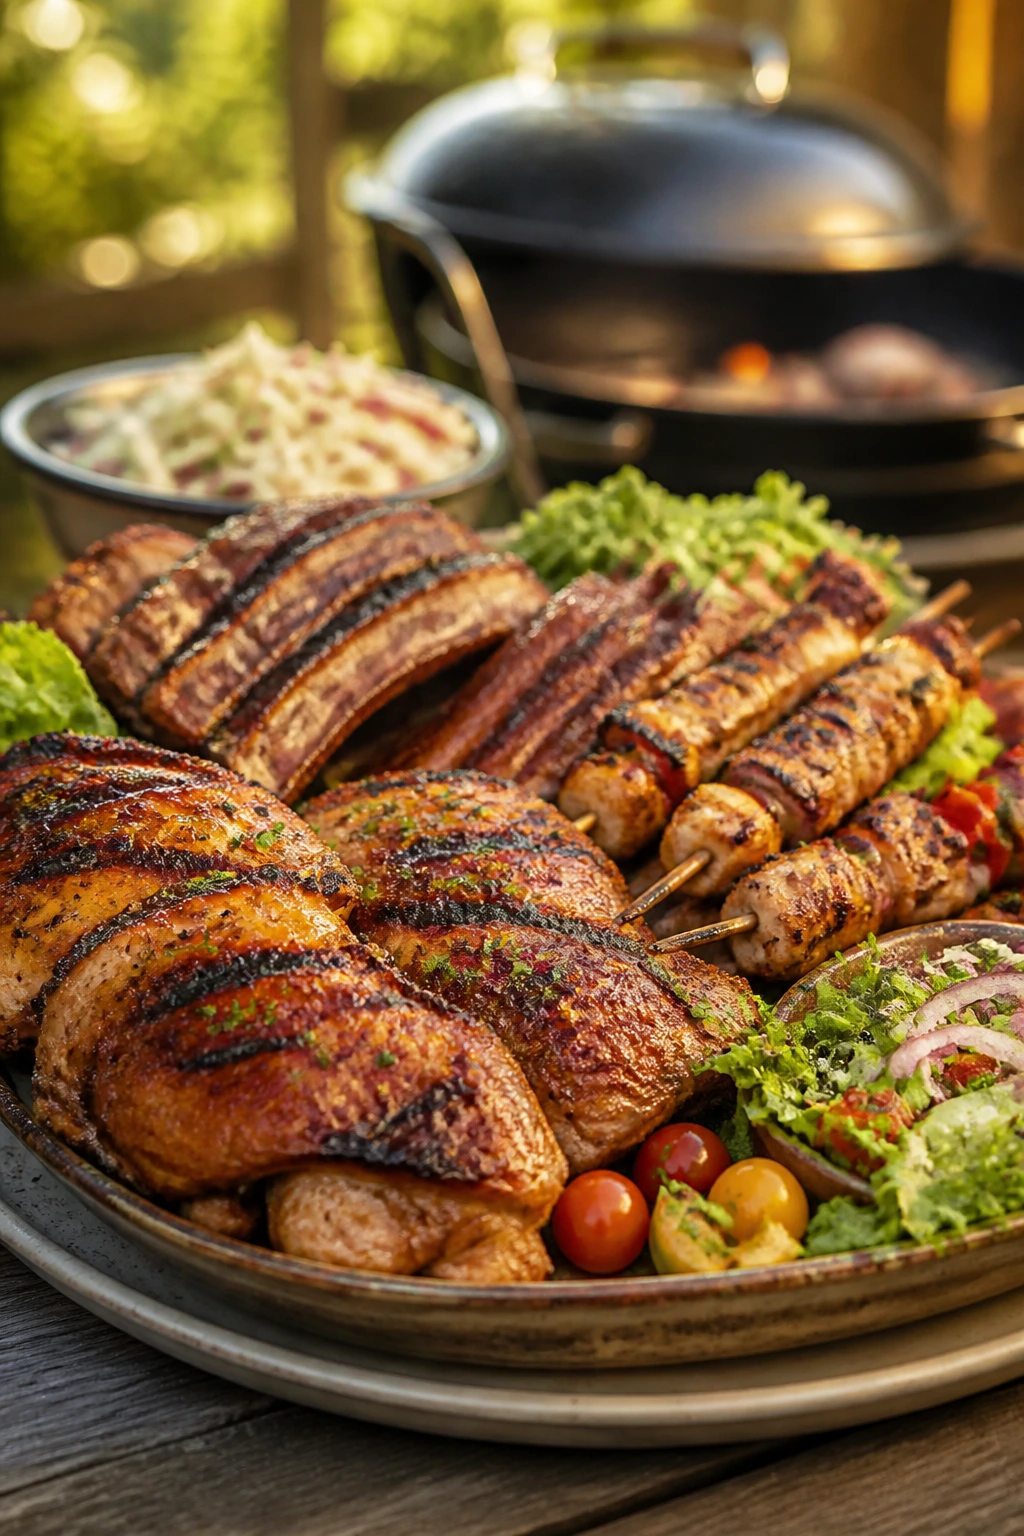
A cold drink is not a side note at a barbecue. It’s part of the architecture. A bite of smoky chicken, a sip of something icy and bright, then another bite when the heat from the grill has softened into salt, fat, and char — that rhythm is what makes easy BBQ recipes feel complete instead of merely cooked.
The best backyard food does three things at once: it feeds a crowd without turning you into a line cook, it gives the grill some real work to do, and it leaves enough room for a glass full of ice, bubbles, or both. That is why these easy BBQ recipes are built around things that like a fast sear, a short marinade, a foil packet, or a slow-cooker finish. Nobody needs a twelve-hour smoke session to earn a good plate. Sometimes the better move is a hot grill, a sharp knife, and a cold drink sweating in a tall glass beside the cutting board.
I like barbecue food that has a little snap to it. A sticky glaze. A cut edge that’s still pink under the surface but not raw. A salad that can stand up to ribs instead of disappearing next to them. If you have ever tried to eat a bland, heavy cookout plate with a warm soda, you know exactly why the drink matters. These recipes are built to keep that problem from happening.
Why These Easy BBQ Recipes Belong Next to a Cold Drink
- They use salt, smoke, and acid in the right places: That mix keeps each bite from flattening out, which matters when you’re sipping something cold between bites.
- Most of them finish fast: Chicken thighs, shrimp, burgers, corn, and skewers all get on and off the heat before your ice melts.
- They work with beer, lemonade, iced tea, or sparkling water: The food is structured enough to handle bubbles and chill without going dull.
- They don’t need a serious tool room: A grill, foil, skewers, and a thermometer cover most of the list.
- They scale cleanly: You can make two chicken thigh packs or four and still keep the process calm.
- They give you a spread, not a stunt: A cookout should feel like a meal, not a flex.
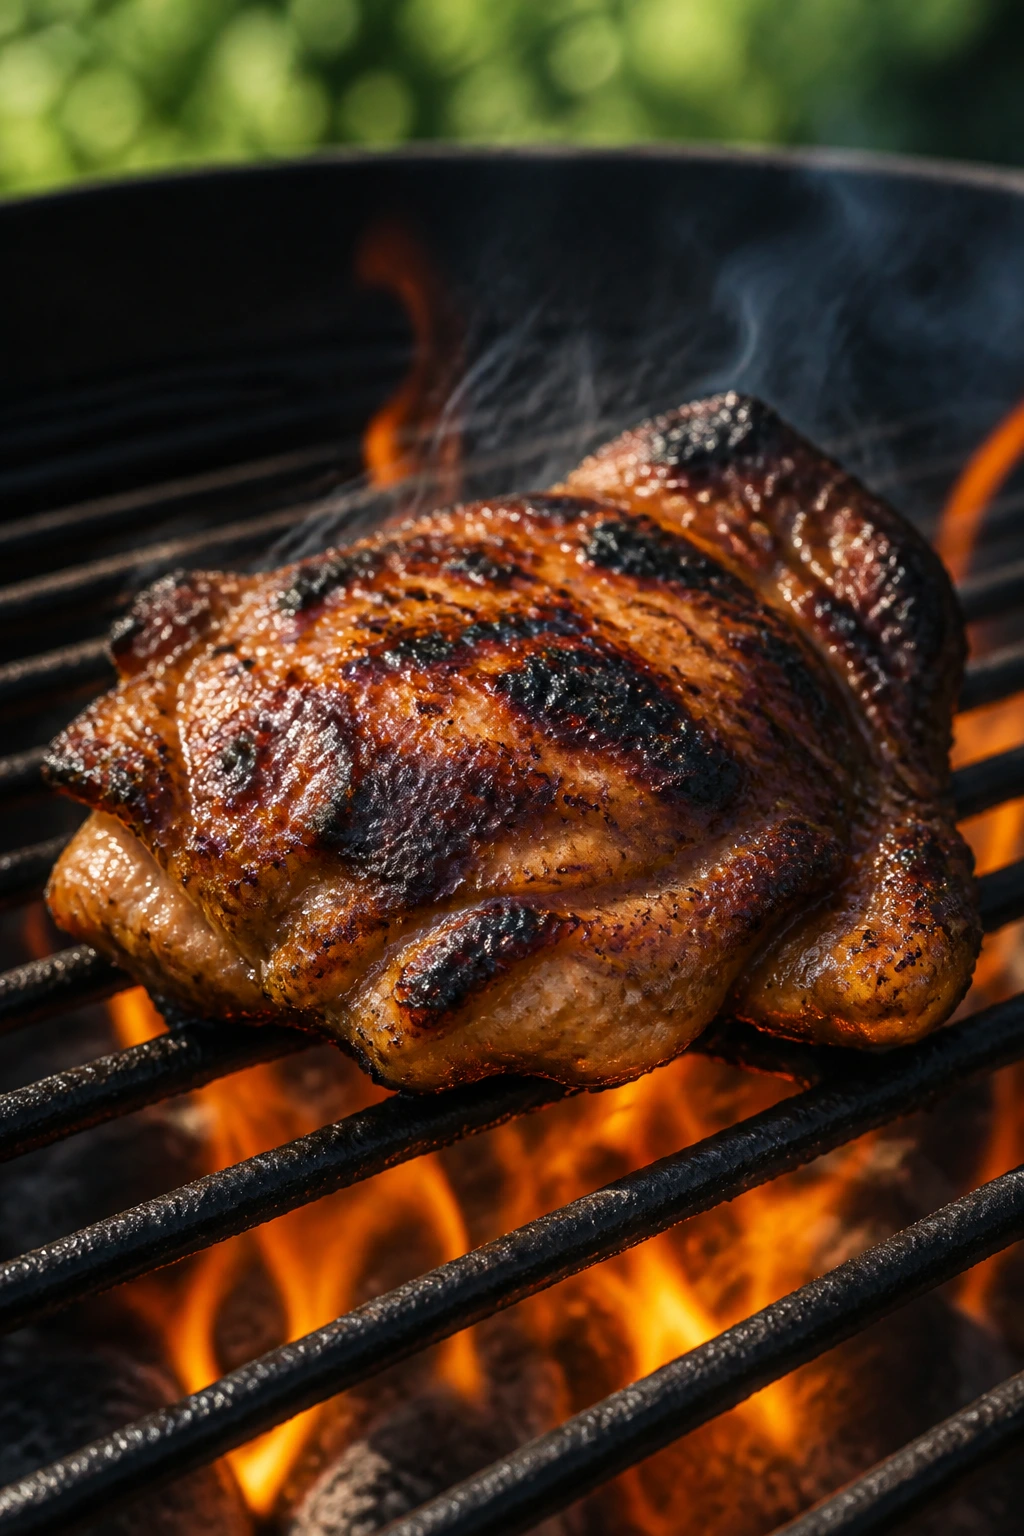
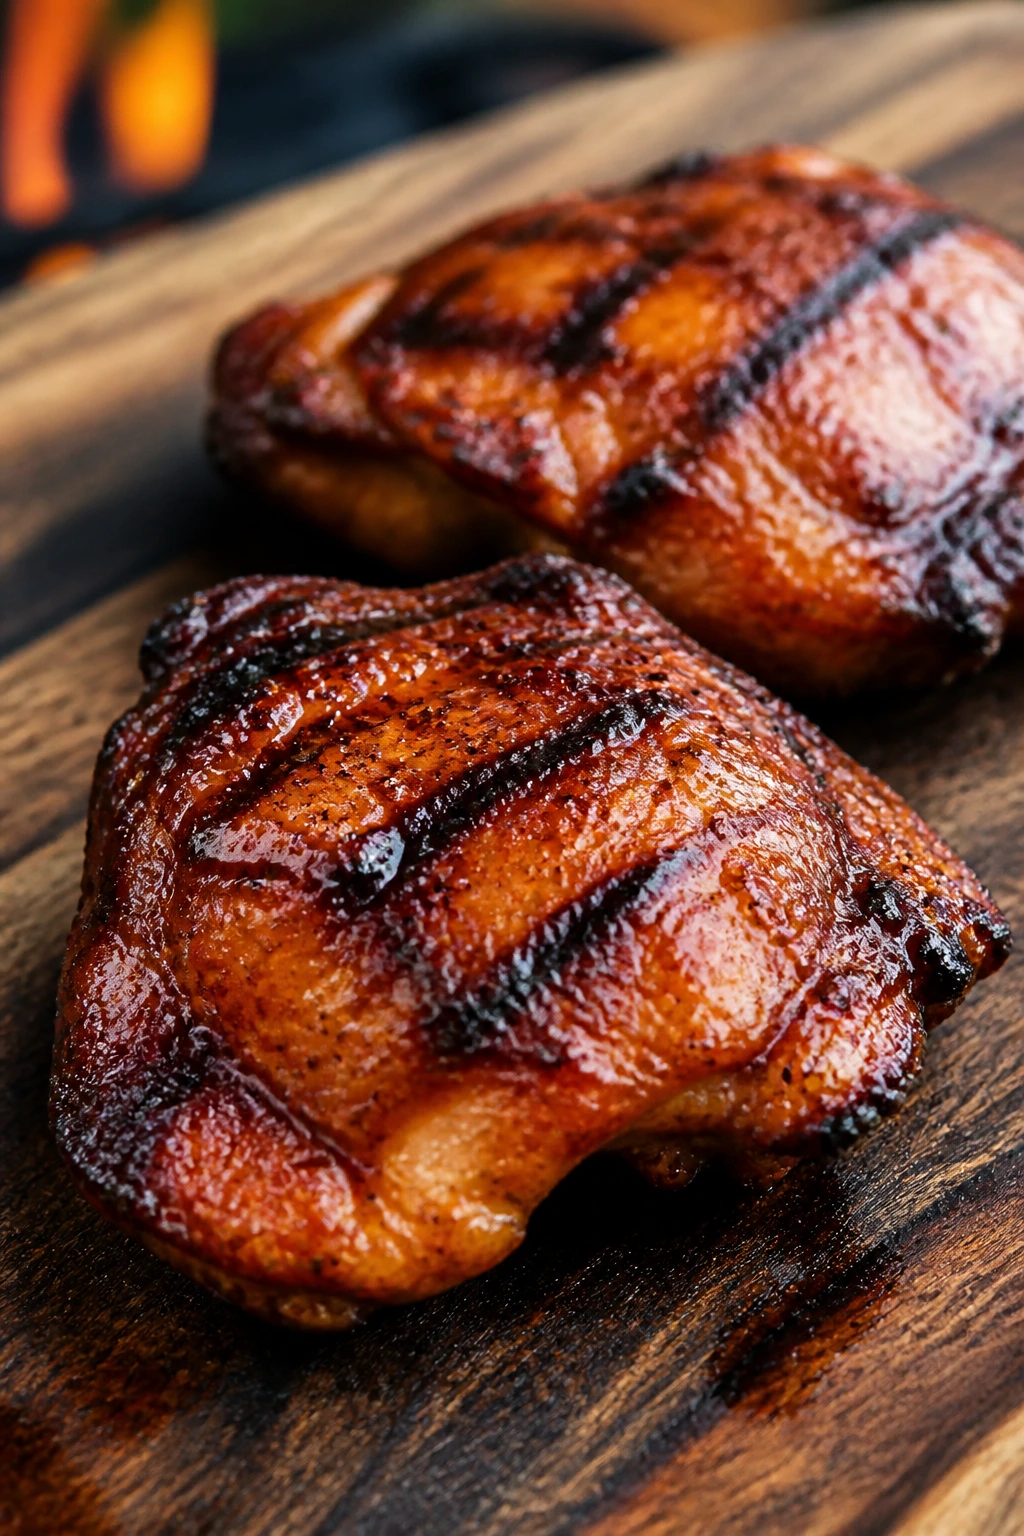
1. Brown Sugar Grilled Chicken Thighs
The first thing you notice is the glaze. It goes dark at the edges, turns sticky over the heat, and smells like paprika and caramelized sugar before it even leaves the grill. Chicken thighs are the right cut here because they stay tender while the outside picks up that slightly tacky, charred finish that makes people reach for a second piece.
Why It Works
Chicken thighs forgive a lot. They handle direct heat better than breasts, and the little bit of fat in the meat helps the brown sugar and paprika cling instead of burning off in a sad dust cloud. A quick finish with BBQ sauce gives you shine without turning the chicken into candy. A medium-high grill, around 400°F, is enough to build color in 10 to 12 minutes total.
Key Ingredients
- 2 pounds boneless, skinless chicken thighs
- 2 tablespoons olive oil
- 2 tablespoons brown sugar
- 1 tablespoon smoked paprika
- 2 teaspoons kosher salt
- 1 teaspoon black pepper
- 1 teaspoon garlic powder
- 1/2 teaspoon cayenne
- 1 tablespoon apple cider vinegar
- 1/2 cup BBQ sauce
Quick Steps
- Toss the chicken thighs with olive oil, brown sugar, paprika, salt, pepper, garlic powder, cayenne, and apple cider vinegar in a bowl.
- Let the chicken sit for 15 to 20 minutes while you heat the grill to medium-high and oil the grates.
- Grill the thighs for 5 to 6 minutes per side, until they have deep grill marks and the thickest piece reaches 165°F.
- Brush on BBQ sauce during the last 2 minutes, then move the chicken to a cooler part of the grill so the glaze tightens instead of scorching.
- Rest the chicken for 5 minutes before serving.
Equipment for This Recipe
- Gas or charcoal grill
- Metal tongs
- Mixing bowl
- Instant-read thermometer
How to Serve This Dish
Pile the chicken on a platter with vinegar slaw and a stack of toasted buns if you want a sandwich situation. For a drink, an icy pilsner or plain lemonade cuts through the sweetness and keeps the glaze from wearing out your palate.
Pro Tips for This Recipe
- Pat the thighs dry before seasoning; wet skinless chicken drags on the grate and gives you patchy color.
- If your BBQ sauce is thick and sugary, brush it on late. Too early and it will darken before the chicken is done.
- Let the meat rest after grilling. If you slice it open immediately, the juices run out onto the cutting board instead of staying in the thigh.
Variations on This Dish
- Chipotle Molasses Version: Stir 1 tablespoon adobo sauce into the BBQ glaze for a smoky, deeper burn.
- Lemon-Pepper Swap: Skip the brown sugar and use lemon zest, black pepper, and olive oil for a brighter plate.
- Oven-Broiler Backup: Bake at 425°F for 18 to 22 minutes, then broil for 2 minutes to finish the glaze.
Common Mistakes to Avoid with This Dish
- Saucing too early: The sugars can turn bitter before the chicken finishes. Brush at the end.
- Grilling over screaming-hot flames: The outside blackens while the center stays underdone. Medium-high heat is enough.
- Skipping the rest: Five minutes on the plate makes the meat easier to slice and much less dry.
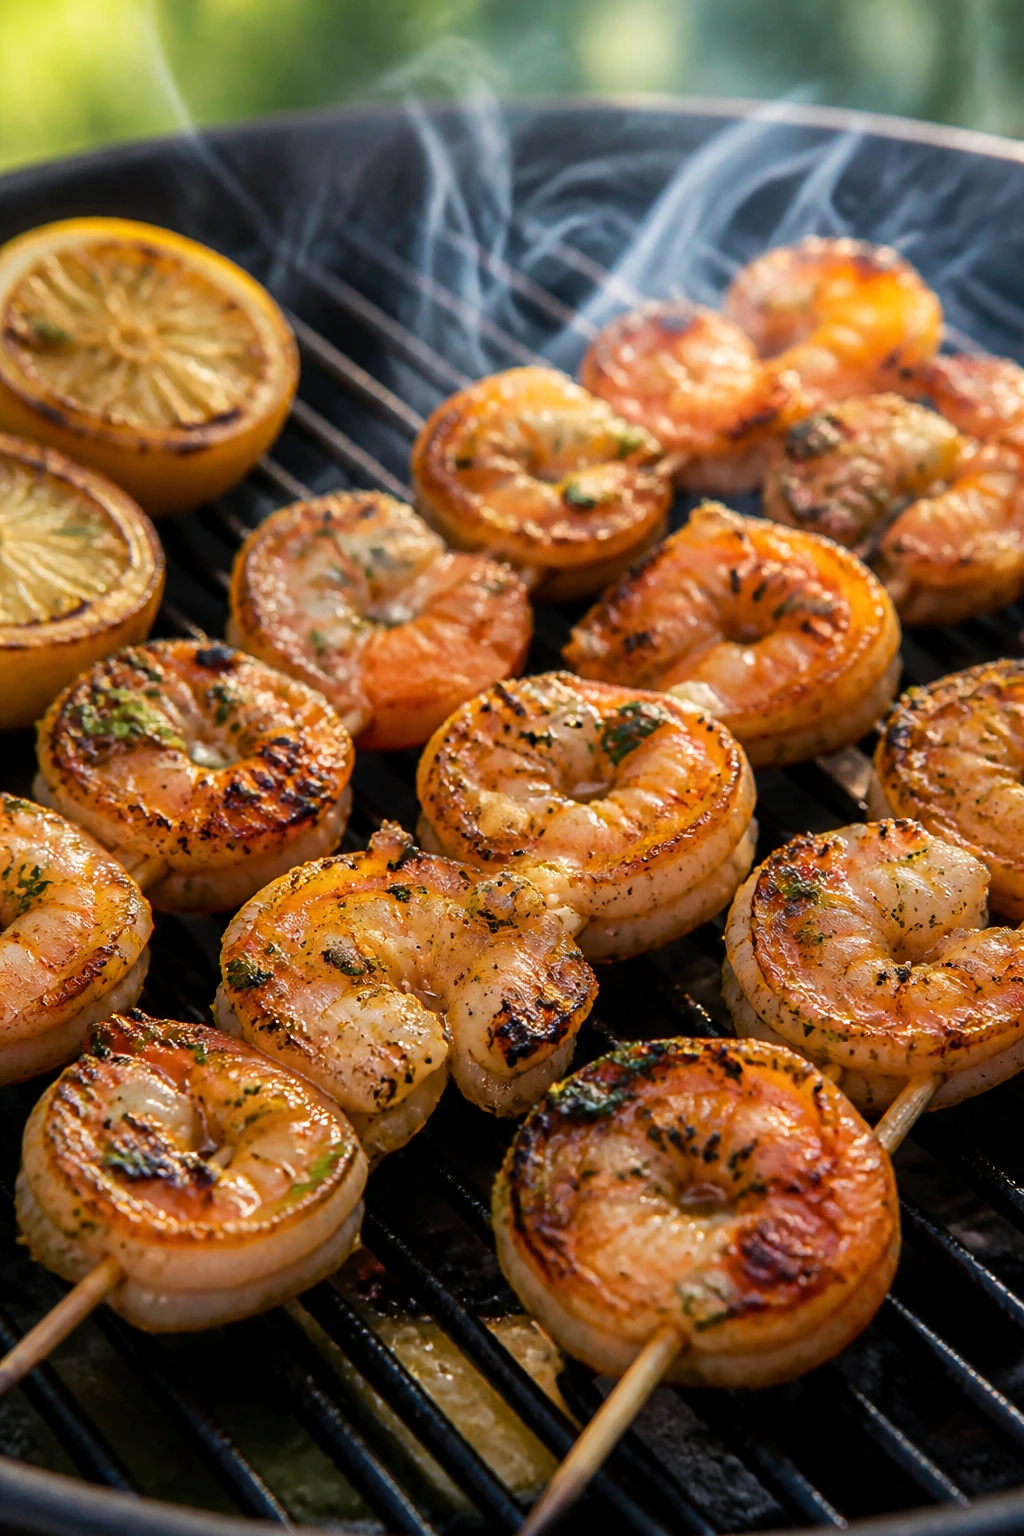
2. Charred Garlic Butter Shrimp Skewers
Shrimp behaves differently from chicken. It cooks in a blink, curls into a little crescent, and turns from translucent to opaque so fast you can miss the moment if you step away for a drink. That’s exactly why these skewers belong on a barbecue table: they feel lively, they pick up smoke fast, and they go down neatly with something cold and fizzy.
Why It Works
Butter, garlic, lemon, and shrimp are a cheat code, but a controlled one. The fat from the butter carries garlic flavor onto the grill, while the lemon wakes everything up at the end. Because shrimp only need 2 to 3 minutes per side, they’re perfect when the rest of the cookout is already moving and you don’t want another long project.
Key Ingredients
- 1 1/2 pounds large shrimp, peeled and deveined
- 3 tablespoons melted butter
- 2 tablespoons olive oil
- 4 garlic cloves, minced
- 1 lemon, zested and juiced
- 1 teaspoon smoked paprika
- 1 teaspoon kosher salt
- 1/2 teaspoon black pepper
- 2 tablespoons chopped parsley
- 6 to 8 skewers
Quick Steps
- Whisk the butter, olive oil, garlic, lemon zest, lemon juice, paprika, salt, pepper, and parsley in a bowl.
- Toss the shrimp in the mixture and let them sit for 10 minutes only.
- Thread the shrimp onto skewers, keeping the curve facing the same direction so they cook evenly.
- Grill over medium-high heat for 2 to 3 minutes per side, until the shrimp are pink, firm, and just opaque.
- Brush with any remaining butter mixture right before serving.
Equipment for This Recipe
- Grill
- Skewers
- Small mixing bowl
- Basting brush
How to Serve This Dish
Serve the skewers over rice or alongside grilled bread that can catch the garlic butter. A cold lager, sparkling water with lime, or even a crisp hard cider works well because the shrimp are rich but not heavy.
Pro Tips for This Recipe
- Use large shrimp. Tiny shrimp overcook before they pick up enough grill flavor.
- Don’t let the shrimp marinate for long in lemon juice. Acid starts tightening the flesh fast.
- If the shrimp are falling through the grates, use double skewers or a grill basket. Both solve the problem cleanly.
Variations on This Dish
- Cajun Heat: Add 1 teaspoon Cajun seasoning and a pinch of cayenne to the butter.
- Honey-Lime Version: Swap lemon for lime and add 1 tablespoon honey for a sweeter glaze.
- Dairy-Free Swap: Use olive oil or ghee if you want the same finish without regular butter.
Common Mistakes to Avoid with This Dish
- Overcooking: Shrimp turn rubbery after a minute too long. Pull them as soon as they’re opaque.
- Packing the skewers too tightly: If the shrimp press together, the middles stay cool and the edges dry out.
- Using the wrong size: Small shrimp cook too fast to develop grill marks. Buy large or extra-large.
3. Dry-Rubbed Baby Back Ribs
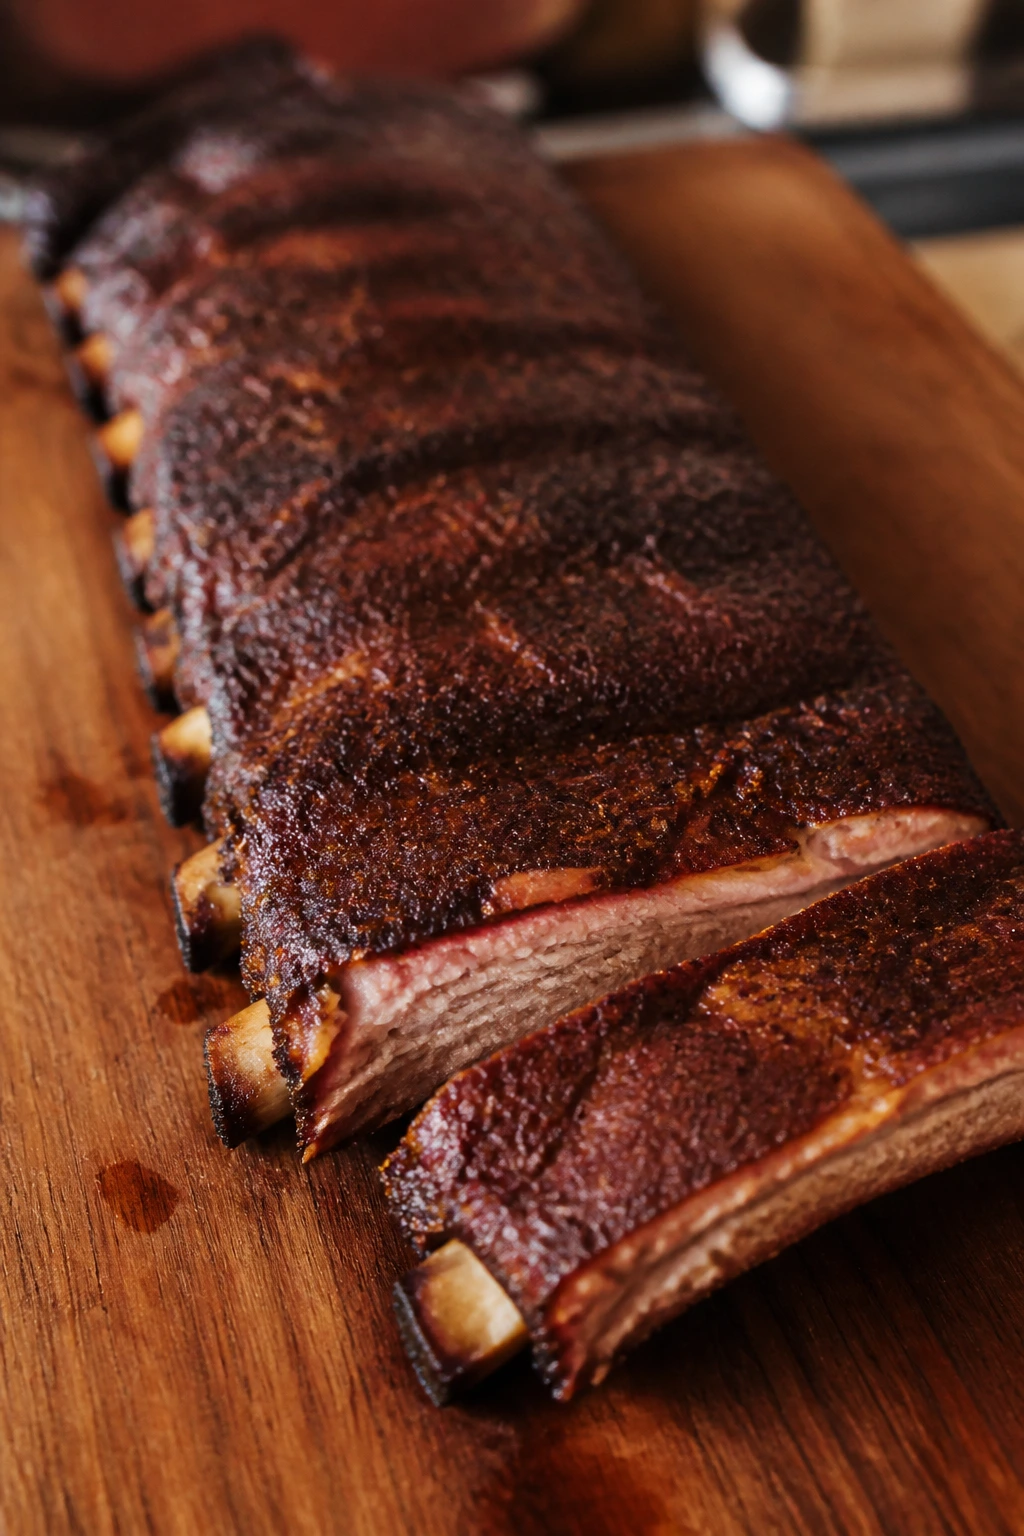
Ribs sound like a commitment, and sometimes they are. These are the exception. A dry rub, a foil wrap, and a hot finish give you ribs that taste like a longer project than they really are. The meat slides back from the bone with a little resistance, which is the sweet spot: tender, but not mush.
Why It Works
The foil stage does the heavy lifting. It traps steam from the apple juice and lets the ribs soften without drying out. Then the uncovered finish adds color and a sticky edge that keeps the whole rack from tasting flat. You get rib-shop flavor without standing over a smoker all afternoon.
Key Ingredients
- 2 racks baby back ribs, about 4 to 5 pounds total
- 1/4 cup brown sugar
- 2 tablespoons paprika
- 1 tablespoon kosher salt
- 1 tablespoon black pepper
- 2 teaspoons garlic powder
- 1 teaspoon onion powder
- 1 teaspoon mustard powder
- 1/2 teaspoon cayenne
- 1/2 cup apple juice
- 1/2 cup BBQ sauce
Quick Steps
- Pull off the thin membrane from the back of the ribs and pat them dry.
- Mix the brown sugar, paprika, salt, pepper, garlic powder, onion powder, mustard powder, and cayenne, then rub it over both sides of the ribs.
- Wrap each rack tightly in foil with 1/4 cup apple juice per rack.
- Bake at 300°F for 2 1/2 hours, or until the ribs feel tender when you lift them with tongs.
- Unwrap, brush with BBQ sauce, and finish under a broiler or on the grill for 5 to 8 minutes until the sauce looks glossy and spots of char appear.
Equipment for This Recipe
- Rimmed baking sheet
- Heavy-duty aluminum foil
- Tongs
- Basting brush
How to Serve This Dish
Cut the ribs between the bones and set them on butcher paper or a large platter with pickles. A cold cola, amber ale, or iced tea with lemon makes the salt and smoke easier to keep eating.
Pro Tips for This Recipe
- Removing the membrane matters. Leave it on and the ribs eat like they’re wearing plastic.
- If the rub looks wet after 10 minutes, that’s fine. The sugar will melt into the surface in the oven.
- Do not skip the final blast of heat. That’s what gives the sauce its sticky finish.
Variations on This Dish
- Memphis-Style Dry Finish: Skip the sauce and serve the ribs with extra rub and a splash of cider vinegar on the side.
- Coffee-Chile Rub: Add 1 tablespoon finely ground coffee and 1 teaspoon chipotle powder to the rub.
- Orange-Glaze Version: Mix orange marmalade with BBQ sauce for a brighter topcoat.
Common Mistakes to Avoid with This Dish
- Wrapping too loosely: Steam escapes and the ribs dry out. Seal the foil well.
- Cooking by the clock only: Rib size varies. Tenderness is the real test.
- Saucing before the meat is soft: The glaze can darken before the ribs are ready. Finish the texture first, then the shine.
4. Smash Burgers with Onion Sizzle
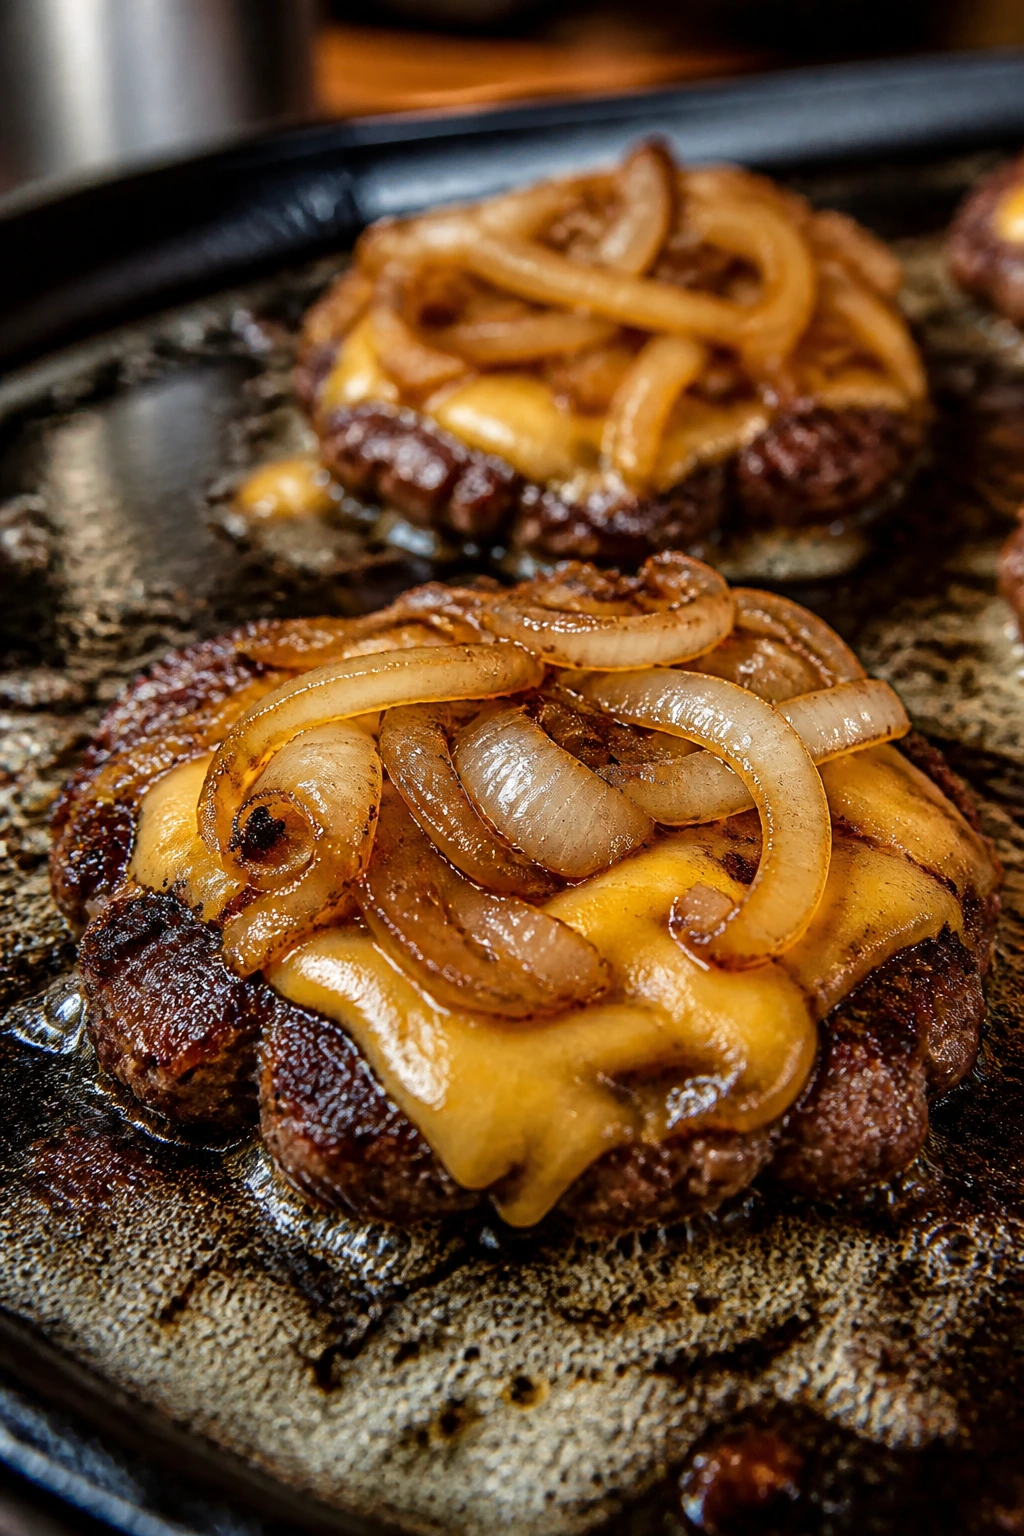
A smash burger is a little dramatic in the best way. The meat hits the hot surface, sizzles hard, and turns into a thin, crisp-edged patty in under two minutes. Add onion, pickles, and melted cheddar, and you’ve got a cookout sandwich that holds its own beside a frosty beer or a tall cup of iced tea.
Why It Works
Ground beef with enough fat — 80/20 is the sweet spot — needs contact heat more than it needs fuss. Pressing the ball flat on a ripping-hot skillet or griddle builds the crust that makes smash burgers worth making. The onions soften in butter while the patties cook, so the whole thing finishes fast and stays juicy.
Key Ingredients
- 1 1/2 pounds ground beef, 80/20
- 1 large yellow onion, thinly sliced
- 2 tablespoons butter
- 1 teaspoon kosher salt
- 1/2 teaspoon black pepper
- 4 slices cheddar cheese
- 4 burger buns, split
- Pickle chips
- Mustard or mayo, for serving
Quick Steps
- Form the beef into 8 loose balls, about 3 ounces each, and keep them cold until cooking.
- Melt the butter in a skillet or on a griddle and cook the onions over medium heat until soft and lightly golden.
- Heat the cooking surface until hot, then set the beef balls down and smash them flat with a sturdy spatula.
- Salt and pepper the patties, cook for about 1 to 1 1/2 minutes, flip, add cheese, and cook 30 to 45 seconds more.
- Toast the buns, then build with onion, pickles, mustard, and the hot patties.
Equipment for This Recipe
- Cast-iron skillet or flat griddle
- Wide metal spatula
- Sturdy burger press or second spatula
- Knife and cutting board
How to Serve This Dish
Serve the burgers with a pile of kettle chips or a crunchy slaw so the plate doesn’t feel too soft. A cold lager, root beer, or unsweetened iced tea cuts the fat nicely.
Pro Tips for This Recipe
- Don’t overwork the beef. Loose balls smash better than packed patties.
- Press once, hard. If you keep smashing after the crust forms, you squeeze out the juices.
- Toast the buns. Soft buns turn soggy fast under melted cheese and onion.
Variations on This Dish
- Bacon Jam Burger: Add a spoonful of bacon jam under the cheese for a sweeter, richer bite.
- Jalapeño Version: Mix finely chopped jalapeños into the onions and swap in pepper jack.
- Mushroom-Style Smash: Use sautéed mushrooms instead of onions for a softer, earthier topping.
Common Mistakes to Avoid with This Dish
- Using lean beef: 90/10 dries out before the crust fully forms.
- Cooking on a lukewarm pan: You want the sizzle the second the meat hits.
- Flipping too early: Let the crust set or you’ll tear the patty apart.
5. Honey-Lime Chicken Skewers
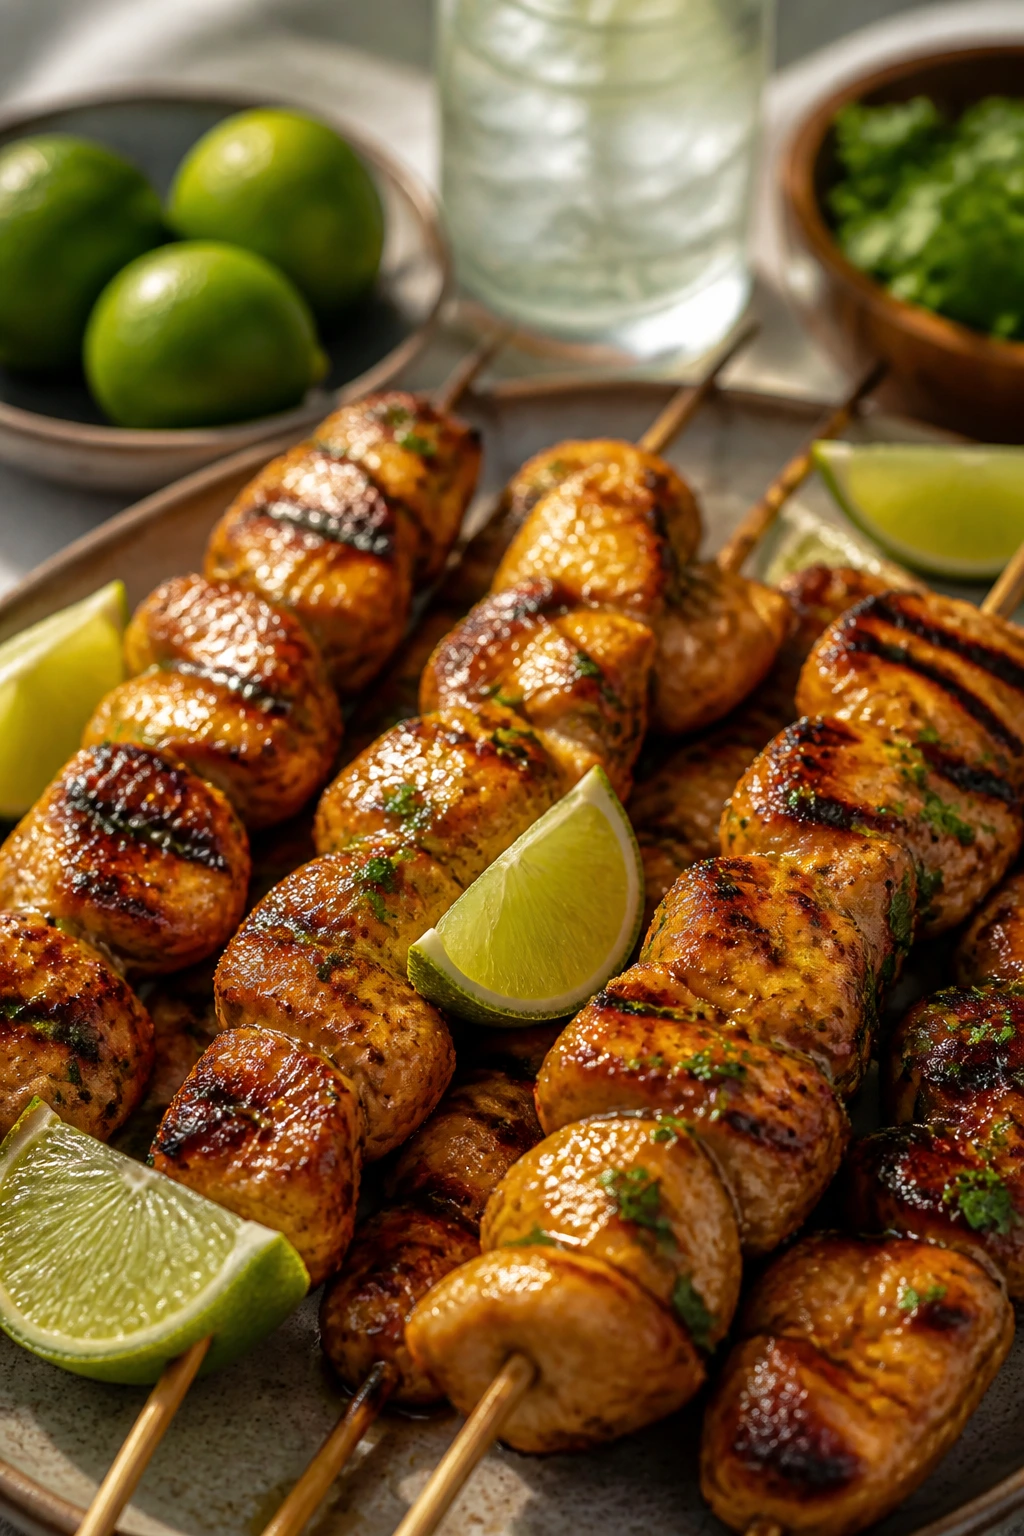
These skewers taste like they belong at a picnic where people stay for hours and keep reaching for the cooler. The honey gives the edges a light glaze, the lime keeps the chicken from tasting heavy, and the grill adds just enough char to make each bite feel finished. You can serve them with rice, salad, or straight off the skewer.
Why It Works
Honey and lime do what sugary sauces often fail to do: they balance each other. The honey browns, the lime cuts through it, and the soy sauce adds salt so the flavor doesn’t go thin. Because the chicken pieces are small and evenly cut, they cook in a tight window and stay easy to manage.
Key Ingredients
- 2 pounds boneless chicken thighs or breasts, cut into 1 1/2-inch pieces
- 1/4 cup honey
- 3 tablespoons lime juice
- 2 tablespoons soy sauce
- 2 tablespoons olive oil
- 3 garlic cloves, minced
- 1 teaspoon ground cumin
- 1 teaspoon chili powder
- 1 teaspoon kosher salt
- 8 skewers
Quick Steps
- Whisk the honey, lime juice, soy sauce, olive oil, garlic, cumin, chili powder, and salt in a bowl.
- Toss the chicken in the marinade and let it sit for 30 minutes.
- Thread the chicken onto skewers, leaving tiny gaps so heat can circulate.
- Grill over medium-high heat for 4 to 5 minutes per side, brushing with leftover marinade during the last few minutes.
- Pull the skewers when the chicken reaches 165°F and the edges have brown spots.
Equipment for This Recipe
- Grill
- Skewers
- Mixing bowl
- Basting brush
How to Serve This Dish
Set the skewers over cilantro rice or a chopped cucumber salad. A cold Mexican lager, lime seltzer, or a simple glass of iced tea with mint keeps the sweet-tart flavor from feeling too sticky.
Pro Tips for This Recipe
- Cut the chicken evenly. Uneven chunks cook unevenly, and the small ones dry out first.
- If you use wooden skewers, soak them for at least 30 minutes so they don’t scorch.
- Reserve a little marinade before adding the raw chicken if you want extra glaze for brushing.
Variations on This Dish
- Peach-Lime Twist: Add 1/4 cup peach preserves to the marinade for a softer sweetness.
- Spicy Sriracha Version: Stir in 1 tablespoon sriracha for a sharper finish.
- Vegetable Skewer Add-On: Thread bell pepper and red onion between the chicken pieces for more color and a little crunch.
Common Mistakes to Avoid with This Dish
- Marinating too long: Lime can make the texture chalky if you leave it overnight.
- Crowding the skewers: Tight packing blocks heat and gives you pale spots.
- Skipping the thermometer: Chicken looks done before it always is. Check the center.
6. Grilled Sausage, Peppers, and Onions
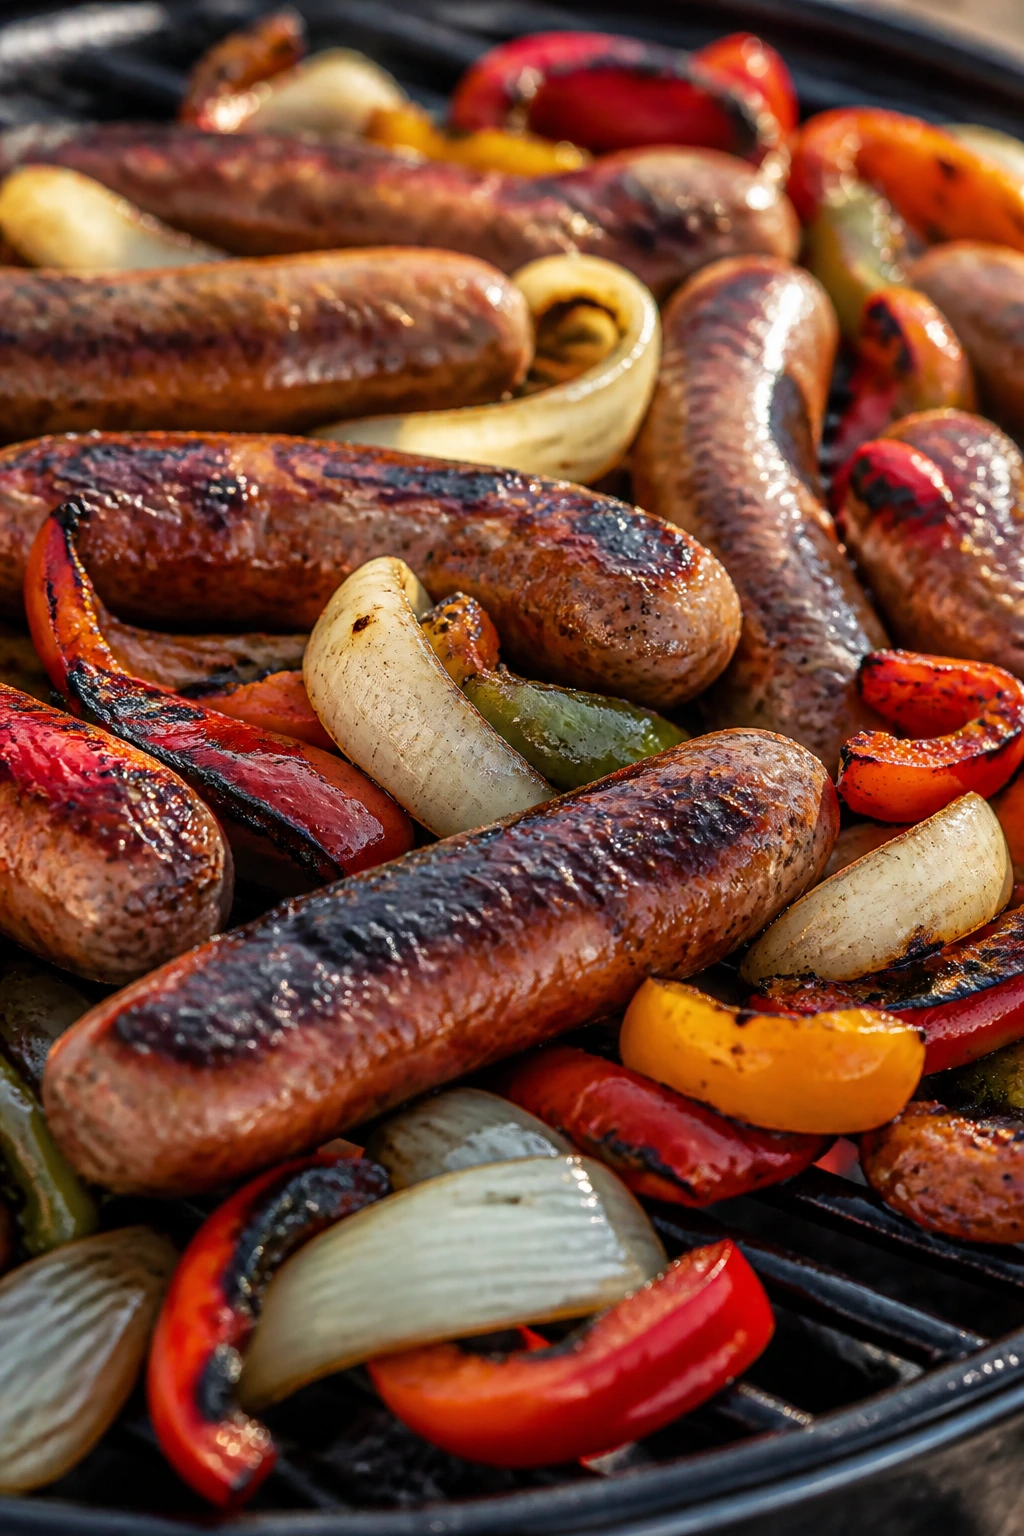
This is the cookout version of common sense, which I mean as praise. Sausage brings the fat, peppers bring sweetness, and onions soften into ribbons that catch the juices. It’s fast, forgiving, and one of the easiest ways to feed people who wander into the yard hungry and impatient.
Why It Works
Sausage is already seasoned, so you’re not building flavor from zero. Grilling the links first gives them color and a little snap, while a foil packet or grill basket takes care of the vegetables without making you stand there stirring. A splash of vinegar at the end keeps it from tasting greasy.
Key Ingredients
- 1 1/2 pounds Italian sausage links
- 3 bell peppers, sliced
- 1 large yellow onion, sliced
- 2 tablespoons olive oil
- 1 teaspoon Italian seasoning
- 1 teaspoon kosher salt
- 1/2 teaspoon black pepper
- 1 tablespoon red wine vinegar
- Hoagie rolls, optional
Quick Steps
- Toss the peppers and onion with olive oil, Italian seasoning, salt, and pepper.
- Grill the sausage links over medium heat for 10 to 12 minutes, turning so they brown on all sides.
- Put the vegetables in a grill basket or foil packet and cook for 12 to 15 minutes, stirring once, until soft and spotted with char.
- Slice the sausage and toss it with the vegetables and red wine vinegar.
- Serve on rolls or straight from the platter.
Equipment for This Recipe
- Grill
- Grill basket or heavy foil
- Tongs
- Sharp knife
How to Serve This Dish
Serve it on toasted rolls with mustard, or pile it onto a plate with potato salad and pickles. A cold pilsner or ginger beer works well because the sausage is rich and the peppers are sweet.
Pro Tips for This Recipe
- Use a mix of red, yellow, and green peppers if you want the tray to look and taste more layered.
- Slice the onions thick enough to keep them from disappearing through the basket.
- Let the sausage rest a few minutes before slicing so the juices stay in the link.
Variations on This Dish
- Spicy Sausage Tray: Use hot Italian sausage and add sliced cherry peppers.
- Mustard-Herb Finish: Drizzle with grainy mustard and chopped parsley right before serving.
- Sheet Pan Backup: Roast everything at 425°F for about 25 minutes if the grill is packed.
Common Mistakes to Avoid with This Dish
- High heat on the sausage: The outside splits before the center warms through.
- Under-seasoning the vegetables: They need salt, or they taste like filler.
- Overcooking the onions into mush: You want soft, not collapsed into nothing.
7. Cilantro-Lime Flank Steak
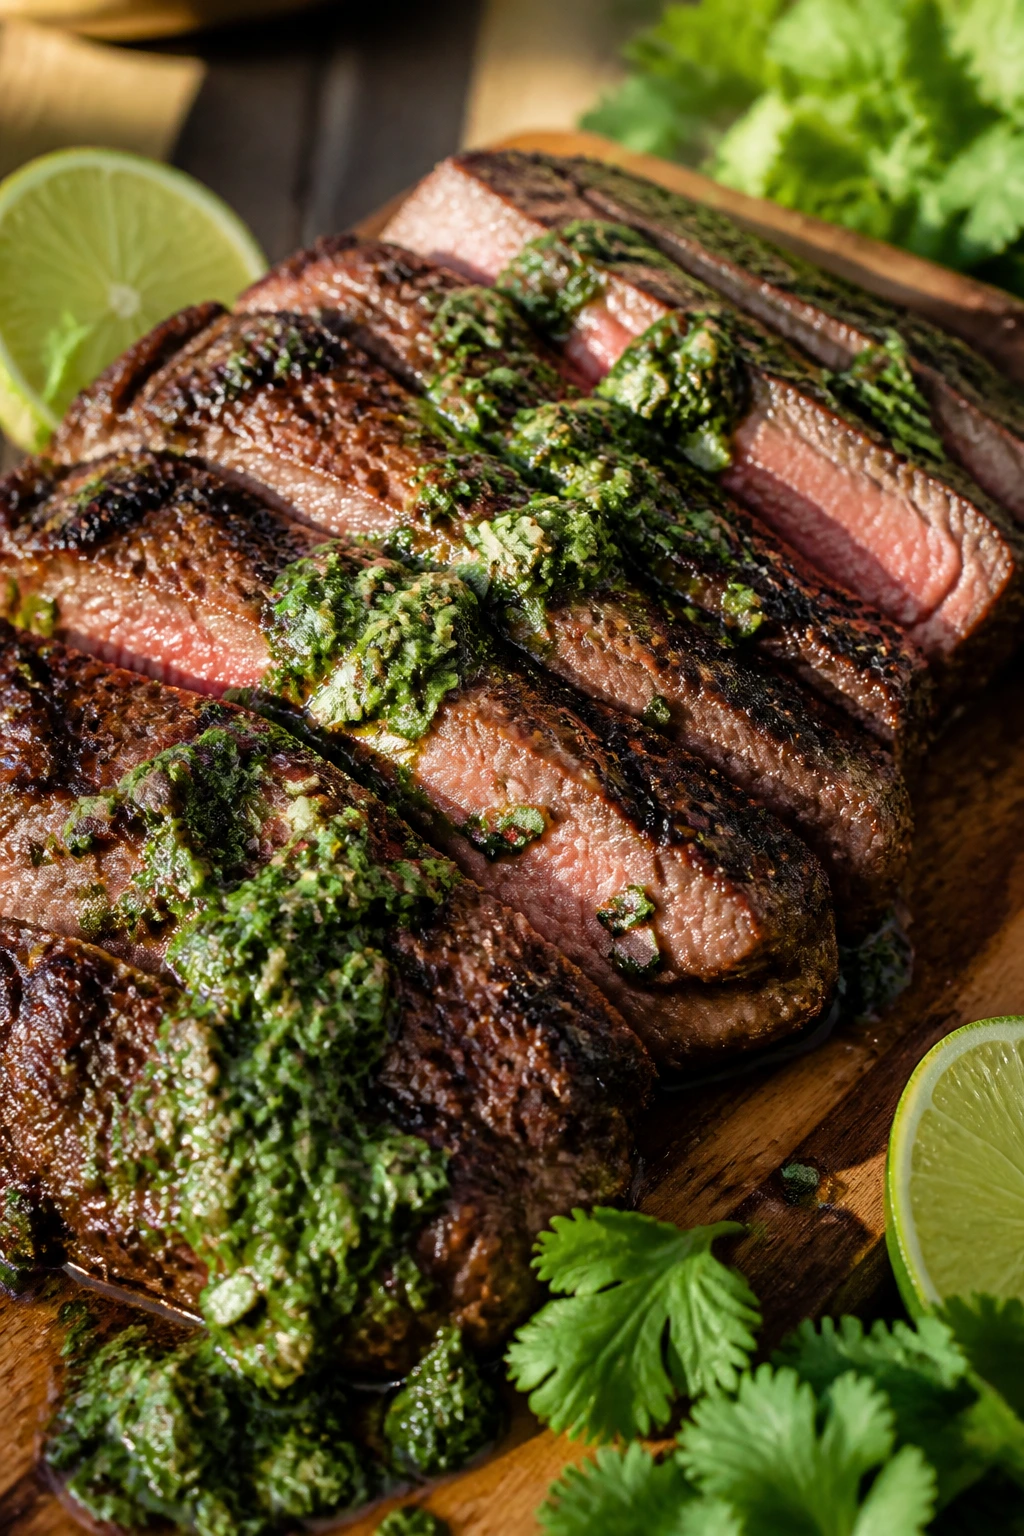
Flank steak wants a sharp knife and a short cook. That’s the deal. Slice it thin against the grain and it turns tender enough for a crowd, especially when a fresh herb sauce hits the hot meat and starts dripping down onto the plate.
Why It Works
Flank steak is lean, so it benefits from acid and fat before it ever sees the grill. A quick marinade with lime, garlic, and oil helps season the surface, and a bright herb sauce finishes the job after the rest. The steak only needs a few minutes per side, which makes it easy to keep in rotation when other things are cooking too.
Key Ingredients
- 2 pounds flank steak
- 3 tablespoons olive oil
- 2 tablespoons lime juice
- 3 garlic cloves, minced
- 1 teaspoon kosher salt
- 1 teaspoon black pepper
- 1 cup parsley leaves
- 1/2 cup cilantro leaves
- 1/4 cup olive oil for sauce
- 3 tablespoons red wine vinegar
- 1/2 teaspoon red pepper flakes
Quick Steps
- Rub the flank steak with olive oil, lime juice, garlic, salt, and pepper.
- Blend or chop the parsley, cilantro, olive oil, red wine vinegar, and red pepper flakes into a loose herb sauce.
- Let the steak sit for 20 to 30 minutes while the grill heats to high.
- Grill the steak for 4 to 5 minutes per side for medium-rare, or a bit longer if you want it more done.
- Rest for 10 minutes, then slice thinly across the grain and spoon the herb sauce over the top.
Equipment for This Recipe
- Grill
- Blender or sharp knife
- Cutting board
- Long tongs
How to Serve This Dish
Serve the sliced steak with corn, beans, or grilled potatoes. A cold pale ale or a lime soda keeps the herb sauce from feeling too sharp and gives each bite a clean exit.
Pro Tips for This Recipe
- Slice against the grain. That one move matters more than almost anything else with flank steak.
- Let the steak rest before slicing. Cutting it early pours the juices onto the board.
- The herb sauce should be loose, not thick like pesto. You want it to run.
Variations on This Dish
- Chimichurri Swap: Add oregano and more vinegar for a stronger, punchier sauce.
- Chipotle-Lime Version: Mix chipotle powder into the marinade for smoky heat.
- Garlic Butter Finish: Spoon melted butter over the slices if you want a richer, less acidic plate.
Common Mistakes to Avoid with This Dish
- Overcooking flank steak: It gets chewy fast. Medium-rare is the safe landing zone.
- Slicing with the grain: That leaves long strings of meat that fight back.
- Using a thick sauce: Heavy sauces bury the flavor instead of lifting it.
8. Slow Cooker Pulled Pork Sandwiches
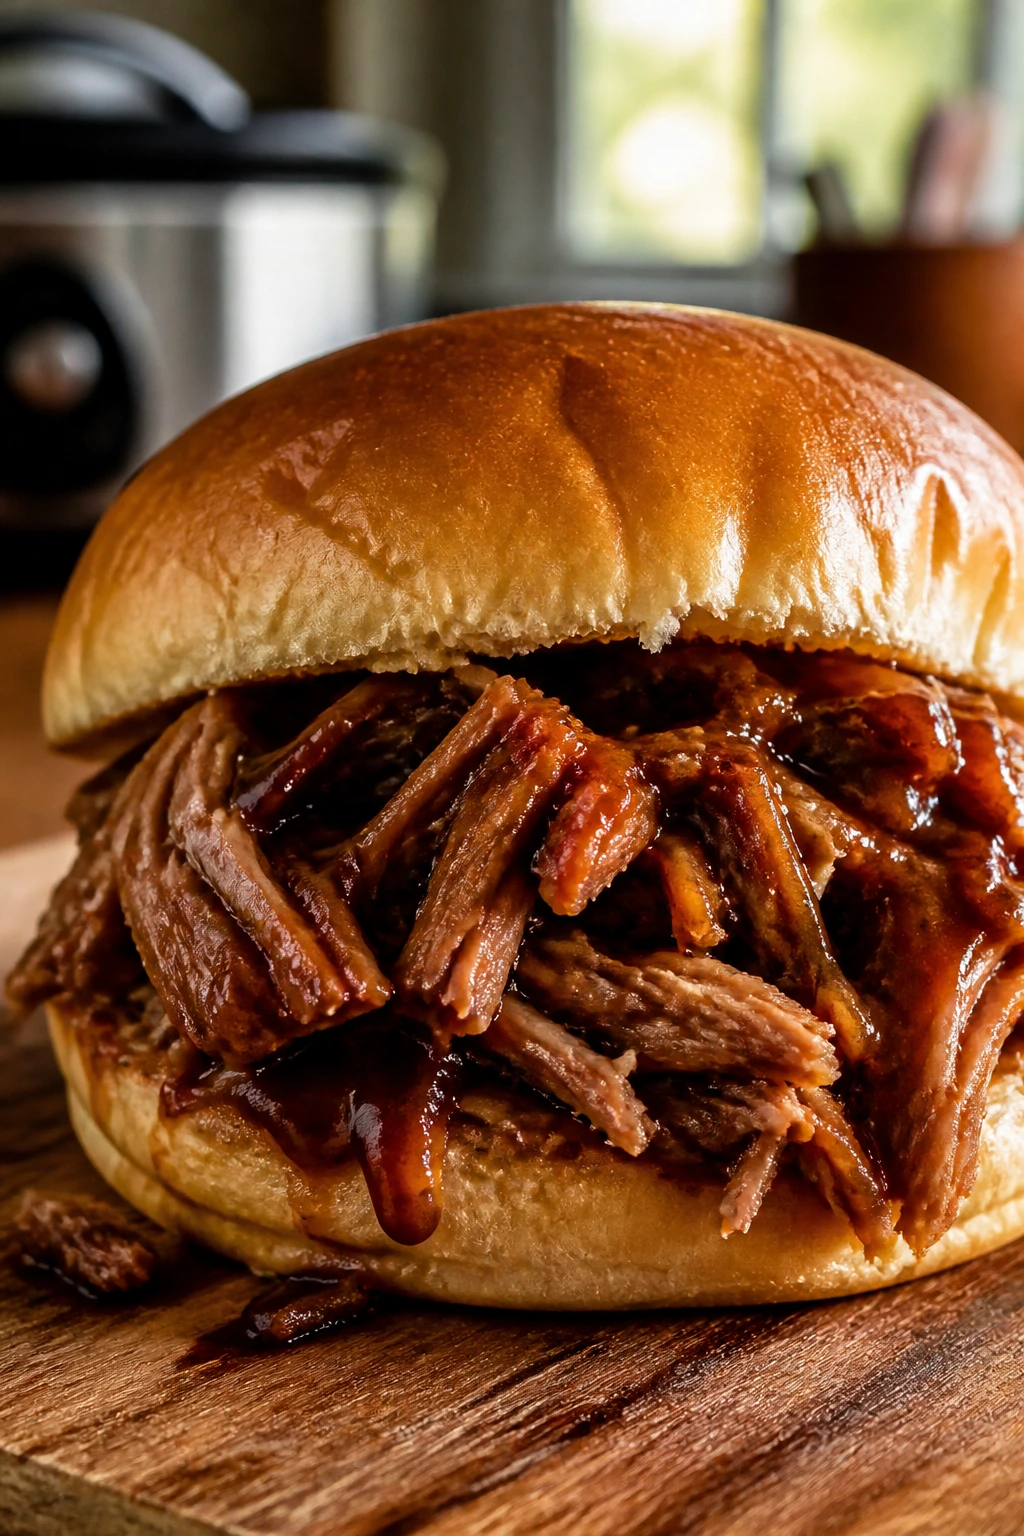
Pulled pork in a slow cooker is one of those rare shortcuts that still tastes like you paid attention. The pork shoulder softens into strands that catch sauce in every ridge, and the onions underneath turn sweet enough to spread on a bun. It’s the sort of BBQ recipe you make when you want the house to smell good all afternoon without hovering over anything.
Why It Works
Pork shoulder has the fat and connective tissue that turn silky after a long cook. The slow cooker does the work without drying the meat out, and the vinegar in the liquid keeps the sauce from clumping into pure sweetness. A quick broil or bun toast at the end gives the sandwich enough structure to hold up under slaw.
Key Ingredients
- 4 pounds pork shoulder
- 2 tablespoons brown sugar
- 1 tablespoon paprika
- 2 teaspoons kosher salt
- 1 teaspoon black pepper
- 1 teaspoon garlic powder
- 1 large onion, sliced
- 3/4 cup BBQ sauce
- 1/2 cup apple cider vinegar
- 1/2 cup water
- 6 sandwich buns
Quick Steps
- Rub the pork with brown sugar, paprika, salt, pepper, and garlic powder.
- Put the onion in the slow cooker, set the pork on top, and pour in BBQ sauce, apple cider vinegar, and water.
- Cook on low for 8 hours or high for about 5 hours, until the pork falls apart with a fork.
- Shred the meat, stir it back into the cooking juices, and let it sit for 10 minutes.
- Pile onto buns and top with slaw if you like a little crunch.
Equipment for This Recipe
- Slow cooker
- Two forks
- Sharp knife
- Serving spoon
How to Serve This Dish
Serve the sandwiches with tangy slaw or dill pickles and a pile of kettle chips. A cold amber beer, sweet tea, or even a cola with plenty of ice works because the pork is rich and sauce-heavy.
Pro Tips for This Recipe
- A pork shoulder with a decent fat cap gives better texture than a lean roast.
- Do not drown the pork in extra sauce before serving. A little cooking liquid goes a long way.
- If the sandwich gets too soft, toast the bun and add slaw between the pork and the bread.
Variations on This Dish
- Carolina Vinegar Style: Reduce the BBQ sauce and increase the vinegar for a sharper finish.
- Spice-Rubbed Version: Add cumin and cayenne for more heat in the bark.
- Oven Braise Backup: Cook covered at 300°F until shreddable if you do not want to use the slow cooker.
Common Mistakes to Avoid with This Dish
- Using pork loin: It dries out long before it turns tender.
- Skipping the rest after shredding: Letting the meat sit in the juices improves the texture.
- Serving on flimsy buns: They collapse under sauce and hot pork. Use sturdy rolls.
9. Lemon-Pepper Salmon Packets
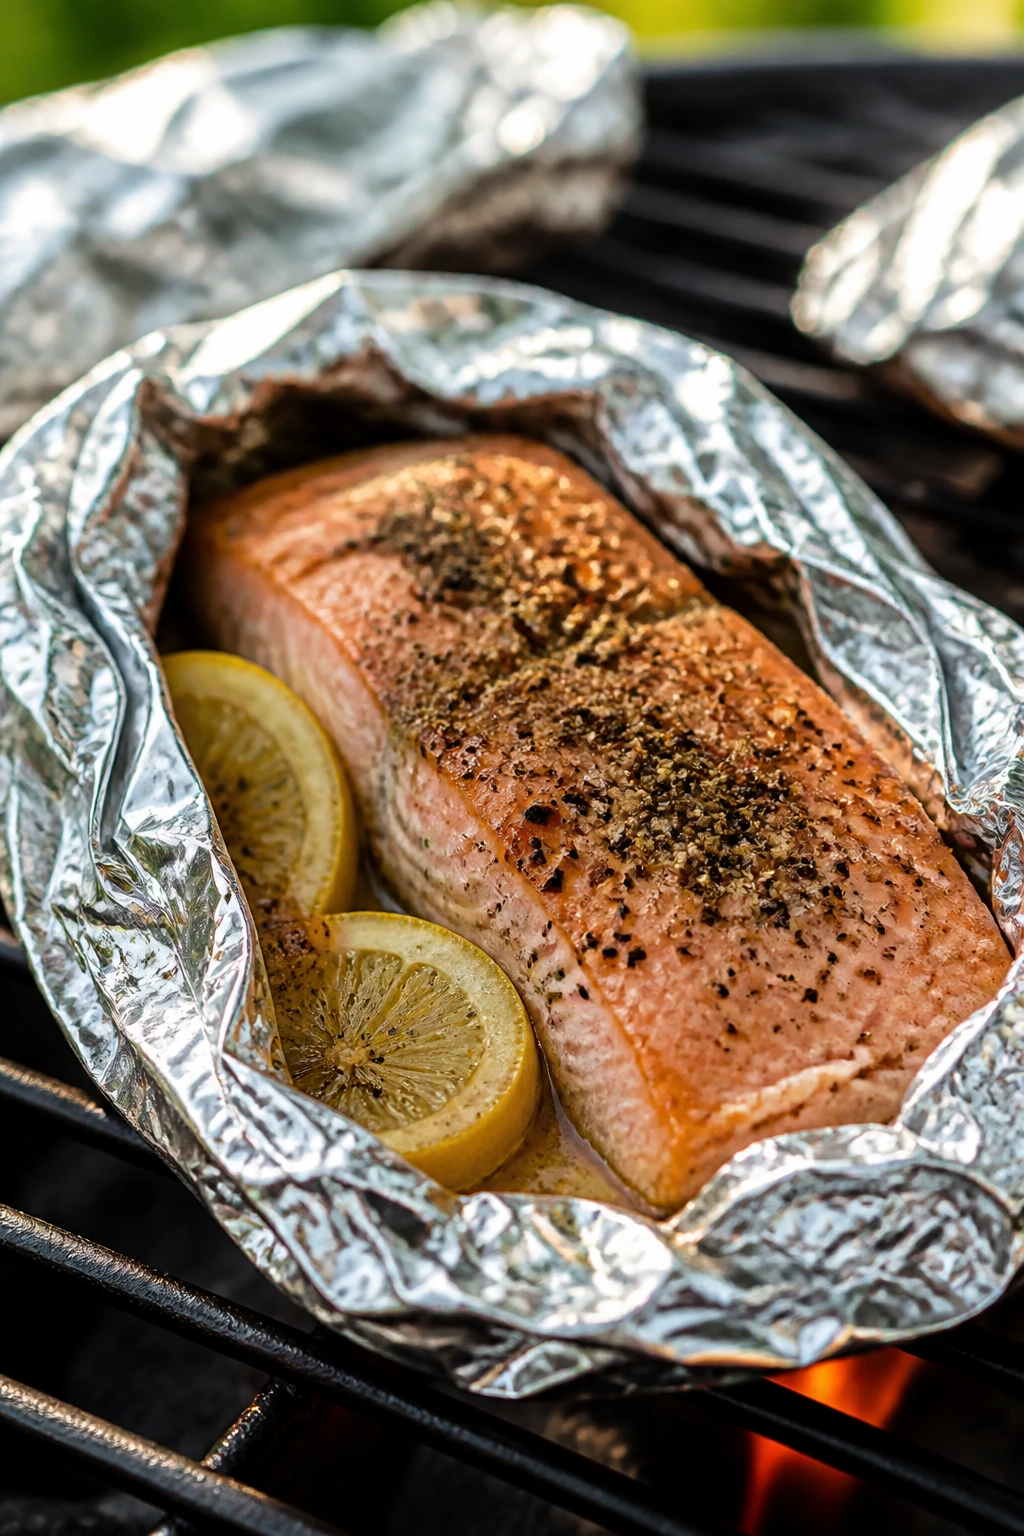
Salmon in foil packets feels tidy in the best way. No splatter, no endless cleanup, and no worrying about the fish sticking to a grate. The lemon slices steam the fillet from the top while the grill or oven does the cooking underneath, which gives you a soft center and lightly crisp edges.
Why It Works
The foil packet traps moisture without turning the fish mushy. Butter and olive oil keep the salmon rich, while lemon pepper does the seasoning work with almost no effort. Because the packet holds the steam, you can cook fish alongside vegetables and still keep the timing simple.
Key Ingredients
- 1 1/2 pounds salmon fillet, skin on or off
- 2 zucchini, sliced
- 1 lemon, thinly sliced
- 2 tablespoons olive oil
- 1 tablespoon butter, cut into pieces
- 1 teaspoon lemon pepper
- 1 teaspoon kosher salt
- 2 tablespoons chopped dill
Quick Steps
- Lay a large sheet of foil on the counter and place the zucchini in the center.
- Set the salmon on top, drizzle with olive oil, and season with lemon pepper and salt.
- Add lemon slices, butter pieces, and dill, then fold the foil into a sealed packet.
- Grill over medium heat for 10 to 12 minutes, or bake at 400°F for about 15 minutes, until the salmon flakes easily with a fork.
- Open the packet carefully so the steam doesn’t hit your hands.
Equipment for This Recipe
- Heavy-duty foil
- Grill or oven
- Sharp knife
- Tongs or a spatula
How to Serve This Dish
Serve the salmon straight from the packet with rice or a crisp cucumber salad. A cold sauvignon blanc, sparkling water with lemon, or light beer keeps the butter and citrus feeling clean instead of heavy.
Pro Tips for This Recipe
- Use thick fillets if you can. Thin ends overcook before the center is ready.
- Leave a little room in the packet for steam to move around.
- If you want a browned top, open the packet for the last 2 minutes.
Variations on This Dish
- Dill-Mustard Version: Spread a thin layer of Dijon over the salmon before sealing.
- Garlic-Herb Swap: Add minced garlic and parsley for a more savory packet.
- Asparagus Packets: Replace zucchini with asparagus if you want a firmer vegetable.
Common Mistakes to Avoid with This Dish
- Oversealing the foil so tightly that it leaks: Crimp the edges, but don’t tear the packet.
- Using paper-thin fillets: They dry out quickly.
- Checking too often: Each time you open the packet, you lose steam and slow the cook.
10. Grilled Corn with Chili-Lime Butter
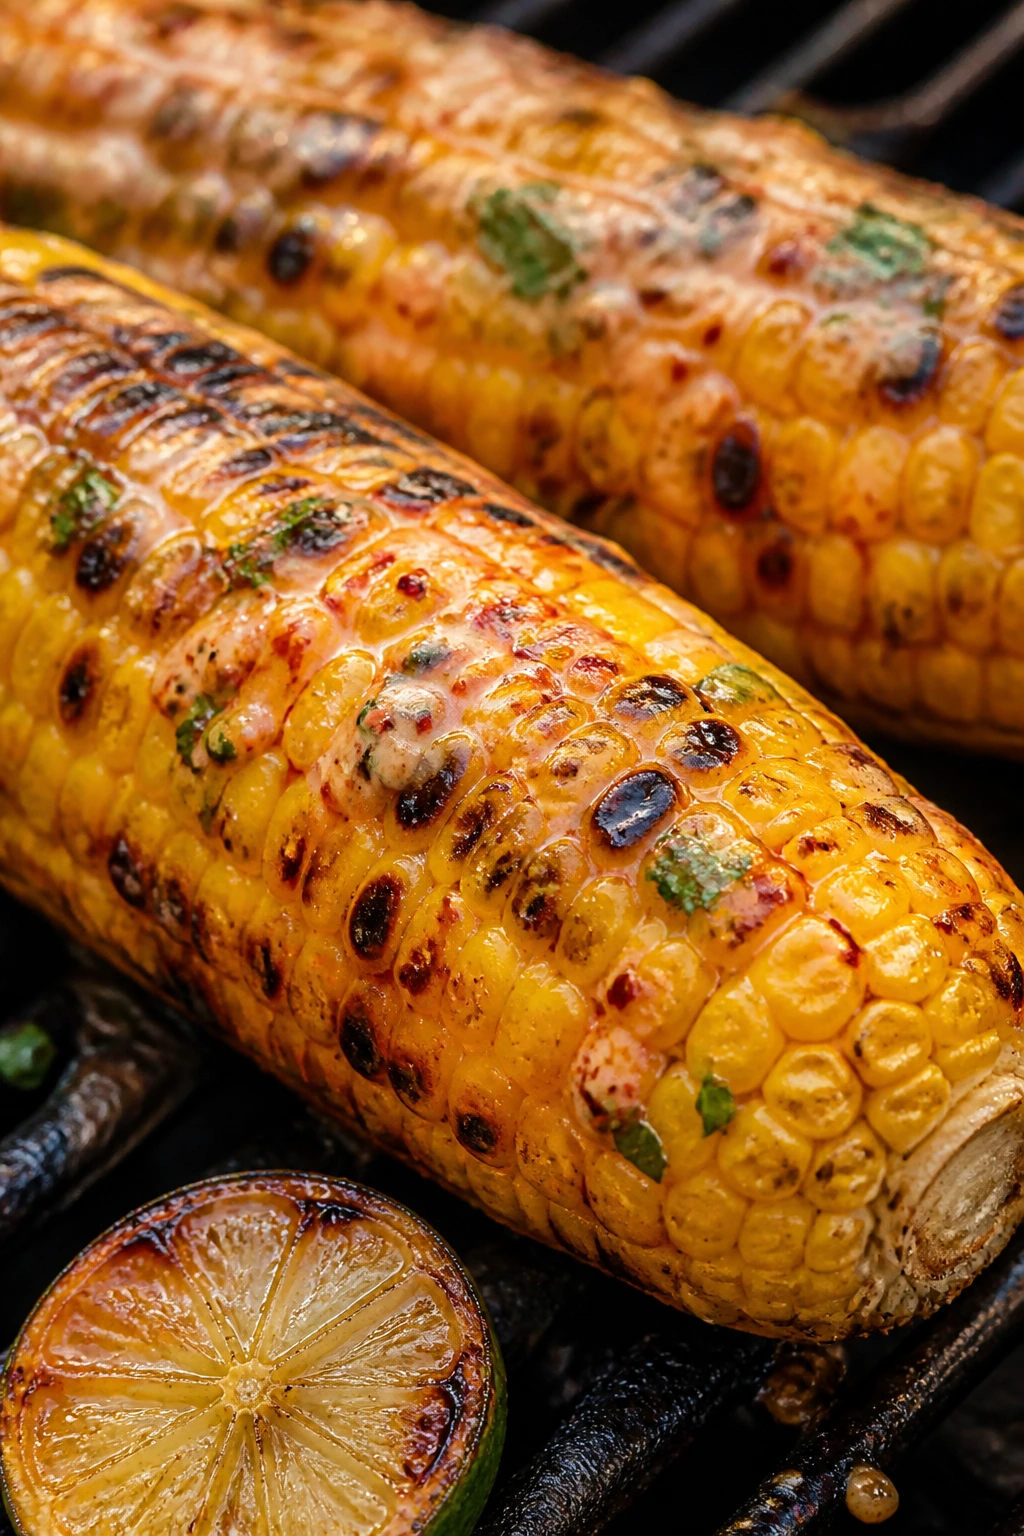
Corn on the cob sounds too simple to get excited about until you put it over fire. The kernels blister, the edges sweeten, and the butter melts down into the grooves with chili and lime clinging to every row. This is the side dish people hover near while they wait for the main event.
Why It Works
Grilling corn changes the texture in a way boiling never will. The sugars caramelize on the kernels, the smoke adds a little depth, and the butter finish makes the whole thing taste richer than the ingredient list suggests. It’s cheap, fast, and easy to hold in one hand while the other reaches for a drink.
Key Ingredients
- 6 ears corn, husked
- 4 tablespoons unsalted butter, softened
- 1 lime, zested and juiced
- 1 teaspoon chili powder
- 1/2 teaspoon kosher salt
- 1/4 cup cotija cheese, crumbled
- 2 tablespoons chopped cilantro
Quick Steps
- Mix the butter, lime zest, lime juice, chili powder, and salt in a small bowl.
- Grill the corn over medium-high heat for 10 minutes, turning often, until the kernels are spotty brown.
- Slather each ear with the chili-lime butter while the corn is still hot.
- Sprinkle with cotija and cilantro.
- Serve immediately.
Equipment for This Recipe
- Grill
- Small bowl
- Butter knife or brush
- Tongs
How to Serve This Dish
Set the corn beside ribs, chicken, or burgers, then keep extra lime wedges nearby. A cold lager, ranch water, or lemonade with a lot of ice works because the chili needs something cool to chase it.
Pro Tips for This Recipe
- If the husks are still on, soak the corn first and grill it in the husk for a softer result.
- Butter sticks to hot corn much better than cold corn.
- Cotija is salty, so taste before adding a second shower of cheese.
Variations on This Dish
- Mexican Street Corn Style: Add mayo and extra cheese for a creamier coating.
- Garlic Butter Version: Swap chili powder for minced garlic and parsley.
- Smoked Paprika Swap: Use smoked paprika instead of chili powder if you want less heat and more grill flavor.
Common Mistakes to Avoid with This Dish
- Boiling the corn first: You lose the char and some of the sweetness.
- Under-salting the butter: Corn needs salt to taste like itself.
- Walking away from the grill: Corn goes from golden to dry in a small window.
11. Halloumi and Vegetable Skewers
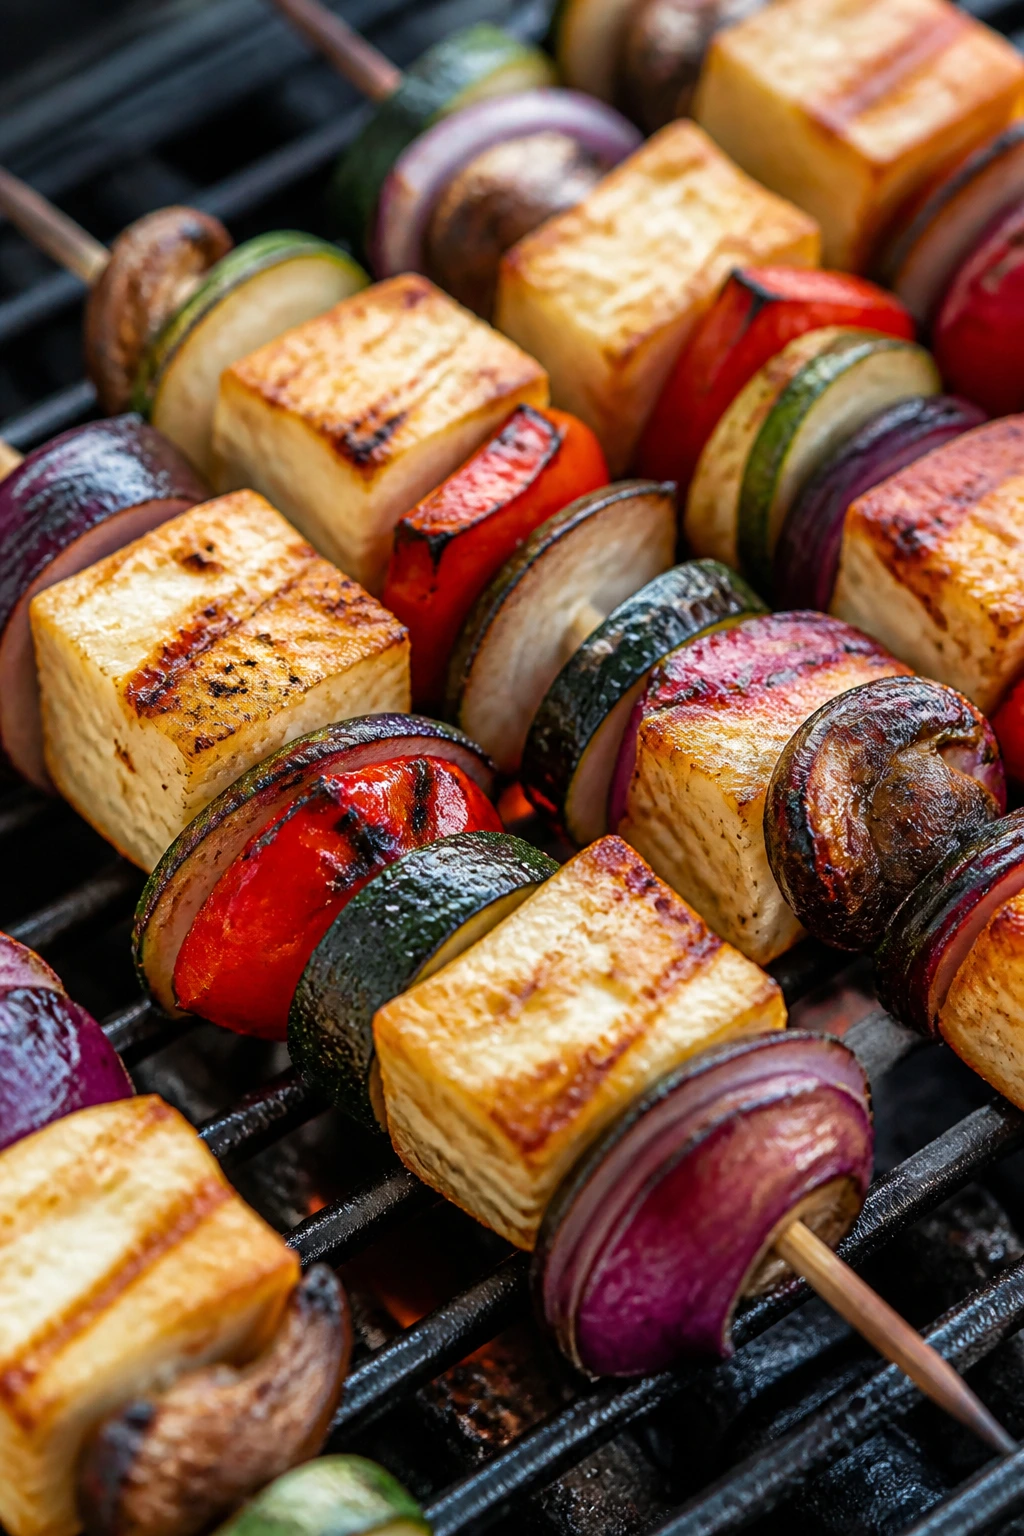
Halloumi is the grill’s trickster cheese. It doesn’t melt into a puddle, it browns into a salty crust and stays put. Thread it with zucchini, onion, peppers, and mushrooms, and you get a skewer that looks lively and eats with a nice mix of soft and firm textures.
Why It Works
Halloumi has the structure to survive direct heat, which means you get actual grill marks instead of cheese soup. The vegetables pick up the same seasoning and soften at roughly the same pace if you cut them in similar sizes. A lemon-and-oregano finish keeps the whole skewer from feeling too salty.
Key Ingredients
- 14 ounces halloumi, cut into cubes
- 2 zucchini, sliced into thick half-moons
- 1 red onion, cut into chunks
- 1 red bell pepper, cut into squares
- 8 ounces mushrooms
- 3 tablespoons olive oil
- 1 tablespoon lemon juice
- 1 teaspoon dried oregano
- 1/2 teaspoon kosher salt
- 1/4 teaspoon black pepper
Quick Steps
- Toss the vegetables and halloumi with olive oil, lemon juice, oregano, salt, and pepper.
- Thread them onto skewers, alternating cheese and vegetables.
- Grill over medium heat for 8 to 10 minutes, turning carefully so the cheese browns on two sides.
- Pull them off when the vegetables are tender and the halloumi is golden.
- Serve with extra lemon.
Equipment for This Recipe
- Grill
- Skewers
- Mixing bowl
- Tongs
How to Serve This Dish
Serve these as a main for vegetarians or as a side beside chicken and steak. A cold sparkling water with lime or a dry white wine keeps the salty cheese from feeling too dense.
Pro Tips for This Recipe
- Keep the cheese pieces on the larger side so they hold together.
- If the mushrooms are tiny, use them whole; if they’re large, halve them.
- Oil the grill grates well. Halloumi can stick if the surface is dry.
Variations on This Dish
- Mediterranean Herb Version: Add thyme and cherry tomatoes to the skewer.
- Spicy Aleppo Swap: Use Aleppo pepper instead of black pepper for a softer heat.
- No-Cheese Option: Replace halloumi with firm tofu, pressed and seasoned the same way.
Common Mistakes to Avoid with This Dish
- Cutting the cheese too small: Tiny pieces can slip through the grates.
- Overcooking the vegetables: You want color and bite, not collapse.
- Using weak skewers: Flimsy wood can bend once the halloumi warms.
12. Beer-Brined Pork Chops
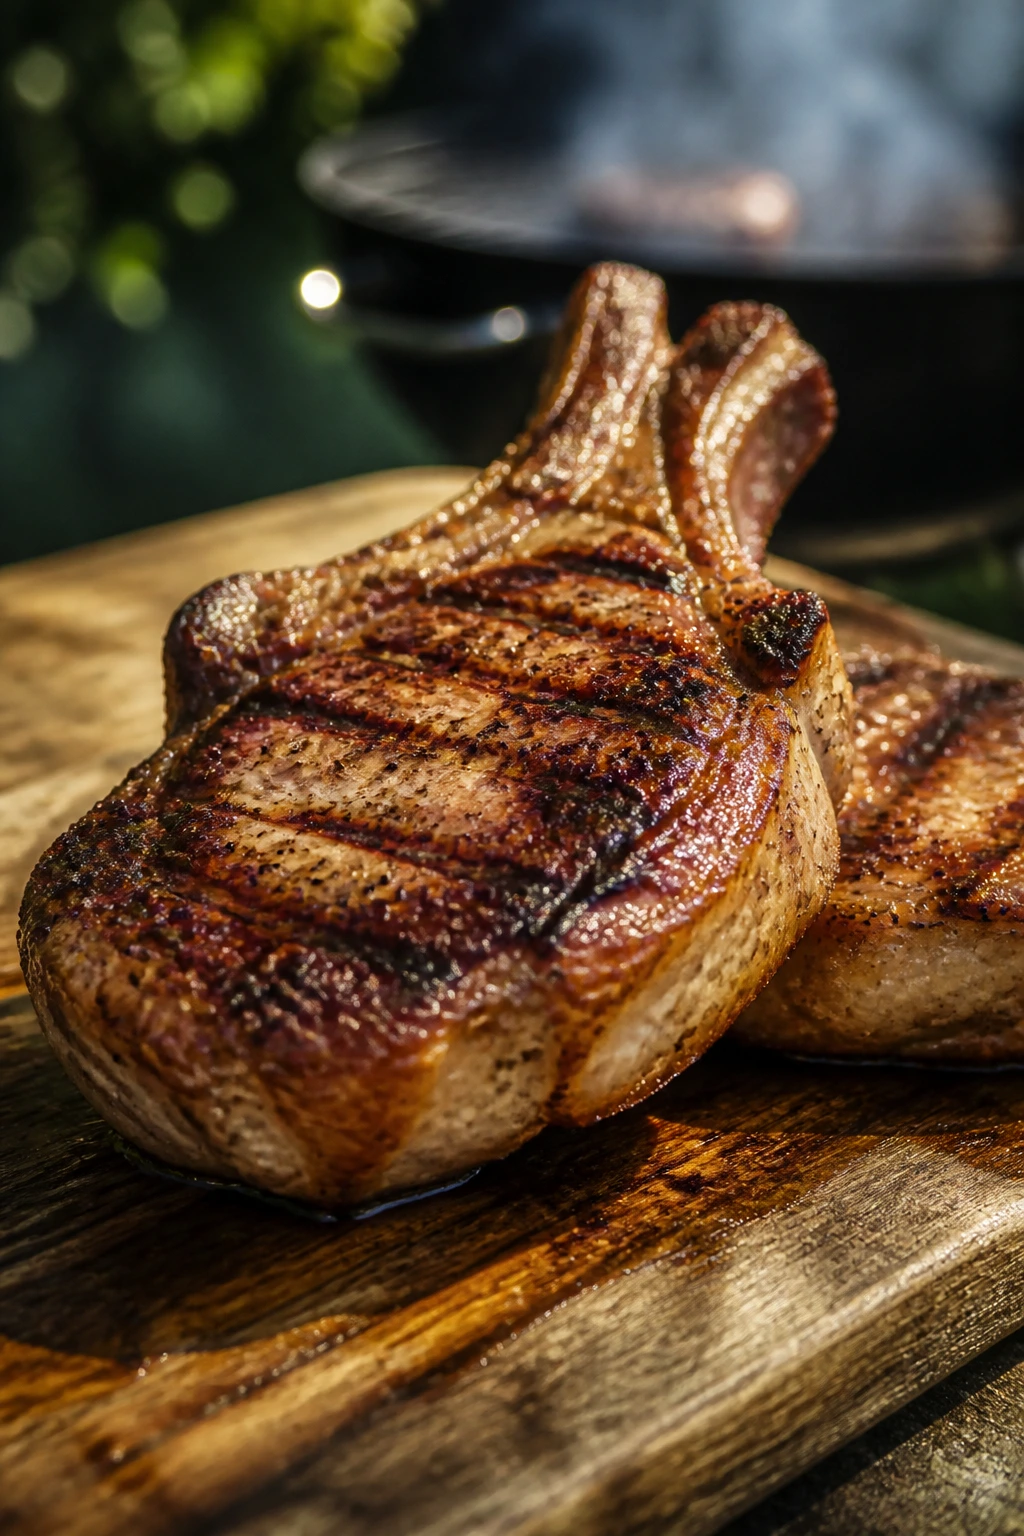
Pork chops are easy to ruin, which is why a quick beer brine feels like cheating in a way I can live with. The brine seasons the meat all the way through, and the grill gives the chop a browned edge without pulling all the moisture out. Bone-in chops stay especially juicy here.
Why It Works
Salt is doing the heavy lifting in the brine. The beer adds mild bitterness and malt, which keeps the pork from tasting flat, while a short drying period before grilling helps the surface brown instead of steam. A 1-inch chop is thick enough to stay juicy but thin enough to cook fast.
Key Ingredients
- 4 bone-in pork chops, about 1 inch thick
- 12 ounces lager
- 2 cups water
- 2 tablespoons kosher salt
- 2 tablespoons brown sugar
- 2 garlic cloves, smashed
- 1 teaspoon black peppercorns
- 1 teaspoon paprika
- 1 tablespoon oil
Quick Steps
- Stir the lager, water, salt, brown sugar, garlic, and peppercorns together until the salt dissolves.
- Brine the pork chops for 1 to 2 hours in the refrigerator.
- Remove, pat dry, and season with paprika and oil.
- Grill over medium-high heat for 4 to 6 minutes per side, until the chops reach 145°F.
- Rest for 5 minutes before serving.
Equipment for This Recipe
- Large zip-top bag or bowl
- Grill
- Tongs
- Instant-read thermometer
How to Serve This Dish
Set the chops beside grilled apples, potato salad, or baked beans. A cold lager — the same style you used in the brine — or a dry cider makes the pork taste rounder and keeps the plate from feeling heavy.
Pro Tips for This Recipe
- Do not brine pork chops overnight unless you want ham-like texture.
- Dry the surface well before grilling. Wet chops steam.
- Pull the chops at 140°F if you know your grill runs hot and the meat will carry over.
Variations on This Dish
- Mustard Brine: Add 1 tablespoon Dijon to the brine for a sharper note.
- Herb Crust: Press chopped rosemary and thyme onto the chops before grilling.
- Boneless Backup: Boneless chops work too, but cut them a little thicker so they don’t dry out.
Common Mistakes to Avoid with This Recipe
- Over-brining: Too much time makes the pork salty and dense.
- Grilling on low heat: You need color quickly before the chop dries.
- Skipping the rest: The juices need a few minutes to settle back into the meat.
13. BBQ Chicken Drumsticks
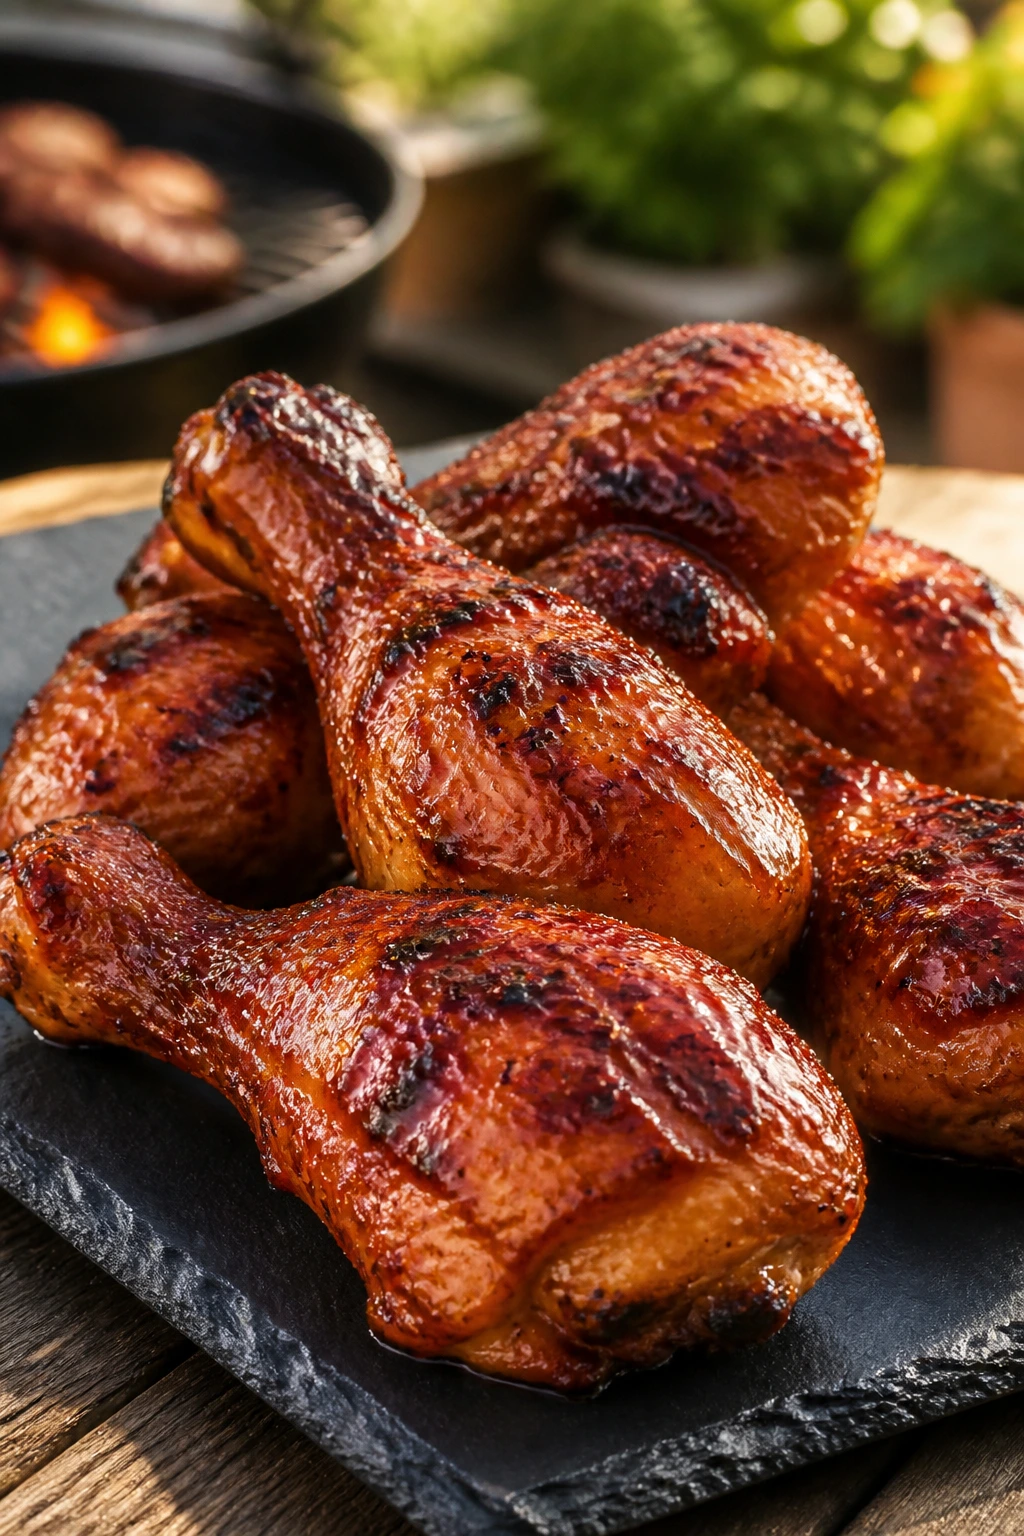
Drumsticks are one of the few cuts that feel made for barbecue rather than adapted to it. The skin can crisp, the meat stays tender near the bone, and the shape gives you a handle that makes them easy to pass around. They also reheat better than most grilled chicken, which is worth saying out loud.
Why It Works
A two-stage cook is the smart move here. Baking or roasting the drumsticks first gets the meat cooked through, then a quick grill or broiler pass builds the color and tightens the sauce. The result is sticky, bronzed skin without burnt barbecue sauce smeared all over the tray.
Key Ingredients
- 3 pounds chicken drumsticks
- 2 tablespoons oil
- 1 tablespoon kosher salt
- 1 tablespoon smoked paprika
- 1 teaspoon garlic powder
- 1/2 teaspoon black pepper
- 3/4 cup BBQ sauce
- 1 tablespoon apple cider vinegar
Quick Steps
- Toss the drumsticks with oil, salt, paprika, garlic powder, and pepper.
- Bake at 400°F for 25 minutes, turning once halfway through.
- Brush with BBQ sauce mixed with apple cider vinegar.
- Grill or broil for 5 to 7 minutes, turning once, until the skin looks lacquered and the chicken reaches 165°F.
- Rest for 5 minutes before serving.
Equipment for This Recipe
- Rimmed sheet pan
- Grill or broiler
- Tongs
- Basting brush
How to Serve This Dish
Serve the drumsticks with corn on the cob and a cold drink that can handle a little smoke — iced tea, beer, or a cola over lots of ice. I like them on a wide plate with a pile of napkins nearby, because this is a hands-on meal in the best sense.
Pro Tips for This Recipe
- Pat the skin dry before seasoning. Moist skin resists browning.
- Mixed BBQ sauce and vinegar gives you a thinner glaze that paints on better.
- If the sauce starts to darken too quickly, move the drumsticks away from the hottest spot.
Variations on This Dish
- Honey Hot Version: Add 1 tablespoon honey and 1 teaspoon hot sauce to the glaze.
- Dry Rub Finish: Skip the sauce and serve with extra paprika rub and ranch on the side.
- Smoky Oven Version: Finish under a hot broiler if the grill is already busy.
Common Mistakes to Avoid with This Dish
- Saucing before the chicken is cooked through: Sugar burns fast.
- Skipping the turn in the oven: One side browns much faster than the other.
- Serving right away: The meat is better when the juices settle for a few minutes.
14. Turkey Burgers with Pickle Slaw
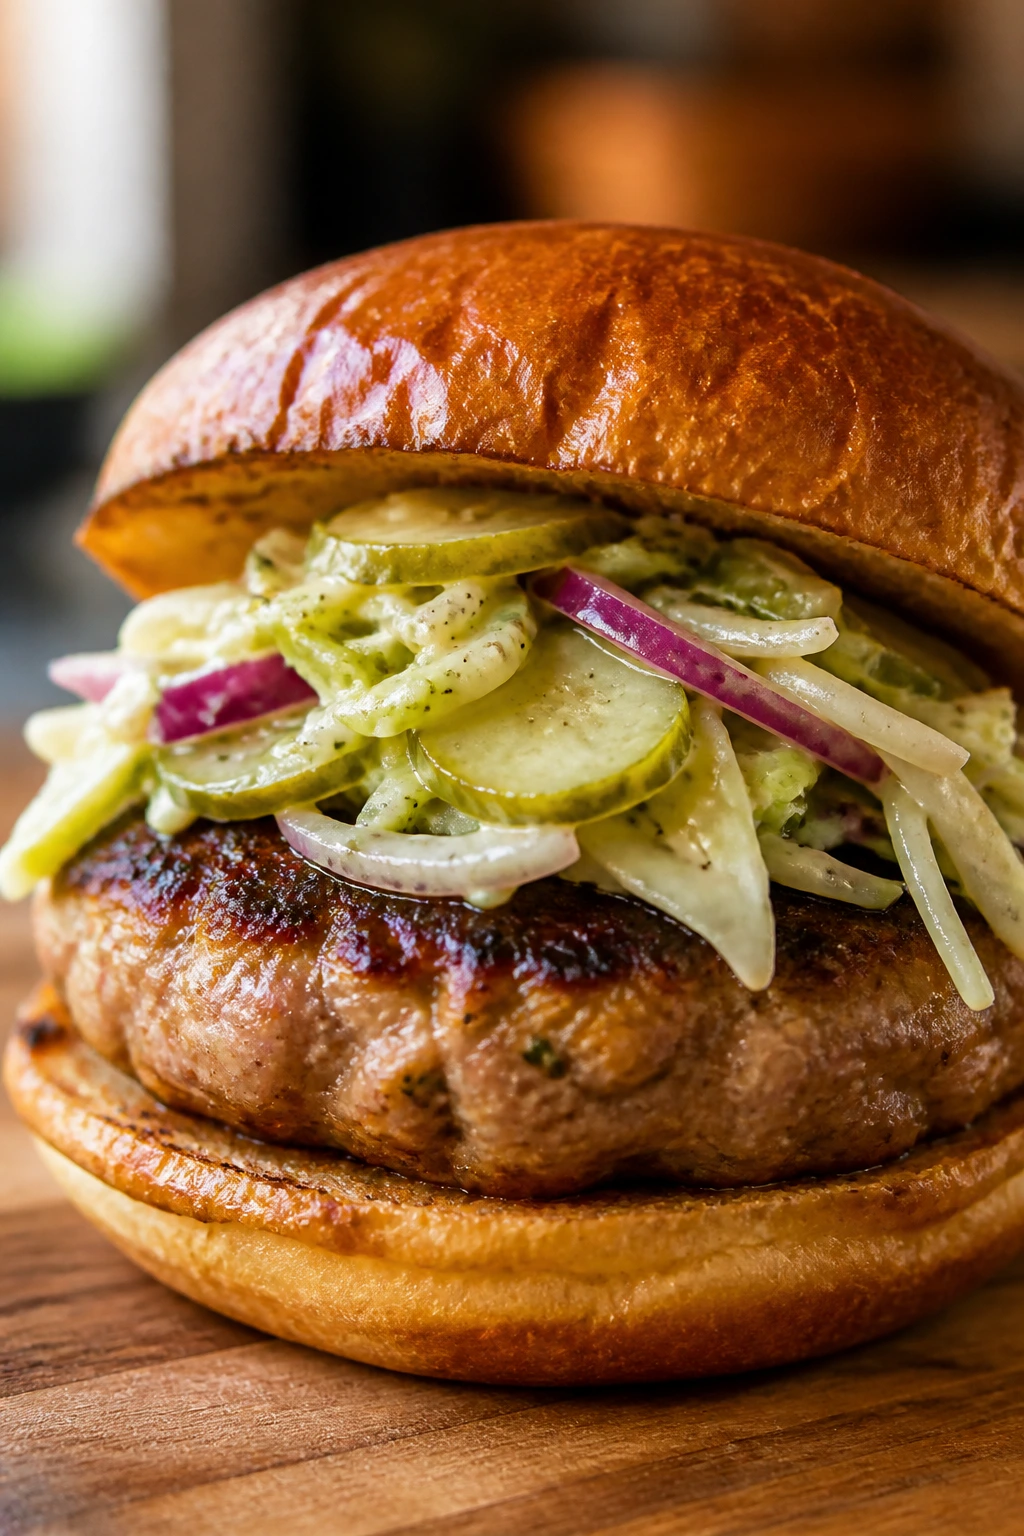
Turkey burgers get a bad reputation because people treat them like beef with the flavor stripped out. That’s the wrong approach. Add an egg, some breadcrumbs, a sharp pickle slaw, and a hot sear, and the burger turns bright, tender, and properly sandwichable.
Why It Works
Ground turkey needs help with moisture and seasoning. The egg and breadcrumbs keep the patties from crumbling, while Worcestershire sauce and onion bring back some depth. The pickle slaw does what mayo alone can’t: it adds crunch and enough acidity to wake the burger up.
Key Ingredients
- 1 1/2 pounds ground turkey
- 1 egg
- 1/2 cup breadcrumbs
- 1 tablespoon Worcestershire sauce
- 1 teaspoon kosher salt
- 1/2 teaspoon black pepper
- 2 cups shredded cabbage
- 1/3 cup mayonnaise
- 2 tablespoons pickle juice
- 1/4 cup chopped dill pickles
- 4 burger buns
Quick Steps
- Mix the turkey, egg, breadcrumbs, Worcestershire, salt, and pepper until just combined.
- Form into 4 patties and chill for 15 minutes.
- Stir the cabbage, mayonnaise, pickle juice, and chopped pickles together for the slaw.
- Grill or pan-sear the patties for 4 to 5 minutes per side, until they reach 165°F.
- Toast the buns and top the burgers with pickle slaw.
Equipment for This Recipe
- Grill or skillet
- Mixing bowl
- Spatula
- Instant-read thermometer
How to Serve This Dish
Serve these burgers with tomato slices, extra pickles, and potato chips on the side. A cold cider or iced tea with lemon fits the tangy slaw better than a sweet soda.
Pro Tips for This Recipe
- Do not mix turkey too long or the patties turn dense.
- Chill the patties before cooking. They hold together better on the heat.
- The slaw should be dressed lightly, not swimming.
Variations on This Dish
- Greek Turkey Burger: Add oregano and crumbled feta, then swap the slaw for cucumber yogurt.
- Spicy Burger: Mix in diced jalapeño and use pepper jack.
- Lettuce-Wrap Version: Skip the bun and serve over crunchy romaine leaves.
Common Mistakes to Avoid with This Recipe
- Using extra-lean turkey: It can turn dry and chalky fast.
- Pressing the patties while they cook: You squeeze out the moisture you need.
- Skipping the thermometer: Turkey has no room for guesswork.
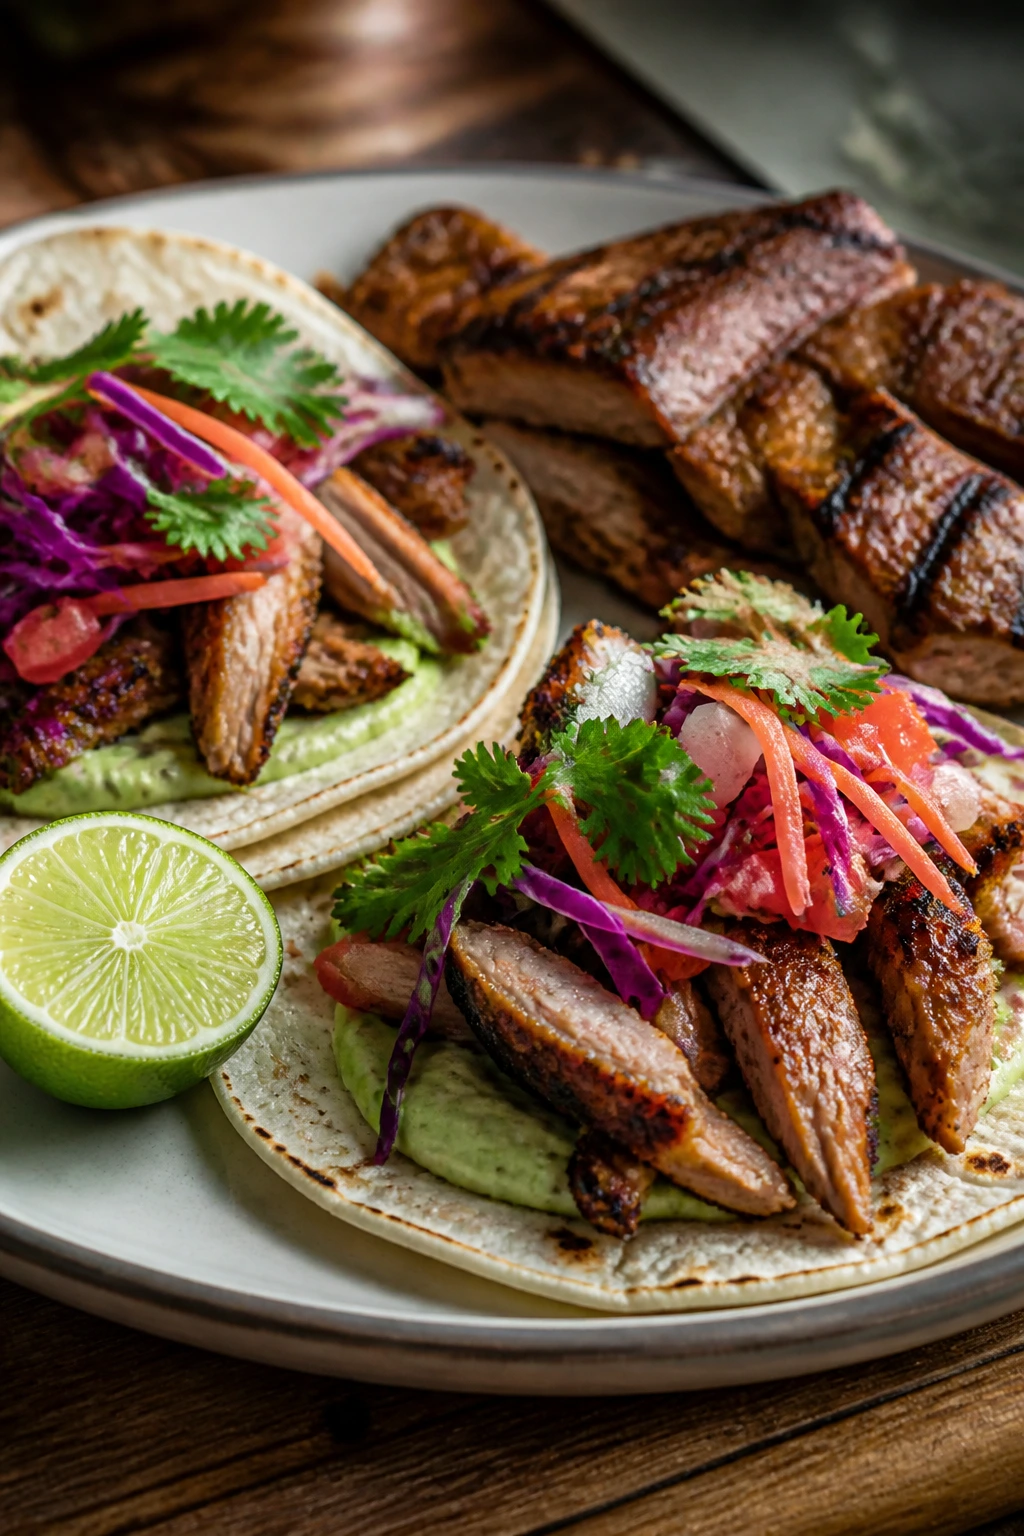
15. Pineapple Pork Tacos

Pineapple and pork have been friends for a long time, and for good reason. The fruit brings sweetness and acid, the pork brings fat and char, and the tortilla ties it all together without much ceremony. These tacos work because nothing tries too hard.
Why It Works
The pineapple does double duty: some of it gets grilled for caramelized edges, and some of it stays fresh for brightness. Pork tenderloin cooks quickly and slices cleanly, which makes taco assembly easy. A quick spice rub gives the meat enough backbone to stand up to the fruit.
Key Ingredients
- 1 1/2 pounds pork tenderloin
- 2 cups pineapple chunks
- 1 tablespoon chili powder
- 1 teaspoon ground cumin
- 1 teaspoon kosher salt
- 1 tablespoon oil
- 8 small tortillas
- 1/2 cup diced onion
- 1/4 cup chopped cilantro
- 1 lime, cut into wedges
Quick Steps
- Rub the pork with chili powder, cumin, salt, and oil.
- Grill the pork over medium-high heat for 12 to 15 minutes, turning until it reaches 145°F.
- Grill the pineapple for 2 to 3 minutes per side until browned.
- Rest the pork, then slice it thinly.
- Fill tortillas with pork, pineapple, onion, cilantro, and lime juice.
Equipment for This Recipe
- Grill
- Cutting board
- Knife
- Tongs
How to Serve This Dish
Set the tacos on a tray with a bowl of salsa and a stack of napkins. A cold Mexican beer, lime soda, or sparkling water with a pinch of salt makes the sweetness of the pineapple feel sharp rather than sugary.
Pro Tips for This Recipe
- Do not overcook the pork tenderloin. It gets dry faster than shoulder.
- Grill the pineapple hard enough to get a little browning. Pale fruit tastes flat here.
- Warm the tortillas on the grill for a few seconds so they don’t crack.
Variations on This Dish
- Chipotle Pineapple Taco: Add chipotle powder to the rub for smoke.
- Pork Shoulder Shortcut: Use leftover pulled pork and top it with the pineapple instead.
- Fish Taco Version: Swap the pork for firm white fish if you want something lighter.
Common Mistakes to Avoid with This Dish
- Cutting the pork too soon: Resting keeps the slices juicy.
- Using watery pineapple: Drain excess juice or the tacos get messy fast.
- Loading too much filling into each tortilla: Two or three bites per taco is the right size.
16. Smoky Baked Beans with Bacon
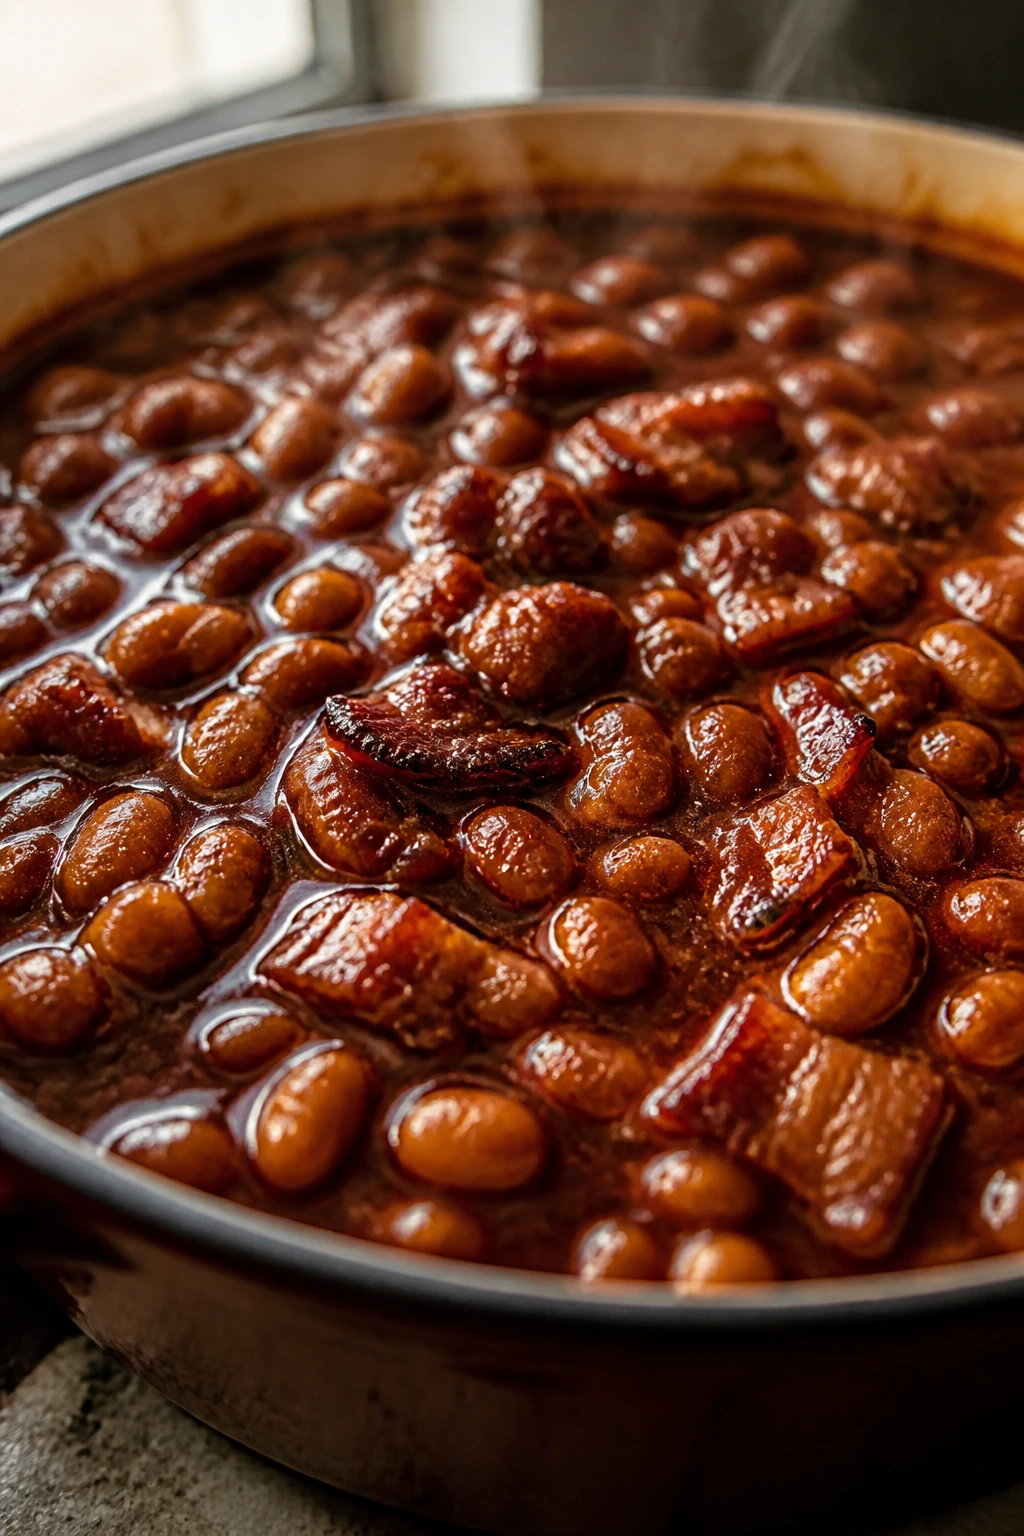
Beans belong at a barbecue because they soak up smoke, salt, and sauce better than almost anything else on the table. Bacon gives them a savory backbone, molasses adds depth, and a little mustard keeps them from tasting like candy. They’re sturdy, cheap, and better the next day.
Why It Works
The beans are doing what beans do best: taking on flavor from everything around them. Bacon fat, onion, BBQ sauce, and molasses melt into the pot and turn a plain can of beans into something worth sneaking with a spoon. A low oven bake thickens the sauce without making you stand over a burner.
Key Ingredients
- 8 slices bacon, chopped
- 1 large onion, diced
- 3 cans navy beans, drained and rinsed
- 1 cup BBQ sauce
- 1/4 cup molasses
- 2 tablespoons yellow mustard
- 1 tablespoon apple cider vinegar
- 1 teaspoon smoked paprika
- 1/2 teaspoon black pepper
Quick Steps
- Cook the bacon in a Dutch oven or skillet until most of the fat renders.
- Add the onion and cook until soft and golden.
- Stir in the beans, BBQ sauce, molasses, mustard, vinegar, paprika, and pepper.
- Bake at 350°F for 40 to 45 minutes, stirring once, until the sauce looks thick and glossy.
- Let the beans sit for 10 minutes before serving.
Equipment for This Recipe
- Dutch oven or oven-safe baking dish
- Wooden spoon
- Knife
- Can opener
How to Serve This Dish
Serve the beans beside ribs, chicken, or burgers, with a spoon that can handle the thick sauce. A cold cola, brown ale, or iced tea stands up to the molasses and smoke without making the dish feel heavier.
Pro Tips for This Recipe
- If the beans look loose after baking, give them 10 more minutes uncovered.
- A little vinegar keeps the pot from tasting like pure sweet sauce.
- If you want more texture, leave one can of beans lightly mashed and stir it in.
Variations on This Dish
- Spicy Bean Pot: Add diced jalapeño or a pinch of cayenne.
- No-Bacon Version: Use smoked paprika and a spoonful of olive oil for a vegetarian take.
- Maple Swap: Replace half the molasses with maple syrup for a softer sweetness.
Common Mistakes to Avoid with This Dish
- Using too much sauce: You want a thick pot, not soup.
- Skipping the onion: The beans need something savory to balance the sugar.
- Serving right away: They taste better after a brief rest.
17. Potato Salad with Mustard-Dill Dressing

Potato salad can be bland if you let it drift. This version stays awake because the dressing is tangy, the potatoes are warm when they meet it, and the dill brings a sharp green note that cuts through grilled meat. It’s the kind of side people keep returning to while waiting for the next round from the grill.
Why It Works
Warm potatoes soak up dressing better than cold ones. That’s the whole trick. The mustard and pickle juice give the mayonnaise some bite, and celery keeps the texture from going soft all the way through. It plays especially well beside smoky meat because it’s cooling without being dull.
Key Ingredients
- 2 1/2 pounds baby potatoes
- 1/2 cup mayonnaise
- 2 tablespoons Dijon mustard
- 2 tablespoons pickle juice
- 2 celery stalks, diced
- 3 scallions, sliced
- 2 tablespoons chopped dill
- 1 teaspoon kosher salt
- 1/2 teaspoon black pepper
Quick Steps
- Boil the potatoes in salted water until just tender, about 12 to 15 minutes.
- Drain and let them cool for 5 minutes, then cut any large ones in half.
- Whisk the mayonnaise, mustard, pickle juice, salt, and pepper together.
- Toss the warm potatoes with the dressing, celery, scallions, and dill.
- Chill for at least 30 minutes before serving if you want the flavors to settle.
Equipment for This Recipe
- Large pot
- Colander
- Mixing bowl
- Spoon or spatula
How to Serve This Dish
Scoop it into a shallow bowl and finish with extra dill on top. A cold iced tea, sparkling water, or a light beer keeps the creamy dressing from feeling too heavy next to ribs or chicken.
Pro Tips for This Recipe
- Salt the potato water well. Unsalted potatoes taste flat no matter how good the dressing is.
- Dress the potatoes while they’re still a little warm. They soak up flavor better.
- Use baby potatoes if you want less peeling and a more waxy texture.
Variations on This Dish
- Herb Garden Version: Add parsley and chives along with the dill.
- Bacon Potato Salad: Fold in crisp bacon bits after chilling.
- No-Mayo Swap: Use half yogurt and half olive oil for a lighter dressing.
Common Mistakes to Avoid with This Recipe
- Overboiling the potatoes: They should hold their shape, not crumble.
- Dressing them cold: Cold potatoes take up less flavor.
- Skipping the acid: Mustard and pickle juice keep the salad from tasting heavy.
18. Watermelon Feta Salad with Mint
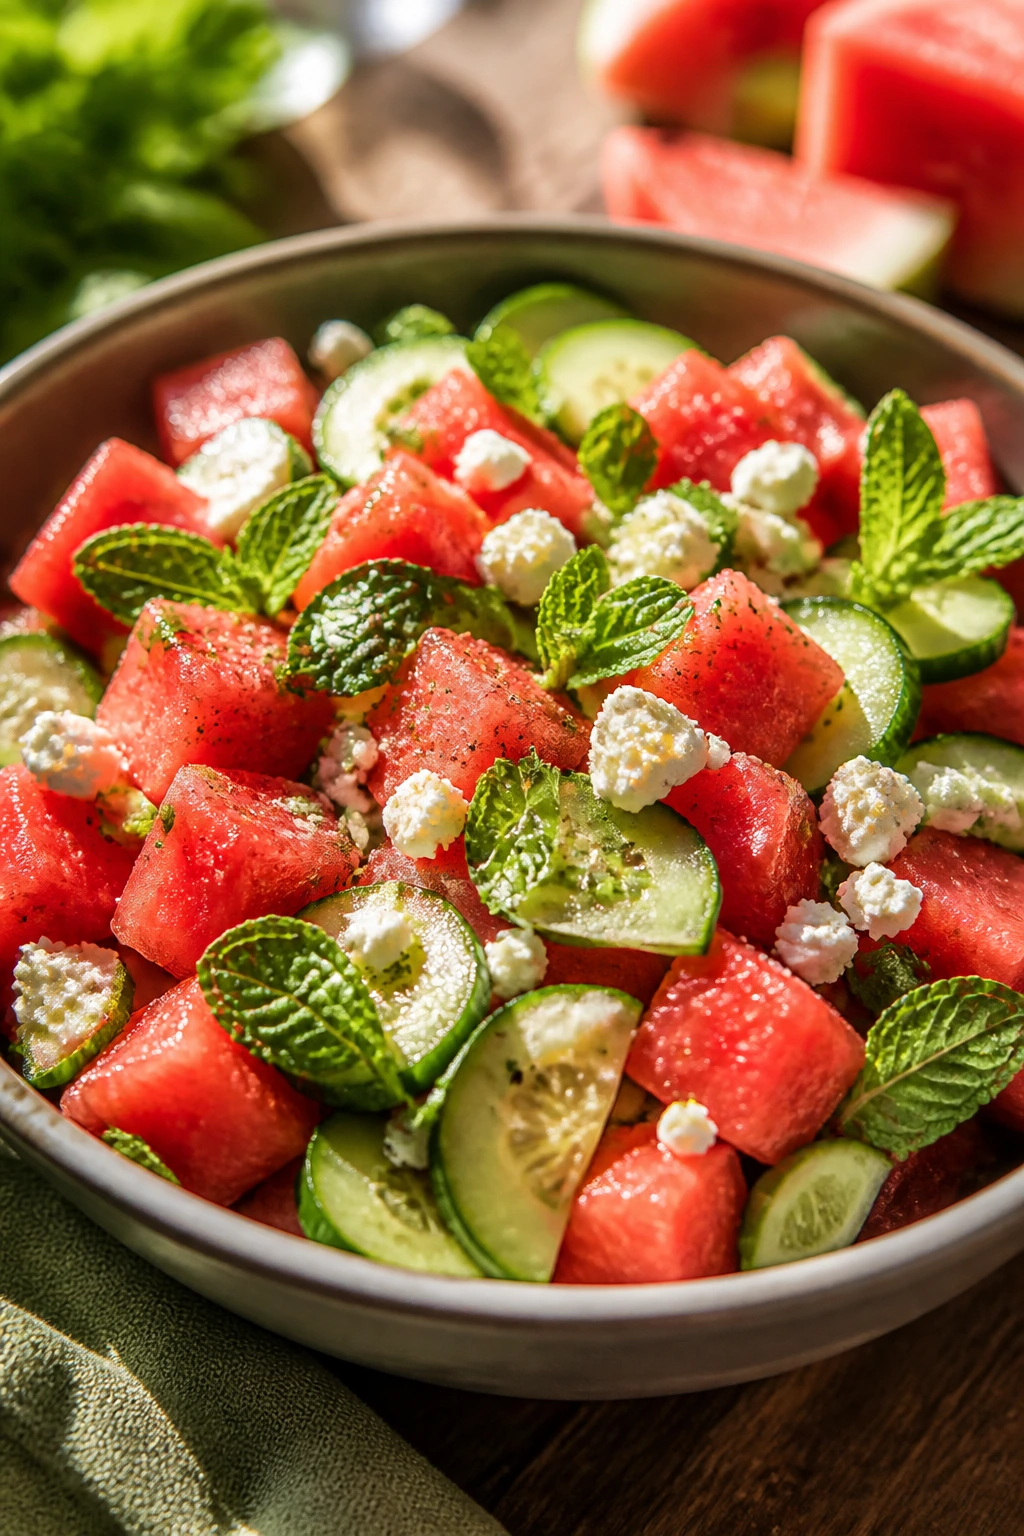
Watermelon at a barbecue has a job beyond being cold. It cools the palate, resets the salt from the rest of the meal, and gives you something crisp between bites of smoke. Add feta, mint, cucumber, and lime, and the bowl starts acting like a palate cleanser with personality.
Why It Works
Watermelon brings sweetness and water content, which is useful after salty ribs or burgers. Feta adds a briny edge, cucumber brings another kind of crunch, and lime keeps the whole bowl from sliding into fruit salad territory. This is one of the few sides that actually gets better the minute it hits the table.
Key Ingredients
- 6 cups watermelon cubes
- 8 ounces feta, crumbled
- 1 cucumber, sliced
- 1/4 cup mint leaves
- 2 tablespoons lime juice
- 1 tablespoon olive oil
- 1/4 teaspoon black pepper
- Pinch of salt
Quick Steps
- Cut the watermelon into bite-size cubes and slice the cucumber thinly.
- Combine the watermelon, cucumber, feta, and mint in a large bowl.
- Whisk the lime juice, olive oil, black pepper, and salt together.
- Drizzle the dressing over the salad and toss gently once or twice.
- Serve immediately while the fruit is cold.
Equipment for This Recipe
- Large bowl
- Sharp knife
- Cutting board
- Small whisk or fork
How to Serve This Dish
Serve it in a wide bowl so the feta stays visible and the fruit doesn’t crush itself. A cold sparkling water, dry rosé, or even plain ice water with lime makes sense here because the salad is already bright.
Pro Tips for This Recipe
- Use seedless watermelon if you want less fuss at the table.
- Tear the mint by hand instead of chopping it to death.
- Add the dressing at the last minute so the melon stays crisp.
Variations on This Dish
- Basil Swap: Use basil instead of mint for a more savory edge.
- Cherry Tomato Version: Add halved tomatoes if you want more acidity.
- Cucumber Heavy: Double the cucumber when you want a less sweet side.
Common Mistakes to Avoid with This Recipe
- Salting too aggressively: Feta already brings salt. Start light.
- Making it too far ahead: The watermelon will release juice and flatten the texture.
- Using soft, overripe fruit: You want slices that still hold their shape.
19. Grilled Romaine Caesar-ish Salad
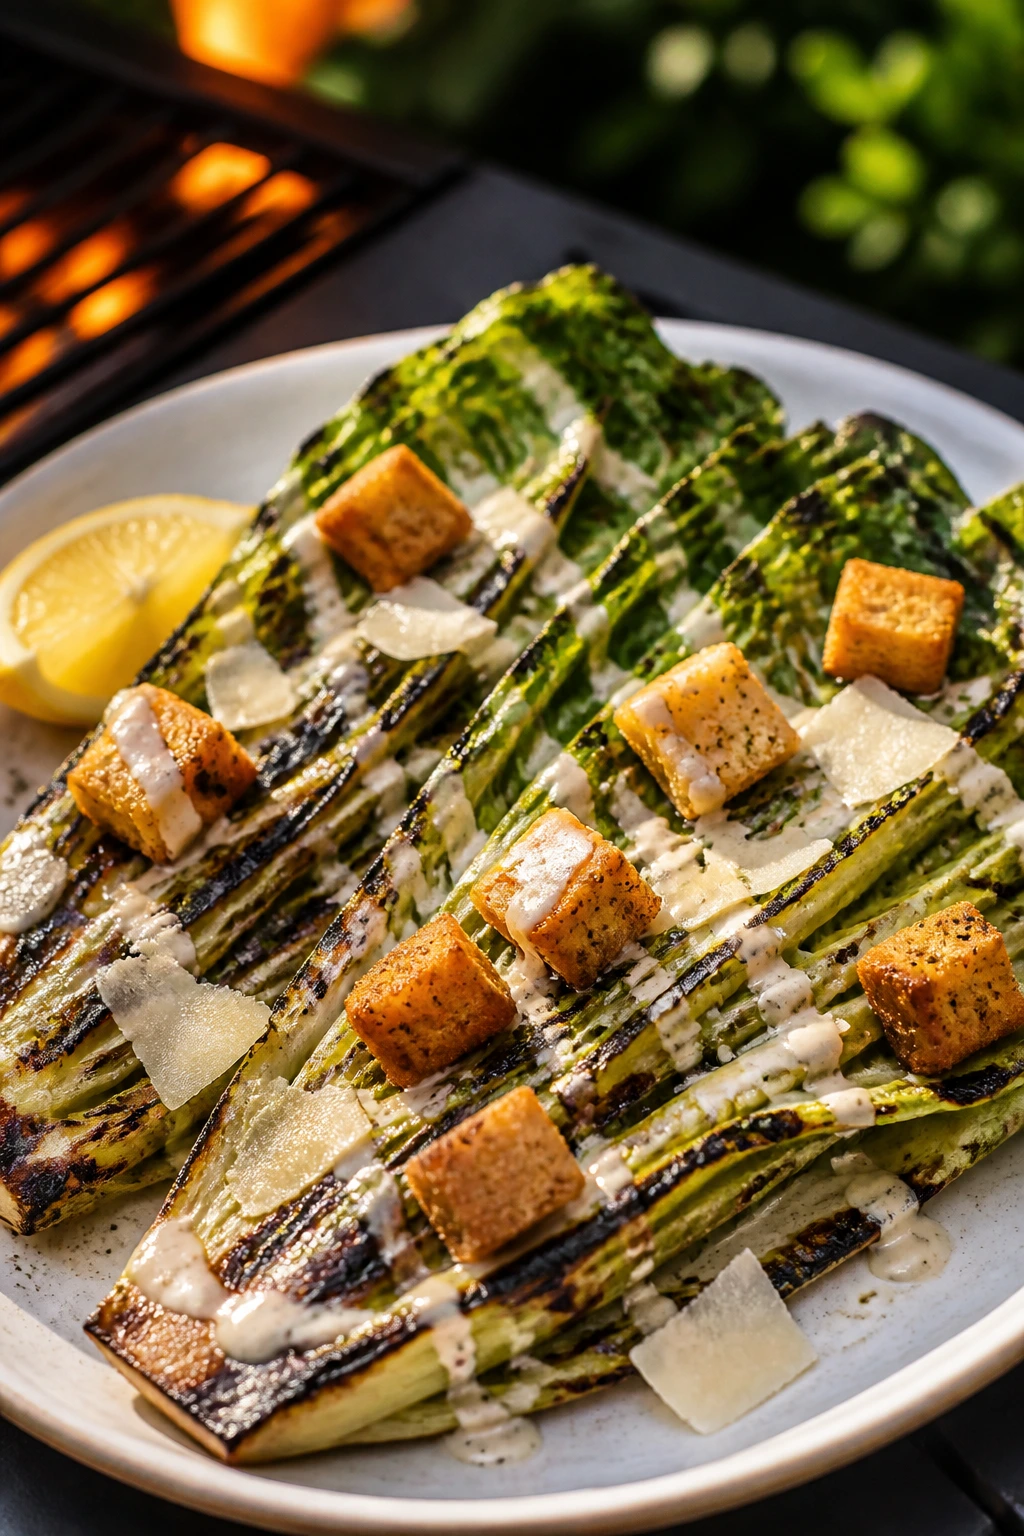
Grilled lettuce sounds odd until you taste it. The outer leaves char a little, the center stays crisp, and the dressing clings in all the right places because the leaves are warm. It’s a side that belongs near grilled meat, not because it’s fancy, but because it makes the plate feel less one-note.
Why It Works
Heat changes romaine without turning it limp in the first minute. A quick kiss on the grill gives the salad a smoky edge, and the dressing turns the lettuce into something sturdier than a cold bowl of greens. Croutons, Parmesan, and lemon do the rest. It’s still a salad, but it’s not apologizing for being next to the ribs.
Key Ingredients
- 2 romaine hearts, halved lengthwise
- 2 tablespoons olive oil
- 1/3 cup Caesar dressing
- 1/2 cup croutons
- 1/4 cup shaved Parmesan
- 1 lemon, cut into wedges
- 1/4 teaspoon black pepper
Quick Steps
- Brush the cut sides of the romaine with olive oil.
- Grill cut-side down for 1 to 2 minutes, just until char marks appear.
- Transfer to a plate and drizzle with Caesar dressing.
- Add croutons, Parmesan, black pepper, and a squeeze of lemon.
- Serve right away while the lettuce is still warm.
Equipment for This Recipe
- Grill
- Tongs
- Pastry brush or spoon
- Serving platter
How to Serve This Dish
Serve each half as a portion or chop the hearts and toss everything together for easier sharing. A cold sparkling water, crisp lager, or dry white wine keeps the creamy dressing from feeling too rich.
Pro Tips for This Recipe
- Grill the lettuce fast. A long stay on the grate turns it floppy.
- Use a dressing with enough body to coat the leaves. Thin dressing slides off.
- Finish with lemon. It sharpens the whole bowl.
Variations on This Dish
- Anchovy Boost: Add a little anchovy paste to the dressing for more depth.
- Bacon Caesar: Sprinkle in crisp bacon bits for a stronger savory hit.
- Lighter Version: Use yogurt-based dressing if you want less richness.
Common Mistakes to Avoid with This Recipe
- Grilling the romaine too long: You want char, not collapse.
- Dressing too early: The lettuce loses its edge fast.
- Using flimsy croutons: They should stay crunchy under the sauce.
20. Grilled Peaches with Honey Yogurt and Toasted Almonds
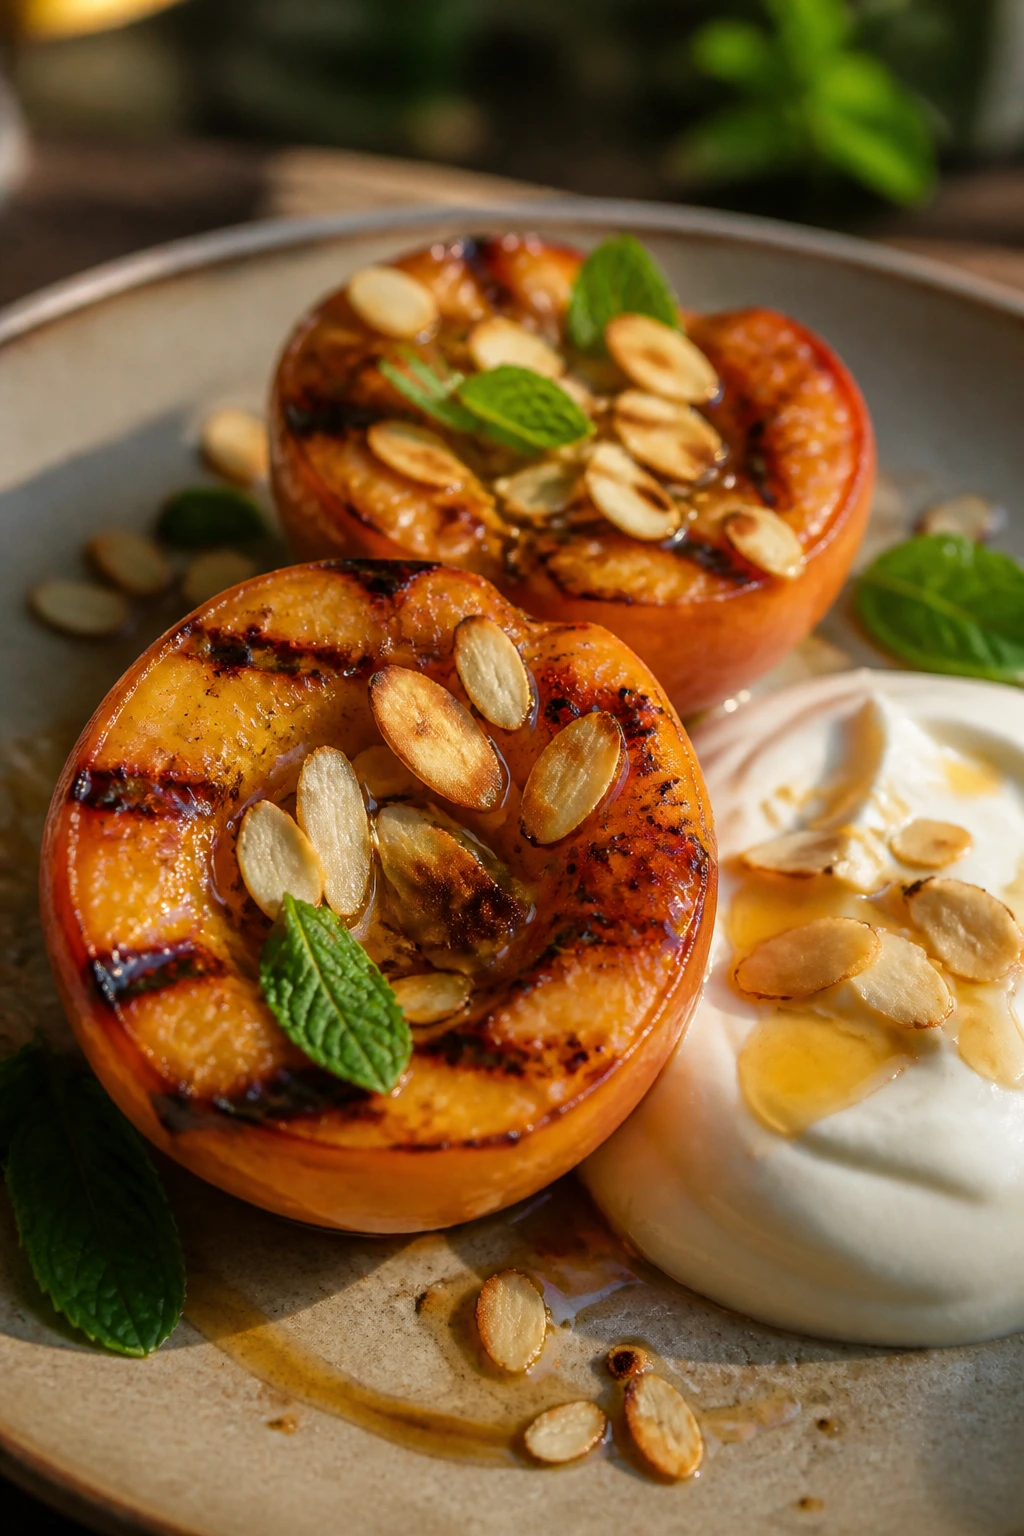
This is the dessert I trust when the grill is still hot and nobody wants a fussy cake. Peaches pick up caramelized edges, yogurt brings a cool tang, and toasted almonds give the bowl enough crunch to keep it from feeling soft all the way through. It tastes like the end of a cookout should taste: warm, cold, sweet, and just a little smoky.
Why It Works
Peaches are built for heat. A short grill time concentrates their juices, and the natural sugar darkens without needing much help. Honey and yogurt keep the dessert from tipping into syrup, while almonds add a dry, nutty finish that plays well with cold drinks.
Key Ingredients
- 4 ripe but firm peaches, halved and pitted
- 1 tablespoon neutral oil
- 1 cup plain Greek yogurt
- 2 tablespoons honey
- 1/2 teaspoon vanilla extract
- 1/4 cup sliced almonds
- Pinch of cinnamon
- Mint leaves, optional
Quick Steps
- Brush the peach halves with oil and grill cut-side down for 2 to 3 minutes.
- Flip and grill for 1 minute more, just until softened and marked.
- Stir the yogurt, honey, vanilla, and cinnamon together.
- Spoon the yogurt into bowls or onto a platter and top with the warm peaches.
- Finish with toasted almonds and mint.
Equipment for This Recipe
- Grill
- Small bowl
- Spoon
- Tongs
How to Serve This Dish
Serve the peaches warm with a spoonful of the honey yogurt on the side or underneath. A cold sparkling wine, iced coffee, or chilled herbal tea keeps the sweetness bright instead of heavy.
Pro Tips for This Recipe
- Use peaches that give slightly when pressed but are not mushy.
- Toast the almonds in a dry skillet for 2 to 3 minutes until fragrant.
- Serve this soon after grilling so the contrast between warm fruit and cold yogurt stays sharp.
Variations on This Dish
- Berry Bowl: Add a handful of berries beside the peaches for more color.
- Mascarpone Swap: Replace yogurt with mascarpone for a richer dessert.
- Cinnamon Sugar Finish: Dust the peaches lightly with cinnamon sugar before grilling.
Common Mistakes to Avoid with This Dish
- Using overripe peaches: They collapse on the grill.
- Grilling too long: You want softened fruit, not peach jam.
- Skipping the salt pinch in the yogurt: It keeps the dessert from tasting flat.
Why Easy BBQ Recipes Work Better With Direct Heat and Short Timing
What makes this kind of barbecue feel easy is not that it avoids heat. It uses heat honestly. Chicken thighs, shrimp, burgers, corn, skewers, salmon packets, and even peaches all benefit from direct contact or a tightly controlled pocket of steam. That means you’re not standing around waiting for a giant slab of meat to behave. You’re moving food from hot surface to plate in a clean rhythm, and that rhythm leaves room for the cooler full of drinks to matter.
I like that these recipes don’t demand a single cooking method. A grill handles most of them, but a slow cooker, oven, griddle, or foil packet steps in when needed. That flexibility is what keeps a cookout from turning into a stress test. If the grill is crowded, the ribs can finish in the oven. If the weather refuses to cooperate, the salmon packet still works inside. A recipe is easy when it survives a little chaos.
The other part is balance. Sugar wants salt. Fat wants acid. Smoke wants something cold beside it. That is not a poetic rule; it’s practical. The cold drink clears the bite, the food pulls you back, and the cycle keeps going without the plate feeling too heavy. A cookout with that kind of balance usually ends with empty trays.
Essential Equipment for These Recipes
- Gas or charcoal grill: The main tool for most of the collection, and either one will work if you know the hot spots.
- Instant-read thermometer: The easiest way to keep chicken, pork, and salmon from overcooking.
- Metal tongs: Better than a fork for turning meat without losing juices.
- Skewers: Wood or metal, depending on whether you want reusable gear or disposable convenience.
- Heavy-duty foil: Needed for ribs, salmon packets, and any backup oven finish.
- Cast-iron skillet or griddle: Useful for smash burgers and for keeping heat steady on a patio burner.
- Slow cooker: The simplest path to pulled pork when you want the meat to cook itself.
- Mixing bowls: A few medium bowls make marinades, rubs, and slaws easier to handle.
- Basting brush: Handy for sauces, butter, and last-minute glaze.
- Rimmed sheet pan: Good for moving seasoned chicken and drumsticks in and out of the oven without spills.
Smart Shopping and Ingredient Tips for Easy BBQ Recipes
The easiest barbecue meals start at the store. Buy chicken thighs instead of breasts when you can; they’re more forgiving on the grill and keep a better texture under sauce. For shrimp, look for large or extra-large peeled and deveined shrimp, usually in the 16/20 or 21/25 size range. Anything much smaller cooks too fast and can dry out before you finish the skewers.
Pork shoulder is the right cut for pulled pork because it has enough fat to stay moist through a long cook. For ribs, choose racks with meat that looks even from end to end rather than thin at one end and thick at the other. On the produce side, pick corn with tight husks, peaches that are firm with a little give, and watermelon that feels heavy for its size. Heavy usually means juicy.
Bottled BBQ sauce is fine. Really. The trick is choosing one that tastes smoky rather than just sweet, because sugar burns fast on a grill. Low-sodium beans, canned or dry, are also a smart buy since bacon, mustard, and sauce do a lot of the seasoning work. For cheese, halloumi should feel springy, feta should crumble cleanly, and cotija should be dry enough to sprinkle, not wet in the container. Small signs matter.
How to Serve These Recipes
Presentation: Put the food on a wide platter or tray instead of crowding it into bowls. Chicken thighs and ribs look better in loose layers, skewers belong slightly fanned out, and salads need enough surface area so the greens or fruit stay visible.
Accompaniments: Pair the mains with one starchy side and one crisp side. Potato salad, baked beans, grilled corn, slaw, and watermelon salad cover the bases without making the table feel crowded. If you want bread, toast the buns or rolls first so they can handle sauce.
Portions: Count on 2 chicken thighs or 1 large pork chop per person, 3 to 4 shrimp skewers for a light main, 1 rack of ribs for 2 hungry eaters, and 1 1/2 cups of sides per person. Salads and beans disappear faster than you think, so make a little more than feels safe.
Beverage Pairing: Cold lager, pale ale, iced tea, sparkling lemonade, and crisp cider all fit this menu because they cut through fat and smoke without fighting it. For nonalcoholic drinks, lime seltzer and very cold sweet tea are the cleanest matches.
Additional Tips and Flavor Boosters
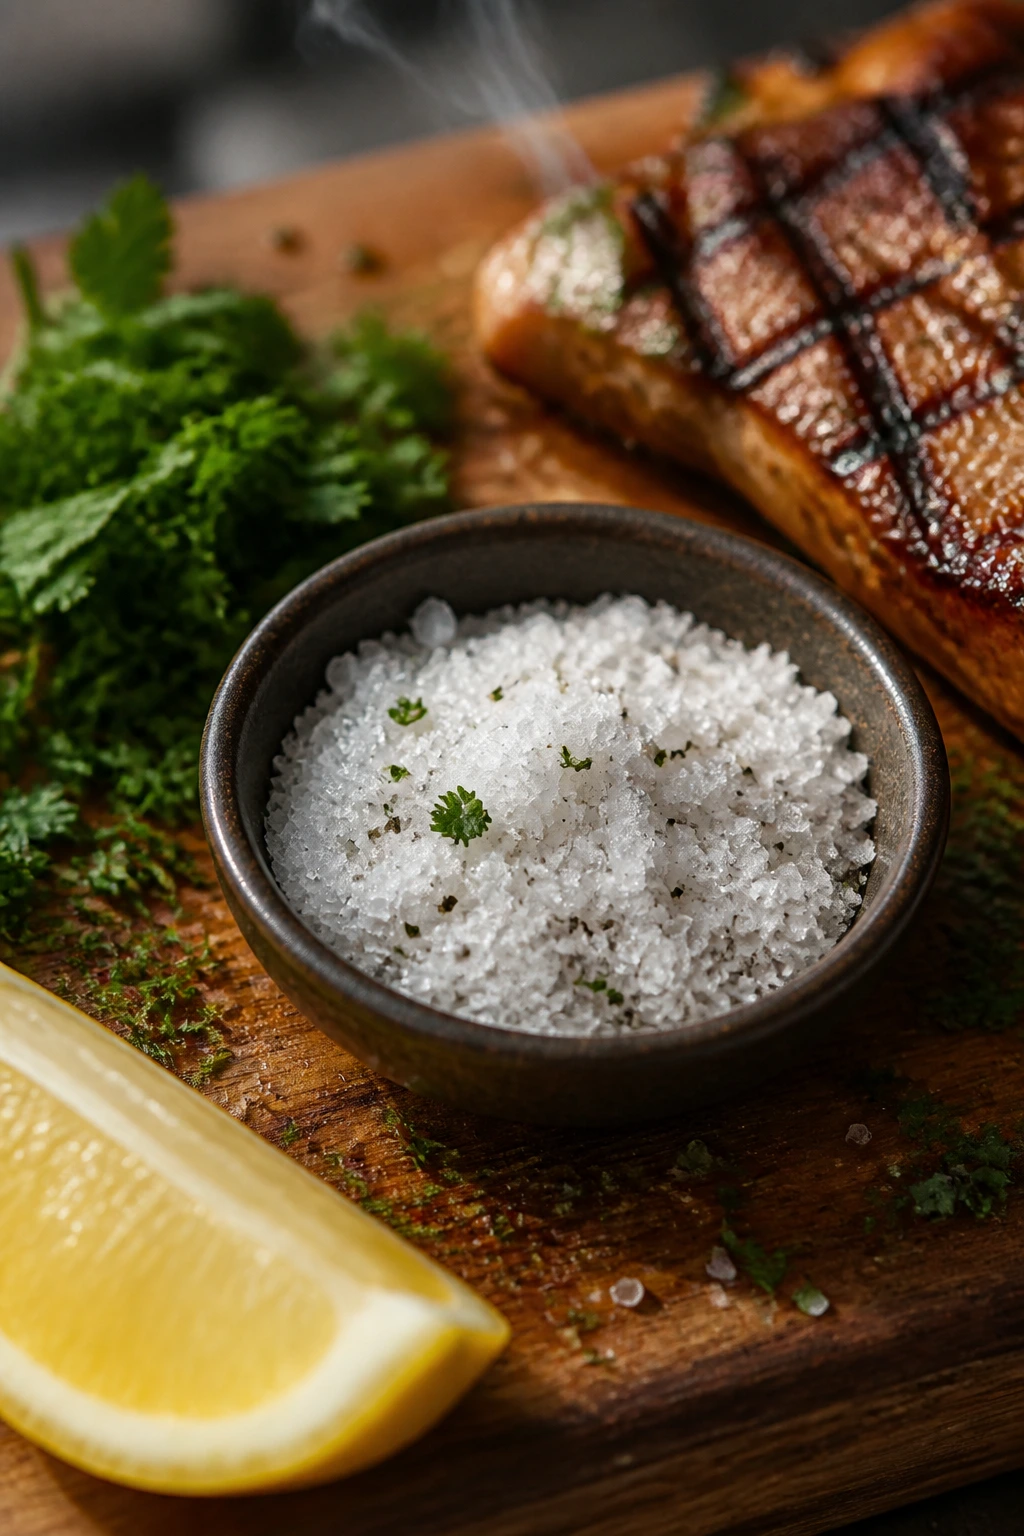
Flavor Enhancement: Keep a small bowl of finishing salt, chopped herbs, or lemon wedges near the grill. A final sprinkle of flaky salt on chicken thighs or a squeeze of lime over shrimp can wake up a plate that tastes good but not quite finished.
Customization: If you want heat, add chili flakes, chipotle powder, or sliced jalapeños in one place only — the rub, the sauce, or the garnish. That keeps the spice readable instead of muddy. If you want things milder, lean on mustard, vinegar, and fresh herbs instead of extra sugar.
Serving Suggestions: Mix textures on purpose. Put crunchy slaw beside sticky ribs, toss toasted almonds over fruit, and serve grilled romaine with sharp cheese and croutons that still snap. A plate gets boring when every bite feels the same.
Make-It-Yours: For a gluten-free spread, use corn tortillas, gluten-free buns, and check the label on BBQ sauce and soy sauce. For dairy-free cooking, use olive oil instead of butter on shrimp and peaches, and skip the yogurt or cheese finish. For a lower-sodium spread, lean on citrus, onion, garlic, and herbs first, then salt in the last step.
Make-Ahead, Storage, and Reheating Guidance
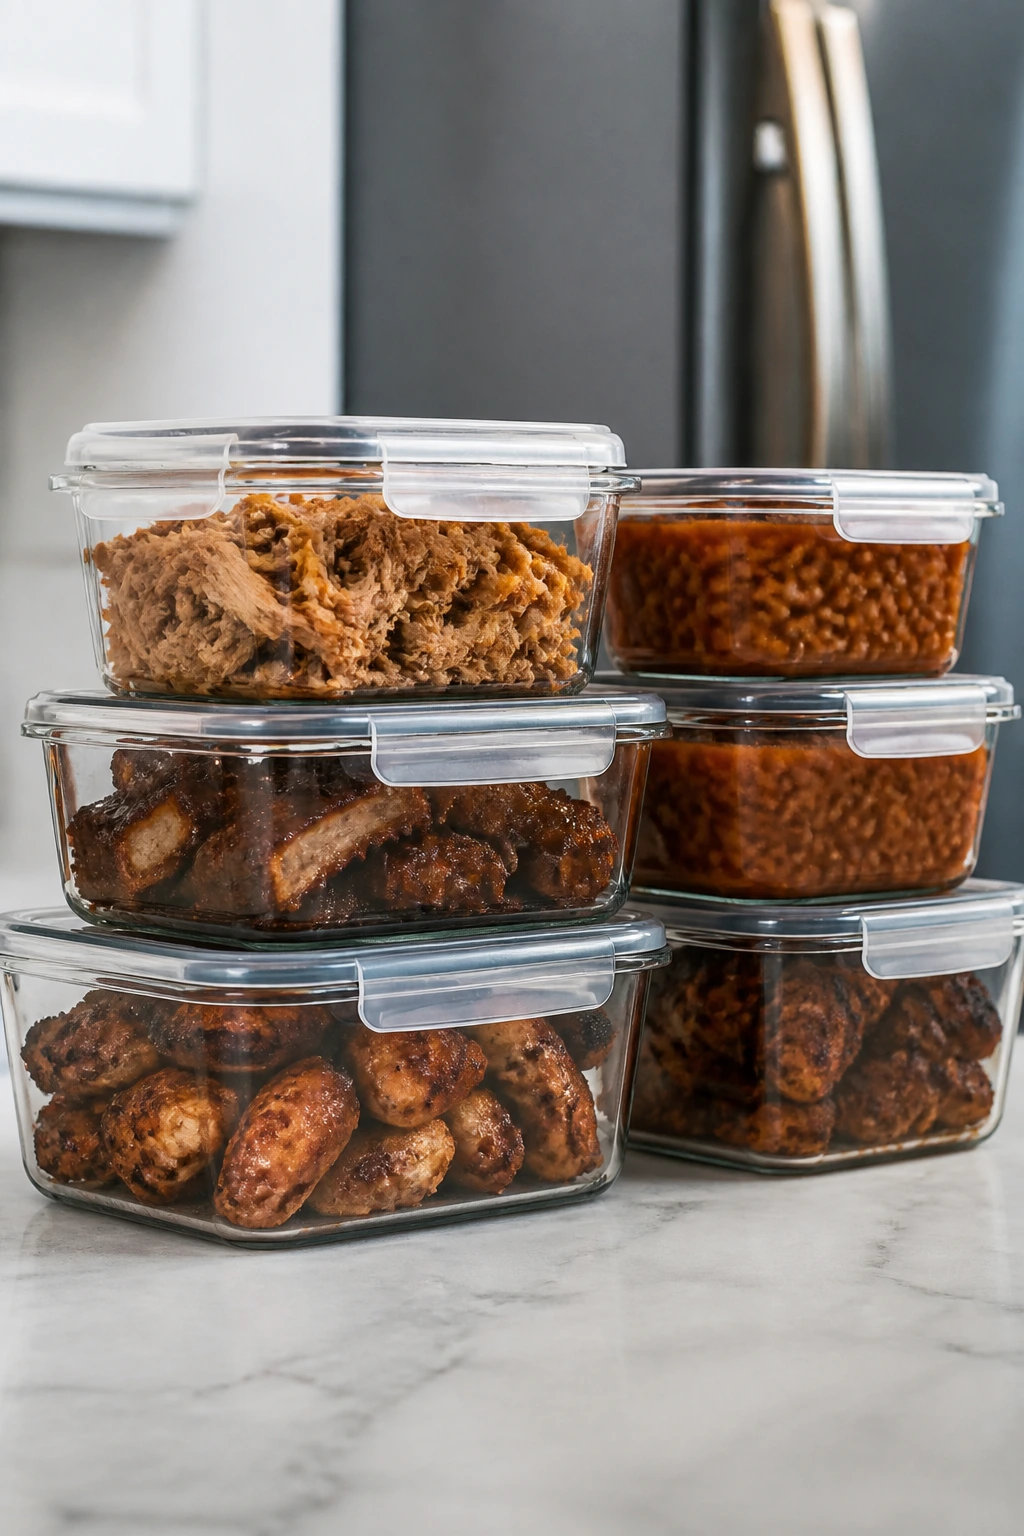
Most of these recipes keep well for 3 to 4 days in the refrigerator, though salads with melon or grilled romaine are best eaten the same day. Pulled pork, ribs, chicken thighs, drumsticks, sausage, beans, and cooked pork chops all freeze well for up to 2 months if you wrap them tightly and keep the sauce separate when you can. Shrimp is the exception; it can freeze, but the texture usually drops off after reheating, so I’d rather cook it fresh.
For reheating, low and slow wins. Use a 300°F oven with foil over ribs, chicken, pork, beans, or potato salad components that need warming without drying out. Add a splash of water, broth, or cooking juices if the meat looks tight. A skillet on low heat works for burger patties, sausage, or sliced steak; just cover it loosely so the center warms without burning the outside.
Salads with dressing should usually be held back until serving, or the cucumbers, watermelon, and lettuce will slump. Corn can be reheated quickly on a grill or in a skillet with a lid. Pulled pork often tastes better the next day because the sauce settles into the meat, while grilled peaches and salmon are at their best fresh. If you’re planning ahead, make the sauces, slaw, bean pot, and dressings first. Grill the protein close to serving time and the whole meal stays sharper.
Variations and Adaptations to Try
Gluten-Free Cookout Plate: Use corn tortillas instead of buns where needed, and choose a gluten-free BBQ sauce, Worcestershire, and soy sauce. Most of the grilled meat and vegetable recipes already fit this with almost no extra work, which is a nice change from recipes that make you rebuild the whole plate.
Dairy-Free Summer Spread: Swap butter for olive oil or ghee in the shrimp and corn, skip the feta and halloumi, and use a dairy-free yogurt or vinaigrette for the fruit and salads. The food still feels full, just less creamy.
Lower-Sodium Backyard Menu: Lean hard on citrus, vinegar, garlic, herbs, and pepper. You can cut salt in the rubs a little, but do not erase it completely; barbecue food tastes dead when every ingredient is unsalted. The better move is to salt once, then finish with acid.
Heat-Seeker’s Table: Add chipotle powder, cayenne, sliced jalapeños, or hot sauce to one dish at a time. If everything is spicy, nothing stands out. A hot glaze on chicken, a peppery slaw, and a plain cold drink keep the heat from turning into punishment.
Kid-Friendly Version: Use the same grill, but keep a few plain or lightly seasoned items in the mix — buttered corn, mild chicken thighs, sausage, and grilled peaches. Kids usually go after the sweet and smoky pieces first, especially when the food is cut small enough to grab without fuss.
No-Grill Backup Plan: Most of the list can move indoors. Use a broiler for chicken, ribs, drumsticks, and sausage; a cast-iron skillet for burgers and steak; foil packets in the oven for salmon; and a slow cooker for pulled pork. The flavor shifts a little, but the shape of the meal stays intact.
Common Mistakes to Avoid
The first mistake is crowding the heat source. A packed grill steams food instead of browning it, and the difference shows up fast on shrimp, chicken thighs, and vegetables. Give each piece a little room, even if it means cooking in two rounds. It takes longer on the clock, but not nearly as long as fixing pale food.
Another problem is using sauce as a blanket instead of a finish. Sweet BBQ sauce can burn before the meat is ready, especially on ribs, drumsticks, and chicken thighs. Brush it on near the end, then use a second pass after a quick turn on the hottest part of the grill. That’s how you get lacquer instead of scorch.
A third one: not checking temperature. Chicken, pork, and salmon look “done” long before they’re actually ready, and the difference between juicy and dry can be 10 degrees. Use the thermometer. It’s not fussy. It’s how you keep the meat from crossing the line.
People also cut meat too soon. Ribs need a short rest, pork chops need a short rest, flank steak needs a real rest. If you slice immediately, the juices leave in a rush and the plate suffers for it. Last, don’t forget that side dishes matter. A barbecue table with only heavy food and no crisp, cold, acidic pieces feels clumsy. The drink helps, sure, but a good slaw or watermelon salad makes the whole spread feel smarter.
Frequently Asked Questions
Can I make most of these recipes on a gas grill?
Yes. A gas grill handles chicken, steak, shrimp, corn, burgers, and skewers well, as long as you preheat it and oil the grates. The real difference is heat control; gas makes it easier to set up a hot side and a cooler side for finishing sauced food.
What cold drink goes best with smoky barbecue food?
Anything with chill and some acidity does the job: lager, pale ale, iced tea with lemon, sparkling lemonade, or cider. Sweet drinks can work too, but if they’re sugary and flat, they can make the food taste heavier.
How do I keep chicken from sticking to the grill?
Start with clean grates, preheat well, and oil the grates or the chicken lightly before cooking. Also, don’t try to flip too early. If the meat still clings, it usually needs another minute to release on its own.
Can I prep any of these recipes a day ahead?
Definitely. Dry rubs, marinades, slaw, bean mixtures, salad dressings, and even pulled pork all benefit from being made ahead. Keep sauces and crunchy toppings separate until serving so the final texture stays sharp.
What if I don’t have a grill?
Use a cast-iron skillet, grill pan, oven broiler, or sheet pan setup. Ribs, drumsticks, salmon packets, vegetables, and pork can all move indoors without losing the whole point of the recipe.
Which recipes are best for a crowd?
Pulled pork, ribs, drumsticks, sausage and peppers, baked beans, potato salad, and watermelon salad scale easily. Shrimp and salmon are better when cooked close to serving time, so keep those for smaller groups or a second round.
How do I keep fruit and salad dishes from getting watery?
Salt lightly, dress at the last minute, and use fruit that is ripe but still firm. Watermelon, peaches, and grilled lettuce all lose their shape fast once they sit in their own juice.
Can I use bottled BBQ sauce and still get good flavor?
Yes, and you probably should if the bottle tastes smoky rather than cloying. The trick is to use the sauce as part of the build, then add acid, spice, or herbs so the final dish tastes layered.
What’s the safest internal temperature for the meats here?
Chicken and turkey should reach 165°F, pork chops 145°F with a rest, salmon should flake easily and look opaque in the center, and steak can be cooked to your preferred doneness after a proper rest. A thermometer removes the guesswork.
The Last Tray Out of the Cooler
A barbecue menu works best when it gives you contrast. Sticky chicken next to cold slaw. Salty sausage with peppers. Shrimp that disappear in two bites, then a drink with enough ice to reset the tongue. That’s why these recipes make sense together: they don’t all play the same note.
The cold drink matters because it gives the meal a pulse. A sip, a bite, a pause, another bite. Keep a few of these recipes in rotation, and the whole cookout gets easier to manage — and more fun to eat.