
A pan of graveyard brownies solves a very specific Halloween problem: you want a dessert that looks theatrical on the table, but you do not want to build something fragile, fussy, or impossible to serve after everyone has hovered over the buffet for 20 minutes. Brownies give you a dark, sturdy, flat base. That matters. Cookie tombstones stand up. Oreo crumbs behave like dirt. Candy pumpkins stay where you put them instead of rolling off a frosting slope.
And brownies do one thing cake layers rarely do in a Halloween setting: they slice cleanly after chilling. That means the little graves, ghosts, worms, and crackly frosting edges survive the trip from pan to plate. You can make them with a boxed mix or from scratch, dress them up with peanut butter, cheesecake, espresso, caramel, mint, or marshmallow, and still end up with something that feels fun instead of overworked.
I’ve always liked desserts like this more than the picture-perfect ones. They’re a little messy. Good. A graveyard should look like it’s been dug up, not airbrushed. The trick is making the mess intentional: a thick fudgy base, a dark crumb “soil,” and decorations that read instantly at arm’s length. Once you get that balance right, the rest is just choosing your favorite flavor lane and committing to it.
Why These Graveyard Brownies Earn a Spot on the Halloween Table
-
Sturdy Base: Brownies hold tombstones, candy eyes, and crumb toppings better than a cakey bar, so the scene stays readable after slicing.
-
Make-Ahead Friendly: The brownie layer can be baked a day ahead, then decorated once it’s fully cool; that keeps the frosting from slipping.
-
Flavor Flexibility: One pan can lean fudgy, minty, nutty, coffee-forward, or extra-sweet depending on which add-ins you choose.
-
Kid-Friendly Decorating: Kids can crush cookies, place candy pumpkins, and pipe “RIP” onto tombstones without needing steady pastry hands.
-
Party-Ready Slices: A 9×13 pan gives you neat squares, but you can also cut the brownies into mini rectangles for buffet trays and lunchbox treats.
-
Shortcut Compatible: Boxed brownie mix, store-bought frosting, and ready-made cookies all fit this format without making it look cheap.
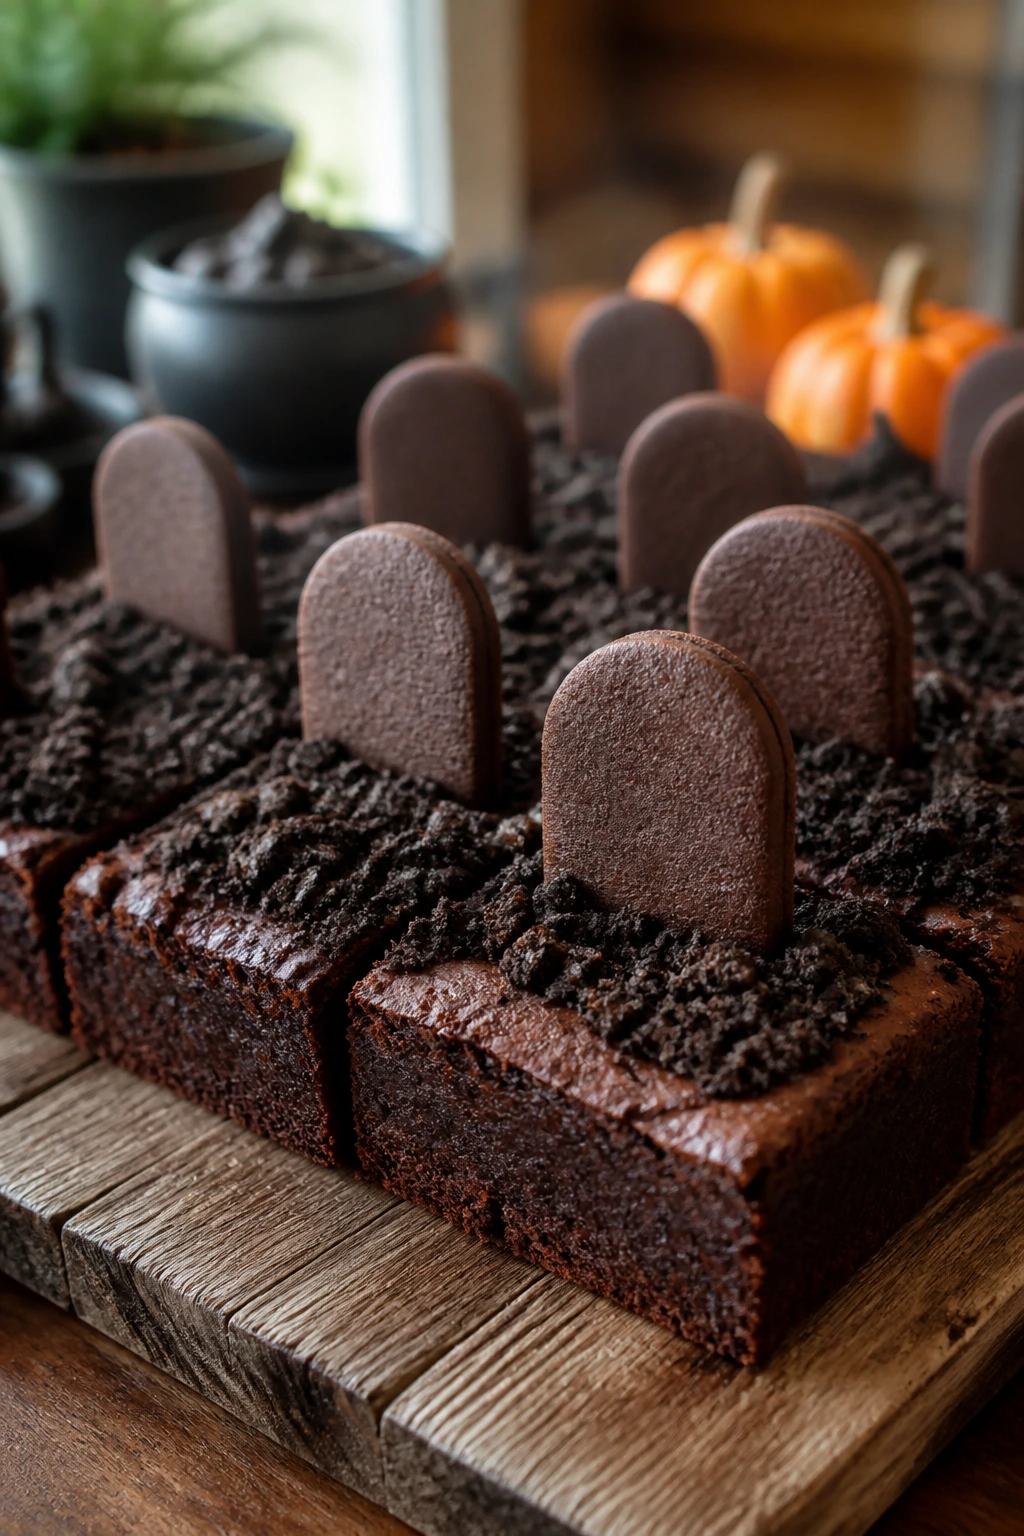
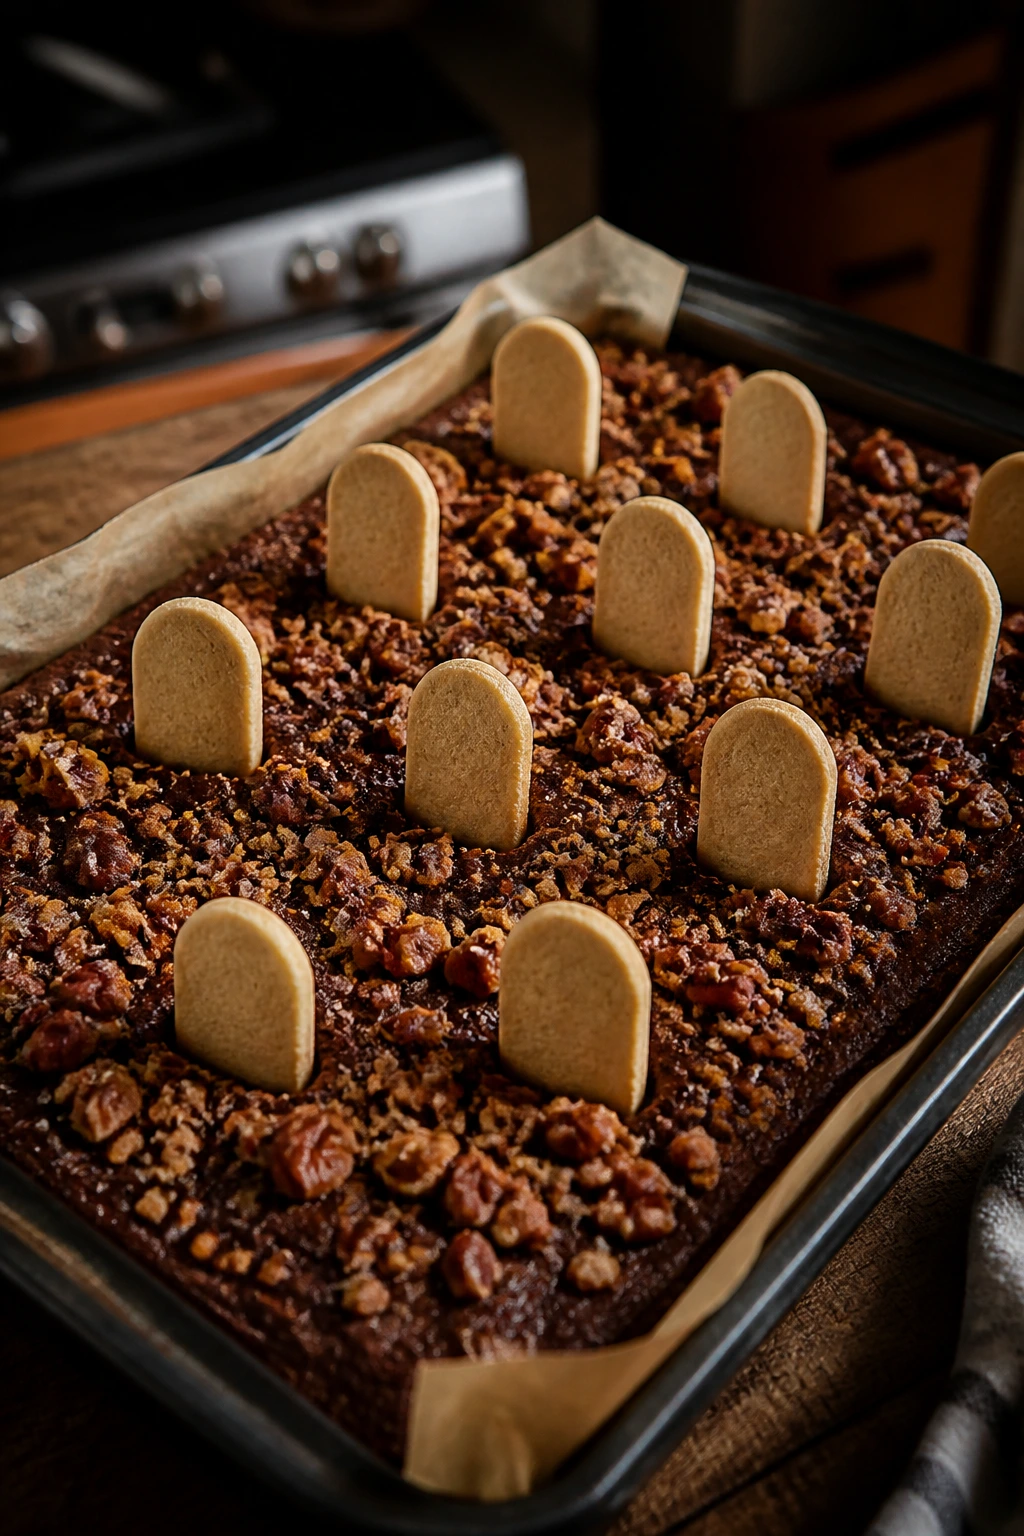
1. Classic Graveyard Brownies with Cookie Tombstones
Intro:
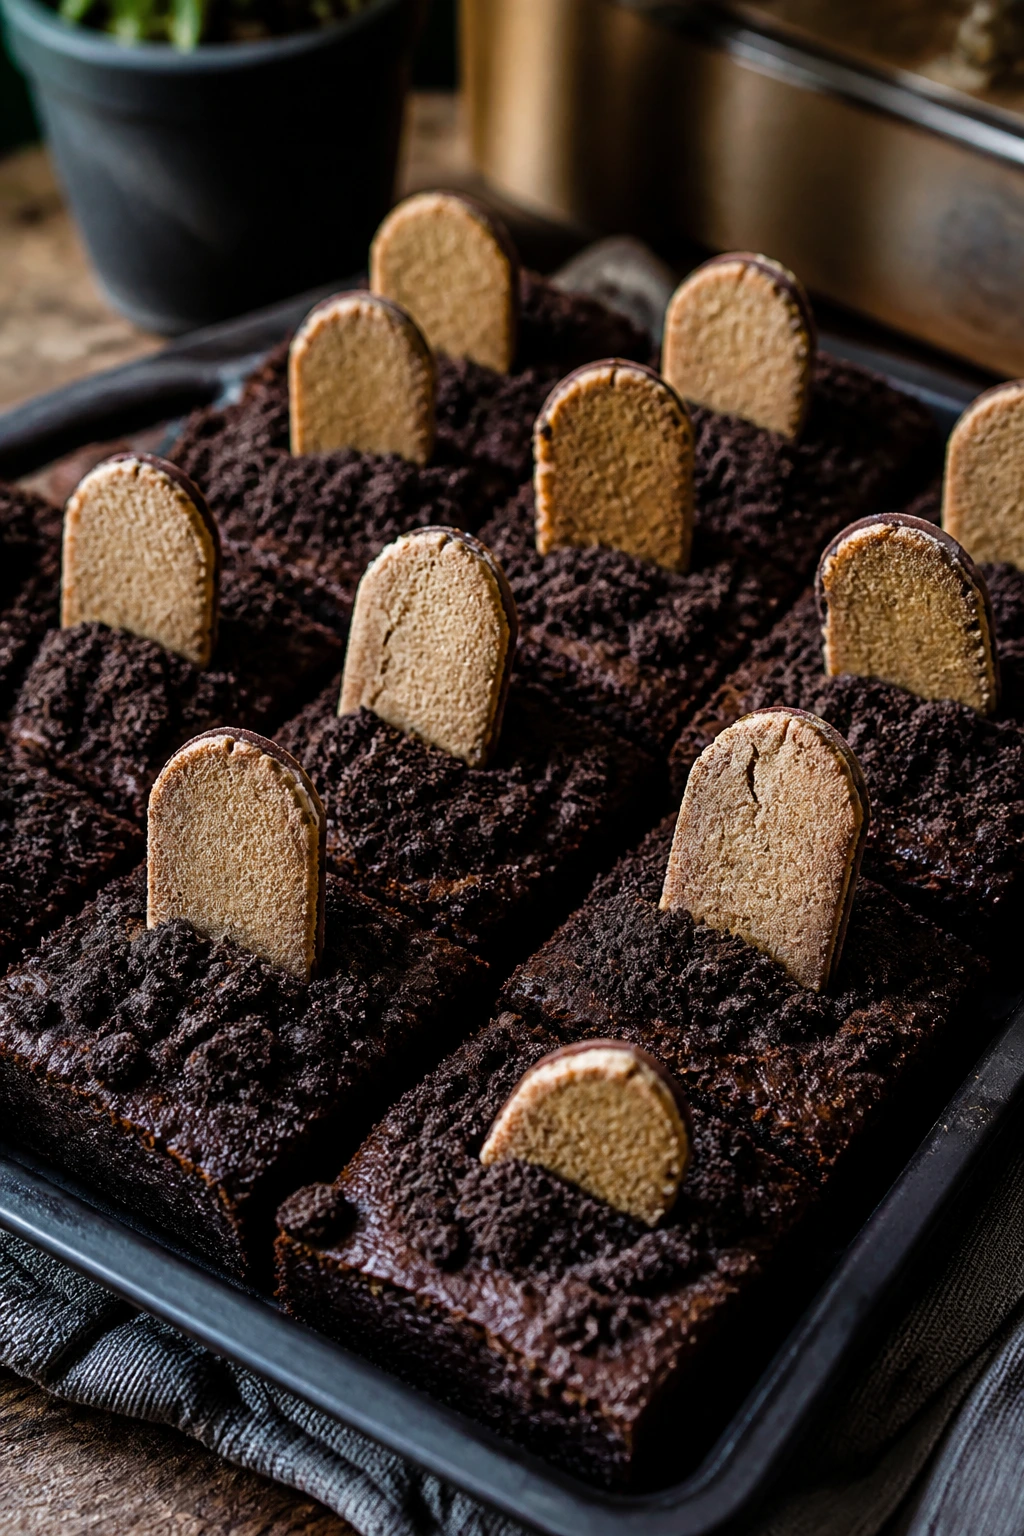
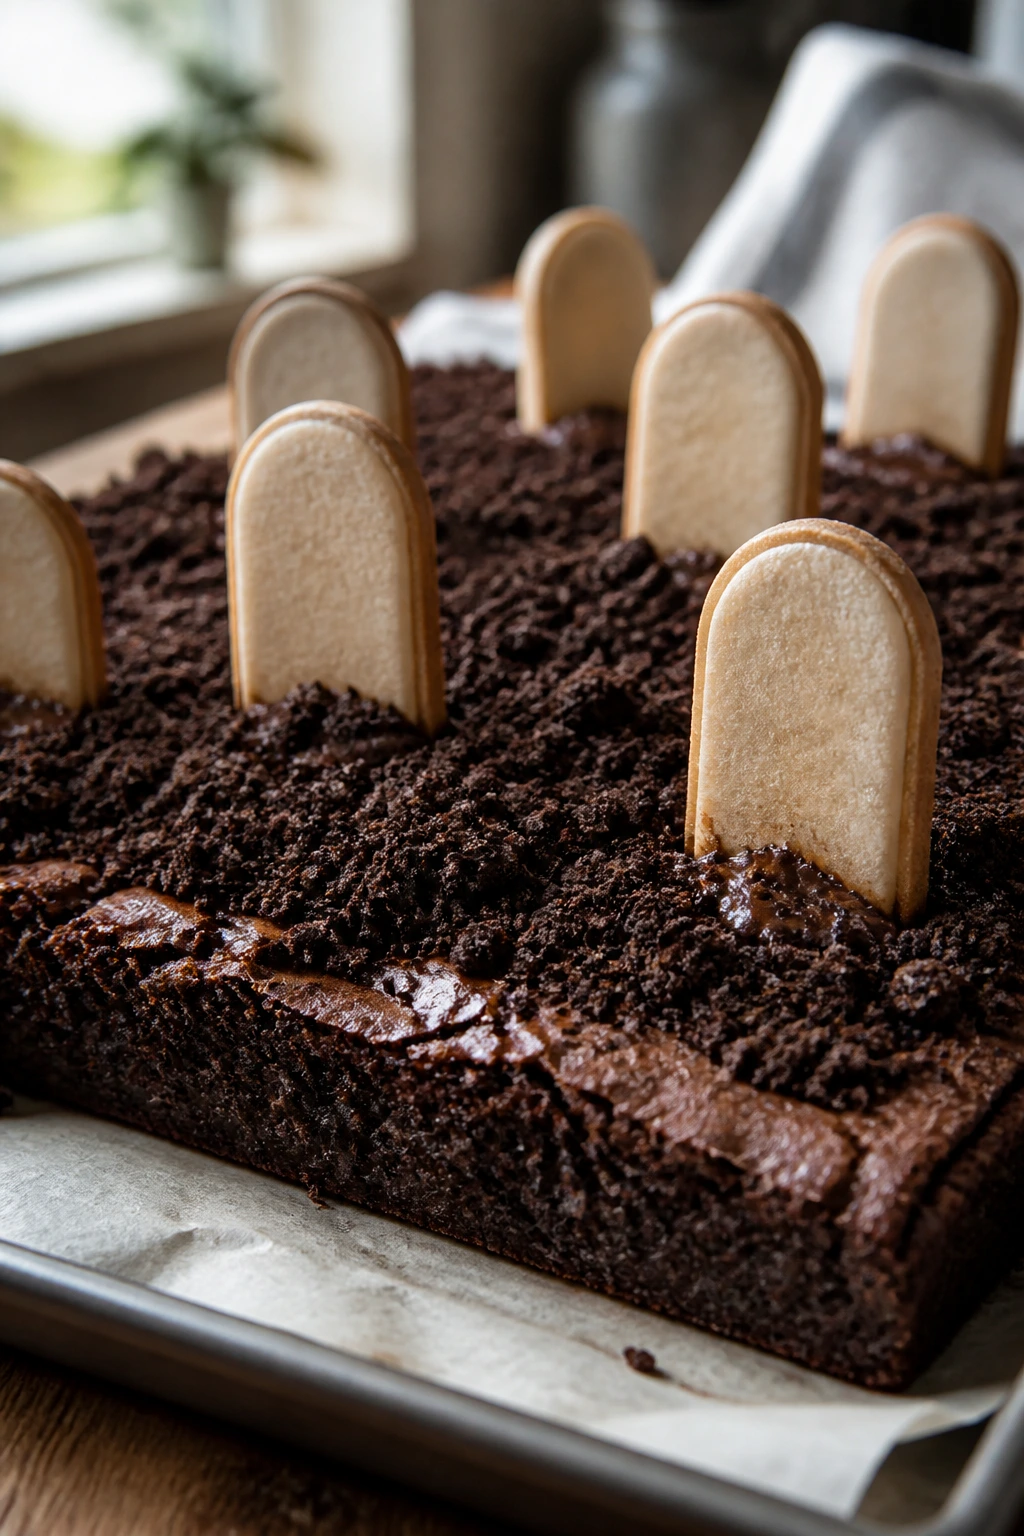
This is the version that most people picture first: dark, fudgy brownies, a layer of chocolate crumbs, a few upright cookie tombstones, and enough frosting to make the whole pan look like a tiny edible cemetery. The flavor is straight-up chocolate, which is exactly why it works. Nothing competes with the decorations.
Why It Works:
The brownie base is dense enough to support the toppings, but not so firm that it turns into a chocolate brick. A little mini chocolate chip action gives the interior a softer bite, and the vanilla frosting acts like edible glue for the cookie tombstones. I like using crushed sandwich cookies for “soil” because the crumbs read as loose dirt immediately; graham crumbs are lighter and don’t give the same visual hit.
Key Ingredients:
- 1 cup unsalted butter, melted
- 2 cups granulated sugar
- 4 large eggs
- 2 teaspoons pure vanilla extract
- 1 cup unsweetened cocoa powder
- 1 cup all-purpose flour
- 1/2 teaspoon fine sea salt
- 1 cup mini chocolate chips
- 1 cup vanilla frosting
- 1 cup chocolate sandwich cookies, finely crushed
- 12 Milano cookies or rectangular graham crackers, for tombstones
- 12 candy pumpkins
Quick Steps:
- Preheat the oven to 350°F (175°C). Line a 9×13-inch baking pan with parchment, leaving overhang on the long sides.
- Whisk the melted butter and sugar in a large bowl until glossy and thickened, about 1 minute. Beat in the eggs one at a time, then add the vanilla.
- Stir in the cocoa, flour, and salt until no dry streaks remain. Fold in the mini chocolate chips.
- Spread the batter into the pan and bake for 28 to 32 minutes, until the center is set and a toothpick comes out with a few moist crumbs.
- Cool completely, then spread the vanilla frosting over the surface. Sprinkle with crushed cookies, stand the tombstones upright, pipe “RIP” if you like, and tuck candy pumpkins around the base.
Equipment for This Recipe:
- 9×13-inch baking pan
- Parchment paper
- Large mixing bowl
- Silicone spatula
- Offset spatula or butter knife for frosting
How to Serve This Dish:
Cut the brownies into 12 or 16 squares, depending on how crowded your dessert table is. A small drizzle of chocolate sauce on the plate makes the tombstones stand out, but you do not need much. These look best with the “soil” slightly uneven, not smoothed flat.
Pro Tips for This Recipe:
- Let the brownies cool for at least 1 hour before frosting. Warm brownies will turn the frosting into a slide.
- If your cookie tombstones wobble, use a small slit cut into the brownie surface with a paring knife before inserting them.
- Crush the cookies by hand, not into powder. You want dirt, not cocoa dust.
- Chill the pan for 20 minutes before slicing if you want very clean edges.
Variations on This Dish:
- Milk Chocolate Graveyard: Swap half the cocoa for milk chocolate chips melted into the butter for a sweeter, softer brownie.
- Peppermint Plot: Add 1/2 teaspoon peppermint extract to the frosting and scatter crushed peppermint candies over the “soil.”
- Shortcut Cemetery: Use your favorite boxed brownie mix and spend your energy on the decorations.
Common Mistakes to Avoid with This Dish:
- Decorating too soon: If the brownie is even slightly warm, the frosting will melt and the crumbs will sink.
- Using soft cookies for tombstones: Thin, crisp cookies stand up better than soft sandwich cookies or chewy wafers.
- Overbaking: Dry brownies crack when you try to insert tombstones. Pull them when the center still has a little give.
2. Peanut Butter Cup Graveyard Brownies
Intro:
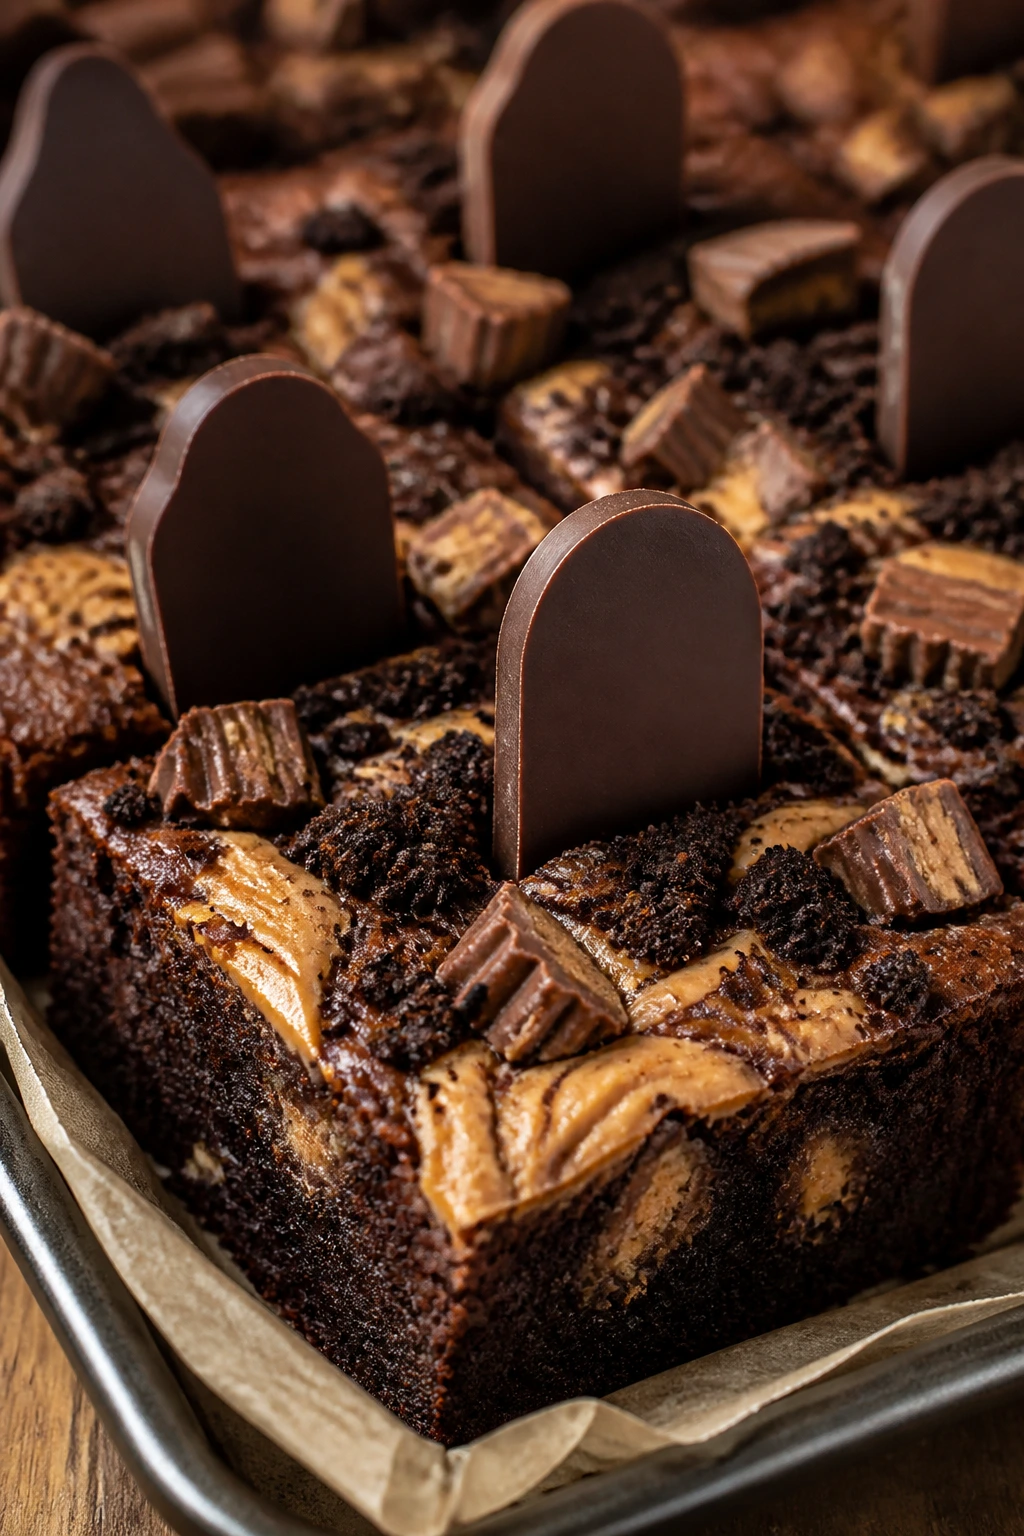
Peanut butter and chocolate have the kind of blunt-force harmony that works especially well in a Halloween pan. These brownies lean richer and saltier than the classic version, with little pockets of peanut butter cup pieces that soften as the brownies bake. The final result tastes like a candy aisle got organized into one neat rectangle.
Why It Works:
A peanut butter swirl keeps the base from tasting one-note. The peanut butter also gives the top a little sheen once baked, which looks good under the crushed-cookie “dirt.” I like this version for parties because the salty peanut butter cuts through all the frosting and candy in a way plain chocolate sometimes doesn’t.
Key Ingredients:
- 1 cup unsalted butter, melted
- 1 3/4 cups granulated sugar
- 4 large eggs
- 1 teaspoon vanilla extract
- 3/4 cup unsweetened cocoa powder
- 1 cup all-purpose flour
- 1/2 teaspoon fine sea salt
- 1/2 cup creamy peanut butter
- 2 tablespoons powdered sugar
- 1 tablespoon milk
- 1 cup chopped peanut butter cups
- 1 cup chocolate frosting
- 1 cup chocolate cookie crumbs
- 12 cookie tombstones
Quick Steps:
- Heat the oven to 350°F (175°C) and line a 9×13-inch pan with parchment.
- Mix the melted butter and sugar, then beat in the eggs and vanilla. Stir in cocoa, flour, and salt until the batter turns thick and glossy.
- Whisk the peanut butter, powdered sugar, and milk in a small bowl until smooth.
- Spread the brownie batter into the pan, dollop the peanut butter mixture over the top, and drag a knife through it in wide figure-eights. Scatter chopped peanut butter cups over the surface.
- Bake for 27 to 31 minutes. Cool fully, frost with chocolate frosting, cover with cookie crumbs, and add the tombstones.
Equipment for This Recipe:
- 9×13-inch pan
- Parchment paper
- Mixing bowls, one large and one small
- Whisk and silicone spatula
- Butter knife or skewer for swirling
How to Serve This Dish:
These brownies are rich enough that you can cut them into 16 smaller squares and still satisfy a sweet tooth. Serve them with cold milk or a strong cup of coffee; the peanut butter makes both feel like the right move. A few extra peanut butter cup pieces on the serving platter never hurt.
Pro Tips for This Recipe:
- Warm the peanut butter slightly so it swirls instead of clumping.
- Do not over-swirl. You want visible streaks, not a tan batter.
- Chop the peanut butter cups after they’ve chilled for 10 minutes in the fridge; they cut cleaner.
- Frost only after the pan is fully cool, or the peanut butter layer can soften too much.
Variations on This Dish:
- Pretzel Peanut Butter Grave: Add 1/2 cup chopped pretzels for a salty crunch.
- Dark Chocolate Version: Use Dutch-process cocoa for a darker, smoother chocolate flavor.
- Nut-Free Swap: Replace peanut butter with sunflower seed butter and use candy pumpkins instead of peanut butter cups.
Common Mistakes to Avoid with This Dish:
- Too much peanut butter swirl: Heavy swirls can sink and make gummy patches. Keep the peanut butter in thin ribbons.
- Adding candy too early: Peanut butter cups can melt into oily streaks if the brownies bake too long.
- Using dry frosting: Thin the frosting with 1 to 2 teaspoons of milk so it spreads without tearing the brownie surface.
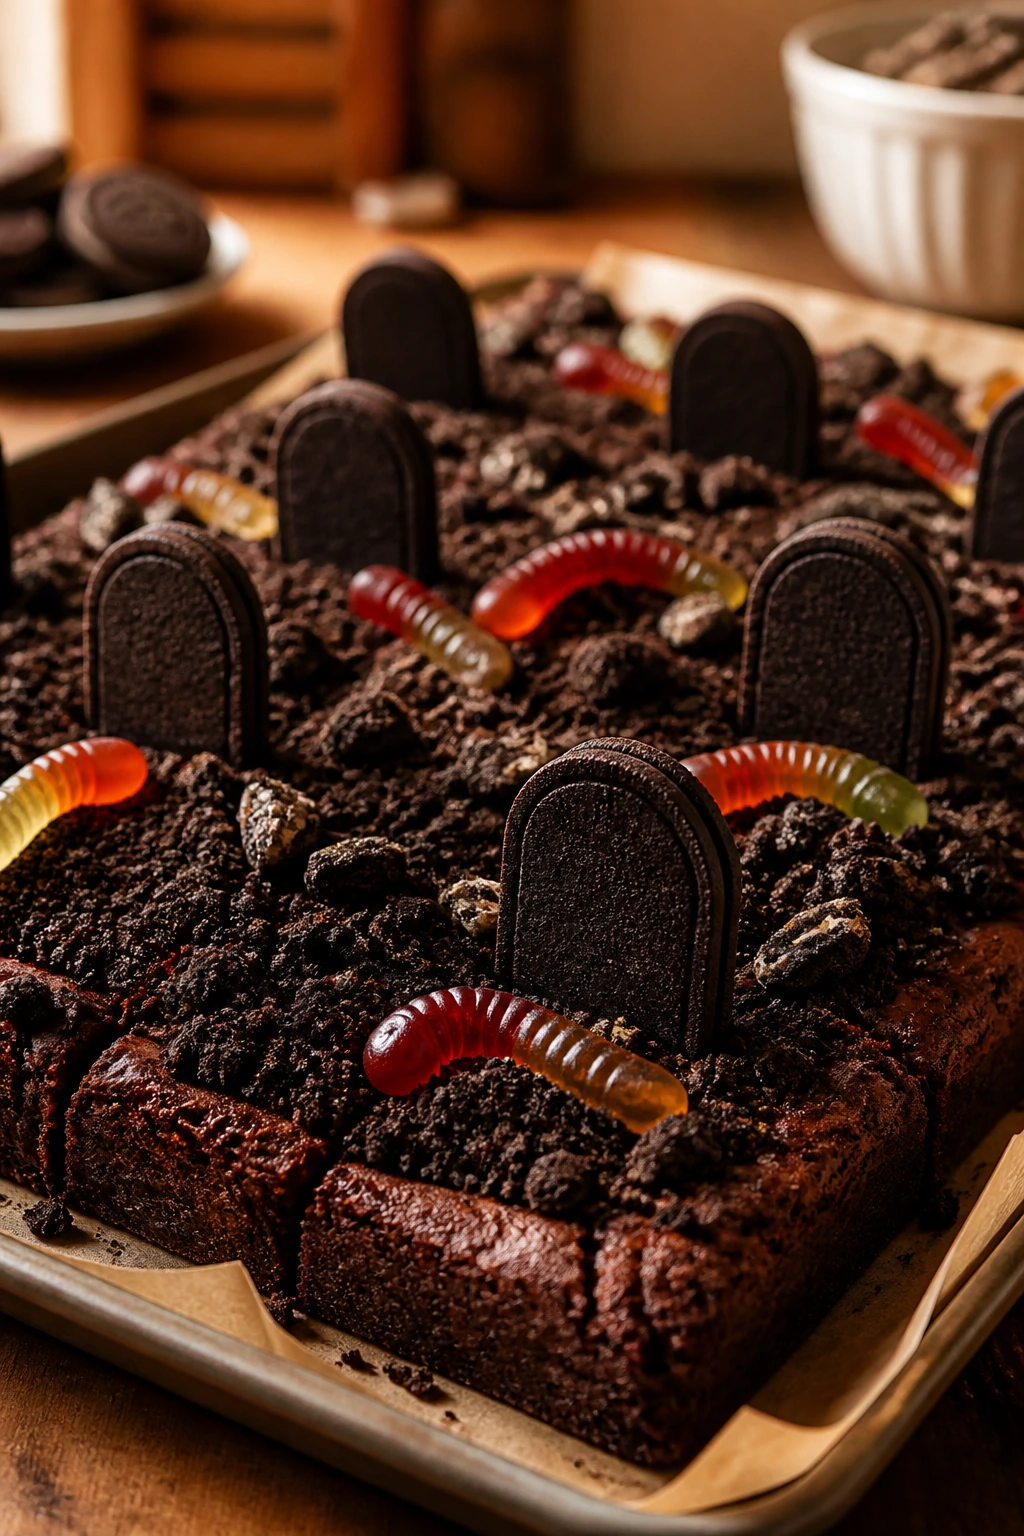
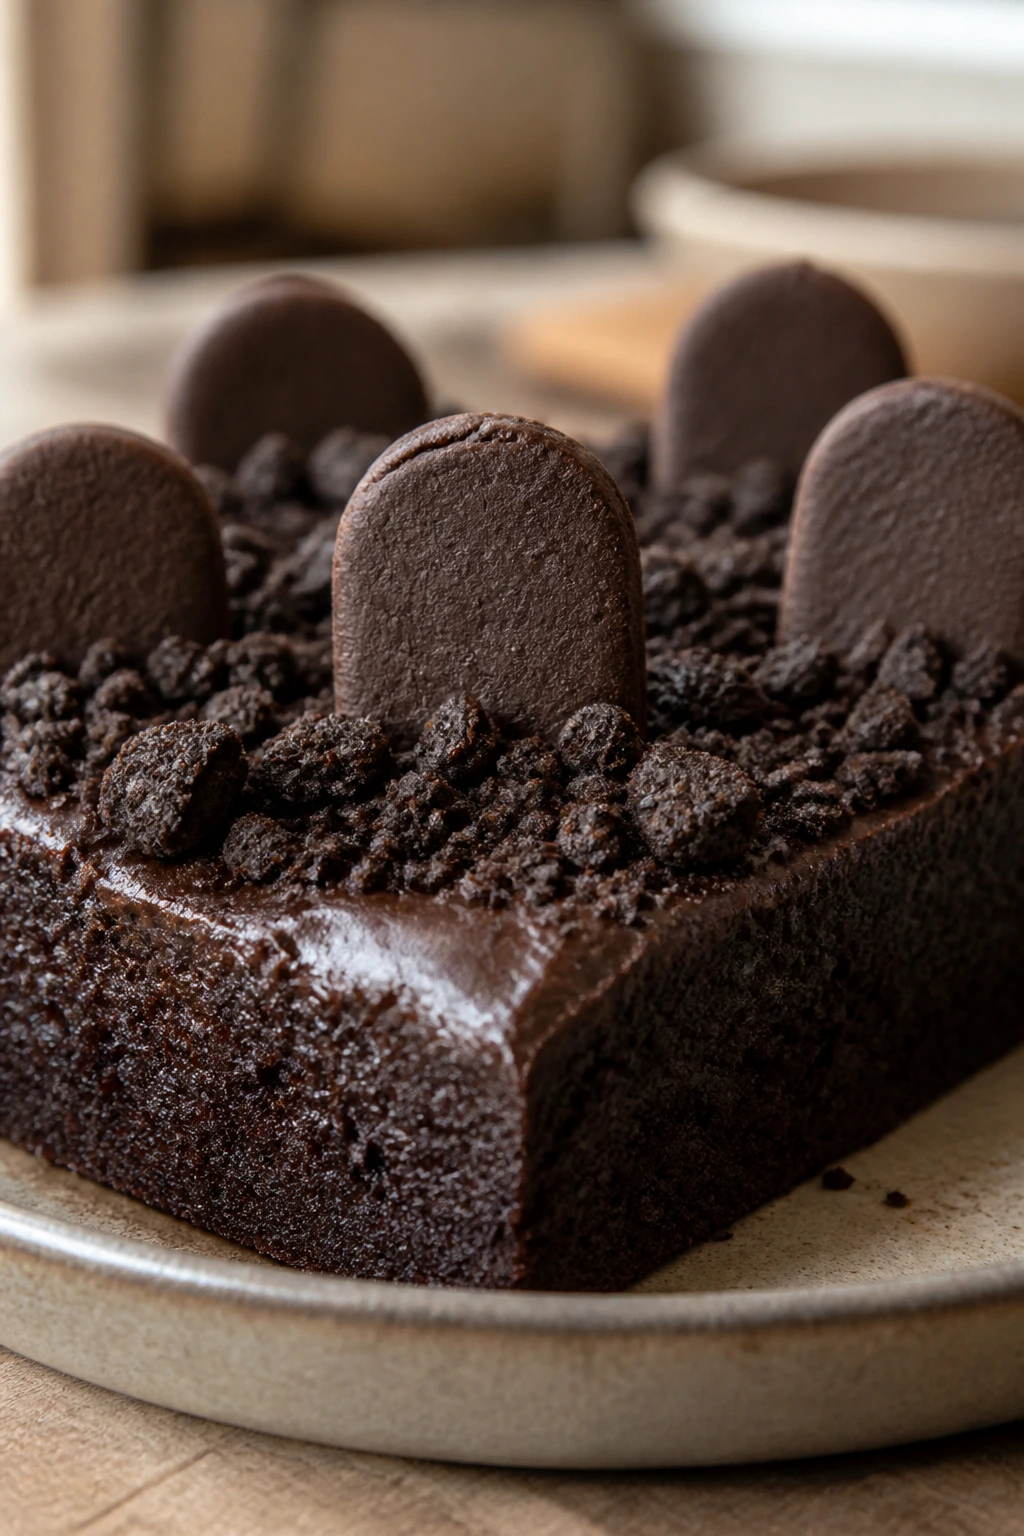
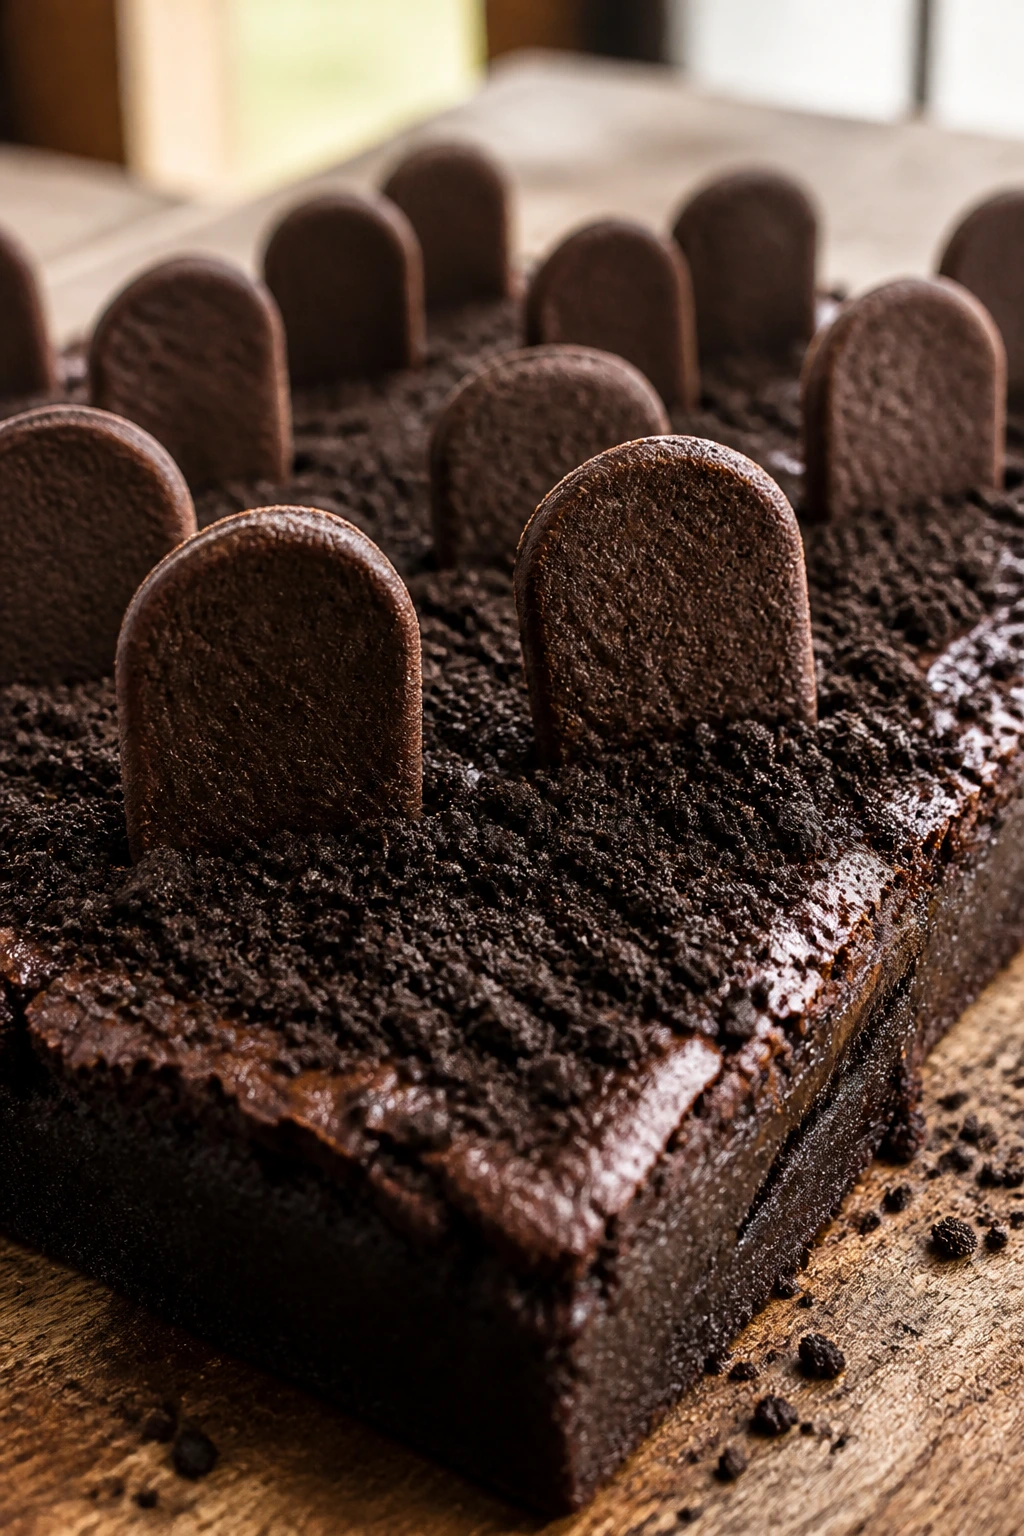
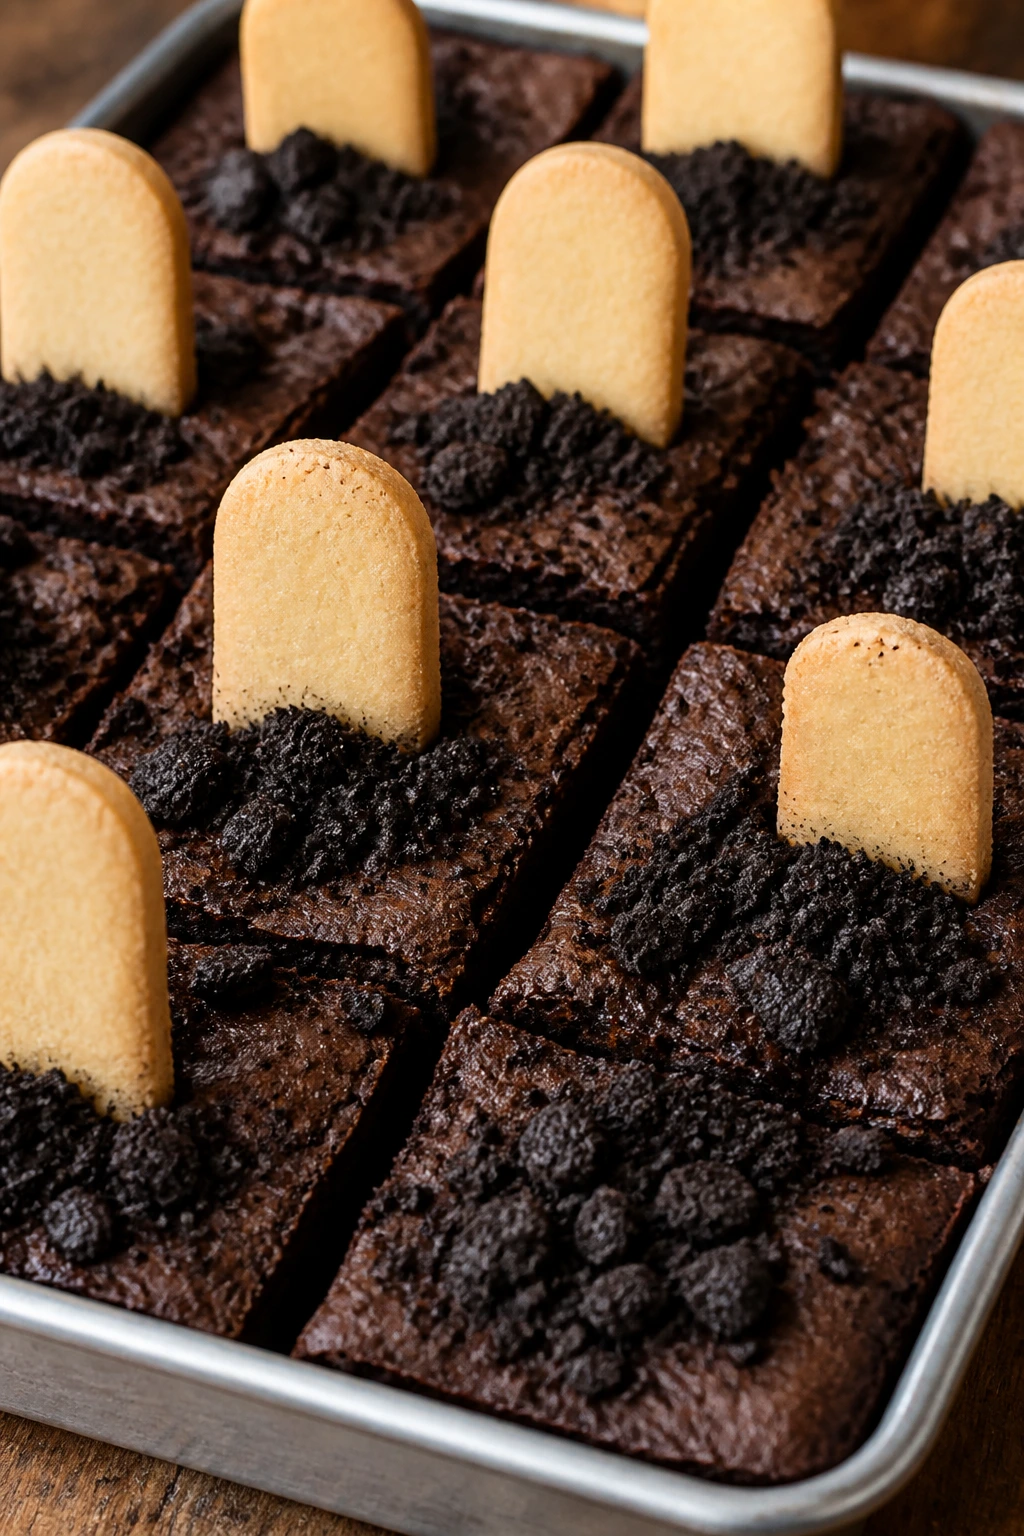
3. Oreo Dirt Graveyard Brownies
Intro:
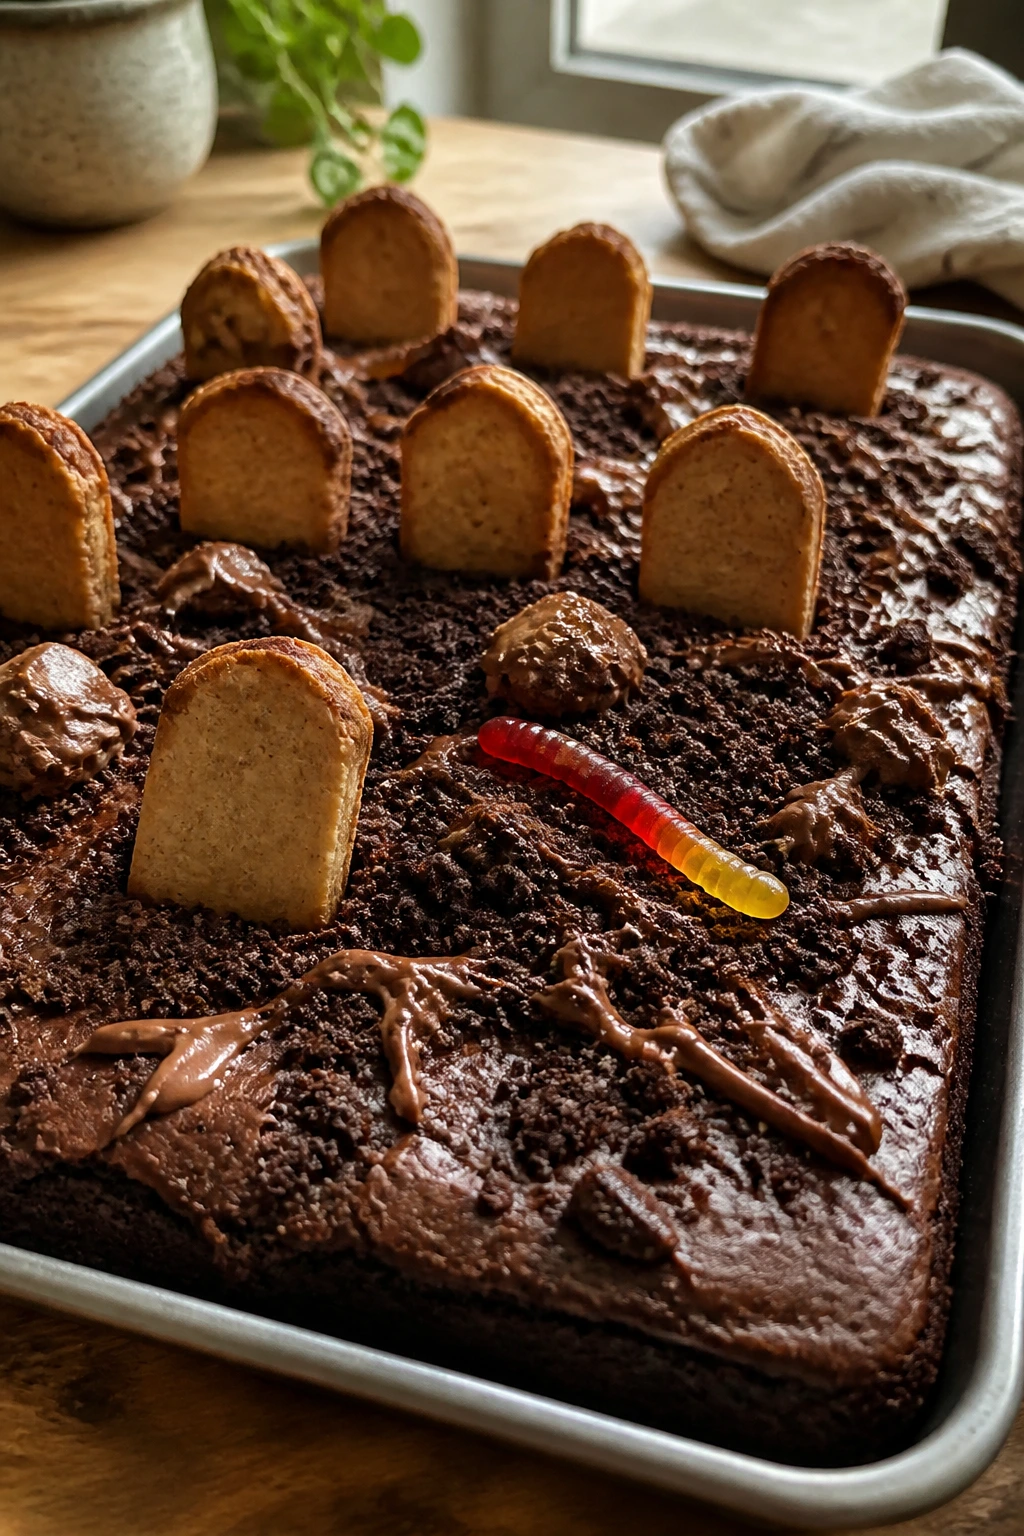
If you want the graveyard effect to read from across the room, this is the one. Oreo crumbs turn the top into real-looking soil, and the dark cookie shards catch the light in a way plain cocoa powder never does. Add a few gummy worms and the pan suddenly has a sense of mischief.
Why It Works:
Oreos give you texture, not just flavor. The cream in the cookies helps the crumbs cling to frosting, which matters more than people think. A plain ganache base can work here too, but a thin layer of chocolate frosting gives you enough tack for the “soil” to stay put without turning the brownies greasy.
Key Ingredients:
- 1 cup unsalted butter, melted
- 2 cups granulated sugar
- 4 large eggs
- 1 teaspoon vanilla extract
- 1 cup unsweetened cocoa powder
- 1 cup all-purpose flour
- 1/2 teaspoon salt
- 1 cup chocolate frosting
- 18 chocolate sandwich cookies, crushed
- 12 cookie tombstones
- 8 to 10 gummy worms
Quick Steps:
- Preheat the oven to 350°F (175°C) and line the pan with parchment.
- Whisk together the butter and sugar, then add the eggs and vanilla. Stir in cocoa, flour, and salt until the batter is thick and smooth.
- Spread the batter into the pan and bake for 29 to 33 minutes, until the center is just set.
- Cool completely, then spread the chocolate frosting in a thin, even layer.
- Scatter the Oreo crumbs over the frosting, press in the tombstones, and drape gummy worms over the edges so they look half-buried.
Equipment for This Recipe:
- 9×13-inch pan
- Food processor or zip-top bag for crushing cookies
- Offset spatula
- Parchment paper
- Small knife for placing the decorations
How to Serve This Dish:
This version looks best in thick squares, not skinny bars. The cookie crumbs can fall a little, which is part of the charm, so serve it on a platter with a rim. If you want a cleaner look, cut the brownies first, then add the worms after the pieces are plated.
Pro Tips for This Recipe:
- Pulse the Oreos just a few times. Fine enough to mimic dirt, coarse enough to keep texture.
- Chill the frosted pan for 15 minutes before adding tombstones; that helps the cookies stand upright.
- If the gummy worms are stiff, let them sit on the counter for 5 minutes before arranging them.
- Use a serrated knife wiped clean between cuts if you want sharp edges under the crumb topping.
Variations on This Dish:
- Mint Oreo Graveyard: Use mint cookies for a cooler flavor and a darker green-tinged crumb.
- Mud-Puddle Brownies: Stir 1/2 cup chocolate chips into the batter for extra pockets of melt.
- No-Frosting Shortcut: Brush the top lightly with warm chocolate glaze, then add crumbs while it’s tacky.
Common Mistakes to Avoid with This Dish:
- Crumbs that are too powdery: They look dusty, not like soil. Leave a little texture.
- Decorating a warm pan: The frosting softens and the cookie dirt turns wet.
- Burying the tombstones too deep: Set them in just enough to stand. If they sink halfway, they disappear.
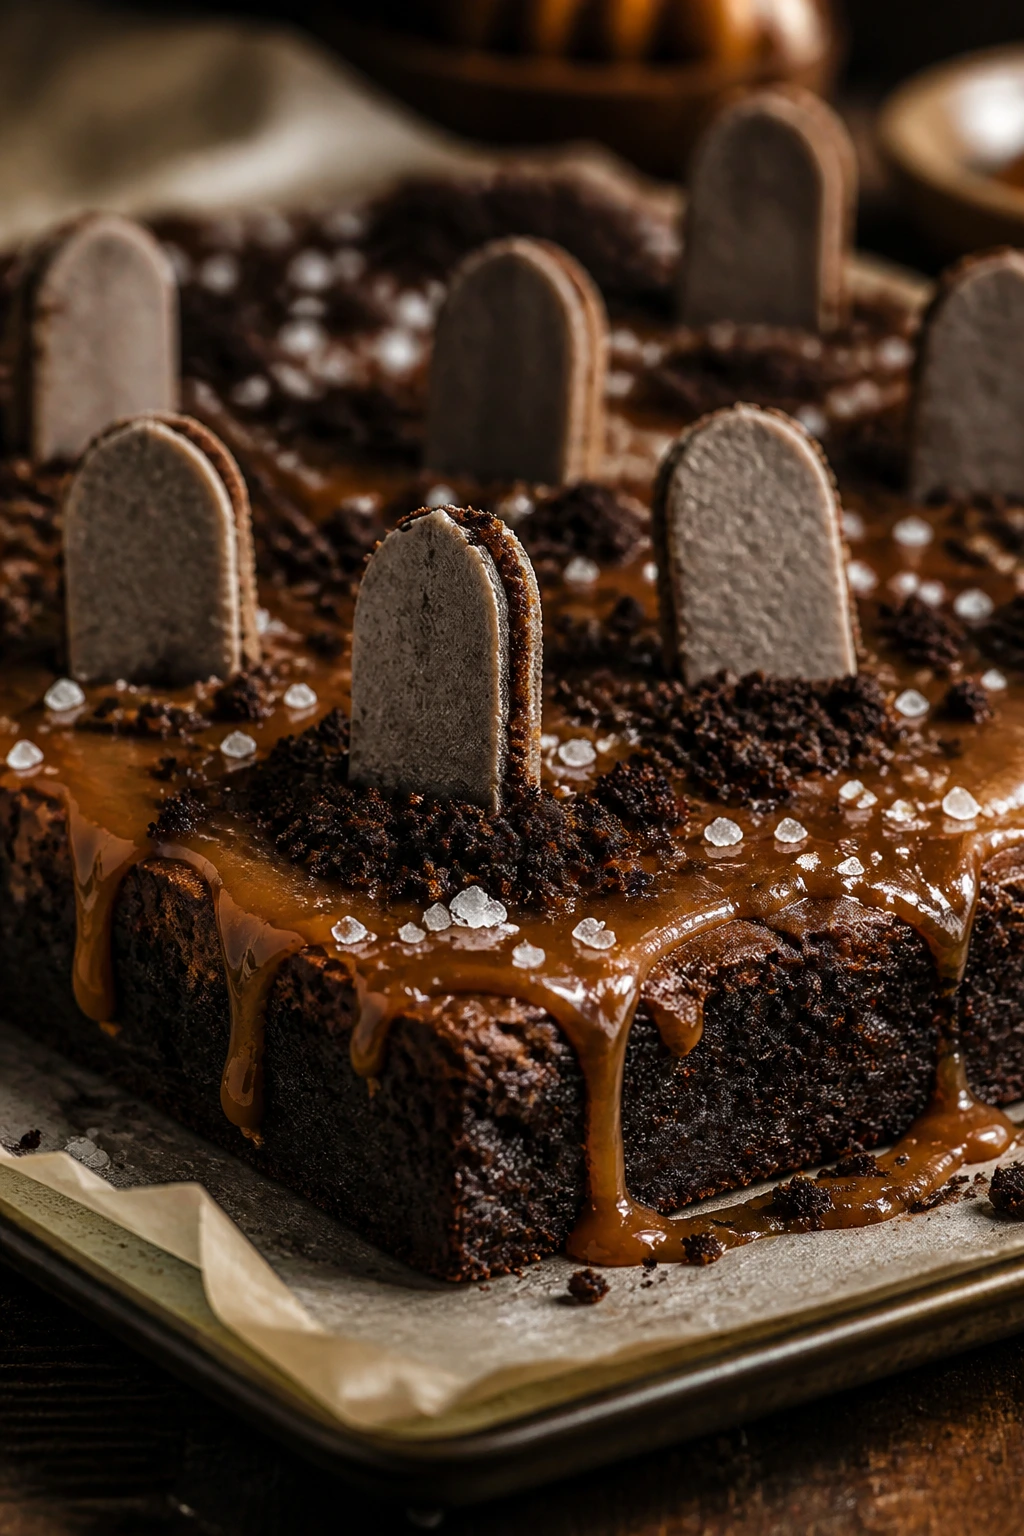
4. Salted Caramel Graveyard Brownies
Intro:
These brownies are for the people who like a little contrast in their sweets. The chocolate base is deep and dark, the caramel is sticky and buttery, and the flaky salt keeps the whole thing from sliding into one-note sugar. The graveyard decorations look especially sharp against the glossy caramel streaks.
Why It Works:
Caramel gives you shine and a soft chew that stays interesting after the first bite. I prefer a thicker caramel sauce here, not the thin kind that pours everywhere, because you want visible ribbons and small puddles, not a wet pan. Salt on top makes the chocolate taste darker and keeps each square from tasting flat.
Key Ingredients:
- 1 cup unsalted butter, melted
- 2 cups brown sugar, packed
- 4 large eggs
- 1 teaspoon vanilla extract
- 3/4 cup unsweetened cocoa powder
- 1 cup all-purpose flour
- 1/2 teaspoon salt
- 1/2 cup thick caramel sauce
- 1 cup chocolate frosting
- 1 cup chocolate cookie crumbs
- 1/2 teaspoon flaky sea salt
- 12 tombstone cookies
Quick Steps:
- Preheat the oven to 350°F (175°C) and line a 9×13-inch pan with parchment.
- Whisk the butter and brown sugar together, then beat in the eggs and vanilla. Stir in cocoa, flour, and salt.
- Spread the batter into the pan and drizzle the caramel sauce over the top. Swirl lightly with a knife.
- Bake for 28 to 31 minutes until the center is set but still soft.
- Cool fully, frost with chocolate frosting, add cookie crumbs, sprinkle flaky salt, and finish with tombstones.
Equipment for This Recipe:
- 9×13-inch baking pan
- Parchment paper
- Mixing bowl and whisk
- Small spoon for caramel
- Offset spatula
How to Serve This Dish:
These are rich, so smaller squares make sense. I like them on a plain white tray because the caramel streaks and dark crumbs pop harder against a light background. A tiny pinch of extra salt on each plate makes the chocolate seem deeper.
Pro Tips for This Recipe:
- Use thick caramel, not a thin dessert sauce, or it will disappear into the batter.
- Warm the caramel just enough to spread. Hot caramel can sink and scorch the top.
- Add the flaky salt after the frosting and crumbs go on, not before.
- Let the brownies chill for 20 minutes before slicing so the caramel firms up.
Variations on This Dish:
- Toffee Caramel Graveyard: Swap cookie crumbs for crushed toffee bits.
- Sea Salt Overload: Use salted caramel and skip the extra flaky salt on top.
- Brown Butter Version: Brown the butter before mixing for a toasted, nutty note.
Common Mistakes to Avoid with This Dish:
- Thin caramel: It runs into the brownie instead of sitting on top.
- Too much swirling: You want caramel lanes, not a muddy mix.
- Skipping the salt balance: Without salt, caramel brownies can taste sticky instead of rich.
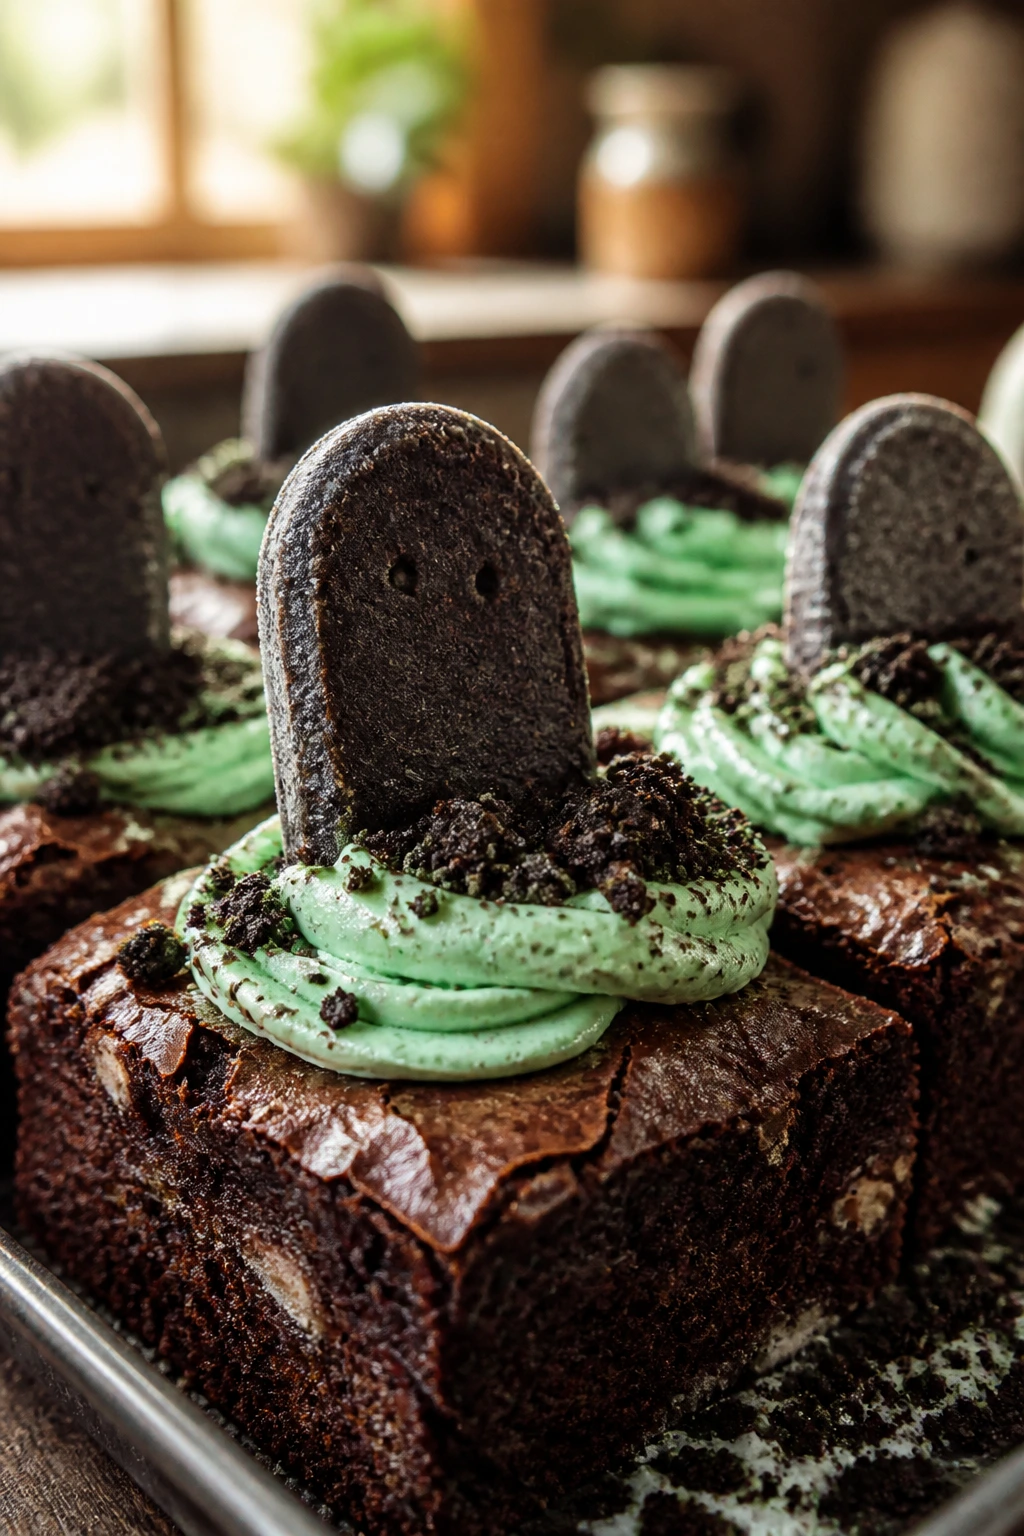
5. Mint Chocolate Graveyard Brownies
Intro:
Mint chocolate brownies have a cool, sharp edge that feels made for a spooky dessert tray. The flavor lands somewhere between candy bar and bakery brownie, and the green tint in the frosting makes the graveyard details easier to read. It’s the version people notice before they’ve even had a bite.
Why It Works:
Mint can go wrong fast if you overdo it, which is why this version keeps the mint in the frosting and a small dose in the batter. The chocolate base stays familiar, while the fresh note keeps the sweetness from becoming heavy. Crushed chocolate cookies on top mimic damp soil and make the whole pan feel darker.
Key Ingredients:
- 1 cup unsalted butter, melted
- 2 cups granulated sugar
- 4 large eggs
- 1 teaspoon vanilla extract
- 3/4 cup unsweetened cocoa powder
- 1 cup all-purpose flour
- 1/2 teaspoon salt
- 1/2 teaspoon peppermint extract
- 1 cup mint chocolate chips
- 1 cup vanilla frosting
- Green food coloring, 2 to 3 drops
- 1 cup chocolate cookie crumbs
- 12 tombstone cookies
Quick Steps:
- Heat the oven to 350°F (175°C) and line the pan with parchment.
- Mix butter and sugar, beat in eggs and vanilla, then stir in cocoa, flour, salt, peppermint extract, and mint chips.
- Spread the batter in the pan and bake for 28 to 32 minutes.
- Cool fully. Tint the frosting pale green, spread it over the brownies, and dust with cookie crumbs.
- Add tombstones and, if you want, a few mint chips near the graves like scattered stones.
Equipment for This Recipe:
- 9×13-inch pan
- Parchment paper
- Mixing bowls
- Silicone spatula
- Offset spatula for the frosting
How to Serve This Dish:
These brownies slice best after a short chill, since the mint frosting can be softer than plain chocolate frosting. Serve them with cold milk or hot coffee; both make the mint read cleaner. A little extra green frosting piped around the tombstones looks dramatic without needing much effort.
Pro Tips for This Recipe:
- Start with 1/4 teaspoon peppermint extract if you’re unsure; mint gets loud fast.
- Use small mint chips so they distribute evenly and don’t sink.
- Make the frosting pale green, not neon. A faint tint looks more like a graveyard accent.
- Chill before cutting if you want the tombstones to stay upright.
Variations on This Dish:
- Peppermint Patty Graveyard: Fold in chopped peppermint patties for a softer center.
- Andes Mint Version: Replace mint chips with chopped Andes candies for a cleaner finish.
- Dark Mint Double Chocolate: Add 1/4 cup extra cocoa for a deeper base.
Common Mistakes to Avoid with This Dish:
- Too much peppermint extract: It can taste like toothpaste if you pour with a heavy hand.
- Green frosting that’s too bright: Neon green can look fake instead of festive.
- Adding mint candy too early: Some mint candies melt into oily streaks if they bake too long.
6. S’mores Graveyard Brownies
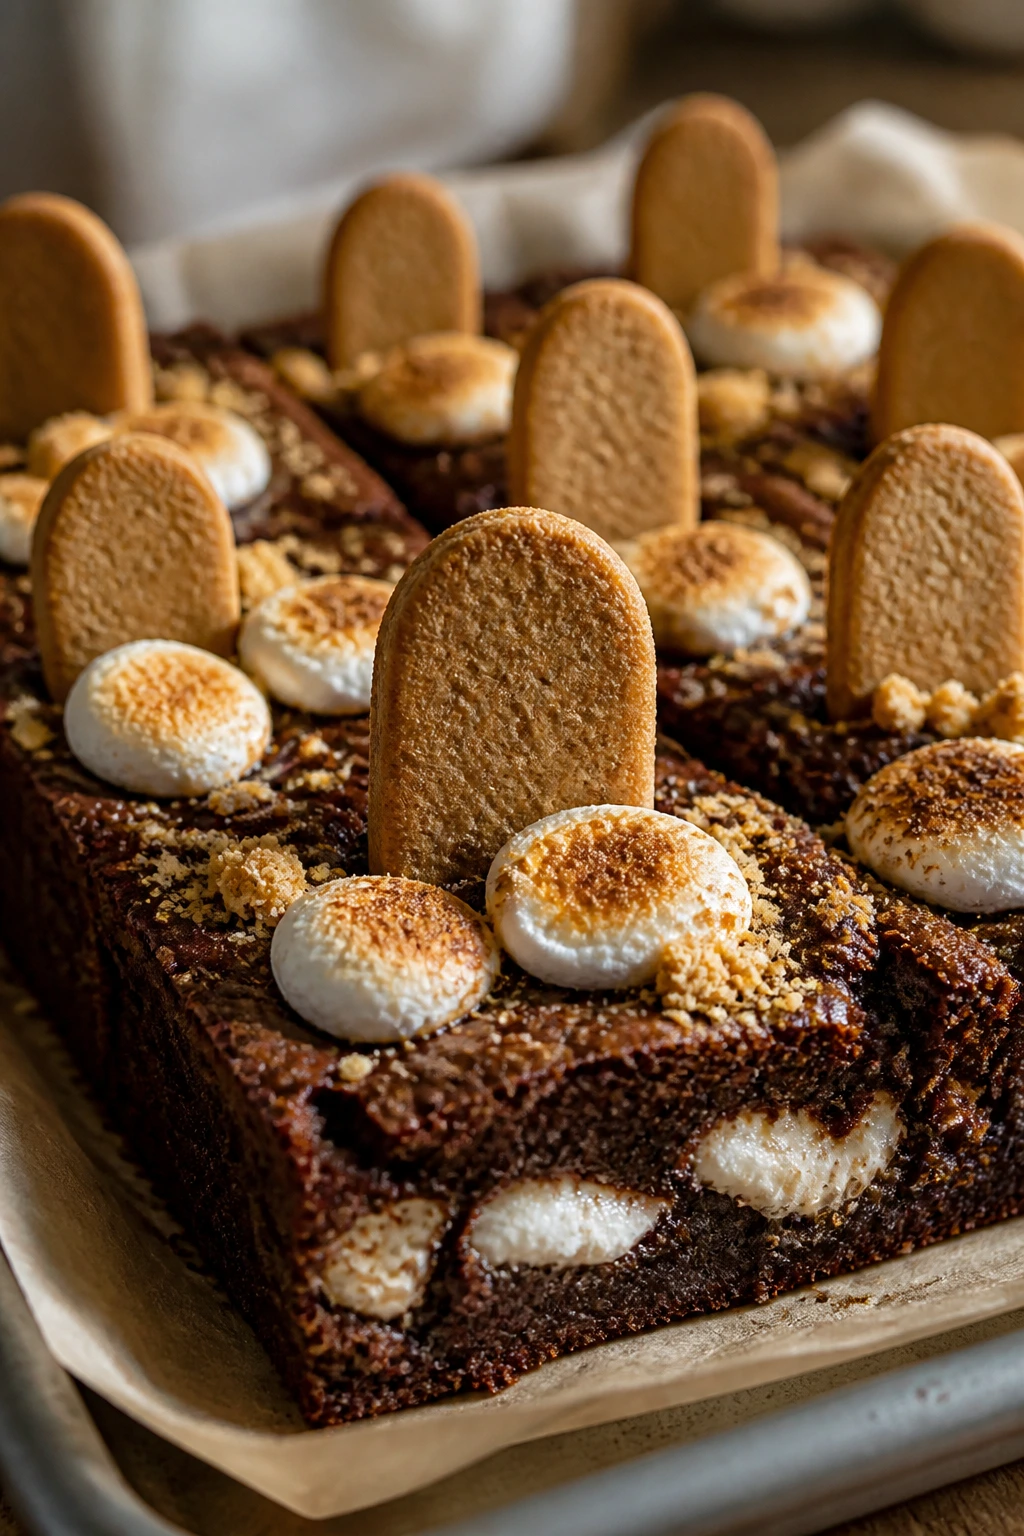
Intro:
S’mores brownies bring campfire energy to a Halloween tray, minus the smoke in your hair. You get gooey marshmallow pockets, a graham-cracker crunch, and the dark brownie base that keeps everything from tasting too sweet. Add tombstones on top and the whole pan looks like a campground that took a weird turn.
Why It Works:
Graham crumbs and marshmallows give you two different textures that play nicely against the fudgy base. I like to add the marshmallows near the end of baking or broil them briefly, because full-time heat makes them disappear into the batter. That toasted top also gives the graveyard a scorched, spooky look without any extra decorating trick.
Key Ingredients:
- 1 cup unsalted butter, melted
- 2 cups granulated sugar
- 4 large eggs
- 1 teaspoon vanilla extract
- 1 cup unsweetened cocoa powder
- 1 cup all-purpose flour
- 1/2 teaspoon salt
- 1 cup mini marshmallows
- 1 cup graham cracker crumbs
- 1/2 cup chocolate chips
- 1 cup chocolate frosting
- 12 cookie tombstones
Quick Steps:
- Preheat the oven to 350°F (175°C) and line the pan with parchment.
- Mix the butter, sugar, eggs, and vanilla, then stir in cocoa, flour, and salt.
- Spread the batter into the pan. Scatter the chocolate chips over the top and bake for 22 minutes.
- Pull the pan out, sprinkle on the marshmallows and graham crumbs, then bake for 5 to 7 minutes more until the marshmallows puff and turn lightly golden.
- Cool completely, frost lightly if needed, and add the tombstones.
Equipment for This Recipe:
- 9×13-inch baking pan
- Parchment paper
- Mixing bowls
- Spatula
- Kitchen torch or broiler, if you want a deeper toast
How to Serve This Dish:
These are best served the day they’re decorated, while the marshmallows are still soft on top. Cut them with a lightly oiled knife if the toasted marshmallow sticks a little. A scoop of vanilla ice cream on the side makes the whole pan feel more like dessert and less like a project.
Pro Tips for This Recipe:
- Add marshmallows late so they toast instead of melting out of sight.
- If you use a broiler, watch the pan like a hawk. Marshmallows go from golden to burnt in a blink.
- Use coarse graham crumbs for better crunch.
- Frost only the bare spots; too much frosting will bury the s’mores texture.
Variations on This Dish:
- Chocolate Marshmallow Graveyard: Skip the graham crumbs and use crushed chocolate cookies instead.
- Pumpkin S’mores Version: Add 1/2 teaspoon pumpkin spice to the batter.
- Extra-Gooey Batch: Press a few marshmallows into the batter before baking for hidden pockets.
Common Mistakes to Avoid with This Dish:
- Marshmallows too early: They can melt away before they toast.
- Heavy frosting: It drowns the s’mores flavors and turns the top slick.
- Cutting while warm: Soft marshmallow pulls apart and smears the crumbs.
7. Cheesecake Swirl Graveyard Brownies
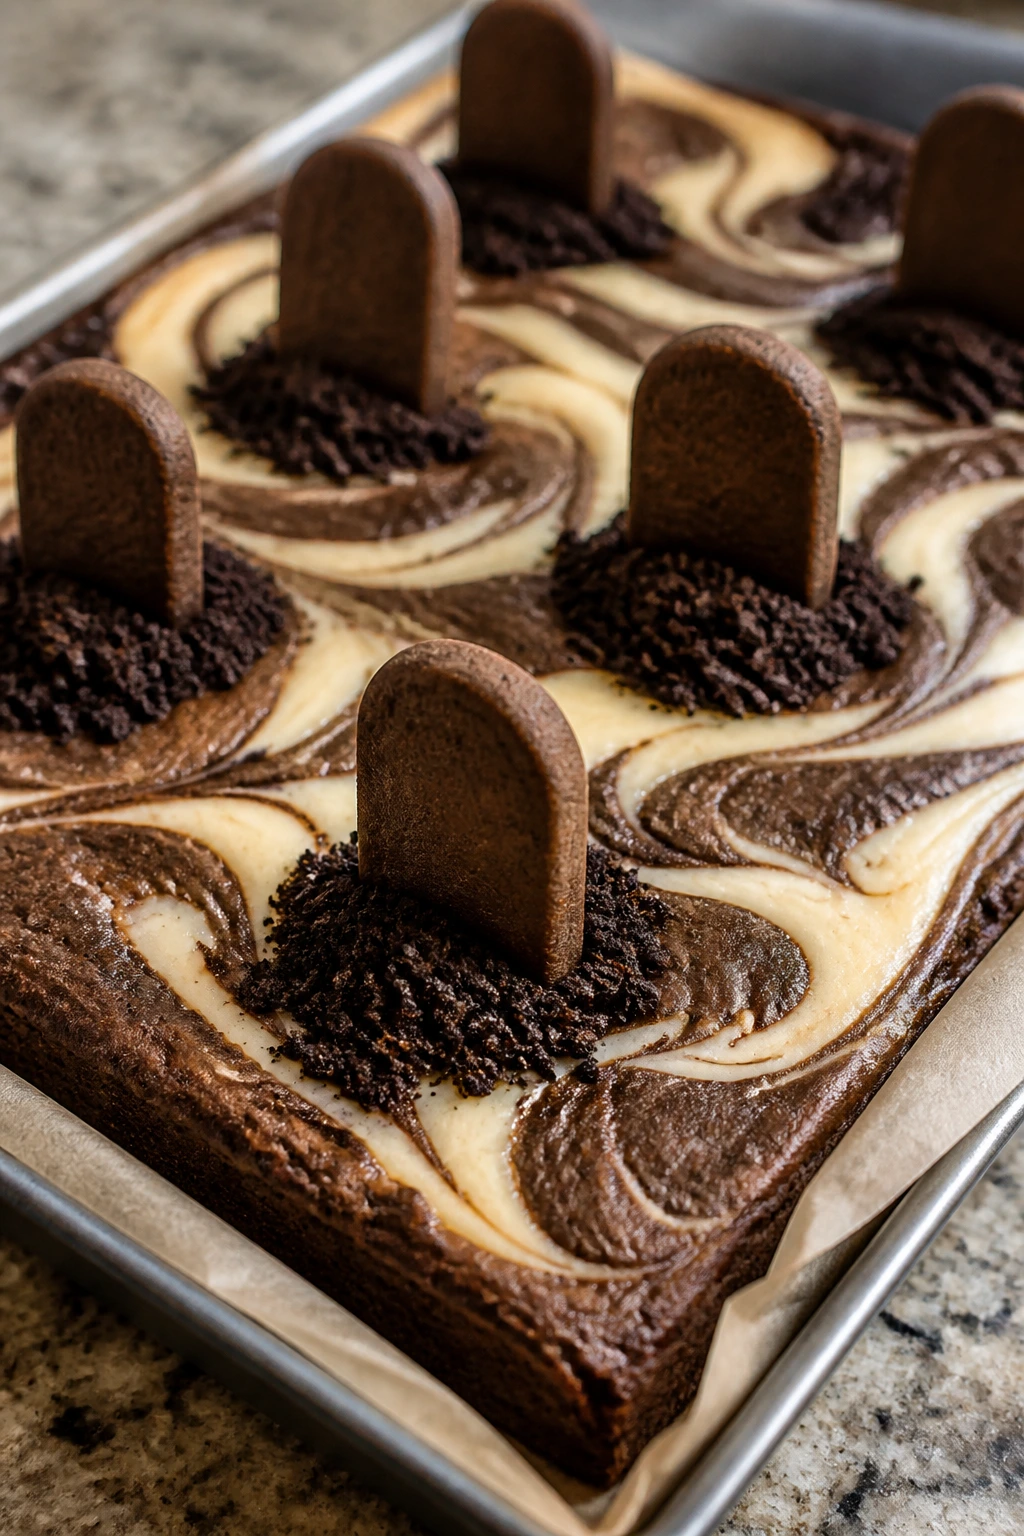
Intro:
This is the richest, most dramatic pan in the bunch. The cheesecake swirl cuts through the brownie’s density and leaves pale ribbons on top that look eerie in a good way, especially once the cookie “dirt” and tombstones go on. It tastes like two desserts in one pan, which is not a bad place to be.
Why It Works:
Cream cheese adds a tart, smooth layer that keeps the brownie from feeling too heavy. The swirl also bakes into a marbled top, which gives you visual movement before you even decorate. I like this version because it slices neatly after chilling and the cheesecake layer helps the brownies feel a little more polished.
Key Ingredients:
- 1 cup unsalted butter, melted
- 2 cups granulated sugar
- 4 large eggs, divided
- 1 teaspoon vanilla extract
- 3/4 cup unsweetened cocoa powder
- 1 cup all-purpose flour
- 1/2 teaspoon salt
- 8 ounces cream cheese, softened
- 1/3 cup granulated sugar
- 1 tablespoon all-purpose flour
- 1 cup chocolate frosting
- 1 cup chocolate cookie crumbs
- 12 tombstone cookies
Quick Steps:
- Preheat the oven to 350°F (175°C) and line a 9×13-inch pan with parchment.
- Mix the brownie batter with butter, sugar, 3 eggs, vanilla, cocoa, flour, and salt until smooth.
- Beat the cream cheese with the remaining egg, sugar, and 1 tablespoon flour until silky.
- Spread the brownie batter into the pan. Dollop the cheesecake mixture on top and swirl it gently with a knife.
- Bake for 32 to 36 minutes, cool completely, then frost lightly, add cookie crumbs, and finish with tombstones.
Equipment for This Recipe:
- 9×13-inch pan
- Parchment paper
- Two mixing bowls
- Hand mixer, or a sturdy whisk and patience
- Butter knife for swirling
How to Serve This Dish:
Cut these brownies after a full chill, or the cheesecake swirl can drag a little. Serve them on a cold platter if you can; the contrast keeps the cream cheese layer firm for longer. They’re rich enough that a small square goes a long way.
Pro Tips for This Recipe:
- Use softened cream cheese, not melted, so the swirl stays thick.
- Do not over-swirl. Two or three passes are enough.
- Chill before cutting for the cleanest marbling.
- If the top browns too fast, tent loosely with foil for the last 8 minutes.
Variations on This Dish:
- Chocolate Chip Cheesecake Graveyard: Fold 1/2 cup chocolate chips into the brownie batter.
- Pumpkin Cheesecake Version: Replace 1/4 cup of cream cheese mixture with pumpkin purée and pumpkin spice.
- Lighter Swirl: Use less cheesecake mixture and make smaller, sharper ribbons.
Common Mistakes to Avoid with This Dish:
- Cream cheese that’s still cold: It leaves lumps and won’t swirl well.
- Too much baking: Overbaked cheesecake turns dry around the edges.
- Cutting before chilling: The swirl smears and the brownie layer tears.
8. Red Velvet Graveyard Brownies
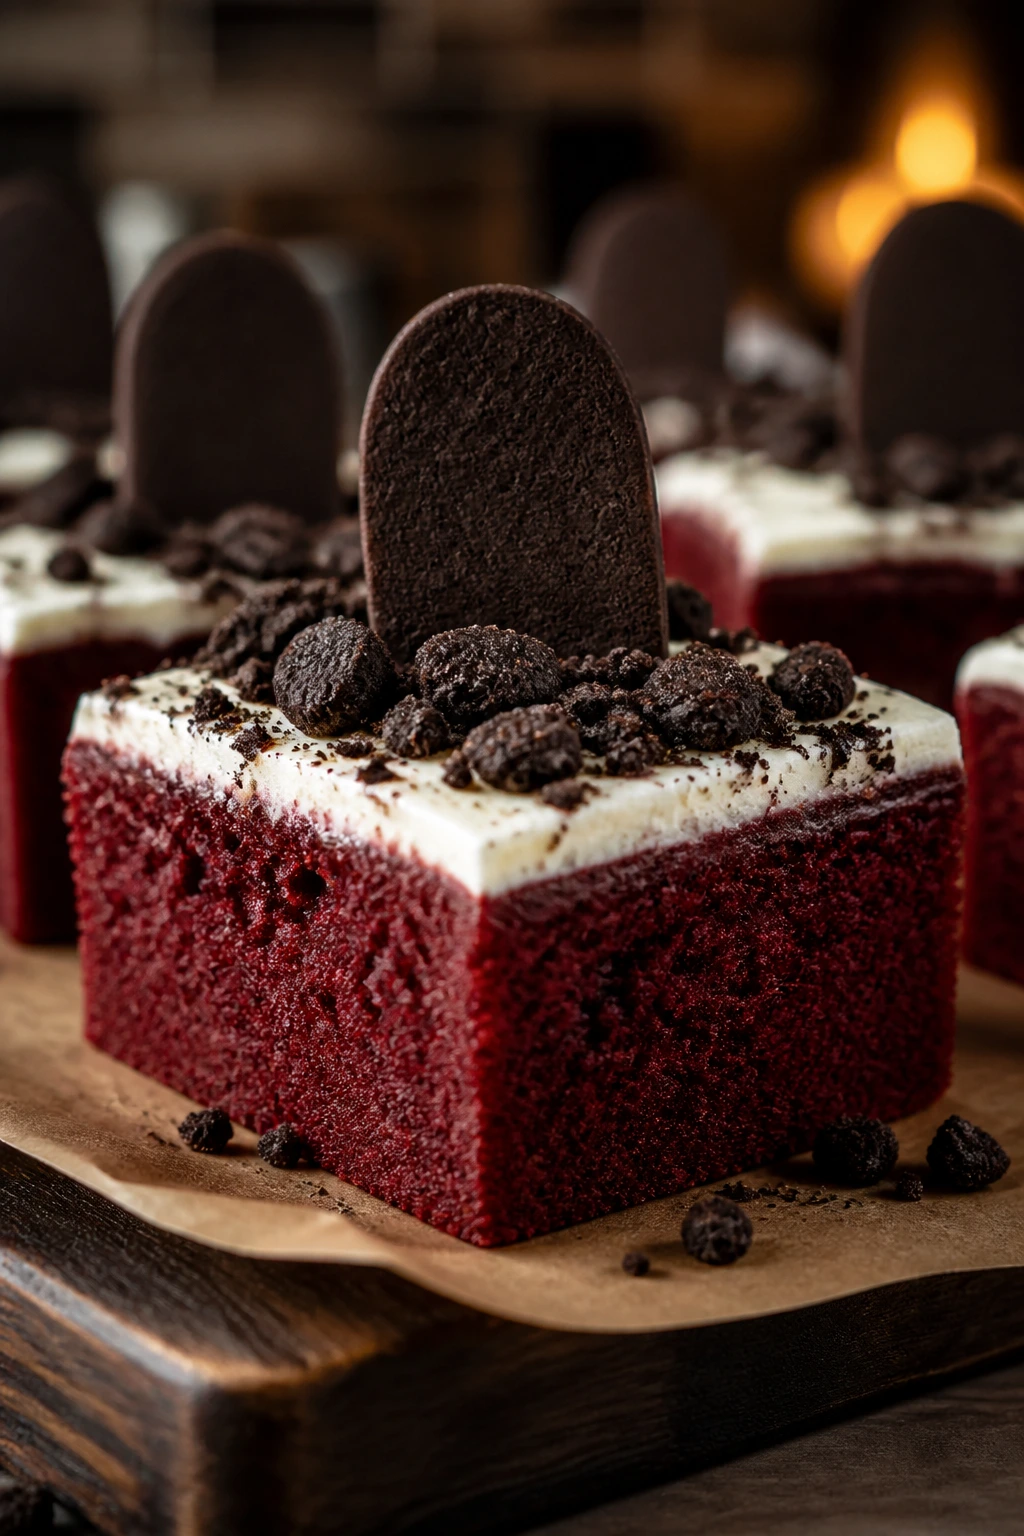
Intro:
Red velvet brownies are a little more theatrical than the standard chocolate pan, which makes them a natural fit for Halloween. The red crumb peeking out under white frosting and black cookie dirt has a strange, pleasing contrast. It looks dramatic without needing a dozen decorations.
Why It Works:
A small amount of cocoa keeps the flavor anchored in chocolate while the red food coloring gives the interior that unmistakable red velvet look. Cream cheese frosting is the obvious partner here because it brings tang and gives the tombstones a pale background. I prefer this version with crushed dark cookies on top, since the black crumbs make the red slice even louder once cut.
Key Ingredients:
- 1/2 cup unsalted butter, melted
- 1 1/2 cups granulated sugar
- 2 large eggs
- 1 tablespoon red food coloring
- 1 teaspoon vanilla extract
- 1 tablespoon unsweetened cocoa powder
- 1 1/4 cups all-purpose flour
- 1/2 teaspoon salt
- 1 teaspoon white vinegar
- 8 ounces cream cheese, softened
- 1 cup powdered sugar
- 1 cup chocolate cookie crumbs
- 12 small tombstone cookies
Quick Steps:
- Preheat the oven to 350°F (175°C) and line a 9×13-inch pan with parchment.
- Whisk together butter, sugar, eggs, food coloring, vanilla, cocoa, and vinegar. Stir in flour and salt until just combined.
- Spread into the pan and bake for 22 to 26 minutes. Red velvet brownies are usually thinner than full chocolate brownies, so watch the edges.
- Beat the cream cheese and powdered sugar until smooth.
- Cool the brownies completely, frost them, scatter cookie crumbs, and place the tombstones.
Equipment for This Recipe:
- 9×13-inch pan
- Parchment paper
- Mixing bowls
- Hand mixer for the frosting
- Offset spatula
How to Serve This Dish:
This pan slices beautifully into small squares because the frosting and crumbs do a lot of the visual work. Put the pieces on a dark tray or slate board if you have one; the red interior looks sharp against a dark background. A few extra cookie crumbs on the plate make the whole thing feel more intentional.
Pro Tips for This Recipe:
- Use gel coloring if you want a strong red without thinning the batter.
- Don’t overbake. Red velvet brownies dry out faster than denser chocolate ones.
- Chill the frosted pan before slicing for sharper edges.
- Pipe the frosting in short swipes so it looks like fresh soil turned over.
Variations on This Dish:
- Black Velvet Graveyard: Add extra cocoa and use black cocoa powder for a darker base.
- Raspberry Bloodline Version: Add a thin layer of raspberry jam under the frosting.
- Mini Square Version: Bake in a smaller pan for thicker, richer pieces.
Common Mistakes to Avoid with This Dish:
- Too much cocoa: The flavor stops tasting like red velvet and turns plain chocolate.
- Using watery food coloring: It can loosen the batter and make the texture cake-like.
- Skipping the chill: Cream cheese frosting smears if you cut too soon.
9. Espresso Fudge Graveyard Brownies
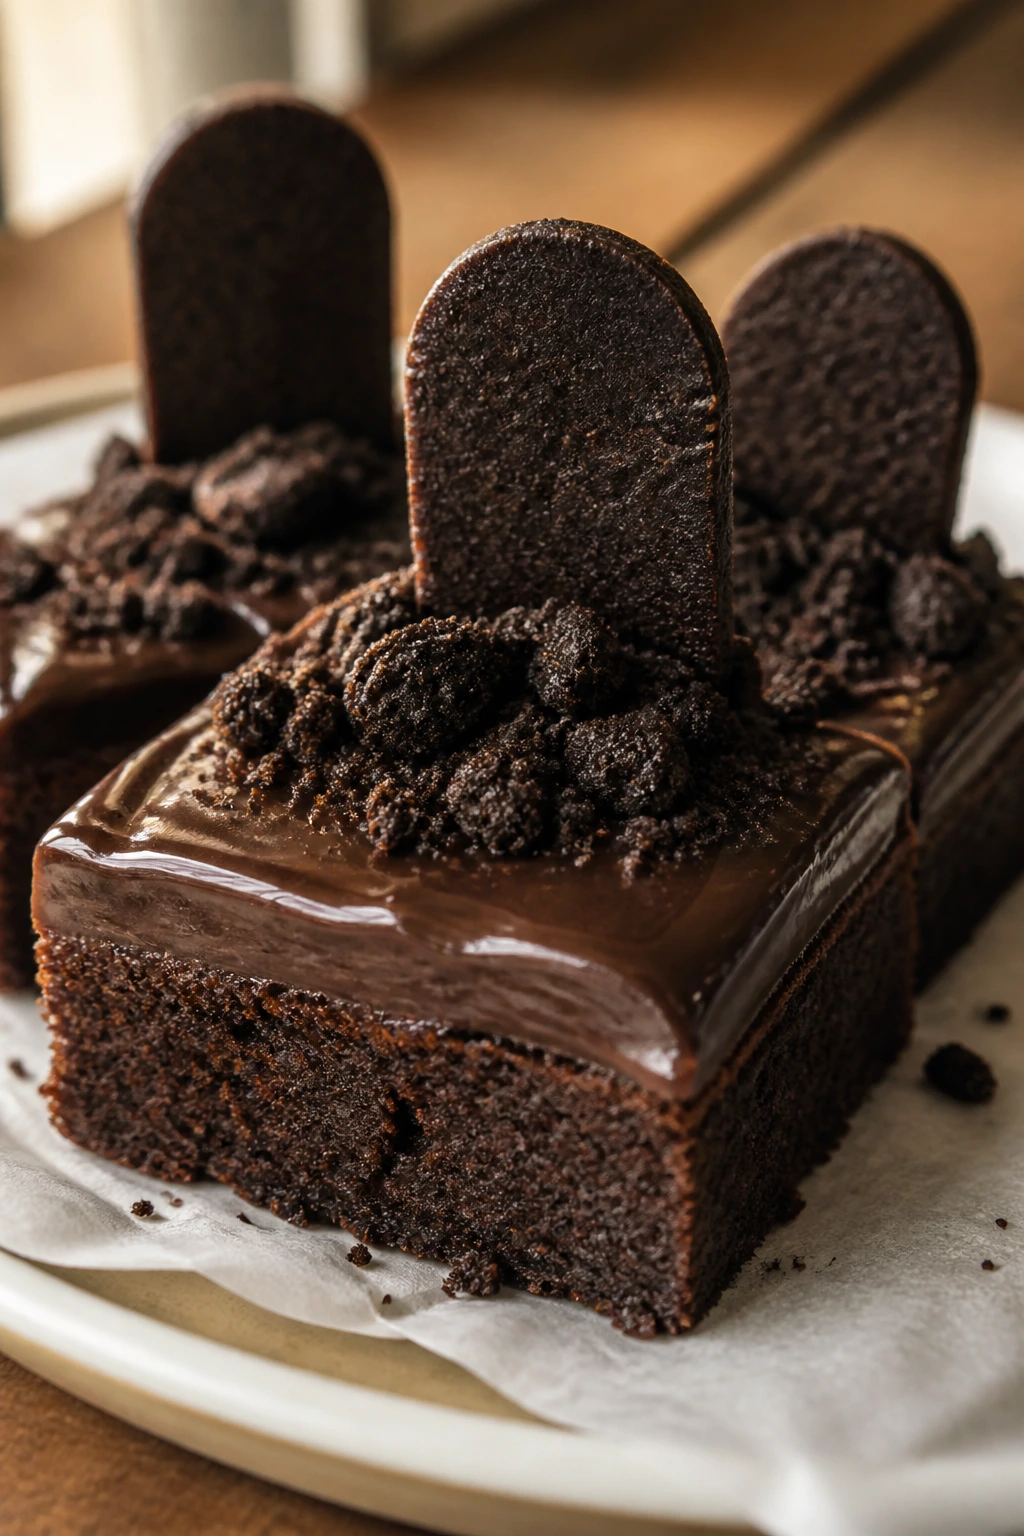
Intro:
If you like your brownies dark and slightly serious, this is the pan to make. Espresso doesn’t make these taste like coffee cake; it sharpens the chocolate and deepens the bitterness just enough to keep the sugar in check. It’s the adult version of the graveyard tray, and I mean that in the best possible way.
Why It Works:
Instant espresso powder amplifies cocoa flavor without adding liquid, which keeps the brownie base dense. A chocolate ganache-style topping gives you a glossy surface for crumbs and tombstones, and the coffee note makes the finish taste less sugary. This is one of those recipes that gets better after an overnight rest, because the flavors settle into each other.
Key Ingredients:
- 1 cup unsalted butter, melted
- 2 cups granulated sugar
- 4 large eggs
- 1 teaspoon vanilla extract
- 3/4 cup unsweetened cocoa powder
- 1 tablespoon instant espresso powder
- 1 cup all-purpose flour
- 1/2 teaspoon salt
- 1 cup semi-sweet chocolate chips
- 1/2 cup heavy cream
- 1 cup chocolate cookie crumbs
- 12 tombstone cookies
Quick Steps:
- Preheat the oven to 350°F (175°C) and line the pan with parchment.
- Whisk butter and sugar, then add eggs, vanilla, cocoa, espresso powder, flour, and salt.
- Spread the batter into the pan and bake for 28 to 32 minutes.
- Heat the cream until steaming, pour it over the chocolate chips, and stir until smooth to make a quick ganache.
- Cool the brownies, spread on the ganache, dust with cookie crumbs, and add tombstones.
Equipment for This Recipe:
- 9×13-inch baking pan
- Parchment paper
- Mixing bowl
- Small saucepan or microwave-safe bowl for the ganache
- Offset spatula
How to Serve This Dish:
Serve these in smaller squares than you think you need. The espresso gives them a bigger flavor footprint than plain brownies, so a modest piece is enough. A little whipped cream on the side is nice, but not necessary.
Pro Tips for This Recipe:
- Dissolve the espresso powder in the melted butter if you want an even smoother flavor.
- Use semi-sweet chocolate for the ganache, not milk chocolate, or the topping will taste too soft.
- Let the ganache set for 15 minutes before adding crumbs.
- These taste even better the next day, once the coffee note rounds out.
Variations on This Dish:
- Mocha Mint Graveyard: Add 1/4 teaspoon peppermint extract to the ganache.
- Dark Roast Version: Use dark chocolate chips for the topping.
- Orange Espresso Twist: Add 1 teaspoon orange zest to the batter.
Common Mistakes to Avoid with This Dish:
- Too much espresso powder: The brownies turn harsh and bitter.
- Ganache that’s too hot: It melts the brownie surface and makes the crumbs slide.
- Skipping the rest time: The coffee flavor is flatter when served immediately.
10. Rocky Road Graveyard Brownies
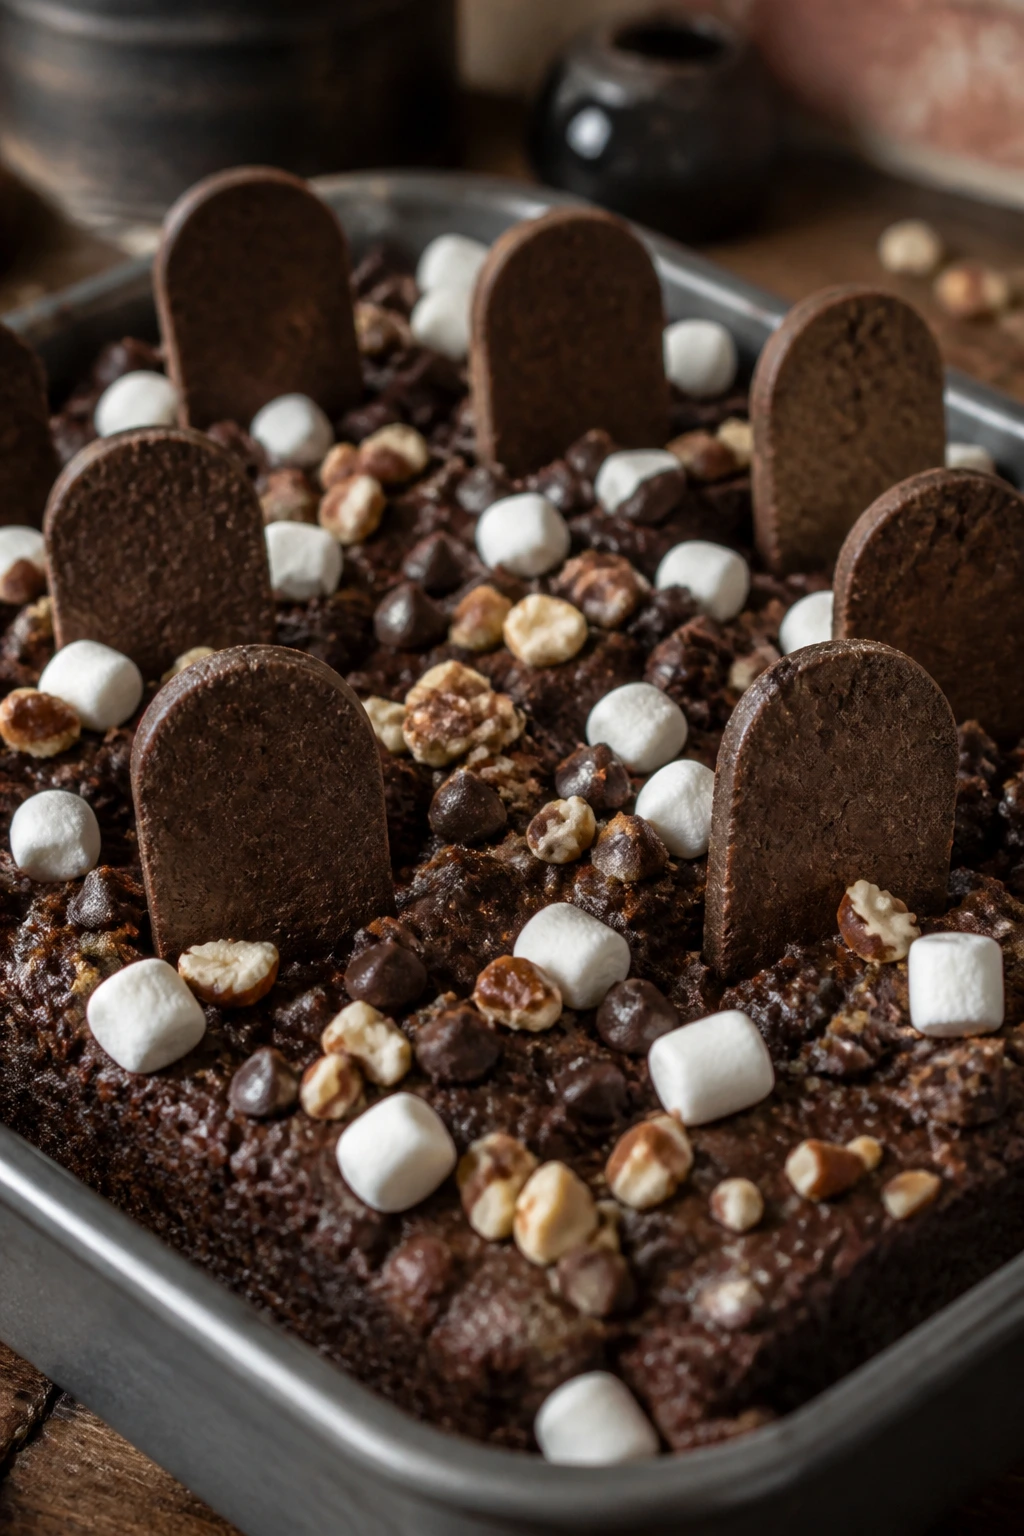
Intro:
Rocky road brownies already feel a little chaotic, which is a fine starting point for a graveyard. Marshmallows, nuts, and chocolate chips make the surface look like it’s been disturbed, and that texture works beautifully with the tombstone theme. This is a messy dessert, but the good kind of messy.
Why It Works:
Marshmallows puff in the heat and create little pale craters on top, while walnuts or pecans add crunch that keeps every bite from being one soft note. The topping has enough contrast that you don’t need heavy frosting. A light dusting of cookie crumbs is enough to turn the whole thing into a graveyard.
Key Ingredients:
- 1 cup unsalted butter, melted
- 2 cups granulated sugar
- 4 large eggs
- 1 teaspoon vanilla extract
- 1 cup unsweetened cocoa powder
- 1 cup all-purpose flour
- 1/2 teaspoon salt
- 1 cup mini marshmallows
- 1 cup chopped walnuts
- 1 cup semi-sweet chocolate chips
- 1 cup chocolate cookie crumbs
- 12 tombstone cookies
Quick Steps:
- Heat the oven to 350°F (175°C) and line the pan with parchment.
- Make the brownie batter by mixing butter, sugar, eggs, vanilla, cocoa, flour, and salt.
- Spread the batter in the pan and sprinkle the marshmallows, walnuts, and chocolate chips evenly on top.
- Bake for 28 to 31 minutes until the top is set and the marshmallows are lightly puffed.
- Cool, add a thin layer of cookie crumbs in patches, and place the tombstones where they’ll stand out.
Equipment for This Recipe:
- 9×13-inch pan
- Parchment paper
- Mixing bowl
- Spatula
- Small offset spatula or spoon for arranging toppings
How to Serve This Dish:
These brownies look best with uneven topping distribution. Leave a few bald spots so the tombstones have room to breathe. A scoop of vanilla ice cream is a good side if you want the texture contrast to feel more complete.
Pro Tips for This Recipe:
- Put the marshmallows on top, not mixed deep into the batter, or they disappear.
- Toast the nuts in a dry skillet first if you want a deeper flavor.
- Use whole marshmallows if you want a puffier top; mini marshmallows melt faster.
- Let the pan cool before adding cookie crumbs so they don’t absorb moisture.
Variations on This Dish:
- Almond Rocky Road: Swap walnuts for sliced almonds.
- Salted Rocky Grave: Sprinkle flaky salt over the marshmallows right after baking.
- Extra-Chocolate Road: Add 1/2 cup chocolate chunks to the batter.
Common Mistakes to Avoid with This Dish:
- Overloading the topping: Too many add-ins can weigh the brownies down.
- Using raw nuts without toasting: The flavor stays flat.
- Adding crumbs while hot: They turn damp instead of staying crumbly.
11. Vegan Graveyard Brownies
Intro:
A vegan graveyard pan can still be rich, dark, and sturdy enough for decorations. The trick is building enough fat and structure into the batter so it slices like a real brownie instead of a soft snack cake. Once it’s topped with frosting and cookie crumbs, nobody misses the eggs.
Why It Works:
Ground flaxseed gives the batter a little binding power, while oil keeps the crumb tender. Vegan brownies can dry out if you push them too far in the oven, so this version stays on the fudgy side. The decorations don’t need dairy to work; a vegan chocolate frosting or ganache holds the tombstones just fine.
Key Ingredients:
- 3 tablespoons ground flaxseed
- 9 tablespoons warm water
- 3/4 cup neutral oil
- 2 cups granulated sugar
- 1 teaspoon vanilla extract
- 3/4 cup unsweetened cocoa powder
- 1 cup all-purpose flour
- 1/2 teaspoon salt
- 1/2 teaspoon baking powder
- 1 cup dairy-free chocolate chips
- 1 cup vegan chocolate frosting
- 1 cup chocolate cookie crumbs
- 12 vegan-friendly tombstone cookies
Quick Steps:
- Mix the flaxseed and warm water in a small bowl and let it thicken for 10 minutes.
- Preheat the oven to 350°F (175°C) and line the pan with parchment.
- Whisk oil, sugar, vanilla, and the flax mixture until combined. Stir in cocoa, flour, salt, and baking powder, then fold in the chocolate chips.
- Spread the batter into the pan and bake for 30 to 34 minutes.
- Cool completely, frost with vegan chocolate frosting, add cookie crumbs, and set the tombstones in place.
Equipment for This Recipe:
- 9×13-inch pan
- Parchment paper
- Mixing bowl
- Whisk and spatula
- Small bowl for the flax mixture
How to Serve This Dish:
These brownies travel well, which makes them useful for mixed-diet gatherings. Cut them after a short chill so the vegan frosting stays neat. A few extra crumbs around the base of the tombstones make them look more grounded.
Pro Tips for This Recipe:
- Use a neutral oil with a mild taste; olive oil can be too loud here.
- Don’t skip the flax rest. It matters for structure.
- Bake until the center no longer jiggles, but do not wait for a dry toothpick.
- If your frosting is soft, chill the decorated pan before slicing.
Variations on This Dish:
- Coconut Graveyard: Replace half the oil with melted coconut oil for a faint coconut note.
- Nutty Vegan Version: Fold 1/2 cup chopped walnuts into the batter.
- Gluten-Free Vegan Swap: Use a 1:1 gluten-free flour blend with the same measurements.
Common Mistakes to Avoid with This Dish:
- Too much flour: Vegan brownies get cakey fast if the flour is packed too hard.
- Overbaking: They dry out faster than egg-based brownies.
- Thin frosting: It won’t hold the crumbs or tombstones in place.
12. Gluten-Free Graveyard Brownies
Intro:
Gluten-free brownies can be every bit as fudgy as the standard version if you treat them like brownies, not cake. You want a batter that’s thick enough to hold decorations and a flour blend that won’t leave a gritty finish. Once decorated, these brownies look identical to the classic pan unless you tell people otherwise.
Why It Works:
A good 1:1 gluten-free blend does most of the work, and a little almond flour helps soften the texture. Brownies naturally forgive a lot of flour substitution because cocoa and sugar carry so much of the flavor. That means the graveyard decorations still sit on a proper, dense base instead of a fragile crumb.
Key Ingredients:
- 1 cup unsalted butter, melted
- 2 cups granulated sugar
- 4 large eggs
- 1 teaspoon vanilla extract
- 3/4 cup unsweetened cocoa powder
- 1 cup 1:1 gluten-free flour blend
- 1/2 cup almond flour
- 1/2 teaspoon salt
- 1 cup chocolate chips
- 1 cup chocolate frosting
- 1 cup gluten-free cookie crumbs
- 12 gluten-free tombstone cookies
Quick Steps:
- Preheat the oven to 350°F (175°C) and line the pan with parchment.
- Whisk the butter and sugar, then add the eggs and vanilla. Stir in cocoa, gluten-free flour, almond flour, and salt.
- Fold in the chocolate chips and spread the batter into the pan.
- Bake for 29 to 33 minutes, until the center is set.
- Cool completely, frost, add the gluten-free cookie crumbs, and set the tombstones upright.
Equipment for This Recipe:
- 9×13-inch pan
- Parchment paper
- Mixing bowl
- Silicone spatula
- Offset spatula or spoon for frosting
How to Serve This Dish:
Because gluten-free brownies can crumble more if they’re warm, I’d chill them before cutting. Serve them with the same confidence you’d give any brownie tray; there’s no need to label them at the table unless you want to. A dusting of crumbs makes the top look fuller and hides any slightly uneven edges.
Pro Tips for This Recipe:
- Choose a blend that already contains xanthan gum if possible.
- Let the batter rest for 10 minutes before baking so the flour hydrates.
- Use almond flour as a softening support, not the whole flour base.
- Cut with a warm knife for cleaner slices through the dense crumb.
Variations on This Dish:
- Crisp-Edge GF Brownies: Bake in a metal pan for firmer edges.
- Nut-Free GF Version: Replace almond flour with more gluten-free blend.
- Dark Cocoa Swap: Use Dutch-process cocoa for a richer finish.
Common Mistakes to Avoid with This Dish:
- Using a weak flour blend: Some blends bake up sandy or dry. Pick one meant for cup-for-cup baking.
- Cutting hot brownies: They fall apart more easily than wheat-flour brownies.
- Skipping the rest: Gluten-free batter benefits from a brief sit before the oven.
13. Brownie Bite Graveyard Cups
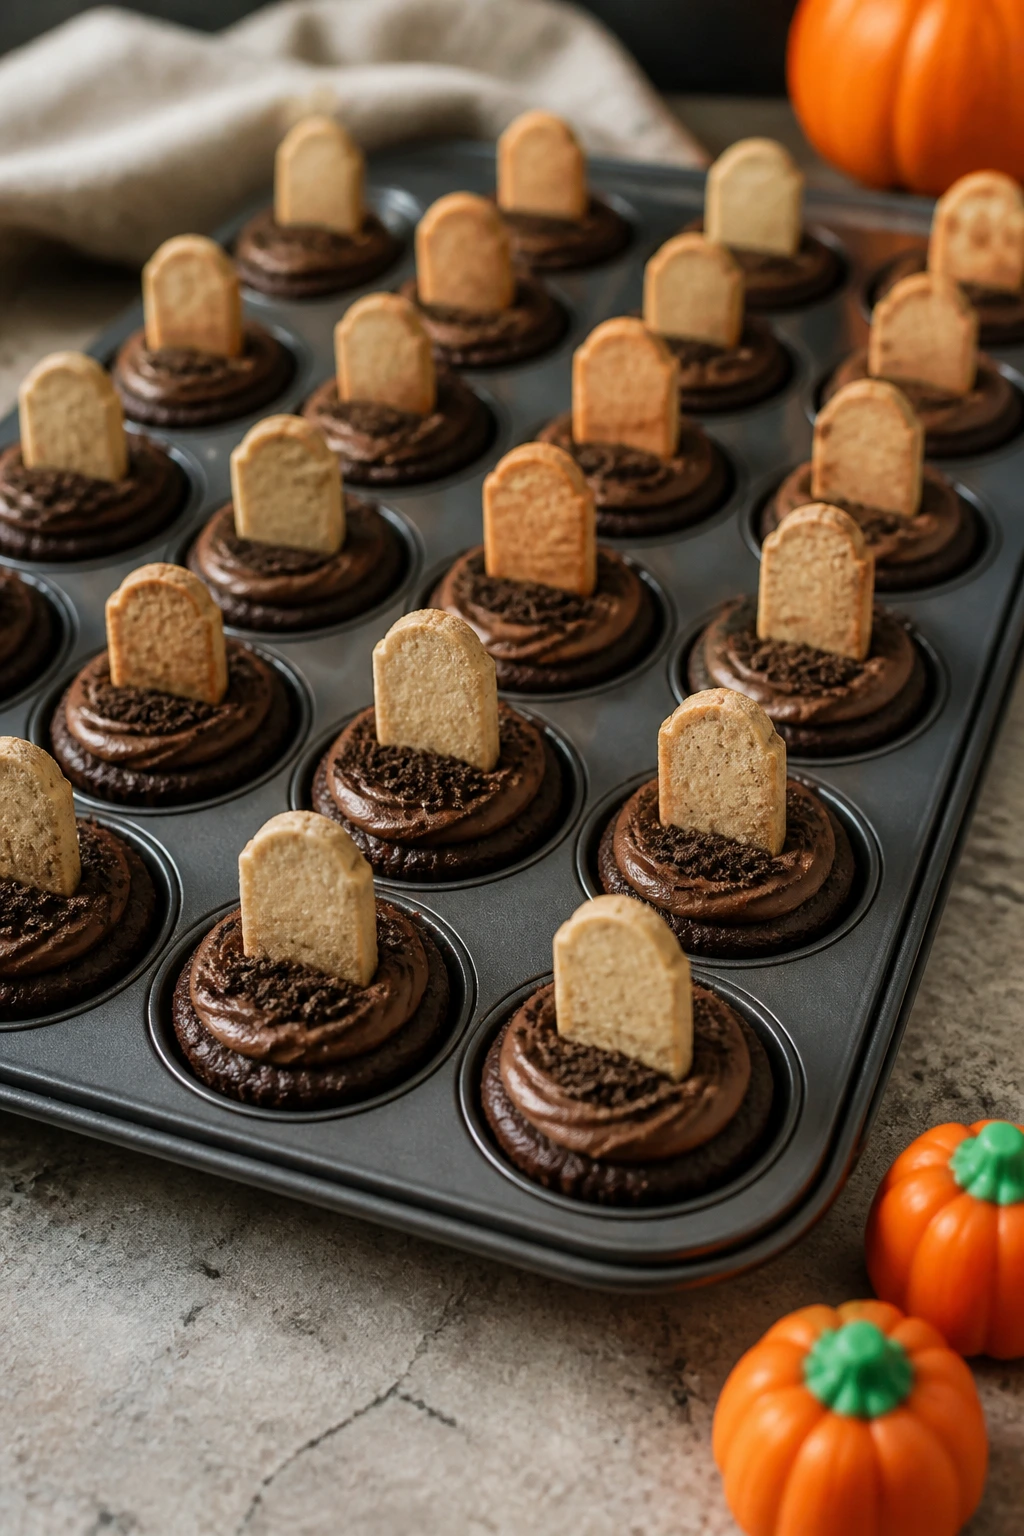
Intro:
Sometimes the smartest graveyard brownie is the smallest one. Mini brownie bites in a muffin tin are easy to serve, easy to decorate, and impossible to cut badly. Each bite becomes its own little plot, which is half the fun.
Why It Works:
A mini format gives you a thick edge-to-center ratio, so every piece feels fudgy and substantial. The cup shape also corrals frosting and crumbs, which means fewer decorations slide off. These are especially good for school events or potlucks where people want something tidy.
Key Ingredients:
- 1/2 cup unsalted butter, melted
- 1 cup granulated sugar
- 2 large eggs
- 1 teaspoon vanilla extract
- 1/2 cup unsweetened cocoa powder
- 1/2 cup all-purpose flour
- 1/4 teaspoon salt
- 1/2 cup chocolate frosting
- 1/2 cup chocolate cookie crumbs
- 24 mini tombstone cookies or cookie cutouts
- 12 candy pumpkins
Quick Steps:
- Preheat the oven to 350°F (175°C) and grease a 24-cup mini muffin tin.
- Whisk butter and sugar, then add the eggs and vanilla. Stir in cocoa, flour, and salt.
- Fill each cup about 3/4 full and bake for 12 to 15 minutes, until the centers are just set.
- Cool in the tin for 10 minutes, then transfer to a rack and cool fully.
- Frost each bite, sprinkle with cookie crumbs, and add a tiny tombstone or pumpkin to each one.
Equipment for This Recipe:
- Mini muffin tin
- Nonstick spray or butter for greasing
- Mixing bowl
- Small spoon or cookie scoop
- Cooling rack
How to Serve This Dish:
Put these on a tiered stand or a tray lined with parchment so the bottoms stay neat. They disappear fast, so making them in multiples of 24 is the right instinct. I like arranging the tombstones at slightly different angles; that keeps the mini cemetery from looking too staged.
Pro Tips for This Recipe:
- Fill the cups only 3/4 full so they don’t mushroom over the edges.
- Use a small cookie scoop for even portions.
- A piping bag with the corner snipped off makes topping them fast.
- Cool completely before adding decorations, or the frosting will slide into the cups.
Variations on This Dish:
- Peanut Butter Bite Graves: Add a peanut butter drizzle over the frosting.
- Mint Bite Graves: Tint the frosting green for a tiny cemetery glow.
- Double-Chocolate Cups: Stir mini chocolate chips into the batter.
Common Mistakes to Avoid with This Dish:
- Overfilling the cups: They bake into misshapen domes.
- Skipping the greasing step: Mini brownies cling to muffin tins hard.
- Decorating while warm: The tiny tombstones won’t stay upright.
14. Brookie Graveyard Bars

Intro:
Brookies bring the chewy sweetness of cookie dough and the dense bite of brownies into one pan. For a graveyard dessert, that means you get a better structural base and a little extra vanilla richness in every square. It’s a good choice when you want the Halloween tray to feel a little more bakery-case than home project.
Why It Works:
The cookie layer gives the top a soft, pale contrast under the darker crumbs, so the graveyard decorations stand out. Cookie dough also bakes into a sturdy lid that holds tombstones in place nicely. I’m fond of this version because it tastes like you spent a lot longer on it than you actually did.
Key Ingredients:
- For the Brownie Layer:
- 1/2 cup unsalted butter, melted
- 1 1/2 cups granulated sugar
- 2 large eggs
- 1 teaspoon vanilla extract
- 3/4 cup unsweetened cocoa powder
- 3/4 cup all-purpose flour
- 1/4 teaspoon salt
- For the Cookie Layer:
- 1/2 cup unsalted butter, softened
- 3/4 cup brown sugar, packed
- 1 large egg
- 1 teaspoon vanilla extract
- 1 1/4 cups all-purpose flour
- 1/2 teaspoon baking soda
- 1/4 teaspoon salt
- 3/4 cup chocolate chips
- For the Top:
- 1 cup chocolate frosting
- 1 cup chocolate cookie crumbs
- 12 tombstone cookies
Quick Steps:
- Preheat the oven to 350°F (175°C) and line the pan with parchment.
- Make the brownie batter and spread it into the pan.
- Cream the softened butter and brown sugar, then beat in the egg and vanilla. Stir in flour, baking soda, salt, and chocolate chips to make the cookie dough.
- Flatten pieces of cookie dough over the brownie layer and bake for 30 to 34 minutes, until the cookie top is lightly golden.
- Cool completely, frost lightly, add cookie crumbs, and place the tombstones.
Equipment for This Recipe:
- 9×13-inch pan
- Parchment paper
- Two mixing bowls
- Hand mixer or sturdy spoon
- Offset spatula
How to Serve This Dish:
Cut these into neat bars; the cookie layer makes them handle well. They’re a little more filling than plain brownies, so smaller rectangles work nicely. I like using a long metal spatula to lift them cleanly from the pan.
Pro Tips for This Recipe:
- Soften the cookie dough slightly if it’s too stiff to spread.
- Do not press the cookie layer into a perfect sheet; rustic patches bake more evenly.
- Let the bars cool before frosting so the cookie top stays firm.
- Use chocolate chips in the cookie layer, not chunks, for easier cutting.
Variations on This Dish:
- Peanut Butter Brookies: Swap half the chocolate chips for peanut butter chips.
- Oatmeal Brookie Graveyard: Add 1/2 cup oats to the cookie dough for more chew.
- Salted Brookies: Sprinkle flaky salt over the frosting for a sharper finish.
Common Mistakes to Avoid with This Dish:
- Cookie layer too thick: It can stay doughy in the middle.
- No parchment: Brookies are sticky and want to cling to the pan.
- Cutting too soon: The layers need time to set or they slide apart.
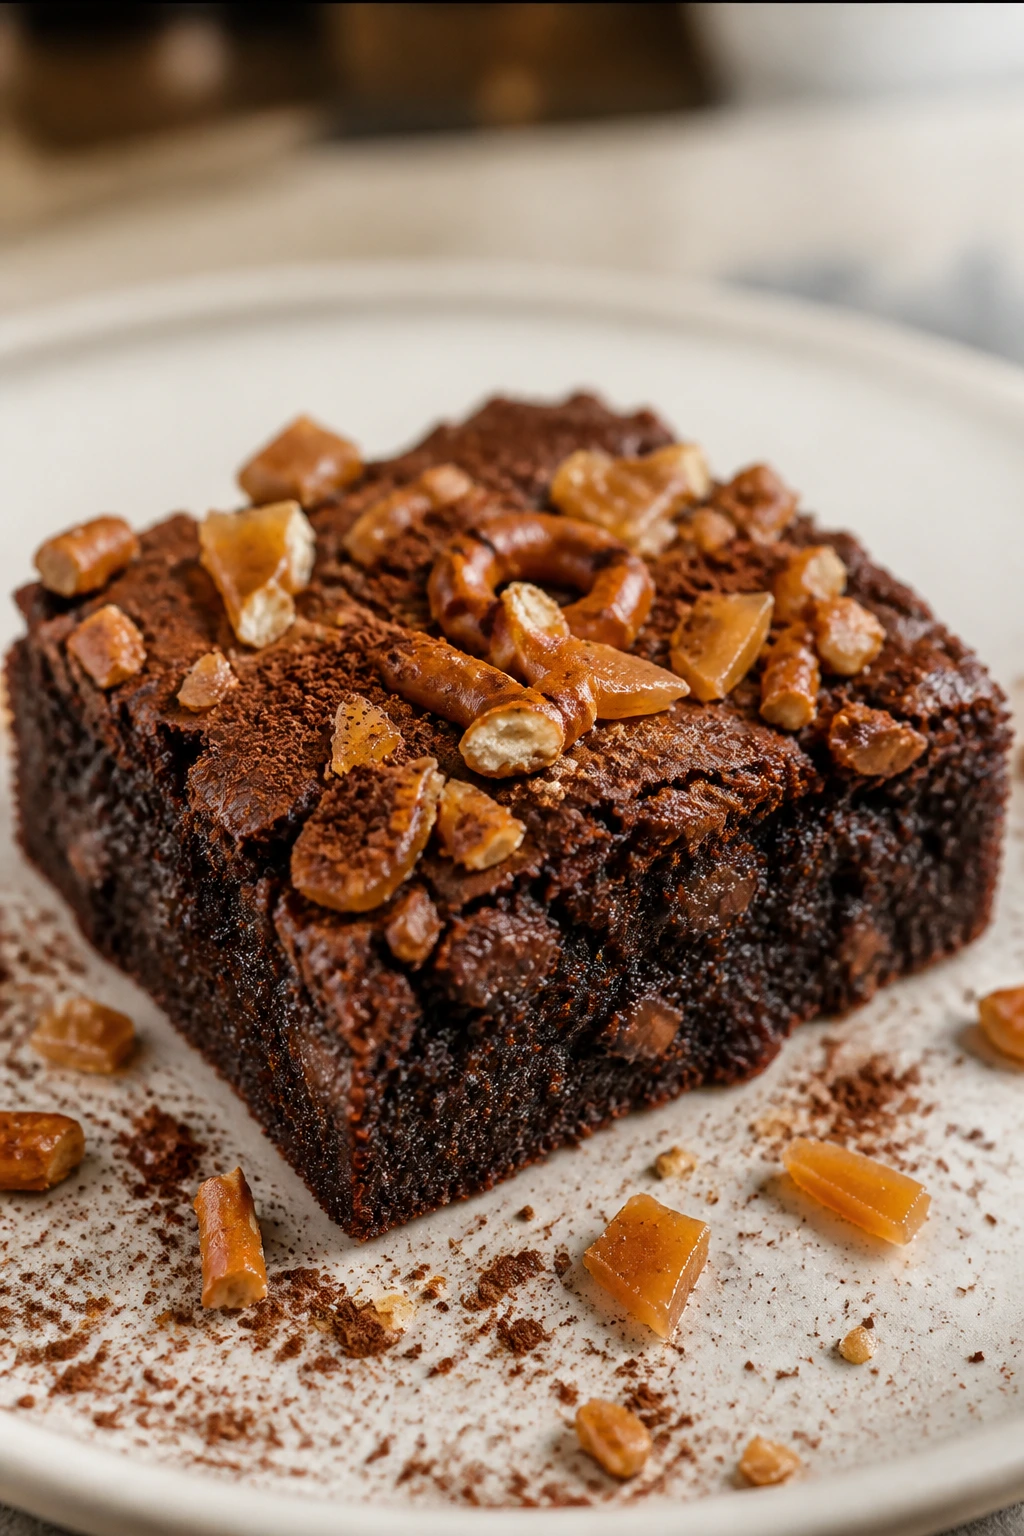
15. Pretzel Crunch Graveyard Brownies
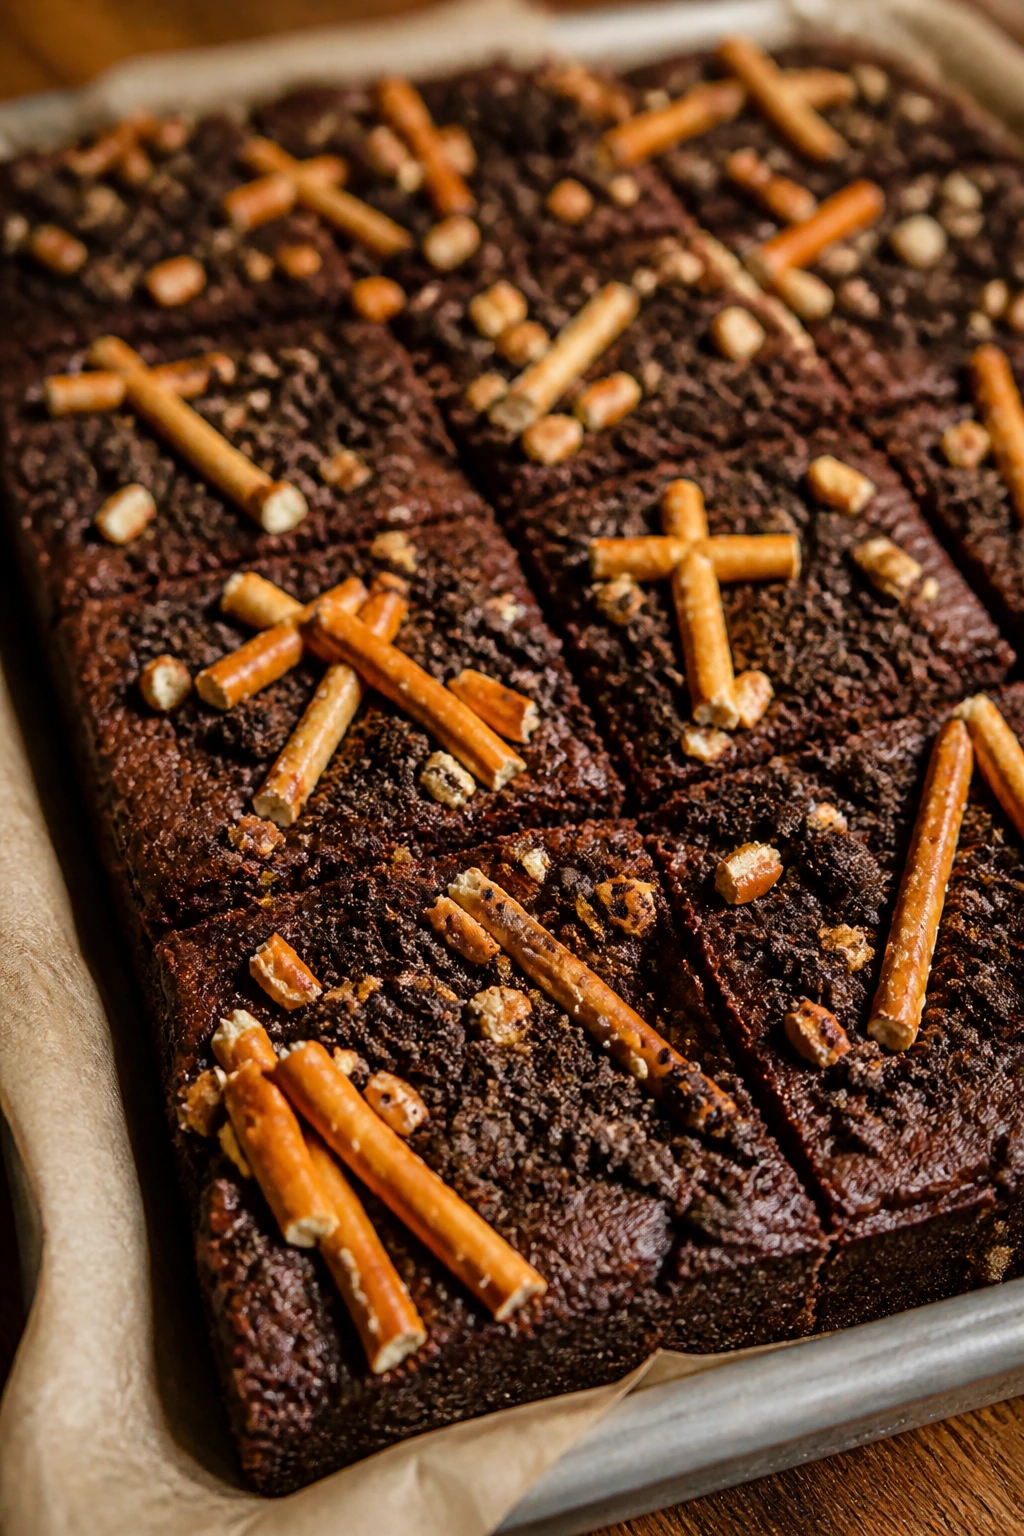
Intro:
Pretzels bring salt, crunch, and a little bite of structure to an otherwise soft dessert. That matters in a graveyard brownie because the topping can get heavy fast. The pretzel pieces act like little bones under the dirt, which is a slightly odd sentence and also exactly why this works.
Why It Works:
Salted crunch keeps the brownie from feeling one-dimensional, and broken pretzel sticks give you a visual texture that plays nicely with cookie crumbs. Caramel or chocolate frosting helps the pieces cling without turning soggy. If you like sweet-salty desserts, this is one of the easiest wins in the bunch.
Key Ingredients:
- 1 cup unsalted butter, melted
- 2 cups granulated sugar
- 4 large eggs
- 1 teaspoon vanilla extract
- 3/4 cup unsweetened cocoa powder
- 1 cup all-purpose flour
- 1/2 teaspoon salt
- 1 cup mini pretzel twists, broken in half
- 1 cup chocolate frosting
- 1/2 cup caramel sauce
- 1 cup chocolate cookie crumbs
- 12 tombstone cookies
Quick Steps:
- Preheat the oven to 350°F (175°C) and line the pan with parchment.
- Mix the brownie batter, then fold in half of the broken pretzels.
- Spread the batter into the pan and bake for 28 to 32 minutes.
- Cool fully, spread on a thin layer of frosting, drizzle with caramel, then scatter the remaining pretzels and cookie crumbs over the top.
- Add tombstones where the pretzels won’t knock them loose.
Equipment for This Recipe:
- 9×13-inch pan
- Parchment paper
- Mixing bowl
- Spoon for caramel drizzle
- Offset spatula
How to Serve This Dish:
Serve these in squares, not slim bars, so the pretzel crunch doesn’t break away at the edges. A few pretzel sticks tucked around the base of the tombstones make them look buried, which is a nice touch. Cold milk is the drink I’d pick here every time.
Pro Tips for This Recipe:
- Break the pretzels into mixed sizes for better texture.
- Keep some pretzel pieces on top after baking so the crunch stays crisp.
- Use thick caramel sauce so it doesn’t soak the crumbs.
- Add tombstones after the frosting sets slightly.
Variations on This Dish:
- Chocolate-Covered Pretzel Graveyard: Use chocolate-dipped pretzels for a sweeter version.
- Honey Mustard Pretzel Joke: Do not. That was a joke. Stick to dessert pretzels.
- White Chocolate Pretzel Version: Drizzle white chocolate over the top for more contrast.
Common Mistakes to Avoid with This Dish:
- Too many pretzels: The brownies lose their fudgy texture.
- Pretzels crushed too fine: You lose the crunch that makes the idea work.
- Wet caramel everywhere: It makes the top sticky instead of textured.
16. Pumpkin Cheesecake Graveyard Brownies
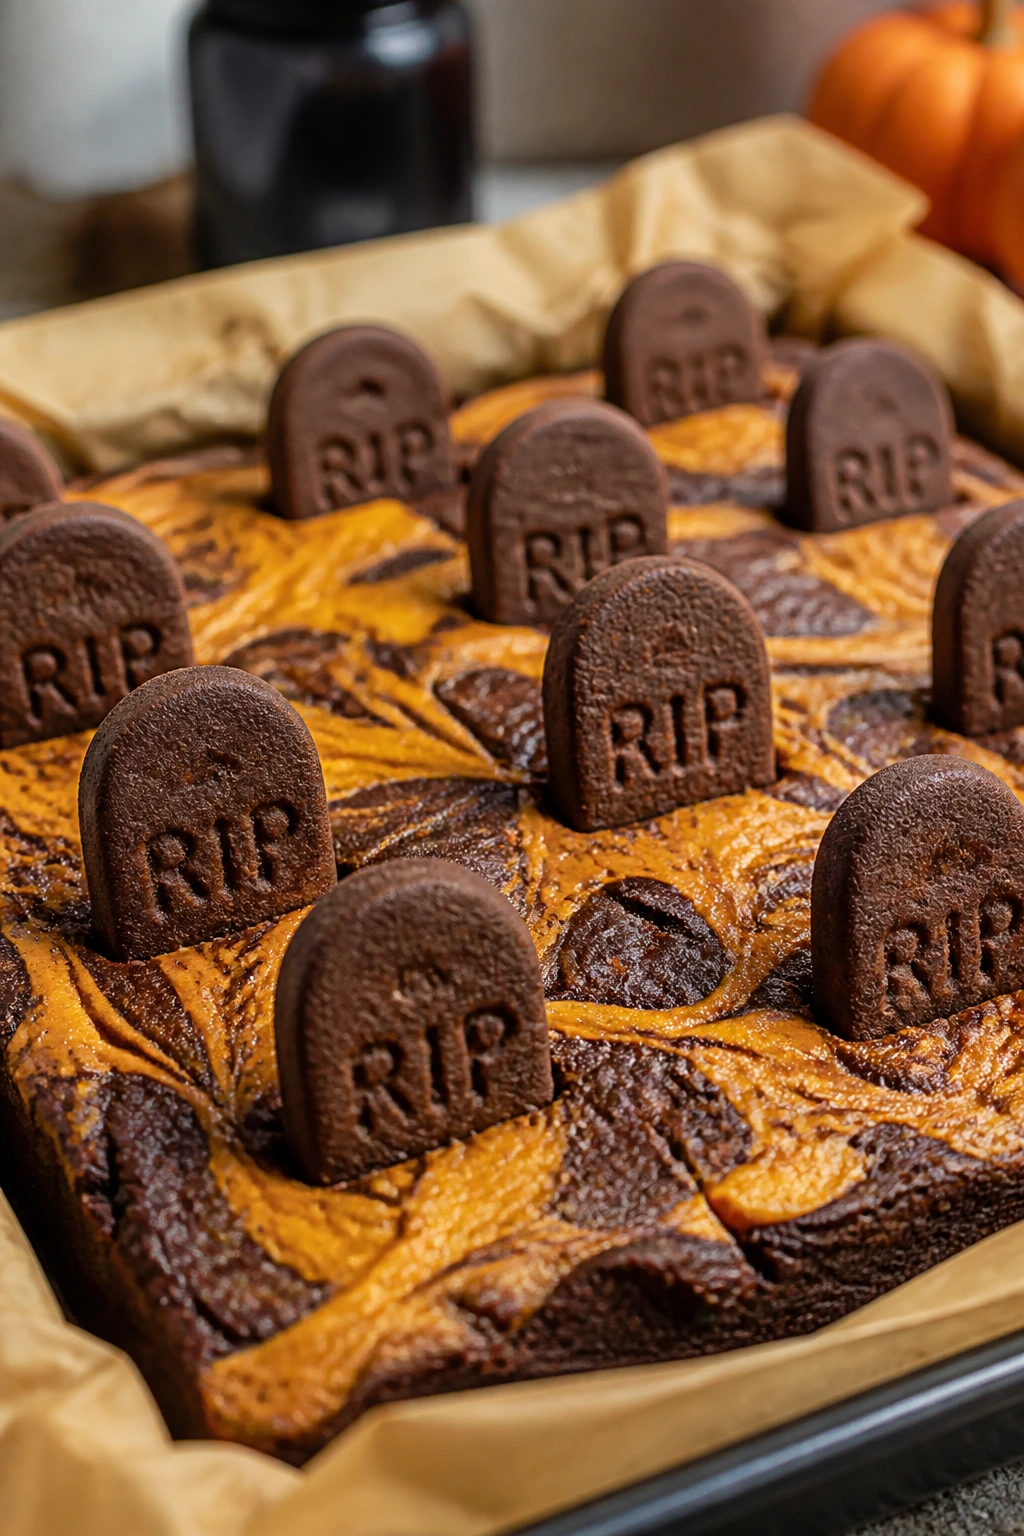
Intro:
Pumpkin and chocolate don’t always get enough credit together. In this pan, the pumpkin cheesecake swirl adds a soft orange-gold color that looks especially eerie under the black crumbs and cookie tombstones. It tastes like fall, yes, but in a deeper, more dessert-table way than a plain pumpkin bar.
Why It Works:
Pumpkin purée adds moisture and a subtle earthy sweetness, while cream cheese keeps the swirl tangy so it doesn’t taste flat. Pumpkin spice gives the top a warm aroma that comes through as soon as the pan leaves the oven. I like this one for people who want a Halloween dessert that still feels firmly like a brownie.
Key Ingredients:
- 1 cup unsalted butter, melted
- 2 cups granulated sugar
- 4 large eggs, divided
- 1 teaspoon vanilla extract
- 3/4 cup unsweetened cocoa powder
- 1 cup all-purpose flour
- 1/2 teaspoon salt
- 8 ounces cream cheese, softened
- 1/2 cup pumpkin purée
- 1/3 cup granulated sugar
- 1 teaspoon pumpkin spice
- 1 cup chocolate cookie crumbs
- 12 tombstone cookies
Quick Steps:
- Preheat the oven to 350°F (175°C) and line the pan with parchment.
- Make the brownie batter with butter, sugar, 3 eggs, vanilla, cocoa, flour, and salt.
- Beat the cream cheese with the remaining egg, pumpkin purée, sugar, and pumpkin spice until smooth.
- Spread the brownie batter into the pan, dollop the pumpkin cheesecake mixture over the top, and swirl gently with a knife.
- Bake for 33 to 37 minutes, cool completely, then add cookie crumbs and tombstones.
Equipment for This Recipe:
- 9×13-inch pan
- Parchment paper
- Mixing bowls
- Hand mixer
- Knife for swirling
How to Serve This Dish:
The orange swirl deserves to show, so cut these into clean squares and keep the crumb layer light. They’re rich enough for small servings, especially after a heavy meal. A little whipped cream on the side is optional, not required.
Pro Tips for This Recipe:
- Use pumpkin purée, not pumpkin pie filling.
- Don’t over-swirl or the layers turn muddy.
- Chill before slicing if you want the swirl to stay neat.
- If your cream cheese is lumpy, beat it longer before combining.
Variations on This Dish:
- Maple Pumpkin Graveyard: Replace part of the sugar with maple syrup and reduce another liquid slightly.
- Spice-Forward Version: Add a pinch of cinnamon to the brownie batter too.
- Smaller Swirl Bars: Bake in a slightly smaller pan for thicker layers.
Common Mistakes to Avoid with This Dish:
- Watery pumpkin: It makes the swirl loose and weak.
- Overbaking: Pumpkin cheesecake dries out faster than plain brownie batter.
- Too much crumb topping: It hides the swirl, which is the point here.
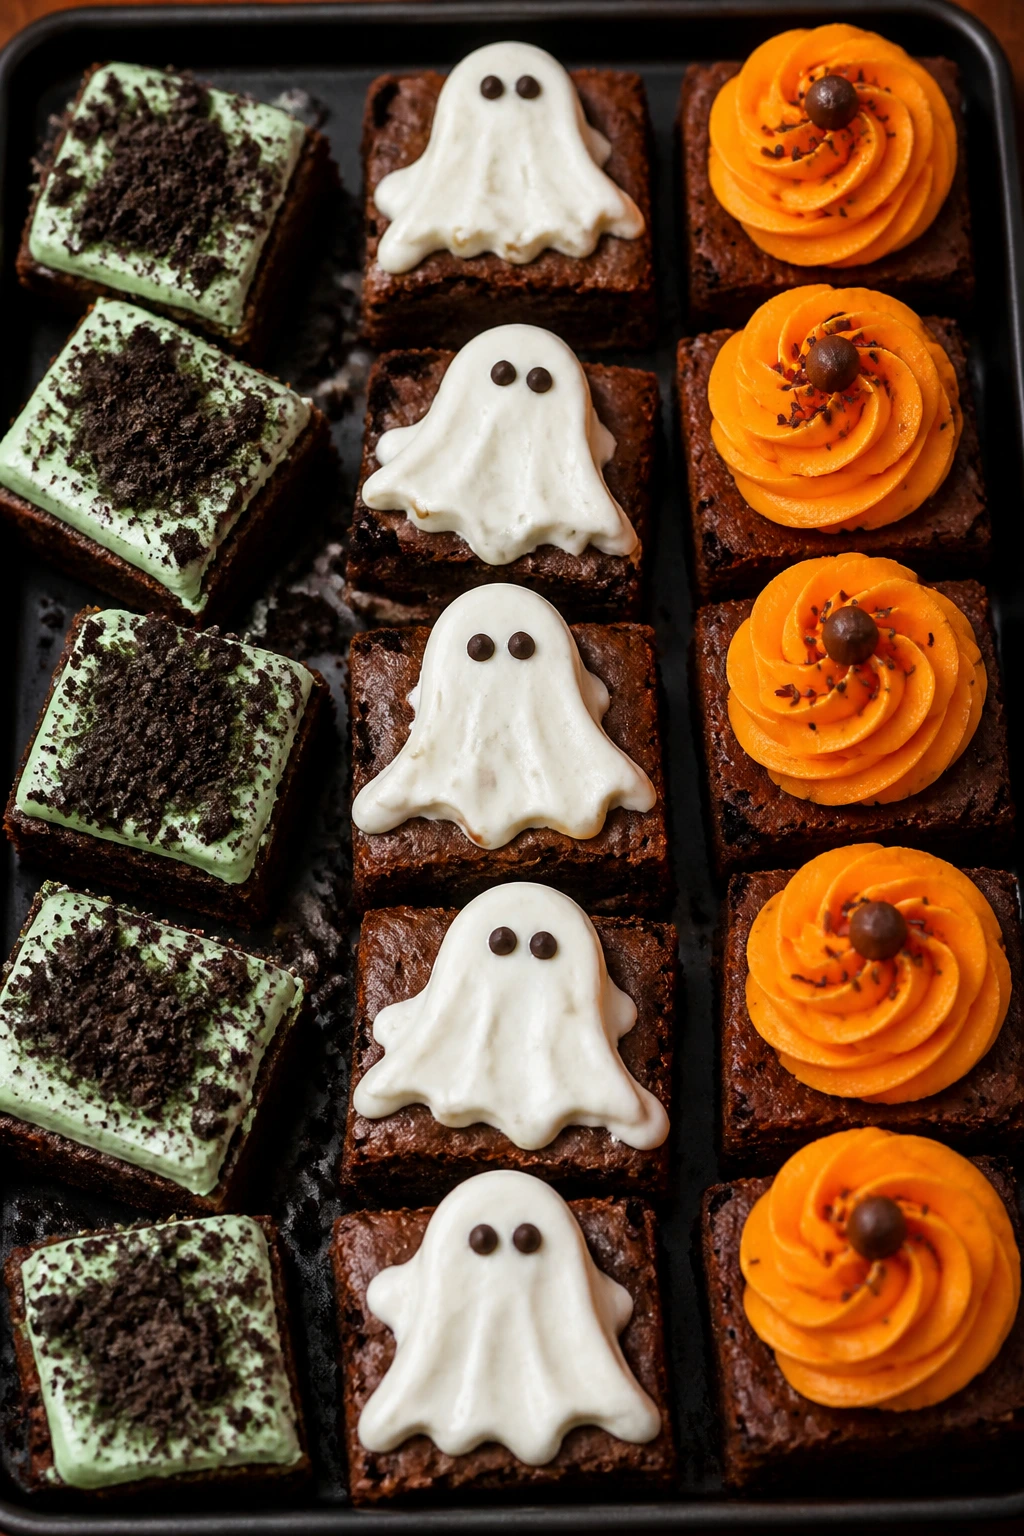
17. White Chocolate Ghost Graveyard Brownies
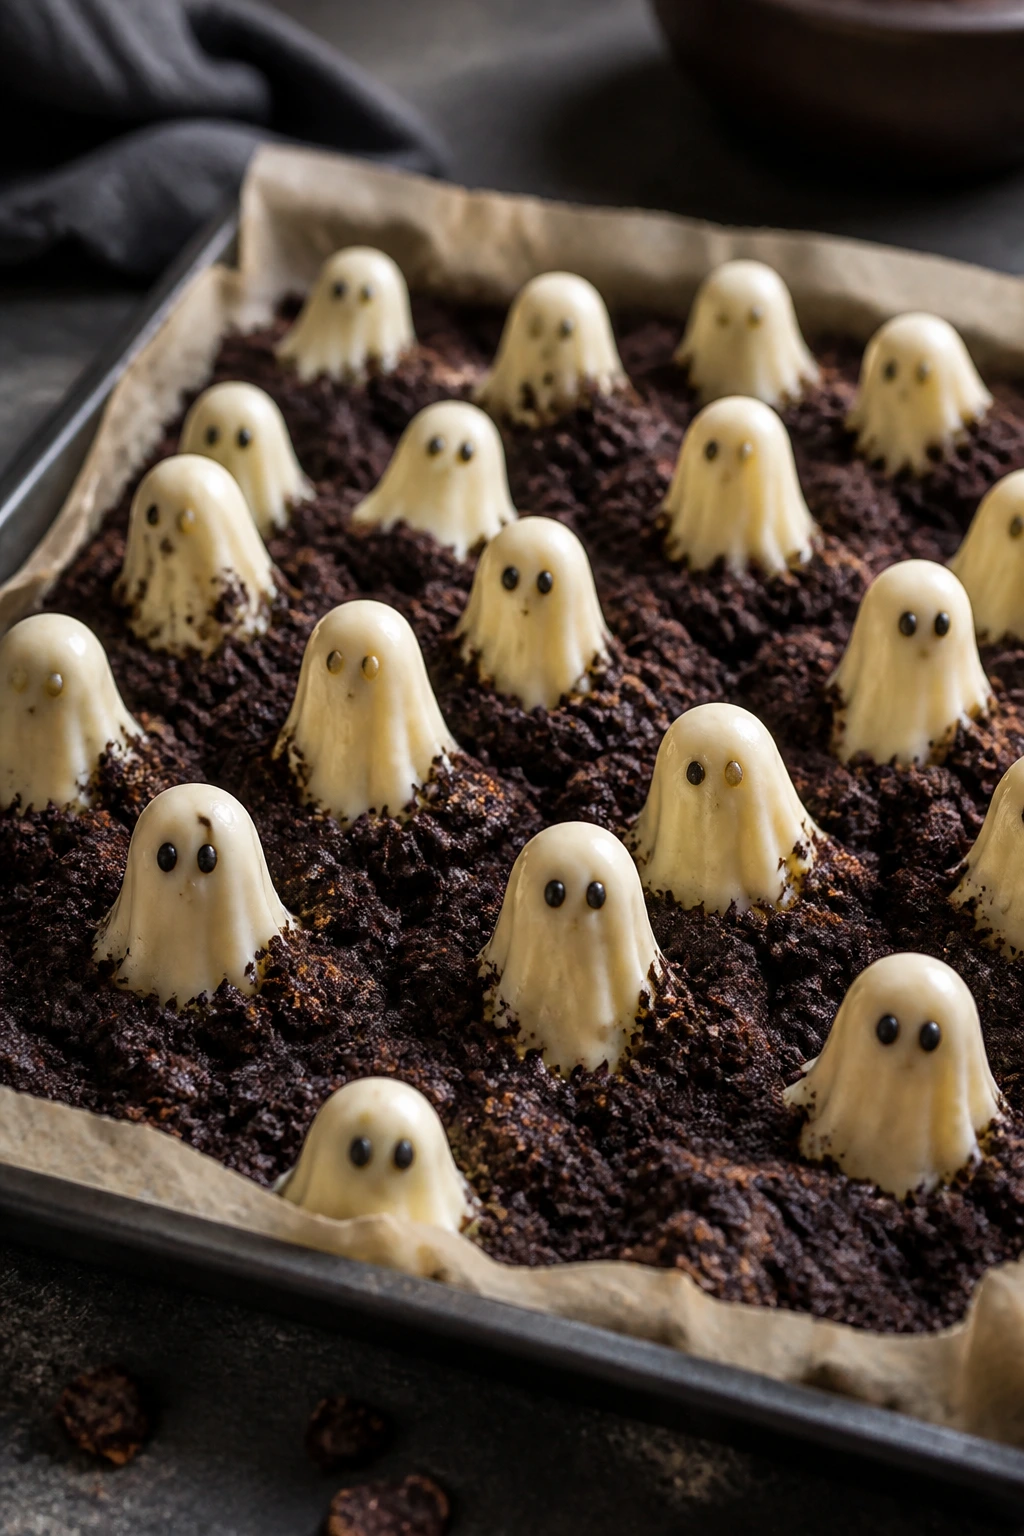
Intro:
White chocolate ghosts are a little goofy, and that’s what makes them useful. The white shapes stand out sharply against dark brownie soil, and they bring a sweeter, creamier note to the pan without changing the whole base. If you want something that reads as festive from a distance, this is a good way to do it.
Why It Works:
A dark brownie base gives the white decorations a strong contrast. White chocolate frosting or melted white chocolate piped into ghost shapes stays bright against the crumbs, and tiny chocolate chip eyes finish the effect fast. The trick is keeping the ghosts small and simple, not sculpted into little masterpieces nobody wants to eat.
Key Ingredients:
- 1 cup unsalted butter, melted
- 2 cups granulated sugar
- 4 large eggs
- 1 teaspoon vanilla extract
- 1 cup unsweetened cocoa powder
- 1 cup all-purpose flour
- 1/2 teaspoon salt
- 1 cup white chocolate chips
- 1/2 cup heavy cream
- 1 cup chocolate frosting
- 1 cup chocolate cookie crumbs
- 12 candy eyes or mini chocolate chips
Quick Steps:
- Preheat the oven to 350°F (175°C) and line the pan with parchment.
- Make the brownie batter and bake it for 28 to 32 minutes.
- Warm the cream and pour it over the white chocolate chips to make a smooth white ganache.
- Cool the brownies fully, frost with chocolate frosting, and cover with cookie crumbs.
- Pipe small ghost shapes with the white ganache, then add candy eyes or mini chocolate chips.
Equipment for This Recipe:
- 9×13-inch pan
- Parchment paper
- Mixing bowls
- Piping bag or zip-top bag
- Small spoon for ganache
How to Serve This Dish:
These look best when the ghosts are clustered in small groups instead of spaced in a perfect grid. Give each slice a ghost or two and a little dirt around it. A black serving tray makes the white shapes pop harder, which is useful if you’re feeding a crowd.
Pro Tips for This Recipe:
- Let the white ganache cool slightly before piping or it will run.
- Keep the ghosts small so they don’t slump.
- Use mini chips for eyes; regular-size chips can overpower the design.
- Chill the decorated pan briefly if the ghosts need help holding shape.
Variations on This Dish:
- Marshmallow Ghosts: Swap ganache ghosts for piped marshmallow cream.
- Vanilla Swirl Version: Add a few white chocolate chips to the brownie batter.
- Double-Contrast Bars: Use milk chocolate frosting under the crumbs and white ghosts on top.
Common Mistakes to Avoid with This Dish:
- White chocolate too hot: It melts into flat puddles.
- Ghosts too large: They collapse and smear.
- Using pale crumbs: Dark crumbs give the white decorations more punch.
18. Chocolate Orange Graveyard Brownies
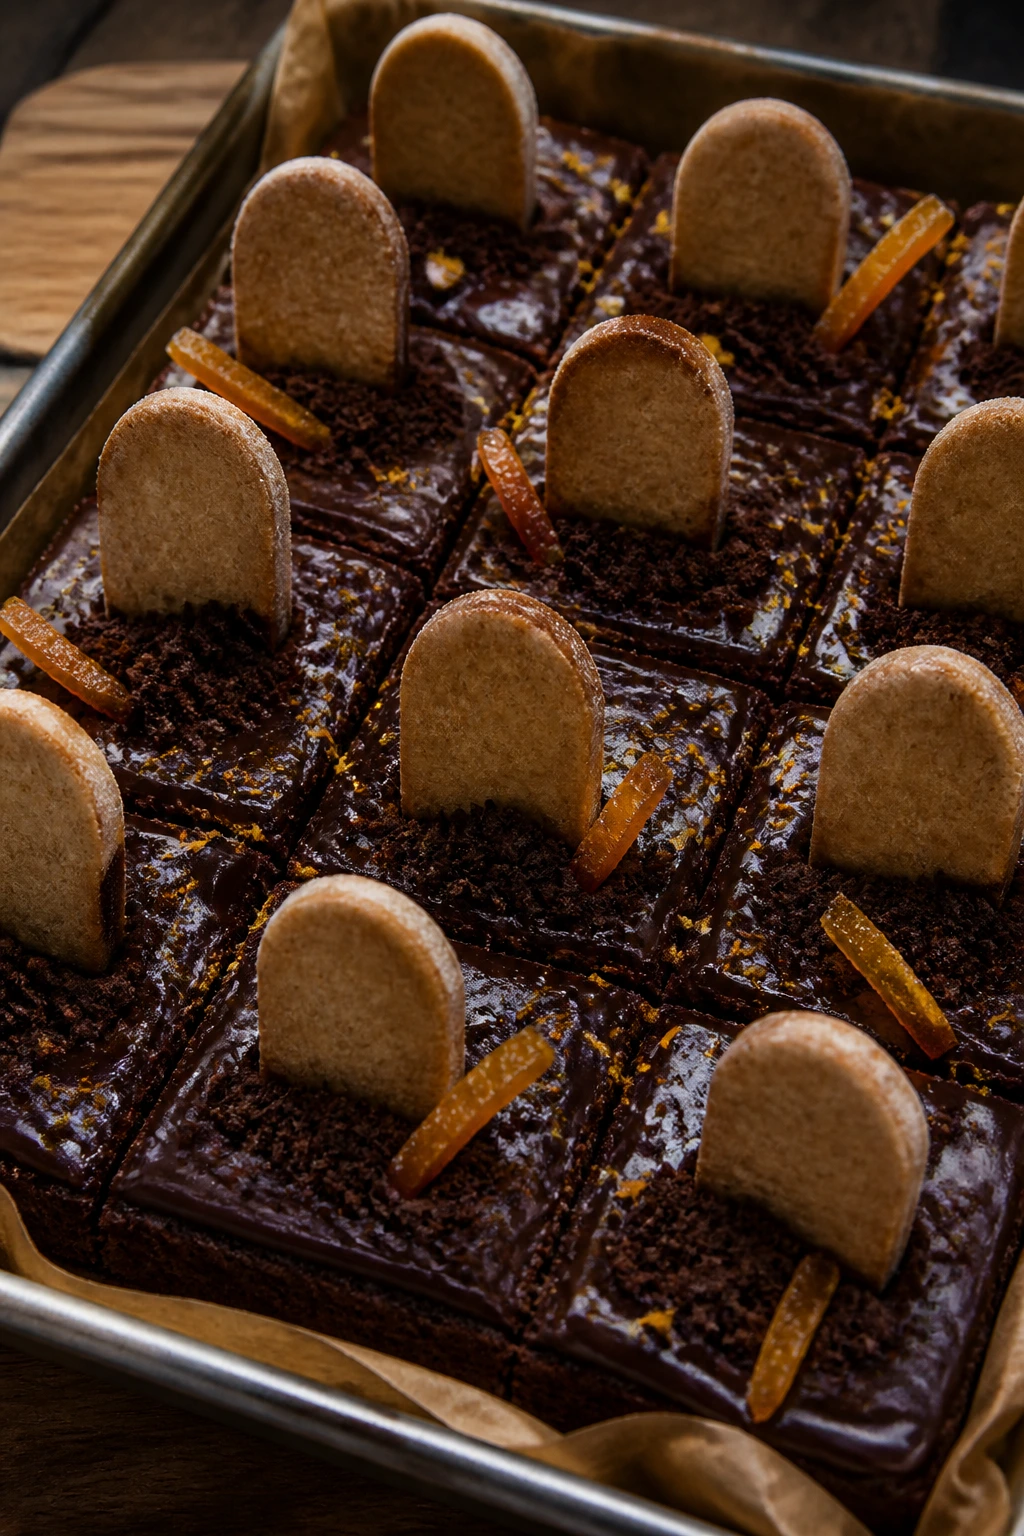
Intro:
Chocolate orange is one of those flavors that can seem odd on paper and then makes sense the second you bite it. The citrus lifts the brownie and gives the whole tray a sharper aroma, while the orange accent makes the dark crumb topping feel even darker. It’s a little more grown-up, a little less candy store.
Why It Works:
Orange zest cuts through the richness of the brownie base, and a small splash of orange extract carries the flavor without turning the pan into perfume. Chocolate and orange have enough contrast that the graveyard decorations stay readable even if you keep the frosting light. This is a good place for candied orange peel if you want a fancier finish.
Key Ingredients:
- 1 cup unsalted butter, melted
- 2 cups granulated sugar
- 4 large eggs
- 1 teaspoon vanilla extract
- 1 tablespoon orange zest
- 1/2 teaspoon orange extract
- 3/4 cup unsweetened cocoa powder
- 1 cup all-purpose flour
- 1/2 teaspoon salt
- 1 cup chocolate frosting
- 1 cup chocolate cookie crumbs
- Candied orange peel, 1/2 cup chopped
- 12 tombstone cookies
Quick Steps:
- Preheat the oven to 350°F (175°C) and line the pan with parchment.
- Mix the butter, sugar, eggs, vanilla, orange zest, and orange extract, then stir in cocoa, flour, and salt.
- Spread the batter into the pan and bake for 28 to 31 minutes.
- Cool fully, frost lightly with chocolate frosting, add cookie crumbs, and scatter a few pieces of candied orange peel.
- Stand the tombstones in place.
Equipment for This Recipe:
- 9×13-inch pan
- Parchment paper
- Zester
- Mixing bowl
- Offset spatula
How to Serve This Dish:
I like this one cut into narrower bars because the orange flavor feels brighter in smaller bites. A little extra zest sprinkled around the plate looks subtle and smells great when the tray is set down. If you want, add a thin strip of candied peel beside each tombstone.
Pro Tips for This Recipe:
- Zest only the orange peel, not the white pith, or the flavor turns bitter.
- Orange extract is strong; measure it carefully.
- Candied peel should be chopped small enough to eat in one bite.
- Let the brownies cool before adding zest garnish so it stays fresh-looking.
Variations on This Dish:
- Blood Orange Graveyard: Use blood orange zest if you want a sharper color note.
- Orange-Chocolate Ganache: Replace frosting with a thin chocolate-orange ganache.
- Citrus Trio Version: Add a little lemon zest along with the orange for a brighter finish.
Common Mistakes to Avoid with This Dish:
- Too much orange extract: It can taste chemical fast.
- Too much candied peel: The texture can overpower the brownie.
- Overfrosting: A heavy chocolate layer buries the citrus.
19. Toffee Pecan Graveyard Brownies
Intro:
Toffee and pecans give brownies a buttery crunch that feels especially good in a dessert tray full of soft sweets. The toffee melts slightly at the edges, the pecans stay crisp, and the dark brownie beneath keeps it all from getting too sweet. This one has a nice old-school candy-shop energy.
Why It Works:
Pecans toast beautifully in the oven and bring a warm, nutty flavor that pairs well with the chocolate base. Toffee bits add little caramelized snaps without needing a separate sauce. The texture is the main event here, which means the graveyard decorations can stay simple and still look complete.
Key Ingredients:
- 1 cup unsalted butter, melted
- 2 cups brown sugar, packed
- 4 large eggs
- 1 teaspoon vanilla extract
- 3/4 cup unsweetened cocoa powder
- 1 cup all-purpose flour
- 1/2 teaspoon salt
- 1 cup chopped pecans
- 1 cup toffee bits
- 1 cup chocolate frosting
- 1 cup cookie crumbs
- 12 tombstone cookies
Quick Steps:
- Preheat the oven to 350°F (175°C) and line the pan with parchment.
- Stir together the butter, brown sugar, eggs, vanilla, cocoa, flour, and salt.
- Fold in the pecans and toffee bits, then spread the batter into the pan.
- Bake for 29 to 33 minutes until the center is set and the edges are just firm.
- Cool completely, frost lightly, sprinkle crumbs, and add the tombstones.
Equipment for This Recipe:
- 9×13-inch pan
- Parchment paper
- Mixing bowl
- Spatula
- Knife for chopping nuts, if needed
How to Serve This Dish:
These are sturdy, so they cut well into neat rectangles. I’d serve them on a platter with a little extra toffee sprinkled around the edges, because the shine helps the tray look full. A cup of tea or coffee is a natural pairing if the dessert table needs a break from all the candy.
Pro Tips for This Recipe:
- Toast the pecans first for a deeper flavor.
- Use small toffee bits so you don’t get giant hard shards.
- Don’t frost too heavily; the nuts and toffee should stay visible.
- Let the pan cool fully before cutting, or the toffee can drag.
Variations on This Dish:
- Pecan Pie Graveyard: Add a drizzle of caramel for a pie-like finish.
- Salted Toffee Version: Sprinkle flaky salt over the frosting.
- Almond Toffee Swap: Replace pecans with chopped almonds for a lighter crunch.
Common Mistakes to Avoid with This Dish:
- Raw nuts: They taste flat and won’t give you the same aroma.
- Toffee bits burned on top: If your oven runs hot, check early.
- Heavy frosting under the crumbs: It makes the topping greasy.
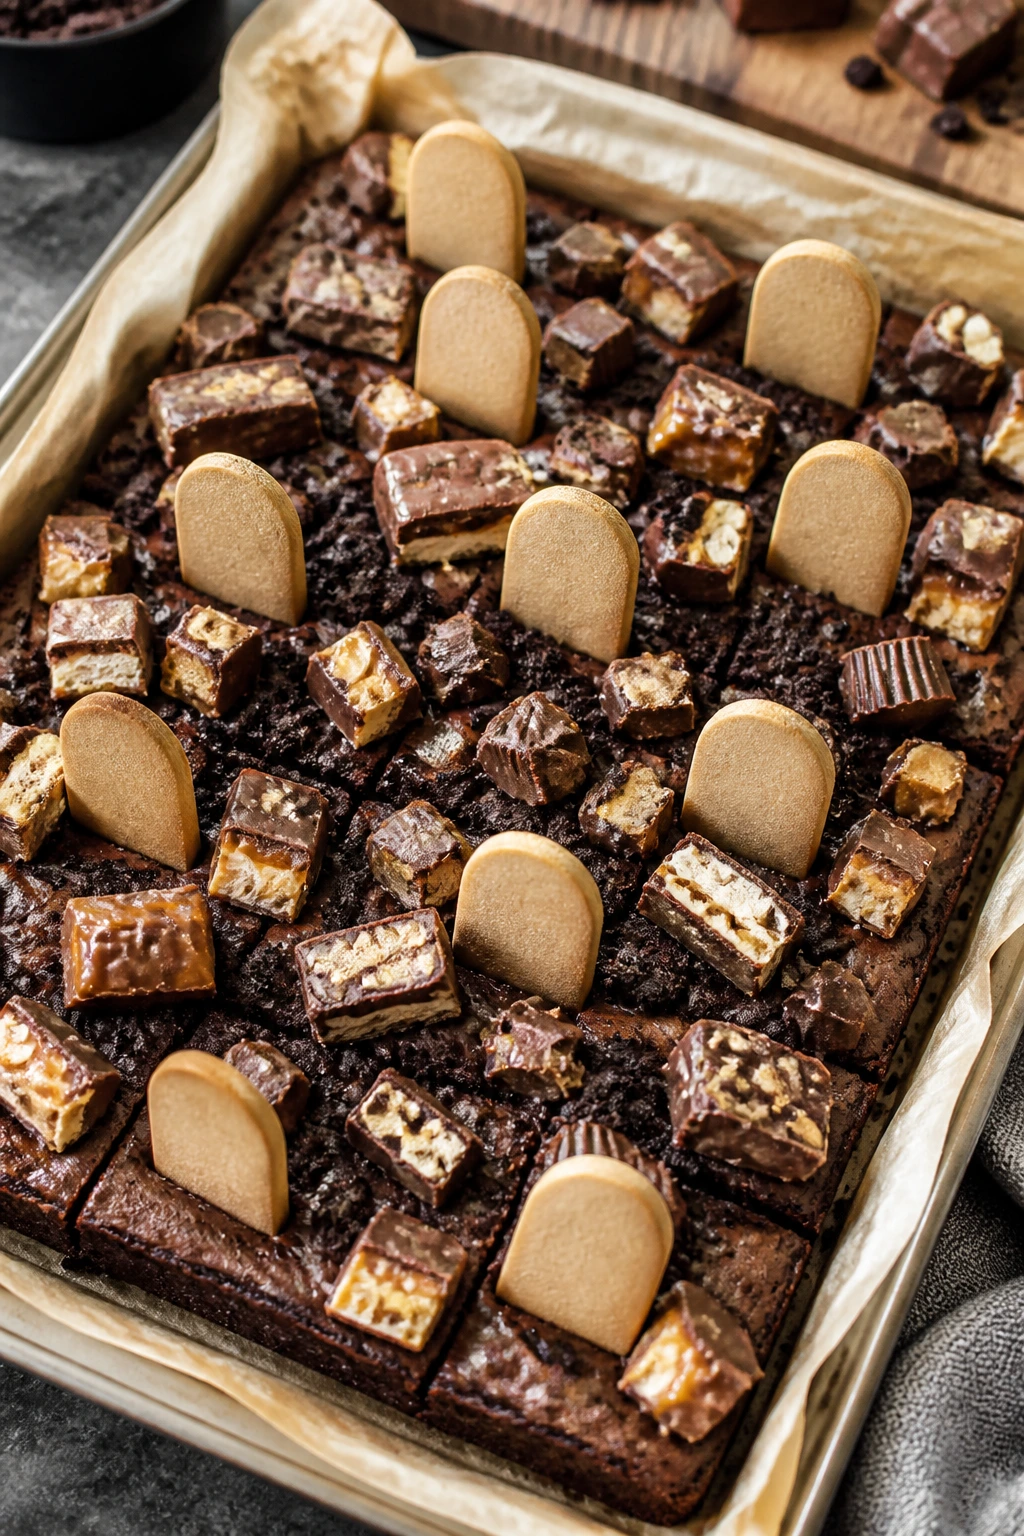
20. Candy Bar Overload Graveyard Brownies
Intro:
This is the pan for clearing out the Halloween stash without pretending otherwise. Snickers, Twix, Milky Way, peanut butter cups, caramel squares — anything chopped into little pieces can go in here, and the result is gloriously over the top. The graveyard decorations sit on a brownie that already feels like a candy bin in a good outfit.
Why It Works:
Candy bars add soft caramel, nougat, and crisp cookie bits all in one pan, which means every slice tastes different in a useful way. The brownie base keeps the sweetness from becoming reckless, and a layer of crumbs on top ties the whole thing back to the graveyard idea. This is the most casual version, but it is also the one people circle back to first.
Key Ingredients:
- 1 cup unsalted butter, melted
- 2 cups granulated sugar
- 4 large eggs
- 1 teaspoon vanilla extract
- 1 cup unsweetened cocoa powder
- 1 cup all-purpose flour
- 1/2 teaspoon salt
- 2 cups chopped assorted candy bars
- 1 cup chocolate frosting
- 1 cup chocolate cookie crumbs
- 12 tombstone cookies
- 6 candy pumpkins
Quick Steps:
- Preheat the oven to 350°F (175°C) and line the pan with parchment.
- Make the brownie batter and spread it into the pan.
- Scatter half the chopped candy bars over the surface and bake for 20 minutes.
- Remove the pan, add the remaining candy, then bake 8 to 10 minutes more until the center is set.
- Cool completely, frost, add cookie crumbs, and finish with tombstones and candy pumpkins.
Equipment for This Recipe:
- 9×13-inch pan
- Parchment paper
- Mixing bowl
- Sharp knife for chopping candy bars
- Offset spatula
How to Serve This Dish:
Cut these into smaller pieces than usual because the candy bars make each square heavy. A few random candy chunks on the serving plate make the pan look abundant instead of crowded. If you’re packing them for a party, chill them first so the chopped candy stays put.
Pro Tips for This Recipe:
- Chop the candy bars into bite-size pieces, not dust, so the texture stays interesting.
- Add some candy before baking and some after for a better mix of soft and intact pieces.
- Choose bars with caramel, nougat, or wafer for the best texture spread.
- Keep the frosting light so the candy still shows through.
Variations on This Dish:
- Peanut Butter Candy Graveyard: Use mostly peanut butter cups and chopped peanut bars.
- Caramel Crunch Version: Focus on caramel-filled bars and add pretzel crumbs.
- Cookie Bar Graveyard: Mix in chopped cookie bars for more crunch and less chew.
Common Mistakes to Avoid with This Dish:
- Too many candy bars: The brownies turn sticky and hard to cut.
- Adding all the candy at once: Some pieces melt away completely.
- Heavy frosting: It buries the best part, which is the candy mix.
Why Brownie Bases Make the Best Halloween Graveyards
Brownies work for graveyard desserts because they’re naturally stable. A cake layer tends to spring back and crumble, which is nice for birthdays and annoying for tombstones. Brownies sit flat, cut cleanly, and keep their shape under frosting, cookie crumbs, and candy decorations. That one detail changes everything.
The other advantage is visual. A dark chocolate surface makes white frosting, candy pumpkins, orange sprinkles, and cookie tombstones pop right away. You do not have to build a complicated scene for the idea to land. A few upright cookies, some crushed chocolate crumbs, and one or two bright candies are enough.
There’s also a practical side nobody talks about enough. Brownies are easy to make ahead, easy to chill, and easy to transport in a covered pan. If your dessert has to survive a car ride, a school event, or a buffet table with three forks and no serving order, brownies behave better than almost any cake-based Halloween treat I can think of.
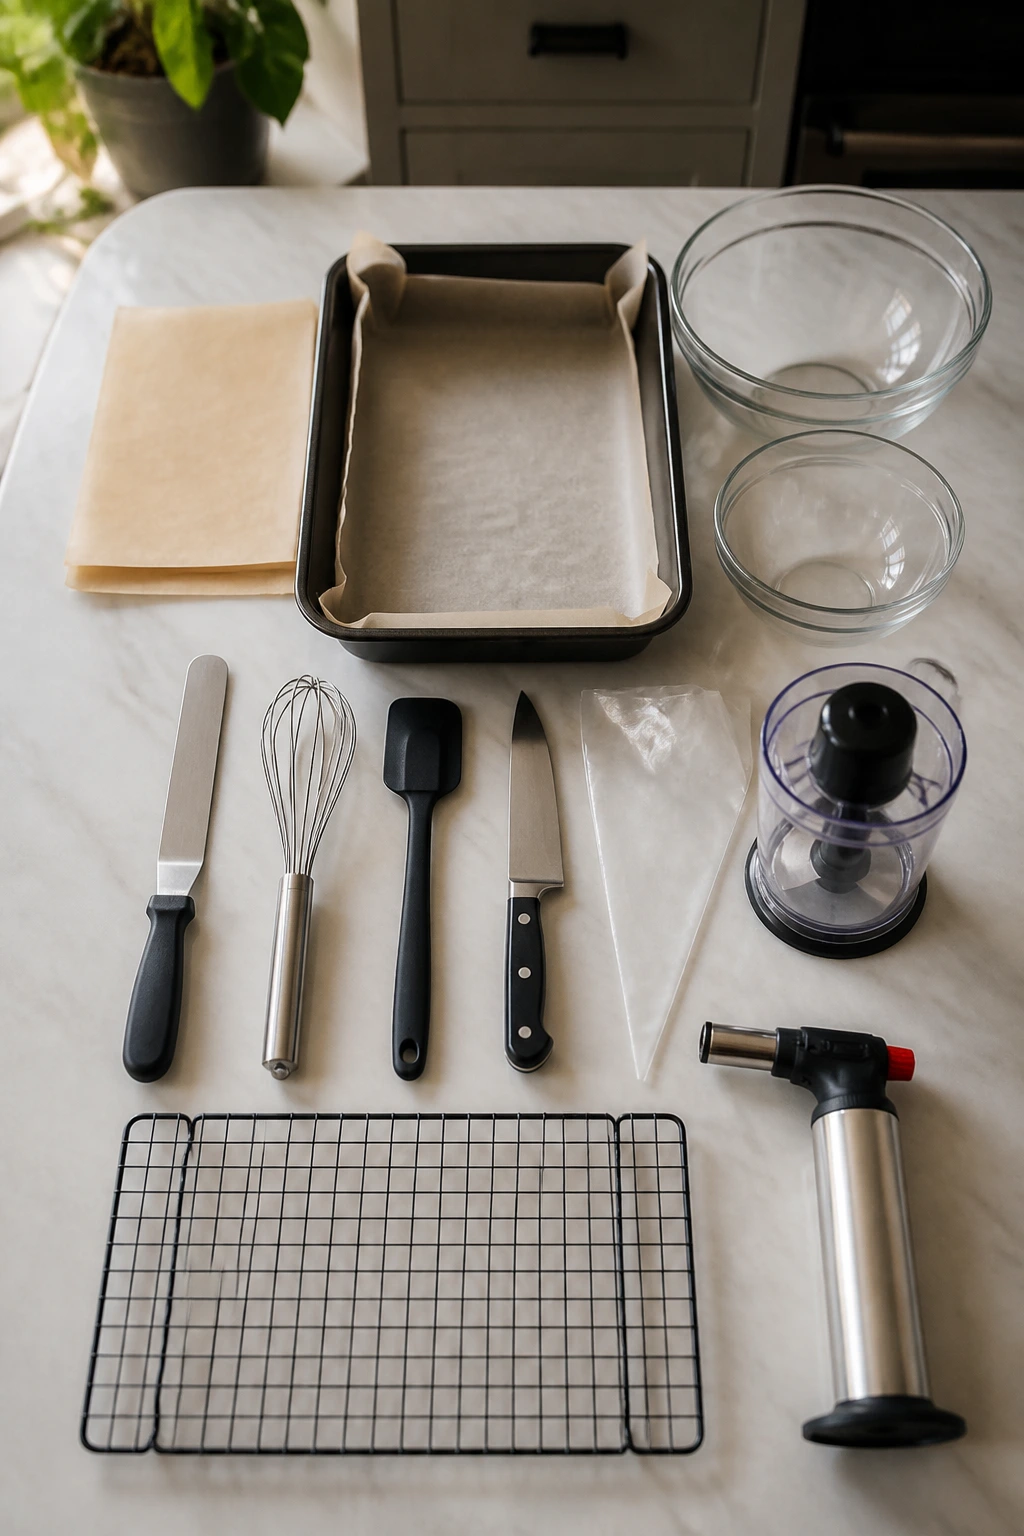
Essential Equipment for These Recipes
-
9×13-inch baking pans: The standard size for most of these graveyard brownies, with enough surface area for tombstones and crumbs.
-
Parchment paper: Leave a little overhang so you can lift the brownies out cleanly before decorating or slicing.
-
Mixing bowls: At least two sizes helps, especially for swirl batters and frosting.
-
Offset spatula: Useful for frosting the top without tearing a fudgy brownie surface.
-
Whisk and silicone spatula: The whisk handles the batter base; the spatula gets every last bit out of the bowl.
-
Sharp chef’s knife or serrated knife: A clean cut matters once the cookie tombstones and crumb topping are on.
-
Piping bag or zip-top bag: Snip the corner and you can write “RIP,” pipe ghosts, or add little frosting mounds.
-
Mini food processor or zip-top bag: Helpful for crushing cookies into dirt-like crumbs without making a mess everywhere.
-
Cooling rack: Brownies need air underneath if you want the bottom to cool evenly.
-
Kitchen torch, optional: Handy for toasting marshmallows on s’mores-style brownies, though a broiler works too if you watch it closely.
Smart Shopping and Ingredient Tips
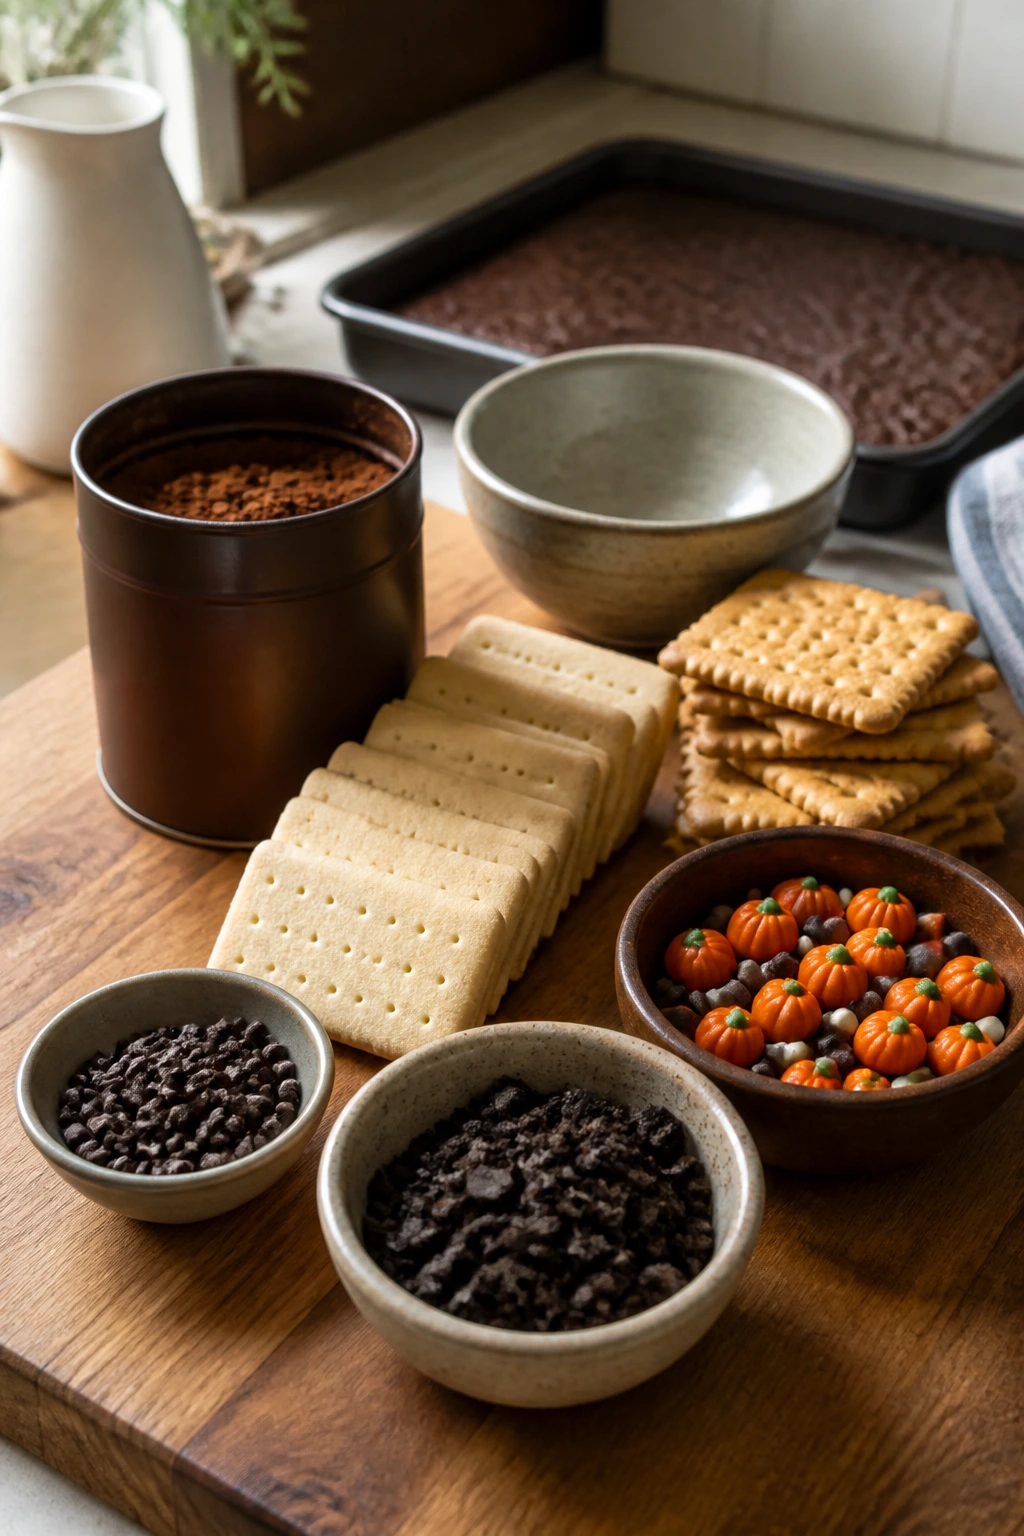
Chocolate brownies reward decent cocoa, but not expensive cocoa. What matters more is freshness and whether the cocoa tastes flat when you smell it. If the box has been sitting open for years, it’ll show in the brownies. Dutch-process cocoa gives a darker color and smoother flavor, while natural cocoa brings a brighter chocolate bite. Both work; pick one and stay consistent inside a single batch.
For the graveyard decorations, buy cookies that are crisp enough to stand upright. Milano cookies, thick graham crackers, and rectangular shortbread cookies hold up better than soft sandwich cookies. If you want clean tombstones, choose cookies that are dry on the outside and not too thin. The tombstone shape only needs to be tall enough to read. Nobody is measuring architectural accuracy here.
Oreos and similar sandwich cookies make better dirt than cocoa powder because they stay textured. Crush them in stages. A few larger crumbs are a good thing. If everything turns into dust, the top starts looking flat and muddy instead of like loose soil. That matters more than people expect.
Candy pumpkins, candy eyes, mini marshmallows, and chocolate chips should be bought with a blunt eye toward size. Small pieces sit better on a brownie surface. Oversized candy can look cute in the package and awkward on the pan. If you’re making multiple versions, choose a few decoration families and repeat them. A tray that looks coordinated beats one with every candy in the drawer thrown at it.
If you’re using boxed brownie mix, pick a fudgy style rather than a cakey one. You want a base that can be chilled and sliced without falling apart. That single choice will save you more trouble than any decorative trick later.
How to Serve These Recipes
Presentation:
Use a dark tray for the darker brownies and a white or pale tray for the versions with stronger decorations like white ghosts, green mint frosting, or bright orange pumpkin swirls. Keep the tombstones at different angles. A graveyard that looks a little uneven feels more believable than a perfectly lined-up row.
Accompaniments:
Cold milk is the easy answer, but strong coffee, hot cocoa, or even a scoop of vanilla ice cream works well depending on the brownie flavor. Mint brownies like plain milk. Espresso brownies want coffee. Pumpkin cheesecake brownies do well with whipped cream. S’mores brownies practically ask for ice cream.
Portions:
For a standard 9×13 pan, cut 12 large squares if you want dessert portions, or 16 smaller squares for buffet service. The candy bar and cheesecake versions are richer, so smaller cuts make sense. Brownie bites and mini muffin versions should be treated as one-bite servings with maybe two per person if the table is casual.
Beverage Pairing:
Coffee, milk, and dark hot chocolate cover most of the collection. If you want something a little sharper, black tea or chai handles the sweeter versions well. For the chocolate orange brownies, a strong cup of tea or espresso is the cleanest match.
Additional Tips and Flavor Boosters
Flavor Enhancement:
A pinch of espresso powder in the brownie batter deepens the chocolate without making the dessert taste like coffee. You only need 1 to 2 teaspoons for most pans. It’s a small move with a big payoff.
Customization:
If your crowd likes crunch, add chopped pretzels, toffee bits, or toasted nuts to the top layer rather than burying everything inside the batter. That way the texture stays visible and the graveyard “soil” still has a chance to sit on top.
Serving Suggestions:
Pipe frosting in short, uneven mounds before adding crumbs. That gives the “dirt” somewhere to cling, and it makes the tombstones look like they’re planted in small hills instead of floating on a flat sheet.
Make-It-Yours:
For dairy-free eaters, use vegan butter, dairy-free frosting, and vegan cookies. For gluten-free guests, choose a verified gluten-free cookie tombstone and a 1:1 flour blend. For less-sweet palates, cut back the frosting and lean on dark cocoa, espresso, or salted caramel instead.
Make-Ahead, Storage, and Reheating Guidance
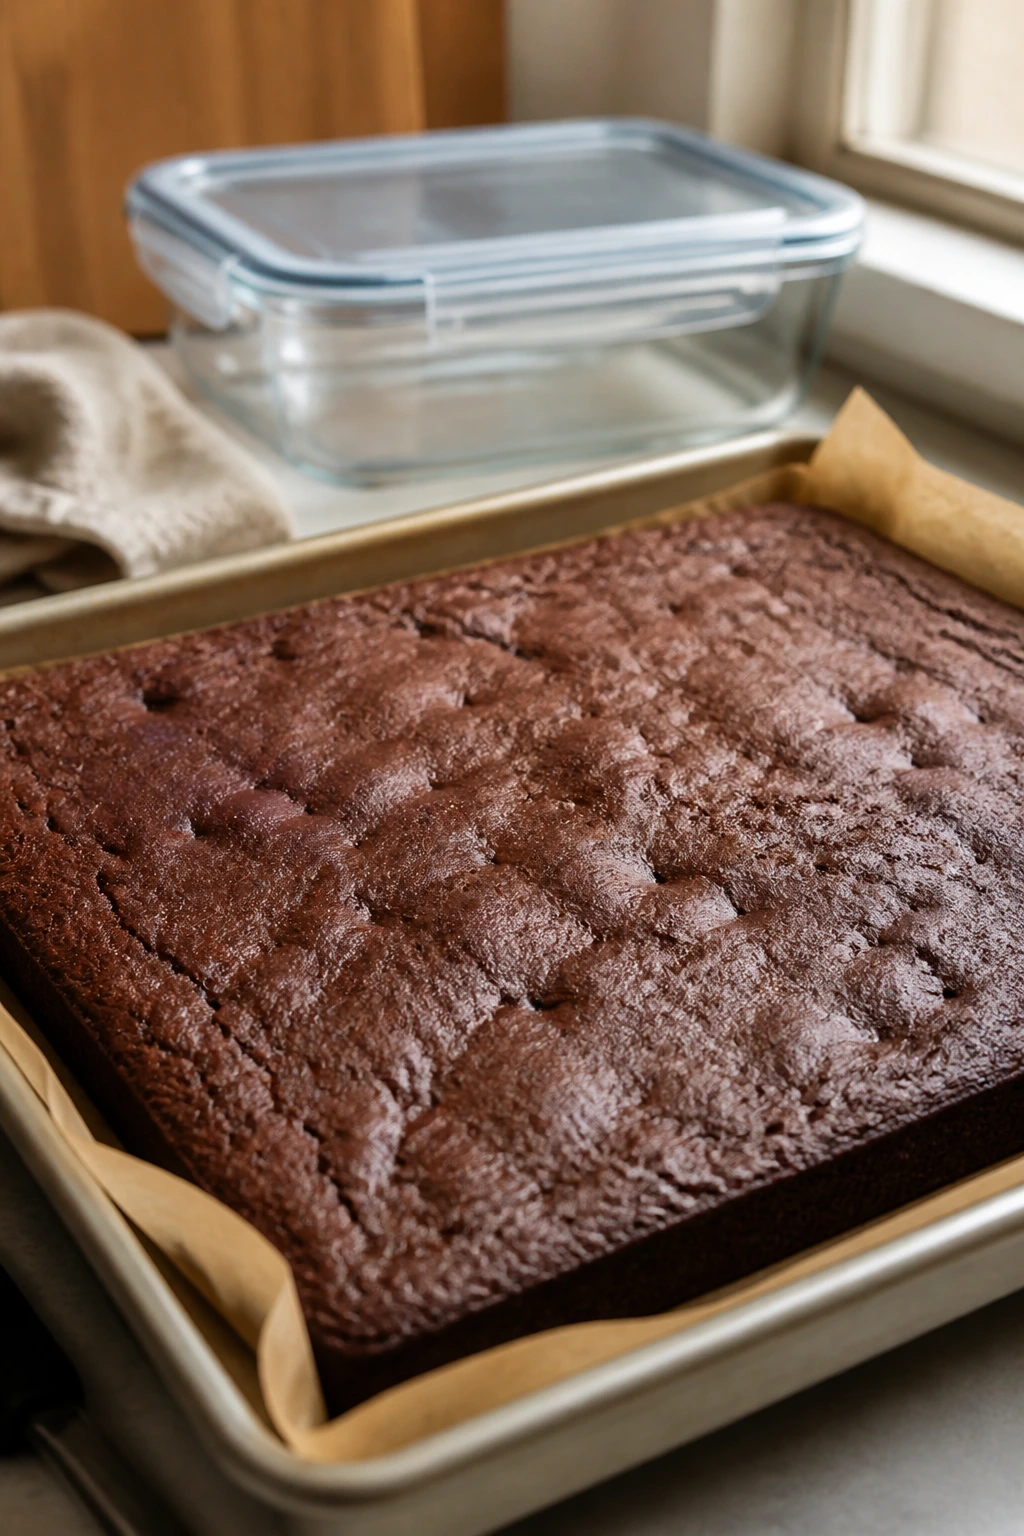
Plain brownie bases keep well, which is one of the reasons this dessert theme is so practical. Unfrosted brownies can sit covered at room temperature for 2 days without much trouble, especially if your kitchen is cool. Once decorated with frosting and cookie crumbs, I’d keep them at room temperature only if you’re serving them the same day or the next day. If the toppings include cream cheese frosting, marshmallows, or soft candy, move them to the refrigerator after a few hours.
Refrigerated graveyard brownies hold for 4 to 5 days in an airtight container. To keep the decorations from getting soggy, place parchment between layers and store any upright tombstones separately if they’re delicate. Cookie dirt softens over time, which is not a disaster, but the top looks better in the first 48 hours.
Most of these freeze well if you freeze the brownie base before final decoration. Wrap the plain baked slab tightly, then freeze for up to 2 months. Thaw it in the refrigerator overnight, decorate the next day, and slice after the frosting has set. If you freeze already decorated brownies, the crumbs and frosting can lose their texture once thawed, especially in the marshmallow and cheesecake versions.
Reheating is optional. Brownies like this are usually better at room temperature or slightly chilled. If you want a warm square, microwave an undecorated piece for 8 to 10 seconds. Once frosting and cookie tombstones are on top, skip the heat unless you like collapsed decorations. I don’t.
Variations and Adaptations to Try
Box-Mix Shortcut Graveyards:
Use your favorite fudgy boxed brownie mix when time is short, then put the energy into the tombstones, crumbs, and candy. A mix made from oil and eggs usually holds decorations well once cooled. It’s the cleanest shortcut in the whole set.
Dairy-Free Graveyard Platter:
Swap in vegan butter, dairy-free frosting, and dairy-free chocolate chips. Use crisp cookies that contain no milk ingredients, and the whole tray still looks polished. This is one of those situations where the decorations do most of the visual work anyway.
Gluten-Free Dirt Plot:
Choose a 1:1 gluten-free brownie base and gluten-free cookies for the tombstones and crumbs. Brownies are one of the easier desserts to adapt this way because the cocoa and sugar hide a lot of structural differences. Just chill before slicing so the pieces stay clean.
Less-Sweet Dark Chocolate Version:
Use Dutch-process cocoa, cut the sugar slightly, and lean on espresso powder or flaky salt for depth. Dark cookie crumbs and plain tombstones keep the tray from feeling sugary on sugary. This is the one I’d make for adults who still want Halloween fun but not a sugar rush.
Mini Party Squares:
Bake the brownies in a smaller pan or cut them into narrow strips before decorating. Tiny pieces are easier for buffets, and each one can get its own little grave marker without crowding. It also solves the “who gets the corner piece?” problem fast.
Mixed-Graveyard Tray:
Make two brownie flavors in one afternoon — say classic and peanut butter, or mint and espresso — and decorate them with the same crumb-and-tombstone language. The tray looks more abundant without requiring a completely new decorating plan. That’s the kind of shortcut I can live with.
Common Mistakes to Avoid with Graveyard Brownies
The biggest mistake is decorating before the brownie has cooled. Warm brownies melt frosting, collapse cookie tombstones, and turn crumbs into paste. If the pan still feels even a little warm against the back of your hand, wait.
Another common problem is using decorations that are too soft. Marshmallow ghosts, sandwich-cookie tombstones, and candy pieces all behave differently, and some of them need support. Crisp cookies stand up better than soft ones, and upright decorations need a slightly tacky frosting base to cling to.
People also bury the top in too much frosting. A thick blanket hides the brownie itself and makes the whole thing look heavy instead of textured. You only need enough frosting to anchor the crumbs and give the decorations a landing spot. Thin, uneven coverage usually looks better than a perfect sheet.
Overbaking is a sneaky one. Dry brownies crack when cut and make tombstones wobble because the surface is too hard. Pull them when the center still has a slight softness. They finish setting as they cool.
Finally, don’t crush the cookie dirt into powder unless you want the top to look dusty. A mix of fine crumbs and small chunks reads like soil. That texture is what sells the graveyard idea. It’s also what keeps the whole pan from looking like a chocolate avalanche.
Frequently Asked Questions
Can I use boxed brownie mix for graveyard brownies?
Yes, and it’s a smart shortcut if your goal is the decoration rather than the batter. Pick a fudgy mix, not a cakey one, and bake it in a 9×13-inch pan so the top stays flat enough for tombstones and crumbs.
What cookies make the best tombstones?
Milano cookies, rectangular shortbread cookies, and thick graham crackers are the easiest choices. You want something crisp and tall enough to stand without sagging once it’s pushed into frosting or a soft brownie top.
How do I keep the cookie crumbs from getting soggy?
Add them after the brownies are fully cool and the frosting is on. If you’re making the tray a day ahead, store extra crumbs separately and sprinkle them on shortly before serving for the best texture.
Can I make these brownies ahead of time?
Yes. Bake the brownie base a day ahead, cool it completely, and decorate it later. If your toppings are fragile, it’s even better to keep the crumbs and tombstones separate until a few hours before serving.
What if my tombstones keep falling over?
Cut a tiny slit in the brownie surface with a paring knife before inserting the cookie. You can also chill the frosted pan for 15 to 20 minutes so the top firms up enough to hold the decoration.
How do I make the brownies less sweet without ruining the Halloween look?
Use dark cocoa, reduce the frosting layer, and lean on salt, espresso powder, or chocolate cookie crumbs instead of extra candy. You’ll still get the graveyard effect without the whole pan tasting like pure sugar.
Can I freeze graveyard brownies?
Freeze the brownie base before decorating whenever possible. Once frostings, crumbs, and cookie tombstones are on top, freezing and thawing can make the decorations soft or blotchy.
What should I do if the brownies are too soft to slice neatly?
Chill the pan for 30 minutes, then cut with a sharp knife wiped clean between slices. If they’re still too soft, the brownies were probably underbaked by a few minutes, which is easy to fix next time by waiting until the center is set and the edges pull away just slightly.
How do I keep marshmallow or ganache toppings from turning messy?
Let them cool and set before adding crumbs or tombstones. Marshmallow toppings should be toasted briefly and then left alone, while ganache needs to firm up a little so the decorations don’t sink into it.
A Tray Worth Digging Into
There’s a reason graveyard brownies keep showing up on Halloween dessert tables: they’re sturdy, flexible, and forgiving in a way most themed sweets are not. You can make them dark and fudgy, sharp with espresso, bright with orange, heavy with candy, or soft with cheesecake, and the basic structure still holds. That makes them useful, not just cute.
I also like that they invite a little chaos. A crooked tombstone. A worm escaping the crumb layer. A splash of frosting that isn’t perfectly even. Those tiny imperfections make the pan look alive in the one place a graveyard dessert should be alive: the top.
So pick a flavor lane, bake the slab, and decorate with a steady hand and a slightly messy eye. The brownies do the hard work. The tombstones just get the credit.