
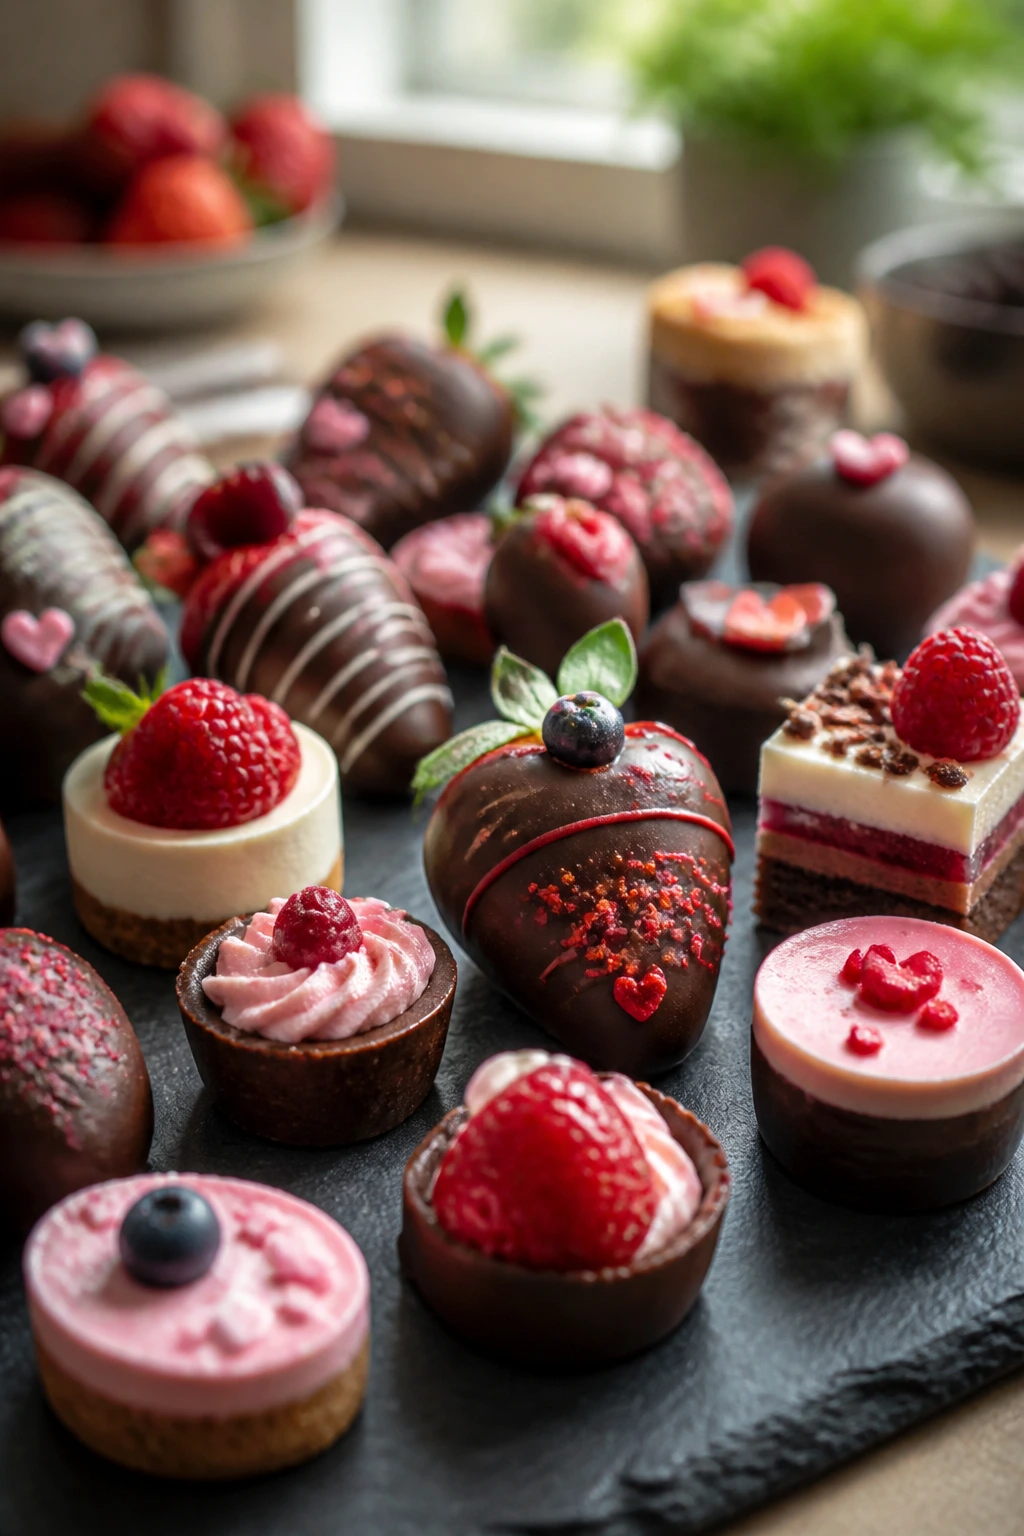
A bowl of strawberries can look plain right up until you give them a glossy chocolate shell and a few bright, sharp details. That same trick shows up again and again in Valentines desserts: small portions, clear color contrast, a clean cut, and one crisp or creamy element that makes the whole thing feel intentional.
The nice part is that none of these recipes asks for pastry-school patience. Puff pastry does half the work. Jam becomes a glaze. Whipped cream turns a few berries into something that looks plated instead of piled. Even the baked desserts here lean on shortcuts that make sense in a real kitchen, where the oven is already warming and the clock is not being generous.
Quick Valentine’s sweets need to do two jobs at once. They have to taste good, obviously. But they also need to look like you paid attention — a heart-shaped edge, a pink drizzle, a dusting of powdered sugar, a neat row of berries cut clean and glossy. That’s where these recipes shine. Small moves. Big visual payoff.
Why You’ll Love This Collection
- Fast enough for a busy evening: Most of these desserts are built around shortcuts like puff pastry, cake mix, phyllo shells, or no-bake fillings, so the active work stays short.
- Pretty without extra fuss: Strawberries, raspberries, cherries, white chocolate, and powdered sugar do most of the decorating work for you.
- Easy to scale up or down: A tray of truffles can feed a party, while a single skillet cobbler or two ramekins of lava cake works for a quiet night in.
- Mix-and-match friendly: If you’ve got berries, chocolate, cream cheese, or a box of brownie mix, you’re already close to one of these desserts.
- A nice balance of textures: Crisp pastry, soft mousse, chewy brownies, cool cream, and snappy chocolate keep the desserts from feeling one-note.
- Useful beyond Valentine’s Day: Most of these desserts work just as well for birthdays, anniversaries, dinner parties, or any night you want something a little special without making a full production of it.
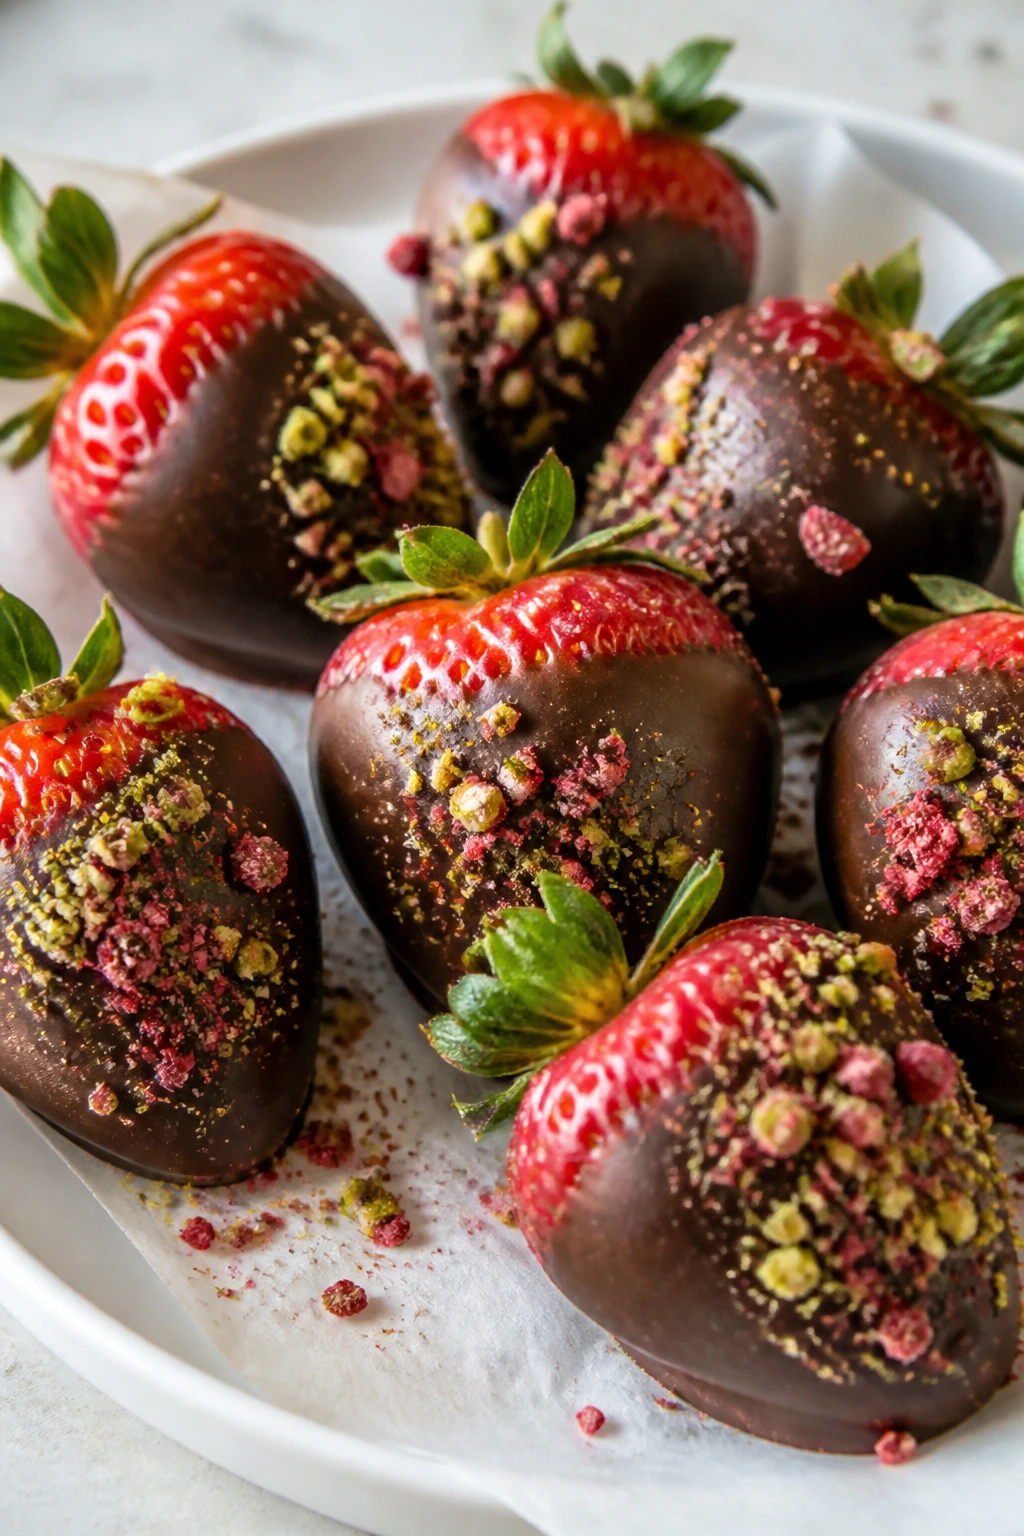
1. Chocolate-Dipped Strawberries with Pistachio Dust
A tray of strawberries can look ordinary for about five minutes. Then the chocolate sets, the sheen turns glossy, and the whole thing suddenly feels like it belongs on a dessert platter instead of in a fruit bowl.
This version keeps the classic shape but gives it a little texture from chopped pistachios and freeze-dried strawberries. The berries stay juicy under the shell, the chocolate snaps when you bite in, and the whole thing looks neat enough to line up on a white plate.
Why It Works:
Chocolate-dipped strawberries are fast because the fruit does the decorating and the chocolate does the finishing. A thin shell sets in about 15 minutes in the fridge, which means you get a polished result without baking. The pistachios add color and a little salt, which keeps the sweetness from feeling flat.
Key Ingredients:
- 1 lb fresh strawberries with stems attached
- 8 oz semisweet chocolate, chopped
- 4 oz white chocolate, chopped
- 1 tsp coconut oil, optional for smoother dipping
- 2 tbsp chopped pistachios
- 1 tbsp freeze-dried strawberries, crushed
- Pinch of flaky sea salt
Quick Steps:
- Line a baking sheet with parchment paper and make sure the strawberries are completely dry.
- Melt the semisweet chocolate in a microwave-safe bowl in 20-second bursts, stirring between each round until smooth.
- Dip each strawberry halfway into the chocolate, let the excess drip off, and set it on the tray.
- Drizzle the white chocolate over the dipped berries, then scatter on pistachios, freeze-dried strawberries, and a tiny pinch of salt.
- Chill for 15 minutes, just until the chocolate sets.
Equipment for This Recipe:
- Baking sheet
- Parchment paper
- Microwave-safe bowl or double boiler
- Small spoon or fork
- Sharp paring knife, for trimming stems if needed
How to Serve This Dish:
Pile them on a chilled platter or tuck each berry into a mini cupcake liner. They look cleanest when served the same day, especially if you want the chocolate shell to stay crisp.
Pro Tips for This Recipe:
- Dry the berries one by one after washing; even a little moisture can make the chocolate seize or slide.
- Use chopped bar chocolate instead of chocolate chips if you want a smoother coat.
- Add the toppings while the chocolate is still wet — wait too long and they won’t stick.
- If your kitchen runs warm, chill the tray for 10 minutes first so the shells set faster.
Variations on This Dish:
- Ruby-Streaked Strawberries: Swap the semisweet chocolate for ruby chocolate if you want a pinker finish and a tangier bite.
- Dark Salted Finish: Skip the white chocolate drizzle and finish with flaky salt only; the berries taste sharper that way.
- Nut-Free Shine: Leave off the pistachios and use crushed freeze-dried raspberries for color instead.
Common Mistakes to Avoid with This Dish:
- Wet berries: They cause the chocolate to slide or bloom. Dry them until the skin feels completely matte.
- Overheated chocolate: If it looks thick or grainy, stop heating and stir in a teaspoon of coconut oil.
- Waiting too long for toppings: The shell firms up fast, so decorate immediately after dipping.
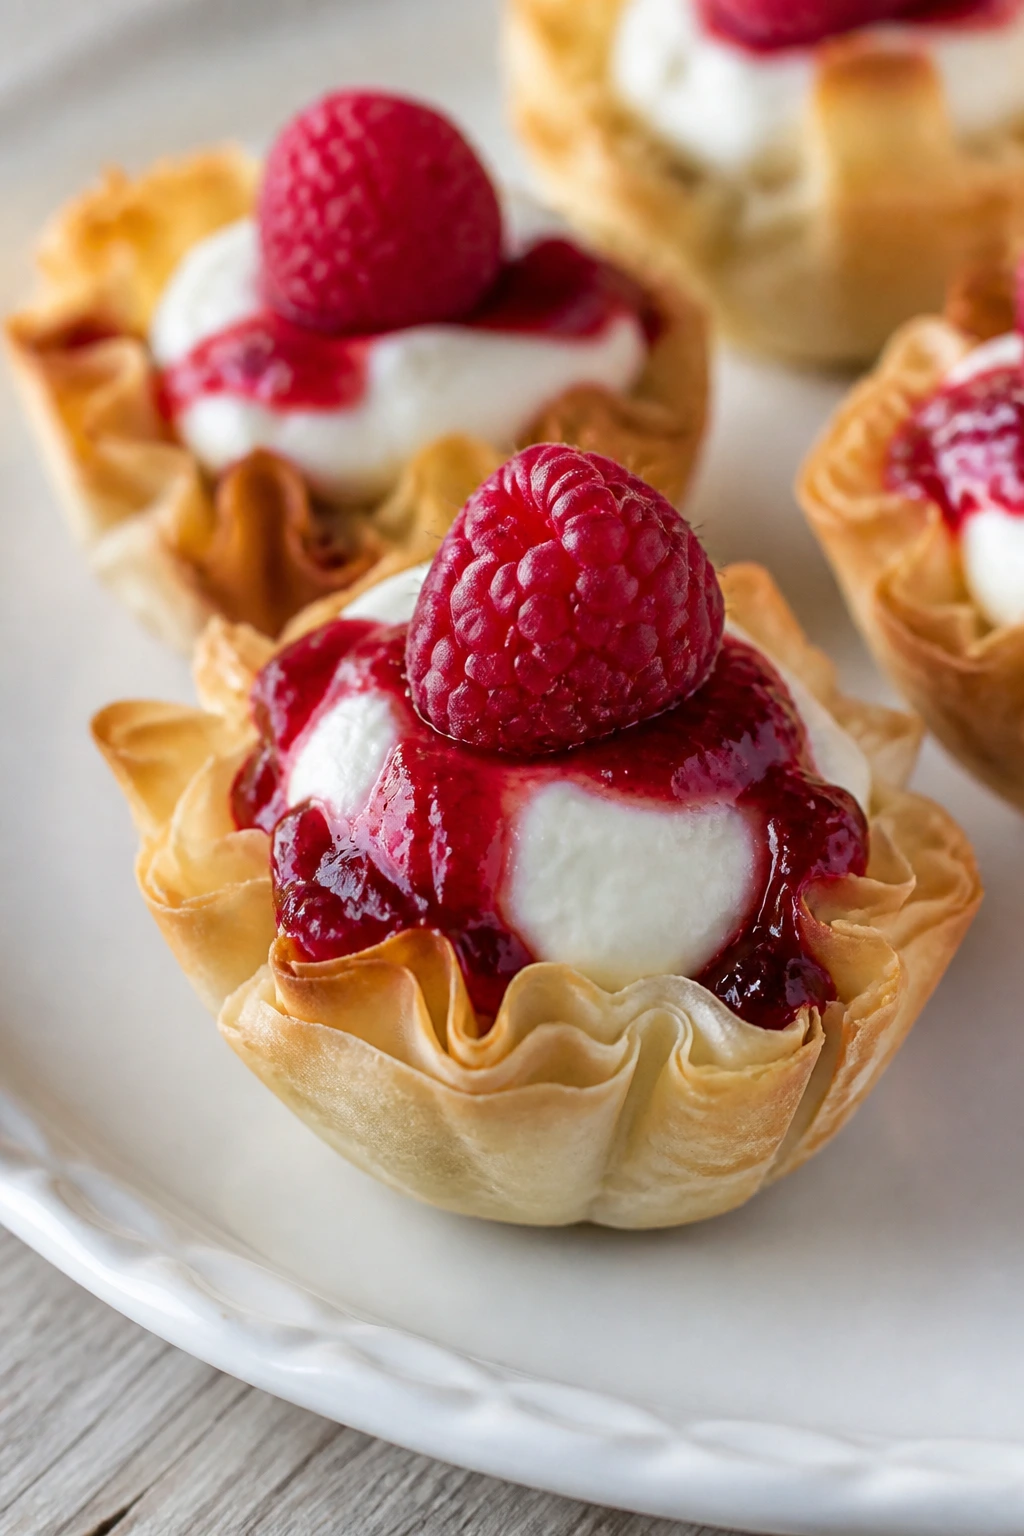
2. Raspberry Cheesecake Phyllo Cups
These little cups have the kind of finish that makes people assume you spent an hour on them. You didn’t. The phyllo shells stay crisp, the cheesecake filling is cool and tangy, and the raspberry jam adds a bright little punch on top.
The best part is the contrast. Crunchy shell, soft cream, sticky berry glaze. That’s all the dessert really needs.
Why It Works:
Store-bought mini phyllo shells bake in minutes and hold their shape well enough for a creamy filling. The cheesecake mixture sets up in the fridge, so you can make the filling first and assemble just before serving. A spoonful of jam gives each cup a polished top without needing a complicated glaze.
Key Ingredients:
- 15 mini phyllo shells
- 8 oz cream cheese, softened
- 1/4 cup powdered sugar
- 1 tsp vanilla extract
- 1 tsp lemon zest
- 2 tbsp heavy cream
- 1/3 cup seedless raspberry jam
- 1 cup fresh raspberries
- 2 tbsp chopped toasted almonds, optional
Quick Steps:
- Bake the phyllo shells according to the package directions if they need crisping, then cool them completely.
- Beat the cream cheese, powdered sugar, vanilla, lemon zest, and heavy cream until smooth and fluffy.
- Spoon or pipe the filling into the shells.
- Top each cup with a small spoonful of raspberry jam, one fresh raspberry, and a few almonds if you like.
- Chill for 20 minutes, or serve right away if you prefer a softer center.
Equipment for This Recipe:
- Hand mixer
- Mixing bowl
- Teaspoon or piping bag
- Baking sheet
- Small offset spatula or butter knife
How to Serve This Dish:
Set the cups on a narrow platter so they don’t wobble around. They pair well with coffee after dinner, and they look especially neat when the raspberries are all about the same size.
Pro Tips for This Recipe:
- Soften the cream cheese fully; cold cream cheese leaves little white lumps in the filling.
- Use seedless jam if you want the top to look smooth and shiny.
- Fill the cups just before serving if you want the shells at their crispiest.
- A tiny pinch of salt in the filling sharpens the cream cheese flavor.
Variations on This Dish:
- Strawberry Swirl Cups: Replace the raspberry jam with strawberry preserves and top with a thin slice of strawberry.
- Lemon-Raspberry Cups: Add 1/2 teaspoon lemon juice for a brighter, sharper filling.
- Chocolate Rim Cups: Brush the inside of each shell with melted chocolate and let it set before filling.
Common Mistakes to Avoid with This Dish:
- Overfilling the cups: The filling can spill when you move the tray. Stop just below the rim.
- Adding jam too early: Jam can soak into the filling if it sits for hours. Spoon it on close to serving.
- Skipping the chill: A short chill helps the filling firm up and makes the cups easier to pick up.
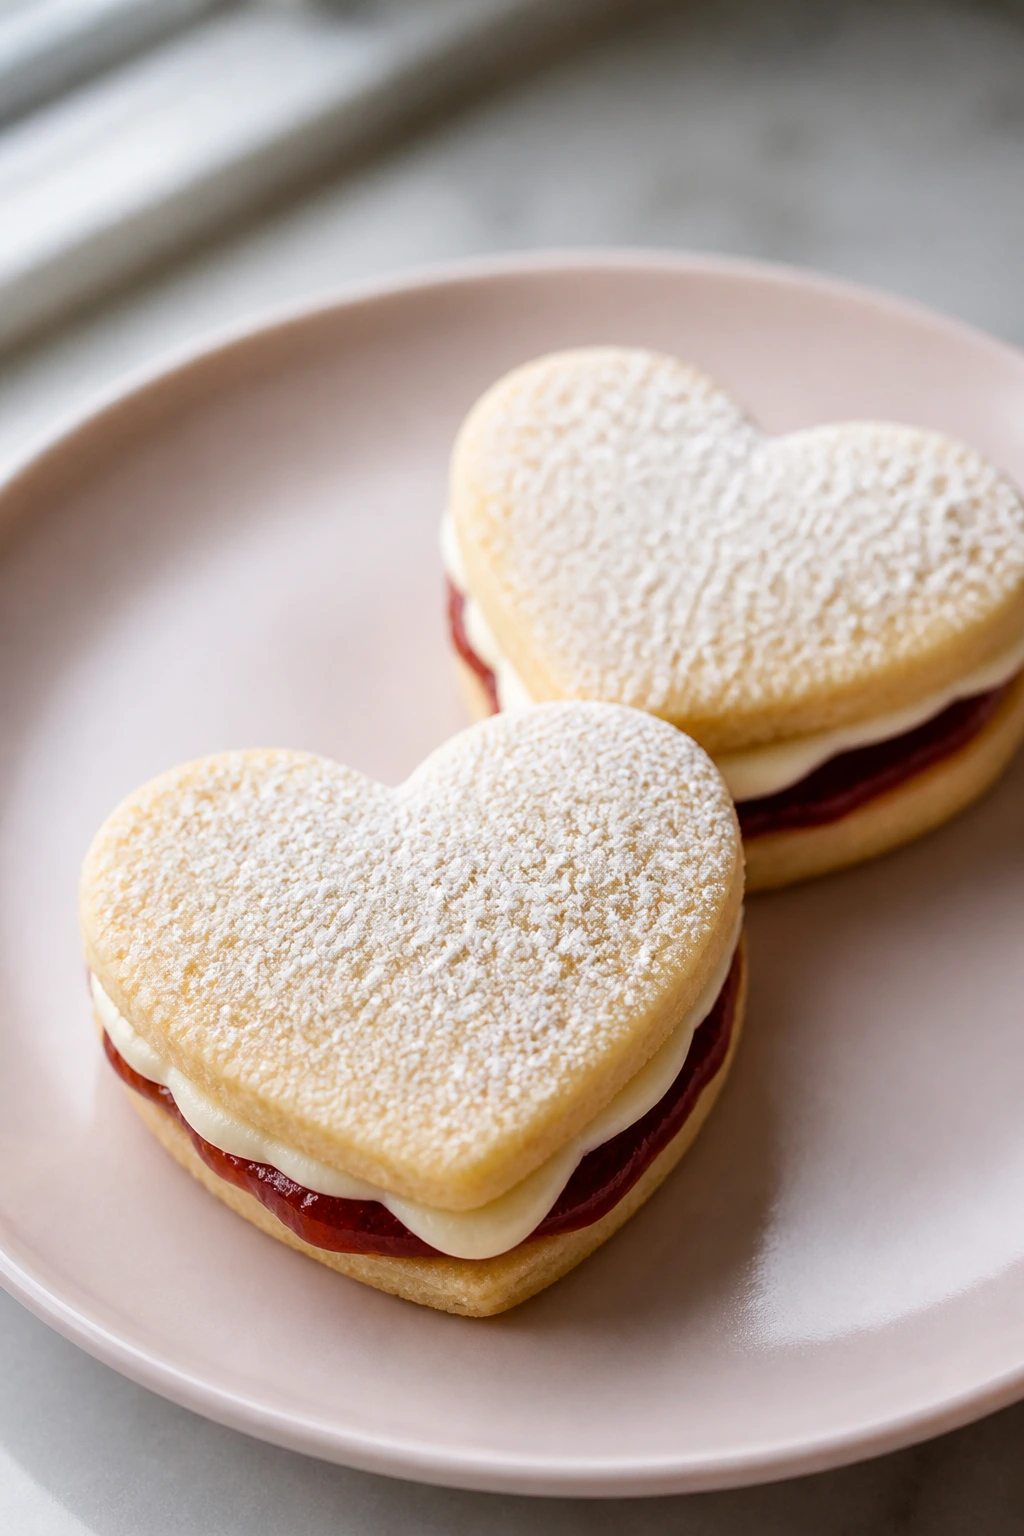
3. Heart-Shaped Sugar Cookie Sandwiches
These cookies look like something from a bakery case, but the trick is mostly in the cutter and the filling. Once you sandwich two tender cookies with jam and cream cheese frosting, the edges become the whole show.
They’re sweet without being heavy, and the center stays soft enough that the bite breaks cleanly instead of crumbling all over the plate. That matters. Nobody wants to chase cookie shards around a dessert napkin.
Why It Works:
Refrigerated sugar cookie dough keeps the process fast and gives you a predictable bake. The jam adds flavor and color, while the cream cheese frosting keeps the sandwich from tasting dry. A dusting of powdered sugar makes the tops look finished in about ten seconds.
Key Ingredients:
- 16 oz refrigerated sugar cookie dough
- 2 tbsp all-purpose flour, for rolling
- 1/2 cup strawberry jam
- 4 oz cream cheese, softened
- 1 cup powdered sugar
- 1 tsp vanilla extract
- 1 tbsp milk, if needed for thinning
- Powdered sugar, for dusting
Quick Steps:
- Heat the oven to 350°F (175°C) and line two baking sheets with parchment.
- Roll the dough on a lightly floured surface and cut out heart shapes with a 2- to 3-inch cutter.
- Bake for 8 to 10 minutes, until the edges are just turning pale gold, then cool completely.
- Beat the cream cheese, powdered sugar, and vanilla until smooth; thin with a little milk if it feels too stiff.
- Spread jam on half the cookies, pipe or spread cream cheese frosting on the other half, and sandwich them together.
Equipment for This Recipe:
- Baking sheets
- Parchment paper
- Rolling pin
- Heart-shaped cookie cutter
- Mixing bowl and spoon or mixer
How to Serve This Dish:
Serve these at room temperature so the filling stays soft. They’re nice stacked in a shallow box or arranged in a fan shape on a platter with a little powdered sugar dusted over the top.
Pro Tips for This Recipe:
- Chill the cut cookies for 10 minutes before baking if the dough gets sticky.
- Bake one sheet at a time for the most even color.
- Let the cookies cool all the way down before filling them or the frosting will melt.
- Use a thick jam; runny jam makes the sandwiches slip.
Variations on This Dish:
- Raspberry Ribbon Sandwiches: Swap the strawberry jam for raspberry preserves and add a little lemon zest to the frosting.
- Chocolate-Filled Hearts: Replace the jam with a thin layer of chocolate ganache for a richer, darker cookie.
- Almond-Scented Version: Add 1/2 teaspoon almond extract to the frosting for a bakery-style edge.
Common Mistakes to Avoid with This Dish:
- Warm cookies: They soften the filling and flatten the sandwich. Wait until the cookies are fully cool.
- Too much jam: It squishes out the sides. Use a thin, even layer.
- Overbaking: Sugar cookies dry out fast. Pull them when the edges are barely golden.
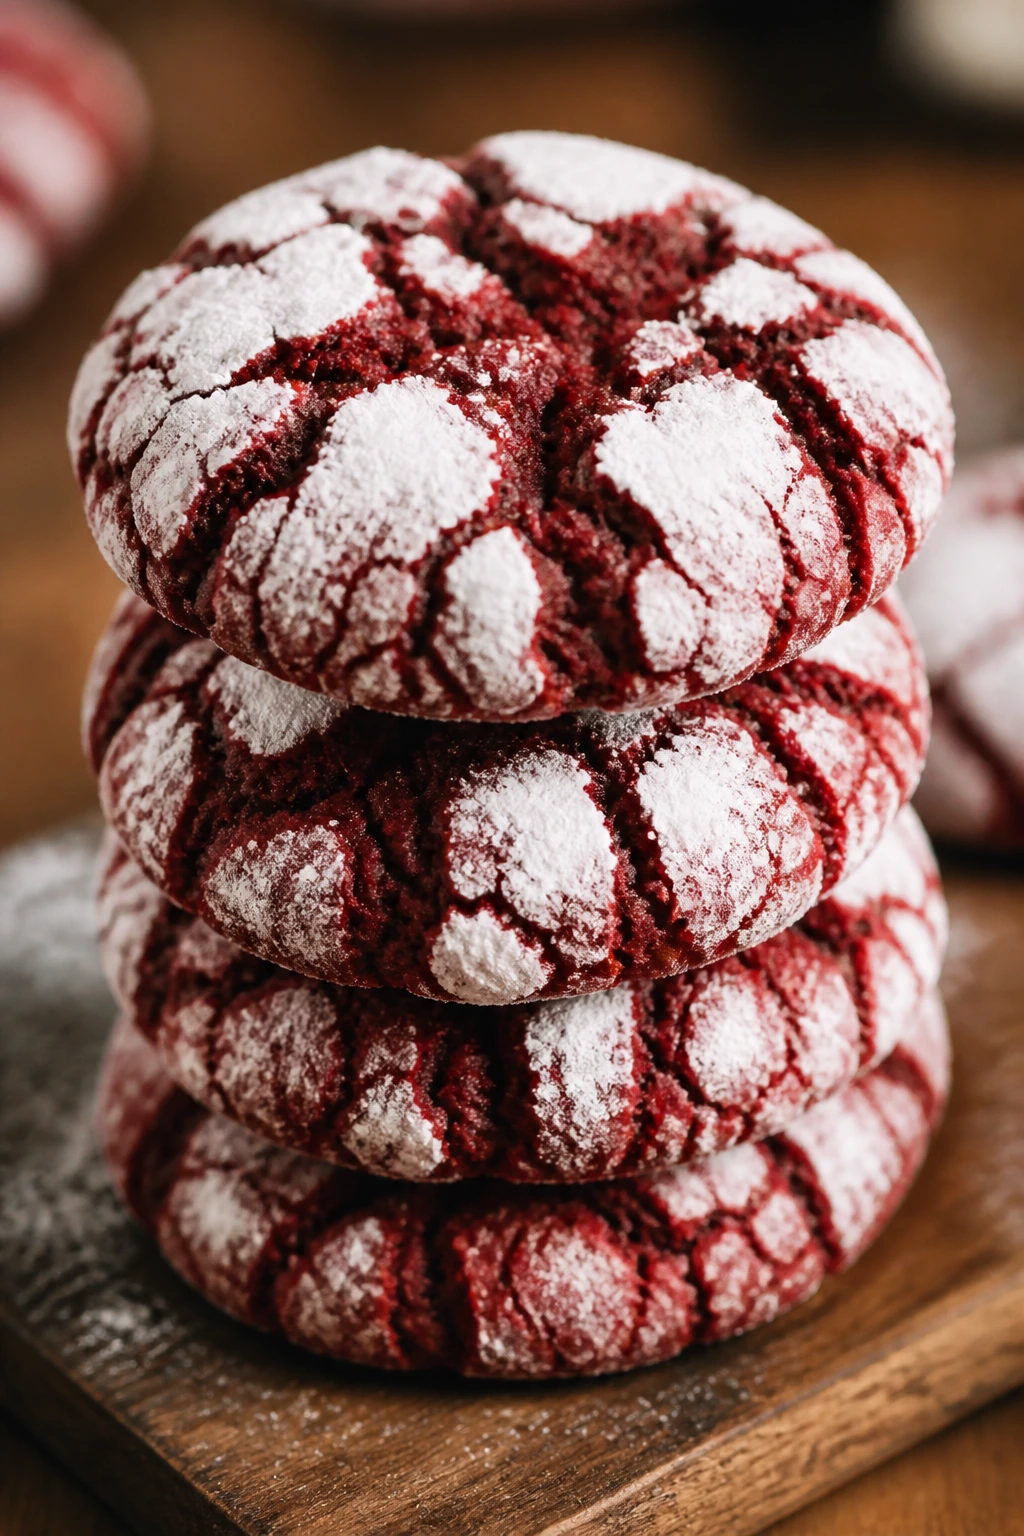
4. Red Velvet Crinkle Cookies
These are the kind of cookies that look fussy and then disappear in two bites. The crackled powdered sugar top gives them the classic crinkle look, while the red velvet base stays soft and faintly cocoa-rich in the middle.
They feel festive without needing frosting. That alone is a small victory.
Why It Works:
Cake mix makes the dough fast and dependable, and the oil keeps the texture tender. Chilling the dough for 15 minutes makes it easier to roll and helps the powdered sugar cling instead of dissolving into the surface. White chocolate chips add little creamy pockets that soften the cocoa edge.
Key Ingredients:
- 1 box red velvet cake mix, about 15.25 oz
- 2 large eggs
- 1/2 cup vegetable oil
- 1 tsp vanilla extract
- 1/2 cup white chocolate chips
- 1 cup powdered sugar
Quick Steps:
- Heat the oven to 350°F (175°C) and line a baking sheet with parchment.
- Mix the cake mix, eggs, oil, vanilla, and white chocolate chips until a thick dough forms.
- Chill the dough for 15 minutes, then scoop into 1-inch balls and roll each one in powdered sugar.
- Bake for 9 to 11 minutes, until the tops are crackled and the centers still look a little soft.
- Cool on the pan for 5 minutes before moving them to a rack.
Equipment for This Recipe:
- Mixing bowl
- Cookie scoop or spoon
- Baking sheet
- Parchment paper
- Cooling rack
How to Serve This Dish:
Stack them on a plate with a few extra white chocolate chips scattered nearby. They’re best once the tops have set but the centers are still soft.
Pro Tips for This Recipe:
- Chill the dough; otherwise the balls spread before the crinkles form.
- Roll generously in powdered sugar so the contrast stays sharp after baking.
- Pull them while they still look slightly underdone in the center.
- If the dough feels sticky, oil your hands lightly before shaping.
Variations on This Dish:
- Peppermint Crinkles: Add 1/4 teaspoon peppermint extract and skip the white chocolate chips.
- Berry-Red Crinkles: Stir in 1/4 cup freeze-dried raspberry powder for a sharper fruit note.
- Extra Chocolate Version: Fold in 1/3 cup mini semisweet chips instead of white chocolate.
Common Mistakes to Avoid with This Dish:
- Skipping the chill: The cookies can spread into flat puddles.
- Undercoating with sugar: You want a heavy coat for the crackled look.
- Overbaking: The centers should stay soft, or you lose the fudgy bite.
5. No-Bake Strawberry Cheesecake Parfaits
These are the desserts you make when you want layers, color, and a fork-ready finish without turning on the oven. The graham crumbs stay sandy and buttery, the filling tastes like chilled cheesecake, and the strawberries give you a bright red stripe through the glass.
They also look smarter than they are. Glass does a lot of the work here.
Why It Works:
No-bake cheesecake filling sets up quickly in the fridge, especially when cream cheese is beaten until completely smooth. The crumb layer provides structure at the bottom, which keeps the parfait from turning into a soft blur. Fresh berries add texture and keep each spoonful from feeling too rich.
Key Ingredients:
- 1 1/2 cups graham cracker crumbs
- 4 tbsp unsalted butter, melted
- 8 oz cream cheese, softened
- 1/3 cup powdered sugar
- 1 tsp vanilla extract
- 1 cup heavy cream, whipped to soft peaks
- 2 cups strawberries, diced
- 1 tbsp sugar
- 1 tsp lemon juice
Quick Steps:
- Stir the graham crumbs with the melted butter until the texture feels like wet sand.
- Beat the cream cheese, powdered sugar, and vanilla until smooth, then fold in the whipped cream.
- Toss the diced strawberries with sugar and lemon juice.
- Layer crumbs, cheesecake filling, and strawberries in small glasses, repeating once if the glass allows.
- Chill for 30 minutes before serving.
Equipment for This Recipe:
- Mixing bowls
- Hand mixer
- Small glasses or jars
- Spoon
- Rubber spatula
How to Serve This Dish:
Serve with narrow spoons so each bite gets all three layers. The glasses look nicest when the top layer is clean and the berries are cut into small, even pieces.
Pro Tips for This Recipe:
- Beat the cream cheese until it is completely smooth before adding anything else.
- Keep the whipped cream at soft peaks; stiff cream can turn grainy when folded.
- Make the strawberry layer just before assembling so it stays bright.
- Use clear glasses so the layers do the visual work.
Variations on This Dish:
- Chocolate Strawberry Parfaits: Add 2 tablespoons cocoa powder to the crumb layer and use shaved chocolate on top.
- Lemon Berry Parfaits: Add extra lemon zest to the filling and swap strawberries for raspberries.
- Shortcut Trifle Cups: Use store-bought pound cake cubes instead of graham crumbs for a softer, cake-like base.
Common Mistakes to Avoid with This Dish:
- Lumpy filling: Usually the cream cheese was too cold. Let it soften first.
- Soggy crumbs: Assemble too far ahead and the buttered crumbs soak up moisture. Chill, but not overnight.
- Overmixed whipped cream: Fold gently or the filling goes loose and heavy.
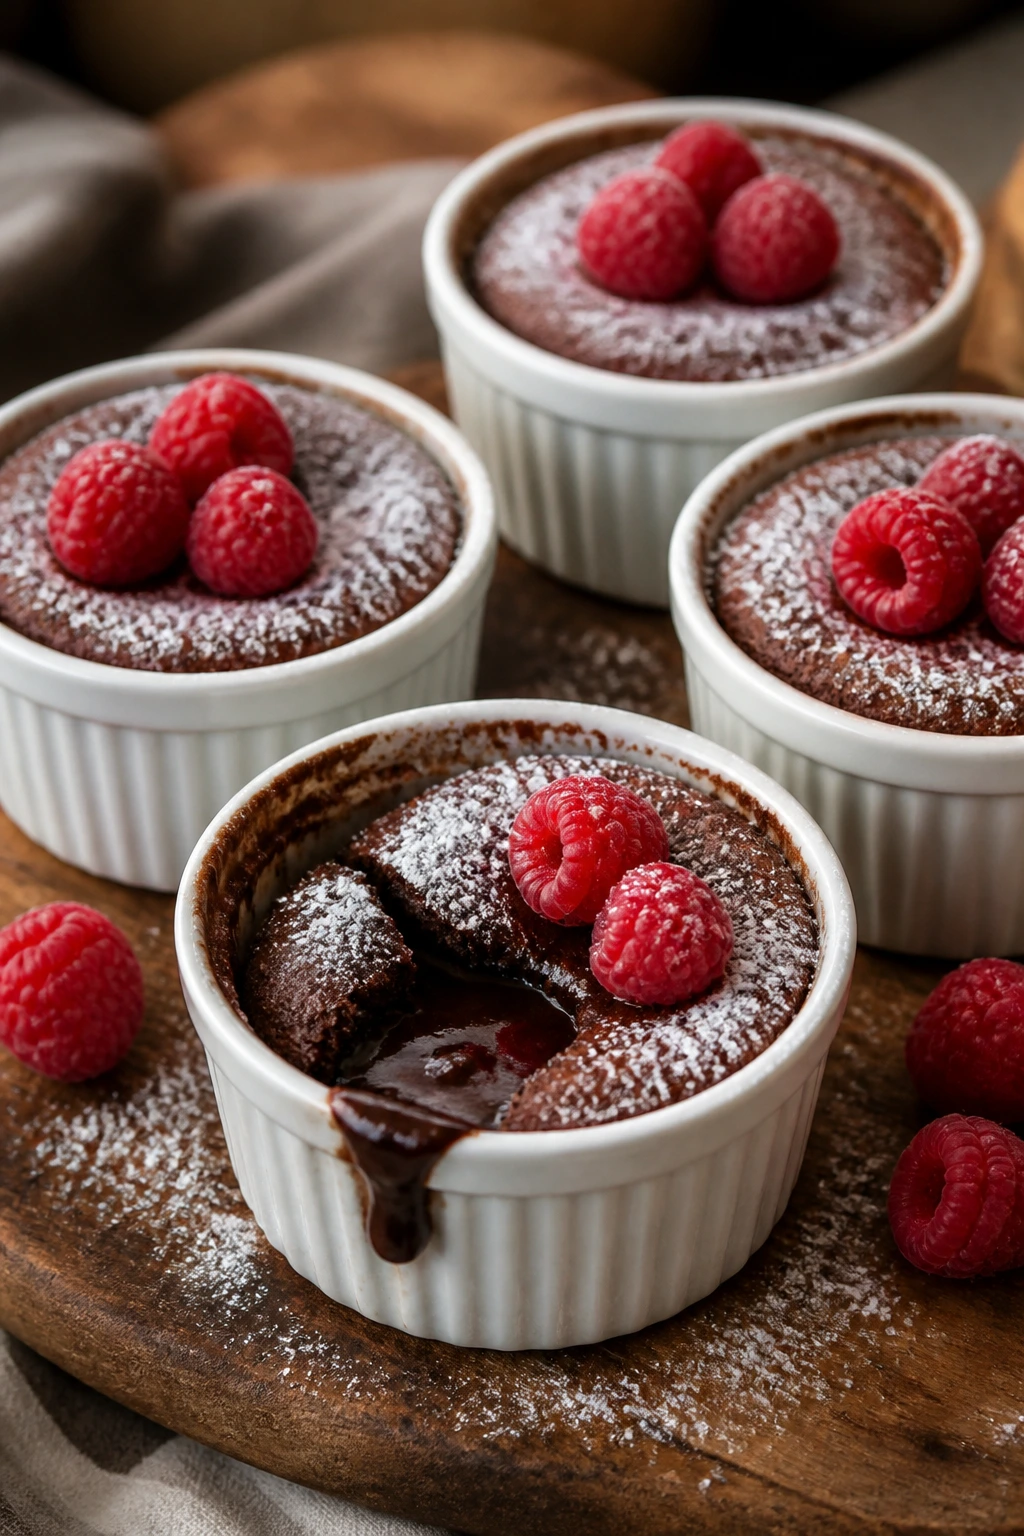
6. Mini Chocolate Lava Cakes
A good lava cake has a very specific personality: dark edges, a tender middle, and a warm chocolate center that moves when you spoon into it. These mini versions are built for exactly that moment.
They’re small enough to feel special, but not so small that you end up with one lonely bite and a plate full of regret. Serve them warm, and they do the rest.
Why It Works:
A hot oven and a short bake time create set edges while the center stays soft. The batter is rich enough that you do not need frosting, whipped cream, or anything else complicated. A dusting of powdered sugar and a few berries is enough to finish the plate.
Key Ingredients:
- 4 oz bittersweet chocolate, chopped
- 4 tbsp unsalted butter
- 2 large eggs
- 2 large egg yolks
- 1/4 cup granulated sugar
- 2 tbsp all-purpose flour
- 1/4 tsp fine salt
- Butter and cocoa powder, for the ramekins
- Fresh raspberries, for serving
Quick Steps:
- Heat the oven to 425°F (220°C) and butter four 6-ounce ramekins, then dust them with cocoa powder.
- Melt the chocolate and butter together until smooth, then let the mixture cool for 2 minutes.
- Whisk the eggs, egg yolks, sugar, and salt until slightly thick, then stir in the chocolate mixture and flour.
- Divide the batter among the ramekins and bake for 8 to 10 minutes, until the edges are set but the centers still jiggle.
- Rest for 1 minute, run a knife around the edges, and invert onto plates.
Equipment for This Recipe:
- 4 ramekins
- Mixing bowl
- Whisk
- Small saucepan or microwave-safe bowl
- Baking sheet
How to Serve This Dish:
Serve immediately with raspberries or a small scoop of vanilla ice cream. A little powdered sugar on the plate makes the dark chocolate look even deeper.
Pro Tips for This Recipe:
- Don’t overbake; the center should wobble when you nudge the ramekin.
- Dust ramekins with cocoa instead of flour so the outside stays dark and neat.
- Use good chocolate here — the flavor lands hard because there are so few ingredients.
- Let the cakes rest only a minute before unmolding, or they can stick.
Variations on This Dish:
- Raspberry Core Cakes: Drop a few raspberries into the center of each ramekin before baking.
- Salted Caramel Lava Cakes: Add a teaspoon of thick caramel to the center for a sweeter, gooier middle.
- Orange-Chocolate Version: Add 1 teaspoon orange zest to the batter for a sharper aroma.
Common Mistakes to Avoid with This Dish:
- Baking too long: The center firms up and you lose the lava effect.
- Cold ramekins straight from the fridge: They can throw off the bake. Room temperature works better.
- Trying to unmold too early: Wait a minute so the edges release cleanly.
7. Puff Pastry Strawberry Hearts
Puff pastry is the cheat code in this dessert. It bakes into crisp, buttery layers that look like you spent time rolling and laminating, even though the freezer did most of the heavy lifting.
The strawberry topping keeps the pastry from feeling too rich, and the cream cheese layer gives it a soft, cool center. It’s a tidy little pastry, and that neat shape is half the charm.
Why It Works:
Puff pastry puffs best when it goes into a hot oven and stays cold until baking. The cream cheese filling holds the strawberries in place, and a little jam gloss makes the tops shine without extra sugar syrup. The hearts look elegant because the edges turn golden while the centers stay lighter.
Key Ingredients:
- 1 sheet puff pastry, thawed
- 1 egg, beaten
- 2 tbsp granulated sugar
- 4 oz cream cheese, softened
- 2 tbsp powdered sugar
- 1 tsp vanilla extract
- 1 cup strawberries, thinly sliced
- 1 tbsp strawberry jam, warmed
Quick Steps:
- Heat the oven to 400°F (200°C) and line a baking sheet with parchment.
- Cut the puff pastry into heart shapes, transfer them to the sheet, and brush the tops lightly with beaten egg.
- Sprinkle with granulated sugar and bake for 12 to 15 minutes, until puffed and deeply golden.
- Beat the cream cheese, powdered sugar, and vanilla, then spread a spoonful over each cooled heart.
- Top with sliced strawberries and brush with a little warmed jam for shine.
Equipment for This Recipe:
- Baking sheet
- Parchment paper
- Sharp knife or heart cutter
- Pastry brush
- Mixing bowl
How to Serve This Dish:
Serve these on a flat plate so the strawberries don’t slide. They’re best the day they’re made, when the pastry still has that sharp, flaky bite.
Pro Tips for This Recipe:
- Keep the pastry cold until the second before it goes into the oven.
- Score a shallow border around each heart if you want a more dramatic puff.
- Let the shells cool fully before adding the cream cheese.
- Slice strawberries thin so they sit flat instead of rolling off.
Variations on This Dish:
- Mixed Berry Hearts: Use raspberries and blueberries with the strawberries for a brighter, mixed look.
- Chocolate Drip Hearts: Add a thin drizzle of melted chocolate after the jam glaze sets.
- Lemon Cream Hearts: Swap the vanilla filling for lemon-zested cream cheese.
Common Mistakes to Avoid with This Dish:
- Warm pastry before baking: It won’t puff as high.
- Loading on too much filling: The hearts can collapse or slide.
- Adding berries too soon: The pastry should cool first, or the filling softens the crust.
8. Raspberry Chocolate Mousse Cups
This is the dessert for people who want something cold, light, and still deeply chocolatey. The mousse is silky enough to spoon, but the raspberries keep it from feeling heavy.
In a small glass, the layers look dramatic: dark mousse, red berries, maybe a little shaved chocolate on top. It is one of those desserts that feels fancier than the work behind it.
Why It Works:
A chocolate base folded with whipped cream gives you mousse texture without eggs or a long chill. Raspberries bring acid, which cuts through the richness and keeps each spoonful from getting dull. The cups can be assembled ahead and served cold, which makes them easy to plan around.
Key Ingredients:
- 6 oz dark chocolate, chopped
- 1 1/2 cups heavy cream, divided
- 2 tbsp granulated sugar
- 1 tsp vanilla extract
- Pinch of fine salt
- 1 cup fresh raspberries
- 1 tbsp raspberry jam
- Shaved chocolate, for topping
Quick Steps:
- Heat 1/2 cup of the cream until steaming, then pour it over the chopped chocolate and stir until smooth.
- Let the chocolate mixture cool until barely warm.
- Whip the remaining 1 cup cream with the sugar, vanilla, and salt to soft peaks, then fold it into the chocolate.
- Spoon the mousse into cups and chill for 30 minutes.
- Top with raspberries, a little warmed jam, and shaved chocolate before serving.
Equipment for This Recipe:
- Mixing bowl
- Whisk or hand mixer
- Rubber spatula
- Small glasses or ramekins
- Microplane, if you want fine chocolate shavings
How to Serve This Dish:
Use short glasses or small dessert cups so the mousse looks tall and tidy. A few berries on top are enough; too many toppings hide the texture.
Pro Tips for This Recipe:
- Cool the chocolate base before folding in whipped cream or the mousse turns loose.
- Fold gently; stirring hard knocks the air out.
- Chill long enough for the texture to set, even if the top looks finished.
- Use good dark chocolate with a clean melt.
Variations on This Dish:
- White Chocolate Raspberry Mousse: Swap in white chocolate and add a little lemon zest for balance.
- Mocha Mousse Cups: Stir 1 teaspoon instant espresso into the hot cream before pouring it over the chocolate.
- Berry Swirl Mousse: Fold in a few spoonfuls of raspberry jam for streaks.
Common Mistakes to Avoid with This Dish:
- Hot chocolate mixture: It melts the cream and makes the mousse heavy.
- Overwhipped cream: The mousse can turn grainy.
- Skipping the chill: Cold mousse holds a cleaner spoonful.
9. Valentine Sprinkle Brownies
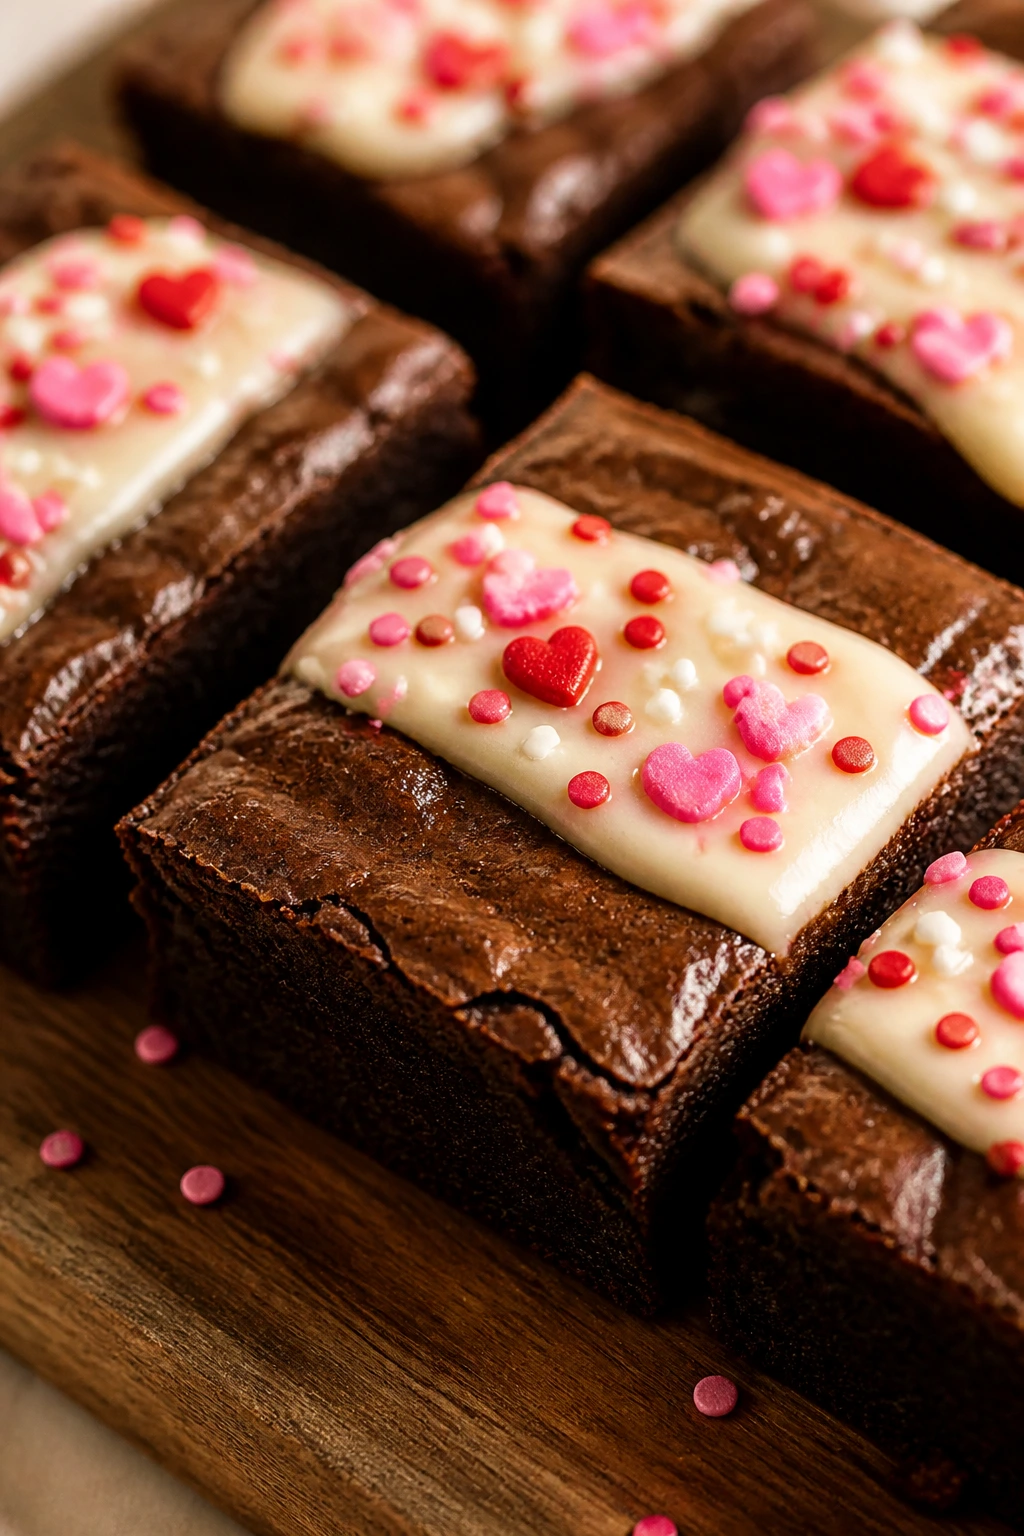
Brownies do not need a costume to look good, but a handful of pink and red sprinkles changes the whole mood. These are dense, fudgy squares with a shiny top and a sweet little finish that reads as festive right away.
If you want a dessert that cuts cleanly into neat squares and travels well, this is one of the easiest choices on the list.
Why It Works:
A boxed brownie mix keeps the base fast and consistent, and the add-ons are small enough not to mess with the texture. Cream cheese glaze gives you a pale stripe across the dark brownie top, which makes the sprinkles pop. Once cooled, the bars cut into sharp edges that look tidy on a tray.
Key Ingredients:
- 1 box brownie mix, about 18 to 19 oz
- Eggs, oil, and water as listed on the box
- 1/2 cup white chocolate chips
- 4 oz cream cheese, softened
- 1/4 cup powdered sugar
- 1 tbsp milk
- 1/4 cup Valentine sprinkles
Quick Steps:
- Heat the oven and prepare the brownie batter according to the box directions, then fold in the white chocolate chips.
- Spread the batter in an 8-inch square pan lined with parchment.
- Bake as directed until the center is set and a toothpick comes out with a few moist crumbs.
- Cool completely, then whisk the cream cheese, powdered sugar, and milk into a thin glaze.
- Drizzle over the brownies and shower with sprinkles before cutting.
Equipment for This Recipe:
- 8-inch square baking pan
- Parchment paper
- Mixing bowl
- Whisk
- Offset spatula
How to Serve This Dish:
Cut the brownies into neat squares and stack them in a low pile. They look nicest after the glaze sets for about 10 minutes.
Pro Tips for This Recipe:
- Line the pan so you can lift the brownies out and cut cleaner edges.
- Cool completely before glazing or the drizzle melts into the top.
- Use a sharp knife wiped clean between cuts.
- If you want a more polished finish, hold the sprinkles to the very top center.
Variations on This Dish:
- Raspberry Brownies: Add 1/4 cup freeze-dried raspberries to the batter for a tart edge.
- Marbled Cheesecake Brownies: Swirl a little extra cream cheese mixture across the top before baking.
- Peppermint Sprinkle Brownies: Replace the Valentine sprinkles with crushed peppermint for a sharper finish.
Common Mistakes to Avoid with This Dish:
- Cutting too soon: Warm brownies smear and fall apart.
- Overbaking: Fudgy brownies should still have a soft middle.
- Too much glaze: A thin drizzle looks cleaner than a thick coat.
10. White Chocolate Cranberry Bark
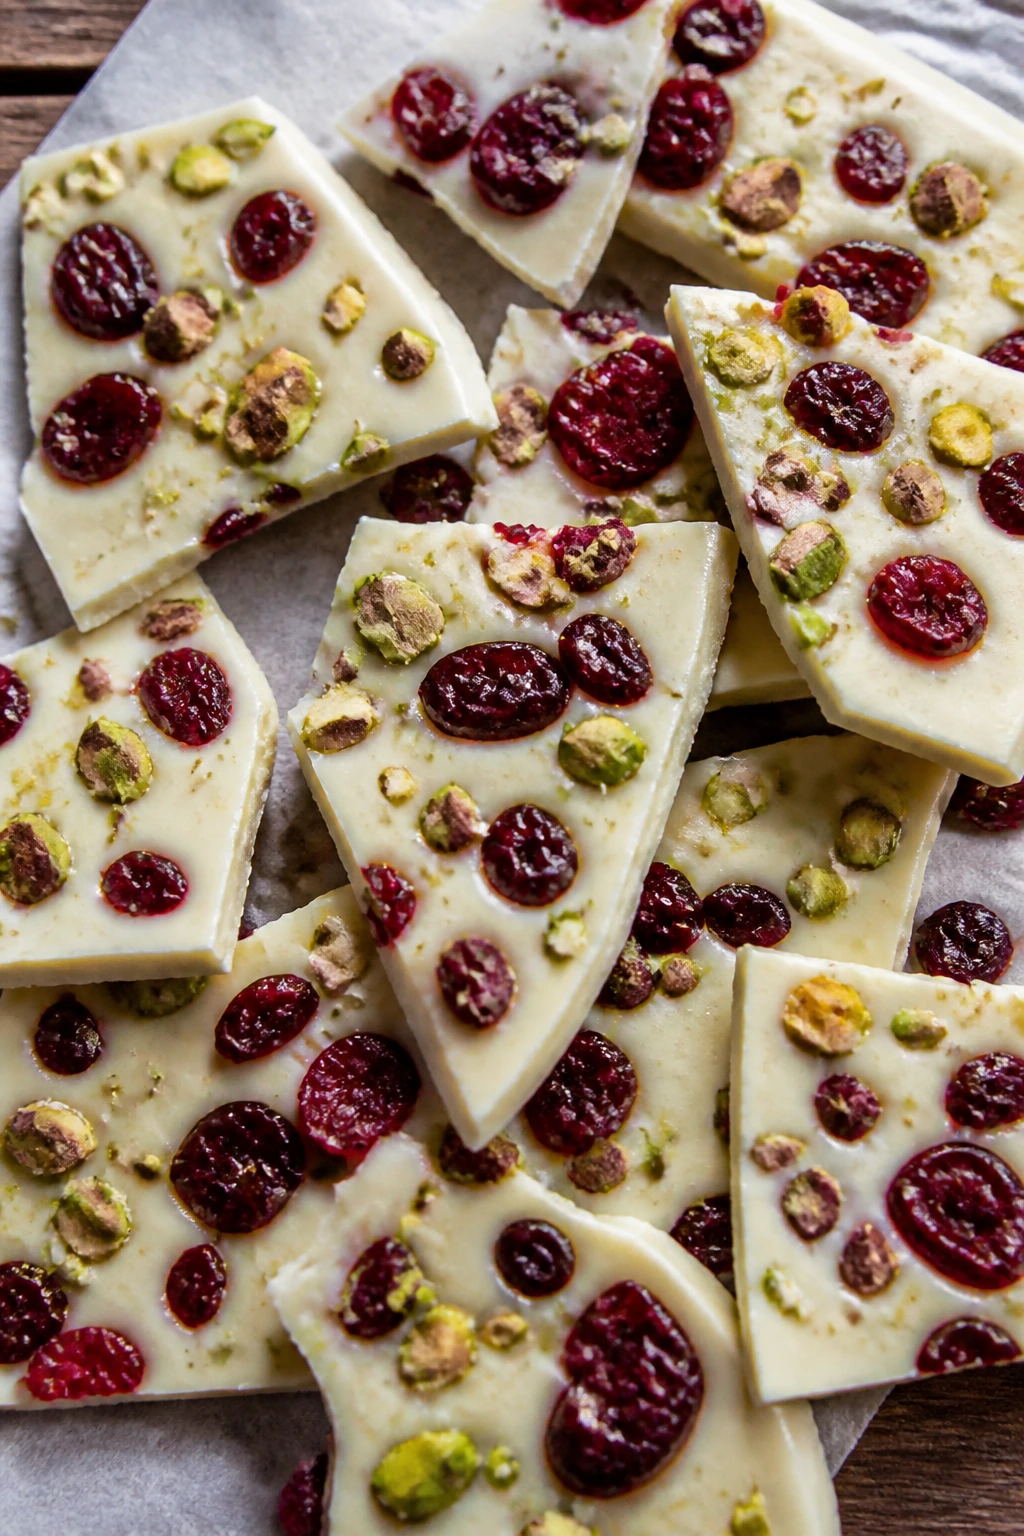
This bark is fast, bright, and a little crunchy, which is a nice change from all the cream-heavy desserts. The white chocolate gives you a snowy background, and the red fruit and green pistachios do the decorating for you.
Break it into jagged pieces and it looks homemade in the best way.
Why It Works:
Bark is about contrast: smooth chocolate, chewy fruit, crisp nuts, and a little salt. It sets in the fridge quickly and can be broken into uneven pieces that still look deliberate. Freeze-dried strawberries are useful here because they keep their color and stay dry.
Key Ingredients:
- 12 oz white chocolate, chopped
- 1/2 cup dried cranberries
- 1/2 cup freeze-dried strawberries
- 1/4 cup chopped pistachios
- Pinch of flaky salt
- 1 tsp coconut oil, optional for smoother melting
Quick Steps:
- Line a baking sheet with parchment paper.
- Melt the white chocolate slowly until smooth, then stir in the coconut oil if you’re using it.
- Spread the chocolate into a rough 1/4-inch layer on the parchment.
- Scatter the cranberries, strawberries, pistachios, and salt over the top.
- Chill for 20 minutes, then break into shards.
Equipment for This Recipe:
- Baking sheet
- Parchment paper
- Microwave-safe bowl or double boiler
- Spatula
- Sharp knife, for chopping toppings if needed
How to Serve This Dish:
Pile the shards in a shallow bowl or tuck them into a cellophane bag for gifting. The uneven edges are the point, so don’t chase perfect squares.
Pro Tips for This Recipe:
- Chop toppings first so you can scatter them quickly before the chocolate firms.
- Use freeze-dried fruit instead of fresh fruit; fresh fruit adds moisture and ruins the bark.
- Tap the tray gently on the counter to level the chocolate.
- Store it away from heat so the white chocolate stays crisp.
Variations on This Dish:
- Dark Chocolate Fruit Bark: Swap to dark chocolate and use chopped dried cherries.
- Coconut Valentine Bark: Add toasted coconut flakes for a softer crunch.
- Citrus Bark: Add finely grated orange zest before chilling.
Common Mistakes to Avoid with This Dish:
- Overheating white chocolate: It can seize fast. Melt it slowly.
- Using wet fruit: Moisture makes the bark soft and blotchy.
- Spreading too thin: A paper-thin bark breaks awkwardly instead of snapping cleanly.
11. Mini Pavlovas with Mixed Berries
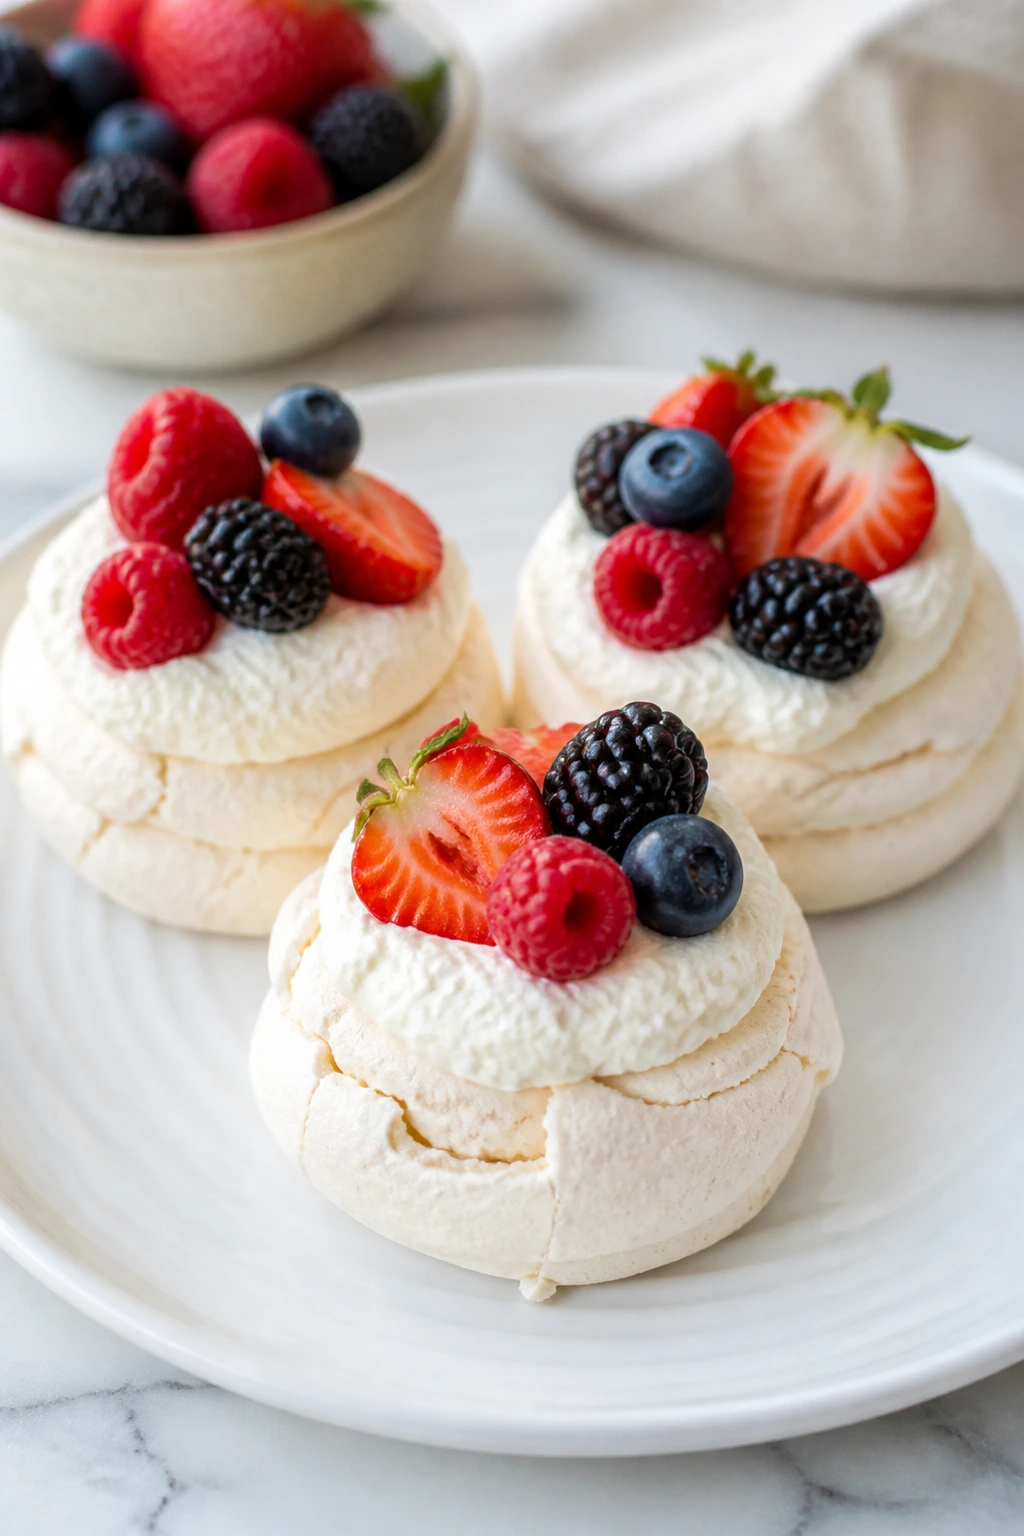
Pavlovas have drama built into the name and the texture. Crisp shells, marshmallow-soft centers, whipped cream, berries. That combination looks delicate on the plate and still eats like a real dessert.
These mini versions feel a little more manageable than one large pavlova. You get the same cracked shell and soft center, only in a shape that is easier to plate and easier to share.
Why It Works:
Whipping the egg whites with sugar until glossy gives the shells their structure. Baking low and slow dries the outside while leaving the inside slightly chewy, which is the whole appeal. Berries and cream add moisture right before serving, so the shell doesn’t soften too early.
Key Ingredients:
- 4 large egg whites, room temperature
- 1 cup superfine sugar
- 1 tsp cornstarch
- 1 tsp white vinegar
- 1 tsp vanilla extract
- 1 cup heavy cream
- 2 tbsp powdered sugar
- 2 cups mixed berries
Quick Steps:
- Heat the oven to 225°F (110°C) and line a baking sheet with parchment.
- Beat the egg whites until soft peaks form, then slowly add the sugar and beat until glossy.
- Fold in the cornstarch, vinegar, and vanilla, then spoon into 6 small nests.
- Bake for 1 hour, turn the oven off, and let the pavlovas cool inside the oven.
- Top with whipped cream and berries just before serving.
Equipment for This Recipe:
- Stand mixer or hand mixer
- Mixing bowl
- Baking sheet
- Parchment paper
- Spoon or piping bag
How to Serve This Dish:
Serve each pavlova on a small plate with a spoonful of berries sliding down the side. They look especially nice with raspberries and strawberries mixed together so the color stays vivid.
Pro Tips for This Recipe:
- Make sure the bowl is grease-free before whipping the whites.
- Add sugar gradually so the meringue turns glossy, not gritty.
- Keep the oven door shut while baking.
- Add cream and fruit only at the last minute.
Variations on This Dish:
- Chocolate Pavlovas: Fold in 1 tablespoon cocoa powder with the cornstarch.
- Lemon Berry Pavlovas: Add lemon zest to the whipped cream.
- Single-Large Pavlova: Shape the meringue into one large round for a centerpiece.
Common Mistakes to Avoid with This Dish:
- Beating in a damp bowl: The whites won’t hold as well.
- High heat: It can crack the shells badly or brown them too much.
- Topping too early: The meringue softens fast once cream hits it.
12. Strawberry Shortcake Skewers
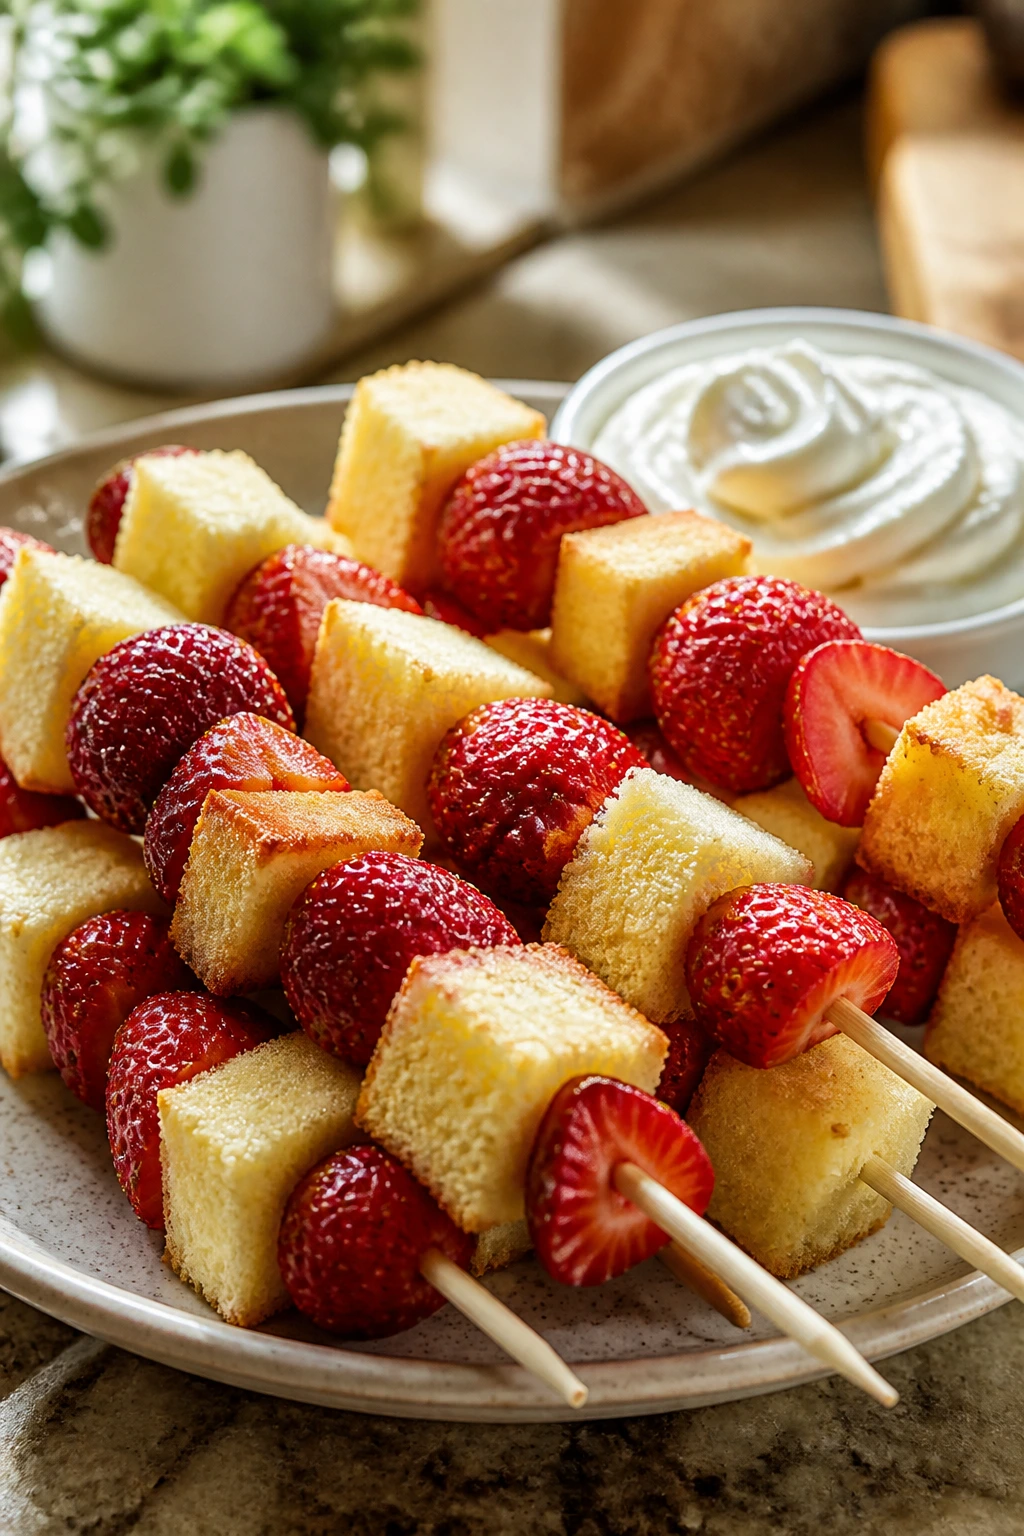
This is the no-fuss answer to strawberry shortcake when you want the flavors but not the messy assembly. The cake cubes, berries, and cream all stay separate until the last second, which keeps the texture clean.
They’re also easy to serve standing up in a glass or laid across a plate. That alone makes them feel a little more styled than a bowl of diced fruit and cake.
Why It Works:
Using pound cake keeps the dessert sturdy, so it doesn’t collapse on the skewer. Fresh strawberries and whipped cream deliver the classic shortcake flavor without baking biscuits. The skewer format makes the dessert easy to plate and even easier to hand around.
Key Ingredients:
- 1 loaf pound cake, about 12 oz, cut into cubes
- 2 cups strawberries, hulled and halved if large
- 1 cup heavy cream
- 2 tbsp powdered sugar
- 1 tsp vanilla extract
- 2 tbsp melted white chocolate, optional for drizzling
Quick Steps:
- Whip the cream with powdered sugar and vanilla until soft peaks form.
- Cut the pound cake into 1-inch cubes.
- Thread cake and strawberries onto small skewers, alternating pieces.
- Drizzle with white chocolate if you want a more polished finish.
- Serve with the whipped cream on the side for dipping.
Equipment for This Recipe:
- Cutting board and knife
- Skewers or cocktail picks
- Mixing bowl
- Hand mixer
- Serving platter
How to Serve This Dish:
Stand the skewers in a tall glass or lay them across a plate with the whipped cream in the center. A light dusting of powdered sugar makes the cake edges look clean.
Pro Tips for This Recipe:
- Choose strawberries that are firm enough to hold on the skewer.
- Cut the cake into even cubes so the skewers balance.
- Keep the whipped cream cold until serving.
- If the cake feels dry, brush it lightly with strawberry syrup first.
Variations on This Dish:
- Chocolate-Dipped Shortcake Skewers: Dip one end of the strawberries in melted chocolate before threading.
- Angel Food Skewers: Swap pound cake for angel food cake if you want a lighter crumb.
- Berry Mix Skewers: Use raspberries and blueberries alongside the strawberries.
Common Mistakes to Avoid with This Dish:
- Too-soft cake: It tears on the skewer. Use a sturdy loaf cake.
- Oversized fruit: Huge strawberry halves can split the skewer.
- Whipped cream too loose: It slides instead of holding a clean dollop.
13. Raspberry Thumbprint Heart Cookies
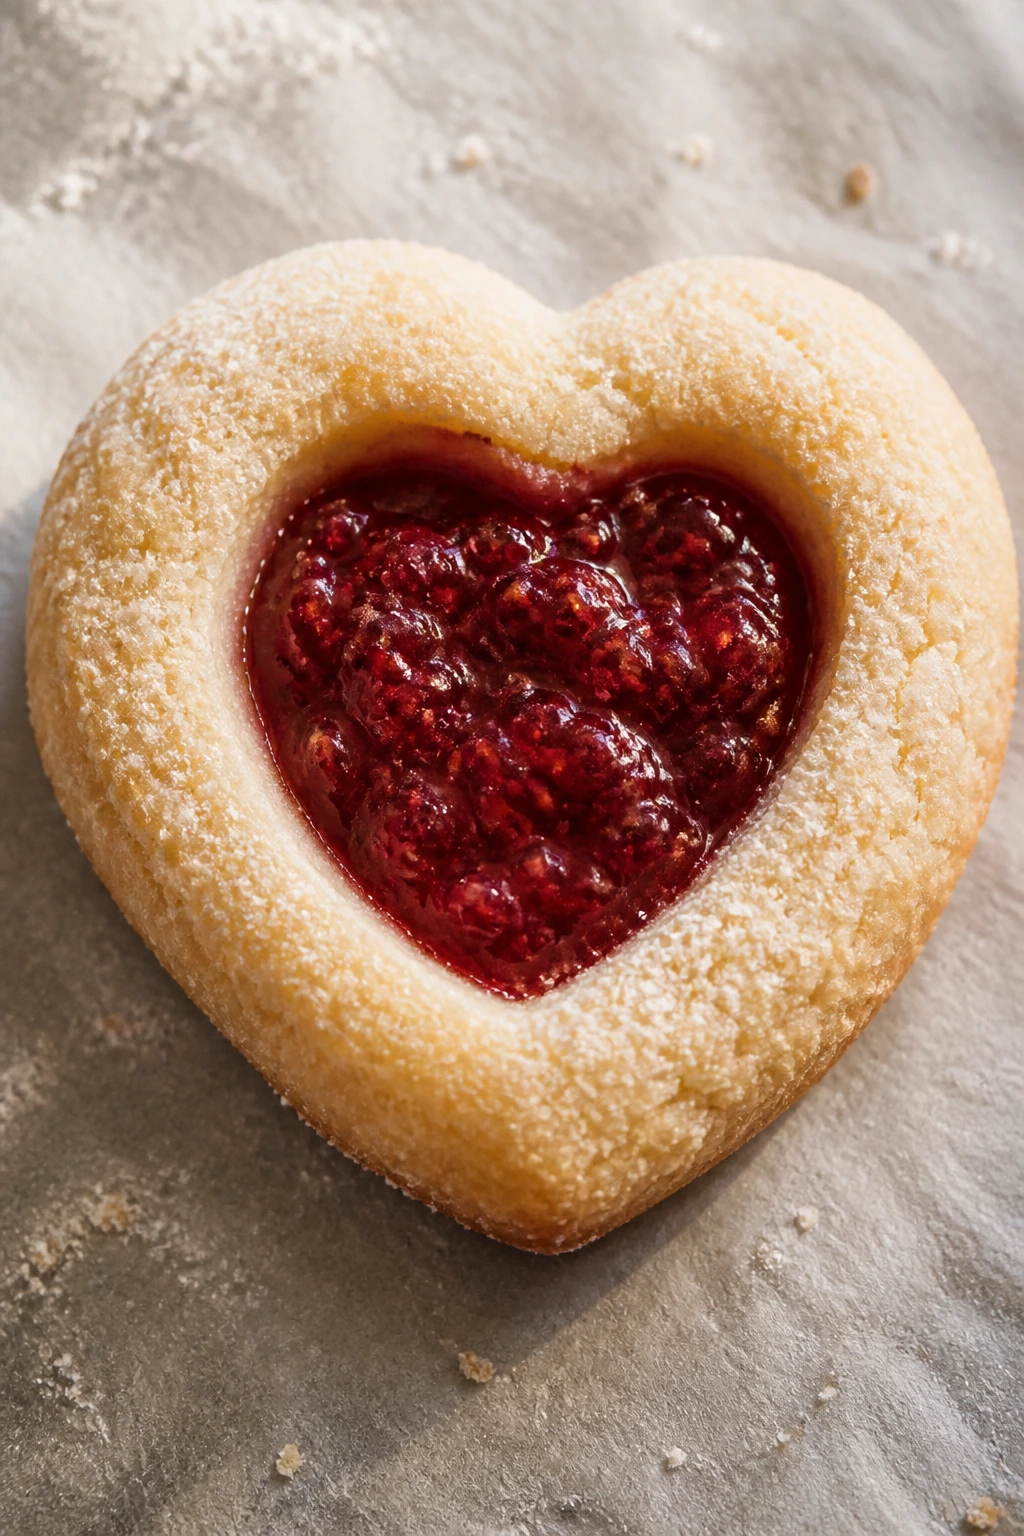
These cookies hit the sweet spot between simple and sentimental. The heart shape looks charming, the jam center shines, and the buttery cookie holds the whole thing together.
If you like a cookie that feels neat on a plate and still tastes like a real bakery cookie, this one lands well.
Why It Works:
Buttery dough gives these cookies a tender crumb that supports the jam without cracking apart. A brief chill keeps the shapes sharp in the oven. Raspberry jam keeps the centers bright and slightly tart, which is the right move against a sweet cookie base.
Key Ingredients:
- 1 cup unsalted butter, softened
- 2/3 cup granulated sugar
- 1 large egg yolk
- 1 tsp vanilla extract
- 2 cups all-purpose flour
- 1/4 tsp fine salt
- 1/2 cup raspberry jam
- Powdered sugar, for dusting
Quick Steps:
- Heat the oven to 350°F (175°C) and line a baking sheet with parchment.
- Beat the butter and sugar until light, then mix in the egg yolk and vanilla.
- Add the flour and salt, mix until a soft dough forms, and chill for 20 minutes.
- Roll the dough to 1/4-inch thick, cut heart shapes, and make a small thumbprint in each center.
- Fill the centers with jam and bake for 10 to 12 minutes, until the edges are just golden.
Equipment for This Recipe:
- Mixing bowl
- Hand mixer
- Rolling pin
- Heart cutter
- Baking sheet
How to Serve This Dish:
Dust the cookies with powdered sugar once they cool. They look especially neat stacked in a shallow tin with parchment between layers.
Pro Tips for This Recipe:
- Chill the dough so the hearts hold their shape.
- Use jam with a thick texture; thin jam can boil over.
- Press the centers gently so you don’t crack the dough.
- Let the cookies cool on the pan for a few minutes before moving them.
Variations on This Dish:
- Strawberry Heart Cookies: Swap raspberry jam for strawberry preserves.
- Almond Thumbprints: Add 1/2 teaspoon almond extract to the dough.
- Chocolate Center Version: Fill the centers with a spoonful of ganache instead of jam.
Common Mistakes to Avoid with This Dish:
- Dough too warm: The hearts spread and lose definition.
- Overfilling with jam: It bubbles out and makes sticky edges.
- Baking too long: The cookies should stay pale with only light gold edges.
14. Red Velvet Cake Pops
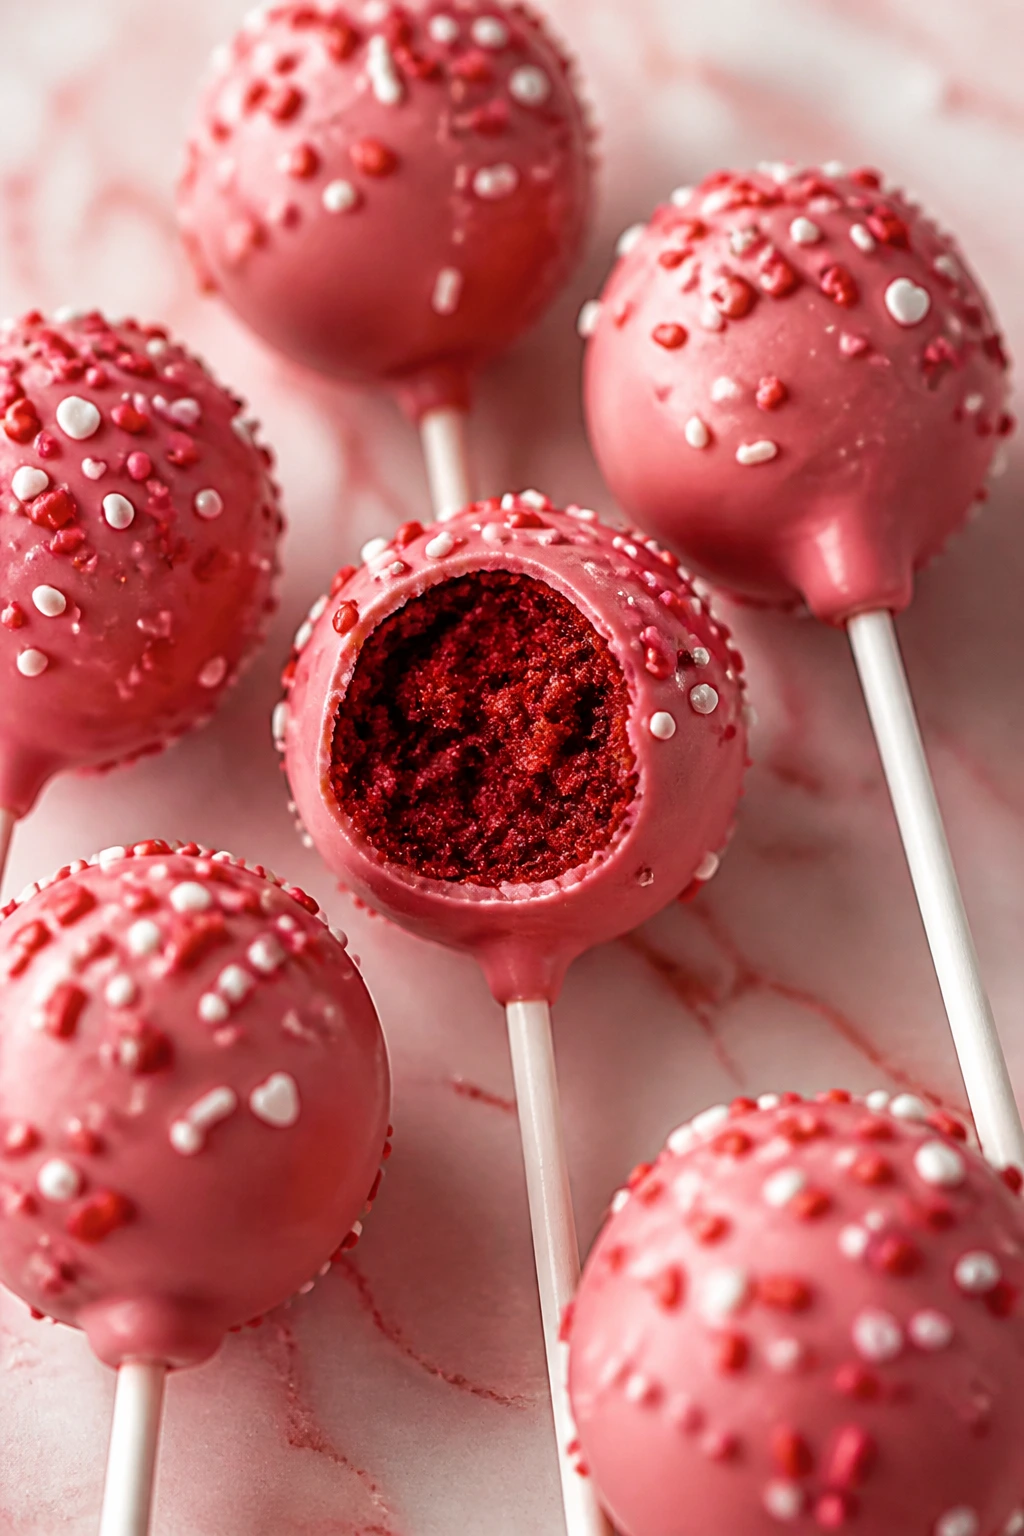
Cake pops look complicated until you realize the decorating job is doing most of the work. The inside is just tender cake mixed with a little frosting, rolled into balls, and dipped in candy coating.
What makes them feel special is the finish. A smooth shell, a few sprinkles, maybe a pink drizzle. Small, neat, and easy to hand over.
Why It Works:
Cake crumbs mixed with frosting make a moldable dough that holds its shape once chilled. Candy melts set fast and give a clean outer shell that keeps the cake from drying out. A stick turns the whole thing into a little display piece.
Key Ingredients:
- 1 baked 8-inch red velvet cake or 1 prepared box cake, cooled
- 1/2 cup cream cheese frosting
- 12 oz pink or white candy melts
- 1 tsp coconut oil, optional
- Valentine sprinkles
Quick Steps:
- Crumble the cake into fine crumbs and mix with the frosting until it feels like soft clay.
- Roll into 1-inch balls and chill for 20 minutes.
- Melt the candy coating until smooth, stirring in coconut oil if needed.
- Dip the tip of each stick into the coating, insert it into a cake ball, then dip the whole pop.
- Let the coating set and finish with sprinkles before the shell hardens.
Equipment for This Recipe:
- Mixing bowl
- Baking sheet
- Parchment paper
- Lollipop sticks
- Microwave-safe bowl
How to Serve This Dish:
Stand the pops upright in a foam block or a shallow glass filled with sugar. They’re easier to display that way, and the coating stays cleaner.
Pro Tips for This Recipe:
- Chill the balls before dipping or they slide off the stick.
- Don’t make the frosting mixture too wet.
- Tap off excess coating so the shell stays thin.
- Add sprinkles right away while the coating is still tacky.
Variations on This Dish:
- White Chocolate Cake Pops: Use white candy melts and pink sanding sugar.
- Double-Chocolate Pops: Swap the cake for chocolate cake and use dark coating.
- Heart-Shaped Pops: Flatten the chilled mixture and use a heart cutter before inserting sticks.
Common Mistakes to Avoid with This Dish:
- Too much frosting: The pops become heavy and soft.
- Warm cake crumbs: They won’t hold shape.
- Thick candy coating: It makes lumpy, heavy shells.
15. Raspberry Linzer Tartlets
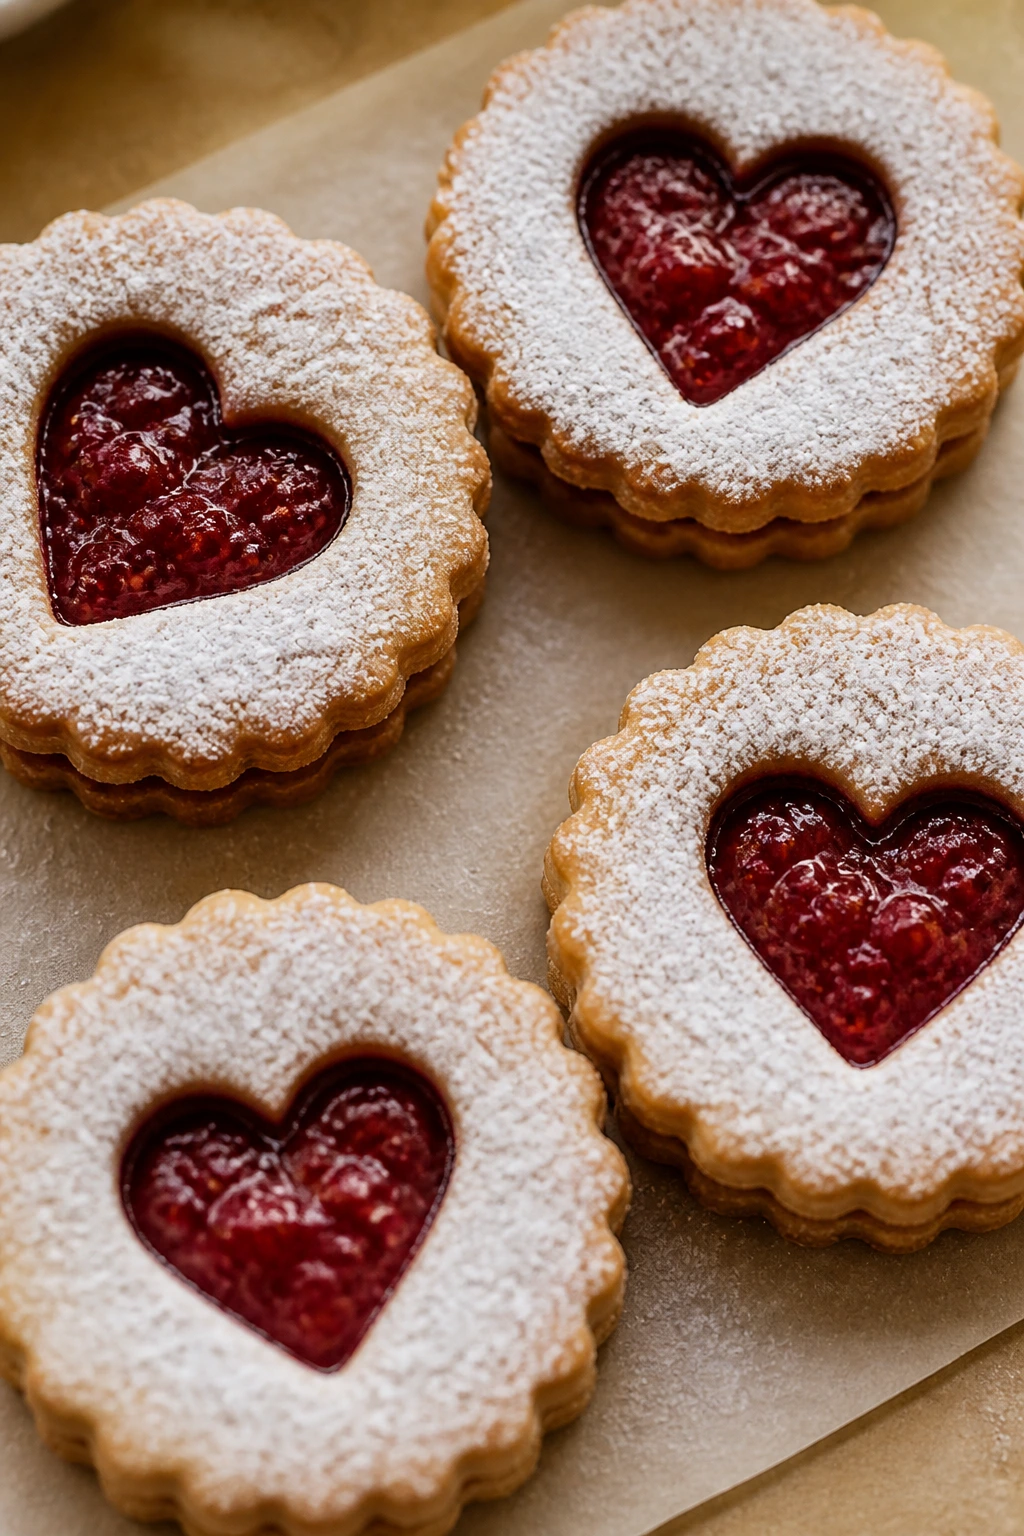
These tartlets are all about the frame. A little cutout on top, a bright jam center, and a dusting of powdered sugar give them that classic Valentine’s look without much fuss.
They feel more polished than a basic cookie, but the work stays manageable if you use tart shells or quick pastry rounds. Good trade.
Why It Works:
Almond flour adds a soft, nutty flavor that pairs well with raspberry jam. A top cutout lets the filling show through, which gives you the layered look without extra decoration. Because the jam sits inside a baked shell, the tartlets travel better than fresh cream desserts.
Key Ingredients:
- 12 mini tart shells or baked pastry rounds
- 3/4 cup raspberry jam
- 1/4 cup almond flour
- 1 tbsp powdered sugar, plus more for dusting
- 1 tsp lemon juice
- 1/4 tsp vanilla extract
- Sliced almonds, optional for garnish
Quick Steps:
- Warm the jam with lemon juice and vanilla until loosened, then stir in the almond flour.
- Fill each tart shell with a spoonful of the jam mixture.
- If using top pastry rounds, place the cutout lids on top and press lightly.
- Bake or warm briefly as needed to set the shells, then cool.
- Dust with powdered sugar and garnish with almonds.
Equipment for This Recipe:
- Mini tart shells or pastry cutter
- Small saucepan
- Spoon
- Fine sieve for dusting
- Baking sheet, if baking shells
How to Serve This Dish:
Serve these on a narrow tray with the cutout side facing up so the jam shows through. A little powdered sugar on the plate makes the red center look brighter.
Pro Tips for This Recipe:
- Use thick jam so the filling stays put.
- Add lemon juice sparingly; too much thins the filling.
- Dust only after the tartlets cool.
- If you make pastry tops, chill them before baking so the shapes stay sharp.
Variations on This Dish:
- Strawberry Linzers: Swap raspberry jam for strawberry preserves.
- Orange-Almond Tartlets: Add orange zest to the filling for a brighter finish.
- Chocolate Linzers: Brush the shells with a thin layer of melted chocolate before filling.
Common Mistakes to Avoid with This Dish:
- Runny jam: It leaks and soaks the crust.
- Dusting too early: Powdered sugar melts into the warm filling.
- Overpacking the shells: A thin layer looks better and cuts cleaner.
16. Skillet Berry Cobbler for Two
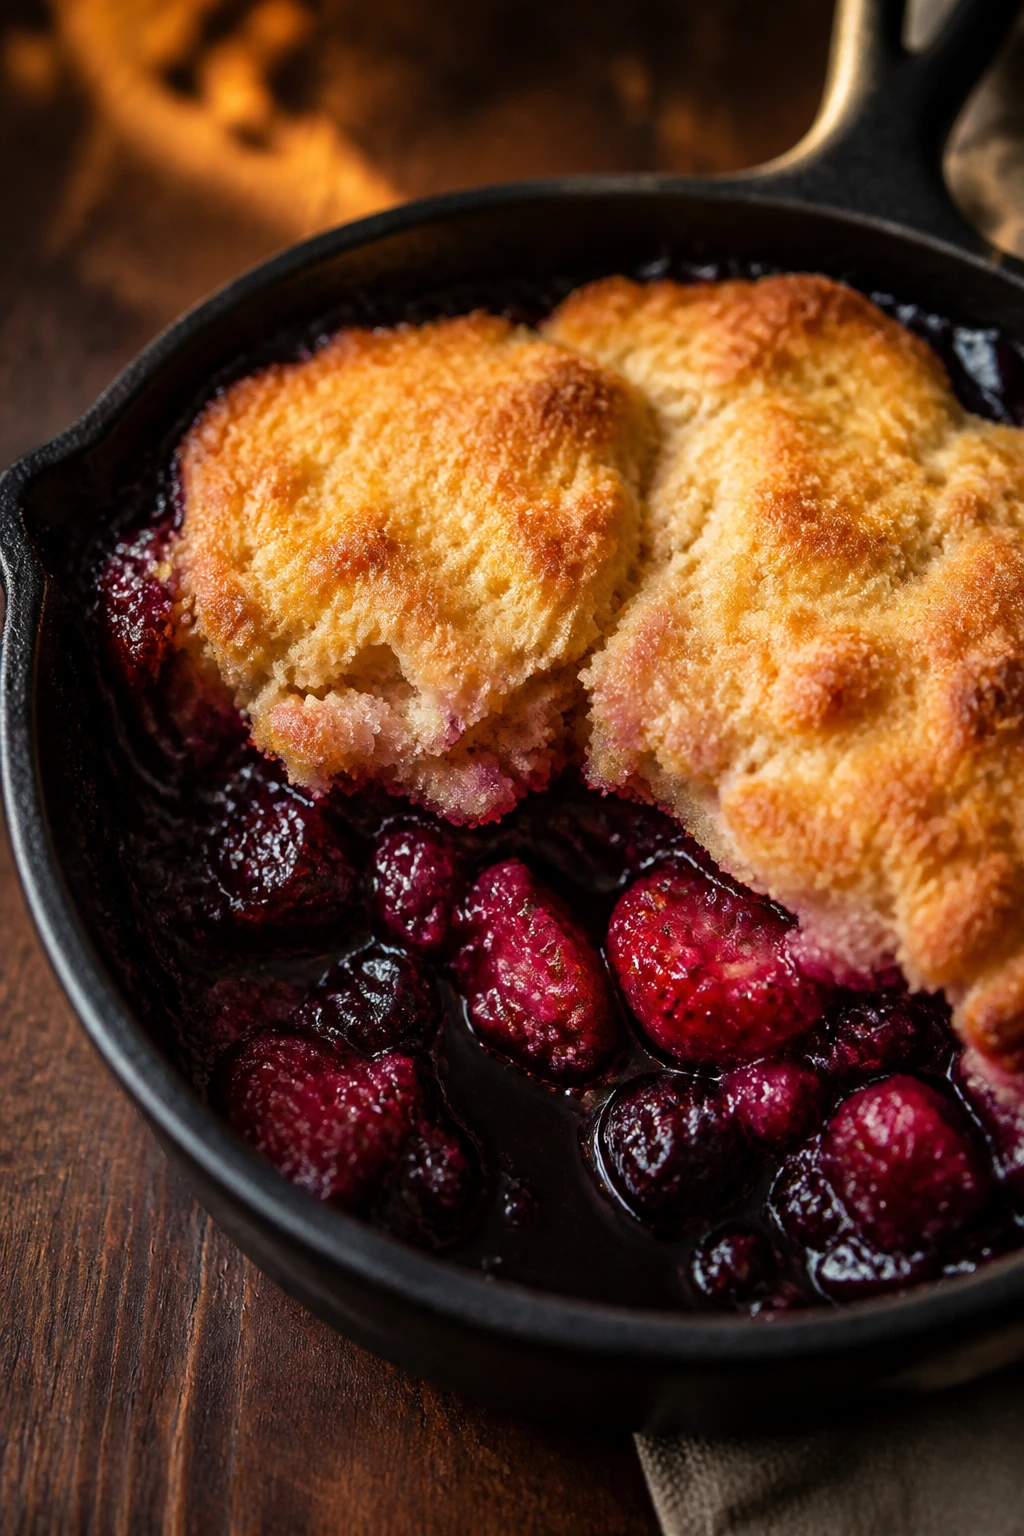
A warm cobbler for two is a smart Valentine’s move. It gives you bubbling berries, a biscuit top with crisp edges, and the kind of spoonable dessert that feels calm instead of showy.
This one works especially well if you want something cozy without making a whole pan of leftovers.
Why It Works:
The fruit base thickens in the oven, so the juices turn glossy instead of watery. A quick biscuit topping bakes over the berries and picks up a little color at the edges. The skillet holds heat well, which keeps the cobbler warm long enough to eat slowly.
Key Ingredients:
- 2 cups mixed berries
- 2 tbsp granulated sugar
- 1 tsp lemon juice
- 1 tsp cornstarch
- 3/4 cup all-purpose flour
- 2 tbsp sugar
- 1 tsp baking powder
- 1/4 tsp fine salt
- 3 tbsp cold butter, cubed
- 1/3 cup milk
Quick Steps:
- Heat the oven to 400°F (200°C).
- Toss the berries with sugar, lemon juice, and cornstarch in a small skillet or baking dish.
- Mix the flour, sugar, baking powder, and salt, then cut in the butter until the mixture looks like coarse crumbs.
- Stir in the milk just until combined and drop the topping over the berries.
- Bake for 20 to 25 minutes, until the top is golden and the fruit is bubbling.
Equipment for This Recipe:
- 8-inch skillet or small baking dish
- Mixing bowl
- Fork or pastry cutter
- Measuring cups
- Spoon
How to Serve This Dish:
Serve warm with a spoonful of vanilla ice cream or whipped cream. The contrast between hot fruit and cold cream is the whole reason to make it.
Pro Tips for This Recipe:
- Use berries that are ripe but not mushy.
- Don’t stir the topping into the fruit; it should sit on top.
- Let it rest 5 minutes after baking so the juices settle.
- A pinch of cinnamon works, but keep it light so the berries stay bright.
Variations on This Dish:
- Strawberry-Rhubarb Cobbler: Swap part of the berries for rhubarb if you like a sharper filling.
- Chocolate Berry Cobbler: Add a handful of chocolate chips to the fruit layer.
- Ginger Cobbler: Stir a little grated fresh ginger into the berries for a warmer edge.
Common Mistakes to Avoid with This Dish:
- Too much liquid in the fruit: It turns soupy. Use cornstarch.
- Overmixed topping: It becomes tough. Stir only until combined.
- Serving immediately: The filling needs a short rest to thicken.
17. Mini Cheesecake Bites with Berry Spoonfuls
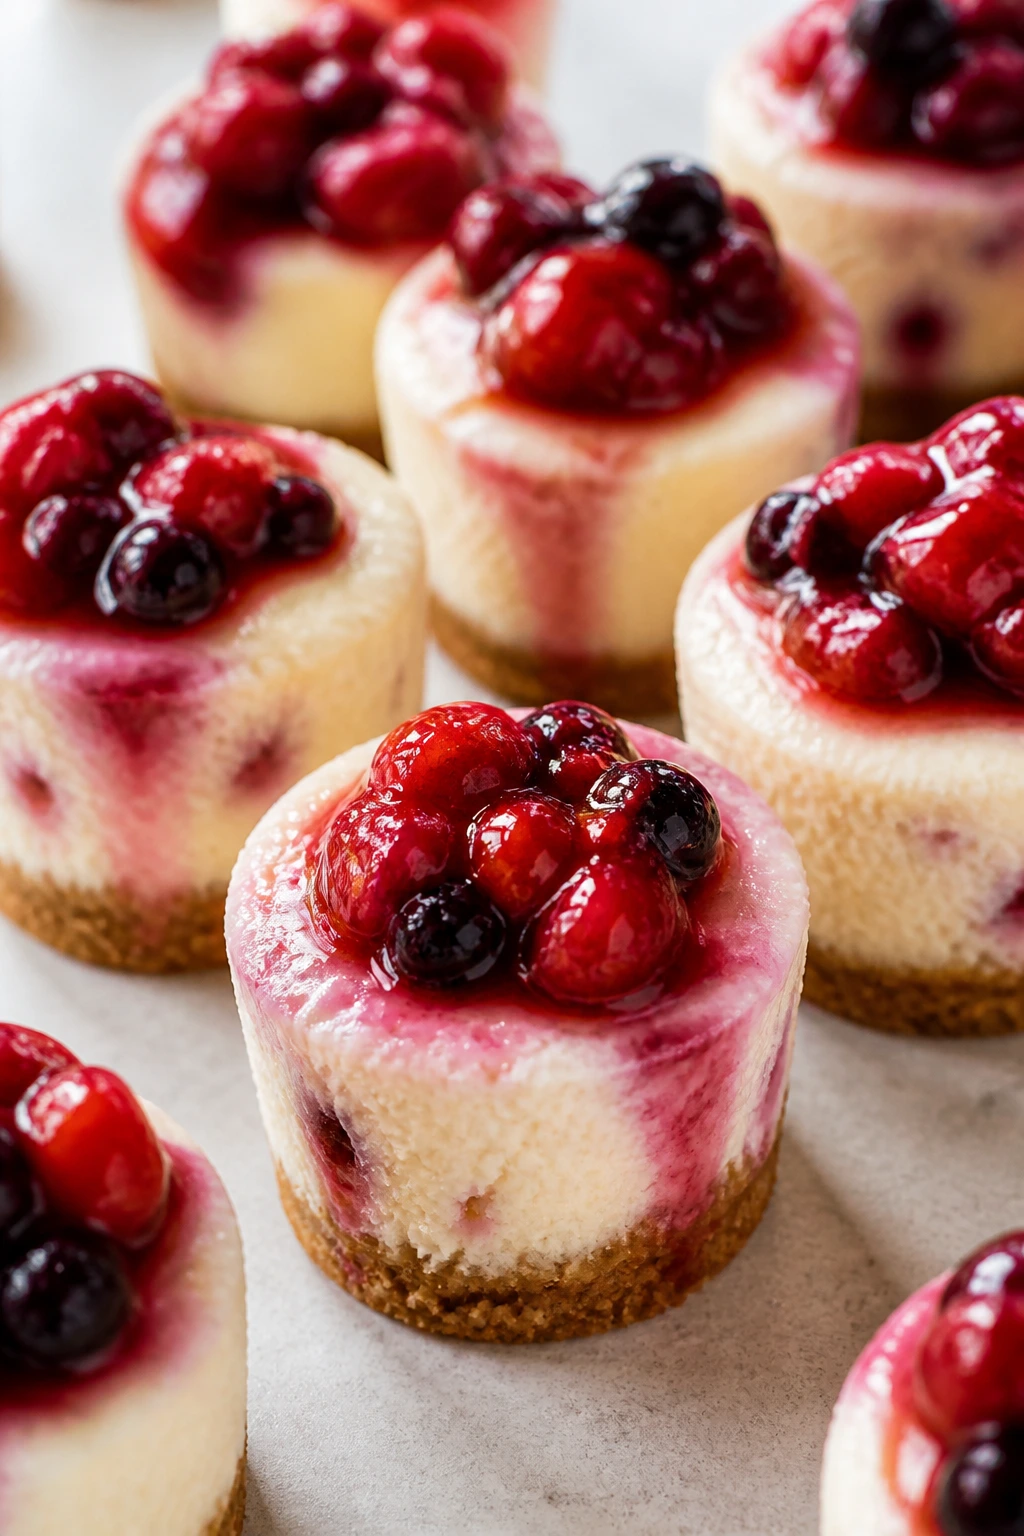
These little cheesecake bites give you all the creamy richness of a full cheesecake in a neat, two-bite square. The graham crust stays firm, the filling bakes up smooth, and the berry topping keeps the sweetness from running away.
They’re excellent if you want something tidy. Very tidy.
Why It Works:
A graham crust in a muffin tin gives you built-in portion control and a clean edge. The filling uses eggs and sour cream for a smooth, classic cheesecake texture without a water bath. A spoonful of berries on top makes each bite look finished right out of the pan.
Key Ingredients:
- 1 cup graham cracker crumbs
- 3 tbsp melted butter
- 16 oz cream cheese, softened
- 1/2 cup granulated sugar
- 2 large eggs
- 1 tsp vanilla extract
- 1/2 cup sour cream
- 1/2 cup berry topping or fresh berries
Quick Steps:
- Heat the oven to 325°F (165°C) and line a muffin pan with paper liners.
- Mix the graham crumbs and butter, then press 1 tablespoon into each liner.
- Beat the cream cheese and sugar until smooth, then mix in the eggs, vanilla, and sour cream.
- Fill each cup nearly to the top and bake for 14 to 16 minutes, until the centers are just set.
- Cool fully, chill, and top with berries before serving.
Equipment for This Recipe:
- 12-cup muffin pan
- Paper liners
- Mixing bowls
- Hand mixer
- Spoon
How to Serve This Dish:
Serve chilled on a small cake stand or plate. A single berry or a little berry spoonful on top gives them a clean, bakery-style look.
Pro Tips for This Recipe:
- Don’t overbeat the batter once the eggs go in.
- Cool before chilling so condensation doesn’t collect on the tops.
- Use a small cookie scoop to divide the batter evenly.
- Add the topping right before serving if you want the crust to stay crisp.
Variations on This Dish:
- Chocolate Crust Bites: Replace the graham crumbs with chocolate cookie crumbs.
- Lemon Cheesecake Bites: Add lemon zest to the batter for a brighter flavor.
- Raspberry Swirl Bites: Drop a little raspberry jam into each cup and swirl with a toothpick.
Common Mistakes to Avoid with This Dish:
- Cold cream cheese: It leaves lumps in the filling.
- Overbaking: The centers should still have a slight wobble.
- Too much berry topping too early: It can soften the crust if it sits overnight.
18. Cherry Hand Pies
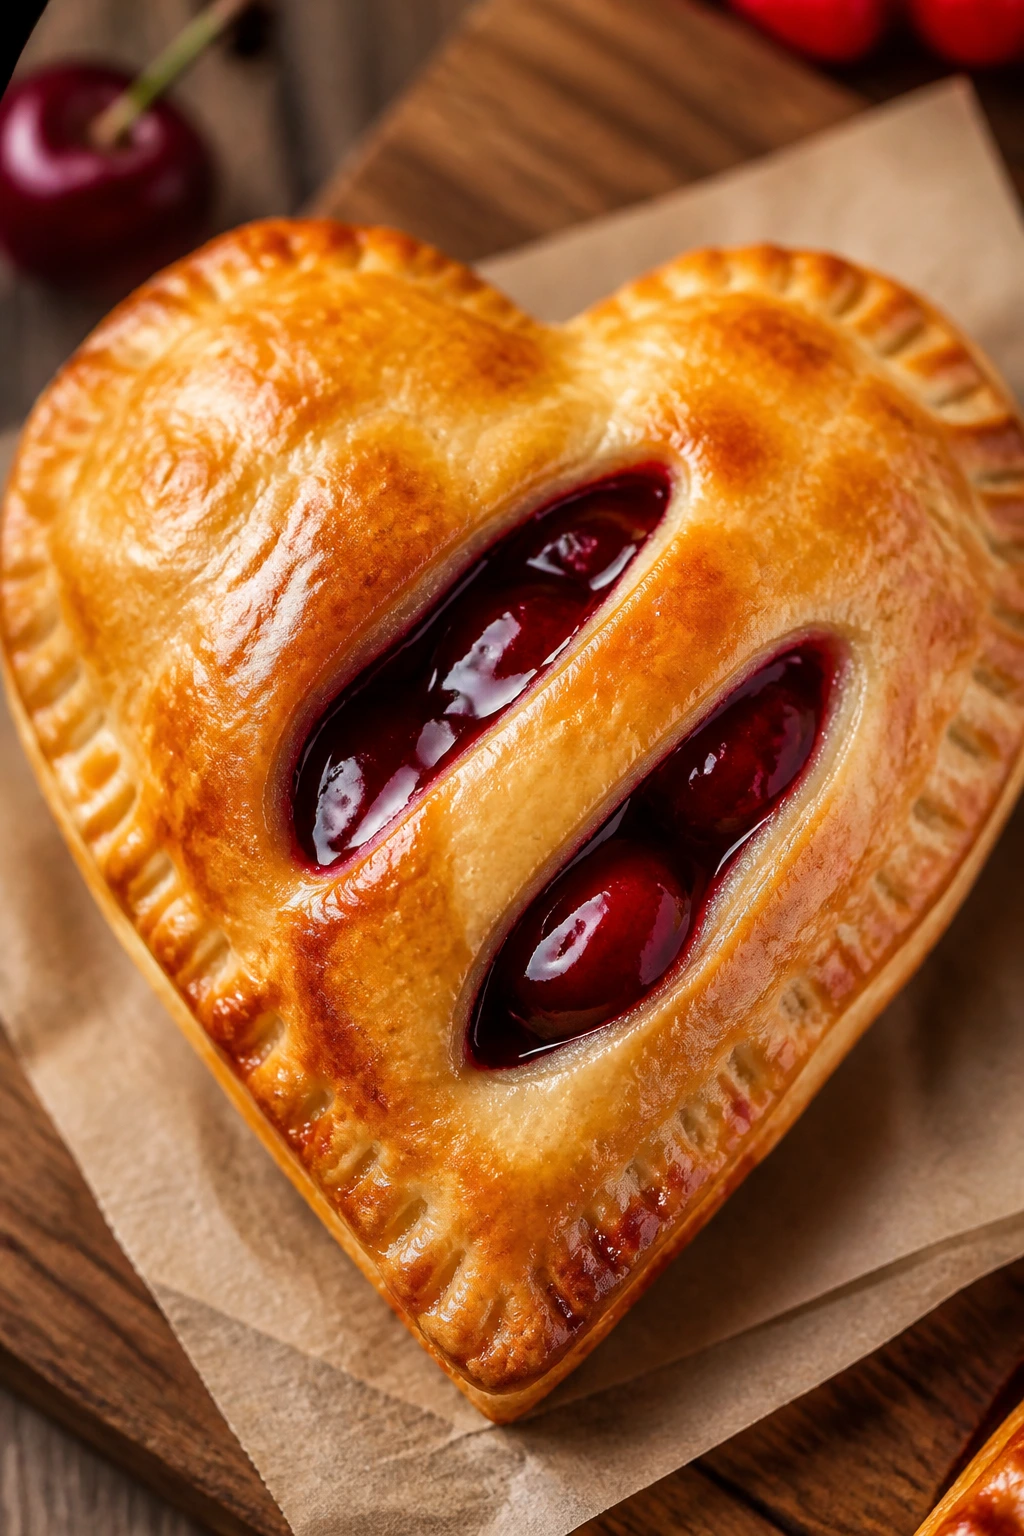
Hand pies are neat little pockets of cherry filling, and the shape alone gives them instant charm. The crust turns golden and flaky, while the fruit inside stays dark and glossy.
They’re also one of the easiest desserts to pack up and carry. No forks, no slicing, no drama.
Why It Works:
Refrigerated pie crust keeps the pastry part fast and reliable. Cherry filling holds its shape well once baked, and a brushed egg wash gives the tops a deep, shiny finish. The sealed edges keep the filling from leaking too much, which is the main thing that can go wrong here.
Key Ingredients:
- 2 refrigerated pie crusts
- 1 1/2 cups cherry pie filling
- 1 egg, beaten
- 1 tbsp water
- 2 tbsp sanding sugar
- 1 tbsp flour, for rolling
Quick Steps:
- Heat the oven to 400°F (200°C) and line a baking sheet with parchment.
- Roll out the crusts and cut into hearts or rounds about 4 inches wide.
- Spoon 1 tablespoon cherry filling into the center of each piece, fold over, and crimp the edges with a fork.
- Brush with egg wash, cut a small steam vent, and sprinkle with sanding sugar.
- Bake for 14 to 16 minutes, until golden and bubbling.
Equipment for This Recipe:
- Baking sheet
- Parchment paper
- Rolling pin
- Fork
- Pastry brush
How to Serve This Dish:
Serve warm or room temperature. They look especially nice lined up in pairs, with a little cherry syrup brushed lightly over the tops.
Pro Tips for This Recipe:
- Keep the filling centered and small so the pies seal.
- Chill the assembled pies for 10 minutes before baking if the dough feels soft.
- Use a sharp knife or vent cutter so steam can escape.
- Dust lightly with powdered sugar after cooling if you want a softer look.
Variations on This Dish:
- Mixed Berry Hand Pies: Swap in berry filling if you want a softer tart note.
- Chocolate Cherry Pies: Add a few chopped chocolate pieces to the filling.
- Heart-Shaped Version: Use a heart cutter for a more obvious Valentine look.
Common Mistakes to Avoid with This Dish:
- Overfilling: The seams burst open and leak.
- Not sealing the edges: The filling escapes in the oven.
- Skipping the vent: Steam can split the top crust.
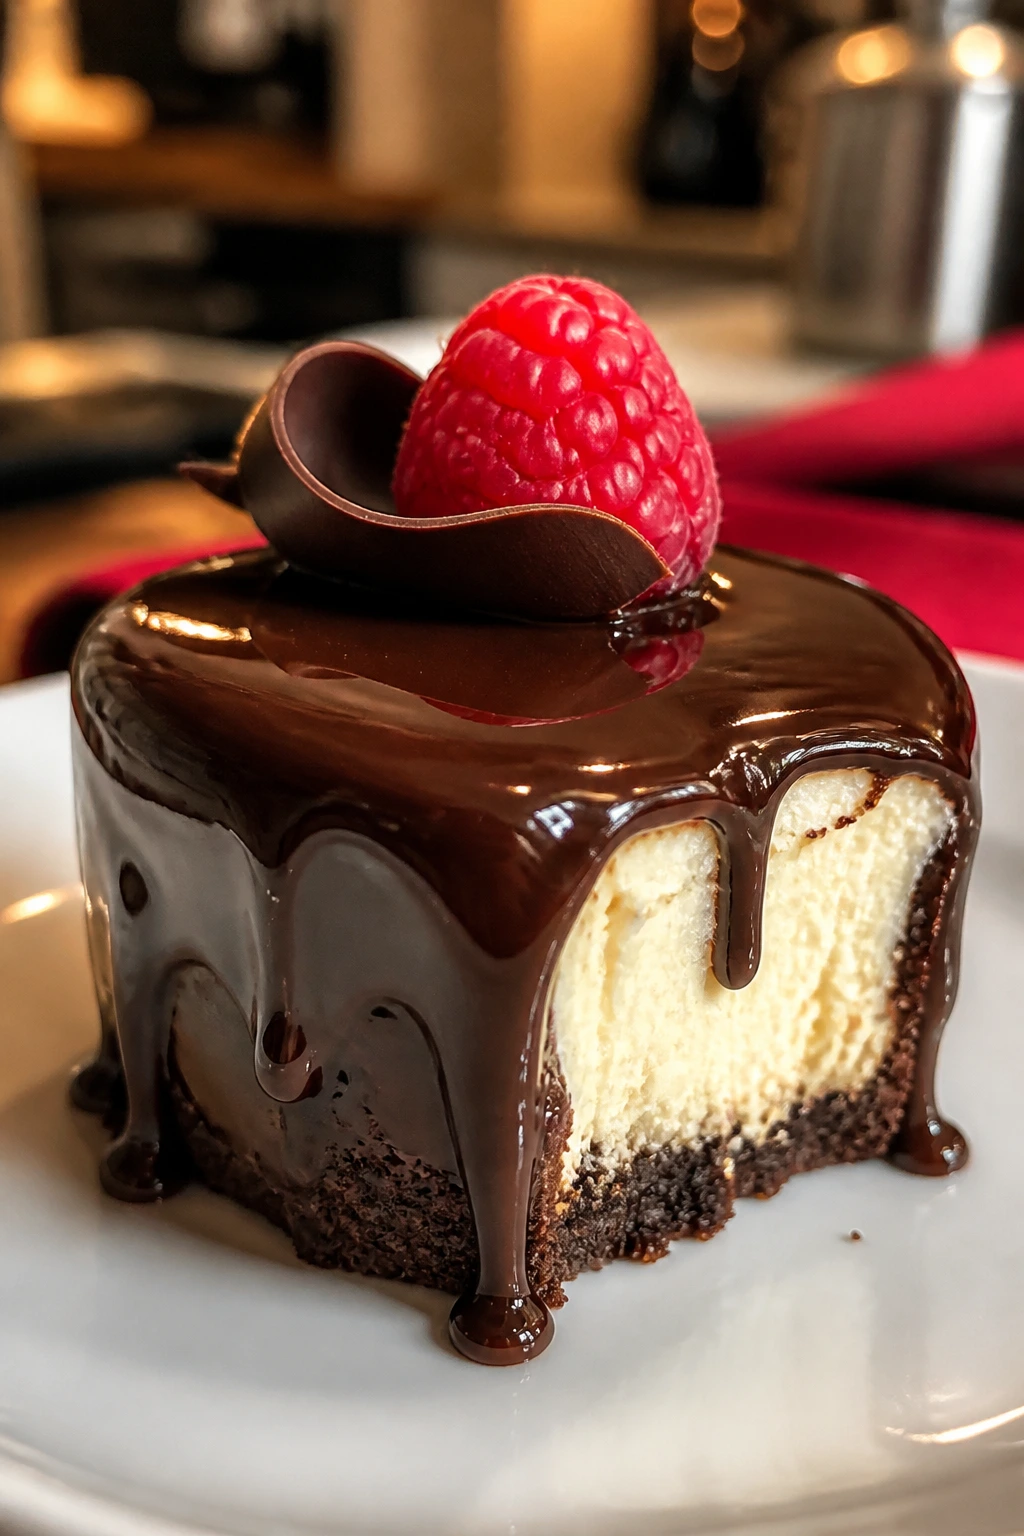
19. Chocolate Ganache Tartlets
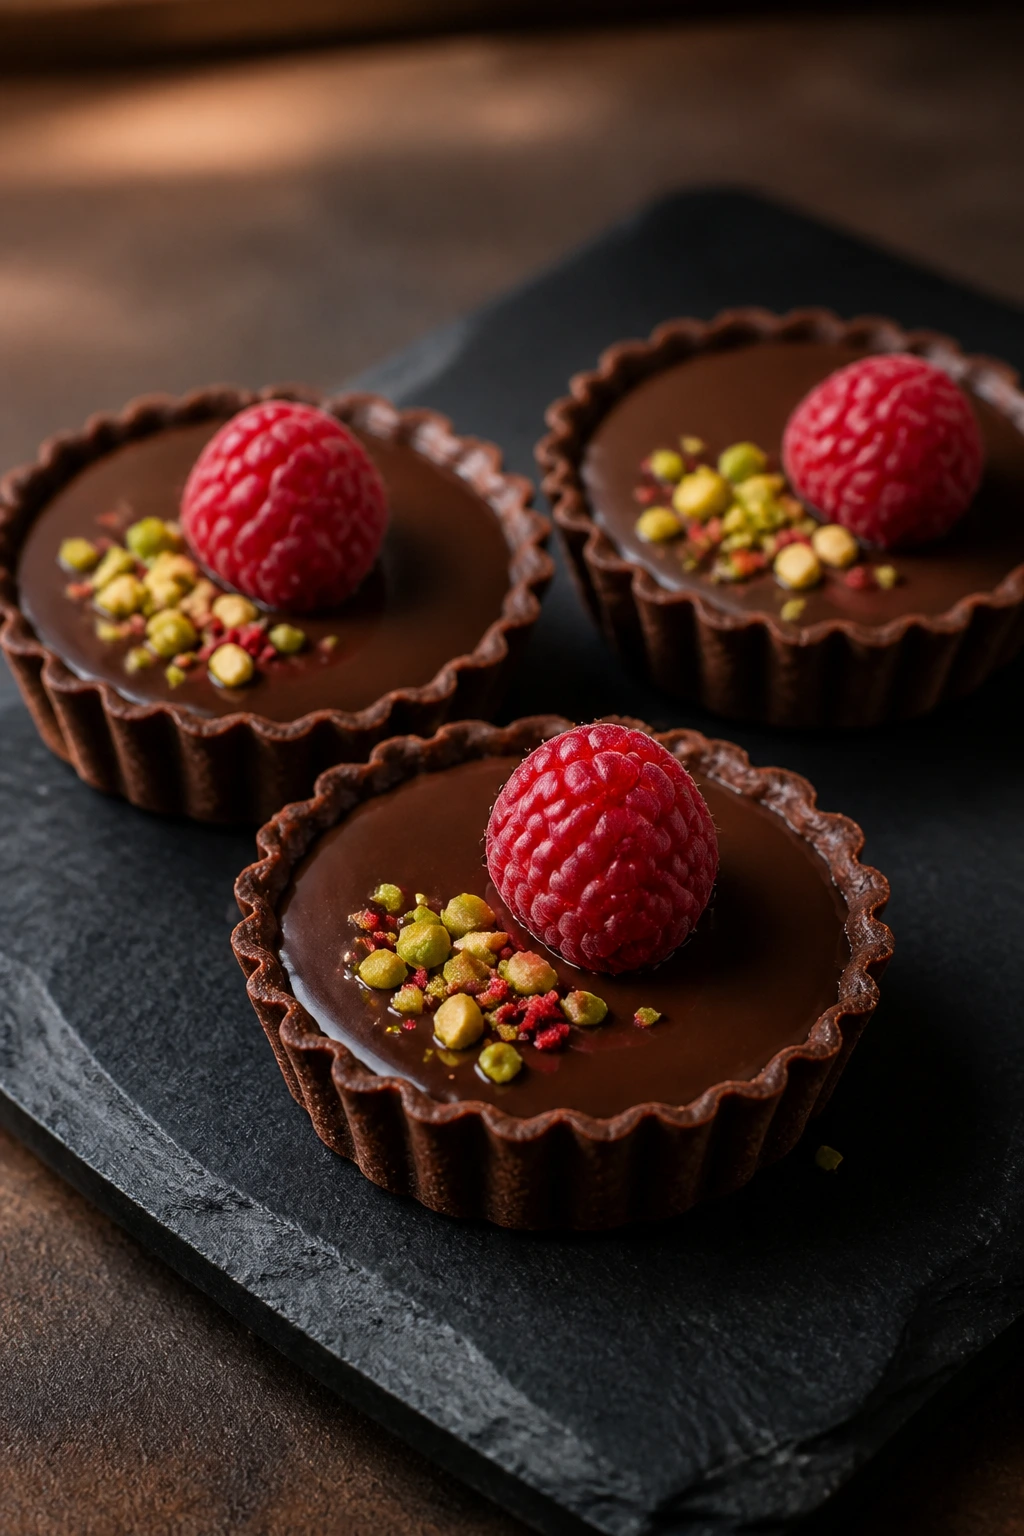
These tartlets taste more expensive than the effort they ask for. The shell is crisp, the ganache is smooth and dark, and a few raspberries on top make the whole thing look carefully plated.
They’re the sort of dessert you set down with a little pause. People notice.
Why It Works:
Ganache needs only chocolate and warm cream, which makes it one of the simplest fillings in pastry work. Once chilled, it slices cleanly and holds its shape in mini shells. Raspberries add a sharp edge that keeps the tartlets from tasting one-note.
Key Ingredients:
- 6 pre-baked mini tart shells
- 6 oz dark chocolate, chopped
- 2/3 cup heavy cream
- 1 tbsp unsalted butter
- Pinch of fine salt
- 1/2 cup fresh raspberries
- Chopped pistachios, optional
Quick Steps:
- Heat the cream until steaming, then pour it over the chocolate, butter, and salt.
- Let it sit for 1 minute, then stir until the ganache turns smooth and glossy.
- Spoon the ganache into the tart shells.
- Chill for 20 minutes, until the filling is set but still soft in the middle.
- Top with raspberries and pistachios before serving.
Equipment for This Recipe:
- Small saucepan or microwave-safe bowl
- Spoon
- Mini tart shells
- Refrigerator space
- Small knife, if chopping chocolate
How to Serve This Dish:
Serve on a flat plate with the berries resting slightly off-center. A narrow strip of powdered sugar on the plate can make the dark filling stand out.
Pro Tips for This Recipe:
- Chop the chocolate finely so the cream melts it evenly.
- Stir gently; vigorous whisking can trap bubbles.
- Chill just enough to set the ganache, not so long that it turns hard.
- If using pistachios, add them right before serving so they stay crisp.
Variations on This Dish:
- Salted Caramel Tartlets: Add a thin layer of caramel under the ganache.
- White Chocolate Tartlets: Use white chocolate and top with raspberries only.
- Orange Ganache Tartlets: Stir orange zest into the warm cream.
Common Mistakes to Avoid with This Dish:
- Cream too hot: It can scorch the chocolate.
- Weak chocolate: Use a bar with enough cocoa solids or the filling can feel soft.
- Overchilling: The ganache should still be spoon-tender.
20. Pink Velvet Cupcakes with Cream Cheese Swirl
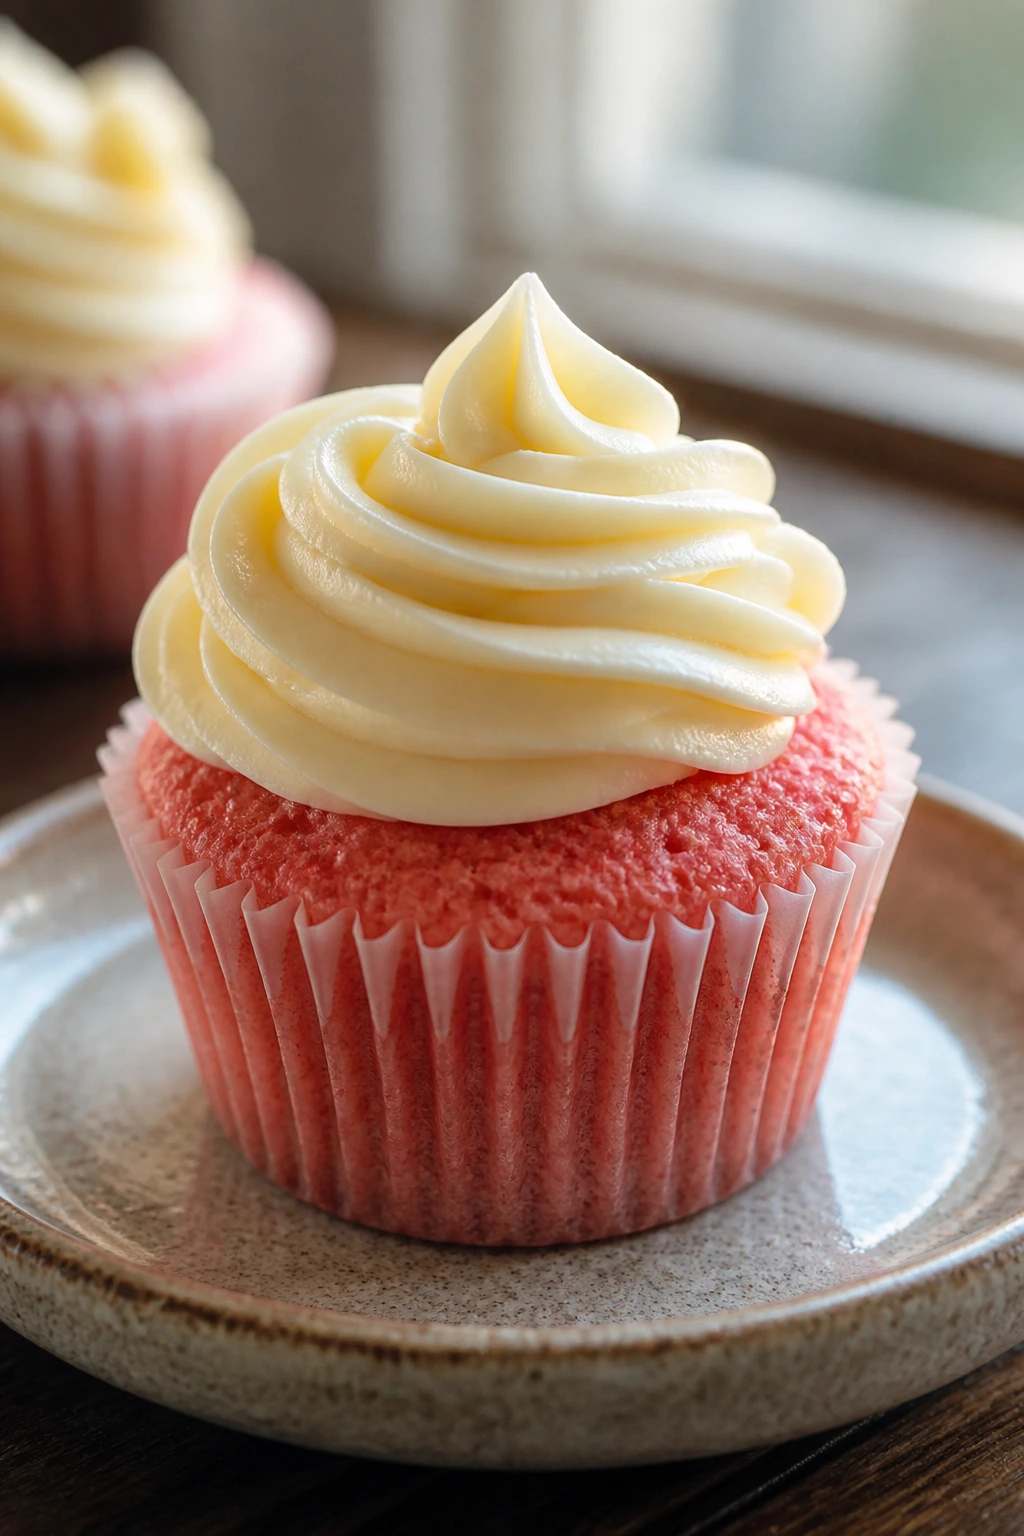
These cupcakes are cheerful in a way that feels earned, not loud. The pink crumb is soft, the cream cheese swirl bakes into a pale cap, and the whole thing looks neat with almost no decorating.
If you want something classic but a little playful, this is a reliable place to land.
Why It Works:
A boxed vanilla cake mix keeps the base fast and gives you a light crumb that accepts food coloring well. The cream cheese swirl adds tang and a pretty pale top that contrasts with the pink cake beneath. Baking the swirl right on top means you get decoration and flavor in one move.
Key Ingredients:
- 1 box vanilla cake mix, about 15.25 oz
- Ingredients listed on the box, usually eggs, oil, and water
- Pink food coloring, a few drops
- 8 oz cream cheese, softened
- 1/4 cup granulated sugar
- 1 large egg
- 1 tsp vanilla extract
Quick Steps:
- Heat the oven to 350°F (175°C) and line a muffin pan with liners.
- Mix the cake batter according to the box, then tint it pale pink.
- Beat the cream cheese, sugar, egg, and vanilla until smooth.
- Fill each liner halfway with pink batter, spoon a little cream cheese mixture on top, and swirl lightly with a toothpick.
- Bake for 18 to 20 minutes, until the tops spring back when touched.
Equipment for This Recipe:
- Muffin pan
- Cupcake liners
- Mixing bowls
- Toothpick
- Hand mixer
How to Serve This Dish:
Let them cool fully before serving so the swirl sets cleanly. A few sliced strawberries on the plate make the cupcakes look even brighter.
Pro Tips for This Recipe:
- Keep the cake batter pale pink; it looks softer and less artificial.
- Don’t over-swirl or the cream cheese layer disappears.
- Cool in the pan for 5 minutes, then move to a rack.
- Refrigerate if you want a firmer cream cheese top.
Variations on This Dish:
- Strawberry Velvet Cupcakes: Add a spoonful of strawberry puree to the batter.
- Lemon Swirl Cupcakes: Add lemon zest to the cream cheese mixture.
- Chocolate-Pink Cupcakes: Use a chocolate cake mix and keep the swirl on top.
Common Mistakes to Avoid with This Dish:
- Overfilling the liners: The tops can spill into each other.
- Too much food coloring: The pink should stay soft, not neon.
- Underbaking the center: The cream cheese swirl needs to set fully.
21. Strawberry Meringue Nests
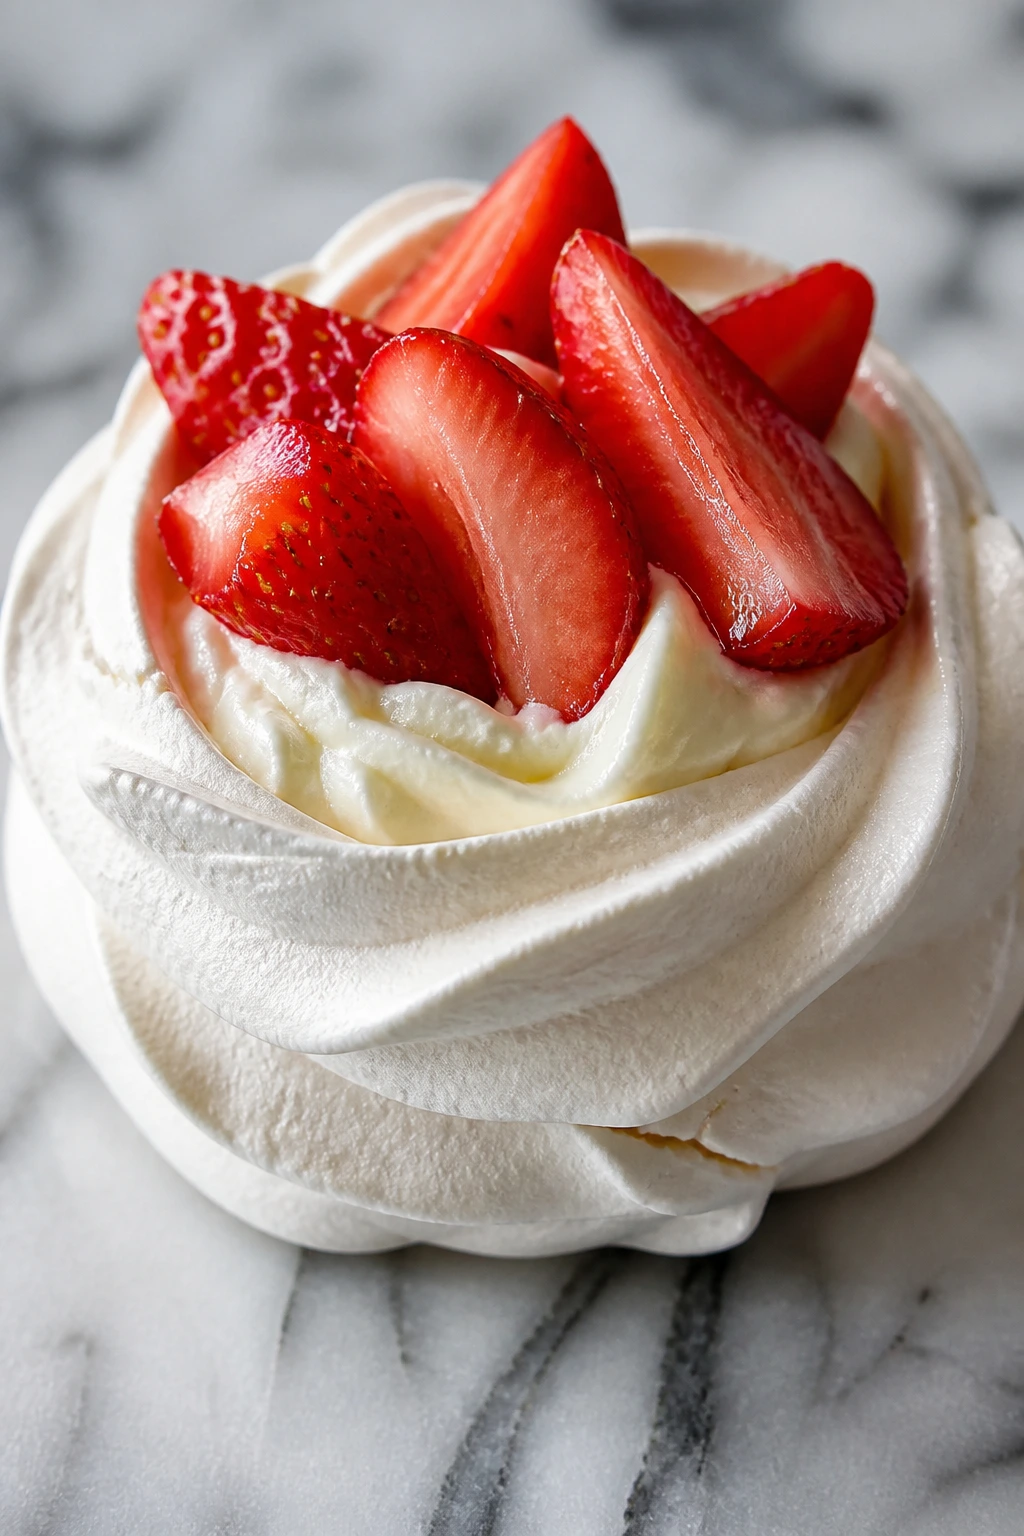
Store-bought meringue nests are a nice little shortcut when you want something airy and crisp without waiting on the oven. Fill them with whipped cream and strawberries, and you get a dessert that looks delicate before anyone even lifts a spoon.
The crunch matters here. It gives the dessert lift.
Why It Works:
Meringue shells stay crisp as long as they stay dry, which makes them ideal for last-minute assembly. Whipped cream adds softness, and sliced strawberries bring moisture and a fresh bite. A tiny brush of jam can add shine without weighing the shells down.
Key Ingredients:
- 8 store-bought meringue nests
- 1 cup heavy cream
- 2 tbsp powdered sugar
- 1 tsp vanilla extract
- 2 cups strawberries, sliced
- 2 tbsp strawberry jam, warmed
Quick Steps:
- Whip the cream with powdered sugar and vanilla until soft peaks form.
- Spoon the cream into the meringue nests.
- Top with sliced strawberries.
- Brush the berries lightly with warm jam if you want extra shine.
- Serve right away so the shells stay crisp.
Equipment for This Recipe:
- Mixing bowl
- Hand mixer
- Spoon
- Small pastry brush
- Serving tray
How to Serve This Dish:
Place the nests on a platter only when you’re ready to serve. They look nicest when the berries are heaped a little higher than the rim.
Pro Tips for This Recipe:
- Keep the nests dry until the very end.
- Slice strawberries evenly so the tops look tidy.
- Chill the whipped cream bowl first if your kitchen is warm.
- Add jam sparingly; too much moisture softens the shells.
Variations on This Dish:
- Berry Medley Nests: Use raspberries, blueberries, and strawberries together.
- Chocolate Cream Nests: Fold a spoonful of cocoa into the whipped cream.
- Citrus Nests: Add lemon zest to the cream for a sharper finish.
Common Mistakes to Avoid with This Dish:
- Assembling too early: The shells soften quickly.
- Wet fruit: It turns the bottom sticky.
- Whipping cream too stiff: It can feel grainy inside the crisp shell.
22. Funfetti Blondie Hearts
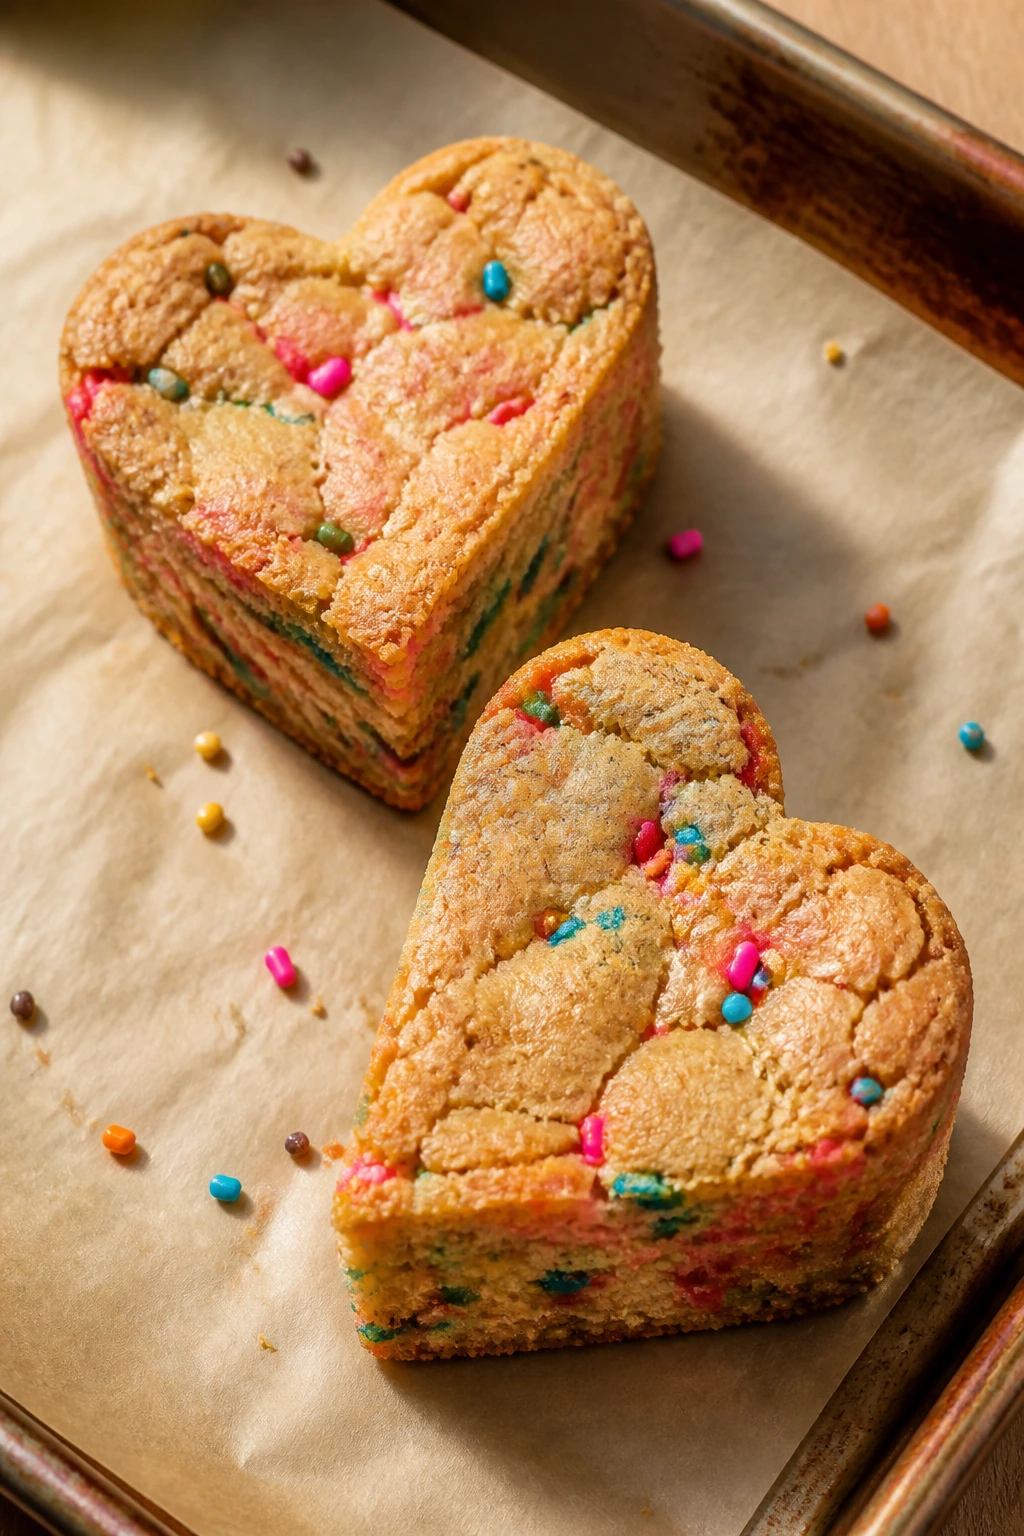
These blondies are soft, buttery, and loaded with tiny pops of color. Cut them into hearts, and they suddenly look like they belong on a Valentine tray instead of in a lunchbox.
They’re a nice option when you want something chewy and easy to slice. No frosting needed, unless you feel like it.
Why It Works:
Brown sugar keeps blondies chewy, while white chocolate chips melt into little pockets that stay soft after baking. Sprinkles bring the color without changing the texture much. Cutting the cooled blondie slab into hearts turns a simple bar dessert into something more deliberate.
Key Ingredients:
- 1/2 cup unsalted butter, melted
- 1 cup light brown sugar
- 1 large egg
- 1 tsp vanilla extract
- 1 cup all-purpose flour
- 1/2 tsp baking powder
- 1/4 tsp fine salt
- 1/3 cup white chocolate chips
- 1/4 cup pink or red sprinkles
Quick Steps:
- Heat the oven to 350°F (175°C) and line an 8-inch square pan with parchment.
- Whisk the butter and brown sugar, then beat in the egg and vanilla.
- Stir in the flour, baking powder, salt, white chocolate chips, and sprinkles.
- Spread the batter in the pan and bake for 20 to 24 minutes, until the top is set and the center is still soft.
- Cool completely before cutting into hearts with a cookie cutter.
Equipment for This Recipe:
- 8-inch square pan
- Parchment paper
- Mixing bowl
- Whisk
- Heart cutter
How to Serve This Dish:
Serve them plain or with a thin drizzle of white chocolate. They look especially tidy when the heart shapes are cut from the center of the pan, not the edges.
Pro Tips for This Recipe:
- Don’t overbake; blondies get dry fast.
- Add sprinkles at the end so they don’t bleed too much into the batter.
- Cool fully for the cleanest cut.
- Wipe the cutter between cuts if the edges get sticky.
Variations on This Dish:
- Chocolate Chip Blondies: Swap half the white chocolate chips for semisweet chips.
- Raspberry Blondies: Add freeze-dried raspberry pieces for tart pops of color.
- Brown Butter Version: Brown the butter first for a deeper, nuttier flavor.
Common Mistakes to Avoid with This Dish:
- Cutting warm bars: They tear instead of slice.
- Too many sprinkles: The batter can get greasy-looking.
- Baking until firm all the way through: You want a soft center.
23. Chocolate Oreo Truffles with Pink Drizzle
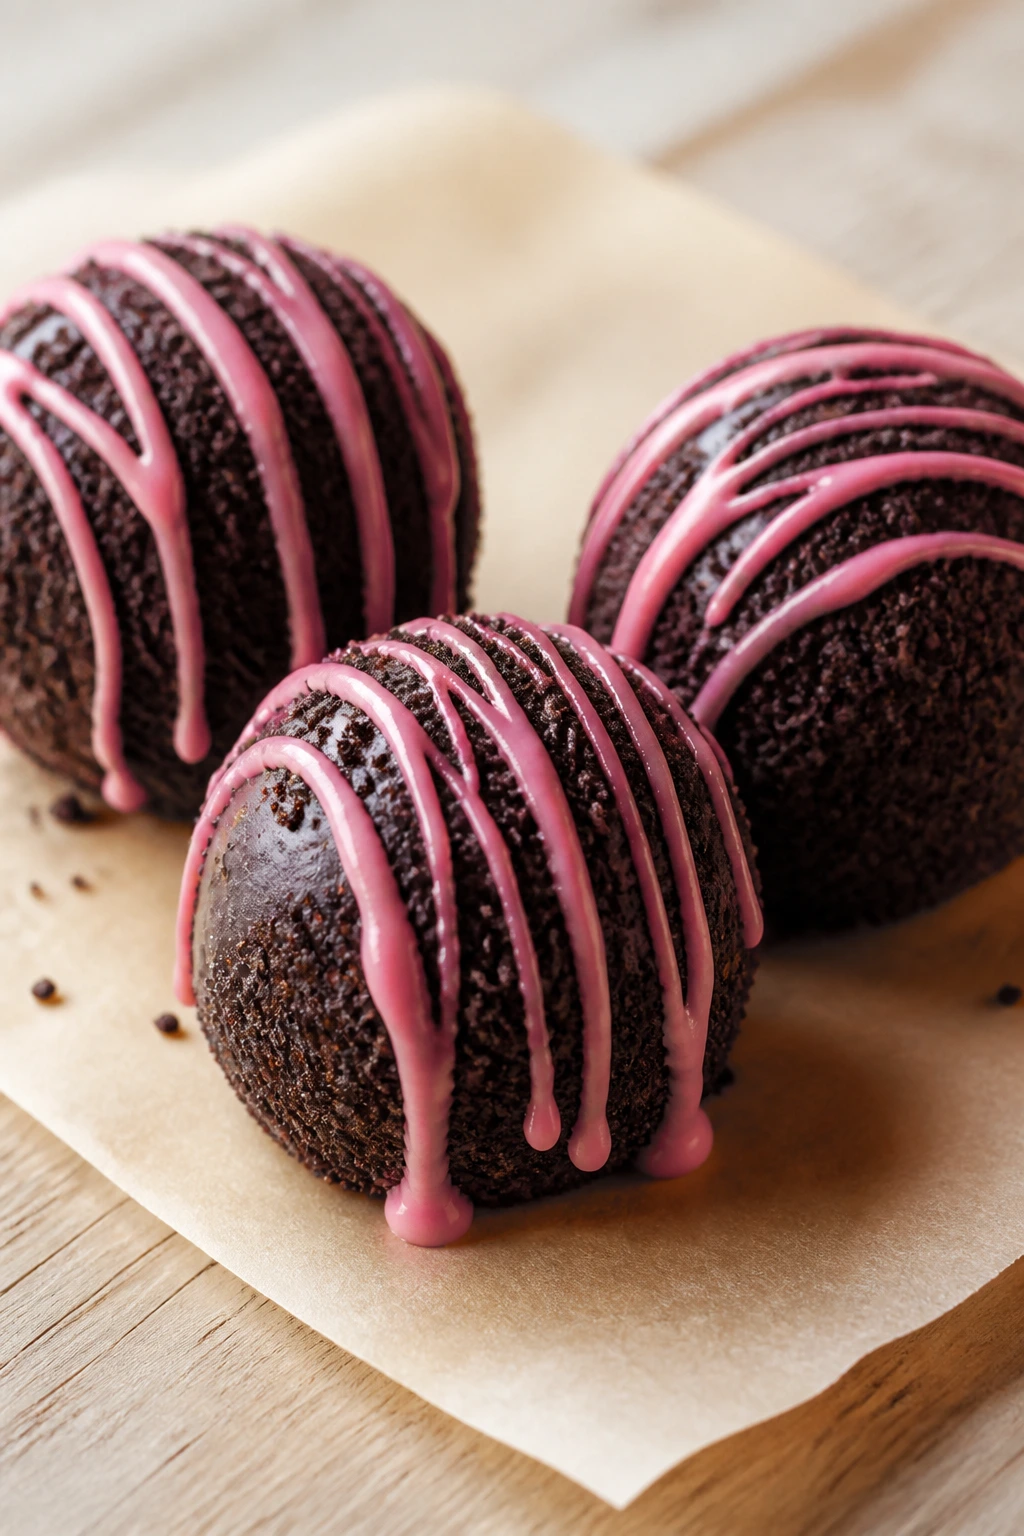
If you want maximum visual payoff from minimal effort, truffles do the job. Oreo crumbs, cream cheese, a quick chocolate shell, and a pink drizzle — that’s the whole story, and it works.
They are rich. Small is the right size.
Why It Works:
The cookies and cream cheese form a dense, rollable mixture that chills into neat spheres. Candy melts set faster than real chocolate and give you a smooth outside finish. A pink drizzle makes the truffles look decorated without adding any real complexity.
Key Ingredients:
- 36 Oreo cookies
- 8 oz cream cheese, softened
- 12 oz white or pink candy melts
- 2 oz dark chocolate, melted
- Valentine sprinkles, optional
Quick Steps:
- Crush the Oreos into fine crumbs and mix with the cream cheese until evenly combined.
- Roll the mixture into 1-inch balls and chill for 20 minutes.
- Melt the candy melts until smooth.
- Dip each truffle, set on parchment, and drizzle with dark chocolate.
- Add sprinkles while the coating is still wet.
Equipment for This Recipe:
- Food processor or zip-top bag and rolling pin
- Mixing bowl
- Baking sheet
- Parchment paper
- Fork or dipping tool
How to Serve This Dish:
Serve them in mini paper cups so they don’t roll around. A shallow box or tin works well for gifting, too.
Pro Tips for This Recipe:
- Crush the cookies very fine so the truffles roll smoothly.
- Chill before dipping or they can fall apart.
- Thin the coating slightly if it seems too thick.
- Keep the truffles cool until serving so the shell stays firm.
Variations on This Dish:
- Dark Chocolate Truffles: Use dark coating for a less sweet finish.
- Peppermint Truffles: Add a small drop of peppermint extract to the filling.
- Strawberry Drizzle Truffles: Replace the dark drizzle with pink candy melts.
Common Mistakes to Avoid with This Dish:
- Too much cream cheese: The mixture turns sticky and soft.
- Skipping the chill: The balls won’t hold in the coating.
- Thick coating: It hides the smooth shape and feels heavy.
24. Berry Crisp in Ramekins
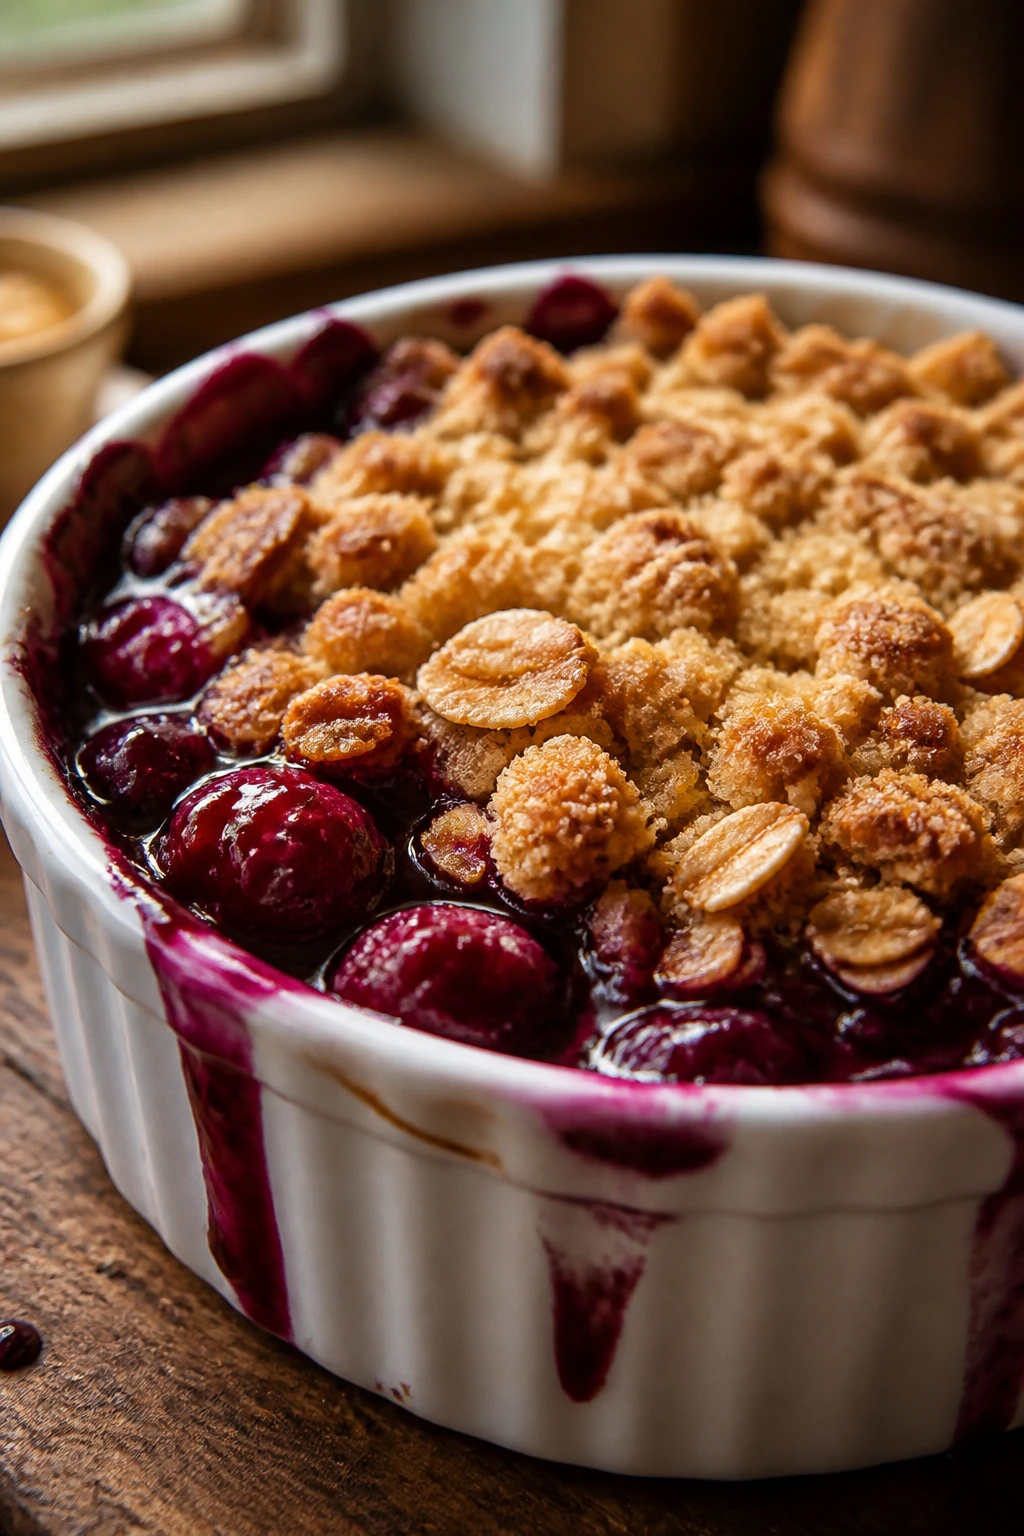
A berry crisp in a ramekin gives you all the comfort of a big baked fruit dessert, just in a portion that feels more intentional. The topping is buttery and craggy, the fruit bubbles around the edges, and the whole thing smells like warm sugar and berries.
It’s the kind of dessert that likes a spoon and a quiet table.
Why It Works:
Small ramekins help the fruit bake quickly and keep the topping crisp around the edges. A little cornstarch thickens the fruit juices, which prevents the crisp from turning soupy. The oat topping gives you crunch without needing a full pie crust.
Key Ingredients:
- 3 cups mixed berries
- 2 tbsp granulated sugar
- 1 tsp lemon juice
- 1 tbsp cornstarch
- 1/2 cup old-fashioned oats
- 1/3 cup all-purpose flour
- 1/3 cup brown sugar
- 1/4 tsp cinnamon
- 4 tbsp cold butter, cubed
Quick Steps:
- Heat the oven to 375°F (190°C).
- Toss the berries with sugar, lemon juice, and cornstarch, then divide between 4 ramekins.
- Mix the oats, flour, brown sugar, and cinnamon, then cut in the butter until crumbly.
- Scatter the topping over the berries.
- Bake for 20 to 25 minutes, until the fruit bubbles and the topping turns golden.
Equipment for This Recipe:
- 4 ramekins
- Baking sheet
- Mixing bowl
- Fork or pastry cutter
- Spoon
How to Serve This Dish:
Serve warm with vanilla ice cream or whipped cream. A small spoon lets you get through the topping and fruit together without making a mess.
Pro Tips for This Recipe:
- Keep the butter cold for a crisper topping.
- Don’t overpack the topping; loose crumbs bake better.
- Use berries with a mix of tart and sweet flavors.
- Let it rest 5 minutes before serving so the juices settle.
Variations on This Dish:
- Strawberry Crisp: Use all strawberries for a softer, sweeter filling.
- Chocolate Berry Crisp: Stir mini chocolate chips into the topping.
- Almond Crisp: Add sliced almonds for extra crunch.
Common Mistakes to Avoid with This Dish:
- Too much liquid: The filling can drown the topping.
- Warm butter in the topping: It turns pasty instead of crumbly.
- Serving straight from the oven: The fruit needs a short settle time.
25. Berry Cream Cheese Danish Hearts
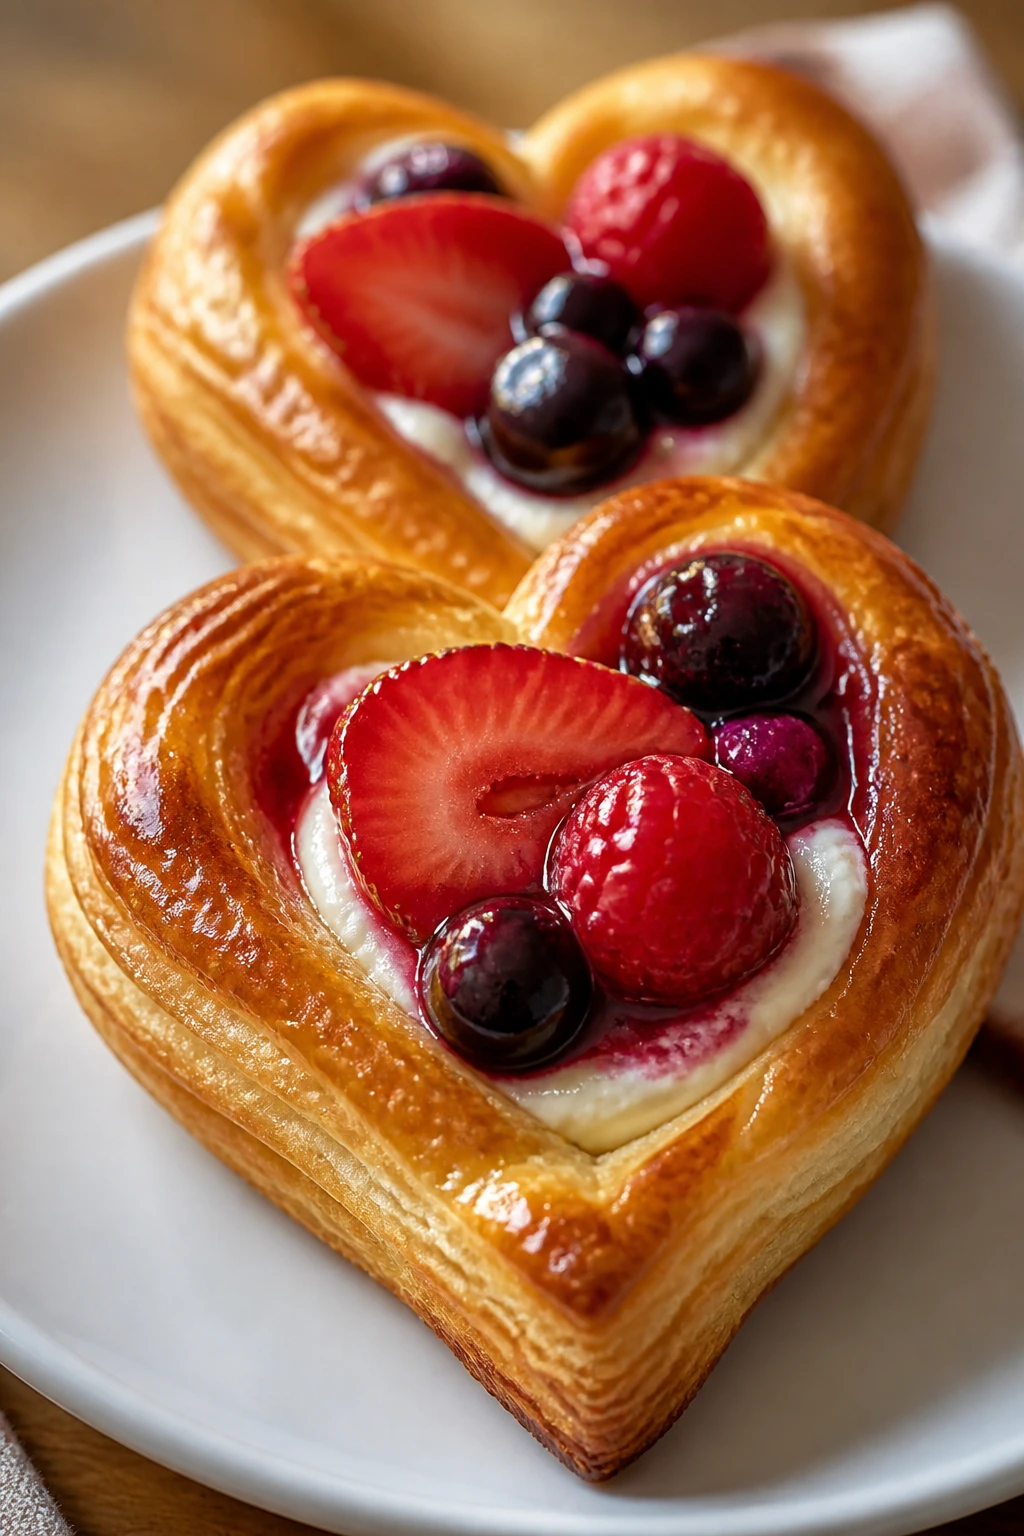
These danish hearts look like they came from a café case, which is the whole reason to make them. Puff pastry gives you the flaky frame, the cream cheese filling goes soft and rich in the center, and the berries make the top look bright and tidy.
They’re a strong finish for a Valentine dessert tray because they feel polished without asking for much.
Why It Works:
Puff pastry puffs around a cool cream cheese filling, creating a contrast between crisp edges and soft center. A little berry topping keeps the sweetness in check and gives the heart shape a clear outline. Since the pastry bakes quickly, you get a dessert that looks styled in under half an hour.
Key Ingredients:
- 1 sheet puff pastry, thawed
- 4 oz cream cheese, softened
- 2 tbsp granulated sugar
- 1 tsp vanilla extract
- 1 cup berries or 1/2 cup berry jam
- 1 egg, beaten
- 1 tbsp milk
- Powdered sugar, for dusting
Quick Steps:
- Heat the oven to 400°F (200°C) and line a baking sheet with parchment.
- Cut the puff pastry into hearts and score a smaller heart border inside each one without cutting all the way through.
- Beat the cream cheese, sugar, and vanilla, then spread a spoonful inside the scored border.
- Top with berries or a little jam, brush the pastry edges with egg wash, and bake for 12 to 15 minutes until golden.
- Dust with powdered sugar once cooled slightly.
Equipment for This Recipe:
- Baking sheet
- Parchment paper
- Sharp knife or heart cutter
- Mixing bowl
- Pastry brush
How to Serve This Dish:
Serve them warm or at room temperature on a flat plate. A few extra berries around the edge make the hearts look more finished.
Pro Tips for This Recipe:
- Keep the pastry cold until baking.
- Don’t overload the center or the pastry won’t puff properly.
- Score the border lightly so it rises around the filling.
- Dust with powdered sugar only after the pastry is no longer steaming.
Variations on This Dish:
- Chocolate-Dipped Danish Hearts: Add a chocolate drizzle after baking.
- Lemon Berry Hearts: Stir lemon zest into the cream cheese filling.
- Mixed Fruit Hearts: Use raspberries, strawberries, and blueberries for a brighter top.
Common Mistakes to Avoid with This Dish:
- Cutting through the border: You lose the frame that makes the pastry puff.
- Warm filling on warm pastry: It can collapse the layers.
- Too much jam: The filling can leak and burn on the tray.
Why These Quick Valentine’s Desserts Work So Well on a Busy Evening
The best quick Valentine’s desserts do not try to imitate a wedding cake in miniature. They lean into what desserts already do well: contrast, color, and clean edges. A dark chocolate shell against a red berry. A pale cream filling under a glossy fruit top. A crisp pastry frame around a soft center. That’s the whole game, and it works because your eye reads those details long before you take a bite.
There’s also a practical reason this style of dessert wins. Most of these recipes can be made with a hand mixer, a baking sheet, and a little fridge space. That means you can make one component ahead, then assemble at the end when the table is set and the plates are ready. No long decorating session. No towering layer cake that asks for perfect slices.
A lot of people think a pretty dessert has to be delicate in the difficult sense. It doesn’t. It just has to be tidy, bright, and built from pieces that hold their shape long enough to reach the plate.
Essential Equipment for These Recipes
- Baking sheets: You’ll use them for cookies, pastry hearts, bark, and anything that needs parchment-lined chilling.
- Parchment paper: This keeps chocolate, cookies, and pastries from sticking and makes cleanup faster.
- Hand mixer or stand mixer: Handy for cheesecake filling, whipped cream, mousse, and meringue.
- Mixing bowls in two or three sizes: Small bowls help with chocolate, medium bowls handle fillings, and larger ones give you room for batter.
- Cookie cutters, especially hearts: A 2- to 3-inch cutter does a lot of work across this whole collection.
- Muffin tin and liners: Useful for cheesecake bites, cupcake-style desserts, and anything portioned neatly.
- Ramekins or small baking dishes: Good for lava cakes, cobblers, and any warm dessert for two.
- Microwave-safe bowls or a double boiler setup: Chocolate melts more cleanly when you can control the heat.
- Pastry brush: Helps with egg wash, jam glaze, and a few glossy finishes.
- Cooling rack: Keeps cookies, brownies, and puff pastry from steaming on the bottom.
Smart Shopping and Ingredient Tips
Strawberries do most of the visual work in this collection, so buy the firm ones with shiny skin and green tops that still look fresh. Soft berries are fine for compote or parfait layers, but not for dipping or skewers. Raspberries should hold their shape in the carton instead of collapsing at the bottom, and cherries need to be dry and glossy, not leaking juice.
For chocolate, chopped bars melt more smoothly than most chips. Chips often contain stabilizers that help them keep their shape, which is useful in cookies but annoying in bark, ganache, and dipping. If you can only buy chips, add a teaspoon of coconut oil or butter and stir slowly so the melt stays smooth.
Cream cheese should be the block-style kind, not the whipped tub. The block gives you a denser, more dependable set in cheesecakes, parfaits, frostings, and Danish fillings. Let it soften on the counter until a finger presses into it easily; cold cream cheese leaves tiny lumps that never fully disappear.
Puff pastry is one of the best shortcuts here, but it needs a proper thaw. If it’s still icy in the middle, the layers can bake unevenly. Keep it cold, but pliable. That’s the line.
Freeze-dried strawberries are worth tracking down if you want color without extra moisture. They crush into a bright pink dust for bark, truffles, and topping, and they stay crisp where fresh fruit would turn soggy. A small bag goes a long way.
How to Serve These Desserts
Presentation:
Use plain plates, shallow platters, or clear glasses and let the color do the talking. A white plate makes chocolate look darker and berries look brighter. For individual desserts, a dusting of powdered sugar, a few whole berries, or one clean chocolate drizzle line is usually enough.
Accompaniments:
Soft whipped cream goes with almost everything here, but the sharper pairings matter too. Espresso helps with chocolate lava cakes and ganache tartlets. A scoop of vanilla ice cream suits cobblers, brownies, and warm crisps. For the fruit-forward desserts, keep it light: unsweetened whipped cream, a spoon of berry coulis, or a little lemon curd on the side.
Portions:
These recipes are built around small servings, which is part of why they feel special. Two lava cakes, four ramekins of crisp, or a dozen truffles all scale well; if you’re serving a group, make more of the easy-assembly desserts rather than trying to stretch the plated ones too far. For a quiet dinner, one or two rich desserts are enough. For a party, bite-size pieces usually disappear fastest.
Beverage Pairing:
Sparkling wine works with fruit and cream desserts because the bubbles cut through the richness. For a nonalcoholic pairing, try black tea with a splash of milk or sparkling water with lemon and a few raspberries dropped in the glass. Chocolate desserts like lava cakes and ganache tartlets also sit nicely next to strong coffee.
Additional Tips and Flavor Boosters
Flavor Enhancement: A tiny pinch of flaky salt on chocolate desserts does more than people expect. It pulls the cocoa forward and keeps white chocolate from feeling sugary and flat.
Customization: If you want the whole tray to lean fruitier, add lemon zest to cheesecake fillings, mousse, and cream cheese frostings. If you want richer desserts, use dark chocolate, brown sugar, and a spoonful of espresso in the chocolate items.
Serving Suggestions: Add fresh mint only where it fits. It works on berry desserts and mousse cups, but not every plate needs it. A light brush of warmed jam on fruit toppings gives them shine and makes the dessert look finished even before the first bite.
Make-It-Yours: For a gluten-free version, lean on the bark, mousse cups, truffles, dipped strawberries, and cheesecake-style desserts made with almond or gluten-free cookie crumbs. For dairy-free versions, use coconut cream for whipped toppings and dairy-free chocolate where the recipe allows. If you want less sweetness, keep the decorations simple and let the berries do more of the work.
Make-Ahead, Storage, and Reheating Guidance
A few of these desserts are best made and eaten the same day. Chocolate-dipped strawberries, strawberry shortcake skewers, and meringue-based desserts all lose their crisp texture once they sit too long. Plan those for the day of serving, and assemble them as late as you reasonably can.
The baked bars, brownies, cookies, truffles, bark, and cake pops keep well. Most of them can be stored in an airtight container at room temperature for 2 to 3 days, though anything with cream cheese or fresh fruit on top should go into the fridge. Cheesecake bites, parfaits, mousse cups, danish hearts with cream filling, and mini pavlovas should be refrigerated and eaten within 3 days for the best texture.
Freezing works best for the sturdier desserts. Brownies, blondies, cake pops, and cookie dough portions can be frozen for up to 2 months. Wrap them tightly, then add a second layer of protection in a freezer bag or container. Thaw overnight in the refrigerator. Bark can be frozen too, but keep it sealed so it doesn’t pick up odd fridge smells.
Warm desserts need gentle reheating. Cobbler and berry crisp can go back into a 300°F (150°C) oven for about 8 to 10 minutes, just until the edges are warm again. Lava cakes do not reheat well once unmolded, so they’re best baked fresh. If you need to make them ahead, mix the batter and hold it in the ramekins in the fridge for a few hours, then bake from chilled and add 1 extra minute.
Variations and Adaptations to Try

Gluten-Free Sweethearts:
The easiest swap is to focus on naturally gluten-free desserts first — dipped strawberries, mousse cups, truffles, bark, and some cheesecake desserts work with almost no changes. For baked bars or cookies, use a gluten-free flour blend that includes xanthan gum and keep an eye on spread, because those doughs can behave a little differently in the oven.
Dairy-Free Cupid Swap:
Use dairy-free chocolate, coconut cream whipped to soft peaks, and plant-based cream cheese where the filling depends on it. Truffles and bark adapt especially well because the structure comes from chocolate and crumbs rather than dairy-heavy custards.
Less-Sweet Valentine Tray:
Choose dark chocolate over white chocolate, keep the powdered sugar dusting light, and use tart berries like raspberries or cherries. You can also skip the glaze on several of these desserts and let the fruit stay bare, which gives the final plate more bite.
Two-Person Dessert Date:
Cut recipes in half for lava cakes, cobblers, and cheesecake bites, then use two ramekins or four small glasses instead of a full tray. It keeps the dessert intimate and reduces leftovers, which is often the real goal.
Party-Ready Mix:
Build a tray around the easier transport desserts: bark, truffles, brownies, cookie sandwiches, and cake pops. They stack well, hold shape, and don’t need a fork or a final garnish at the last minute.
Common Mistakes to Avoid
The biggest mistake with this whole collection is using fruit that’s too wet. Strawberries, raspberries, and cherries can all leave moisture behind, and moisture is what ruins chocolate shells, softens pastry, and makes meringue limp. Pat fruit dry before dipping or layering, and if the dessert includes a shell or pastry, hold the fruit garnish until the end.
Another problem is heat. Warm filling on warm pastry can collapse puff layers, and overheated chocolate turns dull or grainy fast. Keep puff pastry cold until baking, let fillings cool before folding or spreading, and melt chocolate slowly rather than rushing it in the microwave. Chocolate is patient if you are. Not generous, just patient.
A third slip is overfilling. It’s tempting to heap jam into tartlets or pile mousse into tiny cups, but that usually leads to spills, soggy edges, and a plate that looks messy instead of generous. Aim for a clean, level fill and let the garnish sit on top.
People also cut into brownies, blondies, and cheesecake bites too soon. The center might look set, but the crumb and filling often need a full cool-down to slice cleanly. If you want sharp edges, wait. I know. It’s the hardest part.
Finally, don’t decorate with the same heavy hand every time. A little powdered sugar, a narrow chocolate drizzle, or one well-placed berry often does more than a pile of sprinkles. Pretty desserts usually look pretty because they leave some space.
Frequently Asked Questions

Which desserts from this list can I make the day before?
Brownies, blondies, truffles, bark, cheesecake bites, mousse cups, and cookie sandwiches all hold well overnight. Just keep fresh fruit toppings separate until serving if you want them to look sharp.
What is the fastest dessert on the list?
Chocolate-dipped strawberries, bark, and Oreo truffles are the quickest because they need little or no baking. If you already have strawberries washed and chocolate chopped, you can get one of those done very fast.
Can I use frozen berries?
Frozen berries work well in cobblers, crisps, and some sauces, but they are not a good choice for dipping, skewers, or topping desserts that need a dry surface. Thaw them first if you want to use them in a filling, then drain off the extra liquid.
How do I keep chocolate from seizing?
Use dry tools, dry bowls, and completely dry fruit. Melt the chocolate slowly, stir often, and stop heating before it looks fully melted — the last bits usually melt from the residual heat.
What if I don’t have heart-shaped cutters?
Use a knife to cut rough heart shapes, or make rounds and lean into the simpler look. The dessert still reads as Valentine’s if you use pink, red, berries, or a light dusting of powdered sugar.
How do I transport these without ruining them?
Choose the sturdy desserts: truffles, bark, brownies, blondies, and cookie sandwiches. Layer them with parchment in a shallow container and keep anything with cream or fresh fruit cold until you leave.
Can I make these less sweet?
Yes. Use dark chocolate, reduce the powdered sugar in fillings a little, and let raspberries or cherries handle more of the flavor. A pinch of salt also keeps the sweetness from flattening out.
Do I need special pans for the baked desserts?
Not many. Muffin tins, ramekins, a square pan, and a baking sheet cover most of the collection. If you don’t have mini tart shells or special molds, use cookie cutters and simple pans instead.
Sweet Little Finishes
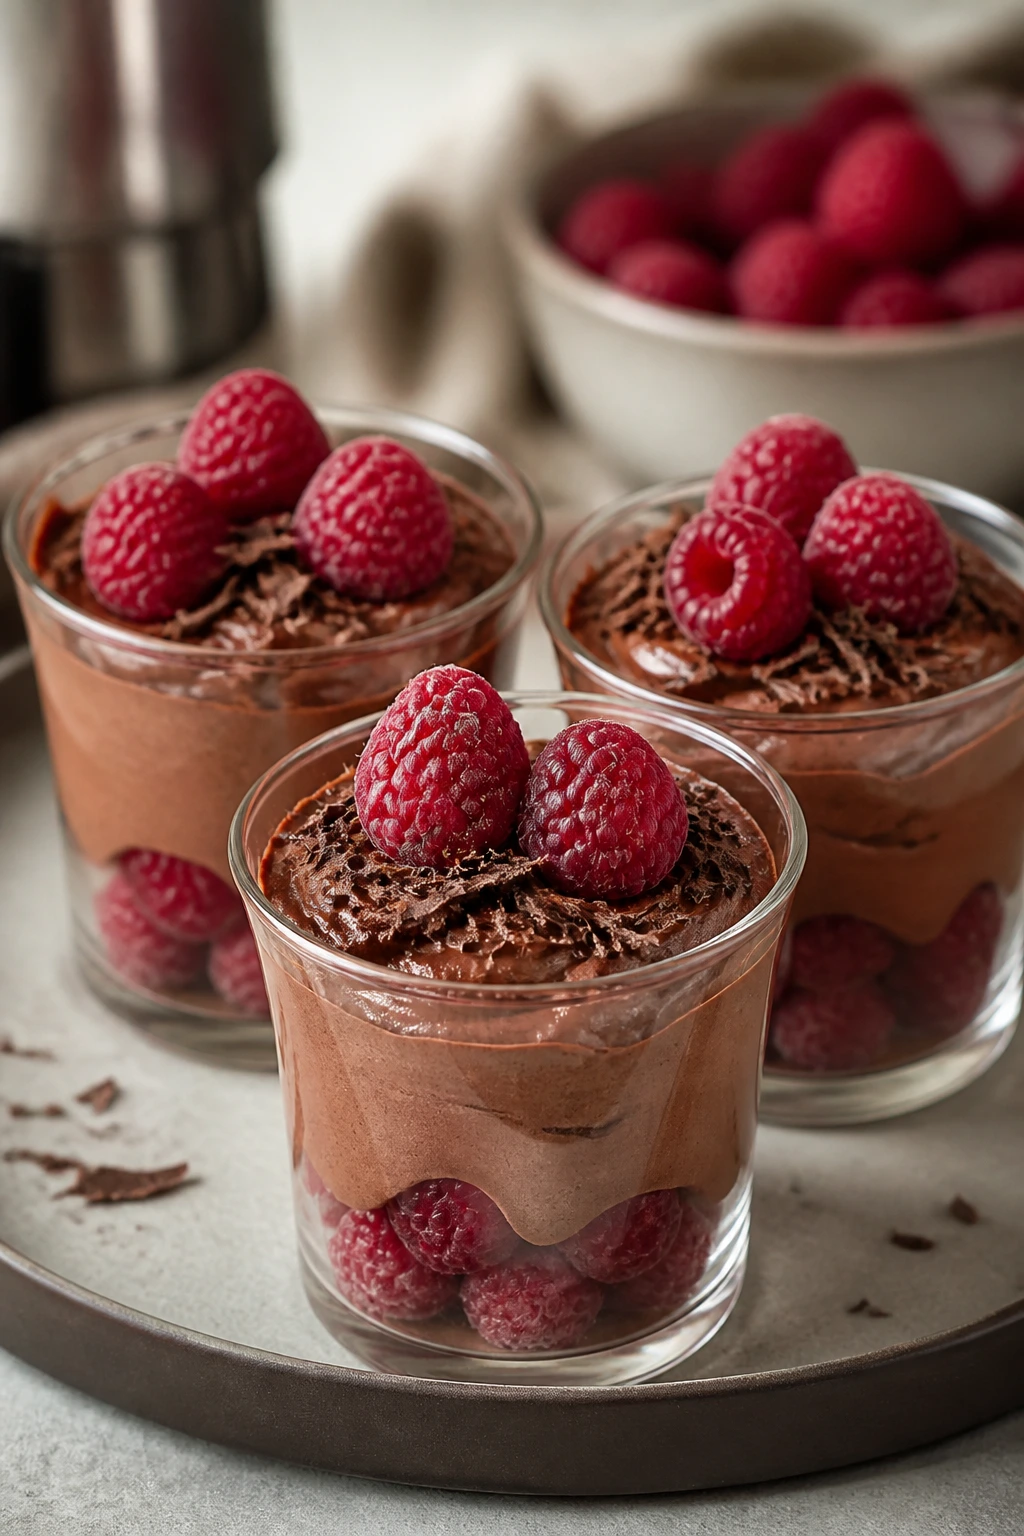
The nicest thing about quick Valentine’s desserts is that they don’t need to be grand to feel thoughtful. A neat layer of mousse, a sharp chocolate shell, a heart cut from a sheet of pastry — those small details are enough when they’re handled well.
And that’s the real charm here. You get desserts that look polished, taste fresh, and leave you with enough energy to actually sit down and eat them. A good tray of sweets should feel like a finish, not a chore.