
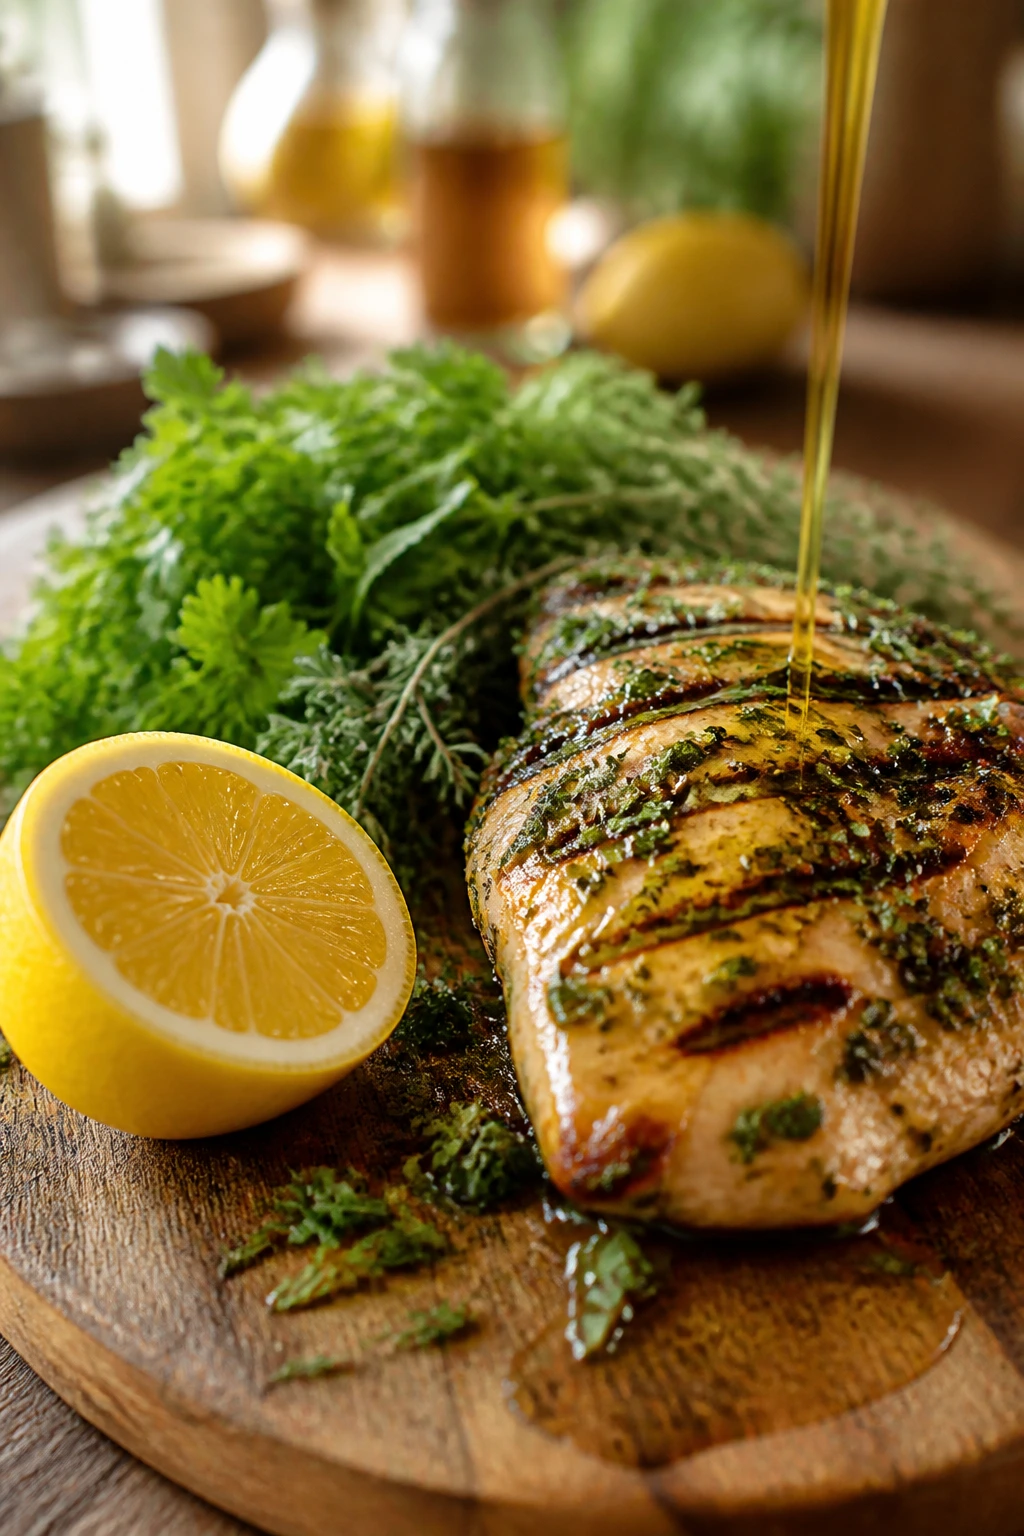
The grill earns its keep when dinner stays bright instead of heavy. A hot grate, a little smoke, and a pile of herbs or citrus can turn a plain Tuesday-style protein into something that feels like it belongs on a patio with a cold drink nearby. That’s the trick with summer grilling: you want char, but you also want a meal that doesn’t sit like a brick.
The best grilled summer dinners have a specific rhythm. They start with a quick marinade or a fast rub, hit high heat, and finish with something cold, crisp, or acidic — a slaw, a herb sauce, a tomato salad, a squeeze of lemon, maybe all four if you’re feeling generous. That contrast matters more than people think. Without it, grilled food can taste flat and smoke-heavy; with it, the whole plate wakes up.
So, if the goal is a weekend dinner that feels relaxed but still tastes deliberate, these 25 recipes are the kind I reach for first. They cover chicken, shrimp, fish, steak, pork, tofu, vegetables, flatbreads, and a few crowd-pleasing mashups that make the grill do a little more than sear meat and hope for the best.
Why These Grill Dinners Earn a Spot on the Weekend Menu
-
Fast enough for a warm night: Most of these recipes cook in 20 minutes or less once the grill is hot, which means you’re not standing outside forever while the kitchen turns into a sauna.
-
Built around contrast: Charred meat, cool slaw, creamy yogurt, or a sharp vinaigrette keep every plate from feeling one-note.
-
Not stuck on one protein: Chicken shows up, sure, but so do shrimp, swordfish, tofu, halloumi, lamb, and a handful of vegetable-forward dinners that actually feel like dinner.
-
Easy to prep ahead: Several marinades, sauces, and slaws can be made in the morning, which makes the whole evening feel calmer.
-
Good leftovers are part of the plan: A few of these taste even better tucked into wraps, bowls, or salads the next day.
-
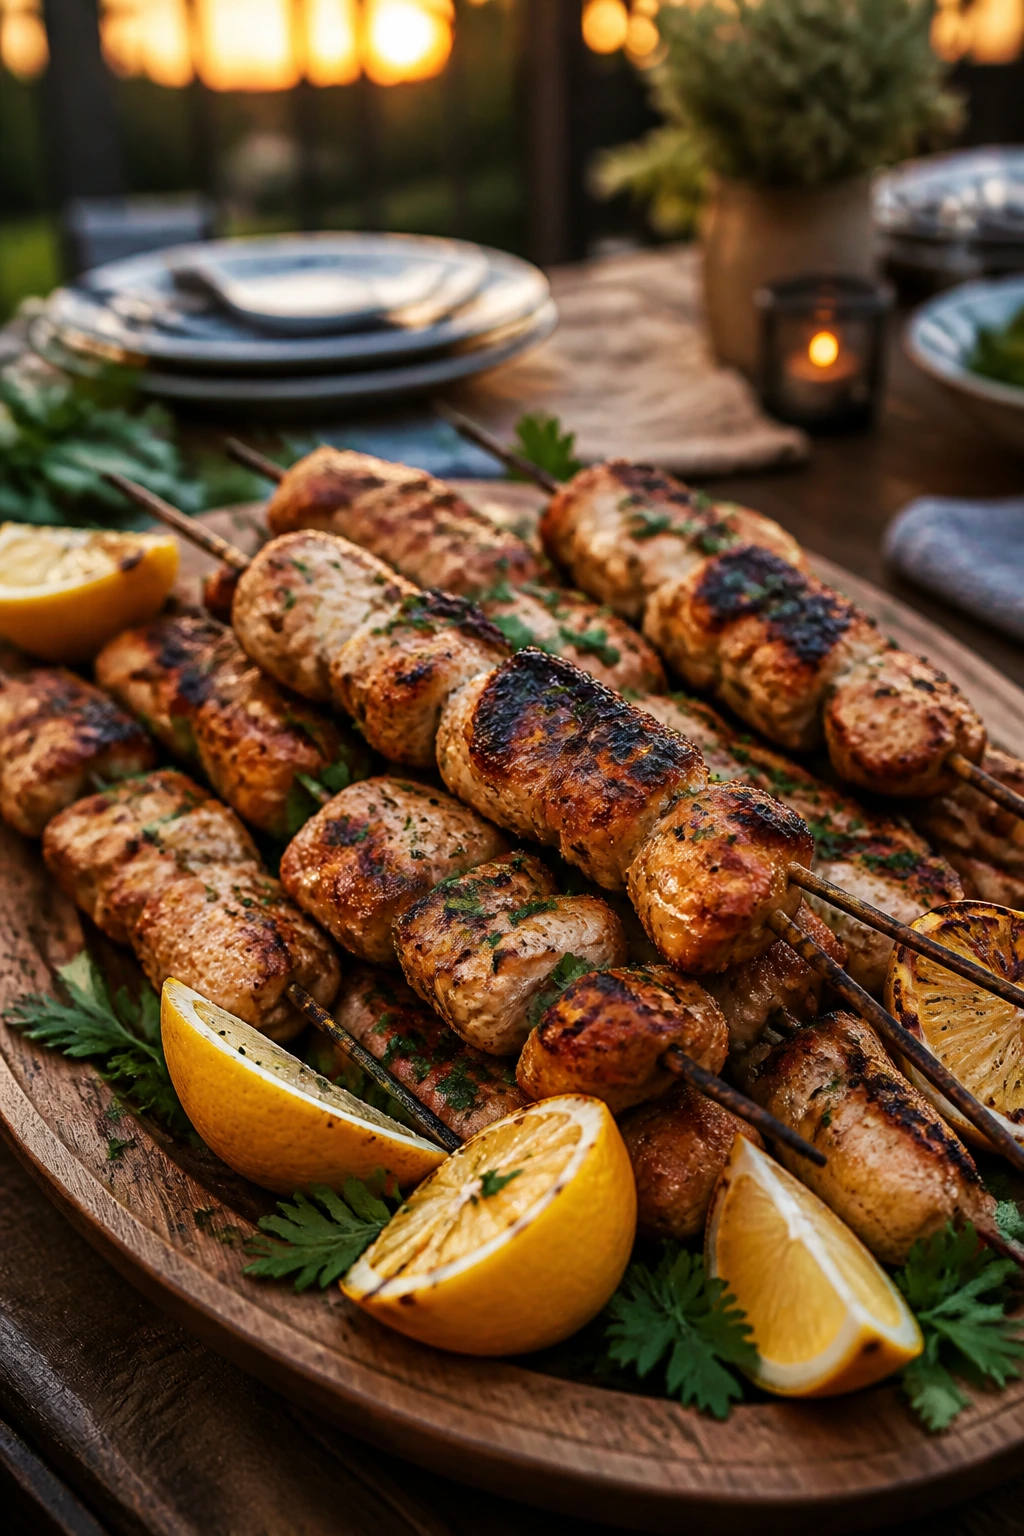
They look like you tried harder than you did: That’s not a small thing. A platter of grilled chicken skewers with herbs and lemon looks intentional the second it hits the table.
1. Lemon-Garlic Chicken Skewers with Tzatziki
Juicy chicken thighs take to the grill better than breasts ever will, and that matters here. The lemon, garlic, and oregano marinade gives the meat a clean, bright edge, while the tzatziki cools everything down with cucumber and dill. It smells like summer before the skewers even leave the bowl.
Why It Works:
Chicken thighs stay tender over direct heat, which gives you room for real char without drying out the center. The yogurt sauce balances the smoke, and a quick pita warm-up turns this into a proper dinner instead of a pile of skewers. The whole thing feels fresh, but not fussy.
Key Ingredients:
- 2 lbs boneless, skinless chicken thighs, cut into 1½-inch pieces
- 3 tbsp olive oil
- 2 tbsp lemon juice
- 1 tsp lemon zest
- 4 garlic cloves, grated
- 2 tsp dried oregano
- 1½ tsp kosher salt
- ½ tsp black pepper
- 1 cup Greek yogurt
- ½ cucumber, grated and squeezed dry
- 1 tbsp chopped dill
- 4 pita rounds
Quick Steps:
- Mix the chicken with olive oil, lemon juice, zest, garlic, oregano, salt, and pepper. Let it sit for 30 minutes.
- Soak wooden skewers in water for 30 minutes if you’re using them.
- Stir the yogurt, cucumber, dill, and a pinch of salt into a quick tzatziki.
- Thread the chicken onto skewers and grill over medium-high heat, about 10 to 12 minutes, turning until charred and cooked through to 165°F.
- Rest the chicken for 5 minutes, then serve with tzatziki and warmed pita.
Equipment for This Recipe:
- Grill or grill pan
- Wooden or metal skewers
- Mixing bowl
- Instant-read thermometer
- Microplane or fine grater
How to Serve This Dish:
Pile the skewers onto a platter with warm pita, sliced tomatoes, and a handful of cucumbers. I like to add a little lemon wedge on the side so people can wake up the chicken right before eating.
Pro Tips for This Recipe:
- Cut the chicken pieces the same size so they cook at the same rate.
- Don’t drown the chicken in marinade; a thin coat is enough for flavor and better browning.
- Char the pita for 20 to 30 seconds per side. It makes the sandwich part better than plain warm bread.
- If your grill runs hot, move the skewers to a cooler spot for the last few minutes so the outside doesn’t overcook.
Variations on This Dish:
- Smoky Harissa Skewers: Add 1 tablespoon harissa paste to the marinade for a red, peppery kick.
- Dairy-Free Herb Sauce: Swap the tzatziki for tahini mixed with lemon juice and chopped parsley.
- Skewer-Free Shortcut: Grill the chicken pieces in a perforated grill basket instead of threading them.
Common Mistakes to Avoid with This Dish:
- Using chicken breast and treating it like thighs: It dries out fast. If you want breasts, pound them thin and shorten the grill time.
- Skipping the rest: A 5-minute rest keeps the juices in the meat instead of running across the cutting board.
- Grilling over weak heat: Chicken skinless pieces need a hot grate to pick up color; a lukewarm grill just steams them.
2. Grilled Shrimp Tacos with Lime-Cabbage Slaw
Shrimp is one of the best things you can throw on a grill when the weather is warm. It cooks fast, it loves lime and chili, and it tastes especially good tucked into tortillas with something crisp underneath. These tacos stay light, but they never feel skimpy.
Why It Works:
Shrimp only needs a short hit of heat, which makes it ideal for a quick weekend dinner. The slaw brings crunch and acidity, while avocado softens the edges so the tacos feel balanced instead of sharp. That little bit of char on the shrimp is doing a lot of work here.
Key Ingredients:
- 1½ lbs large shrimp, peeled and deveined
- 1½ tbsp olive oil
- 1 tsp chili powder
- 1 tsp ground cumin
- 1 tsp kosher salt
- 2 tbsp lime juice
- 8 corn or flour tortillas
- 3 cups shredded cabbage
- ¼ cup Greek yogurt or mayo
- 2 tbsp chopped cilantro
- 1 avocado, sliced
- 1 small jalapeño, thinly sliced
Quick Steps:
- Toss the shrimp with olive oil, chili powder, cumin, salt, and lime juice. Let it sit for 10 minutes.
- Stir the cabbage, yogurt or mayo, cilantro, and a little extra lime into a fast slaw.
- Thread the shrimp onto skewers or use a grill basket so they don’t fall through the grate.
- Grill over medium-high heat for 1 to 2 minutes per side, until pink, opaque, and lightly charred.
- Warm the tortillas, fill them with slaw and shrimp, and finish with avocado and jalapeño.
Equipment for This Recipe:
- Grill or grill basket
- Metal or soaked wooden skewers
- Mixing bowls
- Tongs
- Small skillet or tortilla warmer
How to Serve This Dish:
Serve the tacos with extra lime wedges and a bowl of salsa on the side. A simple tomato-and-corn salad makes a good partner if you want something that feels more like a full plate.
Pro Tips for This Recipe:
- Pat the shrimp dry before tossing them with seasoning; wet shrimp steam instead of sear.
- Warm the tortillas directly on the grill for 15 to 20 seconds per side.
- If the slaw looks watery, squeeze out a little cabbage liquid before mixing in the dressing.
- Pull the shrimp the second they turn opaque. Shrimp can go from perfect to rubbery in a minute.
Variations on This Dish:
- Pineapple Salsa Version: Swap the avocado for diced pineapple salsa to lean brighter and sweeter.
- Spicy Baja Style: Add a spoonful of chipotle sauce to the slaw for a smoky finish.
- Lettuce-Wrap Swap: Spoon the shrimp and slaw into butter lettuce leaves instead of tortillas.
Common Mistakes to Avoid with This Dish:
- Overcooking shrimp: They curl tightly and turn dry when they stay on the heat too long.
- Loading the tacos with too much sauce: The tortillas get soggy fast. Keep the slaw lightly dressed.
- Using tiny shrimp: Bigger shrimp hold up better on the grill and are easier to flip.
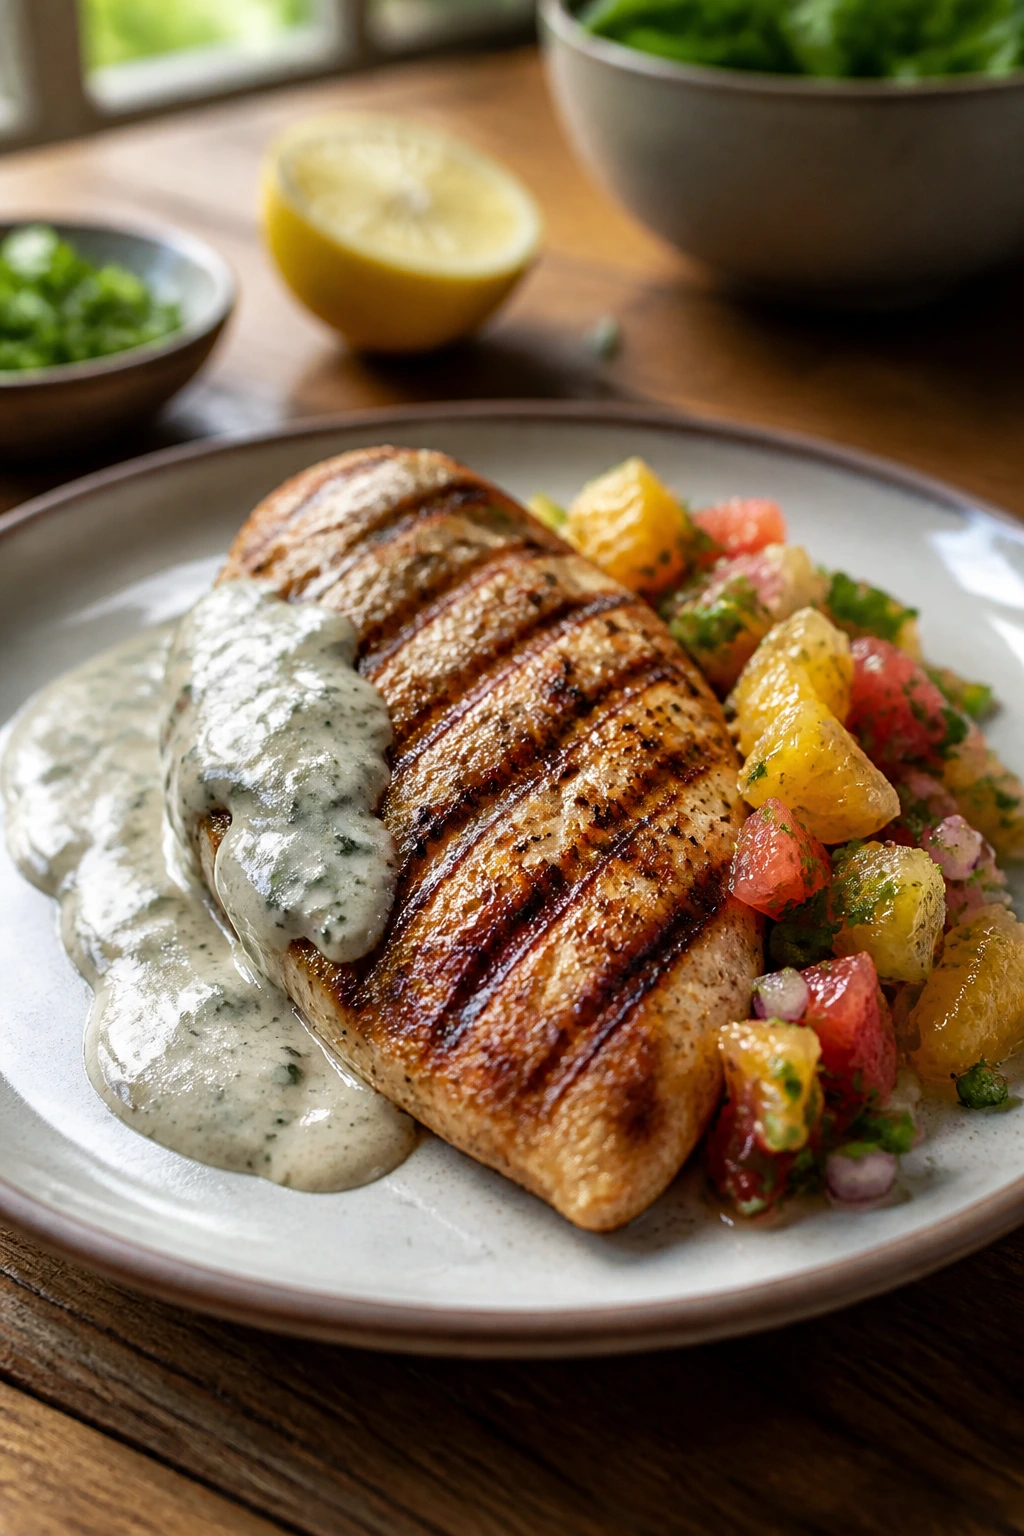
3. Cedar-Plank Salmon with Cucumber-Dill Salad
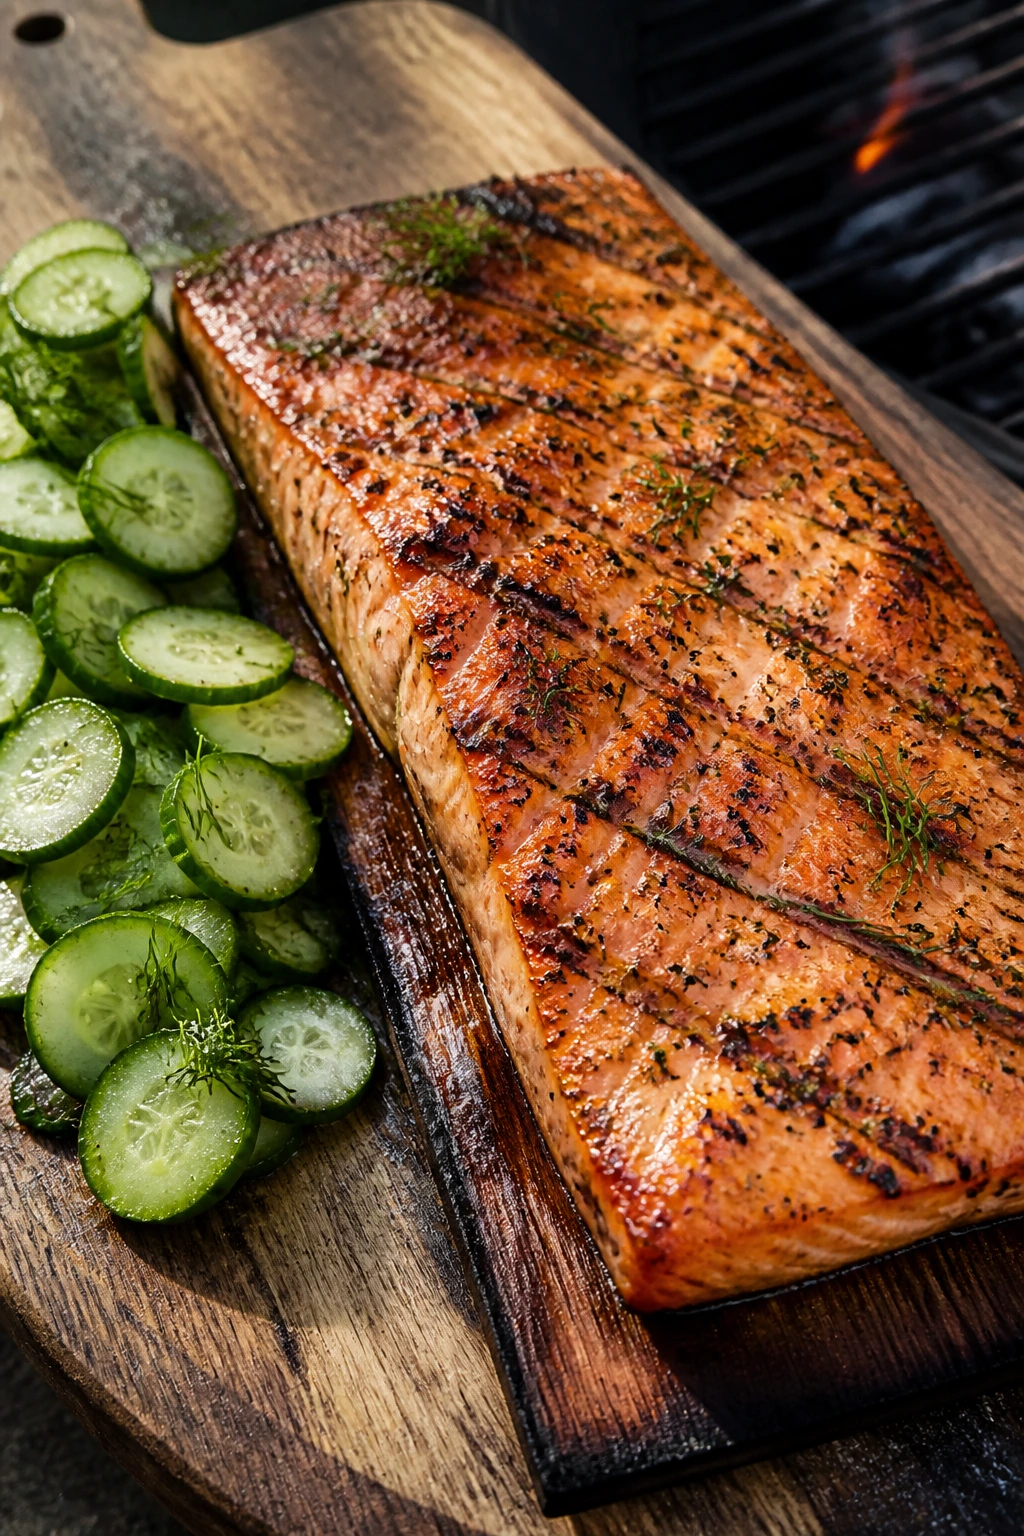
Cedar plank salmon has a very specific kind of calm to it. The plank perfumes the fish with smoke while the salmon stays soft and rich underneath, and the cucumber-dill salad pulls the whole dish back toward brightness. It’s a dinner that feels cool even while the grill is hot.
Why It Works:
The plank acts like a buffer, so the salmon cooks gently and keeps its shape. A touch of Dijon and honey gives the top a glossy finish without turning sweet, and the cucumber salad cuts through the richness with a cold crunch. That combination is what keeps the plate refreshing.
Key Ingredients:
- 1 cedar plank, soaked for 1 hour
- 2 lbs skin-on salmon fillet
- 1 tbsp olive oil
- 1 tbsp Dijon mustard
- 1 tbsp honey
- 1 lemon, sliced
- 1 English cucumber, thinly sliced
- ½ cup Greek yogurt
- 2 tbsp chopped dill
- 2 scallions, sliced
- 1 tsp kosher salt
- ½ tsp black pepper
Quick Steps:
- Soak the cedar plank in water for 1 hour, weighing it down if needed.
- Stir the olive oil, Dijon, honey, salt, and pepper, then brush it over the salmon.
- Mix the cucumber, yogurt, dill, and scallions for a quick chilled salad.
- Heat the grill to medium-high, place the plank on the grate, and set the salmon on top.
- Grill with the lid closed for 12 to 18 minutes, until the fish flakes and reaches 125°F to 130°F at the thickest part.
- Serve with lemon slices and the cucumber salad.
Equipment for This Recipe:
- Cedar plank
- Grill with a lid
- Fish spatula
- Mixing bowls
- Instant-read thermometer
How to Serve This Dish:
Set the plank right on the table if your serving dish is sturdy enough, then spoon the salad alongside the fish. I like a small pile of boiled baby potatoes or grilled asparagus with this, mostly because salmon and dill make that feel natural.
Pro Tips for This Recipe:
- Use a center-cut salmon fillet if you can; it cooks more evenly than a tail end.
- Don’t skip the soak. Dry planks can catch fast and give you more smoke than flavor.
- Keep the grill at medium, not raging hot, or the bottom of the plank will burn before the fish finishes.
- If you want a deeper glaze, brush the salmon once halfway through grilling, not every minute.
Variations on This Dish:
- Mustard-Herb Salmon: Add chopped parsley and tarragon to the glaze for a greener finish.
- No-Plank Version: Grill the salmon skin-side down on oiled foil if you don’t own a cedar plank.
- Lemony Fennel Salad: Swap cucumber for thin-sliced fennel if you want more crunch and a faint licorice note.
Common Mistakes to Avoid with This Dish:
- Skipping the plank soak: The wood can scorch fast and leave the fish with a harsh smoky edge.
- Overcooking salmon until it dries out: Pull it when the center still looks slightly glossy.
- Moving the fillet too early: Let the salmon set for a few minutes before trying to lift it off the plank.
4. Chicken Shawarma Pitas with Grilled Red Onion
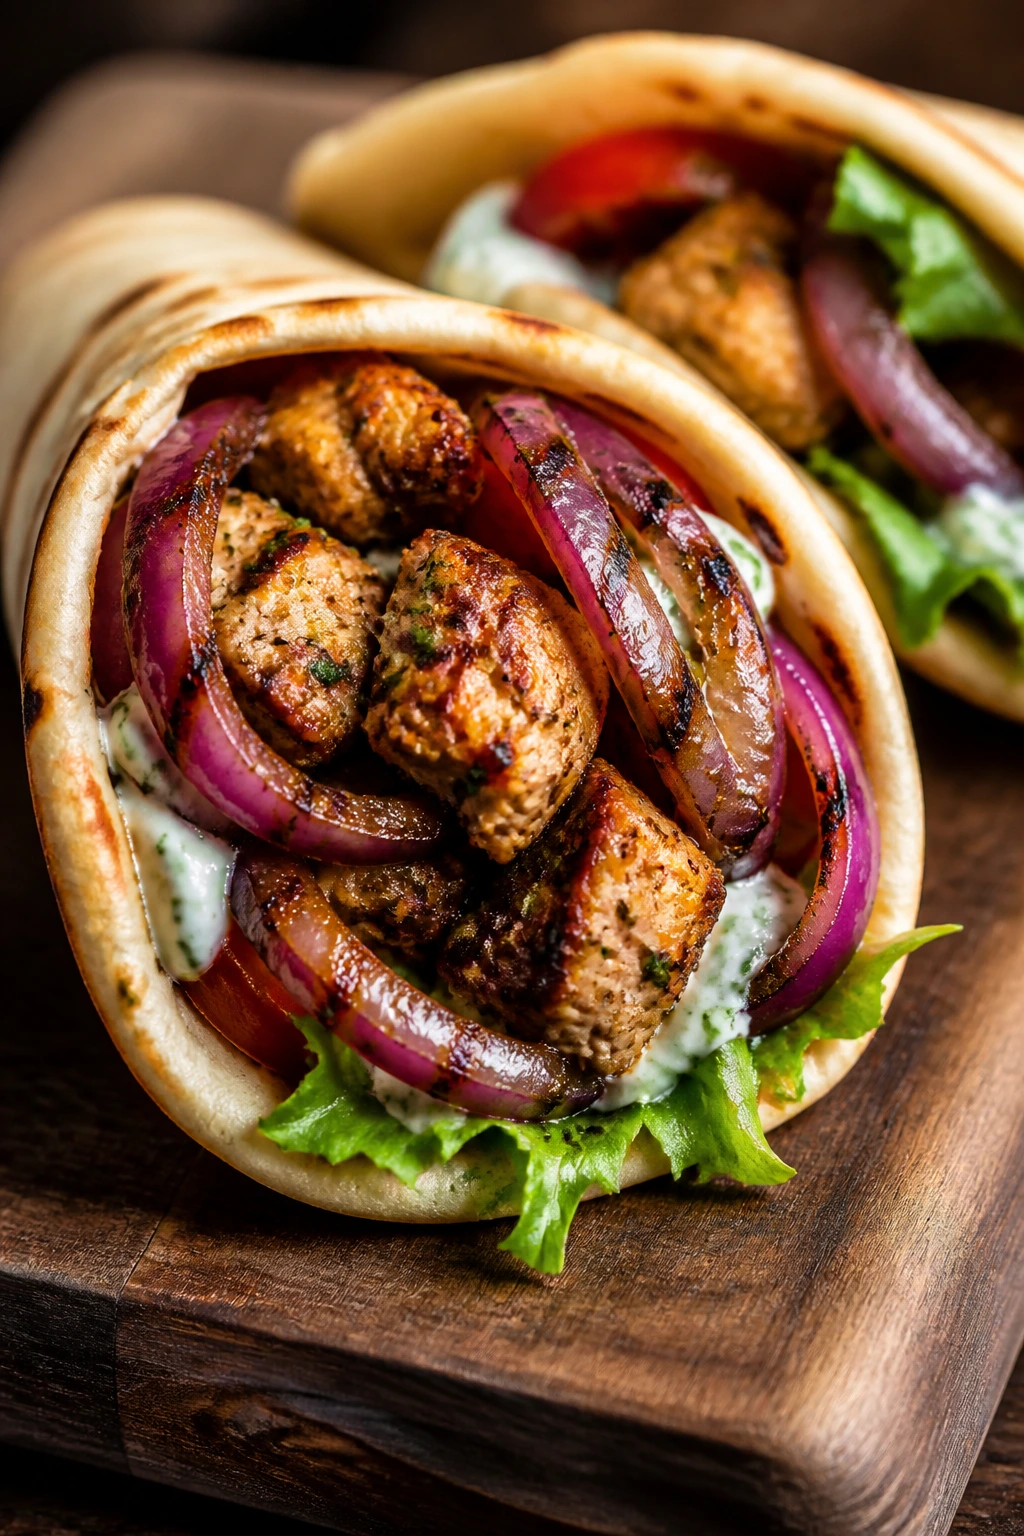
This is the kind of grilled chicken that makes people lean back a little after the first bite. Warm cumin, coriander, paprika, and cinnamon give it depth, while grilled onion and tahini keep the flavors broad instead of sharp. The pita catches the drips. That’s part of the fun.
Why It Works:
Shawarma-style seasoning loves high heat because the spices bloom on the outside while the yogurt helps keep the meat moist. Grilled onion adds sweetness without making the dish heavy, and the tahini sauce gives you a creamy, nutty finish that feels right with the smoky chicken. It’s sturdy, but still bright.
Key Ingredients:
- 2 lbs boneless, skinless chicken thighs
- ½ cup plain yogurt
- 2 tbsp olive oil
- 2 garlic cloves, grated
- 2 tsp ground cumin
- 2 tsp ground coriander
- 1 tsp paprika
- ½ tsp cinnamon
- 1 lemon, juiced
- 1 red onion, sliced into thick rounds
- 4 pitas
- 1 cup chopped cucumber and tomato
- ¼ cup tahini
Quick Steps:
- Mix the yogurt, olive oil, garlic, cumin, coriander, paprika, cinnamon, lemon juice, salt, and pepper.
- Coat the chicken in the marinade and let it sit for at least 30 minutes.
- Grill the onion rounds over medium heat until they soften and show char marks, about 6 minutes.
- Grill the chicken thighs for 5 to 6 minutes per side, until they reach 165°F.
- Warm the pitas, slice the chicken, and tuck it inside with cucumber, tomato, onion, and tahini.
Equipment for This Recipe:
- Grill or grill pan
- Mixing bowl
- Tongs
- Sharp knife
- Instant-read thermometer
How to Serve This Dish:
Serve these open-faced on a platter so the grilled onion and chicken stay visible under the sauce. A handful of parsley or a spoonful of pickled peppers on the side sharpens the whole plate.
Pro Tips for This Recipe:
- Slice the onion thick enough that it stays on the grate.
- If the tahini seems tight, whisk in 1 to 2 tablespoons of water and a squeeze of lemon.
- Let the chicken rest before slicing, or the juices run straight into the cutting board.
- Warm the pita directly over the flame for a few seconds; that little blistering matters.
Variations on This Dish:
- Spicy Harissa Shawarma: Add 1 tablespoon harissa paste to the marinade.
- Chicken Bowl Version: Serve the meat over rice with the same vegetables and sauce.
- Garlic-Dill Sauce Swap: Replace tahini with yogurt, dill, lemon, and grated garlic.
Common Mistakes to Avoid with This Dish:
- Using too little salt in the marinade: Shawarma seasoning needs a firm hand or it tastes flat.
- Crowding the grill with onions: Leave room so the edges can caramelize instead of steaming.
- Slicing chicken too soon: Wait 5 minutes so the meat stays juicy.
5. Steak Salad with Charred Corn, Avocado, and Herbs
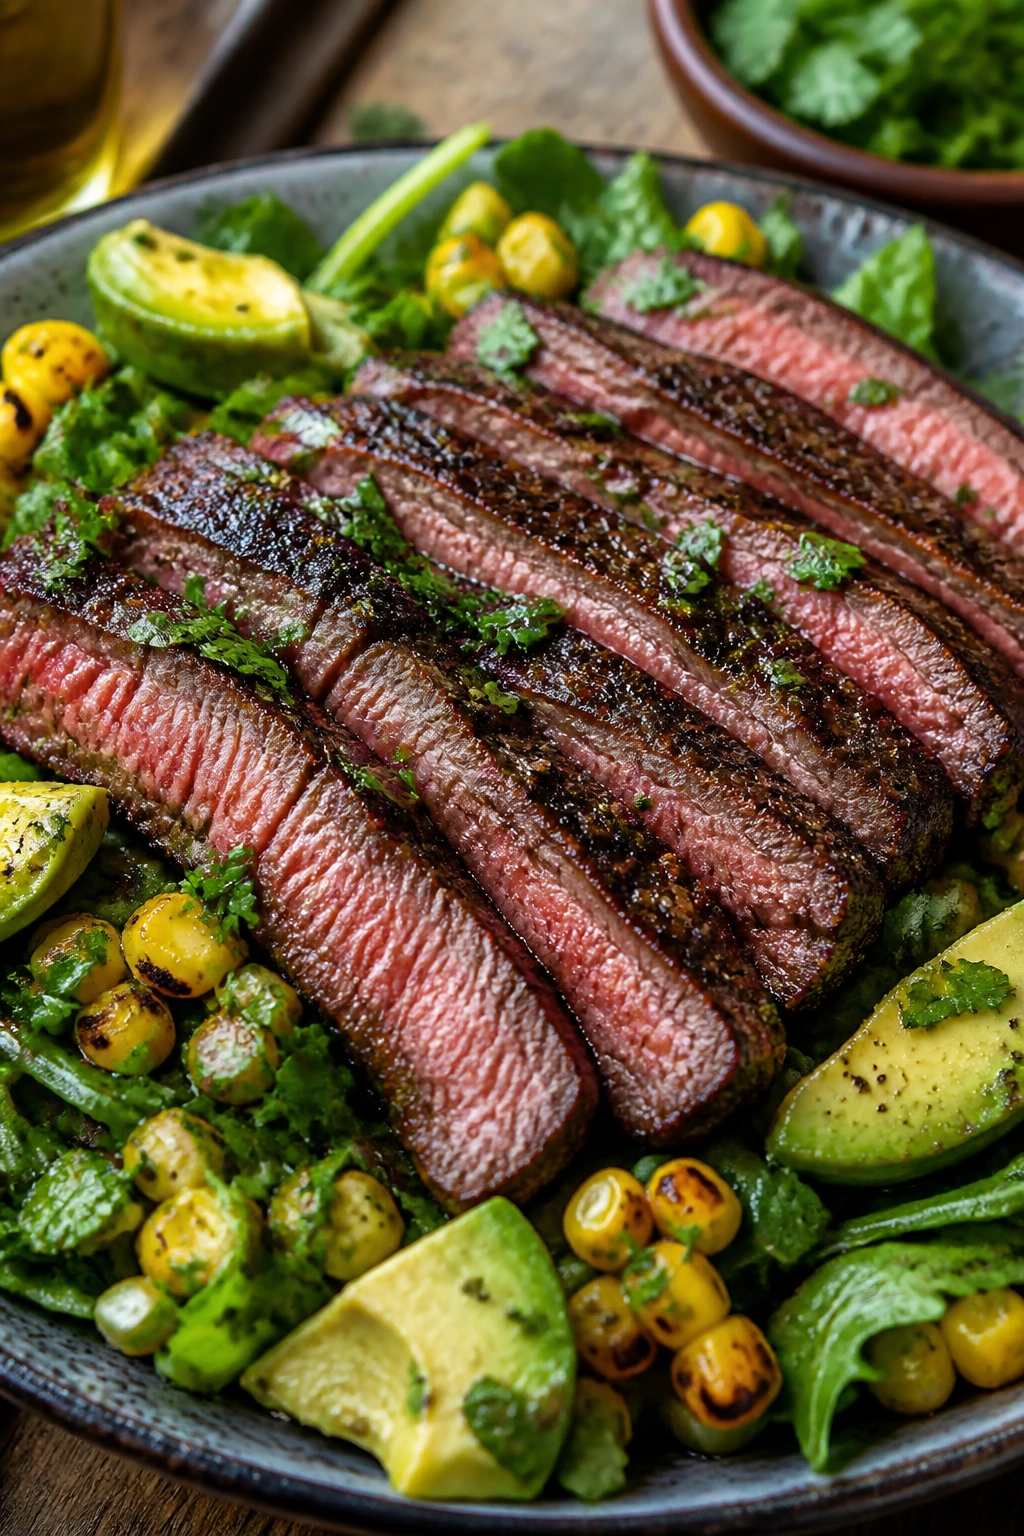
A steak salad can be lazy or it can be excellent. This one is excellent because the steak gets real char, the corn goes smoky and sweet, and the avocado softens the bite without turning the bowl into a mushy mess. It eats like dinner, not a side salad pretending to be dinner.
Why It Works:
Flank steak is lean enough for quick grilling but has enough flavor to stand up to lime, herbs, and charred corn. The salad stays cold, the steak stays warm, and the contrast is what makes the whole thing feel finished. You get richness, crunch, and acid in every forkful.
Key Ingredients:
- 1½ lbs flank steak
- 2 ears corn, husked
- 1 tbsp olive oil
- 1 tsp kosher salt
- ½ tsp black pepper
- 6 cups mixed greens
- 1 avocado, sliced
- 1 cup cherry tomatoes, halved
- ¼ cup thinly sliced red onion
- 2 tbsp lime juice
- 2 tbsp olive oil
- 2 tbsp chopped cilantro and parsley
Quick Steps:
- Rub the steak and corn with olive oil, salt, and pepper.
- Grill the corn for 8 to 10 minutes, turning until the kernels show deep brown spots.
- Grill the steak over high heat for 3 to 5 minutes per side, until it reaches 130°F to 135°F for medium-rare.
- Let the steak rest for 10 minutes, then slice it thinly across the grain.
- Toss the greens with lime juice, olive oil, herbs, tomatoes, onion, and avocado, then top with steak and corn kernels cut off the cob.
Equipment for This Recipe:
- Grill
- Instant-read thermometer
- Sharp slicing knife
- Cutting board
- Large salad bowl
How to Serve This Dish:
Use a wide platter instead of a deep bowl so the steak sits on top instead of hiding underneath. A piece of grilled bread on the side is useful for mopping up the lime dressing and stray juices.
Pro Tips for This Recipe:
- Cut the steak against the grain. It matters more than people think.
- Hold back a little avocado and add it at the end so the pieces stay clean.
- If the corn is small and sweet, you can grill it a minute less; you want color, not collapse.
- Dress the greens lightly before adding steak so the salad doesn’t sink.
Variations on This Dish:
- Chimichurri Finish: Spoon chimichurri over the steak instead of the lime-herb dressing.
- Peach-and-Steak Version: Swap half the tomatoes for sliced peaches when they’re ripe and firm.
- Grilled Romaine Swap: Use grilled romaine hearts if you want a more Caesar-like texture.
Common Mistakes to Avoid with This Dish:
- Overcooking flank steak: It gets chewy fast above medium.
- Slicing with the grain: That leaves long, tough strands instead of tender bites.
- Dressing the salad too early: The greens wilt and the avocado turns soft in a hurry.
6. Halloumi and Zucchini Skewers with Mint Yogurt

Halloumi is the grill’s little trick for people who want a vegetarian dinner that still feels substantial. It browns at the edges instead of melting away, and with zucchini, cherry tomatoes, and mint yogurt, the result is salty, cool, and a little smoky in the best way.
Why It Works:
Halloumi has enough structure to handle direct heat, so you get firm, squeaky bites with grill marks instead of a puddle. Zucchini brings moisture and sweetness, and the mint yogurt keeps the plate from feeling too dense. It’s a tidy dinner, but not a boring one.
Key Ingredients:
- 14 oz halloumi, cut into 1-inch cubes
- 2 zucchini, sliced into thick half-moons
- 1 pint cherry tomatoes
- 2 tbsp olive oil
- 1 tsp lemon zest
- 1 cup Greek yogurt
- 2 tbsp chopped mint
- 1 garlic clove, grated
- ½ tsp ground cumin
- 1 lemon, cut into wedges
Quick Steps:
- Toss the zucchini and halloumi with olive oil and lemon zest.
- Thread the halloumi, zucchini, and tomatoes onto skewers.
- Stir the yogurt, mint, garlic, cumin, and a pinch of salt into a quick sauce.
- Grill the skewers over medium-high heat for 2 to 3 minutes per side, just until the halloumi browns and the zucchini softens.
- Serve with lemon wedges and mint yogurt spooned over the top.
Equipment for This Recipe:
- Grill
- Skewers
- Mixing bowl
- Tongs
- Serving platter
How to Serve This Dish:
Serve these skewers with couscous, grilled flatbread, or a tomato-cucumber salad. I like them best when the yogurt sauce is on the side so people can dip instead of drowning the cheese.
Pro Tips for This Recipe:
- Cut the zucchini thick or it will slip off the skewer and overcook.
- Use halloumi straight from the package, but pat it dry so it browns instead of sputtering.
- Keep the grill clean and lightly oiled; halloumi likes a smooth grate.
- Pull the skewers while the cheese is still firm. If it goes soft, you’ve waited too long.
Variations on This Dish:
- Peach and Halloumi Skewers: Add peach wedges for a sweet-salty mix.
- Herb-Labneh Swap: Use labneh instead of yogurt for a thicker sauce.
- Veggie-Only Version: Add mushrooms and red onion in place of some of the cheese.
Common Mistakes to Avoid with This Dish:
- Overcooking halloumi: It can turn rubbery if you leave it on the heat too long.
- Using thin zucchini slices: They collapse and dry out before the cheese is ready.
- Forgetting to oil the skewers lightly: Sticky cheese can cling to a dry grate.
7. Honey-Lime Pork Tenderloin with Peach Salsa
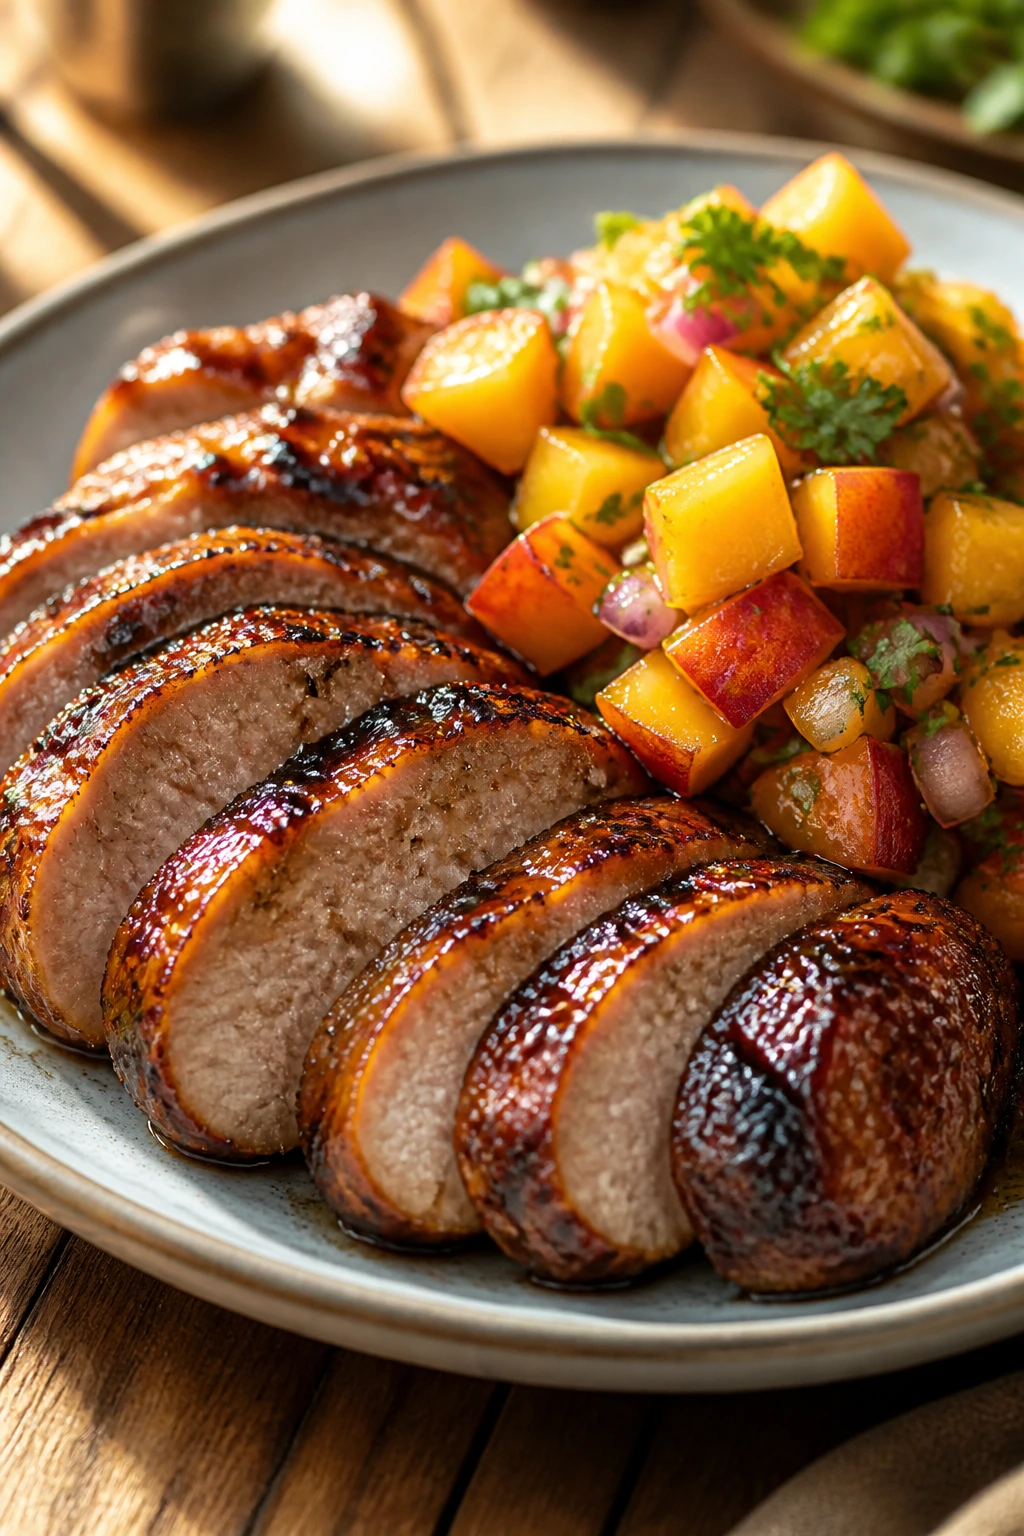
Pork tenderloin is one of those cuts that rewards a short, careful grill session. The honey-lime glaze gives the meat a shiny, sweet edge, and the peach salsa keeps it from feeling heavy. It’s a little glossy, a little smoky, and exactly the kind of dinner that works when peaches are good.
Why It Works:
Tenderloin is lean, so it benefits from a quick marinade and a firm temperature target. Peaches, red onion, and cilantro bring cold, sharp freshness right where the pork needs it. The glaze also caramelizes nicely, which gives you flavor without a long cook.
Key Ingredients:
- 2 pork tenderloins, about 2 lbs total
- 2 tbsp honey
- 2 tbsp lime juice
- 1 tbsp olive oil
- 2 garlic cloves, grated
- 1 tsp ground cumin
- 1 tsp kosher salt
- ½ tsp black pepper
- 2 ripe peaches, diced
- ¼ red onion, finely diced
- 1 jalapeño, minced
- 2 tbsp chopped cilantro
Quick Steps:
- Mix honey, lime juice, olive oil, garlic, cumin, salt, and pepper, then coat the pork.
- Let the tenderloin sit for 20 to 30 minutes.
- Toss the peaches, onion, jalapeño, cilantro, and a little lime for the salsa.
- Grill the pork over medium heat for 12 to 15 minutes, turning to brown all sides, until it reaches 145°F.
- Rest the pork for 5 to 10 minutes, slice it, and spoon the peach salsa over the top.
Equipment for This Recipe:
- Grill
- Instant-read thermometer
- Mixing bowls
- Tongs
- Sharp slicing knife
How to Serve This Dish:
This looks good sliced on a long platter with the salsa piled in the center. Serve it with grilled zucchini or a big bowl of butter lettuce if you want to keep the meal on the light side.
Pro Tips for This Recipe:
- Tie the tenderloin with kitchen twine if one end is much thinner than the other.
- Keep the glaze thin; thick honey-heavy coatings can burn before the center is done.
- Make the salsa just before serving so the peaches stay firm.
- Resting matters here. Cut too soon and the pork leaks onto the board.
Variations on This Dish:
- Nectarine Salsa Version: Swap peaches for nectarines when they’re firmer.
- Chipotle Honey Pork: Add 1 teaspoon chopped chipotle to the glaze for heat.
- Lettuce Wrap Swap: Slice the pork and serve it in lettuce cups with the salsa.
Common Mistakes to Avoid with This Dish:
- Overcooking pork tenderloin: It dries out fast once it moves past 145°F.
- Using underripe peaches: The salsa turns firm and sour instead of juicy.
- Leaving the pork untrimmed and uneven: Thin ends char before the thick center is finished.
8. Grilled Fish Tacos with Chipotle Crema
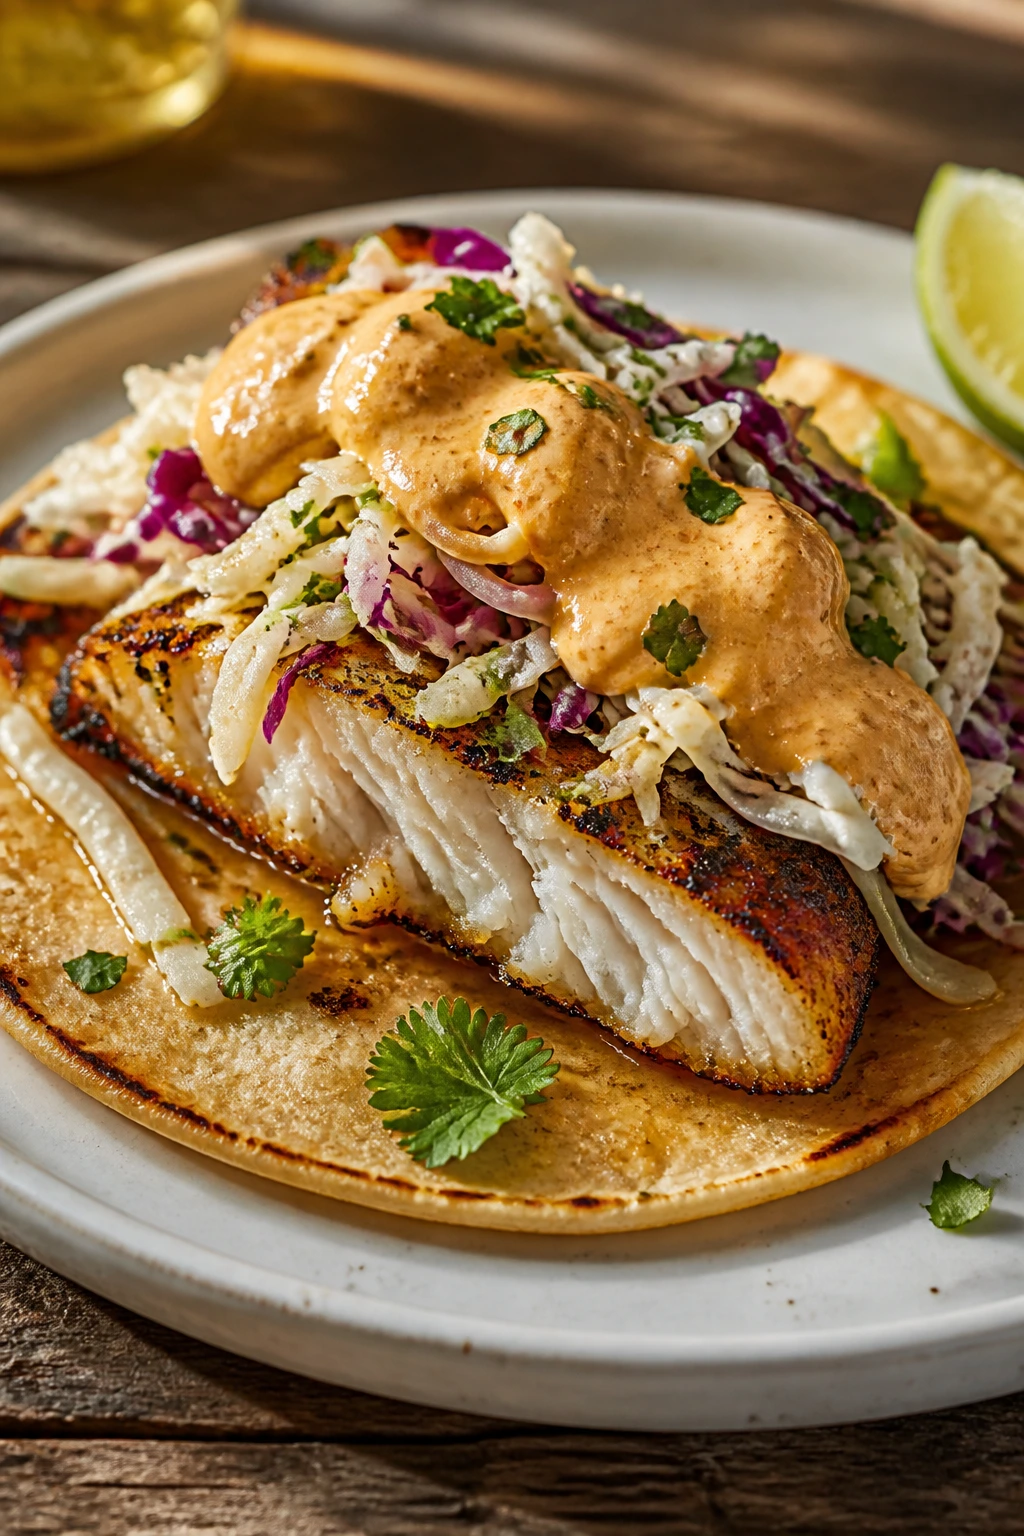
These tacos are all about the contrast between flaky fish and a cool, smoky sauce. The chipotle crema brings heat without overpowering the fish, and the cabbage gives you the crunch that keeps the taco from slumping in your hand. Good fish tacos should feel easy. These do.
Why It Works:
A mild, firm white fish picks up seasoning fast and cooks before the tortilla gets tired. The crema carries the smoky note, while cabbage and radish keep the whole thing crisp. You want the fish to taste like the grill, but not like it fought the grill and lost.
Key Ingredients:
- 1½ lbs cod, mahi-mahi, or halibut fillets
- 1 tbsp olive oil
- 1 tsp chili powder
- 1 tsp garlic powder
- 1 tsp kosher salt
- 8 small tortillas
- ½ cup sour cream or Greek yogurt
- 1 chipotle pepper in adobo, minced
- 1 lime, juiced
- 3 cups shredded cabbage
- 4 radishes, thinly sliced
- 2 tbsp chopped cilantro
Quick Steps:
- Stir the sour cream, chipotle, and lime juice into a crema.
- Rub the fish with olive oil, chili powder, garlic powder, and salt.
- Grill the fish over medium-high heat for 3 to 4 minutes per side, until it flakes easily.
- Warm the tortillas on the grill for a few seconds per side.
- Break the fish into large chunks, fill the tortillas with cabbage and radish, and finish with crema and cilantro.
Equipment for This Recipe:
- Grill
- Fish spatula
- Mixing bowls
- Tongs
- Small whisk or spoon
How to Serve This Dish:
Serve the tacos immediately with lime wedges and a cold cucumber salad. If you want more body on the plate, a scoop of black beans beside the tacos makes sense without weighing them down.
Pro Tips for This Recipe:
- Oil the grates lightly before the fish goes on.
- Don’t flip fish that’s still stuck; it releases once the crust sets.
- Keep the crema on the cool side so it doesn’t run everywhere.
- Use the thickest part of the fillet to judge doneness; thin tails cook much faster.
Variations on This Dish:
- Mango Crema Version: Mix diced mango into the crema for a sweeter taco.
- Slaw-Only Style: Toss the cabbage with a little lime and salt if you want less sauce.
- Spice-Heavy Option: Add cayenne to the fish rub for a sharper edge.
Common Mistakes to Avoid with This Dish:
- Moving the fish too soon: It tears if the crust hasn’t set.
- Using a delicate fish that flakes apart on the grate: Stick with firm white fish.
- Overloading the tortilla: Two good chunks of fish beat a messy pile.
9. Turkey Burgers with Tomato Jam and Arugula
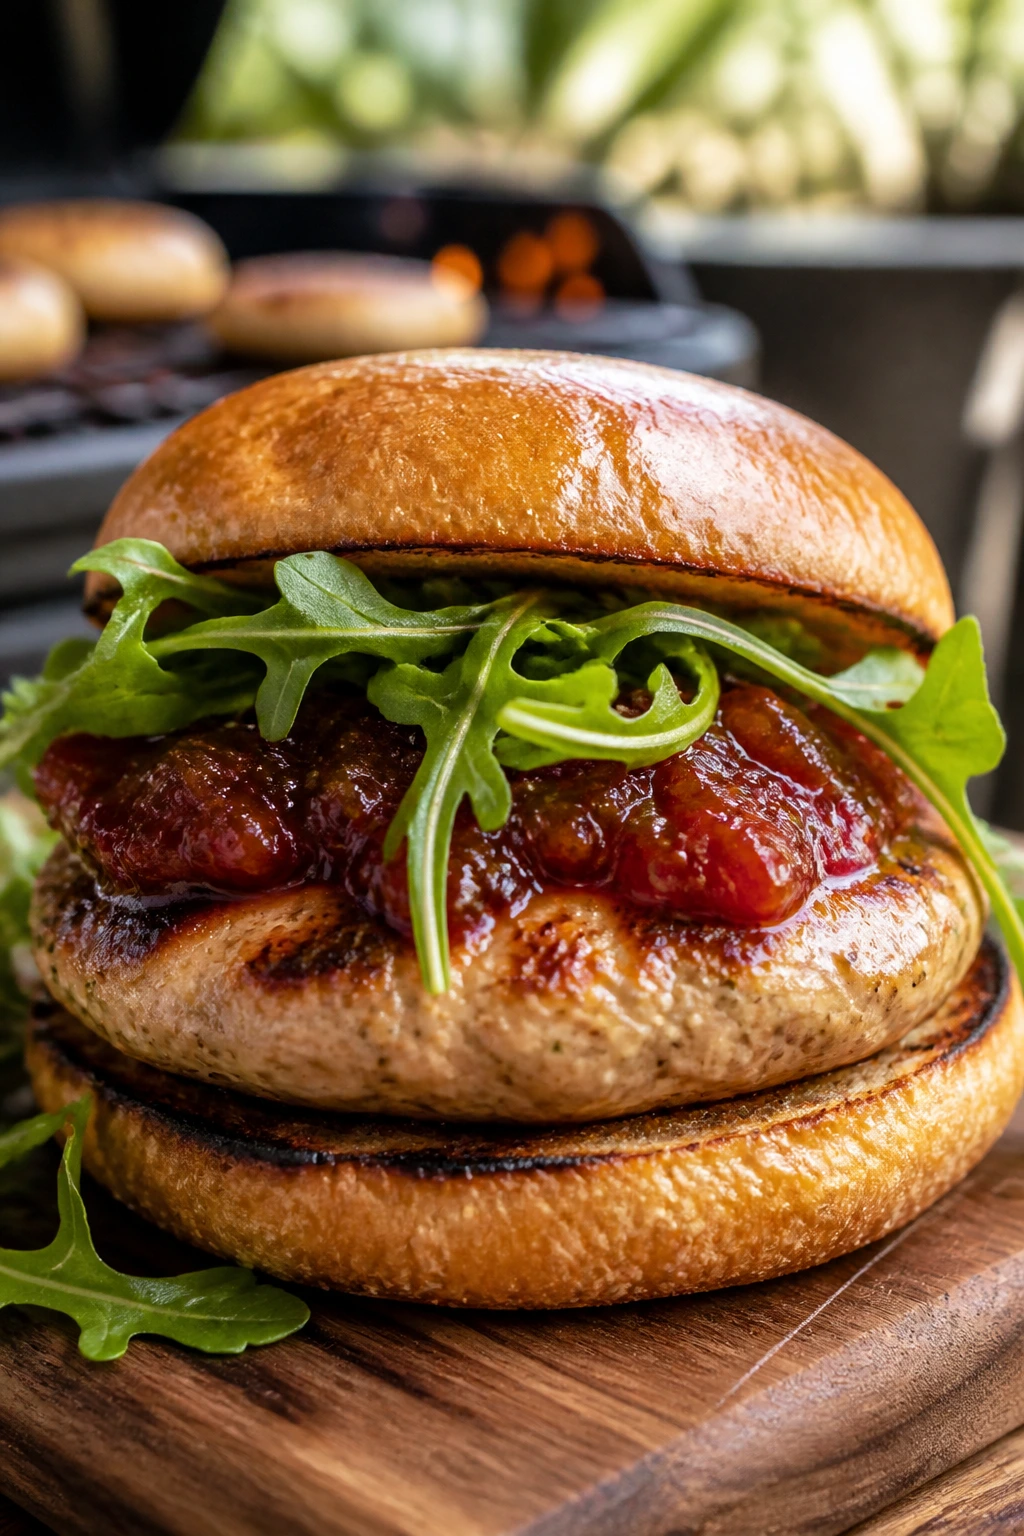
Turkey burgers get a bad reputation for being dry, and most of the time that reputation is earned. Breadcrumbs, egg, and a little Worcestershire solve that problem, and tomato jam adds a sweet-savory edge that keeps every bite lively. Arugula gives the burger a peppery finish that feels right for warm weather.
Why It Works:
Ground turkey needs help with moisture, and this burger gives it exactly that without turning mushy. The tomato jam adds body and a little acidity, which is more useful than plain ketchup here. A grilled bun helps too. It keeps the bread from feeling limp.
Key Ingredients:
- 1½ lbs ground turkey
- ½ cup breadcrumbs
- 1 egg
- 1 tbsp Worcestershire sauce
- 1 tsp garlic powder
- 1 tsp kosher salt
- 1 pint cherry tomatoes
- ½ small onion, chopped
- 1 tsp sugar
- 1 tbsp red wine vinegar
- 4 burger buns
- 2 cups arugula
Quick Steps:
- Mix the tomatoes, onion, sugar, vinegar, and a pinch of salt in a skillet and cook over medium heat until jammy, about 15 minutes.
- Combine the turkey, breadcrumbs, egg, Worcestershire, garlic powder, salt, and pepper. Form into 4 patties.
- Grill the patties over medium heat for 5 to 6 minutes per side, until they reach 165°F.
- Toast the buns on the grill for 30 seconds.
- Build the burgers with arugula and tomato jam.
Equipment for This Recipe:
- Grill
- Skillet
- Spatula
- Mixing bowl
- Thermometer
How to Serve This Dish:
Serve with grilled potato wedges or a crisp slaw and call it done. I like these open-faced for a few bites because the tomato jam looks better when it doesn’t get squashed into the bun.
Pro Tips for This Recipe:
- Mix the turkey just until combined. Packed meat turns dense.
- Make the patties a little wider than the buns; they shrink on the grill.
- Cool the tomato jam a few minutes before building the burgers so the buns don’t steam.
- If the turkey feels sticky, chill the patties for 15 minutes before grilling.
Variations on This Dish:
- Feta Turkey Burgers: Fold crumbled feta into the meat for a saltier bite.
- Avocado Swap: Replace the tomato jam topping with smashed avocado and quick pickles.
- Lettuce Bun Version: Use butter lettuce leaves instead of buns for a lighter plate.
Common Mistakes to Avoid with This Dish:
- Underseasoning turkey: It needs more salt and spice than beef does.
- Pressing the burgers on the grill: That squeezes out the juices.
- Serving the jam too wet: Reduce it until it clings to the spoon.
10. Zucchini, Corn, and Feta Flatbreads
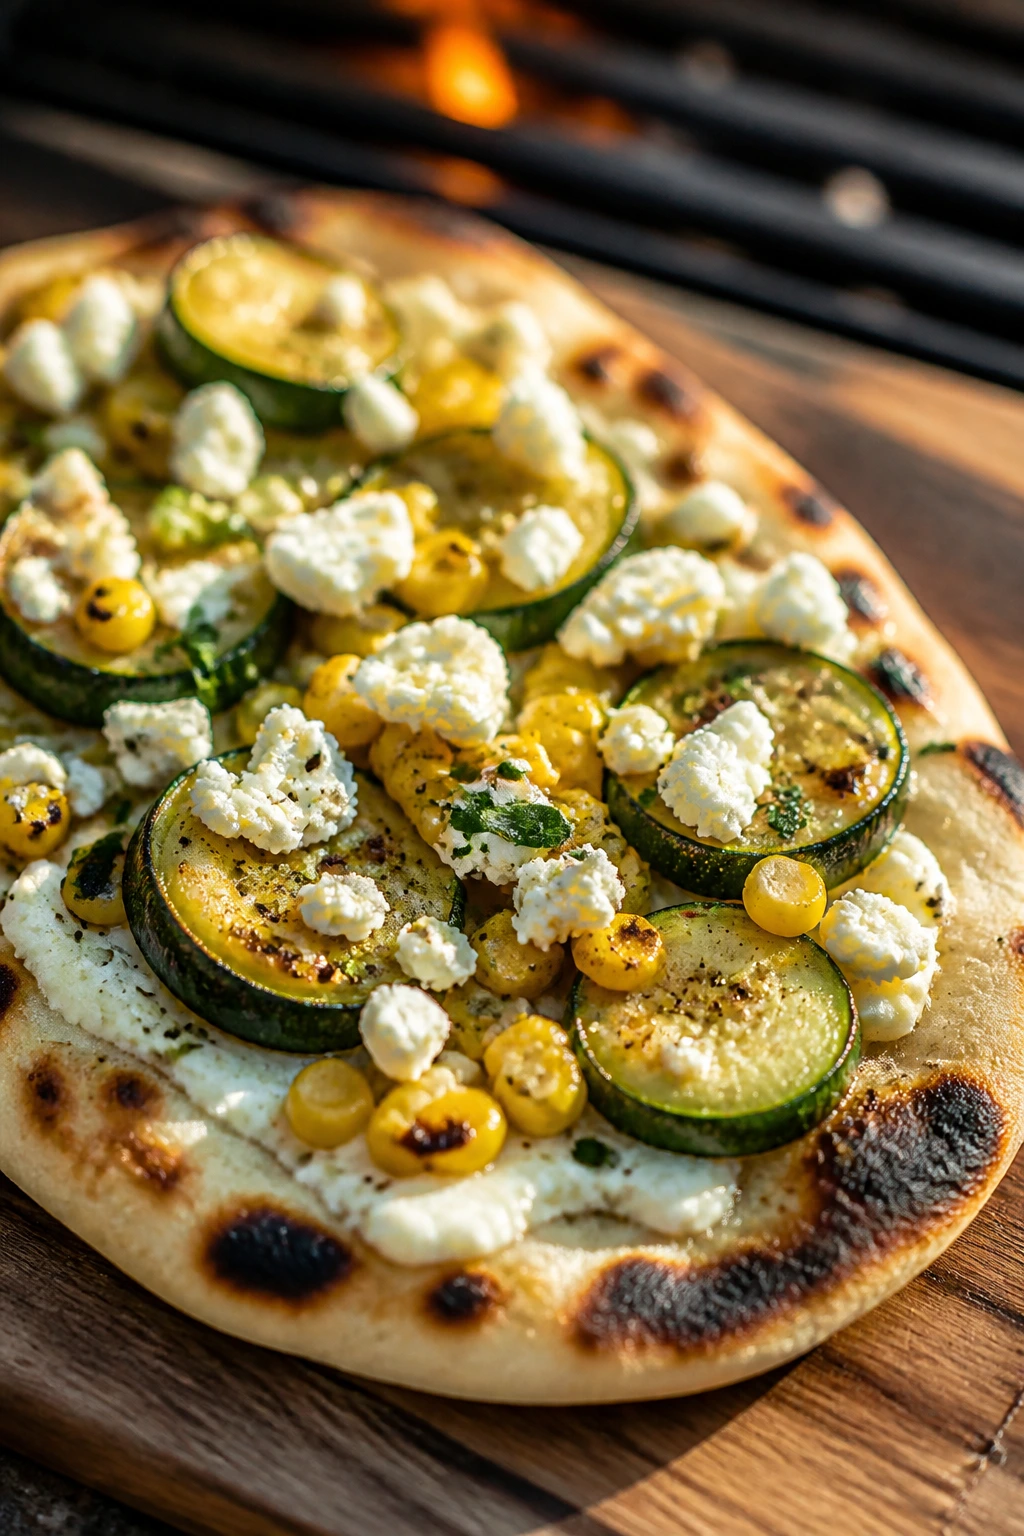
Flatbreads are a smart move when you want the grill involved but don’t want a long list of moving parts. Charred zucchini, sweet corn, creamy ricotta, and salty feta give you enough texture to make the meal feel complete. Basil and lemon keep it from tipping into heavy pizza territory.
Why It Works:
The flatbread cooks fast, so the vegetables stay bright rather than collapsing into softness. Ricotta gives the base a cool, creamy layer, and feta adds the salty pop that makes the sweet corn more noticeable. It eats like a weeknight dinner that accidentally turned elegant.
Key Ingredients:
- 2 naan or flatbreads
- 1 zucchini, sliced into thin rounds
- 1 ear corn, kernels cut off
- 1 tbsp olive oil
- 1 cup ricotta
- ½ cup crumbled feta
- 1 garlic clove, grated
- 1 tbsp lemon juice
- 1 tsp lemon zest
- ¼ cup basil leaves
- 1 pinch kosher salt
Quick Steps:
- Toss the zucchini and corn with olive oil and a pinch of salt.
- Grill the vegetables in a basket or on foil until lightly charred, about 4 to 6 minutes.
- Warm the flatbreads on the grill for 1 minute per side.
- Spread ricotta mixed with garlic, lemon juice, and zest over the bread.
- Top with vegetables, feta, and basil, then cut and serve.
Equipment for This Recipe:
- Grill
- Grill basket or foil
- Mixing bowl
- Tongs
- Knife or pizza cutter
How to Serve This Dish:
Cut the flatbreads into wedges and serve them with a simple green salad. They also work as a side to grilled chicken if you want to stretch the meal a little.
Pro Tips for This Recipe:
- Use flatbreads that are flexible enough to move on and off the grill without cracking.
- Don’t drown the ricotta in lemon juice or it gets loose.
- If your corn is very sweet, skip extra sugar or sweet sauces; the vegetables already carry the plate.
- Add the basil after grilling so it stays fragrant.
Variations on This Dish:
- Tomato-Basil Version: Add sliced cherry tomatoes after grilling for a more Caprese-like feel.
- Goat Cheese Swap: Use goat cheese instead of ricotta for a tangier base.
- Spicy Oil Finish: Drizzle with chili oil right before serving.
Common Mistakes to Avoid with This Dish:
- Putting toppings on before the bread is grilled: The crust won’t crisp.
- Using watery zucchini: It can make the flatbread soggy.
- Overloading the toppings: Two or three good layers are enough.
11. Grilled Romaine Caesar with Lemon Shrimp
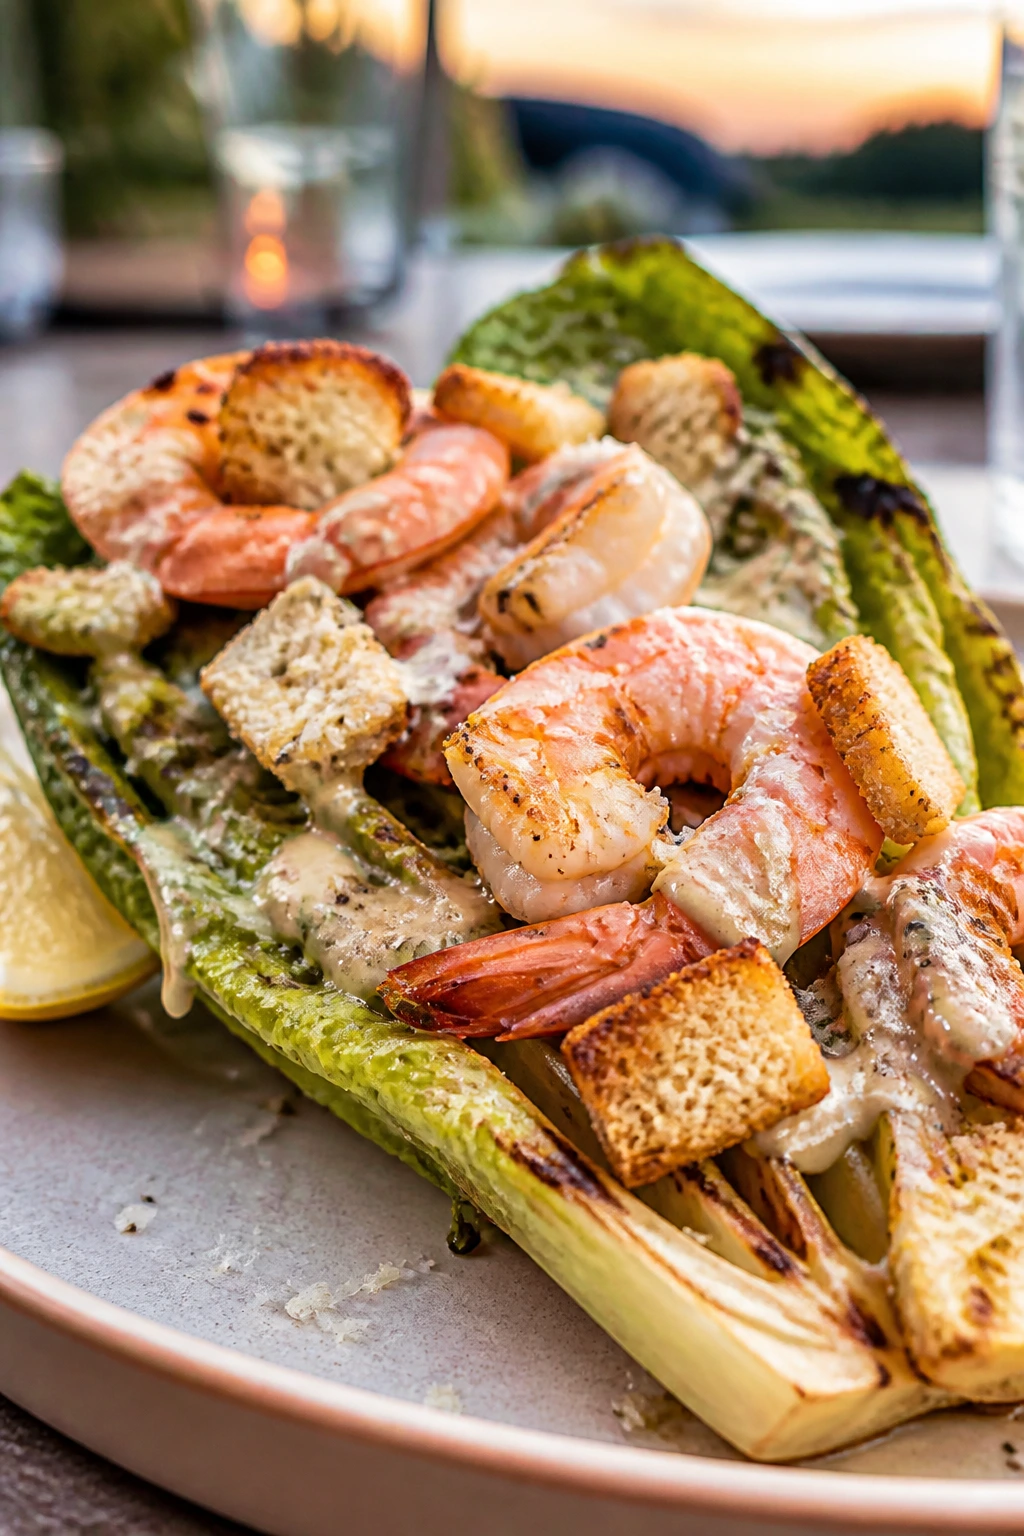
Grilled romaine sounds odd until you try it. The edges pick up a little char, the core stays crisp, and the whole salad gains a smoky note that makes Caesar dressing taste sharper. Add lemon shrimp on top and it stops being a starter and starts being a real dinner.
Why It Works:
Romaine has enough structure to hold heat for a short stretch without collapsing. The shrimp bring protein and a fresh citrus note, while the Parmesan and croutons keep the salad from feeling too airy. It’s one of those dinners that sounds light and still leaves you satisfied.
Key Ingredients:
- 2 romaine hearts, halved lengthwise
- 1½ lbs large shrimp, peeled and deveined
- 2 tbsp olive oil
- 1 tsp garlic powder
- 2 cups croutons
- ¼ cup grated Parmesan
- ¼ cup mayo or Greek yogurt
- 1 tbsp lemon juice
- 1 tsp Dijon mustard
- 1 anchovy fillet, minced, or 1 tsp Worcestershire
- 1 garlic clove, grated
Quick Steps:
- Whisk the mayo or yogurt, lemon juice, Dijon, anchovy or Worcestershire, garlic, salt, and pepper into a Caesar-style dressing.
- Toss the shrimp with olive oil and garlic powder.
- Grill the shrimp for 1 to 2 minutes per side until pink.
- Grill the romaine cut-side down for 1 to 2 minutes, just until the edges brown.
- Arrange the lettuce on a platter, top with shrimp, croutons, Parmesan, and dressing.
Equipment for This Recipe:
- Grill
- Tongs
- Mixing bowls
- Small whisk
- Serving platter
How to Serve This Dish:
Serve with grilled bread or roasted potatoes if you want a fuller meal. I like this on a wide platter because the romaine leaves look better when they stay intact and you can see the char.
Pro Tips for This Recipe:
- Dry the romaine well before grilling or it will steam.
- Keep the dressing bold; grilled lettuce can stand up to more flavor than raw lettuce.
- Shrimp should still look glossy when you pull them off.
- If using yogurt in the dressing, add a teaspoon of water to loosen it.
Variations on This Dish:
- Chicken Caesar Version: Swap the shrimp for grilled chicken cutlets.
- Avocado Caesar: Add sliced avocado for a creamier plate.
- No-Anchovy Dressing: Use Worcestershire only if you want a milder dressing base.
Common Mistakes to Avoid with This Dish:
- Leaving romaine on the grill too long: It wilts and gets limp fast.
- Using too much dressing: The lettuce should be coated, not soaked.
- Cooking shrimp until they curl into tight rings: That’s the dry zone.
12. Salmon Burgers with Dill Pickle Slaw
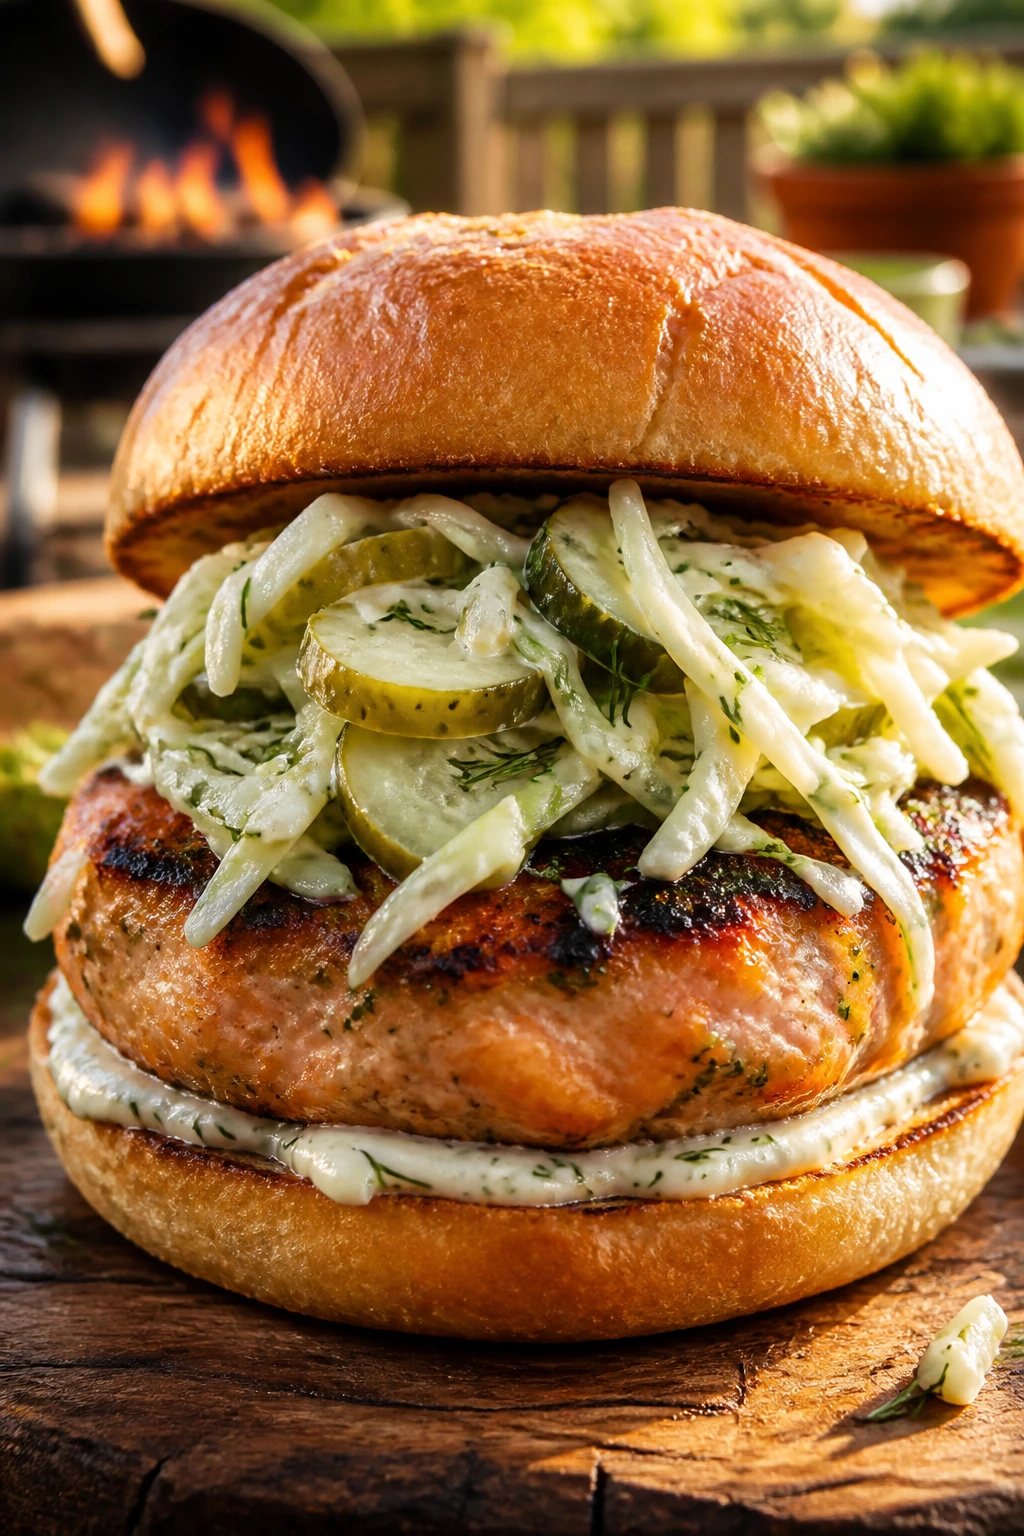
Salmon burgers should taste like salmon, not filler. This version keeps the fish front and center, with breadcrumbs and egg just enough to hold the patties together. The dill pickle slaw adds acid and crunch, which is exactly what grilled salmon likes.
Why It Works:
Salmon has enough fat to stay moist, and a burger format makes it easy to grill without overcomplicating things. The pickle slaw sharpens the rich fish, and the bun gives you something soft to contrast with the crisp edges. It’s the kind of sandwich that gets better with a napkin nearby.
Key Ingredients:
- 1½ lbs salmon fillet, skin removed and finely chopped
- ½ cup breadcrumbs
- 1 egg
- 2 tbsp mayonnaise
- 1 tbsp chopped dill
- 1 tsp kosher salt
- 1 cup shredded cabbage
- 2 tbsp pickle juice
- 1 tbsp Greek yogurt or mayo
- 4 burger buns
- 4 sliced dill pickles
Quick Steps:
- Mix the salmon, breadcrumbs, egg, mayo, dill, salt, and pepper. Form into 4 patties and chill for 15 minutes.
- Stir the cabbage, pickle juice, and yogurt into a quick slaw.
- Grill the patties over medium heat for 4 minutes per side, turning carefully.
- Toast the buns for 30 seconds.
- Build the burgers with slaw and pickles.
Equipment for This Recipe:
- Grill
- Spatula
- Mixing bowl
- Sheet pan or plate
- Thermometer
How to Serve This Dish:
Serve with a cucumber salad or grilled asparagus and a squeeze of lemon on the side. The pickle slaw already brings enough tang, so keep the other sides clean and simple.
Pro Tips for This Recipe:
- Chill the patties before grilling or they can fall apart.
- Use salmon pieces that are dry enough to chop cleanly.
- Turn the burgers only once, and do it gently.
- If the mixture seems loose, add a tablespoon more breadcrumbs, not a fistful.
Variations on This Dish:
- Dijon Salmon Burgers: Add a spoonful of Dijon to the mix for more bite.
- Lettuce Bun Version: Skip the bun and tuck the burger into lettuce with extra slaw.
- Herb-Heavy Swap: Add parsley and chives for a greener flavor.
Common Mistakes to Avoid with This Dish:
- Using wet salmon mixture: It won’t hold together on the grill.
- Pressing the patties flat: That squeezes out the moisture.
- Cooking until the center is dry: Salmon burgers should stay tender.
13. Grilled Tofu and Pineapple Rice Bowls
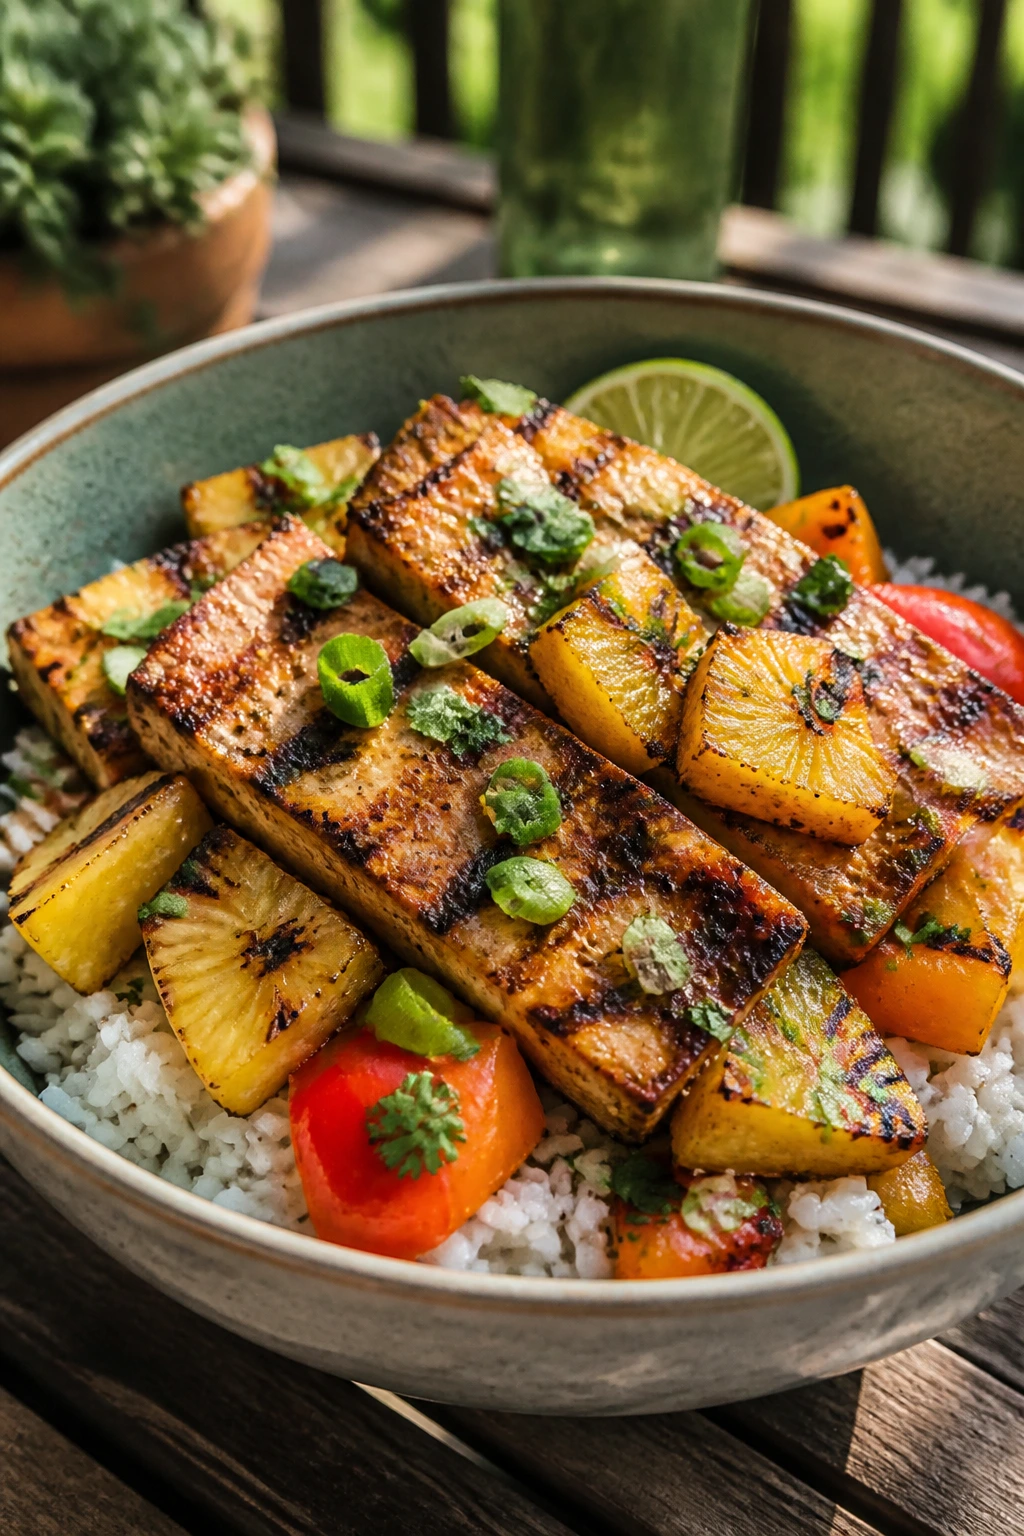
This is the dish I point to when someone says grilled dinner has to be meat. Pressed tofu absorbs the soy-ginger marinade, pineapple brings sugar and smoke, and the rice gives the bowl enough backbone to count as dinner. It’s bright without being sugary.
Why It Works:
Tofu needs a good press and a hot grate, not a lot of drama. The pineapple chars fast and gives you those caramelized edges that make the bowl taste more layered, while the lime at the end keeps the sweetness in check. It’s the kind of meal that makes sense even if you’re not trying to be virtuous about it.
Key Ingredients:
- 2 blocks extra-firm tofu, pressed and cut into slabs
- 2 tbsp soy sauce
- 1 tbsp sesame oil
- 1 tbsp lime juice
- 1 tsp grated ginger
- 2 cups pineapple chunks
- 2 bell peppers, cut into strips
- 4 cups cooked jasmine rice
- 2 scallions, sliced
- 1 tbsp sesame seeds
- 1 tbsp olive oil
Quick Steps:
- Press the tofu for 20 minutes, then slice it into thick slabs.
- Whisk the soy sauce, sesame oil, lime juice, ginger, and olive oil, and marinate the tofu for 20 to 30 minutes.
- Grill the tofu, pineapple, and peppers over medium-high heat until the tofu has grill marks and the pineapple looks caramelized, about 3 to 4 minutes per side.
- Spoon rice into bowls.
- Top with tofu, pineapple, peppers, scallions, sesame seeds, and a squeeze of lime.
Equipment for This Recipe:
- Grill or grill basket
- Tofu press or heavy skillet
- Tongs
- Mixing bowl
- Serving bowls
How to Serve This Dish:
Serve the bowls warm with extra lime and a spoonful of chili crisp if you like heat. A few cucumber slices on the side keep the bowl feeling cool and crisp.
Pro Tips for This Recipe:
- Pressing the tofu is not optional. Water is the enemy of browning.
- Oil the grill basket or grate well so the tofu lifts cleanly.
- Use ripe pineapple, but not overripe; you want slices that hold shape.
- If your rice is dry, splash it with a teaspoon of water and cover it for a minute before assembling.
Variations on This Dish:
- Teriyaki Style: Swap the marinade for teriyaki and add grilled snap peas.
- Brown Rice Version: Use brown rice for more chew and a nuttier base.
- Peanut Drizzle Finish: Add a thin peanut sauce for a richer bowl.
Common Mistakes to Avoid with This Dish:
- Not pressing the tofu: It won’t brown properly.
- Handling tofu too early on the grill: Let it set before turning.
- Using plain rice with no acid or garnish: The bowl tastes flat without lime or herbs.
14. Chicken Caprese Sandwiches with Basil Mayo
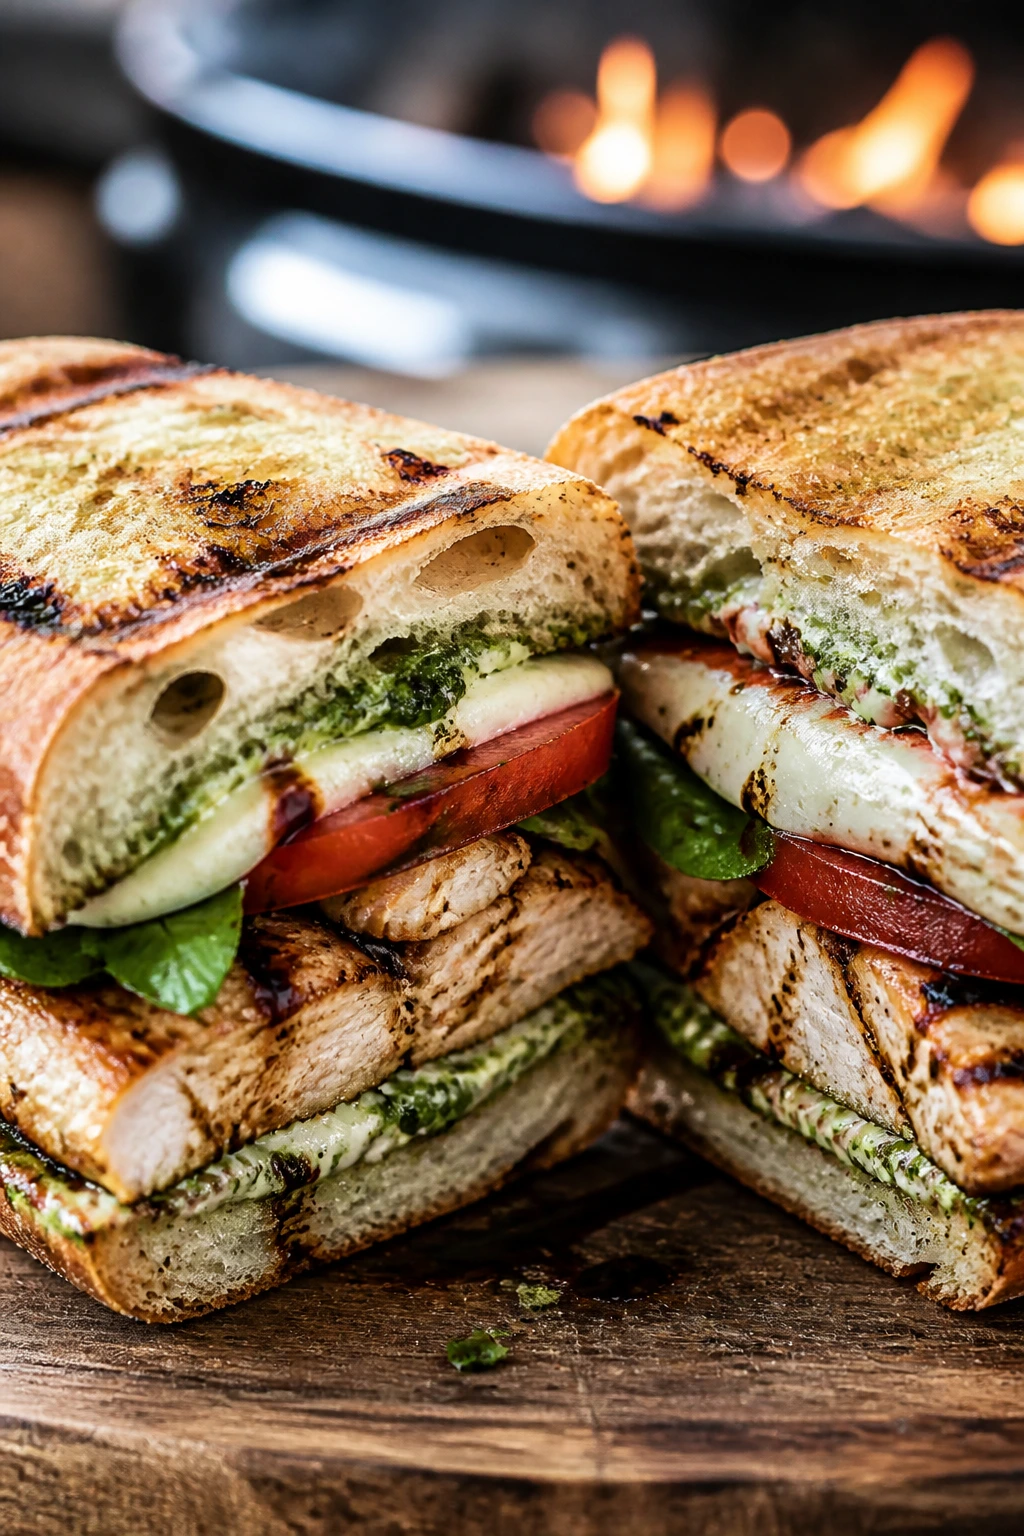
Caprese flavors usually live in a salad or on a skewer, but they make a very convincing sandwich when the chicken gets grilled and the bread gets toasted. Tomato, basil, mozzarella, and balsamic glaze give you the familiar combination, but the grill adds enough smoke to keep it from feeling soft and sleepy.
Why It Works:
Chicken cutlets cook quickly and take on grill marks without drying out. Mozzarella softens over the warm meat, basil mayo gives the bread a fragrant layer, and the balsamic glaze sharpens the tomatoes. The sandwich feels familiar, just with more texture.
Key Ingredients:
- 2 lbs chicken cutlets or 2 large breasts pounded thin
- 1 tbsp olive oil
- 1 tsp kosher salt
- ½ tsp black pepper
- 4 ciabatta rolls
- 8 oz fresh mozzarella, sliced
- 2 tomatoes, sliced
- 1 cup basil leaves
- ¼ cup mayo
- 1 tsp lemon juice
- 2 tbsp balsamic glaze
Quick Steps:
- Brush the chicken with olive oil and season with salt and pepper.
- Grill the chicken over medium-high heat for 4 to 5 minutes per side, until it reaches 165°F.
- Toast the rolls on the grill until the cut sides are lightly crisp.
- Mix the mayo with lemon juice and a little chopped basil.
- Assemble with basil mayo, chicken, mozzarella, tomatoes, basil leaves, and balsamic glaze.
Equipment for This Recipe:
- Grill
- Tongs
- Sharp knife
- Mixing bowl
- Instant-read thermometer
How to Serve This Dish:
Serve these with a simple arugula salad or grilled corn. If you want the sandwiches neater, slice them in half and let the cheese soften over the hot chicken before closing the bread.
Pro Tips for This Recipe:
- Pound the chicken evenly so the thicker end doesn’t lag behind.
- Grill the bread just enough to give it structure, not so much that it scrapes your mouth.
- Add the mozzarella while the chicken is still hot so it softens a little.
- Use firm tomatoes; watery slices will slide around and make the sandwich soggy.
Variations on This Dish:
- Pesto Caprese: Swap basil mayo for pesto.
- Peach Caprese: Use sliced peaches along with the tomato for a sweeter version.
- Baguette Style: Build the sandwich on a toasted baguette for more crunch.
Common Mistakes to Avoid with This Dish:
- Using thick chicken pieces: They dry out before the center cooks through.
- Adding too much balsamic glaze: It can drown the basil and tomato.
- Skipping the toast on the bread: Soft rolls get soggy fast.
15. Skirt Steak Lettuce Wraps with Cucumber Salad
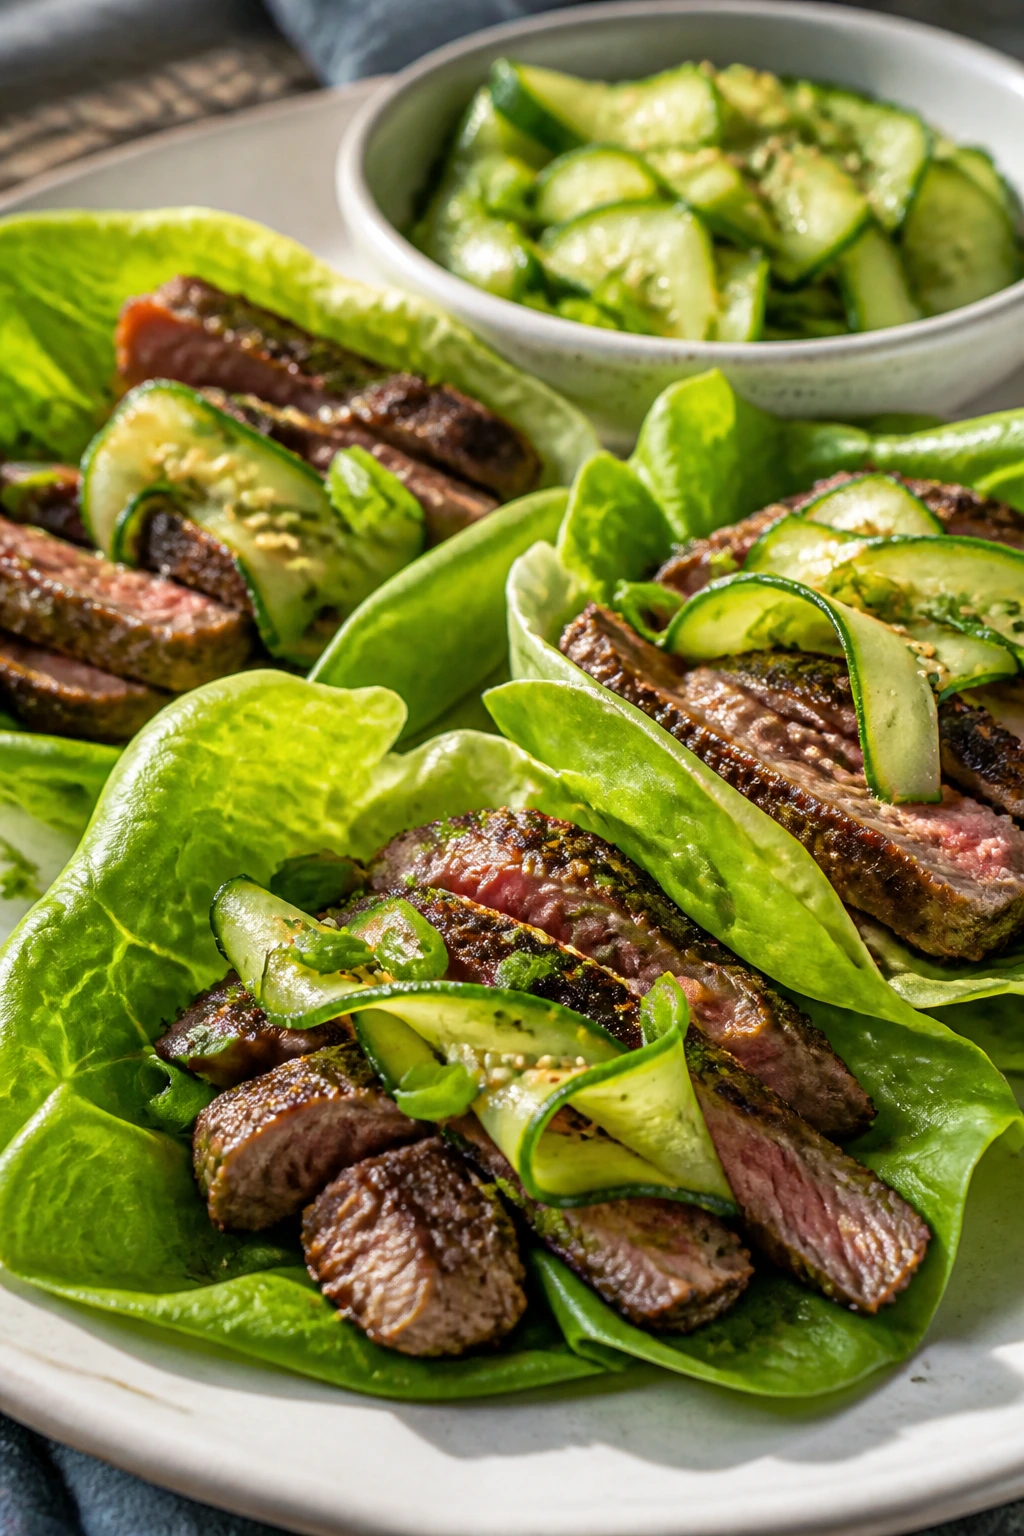
Skirt steak cooks fast, slices beautifully, and has enough beefy flavor to make lettuce wraps feel like a proper meal. The cucumber salad keeps the plate cool, and the soy-sesame dressing gives the steak a clean, savory edge. Crisp lettuce is the whole point here.
Why It Works:
Skirt steak is thin and flavorful, which makes it ideal for a hot grill and a light meal. The lettuce wraps keep the beef from feeling heavy, while cucumber, scallion, and rice vinegar add enough brightness to keep each bite sharp. You get dinner with crunch and attitude.
Key Ingredients:
- 1½ lbs skirt steak
- 2 tbsp soy sauce
- 1 tbsp sesame oil
- 1 tbsp rice vinegar
- 2 garlic cloves, grated
- 1 head butter lettuce, leaves separated
- 1 cucumber, thinly sliced
- 2 scallions, sliced
- 1 tbsp sesame seeds
- 1 tsp chili crisp, optional
- 1 tsp kosher salt
Quick Steps:
- Mix the soy sauce, sesame oil, rice vinegar, garlic, and salt, then coat the steak for 15 to 30 minutes.
- Toss the cucumber and scallions with a splash of the same dressing.
- Grill the steak over high heat for 3 to 4 minutes per side, until it reaches 130°F for medium-rare.
- Rest the steak for 10 minutes, then slice it thinly against the grain.
- Spoon steak and cucumber salad into lettuce leaves and finish with sesame seeds and chili crisp.
Equipment for This Recipe:
- Grill
- Mixing bowl
- Sharp slicing knife
- Cutting board
- Tongs
How to Serve This Dish:
Serve the wraps family-style and let people build their own. A bowl of chilled melon or a plate of grilled green beans makes the whole meal feel lighter.
Pro Tips for This Recipe:
- Don’t marinate skirt steak for hours; 30 minutes is enough for this cut.
- Slice the steak thin, or the wraps feel clumsy.
- Keep the lettuce leaves cold and dry until serving.
- Add chili crisp at the table so the heat stays optional.
Variations on This Dish:
- Ginger-Lime Version: Add fresh ginger and lime to the marinade.
- Rice Bowl Swap: Serve the same steak and cucumber salad over rice.
- Spicy Sesame Style: Add gochujang to the dressing for a deeper heat.
Common Mistakes to Avoid with This Dish:
- Overcooking skirt steak: It gets chewy fast when pushed past medium.
- Slicing with the grain: The meat stays stringy.
- Using limp lettuce: The wraps fall apart before the first bite.
16. Burrata and Charred Vegetable Salad with Grilled Bread
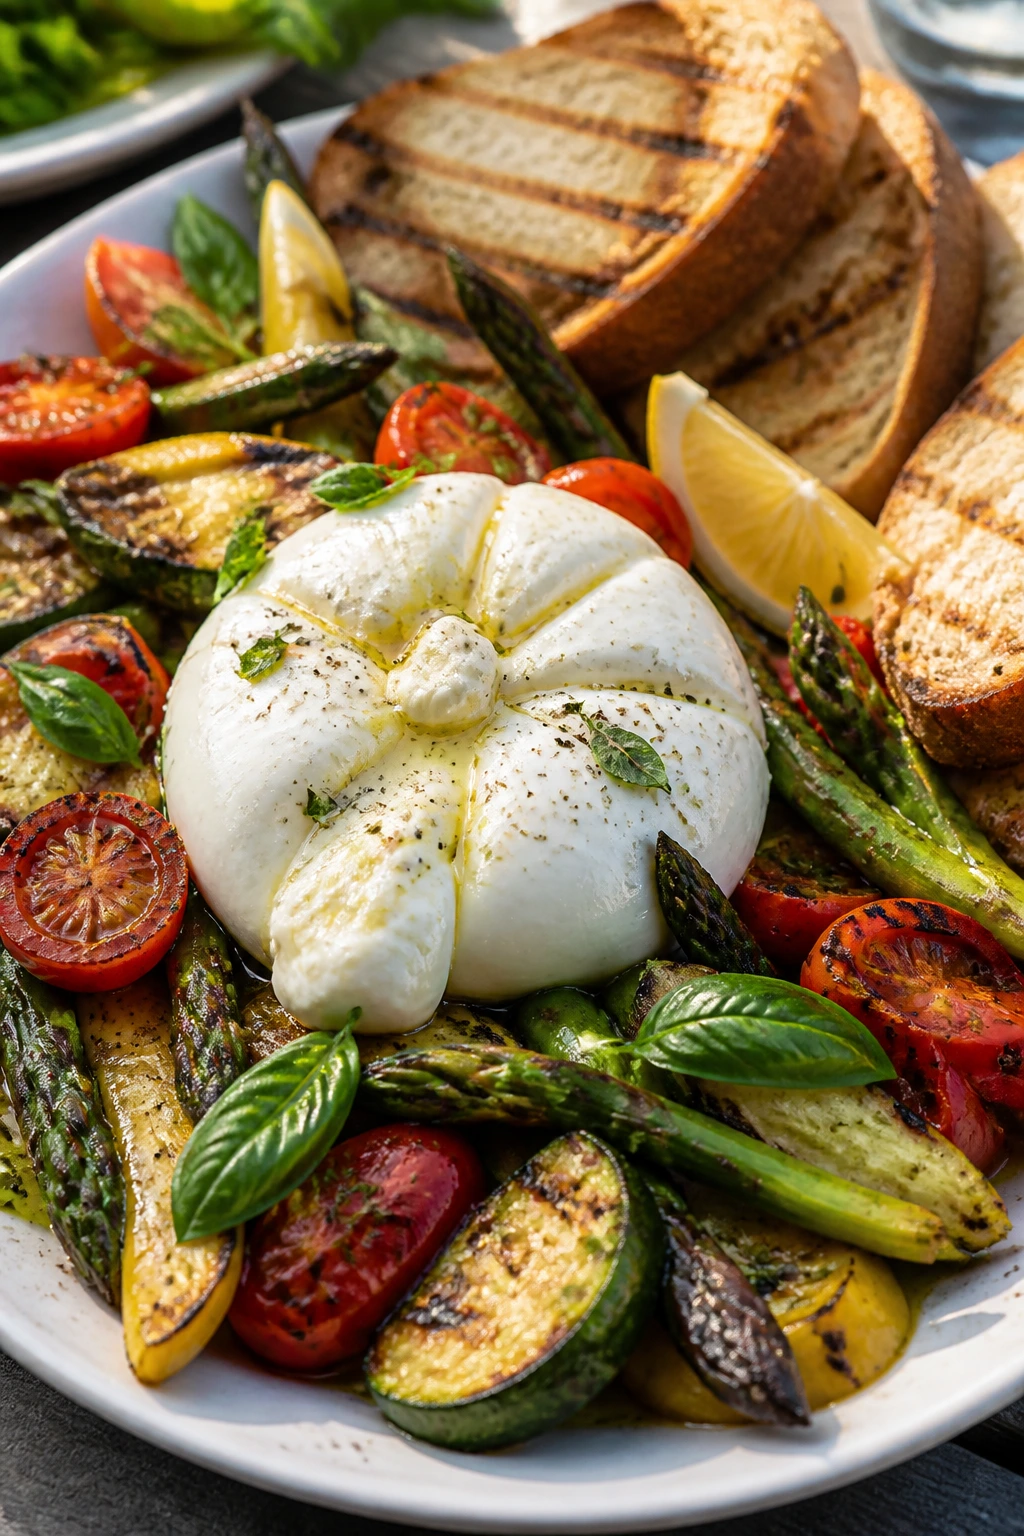
Burrata is one of those ingredients that can feel indulgent without being heavy if you treat it right. Pair it with charred zucchini, asparagus, and tomatoes, and you get a salad that tastes like peak-season produce with a creamy center. The grilled bread catches the oil. It’s doing some very important work.
Why It Works:
Warm vegetables and cold burrata make a natural contrast that doesn’t need much else. A little lemon, basil, and good olive oil pull the salad together, while the bread gives the creamy cheese a place to go. I like salads like this because they eat like a plate, not a side.
Key Ingredients:
- 2 balls burrata, about 8 oz each
- 2 zucchini, sliced lengthwise
- 1 bunch asparagus, trimmed
- 1 pint cherry tomatoes
- 6 cups arugula
- 1 loaf sourdough, sliced
- 3 tbsp olive oil
- 1 lemon, juiced
- 1 cup basil leaves
- 1 tsp kosher salt
- ½ tsp black pepper
Quick Steps:
- Brush the vegetables and bread with olive oil, salt, and pepper.
- Grill the zucchini, asparagus, and tomatoes until lightly charred, about 4 to 6 minutes total.
- Grill the bread until toasted and marked on both sides.
- Arrange the arugula on a platter, then add the vegetables and burrata.
- Tear the burrata open, drizzle with lemon and olive oil, and serve with bread.
Equipment for This Recipe:
- Grill
- Tongs
- Large platter
- Knife
- Cutting board
How to Serve This Dish:
Serve this in the middle of the table and let people tear bread and scoop everything together. A chilled white wine or sparkling water with lemon suits it perfectly.
Pro Tips for This Recipe:
- Don’t over-char the tomatoes; you want them blistered, not collapsed.
- Pull the burrata from the fridge 15 minutes before serving so it loses the ice-cold center.
- Use the best olive oil you have here. There isn’t much of it, so quality matters.
- Salt the vegetables before grilling, not after.
Variations on This Dish:
- Peach Burrata Salad: Add sliced peaches if you want a sweeter summer version.
- Pesto Drizzle: Spoon a little pesto over the top instead of plain basil.
- No-Bread Plate: Serve it over more arugula for a lighter bowl.
Common Mistakes to Avoid with This Dish:
- Grilling vegetables until they’re mushy: They should still have shape.
- Serving burrata straight from the fridge: The center stays too firm.
- Over-dressing the salad: Burrata already brings richness.
17. Miso-Glazed Cod with Radish-Cucumber Slaw
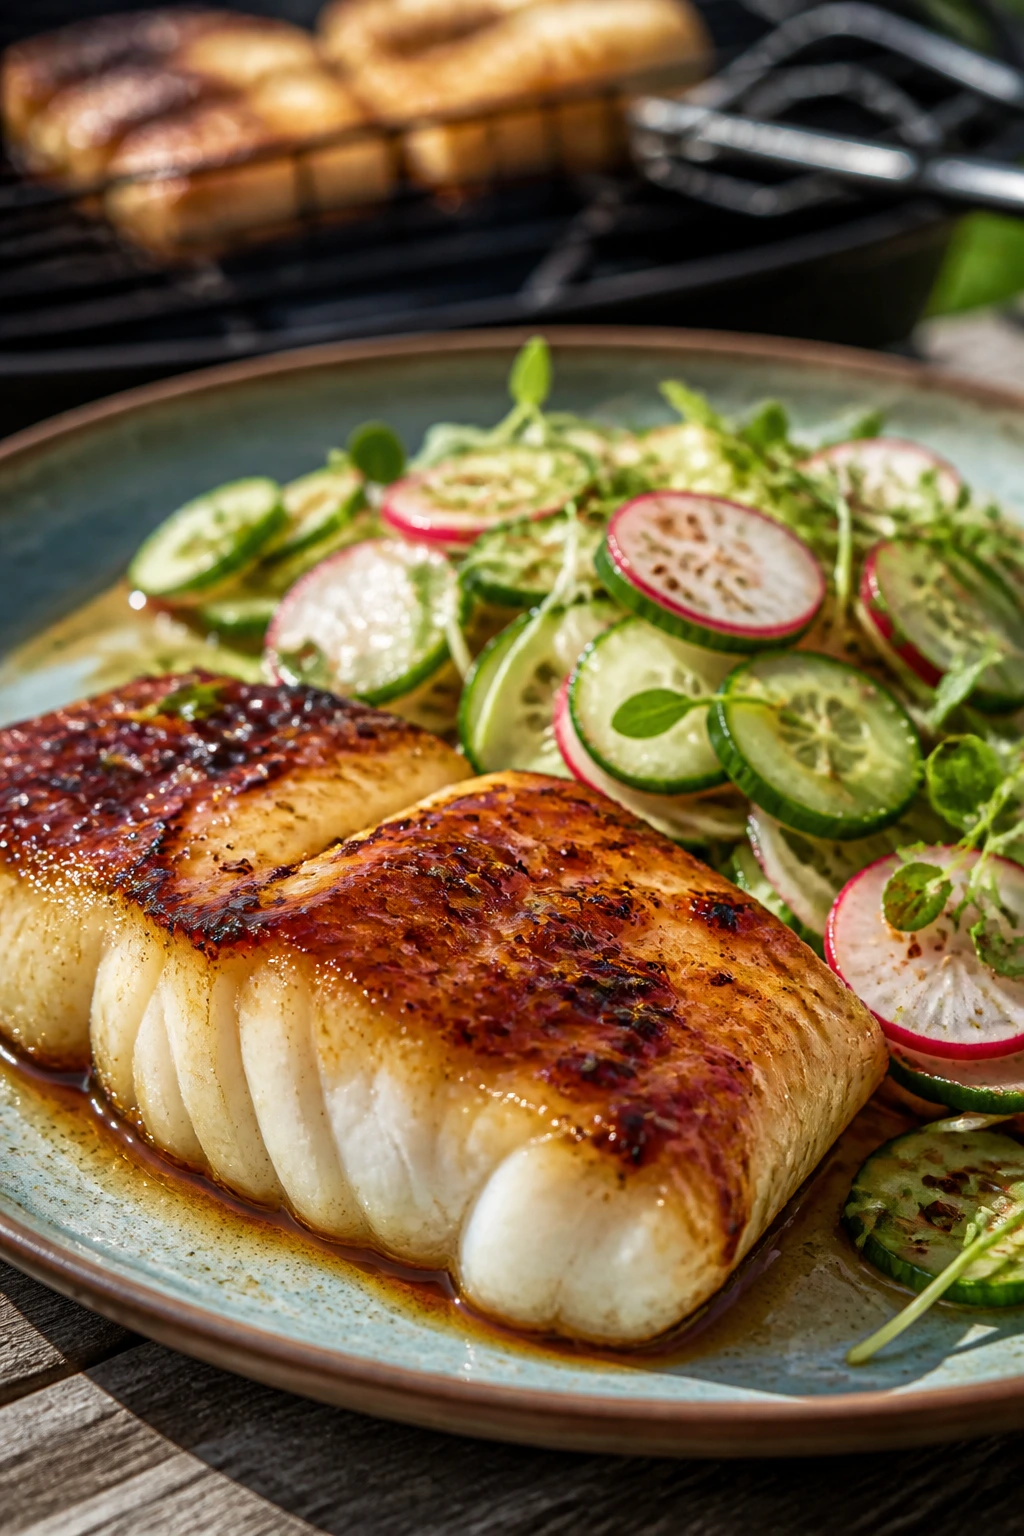
Cod likes a gentle hand and a short cook, which is why miso is such a good partner for it. The glaze brings a little sweetness and deep savory flavor, while the radish-cucumber slaw keeps the plate cool and crisp. This is a clean-tasting dinner with a smoky edge.
Why It Works:
Miso gives cod enough flavor to stand up to the grill without hiding the fish. The slaw adds bite and water-crisp texture, which is a nice break from the soft fish. If you’ve ever wanted seafood that feels neat instead of messy, this is it.
Key Ingredients:
- 2 lbs cod fillets
- 2 tbsp white miso
- 1 tbsp honey
- 1 tbsp rice vinegar
- 1 tbsp sesame oil
- 4 radishes, thinly sliced
- 1 cucumber, thinly sliced
- 2 scallions, sliced
- 1 tsp sesame seeds
- 1 lime, cut into wedges
- 1 tsp kosher salt
Quick Steps:
- Whisk the miso, honey, rice vinegar, and sesame oil into a glaze.
- Mix the radishes, cucumber, scallions, salt, and a squeeze of lime for the slaw.
- Brush the cod lightly with the glaze.
- Grill the fish on oiled foil or in a grill basket over medium heat for 8 to 10 minutes, until it flakes cleanly.
- Spoon the slaw on the side and finish with sesame seeds and lime.
Equipment for This Recipe:
- Grill
- Grill basket or foil
- Fish spatula
- Mixing bowl
- Brush
How to Serve This Dish:
Serve the cod with steamed rice or a small pile of grilled snap peas. I like keeping the plate spare so the glaze and slaw stay the focus.
Pro Tips for This Recipe:
- Oiled foil or a basket keeps the delicate cod from breaking apart.
- Watch the glaze closely; honey can go from glossy to burnt fast.
- Use the thickest part of the fillet for your doneness check.
- If the slaw sits too long, drain off a little liquid before plating.
Variations on This Dish:
- Ginger-Miso Version: Add grated ginger to the glaze.
- Salmon Swap: Use salmon if you want a richer fish.
- Cucumber-Only Slaw: Leave out the radishes for a softer crunch.
Common Mistakes to Avoid with This Dish:
- Handling the fish too much: Cod falls apart if you keep moving it.
- Using direct high flame: The glaze can scorch before the fish cooks.
- Skipping the acid in the slaw: It needs lime or vinegar to stay bright.
18. Mediterranean Lamb Burgers with Tzatziki
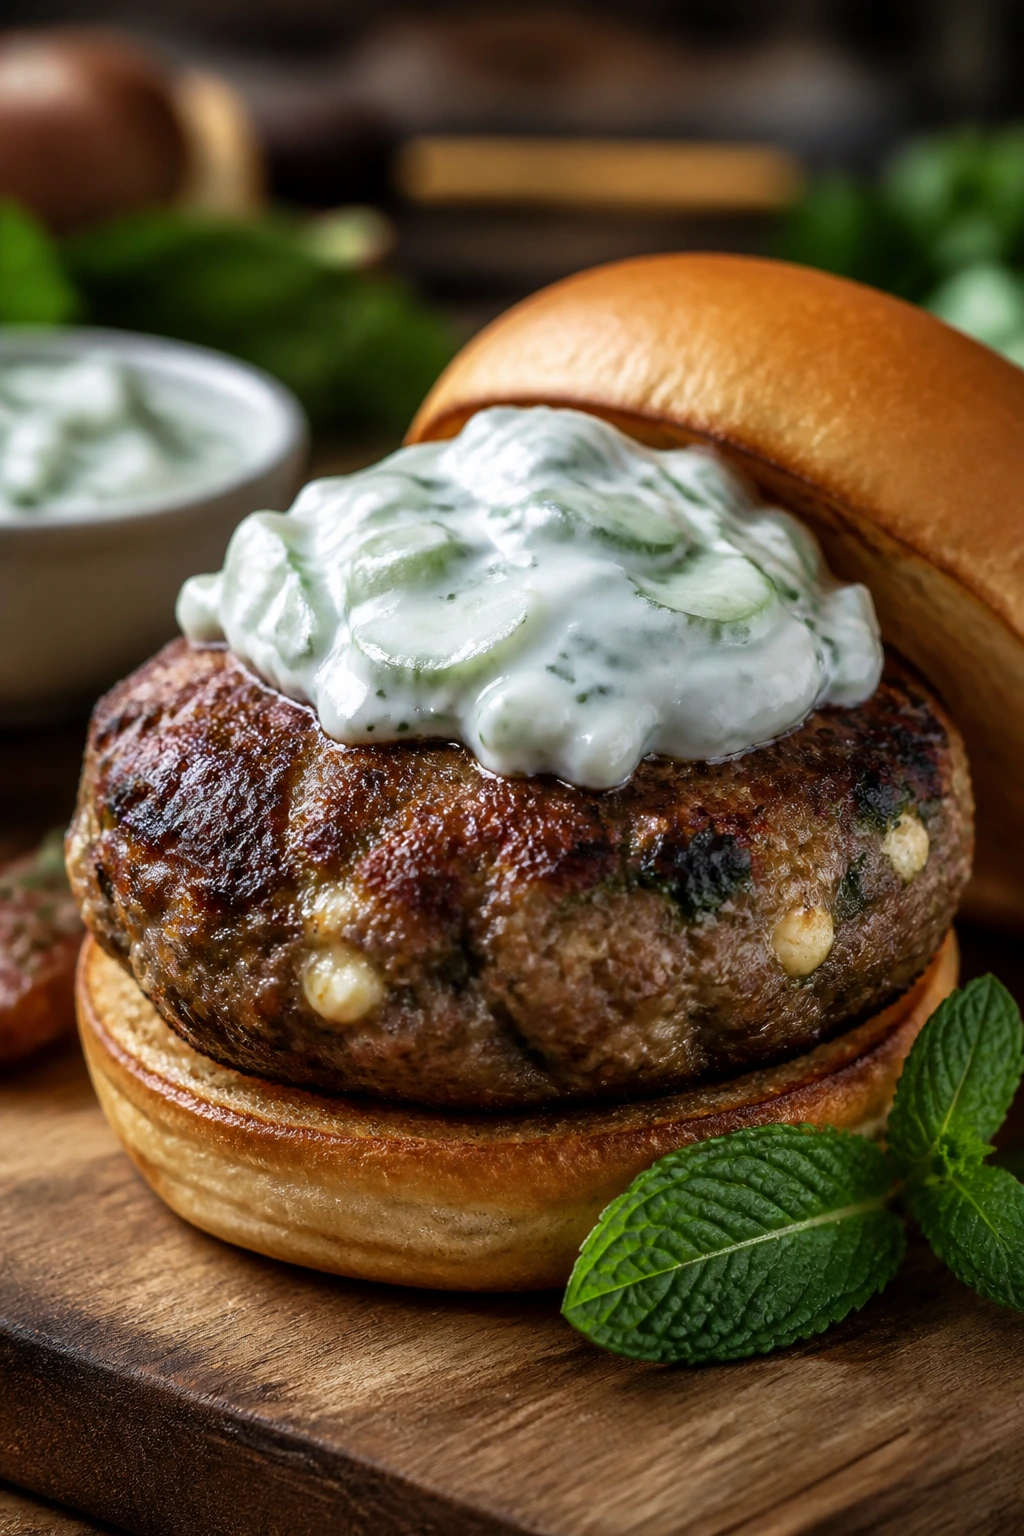
Lamb burgers bring a deeper, more savory flavor than beef burgers, and that makes them feel right at home beside cool tzatziki and cucumber. A little mint and oregano in the meat keeps the flavor clean, not gamey. This is one of those dinners that tastes like you planned it, even if you didn’t.
Why It Works:
Ground lamb likes herbs, garlic, and a touch of yogurt on the side. The tzatziki cools the richness, while the bun or pita gives you something soft against the savory burger. It’s a strong flavor, but not a heavy plate.
Key Ingredients:
- 1½ lbs ground lamb
- 1 garlic clove, grated
- 1 tsp dried oregano
- 1 tsp chopped mint
- 1 tsp kosher salt
- ½ tsp black pepper
- ½ cup crumbled feta
- 1 cup Greek yogurt
- ½ cucumber, grated and squeezed dry
- 1 tbsp lemon juice
- 4 buns or pitas
Quick Steps:
- Mix the lamb with garlic, oregano, mint, salt, pepper, and feta. Form into 4 patties.
- Stir the yogurt, cucumber, lemon juice, and a pinch of salt for tzatziki.
- Grill the patties over medium-high heat for 4 to 5 minutes per side, until they reach 160°F.
- Warm the buns or pitas on the grill.
- Serve with tzatziki and any extra cucumber you have left.
Equipment for This Recipe:
- Grill
- Mixing bowl
- Spatula
- Thermometer
- Grater
How to Serve This Dish:
Serve the burgers with tomato slices, red onion, and a handful of herbs. A simple lettuce salad with lemon dressing is enough on the side; the burger already carries the meal.
Pro Tips for This Recipe:
- Mix the meat lightly. Overworking lamb makes the burgers dense.
- Chill the patties for 15 minutes before grilling if they feel soft.
- Keep the tzatziki thick so it stays on the burger instead of running off.
- Use pitas if you want a less bulky dinner.
Variations on This Dish:
- Spiced Lamb Version: Add a pinch of cumin and coriander to the meat.
- Burger Bowl Swap: Serve the patty over cucumber salad with no bun.
- Garlic-Herb Pita: Brush the pita with garlic oil before warming it.
Common Mistakes to Avoid with This Dish:
- Overcooking lamb burgers: They lose their juiciness and flavor.
- Using watery tzatziki: It will slide everywhere.
- Skipping the salt in the meat: Lamb needs it.
19. Portobello Fajitas with Salsa Verde
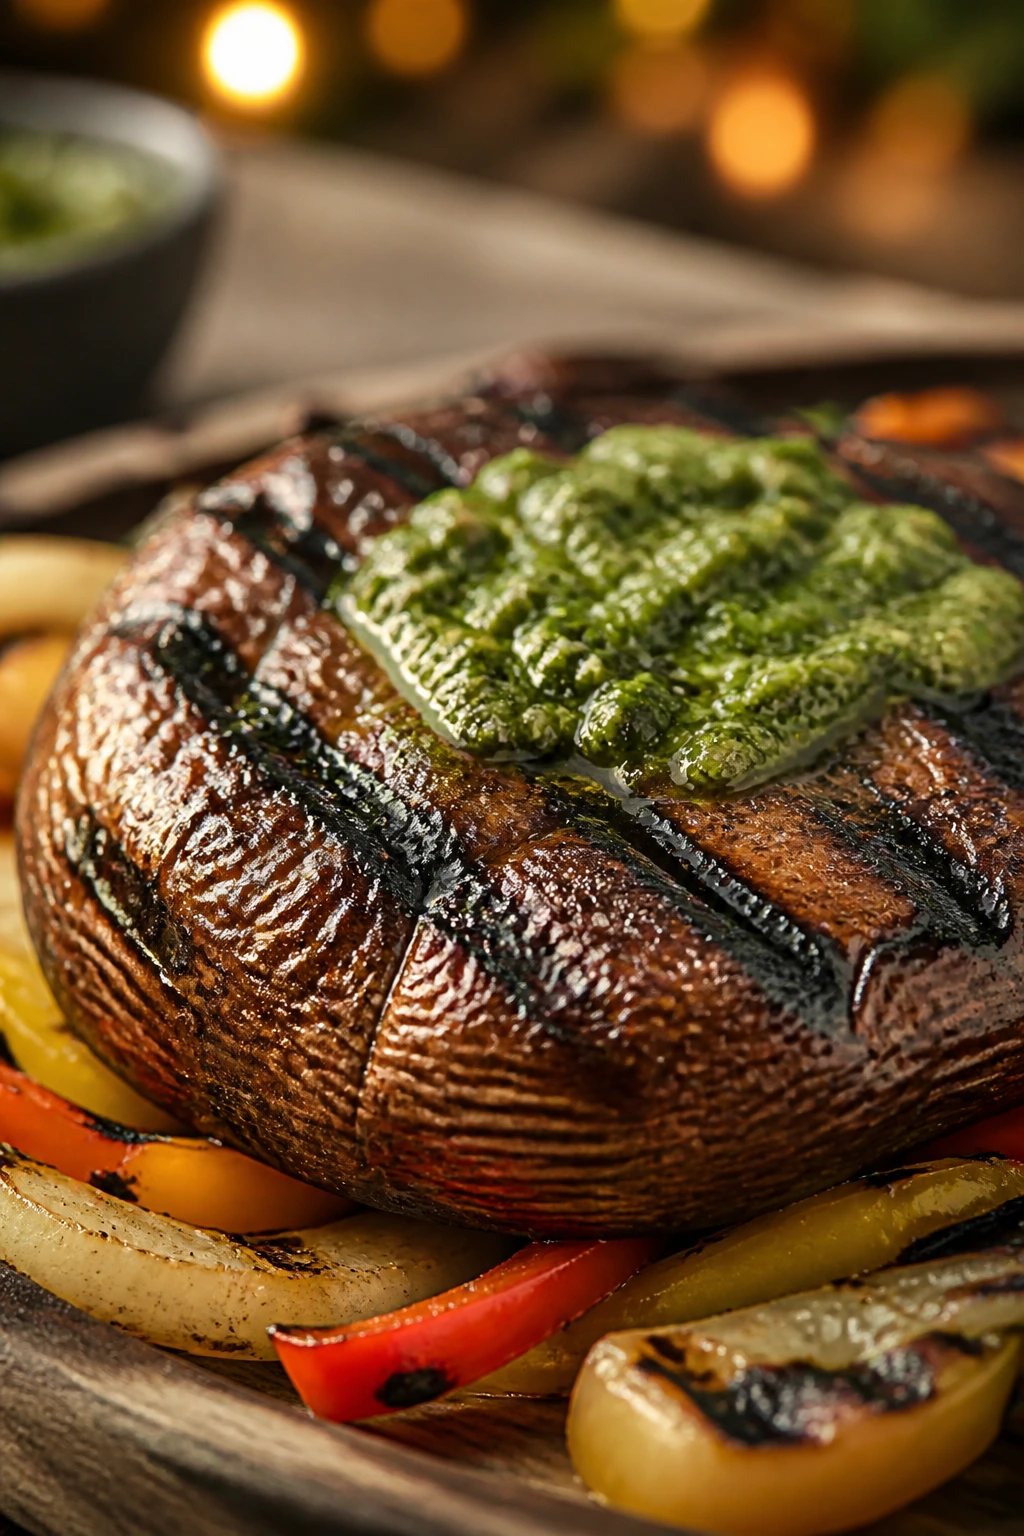
Portobellos are one of the few vegetables that can hold their own in fajita form. They soak up smoke, take on a meaty texture, and pair beautifully with peppers, onions, and salsa verde. The whole pan or platter smells like a taqueria that found a grill.
Why It Works:
The mushrooms have enough surface area to pick up char, and their natural moisture keeps them from feeling dry. Bell peppers and onion bring sweetness, while the salsa verde adds sharpness after the grill. It’s a vegetarian dinner that doesn’t ask anyone to apologize for it.
Key Ingredients:
- 4 large portobello caps, stems removed
- 2 bell peppers, sliced
- 1 large onion, sliced
- 2 tbsp olive oil
- 1 tbsp lime juice
- 2 tsp fajita seasoning
- 8 tortillas
- ½ cup salsa verde
- 1 avocado, sliced
- 1 tsp kosher salt
Quick Steps:
- Brush the mushrooms, peppers, and onion with olive oil, lime juice, fajita seasoning, and salt.
- Grill the vegetables over medium-high heat until the mushrooms are tender and the peppers have char, about 4 to 6 minutes per side.
- Slice the mushrooms into strips.
- Warm the tortillas on the grill.
- Fill with vegetables, avocado, and salsa verde.
Equipment for This Recipe:
- Grill
- Tongs
- Large knife
- Mixing bowl
- Grill basket, optional
How to Serve This Dish:
Serve with black beans or corn salad if you want a fuller plate. I like a little extra salsa verde on the side because mushrooms can take more acid than people expect.
Pro Tips for This Recipe:
- Wipe the mushrooms clean with a damp towel instead of soaking them.
- If the mushrooms curl on the grill, lay them cap-side down first.
- Don’t overdo the seasoning blend; mushrooms carry flavor easily.
- Warm tortillas before filling or they tear.
Variations on This Dish:
- Quesadilla Fill: Chop the grilled vegetables and fold them into tortillas with cheese.
- Smoky Chipotle Version: Stir chipotle into the fajita seasoning.
- Bean Bowl Swap: Serve the vegetables over rice and beans instead of tortillas.
Common Mistakes to Avoid with This Dish:
- Using mushrooms that are too wet: They steam instead of char.
- Cutting the peppers too thin: They can fall through the grate.
- Forgetting the acid: Fajitas need lime or salsa to taste complete.
20. Coconut-Lime Shrimp Skewers with Mango Salsa
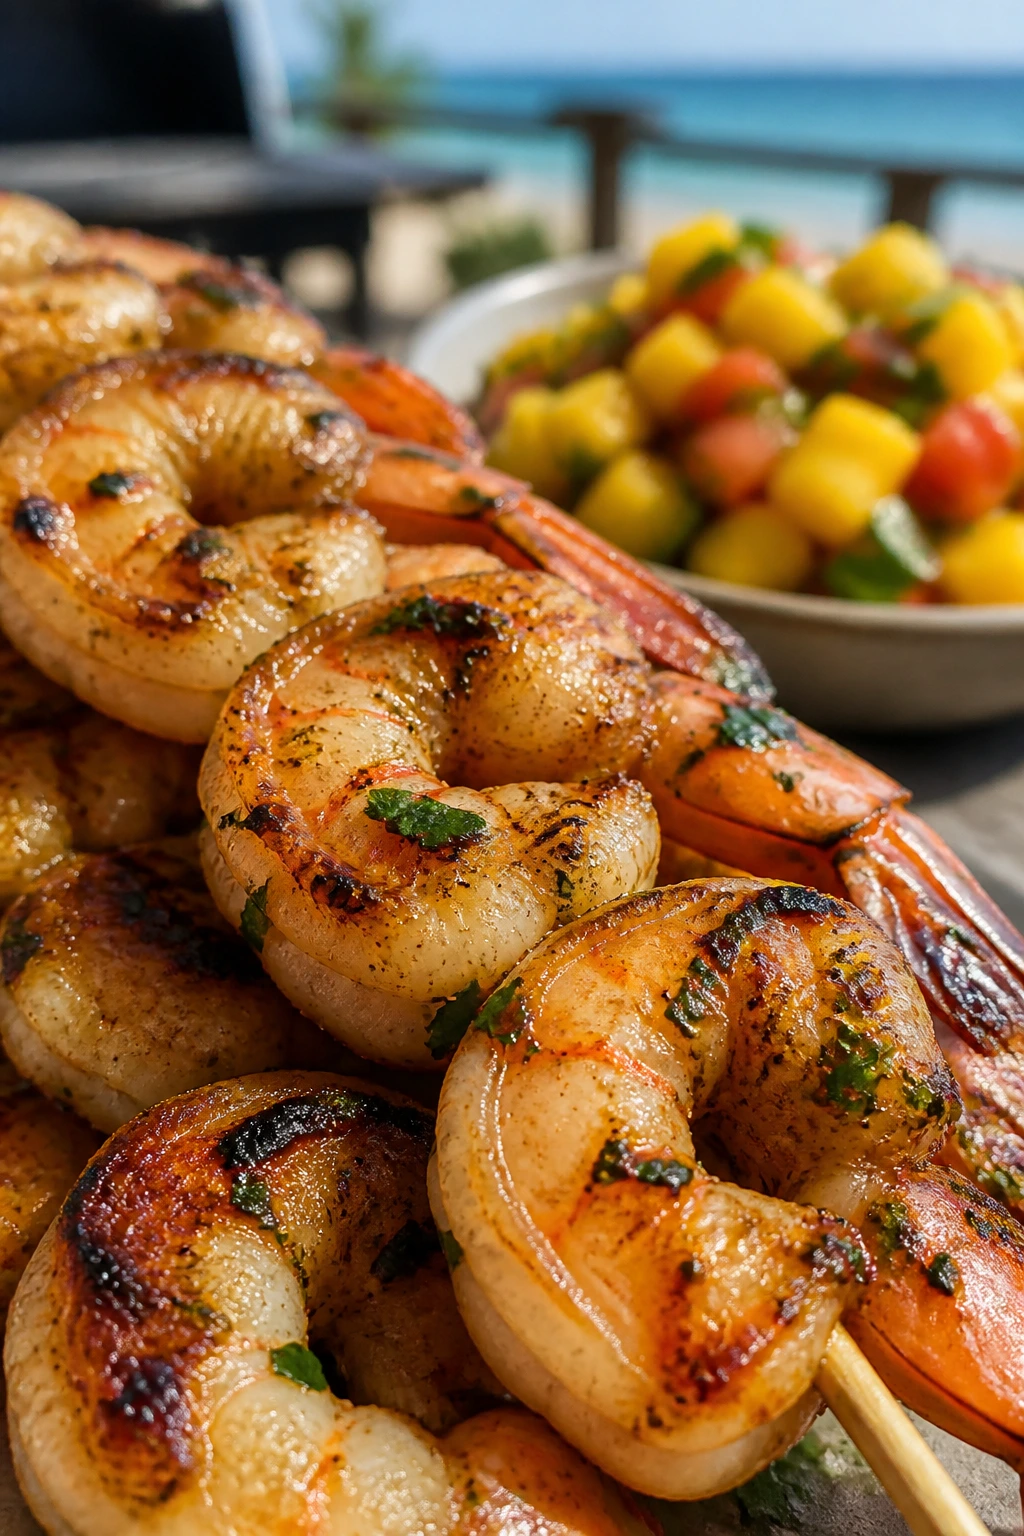
This is the grill dinner that tastes like it borrowed a little sunshine from a fruit stand. Coconut and lime give the shrimp a soft tropical note, and the mango salsa brings heat, sweetness, and juice all at once. It’s light, but it never feels thin.
Why It Works:
Shrimp absorbs flavor fast, which makes a short marinade perfect. The mango salsa is doing the usual salsa job, but with better texture and a brighter sweet note than tomatoes can manage here. Keep the shrimp on the grill just long enough to turn pink, and you’re set.
Key Ingredients:
- 1½ lbs large shrimp, peeled and deveined
- ¼ cup coconut milk
- 2 tbsp lime juice
- 1 tbsp olive oil
- 1 tsp grated garlic
- 1 ripe mango, diced
- ¼ red onion, finely diced
- 1 jalapeño, minced
- 2 tbsp chopped cilantro
- 1 pinch kosher salt
- 8 skewers
Quick Steps:
- Mix the coconut milk, lime juice, olive oil, garlic, and salt, then toss with the shrimp for 15 minutes.
- Stir the mango, onion, jalapeño, cilantro, and a squeeze of lime into a quick salsa.
- Thread the shrimp onto skewers.
- Grill over medium-high heat for 1 to 2 minutes per side, until pink and just opaque.
- Serve with the mango salsa and extra lime.
Equipment for This Recipe:
- Grill
- Skewers
- Mixing bowls
- Tongs
- Small spoon
How to Serve This Dish:
These work well with coconut rice or a pile of grilled pineapple and rice. If you want a true summer spread, add a cucumber salad with rice vinegar and keep the rest of the meal cool and crisp.
Pro Tips for This Recipe:
- Don’t marinate the shrimp too long or the lime can start to “cook” the surface.
- Pat the shrimp dry before grilling so the coconut doesn’t steam off the grate.
- If the mango is very soft, dice it larger so the salsa still has shape.
- Thread the shrimp in the same direction so they lay flat on the grate.
Variations on This Dish:
- Pineapple Salsa Version: Swap mango for pineapple if you want more tang.
- Rice Bowl Style: Serve the shrimp over rice with the salsa spooned on top.
- Chili-Lime Heat: Add a pinch of cayenne to the marinade.
Common Mistakes to Avoid with This Dish:
- Overcooking shrimp: It ruins the tender texture fast.
- Using pale, hard mango: The salsa ends up flat and dry.
- Crowding the skewers: The shrimp need a little space to cook evenly.
21. Flank Steak with Watermelon-Feta Salad

Watermelon and feta sound a little obvious until you put them next to a hot slice of flank steak. Then the whole thing makes sense. The steak gives you savory weight, the watermelon brings cold sweetness, and the mint keeps the salad from drifting into dessert territory.
Why It Works:
Flank steak sears well on a hot grill and slices into thin, tender ribbons when you rest it properly. Watermelon has the kind of clean juiciness that refreshes the palate after each bite of beef, and feta adds enough salt to make the fruit taste even more like itself. It’s a very good summer trick.
Key Ingredients:
- 1½ lbs flank steak
- 1 tbsp olive oil
- 2 tsp kosher salt
- 1 tsp black pepper
- 4 cups watermelon cubes
- 1 cup cucumber cubes
- ½ cup crumbled feta
- ¼ cup chopped mint
- 2 tbsp lime juice
- 1 small shallot, thinly sliced
Quick Steps:
- Rub the steak with olive oil, salt, and pepper.
- Grill over high heat for 3 to 5 minutes per side, until the steak reaches 130°F to 135°F.
- Rest for 10 minutes before slicing.
- Toss the watermelon, cucumber, feta, mint, lime juice, and shallot together.
- Slice the steak against the grain and serve it beside the salad.
Equipment for This Recipe:
- Grill
- Instant-read thermometer
- Sharp knife
- Cutting board
- Large bowl
How to Serve This Dish:
Serve this on a wide platter with the salad piled up next to the steak instead of underneath it. A few pieces of grilled bread or grilled corn on the side make a nice buffer if you want a slightly bigger dinner.
Pro Tips for This Recipe:
- Salt the steak before it goes on the grill so the seasoning reaches the center.
- Keep the watermelon pieces large enough that they don’t melt into juice.
- Let the steak rest before slicing, or the board gets all the good part.
- A very cold salad is the whole point here; chill the watermelon before assembling if you can.
Variations on This Dish:
- Peach-Feta Swap: Use peaches in place of watermelon when they’re in season.
- Chimichurri Steak: Drizzle chimichurri over the sliced beef.
- No-Cheese Version: Skip feta and add chopped olives for salt.
Common Mistakes to Avoid with This Dish:
- Slicing steak too soon: The juices leak out and the meat dries.
- Cutting with the grain: The steak becomes chewy.
- Using tiny watermelon cubes: They disappear into the salad too fast.
22. Grilled Pizza with Summer Squash and Basil
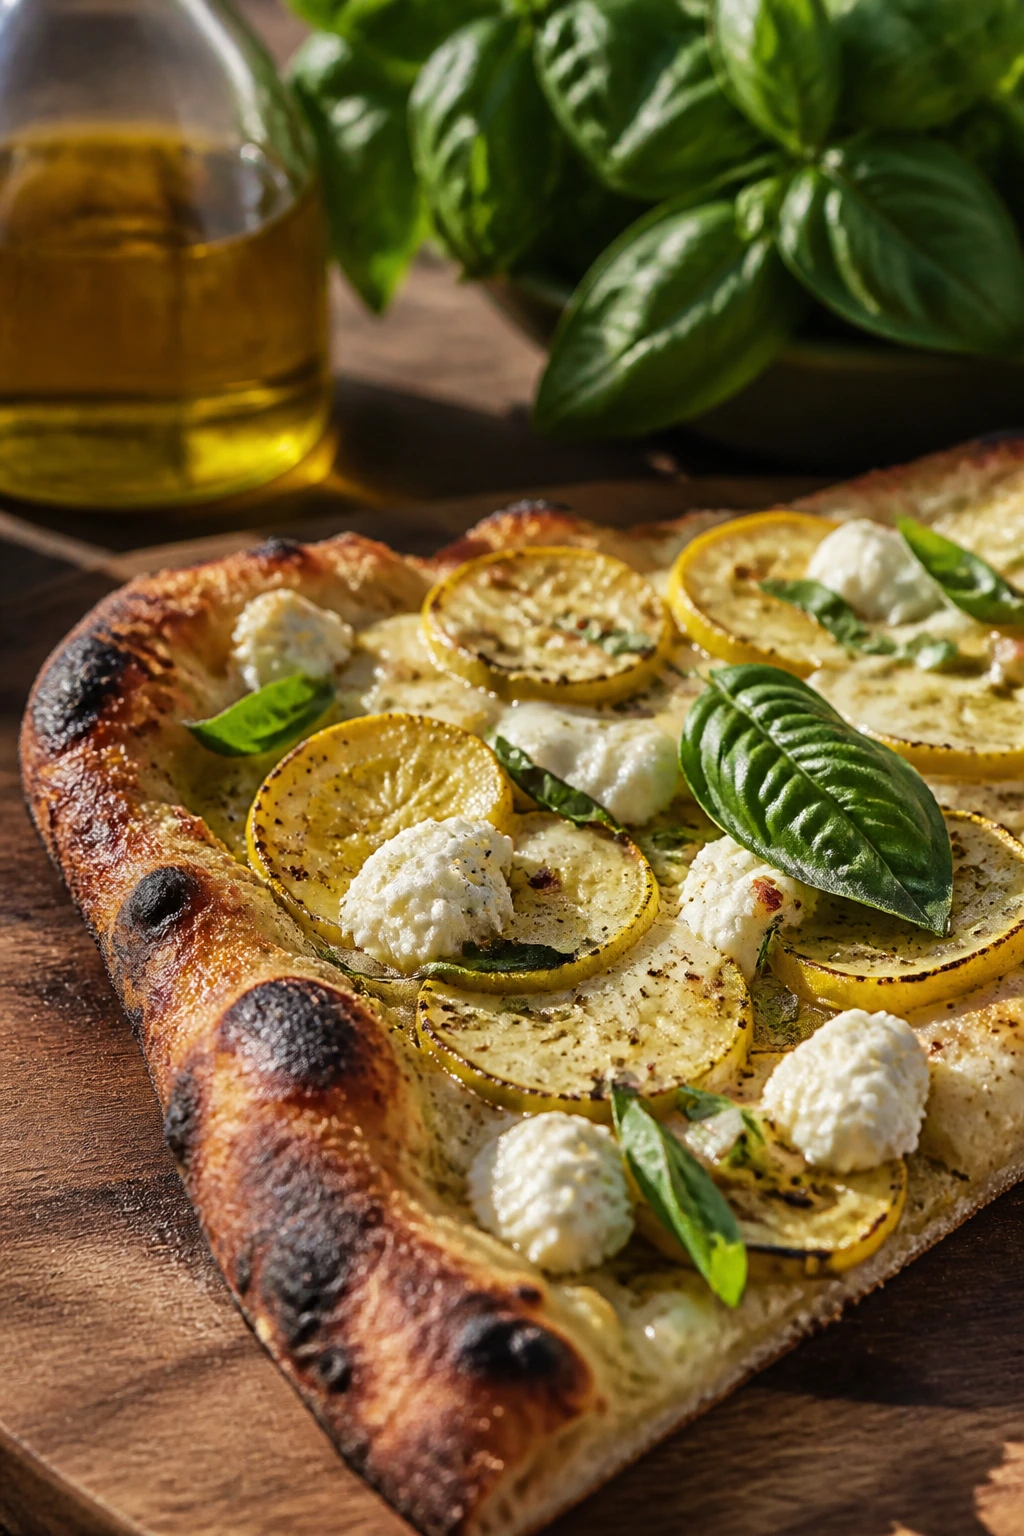
Pizza on the grill sounds like a party trick until you realize it makes one of the crispest, most interesting crusts you can get at home. Summer squash brings a mild sweetness, ricotta gives the base a creamy patch here and there, and basil lands on top like a fresh final note. This is a very good use of a hot grill.
Why It Works:
Grilled pizza gets a little smoke and a lot of structure, which is perfect for vegetables that can taste boring in the oven. The crust crisps fast, the toppings stay bright, and the whole thing feels lighter than a heavy red-sauce pie. It’s pizza, but it doesn’t drag.
Key Ingredients:
- 1 lb pizza dough
- 2 zucchini or yellow squash, thinly sliced
- 1 cup shredded mozzarella
- ½ cup ricotta
- 2 tbsp olive oil
- 1 garlic clove, grated
- 1 tbsp lemon zest
- 1 cup basil leaves
- 1 tsp kosher salt
- ½ tsp black pepper
Quick Steps:
- Toss the squash with olive oil, garlic, salt, and pepper, then grill it in a basket or on foil for 3 to 4 minutes.
- Stretch the dough into a thin round.
- Grill one side of the dough for 2 to 3 minutes until it lifts easily and shows grill marks.
- Flip it, add mozzarella, ricotta, and squash, then close the lid until the cheese melts, about 3 to 4 minutes.
- Finish with basil and lemon zest.
Equipment for This Recipe:
- Grill
- Pizza peel or inverted sheet pan
- Grill basket or foil
- Brush
- Tongs
How to Serve This Dish:
Cut the pizza into narrow wedges and serve it with a sharp arugula salad. I like a few extra basil leaves and a drizzle of olive oil on top because grilled pizza can handle more freshness than people give it.
Pro Tips for This Recipe:
- Keep the dough cold enough to handle, but not so cold that it snaps back.
- Don’t overload the toppings or the crust gets floppy.
- Pre-grill the squash so it doesn’t leak water onto the dough.
- Work quickly after flipping the crust; pizza likes decisive hands.
Variations on This Dish:
- Tomato and Squash Version: Add cherry tomatoes after grilling for more juiciness.
- Goat Cheese Swap: Use goat cheese instead of ricotta for more tang.
- Herb Oil Finish: Drizzle basil or oregano oil over the top.
Common Mistakes to Avoid with This Dish:
- Starting with a weak fire: The crust won’t crisp before it sticks.
- Using wet toppings straight from the bowl: They make the pizza soggy.
- Leaving the dough too thick: You want a thin base for fast grilling.
23. Korean-Style Beef Lettuce Cups
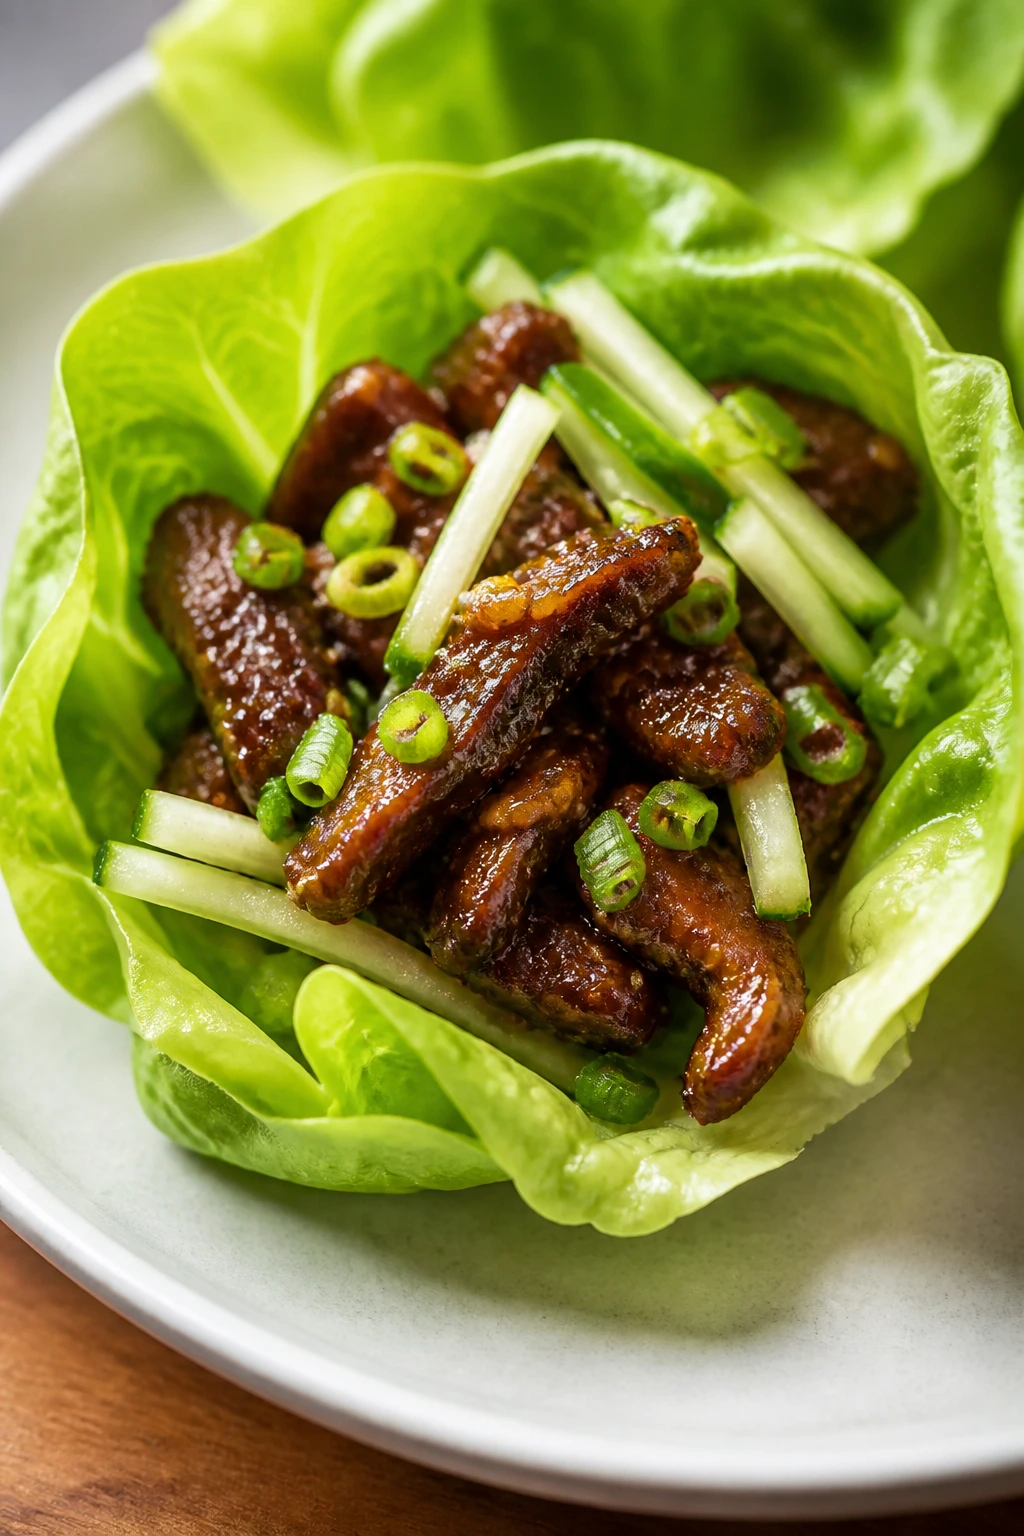
These lettuce cups bring a little heat, a little sweetness, and a lot of crunch. The beef grills quickly, the marinade gets sticky in the right way, and the cool lettuce gives you a crisp shell that keeps the whole thing lively. It’s messy in a useful way.
Why It Works:
A soy-garlic-gochujang marinade gives beef a savory backbone with enough sweetness to char attractively. The lettuce, cucumber, and scallions keep the bites crisp, so the heat never feels oppressive. This is one of those dinners that disappears fast.
Key Ingredients:
- 1½ lbs flank steak or sirloin, thinly sliced
- 3 tbsp soy sauce
- 1 tbsp brown sugar
- 1 tbsp gochujang
- 1 tbsp sesame oil
- 2 garlic cloves, grated
- 1 tsp grated ginger
- 1 head butter lettuce, leaves separated
- 1 cucumber, cut into thin matchsticks
- 2 scallions, sliced
- 1 tbsp sesame seeds
- 1 lime, cut into wedges
Quick Steps:
- Whisk the soy sauce, brown sugar, gochujang, sesame oil, garlic, and ginger into a marinade.
- Coat the beef and let it sit for 20 minutes.
- Grill over high heat for 2 to 3 minutes per side, just until browned and cooked to your liking.
- Rest the beef for 5 minutes, then slice it thin if needed.
- Spoon beef into lettuce leaves with cucumber, scallions, sesame seeds, and lime.
Equipment for This Recipe:
- Grill
- Mixing bowl
- Sharp knife
- Cutting board
- Tongs
How to Serve This Dish:
Set out the lettuce cups family-style and let everyone build their own. A bowl of rice on the side is optional, but it does turn the meal from light dinner into more of a full spread.
Pro Tips for This Recipe:
- Slice the beef thin so it cooks quickly and stays tender.
- If the marinade seems too thick, loosen it with a teaspoon of water.
- Don’t pile too much beef into each lettuce leaf.
- Butter lettuce is nicer here than romaine because it folds more easily.
Variations on This Dish:
- Pork Version: Use thin pork tenderloin slices with the same marinade.
- Extra-Crunch Bowl: Add shredded carrots and bean sprouts.
- Milder Version: Reduce the gochujang by half and add more sesame oil.
Common Mistakes to Avoid with This Dish:
- Leaving the beef on too long: It can go chewy fast.
- Using dry, brittle lettuce: The cups split immediately.
- Skipping the rest: Even quick-cooked steak needs a minute to settle.
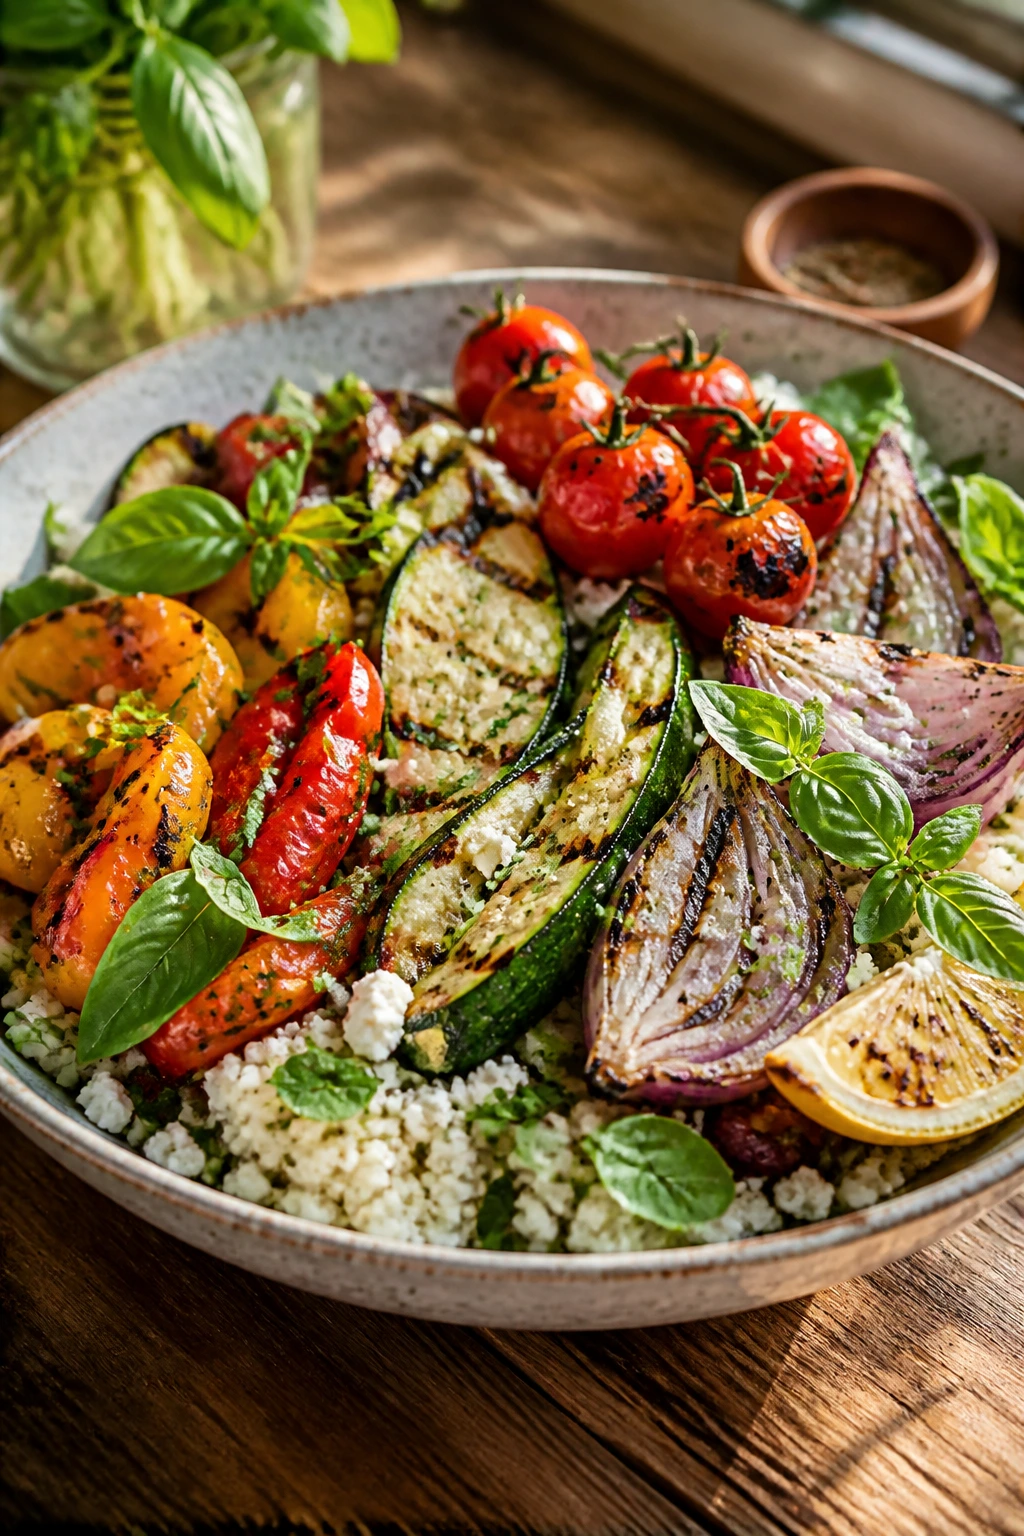
24. Grilled Vegetable Couscous Bowls with Lemon Tahini
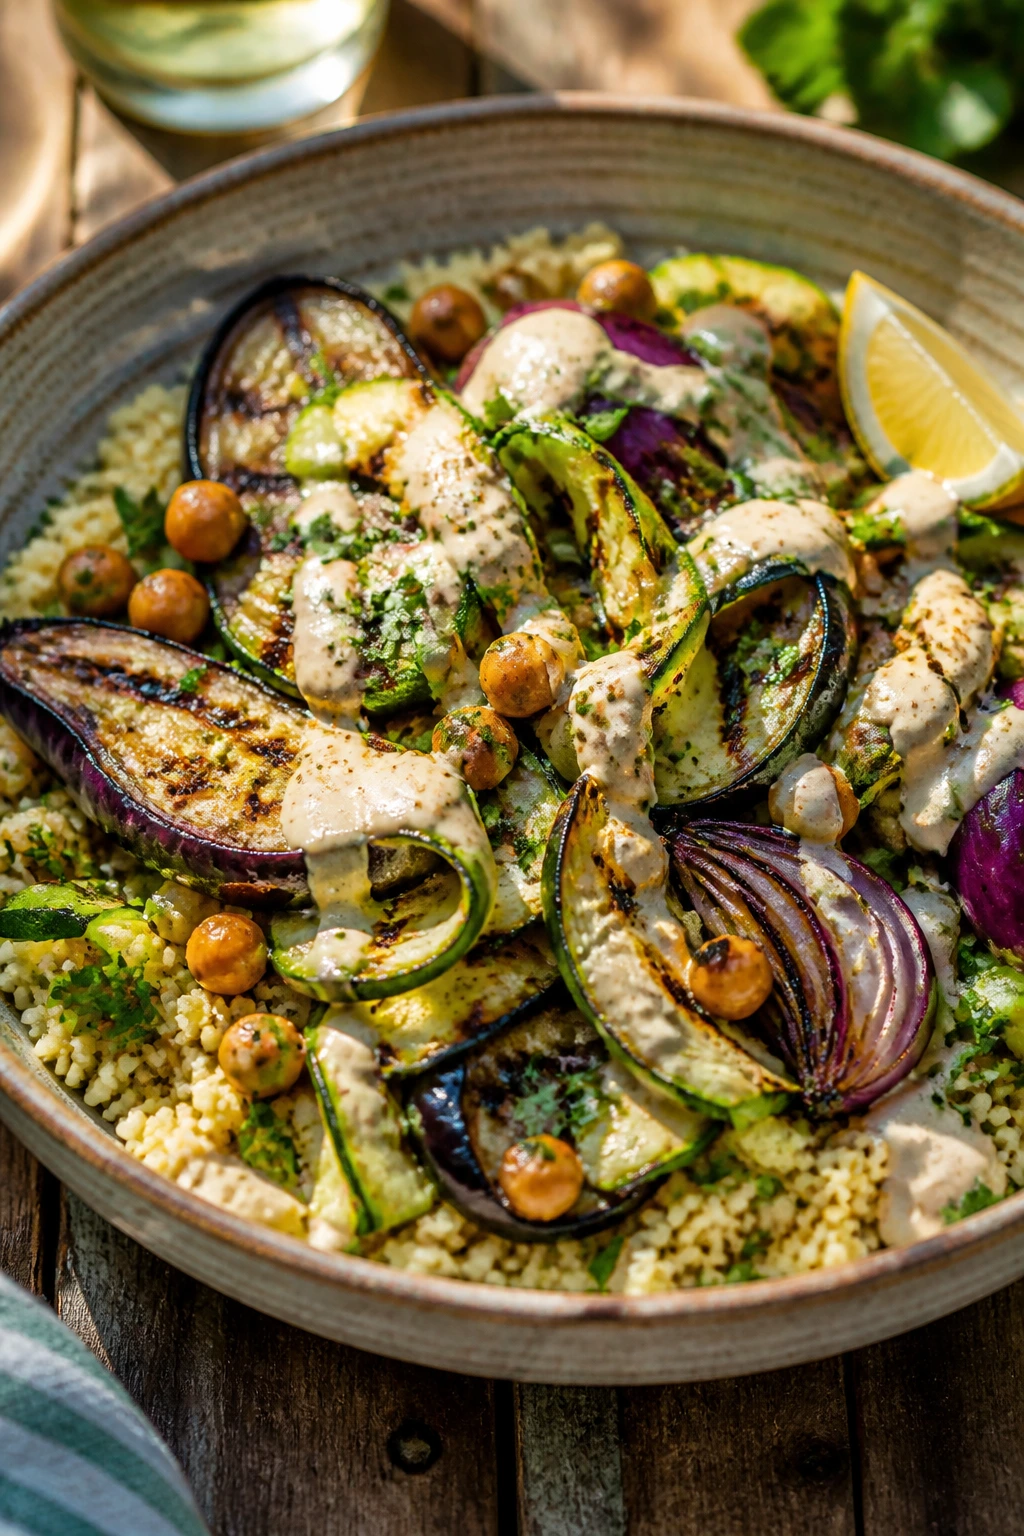
This bowl has the right kind of balance for warm weather: smoky vegetables, a fluffy grain base, and a sauce that tastes nutty and bright instead of heavy. Couscous makes it fast, grilled vegetables make it interesting, and lemon tahini ties the whole thing together without fuss.
Why It Works:
The grill gives the vegetables a little bitterness and char, which is a good thing against the mild couscous. Chickpeas add protein and body, and the tahini sauce keeps the bowl from feeling dry. It’s the sort of dinner that can live at the center of the table or inside a lunch container the next day.
Key Ingredients:
- 2 zucchini, sliced lengthwise
- 1 eggplant or 1 red bell pepper, sliced
- 1 red onion, cut into thick wedges
- 1 tbsp olive oil
- 1 tsp kosher salt
- 1 cup couscous
- 1½ cups hot water
- 1 can chickpeas, drained and rinsed
- ¼ cup tahini
- 2 tbsp lemon juice
- 2 tbsp chopped parsley
- ¼ cup crumbled feta, optional
Quick Steps:
- Toss the vegetables with olive oil and salt.
- Grill the vegetables over medium-high heat until charred and tender, about 4 to 6 minutes.
- Put the couscous in a bowl, pour over the hot water, cover, and let it sit for 5 minutes. Fluff with a fork.
- Whisk the tahini with lemon juice and a little water until pourable.
- Build bowls with couscous, grilled vegetables, chickpeas, parsley, feta, and tahini.
Equipment for This Recipe:
- Grill
- Mixing bowl
- Fork
- Knife
- Serving bowls
How to Serve This Dish:
Serve the bowls warm with extra lemon on the table. If you want a fuller plate, add grilled chicken or halloumi, but the bowl is already strong enough to stand alone.
Pro Tips for This Recipe:
- Cut the vegetables thick so they don’t drop through the grate or turn limp.
- Add water to tahini little by little; it goes from tight to perfect fast.
- Fluff couscous with a fork, not a spoon, or it clumps.
- Chickpeas are better when they’re warm, so toss them into the bowl while the vegetables are still hot.
Variations on This Dish:
- Mediterranean Herb Bowl: Add chopped mint and cucumber.
- Brown Rice Swap: Use rice instead of couscous if you want a chewier base.
- Spicy Tahini Version: Stir in chili flakes or harissa.
Common Mistakes to Avoid with This Dish:
- Underseasoning the vegetables: They need salt before they hit the grill.
- Using too much water in the couscous: It turns pasty.
- Pouring tahini sauce too early: Save it for the top so the bowl stays textured.
25. Swordfish Steaks with Tomato-Olive Relish
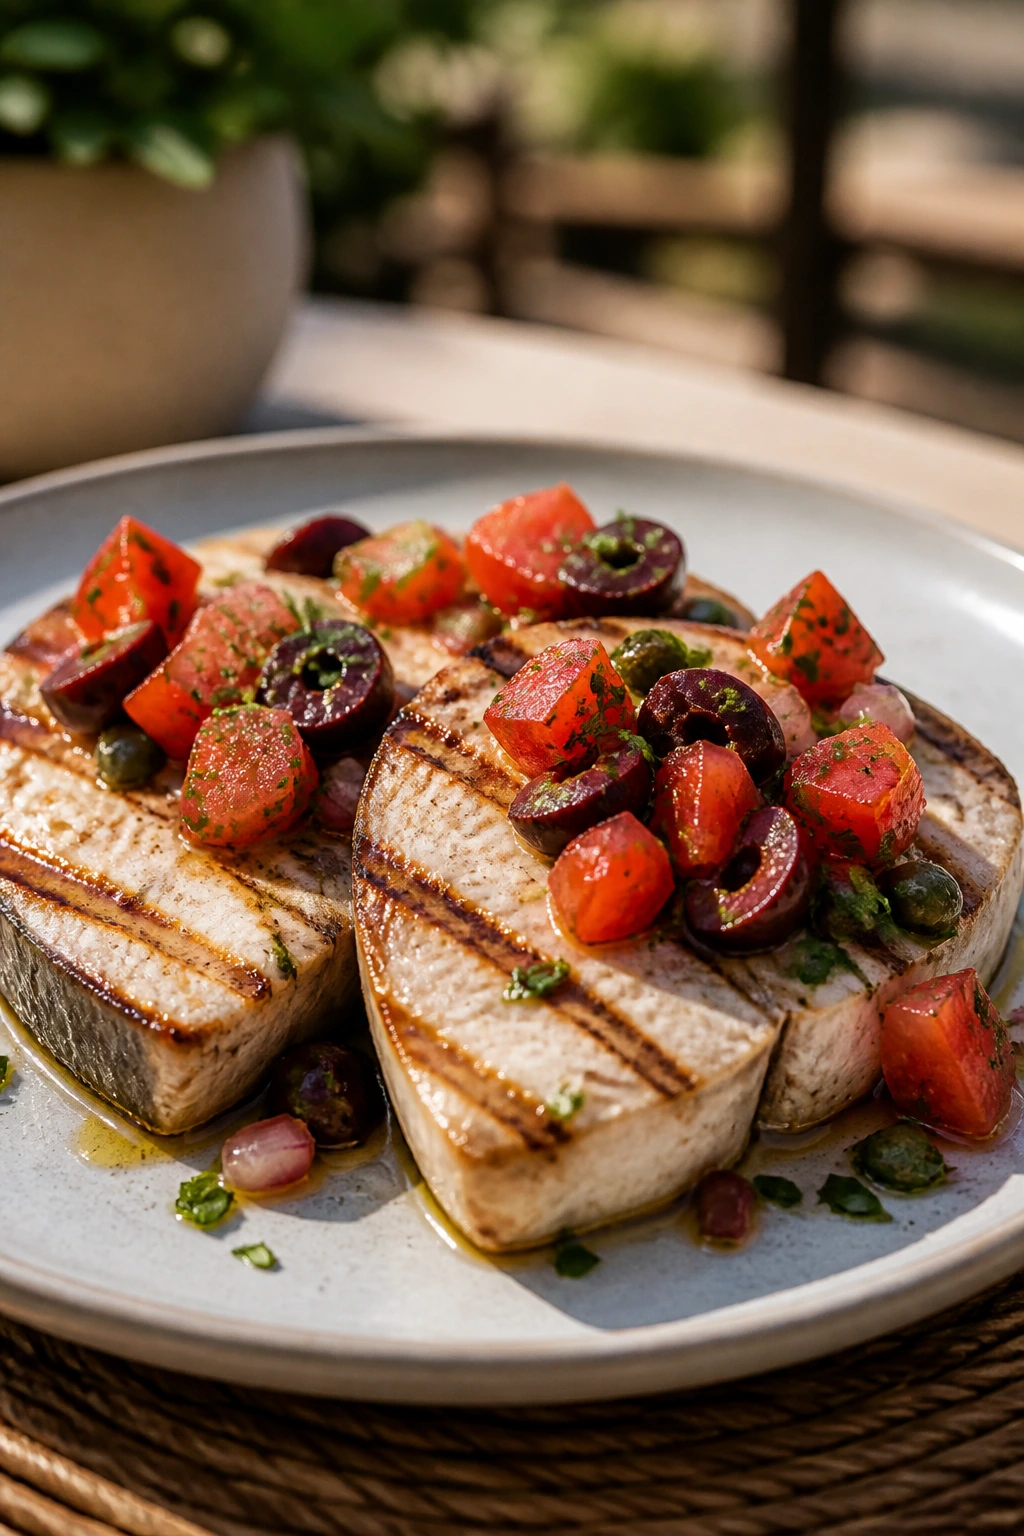
Swordfish is one of the better grilling fish cuts because it behaves more like a steak than a delicate fillet. That makes it ideal for a tomato-olive relish, which brings salt, acid, and a little briny punch to a firm, clean piece of fish. It feels Mediterranean without trying too hard.
Why It Works:
Swordfish stands up to direct heat and develops a solid sear before it flakes. The relish is the counterweight: tomatoes, olives, capers, and parsley create a sharp, juicy topping that wakes the fish up. If you want a grill dinner that feels grown-up without being solemn, this is a strong place to land.
Key Ingredients:
- 2 swordfish steaks, about 1¾ to 2 lbs total
- 2 tbsp olive oil
- 1 tsp kosher salt
- ½ tsp black pepper
- 2 cups cherry tomatoes, halved
- ½ cup chopped olives
- 1 tbsp capers, drained
- 2 tbsp chopped parsley
- 1 shallot, finely diced
- 1 lemon, juiced
Quick Steps:
- Mix the tomatoes, olives, capers, parsley, shallot, lemon juice, and a pinch of salt for the relish.
- Brush the swordfish with olive oil and season with salt and pepper.
- Grill over medium-high heat for 3 to 4 minutes per side, until just opaque and still juicy in the center.
- Let the fish rest for 2 minutes.
- Spoon the relish over the top and serve immediately.
Equipment for This Recipe:
- Grill
- Fish spatula
- Mixing bowl
- Tongs
- Serving platter
How to Serve This Dish:
Serve the swordfish with grilled green beans or a warm potato salad if you want a more complete meal. I like the relish piled on top at the last minute so the tomatoes stay bright and the fish stays hot.
Pro Tips for This Recipe:
- Buy steaks that are thick and even; thin swordfish can dry out faster.
- Keep the grill clean and well oiled so the fish lifts instead of sticking.
- Don’t drown the relish in oil; it should be juicy, not slick.
- Pull the swordfish when the center is still just a little translucent.
Variations on This Dish:
- Herb-Caper Finish: Add oregano or basil to the relish.
- Tomato-Free Version: Use chopped roasted peppers if tomatoes aren’t in good shape.
- Salmon Swap: Use salmon steaks if swordfish isn’t available.
Common Mistakes to Avoid with This Dish:
- Overcooking swordfish: It turns chalky fast.
- Skipping the rest: Even a short rest helps the juices settle.
- Using a relish that sits too long: Tomatoes can go soft and lose their sparkle.
Why the Grill Wins on Hot Evenings
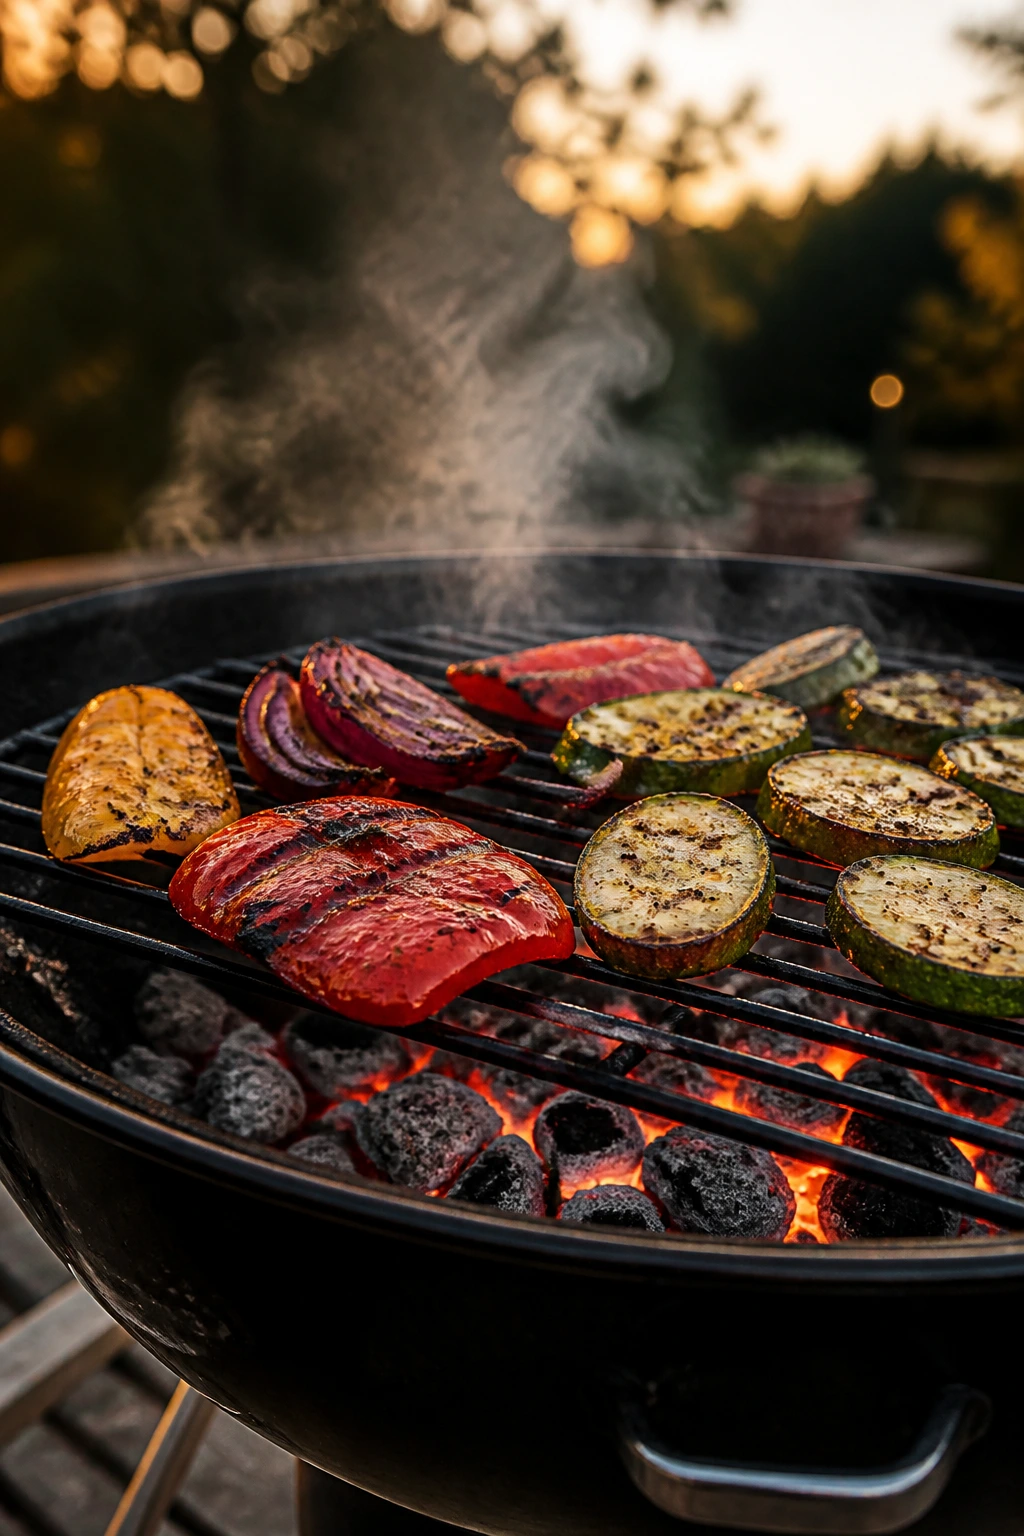
Grilling works for summer dinners because it solves two problems at once. First, it keeps heat outside, which matters more than people admit when the kitchen already feels sticky. Second, it gives food a kind of flavor that indoor pans can’t quite fake — smoke, char, browned edges, a little bitterness that makes bright sauces and raw vegetables taste sharper.
The smartest grilled dinners always seem to follow the same structure, even when the ingredients change. There’s a cooked element with enough salt and smoke to feel finished, then something cold or acidic to pull the plate into focus. That might be a yogurt sauce, a slaw, a tomato salad, a citrus glaze, or a pile of herbs tossed on at the end. The exact choice doesn’t matter as much as the contrast.
I also like grilled dinners because they make timing feel simple. Shrimp goes on fast, fish needs a short, careful turn, vegetables mostly just need color, and steak or chicken can sit for a few minutes while you finish the sides. There’s less stovetop juggling. Less waiting around. More food that tastes like it knew what it was doing.
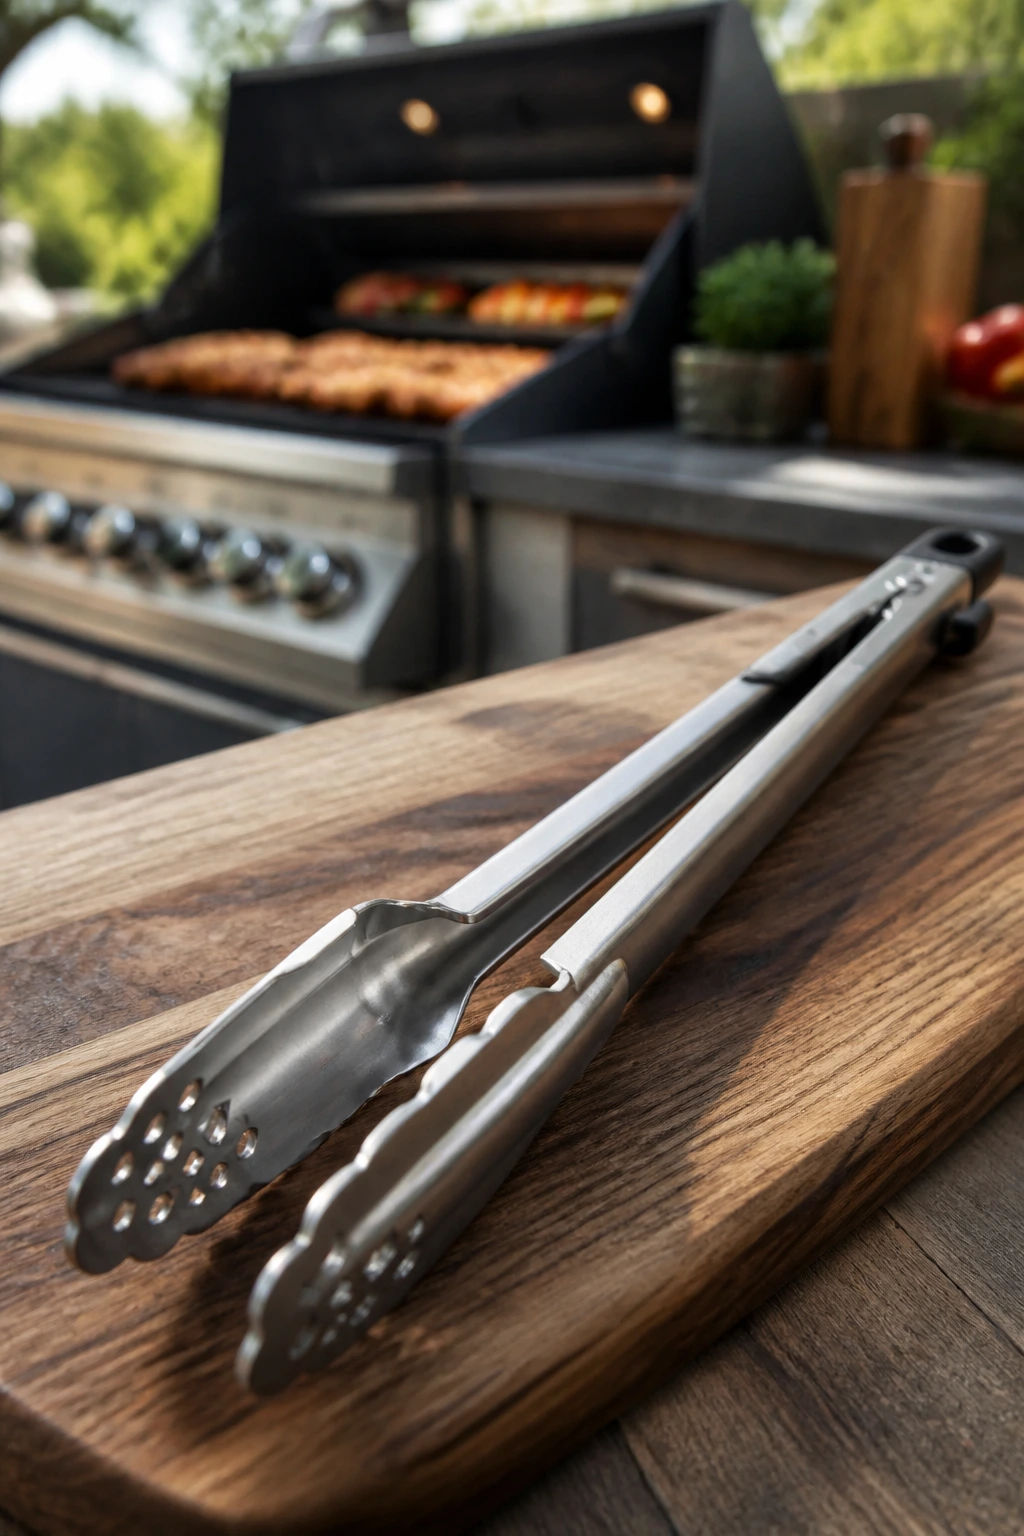
Essential Equipment for These Recipes
-
A grill with a lid: Gas or charcoal both work; the lid helps with salmon, chicken, flatbreads, and thicker cuts.
-
Instant-read thermometer: The easiest way to stop guessing on chicken, pork, steak, and fish.
-
Long tongs: You’ll use these constantly for turning skewers, vegetables, and bread without tearing them.
-
Fish spatula: Thin and flexible, which matters for delicate fillets and burgers that want to stick.
-
Skewers: Metal is easiest; wooden skewers need soaking first and still deserve a watchful eye.
-
Grill basket or perforated tray: Handy for shrimp, sliced vegetables, halloumi, and anything small enough to slip through the grate.
-
Mixing bowls: You need at least two or three for marinades, sauces, and slaws.
-
Sharp knife and cutting board: Skirt steak, pork tenderloin, watermelon, and tomatoes all slice better with a clean blade.
-
Brush for oil or glaze: A simple pastry brush works well for fish, bread, and flatbreads.
-
Foil: Not glamorous, but useful for cod, mushrooms, or keeping a warm side tucked away.
Smart Shopping and Ingredient Tips
The best grilled summer dinners usually start at the butcher counter, fish case, or produce aisle, not at the grill itself. For chicken, thighs are the safer bet when you want juicy meat with real browning. For steak, look for flank, skirt, or sirloin with visible grain and a little fat. For fish, choose firm fillets that hold together on the grate — cod, salmon, swordfish, mahi-mahi, and halibut all do the job well, though each needs a slightly different hand.
Shrimp is worth buying by count if you can. Large shrimp in the 16/20 or 21/25 range are easier to grill than small ones, and they don’t overcook as fast. Frozen shrimp are fine — often better, honestly — as long as they’re thawed overnight or under cold running water and patted dry before they hit the heat.
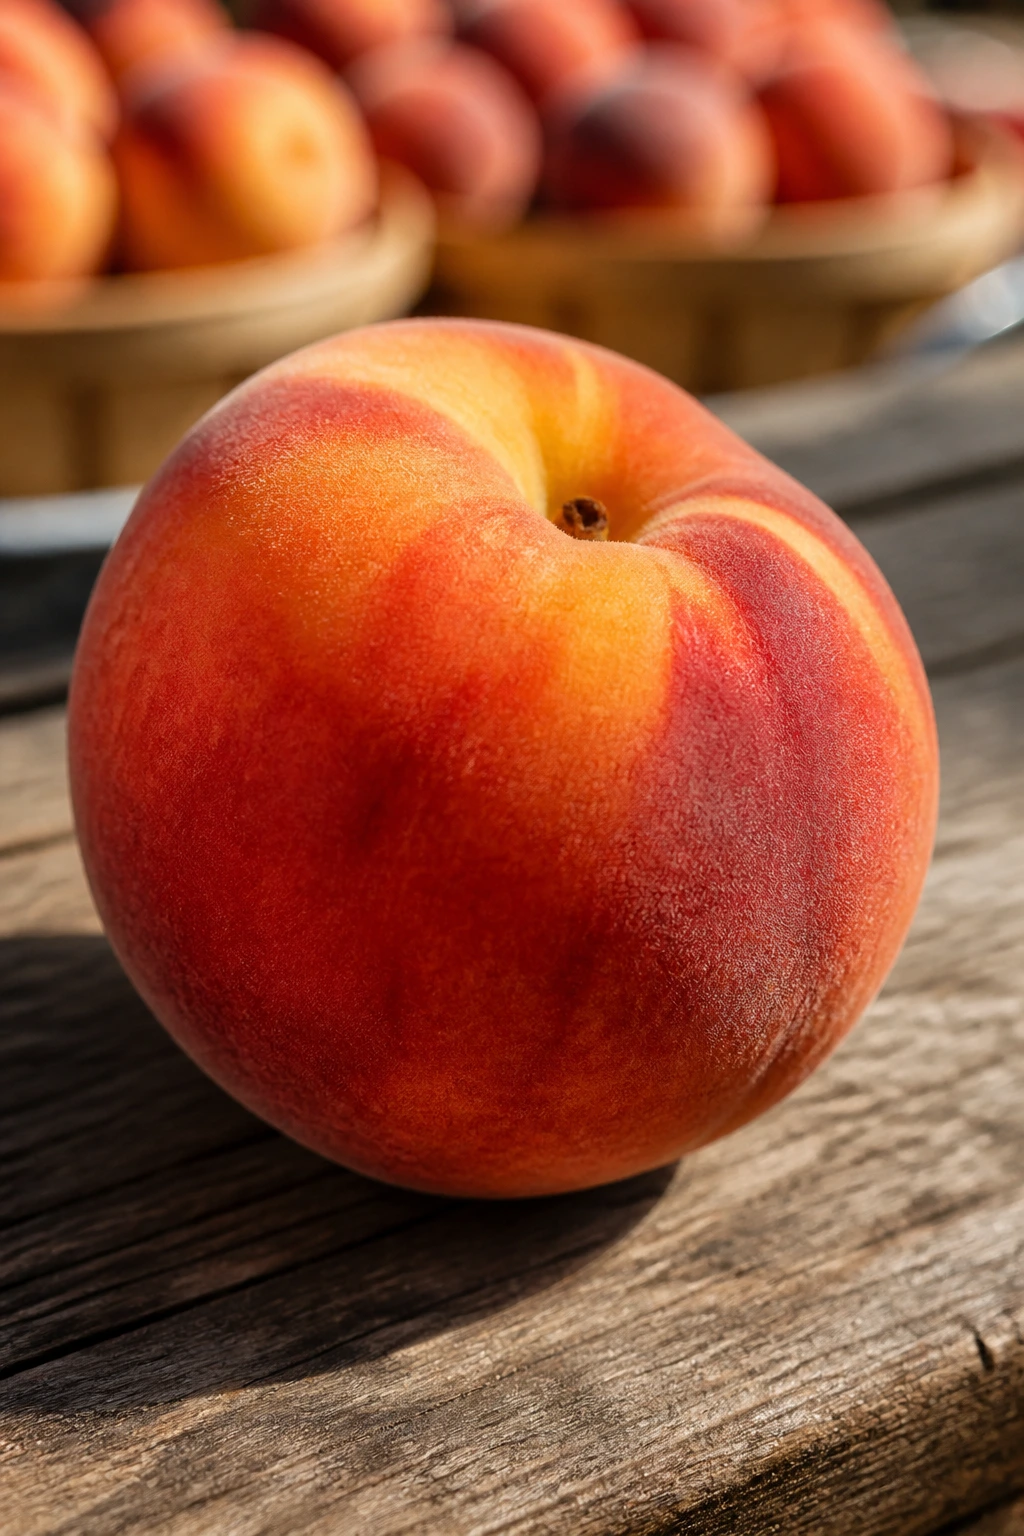
On the produce side, I like to shop for fruit and vegetables with the grill in mind. Peaches should yield slightly without collapsing. Watermelon should be cold and crisp, not watery in the center. Corn is best when the kernels are plump and the husks still look fresh. Zucchini should be smaller rather than giant; the big ones tend to go seedy and soft. Herbs matter too. Mint, basil, cilantro, dill, and parsley are not garnish here. They’re part of the architecture.
A few pantry staples help more than people think: Dijon, tahini, white miso, soy sauce, rice vinegar, and good olive oil. Those are the things that let a grilled dinner lean bright instead of flat. And if you buy one extra lemon or lime, you’ll probably use it.
How to Serve These Recipes
Presentation:
Use wide platters for skewers, steak, fish, and flatbreads; they make the charred edges visible and keep the food from looking crowded. Bowls work better for rice, lettuce cups, and couscous dinners, but even then I like to finish with something loose on top — herbs, sliced radish, scallions, or a spoonful of sauce.
Accompaniments:
For the meatier dinners, keep the sides crisp: tomato salad, cucumber salad, grilled asparagus, corn, or a simple green salad with lemon. Bread helps too — pita, naan, ciabatta, or warm tortillas make the meal feel complete without dragging it down. For the lighter fish and shrimp dishes, a chilled grain salad or a few slices of melon fits better than heavy potatoes.
Portions:
Most of these recipes feed 4 people comfortably, though steak salads and grain bowls can stretch a little farther if you lean on vegetables and sides. For a hungrier group, add grilled bread, rice, or extra tortillas rather than overloading the protein. That keeps the meal balanced and saves you from cooking more meat than you need.
Beverage Pairing:
Sparkling water with lime works across nearly all of them. If you want alcohol, a dry rosé, a crisp lager, or a Sauvignon Blanc is a clean match for the shrimp, fish, and herb-heavy chicken. For steak or lamb, a lighter red with a chill on it does the trick.
Additional Tips and Flavor Boosters
Flavor Enhancement:
A finishing squeeze of lemon or lime does more than “brighten” the food — it wakes up the salt, smoke, and herbs already on the plate. If you keep one extra squeeze bottle of citrus around, these dinners get better at the table instead of just on the grill.
Customization:
Pick one cool element and one fresh element for each dinner. A grilled protein plus yogurt sauce works. So does charred vegetables plus a tomato relish. If a recipe already has richness, use herbs or citrus to lift it rather than piling on more cheese or more oil.
Serving Suggestions:
Quick-pickled onions, sliced radishes, chopped mint, dill, and parsley all make grilled dinners look more alive. I also like a little crunch from toasted seeds, sesame, or even crushed tortilla chips on top of bowls and salads. That texture shift matters more than most people think.
Make-It-Yours:
For dairy-free plates, use tahini, salsa, herb oil, or avocado instead of yogurt and cheese. For gluten-free dinners, go with rice bowls, corn tortillas, lettuce wraps, or grilled vegetables over grains. For extra heat, add chili crisp, jalapeño, harissa, or gochujang — but only in one place, or the whole plate starts to blur.
Make-Ahead, Storage, and Reheating Guidance
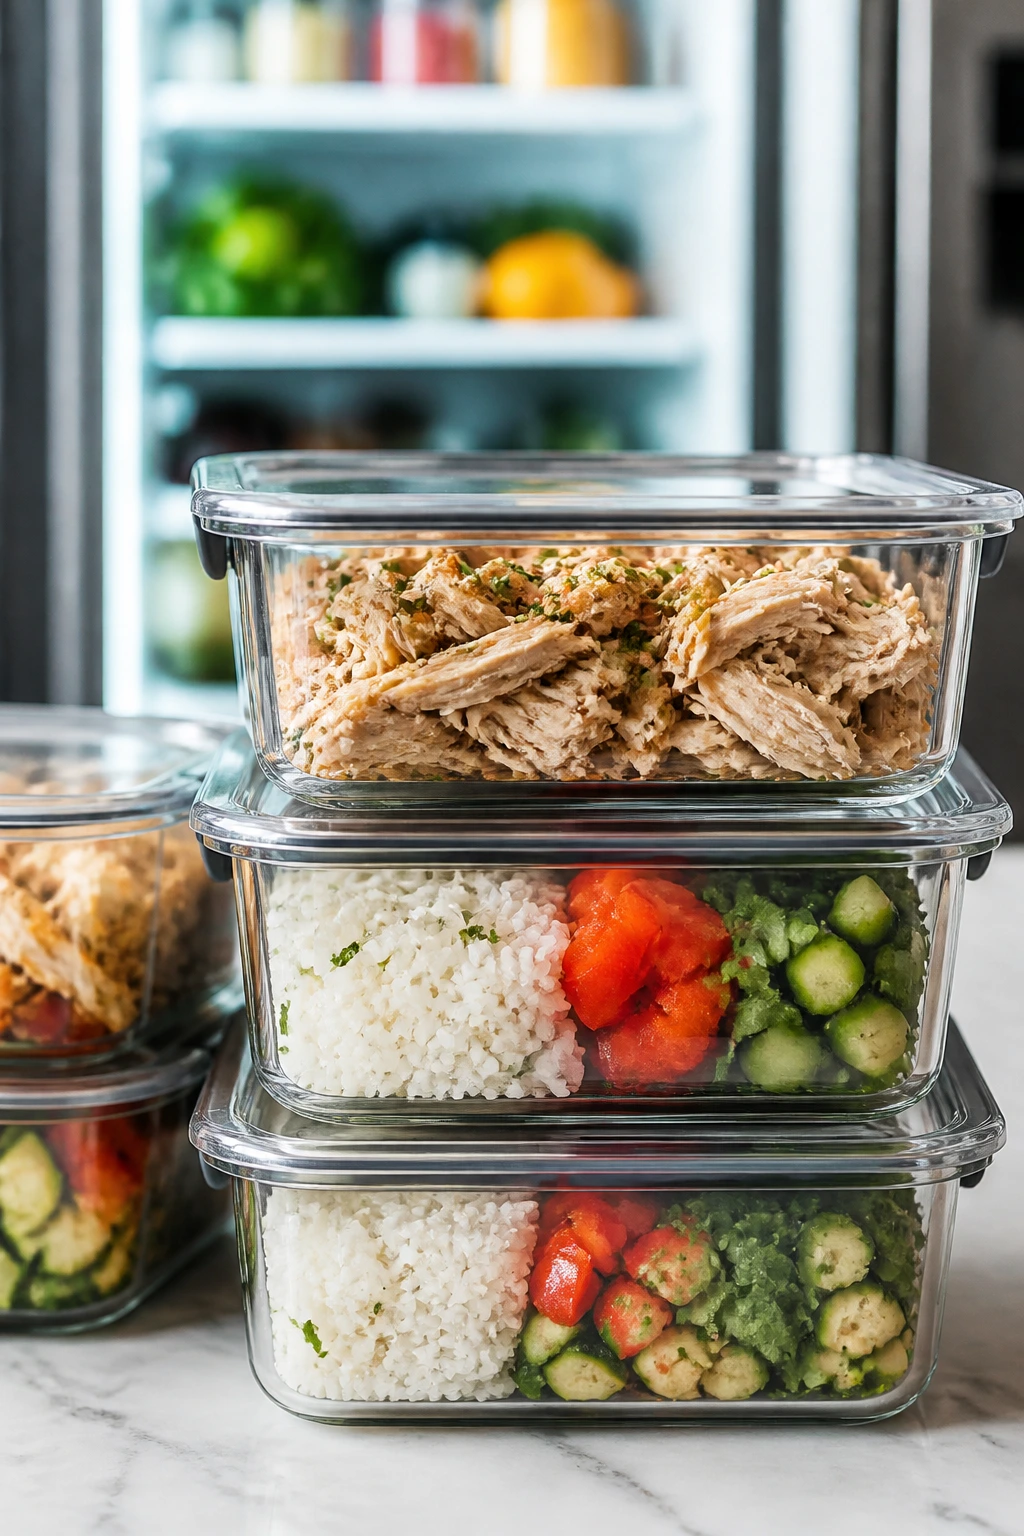
Most of these recipes can be broken into parts without losing quality. Marinades for chicken, pork, steak, and tofu can usually be mixed a day ahead and used immediately when you’re ready to cook. Slaws and dressings hold well for 1 to 2 days if you keep the dressing separate from the crunchy vegetables until serving. Tomato salads, fruit salsas, and cucumber mixtures are best made the same day, though they can sit in the fridge for a few hours without trouble.
Cooked chicken, steak, pork, tofu, and grilled vegetables keep well in the refrigerator for 3 to 4 days in airtight containers. Seafood is a little shorter: plan on 1 to 2 days for the best texture. Rice, couscous, and cooked flatbreads can usually be refrigerated for 3 to 4 days too. Freezing works for burger patties, cooked chicken, and some grilled vegetables, but I wouldn’t freeze a delicate fish dinner or a salad with burrata and expect much pleasure afterward.
Reheat meat gently in a 300°F oven, covered loosely with foil, until warmed through. A skillet over low heat works well for burgers and steak slices. Fish is best reheated very lightly, if at all; a low oven or a covered pan with a spoonful of water keeps it from drying out. Flatbreads and pita revive well on a dry skillet or back on the grill for 20 to 30 seconds. Shrimp is the one I’d rather eat cold or barely rewarmed than blast in the microwave.
If you’re planning ahead for a weekend, prep sauces, chop vegetables, and season proteins early. Then grill right before serving. That gives you the best texture and keeps the whole meal from feeling like leftovers before it starts.
Variations and Adaptations to Try
-
Gluten-Free Plate:
Use corn tortillas, lettuce cups, rice bowls, or grilled vegetables instead of bread and wheat tortillas. Most marinades and sauces already fit this path with only one or two small swaps. -
Dairy-Free Finish:
Replace yogurt, tzatziki, ricotta, burrata, and sour cream with tahini sauce, herb oil, avocado, or a simple citrus vinaigrette. The food stays bright, and you don’t lose the cool contrast that makes these dinners work. -
Low-Carb Swap:
Turn the chicken, steak, fish, and shrimp recipes into lettuce wraps or salad bowls. Add more cucumber, radish, grilled zucchini, and herbs so the plate still has enough bulk. -
Heat-Lover’s Version:
Add harissa, chipotle, chili crisp, gochujang, jalapeño, or crushed red pepper, but keep the heat in one lane. If everything is spicy at once, you lose the other flavors. -
Vegetarian Grill Night:
Halloumi, tofu, portobello mushrooms, grilled vegetables, burrata, and pizza all carry the menu without needing meat. Mix in a grain or flatbread and you won’t miss anything. -
Kid-Friendly Mild Mode:
Keep the seasoning simple, skip the hot sauces, and let the sauces stay on the side. Shrimp tacos, chicken skewers, pizza, and flatbreads usually land best this way.
Common Mistakes to Avoid
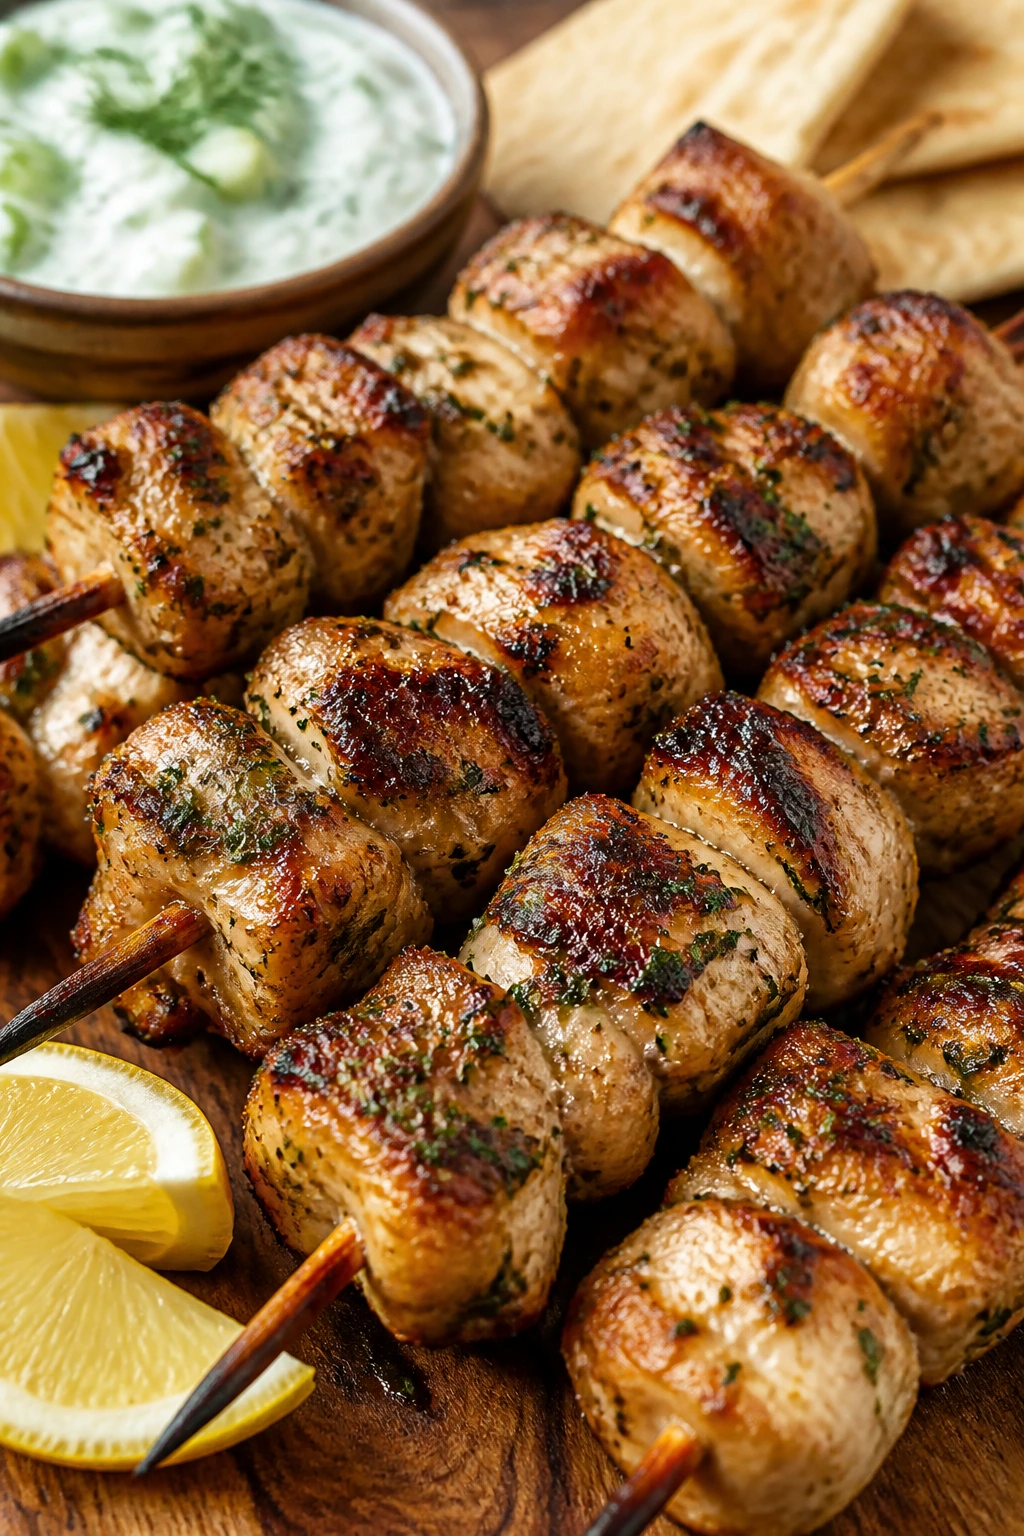
-
Starting with a grill that isn’t hot enough:
If the grate is weakly heated, food sticks and steams instead of searing. Give the grill a full preheat and let the grates get properly hot before anything goes on. -
Skipping the dry step:
Wet fish, wet shrimp, wet vegetables, and watery marinades all fight browning. Pat things dry, then oil them lightly. That tiny step changes the finish a lot. -
Cooking everything to the same doneness:
Chicken needs 165°F, pork tenderloin is best around 145°F, steak can live happily at medium-rare, and fish should come off when it still looks just a touch glossy in the center. One temperature does not fit all. -
Cutting the protein too soon:
Resting gives the juices time to settle. Skip it, and the first slice lands all over the board instead of on the plate. -
Forgetting the cold or acidic element:
Grilled food without a slaw, relish, sauce, or squeeze of citrus can taste flat. That bright contrast is not decoration. It’s the part that makes the meal feel complete. -
Overcrowding the grate:
Too much food at once drops the temperature and blocks airflow, which means pale edges and uneven cooking. Work in batches if you need to. It’s worth the extra few minutes.
Frequently Asked Questions
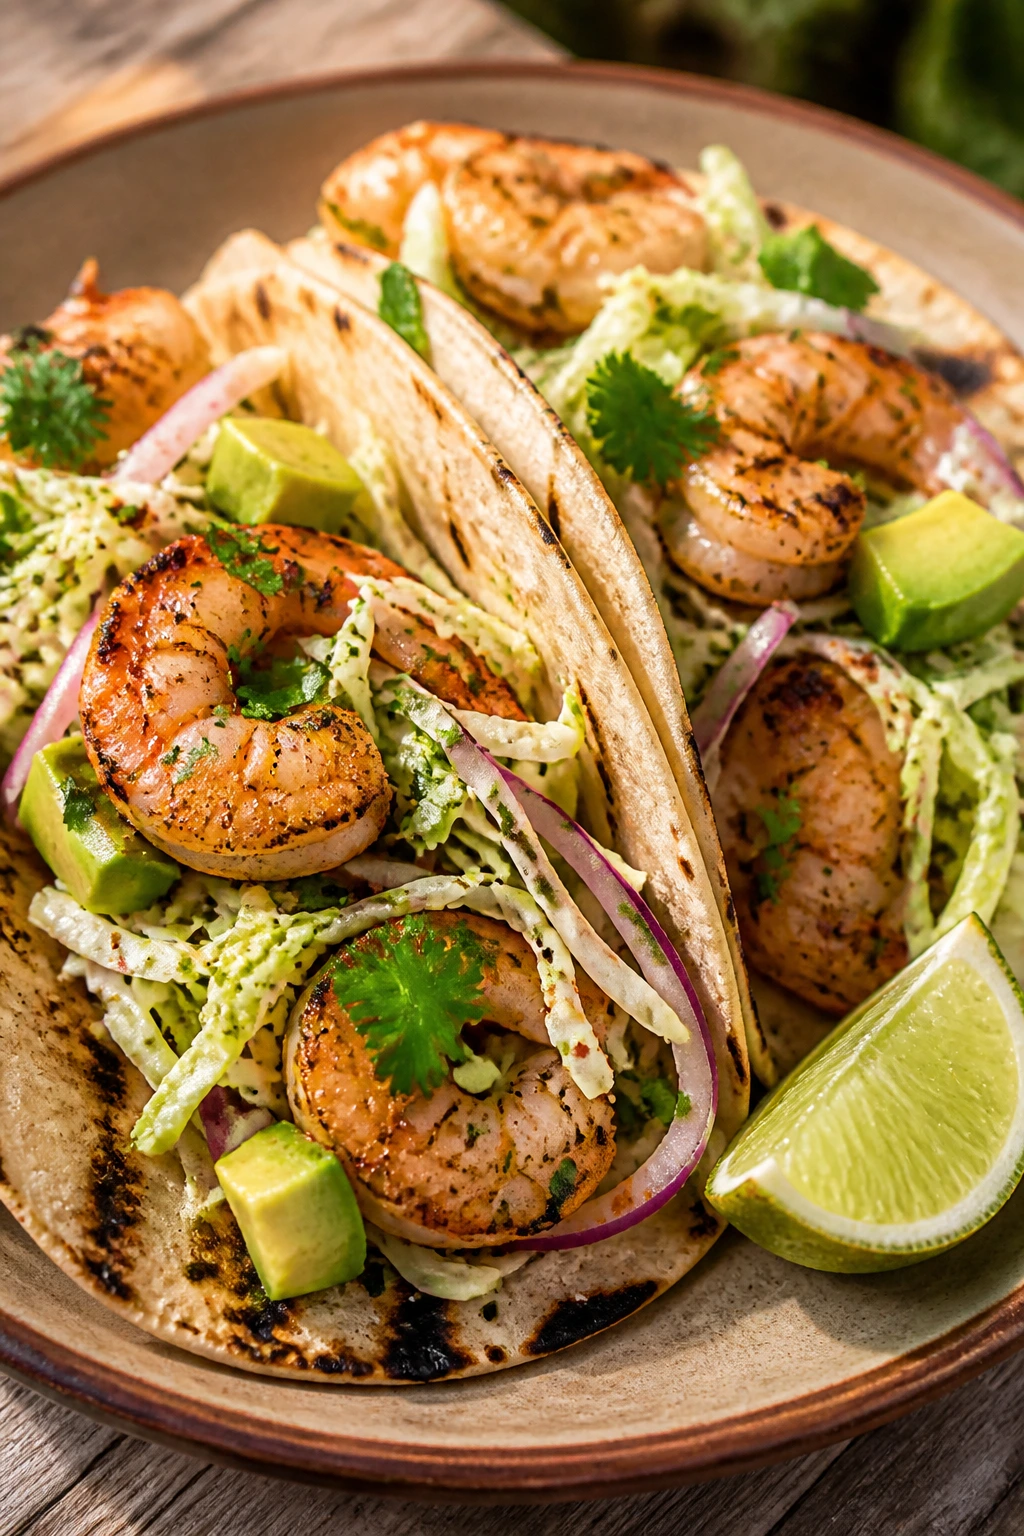
Can I use a gas grill instead of charcoal for these dinners?
Absolutely. Gas is actually easier for a lot of these recipes because you can control heat more tightly, which helps with shrimp, fish, and chicken. Charcoal adds more smoke, but the recipes don’t rely on it.
What grill temperature works best for most of these meals?
Medium-high heat, around 400°F to 450°F, handles most chicken, shrimp, vegetables, and flatbreads. Steak and skirt steak can take a hotter spot, while fish like salmon or cod often do better a little gentler.
How do I keep fish from sticking to the grate?
Start with a clean, well-oiled grill and dry fish. Don’t move the fillet too soon; it usually releases on its own once a proper crust forms. A fish basket or foil helps with delicate cuts like cod.
Can I make the sauces and slaws ahead of time?
Yes, and you should when you can. Yogurt sauces, tahini sauce, and dressings usually hold for 2 to 3 days, while cabbage slaw is best dressed close to serving so it keeps its crunch.
What if I don’t have skewers or a grill basket?
Use a sheet of foil with a few holes poked in it, or grill larger pieces instead of small ones. That works for shrimp, vegetables, halloumi, and fish in a pinch.
Which recipes are best for a crowd?
Chicken skewers, shawarma pitas, tacos, flatbreads, and burger-style dinners are the easiest to scale. They hold well on platters and let people build their own plates without you standing over everyone.
How can I keep the meal light without making it feel skimpy?
Use a strong protein, then add one cold element and one crunchy element. A cucumber salad, grilled vegetables, or a fruit salsa does more for the plate than piling on extra bread.
Can these recipes work indoors if the weather turns?
A grill pan or cast-iron skillet can stand in for most of them. You’ll lose a little open-flame flavor, but the basic structure still works: sear the protein, make something cold or acidic, and keep the plate balanced.
When the Grill Cools Down
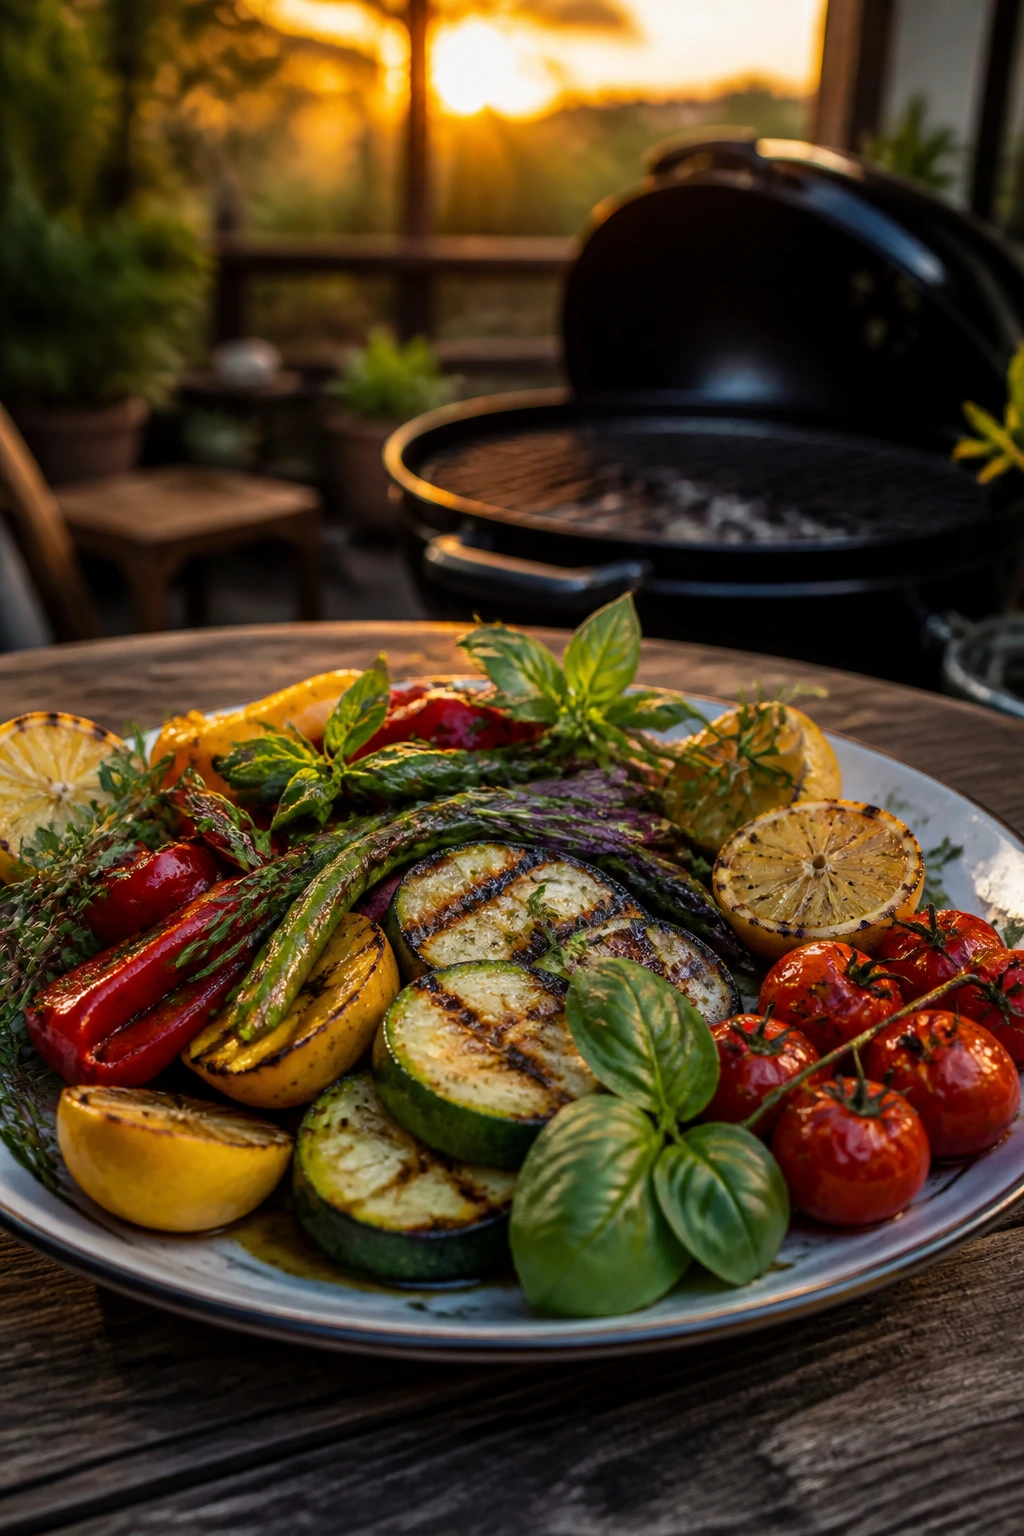
The nicest thing about grilled summer dinners is that they don’t ask for much theater. A hot grate, a sharp knife, a bowl of something cold, and a plate that balances char with brightness — that’s enough. Once you start thinking in those terms, the grill becomes less of a weekend project and more of a shortcut to good dinner.
Keep a few of these recipes in rotation and you’ll always have a way to feed people without turning the kitchen into a sauna. Smoke, citrus, herbs, crunch, and just enough rest time. That’s the formula I trust when the weather wants dinner to stay outside.