
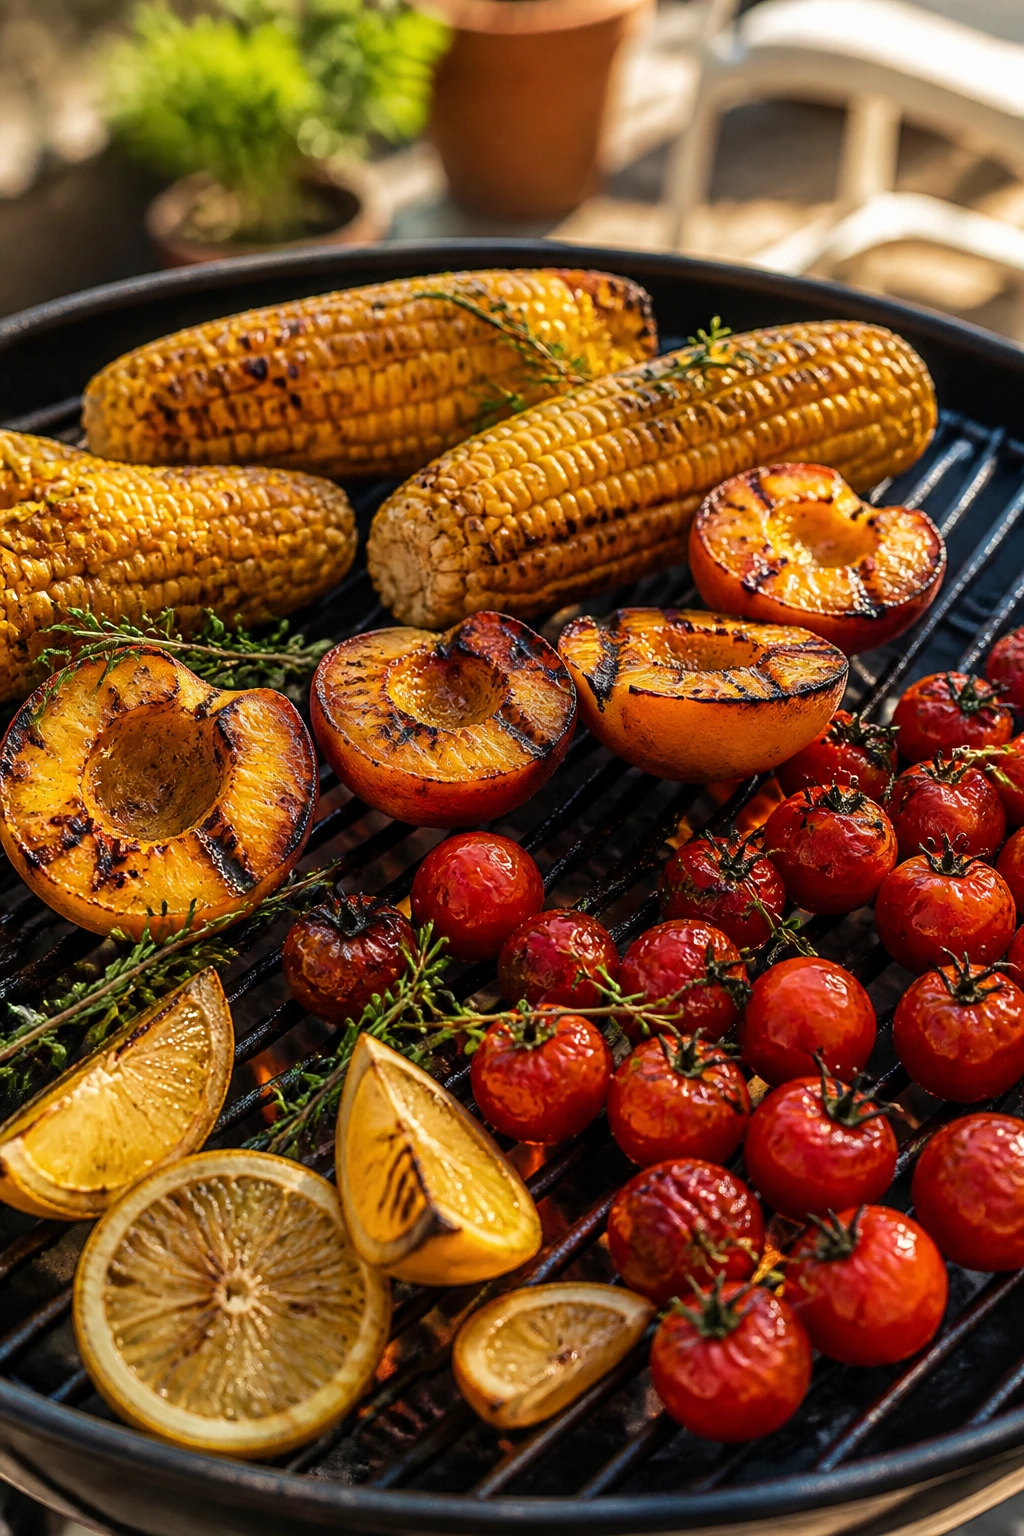
The best summer meals for the grill have a certain rhythm to them: a quick marinade, a hot grate, a little smoke in the corners of the food, and dinner that doesn’t feel like it came from a pan at all. A good grill meal has char where it should, juice where it matters, and enough freshness on the plate to keep the whole thing from sinking into a heavy, greasy pile.
That’s why I like grilling in warm weather more than almost any other cooking style. A flame gives you built-in contrast. You get crisp edges on chicken thighs, blistered peppers, caramelized peaches, and steaks with a crust that a stovetop can’t quite copy. The trick is knowing which cuts handle direct heat, which ones need a gentler zone, and which toppings should wait until the food comes off the grill so they stay bright.
What follows leans hard into that logic. There are fast meals for a weeknight pace, slow-cooked ribs for a longer stretch by the coals, seafood that cooks in minutes, and vegetable-heavy plates that hold their own without pretending to be something else. The common thread is simple: these are grill recipes that actually eat like dinner, not like a side project.
Why This Collection Earns Its Spot on the Grill
- Built for real heat: Each recipe uses a cut or ingredient that can take live fire without turning dry, stringy, or mushy.
- Fresh without being fussy: You’ll see corn, peaches, tomatoes, herbs, citrus, and quick sauces that wake up grilled food fast.
- Crowd-friendly and flexible: Most of these meals scale easily, which matters when the grill is already hot and people keep wandering into the kitchen asking when dinner is ready.
- Not just burgers and dogs: There are seafood plates, stuffed vegetables, flatbreads, tacos, and a few steak dinners that do more than fill a bun.
- Weekend pacing built in: Several recipes use marinades, rubs, or sauces that can be mixed ahead while you prep the rest of the meal.
- Leftovers that still taste like dinner: A few of these are even better sliced cold or tucked into wraps the next day, which is more useful than it sounds.
1. Lemon-Garlic Chicken Thighs with Charred Scallions
Chicken thighs are the grill’s insurance policy. They stay juicy even if the flame gets a little bossy, and the lemon-garlic marinade gives them a clean, bright edge that cuts through the smoke. Charred scallions on top are not decoration; they taste sweet, soft, and a little grassy, which is exactly what this chicken wants.
Why It Works: Bone-in, skin-on thighs handle direct heat better than breasts because the fat under the skin protects the meat. A short marinade seasons the surface without making it floppy. Grilling the scallions in the last few minutes gives you a built-in finishing garnish that tastes more interesting than chopped herbs alone. Keep the lid closed and let the skin crisp instead of fussing with the chicken every 30 seconds.
Key Ingredients:
- 2 lbs bone-in, skin-on chicken thighs
- 3 tablespoons olive oil
- 2 tablespoons fresh lemon juice
- 1 teaspoon lemon zest
- 4 garlic cloves, minced
- 2 teaspoons dried oregano
- 1 teaspoon kosher salt
- 1/2 teaspoon black pepper
- 4 scallions, trimmed
- 1 lemon, cut into wedges
Quick Steps:
- Whisk the olive oil, lemon juice, zest, garlic, oregano, salt, and pepper in a bowl.
- Coat the chicken thighs and marinate for 30 minutes to 4 hours in the fridge.
- Preheat the grill to medium-high and oil the grates.
- Grill the thighs skin-side down for 6 to 7 minutes, flip, then cook 6 to 8 minutes more until the thickest part hits 165°F.
- Grill the scallions for 1 to 2 minutes until blistered, then serve the chicken with lemon wedges.
Equipment for This Recipe:
- Gas or charcoal grill
- Instant-read thermometer
- Tongs
- Small mixing bowl
How to Serve This Dish: Pile the thighs on a platter and scatter the charred scallions over the top. A cucumber salad, grilled bread, or a simple potato salad keeps the plate balanced without stealing the spotlight.
Pro Tips for This Recipe:
- Pat the chicken dry before marinating; wet skin won’t crisp as well.
- If the flames flare, move the thighs to a cooler side and close the lid.
- Don’t sauce these before grilling. The lemon marinade is enough, and sugar-free skin browns better.
Variations on This Dish:
- Greek Herb Version: Add dill and a spoonful of chopped parsley to the marinade.
- Smoky Paprika Swap: Use 1 teaspoon smoked paprika for a deeper, campfire note.
- Yogurt Tenderized Cut: Stir 1/4 cup plain yogurt into the marinade for extra tenderness.
Common Mistakes to Avoid with This Dish:
- Don’t grill thighs over screaming-hot flames the whole time. The skin burns before the meat cooks through.
- Don’t skip the thermometer. Chicken that looks done at the skin can still be under 165°F near the bone.
2. Honey-Soy Salmon with Grilled Pineapple
Salmon and pineapple sound playful until you taste them together. The fish gets glossy from soy, honey, and ginger, while the pineapple turns smoky and almost candy-sweet on the grill. The whole plate lands somewhere between savory and bright, and that sweet-salty edge keeps the salmon from feeling heavy.
Why It Works: Salmon fillets cook quickly, so they’re a natural fit for hot grates and a short marinade. Honey helps the surface brown, but too much sugar can scorch, so the glaze goes on in layers instead of all at once. Grilled pineapple brings acid and juiciness, which helps cut the richness of the fish. If your salmon has skin, grill it skin-side down first and leave it alone.
Key Ingredients:
- 4 salmon fillets, about 6 oz each
- 3 tablespoons soy sauce
- 2 tablespoons honey
- 1 tablespoon grated fresh ginger
- 2 garlic cloves, grated
- 1 tablespoon sesame oil
- 1 small pineapple, peeled, cored, and sliced into rings
- 2 scallions, sliced
- 1 teaspoon sesame seeds
Quick Steps:
- Whisk soy sauce, honey, ginger, garlic, and sesame oil in a bowl.
- Coat the salmon and rest it for 15 to 20 minutes in the fridge.
- Preheat the grill to medium and oil the grates well.
- Grill pineapple rings for 2 to 3 minutes per side, then set aside.
- Grill salmon skin-side down for 4 to 5 minutes, flip carefully, and cook 1 to 2 minutes more until it flakes and reaches 125°F to 130°F in the center.
- Serve with pineapple, scallions, and sesame seeds.
Equipment for This Recipe:
- Grill basket or wide spatula
- Instant-read thermometer
- Small bowl
- Tongs
How to Serve This Dish: Serve the salmon over steamed rice or alongside grilled bok choy. Spoon any leftover glaze over the top right before serving so it stays glossy instead of sticky and scorched.
Pro Tips for This Recipe:
- Buy salmon fillets of similar thickness so they finish together.
- If the fish sticks, let it cook another minute; it often releases on its own.
- Keep extra honey out of the direct flame. Use it in the glaze, not as a final brush before the grate.
Variations on This Dish:
- Spicy Ginger Kick: Add 1 teaspoon chili crisp to the glaze.
- Citrus Swap: Use orange juice instead of pineapple for a cleaner, less tropical finish.
- Miso Glaze Version: Replace half the soy sauce with white miso and thin with 1 tablespoon water.
Common Mistakes to Avoid with This Dish:
- Don’t over-marinate salmon. More than 30 minutes can make the surface taste too salty.
- Don’t flip too early. Salmon breaks when it hasn’t formed a crust yet.
3. Smash Burgers with Smoked Onion Jam
A good smash burger on the grill has a crispy edge that crackles when you bite in. The smoked onion jam brings sweet depth, not the cloying kind—more like caramelized onions with a little edge from vinegar and paprika. If you like burgers with a proper beefy crust, this is the one to make.
Why It Works: Thin patties cook fast, which means you get intense browning before the meat dries out. The onion jam does the heavy lifting on flavor, so you do not need a long list of toppings. Brioche buns toast beautifully on the cooler side of the grill and keep the burger from turning greasy. A hot grate and a dry patty are the whole game here.
Key Ingredients:
- 2 lbs ground beef, 80/20
- 1 1/2 teaspoons kosher salt
- 1 teaspoon black pepper
- 2 large yellow onions, thinly sliced
- 2 tablespoons butter
- 1 tablespoon brown sugar
- 1 tablespoon balsamic vinegar
- 1/2 teaspoon smoked paprika
- 6 brioche buns
- 6 slices American cheese
Quick Steps:
- Cook onions in butter over a grill-safe skillet or side burner for 20 to 25 minutes until deeply golden.
- Stir in brown sugar, balsamic vinegar, and smoked paprika; cook 2 minutes more.
- Preheat the grill to high and oil the grates.
- Form the beef into 6 loose balls, season with salt and pepper, and smash them onto the grates with a sturdy spatula.
- Grill 2 to 3 minutes, flip, top with cheese, and cook 1 minute more.
- Toast the buns and build with onion jam.
Equipment for This Recipe:
- Grill with sturdy grates
- Heavy spatula or burger press
- Grill-safe skillet
- Instant-read thermometer
How to Serve This Dish: Serve with potato chips, grilled corn, or a dill pickle spear. Two thin patties stacked with onion jam make the plate look complete without piling on unnecessary toppings.
Pro Tips for This Recipe:
- Use cold beef; it smashes cleaner and holds the edges better.
- Don’t press the patties after the flip. That squeezes out the juices you just worked for.
- Salt right before grilling so the surface stays tacky enough to brown.
Variations on This Dish:
- Bacon Jam Swap: Replace half the onion jam with chopped crispy bacon.
- Blue Cheese Version: Add blue cheese crumbles after the flip for a sharper finish.
- Heat-Lover’s Burger: Stir sliced pickled jalapeños into the onion jam.
Common Mistakes to Avoid with This Dish:
- Don’t make thick patties here. Smash burgers need thin, lacy edges.
- Don’t put buns directly over a roaring flame for too long; they go from toasted to bitter fast.
4. Chimichurri Skirt Steak
Skirt steak loves loud flavors, and chimichurri delivers exactly that. The herbs stay raw and sharp, the garlic stays punchy, and the vinegar wakes up every bite of beef. Slice it thin across the grain and you get steak that eats tender even if the grill pushed it hard.
Why It Works: Skirt steak has big flavor but benefits from fast, high heat and a short rest. Chimichurri works because it’s oily enough to cling to the meat and acidic enough to cut through the richness. The trick is pulling the steak before it gets too far past medium-rare; skirt steak dries out if you get careless. This is the kind of recipe that rewards a very hot grill and very little drama.
Key Ingredients:
- 2 lbs skirt steak
- 1 tablespoon kosher salt
- 1 teaspoon black pepper
- 1 cup fresh parsley leaves
- 1/2 cup fresh cilantro leaves
- 3 garlic cloves
- 1/4 cup red wine vinegar
- 1/2 cup olive oil
- 1 teaspoon red pepper flakes
Quick Steps:
- Blend or finely chop parsley, cilantro, garlic, vinegar, olive oil, and red pepper flakes.
- Season the skirt steak with salt and pepper.
- Preheat the grill to high and oil the grates.
- Grill the steak for 3 to 4 minutes per side until the center reaches 130°F for medium-rare.
- Rest 10 minutes, then slice thinly against the grain and spoon chimichurri over the top.
Equipment for This Recipe:
- Grill
- Blender or knife
- Cutting board
- Sharp slicing knife
How to Serve This Dish: Serve the steak with grilled potatoes, charred onions, or a tomato salad. The chimichurri should be spooned on after slicing so the meat stays rosy and the sauce stays vivid.
Pro Tips for This Recipe:
- Trim away any loose silver skin so the slices are cleaner.
- Make the chimichurri at least 20 minutes ahead so the garlic softens.
- Slice against the grain, not with it. That part matters here.
Variations on This Dish:
- Mint Chimichurri: Swap half the parsley for mint.
- Smoky Version: Add 1 teaspoon smoked paprika to the sauce.
- Steak Sandwich Option: Pile the sliced steak into toasted rolls with arugula.
Common Mistakes to Avoid with This Dish:
- Don’t overcook skirt steak. It loses its best texture fast.
- Don’t carve it into thick strips. Thin slices are what keep it tender.
5. BBQ Chicken Drumsticks with Vinegar Slaw
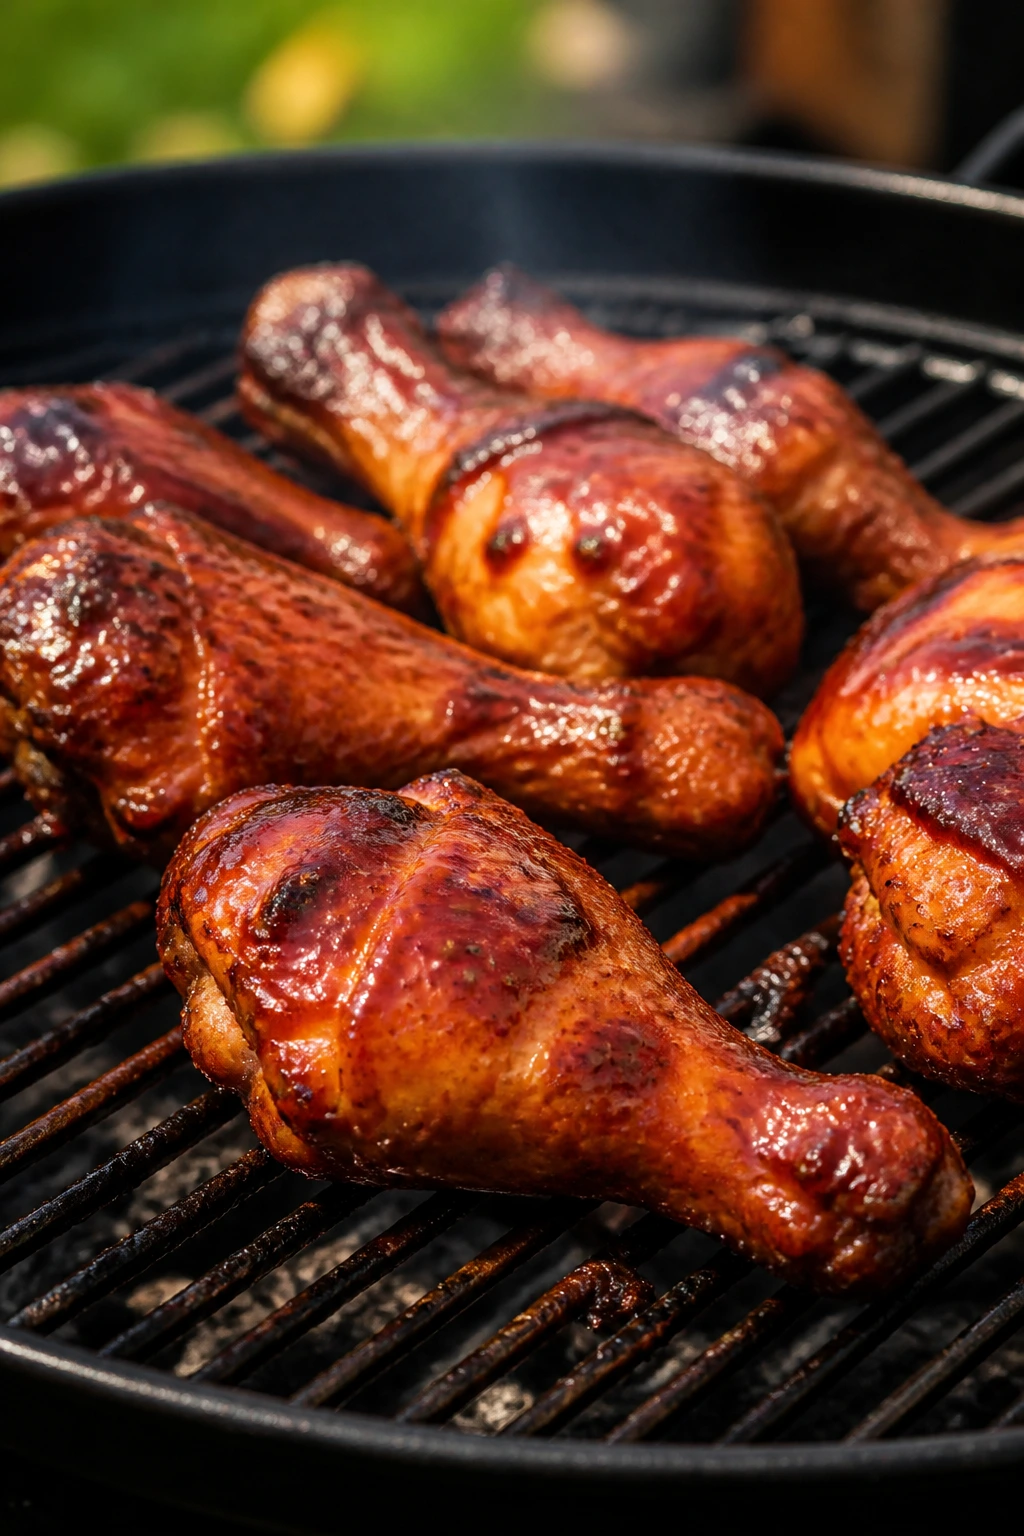
Drumsticks are one of the smartest things you can put over a flame. They’re cheap, forgiving, and the dark meat stays moist while the skin picks up smoke and lacquer from the barbecue sauce. The vinegar slaw isn’t optional in my book; it keeps the plate from feeling sticky and heavy.
Why It Works: Drumsticks are small enough to cook evenly but sturdy enough for indirect heat and a final glaze. A dry rub under the skin gives you flavor before the sauce even shows up. The vinegar slaw brings crunch and acid, which is exactly what saucy chicken needs. If you pile on barbecue sauce too early, sugar burns. Wait.
Key Ingredients:
- 12 chicken drumsticks
- 2 tablespoons olive oil
- 2 teaspoons smoked paprika
- 1 teaspoon garlic powder
- 1 teaspoon kosher salt
- 1/2 teaspoon black pepper
- 1 cup barbecue sauce
- 4 cups shredded cabbage
- 2 tablespoons apple cider vinegar
- 1 tablespoon mayonnaise
Quick Steps:
- Toss drumsticks with oil, paprika, garlic powder, salt, and pepper.
- Preheat the grill to medium with one cooler zone for indirect heat.
- Grill the drumsticks over indirect heat for 25 to 30 minutes, turning once or twice.
- Brush with barbecue sauce and move them over direct heat for 2 to 3 minutes until glossy and lightly charred.
- Mix cabbage, vinegar, and mayonnaise for a quick slaw and serve beside the chicken.
Equipment for This Recipe:
- Grill with lid
- Tongs
- Mixing bowl
- Basting brush
How to Serve This Dish: Pile the drumsticks on a platter with the slaw tucked to one side. Cornbread, grilled corn, or a handful of pickles makes the whole plate feel finished.
Pro Tips for This Recipe:
- Dry the drumsticks well before seasoning so the skin crisps.
- Use indirect heat first; direct flame alone will burn the outside.
- Brush sauce in the final few minutes only.
Variations on This Dish:
- Hot Honey Version: Stir 1 tablespoon hot honey into the barbecue sauce.
- Mustard BBQ Swap: Use yellow mustard and vinegar-based sauce for a sharper finish.
- Dry-Rub Only: Skip the sauce and finish with extra spice rub for a less sticky plate.
Common Mistakes to Avoid with This Dish:
- Don’t crowd the grate. Tight spacing traps steam and softens the skin.
- Don’t judge doneness by color. Use 165°F at the thickest part near the bone.
6. Cajun Shrimp and Corn Skewers
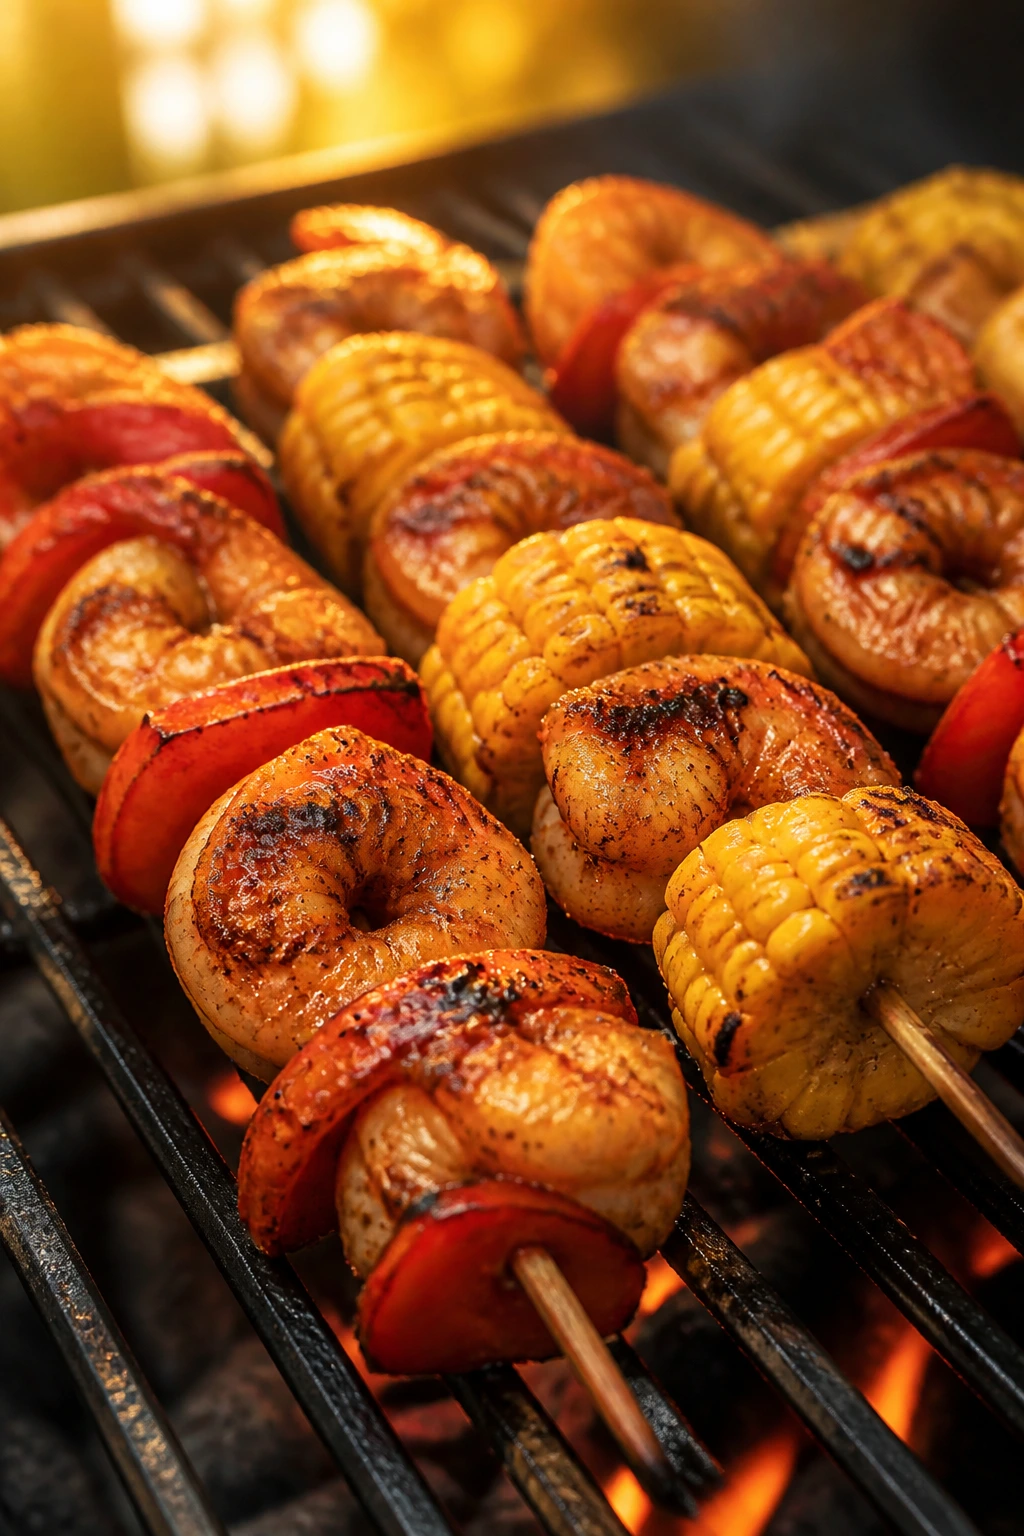
Shrimp move fast, and that’s half the appeal. Add corn, bell pepper, and a Cajun butter finish, and you get a dinner that tastes like it took more effort than it did. The char on the corn makes each bite sweeter, and the shrimp stay snappy if you pull them the second they turn opaque.
Why It Works: Shrimp cook in minutes, which makes them perfect for a hot grill when you don’t want to babysit dinner. Corn and peppers need a little more time, so skewering them together keeps the cooking pace manageable. A Cajun butter finish gives you smoke, salt, and heat without drowning the shrimp. This one rewards organized prep and an uncluttered grate.
Key Ingredients:
- 1 1/2 lbs large shrimp, peeled and deveined
- 2 ears corn, cut into 1-inch rounds
- 1 red bell pepper, cut into squares
- 2 tablespoons olive oil
- 1 1/2 tablespoons Cajun seasoning
- 3 tablespoons melted butter
- 1 lime, cut into wedges
- 2 scallions, sliced
- Wooden or metal skewers
Quick Steps:
- Toss shrimp, corn, and pepper with olive oil and Cajun seasoning.
- Thread shrimp, corn, and pepper onto skewers.
- Preheat the grill to medium-high and oil the grates.
- Grill the skewers for 2 to 3 minutes per side until the shrimp are pink and opaque.
- Brush with melted butter, squeeze with lime, and finish with scallions.
Equipment for This Recipe:
- Skewers
- Grill basket or standard grill
- Tongs
- Pastry brush
How to Serve This Dish: Serve over rice, creamy grits, or tucked into tortillas with sliced avocado. The butter and lime should hit while the skewers are still hot so the seasoning blooms on contact.
Pro Tips for This Recipe:
- If you use wooden skewers, soak them for 30 minutes.
- Keep the shrimp close in size so they don’t overcook unevenly.
- Grill the corn rounds flat-side down so they pick up more char.
Variations on This Dish:
- Garlic-Lemon Swap: Replace Cajun seasoning with garlic, lemon zest, and parsley.
- Blackened Version: Add 1 teaspoon extra paprika and a pinch of cayenne.
- Creamy Finish: Spoon chipotle mayo over the skewers after grilling.
Common Mistakes to Avoid with This Dish:
- Don’t leave shrimp on the grill while you get distracted. They go from perfect to rubbery fast.
- Don’t use oversized pepper pieces. They should match the shrimp in cooking time.
7. Grilled Pork Tenderloin with Peach Salsa
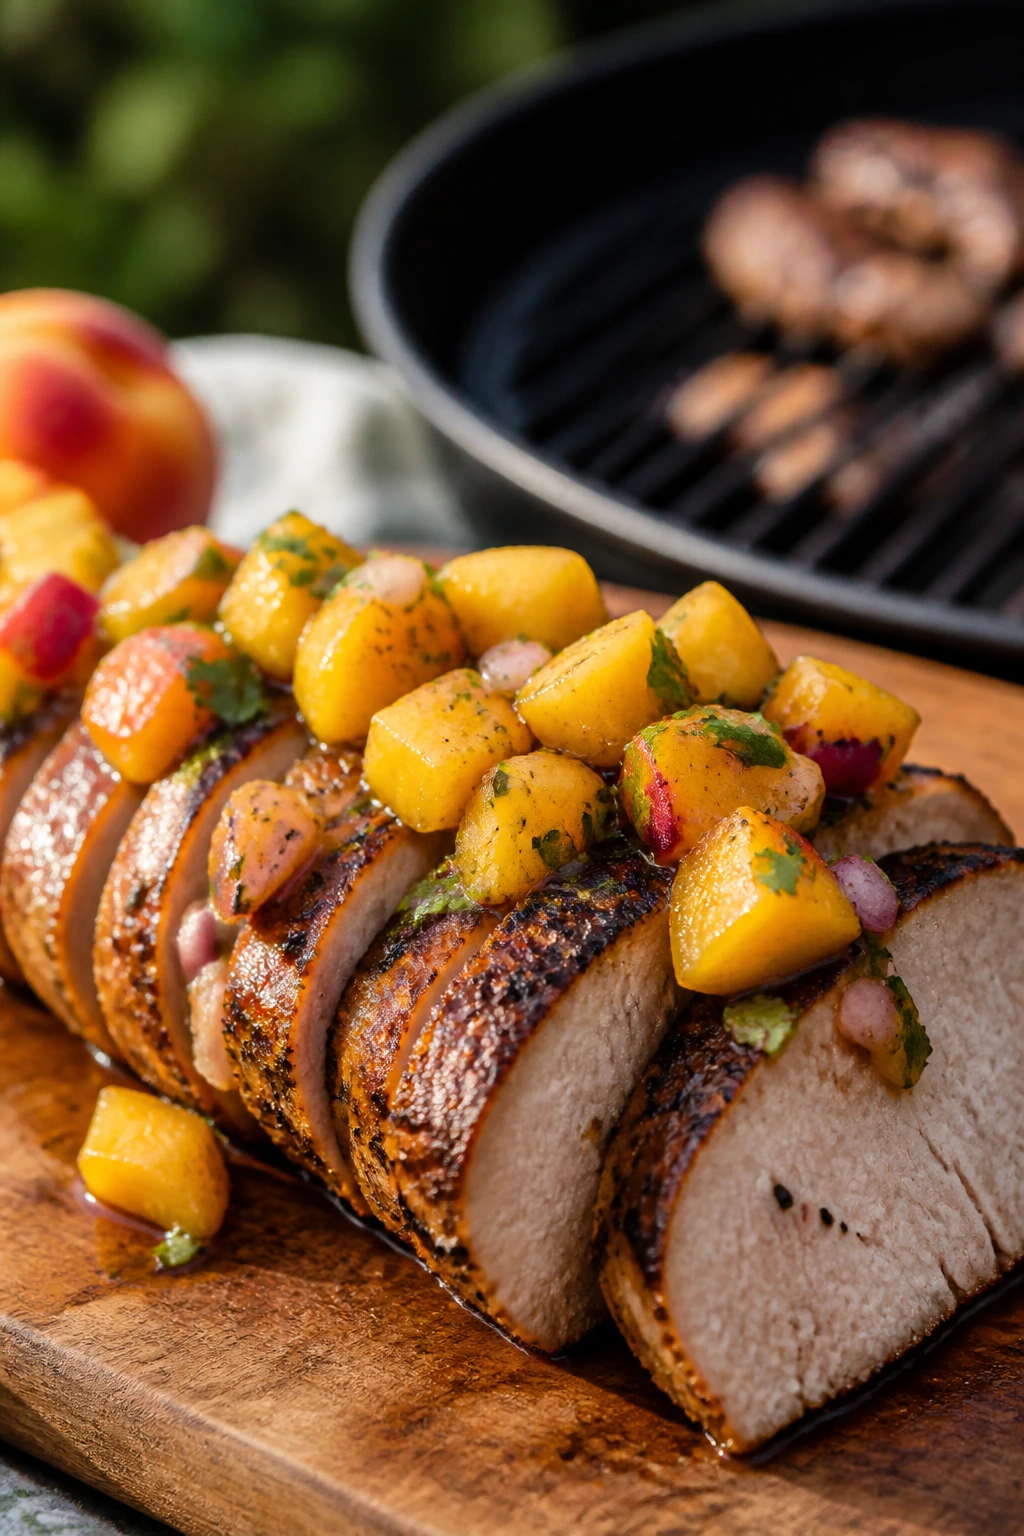
Pork tenderloin is lean, which sounds boring until you put it over charcoal and slice it against a juicy peach salsa. The fruit brings sweetness, the onion brings bite, and the pork picks up a savory crust that makes every slice look more polished than it is. It’s a tidy dinner that still feels warm and summery.
Why It Works: Tenderloin cooks fast and takes to bold seasoning well, especially on a grill with a cooler zone. Peaches need only a minute or two over heat to deepen in flavor before they’re chopped into salsa. The contrast between grilled pork and fresh salsa gives you the kind of dinner that feels complete without a heavy sauce. Slice the meat after a proper rest and it stays moist.
Key Ingredients:
- 1 1/2 lbs pork tenderloin
- 2 tablespoons olive oil
- 1 tablespoon brown sugar
- 1 teaspoon smoked paprika
- 1 teaspoon kosher salt
- 2 ripe peaches, diced
- 1/4 red onion, finely diced
- 2 tablespoons chopped cilantro
- 1 tablespoon lime juice
Quick Steps:
- Rub the pork with oil, brown sugar, paprika, and salt.
- Mix peaches, red onion, cilantro, and lime juice for the salsa.
- Preheat the grill to medium-high and oil the grates.
- Grill the tenderloin for 12 to 15 minutes total, turning every few minutes until it reaches 145°F.
- Rest 8 to 10 minutes, slice, and top with peach salsa.
Equipment for This Recipe:
- Grill
- Instant-read thermometer
- Cutting board
- Small bowl
How to Serve This Dish: Serve with grilled zucchini, rice, or a bitter greens salad. The peach salsa should sit on top of the sliced pork, not on the side, so the juices mingle.
Pro Tips for This Recipe:
- Trim the silvery membrane from the tenderloin before grilling.
- Use peaches that yield slightly to pressure; hard ones taste flat.
- Don’t overcook. Tenderloin is lean and turns dry once it passes 145°F by much.
Variations on This Dish:
- Spicy Peach Version: Add minced jalapeño to the salsa.
- Cherry Swap: Use pitted cherries when peaches aren’t at their best.
- Herb Finish: Add mint or basil for a greener, brighter topping.
Common Mistakes to Avoid with This Dish:
- Don’t skip the rest. Pork tenderloin needs those few minutes to keep its juices.
- Don’t slice with the grain. Crosswise cuts make each bite softer.
8. Greek Chicken Souvlaki
This is the kind of grill meal that smells like oregano and lemon before you even plate it. Cubes of chicken soak up yogurt, garlic, and citrus, then take on a little char that makes the marinade taste deeper. Wrapped in warm pita with crunchy cucumber and tomato, it’s tidy food that still eats like a proper dinner.
Why It Works: Yogurt marinades cling to chicken and help keep the surface tender during grilling. The lemon and oregano bring the classic souvlaki profile without needing a long ingredient list. Small pieces cook quickly, which means you get color without drying out the center. Threading them onto skewers makes turning easier and keeps the cooking even.
Key Ingredients:
- 2 lbs boneless chicken thighs, cut into 1 1/2-inch pieces
- 1/2 cup plain Greek yogurt
- 2 tablespoons olive oil
- 2 tablespoons lemon juice
- 3 garlic cloves, minced
- 2 teaspoons dried oregano
- 1 teaspoon kosher salt
- 1 cucumber, diced
- 1 pint cherry tomatoes
- 4 pita breads
Quick Steps:
- Mix yogurt, oil, lemon juice, garlic, oregano, and salt, then coat the chicken for 1 to 4 hours.
- Thread the chicken onto skewers.
- Preheat the grill to medium-high and oil the grates.
- Grill the skewers for 10 to 12 minutes total, turning until the chicken reaches 165°F.
- Warm the pita and serve with cucumber and tomatoes.
Equipment for This Recipe:
- Skewers
- Grill
- Tongs
- Mixing bowl
How to Serve This Dish: Stuff the chicken into pita with tomatoes, cucumber, and a spoonful of tzatziki if you have it. It also works over rice with a lemon wedge if you want less bread and more bowl.
Pro Tips for This Recipe:
- Use thighs, not breasts, if you want the chicken to stay moist.
- Leave a little space between pieces on the skewer so heat can move around them.
- Warm pita on the grill for 20 seconds per side.
Variations on This Dish:
- Lamb Souvlaki Swap: Use lamb shoulder cubes instead of chicken.
- No-Skewer Version: Grill the chicken in a basket if you do not want to thread pieces.
- Spiced Yogurt Version: Add 1/2 teaspoon cumin to the marinade.
Common Mistakes to Avoid with This Dish:
- Don’t use oversized chicken chunks. Big pieces cook unevenly and scorch outside before they’re done.
- Don’t forget to oil the grates. Yogurt marinades can stick if the grill is dry.
9. Cedar-Plank Salmon with Dill Yogurt
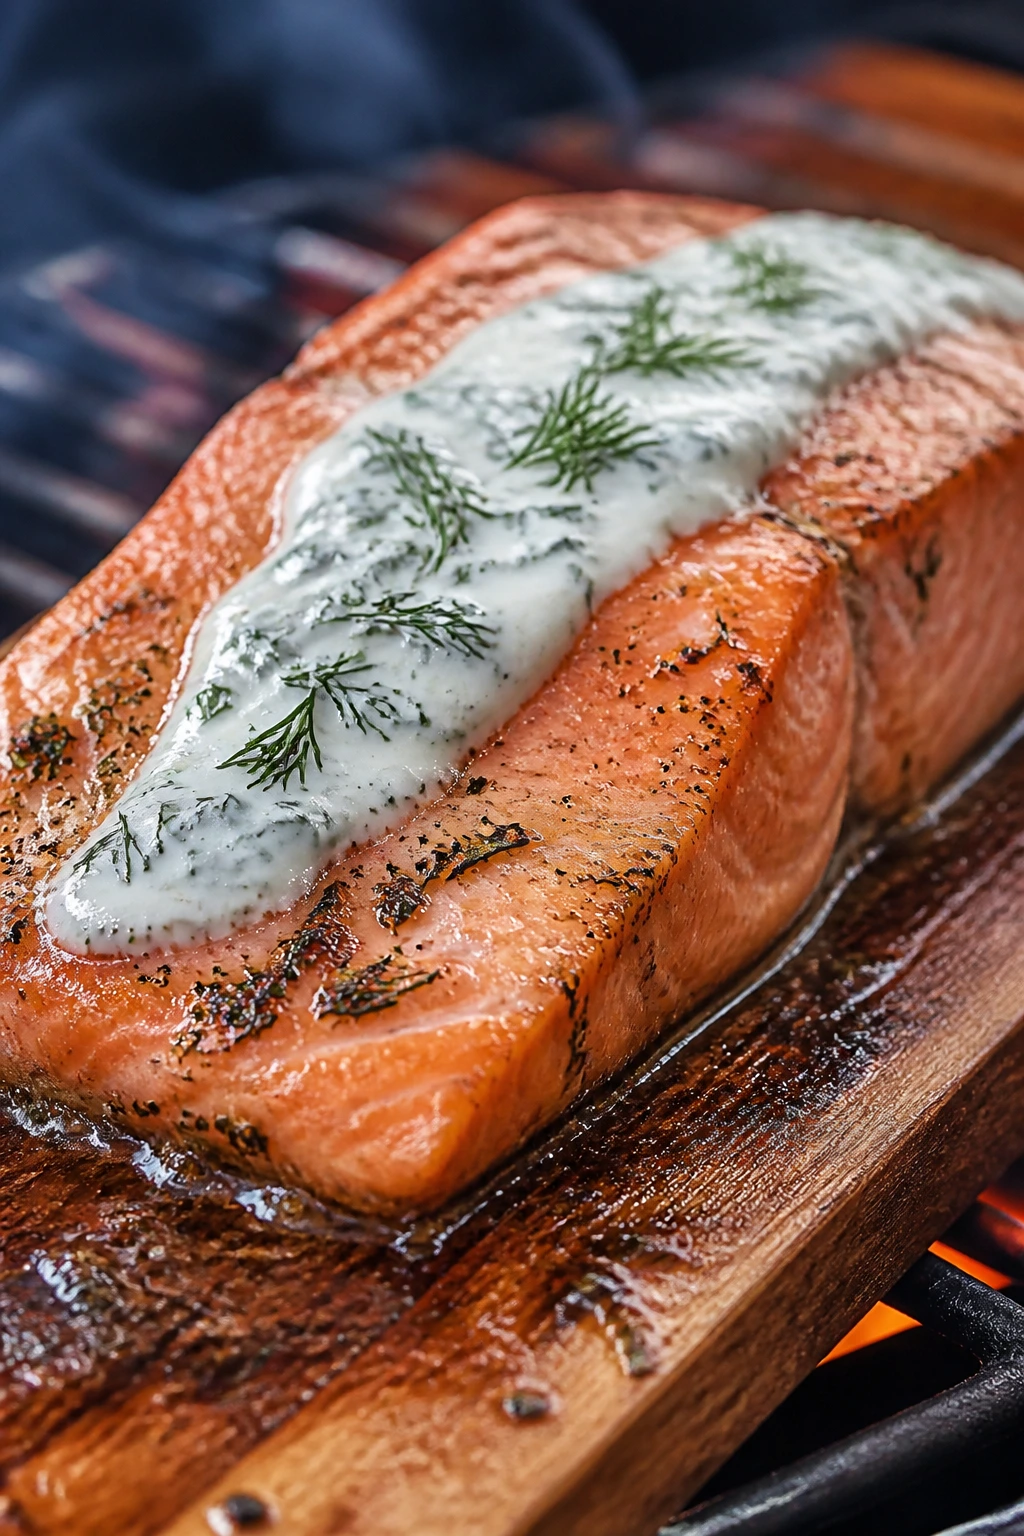
Cedar-plank salmon has a mellow smoke that feels softer than direct grilling, which is why it’s one of my favorite ways to cook fish outdoors. The dill yogurt cools the richness and gives every bite a clean, creamy finish. The salmon itself stays plush, almost silky, if you stop cooking it when the center still looks faintly glossy.
Why It Works: The cedar plank protects delicate fish from direct flame while adding a sweet, woodsy aroma. Yogurt with dill and lemon gives you a cold sauce that cuts through the fat without overpowering the salmon. This method is forgiving because the plank buffers the heat. It’s also one of the few grill meals that looks fancy without asking much from you.
Key Ingredients:
- 4 salmon fillets, about 6 oz each
- 1 cedar plank, soaked for at least 1 hour
- 1/2 cup plain Greek yogurt
- 2 tablespoons chopped dill
- 1 tablespoon lemon juice
- 1 teaspoon lemon zest
- 1 tablespoon olive oil
- 1 teaspoon kosher salt
- 1/2 teaspoon black pepper
Quick Steps:
- Soak the cedar plank in water for at least 1 hour.
- Mix yogurt, dill, lemon juice, and zest for the sauce.
- Season salmon with oil, salt, and pepper.
- Preheat the grill to medium and place the plank on the grates until it starts to smoke lightly.
- Set the salmon on the plank and cook 12 to 15 minutes, until it flakes and reaches 125°F to 130°F.
- Spoon dill yogurt over the fish before serving.
Equipment for This Recipe:
- Cedar plank
- Grill with lid
- Instant-read thermometer
- Small bowl
How to Serve This Dish: Serve with grilled asparagus, new potatoes, or a crisp cucumber salad. The yogurt sauce should be cool and thick, so add it after the fish is plated.
Pro Tips for This Recipe:
- Soak the plank thoroughly or it may catch instead of smoke.
- Use salmon fillets of even thickness.
- Don’t overcook. Salmon keeps cooking for a minute after it leaves the grill.
Variations on This Dish:
- Maple-Dill Version: Add 1 teaspoon maple syrup to the yogurt.
- Herb Mix Swap: Use chives and parsley instead of dill.
- Lemon Pepper Version: Skip the yogurt and finish with lemon pepper butter.
Common Mistakes to Avoid with This Dish:
- Don’t put the plank over a raging flame. You want smoke, not a campfire.
- Don’t spoon sauce onto raw fish before grilling; save it for the end.
10. Halloumi and Vegetable Kebabs

Halloumi is the rare cheese that likes fire. It gets browned and squeaky instead of melting into a mess, which makes it perfect for kebabs with zucchini, peppers, and tomatoes. The vegetables soften and char at the edges while the cheese stays firm enough to bite cleanly.
Why It Works: Halloumi has a high melting point, so it grills like a protein instead of a soft cheese. A quick olive oil marinade keeps the vegetables glossy and helps the herbs stick. The skewers cook at the pace of the fastest ingredient, which is why the halloumi is cut into larger chunks than the peppers. It’s a meatless grill meal that still feels substantial.
Key Ingredients:
- 8 oz halloumi cheese, cut into 1-inch cubes
- 1 zucchini, sliced into thick half-moons
- 1 red bell pepper, cut into chunks
- 1 red onion, cut into wedges
- 1 cup cherry tomatoes
- 3 tablespoons olive oil
- 1 teaspoon dried thyme
- 1 tablespoon lemon juice
- Salt and black pepper to taste
Quick Steps:
- Toss the vegetables with olive oil, thyme, lemon juice, salt, and pepper.
- Thread halloumi and vegetables onto skewers.
- Preheat the grill to medium-high and oil the grates.
- Grill the skewers for 8 to 10 minutes, turning carefully until the vegetables are tender and the halloumi is browned.
- Serve immediately with extra lemon.
Equipment for This Recipe:
- Skewers
- Grill basket or grate
- Tongs
- Large bowl
How to Serve This Dish: Serve over couscous, inside pita, or beside hummus and a tomato salad. A final squeeze of lemon matters here; halloumi likes acid.
Pro Tips for This Recipe:
- Cut the halloumi thick so it doesn’t slip through the grates.
- Use a grill basket if your skewers are narrow and the vegetables want to move.
- Don’t salt too aggressively before grilling; halloumi already brings salt.
Variations on This Dish:
- Mediterranean Swap: Add olives and oregano.
- Spicy Pepper Version: Use jalapeño and a pinch of chili flakes.
- Peachy Twist: Thread in peach wedges for sweet spots on the kebabs.
Common Mistakes to Avoid with This Dish:
- Don’t overcook halloumi until it turns rubbery and dry.
- Don’t cut the vegetables too small; tiny pieces disappear before the cheese browns.
11. Flank Steak Fajita Tacos
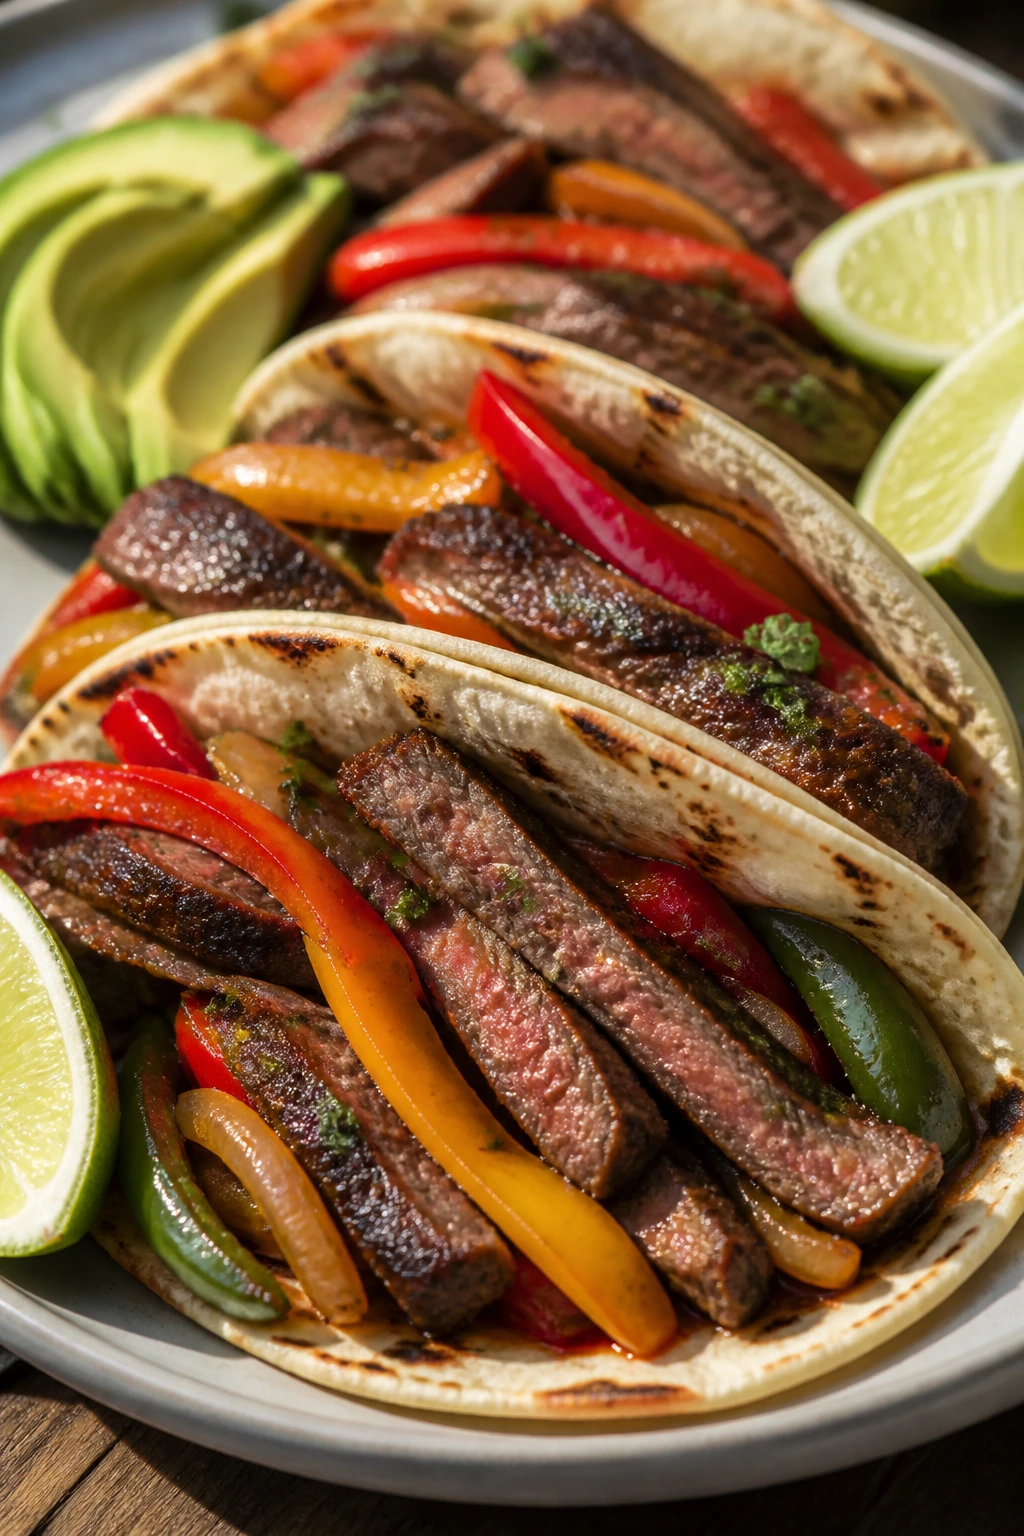
Flank steak has one job here: take on char and then get sliced thin enough to stay tender. The peppers and onions soak up beef juices while the tortillas warm on the grill, which gives the whole taco a smoky edge you can’t fake indoors. Add avocado and lime, and the plate starts to taste like dinner with a little attitude.
Why It Works: Flank steak likes high heat and a brief rest, which makes it ideal for tacos. The fajita vegetables cook in the same hot zone and pick up meat drippings if you give them room. Slicing the steak against the grain after resting keeps the taco from chewing like a shoe. It’s direct, fast, and far better than stuffing overcooked beef into tortillas.
Key Ingredients:
- 1 1/2 lbs flank steak
- 2 tablespoons olive oil
- 1 tablespoon chili powder
- 1 teaspoon cumin
- 1 teaspoon kosher salt
- 1 red bell pepper, sliced
- 1 yellow onion, sliced
- 8 small flour or corn tortillas
- 1 avocado, sliced
- 1 lime, cut into wedges
Quick Steps:
- Rub the steak with oil, chili powder, cumin, and salt.
- Toss peppers and onion with a little oil.
- Preheat the grill to high and oil the grates.
- Grill the steak 4 to 5 minutes per side until it reaches 130°F to 135°F, then rest 10 minutes.
- Grill the vegetables until softened and slightly charred.
- Slice the steak thinly and serve in warm tortillas with avocado and lime.
Equipment for This Recipe:
- Grill
- Sharp slicing knife
- Cutting board
- Tongs
How to Serve This Dish: Keep the tacos simple with salsa, avocado, and a little cotija if you like. A cabbage slaw makes a good side and gives the meal more crunch.
Pro Tips for This Recipe:
- Let the steak warm up for 20 minutes before grilling.
- Warm tortillas directly on the grates for 15 to 20 seconds per side.
- Rest the meat before slicing or the juices will run out onto the board.
Variations on This Dish:
- Carne Asada Style: Add garlic and lime zest to the rub.
- Chipotle Version: Use chipotle powder instead of chili powder.
- Bowl Swap: Serve the steak and vegetables over rice instead of tortillas.
Common Mistakes to Avoid with This Dish:
- Don’t cut flank steak with the grain. It stays tough that way.
- Don’t overload the tortilla. Two or three slices of steak per taco is enough.
12. Teriyaki Chicken Skewers
Sweet, salty, and slightly sticky, these skewers taste like they came from a backyard grill with a bottle of teriyaki that got upgraded. Pineapple juice gives the marinade lift, while ginger and garlic keep the flavor from going flat. The best part is the charred edges where the sugar kisses the heat and turns glossy.
Why It Works: Chicken thighs stay juicy on skewers and absorb marinade better than lean breast meat. Pineapple juice and soy sauce make the marinade taste rounder, not just sweeter. Because the sugar in teriyaki can burn, the skewers need a medium-high grill and a close eye in the final minutes. The result is sticky in the right way.
Key Ingredients:
- 2 lbs boneless chicken thighs, cut into chunks
- 1/2 cup soy sauce
- 1/4 cup pineapple juice
- 2 tablespoons brown sugar
- 2 garlic cloves, minced
- 1 tablespoon grated ginger
- 1 tablespoon sesame oil
- 2 scallions, sliced
- 1 tablespoon sesame seeds
- Skewers
Quick Steps:
- Whisk soy sauce, pineapple juice, brown sugar, garlic, ginger, and sesame oil.
- Marinate the chicken for 1 to 4 hours.
- Thread chicken onto skewers.
- Preheat the grill to medium-high and oil the grates.
- Grill for 10 to 12 minutes total, turning and brushing lightly with marinade until the chicken reaches 165°F.
- Finish with scallions and sesame seeds.
Equipment for This Recipe:
- Skewers
- Grill
- Pastry brush
- Mixing bowl
How to Serve This Dish: Serve over rice with grilled pineapple or a simple cucumber salad. The skewers work well in lettuce cups too if you want something lighter.
Pro Tips for This Recipe:
- Reserve a little marinade before adding raw chicken if you want extra sauce.
- Don’t baste with marinade that touched raw meat unless you boil it first.
- Keep the chicken pieces similar in size so they finish together.
Variations on This Dish:
- Pineapple-Heavy Version: Add grilled pineapple chunks to the skewers.
- Spicy Teriyaki: Stir in chili garlic sauce.
- Garlic-Sesame Swap: Cut the sugar in half for a less sweet glaze.
Common Mistakes to Avoid with This Dish:
- Don’t grill over blazing heat the whole time; the sugar burns fast.
- Don’t pack the chicken too tightly on the skewer or it cooks unevenly.
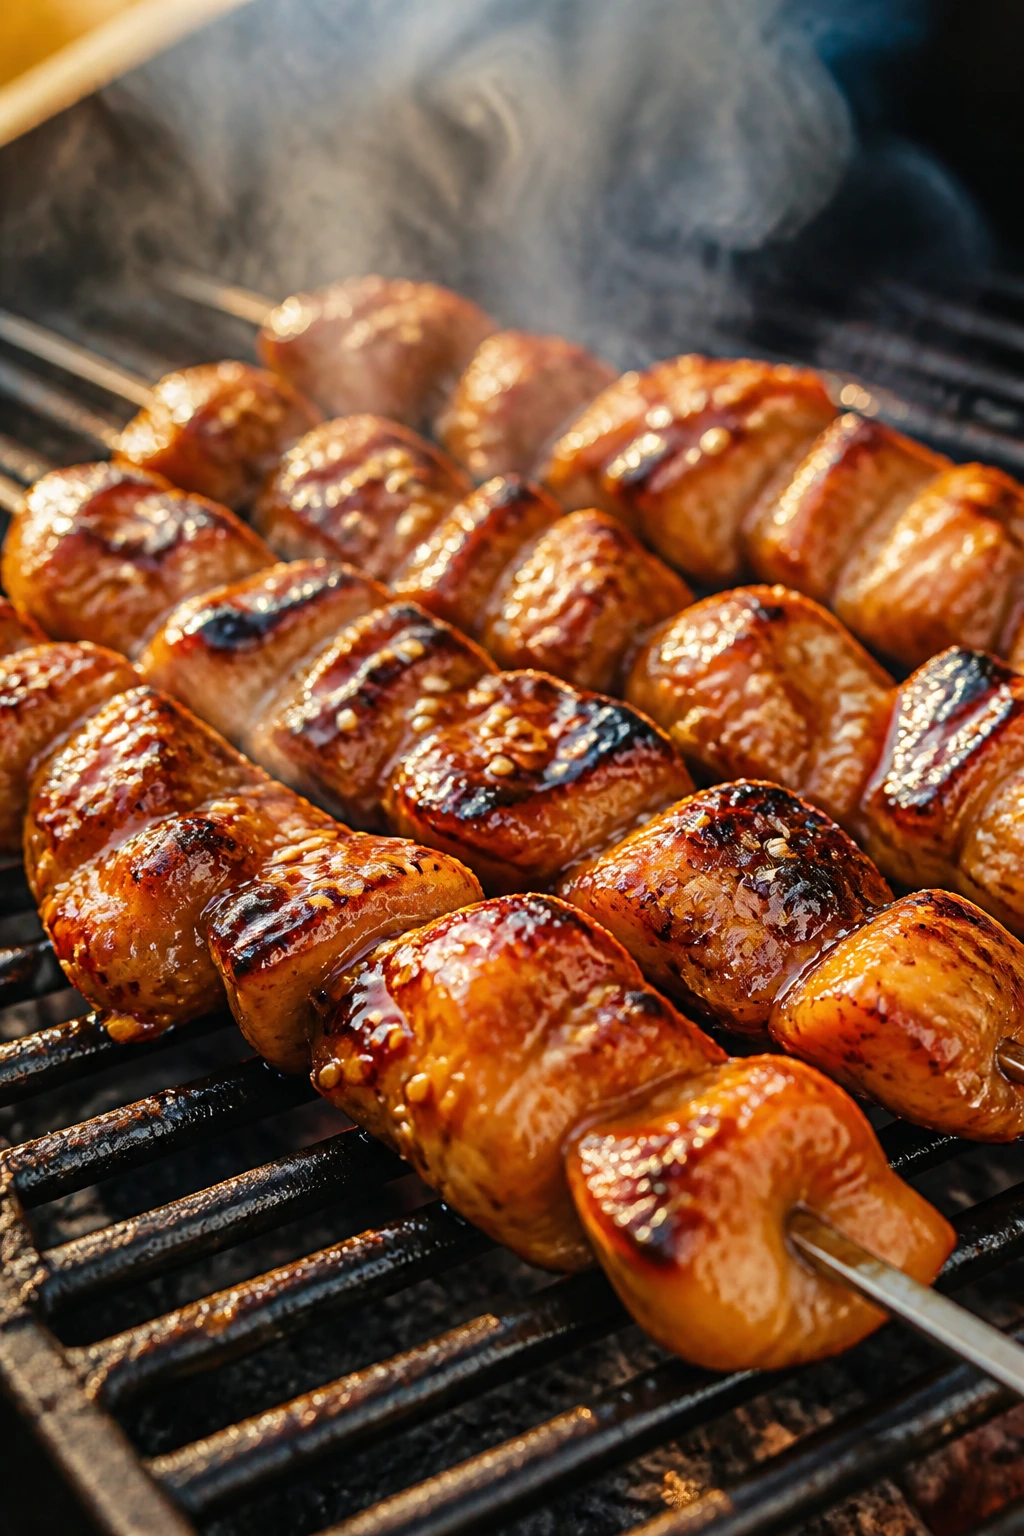
13. Sausage and Peppers Hoagies
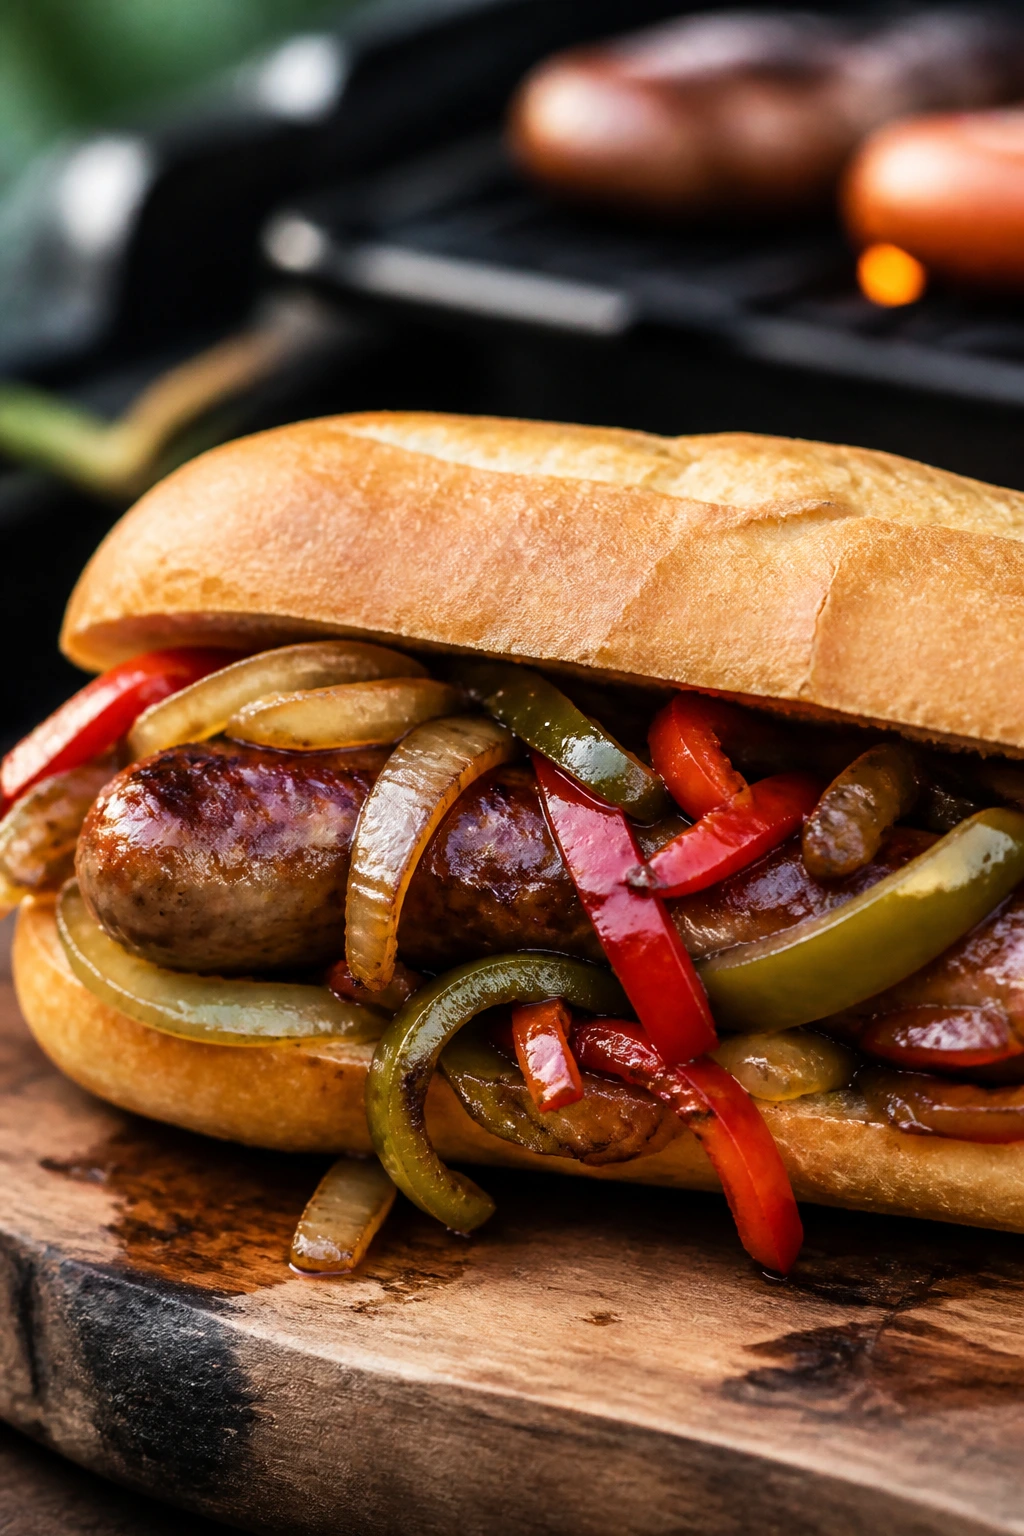
There’s something deeply satisfying about grilling sausages until the casings snap a little when you bite them, then tucking them into soft rolls with peppers and onions that have gone sweet and soft. This is not a delicate meal. Good. It doesn’t need to be.
Why It Works: Sausages are built for the grill because the fat inside keeps them moist while the casing browns. Peppers and onions can cook in a grill basket or foil pan beside the meat, so the whole sandwich comes together without dirtying a pile of pans. A little mustard or provolone at the end keeps the hoagie from feeling one-note. It’s a sturdy dinner that feeds a group without much ceremony.
Key Ingredients:
- 6 Italian sausages
- 2 bell peppers, sliced
- 1 large onion, sliced
- 2 tablespoons olive oil
- 1 teaspoon kosher salt
- 1/2 teaspoon black pepper
- 6 hoagie rolls
- 6 slices provolone cheese
- Mustard, optional
Quick Steps:
- Toss peppers and onion with oil, salt, and pepper.
- Preheat the grill to medium and set up a cooler zone.
- Grill sausages for 12 to 15 minutes, turning often until they reach 160°F.
- Grill the peppers and onions until soft and lightly charred.
- Warm the rolls, tuck in the sausages, top with vegetables and cheese, and close them for a minute so the cheese softens.
Equipment for This Recipe:
- Grill
- Grill basket or foil pan
- Tongs
- Buns or rolls
How to Serve This Dish: Serve with potato wedges, pickles, or a vinegar coleslaw. I like to wrap the bottom half of each hoagie in parchment so the juices don’t soak through immediately.
Pro Tips for This Recipe:
- Pierce sausage only if you want less juice; I usually leave them intact.
- Toast the rolls cut-side down for a little structure.
- Cook the peppers until soft enough to fold over the sausage.
Variations on This Dish:
- Spicy Sausage Swap: Use hot Italian sausage and add pickled peppers.
- Cheesy Version: Melt mozzarella instead of provolone.
- Mustard Relish Style: Finish with mustard and chopped giardiniera.
Common Mistakes to Avoid with This Dish:
- Don’t put raw peppers directly over the hottest flame for too long or they blacken before softening.
- Don’t serve in flimsy rolls; you want something with a little backbone.
14. Miso-Glazed Eggplant Steaks
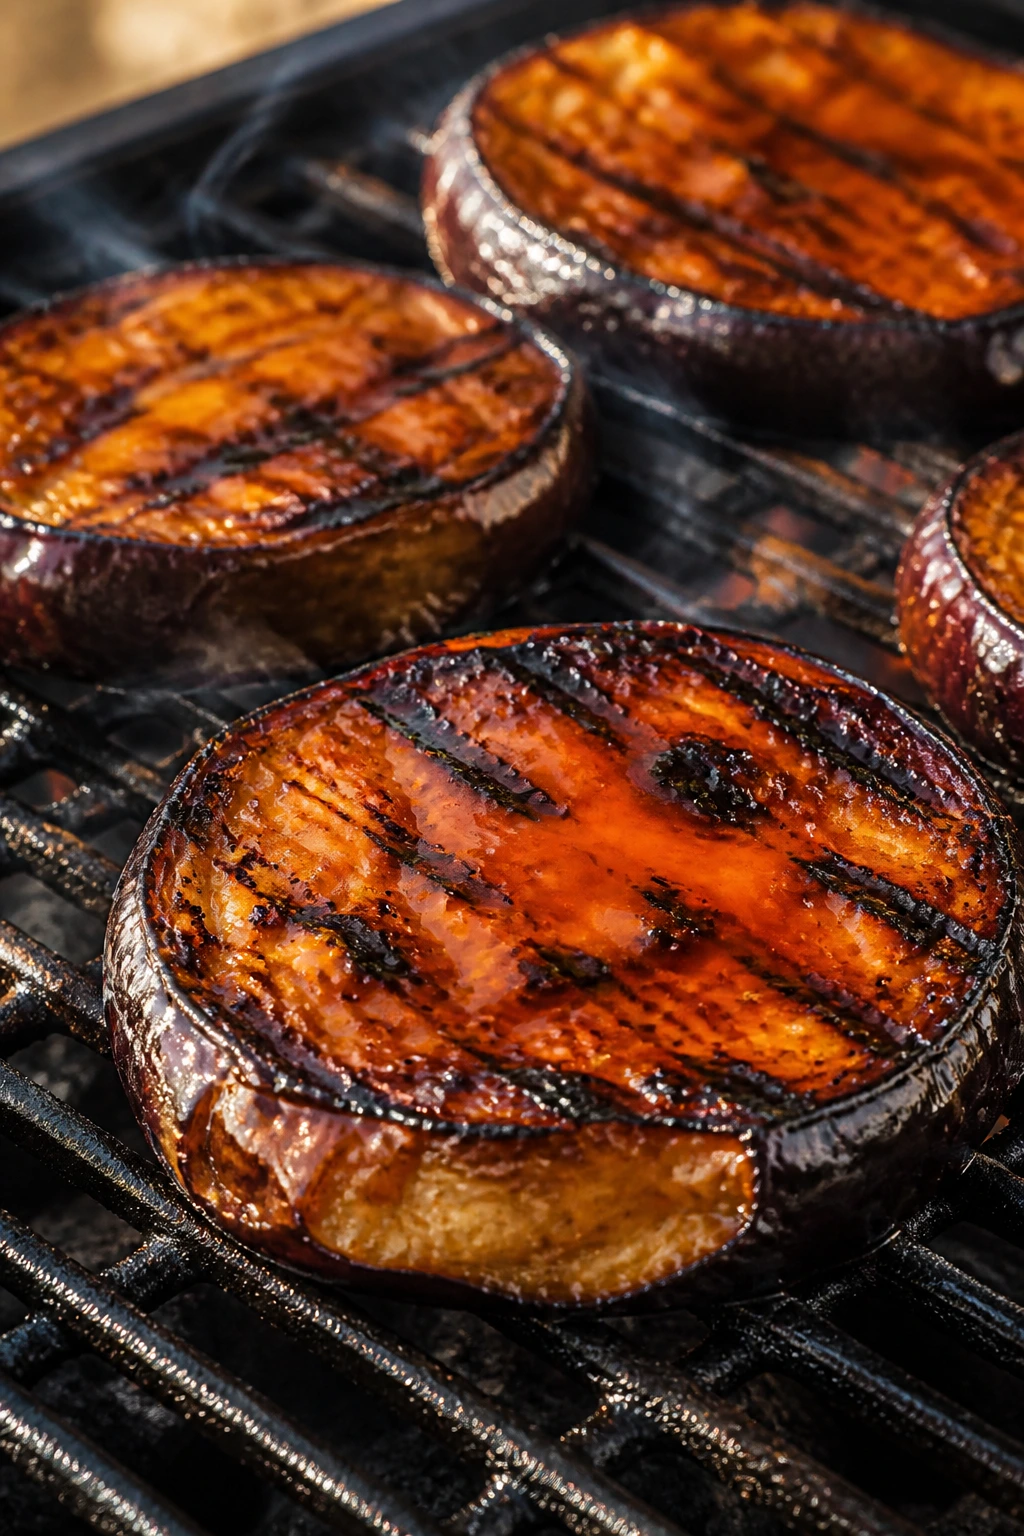
Eggplant gets moody on the grill if you don’t treat it right, but when it’s salted, brushed with oil, and glazed at the end, it turns silky and deep. Miso brings salt and funk, honey brings gloss, and sesame gives the whole thing a nutty finish. This is the vegetable dish that makes even dedicated meat eaters pause.
Why It Works: Eggplant soaks up oil, so you need enough to keep it from drying out on the grill. The glaze goes on near the end because miso and honey can scorch if they meet direct heat too early. Thick slices give you enough body to hold the glaze and still stay creamy inside. A final scatter of scallions or sesame seeds is not extra; it gives the dish texture.
Key Ingredients:
- 2 large eggplants, sliced lengthwise into 1/2-inch steaks
- 3 tablespoons olive oil
- 2 tablespoons white miso paste
- 1 tablespoon honey
- 1 tablespoon rice vinegar
- 1 teaspoon sesame oil
- 2 scallions, sliced
- 1 teaspoon sesame seeds
Quick Steps:
- Mix miso, honey, rice vinegar, and sesame oil.
- Brush eggplant slices with olive oil.
- Preheat the grill to medium-high and oil the grates.
- Grill the eggplant for 4 to 5 minutes per side until tender and marked.
- Brush with the miso glaze during the last minute, then top with scallions and sesame seeds.
Equipment for This Recipe:
- Grill
- Pastry brush
- Tongs
- Small bowl
How to Serve This Dish: Serve the eggplant over rice, with grilled tofu, or beside a cucumber salad. If you want it to read like a main course, add a fried egg or a handful of peanuts.
Pro Tips for This Recipe:
- Salt the eggplant and let it sit 20 minutes if it looks very spongy.
- Don’t slice it too thin; thin slices collapse on the grates.
- Keep the glaze thin enough to brush, not dollop.
Variations on This Dish:
- Spicy Miso Version: Add chili paste to the glaze.
- Garlic-Tahini Finish: Replace the glaze with tahini, lemon, and garlic.
- Pineapple Glaze Swap: Add 1 tablespoon pineapple juice for a sweeter edge.
Common Mistakes to Avoid with This Dish:
- Don’t underoil the eggplant. Dry slices turn leathery.
- Don’t glaze too early. The sugars can burn before the flesh softens.
15. Chili-Lime Steak Tacos
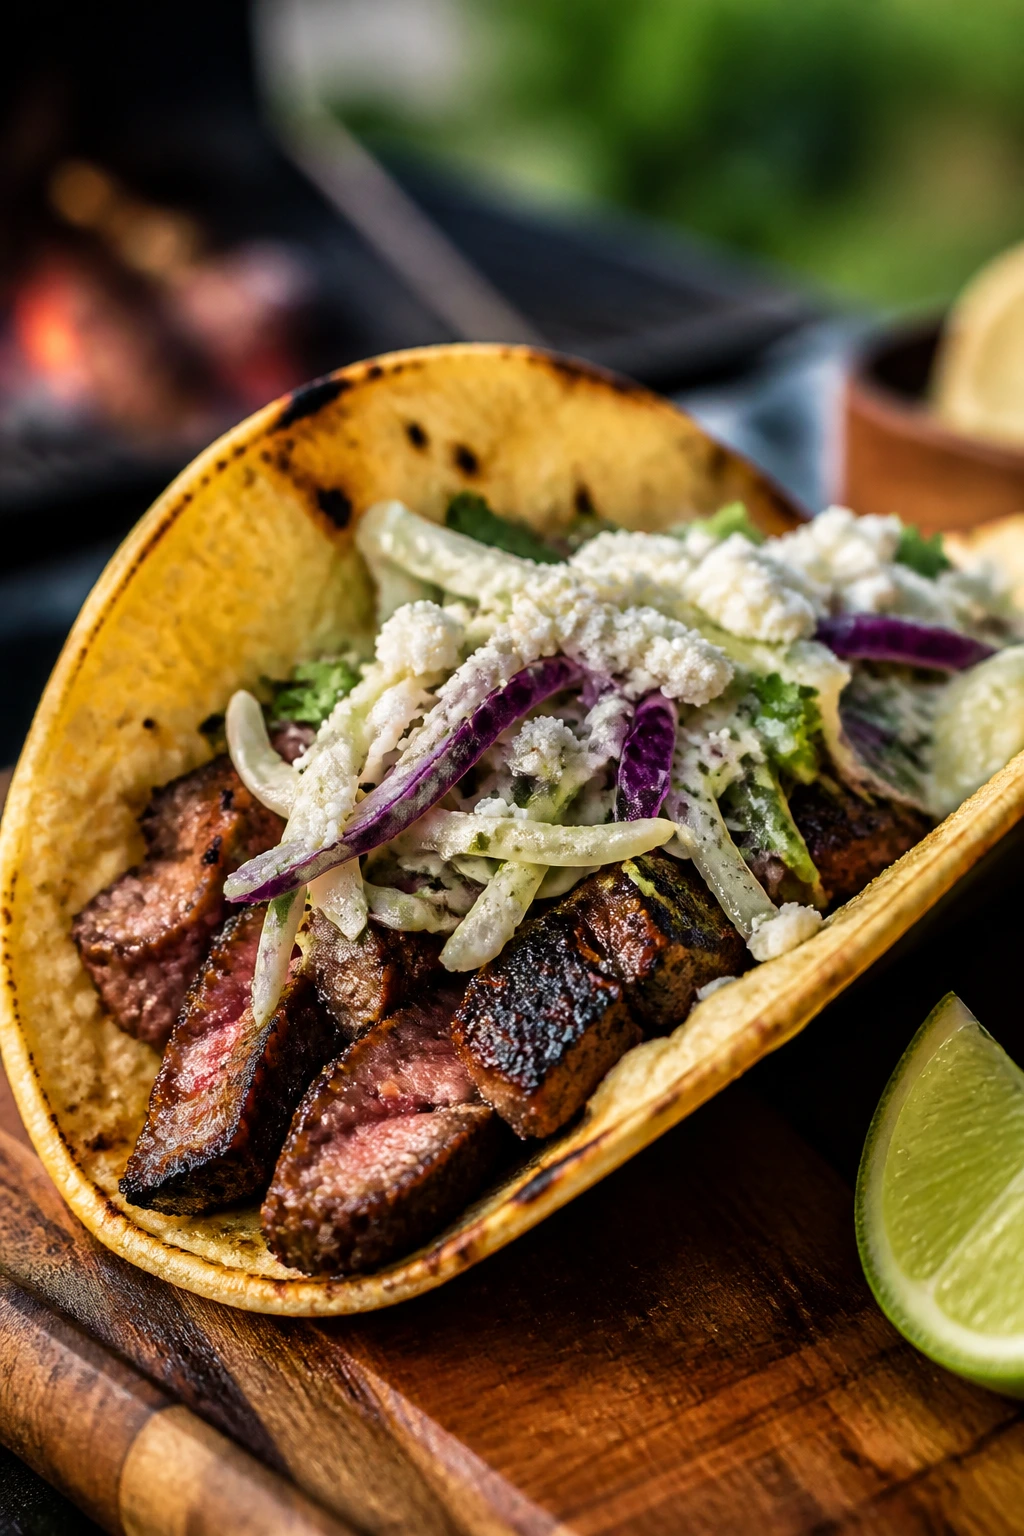
These tacos hit hard in the best way. The steak gets a chili-lime rub, the grill gives it a dark crust, and the cabbage or slaw underneath keeps each bite crisp. They’re sharper and cleaner than a heavy taco, which is why I keep coming back to them when I want something that tastes like summer without a lot of clutter.
Why It Works: Thin steak like skirt or flank grills quickly and takes on seasoning fast. Chili and lime are a natural pair because the acid cuts through the beef and the spice wakes up the char. Cabbage gives you crunch that survives the heat instead of collapsing into a warm pile. The whole thing comes together fast once the steak rests and slices cleanly.
Key Ingredients:
- 1 1/2 lbs skirt or flank steak
- 2 tablespoons olive oil
- 1 tablespoon chili powder
- 1 teaspoon cumin
- 1 teaspoon kosher salt
- 8 corn tortillas
- 2 cups shredded cabbage
- 1/3 cup cotija cheese
- 1 lime, cut into wedges
- 1 avocado, sliced
Quick Steps:
- Rub steak with oil, chili powder, cumin, and salt.
- Preheat the grill to high and oil the grates.
- Grill steak 3 to 4 minutes per side for medium-rare, then rest 10 minutes.
- Warm tortillas on the grill.
- Slice steak thinly and build tacos with cabbage, cotija, avocado, and lime.
Equipment for This Recipe:
- Grill
- Sharp knife
- Cutting board
- Tongs
How to Serve This Dish: Serve with black beans or grilled corn. A squeeze of lime at the table matters more than people think; it keeps the tacos bright.
Pro Tips for This Recipe:
- Let the steak sit with the rub for at least 20 minutes.
- Cut against the grain after resting.
- Warm tortillas one by one so they stay pliable.
Variations on This Dish:
- Smoky Chipotle Version: Add chipotle powder to the rub.
- Street Taco Style: Top with onion, cilantro, and salsa verde.
- Steak Bowl Swap: Serve over rice instead of tortillas.
Common Mistakes to Avoid with This Dish:
- Don’t overcook thin steak. It loses its best texture quickly.
- Don’t skip the rest; sliced too soon, the juices flood the board.
16. Grilled Chicken Caesar Salad
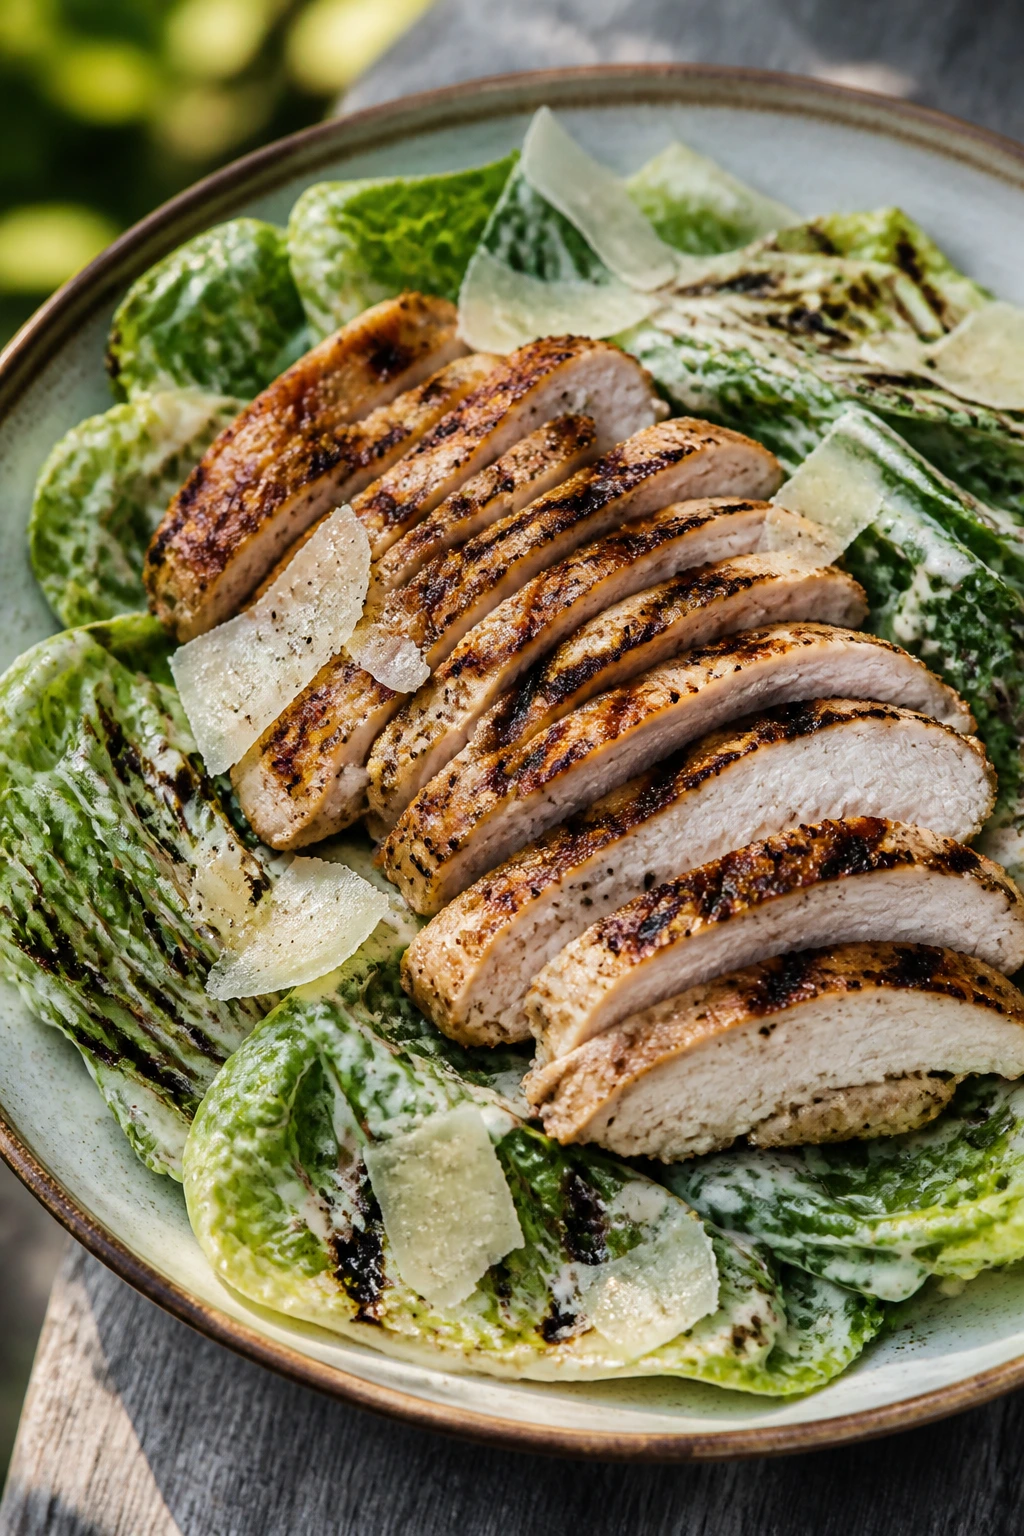
A Caesar salad can be dinner if you treat it like one. Grilled chicken brings smoke, romaine gets charred at the edges, and the dressing clings to the leaves instead of pooling at the bottom of the bowl. The croutons, if you make them from grilled bread, taste like a smarter version of the usual stuff.
Why It Works: Romaine holds up better on the grill than softer lettuces, and a quick char adds flavor without turning it limp. Chicken breasts cook cleanly here because the salad’s creamy dressing helps cover any dryness if you pull them at the right temp. The Parmesan, lemon, and anchovy notes in Caesar dressing are built for grilled food. It’s a familiar plate, but the smoke changes the whole thing.
Key Ingredients:
- 2 boneless, skinless chicken breasts
- 2 romaine hearts, halved lengthwise
- 2 tablespoons olive oil
- 1 teaspoon kosher salt
- 1/2 teaspoon black pepper
- 1/2 cup Caesar dressing
- 1/3 cup grated Parmesan
- 2 cups croutons or grilled bread cubes
- Lemon wedges
Quick Steps:
- Brush chicken and romaine with olive oil and season with salt and pepper.
- Preheat the grill to medium-high and oil the grates.
- Grill chicken for 5 to 6 minutes per side until it reaches 165°F.
- Grill romaine cut-side down for 45 to 60 seconds.
- Slice the chicken, toss the salad with dressing, and top with Parmesan and croutons.
Equipment for This Recipe:
- Grill
- Tongs
- Instant-read thermometer
- Large salad bowl
How to Serve This Dish: Serve the chicken sliced over the romaine with extra dressing on the side. Grilled bread rubbed with garlic turns it into a full dinner without much effort.
Pro Tips for This Recipe:
- Pound the chicken lightly so it cooks evenly.
- Grill the romaine briefly; long heat makes it wilt and collapse.
- Toss the salad right before serving so the leaves stay crisp.
Variations on This Dish:
- Anchovy-Free Swap: Use extra lemon and Worcestershire instead.
- Bacon Caesar Version: Add crisp bacon pieces on top.
- Parmesan Chicken Style: Finish the chicken with shaved Parmesan before serving.
Common Mistakes to Avoid with This Dish:
- Don’t use too much dressing. A heavy hand turns the salad sloppy.
- Don’t overchar the lettuce. A kiss of heat is enough.
17. Honey Mustard Pork Chops with Green Beans
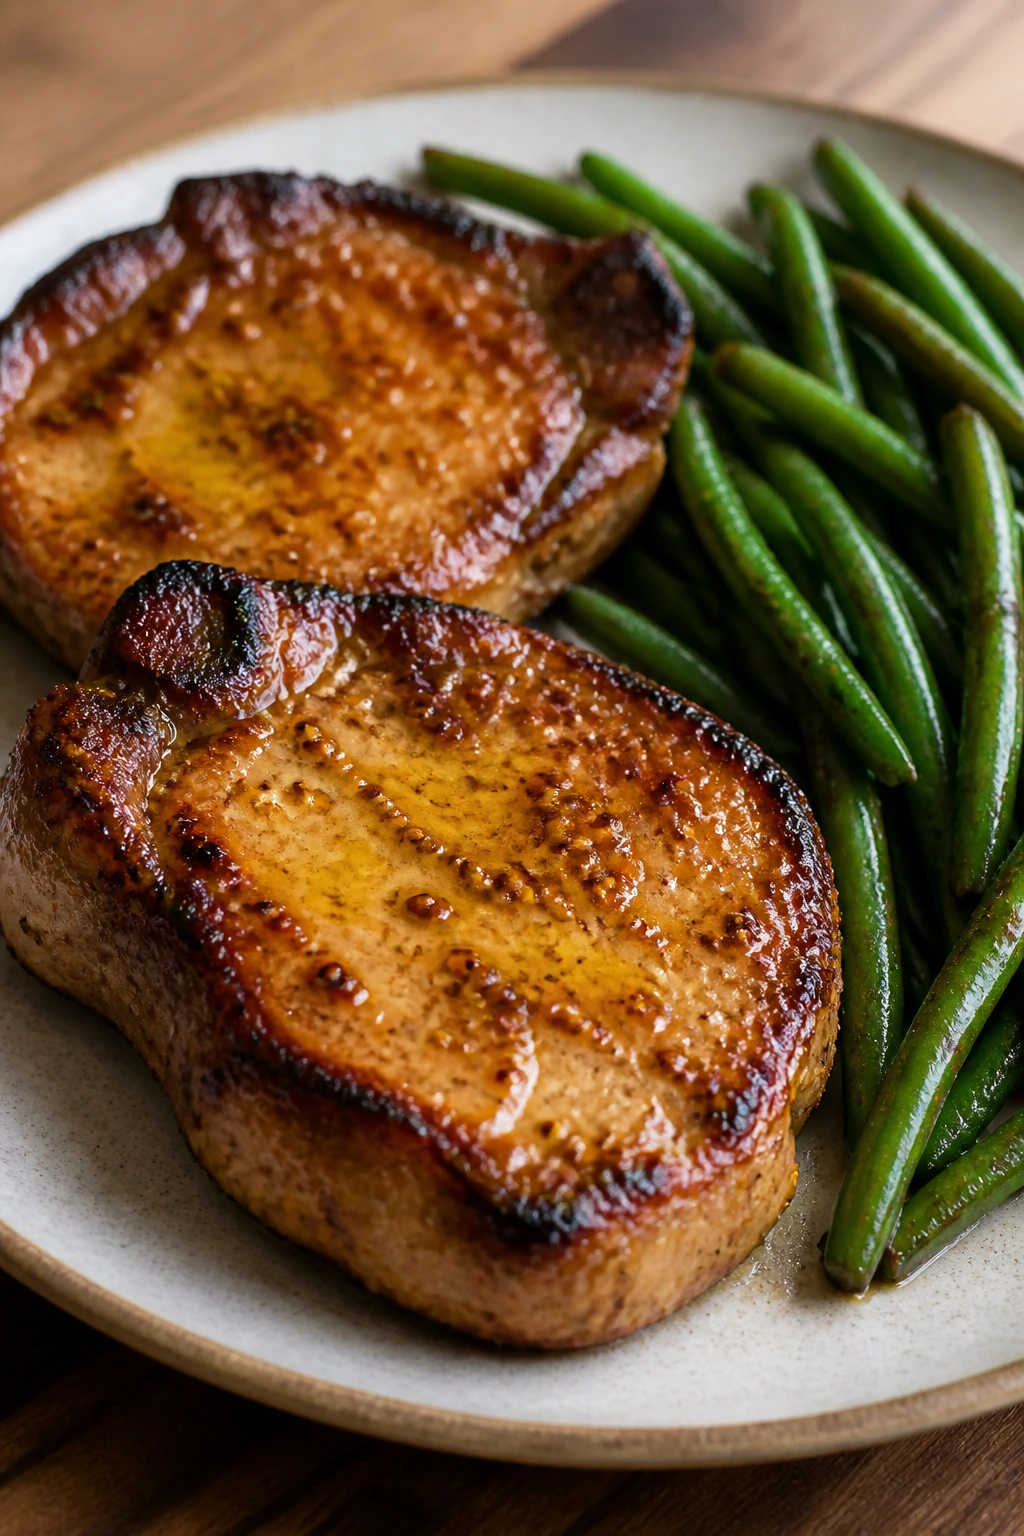
Pork chops get a bad reputation because people cook them like punishment. On the grill, with honey mustard brushed over the top and green beans tucked into a grill basket, they turn into a clean, straightforward dinner with enough sweetness to keep the pork from feeling plain. The edges caramelize, the beans blister, and the whole plate tastes organized.
Why It Works: Thick pork chops handle grilling better than thin ones because they stay juicy while the outside browns. Honey mustard gives you a glaze that can go on near the end without burning immediately. Green beans cook quickly and take well to a little smoke, especially if you keep them in a basket so they don’t fall through the grates. The contrast between the sticky pork and the crisp beans keeps the plate from feeling one-note.
Key Ingredients:
- 4 bone-in pork chops, about 1 inch thick
- 2 tablespoons olive oil
- 2 tablespoons Dijon mustard
- 1 tablespoon honey
- 1 tablespoon apple cider vinegar
- 12 oz green beans, trimmed
- 2 garlic cloves, minced
- 1 teaspoon kosher salt
- 1/2 teaspoon black pepper
Quick Steps:
- Whisk mustard, honey, vinegar, and 1 tablespoon oil.
- Brush pork chops with the glaze and season with salt and pepper.
- Toss green beans with remaining oil and garlic.
- Preheat the grill to medium-high.
- Grill the chops 4 to 5 minutes per side until they reach 145°F; grill the beans in a basket until tender and blistered.
- Rest the pork 5 minutes and serve with the beans.
Equipment for This Recipe:
- Grill
- Grill basket
- Tongs
- Thermometer
How to Serve This Dish: Serve with potatoes or grilled bread to catch the mustard glaze. A squeeze of lemon or a spoonful of extra vinegar on the beans makes the plate pop.
Pro Tips for This Recipe:
- Choose chops with the bone in; they cook a little more evenly.
- Brush the glaze late so the honey doesn’t burn.
- Let the chops rest after grilling or the juices will run out.
Variations on This Dish:
- Herb Mustard Swap: Add rosemary or thyme to the glaze.
- Spicy Dijon Version: Stir in a teaspoon of hot sauce.
- Peach Mustard Finish: Serve with sliced grilled peaches for sweetness.
Common Mistakes to Avoid with This Dish:
- Don’t overcook pork chops to dryness. Pull them at 145°F.
- Don’t skip the rest, even if you’re hungry. It matters.
18. BBQ Pulled Chicken Sandwiches
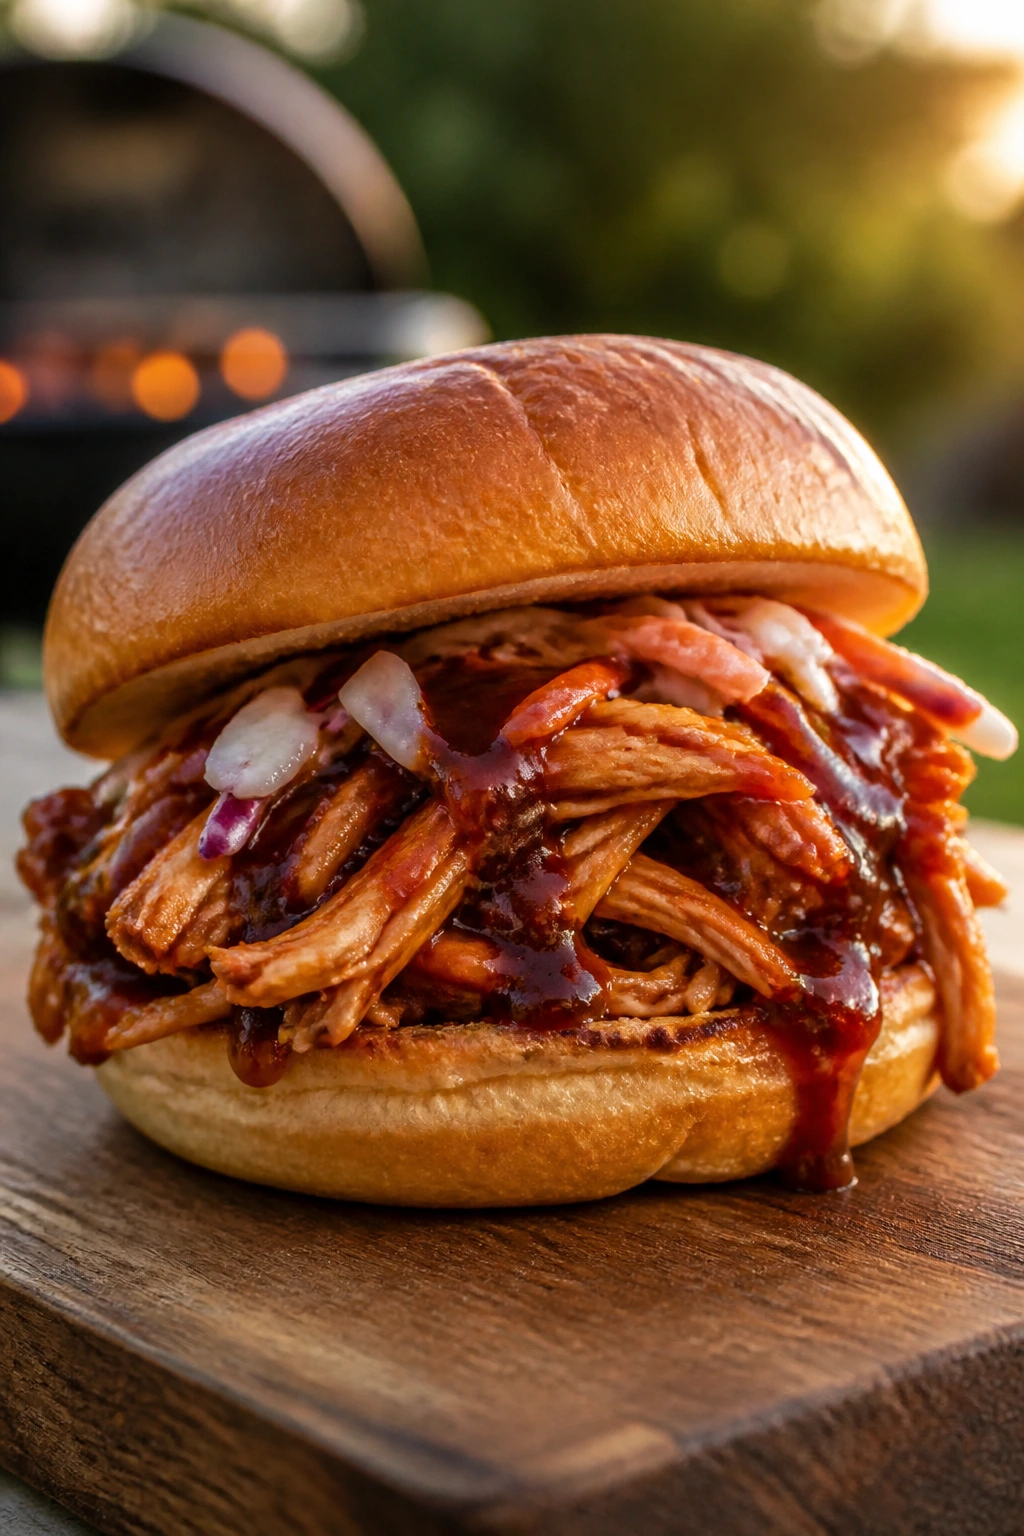
Pulled chicken from the grill tastes a little more interesting than the slow-cooker version because it picks up smoke before it gets sauced. The meat shreds into strands that catch barbecue sauce well, and the buns soak up just enough juice without falling apart. Add a pile of slaw and you’ve got a sandwich that eats like proper weekend food.
Why It Works: Chicken thighs or breasts can both work, but thighs stay moister if you’re cooking them over indirect heat. A dry rub first means the meat tastes seasoned even before the sauce hits. Pulling the chicken after it rests lets it absorb more sauce without turning watery. This is one of the easiest ways to feed a group from the grill without standing over the flames all night.
Key Ingredients:
- 2 1/2 lbs boneless chicken thighs
- 2 tablespoons olive oil
- 2 teaspoons paprika
- 1 teaspoon garlic powder
- 1 teaspoon kosher salt
- 1 cup barbecue sauce
- 6 sandwich buns
- 2 cups coleslaw
- Pickles, optional
Quick Steps:
- Rub chicken with oil, paprika, garlic powder, and salt.
- Preheat the grill to medium with an indirect heat zone.
- Grill chicken for 20 to 25 minutes until it reaches 165°F.
- Rest 5 minutes, then shred with forks.
- Toss with barbecue sauce and pile onto buns with slaw and pickles.
Equipment for This Recipe:
- Grill with lid
- Tongs
- Two forks
- Mixing bowl
How to Serve This Dish: Serve the sandwiches with chips, beans, or grilled corn. I like to spoon a little slaw right into the bun so the texture changes with each bite.
Pro Tips for This Recipe:
- Use thighs if you want richer flavor and easier shredding.
- Warm the buns on the grill for a few seconds.
- Sauce the chicken after shredding so every strand gets coated.
Variations on This Dish:
- Carolina-Style Swap: Use vinegar barbecue sauce.
- Spicy Version: Add sliced jalapeños and hot sauce.
- Smoked Paprika Slaw: Stir smoked paprika into the coleslaw dressing.
Common Mistakes to Avoid with This Dish:
- Don’t try to shred the chicken while it’s scorching hot. Give it a few minutes.
- Don’t drown the sandwich in sauce before serving; it gets messy fast.
19. Tandoori Chicken Thighs
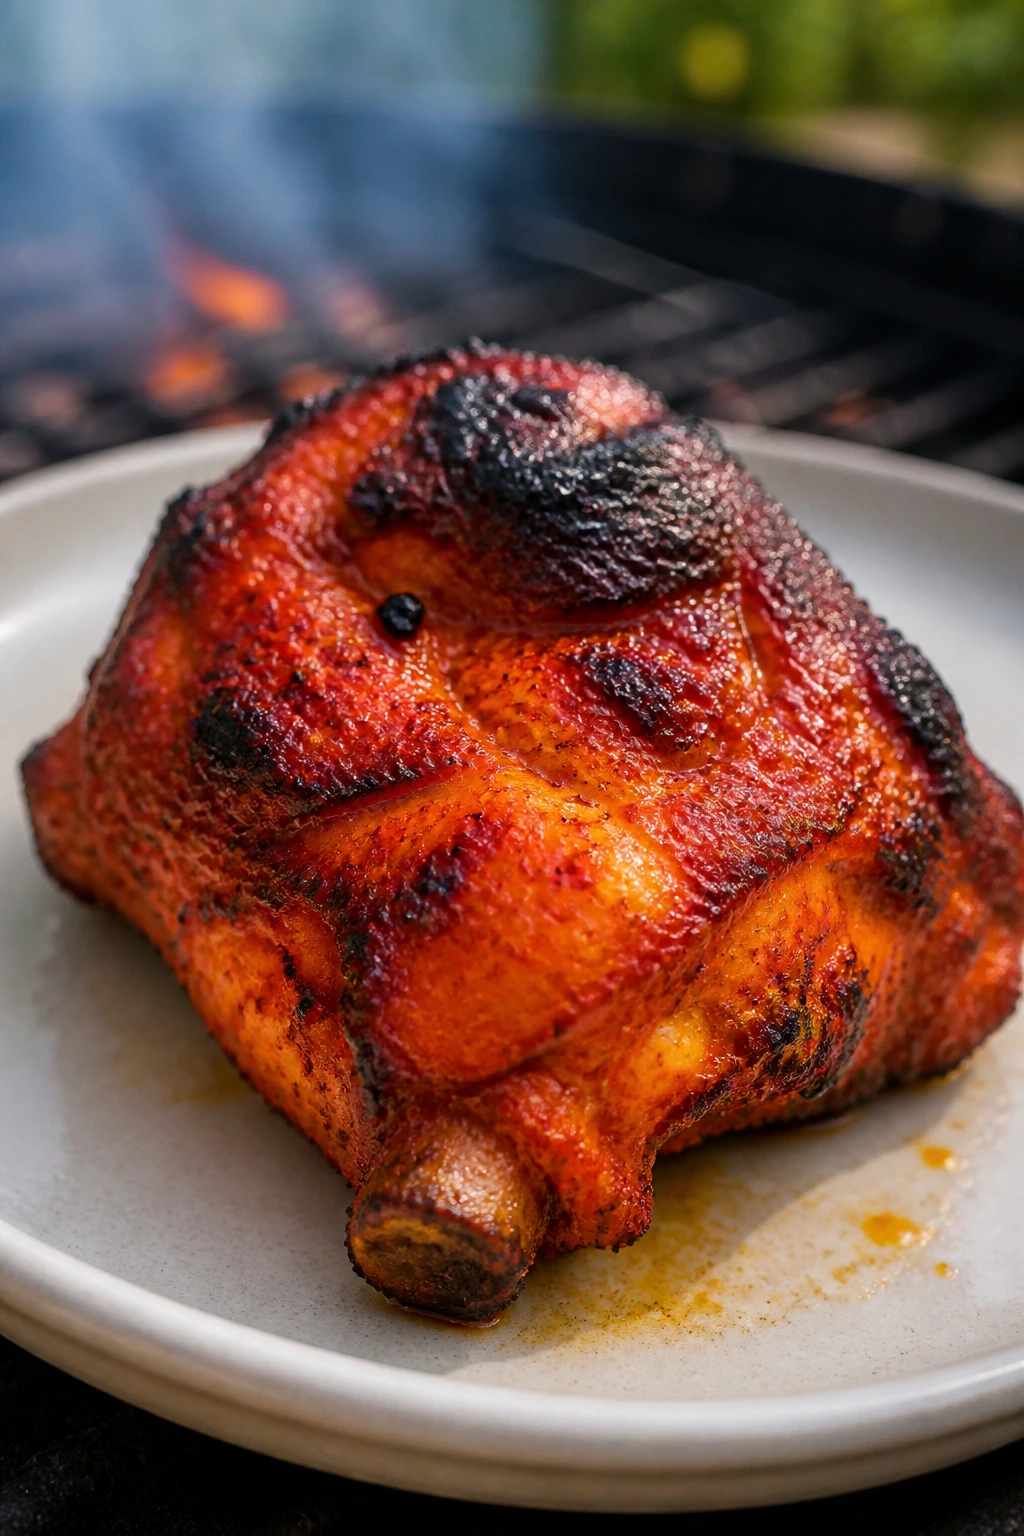
The color on tandoori chicken is half the fun: brick-red, deep orange, and full of those browned edges that smell like garlic and spice. On the grill, you lose the clay oven and keep the char, which is enough for me. The yogurt marinade helps the thighs stay tender while the spice paste turns the skin into something almost crackly.
Why It Works: Yogurt carries the spices and helps them cling to the chicken. Garam masala, turmeric, and paprika build the tandoori flavor without requiring a complicated paste. Chicken thighs are the right cut because they stay juicy at the higher grill heat this recipe likes. A squeeze of lemon at the end keeps the marinade from tasting too dense.
Key Ingredients:
- 2 1/2 lbs bone-in chicken thighs
- 1 cup plain yogurt
- 2 tablespoons lemon juice
- 2 tablespoons olive oil
- 2 teaspoons garam masala
- 1 teaspoon turmeric
- 1 teaspoon paprika
- 4 garlic cloves, minced
- 1 tablespoon grated ginger
- 1 teaspoon kosher salt
Quick Steps:
- Mix yogurt, lemon juice, oil, spices, garlic, ginger, and salt.
- Coat the chicken and marinate for 4 to 12 hours.
- Preheat the grill to medium-high and oil the grates.
- Grill the thighs skin-side down for 6 to 7 minutes, flip, and cook 8 to 10 minutes more until 165°F.
- Rest 5 minutes and serve with lemon.
Equipment for This Recipe:
- Grill
- Mixing bowl
- Tongs
- Thermometer
How to Serve This Dish: Serve with cucumber salad, naan, or basmati rice. A little mint yogurt on the side makes the spices feel brighter and less heavy.
Pro Tips for This Recipe:
- Score the chicken lightly if you want the marinade to cling better.
- Let excess marinade drip off before grilling to avoid flare-ups.
- Use bone-in thighs for deeper flavor and better texture.
Variations on This Dish:
- Lemon-Herb Swap: Add cilantro and more lemon for a fresher finish.
- Boneless Version: Use boneless thighs and shorten the grill time.
- Extra Heat: Add cayenne or Kashmiri chili powder.
Common Mistakes to Avoid with This Dish:
- Don’t use too much yogurt on the surface. Thick clumps burn.
- Don’t rush the marinade; the spices need time to settle in.
20. Salmon Burgers with Dill Pickles
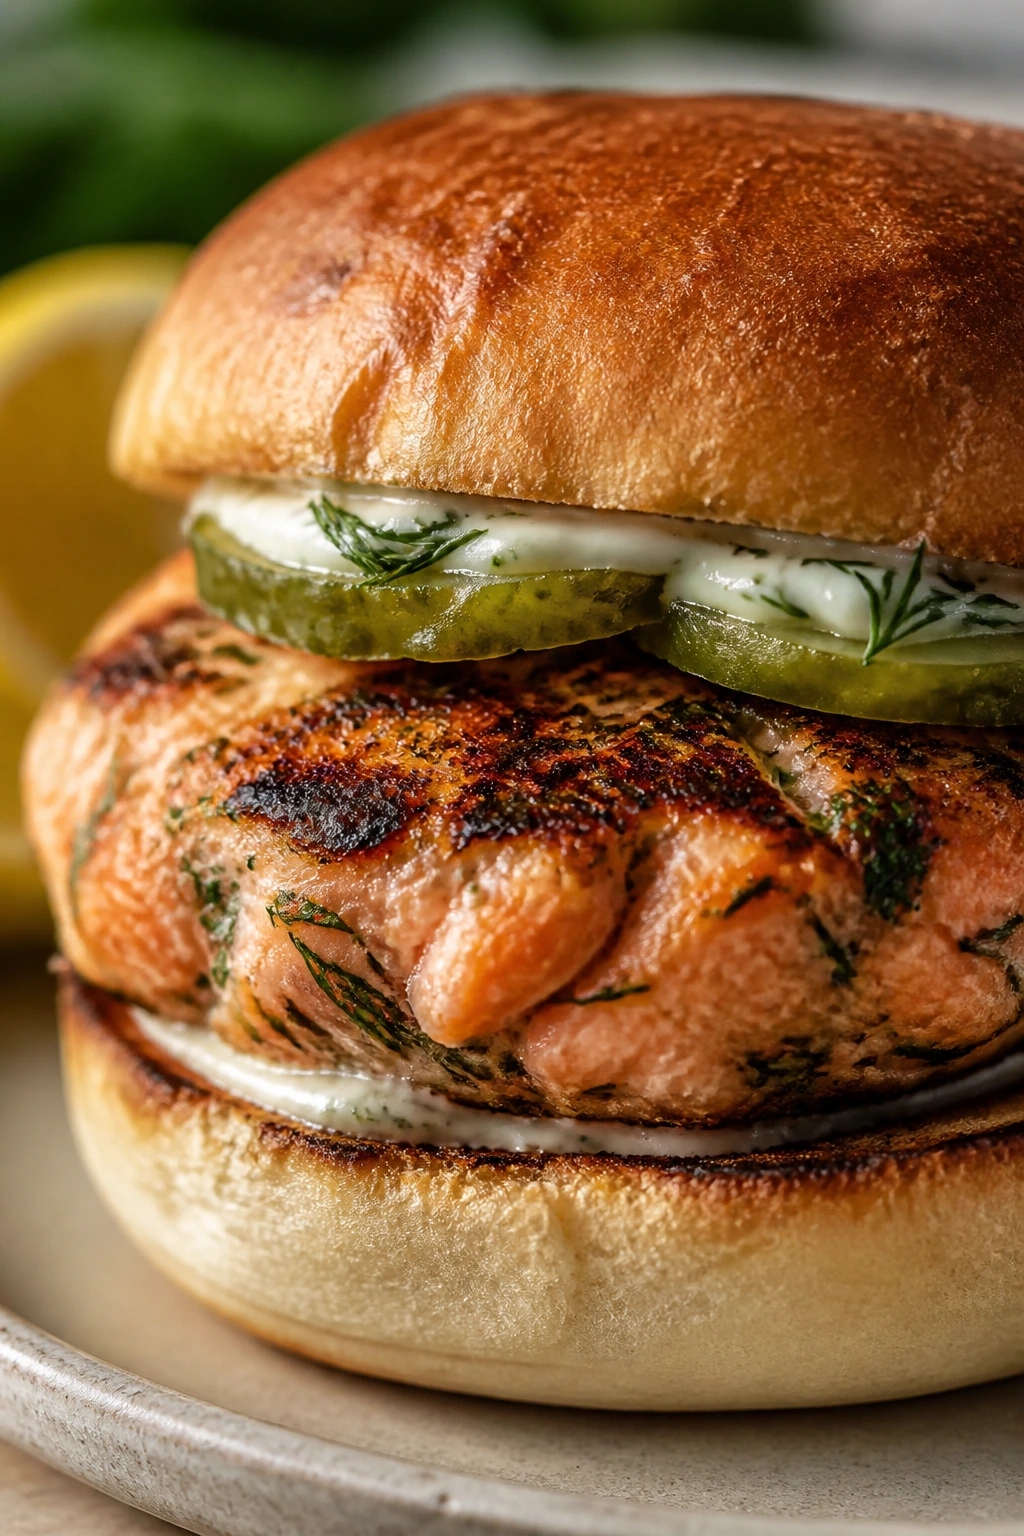
Salmon burgers can go wrong if they turn dry or loose, but when they’re mixed with enough egg and crumbs to hold together, they’re one of the best grill burgers around. The dill pickles sharpen the richness, and a little lemon in the patty keeps the fish flavor clean. These are burgers with a bright edge, not a fish-stick disguise.
Why It Works: Chopped salmon gives you better texture than a mushy purée. Egg and breadcrumbs bind the patties just enough, while the grill gives them a firm crust. Dill pickle and lemon keep the flavor fresh and cut through the richness. A sturdy bun matters because these burgers have a softer texture than beef.
Key Ingredients:
- 1 1/2 lbs skinless salmon, finely chopped
- 1 egg
- 1/3 cup breadcrumbs
- 2 tablespoons chopped dill
- 1 tablespoon lemon juice
- 1 teaspoon kosher salt
- 1/2 teaspoon black pepper
- 4 burger buns
- 8 dill pickle slices
- 1/4 cup mayo
Quick Steps:
- Mix salmon, egg, breadcrumbs, dill, lemon juice, salt, and pepper.
- Form 4 patties and chill 15 minutes.
- Preheat the grill to medium and oil the grates.
- Grill patties 3 to 4 minutes per side until just cooked through and 125°F to 130°F in the center.
- Toast buns and build with mayo and pickles.
Equipment for This Recipe:
- Grill
- Mixing bowl
- Spatula
- Fish spatula, helpful but optional
How to Serve This Dish: Serve with a dill-heavy slaw or roasted potatoes. A slice of tomato under the salmon burger keeps the bun from getting soggy too quickly.
Pro Tips for This Recipe:
- Chill the patties before grilling so they hold shape.
- Don’t make the salmon paste-like; texture matters here.
- Oil the grates well because fish is prone to sticking.
Variations on This Dish:
- Caper Version: Add chopped capers for a brinier burger.
- Spicy Mayo Swap: Mix hot sauce into the mayo.
- Lettuce Wrap Option: Skip the bun and serve in butter lettuce.
Common Mistakes to Avoid with This Dish:
- Don’t overwork the mix. It turns dense.
- Don’t overcook salmon burgers; they dry out fast once they pass their sweet spot.
21. Portobello Mushroom Burgers
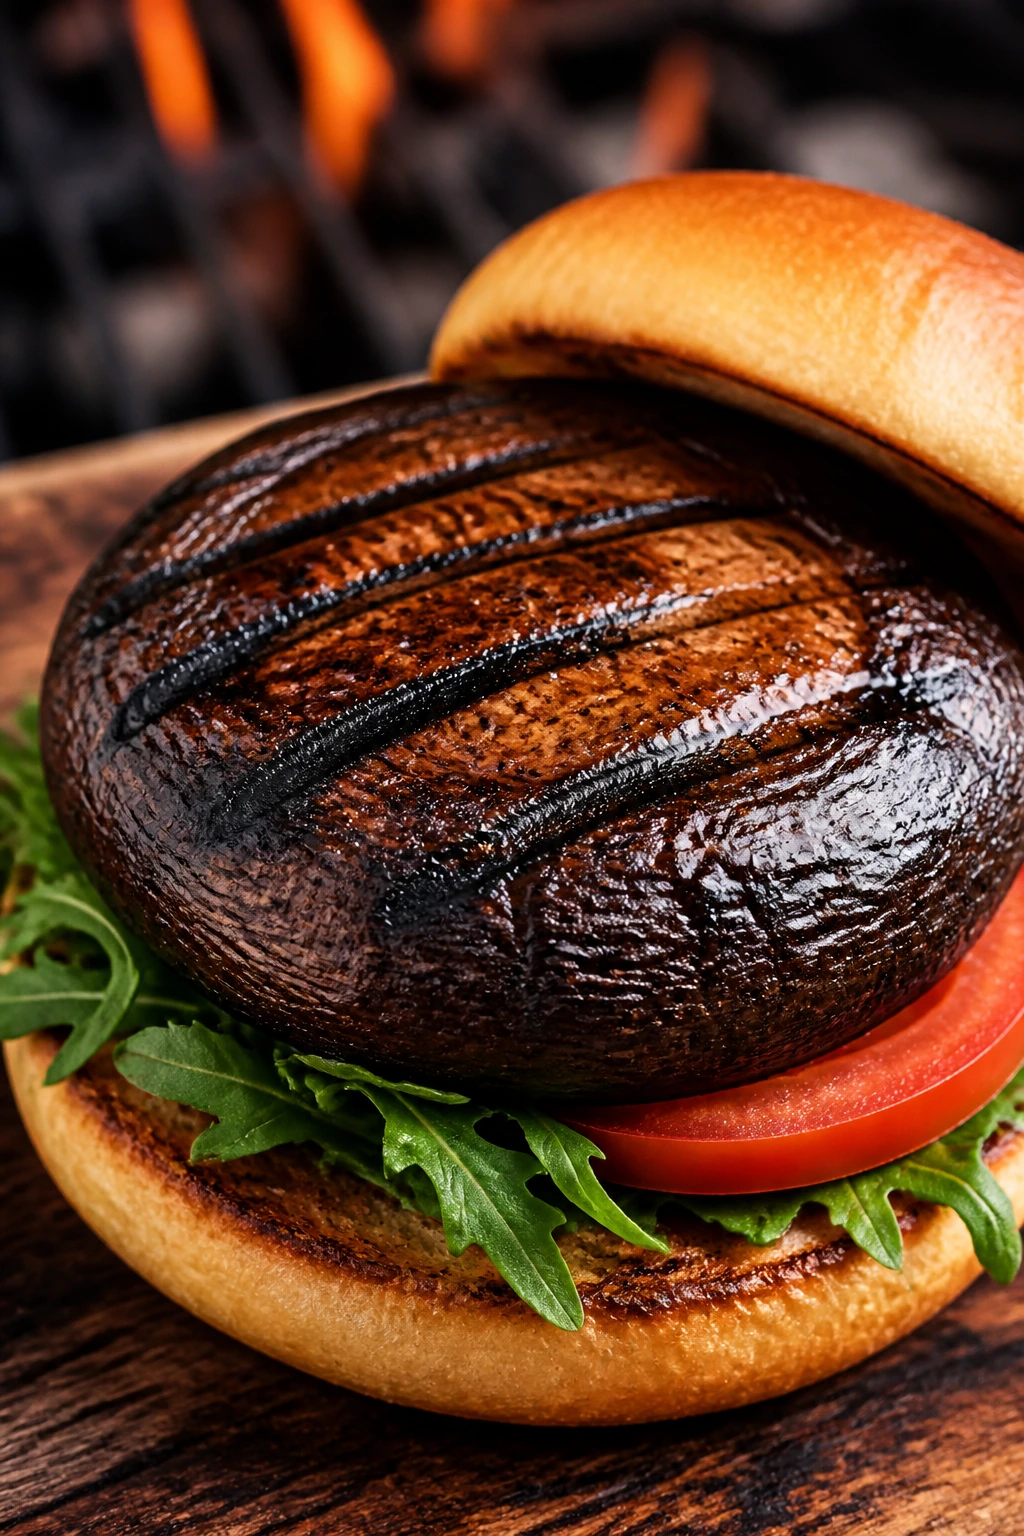
Portobellos are basically meat for people who like mushrooms, and grilling them proves the point. Their caps soak up balsamic, garlic, and oil, then turn meaty at the edges while the centers stay juicy. Put one on a bun with arugula and tomato, and you don’t miss the beef as much as you expected.
Why It Works: Large mushroom caps hold marinade well and grill evenly. Their natural moisture softens during cooking, which gives you a hearty bite without any actual meat. A little cheese can make the burger feel more complete, but it’s not required. The grill gets the mushrooms caramelized in a way a skillet never quite does.
Key Ingredients:
- 4 large portobello caps, stems removed
- 3 tablespoons olive oil
- 2 tablespoons balsamic vinegar
- 2 garlic cloves, minced
- 1 teaspoon kosher salt
- 1/2 teaspoon black pepper
- 4 burger buns
- 4 slices Swiss or provolone
- 1 cup arugula
- 1 tomato, sliced
Quick Steps:
- Whisk oil, balsamic, garlic, salt, and pepper.
- Brush the mushroom caps and rest them 15 minutes.
- Preheat the grill to medium-high and oil the grates.
- Grill caps 4 to 5 minutes per side, topping with cheese in the last minute if using.
- Toast buns and serve with arugula and tomato.
Equipment for This Recipe:
- Grill
- Tongs
- Basting brush
- Small bowl
How to Serve This Dish: Serve with grilled zucchini fries or a simple potato salad. The mushroom cap should be the star, with the bun acting more like a frame than a filler.
Pro Tips for This Recipe:
- Scrape the gills if you want a cleaner texture.
- Don’t over-marinate; mushrooms can get soggy if left too long.
- Grill with the cap-side down first for better browning.
Variations on This Dish:
- Pesto Version: Brush with basil pesto after grilling.
- Blue Cheese Swap: Use blue cheese instead of Swiss.
- Veggie Stack: Add grilled zucchini or roasted red peppers.
Common Mistakes to Avoid with This Dish:
- Don’t cook the caps over high flame the whole time. They can burn before softening.
- Don’t skip the oil. Dry mushrooms stick badly.
22. Shrimp Tostadas
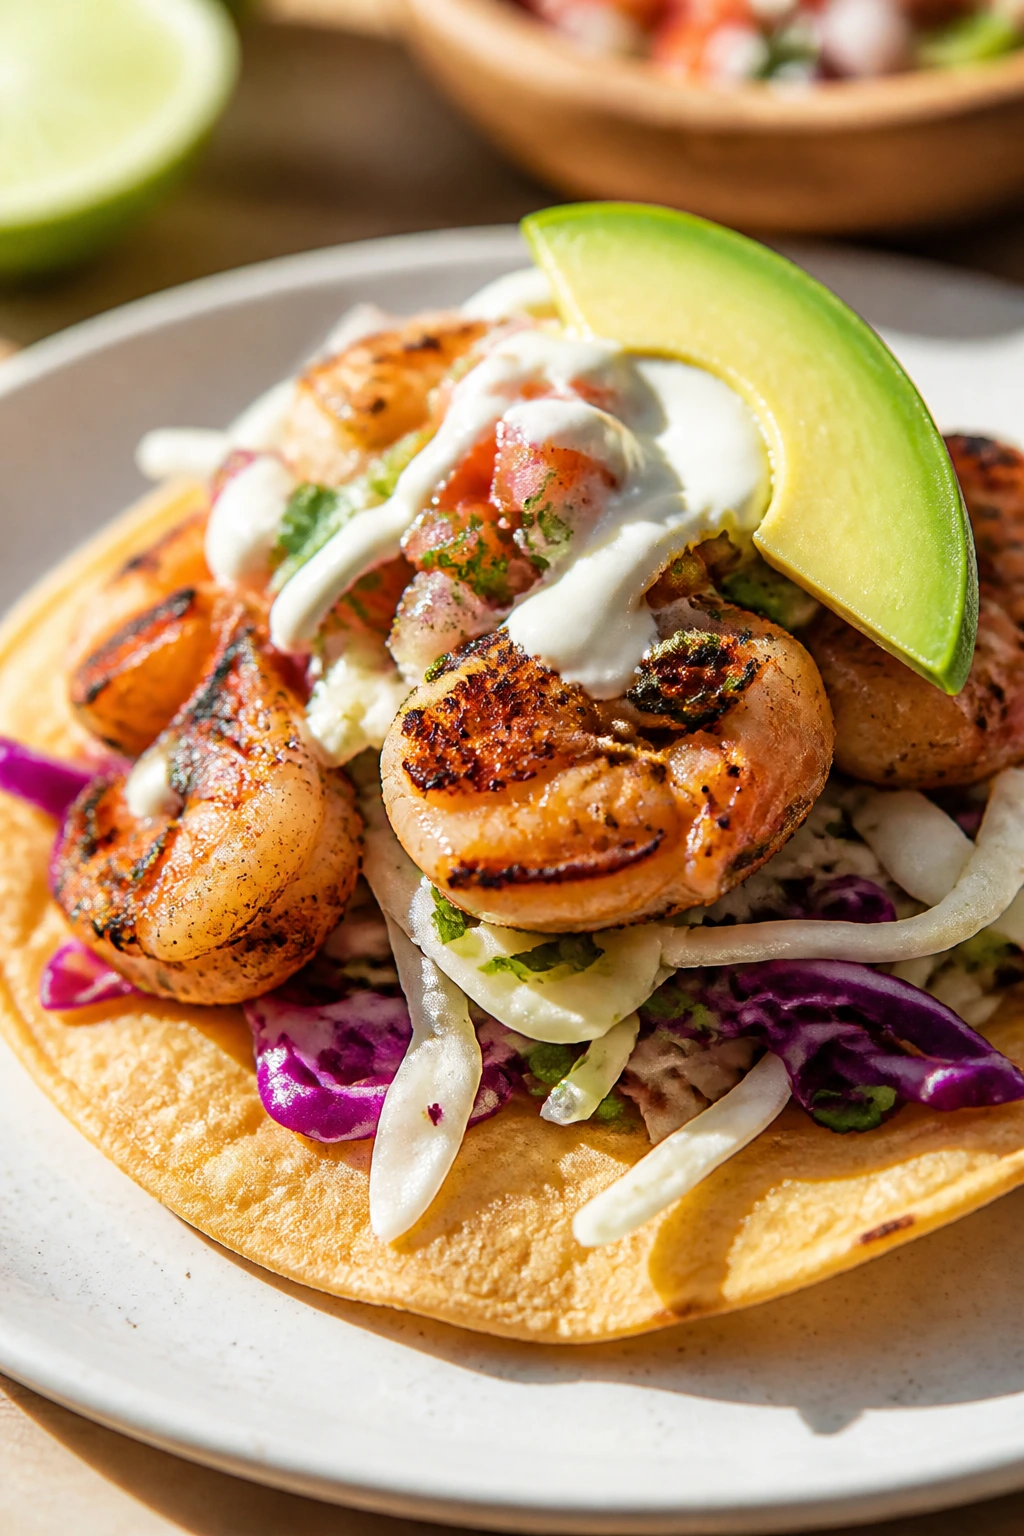
Crunch matters here. Grilled shrimp on a crisp tostada with avocado, cabbage, and crema gives you a plate that feels sharper and lighter than a lot of grilled dinners. The shrimp bring char; the toppings bring cold, creamy contrast. It’s fast food in the best possible sense.
Why It Works: Shrimp cook quickly and take on spice well, which makes them ideal for tostadas. Grilling the tortillas briefly turns them crisp enough to hold toppings without going limp. Cabbage adds crunch that survives the heat, and crema cools the seasoning. You get a lot of texture for very little effort.
Key Ingredients:
- 1 1/2 lbs large shrimp, peeled and deveined
- 2 tablespoons olive oil
- 1 tablespoon taco seasoning
- 8 corn tortillas
- 1 cup shredded cabbage
- 1 avocado, sliced
- 1/2 cup crema or sour cream
- 1/4 cup pico de gallo
- 1 lime, cut into wedges
Quick Steps:
- Toss shrimp with oil and taco seasoning.
- Grill tortillas over medium-high heat for 30 to 45 seconds per side until crisp.
- Grill shrimp 2 to 3 minutes per side until pink and opaque.
- Build tostadas with cabbage, shrimp, avocado, crema, pico de gallo, and lime.
Equipment for This Recipe:
- Grill
- Tongs
- Small bowl
- Spatula, if needed for tortillas
How to Serve This Dish: Serve immediately, because tostadas lose crunch as they sit. A side of black beans or elote-style corn makes it into a fuller meal.
Pro Tips for This Recipe:
- Keep tortillas moving so they don’t burn in one spot.
- Use medium shrimp if you want easier topping distribution.
- Finish with lime at the table, not before grilling.
Variations on This Dish:
- Chipotle Crema Swap: Stir chipotle into the crema.
- Mango Salsa Version: Replace pico de gallo with diced mango salsa.
- Grilled Corn Tostada: Add grilled corn kernels to the cabbage mix.
Common Mistakes to Avoid with This Dish:
- Don’t overload the tostada. It cracks under too much topping.
- Don’t overcook the shrimp; they only need a minute or two per side.
23. Lamb Burgers with Mint Yogurt
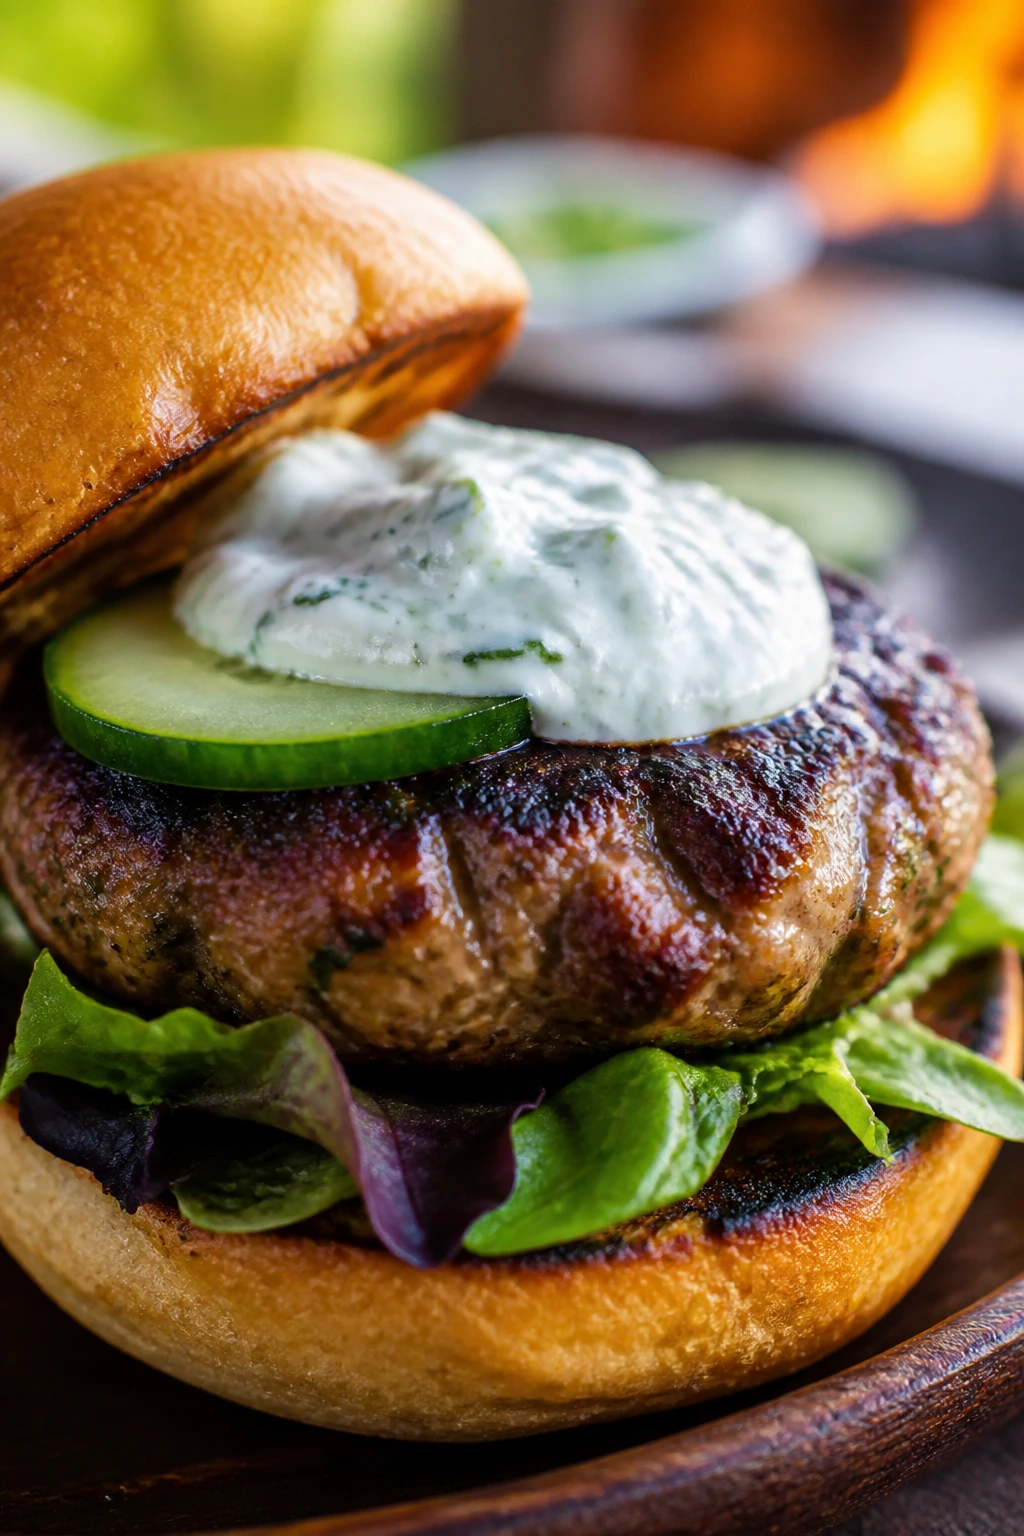
Lamb burgers have more personality than beef burgers, and that’s a compliment. Garlic, cumin, and coriander wake up the meat, while mint yogurt cools it down and keeps each bite from getting too rich. If you like burgers with a little swagger, this is the one.
Why It Works: Ground lamb is naturally fattier and more flavorful than turkey or lean beef, so it stands up well to grilling. The spices in the patty echo the minty yogurt and make the burger taste cohesive, not cluttered. A soft bun or pita gives you a little cushion against the richness. These are burgers that taste intentional without being fussy.
Key Ingredients:
- 2 lbs ground lamb
- 2 garlic cloves, minced
- 1 teaspoon cumin
- 1 teaspoon ground coriander
- 1 teaspoon kosher salt
- 1/2 teaspoon black pepper
- 1/2 cup Greek yogurt
- 2 tablespoons chopped mint
- 4 burger buns or pitas
- Sliced cucumber, optional
Quick Steps:
- Mix lamb with garlic, cumin, coriander, salt, and pepper.
- Form 4 patties and chill 15 minutes.
- Stir yogurt with mint.
- Preheat the grill to medium-high and oil the grates.
- Grill patties 4 to 5 minutes per side for medium, then rest 5 minutes.
- Serve with mint yogurt and cucumber.
Equipment for This Recipe:
- Grill
- Mixing bowl
- Spatula
- Thermometer
How to Serve This Dish: Serve with a cucumber-tomato salad or grilled eggplant. The mint yogurt should go on the bun or directly on the burger, not hidden in a separate bowl.
Pro Tips for This Recipe:
- Don’t overmix the lamb or it turns dense.
- Make a small indentation in the center of each patty so it stays flatter.
- Use pitas if you want a mess-free option.
Variations on This Dish:
- Feta Version: Add crumbled feta to the patties.
- Harissa Swap: Mix a teaspoon of harissa into the yogurt.
- Mediterranean Plate: Serve over rice instead of buns.
Common Mistakes to Avoid with This Dish:
- Don’t press the patties while grilling. It squeezes out the fat.
- Don’t skip the rest after cooking; the burgers need it.
24. Spatchcocked Whole Chicken
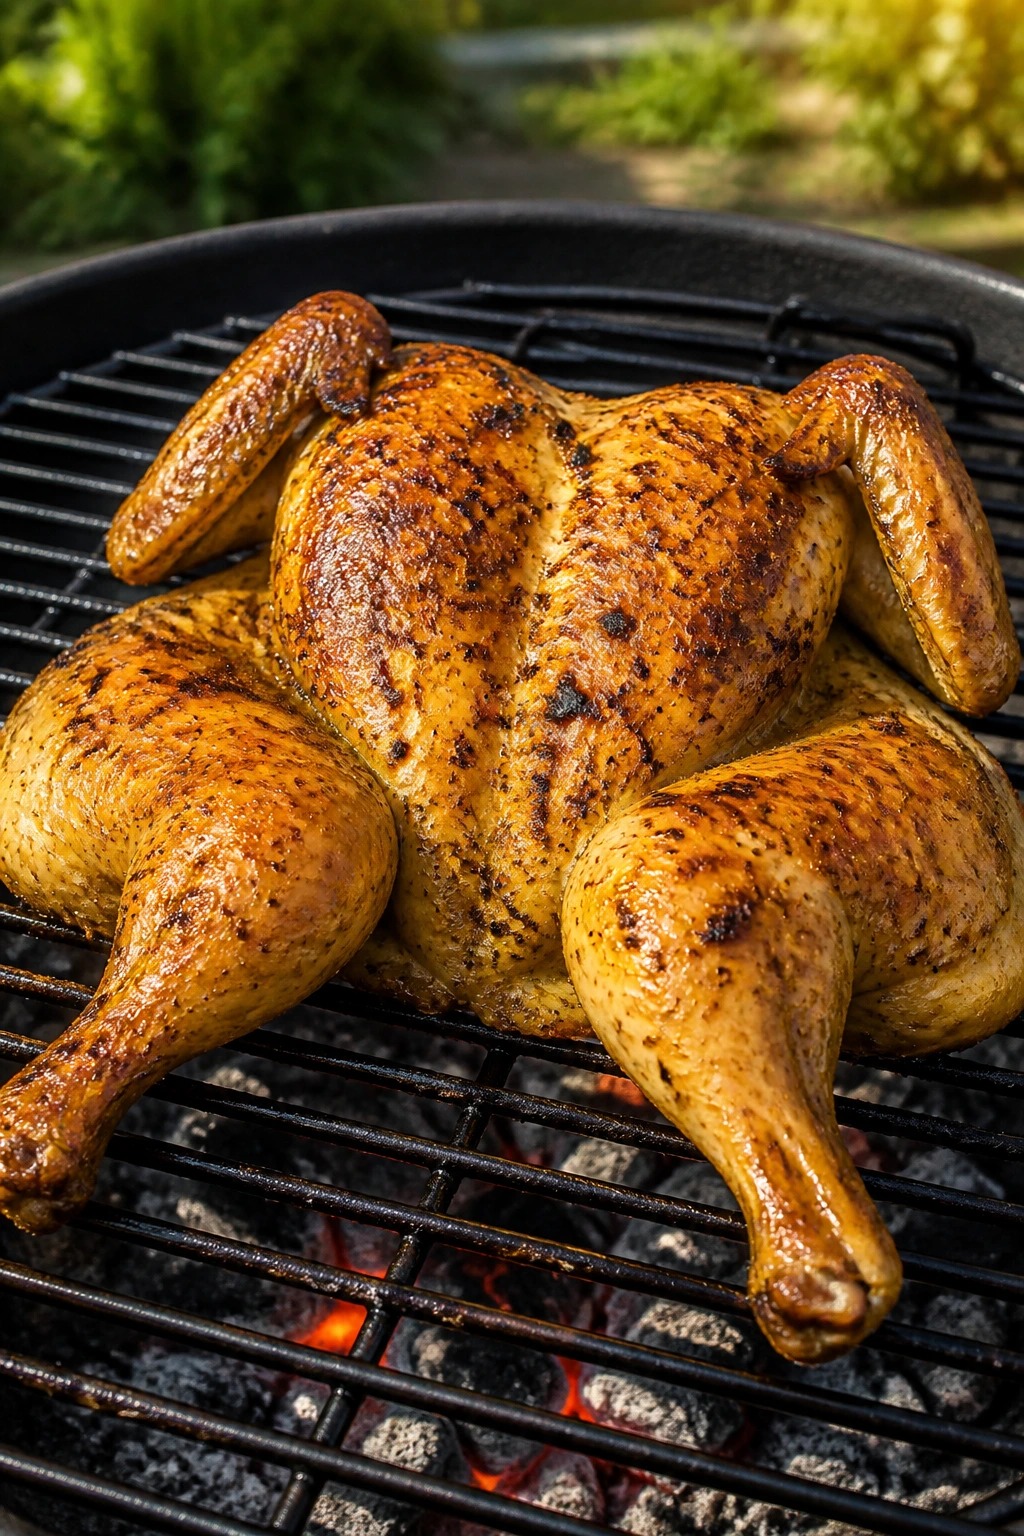
Spatchcocking a chicken sounds technical, but it just means removing the backbone so the bird lies flat and cooks evenly. On the grill, that shape is a gift: more skin exposed, less guesswork, and a bird that gets crisp where you want it. Herb butter under the skin takes it from plain roast-chicken territory to something you’d proudly carry to a table.
Why It Works: A flattened chicken cooks faster and more evenly than a whole bird left upright. The grill can give you direct heat for browning and indirect heat for finishing, which is exactly what a whole chicken wants. Butter under the skin adds flavor and helps the meat stay moist. This is a centerpiece meal that still behaves like grill food.
Key Ingredients:
- 1 whole chicken, 4 to 5 lbs
- 4 tablespoons softened butter
- 2 garlic cloves, minced
- 1 tablespoon chopped parsley
- 1 tablespoon chopped thyme
- 1 1/2 teaspoons kosher salt
- 1 teaspoon black pepper
- 1 lemon, halved
Quick Steps:
- Remove the backbone and flatten the chicken.
- Mix butter, garlic, parsley, thyme, salt, and pepper; rub under and over the skin.
- Preheat the grill for indirect cooking, around 375°F.
- Place the chicken skin-side up over indirect heat and grill 45 to 60 minutes until the breast reaches 165°F and the thighs are 175°F.
- Let it rest 10 minutes and squeeze with lemon.
Equipment for This Recipe:
- Grill with lid
- Kitchen shears
- Instant-read thermometer
- Tongs
How to Serve This Dish: Serve with grilled potatoes, asparagus, or a simple green salad. Carve it into quarters or eighths so the crisp skin stays intact on the plate.
Pro Tips for This Recipe:
- Dry the skin well before applying butter.
- Tuck wings under so they don’t burn.
- Use a drip pan if you want cleaner flare-up control.
Variations on This Dish:
- Smoked Paprika Butter: Add paprika to the herb butter.
- Lemon-Rosemary Swap: Replace thyme with rosemary.
- Dry-Brine Version: Salt the bird a day ahead for even better skin.
Common Mistakes to Avoid with This Dish:
- Don’t cook the chicken over direct flame the whole time. It will burn outside before it’s done.
- Don’t carve immediately; the juices need the rest.
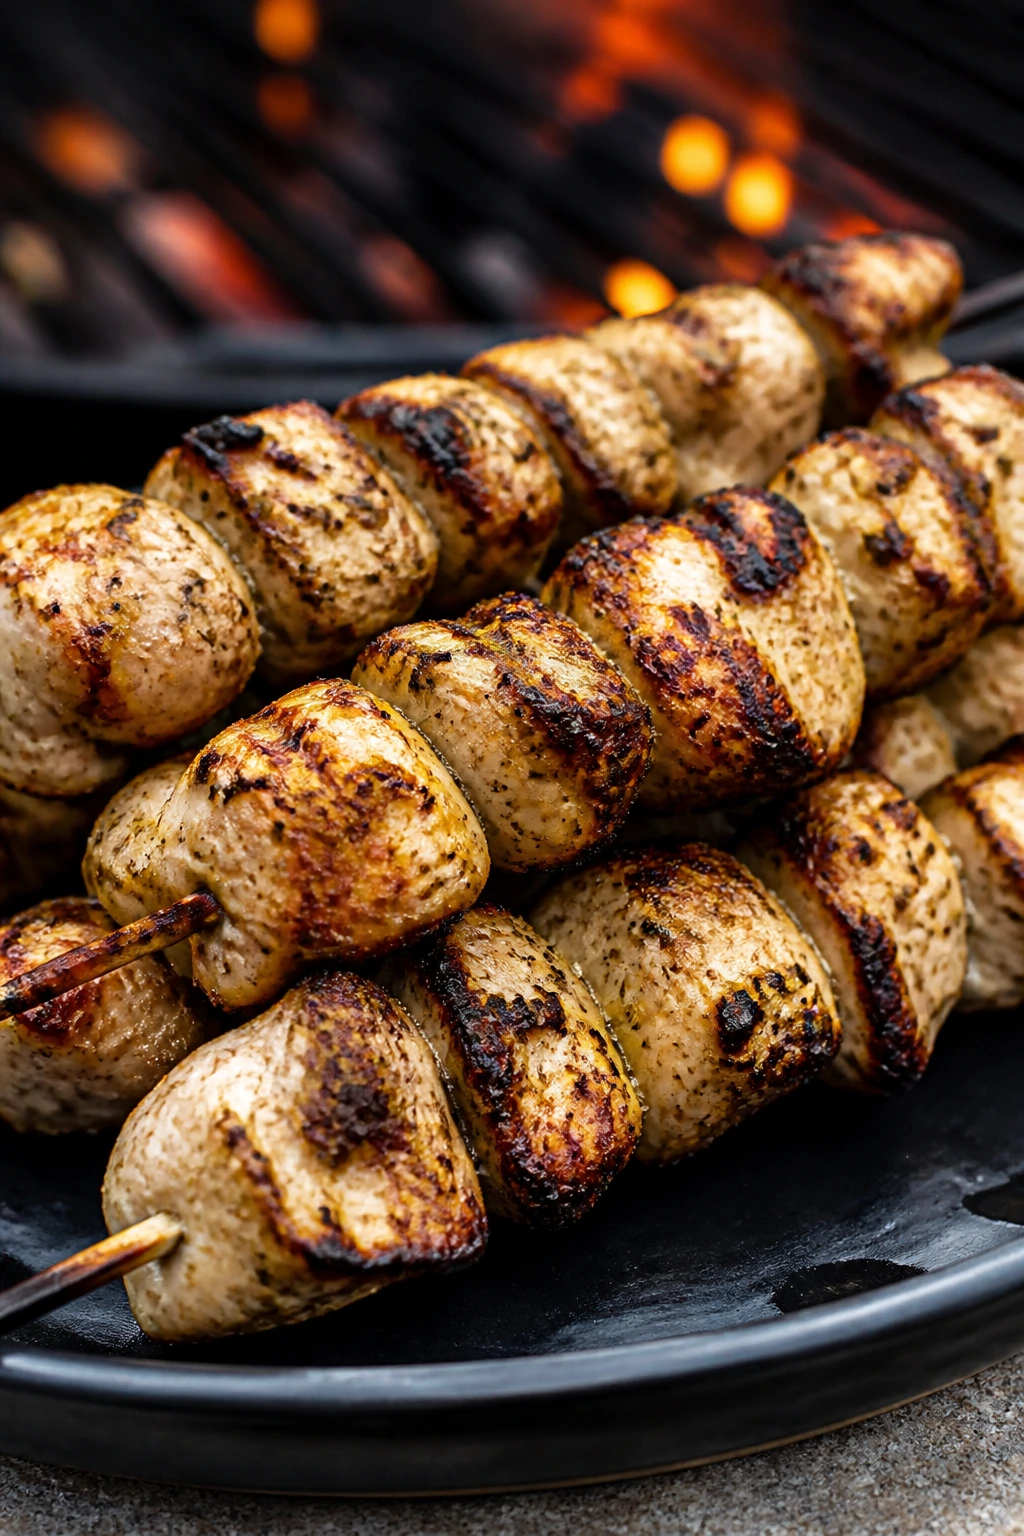
25. Meatball Skewers with Marinara
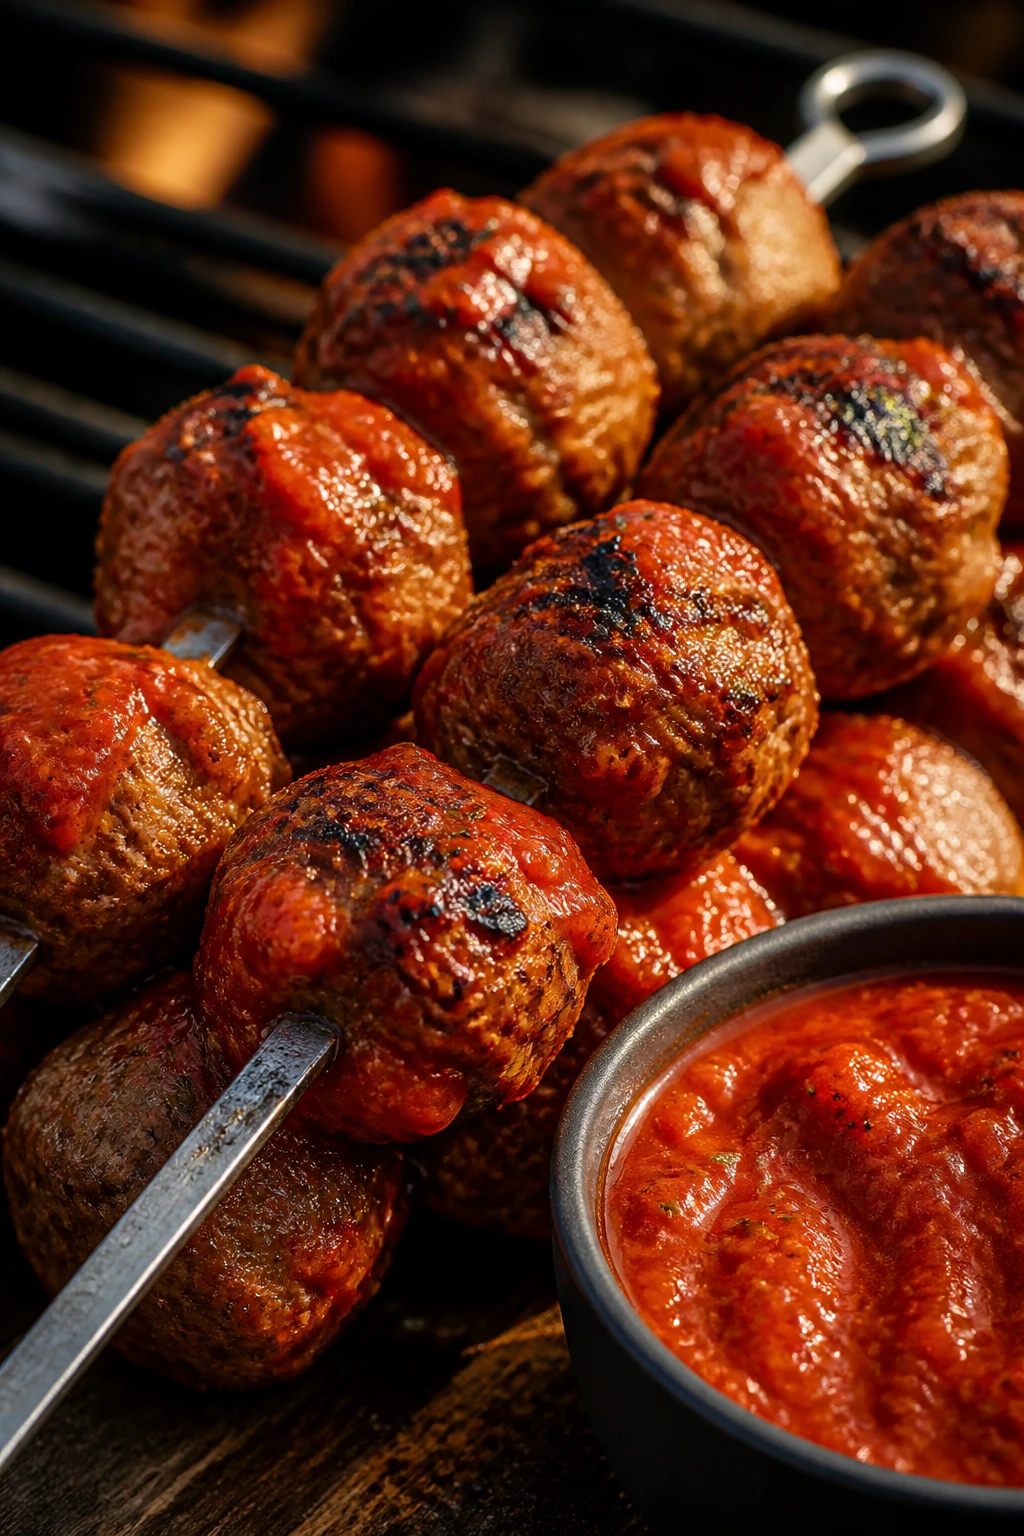
Meatballs on the grill sound a little playful until you taste the char on the outside and the juicy center underneath. Skewering them makes turning easier, and a warm marinara on the side turns the whole thing into a laid-back Italian-style dinner. Add grilled bread, and you’ve got a backyard meal that disappears fast.
Why It Works: Meatballs hold their shape better on skewers than loose on the grate. A mix of beef and sausage gives them enough fat to stay juicy under high heat. Marinara works as a serving sauce, not a grill sauce, so it keeps its tomato brightness. Grilled bread soaks up the juices and makes the plate feel finished.
Key Ingredients:
- 1 lb ground beef
- 1 lb Italian sausage, casings removed
- 1 egg
- 1/2 cup breadcrumbs
- 1/3 cup grated Parmesan
- 2 garlic cloves, minced
- 1 teaspoon kosher salt
- 1/2 teaspoon black pepper
- 2 cups marinara sauce
- 8 skewers, optional soaked if wooden
Quick Steps:
- Mix beef, sausage, egg, breadcrumbs, Parmesan, garlic, salt, and pepper.
- Form into 16 meatballs and thread onto skewers if desired.
- Preheat the grill to medium-high and oil the grates.
- Grill 10 to 12 minutes, turning carefully until browned and cooked to 160°F.
- Warm marinara on the side and serve with grilled bread.
Equipment for This Recipe:
- Grill
- Skewers or grill basket
- Mixing bowl
- Saucepan, if warming sauce separately
How to Serve This Dish: Serve with pasta salad, grilled zucchini, or just more bread than seems polite. A spoonful of marinara on the plate helps keep the meatballs from feeling dry.
Pro Tips for This Recipe:
- Chill the meatballs before grilling so they hold together.
- Keep them roughly the same size.
- Don’t grind them too tightly in your hands; a loose mix stays lighter.
Variations on This Dish:
- Turkey Version: Use ground turkey and add olive oil for moisture.
- Spicy Italian Swap: Use hot sausage.
- Mozzarella Finish: Top with mozzarella in the last minute and cover the grill.
Common Mistakes to Avoid with This Dish:
- Don’t try to turn soft meatballs too early. Wait until the crust sets.
- Don’t let the grill run too cool or they dry out before browning.
26. Grilled BBQ Chicken Pizza
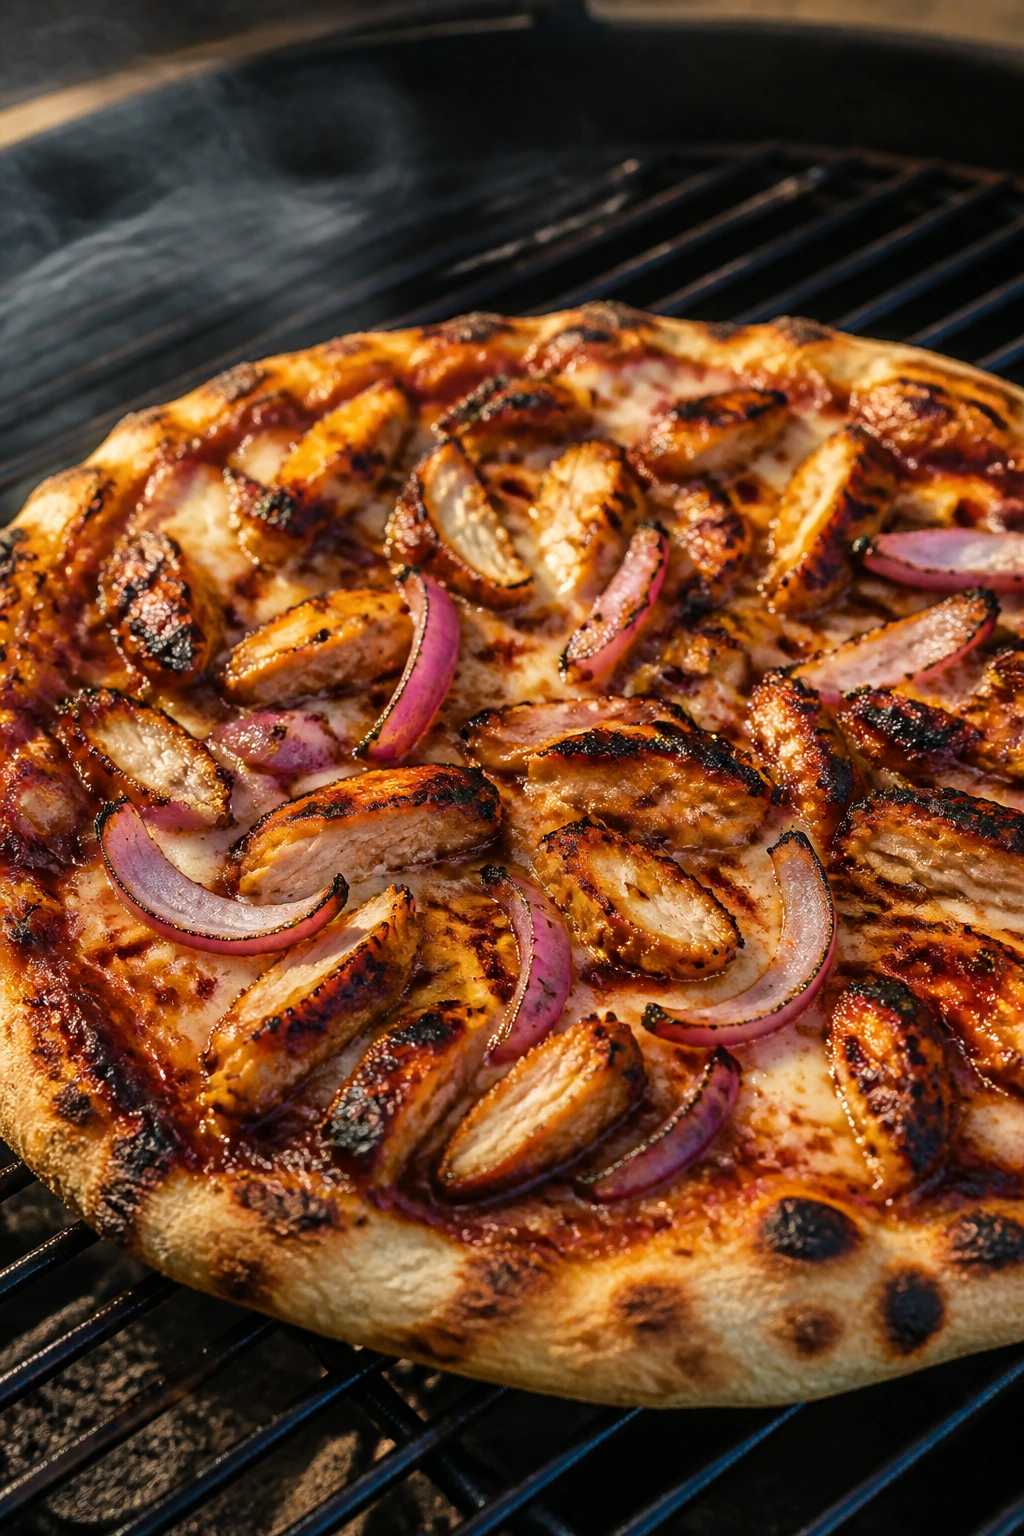
Pizza on the grill gives you a crust with a little blister, a little chew, and the kind of smoky underside that ovens can’t quite duplicate. BBQ sauce, chicken, and red onion make this feel familiar, but the grill turns the flatbread into something more alive. Cilantro at the end keeps it from getting too sweet.
Why It Works: Grilled dough cooks quickly and picks up color directly from the grate. Pre-cooked chicken keeps the pizza safe and simple, while the BBQ sauce acts as the main flavor base. Red onion softens on the grill and adds bite without needing a separate pan. This is one of the best ways to make pizza feel like outdoor cooking instead of indoor food dragged outside.
Key Ingredients:
- 1 lb pizza dough
- 1 1/2 cups cooked shredded chicken
- 3/4 cup BBQ sauce
- 1 1/2 cups shredded mozzarella
- 1/2 red onion, thinly sliced
- 1 tablespoon olive oil
- 1/4 cup chopped cilantro
- Flour or cornmeal for dusting
Quick Steps:
- Stretch the dough and brush one side with olive oil.
- Preheat the grill to medium-high and oil the grates.
- Grill the dough oil-side down for 1 to 2 minutes, then flip.
- Spread BBQ sauce, add chicken, cheese, and onion, then close the grill until the cheese melts and the crust is cooked through, about 4 to 6 minutes.
- Finish with cilantro and slice.
Equipment for This Recipe:
- Grill
- Pizza peel or sheet pan
- Spatula
- Cutting board
How to Serve This Dish: Serve with a crisp salad or sliced watermelon. Cut the pizza while it’s hot, because the cheese sets fast once it leaves the grill.
Pro Tips for This Recipe:
- Keep toppings light or the center gets soggy.
- Have everything ready before the dough hits the grill.
- Use a cooler side if the bottom browns too fast.
Variations on This Dish:
- Buffalo Chicken Swap: Use buffalo sauce instead of BBQ.
- Pulled Pork Version: Replace chicken with shredded pork.
- Veggie BBQ Pizza: Use grilled corn and peppers instead of meat.
Common Mistakes to Avoid with This Dish:
- Don’t overload the pizza with sauce. Less is better here.
- Don’t walk away from the grill; the dough can go from pale to burned fast.
27. Sesame Tuna Steaks
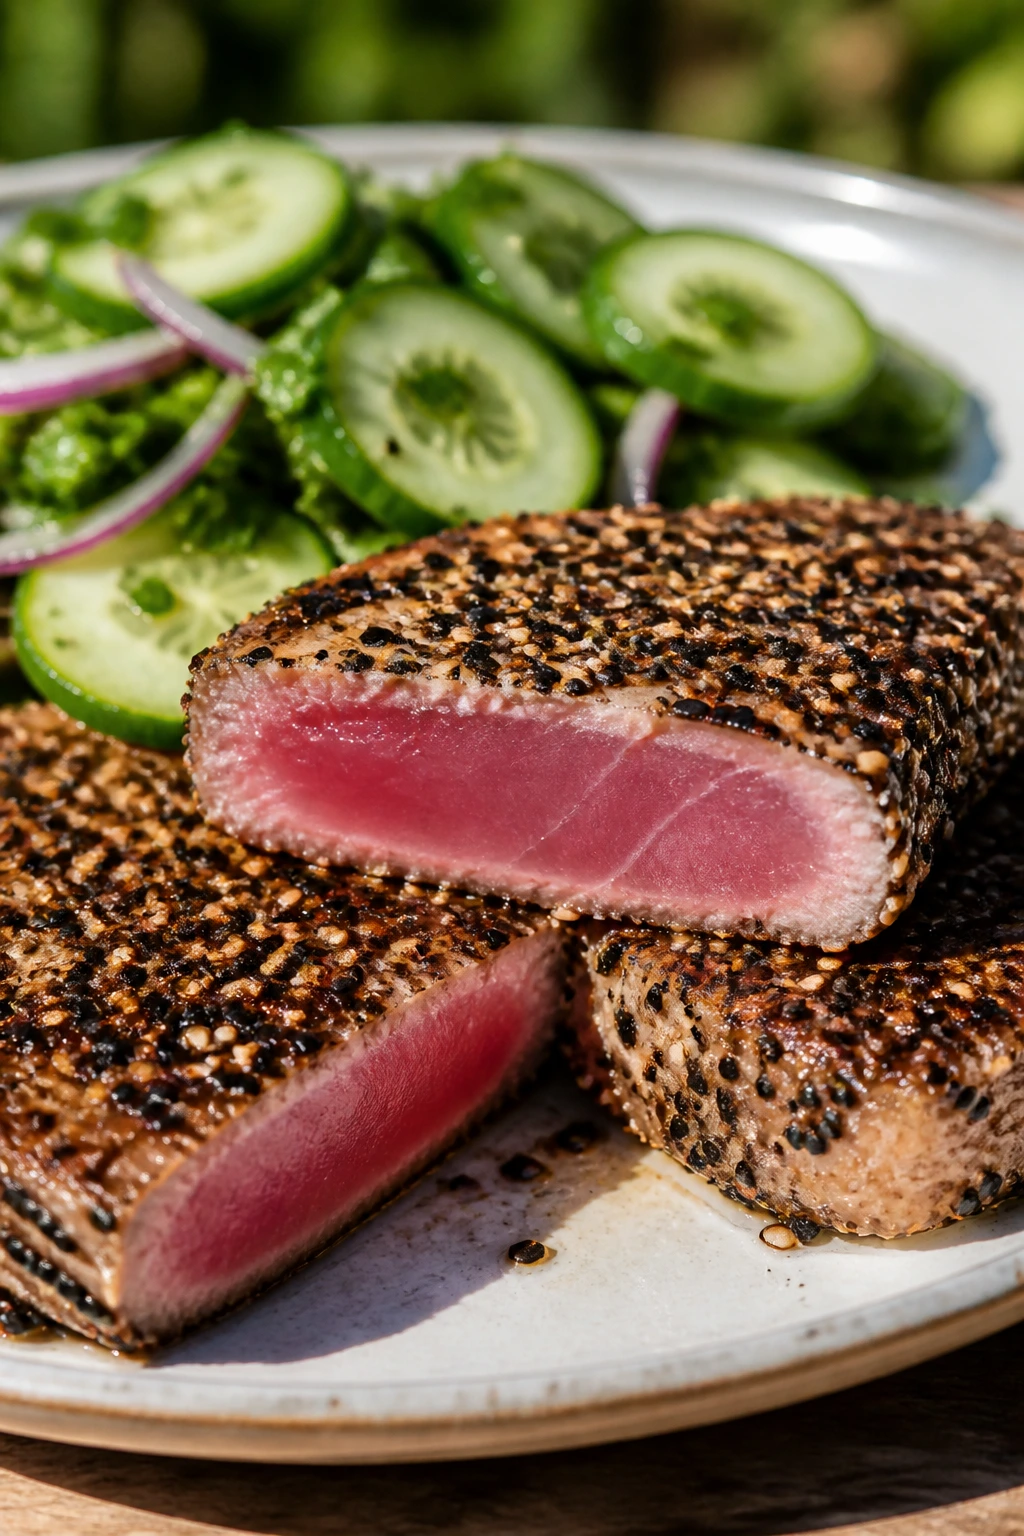
Tuna steaks deserve fire, not a long nap in a pan. The outside gets just enough char to sharpen the sesame-soy crust, while the center stays cool and rosy. Paired with a cucumber salad, this feels like the cleanest dinner in the pile.
Why It Works: Tuna cooks fast enough to stay tender in the middle, which is part of why grilling suits it so well. Soy sauce, sesame oil, and ginger give the exterior a savory layer that behaves almost like a marinade and a glaze at once. Because tuna dries out if you overdo it, a short grill time and hot grate are non-negotiable. The cucumber salad balances the richness and keeps the plate crisp.
Key Ingredients:
- 4 tuna steaks, about 6 oz each
- 2 tablespoons soy sauce
- 1 tablespoon sesame oil
- 1 tablespoon rice vinegar
- 1 teaspoon grated ginger
- 1 tablespoon sesame seeds
- 1 cucumber, sliced
- 2 scallions, sliced
- Salt and black pepper to taste
Quick Steps:
- Whisk soy sauce, sesame oil, rice vinegar, and ginger.
- Coat tuna steaks and rest 10 to 15 minutes.
- Preheat the grill to high and oil the grates well.
- Grill tuna 1 1/2 to 2 minutes per side for rare to medium-rare.
- Rest briefly, slice, and top with sesame seeds and scallions.
Equipment for This Recipe:
- Grill
- Tongs or fish spatula
- Small bowl
- Sharp knife
How to Serve This Dish: Serve with rice, cucumber salad, or soba noodles. Slicing the tuna before plating makes the seared edge show off the rosy center.
Pro Tips for This Recipe:
- Buy tuna meant for searing, not canned tuna.
- Oil the fish lightly as well as the grates.
- Pull it early; tuna tastes best before it turns gray in the middle.
Variations on This Dish:
- Spicy Sesame Swap: Add chili oil to the marinade.
- Wasabi Version: Mix a little wasabi into mayonnaise for serving.
- Citrus Finish: Squeeze lime over the sliced tuna.
Common Mistakes to Avoid with This Dish:
- Don’t cook tuna past medium unless you prefer it firm and dry.
- Don’t forget a very hot grate; a lukewarm grill won’t sear it properly.
28. Chicken Kabobs with Tzatziki
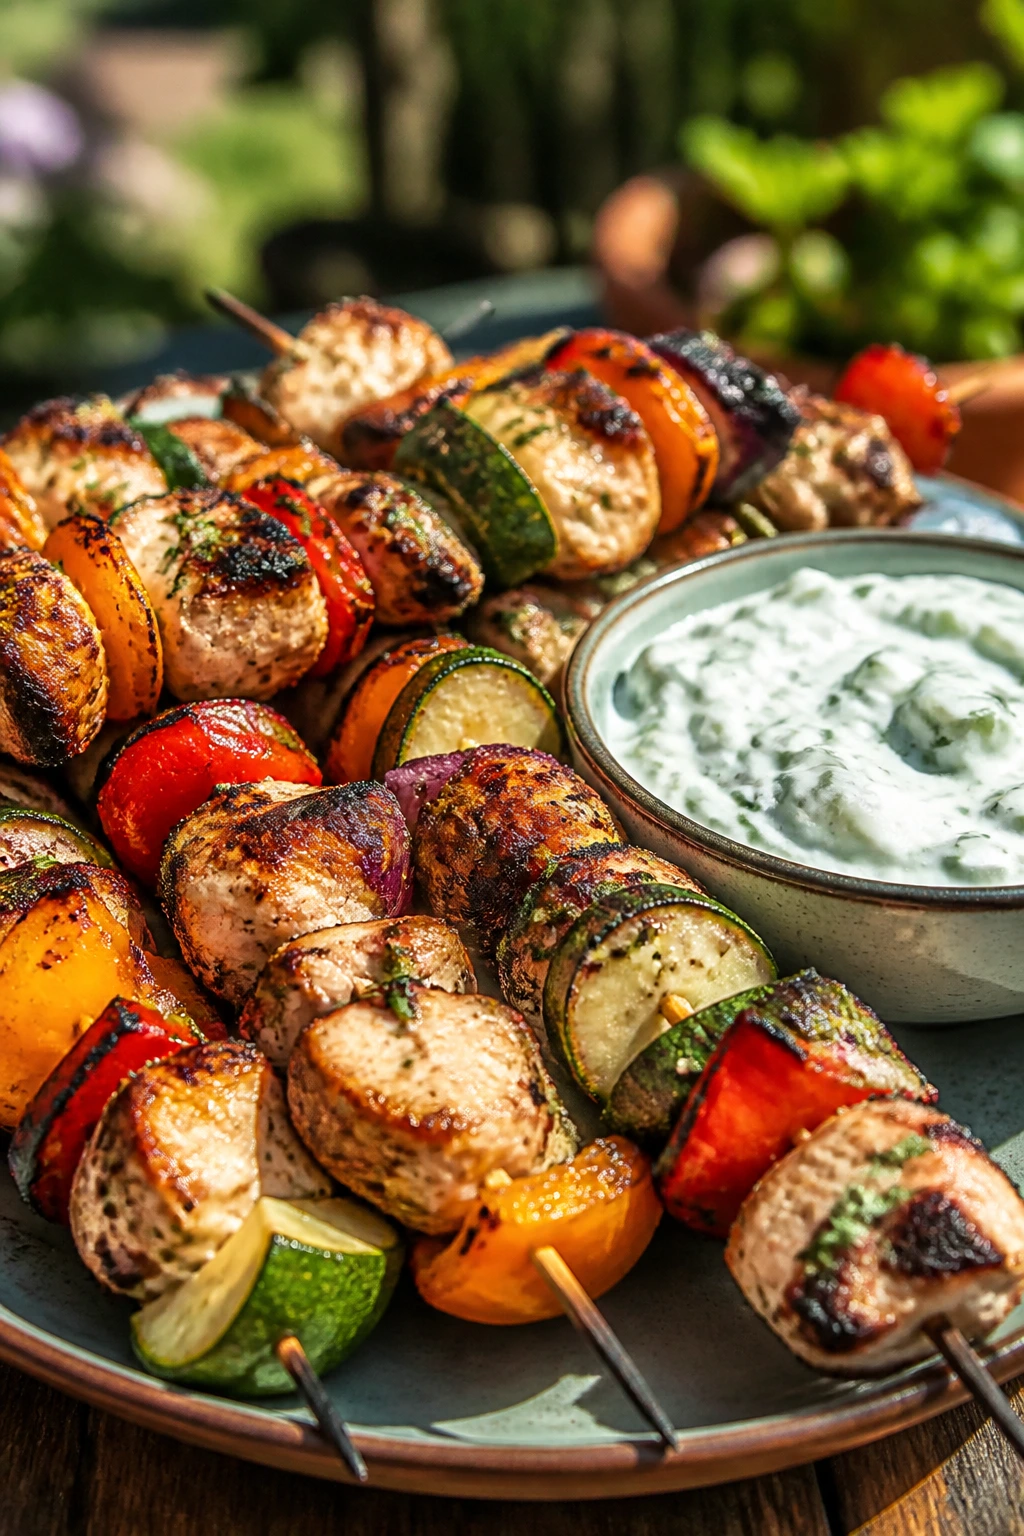
Kabobs are busy in the best way. Chicken, peppers, onion, and zucchini all brown at the edges while a cold tzatziki sauce waits on the side to cool things down. The mix of hot and cold makes every bite more interesting than a standard grilled chicken breast.
Why It Works: Cubed chicken grills evenly when the pieces are the same size. A yogurt-lemon marinade gives the meat tenderness and a little tang. The vegetables can take the same heat if you cut them thick enough. Tzatziki provides the creamy contrast that keeps the kabobs from feeling dry.
Key Ingredients:
- 2 lbs boneless chicken thighs, cut into cubes
- 1/2 cup plain yogurt
- 2 tablespoons lemon juice
- 2 tablespoons olive oil
- 3 garlic cloves, minced
- 1 teaspoon dried oregano
- 1 teaspoon kosher salt
- 1 zucchini, thickly sliced
- 1 red bell pepper, chunked
- 1 cup tzatziki sauce
Quick Steps:
- Mix yogurt, lemon juice, oil, garlic, oregano, and salt; coat the chicken for 1 to 4 hours.
- Thread chicken, zucchini, and pepper onto skewers.
- Preheat the grill to medium-high and oil the grates.
- Grill for 10 to 12 minutes, turning until the chicken reaches 165°F and the vegetables char lightly.
- Serve with tzatziki.
Equipment for This Recipe:
- Skewers
- Grill
- Tongs
- Mixing bowl
How to Serve This Dish: Serve with warm pita, rice, or a tomato-cucumber salad. Tzatziki should be thick and cold so it can be spooned on or dipped beside the kabobs.
Pro Tips for This Recipe:
- Don’t cut the chicken too small or it dries out.
- Keep similar ingredients together on each skewer for even cooking.
- Add the zucchini pieces last if your grill has hot spots.
Variations on This Dish:
- Lemon-Dill Version: Add dill to the marinade and tzatziki.
- Spicy Version: Add red pepper flakes to the yogurt.
- Pork Kabob Swap: Use pork tenderloin cubes instead of chicken.
Common Mistakes to Avoid with This Dish:
- Don’t jam the pieces too tightly together.
- Don’t overcook the vegetables; they should still have a little structure.
29. Elote-Style Chicken Tacos
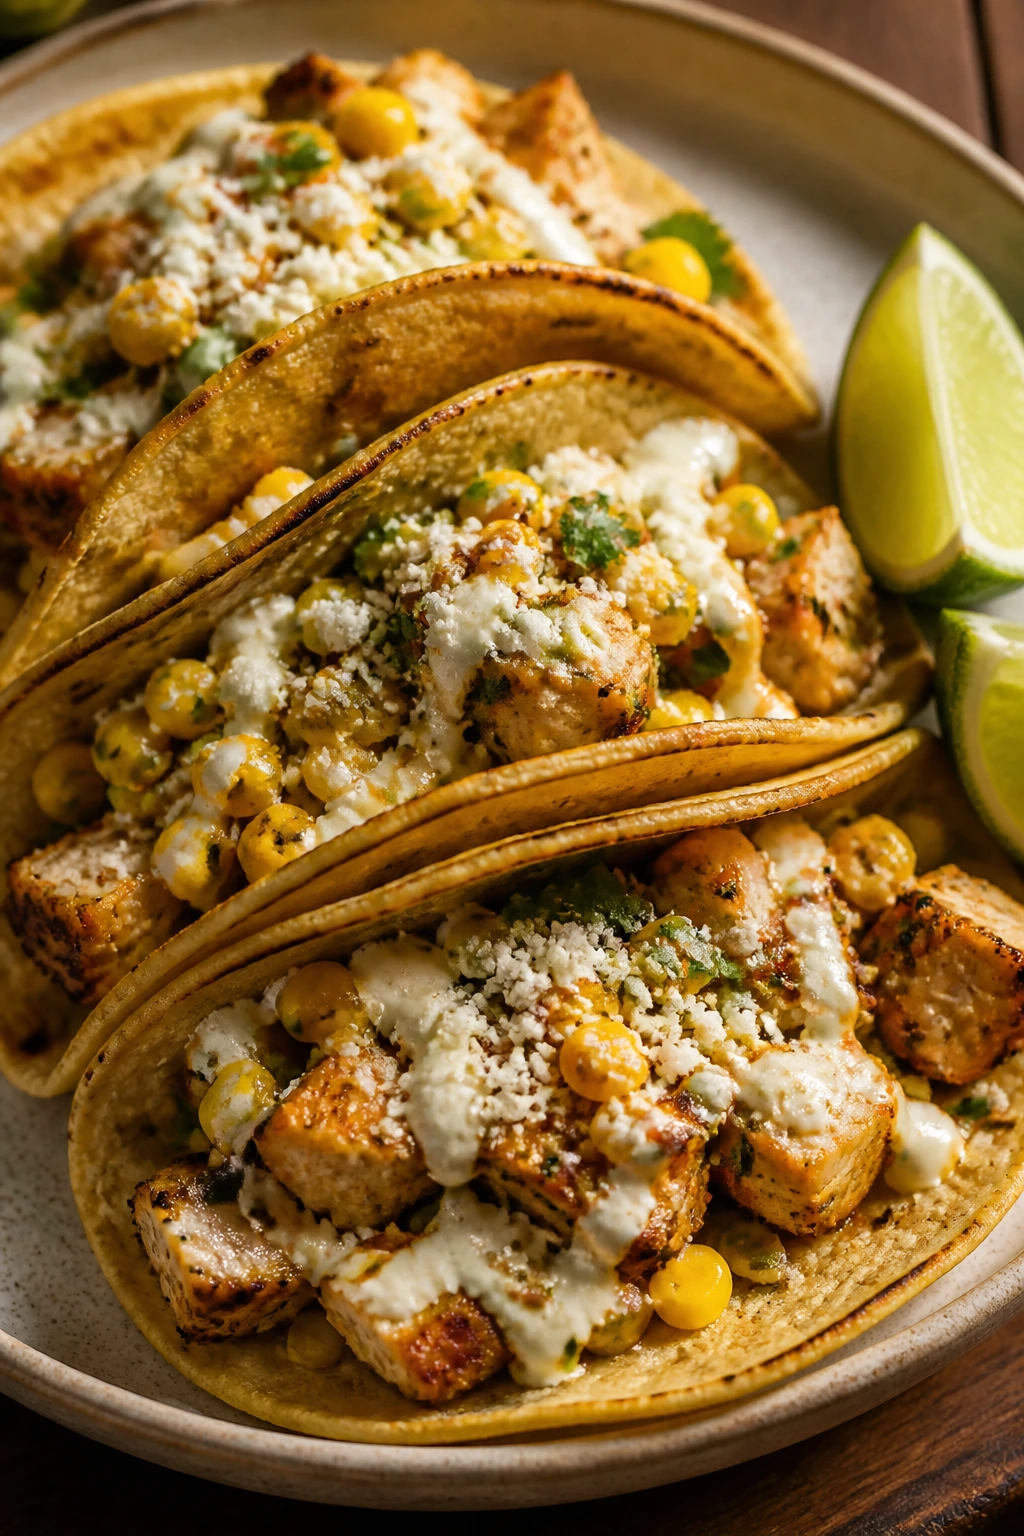
These tacos borrow from Mexican street corn and turn it into dinner. Grilled chicken, charred corn, cotija, lime, and a little creamy sauce give you all the sweet-smoky-salty things in one bite. I like that the corn becomes part of the taco instead of sitting next to it on the plate like an afterthought.
Why It Works: Chicken thighs keep the tacos juicy, and the corn gains sweetness once it picks up grill marks. A chili-lime rub ties the chicken and corn together, so the plate tastes like one idea instead of two separate recipes. Cotija gives you the salty crumble that sharpens the whole thing. It’s a taco with a lot of payoff for a manageable amount of work.
Key Ingredients:
- 2 lbs boneless chicken thighs
- 2 tablespoons olive oil
- 1 tablespoon chili powder
- 1 teaspoon kosher salt
- 2 ears corn
- 8 small tortillas
- 1/2 cup mayonnaise or crema
- 1/3 cup cotija cheese
- 1 lime, cut into wedges
- 2 tablespoons chopped cilantro
Quick Steps:
- Rub chicken with oil, chili powder, and salt.
- Grill corn over medium-high heat until charred, about 8 to 10 minutes.
- Grill chicken 5 to 6 minutes per side until it reaches 165°F.
- Cut kernels off the corn and toss with mayonnaise, cotija, cilantro, and lime.
- Warm tortillas and fill with sliced chicken and the elote-style corn mixture.
Equipment for This Recipe:
- Grill
- Tongs
- Knife
- Mixing bowl
How to Serve This Dish: Serve with black beans or sliced avocado. The corn mixture should be spooned on last so it stays chunky and bright.
Pro Tips for This Recipe:
- Grill the corn whole first, then cut the kernels off.
- If you want cleaner tacos, slice the chicken before serving.
- Use thighs for better moisture and more forgiving grilling.
Variations on This Dish:
- Grilled Corn Salad Bowl: Serve the same mixture over rice.
- Spicy Street Corn Version: Add hot sauce or diced jalapeño.
- Lettuce Cup Swap: Use butter lettuce instead of tortillas.
Common Mistakes to Avoid with This Dish:
- Don’t use too much mayonnaise in the corn; it should cling, not drip.
- Don’t leave the corn undercooked. Some char is good, raw kernels are not.
30. Baby Back Ribs on the Grill
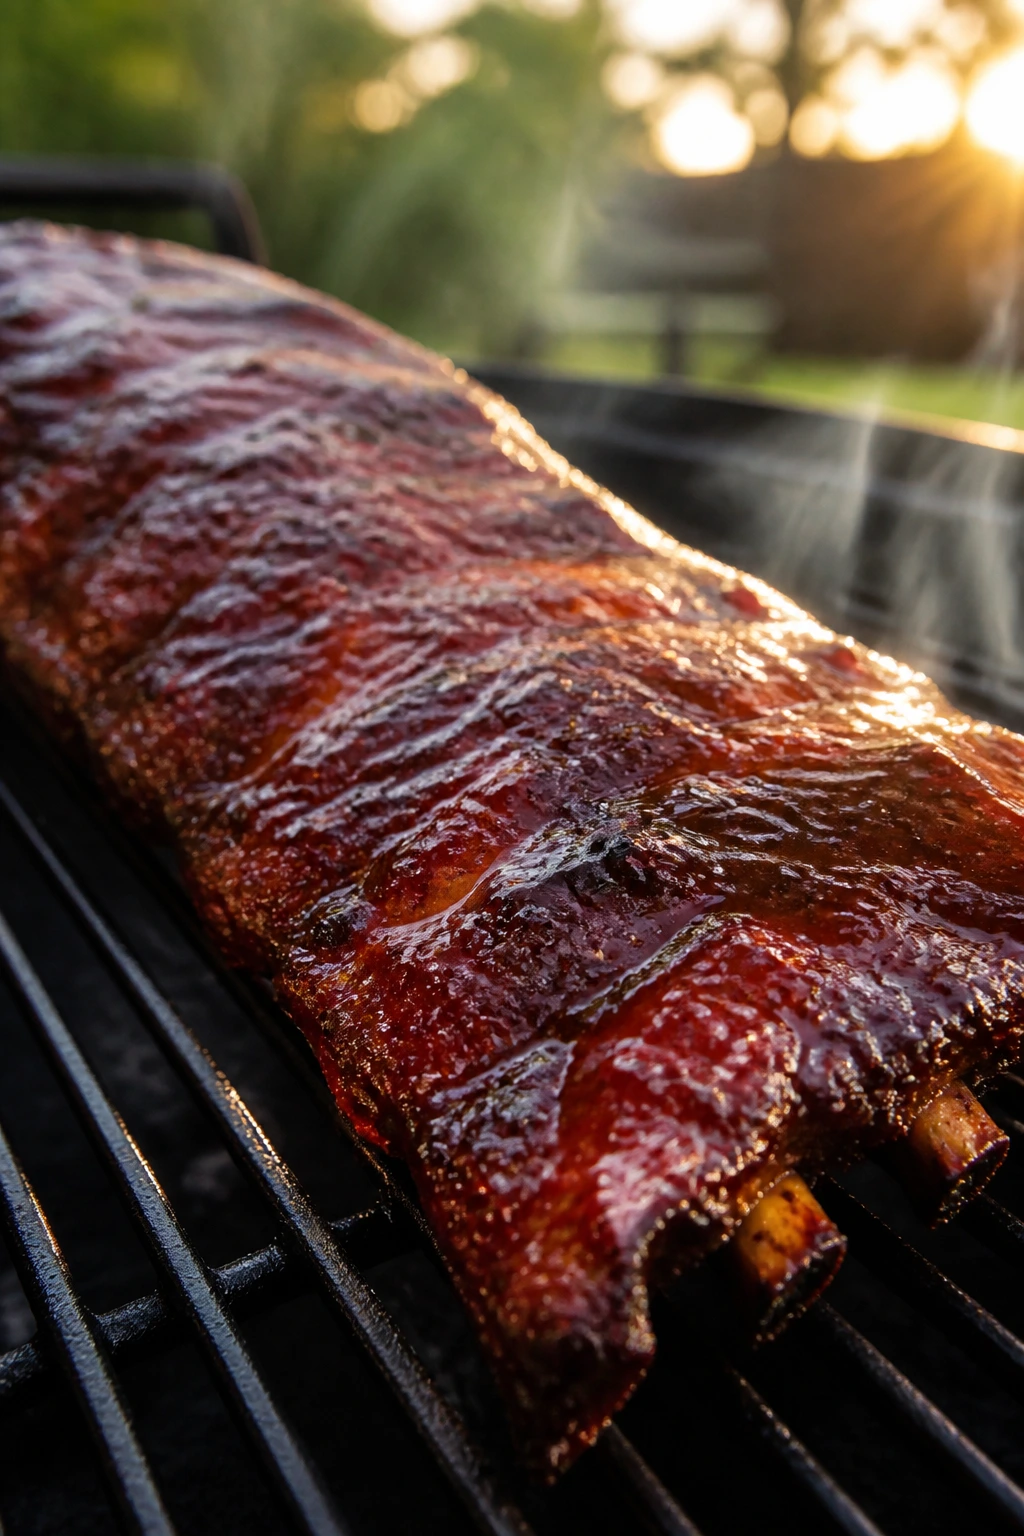
Ribs are the slowest recipe in this stack, and that’s exactly why they matter. The grill gives you smoke, bark, and sticky sauce without needing a smoker the size of a car. When the meat pulls back from the bone and the surface darkens into a lacquered crust, you’ve earned the plate.
Why It Works: Baby back ribs need low, steady heat so the collagen can soften before the surface burns. The grill can mimic a smoker if you keep one zone cooler and add a little moisture. A dry rub builds flavor first; sauce comes later to avoid scorching. This is one of those recipes where patience changes the texture more than any fancy ingredient does.
Key Ingredients:
- 2 racks baby back ribs
- 2 tablespoons yellow mustard
- 3 tablespoons brown sugar
- 2 tablespoons paprika
- 1 tablespoon garlic powder
- 1 tablespoon kosher salt
- 1 teaspoon black pepper
- 1 cup barbecue sauce
- 1 cup apple juice, for moisture
Quick Steps:
- Remove the membrane from the ribs and coat with mustard.
- Mix brown sugar, paprika, garlic powder, salt, and pepper, then rub over the ribs.
- Preheat the grill to low heat, around 275°F, with indirect heat.
- Grill ribs for 2 1/2 to 3 hours, wrapping loosely in foil with a splash of apple juice if they dry too quickly.
- Brush with barbecue sauce in the final 20 to 30 minutes, then rest before slicing.
Equipment for This Recipe:
- Grill with lid
- Heavy-duty foil
- Basting brush
- Tongs
How to Serve This Dish: Serve with slaw, baked beans, or grilled corn. Keep napkins nearby. Plenty of them.
Pro Tips for This Recipe:
- Don’t rush the temperature. Ribs need that low heat.
- The meat should bend easily when lifted with tongs.
- Sauce late so the sugars don’t burn.
Variations on This Dish:
- Dry-Rub Ribs: Skip the sauce and serve with vinegar on the side.
- Hot Honey Finish: Brush with hot honey in the last 10 minutes.
- Mustard Sauce Version: Use Carolina-style mustard sauce instead.
Common Mistakes to Avoid with This Dish:
- Don’t grill ribs over direct heat the whole time.
- Don’t cut them too soon; the juices need a minute to settle.
31. Turkey Burgers with Avocado and Pickled Onions
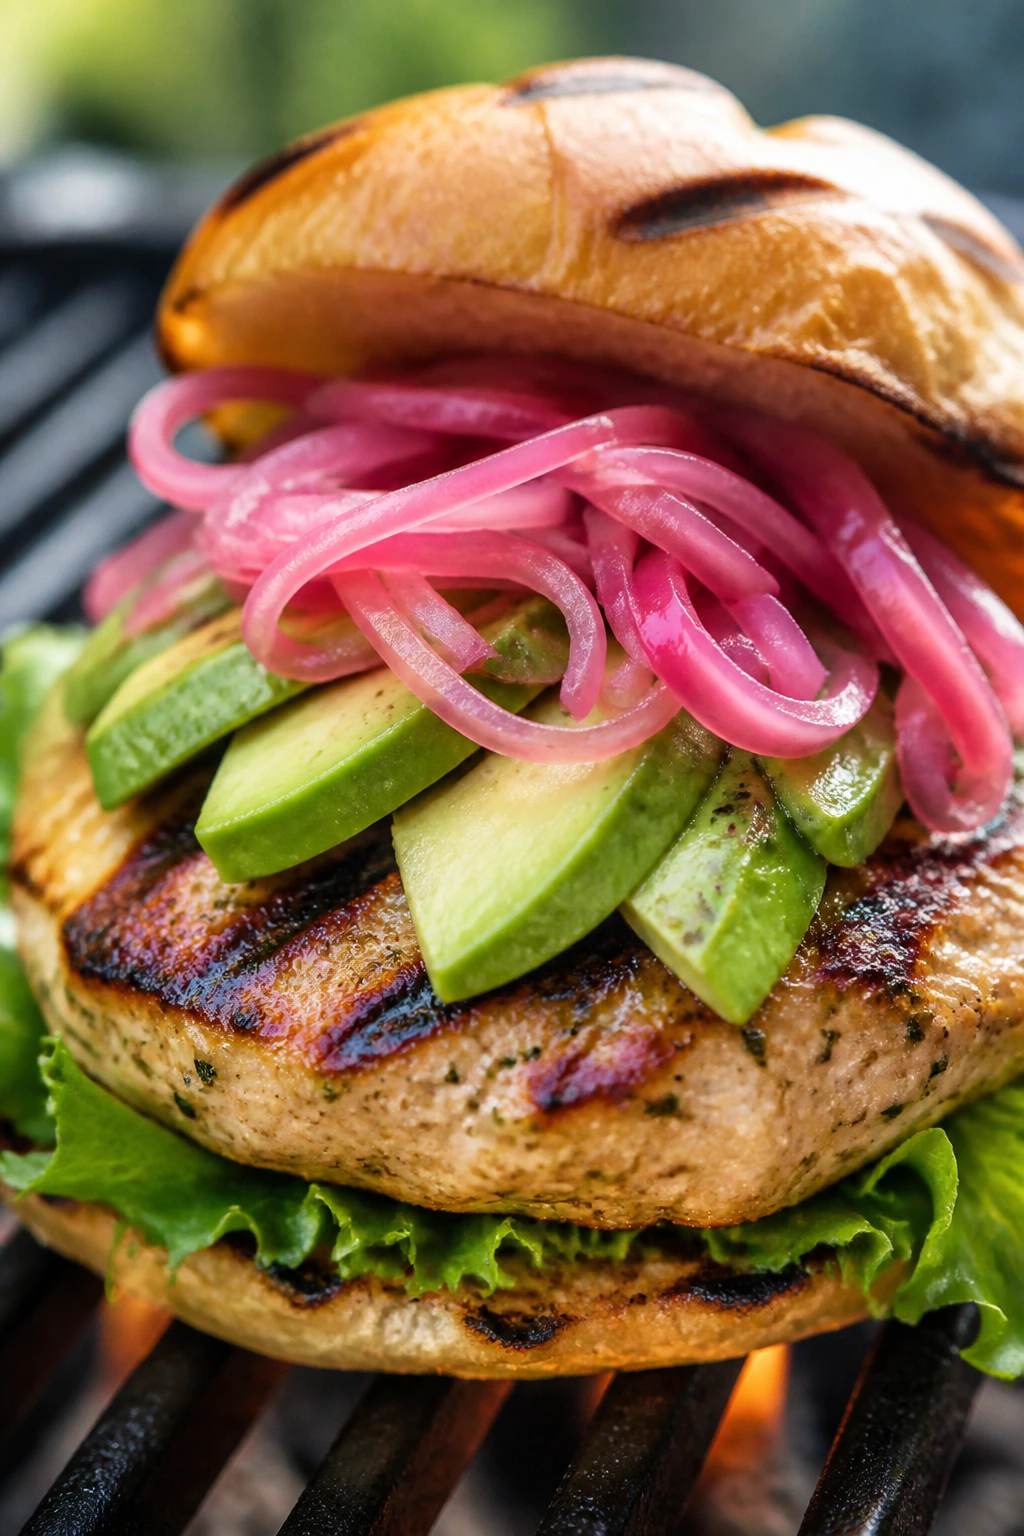
Turkey burgers can be dry and bland if you treat them like chicken breasts in a burger shape. The fix is simple: some onion, some fat, and enough seasoning to make them taste like dinner instead of a compromise. Avocado and pickled onions add the richness and tang that turkey needs.
Why It Works: Ground turkey benefits from binders and moisture because it’s leaner than beef. Onion and breadcrumbs help the patties hold together while also giving them a little more body. Pickled onions keep the burger from tasting flat, and avocado brings back the softness turkey sometimes loses on the grill. This is a burger that respects the grill and still eats clean.
Key Ingredients:
- 2 lbs ground turkey
- 1/2 cup finely grated onion
- 1/3 cup breadcrumbs
- 1 egg
- 1 teaspoon kosher salt
- 1/2 teaspoon black pepper
- 4 burger buns
- 1 avocado, sliced
- 1/2 cup pickled onions
- Lettuce leaves, optional
Quick Steps:
- Mix turkey, onion, breadcrumbs, egg, salt, and pepper.
- Form 4 patties and chill 15 minutes.
- Preheat the grill to medium and oil the grates.
- Grill 5 to 6 minutes per side until the burgers reach 165°F.
- Rest briefly and serve on buns with avocado and pickled onions.
Equipment for This Recipe:
- Grill
- Mixing bowl
- Spatula
- Thermometer
How to Serve This Dish: Serve with sweet potato wedges or a tomato salad. A little mustard or mayo under the avocado helps hold everything together.
Pro Tips for This Recipe:
- Don’t make the patties too thick; turkey needs even heat.
- Chill them so they set before grilling.
- Handle the mix gently or the burgers turn dense.
Variations on This Dish:
- Southwest Version: Add cumin and chopped jalapeño.
- Mushroom Swap: Mix in finely chopped sautéed mushrooms.
- Lettuce Wrap Option: Skip the bun and use lettuce.
Common Mistakes to Avoid with This Dish:
- Don’t underseason turkey. It needs help.
- Don’t stop at medium; ground turkey needs to reach 165°F.
32. Grilled Cauliflower Steaks with White Bean Salsa
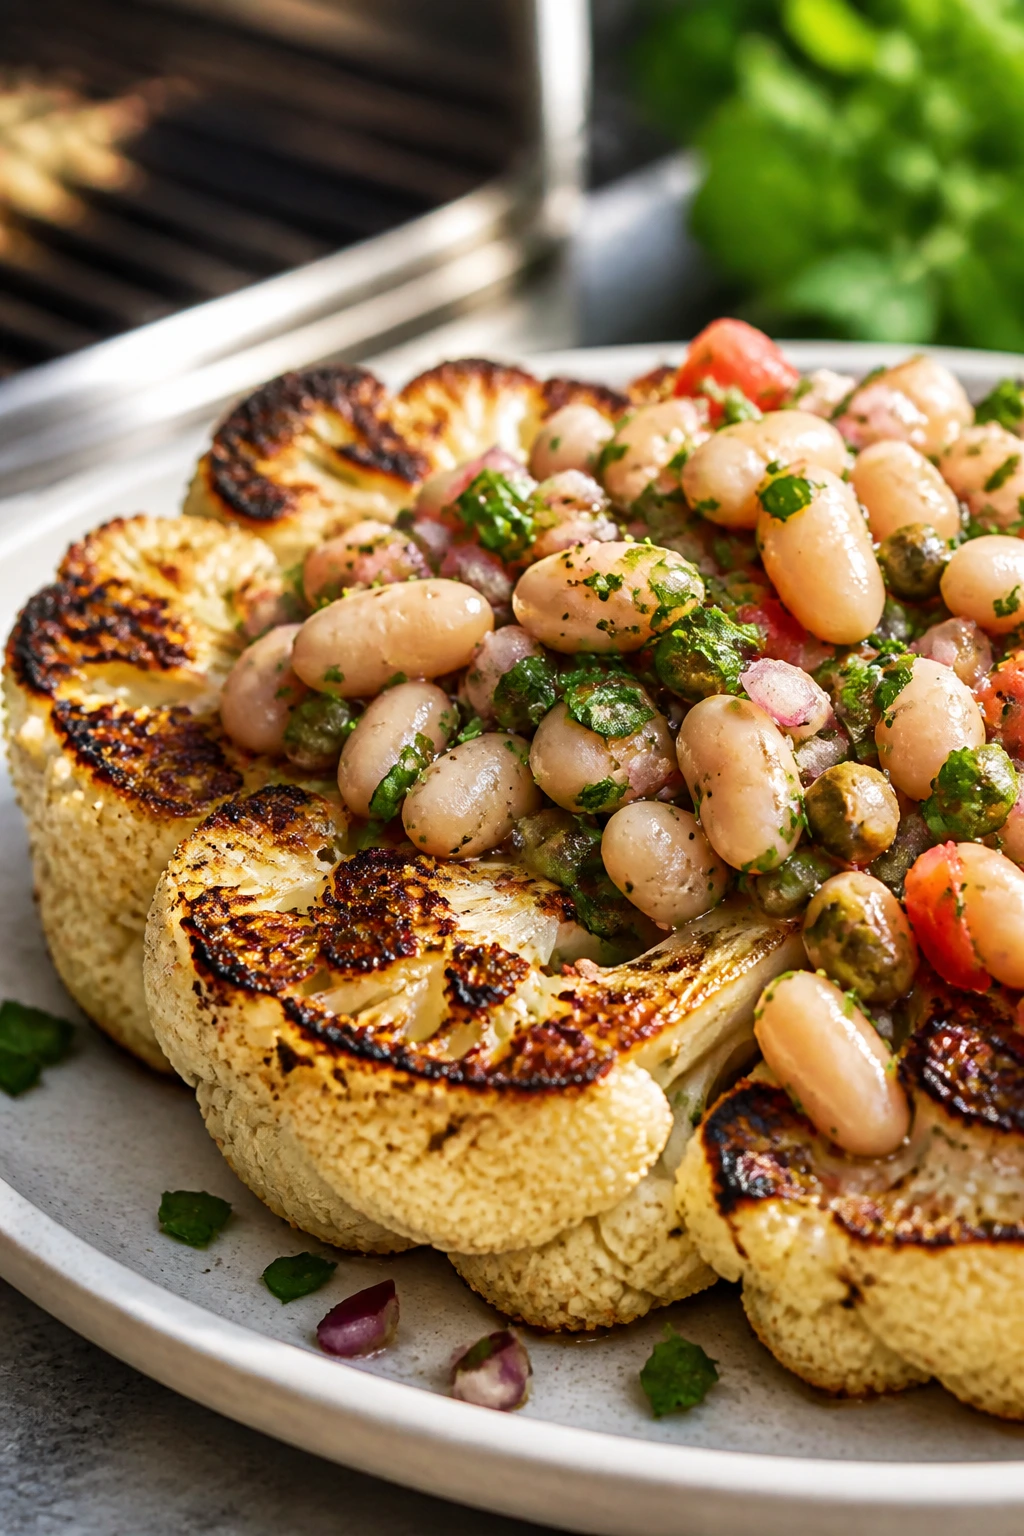
Cauliflower steaks are one of those dishes that sound like a compromise until you actually grill them. The edges brown, the centers soften, and the white bean salsa gives you enough heft to make the plate feel complete. It’s vegetarian, but not timid.
Why It Works: Thick cauliflower slices hold together better on the grill than florets tossed in a basket. Olive oil and smoked paprika help them brown and taste deeper than steamed cauliflower ever could. White beans bring protein and creaminess, while lemon keeps the whole thing from feeling soft and beige. This is one of the better examples of how vegetables can carry a meal when treated properly.
Key Ingredients:
- 1 large head cauliflower, cut into 4 thick steaks
- 3 tablespoons olive oil
- 1 teaspoon smoked paprika
- 1 teaspoon kosher salt
- 1 can white beans, drained and rinsed
- 2 tablespoons lemon juice
- 2 tablespoons chopped parsley
- 1 tablespoon capers, chopped
- 1 garlic clove, minced
Quick Steps:
- Brush cauliflower with oil and season with paprika and salt.
- Mix beans, lemon juice, parsley, capers, and garlic.
- Preheat the grill to medium-high and oil the grates.
- Grill cauliflower 4 to 5 minutes per side until browned and tender.
- Spoon white bean salsa over the steaks and serve hot.
Equipment for This Recipe:
- Grill
- Spatula or wide tongs
- Cutting board
- Mixing bowl
How to Serve This Dish: Serve with pita, rice, or grilled halloumi if you want more substance. The bean salsa should sit on top so the juices soak into the cauliflower.
Pro Tips for This Recipe:
- Leave the stem intact so the steaks hold together.
- Use the outer slices for florets if one or two break apart.
- Don’t underoil the surface or the cauliflower will stick.
Variations on This Dish:
- Tahini Version: Drizzle with tahini and lemon instead of bean salsa.
- Spicy Bean Swap: Add red pepper flakes and chopped chile.
- Roasted Pepper Finish: Stir chopped roasted red peppers into the salsa.
Common Mistakes to Avoid with This Dish:
- Don’t cut the steaks too thin.
- Don’t overcook until mushy; they should stay sliceable.
33. Mahi Mahi with Mango Salsa
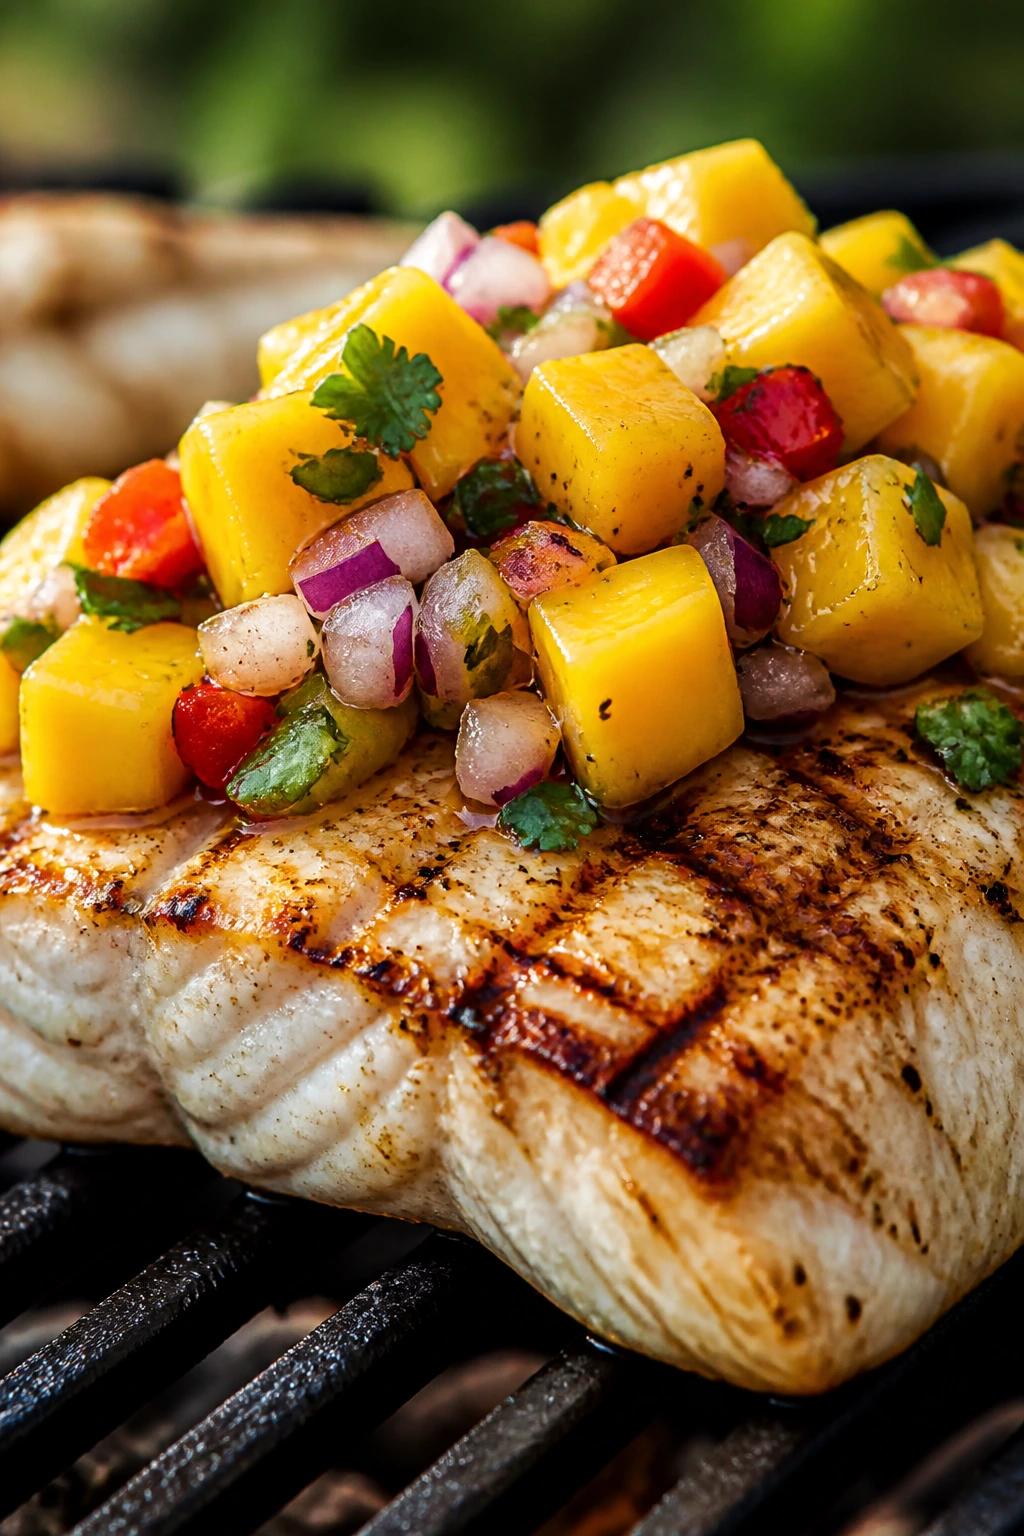
Mahi mahi is mild enough to let salsa do some of the talking, but still firm enough to hold up on the grill. Mango, jalapeño, and lime give it a sweet-hot snap that feels made for warm weather. The fish gets a light crust, the salsa stays fresh, and nothing on the plate feels heavy.
Why It Works: Mahi mahi has a dense texture that works well over direct heat. A simple seasoning rub keeps the fish clean and lets the mango salsa carry the bright notes. Because the fillets cook fast, you want the salsa ready before the fish comes off the grill. The contrast between hot fish and cool fruit is the whole point.
Key Ingredients:
- 4 mahi mahi fillets, about 6 oz each
- 2 tablespoons olive oil
- 1 teaspoon kosher salt
- 1/2 teaspoon black pepper
- 1 ripe mango, diced
- 1/4 red onion, minced
- 1 jalapeño, minced
- 2 tablespoons cilantro, chopped
- 1 tablespoon lime juice
Quick Steps:
- Mix mango, onion, jalapeño, cilantro, and lime for the salsa.
- Brush the fish with oil and season with salt and pepper.
- Preheat the grill to medium-high and oil the grates.
- Grill mahi mahi for 3 to 4 minutes per side until it flakes and reaches 145°F.
- Top with mango salsa and serve immediately.
Equipment for This Recipe:
- Grill
- Fish spatula
- Mixing bowl
- Thermometer
How to Serve This Dish: Serve with rice, grilled zucchini, or tortillas for fish tacos. A little extra lime over the salsa keeps the fruit from tasting too sweet.
Pro Tips for This Recipe:
- Choose fillets that are thick enough to flip cleanly.
- Let the fish rest a minute before topping with salsa.
- Oil the grates well so the fish skin or surface doesn’t tear.
Variations on This Dish:
- Pineapple Salsa Swap: Use pineapple instead of mango.
- Coconut Rice Plate: Serve over coconut rice for a fuller meal.
- Chili-Lime Version: Add chili powder to the fish seasoning.
Common Mistakes to Avoid with This Dish:
- Don’t cook mahi mahi until it flakes apart and turns dry.
- Don’t build the salsa too early if the mango is very ripe; stir it right before serving.
34. Steak and Tomato Salad
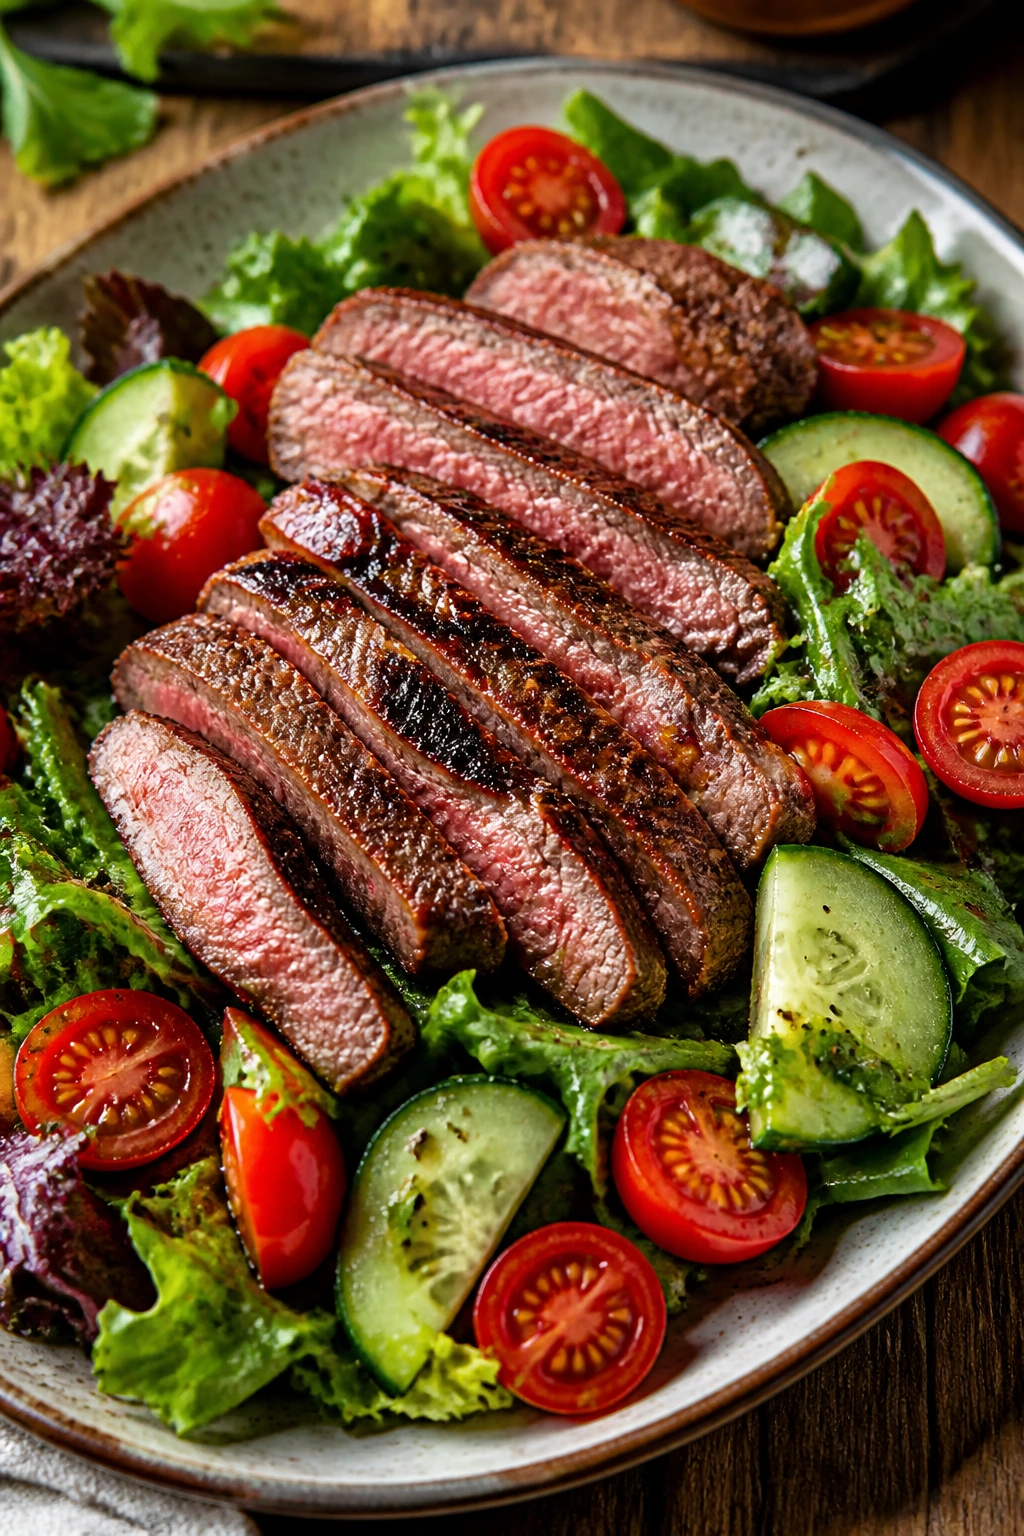
A salad gets taken seriously the moment a grilled steak lands on top of it. The tomatoes, cucumbers, and greens pick up the juices, and the steak brings enough substance that you do not need bread unless you want it. The dressing ties everything together without masking the smoke.
Why It Works: Grilled steak adds richness and warmth to crisp vegetables, which is what makes the salad feel complete. Tomatoes and cucumbers bring juice and crunch, while a sharp vinaigrette keeps the plate from getting flat. The key is slicing the steak thin and arranging it while still warm so the salad benefits from the juices. It’s a lighter dinner that still behaves like dinner.
Key Ingredients:
- 1 1/2 lbs strip steak or flank steak
- 2 tablespoons olive oil
- 1 teaspoon kosher salt
- 1/2 teaspoon black pepper
- 4 cups mixed greens
- 2 cups cherry tomatoes, halved
- 1 cucumber, sliced
- 1 shallot, thinly sliced
- 3 tablespoons red wine vinegar
- 4 tablespoons olive oil for dressing
Quick Steps:
- Season the steak with oil, salt, and pepper.
- Preheat the grill to high and oil the grates.
- Grill steak to 130°F to 135°F for medium-rare, then rest 10 minutes.
- Whisk red wine vinegar with olive oil and shallot.
- Toss greens, tomatoes, and cucumber with dressing, then top with sliced steak.
Equipment for This Recipe:
- Grill
- Sharp knife
- Large bowl
- Whisk
How to Serve This Dish: Serve with grilled bread or roasted potatoes if you want more bulk. The steak should sit on top in broad slices so the salad looks deliberate, not thrown together.
Pro Tips for This Recipe:
- Don’t dress the greens too early.
- Let the steak rest fully before slicing.
- Use ripe tomatoes; this salad depends on them.
Variations on This Dish:
- Blue Cheese Version: Add crumbles and a few walnuts.
- Herb Salad Swap: Add basil or mint to the greens.
- Warm Potato Salad Plate: Serve the steak over grilled potato coins.
Common Mistakes to Avoid with This Dish:
- Don’t slice the steak thick. Thin slices are kinder here.
- Don’t drown the salad in dressing. It should glisten, not swim.
35. Pork Chops with Herb Butter
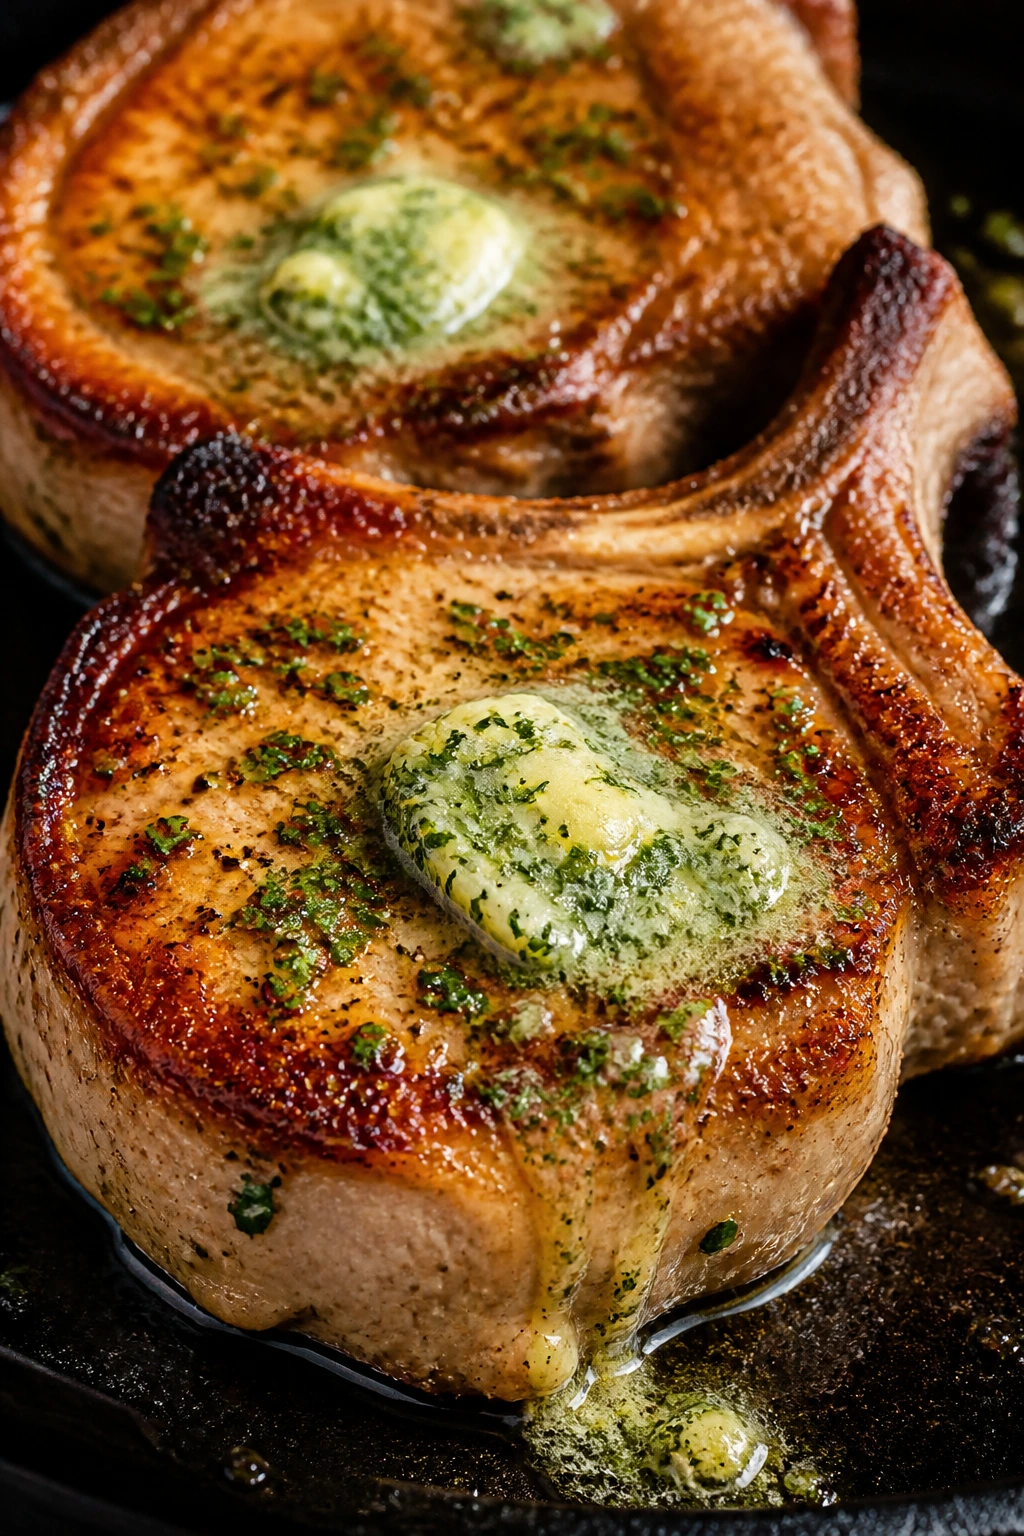
Pork chops and herb butter are a classic move because the butter melts into the meat and carries the herbs into every bite. On the grill, the outside gets a little crust while the butter keeps the interior from feeling sparse. Add grilled zucchini or asparagus and the plate turns into a proper summer dinner.
Why It Works: Thick chops handle direct heat better than thin ones and stay juicier. Herb butter melts over the hot meat and acts like a sauce without asking for a pan. Garlic, parsley, and chives keep the flavor fresh. The key is simple: don’t overcook the chop and don’t add the butter too early.
Key Ingredients:
- 4 bone-in pork chops, 1 inch thick
- 1 tablespoon olive oil
- 1 teaspoon kosher salt
- 1/2 teaspoon black pepper
- 4 tablespoons softened butter
- 1 tablespoon chopped parsley
- 1 tablespoon chopped chives
- 1 garlic clove, minced
- 1 teaspoon lemon zest
Quick Steps:
- Mix butter, parsley, chives, garlic, and lemon zest.
- Season pork chops with oil, salt, and pepper.
- Preheat the grill to medium-high and oil the grates.
- Grill chops 4 to 5 minutes per side until they reach 145°F.
- Rest 5 minutes, then top with herb butter.
Equipment for This Recipe:
- Grill
- Tongs
- Mixing bowl
- Thermometer
How to Serve This Dish: Serve with grilled vegetables, potato salad, or corn on the cob. The herb butter should melt into the center of the chop, not sit in a cold lump.
Pro Tips for This Recipe:
- Bring the chops closer to room temp before grilling.
- Make the butter ahead so the flavors mingle.
- Rest the chops before serving or the butter just runs off.
Variations on This Dish:
- Rosemary Butter Swap: Use rosemary instead of chives.
- Mustard Herb Version: Stir Dijon into the butter.
- Lemon-Caper Finish: Add capers for a briny edge.
Common Mistakes to Avoid with This Dish:
- Don’t overcook pork chops. 145°F is the sweet spot.
- Don’t use thin chops unless you’re ready for a very fast cook time.
36. Korean Beef Short Ribs
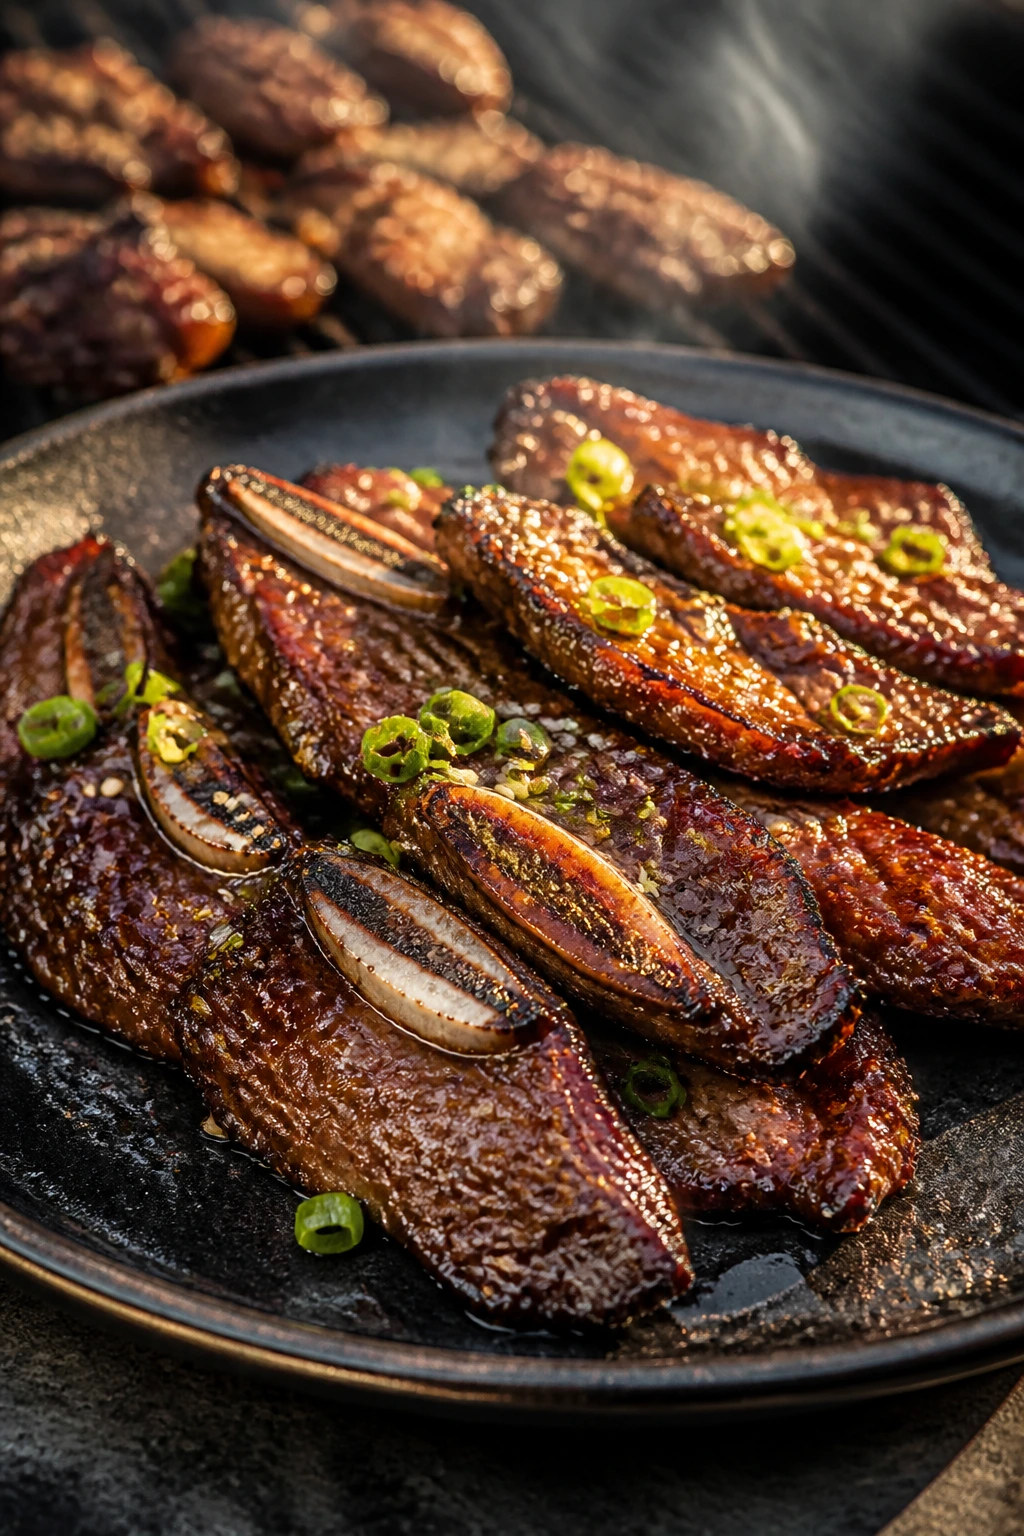
Korean-style short ribs, or kalbi, are one of the most rewarding things you can grill. The marinade goes sweet, salty, and savory all at once, and the thin-cut ribs caramelize fast. You get deep flavor in a short grill window, which is a nice trade.
Why It Works: Thin-cut short ribs take in marinade quickly because they have a lot of surface area. Pear or apple in the marinade adds gentle sweetness and helps tenderize the meat. The grill builds char fast, so these ribs need a careful eye and a hot grate. Serve them with rice and you’re in business.
Key Ingredients:
- 3 lbs thin-cut beef short ribs
- 1/2 cup soy sauce
- 1/4 cup brown sugar
- 1 small Asian pear or apple, grated
- 4 garlic cloves, minced
- 1 tablespoon grated ginger
- 1 tablespoon sesame oil
- 2 scallions, sliced
- 1 teaspoon sesame seeds
Quick Steps:
- Whisk soy sauce, brown sugar, pear, garlic, ginger, and sesame oil.
- Marinate the ribs 2 to 12 hours.
- Preheat the grill to high and oil the grates.
- Grill the ribs 3 to 5 minutes per side until caramelized and cooked through.
- Finish with scallions and sesame seeds.
Equipment for This Recipe:
- Grill
- Mixing bowl
- Tongs
- Small grater
How to Serve This Dish: Serve with rice, kimchi, and sliced cucumbers. These ribs are best sliced and shared family-style so the caramelized edges stay prominent.
Pro Tips for This Recipe:
- Use thin-cut ribs, not thick braising ribs.
- Wipe off excess marinade before grilling to avoid flare-ups.
- Don’t overcook; the best texture is tender, not dry.
Variations on This Dish:
- Spicy Gochujang Version: Add gochujang to the marinade.
- Garlic Heavy Swap: Increase the garlic and skip the pear.
- Lettuce Wrap Plate: Serve in lettuce leaves with rice.
Common Mistakes to Avoid with This Dish:
- Don’t use ribs that are too thick for quick grilling.
- Don’t leave them unattended; sugar burns fast.
37. Grilled Flatbread with Corn, Chicken, and Burrata
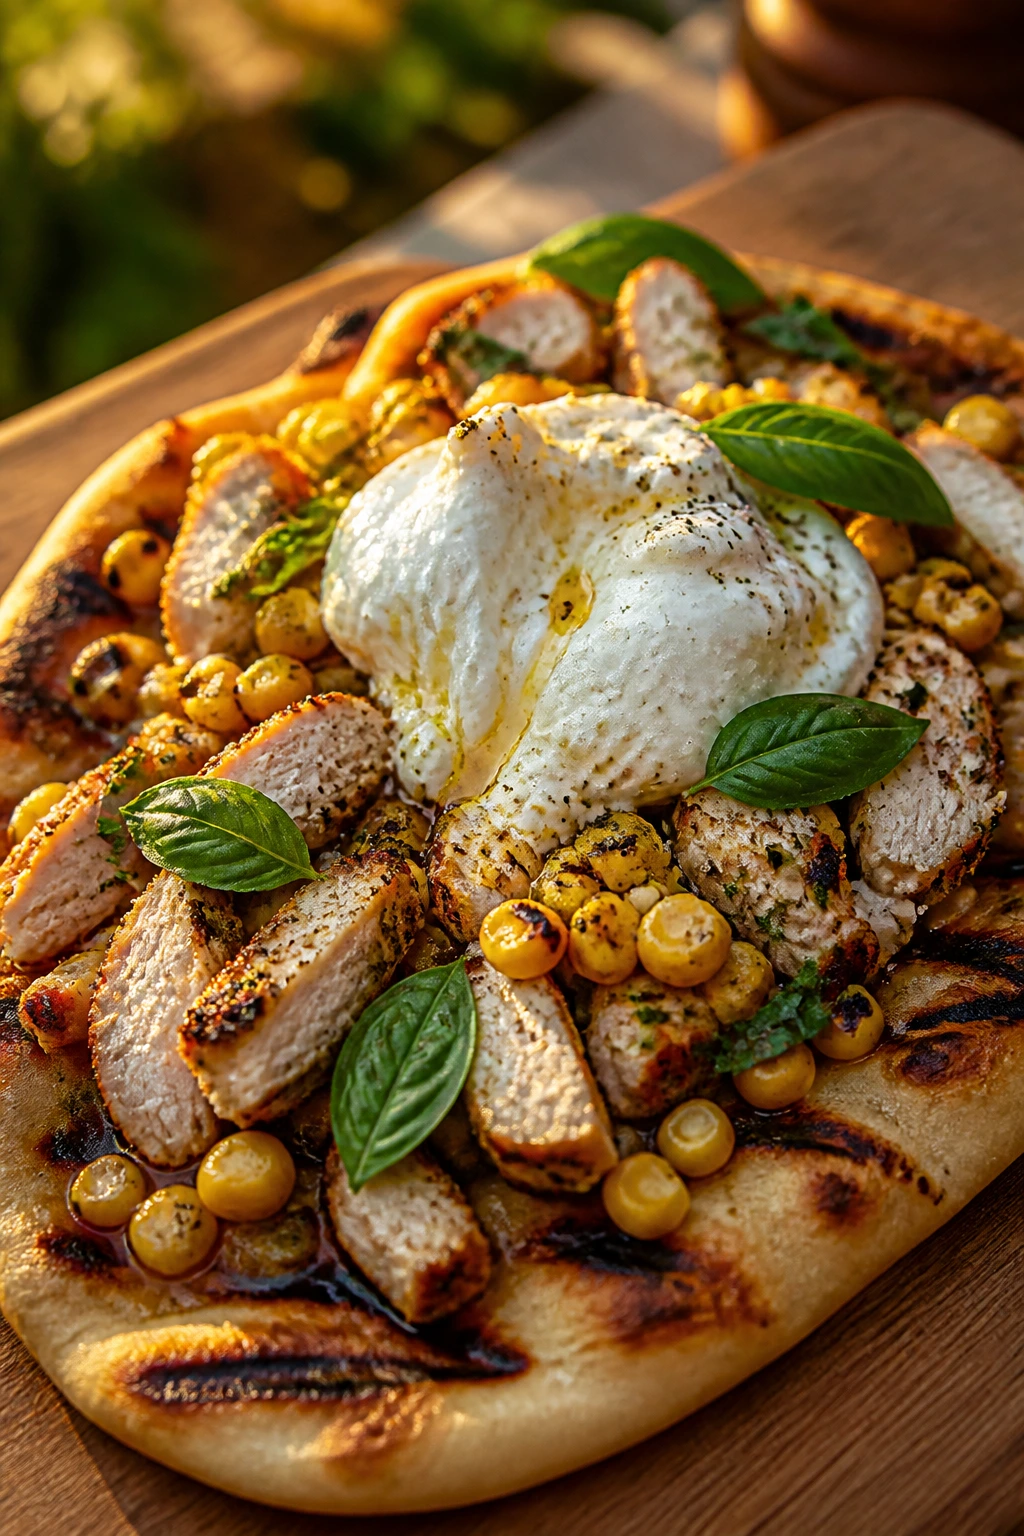
This is the kind of grill meal that looks casual but eats like you spent more time on it than you did. Flatbread gets crisp and smoky, chicken adds substance, sweet corn brings pops of char, and burrata melts into the cracks in a way that makes every slice worth fighting over. It’s messy in the right way.
Why It Works: Flatbread cooks quickly and gives you a sturdy base for warm toppings. Pre-cooked or grilled chicken keeps the assembly fast, while corn adds sweetness and texture. Burrata should go on after grilling so it stays creamy and doesn’t split open into a puddle on the heat. A little basil or pesto ties it together.
Key Ingredients:
- 1 lb pizza dough or 2 naan breads
- 1 1/2 cups cooked chicken, sliced or shredded
- 1 cup corn kernels
- 8 oz burrata
- 2 tablespoons olive oil
- 1/2 cup cherry tomatoes, halved
- 1/4 cup basil leaves
- 1 teaspoon kosher salt
- Black pepper to taste
Quick Steps:
- Brush dough or naan with olive oil.
- Grill the bread 1 to 2 minutes per side until marked and lightly crisp.
- Toss chicken, corn, tomatoes, salt, and pepper in a bowl.
- Return the bread to the grill or a serving board, top with the chicken mixture, and warm briefly if needed.
- Add burrata and basil after grilling and serve.
Equipment for This Recipe:
- Grill
- Tongs
- Cutting board or platter
- Small bowl
How to Serve This Dish: Cut into wide strips and serve like a shared flatbread. A greens salad on the side makes it feel more complete, though honestly the burrata does a lot of the work.
Pro Tips for This Recipe:
- Keep toppings light so the flatbread doesn’t sag.
- Use room-temp burrata for the creamiest texture.
- Grill one side of the bread more than the other if you want extra structure.
Variations on This Dish:
- Pesto Version: Brush the flatbread with pesto before topping.
- Tomato-Rich Swap: Add sliced fresh tomatoes and a little balsamic.
- Spicy Corn Version: Toss corn with chili flakes and lime.
Common Mistakes to Avoid with This Dish:
- Don’t add burrata while the bread is still on direct heat.
- Don’t overload the bread or it tears when you slice it.
38. Cedar-Plank Trout with Herbs
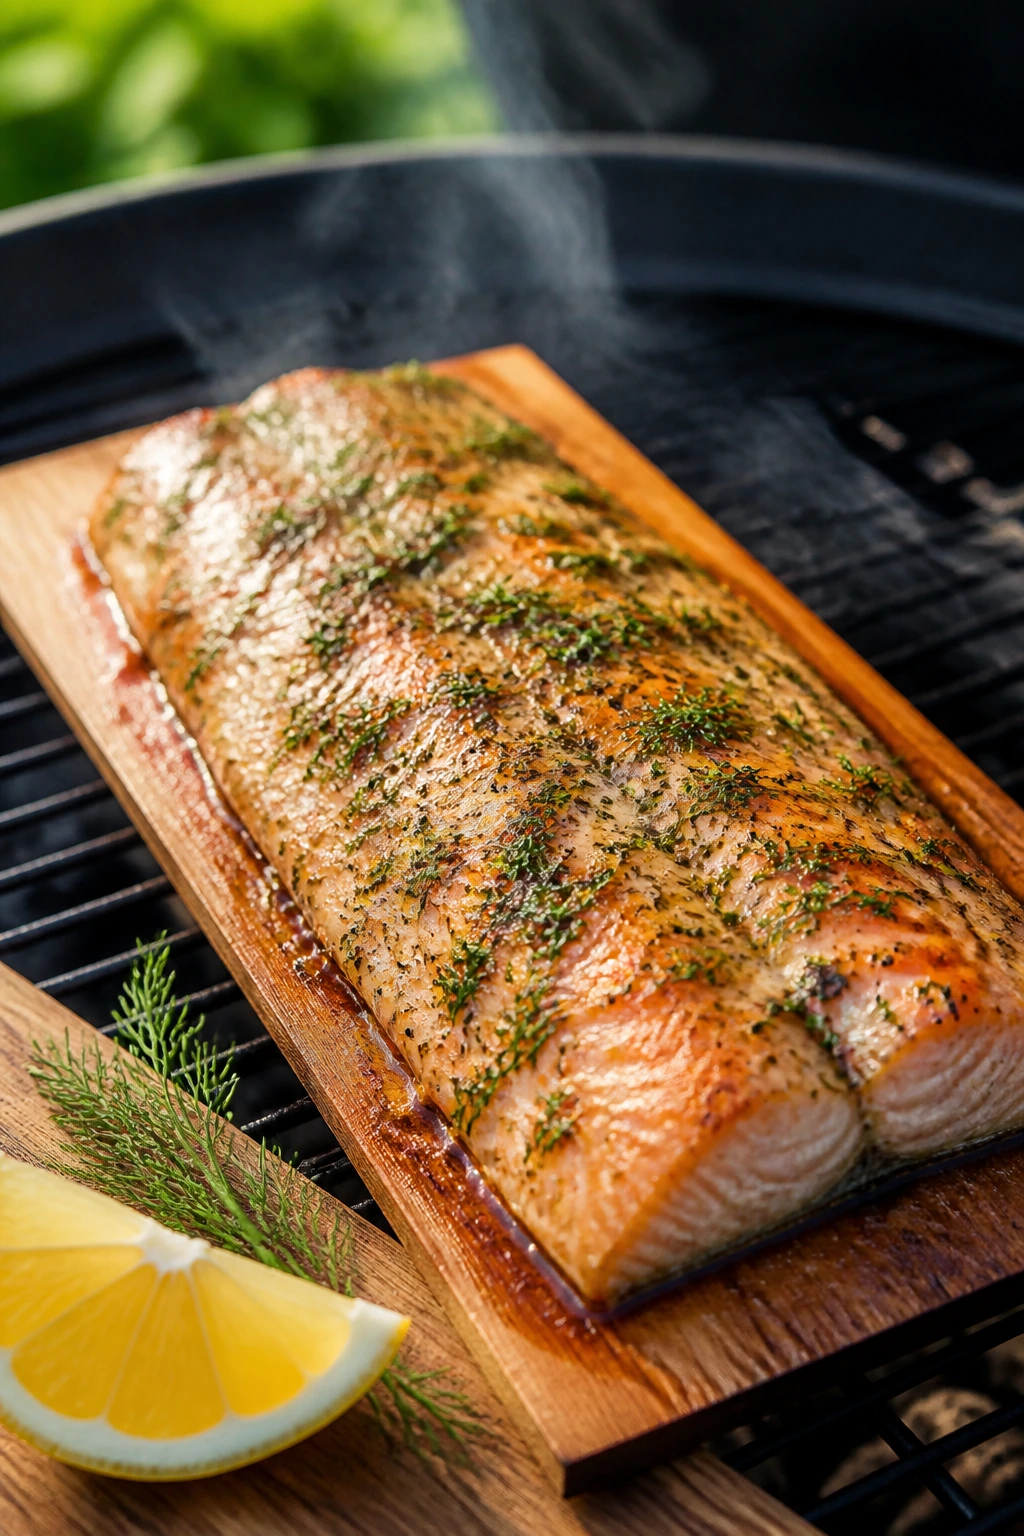
Trout on a cedar plank tastes clean and a little woodsy, with a smoke note that never gets as loud as it would with direct flame. Herbs and lemon keep the fish bright, and the plank makes the whole process feel calm instead of precarious. If salmon feels too rich, trout is the lighter, quieter cousin.
Why It Works: The cedar plank shields the fish from harsh heat and adds an aromatic smoke. Trout fillets are delicate, so indirect grilling keeps them from flaking apart too soon. Butter, dill, and parsley melt into the flesh and keep it juicy. This is one of the easiest ways to grill fish without a drama-filled flip.
Key Ingredients:
- 2 cedar planks, soaked for at least 1 hour
- 4 trout fillets, about 6 oz each
- 2 tablespoons melted butter
- 1 tablespoon olive oil
- 1 tablespoon lemon juice
- 1 tablespoon chopped dill
- 1 tablespoon chopped parsley
- 1 teaspoon kosher salt
- 1/2 teaspoon black pepper
Quick Steps:
- Soak the cedar planks for at least 1 hour.
- Brush trout with butter, oil, lemon juice, herbs, salt, and pepper.
- Preheat the grill to medium and set the planks over the heat until they begin to smoke.
- Place trout on the planks and grill 12 to 15 minutes until the fish flakes easily.
- Serve with lemon.
Equipment for This Recipe:
- Cedar planks
- Grill with lid
- Tongs
- Thermometer
How to Serve This Dish: Serve with grilled asparagus, new potatoes, or a simple rice pilaf. Keep the fillets intact when transferring from plank to plate; they look better that way.
Pro Tips for This Recipe:
- Soak the planks fully or they may burn too fast.
- Use fillets with skin on if you want more structure.
- Don’t overdo the herbs; trout tastes best when the fish still leads.
Variations on This Dish:
- Lemon-Dill Swap: Increase dill and skip the parsley.
- Garlic Butter Version: Add garlic to the melted butter.
- Maple Glaze Finish: Brush lightly with maple and lemon.
Common Mistakes to Avoid with This Dish:
- Don’t use a plank that is too dry.
- Don’t crank the heat so high the plank bursts into flame.
39. Grilled Black Bean Stuffed Poblanos
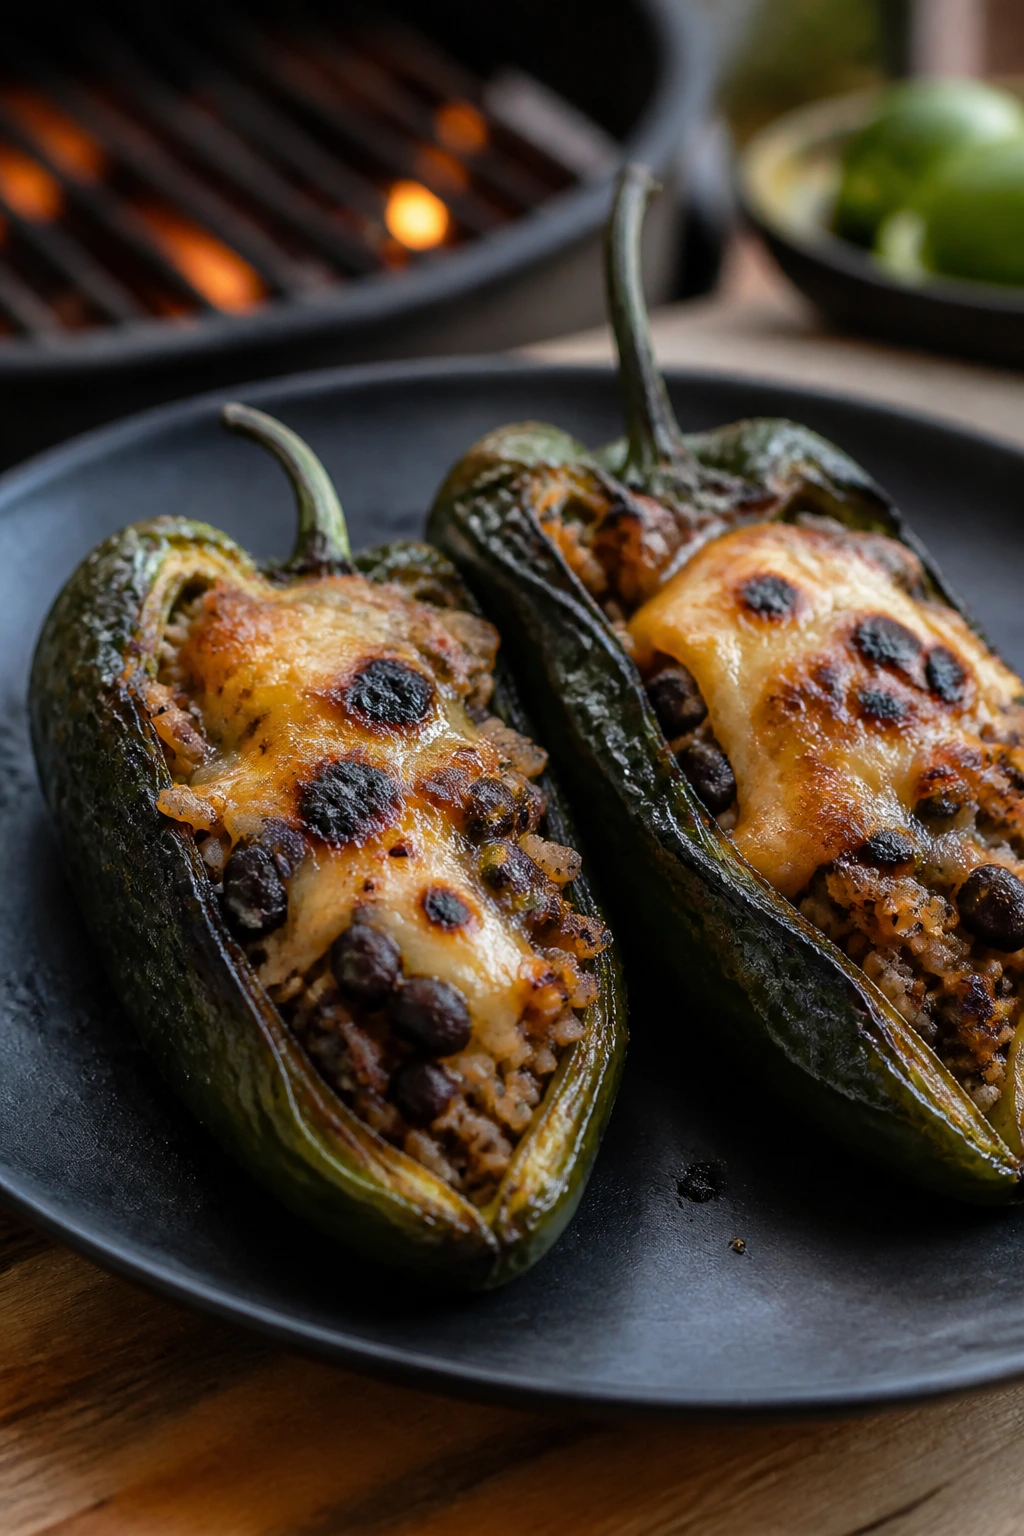
Stuffed poblanos are smoky, soft, and a little messy in the best way. The peppers blister on the outside while the filling turns creamy with beans, rice, cheese, and salsa verde. It’s the kind of vegetarian grill meal that feels like a real main dish, not a sides-only compromise.
Why It Works: Poblanos are sturdy enough to hold a filling and mild enough to let the other ingredients do the talking. Black beans and rice give the dish substance, while cheese helps bind the filling once the pepper softens. Grilling them gives the peppers a smoky skin and deeper flavor. Serve with avocado and you get richness without needing meat.
Key Ingredients:
- 4 large poblano peppers
- 1 1/2 cups cooked rice
- 1 can black beans, drained and rinsed
- 1 cup shredded Monterey Jack
- 1/2 cup salsa verde
- 1 tablespoon olive oil
- 1 teaspoon cumin
- 1 avocado, sliced
- 2 tablespoons chopped cilantro
Quick Steps:
- Mix rice, beans, half the cheese, salsa verde, oil, and cumin.
- Split poblanos lengthwise and remove seeds.
- Stuff the peppers and sprinkle with remaining cheese.
- Preheat the grill to medium and place peppers over indirect heat.
- Grill 15 to 20 minutes until the peppers soften and the filling is hot.
- Top with avocado and cilantro.
Equipment for This Recipe:
- Grill
- Grill basket or foil tray
- Spoon
- Tongs
How to Serve This Dish: Serve as a main course with a tomato salad or grilled corn. A little extra salsa verde on the side keeps each bite bright.
Pro Tips for This Recipe:
- Don’t overfill the peppers or the filling spills out.
- Keep the grill on the gentler side so the peppers soften before burning.
- Use pre-cooked rice to keep the filling from getting dry.
Variations on This Dish:
- Chorizo Version: Add cooked chorizo to the filling.
- Corn and Feta Swap: Replace part of the beans with grilled corn and feta.
- Spicy Green Chili Finish: Add chopped green chiles to the filling.
Common Mistakes to Avoid with This Dish:
- Don’t try to grill stuffed poblanos over high direct heat.
- Don’t leave the seeds in unless you want extra heat and bitterness.
40. Loaded Grilled Sweet Potatoes with Black Beans and Chipotle Crema
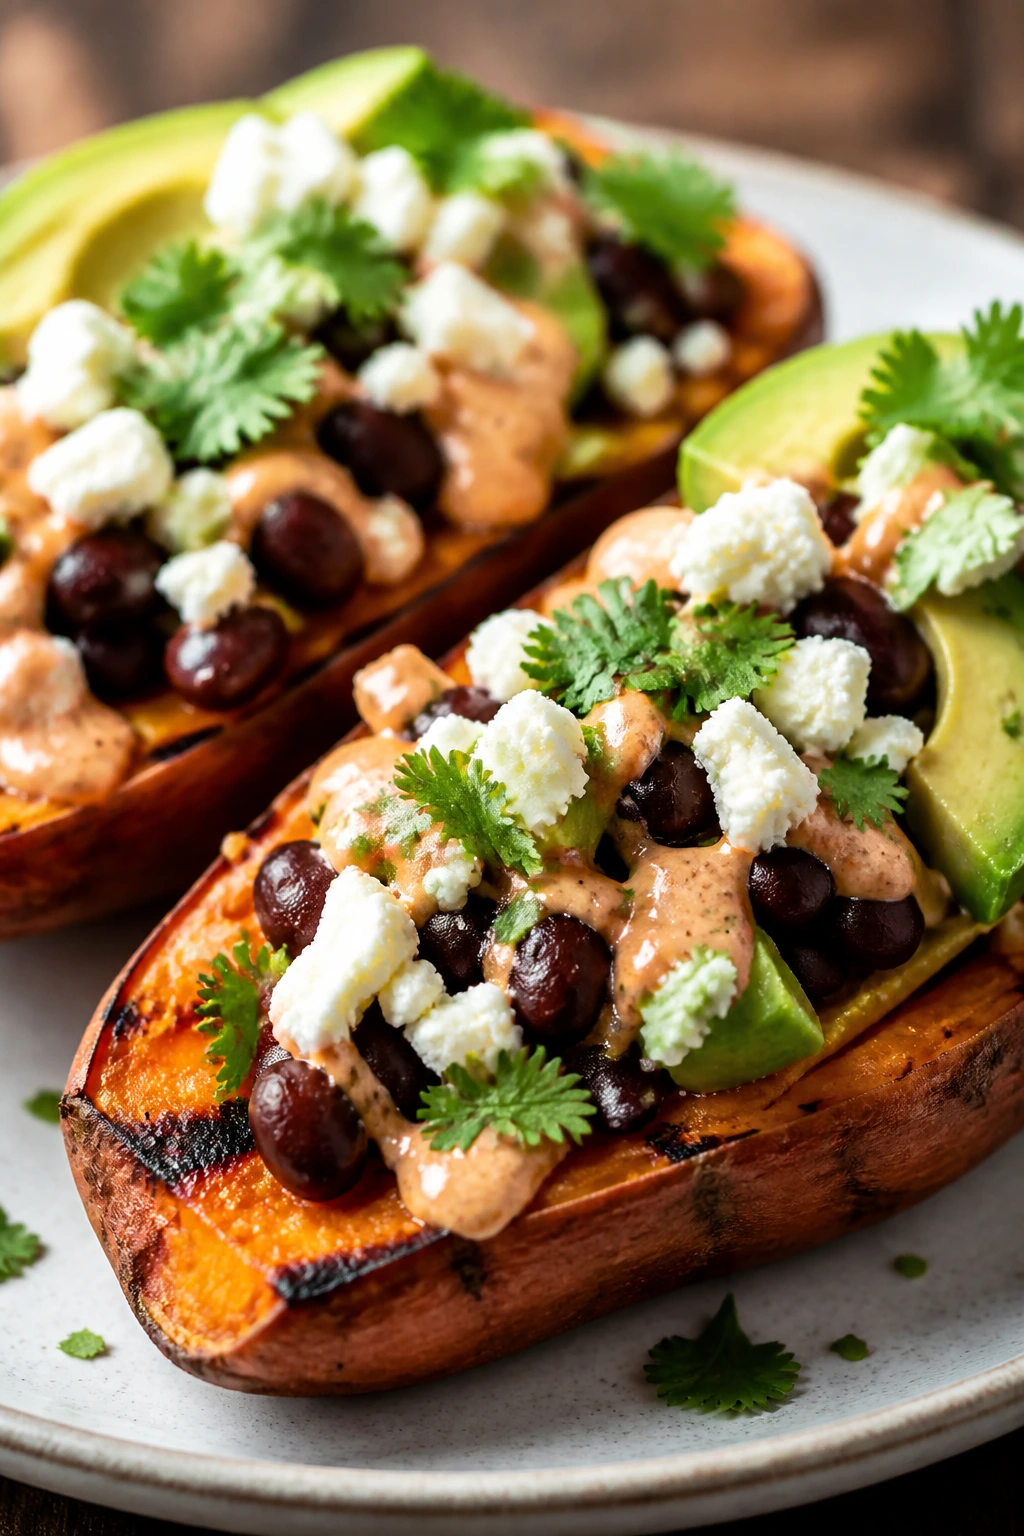
Grilled sweet potatoes are one of those things people underestimate until they taste the edges: a little smoky, a little caramelized, and far better than a plain baked version. Add black beans, chipotle crema, and a handful of toppings, and you’ve got a dinner that holds together without pretending to be a sandwich or a bowl. It’s hearty, cheap, and one of the most useful vegetarian grill meals in the whole bunch.
Why It Works: Sweet potatoes soften on the grill while the cut sides pick up color and a little crust. Black beans bring protein and make the dish feel complete, while chipotle crema adds smoke and acid. Because the potatoes hold heat for a long time, they’re a good base for toppings that would slide off other vegetables. This is a smart way to use the grill for a full plate, not just a side.
Key Ingredients:
- 4 medium sweet potatoes, halved lengthwise
- 2 tablespoons olive oil
- 1 teaspoon kosher salt
- 1 can black beans, drained and rinsed
- 1/2 cup chipotle crema or sour cream mixed with chipotle
- 1/2 cup crumbled feta or cotija
- 1 avocado, sliced
- 2 tablespoons chopped cilantro
- Lime wedges for serving
Quick Steps:
- Brush sweet potatoes with oil and salt.
- Preheat the grill to medium and place potatoes cut-side down over indirect heat.
- Grill 20 to 30 minutes until tender enough to pierce easily.
- Warm the black beans and spoon them over the potatoes.
- Finish with chipotle crema, cheese, avocado, cilantro, and lime.
Equipment for This Recipe:
- Grill with lid
- Tongs
- Foil or grill-safe tray, optional
- Knife and spoon
How to Serve This Dish: Serve two halves per person as a main or one half alongside grilled chicken or fish. The toppings should be layered while the potatoes are hot so the cheese softens and the crema melts slightly.
Pro Tips for This Recipe:
- Choose medium potatoes so they cook through without charring too fast.
- If you want more smoke, finish the potatoes over direct heat for a minute or two.
- Warm the beans with a pinch of cumin and salt.
Variations on This Dish:
- Tex-Mex Version: Add salsa, corn, and chopped jalapeño.
- Tahini Swap: Use tahini-lemon sauce instead of chipotle crema.
- Breakfast Style: Top with a fried egg and hot sauce.
Common Mistakes to Avoid with This Dish:
- Don’t rush the potatoes. If they’re firm, they’re not done.
- Don’t add cold beans straight from the can without seasoning them first.
Why the Grill Wins for Weekend Meals
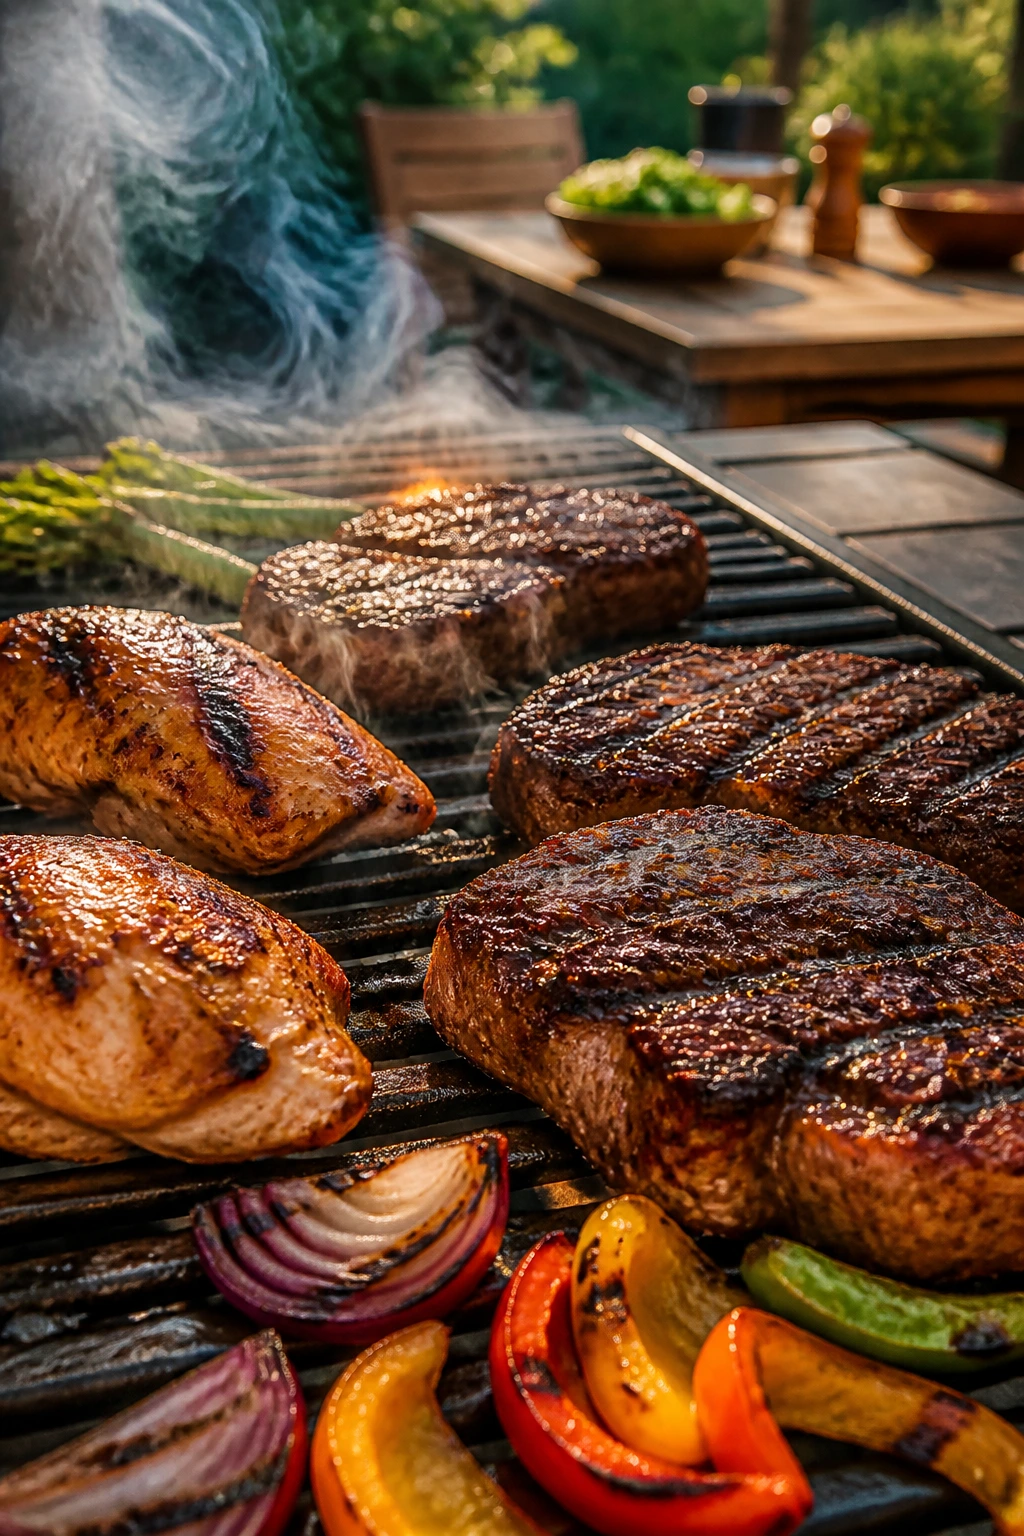
A grill does something a stovetop can’t: it gives food a kind of obvious, easy-to-read flavor. You can see the marks, smell the smoke, and hear the sizzle when the grate is hot enough. That matters more than people admit. Dinner feels more finished when the heat source leaves a mark you can taste.
The other win is space. A grill lets you cook meat, vegetables, bread, and even fruit without crowding a skillet or heating the kitchen into a bad mood. That’s especially useful for outdoor dinners where you want to keep moving and keep the plates simple. A hot grill also handles contrast well. Sweet peaches, sharp onions, rich salmon, and lean chicken all benefit from the same live fire, just in different ways.
Indirect heat deserves more credit too. It’s the bridge between a fast sear and a slow finish, and it’s the reason ribs, whole chickens, and thick pork chops can work outdoors without turning tough. Once you get comfortable moving food between hot and cooler zones, the grill stops being a gadget and starts acting like a full kitchen.
Essential Equipment for These Recipes
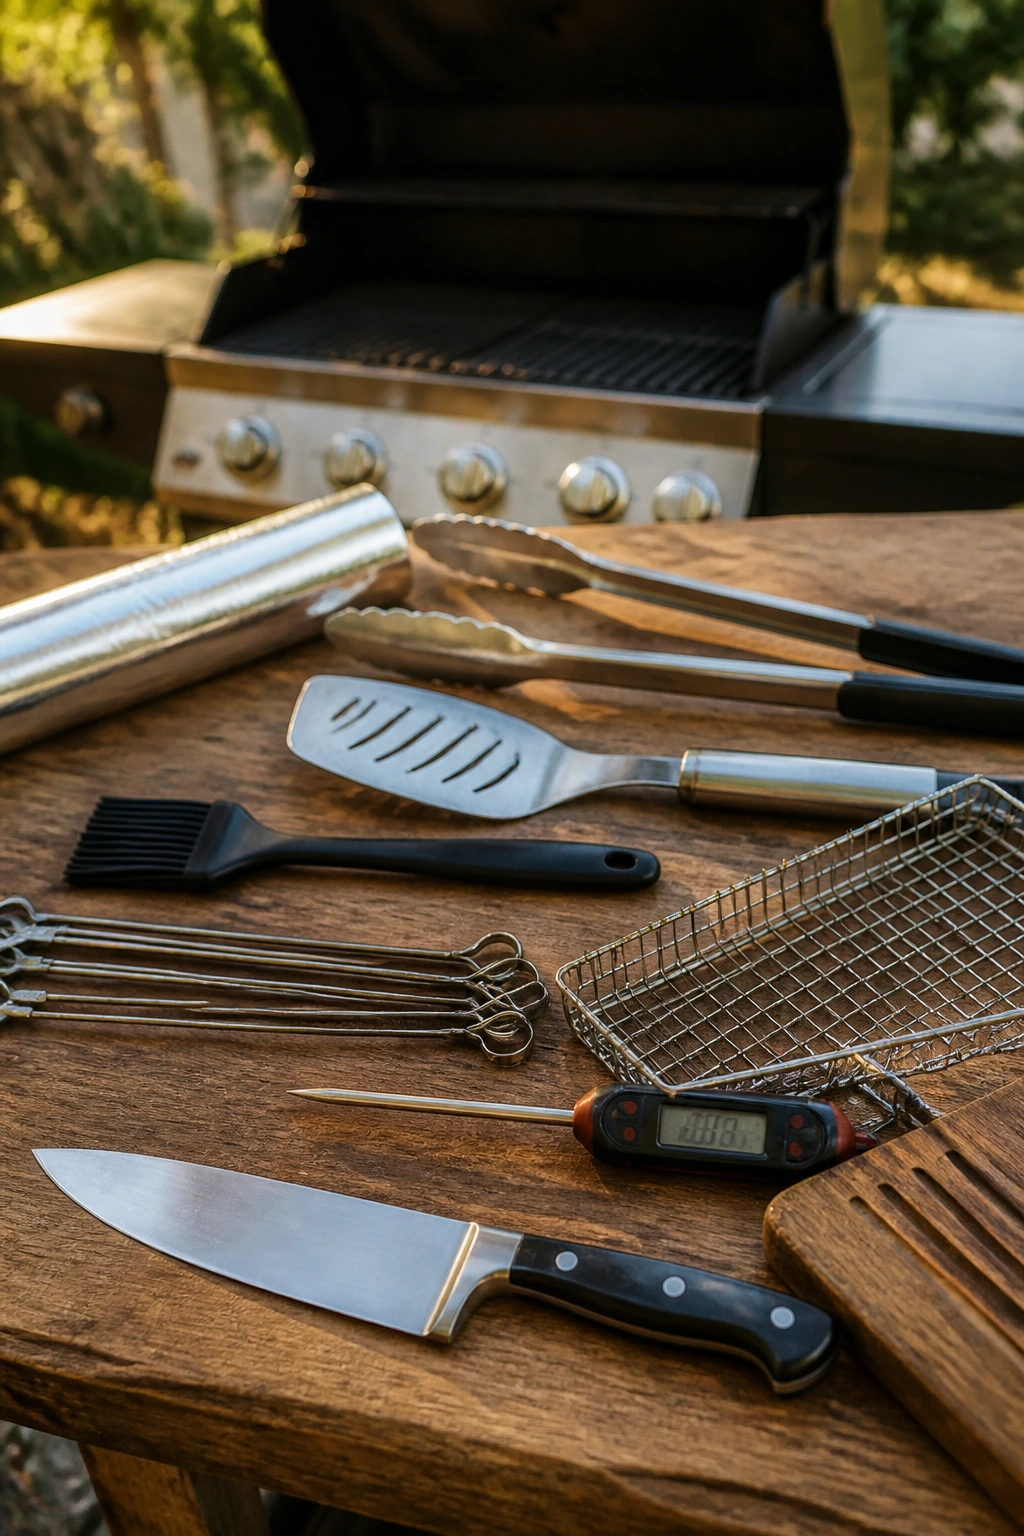
- Gas or charcoal grill with a lid: The lid matters for indirect heat, which several of these recipes rely on.
- Instant-read thermometer: This is the difference between juicy chicken and sad chicken, plain and simple.
- Long tongs: You want enough reach to move food without crowding the fire.
- Fish spatula or wide offset spatula: Helpful for salmon, trout, tuna, and burgers that need a gentle flip.
- Skewers: Metal or soaked wooden skewers work for kabobs, shrimp, and meatball skewers.
- Grill basket or foil tray: Handy for green beans, onions, peppers, and anything small enough to fall through the grate.
- Basting brush: Useful for sauces, glazes, and herb butter.
- Heavy-duty foil: Good for ribs, moisture management, or a makeshift tray.
- Sharp chef’s knife: Slicing steak, pork, fruit, and vegetables cleanly makes a huge difference on the plate.
- Cutting board with a groove: Saves your counter from a puddle of steak juice or peach runoff.
Smart Shopping and Ingredient Tips
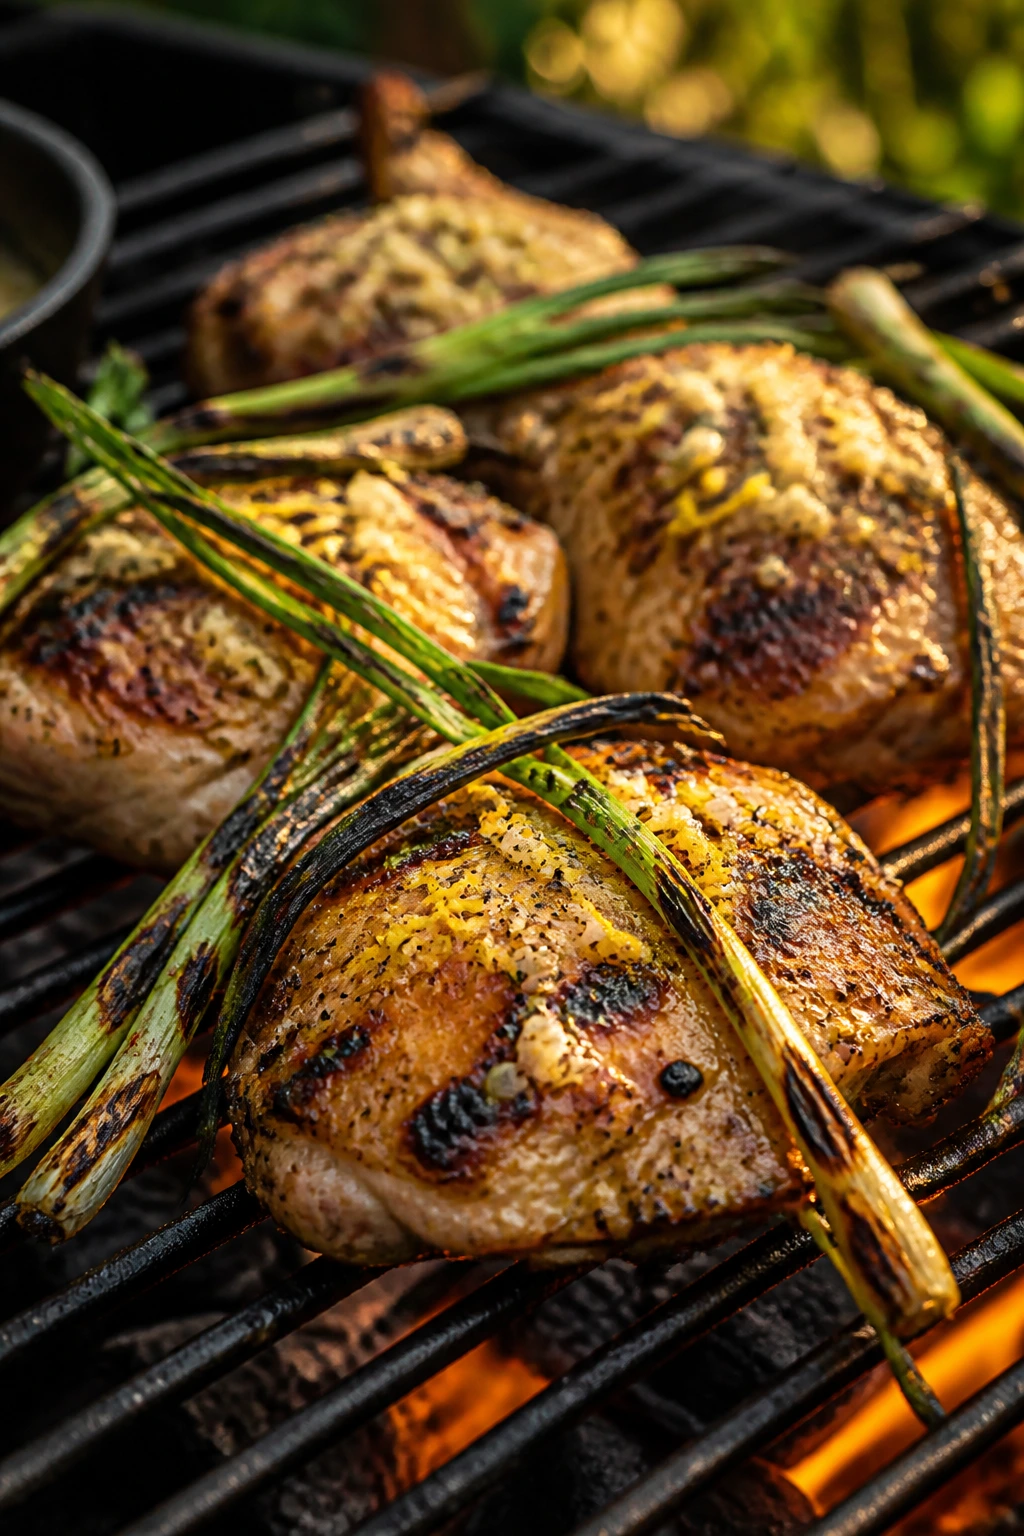
Chicken thighs are the easiest win if you want the least drama. Bone-in, skin-on thighs forgive a hotter grill and stay juicier than breasts. Breasts still work in salads and tacos, but they need more attention and a thermometer, not guesswork. For burgers, choose 80/20 beef unless you want to spend all your energy trying to make lean meat taste rich.
Seafood deserves a little selectiveness. Salmon should look moist and smell clean, not fishy. Tuna needs to be high enough quality for a fast sear, and shrimp should be firm and translucent before cooking, not gray or limp. If you’re buying fish for grilling, choose pieces with even thickness so they finish at the same time.
For produce, go by feel and scent more than color alone. Peaches should yield slightly at the stem. Pineapple should smell sweet at the base. Corn should feel full under the husk if you buy it that way, and tomatoes should still have some weight in the hand. For vegetables like eggplant or zucchini, smaller often tastes better because the flesh is denser and less watery.
Grill-friendly bread matters too. Look for buns and rolls with some structure. Very soft bread can collapse under juicy meat and sauce. Tortillas should be fresh enough to bend without cracking. Flatbreads and naan are useful backups because they crisp quickly and carry toppings without much fuss.
How to Serve These Recipes
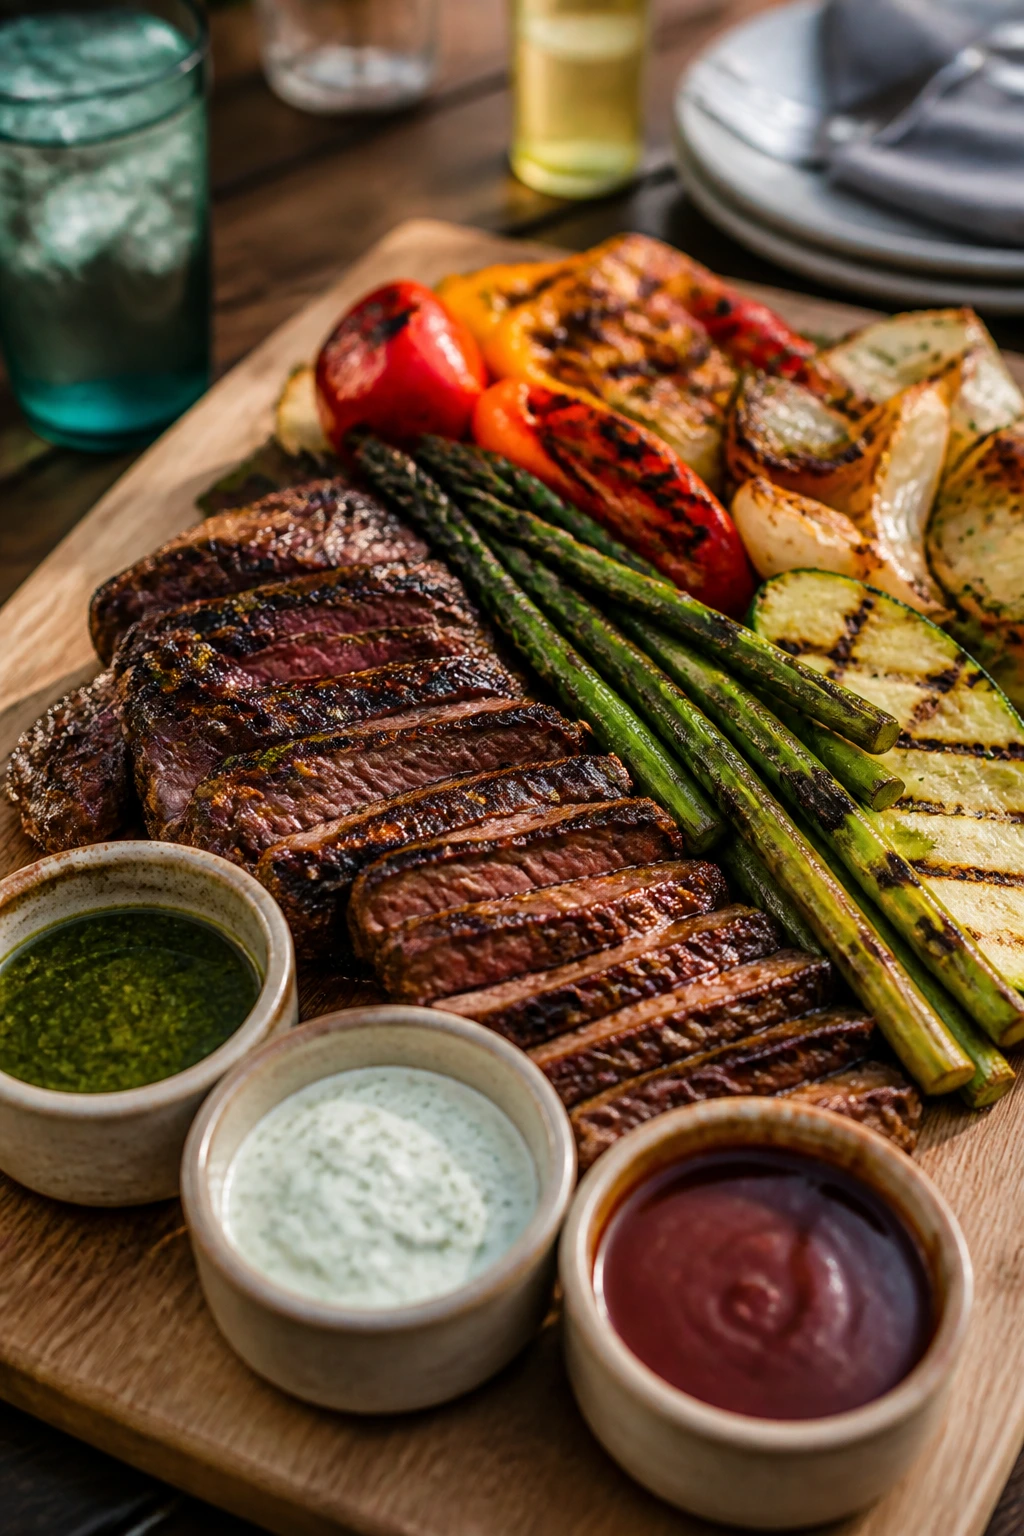
Presentation: Put grilled meat and vegetables on wide platters instead of deep bowls whenever you can. The char and the juices look better spread out, and sliced steak, chicken, or fish gives the plate a sense of purpose. Keep sauces on the side or spooned over the top at the last second so the color stays sharp.
Accompaniments: Grilled corn, vinegar slaw, potato salad, cucumber salad, grilled bread, rice, and simple greens cover most of these meals without repeating the same texture. For richer plates like ribs or burgers, add something acidic. For seafood or vegetables, add something starchy so the meal feels complete.
Portions: Two chicken thighs, one hefty burger, or 6 ounces of fish is a useful baseline for most adults. Steak and ribs need more room on the plate, while stuffed vegetables, salads, and flatbreads can swing smaller if you add a side. When feeding a crowd, it usually helps to make extra sauce rather than extra protein.
Beverage Pairing: A cold pilsner, dry rosé, sparkling water with citrus, or iced tea all sit well beside grilled food. For the richer recipes—burgers, ribs, short ribs—a beer with some bitterness or a citrusy seltzer keeps the meal from dragging. For salmon, chicken, and vegetable dishes, something lighter and colder works better than anything sweet.
Additional Tips and Flavor Boosters
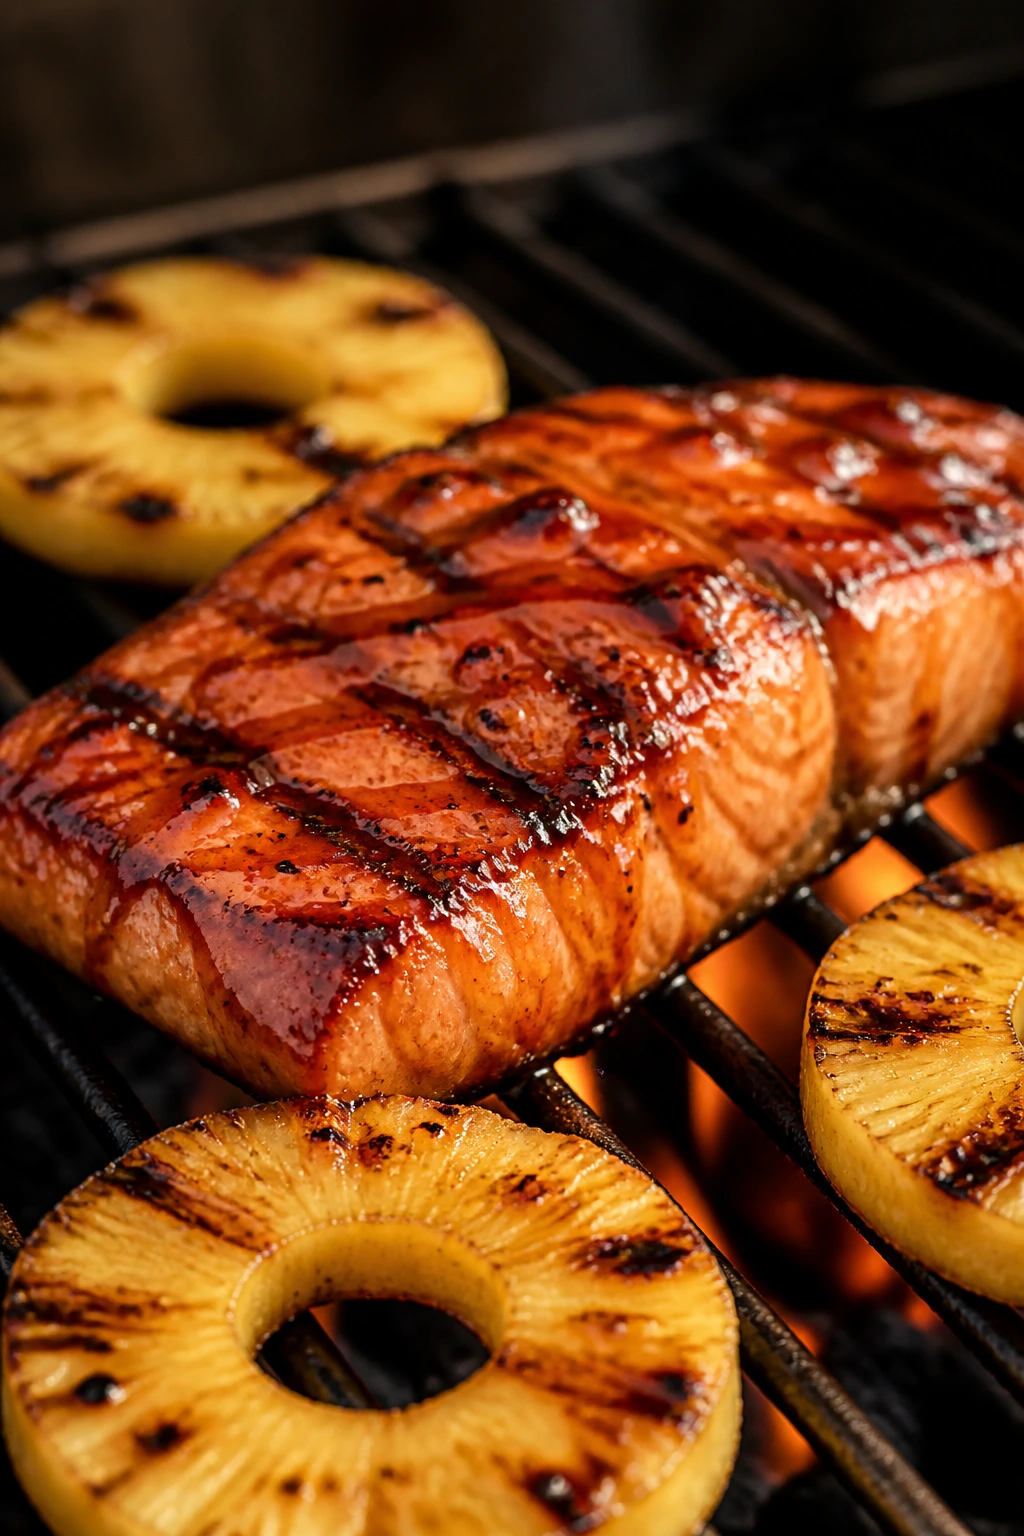
Flavor Enhancement: Keep a small bowl of finishing salt or flaky salt near the grill. A few grains on steak, salmon, tomatoes, or grilled peaches change the whole bite because they stay on the surface instead of disappearing into the marinade.
Customization: Pick one sauce and use it across the week. Chimichurri, mint yogurt, dill yogurt, or chipotle crema can move from chicken to vegetables to sandwiches without feeling repetitive, and that saves time when the grill is already hot.
Serving Suggestions: Fresh herbs should go on at the end, not during the marinade, when you want a cleaner finish. Chopped basil, cilantro, dill, and parsley keep grilled food from tasting too dark or too one-dimensional.
Make-It-Yours: If you want a dairy-free plate, swap yogurt sauces for herb oil, salsa verde, or tahini-lemon dressing. If you need lower-carb options, skip buns and tortillas and build the meal over greens, grilled vegetables, or roasted sweet potatoes. If you want more heat, use pickled jalapeños, hot sauce, or chili crisp at the table instead of loading the marinade with fire.
Make-Ahead, Storage, and Reheating Guidance
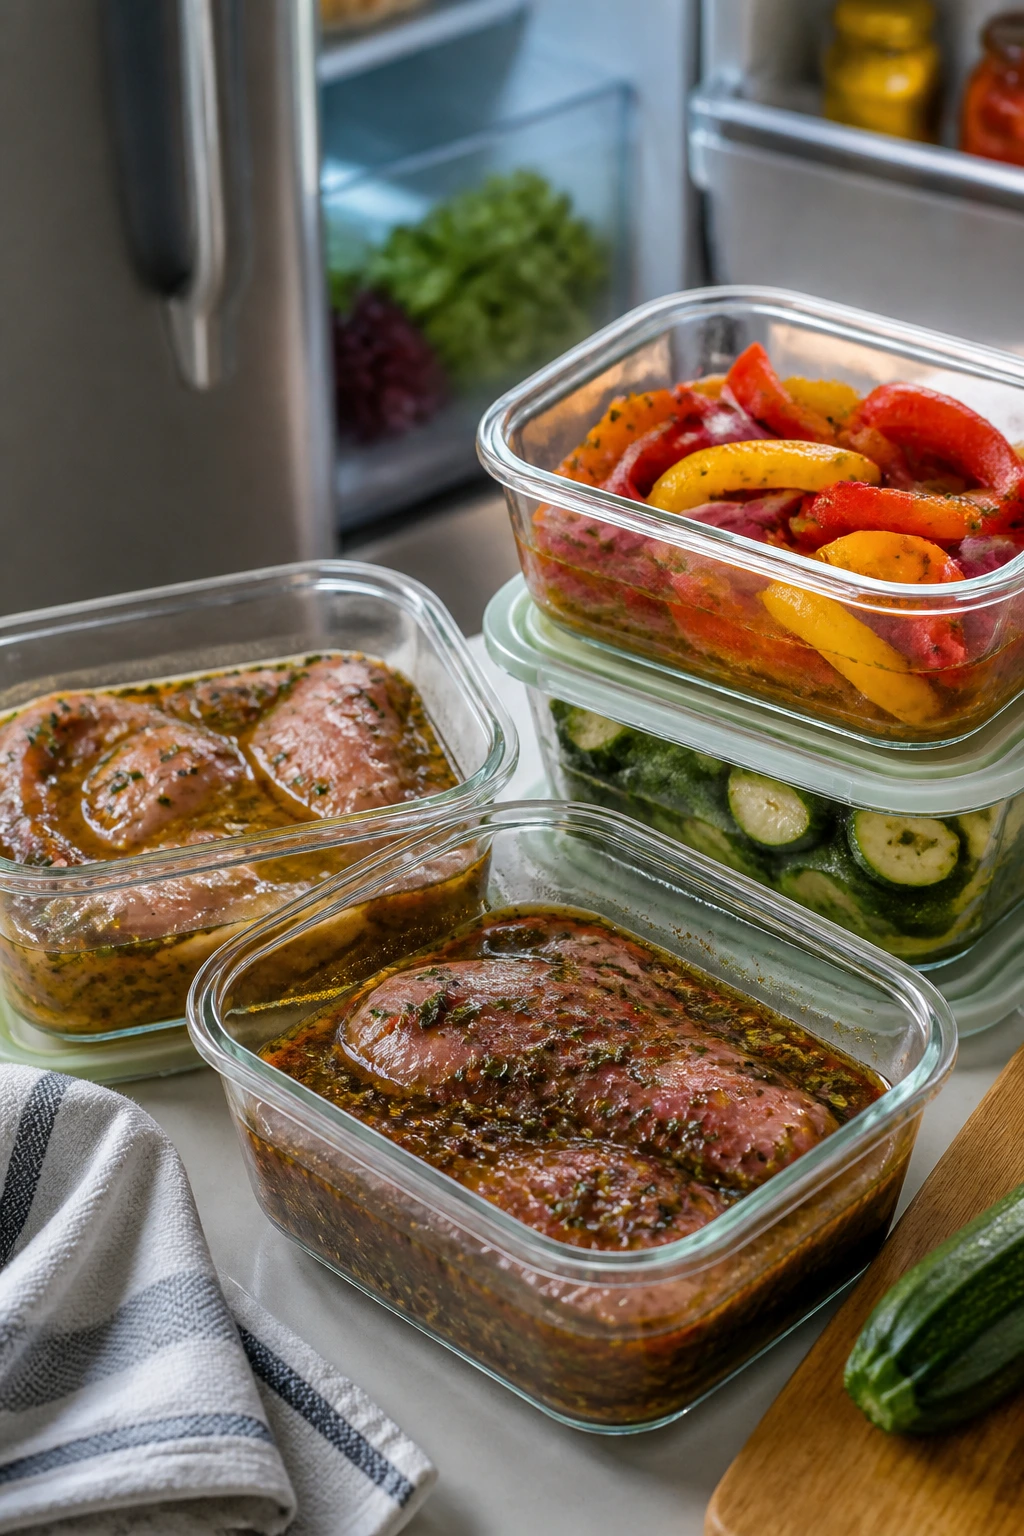
A few pieces of these meals can be done ahead without ruining the final texture. Marinades, dry rubs, sauces, slaws, and chopped vegetables can usually be made 1 to 2 days in advance and held in the fridge. That matters more than it sounds. When the grill is hot, the easier you make the last 20 minutes, the better the whole evening feels.
Cooked chicken, pork, steak, and grilled vegetables keep well in airtight containers for 3 to 4 days in the refrigerator. Seafood is shorter; plan on 1 to 2 days for salmon, tuna, shrimp, trout, or mahi mahi. Pulled chicken, cooked ribs, and short ribs freeze better than fish or delicate grilled vegetables, and they can sit in the freezer up to 2 to 3 months if sealed tightly. Flatbreads and buns are best fresh, though they can be refreshed in a warm oven for a few minutes.
For reheating, low and gentle is the rule. Chicken and pork do well in a 325°F oven covered loosely with foil until warmed through. Steak is better reheated briefly in a skillet or sliced cold over salad, because too much heat dries it out. Fish should be warmed only until just heated, or served cold in salads and tacos. Ribs and pulled chicken can be reheated with a splash of water, broth, or sauce so they don’t turn stringy.
Vegetables and stuffed peppers often taste better the next day if they were not drowned in sauce to begin with. Reheat them in a hot oven or back on the grill for a few minutes, then add fresh herbs or a squeeze of citrus right before serving. That last bit matters. Cold leftovers often become something better when they get a fresh, sharp finish.
Variations and Adaptations to Try
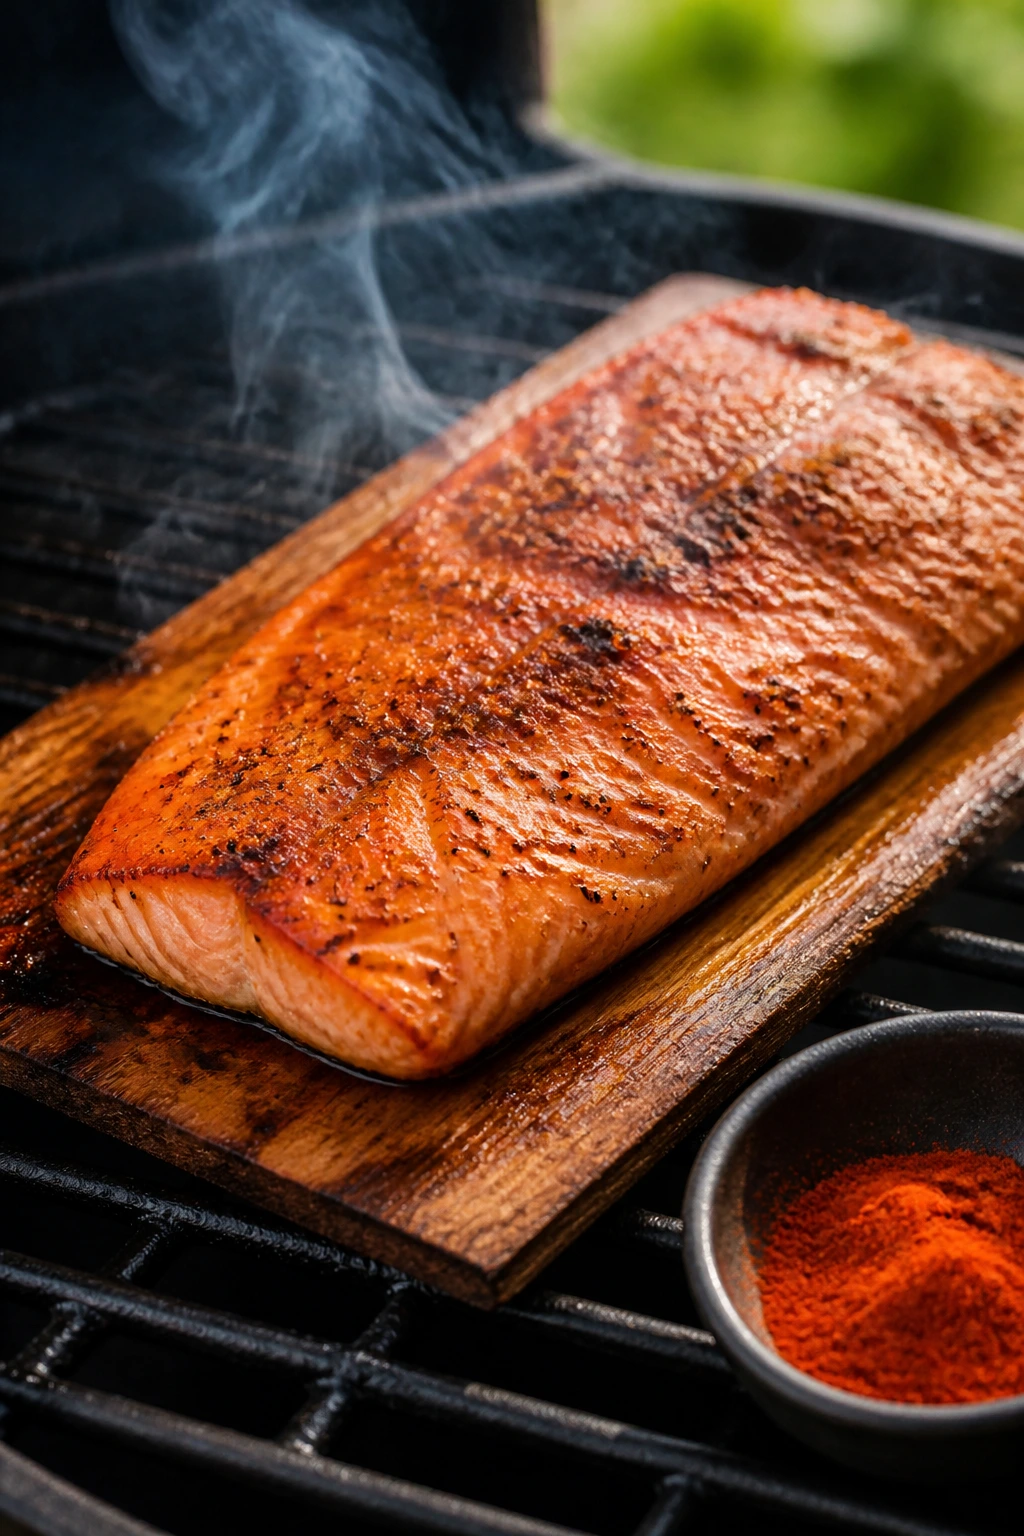
Gluten-Free Grill Night: Swap buns for lettuce cups, tortillas for corn tortillas, and regular breadcrumbs for gluten-free crumbs where needed. Most of these recipes already lean naturally in that direction, which is one reason grilled food works so well for mixed tables.
Dairy-Free Switches: Replace yogurt marinades with olive oil, lemon, garlic, and herbs. For creamy finishes, use tahini sauce, avocado crema made with a dairy-free base, or chimichurri instead of butter-based sauces.
Lower-Carb Plate: Build dinners around grilled meat, seafood, or vegetables and skip the bread altogether. Stuffed poblanos, grilled chicken salads, and cauliflower steaks all hold up well when you add extra greens or beans and leave the bun behind.
Smokier Flavor Path: Use smoked paprika, charcoal heat, cedar planks, or a foil packet of wood chips if your grill supports it. This works especially well for salmon, ribs, chicken thighs, and eggplant, where a little smoke gives the food more shape.
Milder Kid-Friendly Version: Pull back on chili powder, jalapeño, and hot sauces, then let the table add heat with condiments. Chicken skewers, burgers, grilled cheese, and pizza are the easiest wins when you’re feeding a mixed crowd.
Char-and-Citrus Upgrade: Add lemon, lime, or vinegar at the end of nearly any of these recipes. That final hit of acid wakes up grilled food in a way that marinades alone can’t quite manage.
Common Mistakes to Avoid
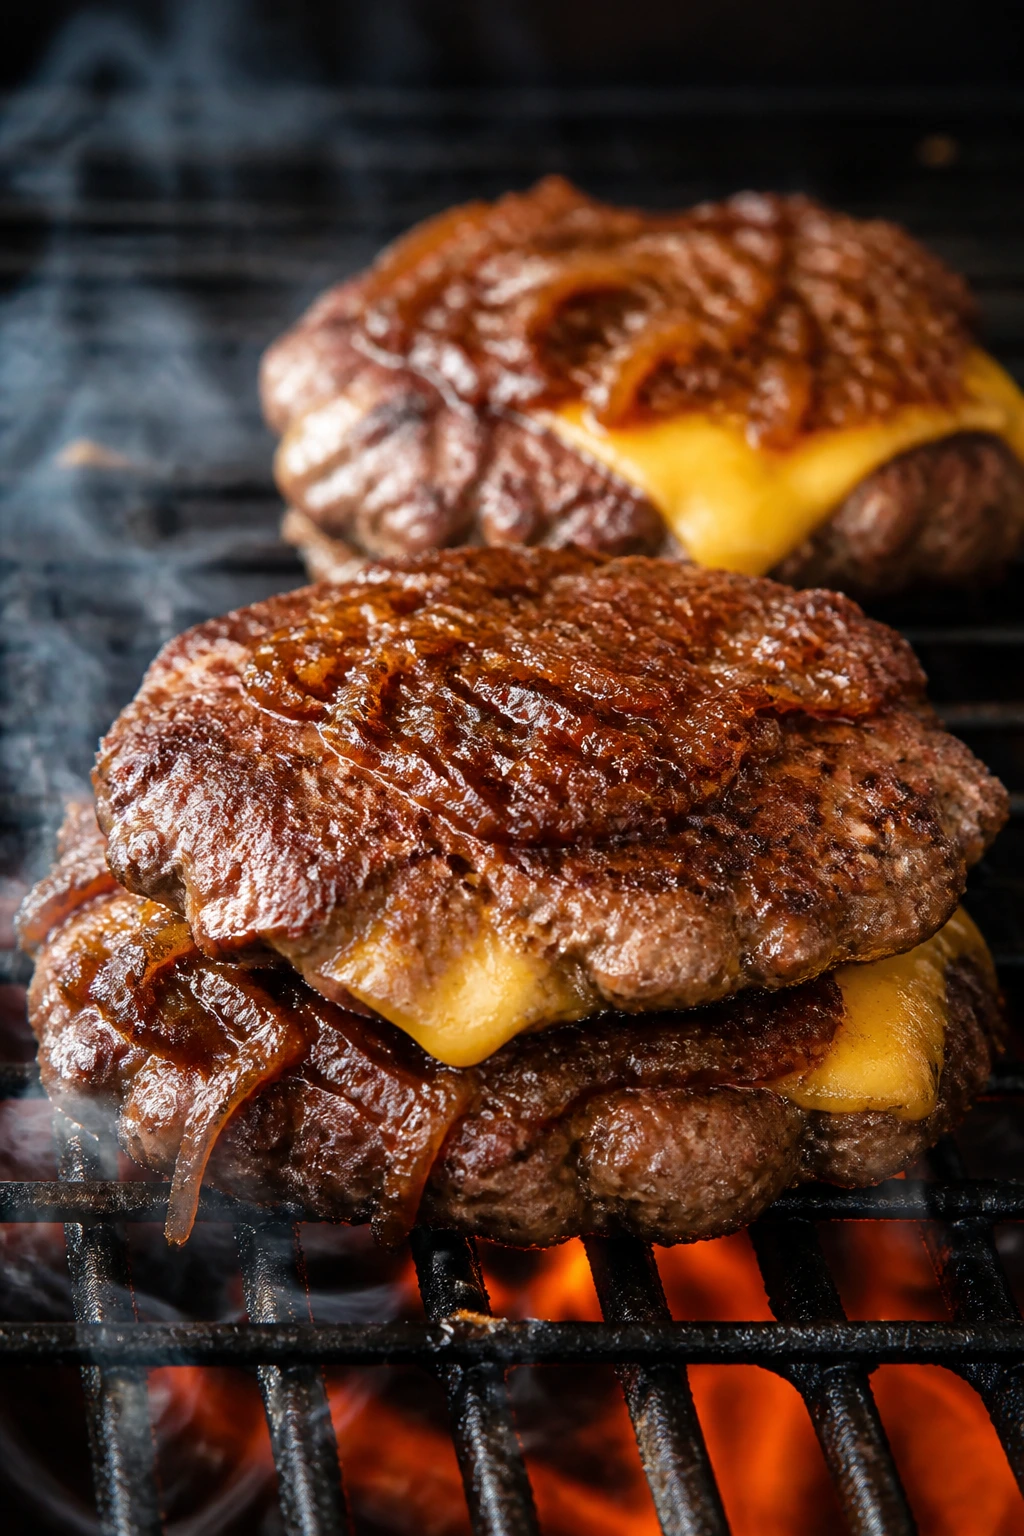
The first mistake is treating every grill meal like a direct-heat job. Chicken thighs, ribs, whole birds, stuffed peppers, and pork chops often need a cooler zone, not just fire directly under them. If the outside looks right before the center is done, the grill is too hot or the food is too thick for the method you chose.
Another trap is saucing too early. Anything with sugar—barbecue sauce, honey glaze, teriyaki, even some store-bought marinades—can burn in minutes if it hits the flame at the wrong time. Put the sauce on late, or reserve part of it for the table so the grill does the browning first and the sauce finishes the job.
Crowding the grate causes more problems than people expect. When pieces sit too close together, they steam instead of sear, and you lose the smoky edges that make grilled food taste grilled. Leave gaps. If you don’t have room, cook in batches. It is slower, but it usually tastes better.
Skipping the rest is another classic mistake. Steak, pork, chicken, and even some fish need a few minutes off the heat so the juices settle back into the meat. Cut too soon and the board gets the good part. That’s a bad trade.
The last one is guessing instead of checking. Burgers, chicken, pork, salmon, and ribs all benefit from temperature or texture cues. Use the thermometer for safety and sanity, then trust your eyes and fingers on the final minute. A little checking saves a lot of disappointment.
Frequently Asked Questions
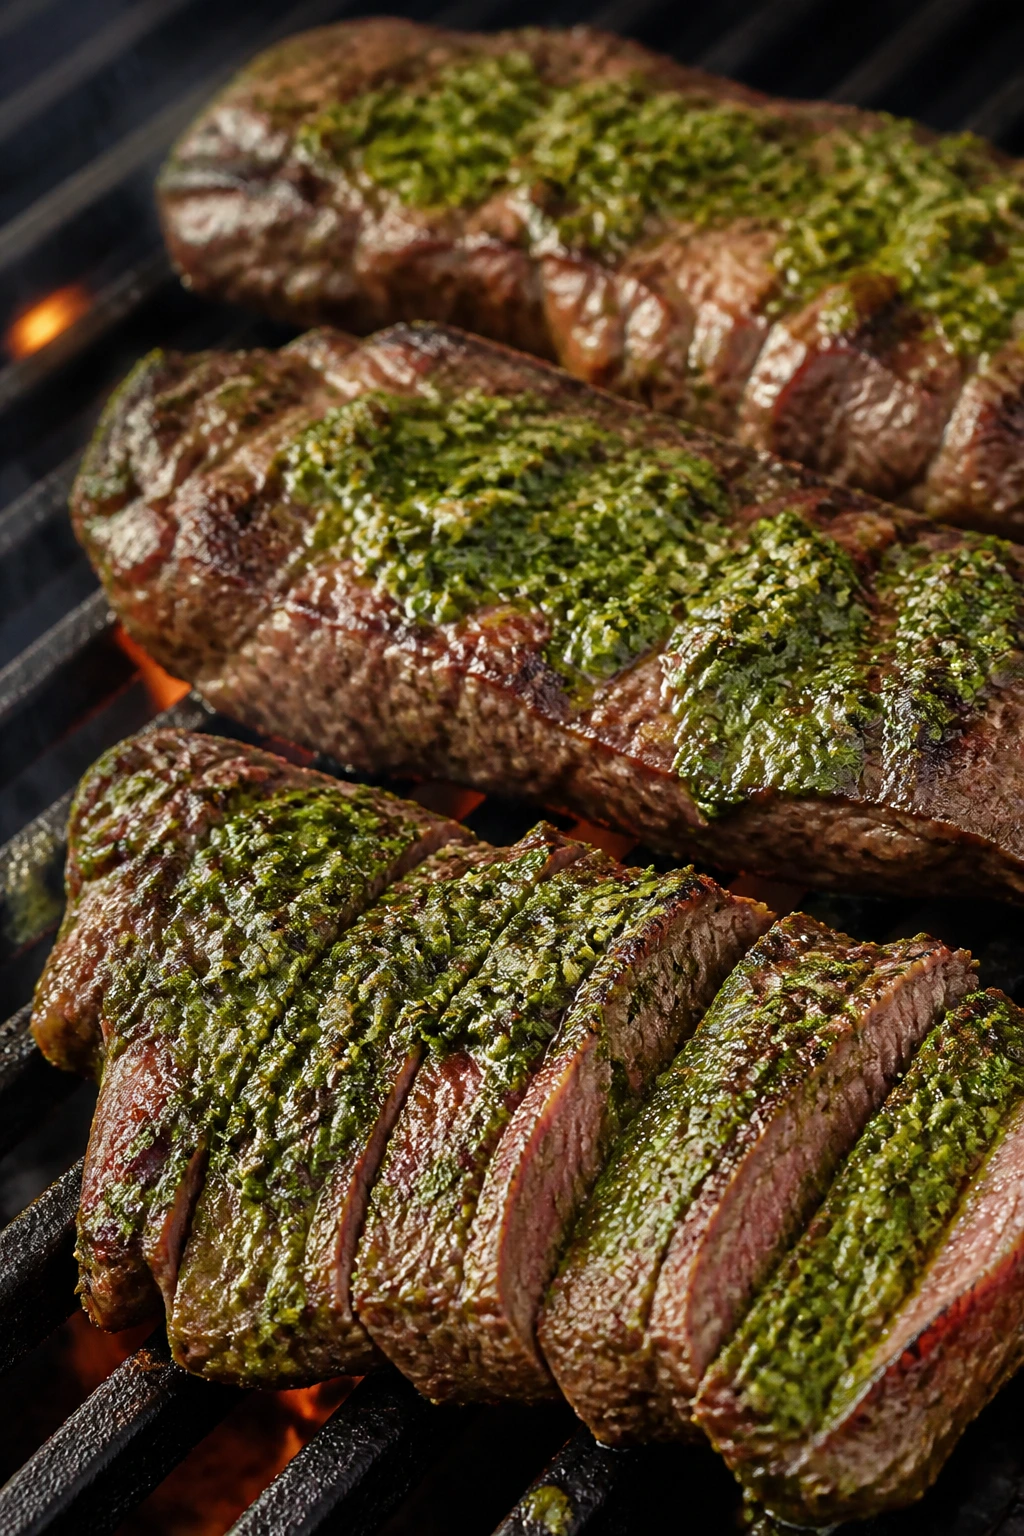
Can I make these recipes on a gas grill instead of charcoal?
Yes. Gas grills handle most of these recipes well, especially chicken, fish, vegetables, and burgers. Charcoal gives a deeper smoke note, but the cooking method stays the same as long as you can create a hot zone and a cooler zone.
What if my grill grates keep sticking?
Clean the grates, preheat them fully, and oil them right before the food goes on. Fish, chicken skin, and vegetables stick most often when the grates are dirty or not hot enough. A clean, hot grate is more useful than extra oil alone.
Which recipes can I prep ahead the day before?
Marinades, sauces, dry rubs, slaw, chopped vegetables, and some burger mixtures can be done ahead. Chicken thighs, pork tenderloin, short ribs, and ribs also benefit from an overnight seasoning or marinade. Seafood is the exception; keep that prep shorter and closer to cooking time.
How do I keep chicken from drying out on the grill?
Choose thighs when you can, and use breasts only when the recipe really calls for them. Pull chicken at 165°F, let it rest, and avoid cooking it over direct flame for the full time unless the piece is very small. A quick marinade or yogurt coating helps too.
Can I swap in chicken breasts for thighs?
Usually, yes, but the timing changes. Breasts cook faster, dry out sooner, and need a little more attention with the thermometer. If you make the swap, pound them to even thickness and keep an eye on them from the first flip.
What if I don’t have skewers or a grill basket?
You can still make most of these recipes directly on the grate or in foil trays. For small vegetables or shrimp, a sheet of heavy-duty foil with a few holes punched in it works in a pinch. It’s not as elegant, but it gets dinner done.
How do I know when steak is done without cutting into it?
Use an instant-read thermometer and pull it around 130°F to 135°F for medium-rare, then rest it. If you need a visual cue, the steak should feel springy but not soft like raw meat. The real answer is still the thermometer.
Which of these meals are best for feeding a crowd?
Drumsticks, burgers, pulled chicken sandwiches, ribs, kabobs, and pizza are the easiest to scale. They can sit a little while without losing their shape, and people can build their own plates. Seafood is the least forgiving when you’re cooking for a large group.
A Grill Worth Firing Up
A good grill meal doesn’t need to be complicated, but it does need to respect heat. The food should know what kind of fire it’s meeting, and the cook should know when to step back and let the char do its job. That’s the thread running through every recipe here: smart cuts, short marinades, proper rest, and toppings that brighten the plate instead of burying it.
If you keep even a few of these meals in rotation, the grill stops being a special occasion tool and starts earning its space every time the weather turns warm and the evening stretches out. Pick one chicken recipe, one fish recipe, and one vegetable dish, and you’ve already got more than enough to keep dinner interesting for a long while.