
A picnic sandwich has one job: stay neat long enough to make it from the kitchen counter to the blanket without slumping, soaking, or turning into a sad stack of bread and regret. The good ones hold their shape against a sweating soda bottle, a stiff paper napkin, and the kind of hunger that makes people reach in with one hand before you’ve even finished unpacking the cooler.
Cold drinks change the whole rhythm of a picnic. Lemonade, iced tea, sparkling water with lime, a bottle of ginger beer with condensation sliding down the glass — those drinks want sandwiches that are crisp, savory, a little salty, and sturdy enough to keep pace. That’s why the best picnic sandwiches are rarely the floppy, over-sauced kind. They’re built with a bit of structure. A moisture barrier here. A sharp pickle there. Bread that can take a little pressure and still taste like bread, not wet tissue.
These 40 picnic sandwiches are chosen with that reality in mind. Some are classic deli-style builds, some are vegetarian, some lean sweet, and some are the sort of sandwiches that get better after a short rest in the fridge. They’re all portable, packable, and friendly to a cold drink on a hot bench, in the grass, or under a tree where the shade disappears halfway through lunch.
Why These Sandwiches Earn a Spot in the Cooler
- Bread that behaves: Each sandwich uses bread, rolls, wraps, or pitas that can hold fillings without collapsing after a short chill.
- Moisture control built in: The recipes lean on spreads, cheese, greens, or pickled ingredients to keep juices away from the bread.
- Cold-drink pairing comes naturally: These fillings play well with lemonade, iced tea, sparkling water, and other chilled drinks that cut through salt and richness.
- Easy to pack in advance: Most of them can be assembled, wrapped, and tucked into the fridge with almost no last-minute fuss.
- Plenty of flavor range: There are deli classics, bright vegetarian stacks, creamy salad sandwiches, and a few bolder choices for people who want more than plain ham.
- Useful for mixed crowds: You can pack a few from each category and cover picky eaters, herb lovers, meat eaters, and the person who always wants “just one more bite.”
1. Cucumber Tea Sandwiches with Dill Cream Cheese
Thin cucumber slices, soft bread, and a cold herb spread make this one feel almost unfairly simple. The trick is that it tastes refined without acting precious, and that’s exactly what you want when the picnic basket is already full of chips, fruit, and a bottle of something icy and fizzy.
Why It Works:
The cucumbers bring crunch, but only if you keep them dry and very thin. Dill cream cheese gives the sandwich a chilled, tangy base that keeps the bread from feeling bare, and the soft crustless bread stays neat when you cut the sandwiches into fingers or triangles. It’s a small sandwich, but it disappears fast.
Key Ingredients:
- 8 slices soft white sandwich bread, crusts trimmed
- 4 oz cream cheese, softened
- 2 tbsp unsalted butter, softened
- 1 tbsp fresh dill, chopped
- 1 tsp lemon juice
- 1 medium English cucumber, peeled into thin ribbons
- 1/2 tsp fine sea salt
- 1/4 tsp black pepper
Quick Steps:
- Stir the cream cheese, butter, dill, lemon juice, salt, and pepper until smooth.
- Slice the cucumber very thin, then pat it dry with paper towels.
- Spread the dill cream cheese on four slices of bread.
- Layer the cucumber ribbons evenly, then top with the remaining bread.
- Press gently, trim the crusts if needed, and cut into fingers or triangles.
Equipment for This Recipe:
- Small mixing bowl
- Serrated knife
- Paper towels
How to Serve This Dish:
Stack these on a chilled plate next to sparkling lemonade or cucumber water. They’re best as a first-round sandwich, not a heavy main, so two or three triangles per person usually feels right.
Pro Tips for This Recipe:
- Let the cream cheese soften fully, or the filling tears the bread.
- Use an English cucumber; the thinner seeds make a cleaner bite.
- Assemble no more than a few hours ahead so the bread stays tender, not damp.
Variations on This Dish:
- Lox-and-Dill Twist: Add 2 oz smoked salmon per sandwich and skip the butter.
- Herb Garden Version: Swap dill for chopped chives and parsley.
- Whole-Grain Swap: Use thin-sliced seeded bread for a nuttier bite.
Common Mistakes to Avoid with This Dish:
- Don’t slice the cucumber thick. You’ll feel the water before you taste the crunch.
- Don’t skip drying the slices. Wet cucumbers turn soft bread slick in minutes.
2. Turkey, Apple, and Sharp Cheddar on Sourdough
Sweet apple and sharp cheddar sound obvious together, but on sourdough with sliced turkey, the combo hits with a clean, crisp bite that feels made for an iced drink. It’s sturdy, a little tangy, and not nearly as fussy as it looks.
Why It Works:
Sourdough holds up better than a fluffy loaf because its chew gives the sandwich some backbone. The apple adds snap and a little juice, while the cheddar brings salt and bite so the turkey doesn’t taste flat. A thin swipe of mustard mayo keeps everything moist without making the bread soggy.
Key Ingredients:
- 8 slices sourdough bread
- 8 oz sliced turkey breast
- 4 oz sharp cheddar, sliced thin
- 1 medium crisp apple, thinly sliced
- 2 tbsp mayonnaise
- 1 tbsp Dijon mustard
- 1 cup baby lettuce
- 1/4 tsp black pepper
Quick Steps:
- Mix the mayonnaise and Dijon until smooth.
- Spread the mustard mayo on all eight slices of bread.
- Layer turkey, cheddar, apple slices, and lettuce on four slices.
- Season with black pepper, close the sandwiches, and press lightly.
- Wrap and chill for 20 minutes, then slice in half on the diagonal.
Equipment for This Recipe:
- Cutting board
- Serrated knife
- Small bowl
How to Serve This Dish:
This one pairs well with iced tea, especially something unsweetened or lightly sweetened. Serve it with kettle chips and a few dill pickles if you want the plate to feel complete.
Pro Tips for This Recipe:
- Choose a crisp apple like Honeycrisp or Pink Lady so it doesn’t turn mealy.
- Slice the cheddar thin; thick slabs fight the turkey.
- Wrap the sandwich before chilling so the sourdough softens just enough.
Variations on This Dish:
- Cranberry Lunchbox Version: Add 2 tbsp cranberry relish for a sweet-tart edge.
- Rye and Mustard Version: Swap sourdough for rye and use whole-grain mustard.
- Smoked Turkey Upgrade: Use smoked turkey and add a few pickled red onions.
Common Mistakes to Avoid with This Dish:
- Don’t use a soft apple that bruises as soon as you cut it.
- Don’t overload the sandwich with cheese; it should taste balanced, not heavy.
3. Chicken Salad Croissants with Grapes and Celery
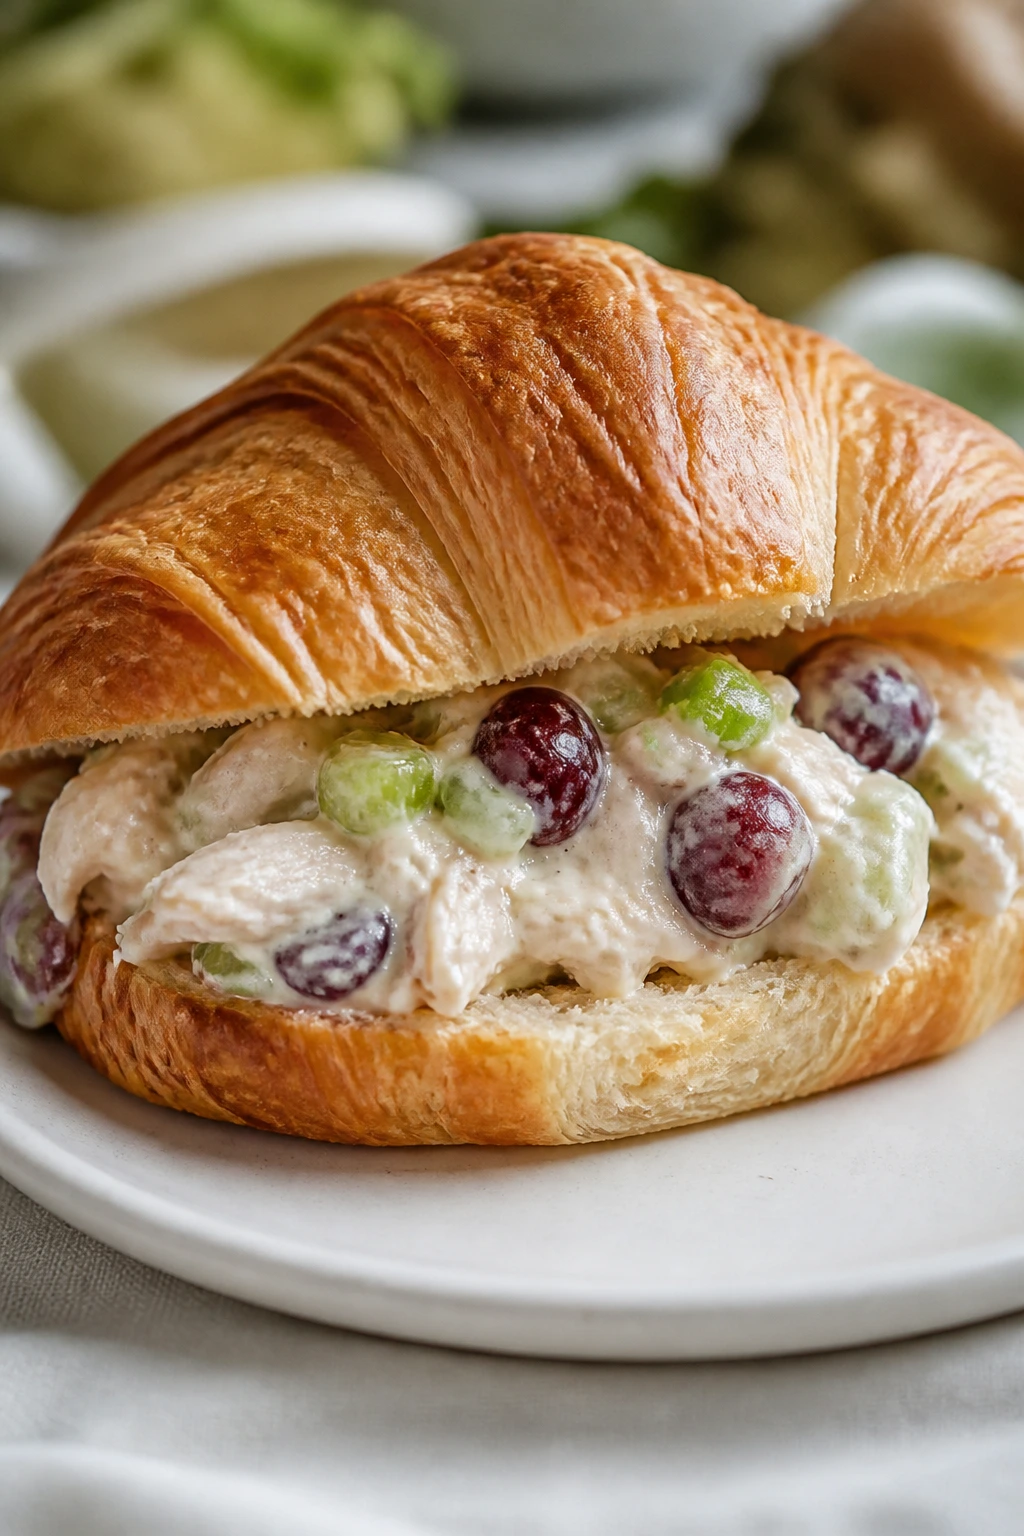
Chicken salad on a croissant is one of those picnic sandwiches that feels fancy only until you make it twice. The filling is creamy, the grapes pop when you bite them, and the croissant stays airy enough to feel indulgent without needing a fork.
Why It Works:
The chicken salad needs contrast, and grapes plus celery give you both sweetness and crunch. Croissants are fragile, so the filling has to be cool and thick, not loose. A little tarragon or dill keeps the mayo from tasting one-note, especially alongside a cold lemonade.
Key Ingredients:
- 2 cups cooked shredded chicken
- 1/3 cup mayonnaise
- 2 tbsp plain Greek yogurt
- 1/2 cup red grapes, halved
- 1/3 cup celery, finely diced
- 2 tbsp red onion, minced
- 1 tbsp fresh tarragon or dill, chopped
- 4 medium croissants, split
Quick Steps:
- Stir the mayonnaise, yogurt, tarragon, and a pinch of salt in a bowl.
- Fold in chicken, grapes, celery, and red onion until coated.
- Chill the filling for 15 minutes so it firms up.
- Split the croissants and line them with lettuce if you want extra protection.
- Spoon in the filling and close gently.
Equipment for This Recipe:
- Mixing bowl
- Rubber spatula
- Sharp knife
How to Serve This Dish:
These are best with iced tea or sparkling peach water. Pack them in a cooler and eat them within a few hours, because croissants lose their charm when they sit too long.
Pro Tips for This Recipe:
- Dice the celery small so it doesn’t jab through the croissant.
- Chill the filling before assembling; warm chicken salad makes pastry greasy.
- Add a few chopped toasted almonds if you want more texture.
Variations on This Dish:
- Curry Chicken Version: Add 1 tsp curry powder and swap grapes for diced apple.
- Herb-Heavy Version: Use dill, parsley, and chives together.
- Dairy-Light Version: Use all mayonnaise and skip the yogurt.
Common Mistakes to Avoid with This Dish:
- Don’t overfill croissants; they crack and shed filling.
- Don’t use warm chicken. The filling gets loose and the pastry softens too fast.
4. Tuna Salad with Lemon and Capers
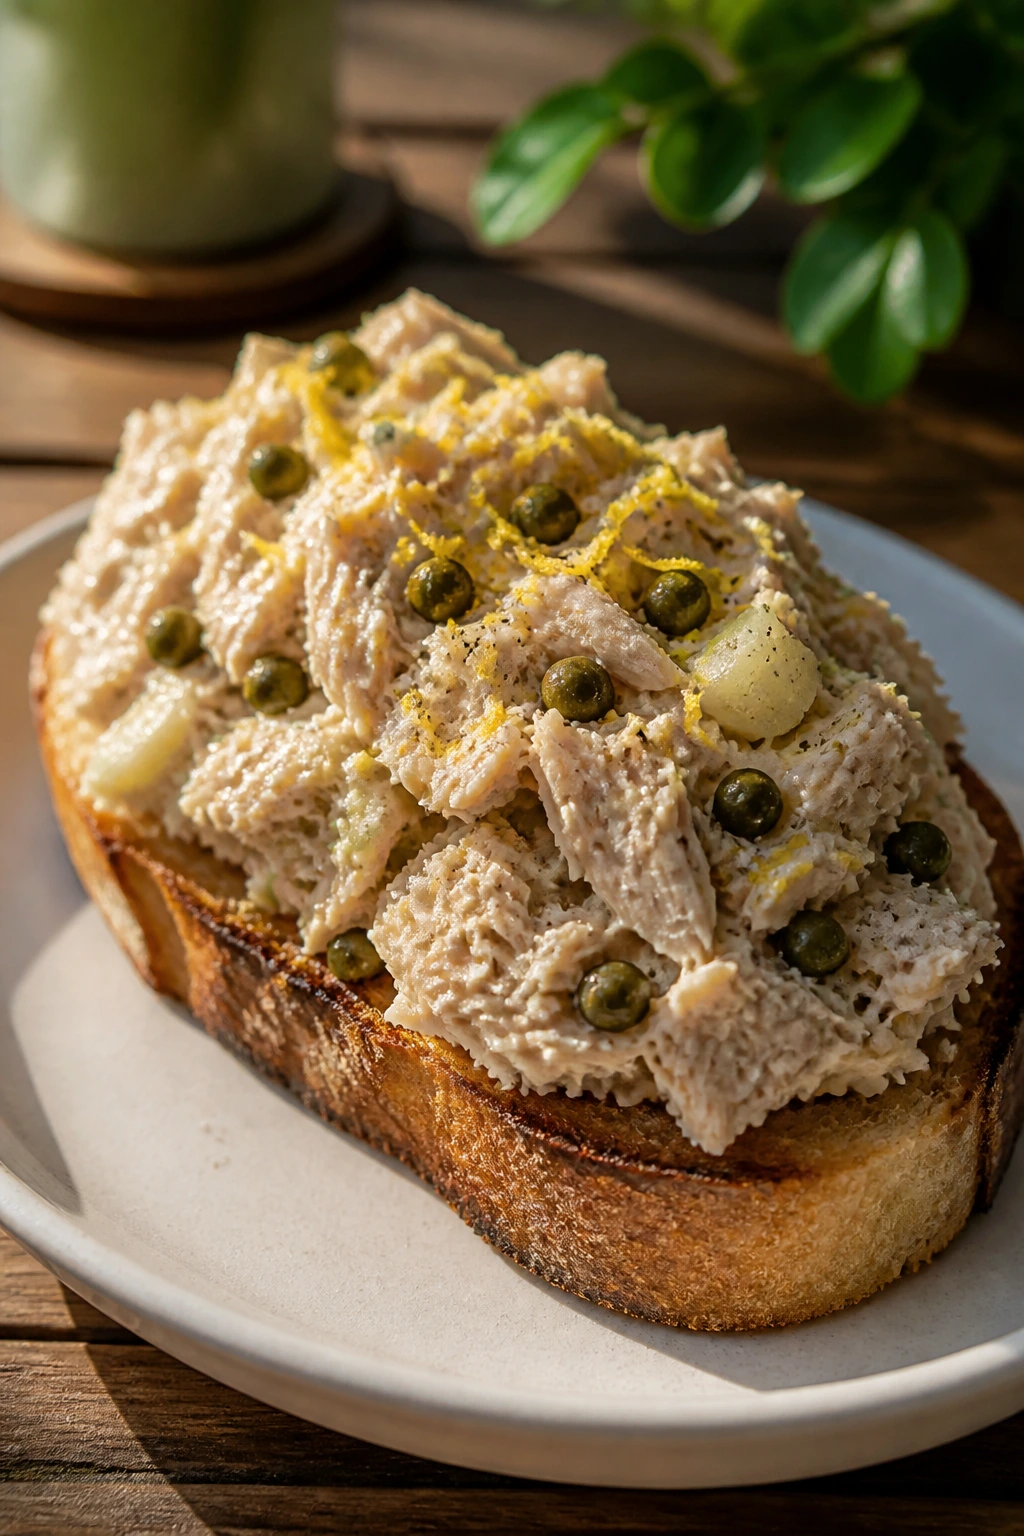
Tuna salad can be dull if you treat it like a pantry chore. Here, lemon and capers cut through the mayo, so each bite tastes bright, briny, and cleaner than the usual canned-fish sandwich that gets forgotten until lunch is over.
Why It Works:
Capers give the tuna a salty pop that wakes everything up. Lemon juice keeps the filling from feeling heavy, and celery adds a crisp bite that matters more than people think. Built on toasted bread or a roll, it travels well and pairs nicely with a cold citrus drink.
Key Ingredients:
- 2 cans tuna in olive oil, drained
- 1/3 cup mayonnaise
- 1 tbsp lemon juice
- 1 tbsp capers, chopped
- 1/3 cup celery, finely diced
- 2 tbsp red onion, minced
- 4 slices sturdy bread or 2 sandwich rolls
- 1 cup lettuce leaves
Quick Steps:
- Flake the tuna into a bowl and drain off any extra oil.
- Stir in mayonnaise, lemon juice, capers, celery, and red onion.
- Toast the bread lightly or split the rolls.
- Layer lettuce on the bread, then spoon on the tuna salad.
- Close, press gently, and wrap tight.
Equipment for This Recipe:
- Mixing bowl
- Fork
- Toaster or skillet
How to Serve This Dish:
Serve it with sparkling water and lime or an iced Arnold Palmer. A handful of potato chips on the side is enough; the sandwich already carries the flavor.
Pro Tips for This Recipe:
- Drain the tuna well, or the filling gets sloshy.
- Chop the capers so the brine spreads through each bite.
- Use bread with some chew; soft white bread gets overwhelmed.
Variations on This Dish:
- Dill Pickle Version: Replace capers with chopped dill pickles.
- Mediterranean Version: Add chopped parsley and a few olives.
- Spicy Version: Stir in a teaspoon of hot sauce or sliced pepperoncini.
Common Mistakes to Avoid with This Dish:
- Don’t drown the tuna in mayo. The filling should cling, not drip.
- Don’t assemble too far ahead if the bread is very soft.
5. Chive Egg Salad on Soft White Bread
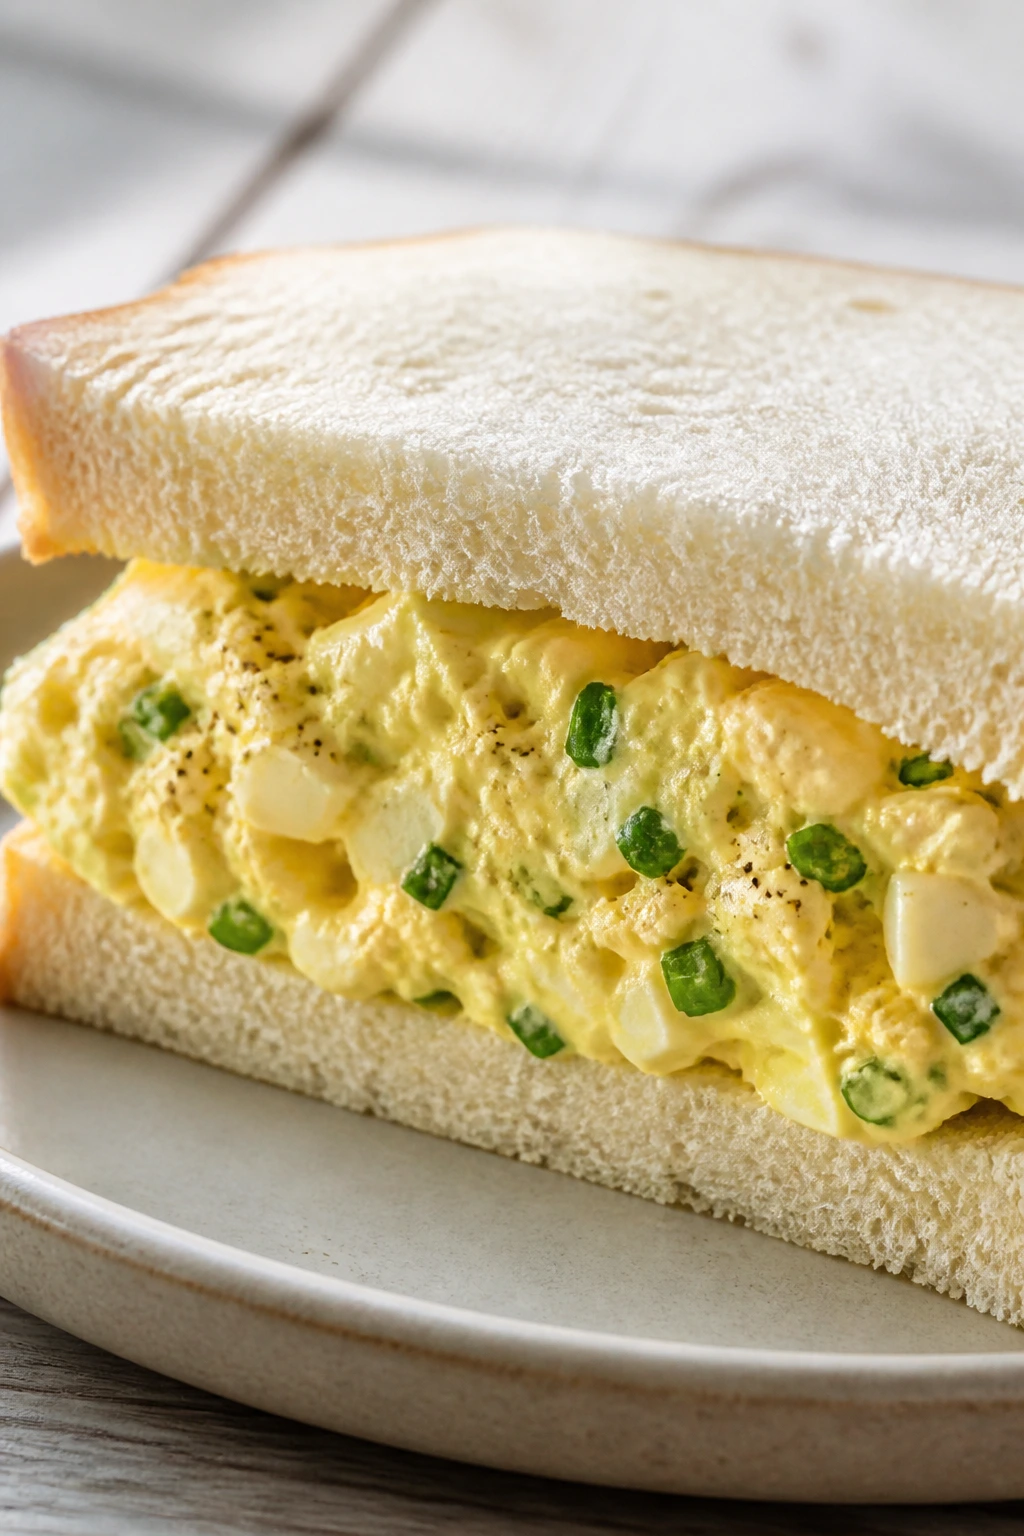
Egg salad has a reputation problem, mostly because too many versions are heavy and bland. With chives, a little Dijon, and soft white bread, it becomes cool, savory, and exactly the sort of thing that disappears while everyone is still setting down their drinks.
Why It Works:
Egg yolks make the filling rich, but chives keep it from feeling flat or dense. Soft bread works here because egg salad already has body; you do not need a chewy loaf fighting it. A little celery salt or Dijon gives the whole sandwich a sharper finish that plays well with iced tea.
Key Ingredients:
- 6 large eggs, hard-boiled and peeled
- 1/4 cup mayonnaise
- 1 tsp Dijon mustard
- 2 tbsp chives, finely chopped
- 1 tbsp celery, very finely diced
- 1/4 tsp celery salt
- 8 slices soft white bread
- Lettuce leaves, optional
Quick Steps:
- Chop the eggs into small pieces and place them in a bowl.
- Stir in mayo, Dijon, chives, celery, and celery salt.
- Taste and adjust the salt, then chill the filling for 10 minutes.
- Spread on bread, add lettuce if using, and close the sandwiches.
- Cut off the crusts or slice in halves for clean edges.
Equipment for This Recipe:
- Saucepan
- Mixing bowl
- Knife
How to Serve This Dish:
A fizzy lemon soda or cold black tea works well against the creamy filling. Keep these chilled until the last minute; egg salad likes cool weather, not long rides in the sun.
Pro Tips for This Recipe:
- Cook the eggs until the yolks are set but not chalky.
- Mash only part of the eggs if you want a little texture.
- Add chives at the end so they stay bright and fresh.
Variations on This Dish:
- Curried Egg Salad: Add 1/2 tsp curry powder and a pinch of turmeric.
- Bacon Egg Salad: Fold in 3 strips of crisp bacon, crumbled.
- Avocado Version: Replace half the mayo with mashed avocado.
Common Mistakes to Avoid with This Dish:
- Don’t chop the eggs too finely unless you want paste.
- Don’t leave egg salad warm; the texture goes loose fast.
6. Ham, Swiss, and Honey Mustard Baguette

Ham and Swiss on a baguette sounds plain until the honey mustard wakes it up. The crust gives you a satisfying crack, the cheese softens just enough, and the whole thing has that salty-sweet balance that works with a cold drink on a hot patch of grass.
Why It Works:
Baguette is sturdy enough to survive a little compression, which matters when you’re packing sandwiches in parchment and stacking them in a cooler. Swiss melts nicely if you toast the bread first, but it also tastes good chilled, so this one has flexibility. Honey mustard bridges the salty ham and the slightly sweet bread.
Key Ingredients:
- 1 small baguette, split lengthwise
- 8 oz thinly sliced ham
- 4 oz Swiss cheese, sliced
- 2 tbsp mayonnaise
- 1 tbsp Dijon mustard
- 1 tbsp honey
- 1 cup lettuce or baby spinach
- 2 tbsp softened butter
Quick Steps:
- Stir mayonnaise, Dijon, and honey into a smooth spread.
- Slice the baguette and spread butter on both cut sides.
- Add the honey mustard, then layer ham, Swiss, and greens.
- Close the baguette and press it gently.
- Wrap tightly and slice into picnic-sized pieces.
Equipment for This Recipe:
- Serrated knife
- Small bowl
- Parchment paper
How to Serve This Dish:
This sandwich likes iced tea or a crisp lager-style nonalcoholic drink. Serve with dill pickles and salty chips so the plate has a little bite.
Pro Tips for This Recipe:
- Butter the bread first; it slows down moisture from the mustard.
- Keep the lettuce dry or it slides around inside the baguette.
- If the crust is too sharp, score the baguette into shorter pieces before packing.
Variations on This Dish:
- Deli-Style Version: Add thin sliced dill pickles and black pepper.
- Rye Swap: Use rye bread instead of baguette for a deeper flavor.
- Smoked Ham Version: Use smoked ham and skip the honey for a cleaner bite.
Common Mistakes to Avoid with This Dish:
- Don’t go heavy on the mustard. Too much and the sandwich tastes sharp instead of balanced.
- Don’t pack it before the bread has cooled if you toasted it.
7. Italian Deli Grinder
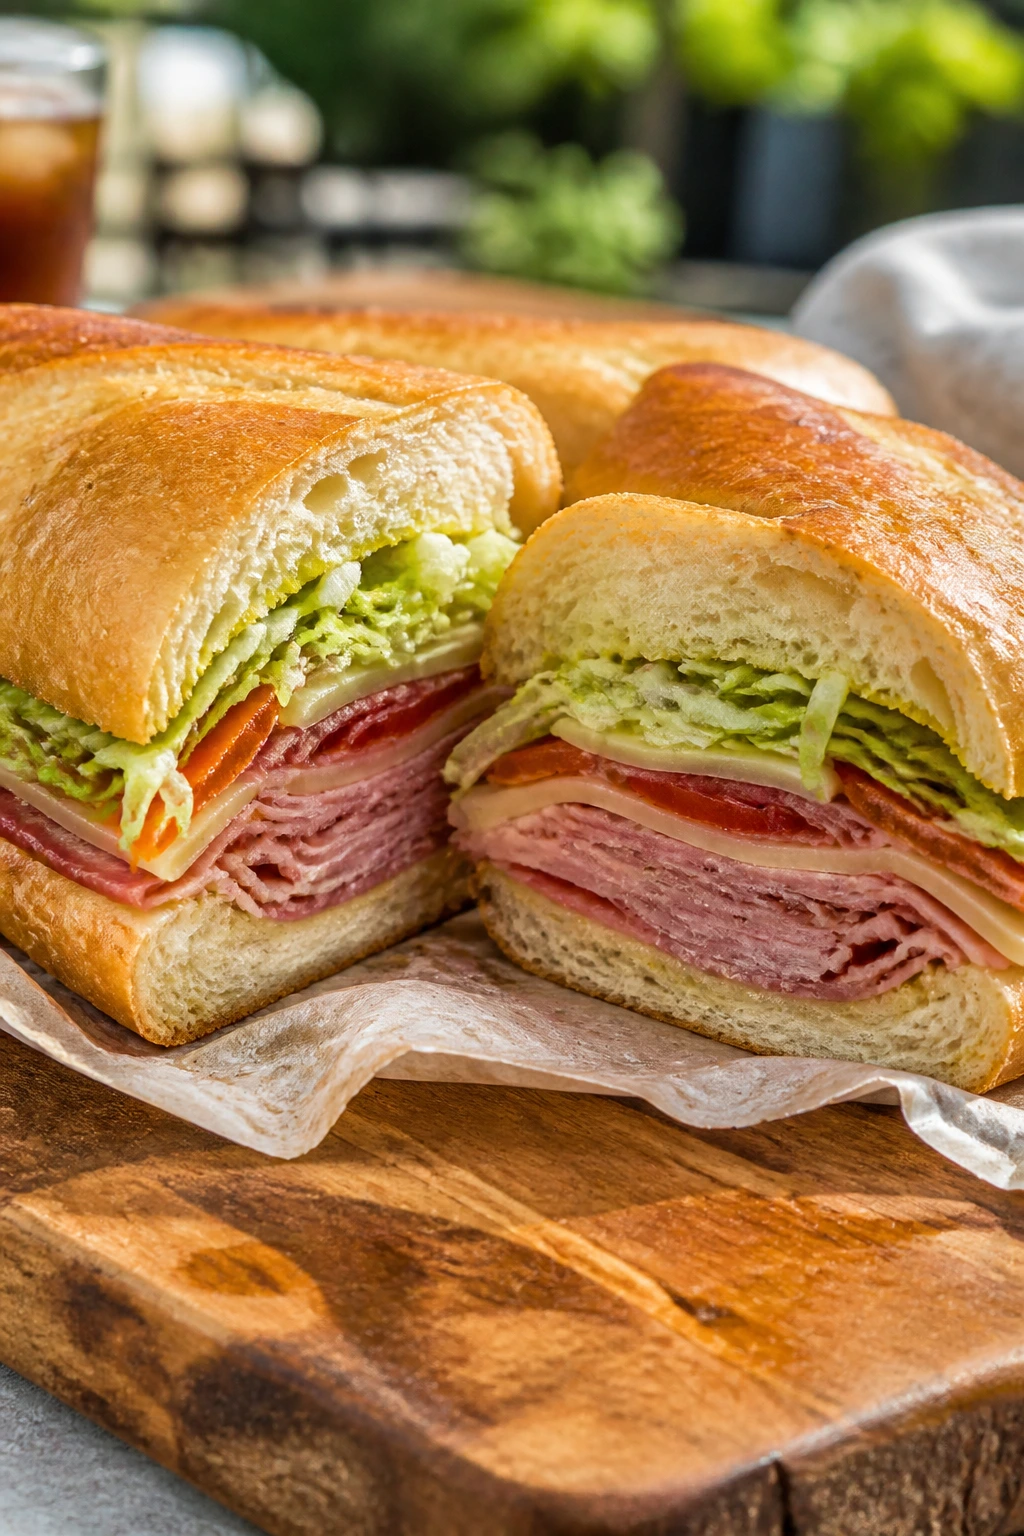
This is the sandwich that smells like a deli counter the second you unwrap it. Salami, ham, provolone, peppers, and crisp lettuce hit different when they’ve had a little time to sit together, and a cold sparkling drink cuts through the richness in exactly the right way.
Why It Works:
The grinder formula is built for contrast: salty meats, creamy cheese, sharp peppers, and a crunchy salad layer. If you keep the wet ingredients together and the bread protected with a little mayo or oil, it stays satisfyingly chewy instead of soggy. This one also likes a short rest in the fridge before eating.
Key Ingredients:
- 1 large baguette or grinder roll
- 4 oz sliced salami
- 4 oz sliced ham
- 4 oz provolone cheese
- 1 cup shredded iceberg lettuce
- 1/2 cup sliced tomato, seeds removed
- 1/4 cup pepperoncini, sliced
- 2 tbsp olive oil
- 1 tbsp red wine vinegar
Quick Steps:
- Toss lettuce with olive oil, vinegar, and a pinch of salt.
- Split the roll and layer salami, ham, and provolone.
- Add tomato slices, pepperoncini, and the dressed lettuce.
- Press the sandwich lightly so the layers settle.
- Wrap in parchment and chill for 15 minutes before slicing.
Equipment for This Recipe:
- Cutting board
- Serrated knife
- Small bowl
How to Serve This Dish:
Serve the grinder with sparkling water, iced tea, or an extra-cold lemon soda. A few olives on the side make the plate feel complete without asking for much more work.
Pro Tips for This Recipe:
- Remove tomato seeds so the bread doesn’t get damp.
- Dress the lettuce separately, not the whole sandwich.
- Use a roll with a firm crust and a chewy center.
Variations on This Dish:
- Turkey Grinder: Swap the ham and salami for sliced turkey.
- Hot Pepper Version: Add hot cherry peppers for more bite.
- Vegetarian Grinder: Use roasted mushrooms, provolone, and marinated peppers.
Common Mistakes to Avoid with This Dish:
- Don’t drown the greens in oil. You want gloss, not runoff.
- Don’t use watery tomatoes unless you’ve seeded them first.
8. Roast Beef, Horseradish, and Arugula
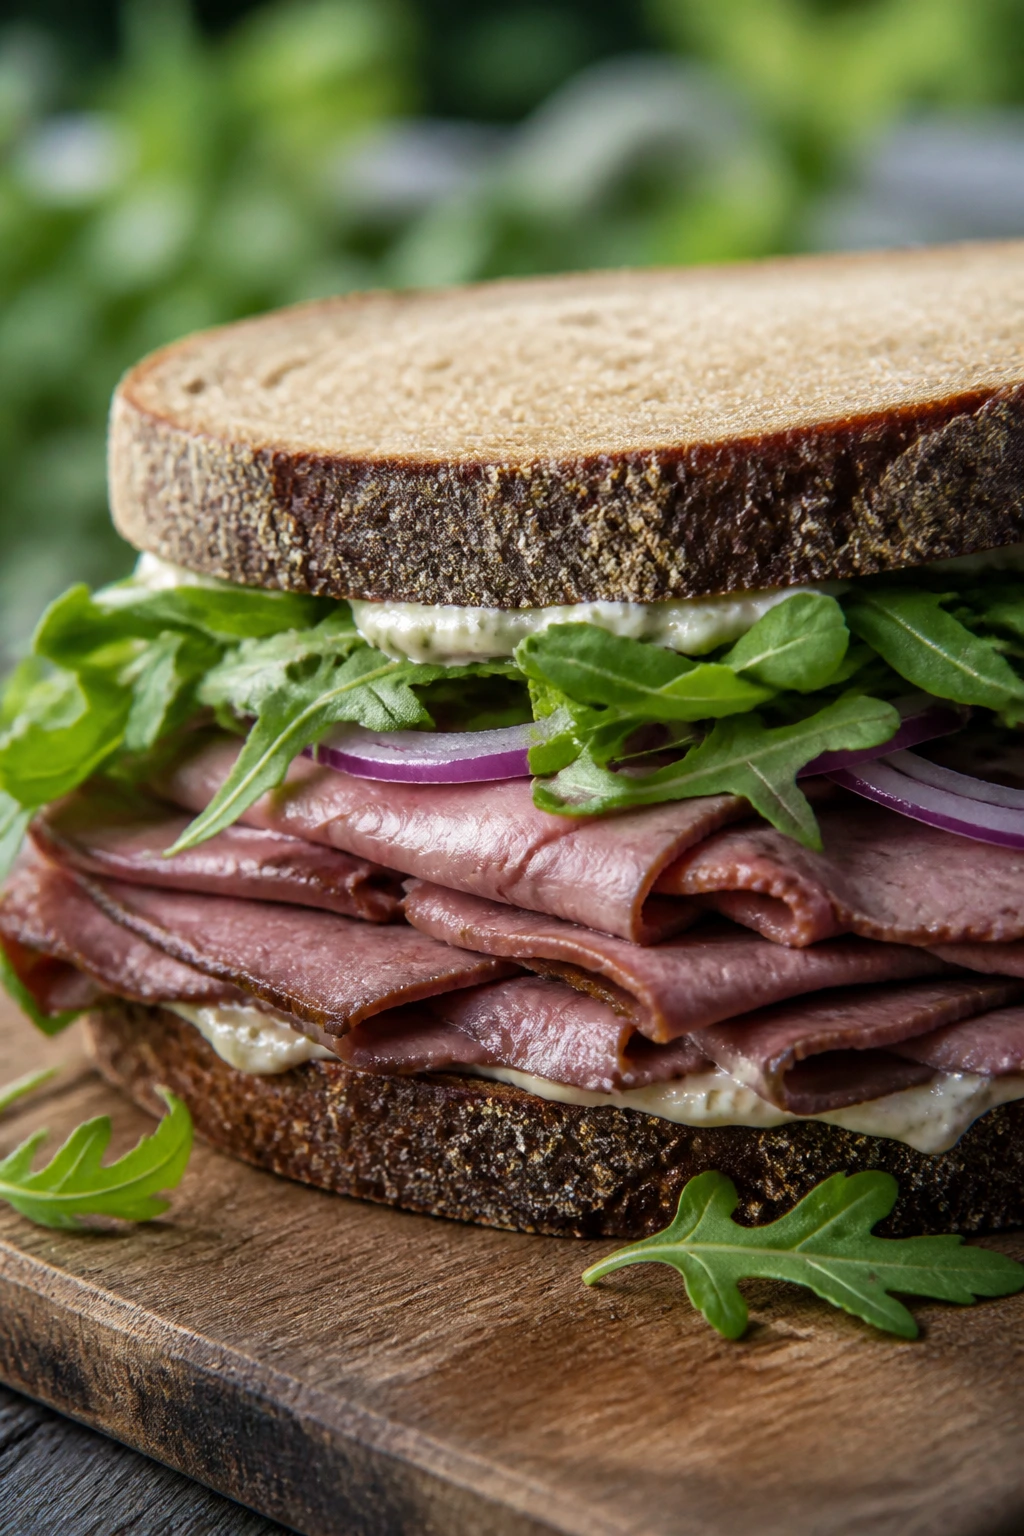
Roast beef wants a little fire behind it, and horseradish is the right kind of sharp. Arugula brings a peppery edge that keeps the sandwich from feeling heavy, so even with a cold drink beside it, the whole bite stays lively.
Why It Works:
Rare or medium-rare roast beef tastes best when it’s sliced thin and layered loosely, not packed into a dense mound. Horseradish mayo gives you heat without making the sandwich dry, and arugula adds a fresh finish. Rye or a good baguette gives the sandwich enough backbone for picnic handling.
Key Ingredients:
- 8 slices rye bread or 1 baguette
- 8 oz sliced roast beef
- 2 tbsp mayonnaise
- 1 tbsp prepared horseradish
- 1 cup arugula
- 1/2 small red onion, thinly sliced
- 4 slices sharp cheddar, optional
- 1 tbsp softened butter
Quick Steps:
- Mix the mayonnaise and horseradish together.
- Butter the bread lightly, then spread on the horseradish mayo.
- Layer roast beef, cheddar if using, arugula, and red onion.
- Close the sandwich and press it gently.
- Wrap well and cut just before serving.
Equipment for This Recipe:
- Serrated knife
- Mixing bowl
- Butter knife
How to Serve This Dish:
Iced tea or a cold cola-style drink works well here. Add kettle chips and pickles, and you’ve got a plate that feels hearty without turning into a heavy meal.
Pro Tips for This Recipe:
- Slice the onion paper-thin so it sharpens the sandwich instead of taking it over.
- Use less horseradish than you think at first; you can always add more.
- If the beef is very lean, a slice of cheese helps keep the sandwich from tasting dry.
Variations on This Dish:
- Blue Cheese Version: Replace cheddar with crumbled blue cheese.
- French Dip-Inspired Version: Add a little mayonnaise mixed with beef drippings or broth seasoning.
- Caramelized Onion Version: Swap raw onion for slow-cooked onions.
Common Mistakes to Avoid with This Dish:
- Don’t pile the beef too high. Thick stacks fall apart in a basket.
- Don’t use thick horseradish straight from the jar without balancing it with mayo.
9. Caprese Ciabatta with Basil Pesto
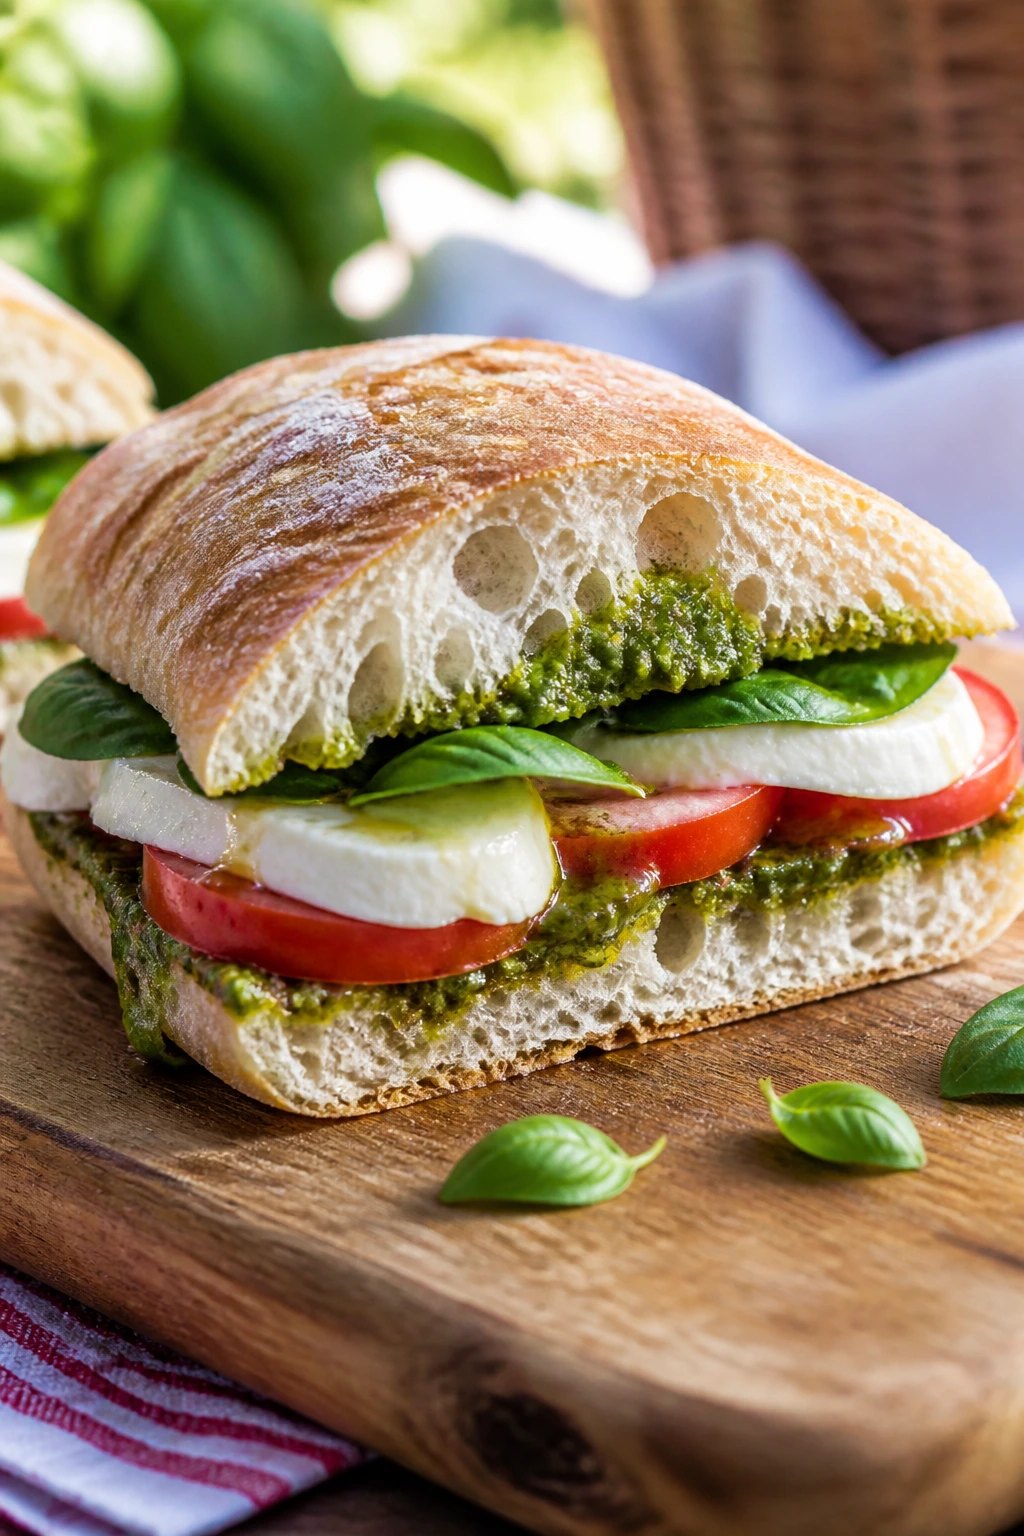
Caprese on ciabatta works because it tastes like summer but still behaves like lunch. The tomatoes bring juice, the mozzarella brings cool creaminess, and the pesto keeps the sandwich from feeling like salad on bread.
Why It Works:
Ciabatta has holes and chew, which makes it better for juicy fillings than many soft loaves. The mozzarella acts as a buffer between the tomato and bread, and pesto gives the sandwich a saltier, herbier backbone. If you salt the tomato and let it sit for a minute, the whole thing gets cleaner and more focused.
Key Ingredients:
- 1 ciabatta loaf, split into 4 portions
- 8 oz fresh mozzarella, sliced
- 2 medium tomatoes, sliced
- 3 tbsp basil pesto
- 1 cup basil leaves
- 1 tbsp olive oil
- 1 tsp balsamic glaze
- 1/2 tsp flaky salt
Quick Steps:
- Salt the tomato slices lightly and let them rest for 5 minutes.
- Spread pesto on the cut sides of the ciabatta.
- Layer mozzarella, tomatoes, and basil leaves.
- Drizzle with olive oil and a little balsamic glaze.
- Close, press gently, and wrap before packing.
Equipment for This Recipe:
- Serrated knife
- Cutting board
- Small spoon
How to Serve This Dish:
Serve with sparkling lemonade or plain iced tea. This sandwich also likes a side of olives or a tomato-cucumber salad if you want to keep the meal bright.
Pro Tips for This Recipe:
- Drain the mozzarella on paper towels first.
- Salt the tomatoes before assembly to draw off excess juice.
- Assemble close to serving time if the bread is very soft.
Variations on This Dish:
- Prosciutto Caprese: Add 3 oz prosciutto for salt and depth.
- Grilled Veg Version: Add grilled zucchini or eggplant slices.
- Vegan Caprese: Use plant-based mozzarella and extra pesto.
Common Mistakes to Avoid with This Dish:
- Don’t use wet mozzarella straight from the package.
- Don’t overdo the balsamic glaze; a light drizzle is enough.
10. BLT with Basil Mayo
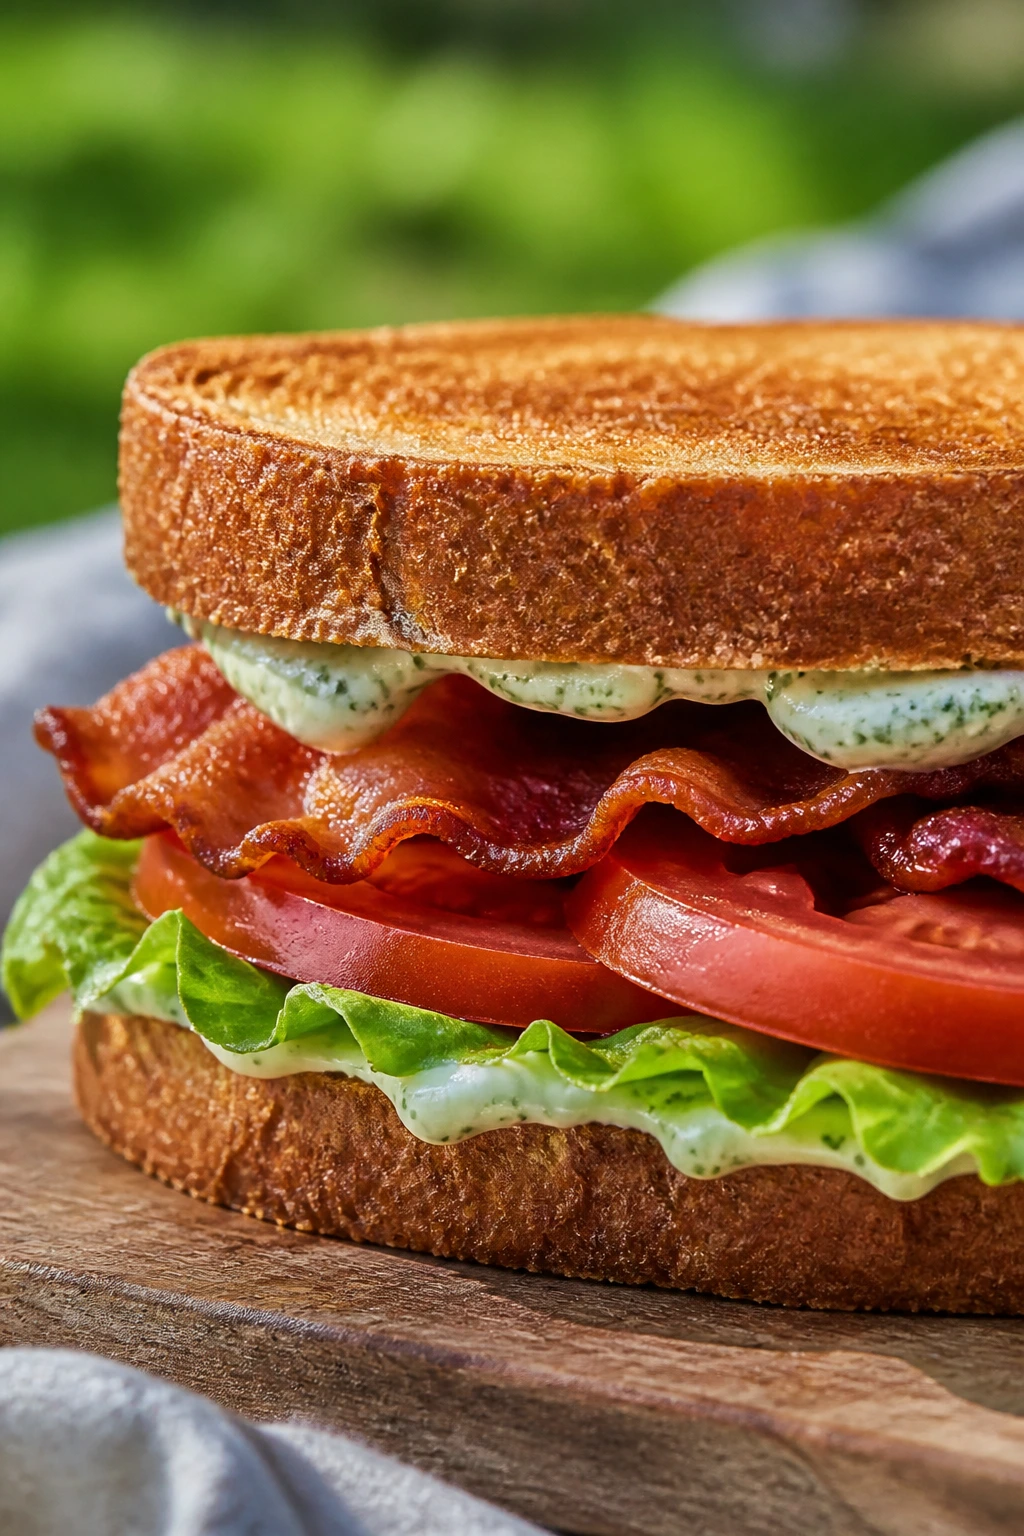
A good BLT is one of the easiest sandwiches to ruin and one of the easiest to love when it’s done right. The bacon should be crisp, the lettuce cold, and the tomato seasoned just enough that the whole thing tastes like a proper lunch and not a stack of separate ingredients.
Why It Works:
Basil mayo gives the classic BLT a fresh edge without messing with the basic formula. Toasted bread matters here because bacon fat and tomato juice can soften plain bread fast. If the tomato is ripe but firm, the sandwich gets juicy without turning slippery.
Key Ingredients:
- 8 slices thick sandwich bread
- 8 strips bacon, cooked crisp
- 2 large tomatoes, sliced
- 1 cup romaine or iceberg lettuce
- 1/4 cup mayonnaise
- 1 tbsp chopped basil
- 1 tbsp butter, softened
- Salt and black pepper
Quick Steps:
- Stir the mayonnaise and basil together.
- Toast the bread lightly and butter one side of each slice.
- Season the tomato slices with salt and pepper.
- Layer lettuce, tomato, and bacon on the basil mayo.
- Close, press gently, and cut on the diagonal.
Equipment for This Recipe:
- Skillet or oven tray
- Knife
- Paper towels
How to Serve This Dish:
A cold glass of iced tea or lemonade fits the salty crunch here. Serve it with potato chips and a few pickle spears if you want the classic picnic shape.
Pro Tips for This Recipe:
- Let the bacon cool before assembling so the bread stays crisp.
- Pat tomato slices with a paper towel before they hit the sandwich.
- Use iceberg if you want maximum crunch; romaine is softer but still works.
Variations on This Dish:
- Avocado BLT: Add sliced avocado for creaminess.
- Fried Green Tomato BLT: Swap ripe tomato for a crisp fried slice.
- Spicy BLT: Add a little hot sauce to the basil mayo.
Common Mistakes to Avoid with This Dish:
- Don’t use bread that’s too soft. It fails the second the tomato juices show up.
- Don’t pack it while the bacon is still warm.
11. Pimento Cheese and Tomato Sandwich
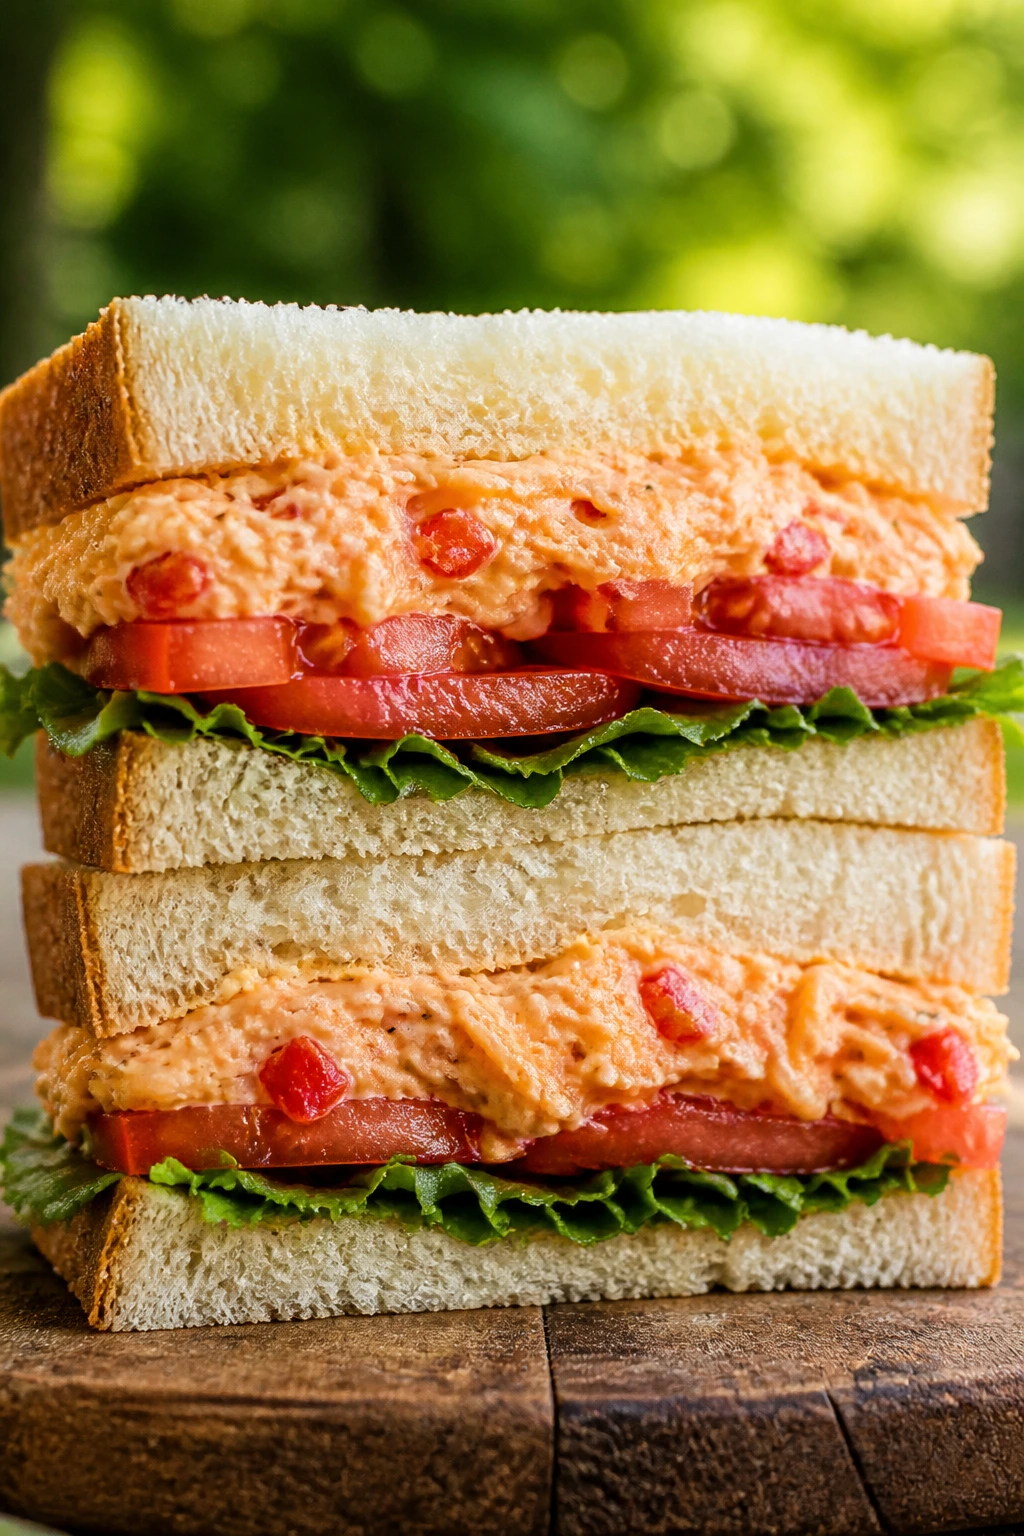
Pimento cheese has the kind of bold, salty richness that makes tomato feel even brighter. On thick bread, it becomes a proper picnic sandwich rather than a smear, and it goes down especially well with something cold and sweet in a glass.
Why It Works:
Pimento cheese does the heavy lifting here, so the tomato only has to be ripe and juicy, not perfect. Thick bread gives the sandwich a sturdy frame, and a little lettuce or butter between the filling and tomato keeps the bread from getting sticky. This one tastes even better if it sits for a little while.
Key Ingredients:
- 8 slices thick white bread or pullman loaf
- 1 cup pimento cheese
- 2 large tomatoes, sliced
- 1 cup lettuce leaves
- 2 tbsp softened butter
- 1/4 tsp black pepper
- 1 tbsp sliced pickled jalapeños, optional
Quick Steps:
- Butter one side of each bread slice.
- Spread pimento cheese on four slices.
- Add lettuce, tomato, and jalapeños if using.
- Season the tomato lightly with black pepper.
- Close, wrap, and chill for 10 minutes before cutting.
Equipment for This Recipe:
- Butter knife
- Sharp knife
- Cutting board
How to Serve This Dish:
Sweet tea is the obvious drink here, though cold sparkling water works too. Add a handful of kettle chips and you have a lunch that needs almost nothing else.
Pro Tips for This Recipe:
- Use firm tomatoes so the sandwich doesn’t leak.
- Keep the pimento cheese thick; thin spread becomes messy fast.
- A quick chill helps the layers settle.
Variations on This Dish:
- Bacon Pimento Version: Add crisp bacon for smoke and crunch.
- Jalapeño Version: Stir chopped jalapeños into the pimento cheese.
- Open-Face Version: Serve on toasted bread for a sharper, less messy bite.
Common Mistakes to Avoid with This Dish:
- Don’t stack too many tomato slices. One or two good ones are enough.
- Don’t use floppy sandwich bread; it gets crushed by the cheese.
12. Peanut Butter, Banana, and Honey Press
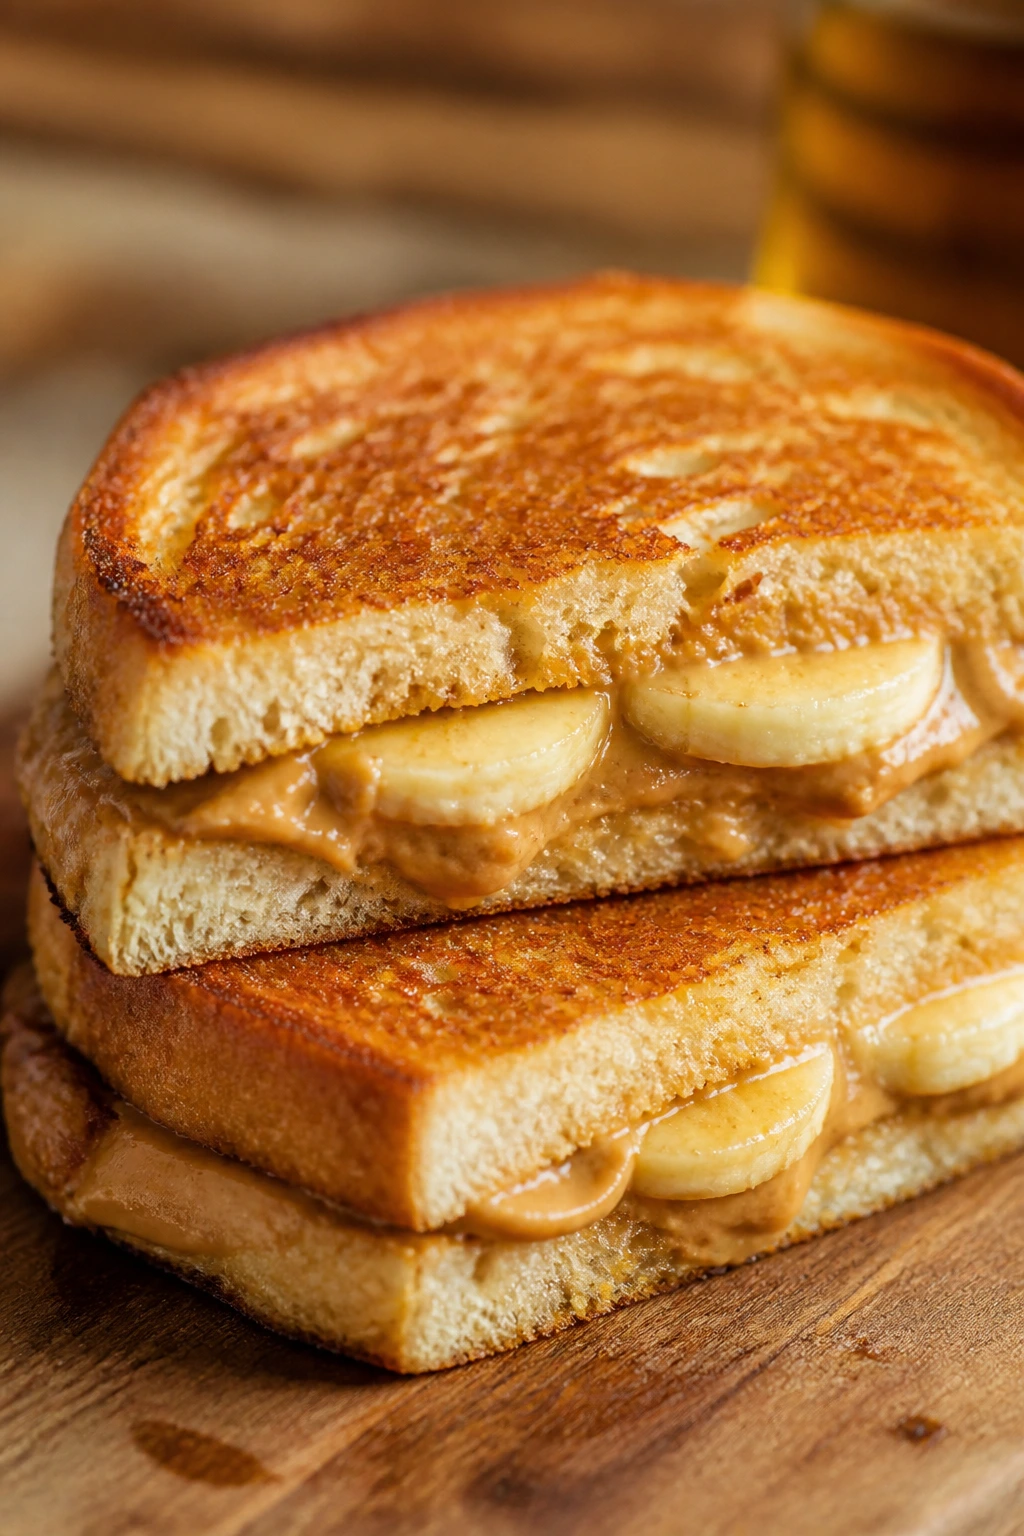
This one is sweet, yes, but it’s also practical. Peanut butter clings to the bread, banana softens into the middle, and honey ties the whole thing together, especially if you press it lightly until the edges go golden and a little crisp.
Why It Works:
Peanut butter makes a natural moisture barrier, which is why this sandwich packs better than most sweet fillings. A quick press in the skillet firms the bread and keeps the banana from sliding around. Cinnamon gives it just enough warmth to work with a cold milkshake-style drink or iced coffee.
Key Ingredients:
- 8 slices sturdy sandwich bread
- 1/2 cup creamy peanut butter
- 2 medium bananas, sliced
- 2 tbsp honey
- 1/2 tsp cinnamon
- 1 tbsp butter
- Pinch of salt
Quick Steps:
- Spread peanut butter on four slices of bread.
- Layer banana slices evenly, then drizzle with honey.
- Sprinkle on cinnamon and a tiny pinch of salt.
- Close the sandwiches and butter the outsides.
- Press in a skillet over medium heat for 2 to 3 minutes per side.
Equipment for This Recipe:
- Skillet
- Spatula
- Knife
How to Serve This Dish:
Serve warm with cold milk, iced coffee, or a vanilla cold brew. If you’re packing it for later, let it cool before wrapping so condensation doesn’t soften the crust.
Pro Tips for This Recipe:
- Use bananas that are ripe but still firm.
- Press gently; too much weight squeezes the filling out.
- A little salt keeps the sweetness from flattening out.
Variations on This Dish:
- Jam Swirl Version: Add a thin layer of strawberry jam.
- Almond Butter Version: Swap the peanut butter for almond butter.
- Granola Crunch Version: Add 2 tbsp granola for texture.
Common Mistakes to Avoid with This Dish:
- Don’t use overripe bananas. They turn mushy fast.
- Don’t skip the salt. The flavor gets one-note without it.
13. Hummus and Roasted Vegetable Wrap
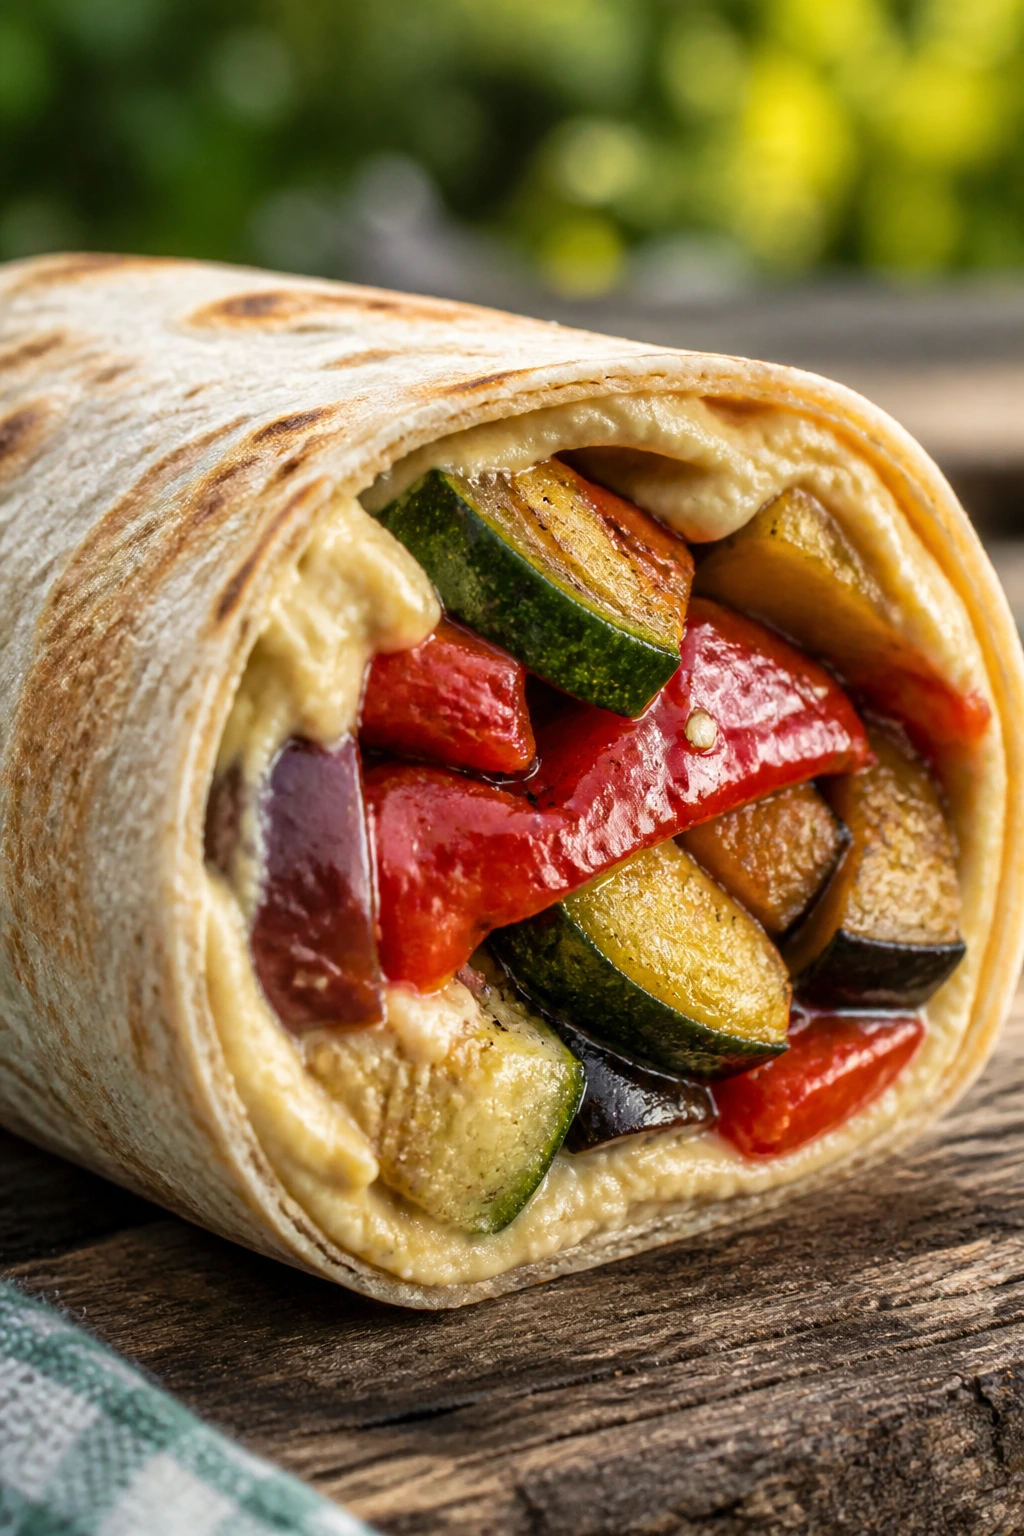
Roasted vegetables and hummus are one of the easiest ways to make a vegetarian picnic sandwich that still feels substantial. The wrap keeps everything tidy, and if the vegetables are roasted until their edges brown a little, the whole thing tastes deeper than the ingredient list suggests.
Why It Works:
Hummus spreads cleanly and helps the wrap resist moisture from the vegetables. Roasted zucchini, peppers, and eggplant bring sweetness and a soft, savory chew that plays well against cool greens. This is a sandwich that can sit for a while without getting dramatic about it.
Key Ingredients:
- 4 large flour tortillas
- 1 cup hummus
- 1 zucchini, sliced and roasted
- 1 red bell pepper, sliced and roasted
- 1 cup roasted eggplant or mushrooms
- 2 cups baby spinach
- 1/4 cup crumbled feta, optional
- 1 tbsp olive oil
Quick Steps:
- Roast the vegetables until tender and lightly browned, then cool them.
- Spread hummus over each tortilla, leaving a border.
- Layer spinach, vegetables, and feta if using.
- Roll the wraps tightly and tuck the ends in.
- Chill briefly, then slice on the diagonal.
Equipment for This Recipe:
- Sheet pan
- Oven
- Large knife
How to Serve This Dish:
This wrap likes mint lemonade or sparkling water with cucumber. Pack it with olives or a little fruit salad and you have a lighter picnic plate that still eats like lunch.
Pro Tips for This Recipe:
- Cool the vegetables completely before rolling.
- Don’t overfill the tortilla or the seam splits.
- Warm the tortilla for a few seconds first so it rolls without cracking.
Variations on This Dish:
- Mediterranean Version: Add olives and chopped sun-dried tomatoes.
- Spicy Version: Stir harissa into the hummus.
- Dairy-Free Version: Skip the feta and add avocado.
Common Mistakes to Avoid with This Dish:
- Don’t pack hot vegetables into the wrap.
- Don’t use watery roasted vegetables; they ruin the tortilla.
14. Falafel Pita with Tahini and Pickles
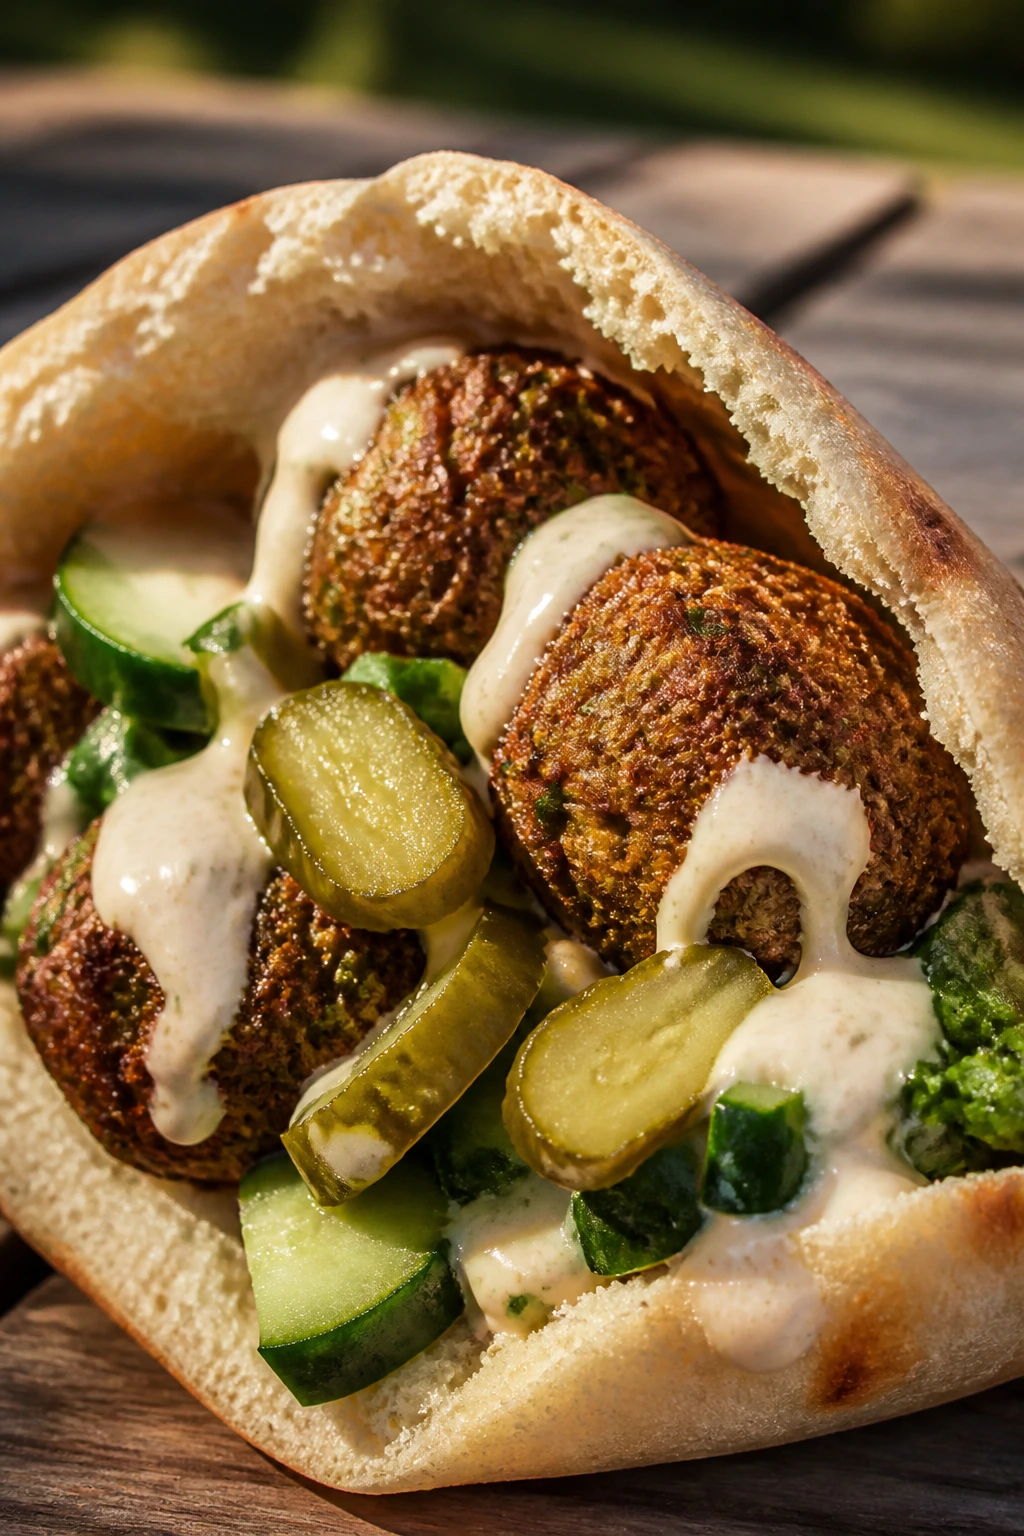
Falafel in a pita is the kind of sandwich that feels lively even before the first bite. The crisp chickpea balls, creamy tahini, and sharp pickles give you crunch, richness, and acid all at once, which is exactly why it’s happy beside a cold drink.
Why It Works:
Falafel brings structure, so the pita doesn’t feel empty or flimsy. Tahini adds nutty depth, while pickles and cucumber keep the filling from tasting dry. If you tuck the fillings low and keep the sauce modest, the sandwich stays neat enough to carry.
Key Ingredients:
- 4 pita pockets
- 12 falafel balls, cooked
- 1/3 cup tahini
- 2 tbsp lemon juice
- 1/4 cup sliced cucumber
- 1/4 cup chopped pickles or pickled turnips
- 1 cup shredded lettuce
- 2 tbsp water
Quick Steps:
- Whisk tahini, lemon juice, and water into a smooth sauce.
- Warm the pita briefly so it opens without tearing.
- Fill each pita with lettuce, falafel, cucumber, and pickles.
- Drizzle on the tahini sauce.
- Pack each one tightly in parchment.
Equipment for This Recipe:
- Skillet or oven
- Small bowl
- Spoon
How to Serve This Dish:
Serve with iced mint tea or lime soda. A little chopped tomato on the side works well, but keep it separate so the pita doesn’t get wet before you eat it.
Pro Tips for This Recipe:
- Use slightly warm falafel so it tastes fresh, not stale.
- Thin the tahini enough to drizzle, not glue.
- Pack the sauce separately if the pita is very soft.
Variations on This Dish:
- Spicy Falafel Version: Add chili sauce or hot pickles.
- Hummus Version: Use hummus instead of tahini for a thicker fill.
- Wrap Version: Roll the same ingredients in a flatbread.
Common Mistakes to Avoid with This Dish:
- Don’t overstuff the pita; it splits fast.
- Don’t use dry falafel straight from the fridge without warming it first.
15. Smoked Salmon, Dill, and Cream Cheese Bagel
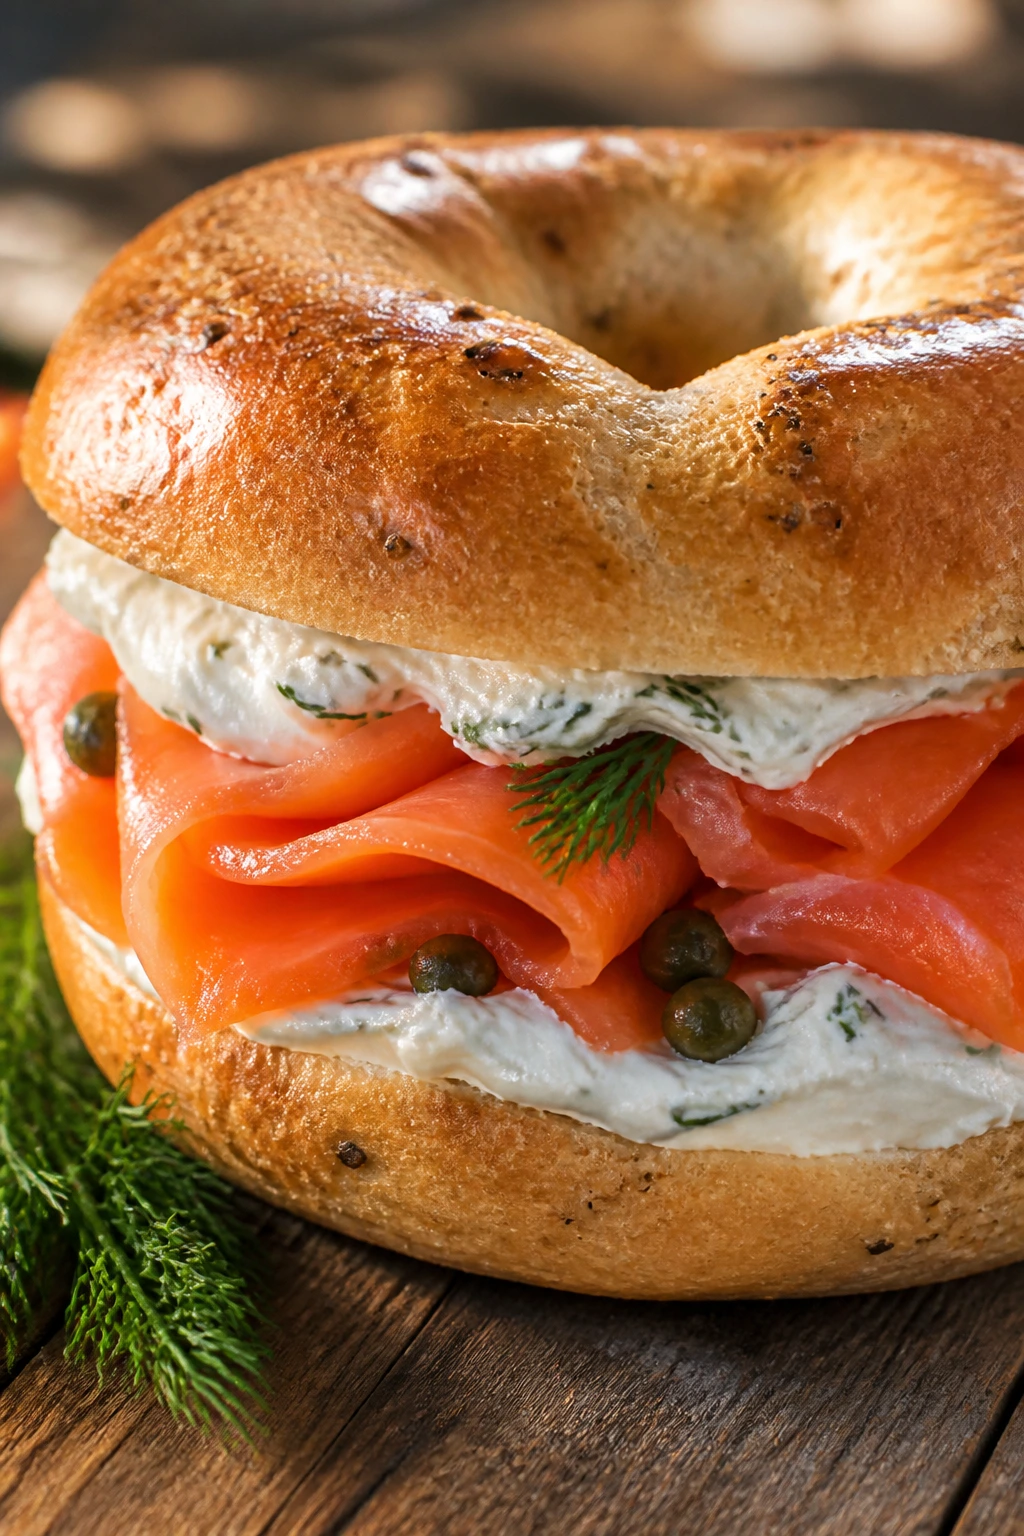
This one is salty, cool, and very much in its own lane. Smoked salmon wants creamy cheese, dill, and a bagel with enough chew to keep the sandwich from feeling dainty in the wrong way.
Why It Works:
The bagel is the whole point here; it gives the sandwich heft and a little resistance. Cream cheese tames the saltiness of the salmon, and dill plus capers bring sharp little pops that keep each bite moving. A few cucumber slices make the whole thing feel fresher and less dense.
Key Ingredients:
- 4 bagels, split
- 6 oz cream cheese, softened
- 6 oz smoked salmon
- 1 tbsp fresh dill, chopped
- 1 tbsp capers
- 1/2 small red onion, very thinly sliced
- 1/2 cucumber, sliced thin
- 1 tsp lemon juice
Quick Steps:
- Mix the cream cheese with dill and lemon juice.
- Toast the bagels lightly if you want more texture.
- Spread the cream cheese on both halves.
- Layer salmon, cucumber, onion, and capers.
- Close, wrap, and chill briefly.
Equipment for This Recipe:
- Serrated knife
- Small bowl
- Spoon or spreader
How to Serve This Dish:
This is a good match for sparkling water, iced black tea, or lemon soda. Serve it with fruit if you want sweetness on the side, because the sandwich itself leans salty and clean.
Pro Tips for This Recipe:
- Slice the onion paper-thin so it doesn’t overpower the salmon.
- Dry the cucumber lightly before layering.
- Don’t skip the lemon; it keeps the cream cheese from feeling flat.
Variations on This Dish:
- Avocado Version: Add sliced avocado under the salmon.
- Everything Bagel Version: Use everything-seasoned bagels and skip extra capers.
- Lox Plate Version: Serve open-face with extra cucumber and tomato.
Common Mistakes to Avoid with This Dish:
- Don’t use too much cream cheese or the salmon gets buried.
- Don’t build it too far ahead if the bagels are fresh and very soft.
16. Curried Chickpea Salad Sandwich
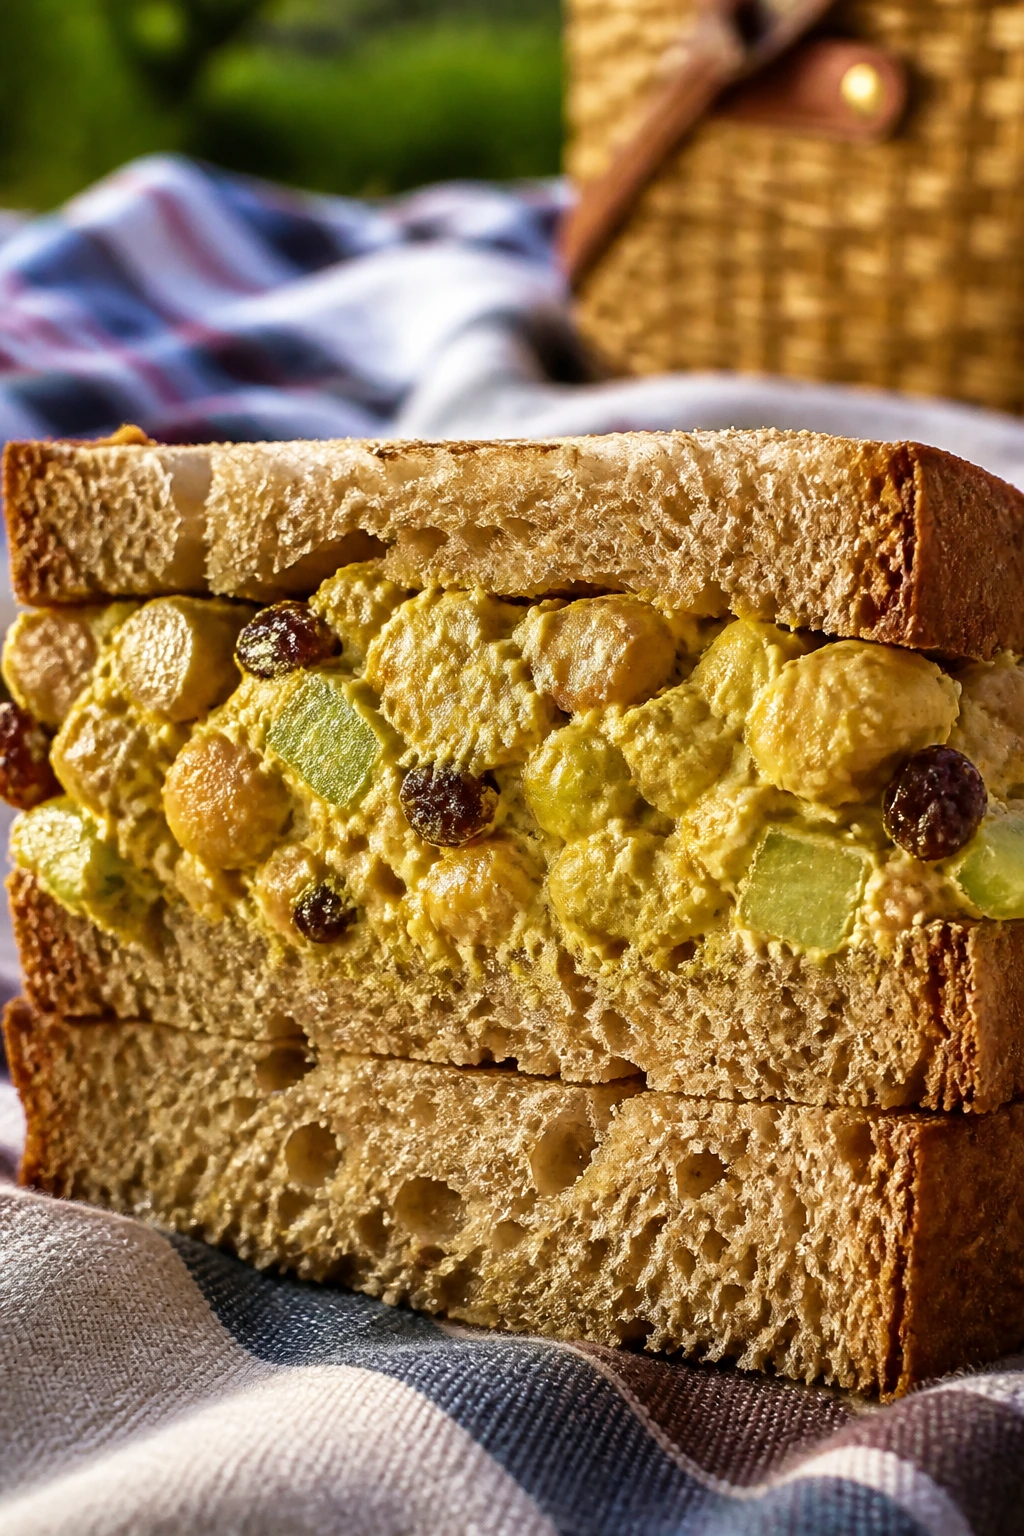
Curried chickpea salad is one of those fillings that tastes better after it sits for a bit. The chickpeas bring body, the curry gives warmth, and the little sweet notes from raisins or apple keep the whole thing from getting stuck in one gear.
Why It Works:
Mashing part of the chickpeas makes the filling hold together while still leaving some texture. Curry powder and lemon brighten the mayo, so the sandwich tastes bigger than the ingredient list. This one does well on bread, in a pita, or tucked into lettuce cups with a cold drink nearby.
Key Ingredients:
- 2 cans chickpeas, drained and rinsed
- 1/3 cup mayonnaise
- 1 tbsp plain yogurt
- 1 tsp curry powder
- 1/3 cup celery, diced
- 2 tbsp raisins or chopped dried cranberries
- 2 tbsp red onion, minced
- 8 slices bread or 4 pitas
Quick Steps:
- Mash about half the chickpeas in a bowl.
- Stir in mayonnaise, yogurt, curry powder, celery, raisins, and onion.
- Season with salt and lemon juice to taste.
- Spoon onto bread or into pitas.
- Chill for 15 minutes if you want a firmer filling.
Equipment for This Recipe:
- Mixing bowl
- Fork
- Knife
How to Serve This Dish:
Serve with iced tea or sparkling water with lime. Add sliced cucumber or carrot sticks on the side to keep the whole lunch crisp and fresh.
Pro Tips for This Recipe:
- Mash only half the chickpeas; full mash makes it gluey.
- Let the filling sit for 10 minutes so the curry blooms.
- Add chopped apple if you want more crunch and a sharper sweet note.
Variations on This Dish:
- Apple Curry Version: Replace raisins with diced apple.
- Vegan Version: Use vegan mayo and skip the yogurt.
- Spicy Version: Add a pinch of cayenne or chili flakes.
Common Mistakes to Avoid with This Dish:
- Don’t leave the filling too loose or it falls out of the bread.
- Don’t use stale curry powder; the flavor turns dusty fast.
17. Muffuletta on Round Bread
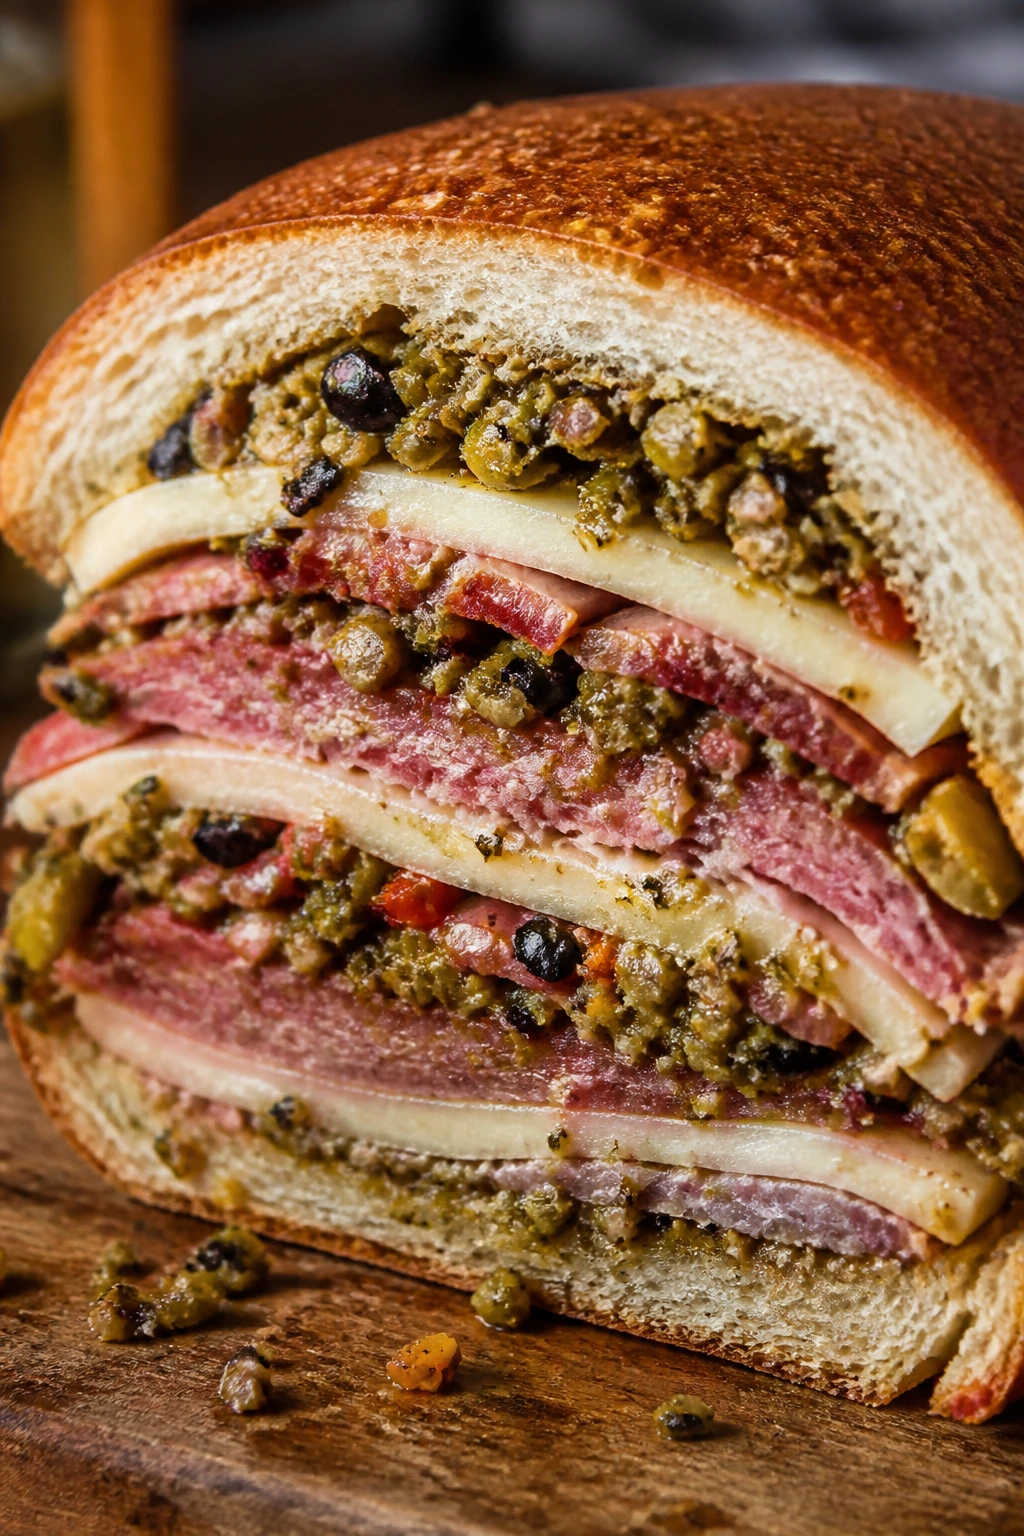
A muffuletta is not subtle, and that’s why it belongs at a picnic. The olive salad spreads through the meat and cheese, and after a short rest, the whole sandwich tastes like it has been waiting for the occasion instead of pretending to be delicate.
Why It Works:
The round loaf gives you enough space for layered meats and cheese, while the olive salad adds salt, acid, and oil all at once. This is a sandwich that actually improves after a short rest because the bread absorbs flavor instead of just getting wet. It pairs nicely with a plain cold drink that can clean up the olive richness.
Key Ingredients:
- 1 round loaf or muffuletta bread, split
- 4 oz salami
- 4 oz ham
- 4 oz mortadella
- 4 oz provolone
- 1/2 cup olive salad
- 1 tbsp olive oil
- 1 cup shredded lettuce, optional
Quick Steps:
- Drizzle the cut bread lightly with olive oil.
- Layer salami, ham, mortadella, and provolone.
- Spoon the olive salad evenly over the meats.
- Add lettuce if using, then close the loaf.
- Wrap tightly, press with a plate, and rest for 30 minutes.
Equipment for This Recipe:
- Serrated knife
- Parchment
- Small spoon
How to Serve This Dish:
Serve with sparkling water, iced tea, or even a simple lemon soda. Cut the loaf into wedges; that makes it much easier to share than trying to hand out giant slices.
Pro Tips for This Recipe:
- Chop the olive salad finely so it spreads cleanly.
- Give the sandwich time to settle; muffuletta is better after a rest.
- Use bread with some structure or the oil takes over.
Variations on This Dish:
- Turkey Muffuletta: Swap all the meats for sliced turkey.
- Giardiniera Version: Replace olive salad with chopped giardiniera.
- Cheese-Forward Version: Add extra provolone and skip the lettuce.
Common Mistakes to Avoid with This Dish:
- Don’t skimp on wrapping. The olive salad needs containment.
- Don’t cut it immediately; the flavors need a few minutes to merge.
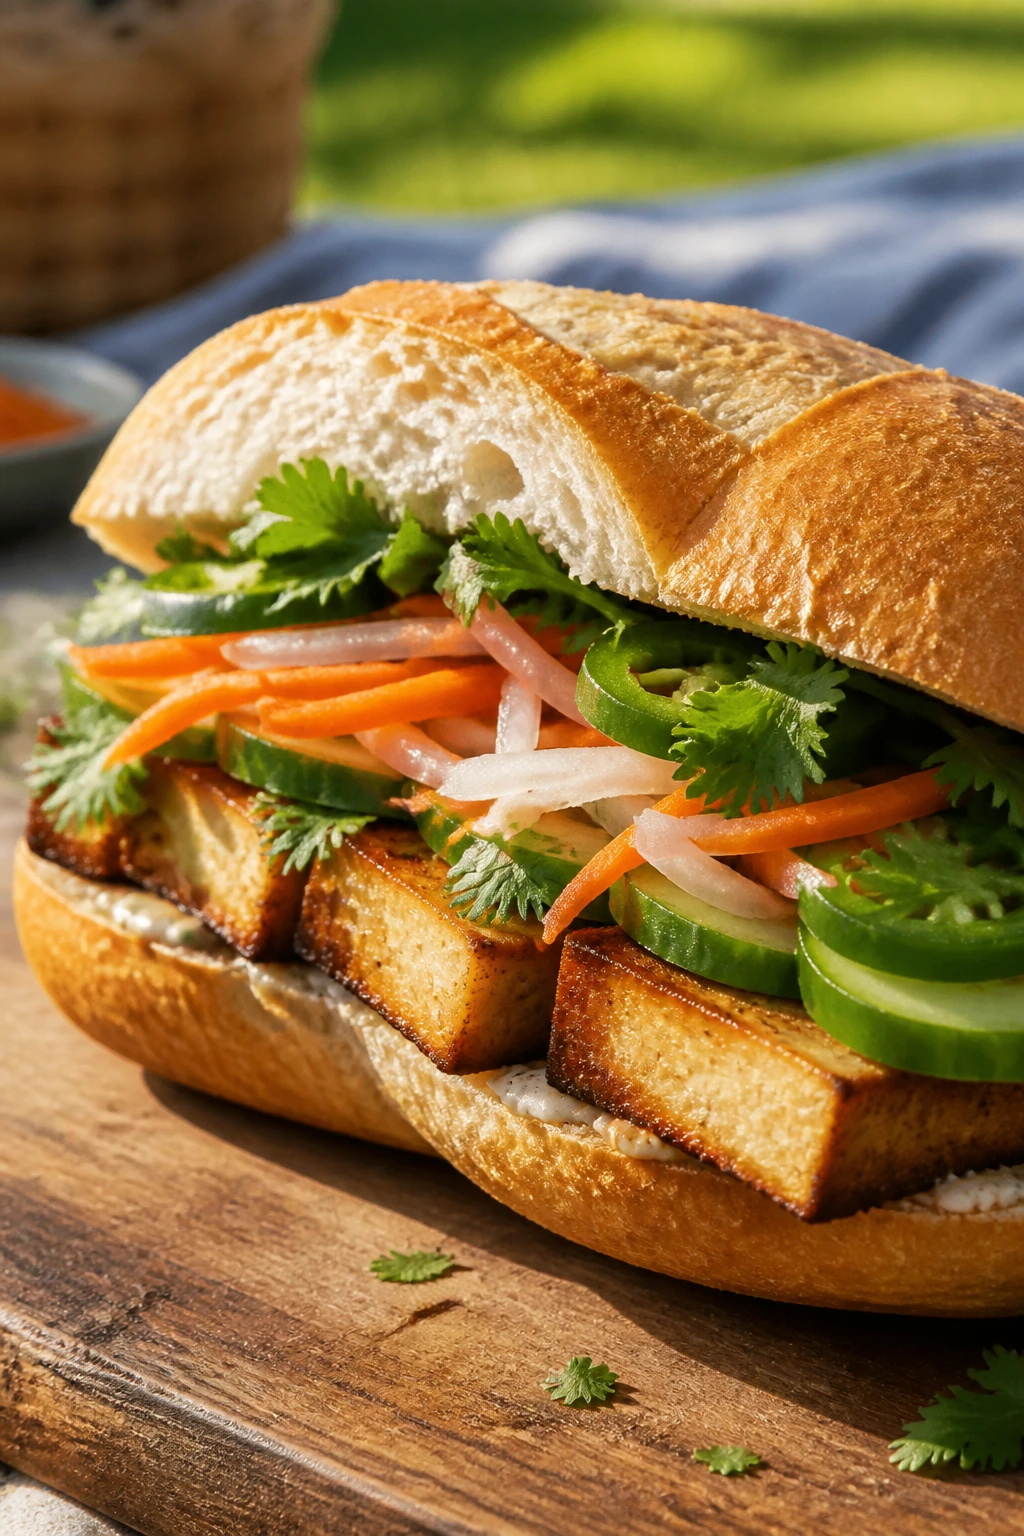
18. Banh Mi with Quick Pickled Vegetables
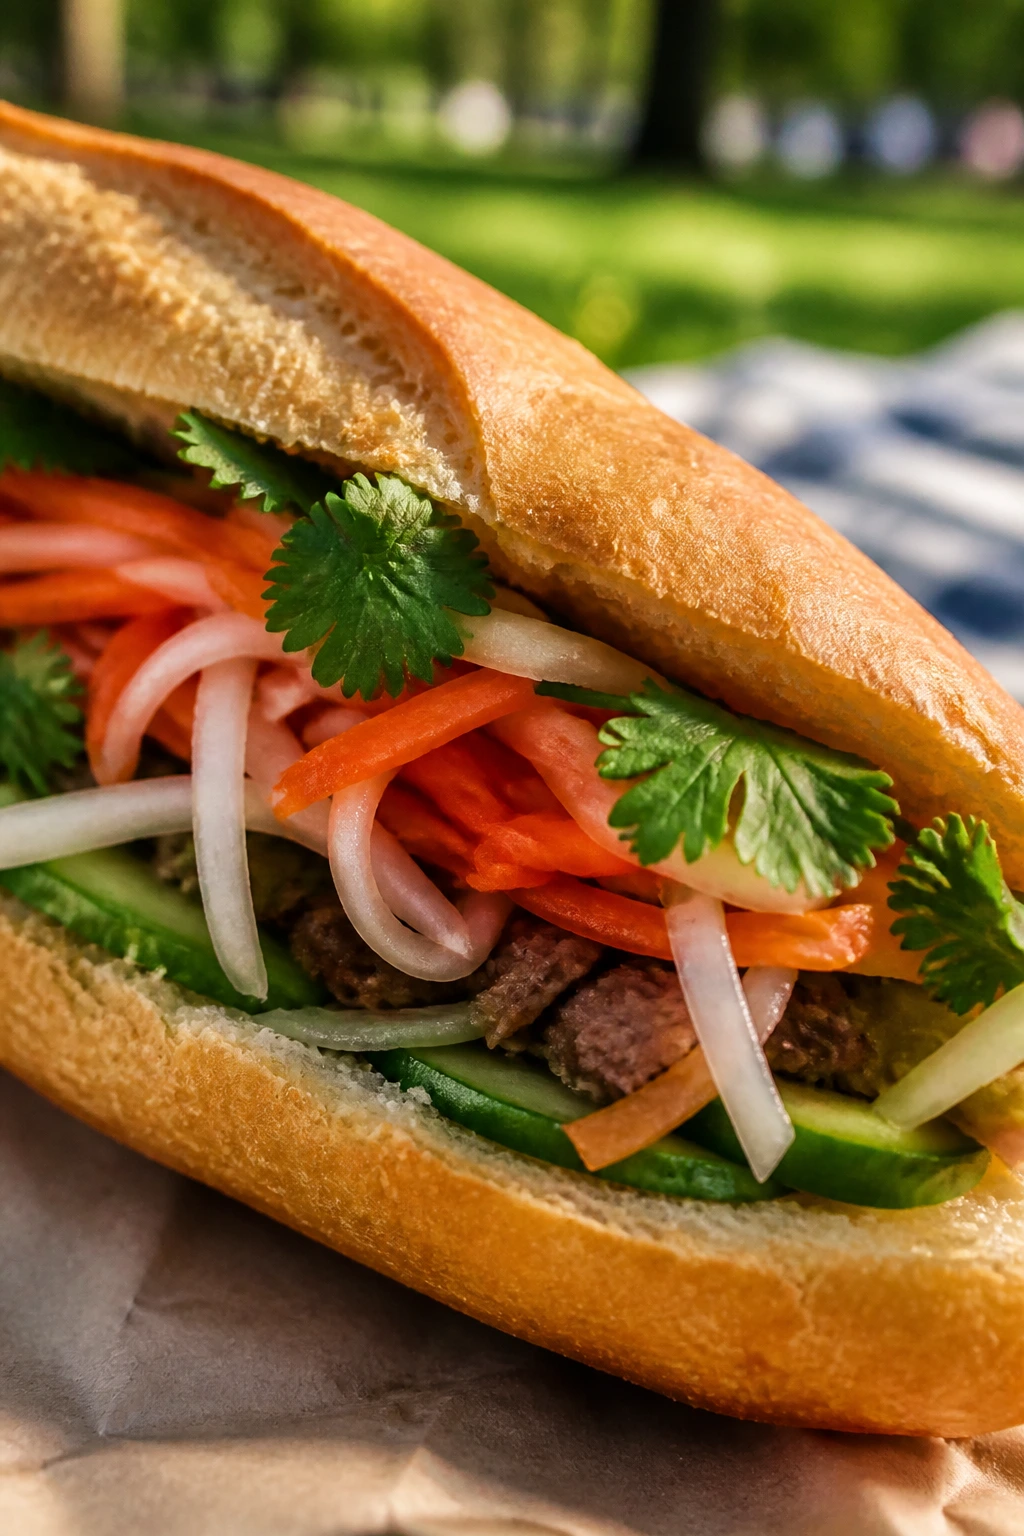
Banh mi brings the picnic some energy. The bread is crisp, the filling is punchy, and the quick pickled carrots and daikon give you the kind of bright crunch that makes a cold drink taste even colder.
Why It Works:
The sandwich leans on contrast: rich protein, sharp pickles, fresh herbs, and a light smear of mayo. The vegetables are quick-pickled, so they stay crisp but lose the harsh edge. A baguette with a crackly crust and a soft center is the right backbone for this one.
Key Ingredients:
- 4 small baguettes
- 1 cup shredded carrots
- 1 cup shredded daikon radish
- 1/4 cup rice vinegar
- 1 tbsp sugar
- 1 tsp salt
- 1/2 cup mayo
- 8 oz cooked pork, chicken, or tofu
- 1 cucumber, sliced
- 1 bunch cilantro
- 1 jalapeño, sliced
Quick Steps:
- Toss carrots and daikon with vinegar, sugar, and salt.
- Let the vegetables sit for 15 minutes, then drain lightly.
- Split the baguettes and spread with mayo.
- Add protein, pickled vegetables, cucumber, cilantro, and jalapeño.
- Wrap tightly and serve soon after assembly.
Equipment for This Recipe:
- Small bowl
- Knife
- Parchment paper
How to Serve This Dish:
Iced lime tea or sparkling water works well with the sharp, salty-sweet flavor. If you’re packing it for later, keep the pickles and protein separate until just before eating.
Pro Tips for This Recipe:
- Don’t skip the sugar in the quick pickle; it softens the bite.
- Keep the cucumber and cilantro dry.
- A little mayo is enough. Too much and the baguette loses its snap.
Variations on This Dish:
- Pork Belly Version: Use sliced pork belly for a richer sandwich.
- Egg Banh Mi: Add a fried or soft-cooked egg.
- Vegan Version: Use crispy tofu or seitan and vegan mayo.
Common Mistakes to Avoid with This Dish:
- Don’t let the pickles soak too long or they lose crunch.
- Don’t pack the sandwich into soft bread; banh mi needs a crust.
19. Turkey Club Wrap
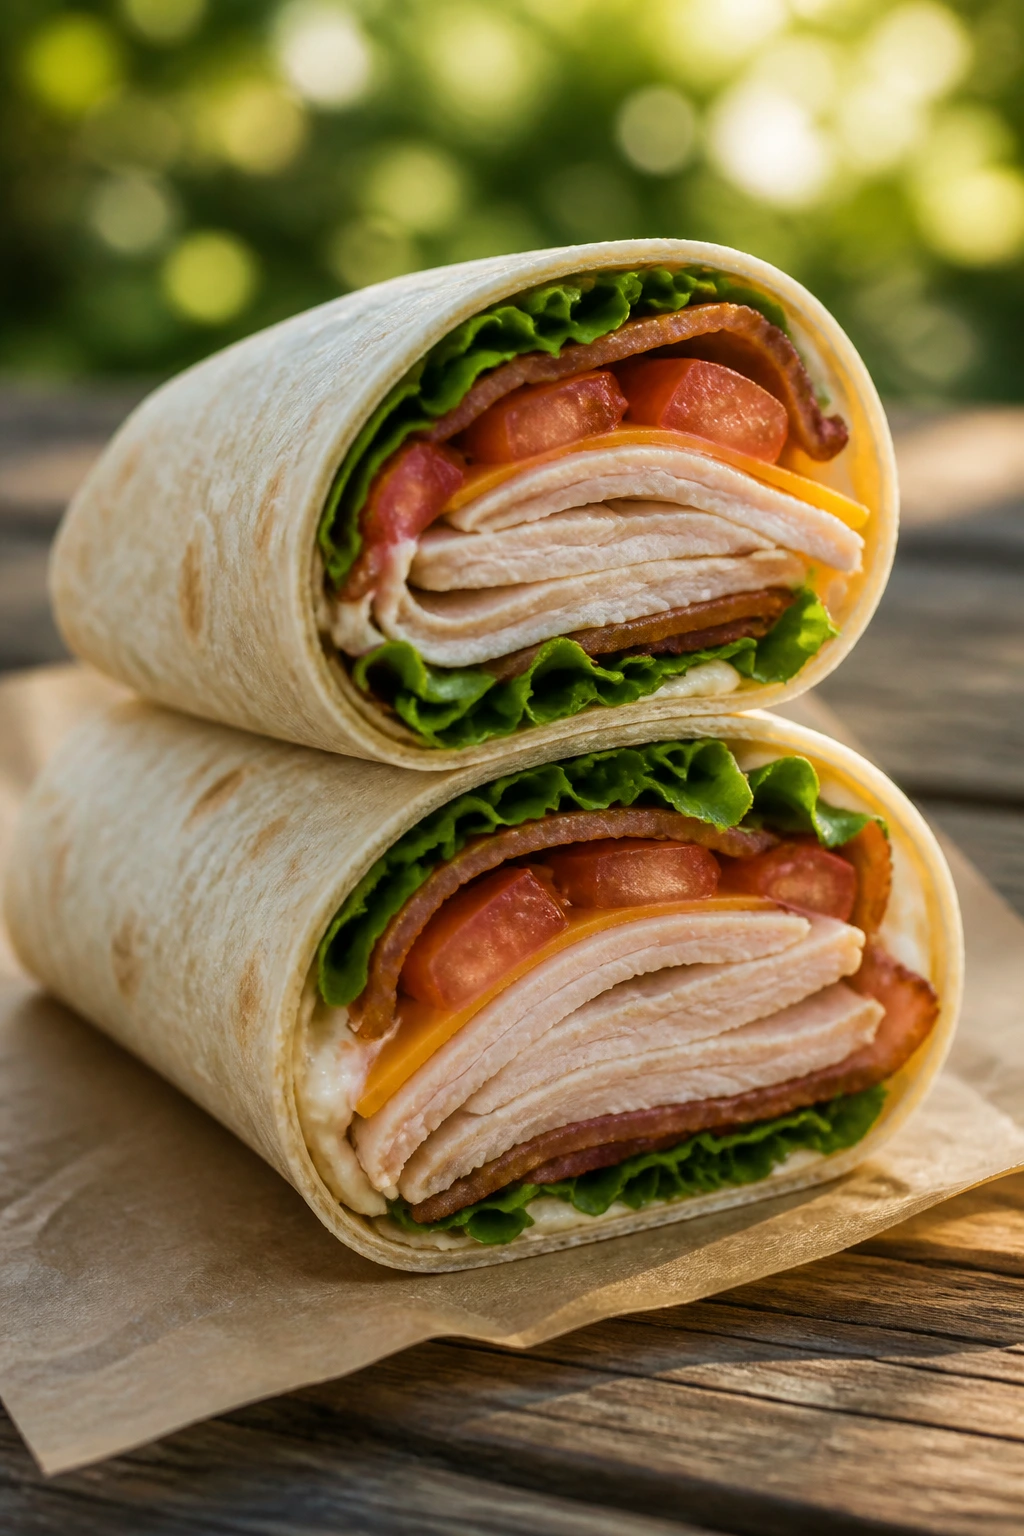
A turkey club wrap gives you the familiar club sandwich flavors without the tall stack that falls apart halfway through a picnic bench conversation. Bacon, turkey, tomato, lettuce, and cheddar all fit inside a tortilla that holds together better than bread in the same role.
Why It Works:
The wrap keeps the structure compact, which matters when you’re eating outdoors. Turkey brings the bulk, bacon brings the salt, and a little ranch or mayo keeps the filling cohesive. If you blot the tomato, you get all the flavor without the mess.
Key Ingredients:
- 4 large flour tortillas
- 8 oz sliced turkey
- 8 strips bacon, cooked crisp
- 1 large tomato, sliced
- 1 cup shredded lettuce
- 4 slices cheddar
- 1/4 cup mayonnaise or ranch dressing
Quick Steps:
- Spread mayo or ranch over each tortilla.
- Layer turkey, bacon, cheddar, lettuce, and tomato.
- Pat the tomato lightly with paper towels before rolling.
- Roll the tortillas tightly, tucking in the sides.
- Slice each wrap in half and wrap in parchment.
Equipment for This Recipe:
- Skillet
- Cutting board
- Sharp knife
How to Serve This Dish:
This wrap likes cold lemonade or plain iced tea. Pair it with chips and celery sticks if you want the meal to feel complete without more cooking.
Pro Tips for This Recipe:
- Don’t overfill the tortilla or the seam splits.
- Use crisp bacon that has cooled before rolling.
- Wrap each half tightly so the filling doesn’t slide out.
Variations on This Dish:
- Avocado Club: Add sliced avocado for creaminess.
- Ranch Version: Use ranch and add shredded carrot.
- Deli Club: Swap turkey for ham and use Swiss instead of cheddar.
Common Mistakes to Avoid with This Dish:
- Don’t add wet tomato slices without blotting them.
- Don’t roll while the bacon is still warm.
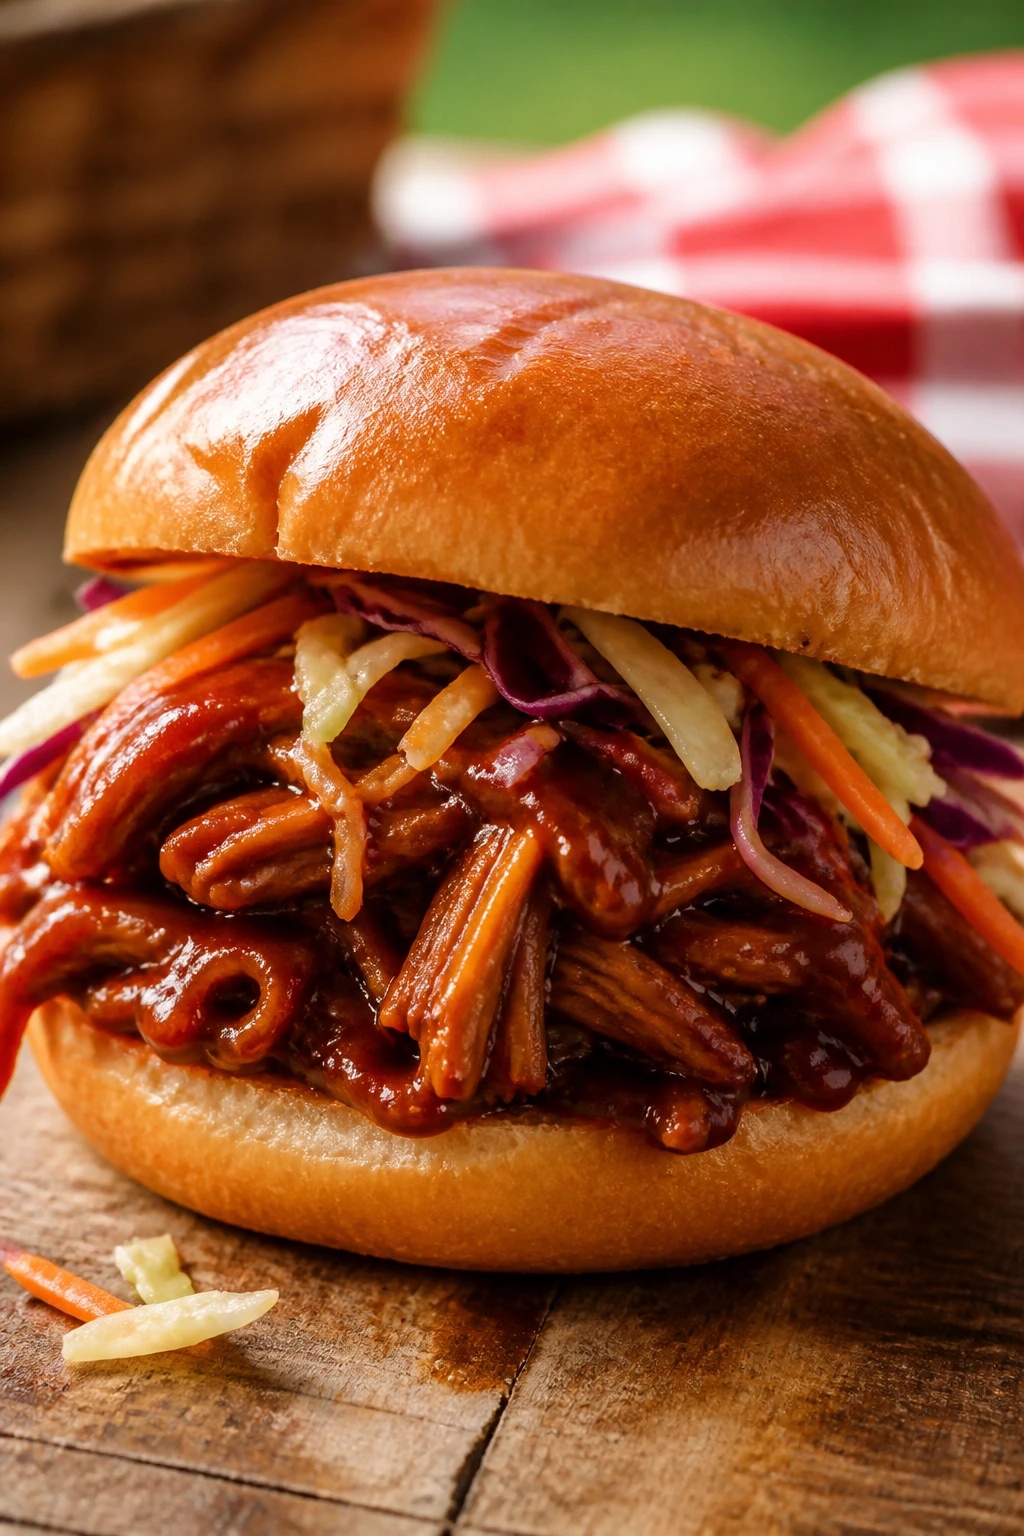
20. Pulled Pork Sliders with Crunchy Slaw
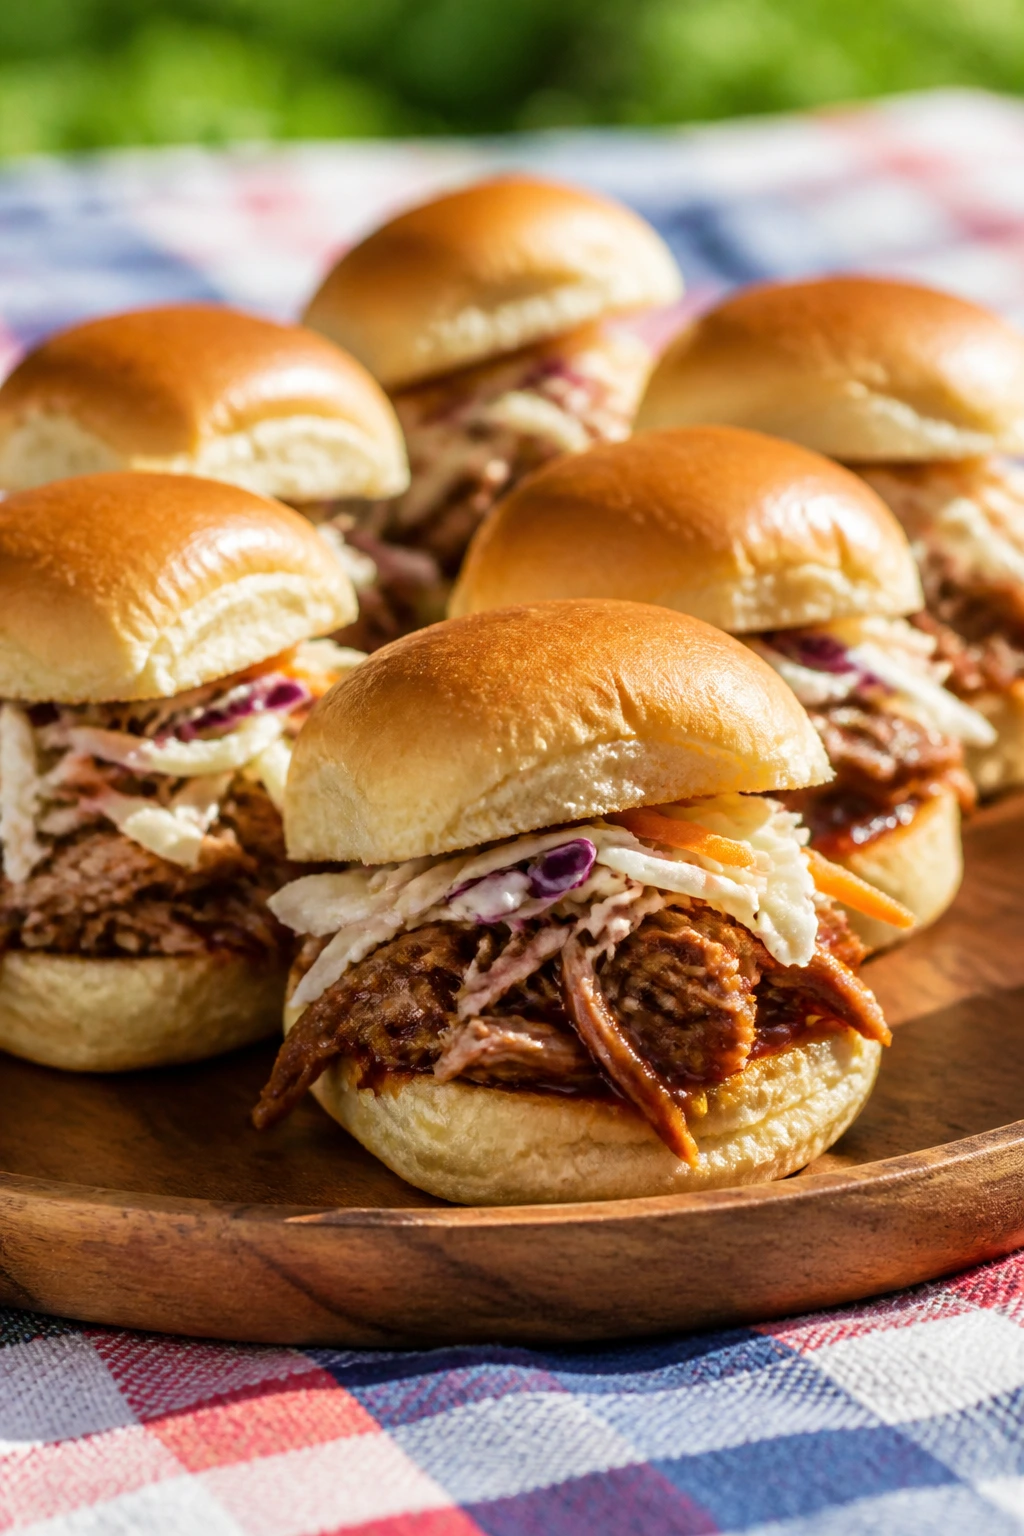
Pulled pork sliders are the closest thing this list has to a small celebration. The pork is rich, the slaw brings crunch and acid, and the little buns soak up just enough sauce to taste serious without falling apart.
Why It Works:
Slider buns are soft, so the slaw matters even more than usual. A vinegar-light slaw cuts through the sweetness of barbecue sauce, and keeping the pork warm or at least not icy cold keeps the texture right. These are easiest to pack when the components are kept separate until the last minute.
Key Ingredients:
- 12 slider buns
- 3 cups cooked pulled pork
- 1/2 cup barbecue sauce
- 2 cups shredded cabbage slaw mix
- 2 tbsp mayonnaise
- 1 tbsp apple cider vinegar
- 1 tbsp sugar
- 1/2 cup dill pickle slices
Quick Steps:
- Toss the slaw mix with mayo, vinegar, sugar, and a pinch of salt.
- Warm the pulled pork and stir in barbecue sauce.
- Split the slider buns and layer pork on the bottom halves.
- Add slaw and a few pickle slices.
- Close, wrap, and serve before the buns soften too much.
Equipment for This Recipe:
- Saucepan or slow cooker
- Mixing bowl
- Spoon
How to Serve This Dish:
Root beer, iced tea, or a sharp lemonade all work here. Sliders are easy to hand out, which makes them the right picnic move when people keep wandering between blankets.
Pro Tips for This Recipe:
- Keep the slaw crisp and the pork saucy, but separate, until assembly.
- Use small buns with a little bite; very soft rolls collapse fast.
- Add pickles for brightness, not just extra crunch.
Variations on This Dish:
- Carolina Version: Use vinegar-heavy sauce and skip the sweeter barbecue.
- Spicy Version: Add hot sauce to the pork.
- Mustard Slaw Version: Swap mayo for mustard in the slaw.
Common Mistakes to Avoid with This Dish:
- Don’t drown the buns in sauce before packing.
- Don’t use slaw that’s too wet; it soaks straight through.
21. Avocado, Egg, and Sprout Sandwich
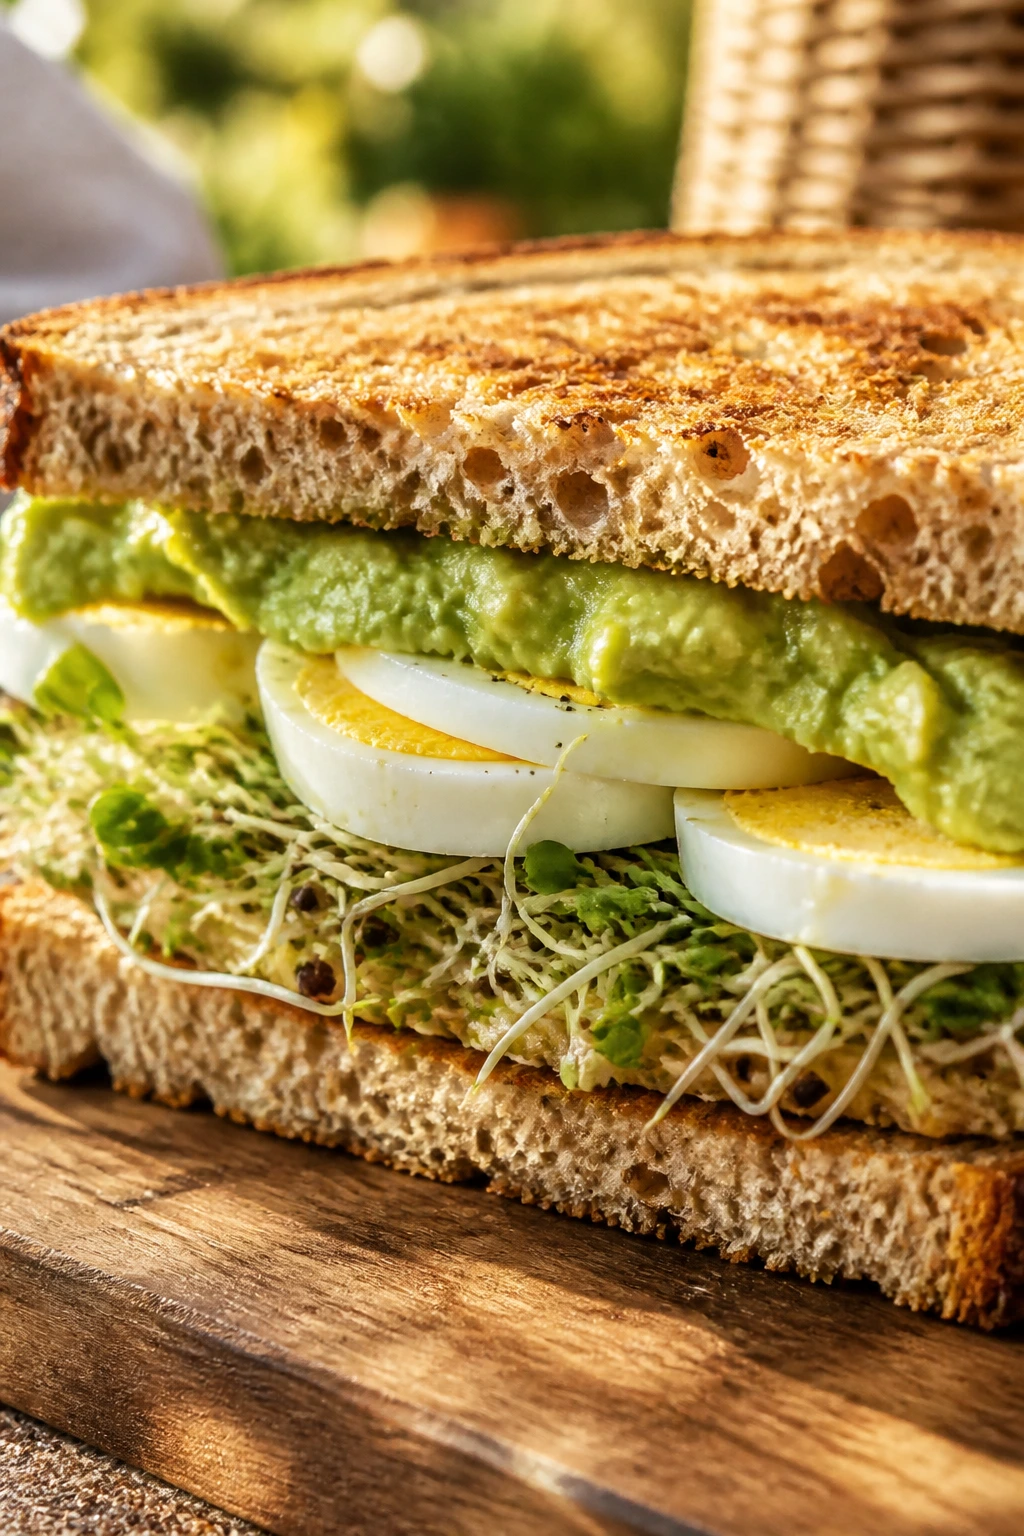
This sandwich feels fresh in a very literal way. Creamy avocado, sliced egg, and crisp sprouts make a layered bite that tastes bright and clean, and it’s the kind of thing that works well beside a sparkling drink with lemon.
Why It Works:
Avocado gives the sandwich richness without needing mayonnaise. Egg adds protein and firmness, while sprouts bring a little snap and a grassy note that keeps the whole thing from tasting heavy. Toasted bread is helpful here because avocado can be slippery.
Key Ingredients:
- 8 slices whole-grain bread
- 2 ripe avocados
- 4 hard-boiled eggs, sliced
- 1 cup sprouts
- 1 tbsp lemon juice
- 2 tbsp mayonnaise
- 1/2 tsp salt
- 1/4 tsp black pepper
Quick Steps:
- Mash the avocado with lemon juice, salt, and pepper.
- Toast the bread lightly if you want a firmer base.
- Spread mayo on one side and avocado on the other.
- Layer egg slices and sprouts.
- Close and cut carefully so the avocado stays in place.
Equipment for This Recipe:
- Fork
- Knife
- Toaster
How to Serve This Dish:
This goes well with iced green tea or sparkling water. Add sliced cucumbers or cherry tomatoes on the side, but keep them separate from the bread.
Pro Tips for This Recipe:
- Use avocados that are ripe but not mushy.
- Lemon juice slows browning and sharpens the flavor.
- Build close to serving time if you want the sprouts crisp.
Variations on This Dish:
- Feta Version: Add crumbled feta for salt.
- Radish Version: Add thin radish slices for more crunch.
- Everything Seasoning Version: Sprinkle everything bagel seasoning over the avocado.
Common Mistakes to Avoid with This Dish:
- Don’t let the avocado sit bare and exposed; it browns fast.
- Don’t use bread too soft to hold slippery fillings.
22. Greek Chicken Pita with Tzatziki

Greek chicken pita is one of those picnic sandwiches that feels balanced from the first bite. The cucumber, tomato, and tzatziki cool everything down, while the chicken and feta keep it from tasting thin.
Why It Works:
Tzatziki brings yogurt tang and cucumber freshness, but it needs to be thick or it leaks. Chicken gives the pita enough weight to feel like lunch, and the red onion and oregano give the sandwich a little snap. This one stays good if you keep the tomatoes and sauce under control.
Key Ingredients:
- 4 pita pockets
- 2 cups cooked chicken, sliced or shredded
- 1/2 cup tzatziki
- 1 cup cucumber, diced
- 1 cup tomato, diced and seeded
- 1/4 small red onion, thinly sliced
- 1/3 cup feta
- 1 tsp dried oregano
Quick Steps:
- Seed the tomatoes and pat them dry.
- Spoon tzatziki into each pita pocket.
- Add chicken, cucumber, tomato, onion, and feta.
- Sprinkle oregano over the top.
- Wrap each pita in parchment and chill briefly.
Equipment for This Recipe:
- Small bowl
- Knife
- Spoon
How to Serve This Dish:
Serve with iced mint tea or cucumber lemonade. A few olives on the side are enough to keep the whole plate in the Greek lane without adding extra work.
Pro Tips for This Recipe:
- Make tzatziki thick enough to stay put in the pita.
- Seed the tomato to avoid drip.
- Warm the pita briefly so it opens cleanly.
Variations on This Dish:
- Lemon Herb Version: Add more lemon and parsley to the chicken.
- Falafel Version: Swap chicken for falafel.
- Chicken Salad Version: Mix the chicken with a spoonful of tzatziki before stuffing.
Common Mistakes to Avoid with This Dish:
- Don’t load the pita with too many wet vegetables.
- Don’t use watery tzatziki straight from a loose container.
23. Beet, Goat Cheese, and Walnut Sandwich
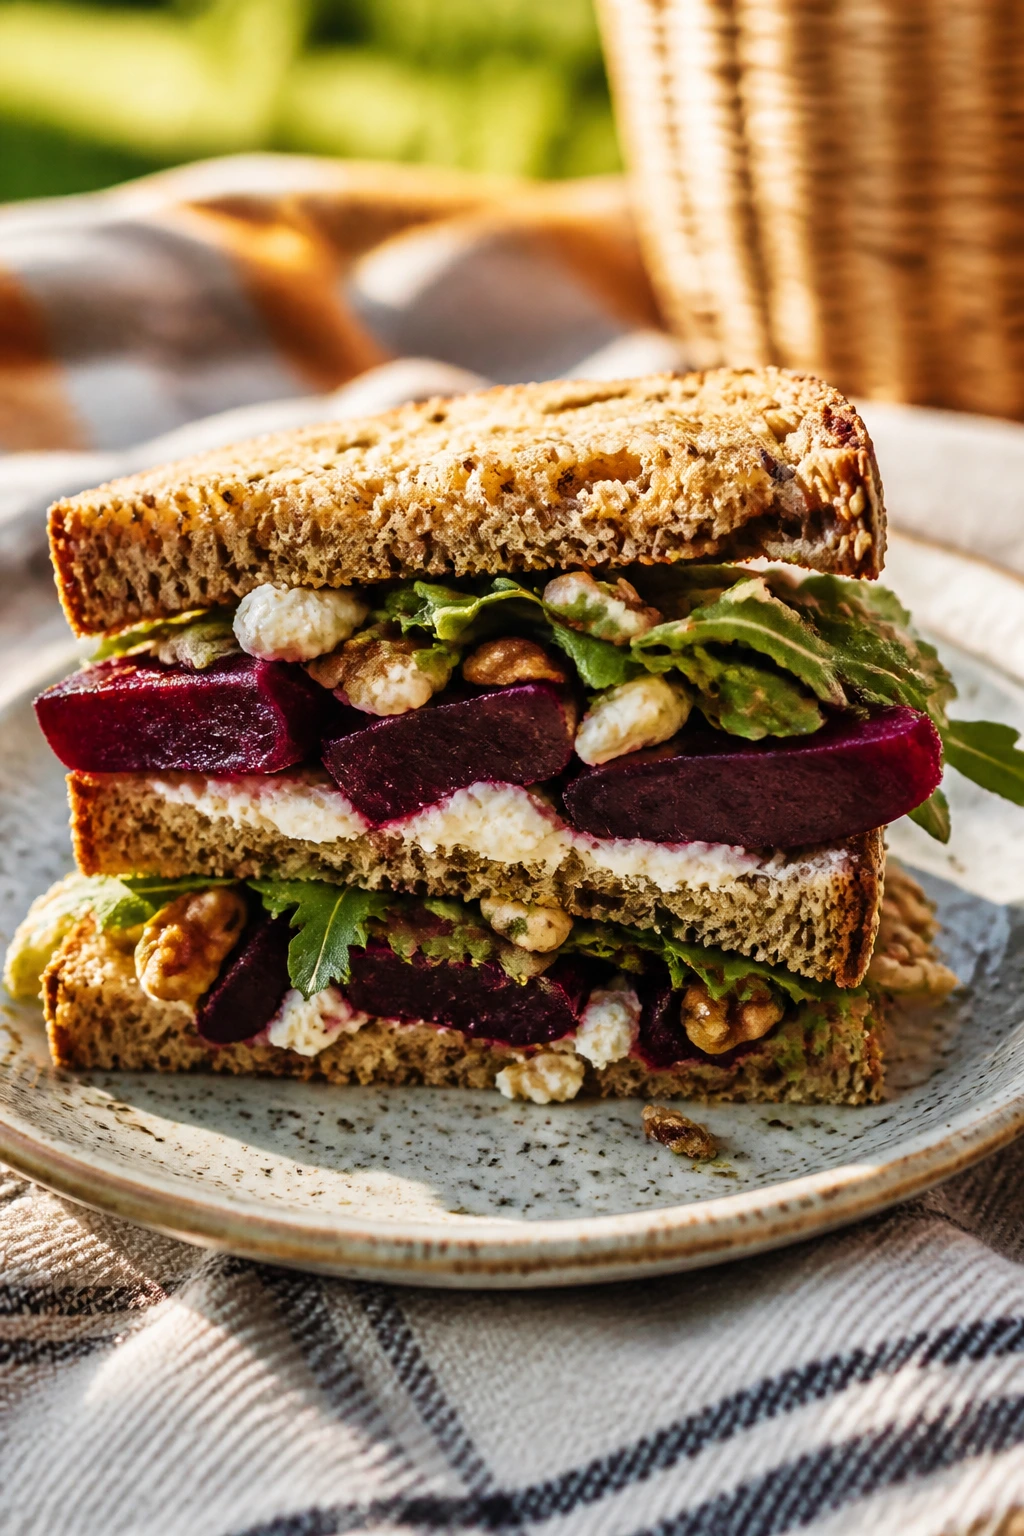
Beets and goat cheese have that earthy-creamy thing going on that makes the sandwich feel more grown-up than a lot of picnic options. Walnuts add crunch, and a little honey keeps the earthiness from becoming too stern.
Why It Works:
Roasted beets bring sweetness and a dense, sliceable texture that sits well on bread. Goat cheese gives you tang and a soft spreadable layer, while walnuts keep the bite interesting. This sandwich works best on bread with some chew, because the filling is soft and needs support.
Key Ingredients:
- 8 slices multigrain bread
- 2 medium beets, roasted, peeled, and sliced
- 4 oz goat cheese, softened
- 1/3 cup walnuts, chopped
- 1 cup arugula
- 1 tbsp honey
- 1 tbsp olive oil
Quick Steps:
- Spread goat cheese on four slices of bread.
- Layer beets, arugula, and walnuts.
- Drizzle lightly with honey and olive oil.
- Close the sandwiches and press gently.
- Wrap and chill for a short rest before serving.
Equipment for This Recipe:
- Roasting pan or foil
- Knife
- Mixing bowl, if softening cheese
How to Serve This Dish:
This goes nicely with iced green tea or sparkling water with orange slices. Add a few apple wedges if you want a fresh side that echoes the sweetness of the beets.
Pro Tips for This Recipe:
- Roast the beets until fully tender so they slice cleanly.
- Keep the cheese at room temperature so it spreads evenly.
- Chop the walnuts finely enough to stay in the sandwich.
Variations on This Dish:
- Orange Version: Add a few orange segments for brightness.
- Herb Version: Stir chopped dill or chives into the goat cheese.
- Ricotta Swap: Use ricotta for a milder, softer filling.
Common Mistakes to Avoid with This Dish:
- Don’t slice beets while they’re still warm; they bleed everywhere.
- Don’t use too much honey or the sandwich turns sticky.
24. Mortadella, Provolone, and Pesto Focaccia
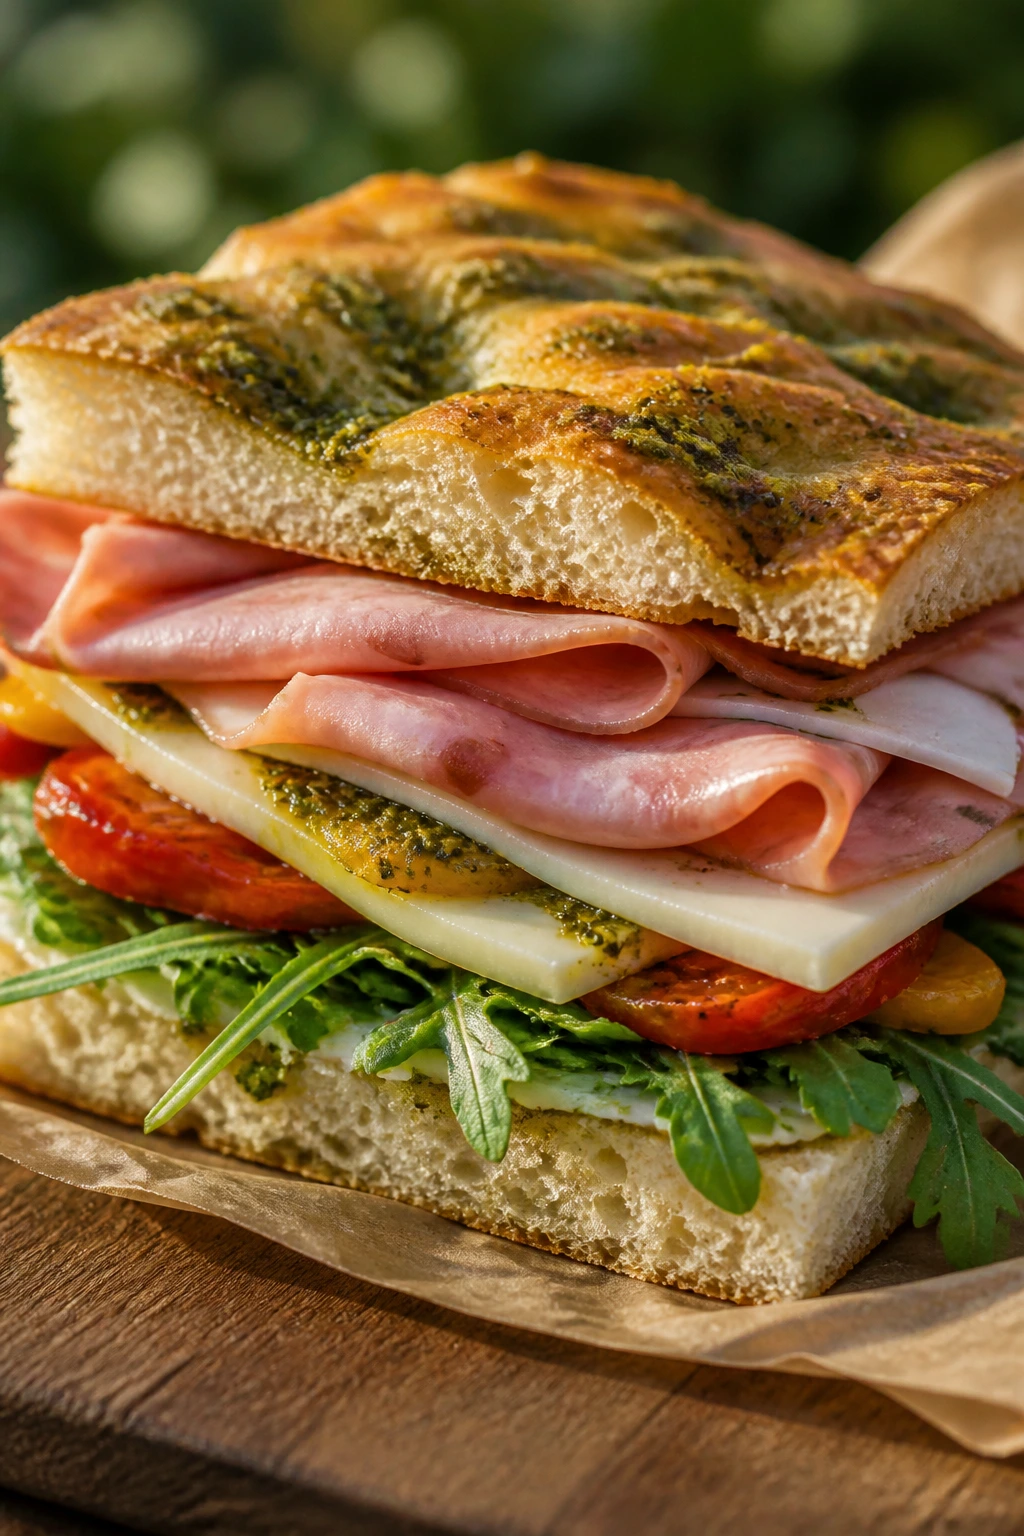
Mortadella on focaccia is rich, salty, and unapologetically Italian deli-style in the best way. Pesto adds basil and garlic, provolone brings a little pull, and the focaccia soaks up the flavor without collapsing.
Why It Works:
Focaccia is oily and sturdy, which makes it ideal for cured meats and pesto. Mortadella is soft, so it needs the provolone to give the sandwich structure. A few peppery greens keep the whole thing from feeling too rich, especially with a cold drink on the side.
Key Ingredients:
- 1 large focaccia square or loaf, split
- 6 oz mortadella, sliced
- 4 oz provolone
- 3 tbsp basil pesto
- 1 cup arugula
- 1/2 cup roasted red peppers, drained
- 1 tsp olive oil
Quick Steps:
- Spread pesto on both cut sides of the focaccia.
- Layer mortadella, provolone, arugula, and roasted peppers.
- Drizzle with a little olive oil.
- Close the sandwich and press lightly.
- Wrap tightly and slice into picnic pieces.
Equipment for This Recipe:
- Serrated knife
- Spoon
- Parchment paper
How to Serve This Dish:
Sparkling water with lemon or an iced herbal tea works well here. Because the sandwich is rich, a crisp side salad or marinated vegetables fit better than heavy chips.
Pro Tips for This Recipe:
- Drain roasted peppers well before using them.
- Keep the pesto layer thin so the bread doesn’t get slick.
- Let the focaccia breathe a little after assembly, then wrap.
Variations on This Dish:
- Salami Version: Swap mortadella for salami.
- Mozzarella Version: Use fresh mozzarella for a softer bite.
- Spicy Version: Add sliced hot peppers or chili oil.
Common Mistakes to Avoid with This Dish:
- Don’t pile the pesto on too thick.
- Don’t use wet peppers straight from the jar or bag.
25. Cranberry Walnut Chicken Salad Sandwich
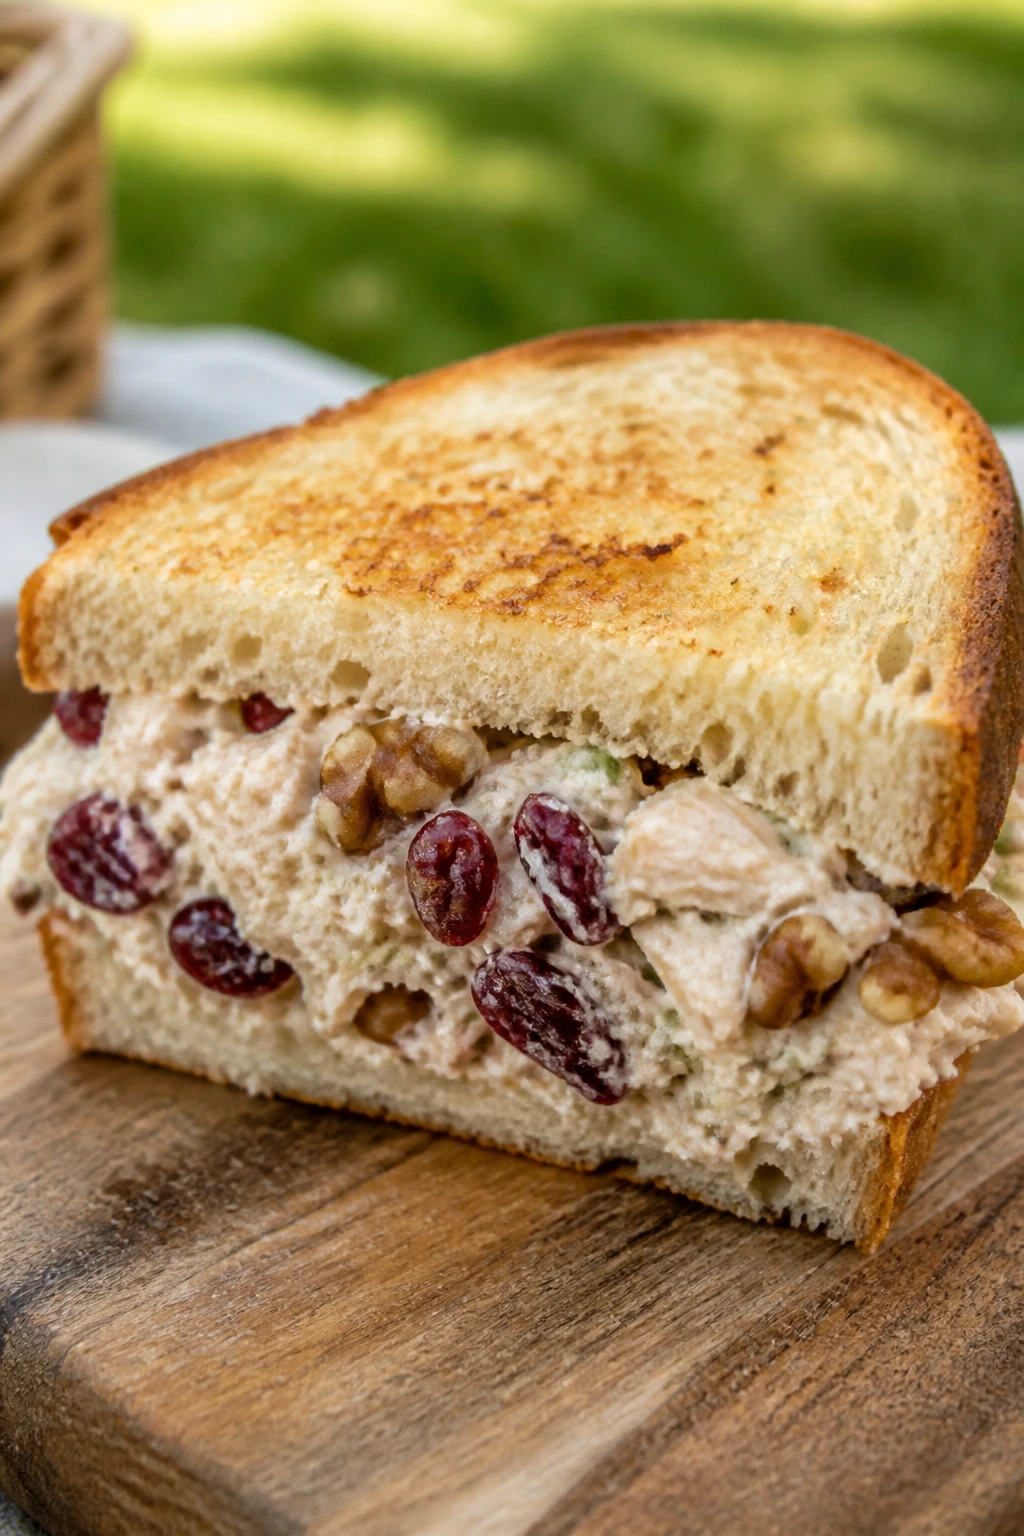
This chicken salad feels a little sweeter and a little nuttier than the classic version, which is why it works so well on a picnic spread. The cranberries pop, the walnuts crunch, and the chicken stays the main event instead of fading into mayo.
Why It Works:
The sweet-tart cranberries keep each bite moving, while toasted walnuts bring a toasty, dry crunch that offsets the creaminess. Celery and onion stop the filling from turning soft and sleepy. It’s especially good on croissants or sturdy whole-grain bread.
Key Ingredients:
- 2 cups cooked shredded chicken
- 1/3 cup mayonnaise
- 1/4 cup plain yogurt
- 1/3 cup dried cranberries
- 1/3 cup walnuts, toasted and chopped
- 1/3 cup celery, diced
- 2 tbsp red onion, minced
- 4 croissants or 8 slices bread
Quick Steps:
- Stir mayonnaise and yogurt together in a bowl.
- Fold in chicken, cranberries, walnuts, celery, and onion.
- Season with salt and pepper, then chill briefly.
- Spoon onto croissants or bread.
- Close gently and wrap for the cooler.
Equipment for This Recipe:
- Mixing bowl
- Spoon
- Knife
How to Serve This Dish:
Iced tea, sparkling apple water, or even plain lemonade works here. A handful of greens or sliced grapes on the side keeps the plate from getting too rich.
Pro Tips for This Recipe:
- Toast the walnuts; raw ones taste flat in chicken salad.
- Don’t overdo the yogurt or the filling gets loose.
- Make the salad a little ahead so the flavors settle.
Variations on This Dish:
- Apple Version: Replace cranberries with finely diced apple.
- Pecan Version: Swap walnuts for pecans.
- Dijon Version: Add a teaspoon of Dijon for more bite.
Common Mistakes to Avoid with This Dish:
- Don’t chop the walnuts too coarse or they shove the filling apart.
- Don’t assemble on very soft bread unless you’re eating right away.
26. Reuben on Rye
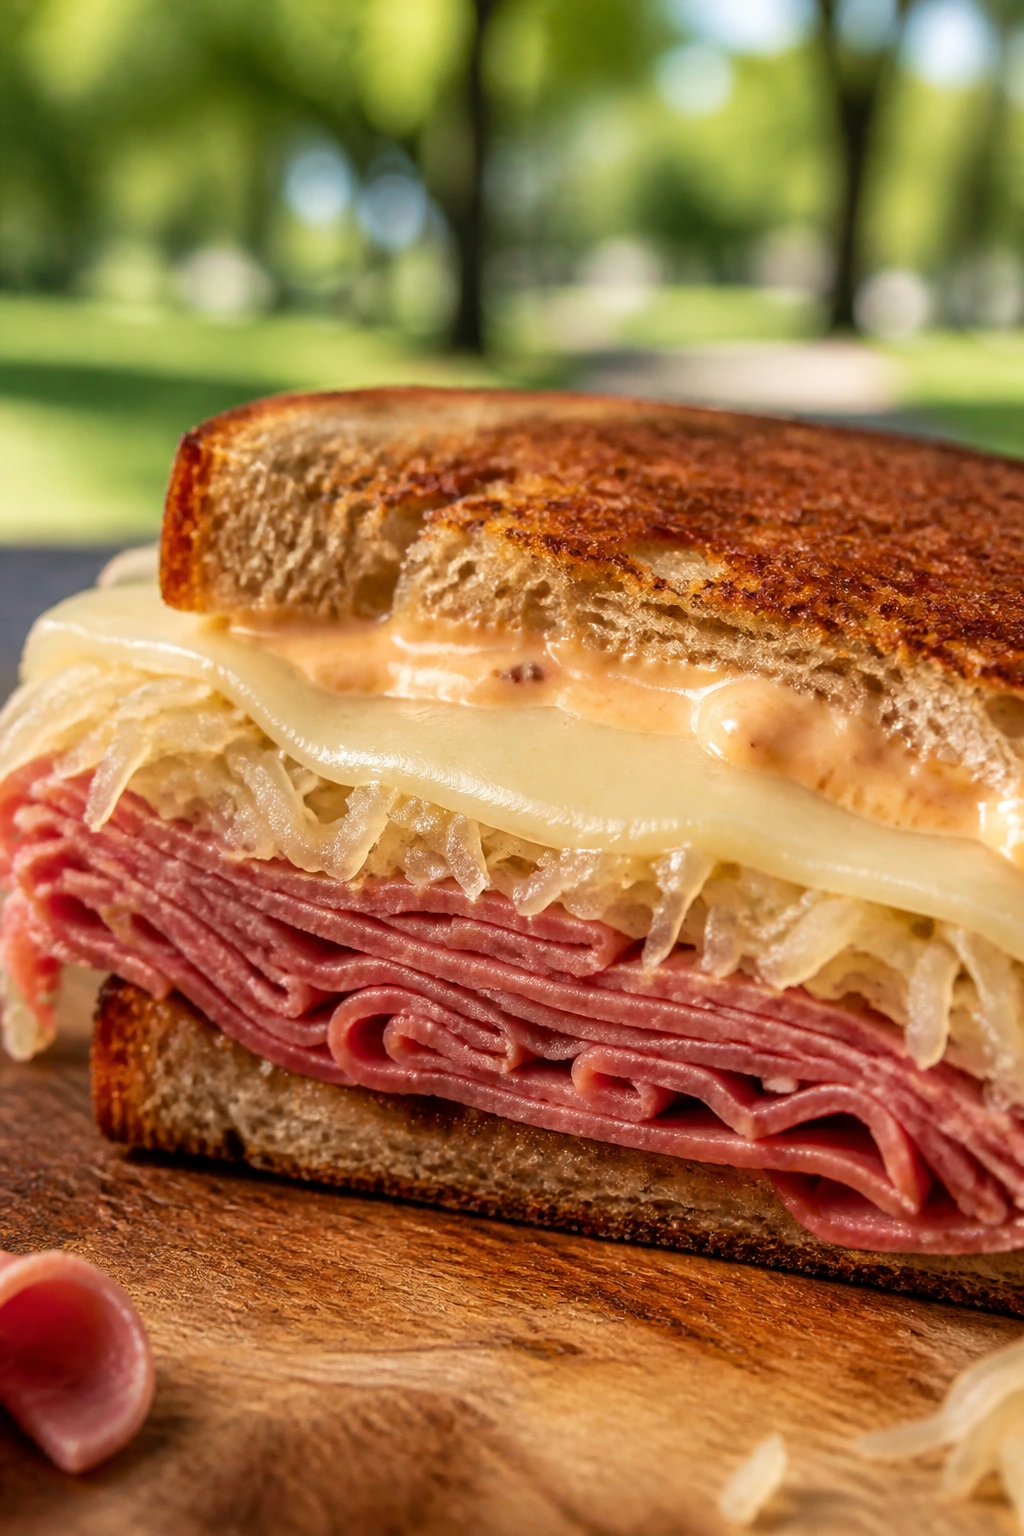
A Reuben is salty, tangy, and a little messy in the best deli way. The key is balance: corned beef, Swiss, sauerkraut, and Russian dressing all need each other, and rye bread gives the sandwich the right flavor to keep up.
Why It Works:
Rye has enough character to stand beside corned beef and sauerkraut. Russian dressing softens the sharp edges, while Swiss melts into the meat if you toast or press the sandwich lightly. For picnic purposes, the sauerkraut needs to be squeezed dry, or the whole thing turns sloppy.
Key Ingredients:
- 8 slices rye bread
- 8 oz sliced corned beef
- 4 slices Swiss cheese
- 1/2 cup sauerkraut, drained and squeezed dry
- 1/4 cup Russian dressing
- 1 tbsp butter
- 1 cup shredded cabbage, optional
Quick Steps:
- Squeeze the sauerkraut dry with paper towels.
- Spread Russian dressing on the bread.
- Layer corned beef, Swiss, sauerkraut, and cabbage if using.
- Butter the outside of the bread if you want a pressed finish.
- Press, slice, and wrap once cooled.
Equipment for This Recipe:
- Skillet or panini press
- Knife
- Paper towels
How to Serve This Dish:
Serve with iced cola, sparkling water, or a cold dill pickle drink if you’re feeling bold. This is best with something crisp and plain on the side, since the sandwich brings plenty of flavor itself.
Pro Tips for This Recipe:
- Dry the sauerkraut until it’s almost fluffy.
- Don’t make the dressing layer too thick.
- Let the sandwich cool fully before wrapping if you’ve pressed it warm.
Variations on This Dish:
- Rachel Version: Swap corned beef for turkey and sauerkraut for coleslaw.
- Turkey Reuben: Use sliced turkey with the same dressing and cheese.
- Open-Face Version: Serve it warm on toasted rye for a fork-and-knife picnic.
Common Mistakes to Avoid with This Dish:
- Don’t leave the kraut wet. That’s the fastest way to ruin the bread.
- Don’t expect this sandwich to stay neat if you overstuff it.
27. Chicken Bacon Ranch Sandwich

Chicken bacon ranch has a lot going on, but when it’s built with care, the flavors line up instead of shouting over each other. The ranch cools things down, the bacon gives the crunch, and the chicken keeps the sandwich grounded.
Why It Works:
Ranch dressing can make bread soggy if you overdo it, so the trick is a thin layer and a little lettuce as a buffer. Chicken gives the sandwich heft, bacon brings salt, and tomato adds enough freshness to keep it from tasting heavy. Toasted bread helps more than people expect.
Key Ingredients:
- 8 slices sturdy bread or 4 sandwich rolls
- 2 cups cooked chicken, sliced or shredded
- 8 strips bacon, cooked crisp
- 1/4 cup ranch dressing
- 1 cup lettuce
- 1 large tomato, sliced and seeded
- 4 slices cheddar
Quick Steps:
- Seed the tomato slices and blot them dry.
- Spread ranch lightly on the bread or rolls.
- Layer chicken, cheddar, bacon, lettuce, and tomato.
- Close and press gently.
- Wrap well and chill until serving.
Equipment for This Recipe:
- Skillet
- Knife
- Paper towels
How to Serve This Dish:
Lemonade or iced tea works well against the creamy dressing. Serve with celery sticks or chips if you want extra crunch, but the sandwich already brings a lot to the table.
Pro Tips for This Recipe:
- Use cool chicken, not warm.
- Keep the ranch thin and even.
- Seed the tomato or the sandwich slips apart.
Variations on This Dish:
- Buffalo Ranch Version: Add a spoonful of buffalo sauce.
- Avocado Version: Add sliced avocado for a softer finish.
- Turkey Version: Swap chicken for turkey and keep everything else the same.
Common Mistakes to Avoid with This Dish:
- Don’t use too much ranch.
- Don’t pack it before the bacon cools down.
28. Caponata and Mozzarella Ciabatta
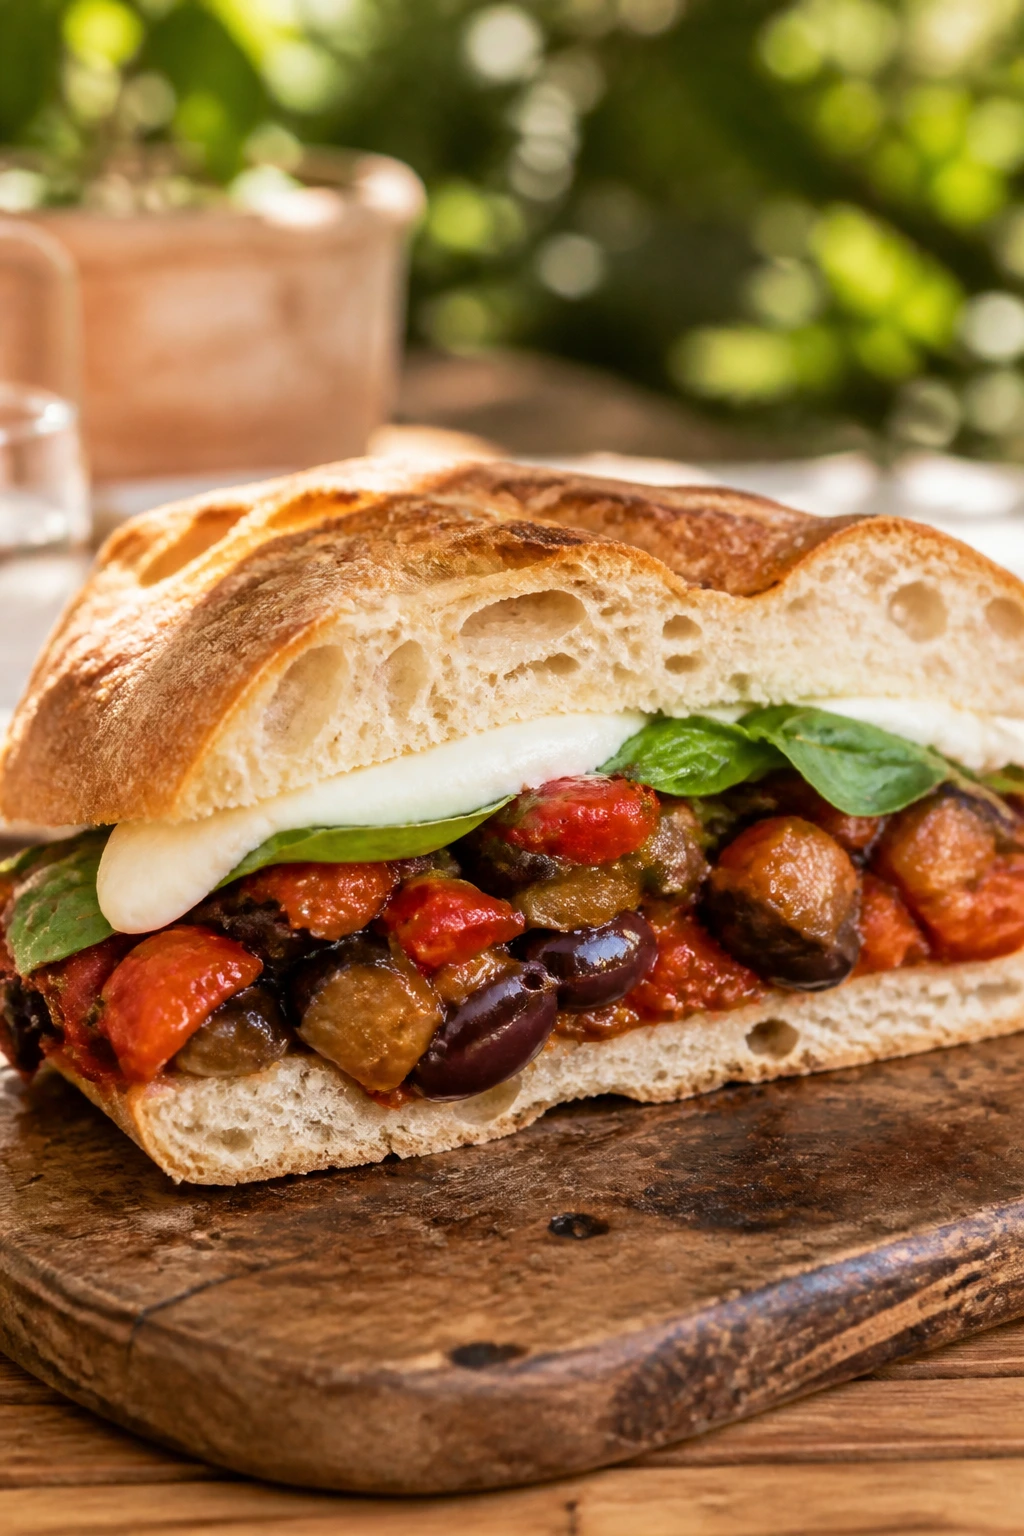
Caponata brings a sweet-sour vegetable richness that feels made for ciabatta. Add mozzarella and basil, and the sandwich ends up tasting layered and a little glossy in a way that works beautifully with a cold drink that isn’t too sweet.
Why It Works:
Caponata has eggplant, tomato, olives, and vinegar, so it naturally carries the flavor. Mozzarella cools the sharper edges, while ciabatta gives you enough chew to handle the saucy filling. The important move is cooling the caponata before it touches the bread.
Key Ingredients:
- 1 ciabatta loaf, split
- 1 cup caponata, cooled
- 8 oz fresh mozzarella, sliced
- 1 cup basil leaves
- 1 tbsp olive oil
- 1 tsp red wine vinegar
- 1/4 tsp salt
Quick Steps:
- Cool the caponata completely before assembling.
- Drizzle the ciabatta lightly with olive oil and vinegar.
- Layer mozzarella, caponata, and basil.
- Sprinkle with a pinch of salt.
- Close, press gently, and wrap for transport.
Equipment for This Recipe:
- Knife
- Spoon
- Parchment paper
How to Serve This Dish:
Sparkling water with lemon or a dry iced tea fits the sweet-sour profile. This sandwich is good with marinated olives or plain fruit on the side, which keeps the picnic from feeling overloaded.
Pro Tips for This Recipe:
- Caponata should be cool and thick, not hot and runny.
- Drain the mozzarella lightly before slicing.
- Use a bread with a crisp crust so the juices don’t win.
Variations on This Dish:
- Provolone Version: Swap mozzarella for provolone.
- Tuna Caponata Version: Add a little tuna for a heartier sandwich.
- Vegan Version: Keep the caponata and skip the cheese.
Common Mistakes to Avoid with This Dish:
- Don’t assemble with hot caponata.
- Don’t let the olive flavors get buried under too much cheese.
29. Feta, Cucumber, and Dill Wrap
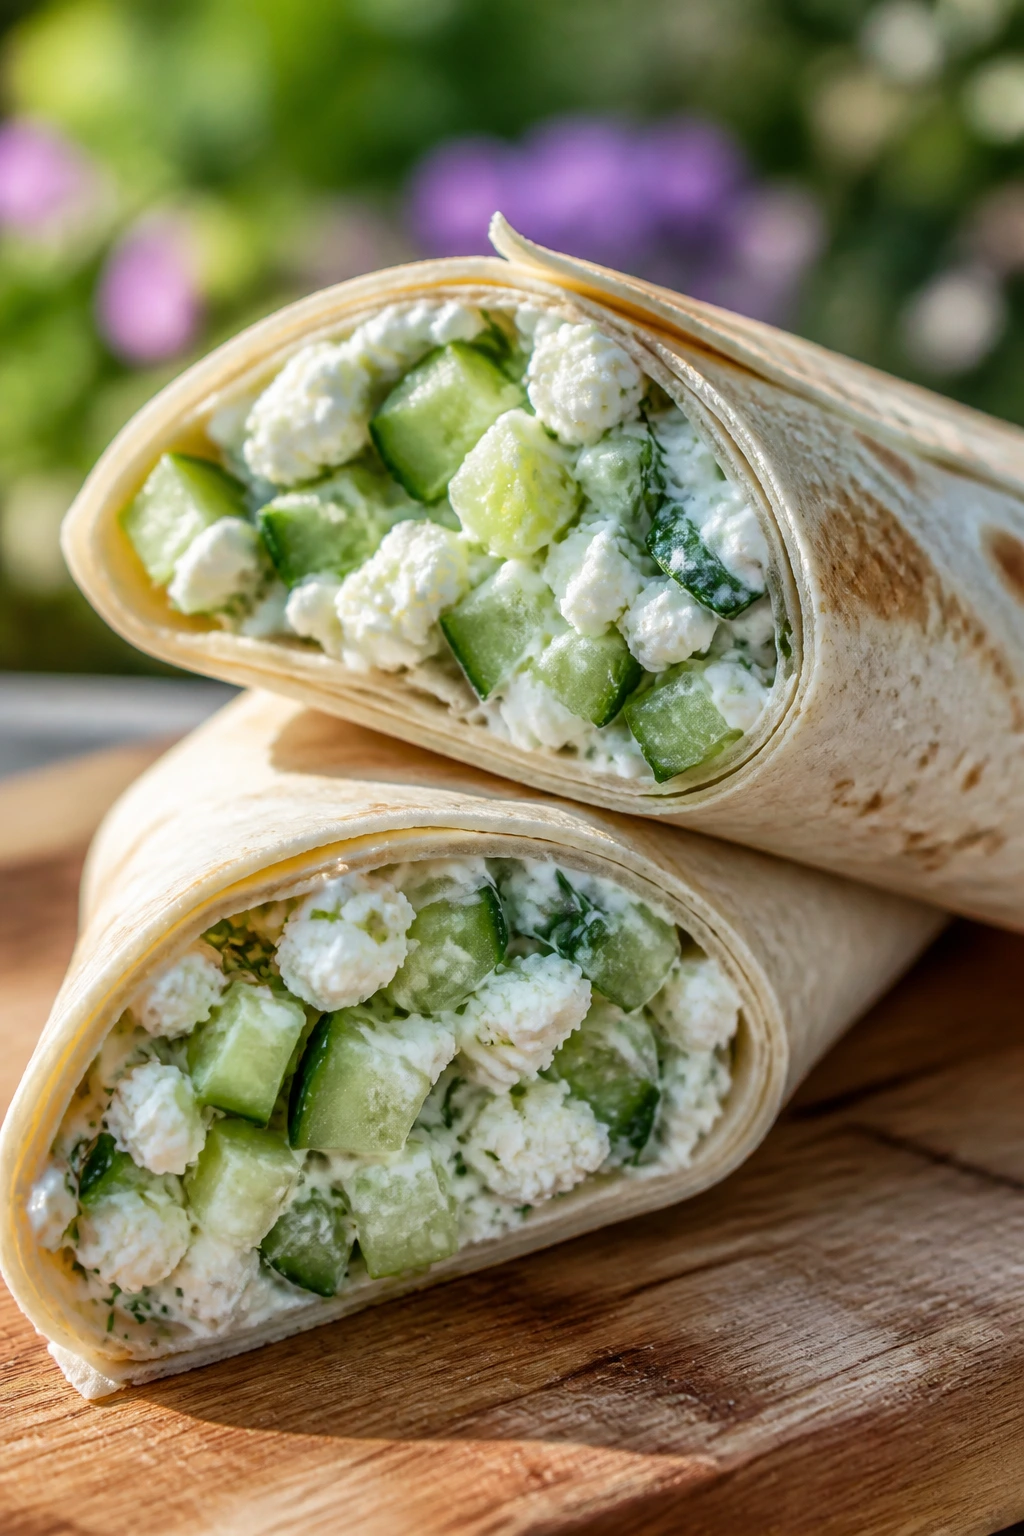
This wrap is cool in the literal sense. Feta gives salt, cucumber gives crunch, dill gives a fresh green note, and the yogurt spread keeps it all together without weighing the tortilla down.
Why It Works:
Cucumber and dill are natural partners, but the sandwich works because the yogurt spread binds the ingredients and adds tang. Feta gives you punch without a lot of effort, and the wrap format keeps the whole thing tidy. It’s a strong choice when you want something light that still feels like lunch.
Key Ingredients:
- 4 large flour tortillas
- 1 cup Greek yogurt
- 1 tbsp lemon juice
- 1 cup cucumber, diced and patted dry
- 3/4 cup feta, crumbled
- 2 tbsp fresh dill, chopped
- 1 cup shredded lettuce
- 1 tbsp olive oil
Quick Steps:
- Stir yogurt, lemon juice, dill, and olive oil together.
- Pat the cucumber dry so it doesn’t water down the filling.
- Spread the yogurt mixture over each tortilla.
- Add lettuce, cucumber, and feta.
- Roll tightly and slice after a short chill.
Equipment for This Recipe:
- Mixing bowl
- Knife
- Cutting board
How to Serve This Dish:
Serve with mint iced tea or sparkling water with cucumber. If you want a side, keep it simple — a few olives or a handful of grapes is enough.
Pro Tips for This Recipe:
- Pat the cucumber dry twice if it’s extra juicy.
- Use a thick yogurt so the wrap doesn’t slip.
- Chill before slicing so the spiral holds.
Variations on This Dish:
- Olive Version: Add chopped Kalamata olives.
- Chickpea Version: Add a spoonful of mashed chickpeas for more body.
- Herb Mix Version: Add parsley and mint with the dill.
Common Mistakes to Avoid with This Dish:
- Don’t drown the wrap in yogurt.
- Don’t skip drying the cucumber or the tortilla turns soft fast.
30. Crispy Tofu Banh Mi
Crispy tofu gives banh mi a meatless version with real texture. When the tofu is pressed, browned, and tucked into a baguette with pickles and herbs, it tastes bright and decisive rather than like a compromise.
Why It Works:
Tofu needs dryness and heat to earn its place in a sandwich like this. Once it’s crisp, it holds sauce well, and the pickled vegetables keep everything sharp and lively. The baguette does the same job it does in the classic version: crunch on the outside, softness inside.
Key Ingredients:
- 4 small baguettes
- 1 block firm tofu, pressed and sliced
- 2 tbsp cornstarch
- 2 tbsp oil
- 1 cup shredded carrots
- 1 cup shredded daikon
- 1/4 cup rice vinegar
- 1/2 cup vegan mayo or regular mayo
- 1 cucumber, sliced
- 1 bunch cilantro
- 1 jalapeño, sliced
Quick Steps:
- Toss carrots and daikon with rice vinegar and a pinch of salt.
- Coat tofu lightly in cornstarch and pan-fry until crisp.
- Spread mayo inside the baguettes.
- Add tofu, pickled vegetables, cucumber, cilantro, and jalapeño.
- Wrap tightly and eat while the tofu still has some crunch.
Equipment for This Recipe:
- Skillet
- Bowl
- Paper towels
How to Serve This Dish:
Serve with lime soda or iced green tea. It’s also good with a little extra cucumber on the side if you want the lunch to stay bright and cool.
Pro Tips for This Recipe:
- Press the tofu longer than you think you need to.
- Don’t crowd the pan or the tofu steams.
- Keep the herbs dry so they stay fragrant.
Variations on This Dish:
- Sesame Version: Toss the tofu with sesame oil and seeds after frying.
- Tempeh Version: Use sliced tempeh instead of tofu.
- Sweet Chili Version: Add a thin drizzle of sweet chili sauce.
Common Mistakes to Avoid with This Dish:
- Don’t fry damp tofu.
- Don’t pack the sandwich too early if you want the tofu crisp.
31. BBQ Jackfruit Sandwich
Jackfruit is not pretending to be meat here; it’s doing its own thing, and that thing works well with barbecue sauce. The texture shreds nicely, the slaw adds crunch, and the bun catches the sauce without collapsing on first contact.
Why It Works:
Young jackfruit has a shredded texture that takes on barbecue flavor fast. A vinegar-touched slaw keeps the sandwich from going sweet and one-note, while a soft bun makes the whole thing easy to eat. This is one of the best vegetarian picnic sandwiches if you want something that feels familiar.
Key Ingredients:
- 4 brioche buns or slider rolls
- 2 cans young green jackfruit, drained
- 1 cup barbecue sauce
- 2 cups coleslaw mix
- 2 tbsp mayonnaise
- 1 tbsp apple cider vinegar
- 1 tbsp sugar
- 1/2 cup dill pickles
Quick Steps:
- Shred the jackfruit with your fingers or a fork.
- Warm it in a skillet with barbecue sauce until coated.
- Toss the slaw mix with mayo, vinegar, and sugar.
- Fill the buns with jackfruit, slaw, and pickles.
- Wrap and pack once cooled enough to handle.
Equipment for This Recipe:
- Skillet
- Fork
- Mixing bowl
How to Serve This Dish:
Iced tea or root beer makes sense here. Serve it with chips or corn salad, and keep napkins close because barbecue sauce is never a tidy guest.
Pro Tips for This Recipe:
- Use young jackfruit packed in water or brine, not syrup.
- Cook it long enough to lose the canned smell.
- Keep the slaw crisp so the sandwich has texture.
Variations on This Dish:
- Spicy BBQ Version: Add hot sauce to the barbecue sauce.
- Mustard Version: Use mustard-heavy sauce and slaw.
- Pineapple Version: Add a slice of grilled pineapple for sweetness.
Common Mistakes to Avoid with This Dish:
- Don’t use ripe jackfruit. It tastes wrong for a sandwich.
- Don’t load the bun before the jackfruit has cooled slightly.
32. Tuna Niçoise-Style Sandwich
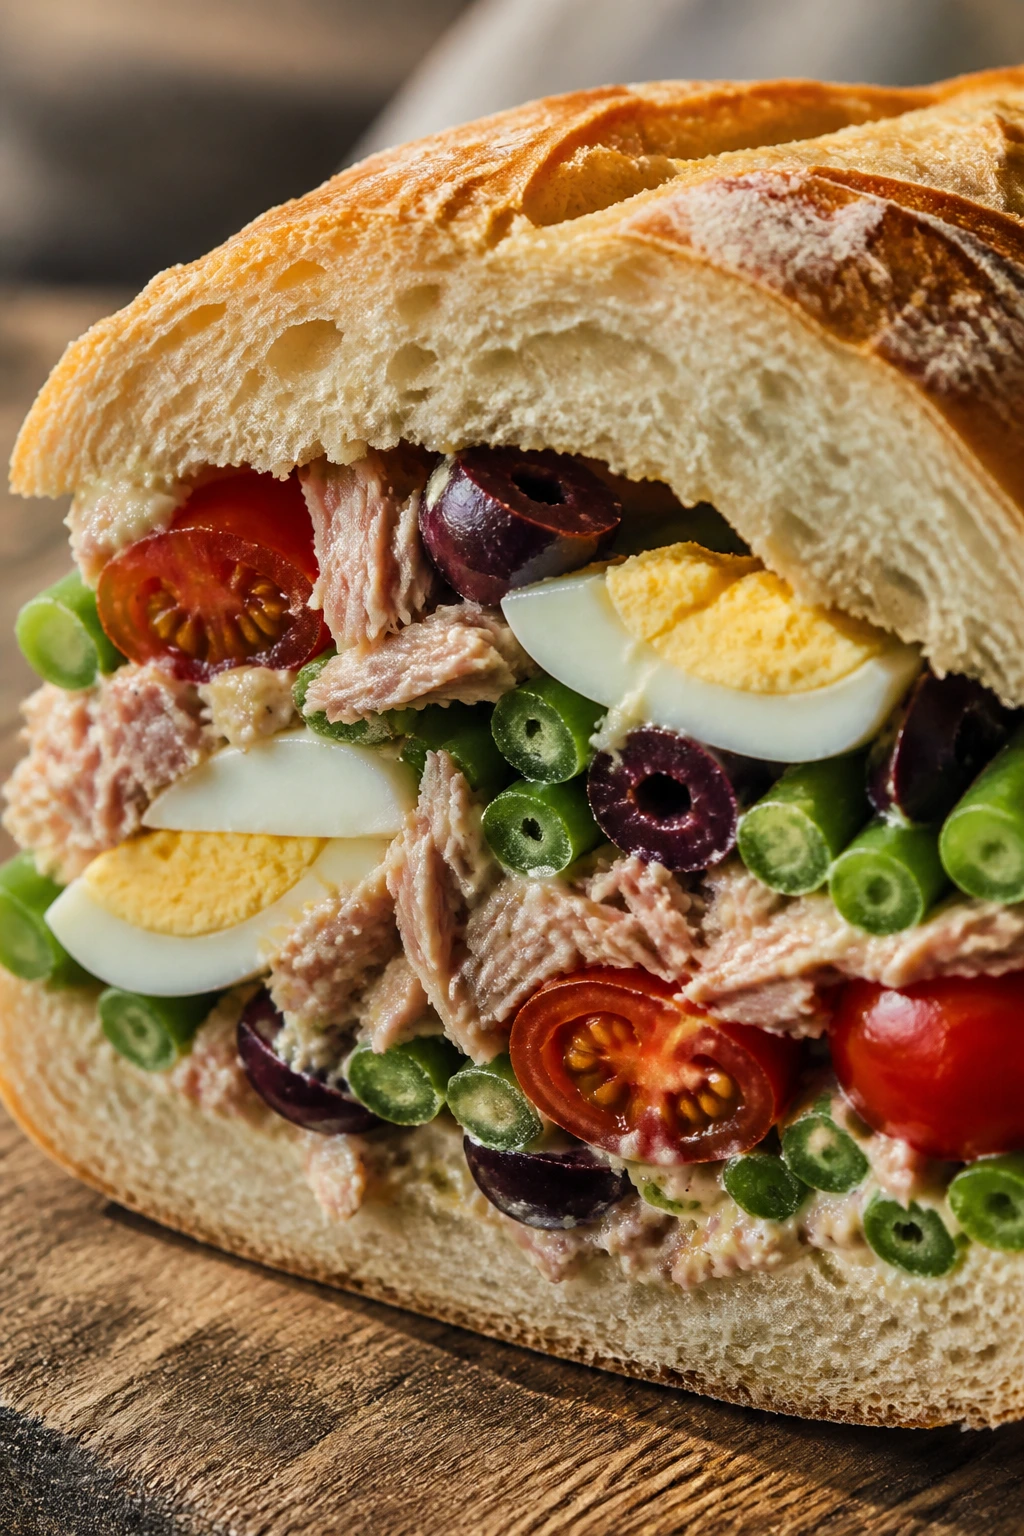
This sandwich borrows from the salad but makes it portable. Tuna, egg, olives, green beans, and tomato bring a lot of moving parts, which is why a firm roll or baguette works better than soft sandwich bread.
Why It Works:
The ingredients are all strong enough to stand on their own, so the sandwich needs a good binder — usually a mustardy mayo or olive-oil dressing. Green beans add a nice snap, and hard-boiled eggs make it feel fuller without becoming heavy. It tastes especially good after a short chill.
Key Ingredients:
- 4 sandwich rolls or 1 baguette
- 2 cans tuna, drained
- 2 hard-boiled eggs, sliced
- 1/2 cup green beans, blanched and cooled
- 1/2 cup cherry tomatoes, halved and seeded
- 1/4 cup olives, sliced
- 1/4 cup mayonnaise
- 1 tsp Dijon mustard
Quick Steps:
- Mix mayonnaise and Dijon into a light spread.
- Seed the tomatoes and pat them dry.
- Spread the dressing on the bread.
- Layer tuna, egg, green beans, tomatoes, and olives.
- Close, wrap, and chill briefly before serving.
Equipment for This Recipe:
- Bowl
- Knife
- Cutting board
How to Serve This Dish:
Sparkling water with lemon or iced tea suits the salty, briny profile. A few potato chips or fresh fruit keep the plate balanced without competing with the sandwich.
Pro Tips for This Recipe:
- Blanch the green beans only until crisp-tender.
- Dry the tomatoes well.
- Keep the dressing light so the filling stays distinct.
Variations on This Dish:
- Anchovy Version: Add a little anchovy paste to the dressing.
- Potato Version: Add thin sliced cooked potato for extra heft.
- Herb Version: Stir in parsley and chives.
Common Mistakes to Avoid with This Dish:
- Don’t use mushy beans or wet tomatoes.
- Don’t make the tuna too creamy or the other ingredients vanish.
33. Shrimp Salad Roll

Shrimp salad has a delicate sweetness that belongs on a picnic as long as you keep it cold and tight. The celery and lemon keep it bright, and a soft split-top roll makes it feel like a coastal lunch instead of a pile of leftovers.
Why It Works:
Cooked shrimp brings a clean, briny flavor that doesn’t need much help. The salad should be cool, lightly dressed, and chopped so each bite feels even. Buttered rolls or buns keep the bread from absorbing too much moisture too fast.
Key Ingredients:
- 1 lb cooked shrimp, chopped
- 1/3 cup mayonnaise
- 1 tbsp lemon juice
- 1/3 cup celery, finely diced
- 2 tbsp dill, chopped
- 1 tbsp chives, chopped
- 4 split-top rolls or brioche buns
- 1 tbsp softened butter
Quick Steps:
- Mix shrimp, mayonnaise, lemon juice, celery, dill, and chives.
- Chill the salad for 10 minutes.
- Butter the rolls lightly on the inside.
- Spoon in the shrimp salad.
- Close, wrap, and keep cold until serving.
Equipment for This Recipe:
- Mixing bowl
- Knife
- Spoon
How to Serve This Dish:
Serve with iced tea, lemon sparkling water, or ginger ale. A cucumber side salad works well if you want something fresh beside the richness of the shrimp salad.
Pro Tips for This Recipe:
- Chop the shrimp into bite-size pieces so the roll holds together.
- Use chilled shrimp, not warm.
- Buttering the rolls slows down sogginess.
Variations on This Dish:
- Old Bay Version: Add a pinch of Old Bay seasoning.
- Avocado Version: Fold in a little diced avocado right before serving.
- Lobster-Style Version: Substitute lobster if you want a richer filling.
Common Mistakes to Avoid with This Dish:
- Don’t leave shrimp salad unrefrigerated.
- Don’t overmix and turn the shrimp into paste.
34. Classic Tomato and Mayo Sandwich
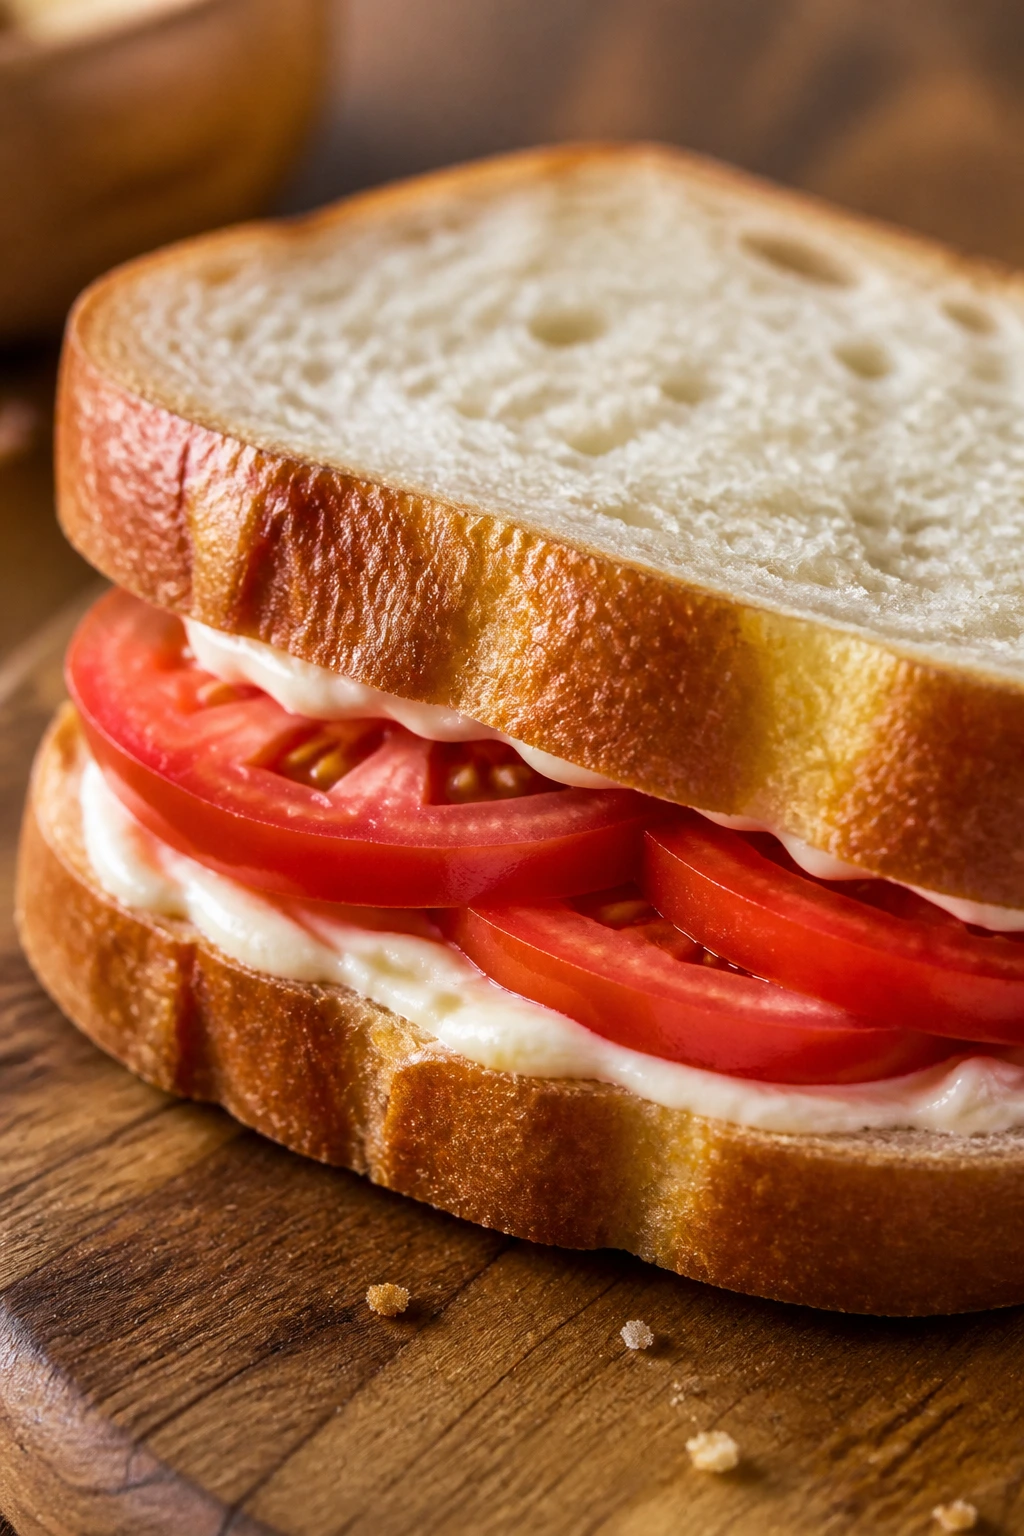
A tomato sandwich sounds almost too simple, which is why it needs good bread and good tomatoes. Salted, juicy slices with a slick of mayo and a thick-cut loaf create one of those lunches that people either understand immediately or learn to appreciate after one good bite.
Why It Works:
The bread matters more here than almost anywhere else on this list. It has to be thick enough to handle tomato juice and mayo without collapsing. A little salt on the tomato makes the flavor jump, and black pepper keeps it from tasting flat.
Key Ingredients:
- 8 slices thick sandwich bread
- 2 large ripe tomatoes, sliced
- 1/4 cup mayonnaise
- 1 tbsp softened butter
- 1/2 tsp salt
- 1/4 tsp black pepper
- Lettuce leaves, optional
Quick Steps:
- Salt the tomato slices and let them sit for 5 minutes.
- Pat them dry gently with paper towels.
- Spread mayonnaise and a little butter on the bread.
- Layer tomato, pepper, and lettuce if using.
- Close and eat soon after assembling.
Equipment for This Recipe:
- Knife
- Paper towels
- Cutting board
How to Serve This Dish:
Sweet tea, lemonade, or plain cold sparkling water all work. Add chips if you want, but this sandwich often needs nothing beyond a clean plate and a napkin.
Pro Tips for This Recipe:
- Use thick, sturdy bread or it will fail quickly.
- Salt the tomatoes first so the sandwich tastes seasoned, not bland.
- Assemble right before eating if the tomatoes are very juicy.
Variations on This Dish:
- Basil Version: Add fresh basil leaves.
- Bacon Version: Add crisp bacon for salt and crunch.
- Heirloom Version: Use different tomato varieties for a sweeter, more complex bite.
Common Mistakes to Avoid with This Dish:
- Don’t use underripe tomatoes; the sandwich tastes hollow.
- Don’t skip the salt just because the mayo is already there.
35. Steak and Arugula Baguette
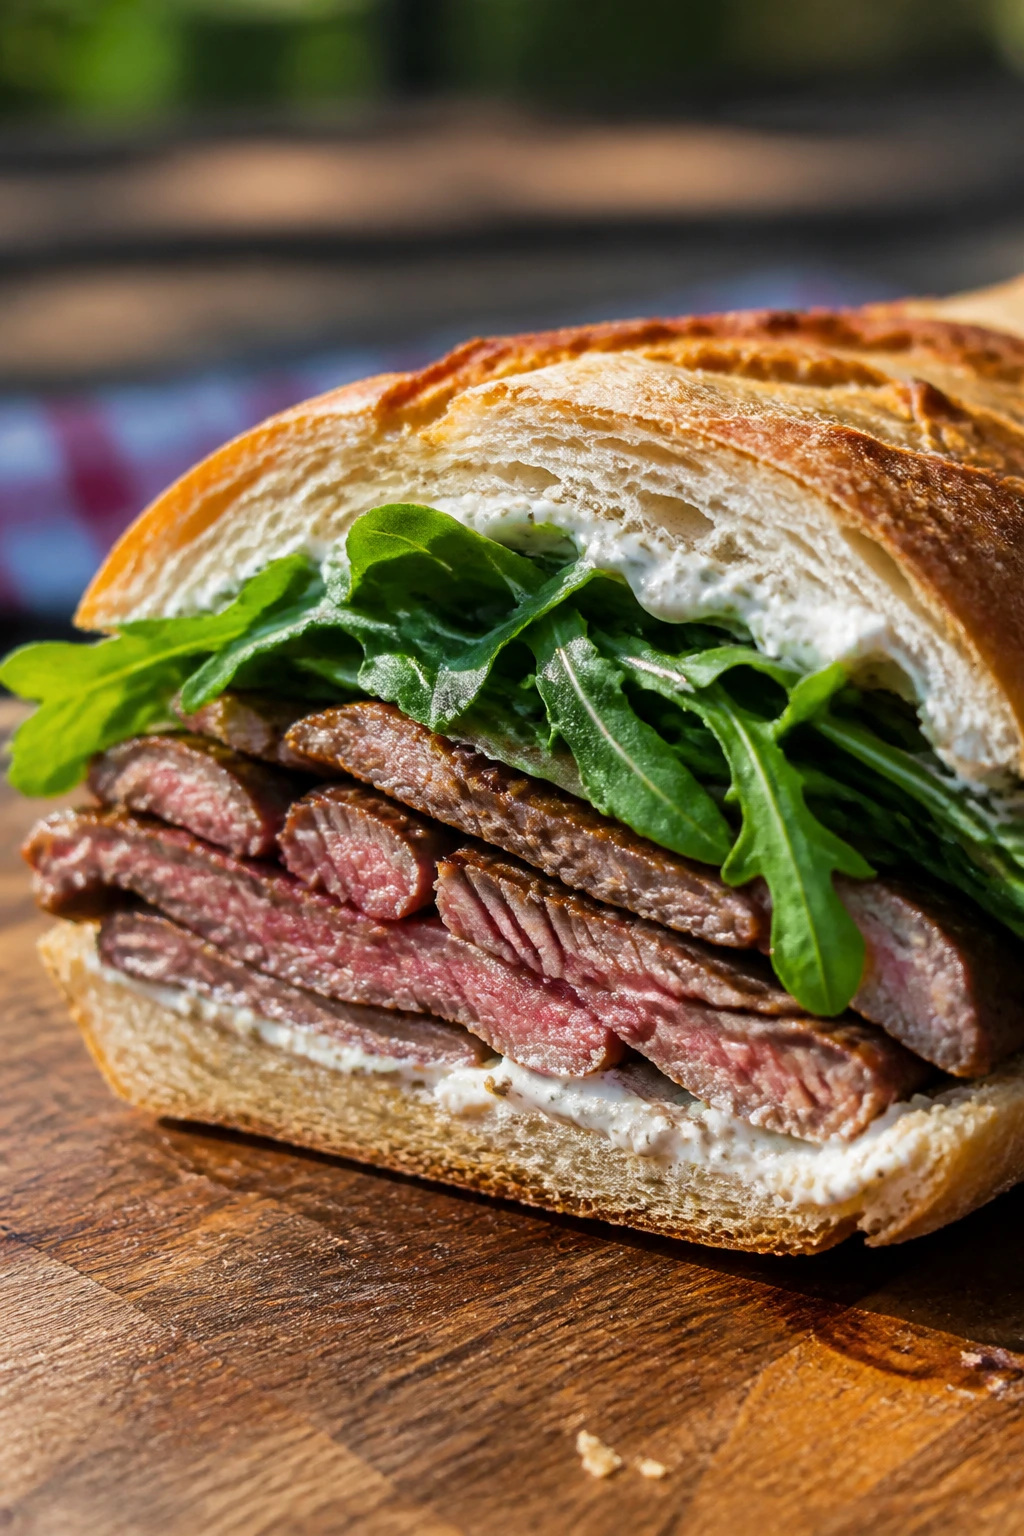
This sandwich brings steakhouse energy to the picnic blanket without requiring a knife and fork. Thin sliced steak, peppery arugula, and horseradish mayo give you a strong, clean bite, especially when the baguette still has a little crunch.
Why It Works:
Steak needs to be sliced across the grain so it stays tender in a handheld sandwich. Arugula cuts the richness, and horseradish mayo adds a sharp finish that keeps the flavor awake. If you add caramelized onions, keep them restrained; too much and the sandwich turns heavy.
Key Ingredients:
- 1 baguette, split
- 8 oz cooked steak, thinly sliced
- 1 cup arugula
- 2 tbsp mayonnaise
- 1 tbsp prepared horseradish
- 1/4 cup caramelized onions
- 2 slices provolone, optional
- 1 tbsp butter
Quick Steps:
- Mix mayonnaise and horseradish.
- Butter the baguette lightly and spread on the horseradish mayo.
- Layer steak, arugula, onions, and provolone if using.
- Close and press the baguette gently.
- Wrap once cooled and slice into shorter lengths.
Equipment for This Recipe:
- Knife
- Small bowl
- Cutting board
How to Serve This Dish:
Pair it with iced tea, cold brew, or sparkling water with lemon. A handful of salt-and-vinegar chips fits the flavor profile nicely.
Pro Tips for This Recipe:
- Slice the steak thin; thick slices pull out when you bite.
- Let hot steak cool before assembling.
- Keep horseradish under control unless you want the sandwich to sting.
Variations on This Dish:
- Blue Cheese Version: Replace provolone with blue cheese.
- Chimichurri Version: Swap horseradish mayo for chimichurri.
- Mushroom Version: Add sautéed mushrooms for a deeper, earthier sandwich.
Common Mistakes to Avoid with This Dish:
- Don’t use steak cut too thick or too chewy.
- Don’t pack it warm unless you’re eating immediately.
36. Buffalo Chicken Wrap
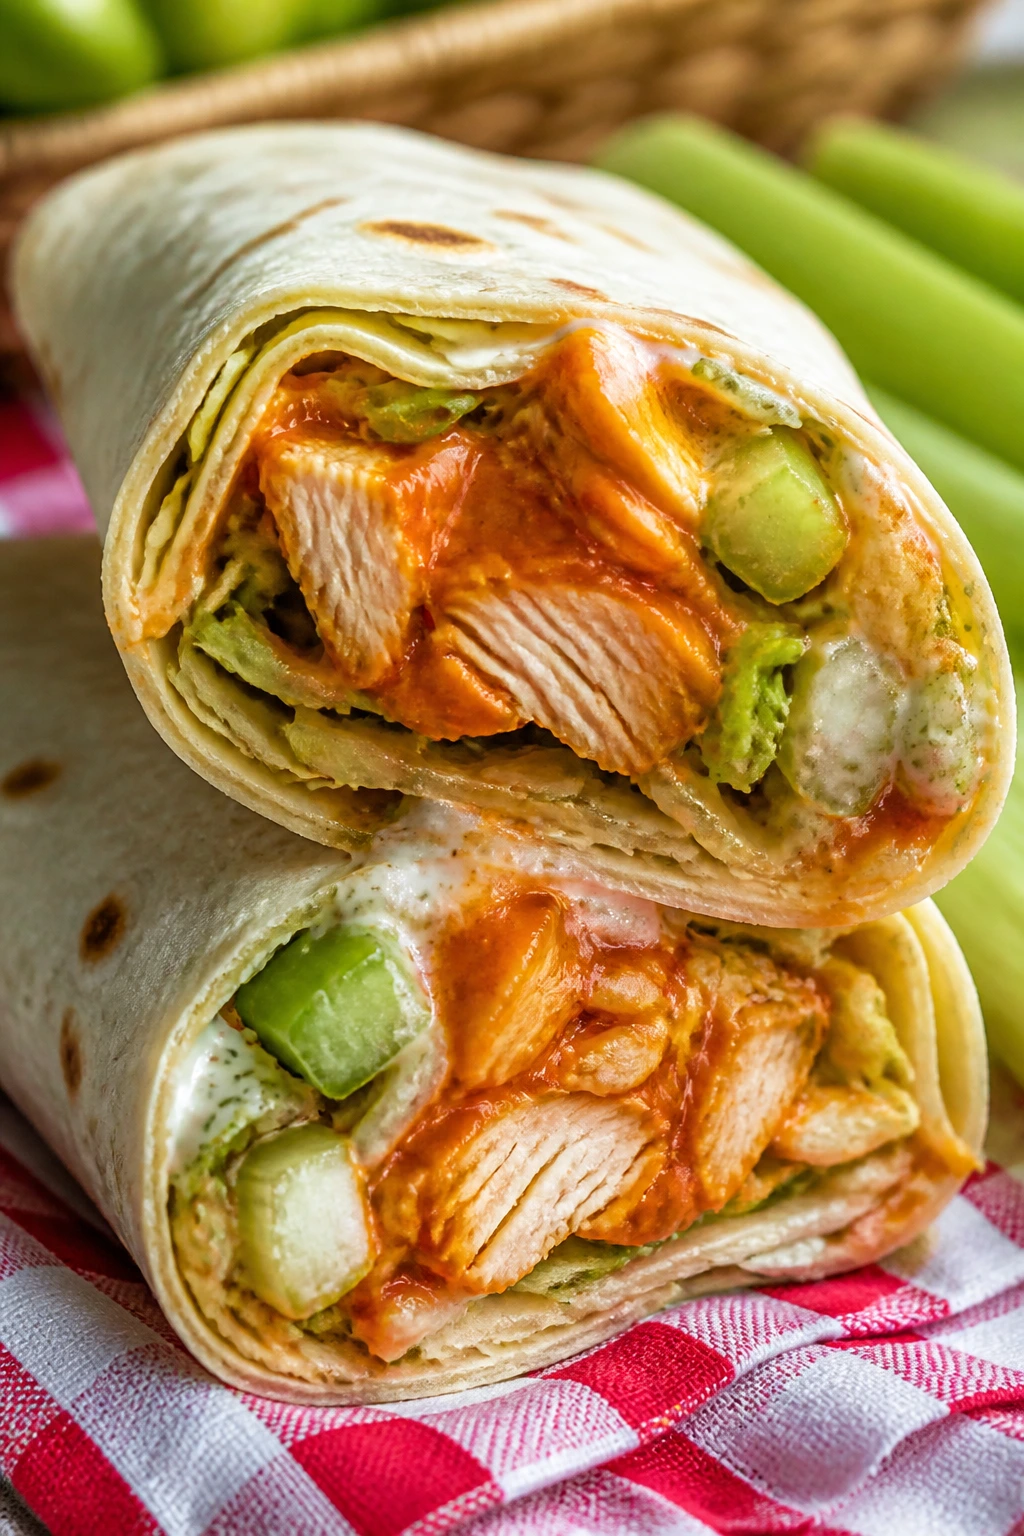
Buffalo chicken wrap is loud in a way a picnic sometimes needs. The sauce brings heat, the ranch cools it down, and the celery gives you a fresh snap that keeps the wrap from turning into pure sauce and tortilla.
Why It Works:
Buffalo sauce is strong enough to carry shredded chicken, but it needs a creamy counterweight or it tastes sharp and thin. Celery and lettuce lighten the wrap, while a tight roll keeps the sauce where it belongs. This one is easy to like with a very cold drink nearby.
Key Ingredients:
- 4 large flour tortillas
- 2 cups cooked shredded chicken
- 1/3 cup buffalo sauce
- 1/4 cup ranch dressing
- 1 cup shredded lettuce
- 1/2 cup celery, thinly sliced
- 1/2 cup shredded carrot
- 1/4 cup crumbled blue cheese, optional
Quick Steps:
- Toss the chicken with buffalo sauce.
- Spread ranch over each tortilla.
- Add lettuce, celery, carrot, and chicken.
- Sprinkle blue cheese if using.
- Roll tightly and slice after a short rest.
Equipment for This Recipe:
- Mixing bowl
- Knife
- Cutting board
How to Serve This Dish:
Serve with lemonade or plain iced tea so the heat has something to meet. Celery sticks on the side make sense here, even if they feel a little on the nose.
Pro Tips for This Recipe:
- Cool the chicken mixture before wrapping.
- Don’t drown the chicken in sauce.
- Roll tightly so the filling doesn’t slide to one end.
Variations on This Dish:
- Blue Cheese Version: Use blue cheese dressing instead of ranch.
- Cauliflower Version: Swap chicken for roasted cauliflower.
- Mild Version: Cut the buffalo sauce with extra ranch.
Common Mistakes to Avoid with This Dish:
- Don’t use hot filling inside the tortilla.
- Don’t overfill or the wrap tears when you slice it.
37. Ricotta, Honey, and Fig Sandwich
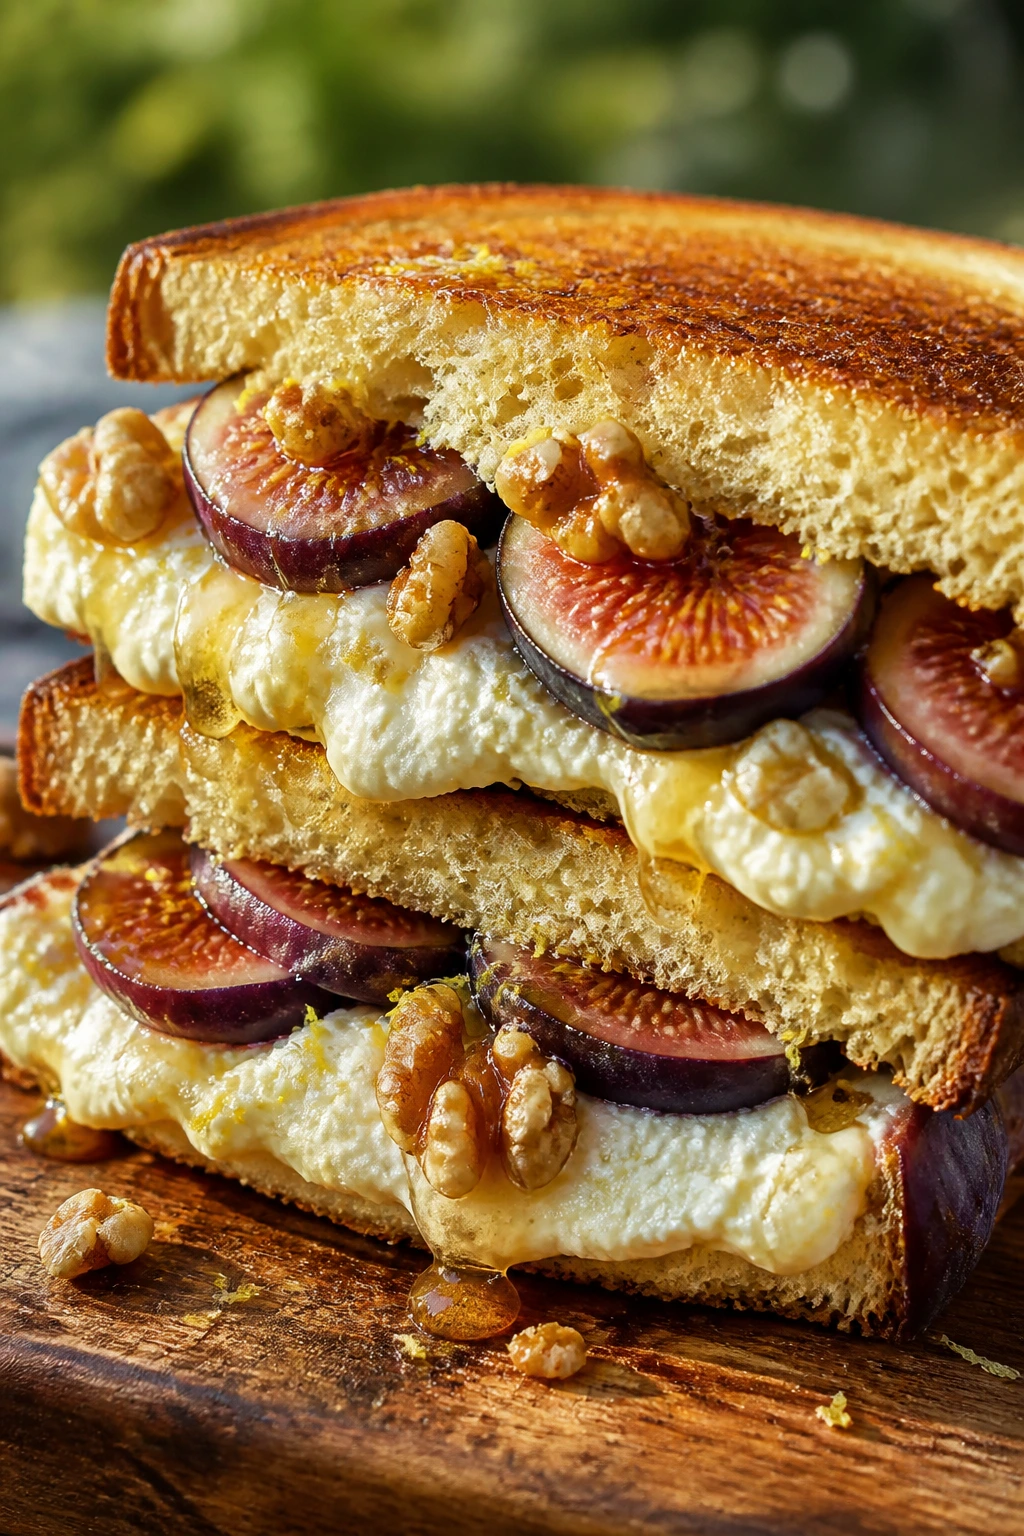
Sweet sandwiches are easy to dismiss until you make one with enough restraint. Ricotta gives this a soft, milky base, figs bring jammy sweetness, and honey pulls everything together without making it taste like dessert wearing a disguise.
Why It Works:
Ricotta is mild and spreadable, so it acts like a blank canvas for the figs. Honey adds shine and sweetness, and a little lemon zest or salt keeps the filling from turning flat. Toasted bread or brioche gives the whole thing a little structure and a nice soft edge.
Key Ingredients:
- 8 slices brioche or sturdy white bread
- 1 cup ricotta
- 4 fresh figs, sliced
- 2 tbsp honey
- 1 tsp lemon zest
- 1/4 cup chopped walnuts
- Pinch of salt
- 1 tbsp butter, optional
Quick Steps:
- Mix ricotta with lemon zest and a pinch of salt.
- Spread it on four slices of bread.
- Layer figs and walnuts, then drizzle with honey.
- Close the sandwiches and press lightly.
- Toast in butter if you want a warmer, richer finish.
Equipment for This Recipe:
- Bowl
- Knife
- Spoon
How to Serve This Dish:
Sparkling water, iced tea, or mint lemonade all fit the sweet-salty profile. This one works well as a lunch sandwich or a shared snack cut into smaller pieces.
Pro Tips for This Recipe:
- Use figs that are ripe but still hold their shape.
- A tiny pinch of salt sharpens the ricotta.
- Toast the bread only lightly if you want it to stay soft.
Variations on This Dish:
- Peach Version: Swap figs for sliced peaches.
- Almond Version: Use sliced almonds instead of walnuts.
- Savory Version: Add a few slices of prosciutto.
Common Mistakes to Avoid with This Dish:
- Don’t overload with honey or the sandwich turns sticky.
- Don’t use watery ricotta straight from the tub without stirring it first.
38. Salami, Olive Tapenade, and Pepper Sandwich
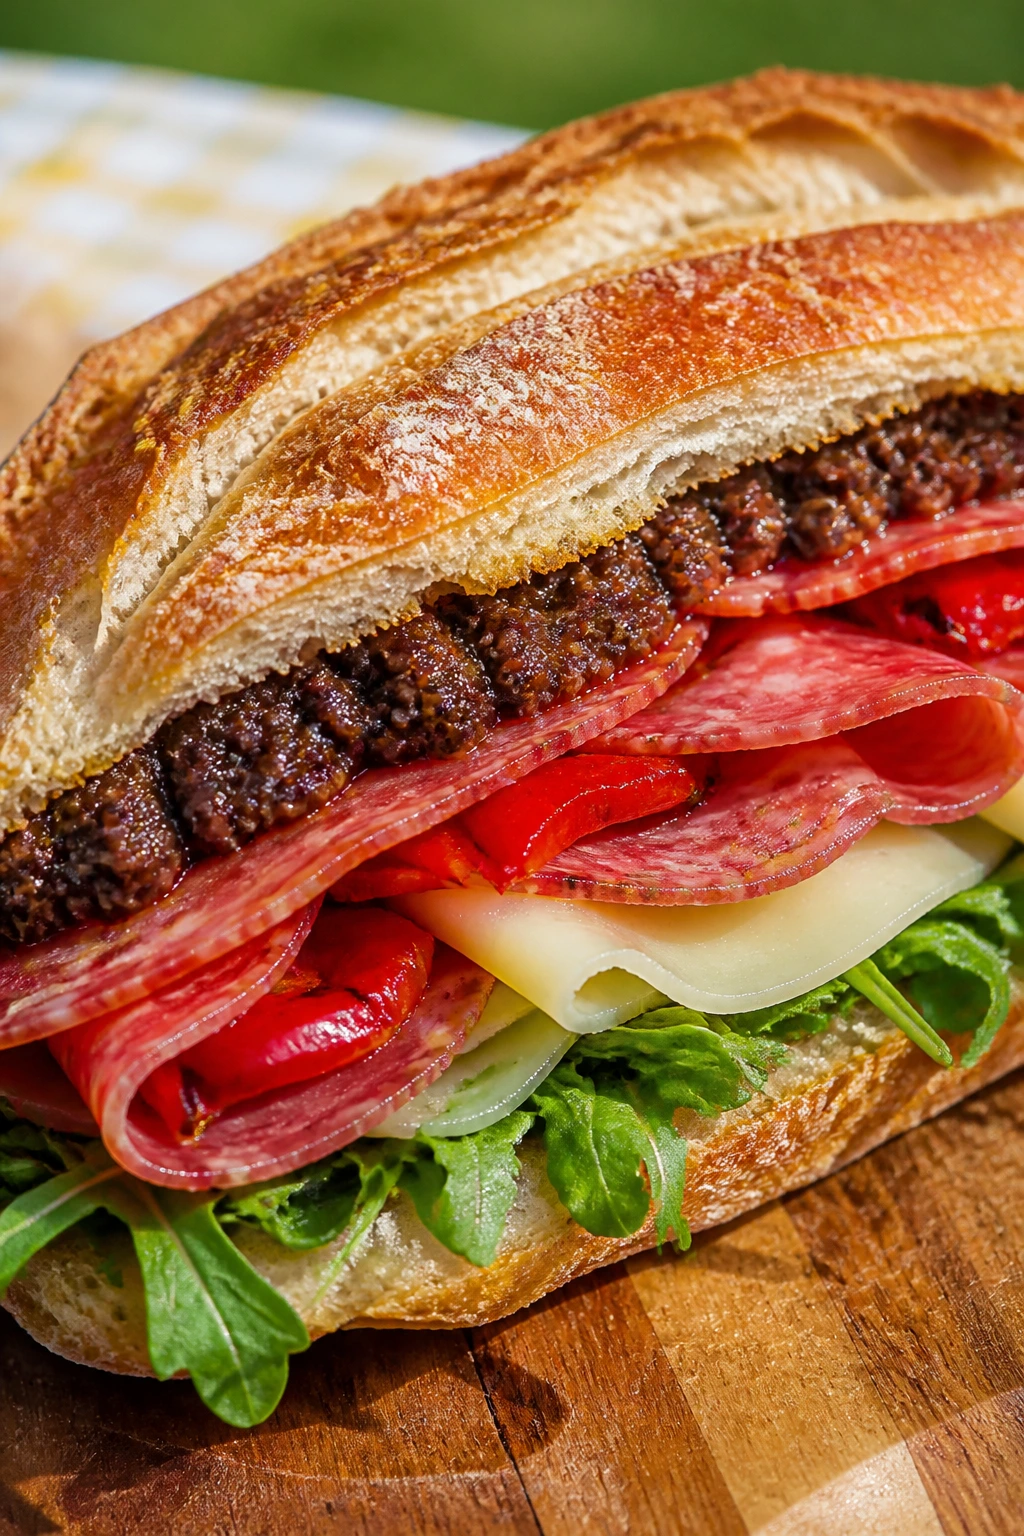
Salami and olive tapenade bring a salty, punchy flavor that does not ask permission. Roasted peppers soften the edges, and provolone gives the sandwich a creamy layer so the whole thing feels deliberate rather than aggressive.
Why It Works:
Tapenade spreads the olive flavor evenly without making the bread soggy if you keep the layer thin. Salami gives chew and salt, and roasted peppers add sweetness that keeps the sandwich from getting too briny. A crusty roll or baguette is the right move here.
Key Ingredients:
- 1 baguette or 4 rolls
- 6 oz salami
- 1/3 cup olive tapenade
- 1/2 cup roasted red peppers, drained
- 4 oz provolone
- 1 cup arugula
- 1 tsp olive oil
Quick Steps:
- Spread tapenade thinly on the bread.
- Layer salami, provolone, roasted peppers, and arugula.
- Drizzle a little olive oil over the greens.
- Close the sandwich and press gently.
- Wrap tightly and slice into picnic pieces.
Equipment for This Recipe:
- Knife
- Spoon
- Parchment
How to Serve This Dish:
This is a good fit for iced tea or sparkling water with lemon. Add marinated artichokes or simple fruit on the side if you want something beside the salt.
Pro Tips for This Recipe:
- Keep the tapenade layer thin.
- Drain peppers well before using them.
- Use arugula sparingly so it doesn’t overpower the olives.
Variations on This Dish:
- Mortadella Version: Swap salami for mortadella.
- Giardiniera Version: Replace peppers with chopped giardiniera.
- Cheese Swap: Use mozzarella if you want a softer bite.
Common Mistakes to Avoid with This Dish:
- Don’t overdo the tapenade; the salt stacks up fast.
- Don’t use soggy roasted peppers straight from the container.
39. Sun-Dried Tomato and Mozzarella Panini
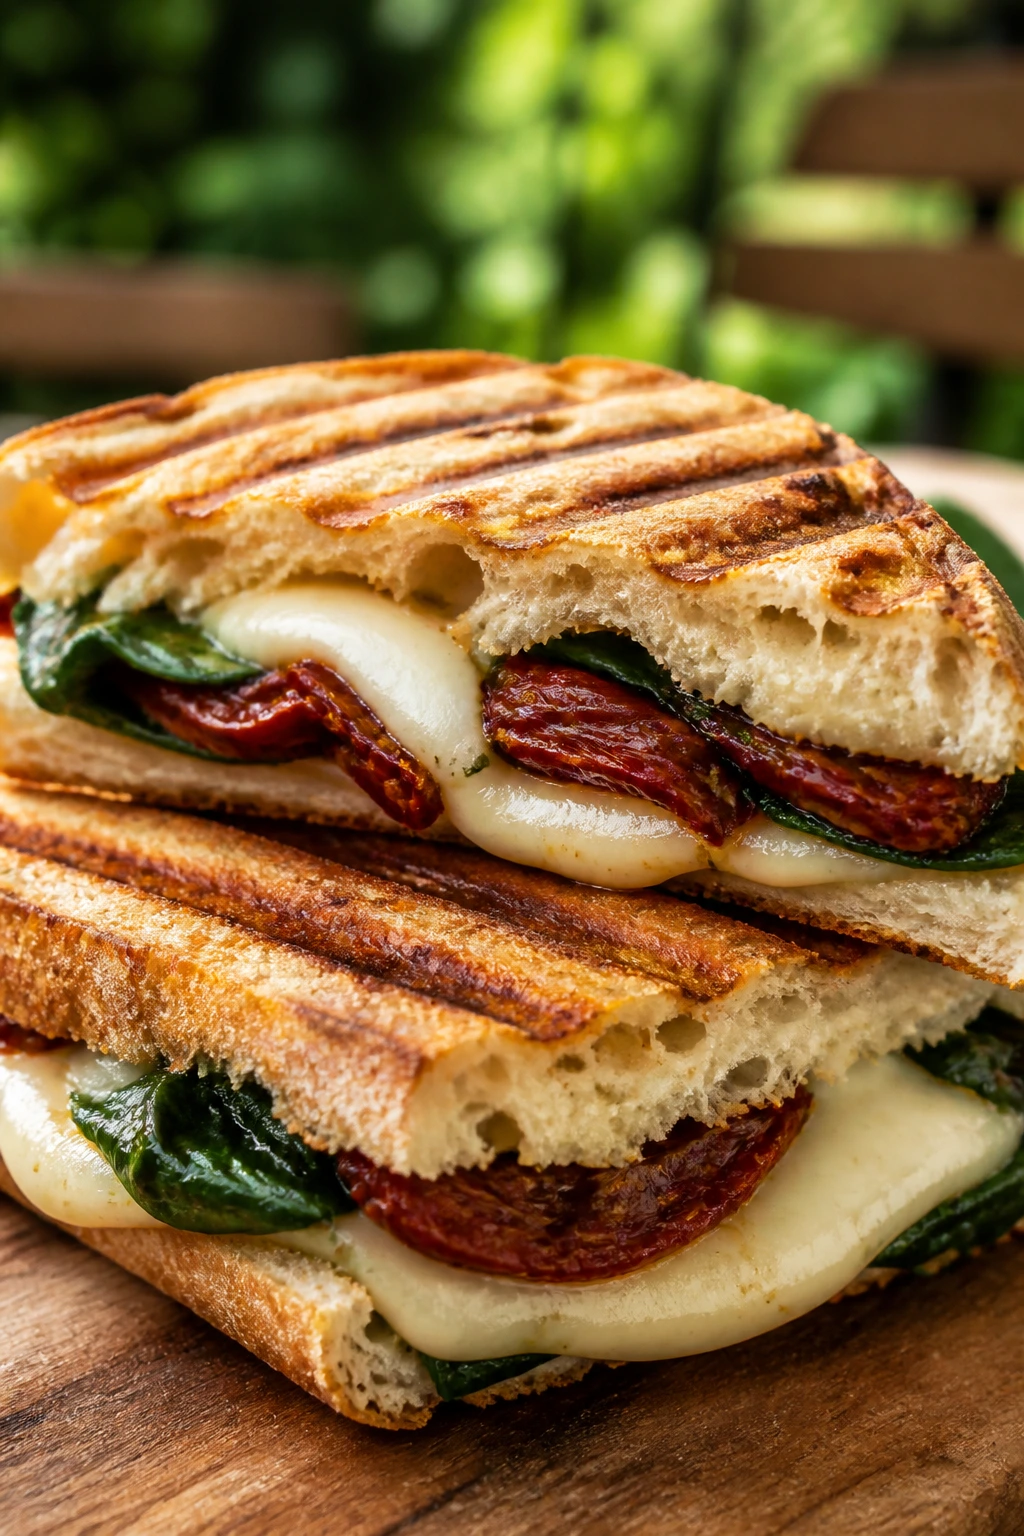
A panini is not the first thing people think of for a picnic, but cooled properly, it travels better than you’d expect. Sun-dried tomatoes bring concentrated flavor, mozzarella softens the edges, and spinach keeps the sandwich from feeling too rich.
Why It Works:
Sun-dried tomatoes are less watery than fresh tomatoes, which makes them a smart picnic choice. Mozzarella melts beautifully if you serve it warm at home, but even cooled it gives a soft, creamy bite. The key is pressing the sandwich lightly and letting it cool before it goes into the wrap.
Key Ingredients:
- 8 slices sturdy bread or ciabatta
- 8 oz mozzarella, sliced
- 1/2 cup sun-dried tomatoes, drained
- 1 cup baby spinach
- 2 tbsp basil pesto
- 1 tbsp olive oil
- 1 tbsp butter
Quick Steps:
- Spread pesto on the bread.
- Layer mozzarella, sun-dried tomatoes, and spinach.
- Butter the outside of the sandwich lightly.
- Press in a skillet or panini press until the bread is crisp and the cheese softens.
- Cool fully before wrapping for the picnic.
Equipment for This Recipe:
- Panini press or skillet
- Spatula
- Knife
How to Serve This Dish:
Serve cooled with lemonade or sparkling water. If you want to keep it from feeling too heavy, add a little fruit or a cucumber salad rather than chips.
Pro Tips for This Recipe:
- Drain the sun-dried tomatoes so the oil doesn’t swamp the bread.
- Let the sandwich cool before packing or the steam softens the crust.
- Press lightly; too much pressure squeezes out the cheese.
Variations on This Dish:
- Turkey Version: Add sliced turkey for more protein.
- Eggplant Version: Swap spinach for roasted eggplant.
- Herb Version: Add basil leaves for a fresher aroma.
Common Mistakes to Avoid with This Dish:
- Don’t pack it while warm.
- Don’t use overly oily tomatoes without draining them first.
40. Apple, Brie, and Turkey Sandwich
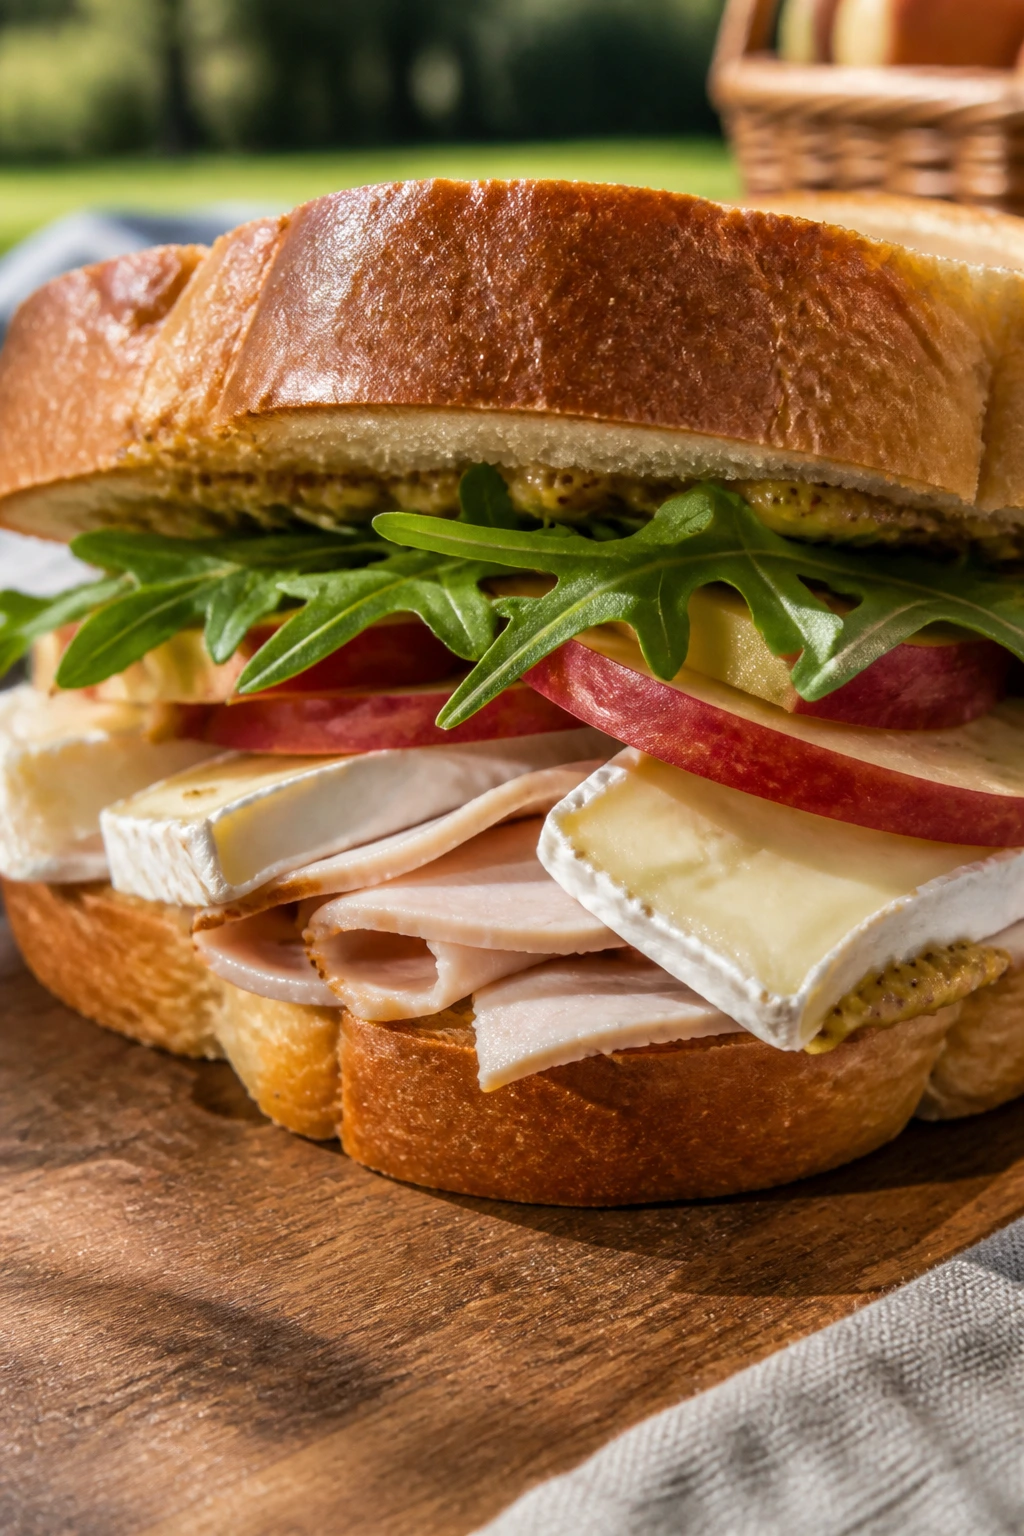
Apple, brie, and turkey is a little sweet, a little savory, and much better than it sounds when you say it quickly. The brie softens the edges, the apple keeps things crisp, and the turkey gives the sandwich enough weight to make it lunch instead of snack food.
Why It Works:
Brie brings a creamy, mild richness that doesn’t fight the apple. Thin apple slices add a clean snap, and turkey keeps the whole sandwich from drifting into dessert territory. A sturdy bread or roll is important because brie can get slippery if the bread is too soft.
Key Ingredients:
- 8 slices sturdy bread or 4 rolls
- 8 oz sliced turkey
- 4 oz brie, sliced
- 1 medium crisp apple, thinly sliced
- 1 tbsp Dijon mustard
- 1 cup arugula
- 1 tbsp softened butter
Quick Steps:
- Spread a thin layer of Dijon on the bread.
- Add turkey, brie, apple, and arugula.
- Butter the outside lightly if you want a toasted finish.
- Close and press gently.
- Wrap and chill briefly before slicing.
Equipment for This Recipe:
- Knife
- Cutting board
- Butter knife
How to Serve This Dish:
Sparkling water with apple slices, iced tea, or a light cider-style cold drink all work well. Add a handful of grapes or a few salted nuts, and the plate feels finished without trying too hard.
Pro Tips for This Recipe:
- Slice the apple thin so it doesn’t shove the sandwich open.
- Use brie that’s ripe but not runny.
- A thin swipe of Dijon is enough; too much makes the apple taste sharp.
Variations on This Dish:
- Cranberry Version: Add a spoonful of cranberry relish.
- Prosciutto Version: Swap turkey for prosciutto.
- Toasted Version: Press the sandwich lightly and serve it warm, then let it cool before packing.
Common Mistakes to Avoid with This Dish:
- Don’t use a mealy apple.
- Don’t let brie get too soft before assembly.
Why Picnic Sandwiches Hold Up Better Than Sloppy Lunches
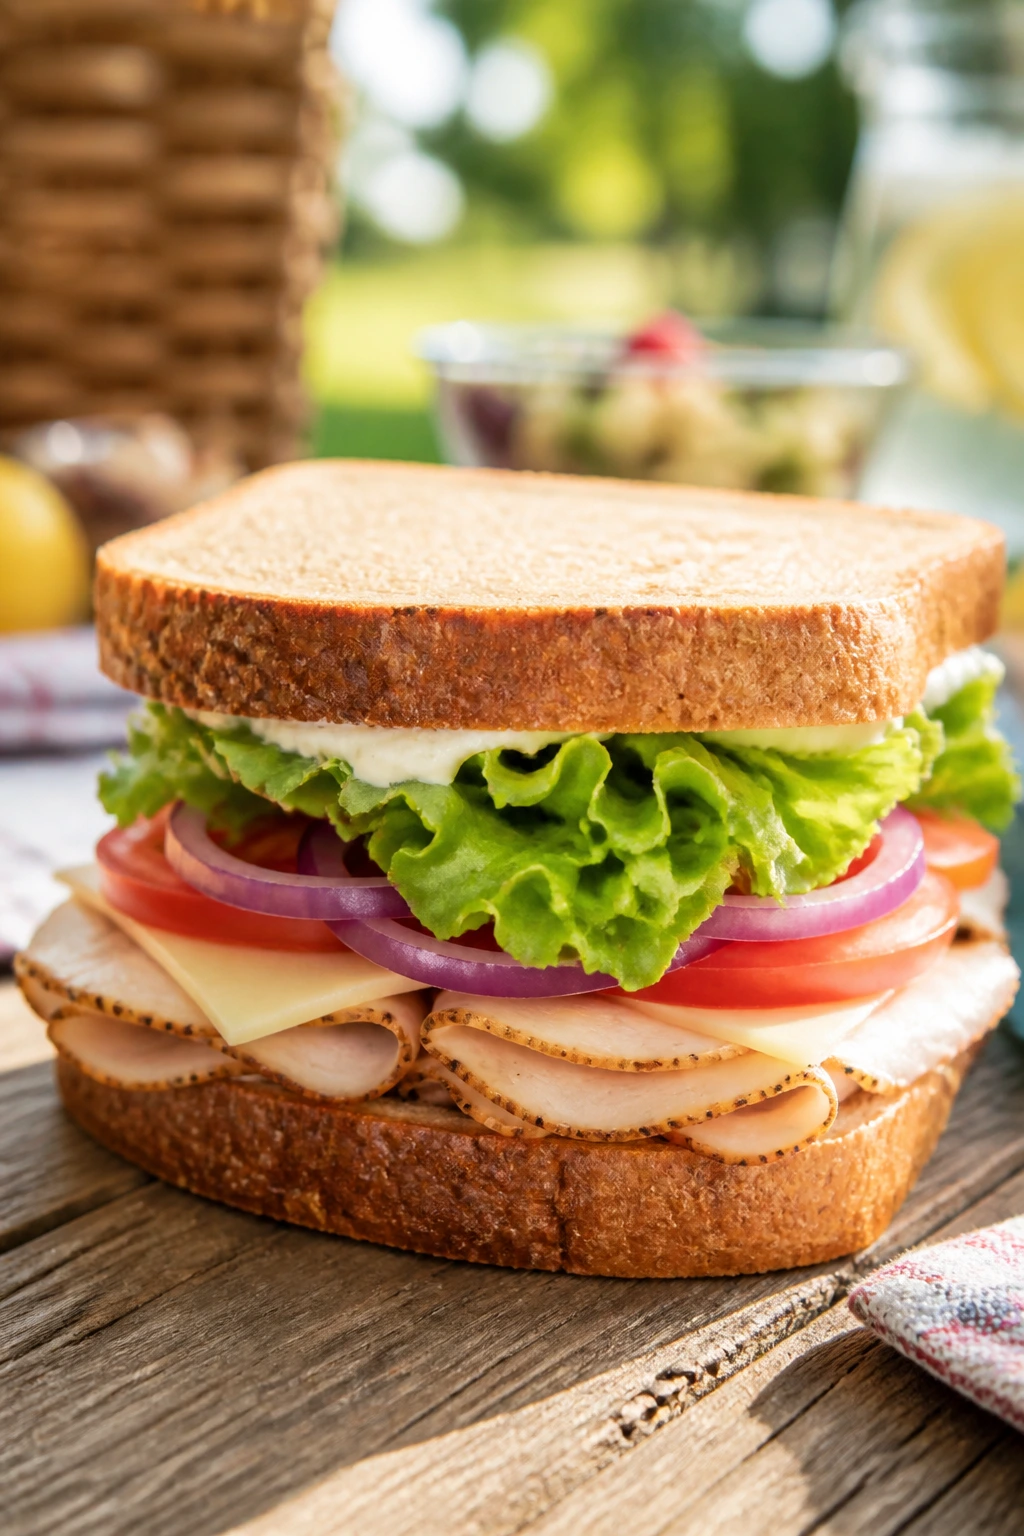
The difference between a sandwich that survives a picnic and one that falls apart in the first five minutes is rarely dramatic. It’s a matter of little decisions: the right bread, the right spread, the right order of ingredients, the right amount of time in the fridge. That’s why these sandwiches work. They’re built with the mess in mind.
Fat and moisture are the two big players. Butter, mayo, cream cheese, hummus, pesto, and cheese all help create a barrier between juicy fillings and bread. Drying tomatoes, patting cucumbers, seeding peppers, and squeezing sauerkraut sound fussy until you realize that each one stops the sandwich from turning soft before you’re halfway through it.
Cold drinks matter here too. A chilled lemon soda, sparkling water with lime, iced tea, or ginger beer changes how salty, creamy, and rich the sandwich tastes. The best picnic sandwich is not trying to dominate the basket. It just needs to stay composed long enough for the rest of the meal to catch up.
Essential Equipment for These Recipes
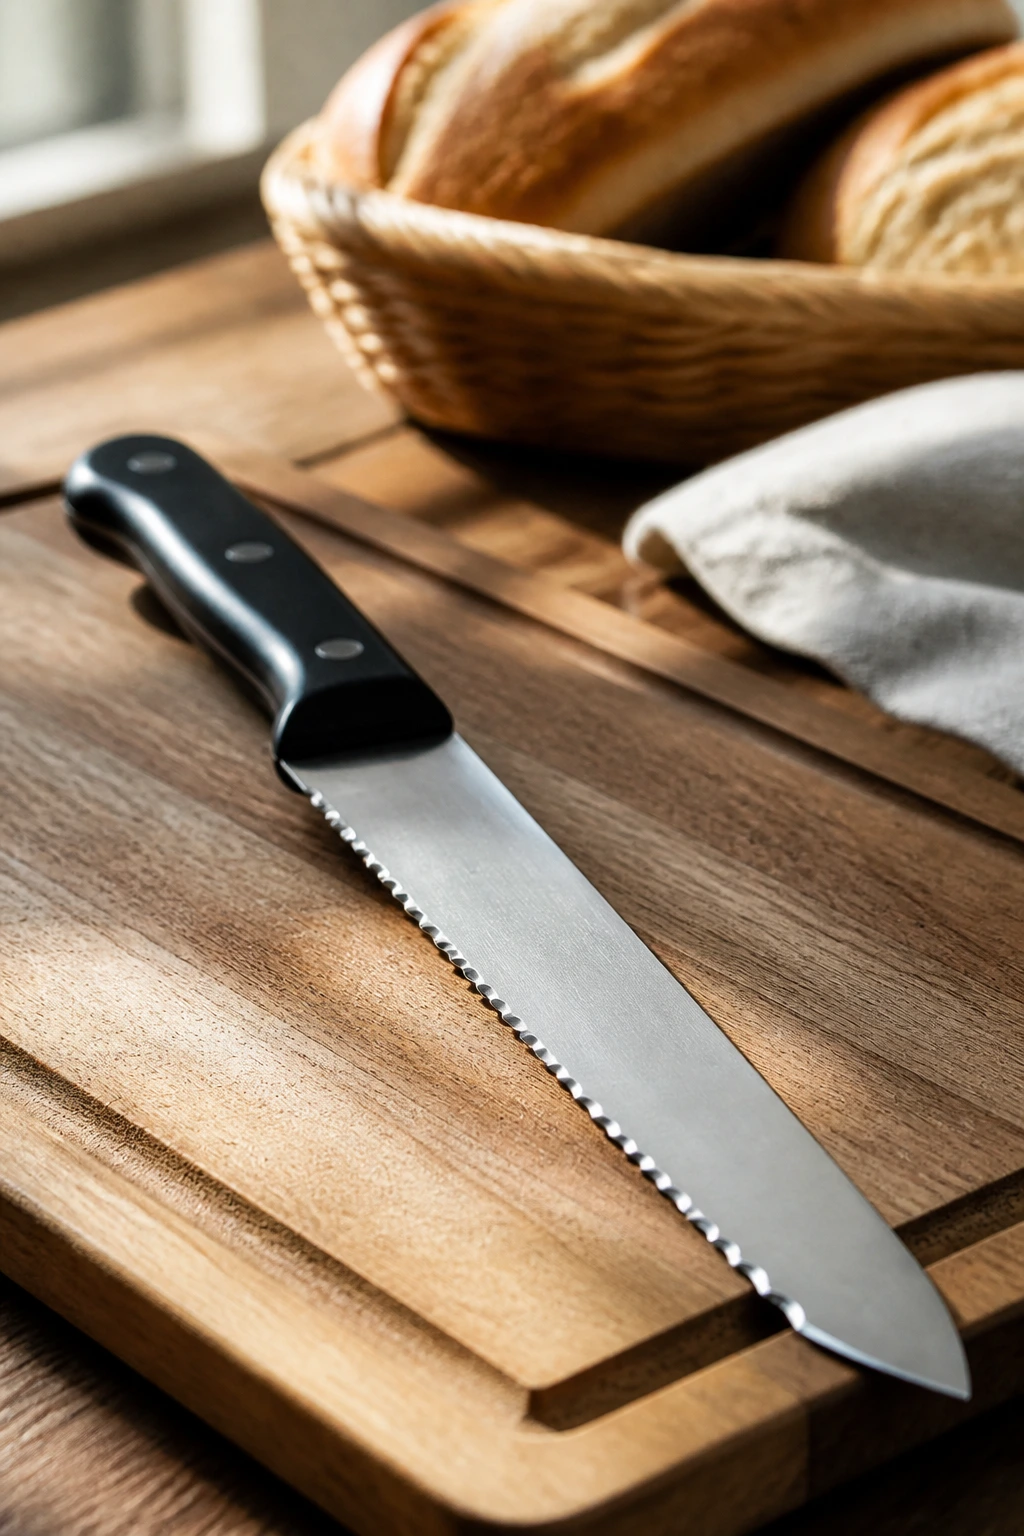
- Serrated knife: Best for bread with crust, from baguettes to sourdough, and it keeps you from crushing the loaf.
- Sharp chef’s knife: Handy for thin apple slices, tomatoes, onions, and herbs.
- Cutting board with a damp towel underneath: Keeps the board from sliding while you slice or spread.
- Small mixing bowls: You’ll use these for chicken salad, spreads, dressings, and quick pickles.
- Rubber spatula or spoon: Better than a fork for folding salads without smashing them.
- Paper towels: Essential for drying tomatoes, cucumbers, roasted vegetables, and pickles.
- Parchment or deli paper: Wraps sandwiches cleanly and helps them hold shape in the cooler.
- Cooler pack or insulated lunch bag: Keeps mayo-based sandwiches safe and stops soft fillings from turning warm and loose.
Smart Shopping and Ingredient Tips

Bread is the first thing to think about, and I mean think about it before you grab the softest loaf on the shelf. Picnic sandwiches do best with bread that has some chew or a crust that protects the interior: baguette, ciabatta, rye, sourdough, seeded bread, split-top rolls, sturdy wraps, and decent bagels all earn their place here. If a loaf squishes when you touch it in the bag, it will probably squish again after you add fillings.
Deli meats and cheeses are worth buying a little more carefully than usual. Ask for a medium slice, not paper-thin unless the sandwich really needs it. Thin shavings can taste elegant, but they also fold into nothing and disappear under moisture. For cheeses, choose slices that fit the bread instead of forcing a square cheese into a narrow roll and hoping for the best.
Produce needs a little prep. Tomatoes should be ripe but firm, cucumber should be dry, and onions should be sliced thin enough to be sharp without taking over. If a filling includes greens, use them as a buffer layer or a finishing layer, not the whole structure. Arugula, romaine, spinach, and sprouts all have different jobs; don’t treat them like interchangeable filler.
A final note on spreads: thicker is safer. Mayo, mustard, pesto, hummus, cream cheese, and tzatziki are all useful, but loose dressings are where good sandwiches get sloppy. If you want a juicy filling, make the filling itself juicy in a controlled way — like chicken salad, tuna salad, or olive tapenade — and keep the bread protected underneath.
How to Serve These Recipes
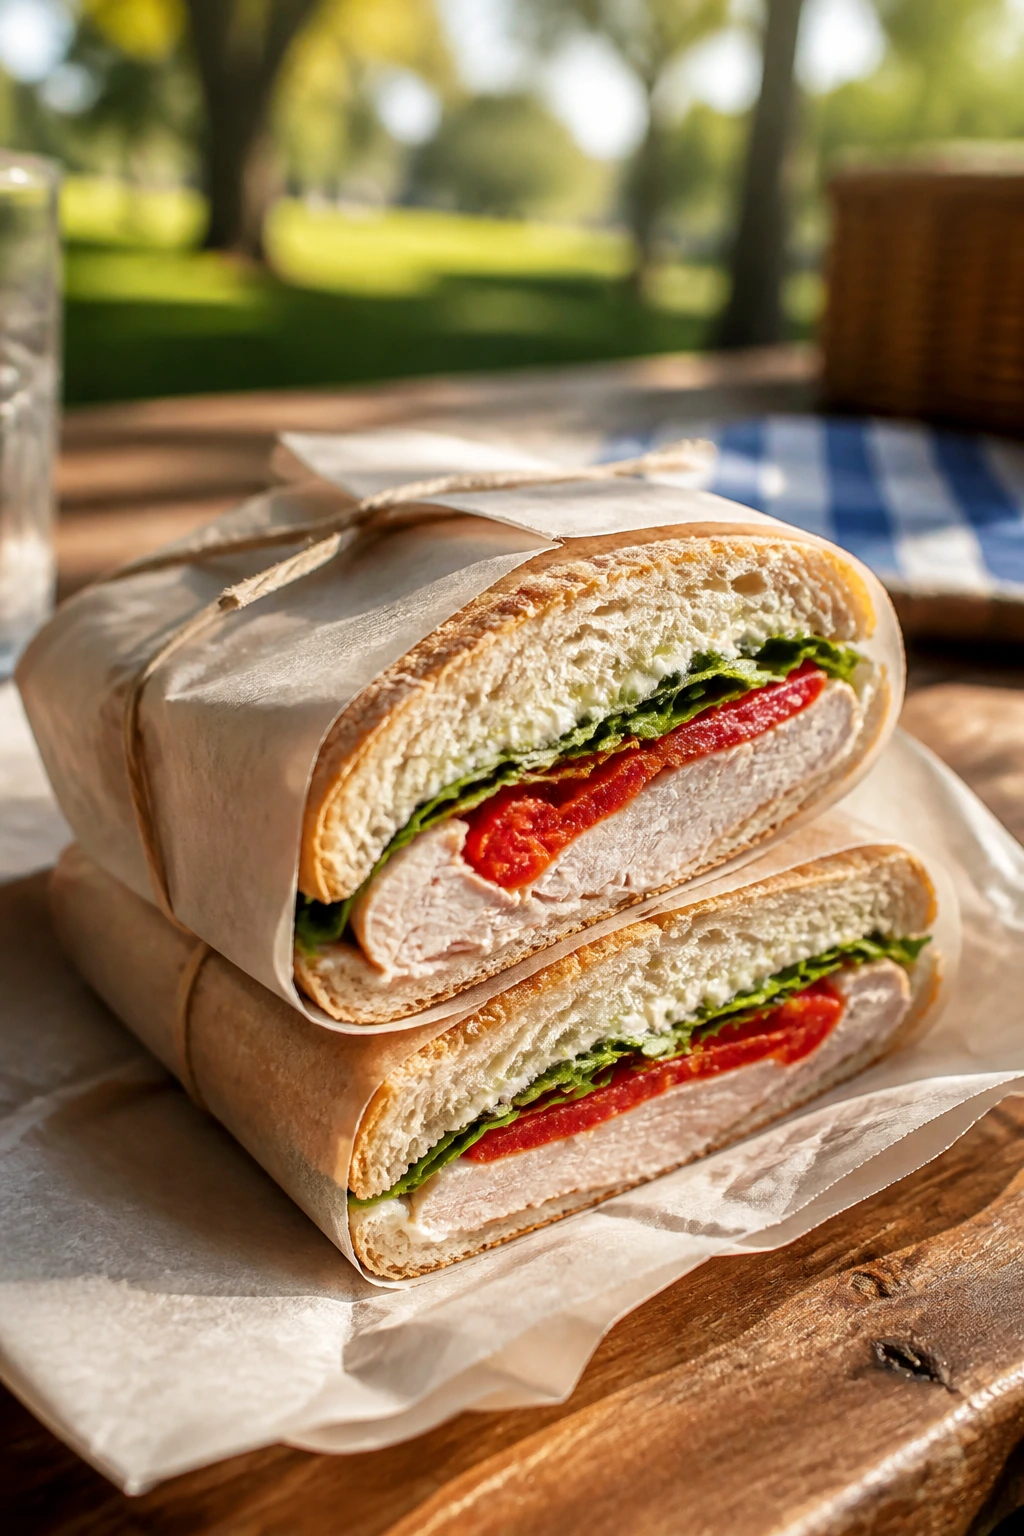
Presentation:
Wrap each sandwich in parchment and cut it cleanly on the diagonal or into manageable halves before packing. For open-face or fragile sandwiches, keep the topping and bread layers as neat as possible, then serve on a chilled platter so the fillings stay firm while people grab them.
Accompaniments:
Keep the sides simple and crunchy: kettle chips, pickles, olives, carrot sticks, snap peas, fruit salad, or a small cucumber-tomato salad. A picnic plate does not need six side dishes; it needs a few things that contrast with the sandwich and don’t compete for attention.
Portions:
Plan on one full sandwich or two small halves per adult, with smaller portions for tea sandwiches, sliders, and rich deli builds. If the sandwiches are very filling — think Reuben, steak, pulled pork, or muffuletta — one piece may be plenty when paired with chips and fruit. For a mixed basket, make a few light sandwiches and a few heavier ones so nobody gets boxed into the same flavor twice.
Beverage Pairing:
Lemonade works with almost everything on the list because acid cuts through mayo, cheese, and cured meat. Iced tea is the quiet all-rounder. Sparkling water with citrus is a good reset button, and ginger beer or cold apple cider works well with the sweeter sandwiches and the ones that lean salty.
Additional Tips and Flavor Boosters

Flavor Enhancement:
A thin layer of butter under tomato, cucumber, or pepper sandwiches changes the whole game. It slows moisture and adds a quiet richness that you notice most after the sandwich has rested for a while. For deli-style builds, a swipe of mustard or horseradish mayo on one side and a little pesto or tapenade on the other gives the sandwich more shape.
Customization:
Pickled onions, pepperoncini, jalapeños, olives, capers, fresh herbs, and shredded cabbage are the easiest way to steer these sandwiches in a different direction without rewriting them from scratch. You can make a turkey sandwich taste Mediterranean with olives and oregano, or turn a chicken salad sandwich into something sharper with curry and apple.
Serving Suggestions:
Toothpicks or sandwich picks help with tall stacks like clubs, sliders, and baguette builds. A little garnish matters too — a few herb leaves, a side of fruit, or a paper cone of chips makes the plate feel more intentional without making it complicated.
Make-It-Yours:
For gluten-free versions, use sturdy gluten-free bread that toasts well, or shift the fillings into lettuce cups and wraps. For dairy-free sandwiches, lean on hummus, olive tapenade, mustard, avocado, or dairy-free mayo instead of cheese or cream spreads. For lower-sodium versions, focus on roast chicken, turkey, fresh vegetables, and herb-heavy spreads rather than cured meats and brined toppings.
Make-Ahead, Storage, and Reheating Guidance
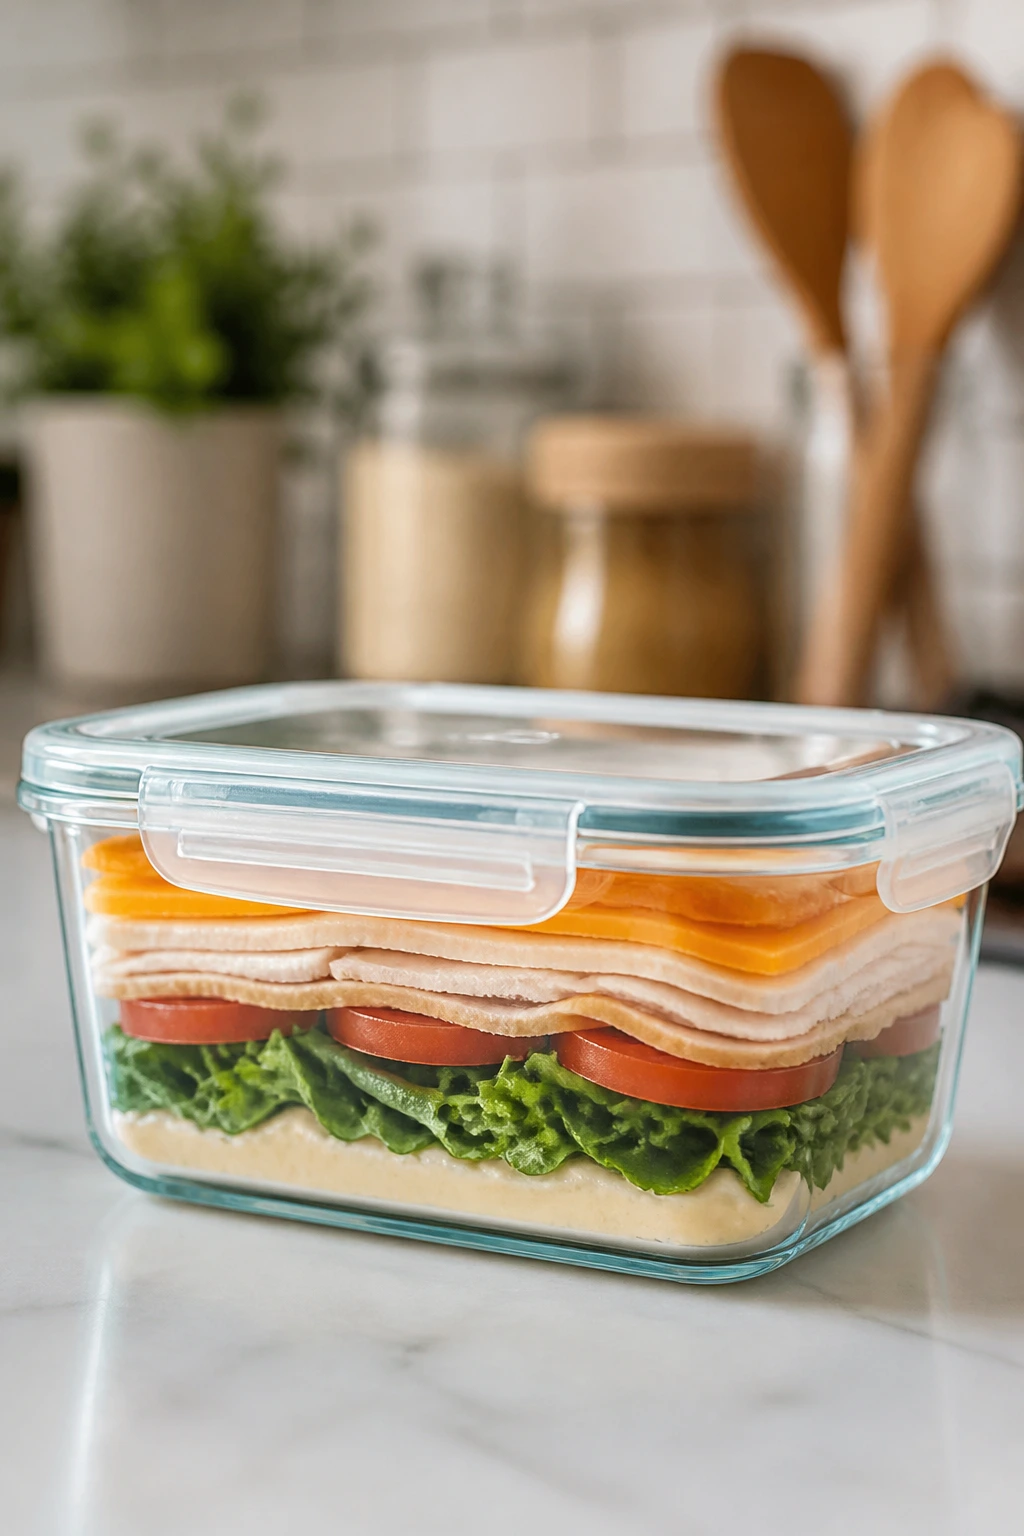
Most picnic sandwiches keep best when the components are prepared ahead but the final assembly happens close to serving. Chicken salad, tuna salad, egg salad, pulled pork, and jackfruit fillings hold well for 3 to 4 days in the refrigerator if stored in airtight containers. Quick pickles and olive salads often keep even longer, and they make the sandwiches taste better after a day of resting.
Assembled sandwiches with dry fillings — turkey and cheddar, ham and Swiss, roast beef and arugula, or apple and brie — can usually sit in the fridge for 1 day, sometimes 2 if the bread is sturdy and the fillings are not too wet. Sandwiches with tomato, cucumber, or dressed greens are best eaten the same day, ideally within a few hours. Mayo-based fillings should not sit out at room temperature longer than 2 hours, and when the weather is hot, an hour is a safer ceiling.
Freezing is useful for fillings, not finished sandwiches. Pulled pork, BBQ jackfruit, and some chicken salad bases freeze well for up to 2 months, though you should freeze the filling alone and add fresh bread later. Shrimp salad, egg salad, and cucumber-heavy fillings do not freeze well; they lose their texture and go watery after thawing.
Reheating only applies to a few of these sandwiches. Pulled pork, panini-style sandwiches, and some steak or chicken builds can be warmed in a skillet over medium heat or in a 325°F oven until the center is heated through and the bread is crisp again. If you reheat a sandwich, let it cool for a few minutes before wrapping, or the trapped steam will undo the crust you just worked for.
Variations and Adaptations to Try
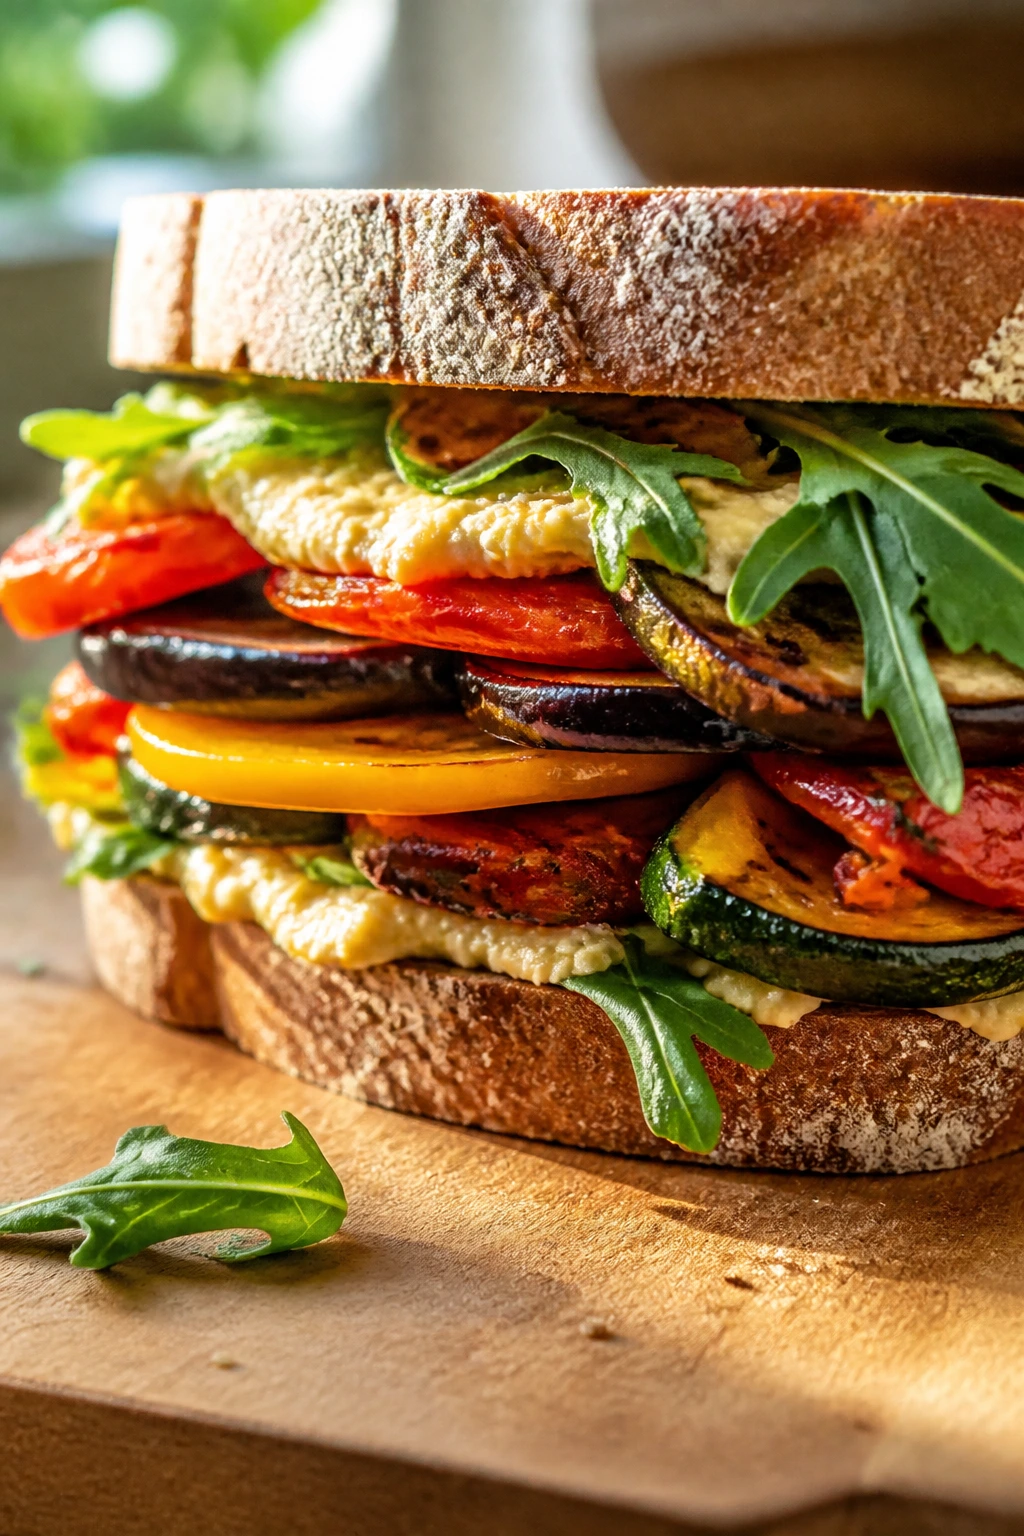
The Gluten-Free Basket:
Use sturdy gluten-free bread, grilled polenta squares, lettuce wraps, or corn tortillas depending on the filling. The key is choosing something that can handle moisture without crumbling the second you press down on it. Toasting gluten-free bread first often helps more than people expect.
The Dairy-Free Cooler:
Swap cream cheese, mayo, and yogurt for hummus, avocado, olive tapenade, mustard, or dairy-free mayo. This works especially well for the banh mi, hummus wrap, chicken-style salads, and deli-style sandwiches where the flavor is already carried by herbs, pickles, or spice.
The Vegetarian Stack:
Focus on caponata, roasted vegetables, falafel, chickpea salad, beet and goat cheese, or hummus wraps. If you want more heft, add avocado, nuts, or marinated tofu so the sandwich doesn’t feel like a side dish on bread.
The Kid-Sized Handful:
Use smaller rolls, wrap halves, or tea sandwich cuts and keep the fillings mild. Turkey, cheese, chicken salad, PB-banana, cucumber, and ham are usually the easiest hits. Leaving the crusts on for sturdier bread can be smart if the sandwich has to travel far.
The Heat-Smart Picnic:
When the forecast or the cooking spot is warm, lean on pickled vegetables, dry spreads, sturdy bread, and fillings that taste good cold. Skip fragile tomato stacks and very loose dressings. This version of picnic food should be able to sit quietly in a cooler and still taste lively when it comes out.
Common Mistakes to Avoid
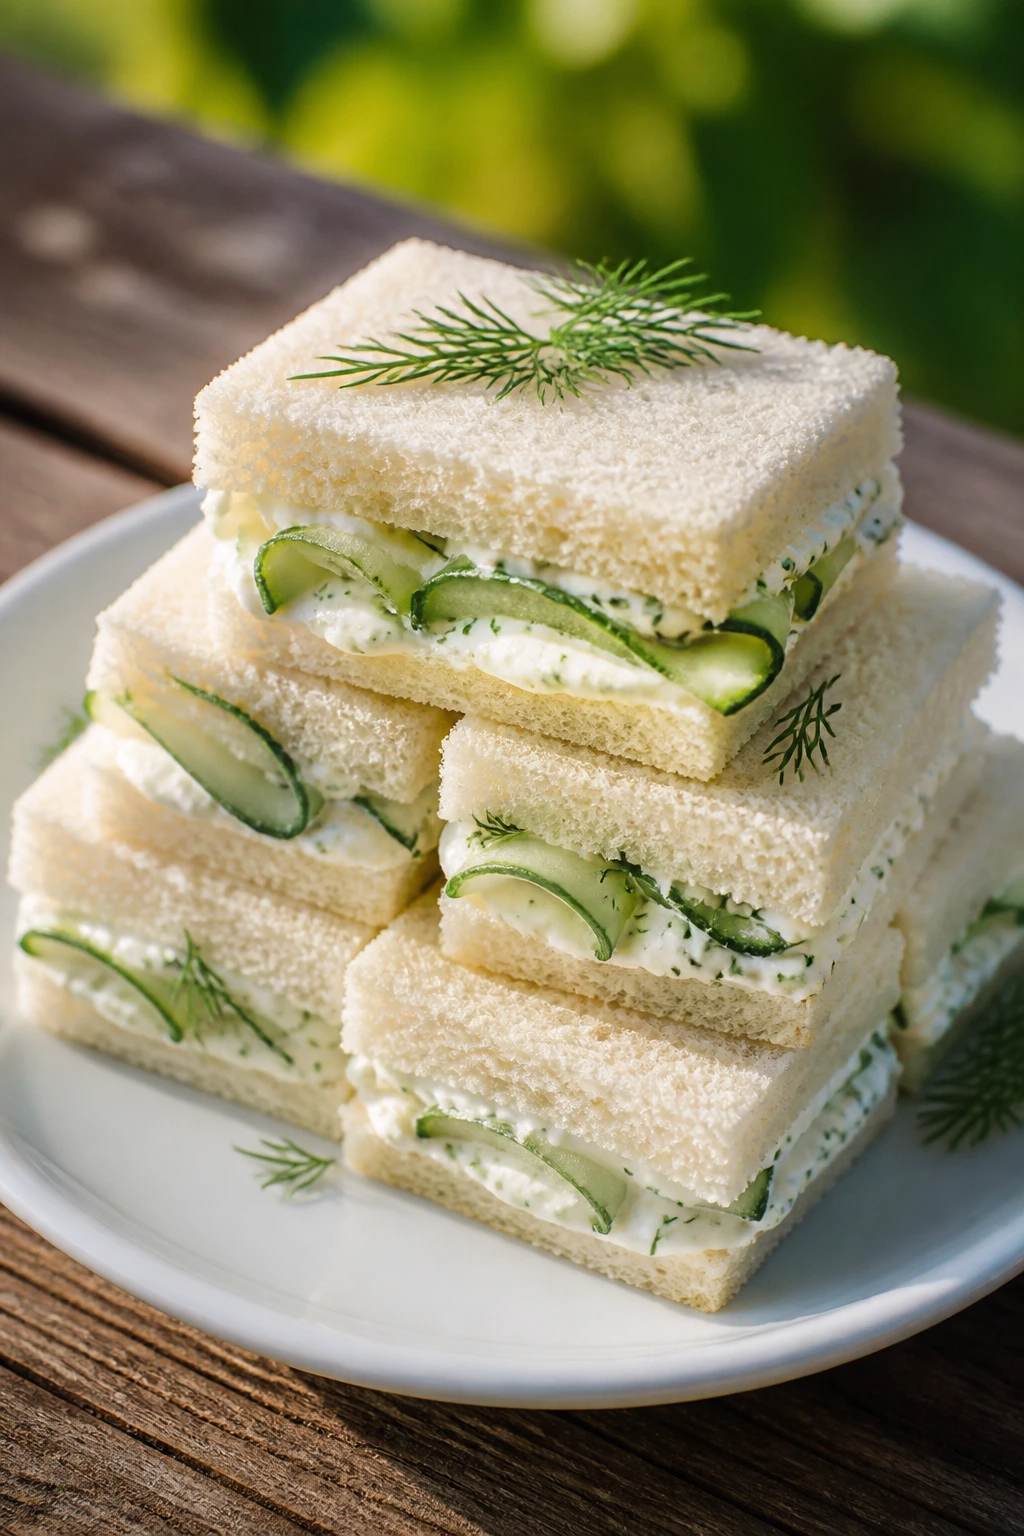
- Using bread that’s too soft: A fluffy loaf might look nice in the kitchen, but it can’t carry juicy fillings for long. Choose bread with structure, or toast it lightly first.
- Skipping moisture control: Wet tomatoes, cucumbers, sauerkraut, roasted peppers, and pickled vegetables all need draining or blotting. If you ignore that step, the bread gives up early.
- Assembling too far ahead: Some sandwiches improve after a rest, but not all. Tomato-heavy, cucumber-heavy, or very creamy sandwiches are at their best shortly after assembly, not after a full day in the fridge.
- Overstuffing every sandwich: Big stacks look impressive for a second and then fall apart in your lap. Keep the filling inside the bread’s limits, especially for wraps, pitas, and sliders.
- Packing the sandwich while it’s still warm: Steam softens bread fast. Let grilled, pressed, or cooked fillings cool before wrapping them for the picnic basket.
- Forgetting the drink pairing: A cold drink does more than quench thirst. Lemonade cuts richness, iced tea cleans up salt, and sparkling water resets your mouth between bites. That matters more than most people think.
Frequently Asked Questions
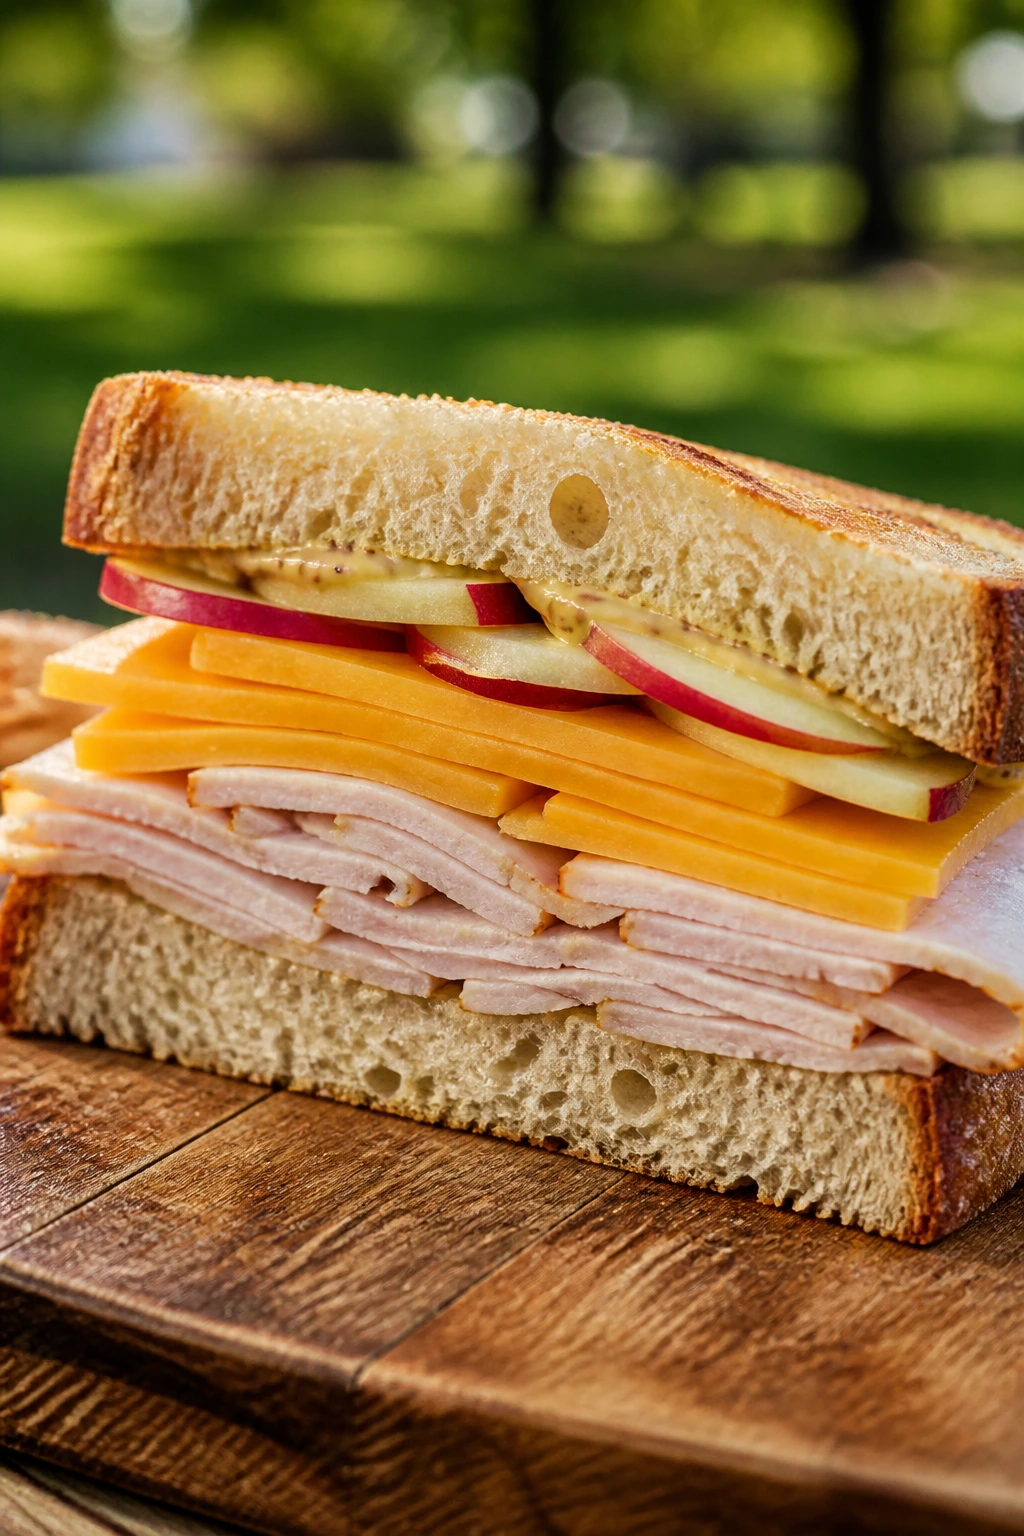
Which breads hold up best for picnic sandwiches?
Baguettes, ciabatta, rye, sourdough, bagels, split-top rolls, and sturdy wraps are the safest bets. They keep their shape better than very soft white bread when you add juicy fillings or pack them in parchment.
How far ahead can I make picnic sandwiches?
Most deli-style sandwiches can be assembled a few hours ahead, while salad-style fillings can be made 3 to 4 days in advance and packed separately. Sandwiches with tomato, cucumber, or dressed greens are best made the same day.
How do I keep sandwiches from getting soggy?
Use a moisture barrier like butter, mayo, cream cheese, hummus, or cheese on the bread first. Then dry the wet ingredients thoroughly — especially tomatoes, cucumbers, pickles, and roasted vegetables — before layering.
Can I make these sandwiches without refrigeration for long?
Only for a short stretch. Mayo-based or protein-heavy sandwiches should stay in a cooler with ice packs and should not sit out for more than 2 hours, or 1 hour if it’s warm outside.
What are the best sandwiches for a hot picnic day?
Choose the ones that depend on pickles, cured meats, hummus, roasted vegetables, or dry spreads rather than raw tomatoes or loose dressings. Banh mi, hummus wraps, olive tapenade sandwiches, and chickpea salad are strong choices.
Can I freeze any of the fillings?
Pulled pork, BBQ jackfruit, and some cooked chicken fillings freeze well for up to 2 months. Tuna salad, egg salad, cucumber-heavy fillings, and shrimp salad do not freeze well because the texture turns watery or grainy.
How do I pack sandwiches so they still look nice when I unpack them?
Wrap them tightly in parchment or deli paper, then chill them flat in the cooler so they don’t get crushed. If a sandwich is especially tall, cut it after packing only if you can keep the halves snug and aligned.
What cold drinks go best with these sandwiches?
Lemonade is the easiest all-around match because the acid cuts through mayo, cheese, and salt. Iced tea, sparkling water with citrus, ginger beer, and cold apple cider also work well depending on how rich or sharp the sandwich is.
The Sandwiches I’d Pack First
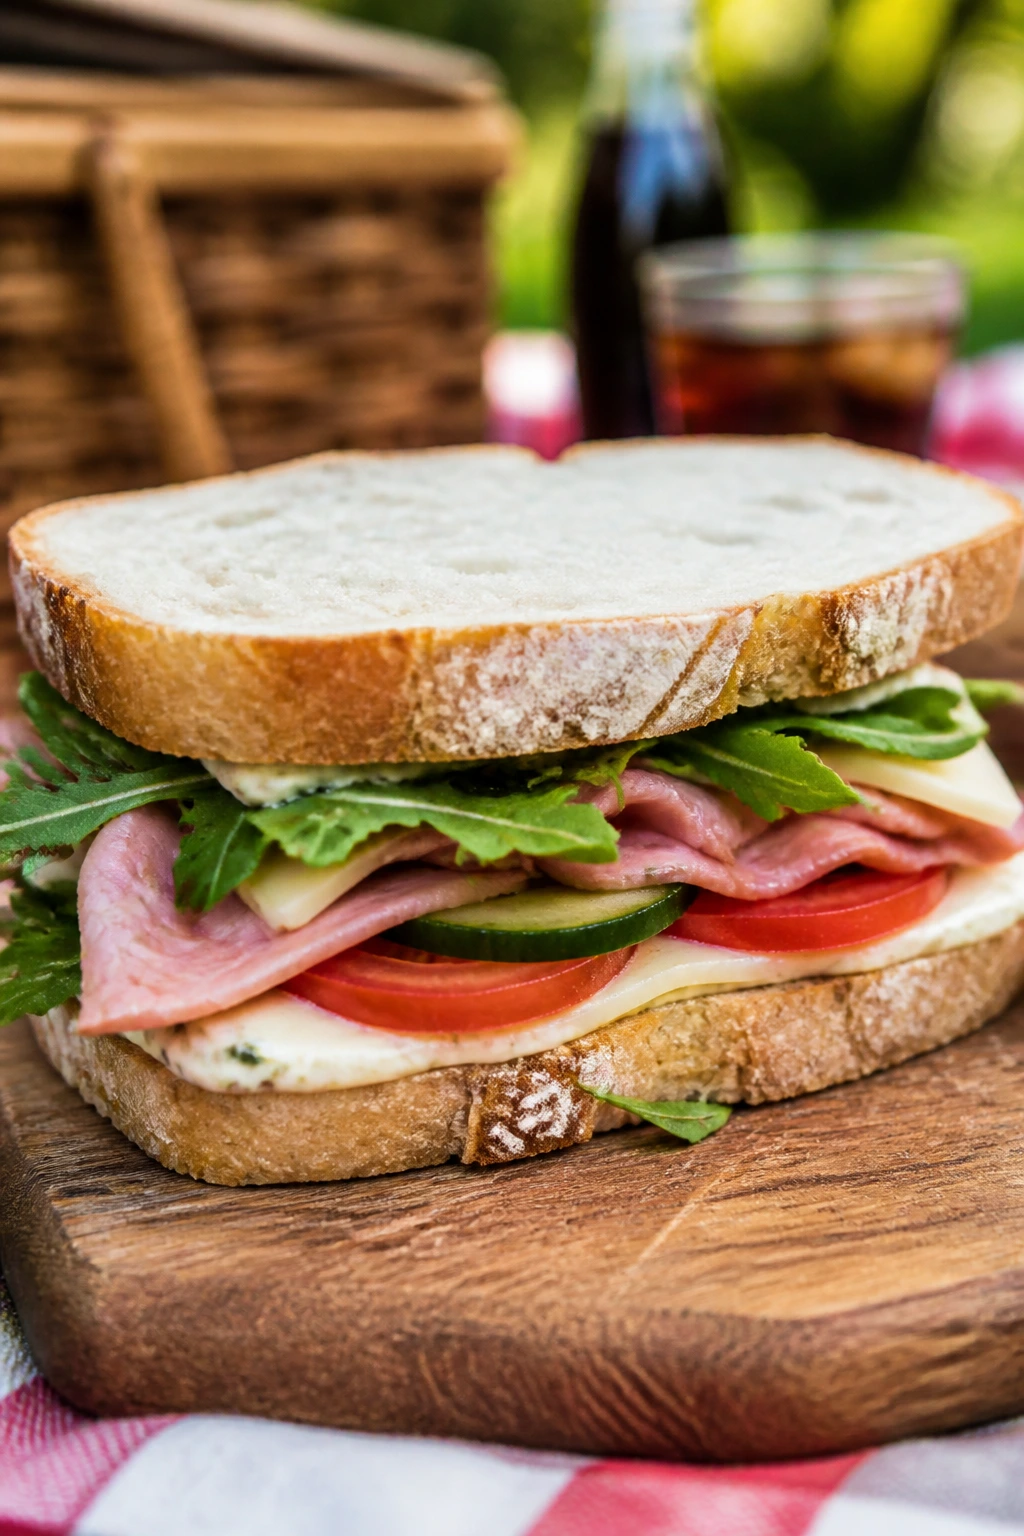
The smartest picnic sandwiches are the ones that know what they’re doing. They use bread with structure, keep wet ingredients in check, and bring enough flavor that you don’t need a complicated spread of sides to make lunch feel complete. That’s the real trick here.
If you pack a mix of deli-style builds, creamy salads, a couple of vegetarian options, and one or two sweet or punchy sandwiches, the basket feels generous without becoming chaotic. And if there’s a cold drink in the cooler — lemonade, iced tea, sparkling water, anything with a little chill on the glass — the whole meal feels sharper and more alive.
Pack the good bread. Dry the tomatoes. Keep the napkins close. The rest is just choosing which sandwich you want first.