
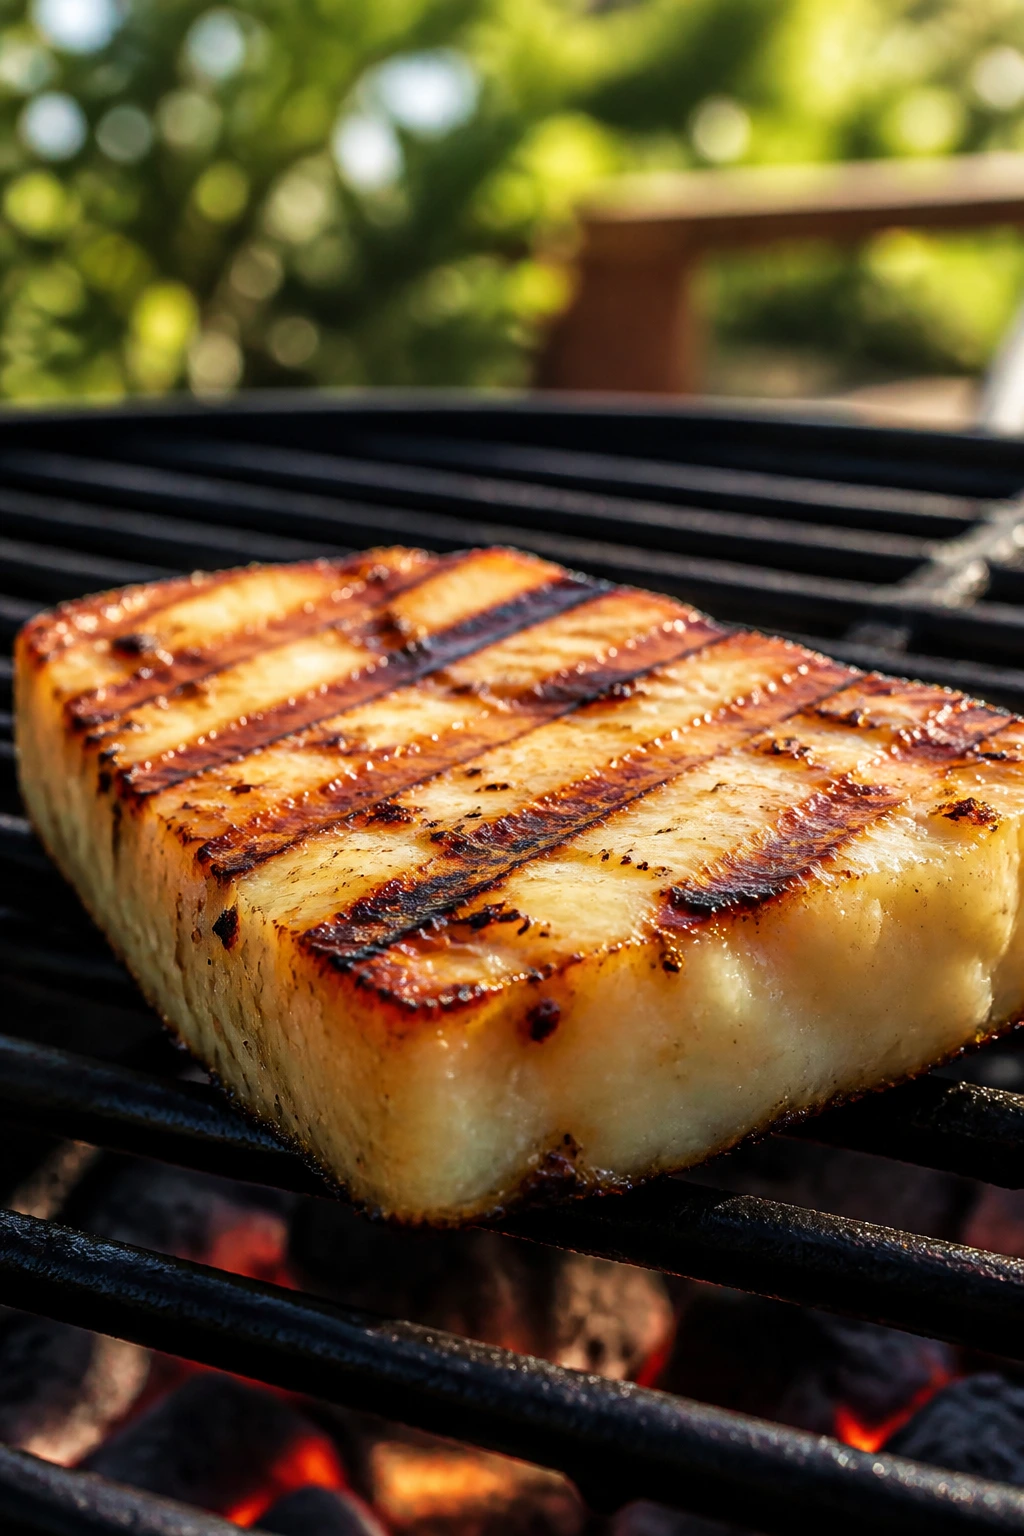
Halloumi is the cheese I reach for when the charcoal is already glowing and I want one dish that will not melt into the grates. A block of halloumi behaves with a kind of cheerful stubbornness: it softens, it browns, it picks up smoke, but it keeps its shape long enough to move from grill to platter without turning into a puddle. That alone makes grilled halloumi feel built for backyard cookouts, where the grill is busy, the timing is loose, and nobody wants a fussy dish that collapses the minute you look away.
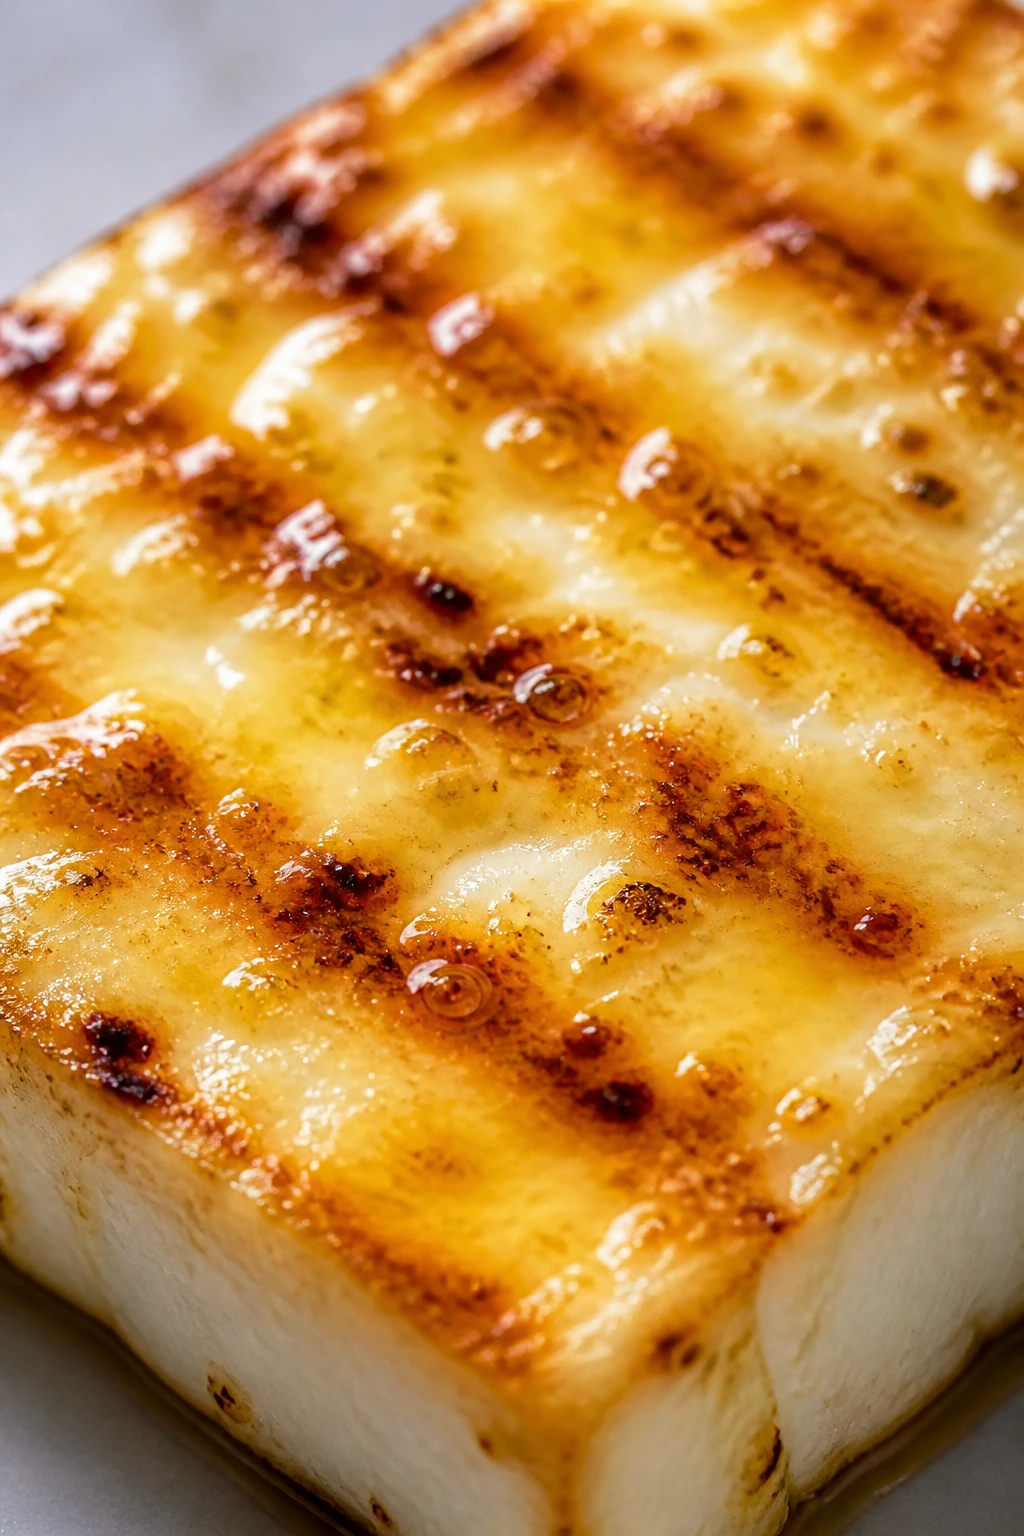
What you get, if you handle it well, is a salty slab with bronzed edges, a warm center that stays pleasantly springy, and enough surface char to keep the bite interesting. Traditional halloumi has roots in Cyprus and is usually made from sheep’s milk, goat’s milk, or a blend. That brine is part of the charm, but it also means the cheese needs a little restraint: dry it, cut it thick, and give it heat that is hot but not reckless. Too much heat and it scorches before it earns those grill marks. Too little and you get a pale, squeaky block with no personality.
I like grilled halloumi because it solves a cookout problem that comes up all the time. The burgers are still resting. The vegetables are going on later. People are hovering. Halloumi can bridge that gap in 3 or 4 minutes and land on the table looking deliberate, not like filler. Add lemon, herbs, and a little honey, and it stops behaving like a side dish and starts acting like the thing everyone keeps spearing with the serving tongs.
Why This Cheese Earns Its Spot Beside the Grill
Fast to the platter: Thick halloumi slabs need only about 90 seconds to 2 minutes per side over medium-high heat, which makes them easy to slot into a busy cookout rhythm without babysitting.
Built for hot weather plates: Halloumi holds its shape where soft cheeses would slump, so you can serve it on a platter, tuck it into pita, or pile it onto tomatoes without losing the structure.
Salt, smoke, and acid in one bite: The cheese brings briny depth on its own, then the grill adds char and the lemon finish pulls everything back into balance. That three-part hit is why it tastes finished with very little garnish.
Flexible without being bland: You can keep it simple with olive oil and lemon, or push it toward mint, chili, peaches, herbs, and toasted bread. It tolerates changes well because its flavor is sturdy.
Easy to scale for a crowd: One block feeds a small starter plate; three blocks on a platter can disappear faster than the burgers if you slice them the right way and keep the finish bright.
A vegetarian anchor for mixed tables: At a cookout where half the food leans smoky and meaty, halloumi gives the vegetarian crowd something hot, savory, and worth standing near the grill for.
Yield: Serves 4 to 6 as a starter or side
Prep Time: 15 minutes
Cook Time: 5 to 7 minutes
Total Time: 20 to 22 minutes
Difficulty: Beginner — the technique is simple, but the timing matters and the cheese rewards a steady hand.
Chill/Rest Time: Optional 10 minutes if you choose to soak off excess brine
Best Served: Right off the grill, while the edges are still crisp and the center is warm
What You Need on the Counter
For the Halloumi:
- 16 ounces halloumi cheese, cut into 8 slabs about 1/2 inch thick
- 2 tablespoons olive oil, for brushing the cheese and loosening the surface
- 1 tablespoon neutral oil, optional if your grill grates need extra insurance against sticking
For the Lemon-Herb Finish:
- 1 tablespoon honey
- 1 tablespoon fresh lemon juice
- 1 teaspoon finely grated lemon zest
- 1 tablespoon chopped fresh mint
- 1 tablespoon chopped fresh parsley
- 1/2 teaspoon freshly ground black pepper
- 1 pinch red pepper flakes, optional
- Lemon wedges, for serving
Why Each Ingredient Matters More Than It Looks
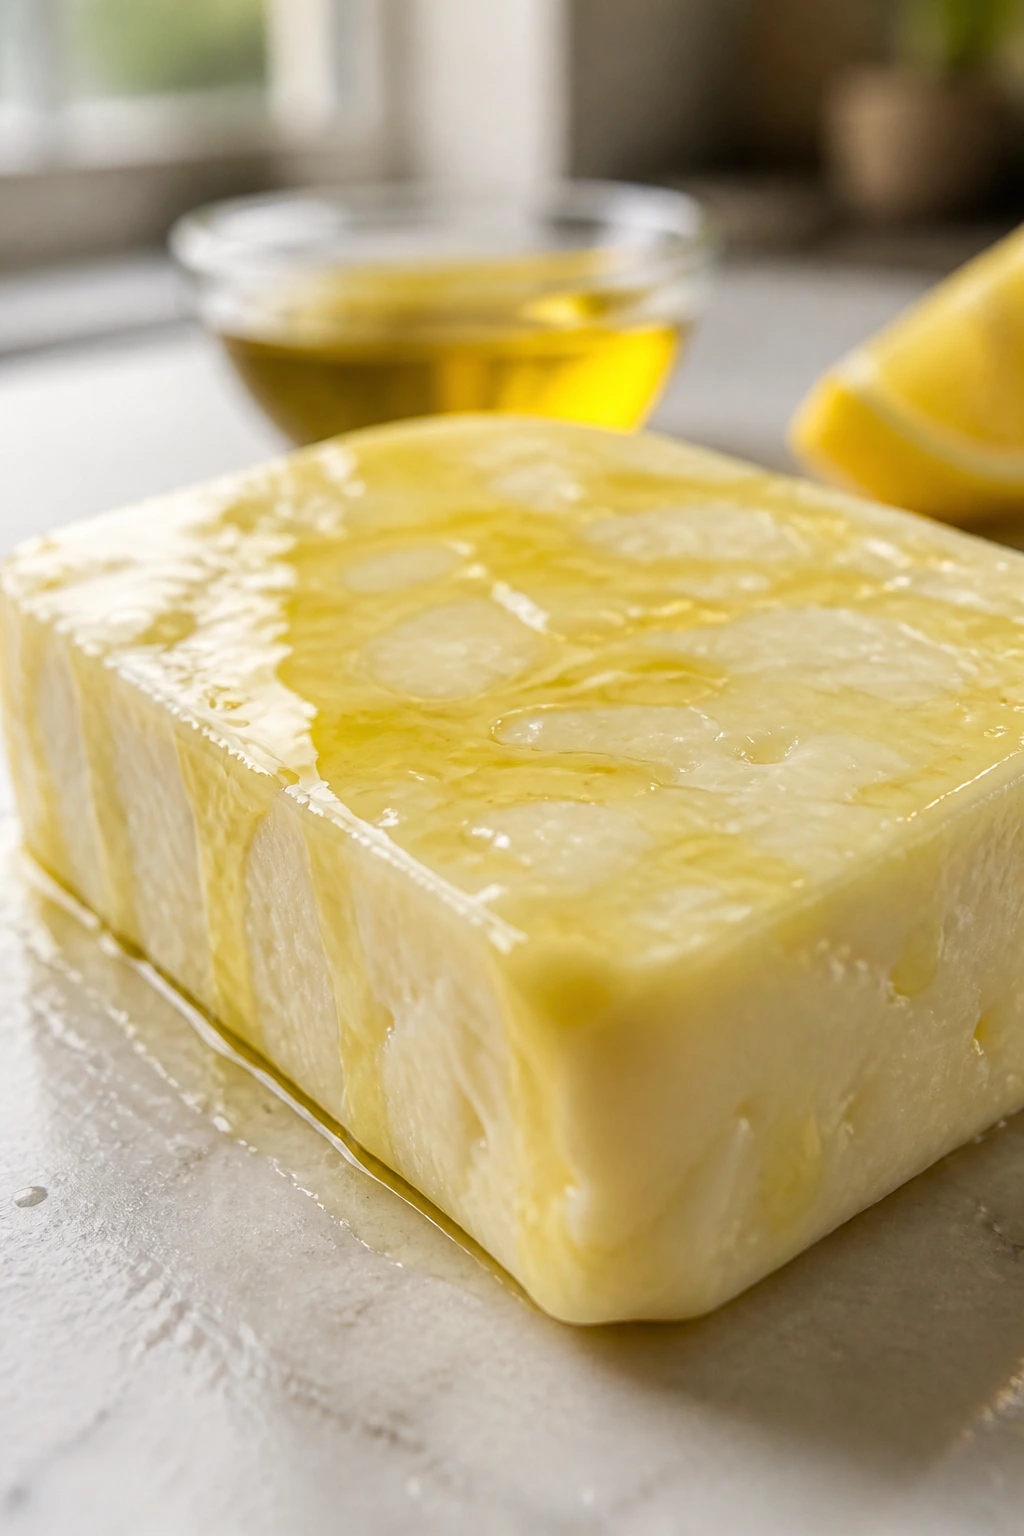
Halloumi What to use: 16 ounces of halloumi in a firm block, preferably packed in brine. Preparation: Slice it into 8 pieces about 1/2 inch thick so the outside can brown before the middle turns rubbery. Substitutions: If you cannot find halloumi, look for another grilling cheese labeled for searing; paneer works in a pinch, though it tastes milder and needs more seasoning. Tips: Buy a block with clean edges and a pale, even color. If the brine tastes fierce straight from the package, soak the slabs in cold water for 10 minutes, then dry them well.
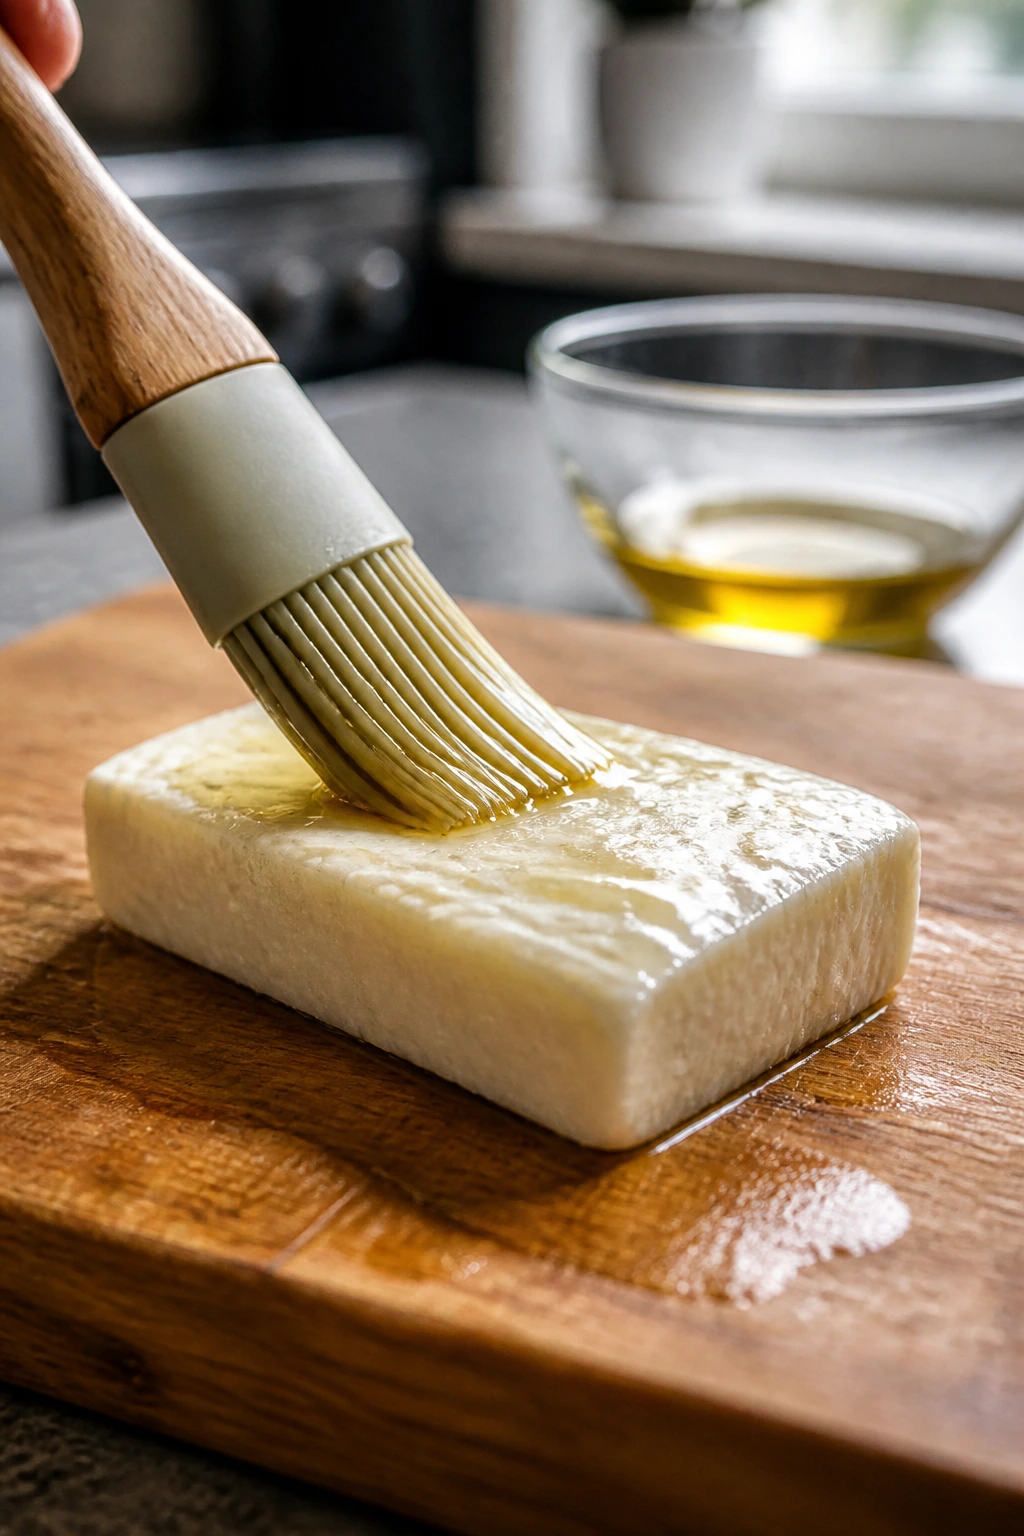
Olive Oil and Neutral Oil What to use: 2 tablespoons olive oil for the cheese and 1 tablespoon neutral oil if the grill is a stubborn one. Preparation: Brush the cheese lightly; do not drench it. Substitutions: Avocado oil or grapeseed oil both handle grill heat well, especially if your olive oil is on the delicate side. Tips: Oil is there to encourage color and keep the surface from grabbing the grates. Too much oil can flare and stain the cheese instead of helping it brown.
Lemon, Honey, and Zest What to use: 1 tablespoon honey, 1 tablespoon lemon juice, and 1 teaspoon lemon zest. Preparation: Zest the lemon before you juice it. That little order saves annoyance. Substitutions: Lime can stand in for lemon, and maple syrup can replace honey if you want a deeper sweetness. Tips: The lemon should taste sharp, not bitter. If your fruit has a thick white pith, zest lightly so the finish stays clean.
Fresh Herbs What to use: 1 tablespoon chopped mint and 1 tablespoon chopped parsley. Preparation: Chop them right before serving so they stay bright and don’t slump into a bruised pile. Substitutions: Dill works well if you want a cooler, more savory edge; basil leans sweeter and softer. Tips: Mint is the herb I prefer here. It cuts through the salt and makes the cheese taste less heavy after the second bite.
Black Pepper and Chili What to use: 1/2 teaspoon black pepper and a pinch of red pepper flakes. Preparation: Grind the pepper fresh if you can; it gives a sharper top note than pre-ground pepper. Substitutions: Aleppo pepper brings gentler heat, while smoked paprika gives the finish a deeper, barbecue-like note. Tips: Keep the heat in the background. Halloumi already has a strong voice; the pepper should frame it, not shout over it.
Tools That Keep the Cheese from Sticking
- Clean grill grates: Burned-on bits are the enemy here. Halloumi wants a clean surface so the exterior can brown instead of tear.
- Long metal tongs: You need a tool that can lift and turn the slabs without poking holes in them.
- Silicone pastry brush: Useful for a thin coat of oil on the cheese and, if needed, on the grates.
- Small mixing bowl: For the lemon-honey-herb finish. A shallow bowl makes whisking easier and keeps the dressing from disappearing into the corners.
- Microplane or fine grater: The lemon zest is better fine and airy than big and bitter.
- Paper towels: You’ll use more than you think. Dry halloumi is easier to grill.
- Rimmed platter or sheet pan: Halloumi leaves the grill fast and should have a landing zone ready before it’s done.
Why Halloumi Behaves So Well Over Hot Coals
Halloumi is one of the few cheeses that seems to enjoy being grilled. That is not magic. It has to do with the way the curds are set and the way the cheese is stored in brine. When you put it over heat, the outside firms up quickly, which gives you time to develop color before the center loosens too much. It softens. It does not liquefy. That difference is everything.
If you have ever tried to grill mozzarella or a soft fresh cheese, you know the heartbreak: the cheese slumps, leaks, and leaves half itself behind on the grate. Halloumi does the opposite. It grips the grill long enough to earn marks, then lets go when you’re ready. That makes it ideal for backyard cookouts where the fire is uneven and the schedule has little gaps in it.
Thickness matters more than people think. Half-inch slabs give you enough interior cushion to keep the bite springy, and they brown at a pace that makes sense for a cookout. Thin slices can work, but they have a shorter window. The difference between a good piece and a dry, salty one is often only 30 seconds.
The other thing halloumi needs is dryness. Wet cheese steams. Steamed halloumi gets pale, not bronzed, and it tastes flatter than it should. A quick pat with paper towels changes the whole result. So does a light coat of oil. The oil does not make the cheese greasy; it helps the surface cook evenly and gives the grill marks somewhere to go.
Prepping the Cheese So It Sizzles Instead of Grabs
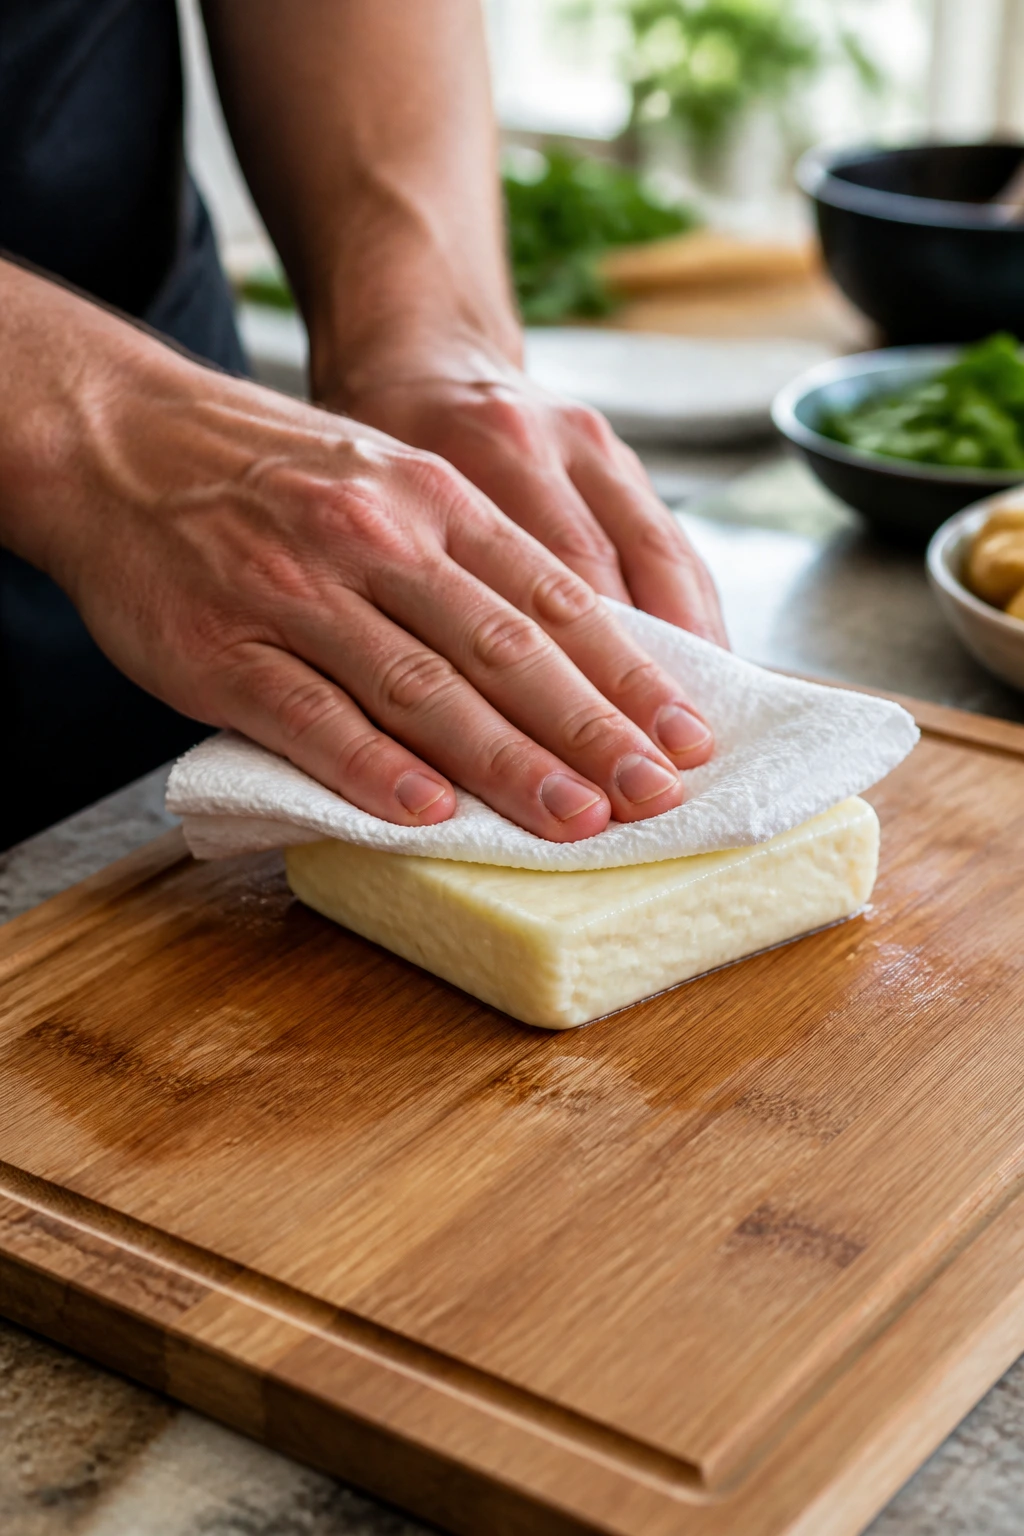
This part is easy to rush, and that is usually where the trouble starts. Halloumi doesn’t need marinating, but it does need a little prep before it meets the fire. If the block comes straight from the package, open it, drain the brine, and pat every side dry with paper towels. You want the surface matte, not shiny.
If the cheese tastes harshly salty, a short soak helps. Ten minutes in cold water is enough for most blocks. After that, dry it again. Seriously. A damp slab on a hot grate will fight you, and the fight ends with torn edges.
I also like to chill the block for 10 to 15 minutes before slicing if it feels soft or sticky. Cold halloumi cuts cleaner. You get straighter slabs, fewer crumbs, and better grill contact. If you slice while it is floppy, the edges smear and those uneven edges can stick.
One more thing: set your platter, lemon wedges, herbs, and tongs within reach before the cheese goes on the grill. Halloumi is not a dish you can walk away from once it starts coloring. The move from pale to bronzed happens fast. Faster than you think. When the grates are ready, the rest needs to be within arm’s reach.
How to Grill Halloumi Without Losing the Sear
Prep the Cheese and Finish:
- Drain the halloumi, pat it dry with paper towels, and slice it into 8 slabs about 1/2 inch thick. If the cheese tastes very salty, soak it in a bowl of cold water for 10 minutes, then dry it thoroughly again.
- In a small bowl, whisk together the olive oil, honey, lemon juice, lemon zest, mint, parsley, black pepper, and red pepper flakes until the mixture looks glossy and slightly loose. Set it near the grill.
Heat the Grill: 3. Preheat a clean grill to medium-high heat, about 400°F to 450°F at the grate. Brush or wipe the grates with a little neutral oil if they tend to cling. Do not skip the cleaning step if your last cook left sticky residue behind. 4. Let the grill sit hot for a few minutes so the grates are evenly heated, not just the lid or firebox. A steady surface matters more than a roaring flame.
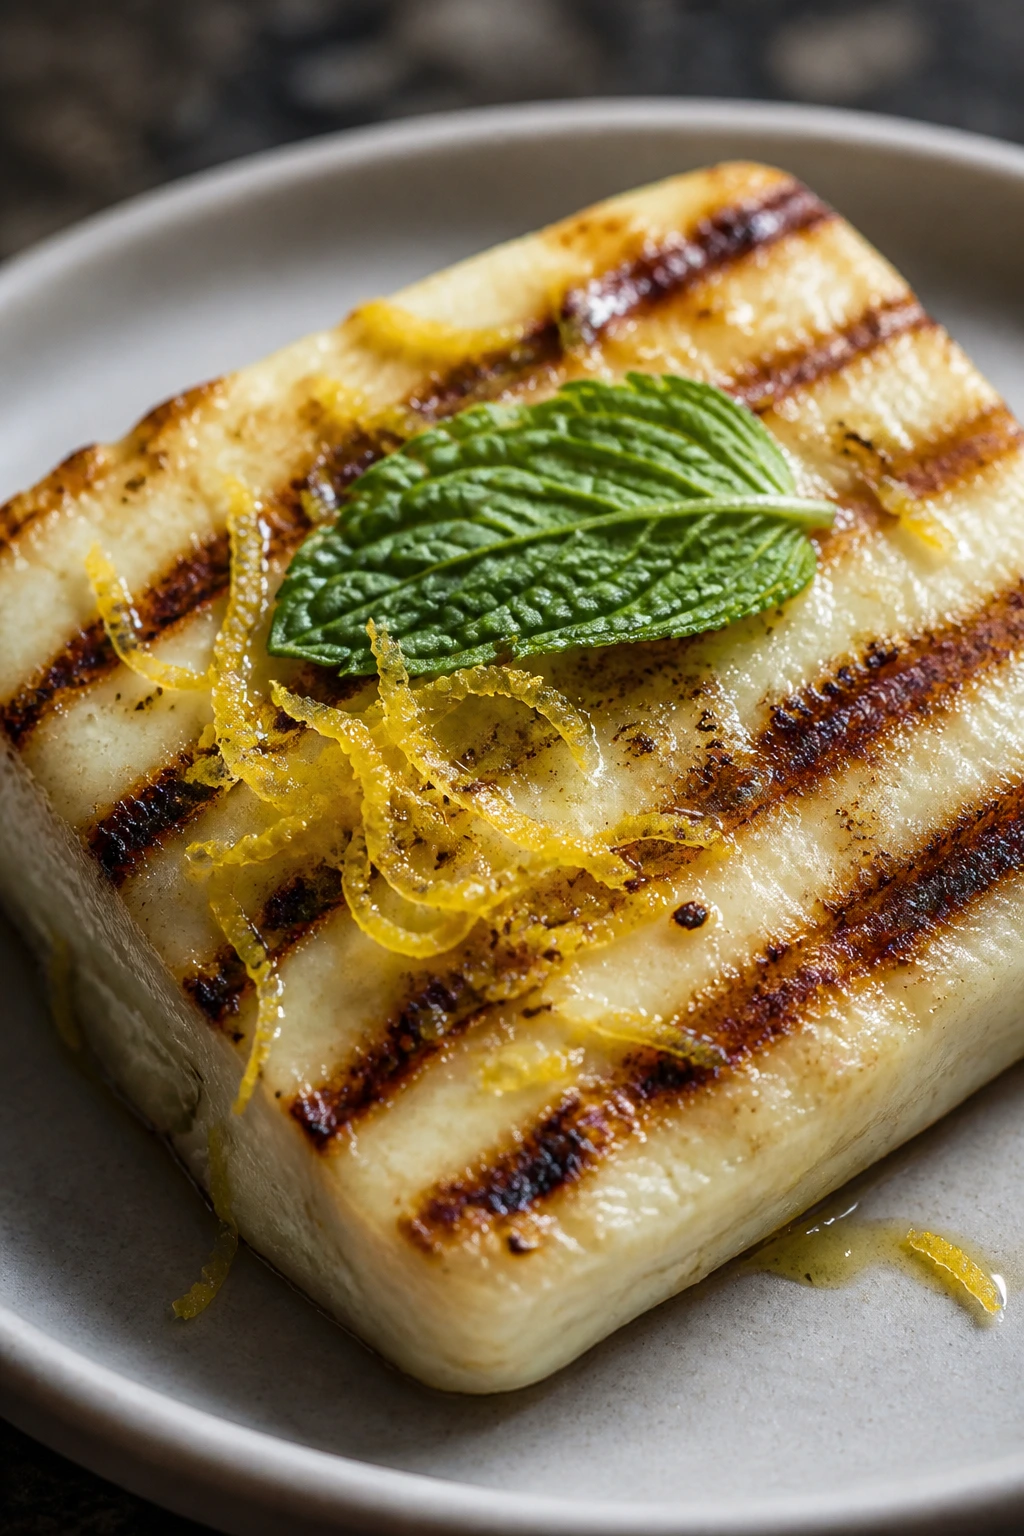
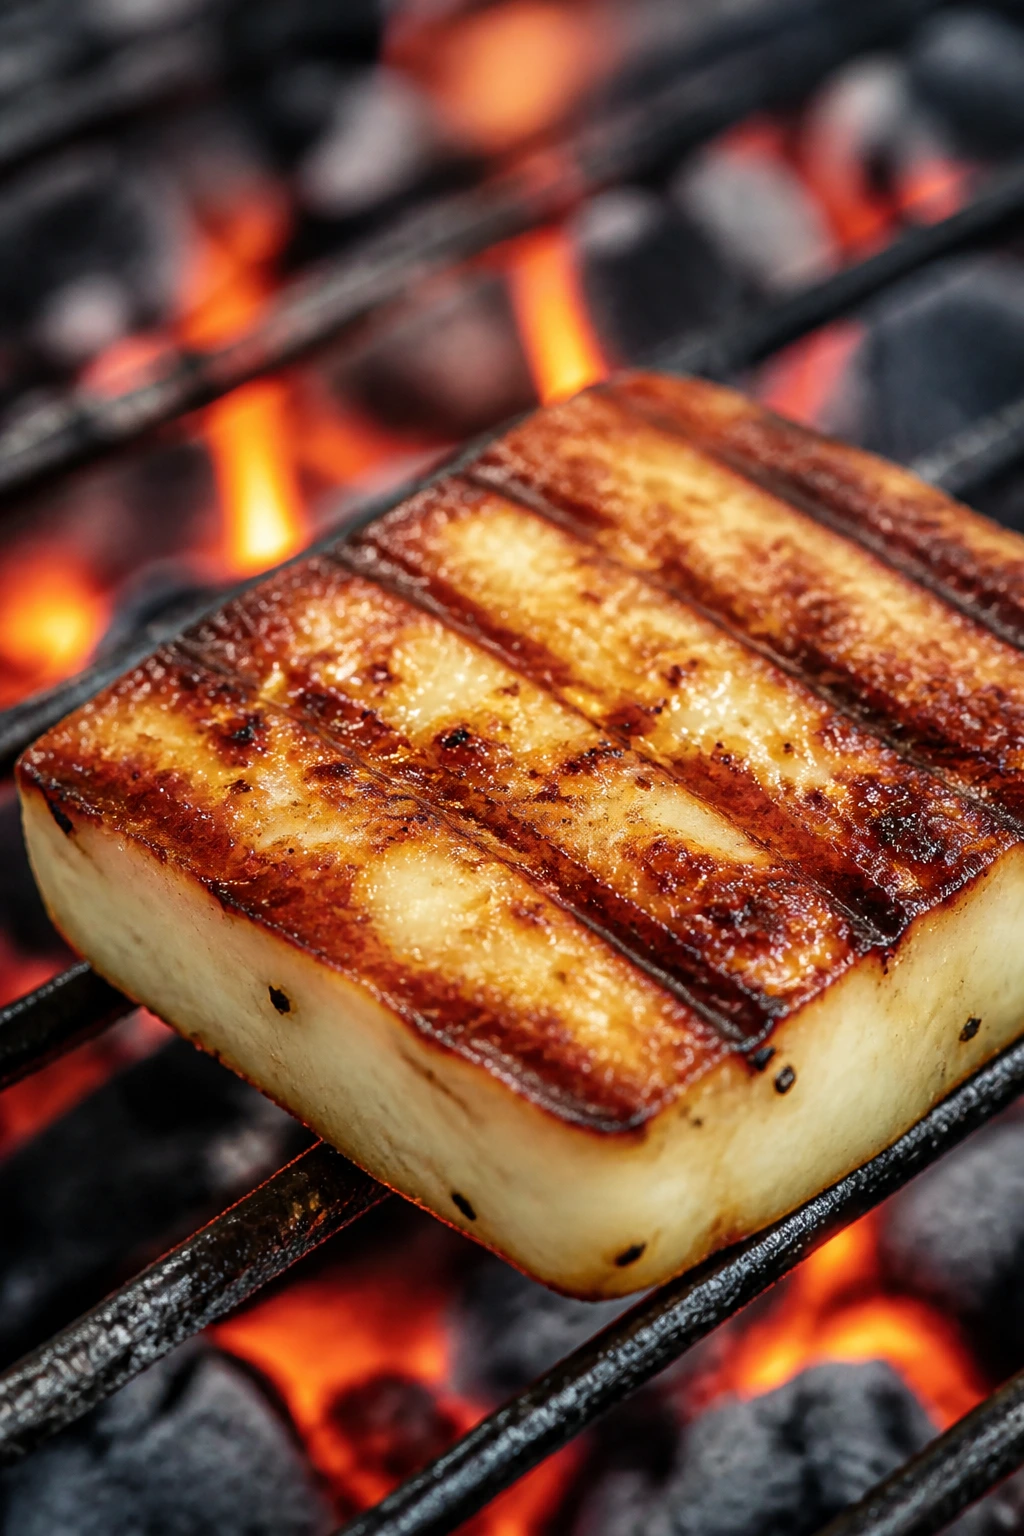
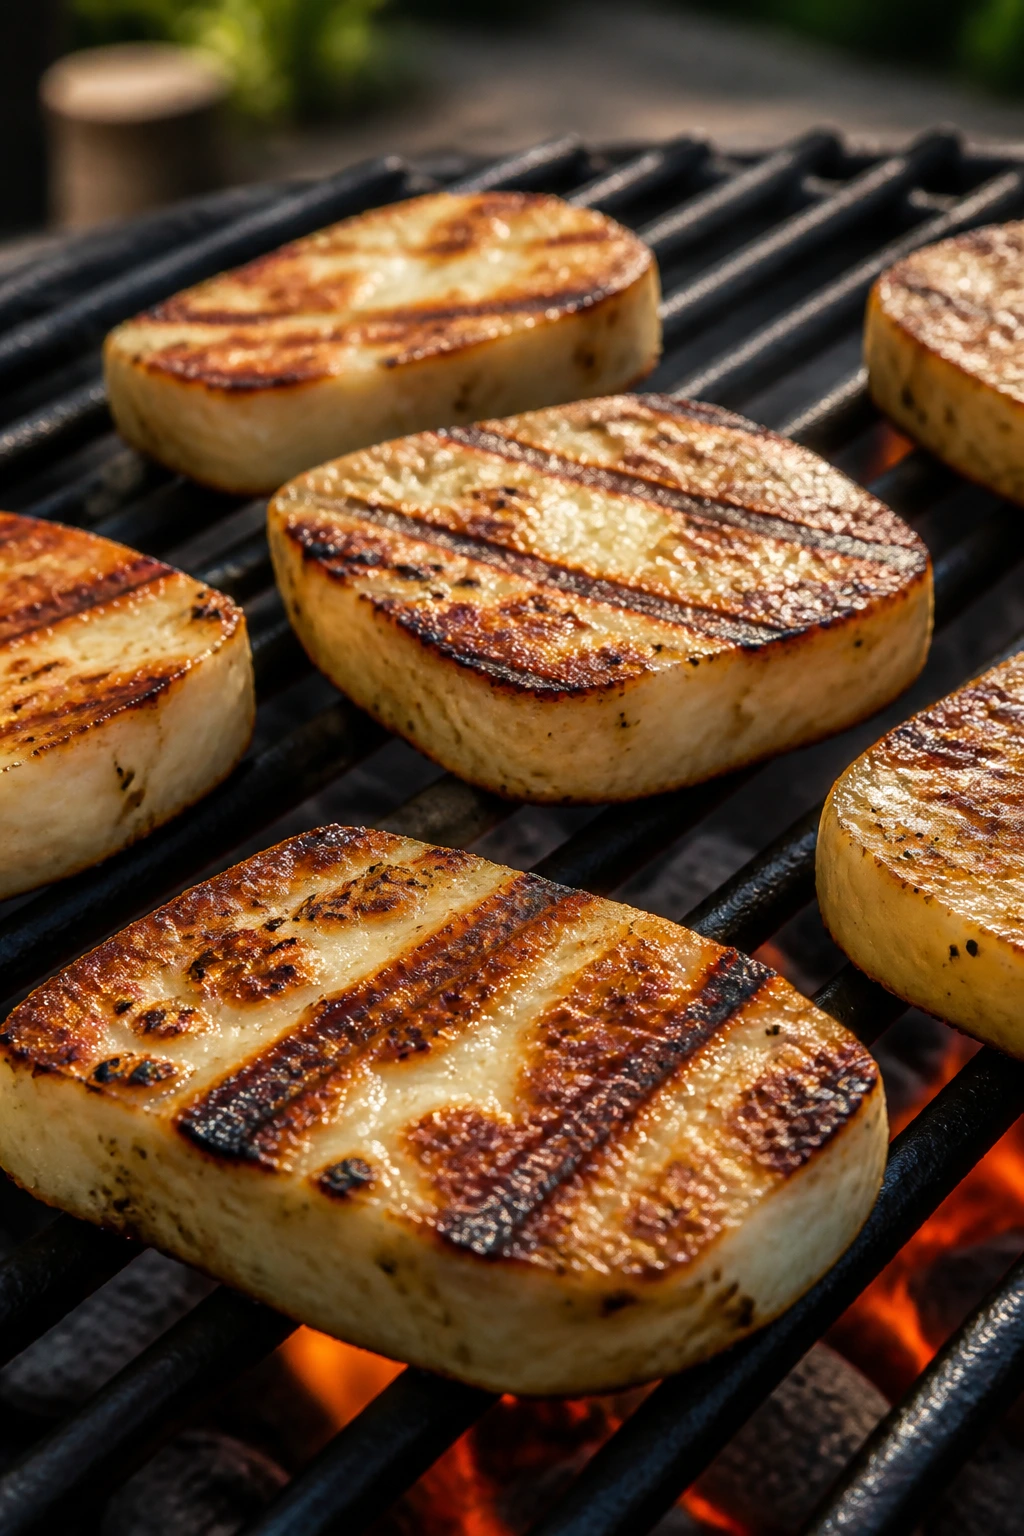
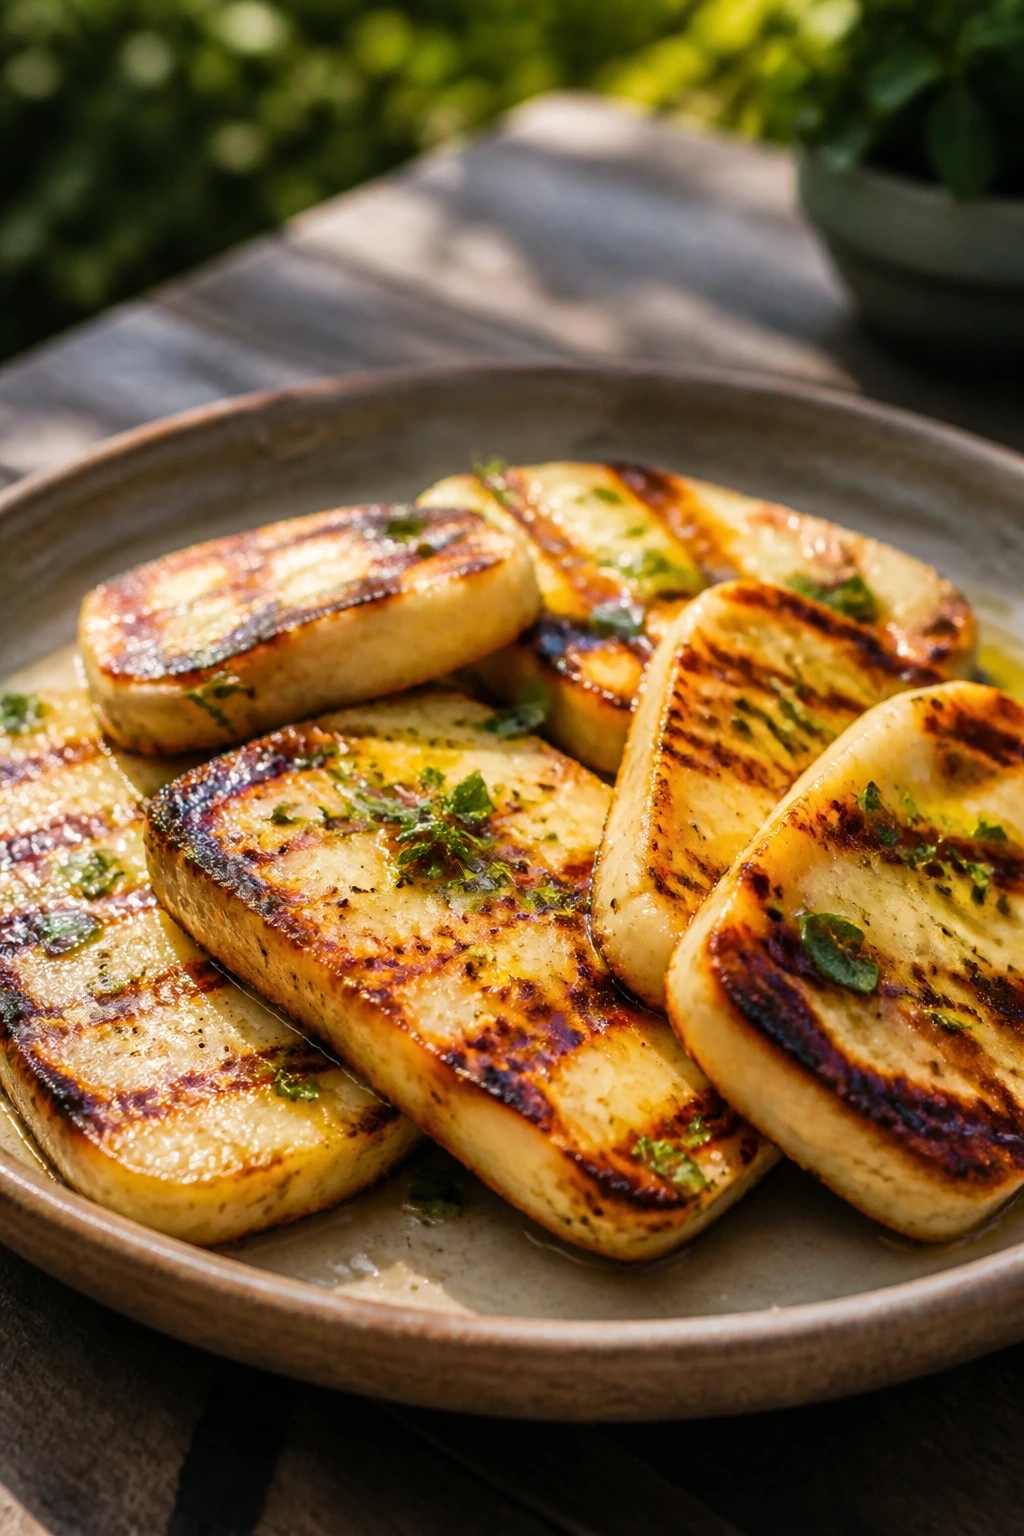
Grill and Finish: 5. Brush both sides of the halloumi lightly with olive oil. Lay the slabs on the hot grates and leave them alone for 90 seconds to 2 minutes, until the underside shows dark golden-brown grill marks and the cheese lifts without dragging. 6. Turn each piece once with tongs and grill the second side for another 90 seconds to 2 minutes, until the edges look slightly softened and the surface has a deep bronze color. If the cheese is blackening before it browns, the fire is too hot. 7. Transfer the halloumi to a warm platter. Spoon the lemon-herb mixture over the top, then add lemon wedges and any extra mint or parsley you have left. 8. Serve immediately. Halloumi waits badly. The flavor is best when the outside still has a little crust and the center is warm enough to feel supple when you cut into it.
What to Put Next to Grilled Halloumi at the Table
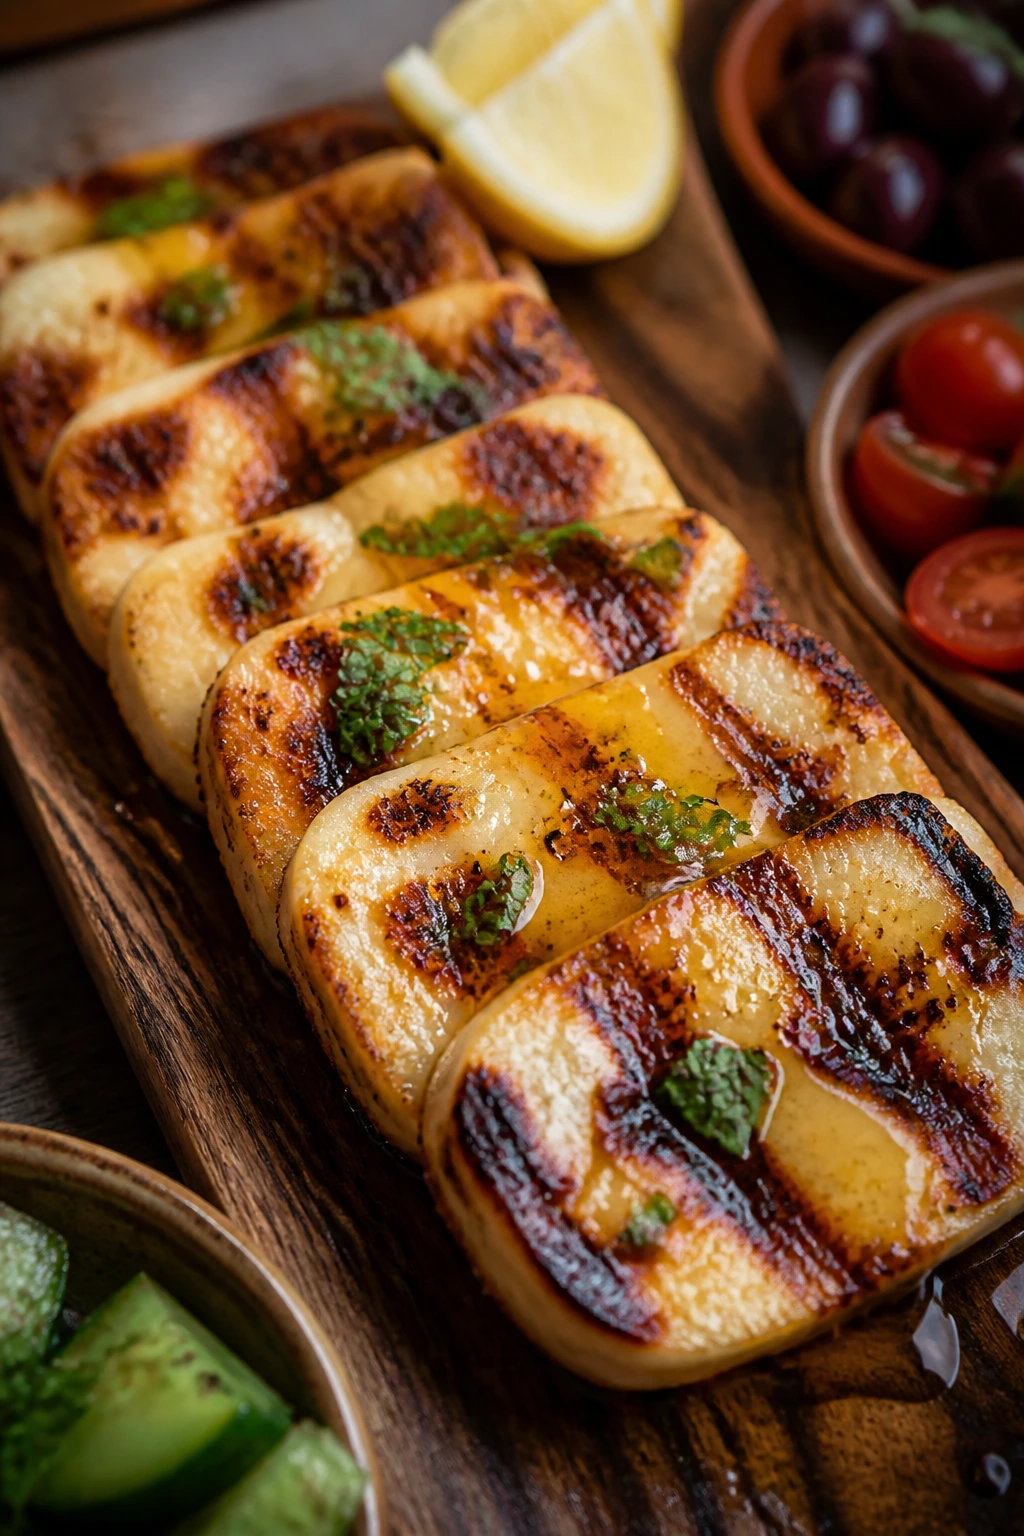
Presentation: Lay the slabs in a loose row or fan them across a wide platter so the grill marks stay visible. Spoon the lemon-honey mixture over the center, not all the way to the edges, so the browned sides stay crisp a little longer. A few torn mint leaves on top look better than a heavy herb pile.
Accompaniments: I like grilled halloumi with charred corn, sliced tomatoes, cucumber salad, or flatbread that can catch the lemony juices. Watermelon is a strong partner too, especially if you add a pinch of black pepper. If the table already has ribs, chicken, or burgers, halloumi slides in as the bright, salty thing that keeps the plate from feeling heavy.
Portions: As a starter, plan on about 2 slabs per person. As part of a broader cookout spread, 1 slab per person is enough if there are plenty of sides. If you’re serving it as the main vegetarian plate, count on 3 to 4 slabs per hungry adult and add bread, salad, and something cold beside it.
Beverage Pairing: Dry rosé is an easy fit because it can handle the salt and the smoke. A crisp lager or pilsner works just as well if you want something colder and less fruity. For a nonalcoholic pairing, make iced mint tea with a squeeze of lemon or serve sparkling water with cucumber slices and a little citrus peel.
Small Moves That Make the Plate Better
Flavor Enhancement: A tiny spoonful of honey brushed on after grilling makes the edges glisten and gives the salt a clean finish. If you want more depth, stir a little orange zest into the lemon-herb mixture. Orange softens the sharpness and makes the cheese feel a touch rounder.
Time-Saver: Mix the lemon-honey-herb finish up to 4 hours ahead and leave it at room temperature. The herbs will darken a little, but the flavor holds. You can also slice the halloumi in the morning, layer the pieces between parchment, and keep them covered in the fridge until the grill is hot.
Pro Move: Put the grilled halloumi on a bed of sliced tomatoes or grilled peaches for 30 seconds before serving. The cheese gives off a little heat, the fruit softens at the edges, and the juices mingle on the plate in a way that tastes more deliberate than it sounds.
Cost-Saver: Halloumi isn’t the cheapest cheese on the shelf, so use it where it can shine. A single 16-ounce block does more work when you cut it into 8 neat slabs and serve it with bread and vegetables than when you scatter it in tiny cubes across a giant salad.
Mistakes That Turn Halloumi Rubbery or Bitter
-
Cutting the slabs too thin: Thin halloumi dries out before it has time to brown. If the slices are under 1/2 inch, they can turn leather-fast. Fix it by cutting thick slabs and keeping the grill at medium-high, not blazing hot.
-
Starting with wet cheese: Wet halloumi sticks. It also steams on contact, which means pale surfaces and weak grill marks. Pat it dry on every side before it goes near the fire.
-
Trying to move it too early: If you tug a slab before it releases naturally, it will tear and leave half itself on the grate. Give it the full 90 seconds to 2 minutes, then lift with tongs. If it resists, wait another 20 seconds.
-
Overcooking it into bouncey rubber: Halloumi should feel springy, not squeaky-hard. Once the outside is bronzed, pull it. It is already cooked. You are building texture, not trying to “finish” it like meat.
-
Skipping lemon or herbs: Straight grilled halloumi can taste heavy and salty after a few bites. Acid and fresh herbs keep the flavor bright and make the cheese easier to keep eating.
-
Using a dirty grate: Old sticky bits on the grill will glue the cheese in place and leave ugly black patches. Clean the grates before heating them and oil them lightly if they need help.
Flavor Swaps and Summer Twists
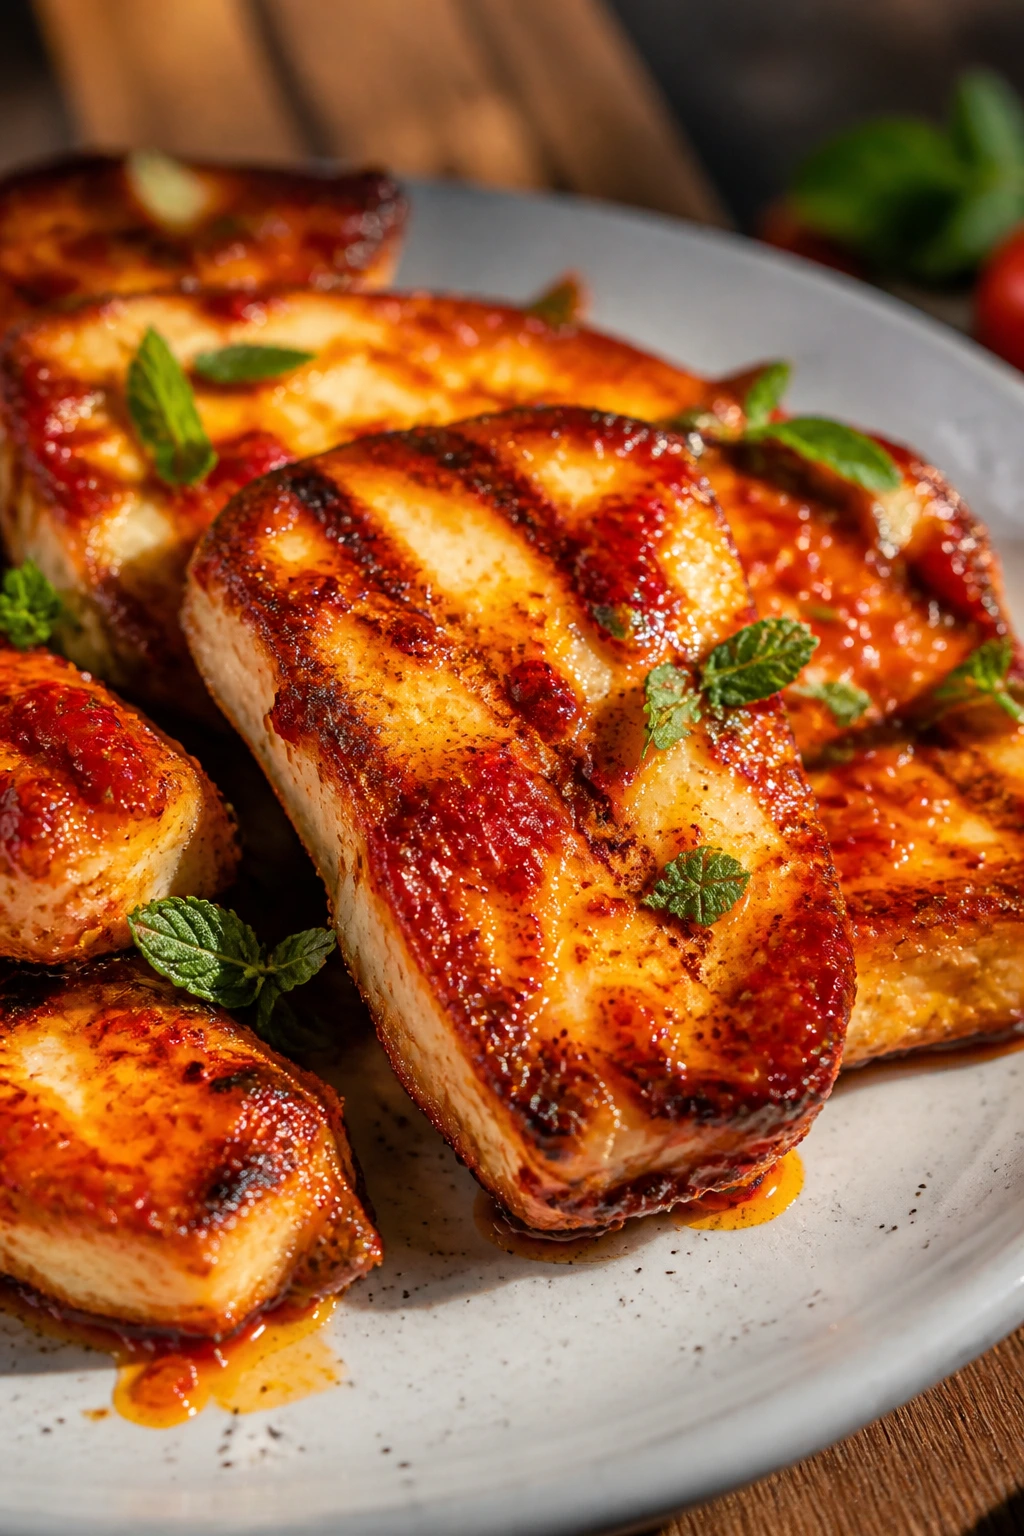
Harissa-Brush Halloumi: Stir 1 teaspoon harissa paste into the olive oil before brushing the cheese. The paste adds heat and a smoky red color that suits charcoal grilling, but use a light hand; halloumi needs room to taste like itself.
Peach and Mint Halloumi: Grill the cheese as written, then serve it with sliced grilled peaches instead of the lemon-herb drizzle. A few mint leaves and a spoonful of peach juices are enough. This one leans softer and sweeter, which works well with chicken or ribs nearby.
Skewered Halloumi and Vegetables: Cut the cheese into 1-inch cubes and thread it with zucchini, red onion, and cherry tomatoes on short metal skewers. Grill over medium heat for about 1 minute per side, turning carefully so the halloumi doesn’t slide. This version is easier to serve to a crowd because each skewer lands ready-made on a plate.
Sesame-Lime Halloumi: Swap lemon for lime, honey for a drizzle of sesame oil, and finish with toasted sesame seeds and chopped scallions. The flavor moves closer to a warm salad topping, and it works especially well with cucumbers and rice.
Herb-Roasted Halloumi Platter: If the grill is packed, sear the halloumi on a cast-iron grill pan indoors and finish it with chopped oregano, parsley, and a few roasted red peppers. You lose the smoke, but the texture stays right, and the platter still feels made for a cookout table.
Keeping Leftover Halloumi Useful Tomorrow
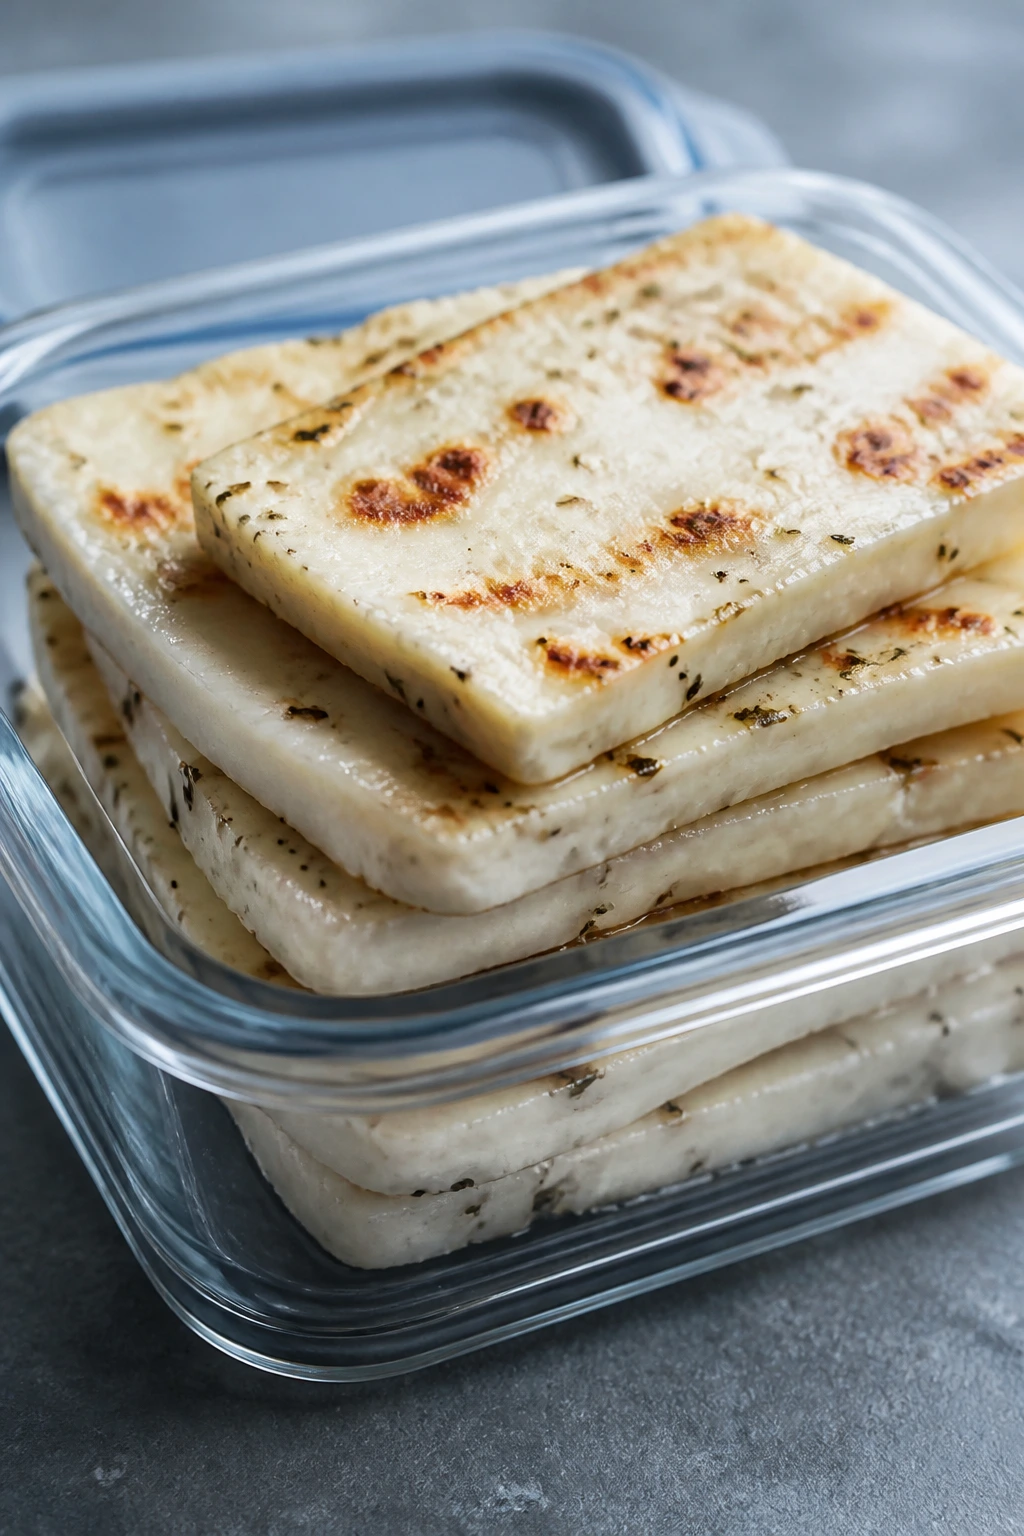
Halloumi is best the minute it leaves the grill, but leftovers can still be worth keeping if you handle them properly. Let the cheese cool for no more than 30 minutes at room temperature, then store it in an airtight container in the refrigerator. It keeps for about 3 days. After that, the texture starts to go dry and oddly squeaky in a way that isn’t much fun.
Reheat leftover halloumi in a dry skillet over medium heat for 30 to 45 seconds per side, just until the surface warms and the edges loosen. You can also use a 375°F oven or air fryer for 3 to 4 minutes. Avoid the microwave if you can. It makes the cheese soft in the wrong way and strips away the browned exterior.
Freezing is possible, but I don’t recommend it unless you have no other choice. Wrapped well, grilled halloumi can live in the freezer for about 1 month, yet the thawed texture loses some of the chew that makes it appealing in the first place. If you do freeze it, thaw it overnight in the refrigerator and use it chopped into a warm salad rather than serving it plain.
For make-ahead work, the best move is to prep the cheese and the lemon-herb mixture separately. Slice the halloumi and keep the slabs between sheets of parchment in the fridge for up to 1 day. Mix the finish ahead and hold it covered at room temperature for a few hours, or chill it and bring it back to room temperature before serving. The grilled cheese itself, though, should be cooked at the last possible minute.
Questions People Ask Before the Cheese Hits the Grates

Do I need to soak halloumi before grilling it?
Not always. If the block tastes very salty or the brine is sharp, a 10-minute cold-water soak takes the edge off. If the cheese is already mild, a good pat dry is enough.
Can I grill halloumi on a stovetop instead of an outdoor grill?
Yes. A cast-iron grill pan or heavy skillet over medium-high heat works well, as long as you let it get hot before the cheese goes in. You’ll still want 90 seconds to 2 minutes per side, and the pan should be lightly oiled.
Why does my halloumi stick to the grate?
Usually the cheese was wet, the grate wasn’t clean, or the grill wasn’t hot enough to form a quick crust. Dry the slabs well, oil the surface lightly, and wait until the grill is fully heated before you lay the cheese down.
Can I make this ahead for a party?
You can prep almost everything ahead, but don’t grill the cheese too early. Grill halloumi just before serving, then hold it on a warm platter for a few minutes at most. If you need to stretch timing, grill in batches and serve the first batch while the next goes on.
What if my halloumi tastes too salty?
Soak it in cold water for 10 minutes before grilling, and make sure your finish includes lemon juice and herbs. Acid cuts the salt in a way plain oil never will. I would not skip the lemon here.
Can I use the same method for other grilling cheeses?
If the cheese is firm enough to slice and designed for searing, yes, but cook times may shift. Paneer needs a little more help from seasoning because it is milder, while some grilling cheeses brown a little faster than halloumi and should be watched closely.
What’s the best way to keep grilled halloumi warm during a long cookout?
Set it on a warm platter, cover it loosely with foil, and keep it away from direct heat. Do not park it over flames or in a hot oven for long; that’s how the surface dries out and the edges go tough.
One Last Plate
Halloumi is one of those foods that rewards a little attention and pays you back immediately. Give it a dry surface, a hot grate, and a bright finish, and it shows up looking like it meant to be part of the cookout from the beginning. That bronzed edge and salty center can hold their own next to grilled meat, sure, but they can also carry a platter of tomatoes, bread, and herbs without feeling like second place.
I like recipes that are honest about what they are. Grilled halloumi is not trying to be cheese sauce, and it isn’t trying to melt into something else. It keeps its shape, takes the smoke, and tastes better when you let the char stay visible. That’s a pretty useful thing to bring to a backyard table.
Grilled Halloumi for Backyard Cookouts — Recipe Card
Recipe Name: Grilled Halloumi for Backyard Cookouts
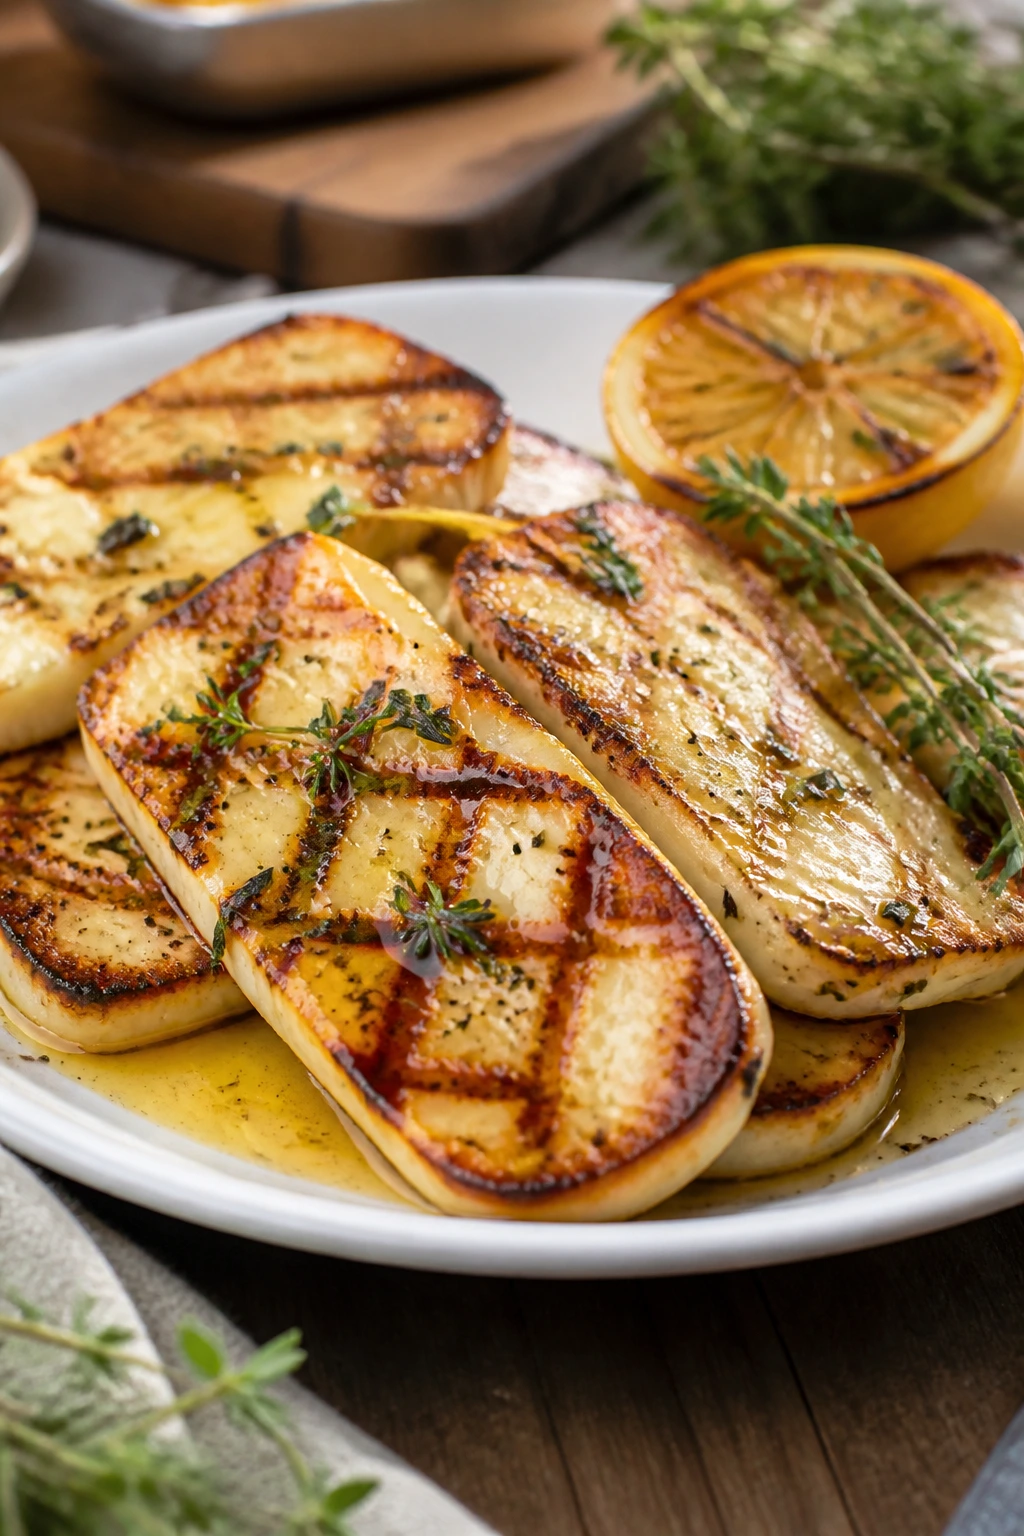
Description: Thick slabs of halloumi are grilled until bronzed and finished with a lemon-honey-herb drizzle. The cheese stays firm, salty, and warmly soft in the center, which makes it a strong fit for cookout platters, flatbreads, and vegetable spreads.
Prep Time: 15 minutes
Cook Time: 5 to 7 minutes
Total Time: 20 to 22 minutes
Course: Appetizer, Side Dish
Cuisine: Mediterranean-Inspired
Servings: 4 to 6 servings
Calories: About 250 kcal per serving
Ingredients
For the Halloumi:
- 16 ounces halloumi cheese, cut into 8 slabs about 1/2 inch thick
- 2 tablespoons olive oil, for brushing the cheese
- 1 tablespoon neutral oil, optional for greasing the grill grates
For the Lemon-Herb Finish:
- 1 tablespoon honey
- 1 tablespoon fresh lemon juice
- 1 teaspoon finely grated lemon zest
- 1 tablespoon chopped fresh mint
- 1 tablespoon chopped fresh parsley
- 1/2 teaspoon freshly ground black pepper
- 1 pinch red pepper flakes, optional
- Lemon wedges, for serving
Instructions
-
Drain the halloumi, pat it dry, and slice it into 8 slabs about 1/2 inch thick. If the cheese tastes very salty, soak it in cold water for 10 minutes, then dry it again.
-
Whisk together the olive oil, honey, lemon juice, lemon zest, mint, parsley, black pepper, and red pepper flakes in a small bowl.
-
Preheat a clean grill to medium-high heat, about 400°F to 450°F. Oil the grates lightly if needed.
-
Brush the halloumi lightly with olive oil.
-
Grill the halloumi for 90 seconds to 2 minutes per side, until deep golden-brown grill marks appear and the slabs release easily.
-
Transfer to a platter, spoon the lemon-herb mixture over the top, and serve with lemon wedges right away.
Notes: Slice the cheese thick or it can dry out fast. A short cold-water soak helps if the brine is sharp. Grill at the last minute for the best texture.