
The best picnic sandwich ideas are the ones that can survive a paper plate, a little sun, and one person who keeps setting their drink on top of the bread. That sounds fussy until you’ve watched a perfect-looking sandwich turn limp in ten minutes flat. A good outdoor sandwich needs structure first, flavor second, and a little common sense about moisture.
That’s why I’m fussy about the bread, the spreads, and the order of layering. A tight-crumb roll, a swipe of something creamy on both slices, and ingredients that are dry where they should be dry—that’s the difference between a sandwich people reach for once and one they come back to after their first plate is gone. I’d rather eat a simple ham-and-cheese slider that holds together than a towering monster that collapses halfway to my mouth.
So the list below is built for backyard cookouts, picnic blankets, folding tables, and cooler bags. Some are cold, some are warm, some travel better than they look like they should, and a few are the kind of thing you can assemble with deli counter ingredients and zero drama. That’s the sweet spot.
Why These Picnic Sandwich Ideas Work So Well at a Cookout
- They travel cleanly: Each recipe favors bread or wraps that hold their shape, so you’re not chasing fillings across the table.
- They mix hot and cold: You get slider trays, pressed sandwiches, and no-cook lunch-box style builds, which keeps the whole spread from feeling repetitive.
- They use normal grocery-store ingredients: No treasure hunt. If your store has deli meat, soft rolls, herbs, cheese, and a decent pickle aisle, you’re in business.
- They can be made ahead: Most of these fillings improve after a short rest in the fridge, and the hot ones reheat without turning leathery.
- They scale easily: Double the filling, grab more rolls, and you’ve got a second tray before the grill even cools off.
- They taste like summer without being messy: Bright pickles, crisp lettuce, sharp mustard, and herby spreads keep the sandwiches lively without flooding the bread.
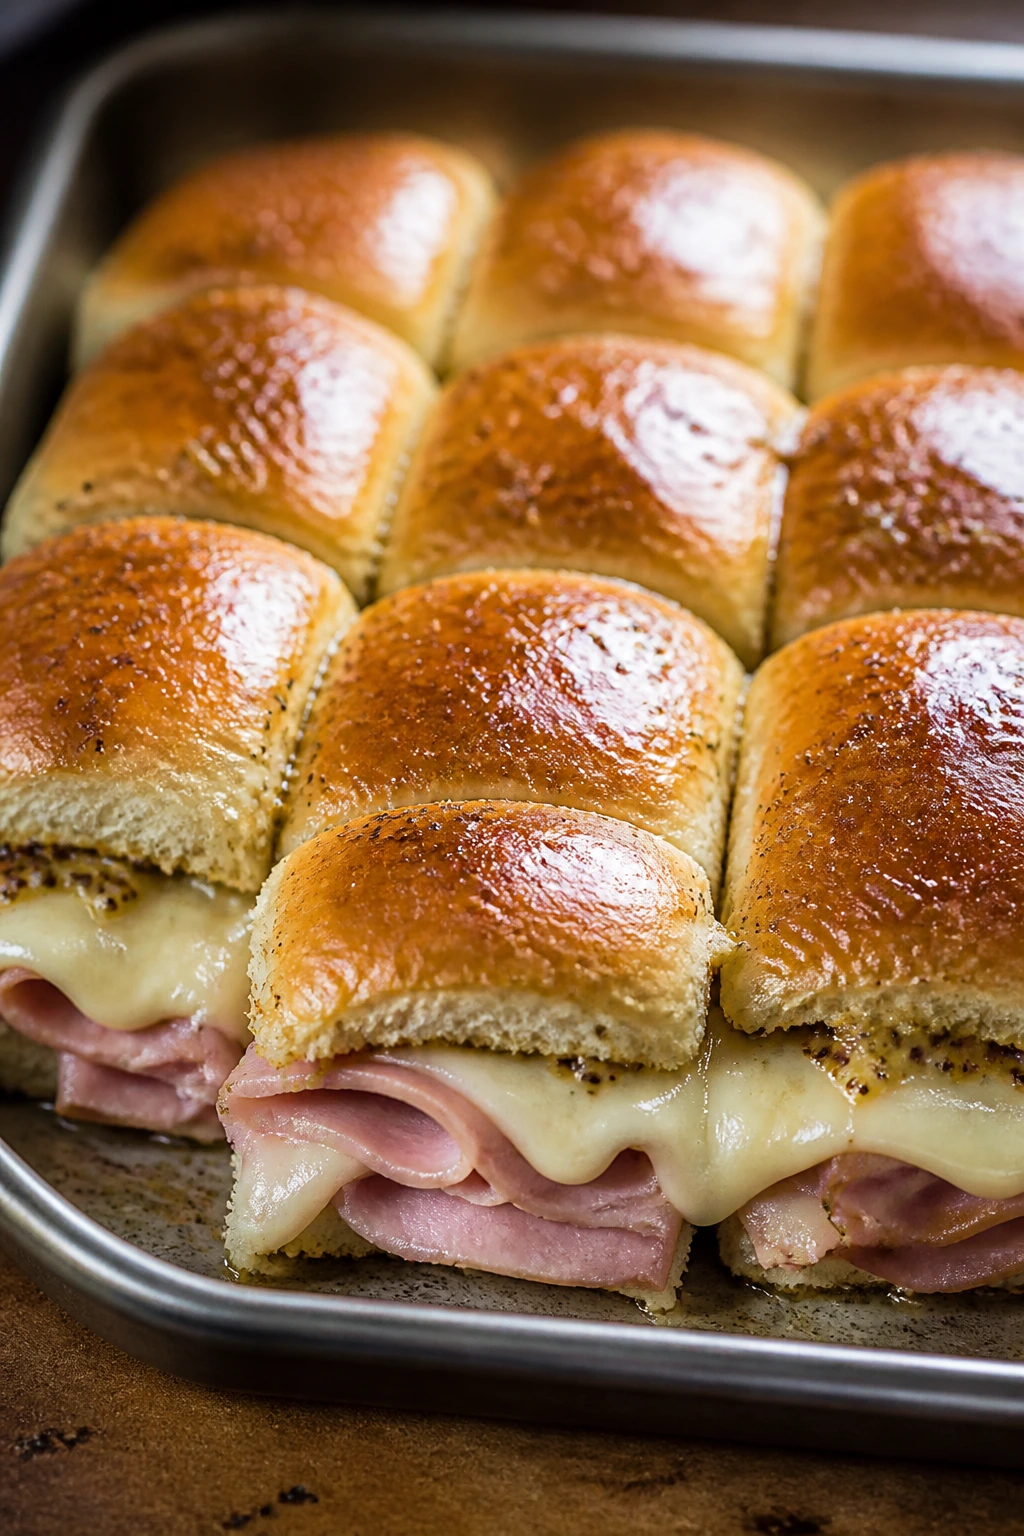
1. Ham, Swiss, and Dijon Sheet-Pan Sliders
A tray of these disappears fast because they hit that sweet spot between salty, buttery, and a little sharp from the mustard. The tops get glossy, the cheese melts into the ham, and the bottom buns soak up just enough butter to taste rich without going soggy.
Why It Works:
Sliders are picnic gold because they bake in one pan and hold together in neat little squares. The Dijon cuts the ham’s salt, and the Swiss melts into clean, elastic layers at about 350°F. Warm or room temp, they still eat well.
Key Ingredients:
- 12 Hawaiian slider buns — soft, sweet, and sturdy enough for a butter glaze.
- 12 oz sliced ham — thin deli ham folds neatly instead of sliding.
- 8 slices Swiss cheese — mild flavor, excellent melt.
- 3 tablespoons Dijon mustard + 2 tablespoons mayonnaise — the sharp creamy layer.
- 3 tablespoons melted butter + 1 teaspoon poppy seeds — brushed on top for sheen and flavor.
Quick Steps:
- Preheat the oven to 350°F (175°C) and line a 9×13-inch pan with parchment.
- Split the buns as one slab, set the bottoms in the pan, and spread the mustard-mayo mixture over them.
- Layer ham and Swiss, then put the tops back on and brush with melted butter and poppy seeds.
- Bake for 12 to 15 minutes, until the cheese is melted and the tops are lightly golden.
- Rest 5 minutes, then slice along the bun seams.
Equipment for This Recipe:
- 9×13-inch baking pan — keeps the sliders snug.
- Pastry brush — for the butter top.
- Serrated knife — clean cuts without crushing the buns.
How to Serve This Dish:
Serve these warm, right out of the pan, with dill pickles and kettle chips. Two sliders make a light plate; three is the number people usually settle on when they’re actually hungry.
Pro Tips for This Recipe:
- Use the whole slab of buns, not separated rolls, or the filling shifts.
- Let the sliders rest before cutting so the cheese firms up a bit.
- If your ham is very salty, swap one slice of Swiss for provolone.
Variations on This Dish:
- Honey Mustard Ham: add 1 tablespoon honey to the Dijon mix for a softer edge.
- Turkey Melt Slider: use sliced turkey and mozzarella for a milder version.
Common Mistakes to Avoid with This Dish:
- Skipping the butter top: the buns bake pale and dry. Brush them.
- Overloading with ham: the sliders fall apart when you cut them. Keep the layer even and thin.
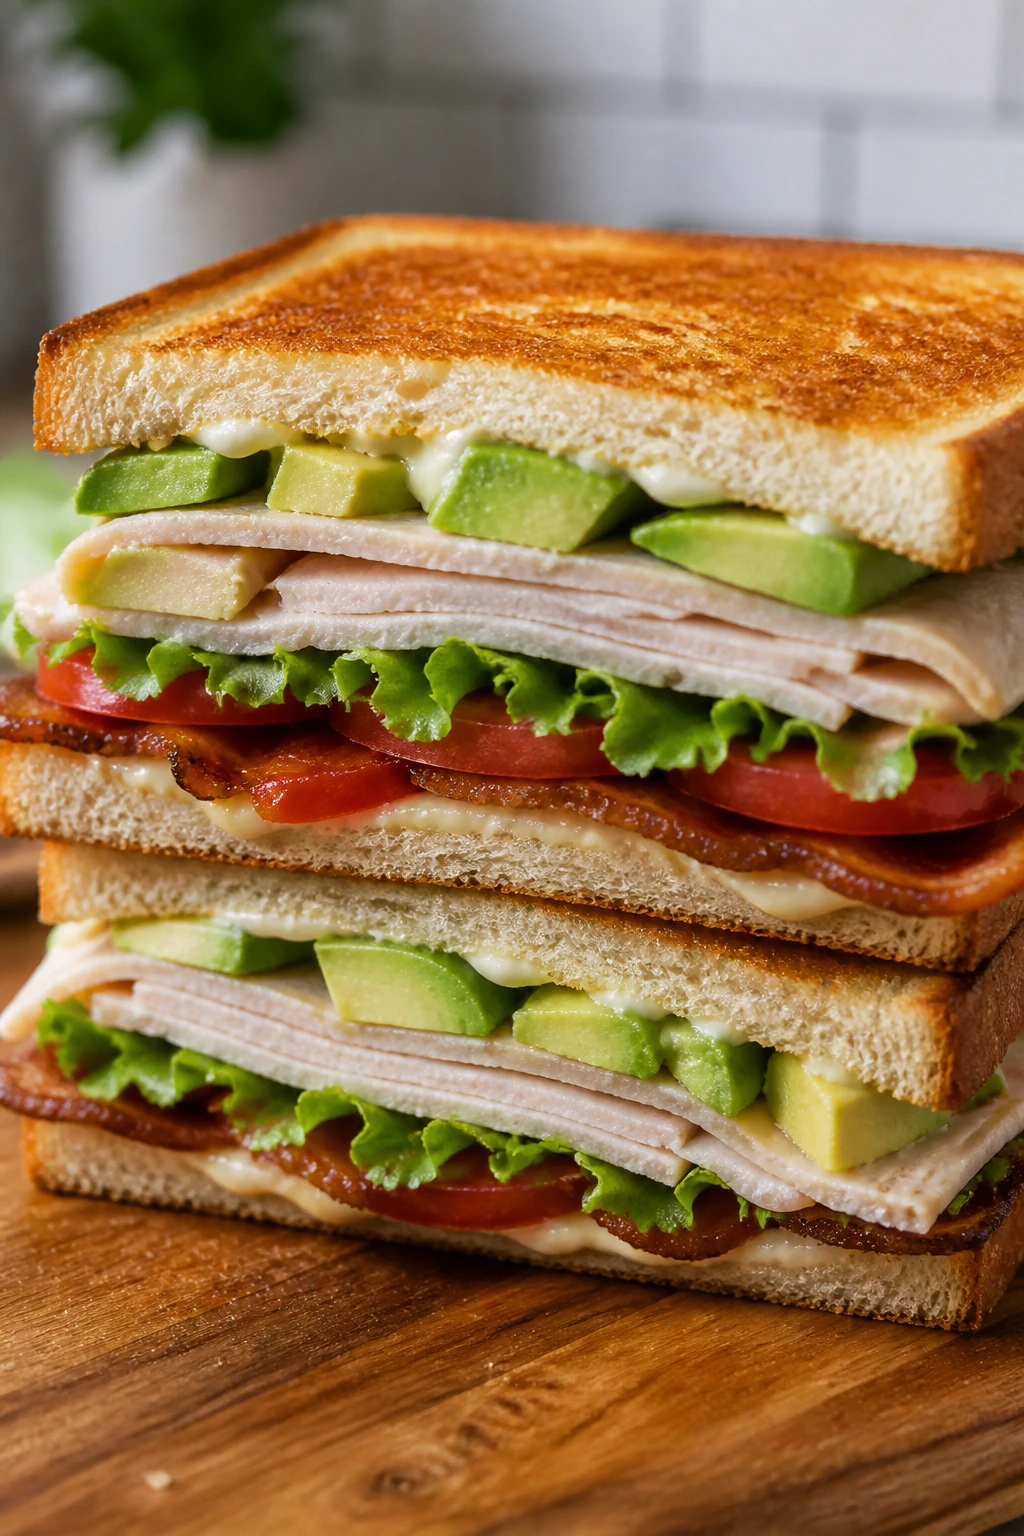
2. Turkey Club Sandwiches on Toasted Bread
This is the sandwich I make when I want something familiar but not dull. Crisp bacon, cool lettuce, tomato that’s been blotted dry, and toast that still has some bite—that’s the whole trick.
Why It Works:
A club sandwich feels big, but it stays manageable if the layers are cut tight and the bread is toasted just enough to resist the mayo. The bacon adds crunch, the turkey keeps it lean, and the avocado gives the middle something creamy without turning it mushy.
Key Ingredients:
- 8 slices sandwich bread or sourdough — toasted for structure.
- 8 oz sliced turkey breast — thin deli slices stack neatly.
- 6 slices cooked bacon — broken in half for even layering.
- 1 avocado, sliced — use just-ripe fruit so it holds shape.
- 2 tomatoes, sliced and blotted dry — less water on the bread.
- 4 lettuce leaves + 3 tablespoons mayonnaise — the cool, crisp finish.
Quick Steps:
- Toast the bread until the edges feel crisp and the surfaces are dry.
- Spread mayo on both sides of every slice.
- Build with lettuce, turkey, bacon, tomato, avocado, then repeat for a tall club.
- Press gently, cut into triangles, and secure with toothpicks if needed.
Equipment for This Recipe:
- Toaster or grill pan — for the bread.
- Serrated knife — cleaner cuts.
- Toothpicks — optional, but useful for tall stacks.
How to Serve This Dish:
Cut each club into quarters and serve with potato chips and a pile of pickle spears. It looks best when the layers show in the cross-section, not when it’s squashed flat.
Pro Tips for This Recipe:
- Salt the tomato slices lightly, then blot them after 2 minutes.
- Toast only the outer faces if you want a softer bite in the center.
- Use thick-cut bacon so it doesn’t disappear in the stack.
Variations on This Dish:
- Smoked Turkey Club: swap in smoked turkey for a deeper flavor.
- Chipotle Club: stir a teaspoon of chipotle in adobo into the mayo.
Common Mistakes to Avoid with This Dish:
- Using wet tomatoes straight from the cutting board: the bread goes slack.
- Packing the sandwich too tall: it becomes impossible to bite cleanly.
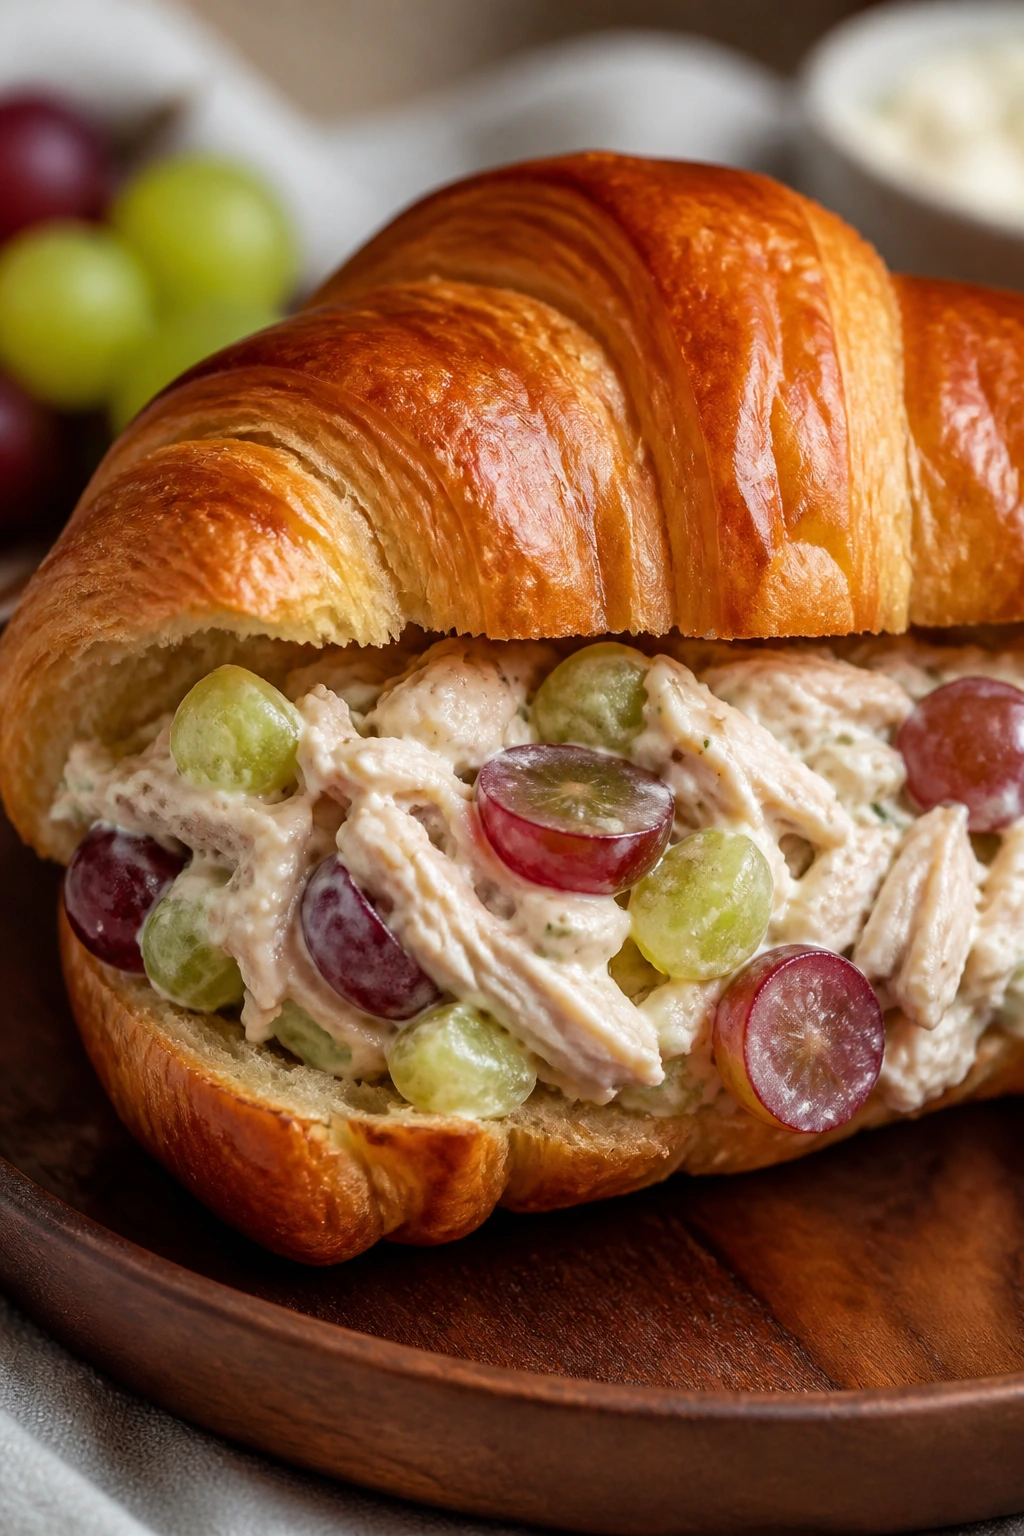
3. Chicken Salad with Grapes on Croissants
Chicken salad can be boring. Or it can be cold, creamy, lightly sweet, and packed into a croissant that flakes all over the plate in the best way. I prefer the second version.
Why It Works:
Cooked chicken, a little mayo, chopped celery, and halved grapes make a filling that tastes fresh even after sitting in the fridge. The croissant gives you buttery softness, while the celery keeps the texture from going paste-like.
Key Ingredients:
- 2 cups chopped cooked chicken — rotisserie chicken works well.
- 1/3 cup mayonnaise — enough to coat, not drown.
- 1/4 cup halved red grapes — the sweet pop matters.
- 1/4 cup diced celery — for crunch.
- 1 tablespoon lemon juice + 1 tablespoon chopped dill — sharp and bright.
- 4 croissants — split gently so they don’t tear.
Quick Steps:
- Stir chicken, mayo, grapes, celery, lemon juice, dill, salt, and pepper in a bowl.
- Chill 15 minutes so the flavors settle.
- Split the croissants and line them with lettuce if you want a moisture barrier.
- Spoon in the chicken salad and close gently.
Equipment for This Recipe:
- Mixing bowl — medium size.
- Rubber spatula — folds without smashing the grapes.
- Serrated knife — for croissants.
How to Serve This Dish:
Serve with kettle chips, cucumber spears, or a simple fruit salad. Half a croissant is enough for a small plate; a whole one becomes lunch fast.
Pro Tips for This Recipe:
- Dice the chicken small so it spreads through every bite.
- Chill before serving; the texture improves after a short rest.
- Add the grapes last so they don’t get crushed.
Variations on This Dish:
- Curry Chicken Salad: add 1 teaspoon curry powder and 2 tablespoons diced apple.
- Cranberry Pecan Salad: swap grapes for dried cranberries and add chopped pecans.
Common Mistakes to Avoid with This Dish:
- Using too much mayo: the filling turns slippery.
- Skipping the lemon juice: the salad tastes flat and heavy.
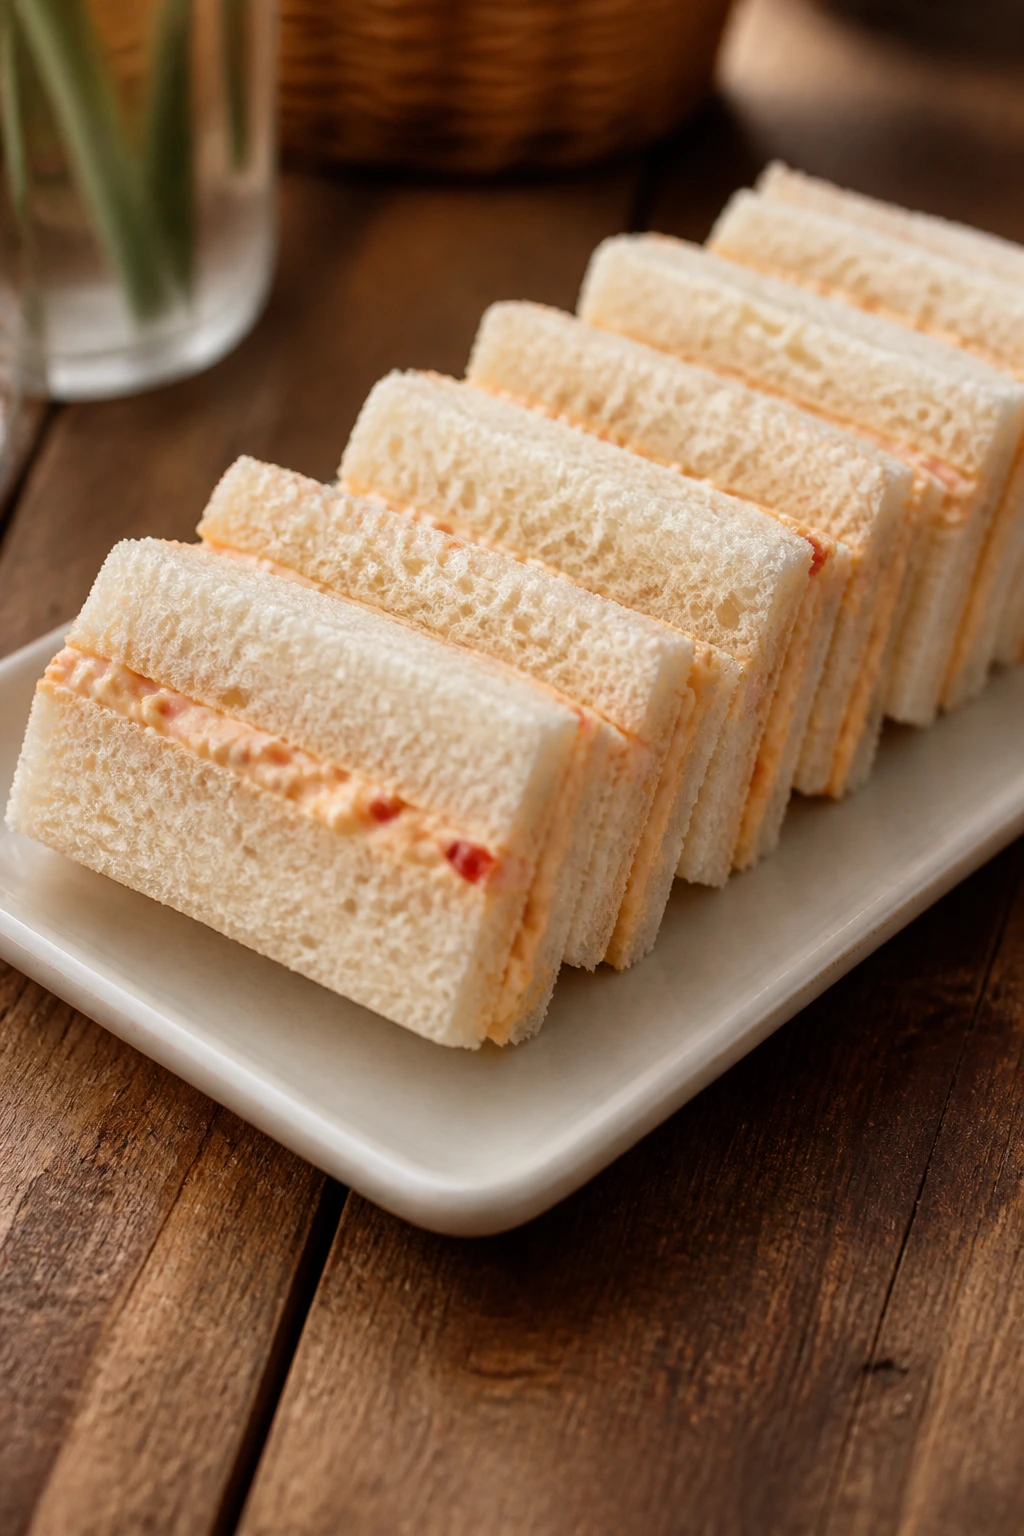
4. Pimento Cheese Tea Sandwiches
These are tiny, sharp, and a little old-fashioned in the best way. Pimento cheese wants soft bread, thin slices, and a cold plate beside something crunchy.
Why It Works:
Pimento cheese spreads cleanly and stays put, which makes it ideal for small picnic sandwiches. The sharp cheddar and cream cheese give you a firm, spreadable filling that doesn’t need reheating or much fuss.
Key Ingredients:
- 1 cup pimento cheese — homemade or store-bought.
- 8 slices soft white bread — crusts removed if you want tea-sandwich style.
- 1 tablespoon mayonnaise — loosens the spread if needed.
- 1 tablespoon chopped chives — for a fresh bite.
- 1 teaspoon hot sauce — optional, but useful.
Quick Steps:
- Stir the pimento cheese with mayo, chives, and hot sauce if using.
- Spread a thin layer on 4 slices of bread.
- Top with the remaining slices and press gently.
- Trim crusts, then cut into fingers or triangles.
Equipment for This Recipe:
- Small mixing bowl — for the filling.
- Serrated knife — for trimming and cutting.
- Offset spatula — helps spread the cheese evenly.
How to Serve This Dish:
Pile them on a platter with cornichons, celery sticks, and sliced radishes. They work best as part of a mixed spread rather than the main event.
Pro Tips for This Recipe:
- If the pimento cheese is stiff, let it sit at room temperature for 10 minutes.
- Use soft bread with no hard crust if you want the classic look.
- Chill briefly before cutting for neat edges.
Variations on This Dish:
- Bacon Pimento Cheese: fold in 2 tablespoons crumbled bacon.
- Jalapeño Pimento Cheese: add 1 tablespoon minced jalapeño for more heat.
Common Mistakes to Avoid with This Dish:
- Spreading too thickly: the bread squishes out at the edges.
- Using very dry bread: the sandwich feels scratchy instead of soft.
5. Caprese Ciabatta with Basil Pesto
Caprese sandwiches live or die by tomato quality. Use good ones, and you get juicy slices, milky mozzarella, and basil that smells like a summer herb pot. Use bad ones, and it’s just wet bread.
Why It Works:
Ciabatta has an open crumb, but it’s strong enough to handle pesto and tomato if you keep the layers thin. The mozzarella acts like a cushion, and pesto brings enough fat to keep the bread from drying out.
Key Ingredients:
- 1 small ciabatta loaf — split lengthwise.
- 1 large tomato, sliced and salted lightly — blot dry after 2 minutes.
- 8 oz fresh mozzarella, sliced — not shredded.
- 3 tablespoons basil pesto — homemade or jarred.
- 1 tablespoon olive oil + 1 tablespoon balsamic glaze — optional finish.
- Handful of basil leaves — for a sharp herbal bite.
Quick Steps:
- Slice the ciabatta and toast it cut-side down for 2 to 3 minutes.
- Spread pesto on both sides of the bread.
- Layer mozzarella, tomato, basil, and a little salt and pepper.
- Drizzle with olive oil or balsamic glaze, then close and cut.
Equipment for This Recipe:
- Serrated bread knife — for the loaf.
- Baking sheet or grill pan — for light toasting.
- Paper towels — to dry the tomato slices.
How to Serve This Dish:
Cut into long slabs, then halve again for easy picnic portions. It pairs well with olives, chips, or a chilled cucumber salad.
Pro Tips for This Recipe:
- Toast the bread first; it slows down tomato moisture.
- Slice mozzarella thin so the sandwich doesn’t slide.
- Add balsamic glaze only at the end or it soaks the bread.
Variations on This Dish:
- Roasted Red Pepper Caprese: add strips of roasted pepper for sweetness.
- Prosciutto Caprese: tuck in a few slices of prosciutto if you want more salt.
Common Mistakes to Avoid with This Dish:
- Using watery tomatoes without blotting: the ciabatta turns slick.
- Too much pesto: the basil flavor gets muddy.
6. Italian Sub with Salami, Provolone, and Giardiniera
This one tastes like a deli counter in sandwich form. Salty meat, provolone, vinegar, and crunchy pickled vegetables do the heavy lifting, so you don’t need much else.
Why It Works:
The acid from giardiniera and a little red wine vinegar cuts through the rich salami and cheese. Hoagie rolls hold shape better than soft sandwich bread, and the layered meats keep the bite balanced from end to end.
Key Ingredients:
- 2 hoagie rolls, split — choose rolls with a firm crust.
- 4 oz salami — thin slices.
- 4 oz ham or capicola — whichever you like better.
- 4 slices provolone — mild, slicable, and stable.
- 1/4 cup giardiniera, drained — the crunchy, tangy part.
- 2 tablespoons olive oil + 1 tablespoon red wine vinegar — for drizzling.
Quick Steps:
- Toast the rolls lightly, just until the cut sides feel dry.
- Layer salami, ham, provolone, and giardiniera.
- Drizzle with olive oil and vinegar, then season with oregano and pepper.
- Press and wrap tightly for 10 minutes before slicing.
Equipment for This Recipe:
- Serrated knife — for the rolls.
- Small spoon — for the giardiniera.
- Parchment or deli paper — to wrap neatly.
How to Serve This Dish:
Serve with potato chips and cherry peppers on the side. A half sub is enough if the rest of the cookout spread is big; a whole one is lunch by itself.
Pro Tips for This Recipe:
- Drain the giardiniera well or the bread gets greasy.
- Wrap it for a few minutes before cutting so the layers settle.
- Don’t overdo the vinegar; a little goes a long way.
Variations on This Dish:
- Turkey Italian Sub: swap salami for turkey and keep the provolone.
- Spicy Muffuletta Style: add olive salad and a few slices of mozzarella.
Common Mistakes to Avoid with This Dish:
- Using soft sandwich bread: it collapses under the oil and vinegar.
- Skipping the drain on pickled vegetables: the sandwich gets soggy fast.
7. Tuna Salad with Dill Pickles on Rye
Tuna salad does not need a lot of help. It needs cold, a bit of crunch, and bread that won’t fall apart when you pick it up. Rye handles the job nicely.
Why It Works:
The pickles and celery keep tuna salad from feeling heavy, while rye brings that peppery, almost earthy note that flatters fish. It’s sturdy enough for transport and tastes even better after chilling for a short spell.
Key Ingredients:
- 2 cans tuna, drained well — water-packed or oil-packed both work.
- 1/4 cup mayonnaise — enough to bind.
- 2 tablespoons diced dill pickles — for sharp crunch.
- 2 tablespoons diced celery — adds snap.
- 1 tablespoon minced red onion — use less if you want it milder.
- 4 slices rye bread — lightly toasted if you want extra grip.
Quick Steps:
- Mix tuna, mayo, pickles, celery, onion, lemon juice, salt, and pepper.
- Chill 10 to 15 minutes.
- Toast the rye lightly if desired.
- Spoon the salad onto bread and close gently.
Equipment for This Recipe:
- Mixing bowl — for the tuna salad.
- Fork — to flake the tuna.
- Serrated knife — for the rye.
How to Serve This Dish:
Serve with lettuce chips, dill spears, or tomato wedges on the side. I like it cut in half on the diagonal because rye looks better that way.
Pro Tips for This Recipe:
- Drain the tuna well before mixing or the filling gets loose.
- Use pickle cubes, not relish, if you want crunch.
- A tiny squeeze of lemon wakes the whole thing up.
Variations on This Dish:
- Dijon Tuna: add 1 teaspoon Dijon for more bite.
- Herb Tuna: stir in dill and parsley for a fresher finish.
Common Mistakes to Avoid with This Dish:
- Overmixing the tuna: it turns pasty.
- Using very soft bread: the sandwich bends and tears.
8. Egg Salad with Chives on Brioche
Egg salad is at its best when it’s soft but not sloppy. Brioche gives it a little luxury, while chives keep the whole thing from tasting flat.
Why It Works:
Egg salad needs a gentle hand. Chop the eggs medium-small so there are some chunks left, then add just enough mayo to coat. Brioche is tender, but it still has enough richness to keep the filling from feeling one-note.
Key Ingredients:
- 6 hard-boiled eggs, peeled — cooled before chopping.
- 1/4 cup mayonnaise — adjust to texture.
- 1 tablespoon Dijon mustard — sharpens the flavor.
- 2 tablespoons chopped chives — fresh and oniony.
- 4 slices brioche or soft sandwich bread — lightly toasted if you like.
Quick Steps:
- Chop the eggs and mix with mayo, Dijon, chives, salt, and pepper.
- Chill for 15 minutes.
- Toast the brioche lightly if using.
- Spoon the egg salad onto bread and close.
Equipment for This Recipe:
- Saucepan — for boiling the eggs, if needed.
- Mixing bowl — medium size.
- Egg slicer or fork — optional, but handy.
How to Serve This Dish:
Serve with chips and sliced cucumber. If you’re packing for later, keep the filling separate and assemble when the bread is ready.
Pro Tips for This Recipe:
- Slightly undercook the eggs if you tend to overboil; dry yolks make the salad chalky.
- Add a pinch of salt after chilling, not before.
- Toast the bread if you want a cleaner bite.
Variations on This Dish:
- Curried Egg Salad: add 1/2 teaspoon curry powder.
- Pickle Egg Salad: stir in 1 tablespoon finely chopped pickle.
Common Mistakes to Avoid with This Dish:
- Turning the mixture into a paste: leave some texture.
- Packing it into very fresh bread: the filling softens it too fast.
9. Pulled Pork Sliders with Vinegar Slaw
This is the tray people hover around first. Pork, a little smoke, a little tang, and slaw that cuts through the richness—there’s a reason pulled pork keeps showing up at cookouts.
Why It Works:
Pulled pork stays moist when reheated, and the vinegar slaw keeps the slider from feeling heavy. Soft buns are fine here because the meat brings enough structure once it’s piled in and pressed down.
Key Ingredients:
- 3 cups pulled pork — warmed or room temp.
- 12 slider buns — split.
- 1 cup vinegar slaw — cabbage, vinegar, sugar, salt.
- 1/4 cup barbecue sauce — optional, but useful.
- 2 tablespoons butter — for brushing buns.
Quick Steps:
- Warm the pork gently in a skillet over medium-low heat.
- Brush the buns with butter and toast them for 2 to 3 minutes.
- Pile pork onto the bottoms, add a spoonful of slaw, and drizzle barbecue sauce if using.
- Close and serve right away.
Equipment for This Recipe:
- Skillet — for reheating the pork.
- Sheet pan — for toasting buns.
- Tongs — for easy assembly.
How to Serve This Dish:
Serve with baked beans, chips, or corn on the cob. Two sliders sound small until you eat them; then they turn into three.
Pro Tips for This Recipe:
- Drain excess liquid from the pork before assembling.
- Keep the slaw crunchy; don’t drown it in dressing.
- Toast the buns so they don’t melt into the filling.
Variations on This Dish:
- Carolina Style: use more vinegar sauce and skip the sweet barbecue.
- Cheddar Pork Sliders: add thin cheddar slices before closing the bun.
Common Mistakes to Avoid with This Dish:
- Assembling too early: the buns go soft.
- Using soggy slaw: it washes out the flavor and texture.
10. BBQ Chicken Sandwiches with Pickles
Barbecue chicken on a bun is simple, but simple is not the same as bland. The pickles matter. They keep the sweet sauce from taking over.
Why It Works:
Shredded chicken takes barbecue sauce fast, which makes this one of the easiest picnic sandwiches to build from leftovers. Pickles or slaw add the acid, and a toasted bun keeps the sauce from seeping through immediately.
Key Ingredients:
- 2 cups shredded cooked chicken — rotisserie is fine.
- 1/2 cup barbecue sauce — choose one you actually like on its own.
- 4 sandwich buns — split and toasted.
- 8 pickle chips — for sharpness.
- 2 tablespoons butter — for the bun tops.
Quick Steps:
- Warm the chicken with barbecue sauce in a skillet over low heat.
- Toast the buns lightly.
- Spoon chicken onto the bottoms, top with pickles, and close.
- Serve hot or wrap for later.
Equipment for This Recipe:
- Skillet — for the chicken.
- Spoon or spatula — for saucy filling.
- Grill or toaster — for the buns.
How to Serve This Dish:
Pair with coleslaw or potato salad. These are best hot, but they’ll still hold up after a short trip in foil.
Pro Tips for This Recipe:
- Do not boil the chicken in sauce; it dries out. Warm it slowly.
- Use thicker barbecue sauce if you plan to transport the sandwiches.
- Add pickles at the last minute so they stay crisp.
Variations on This Dish:
- Spicy BBQ Chicken: stir in hot sauce or chipotle.
- BBQ Chicken Melt: add cheddar and broil briefly before serving.
Common Mistakes to Avoid with This Dish:
- Too much sauce: the bun slips apart.
- Skipping toast on the bread: it weakens under the filling.
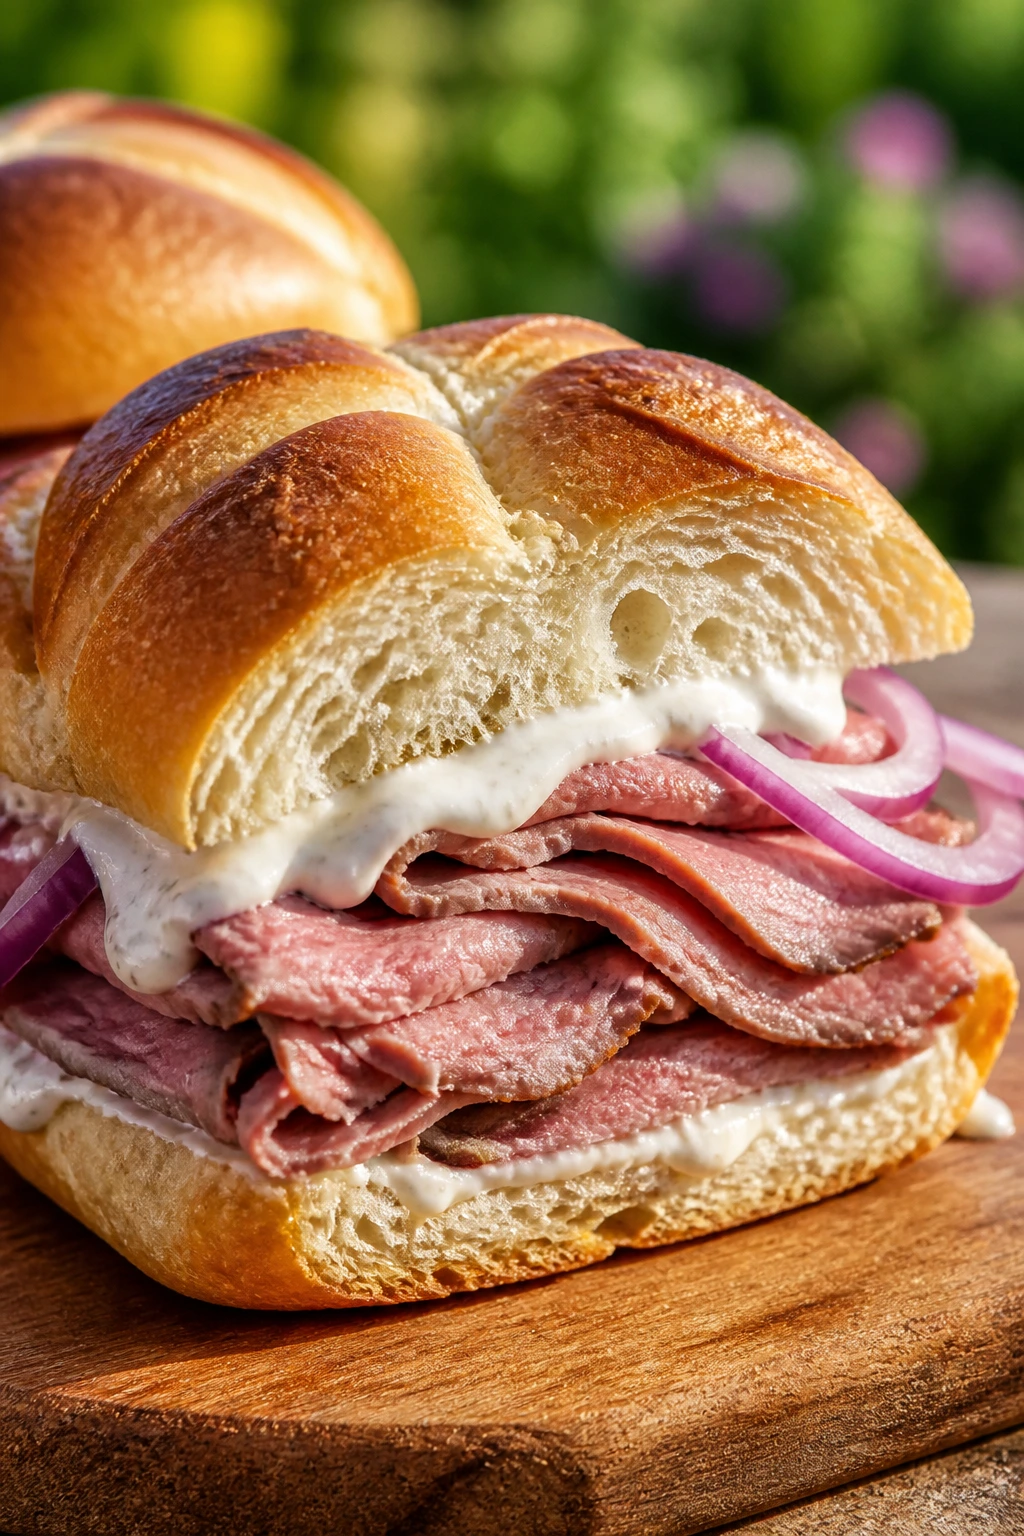
11. Roast Beef with Horseradish Mayo on Kaiser Rolls
Roast beef needs a little bite to keep it from feeling sleepy. Horseradish mayo does that job fast, and a kaiser roll gives you a bread shell sturdy enough to handle it.
Why It Works:
The beef is rich, the horseradish is sharp, and the roll has enough crust to keep the juices from soaking through. A few slices of onion or arugula are enough to add lift without crowding the meat.
Key Ingredients:
- 8 oz thin-sliced roast beef — tender, not chewy.
- 2 kaiser rolls — split.
- 3 tablespoons mayonnaise + 1 to 2 teaspoons prepared horseradish — mixed together.
- 1/2 red onion, very thinly sliced — optional but useful.
- 1 handful arugula — peppery and clean.
Quick Steps:
- Mix the mayo and horseradish.
- Split and lightly toast the rolls.
- Spread the sauce, then layer roast beef, onion, and arugula.
- Press, cut, and serve.
Equipment for This Recipe:
- Serrated knife — for the rolls.
- Small bowl — for the horseradish mayo.
- Cutting board — sturdy enough for slicing.
How to Serve This Dish:
Serve with chips and pickles, or add a cup of chilled potato salad. If you want the sandwich to feel more like deli fare, cut it straight down the middle rather than on the diagonal.
Pro Tips for This Recipe:
- Start with less horseradish than you think; it blooms fast.
- Use room-temperature beef so it isn’t stiff.
- A little arugula keeps the sandwich from feeling too heavy.
Variations on This Dish:
- French Dip Style: add warm jus on the side for dipping.
- Cheddar Roast Beef: tuck in a slice of sharp cheddar.
Common Mistakes to Avoid with This Dish:
- Using too much horseradish: it overpowers the beef.
- Skipping the roll toast: the sandwich gets slippery.
12. Cucumber and Cream Cheese Finger Sandwiches
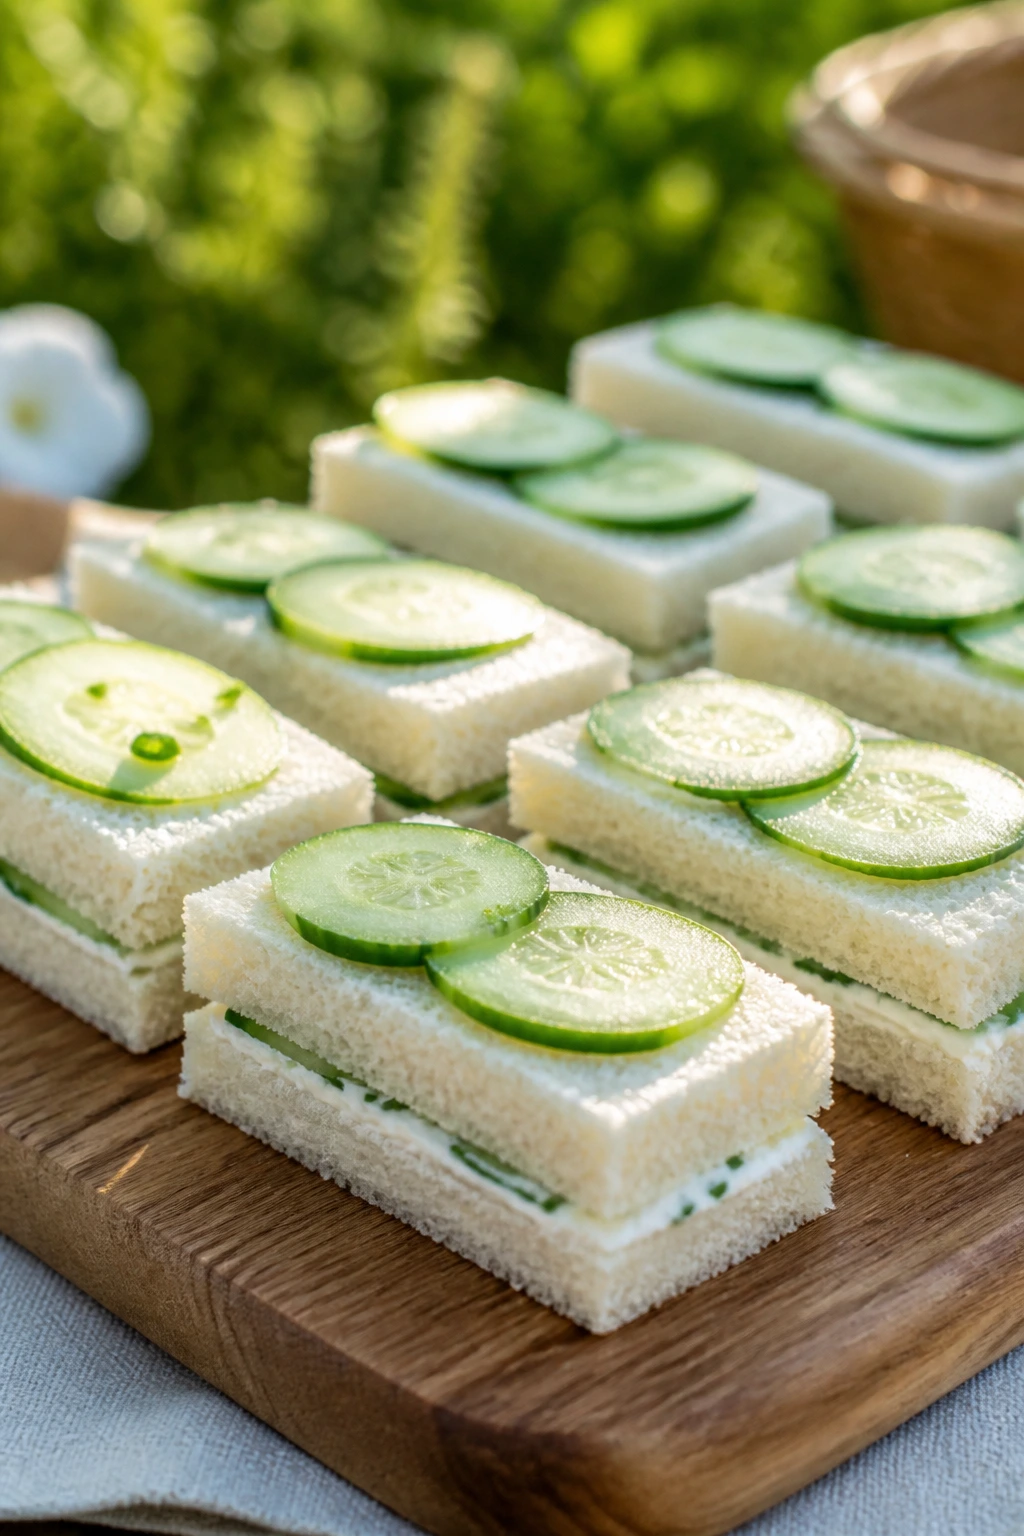
These are all about coolness and restraint. They’re the sandwich equivalent of a cold glass of water on a hot day—plain in theory, exactly right in practice.
Why It Works:
Cream cheese acts like glue, the cucumber brings clean crunch, and soft bread makes the whole thing easy to bite. These are also one of the few picnic sandwiches that actually feel better when cut small and handled gently.
Key Ingredients:
- 8 slices soft white or wheat bread — crusts optional.
- 4 oz cream cheese, softened — spreads smoothly.
- 1 cucumber, thinly sliced — pat dry.
- 1 tablespoon chopped dill — fresh flavor.
- Pinch of salt and black pepper.
Quick Steps:
- Mix cream cheese with dill, salt, and pepper.
- Spread on 4 slices of bread.
- Layer cucumber slices in a single, even row.
- Close, press lightly, trim crusts, and cut into fingers.
Equipment for This Recipe:
- Butter knife or spatula — for spreading.
- Serrated knife — for trimming.
- Paper towels — for drying cucumber slices.
How to Serve This Dish:
Serve on a chilled plate with carrot sticks and olives. They belong in the same platter as something louder and richer.
Pro Tips for This Recipe:
- Salt and blot the cucumbers so they don’t sweat into the bread.
- Use very soft bread for the cleanest tea-sandwich texture.
- Chill before cutting if you want sharper edges.
Variations on This Dish:
- Herbed Cucumber: add parsley and chives to the cream cheese.
- Lemon Cucumber: add a little lemon zest for brightness.
Common Mistakes to Avoid with This Dish:
- Skipping the cucumber drying step: the bread gets damp.
- Cutting with a dull knife: the filling drags and tears.
13. BLT Sandwiches with Herb Mayo
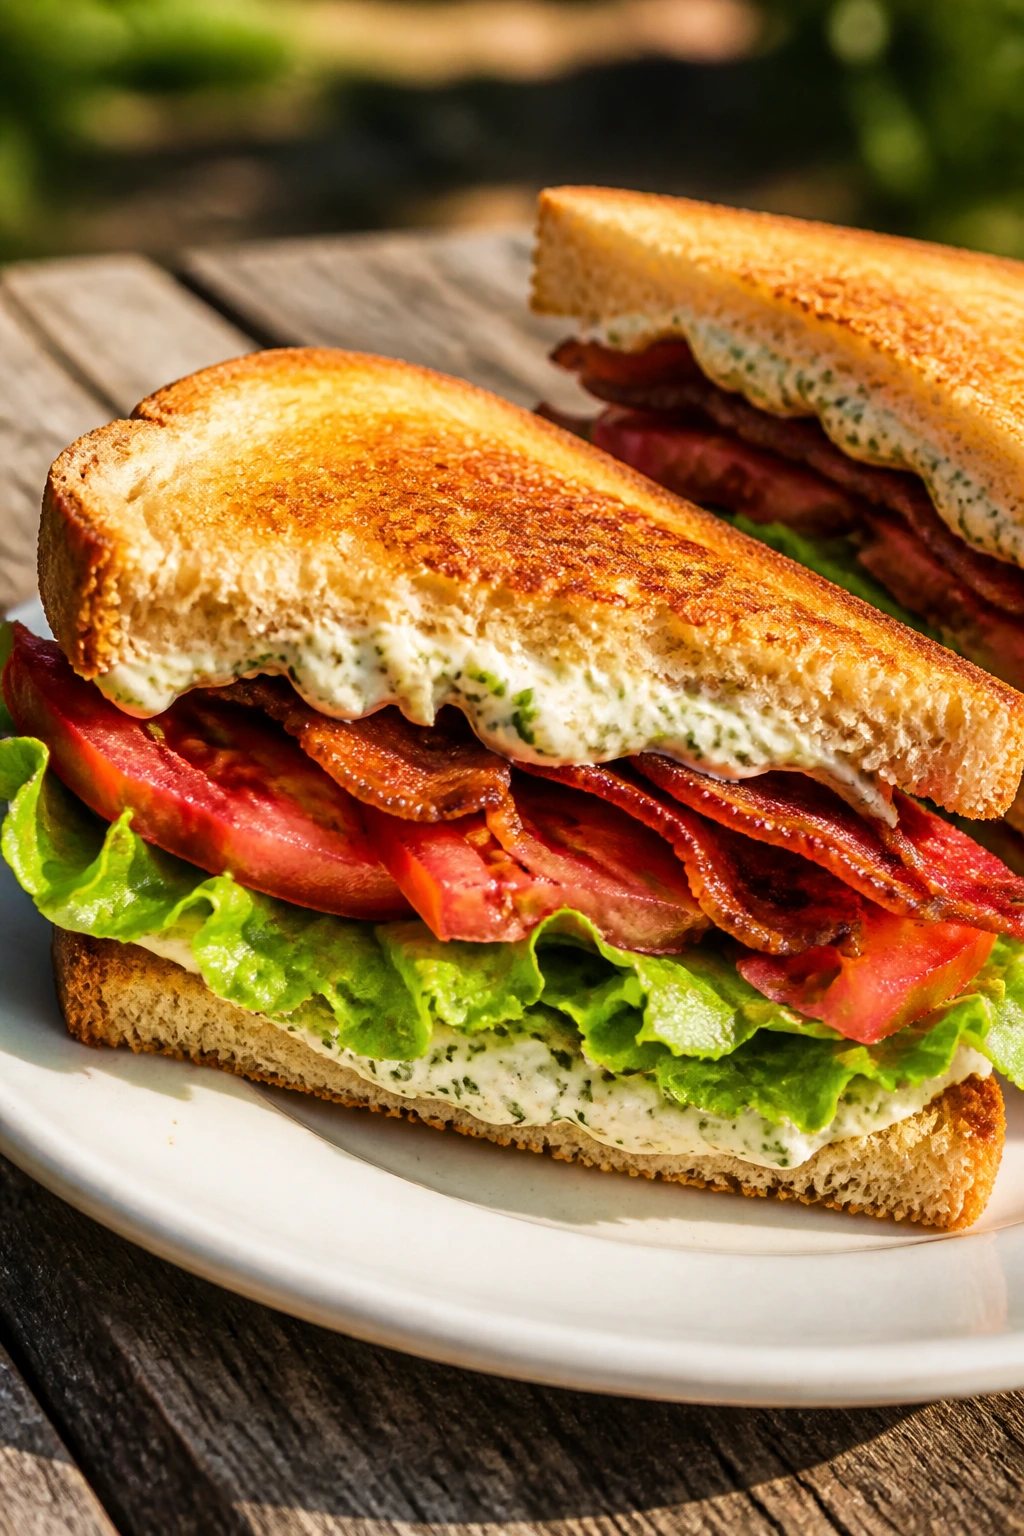
A good BLT is mostly about timing. Crisp bacon, cold lettuce, tomato that has been drained of extra juice, and mayo with enough herb flavor to make the bread taste intentional.
Why It Works:
The bacon gives salt and crunch, while the tomato adds sweetness and acid. Herb mayo does more than sound nice—it keeps the sandwich from tasting one-dimensional and gives the bread a little insurance against moisture.
Key Ingredients:
- 8 slices sandwich bread or sourdough — toasted.
- 6 slices bacon — cooked crisp.
- 2 tomatoes, sliced and blotted dry — the watery part matters.
- 4 lettuce leaves — romaine or iceberg.
- 3 tablespoons mayonnaise + 1 tablespoon chopped herbs — parsley, chives, or dill.
Quick Steps:
- Mix the mayo with herbs.
- Toast the bread until the surfaces are dry and light brown.
- Spread mayo on both sides, then layer lettuce, tomato, and bacon.
- Close and cut immediately.
Equipment for This Recipe:
- Skillet or oven tray — for the bacon.
- Serrated knife — for bread and tomatoes.
- Paper towels — to blot tomato slices.
How to Serve This Dish:
Serve with chips and a pickle spear, or cut into quarters for a snack tray. BLTs are best assembled close to serving, not hours ahead.
Pro Tips for This Recipe:
- Let the bacon drain on a rack, not paper, if you want it crisp.
- Salt tomatoes lightly, then blot after a minute.
- Keep lettuce cold so it stays crunchy.
Variations on This Dish:
- Avocado BLT: add slices of avocado for a softer middle.
- BLT Melt: add cheddar and grill briefly.
Common Mistakes to Avoid with This Dish:
- Building it too early: the tomato softens the bread.
- Using limp lettuce: the texture falls flat.
14. Mediterranean Veggie Pita Pockets
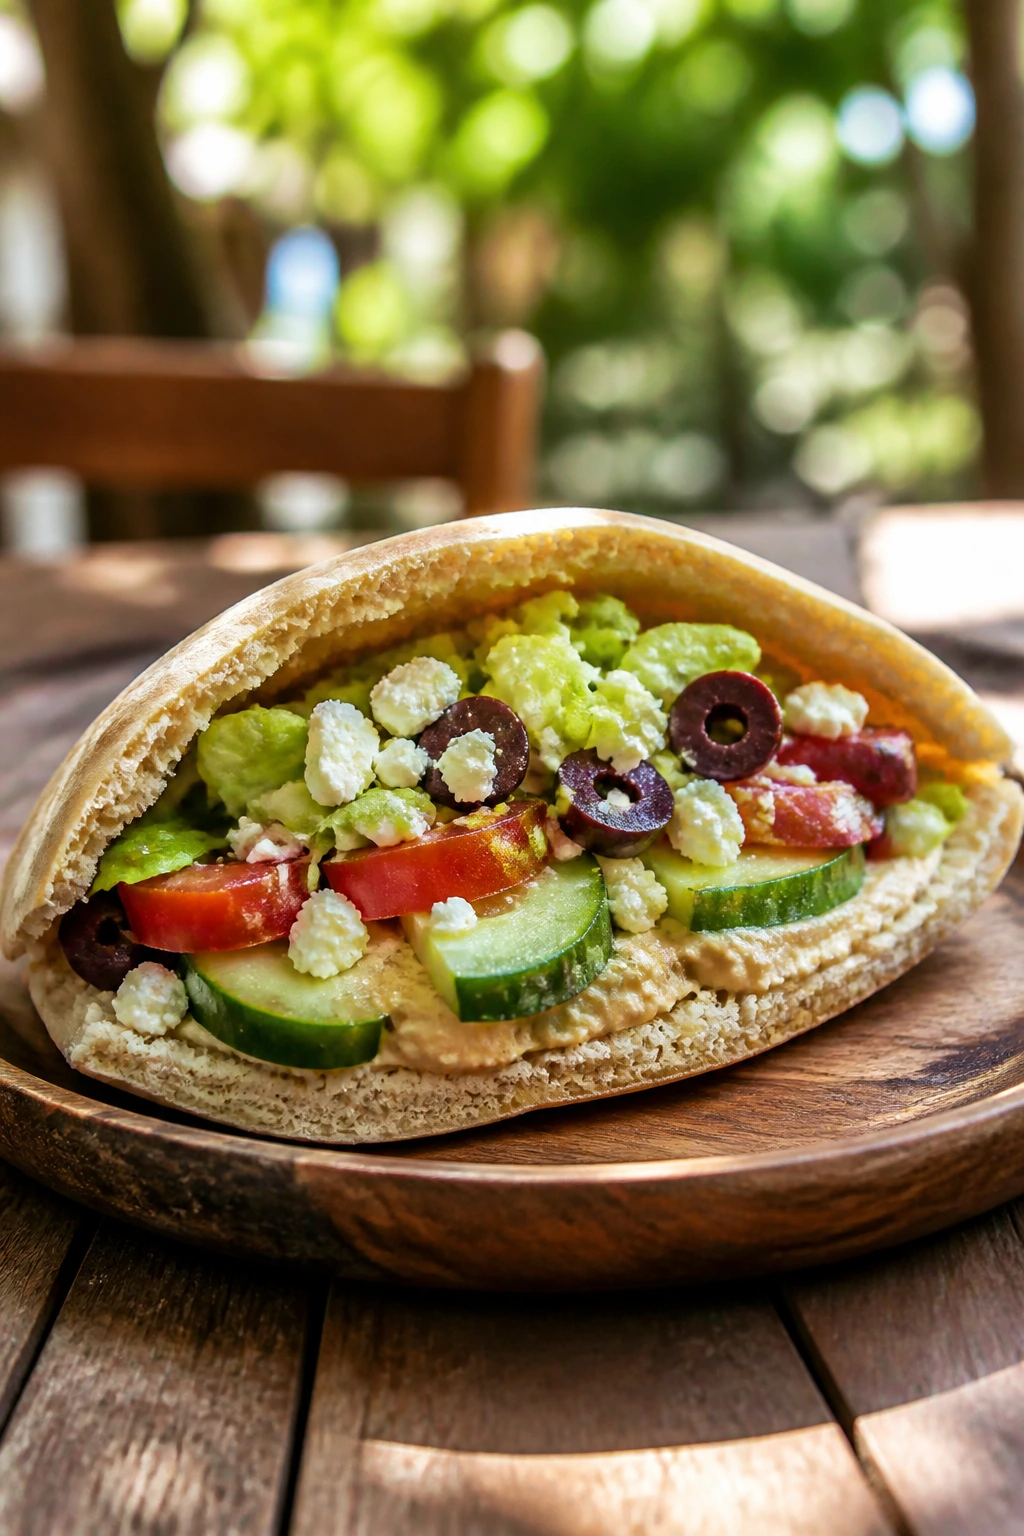
This is the sandwich you bring when half the group wants something lighter and still expects flavor. The pita is the pocket, the hummus is the glue, and the vegetables do the rest.
Why It Works:
A pita pocket holds chopped vegetables in place better than a floppy wrap, and hummus gives you a thick, savory base that doesn’t run. Feta and olives add enough salt to keep the sandwich from tasting like a salad in bread.
Key Ingredients:
- 4 pita rounds — split gently.
- 1/2 cup hummus — regular or roasted garlic.
- 1 cup chopped cucumber and tomato — drained well.
- 1/2 cup shredded lettuce — for texture.
- 1/4 cup crumbled feta — salty finish.
- 2 tablespoons sliced olives — optional but useful.
Quick Steps:
- Warm the pitas for 20 seconds so they open more easily.
- Spread hummus inside each pita pocket.
- Fill with cucumber, tomato, lettuce, feta, and olives.
- Wrap in parchment to keep the pocket from splitting.
Equipment for This Recipe:
- Knife — for chopping vegetables.
- Small spoon — for hummus.
- Parchment or foil — to wrap the pita.
How to Serve This Dish:
Serve with tzatziki, chips, or a bowl of grapes. These are easy to pack and even easier to nibble while standing around the grill.
Pro Tips for This Recipe:
- Drain the vegetables well, or the pita gets soggy inside.
- Don’t overfill the pocket. It tears.
- Use thick hummus so it anchors the filling.
Variations on This Dish:
- Roasted Pepper Pita: add strips of roasted red pepper.
- Chickpea Crunch Pita: add smashed chickpeas for more body.
Common Mistakes to Avoid with This Dish:
- Using cold, stiff pita: it cracks when you fill it.
- Chopping vegetables too large: they fall out with every bite.
15. Smoked Salmon Bagels with Cream Cheese and Capers
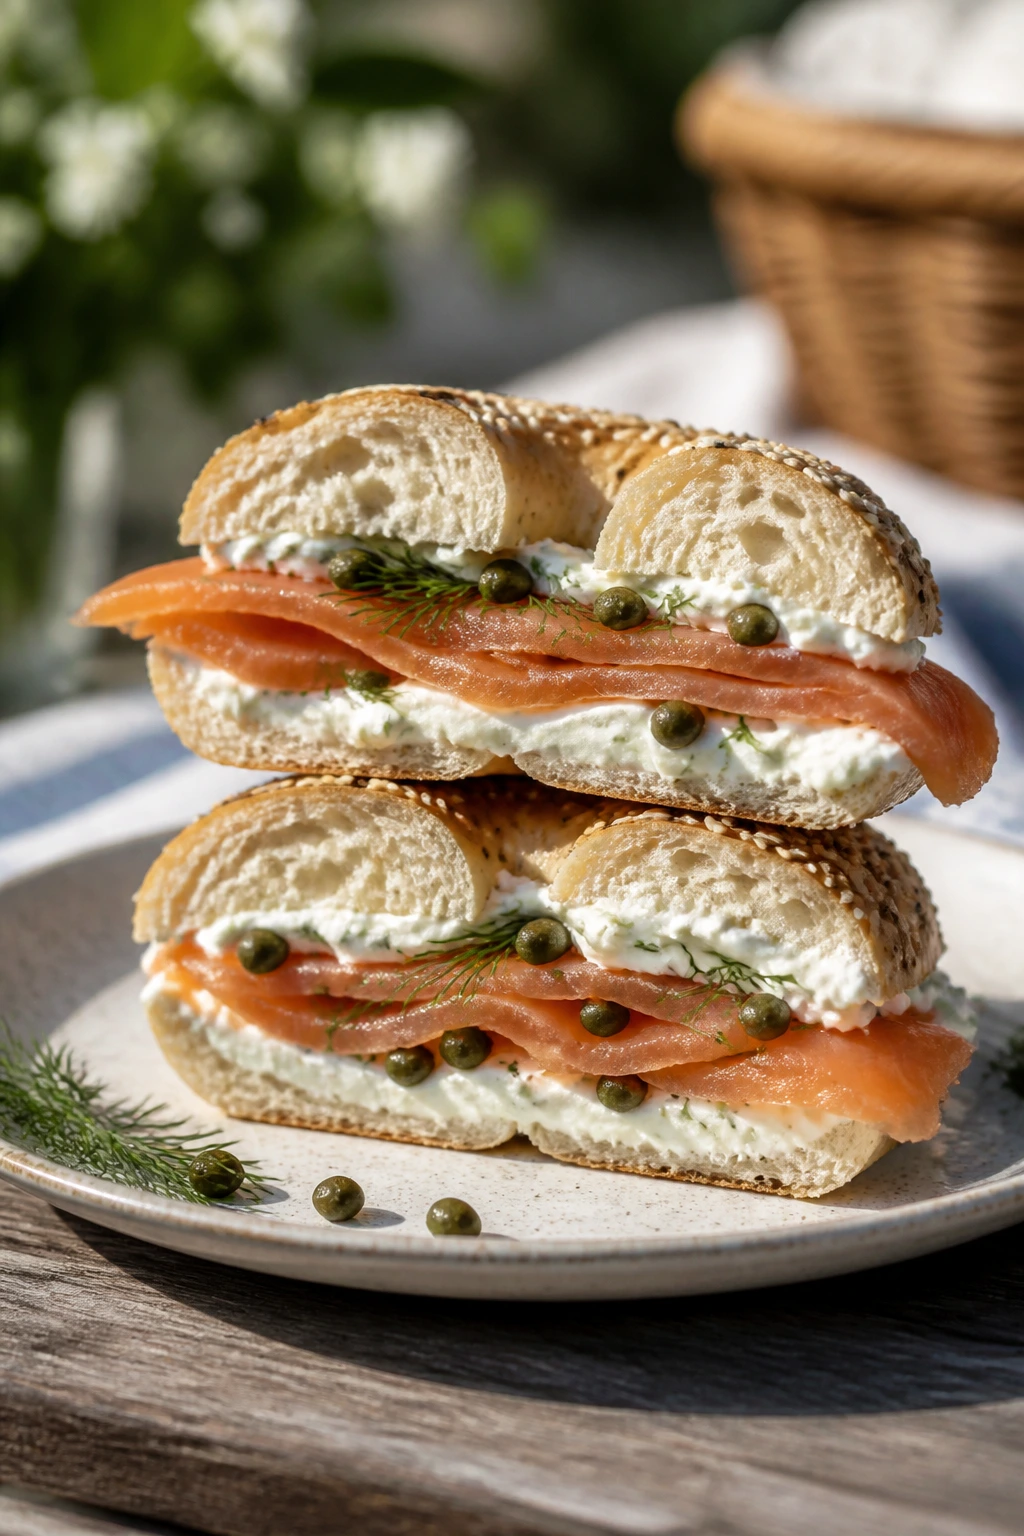
These are rich, salty, and a little fancy without needing much work. If you’re setting out a brunchy cookout spread, they disappear faster than the hot tray.
Why It Works:
Bagels handle soft spreads and slippery smoked salmon better than most breads. Cream cheese holds everything in place, capers cut the richness, and cucumber adds freshness so the sandwich doesn’t feel heavy.
Key Ingredients:
- 4 bagels, split — plain or everything style.
- 4 oz cream cheese — softened.
- 6 oz smoked salmon — thin slices.
- 2 tablespoons capers — drained.
- 1/2 cucumber, thinly sliced.
- 1 tablespoon chopped dill.
Quick Steps:
- Toast the bagels lightly if you want more grip.
- Spread cream cheese on both halves.
- Layer cucumber, smoked salmon, capers, and dill.
- Close gently and serve cold.
Equipment for This Recipe:
- Serrated knife — for bagels.
- Small spoon — for capers.
- Cutting board — for clean assembly.
How to Serve This Dish:
Serve with lemon wedges and a little fruit on the side. These work best as a lighter sandwich in a mixed tray, not the main pile.
Pro Tips for This Recipe:
- Pat the cucumber slices dry.
- Don’t pile the salmon high; it should drape, not mound.
- A little lemon zest in the cream cheese helps.
Variations on This Dish:
- Lox and Avocado Bagel: add thin avocado slices.
- Dill Caper Bagel: mix extra dill into the cream cheese.
Common Mistakes to Avoid with This Dish:
- Overtoasting the bagel: it fights the soft filling.
- Using too many capers: the salt overwhelms everything else.
16. Meatball Subs with Mozzarella

A meatball sub is not subtle. That’s fine. Sometimes you want hot sauce, stretchy cheese, and a roll that holds up when you lean into it with both hands.
Why It Works:
Meatballs already come with built-in seasoning, so the sandwich only needs a good tomato sauce and enough cheese to melt into the gaps. A toasted roll gives you structure, which matters because this one gets juicy fast.
Key Ingredients:
- 12 meatballs, cooked — homemade or store-bought.
- 1 cup marinara sauce — thick enough to coat.
- 2 sub rolls — split.
- 8 oz mozzarella, shredded or sliced.
- 1 tablespoon grated Parmesan — optional.
- 1 tablespoon butter — for toasting the rolls.
Quick Steps:
- Warm the meatballs in marinara over low heat.
- Toast the rolls cut-side down in a skillet with a little butter.
- Fill with meatballs and sauce, then top with mozzarella.
- Broil or cover until the cheese melts.
Equipment for This Recipe:
- Skillet — for sauce and meatballs.
- Baking sheet — for melting cheese.
- Tongs — to move hot rolls safely.
How to Serve This Dish:
Serve hot with napkins. Plenty of them. A crunchy salad or chips helps offset the sauce, which is half the point.
Pro Tips for This Recipe:
- Use thick marinara, not thin pasta sauce.
- Don’t drown the roll; spoon just enough sauce to coat.
- Let the cheese melt fully before moving the sandwich.
Variations on This Dish:
- Spicy Meatball Sub: add red pepper flakes to the sauce.
- Provolone Sub: swap mozzarella for provolone and broil a touch longer.
Common Mistakes to Avoid with This Dish:
- Cold meatballs in a sandwich: the cheese never melts right.
- Thin rolls: they collapse under the sauce.
17. Greek Chicken Pita Sandwiches
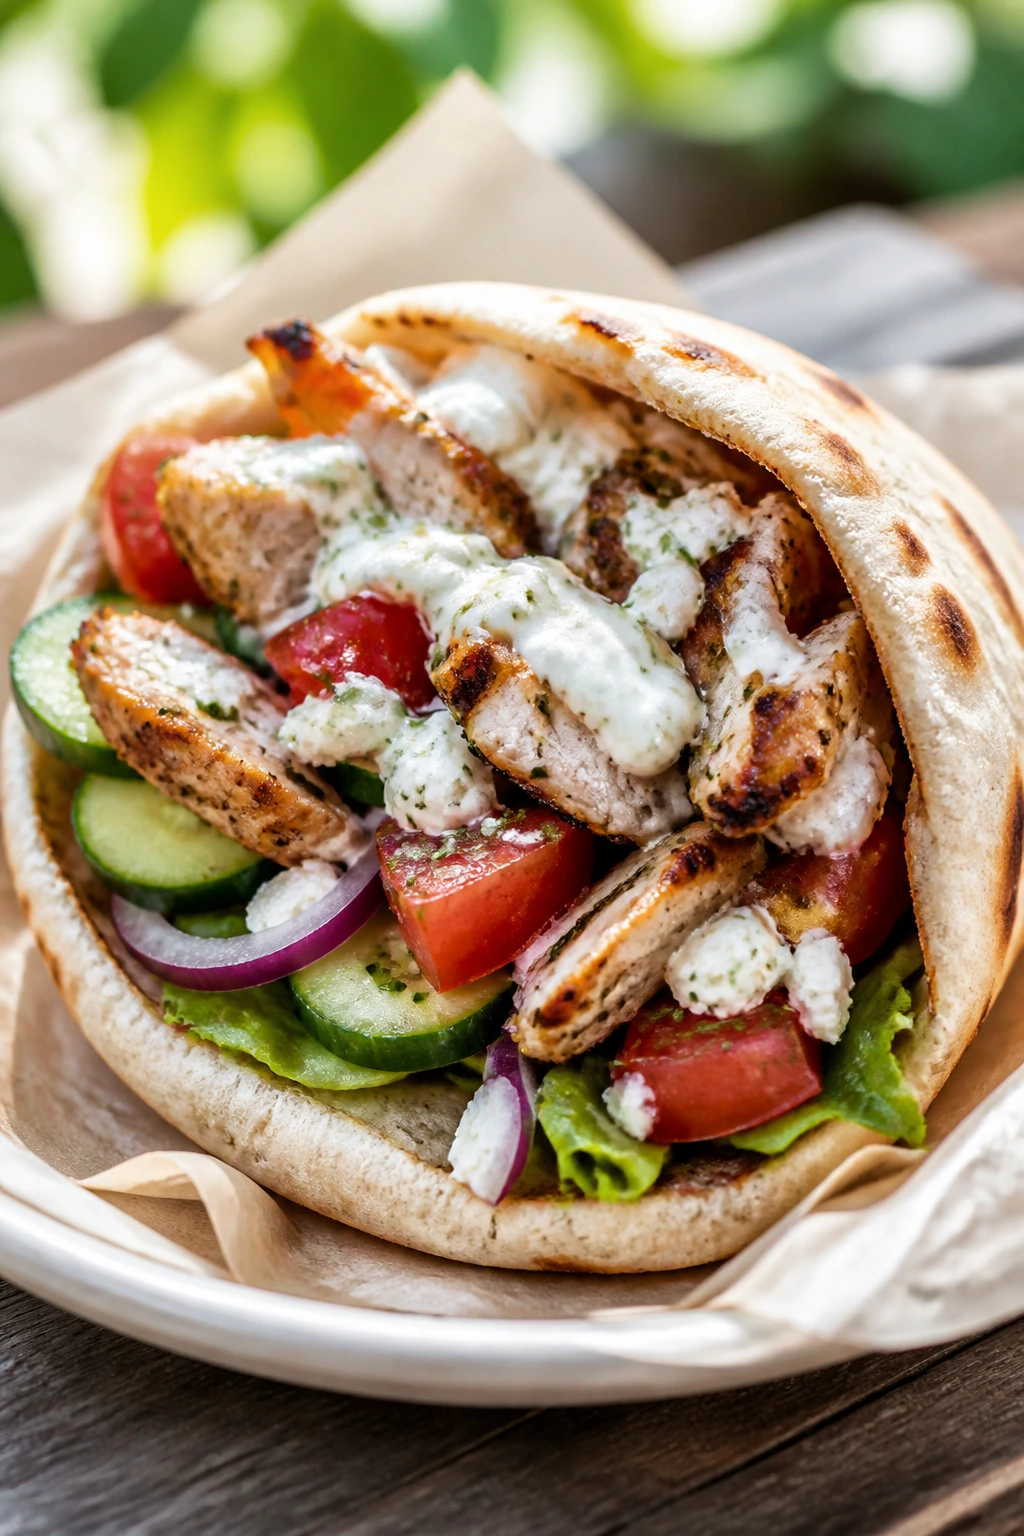
If you like grilled chicken with bright, briny toppings, this is one to keep in rotation. It tastes fresh, but it still eats like a meal.
Why It Works:
Chicken with lemon and oregano feels built for outdoor eating. The cucumber, tomato, and feta stay crisp and cool against the warm meat, and the pita keeps every bite contained.
Key Ingredients:
- 2 cups cooked chicken, sliced or chopped — seasoned with lemon and oregano.
- 4 pita rounds — warm them briefly.
- 1/2 cup diced cucumber and tomato — drained.
- 1/4 cup crumbled feta — salty and creamy.
- 1/4 cup tzatziki — for the base.
Quick Steps:
- Warm the pita for 20 seconds.
- Spread tzatziki inside each pocket.
- Add chicken, cucumber, tomato, and feta.
- Wrap in parchment and serve.
Equipment for This Recipe:
- Knife and cutting board — for the vegetables.
- Spoon — for the tzatziki.
- Parchment — for easy transport.
How to Serve This Dish:
Serve with olives, grapes, or a lemony potato salad. These are good cold, but they’re even better if the chicken is just barely warm.
Pro Tips for This Recipe:
- Salt the cucumber lightly and blot it dry.
- Don’t overload the pita or it splits.
- Add herbs at the end for a brighter finish.
Variations on This Dish:
- Gyro-Style Chicken: add a little garlic and red onion.
- Vegan Greek Pita: swap in roasted chickpeas and extra tzatziki-style sauce.
Common Mistakes to Avoid with This Dish:
- Wet vegetables: they slide right out.
- Using pita that’s too cold: it cracks when opened.
18. Jerk Chicken Sandwiches with Pineapple Slaw
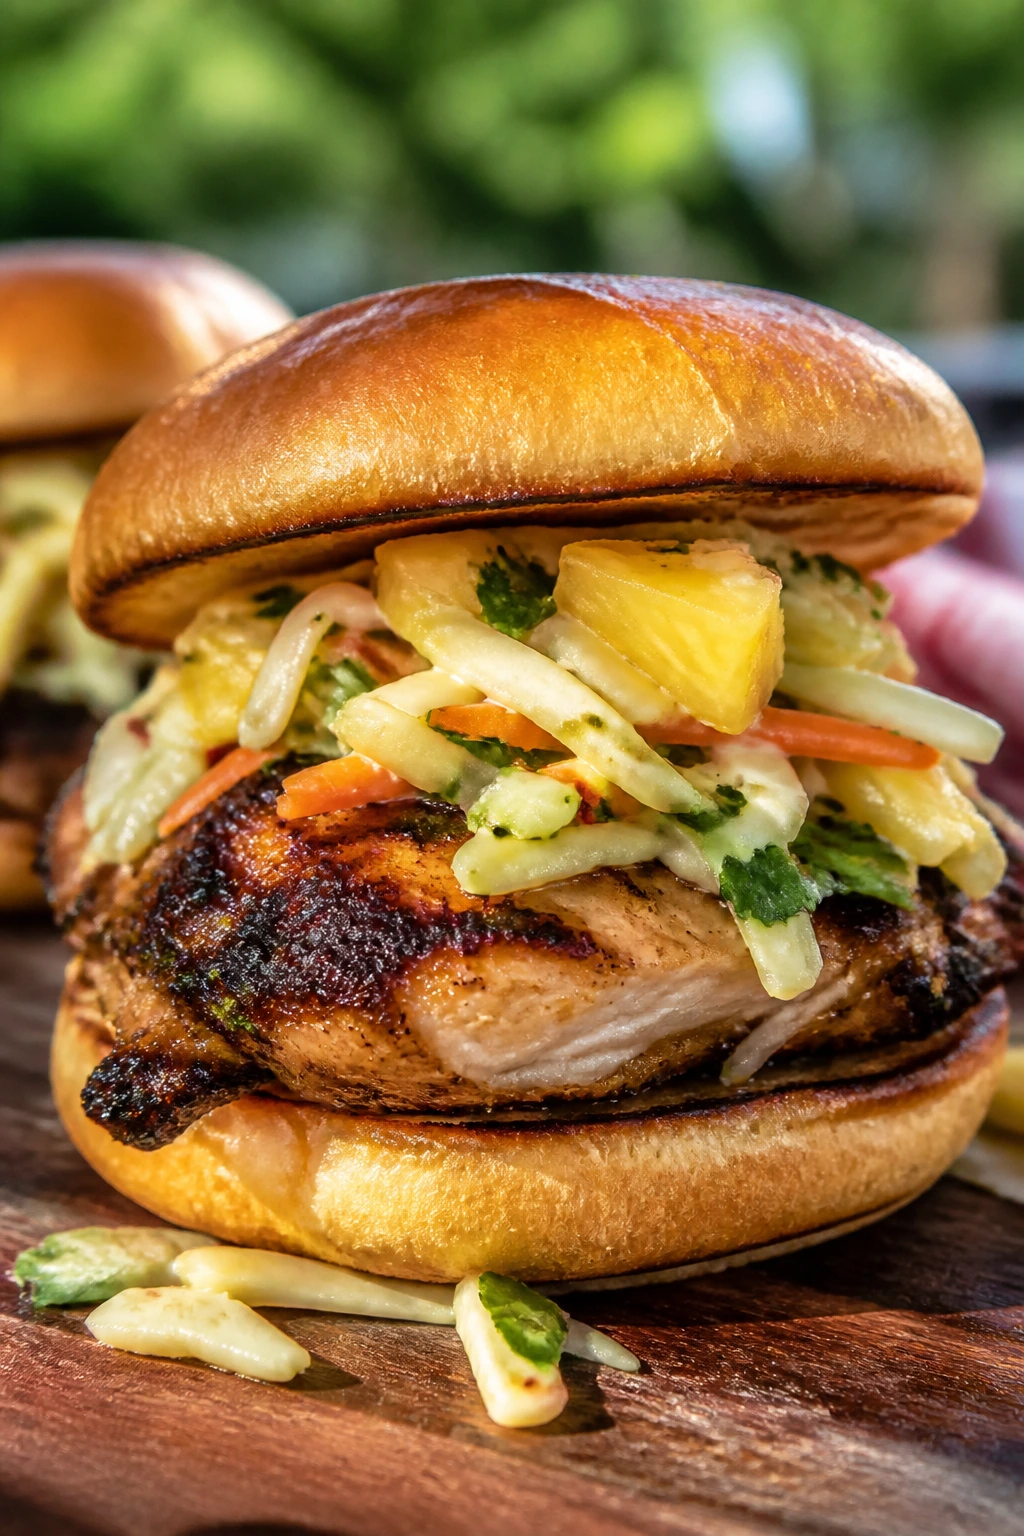
This one has heat, sweetness, and crunch in all the right places. It’s the sandwich I reach for when the rest of the spread leans too safe.
Why It Works:
Jerk seasoning brings allspice, thyme, and a little chili heat, which plays nicely with pineapple slaw. A sturdy roll or bun is important because the filling has enough juice to ask for help.
Key Ingredients:
- 2 cups cooked jerk chicken, sliced or shredded.
- 4 sandwich buns — toasted.
- 1 cup pineapple slaw — cabbage, pineapple, lime, salt.
- 2 tablespoons mayo or yogurt — optional binder.
- 1 tablespoon lime juice — for brightness.
Quick Steps:
- Warm the chicken gently in a skillet.
- Toast the buns cut-side down.
- Layer chicken and pineapple slaw on the bottom bun.
- Close and serve immediately.
Equipment for This Recipe:
- Skillet — for reheating.
- Knife — for slicing chicken if needed.
- Mixing bowl — for slaw.
How to Serve This Dish:
Serve with plantain chips or plain kettle chips. A cold drink helps, because jerk heat tends to build after the second bite.
Pro Tips for This Recipe:
- Keep the slaw crunchy, not wet.
- Add lime juice at the end so the pineapple stays bright.
- Toast the buns well or they soften fast.
Variations on This Dish:
- Milder Jerk Chicken: cut the spice with extra yogurt.
- Pineapple-Only Chicken Sandwich: skip the slaw and add grilled pineapple rings.
Common Mistakes to Avoid with This Dish:
- Too much slaw dressing: it drips everywhere.
- Overheating the chicken: it dries out fast.
19. Bacon, Avocado, and Tomato Sandwiches
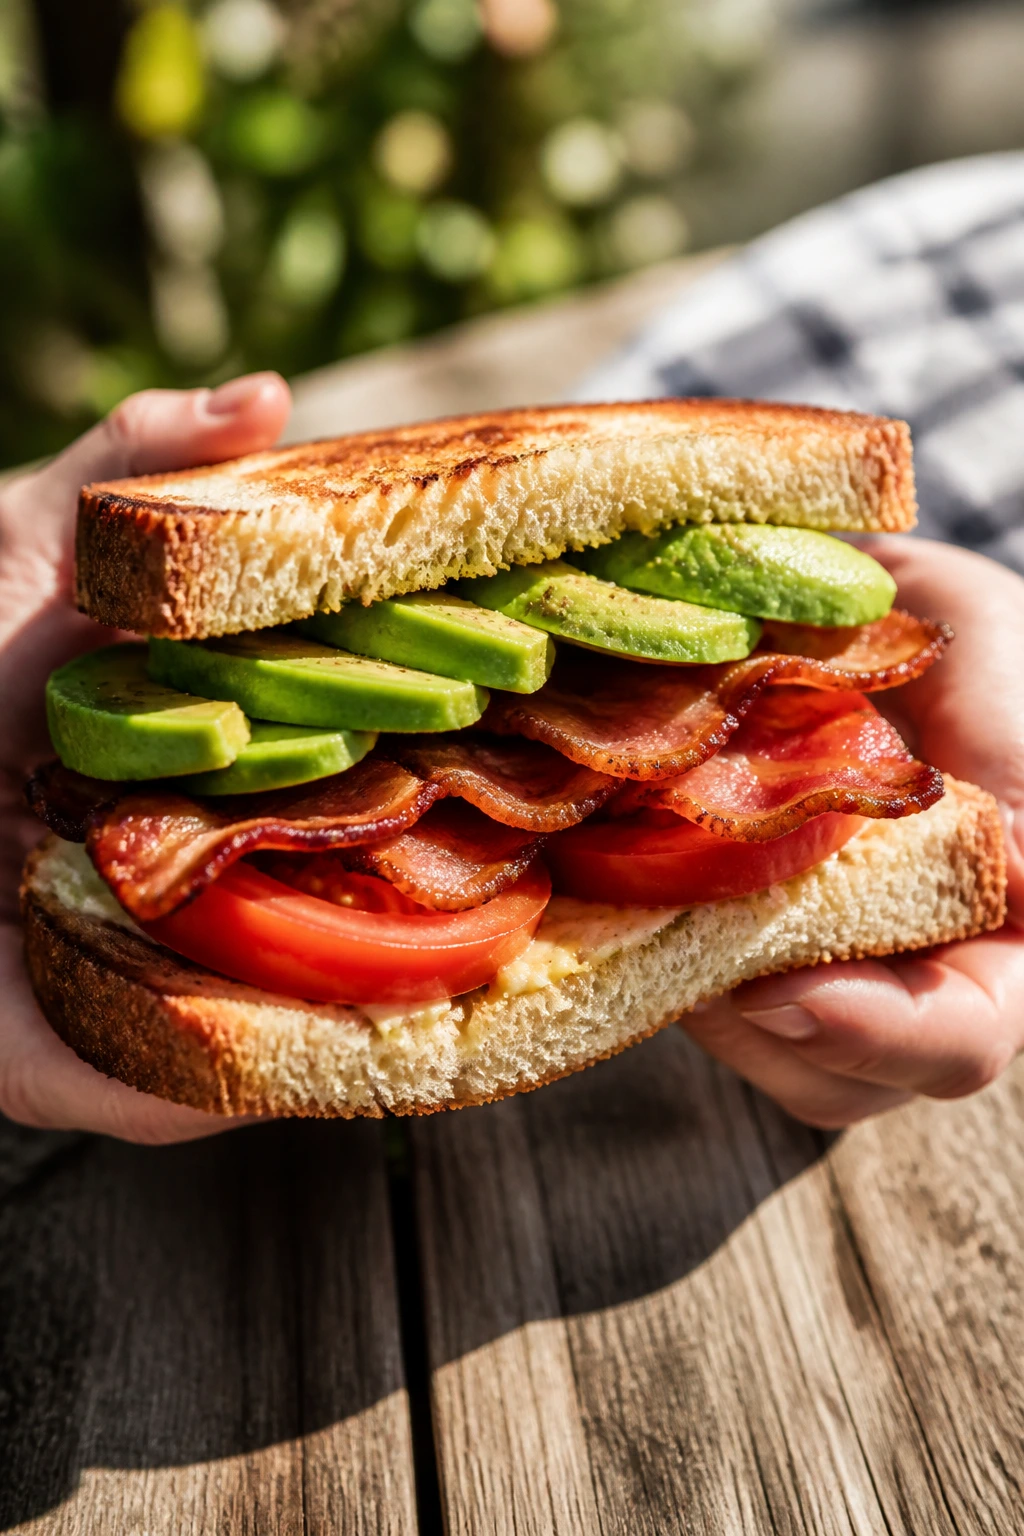
This is a softer, richer cousin of the BLT. The avocado brings creaminess, the bacon brings salt, and the tomato still needs to be treated like it matters.
Why It Works:
Avocado fills the gap where extra mayo would normally go, which gives the sandwich a smoother texture. A sturdy bread slice or bun helps because avocado likes to smear if the bread is too thin.
Key Ingredients:
- 8 slices sturdy sandwich bread — toasted or not.
- 6 slices bacon — cooked crisp.
- 1 avocado, sliced — just ripe.
- 1 tomato, sliced and blotted dry.
- 2 tablespoons mayonnaise — optional.
- Pinch of salt and pepper.
Quick Steps:
- Toast the bread lightly if using soft slices.
- Spread mayo, then layer tomato, avocado, and bacon.
- Season with salt and pepper.
- Close, press gently, and cut.
Equipment for This Recipe:
- Skillet — for bacon.
- Serrated knife — for bread and tomato.
- Paper towels — for draining.
How to Serve This Dish:
Serve with chips and a little citrusy slaw. These sandwiches are best eaten soon after assembly so the avocado stays fresh-looking.
Pro Tips for This Recipe:
- Use avocado that gives slightly at the stem end.
- Salt the tomato lightly before assembling.
- Crisp bacon makes the texture worth it.
Variations on This Dish:
- Chipotle Avocado Sandwich: add chipotle mayo.
- Egg Bacon Avocado: add a sliced hard-boiled egg.
Common Mistakes to Avoid with This Dish:
- Using underripe avocado: the texture feels chalky.
- Packing it too early: avocado can discolor and smear.
20. Grilled Zucchini and Mozzarella Panini
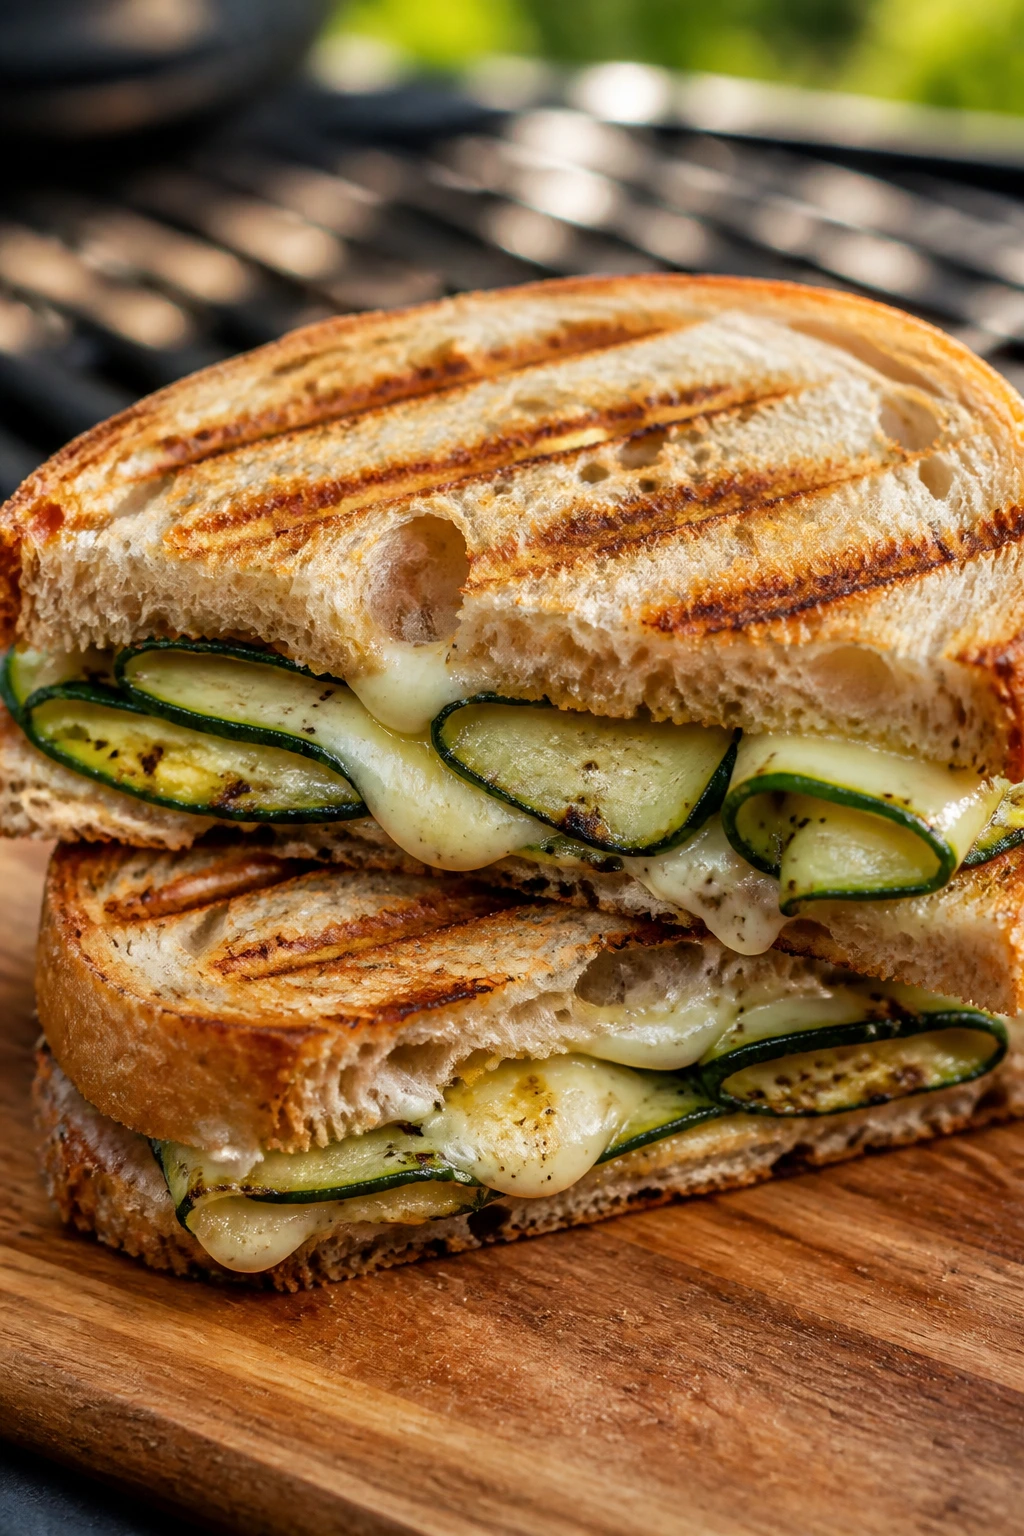
This is the sandwich I make when the grill is already hot and there’s zucchini sitting on the counter. It eats like a warm vegetable stack, but it still feels like a proper sandwich.
Why It Works:
Grilled zucchini goes soft and savory without getting watery if you salt it lightly first. Mozzarella melts into the gaps, and pressing the sandwich seals everything together so it doesn’t wander off the bread.
Key Ingredients:
- 2 zucchini, sliced lengthwise — about 1/4-inch thick.
- 4 slices mozzarella — or 1 cup shredded.
- 4 slices ciabatta or focaccia — sturdy bread.
- 1 tablespoon olive oil — for grilling.
- 2 tablespoons basil pesto — optional but good.
Quick Steps:
- Brush zucchini with oil and grill 2 to 3 minutes per side.
- Assemble with pesto, zucchini, and mozzarella.
- Press in a panini press or skillet with a heavy pan on top.
- Cook until the bread is crisp and the cheese melts.
Equipment for This Recipe:
- Grill or grill pan — for the zucchini.
- Panini press or cast-iron skillet — for pressing.
- Spatula — for turning.
How to Serve This Dish:
Cut into thirds and serve warm with tomatoes or a green salad. It is one of the few sandwiches here that wants to be eaten while the cheese is still soft.
Pro Tips for This Recipe:
- Salt zucchini lightly and pat dry before grilling.
- Don’t overfill or the bread splits under pressure.
- A little pesto keeps the vegetables from tasting flat.
Variations on This Dish:
- Add Roasted Peppers: they bring sweetness.
- Goat Cheese Version: swap mozzarella for goat cheese if you want more tang.
Common Mistakes to Avoid with This Dish:
- Using raw zucchini: it gets watery and bland.
- Pressing too hard: the filling squeezes out.
21. Pepperoni Pizza Subs

These taste like a pizza slice dressed as a sandwich, which is exactly the point. They’re fast, familiar, and almost unfairly easy to make in bulk.
Why It Works:
Pizza flavor is mostly about tomato sauce, melted cheese, and something salty on top. Pepperoni gives you the salt, mozzarella gives you the pull, and a toasted roll keeps the sauce from soaking through.
Key Ingredients:
- 2 sub rolls — split.
- 1/2 cup pizza sauce — thick.
- 20 slices pepperoni — or more if you like it crowded.
- 1 cup shredded mozzarella — full melt.
- 1 tablespoon grated Parmesan — optional.
- Pinch of oregano.
Quick Steps:
- Toast the rolls lightly.
- Spread with pizza sauce.
- Layer pepperoni and mozzarella, then sprinkle oregano and Parmesan.
- Broil or cover until the cheese melts.
Equipment for This Recipe:
- Baking sheet — for broiling.
- Spoon — for sauce.
- Knife — for splitting rolls.
How to Serve This Dish:
Serve with extra napkins and maybe a bowl of olives. These are best hot, but they still work in a foil wrap for short transport.
Pro Tips for This Recipe:
- Use thick sauce or the bread turns soggy.
- Layer pepperoni under the cheese and on top for a better melt.
- A light toast before adding sauce helps a lot.
Variations on This Dish:
- Supreme Sub: add sautéed peppers and onions.
- Spicy Pepperoni: use hot pepperoni or a pinch of chili flakes.
Common Mistakes to Avoid with This Dish:
- Too much sauce: the roll gets mushy.
- Skipping the broil: the sandwich feels flat.
22. Turkey, Brie, and Cranberry Sandwiches
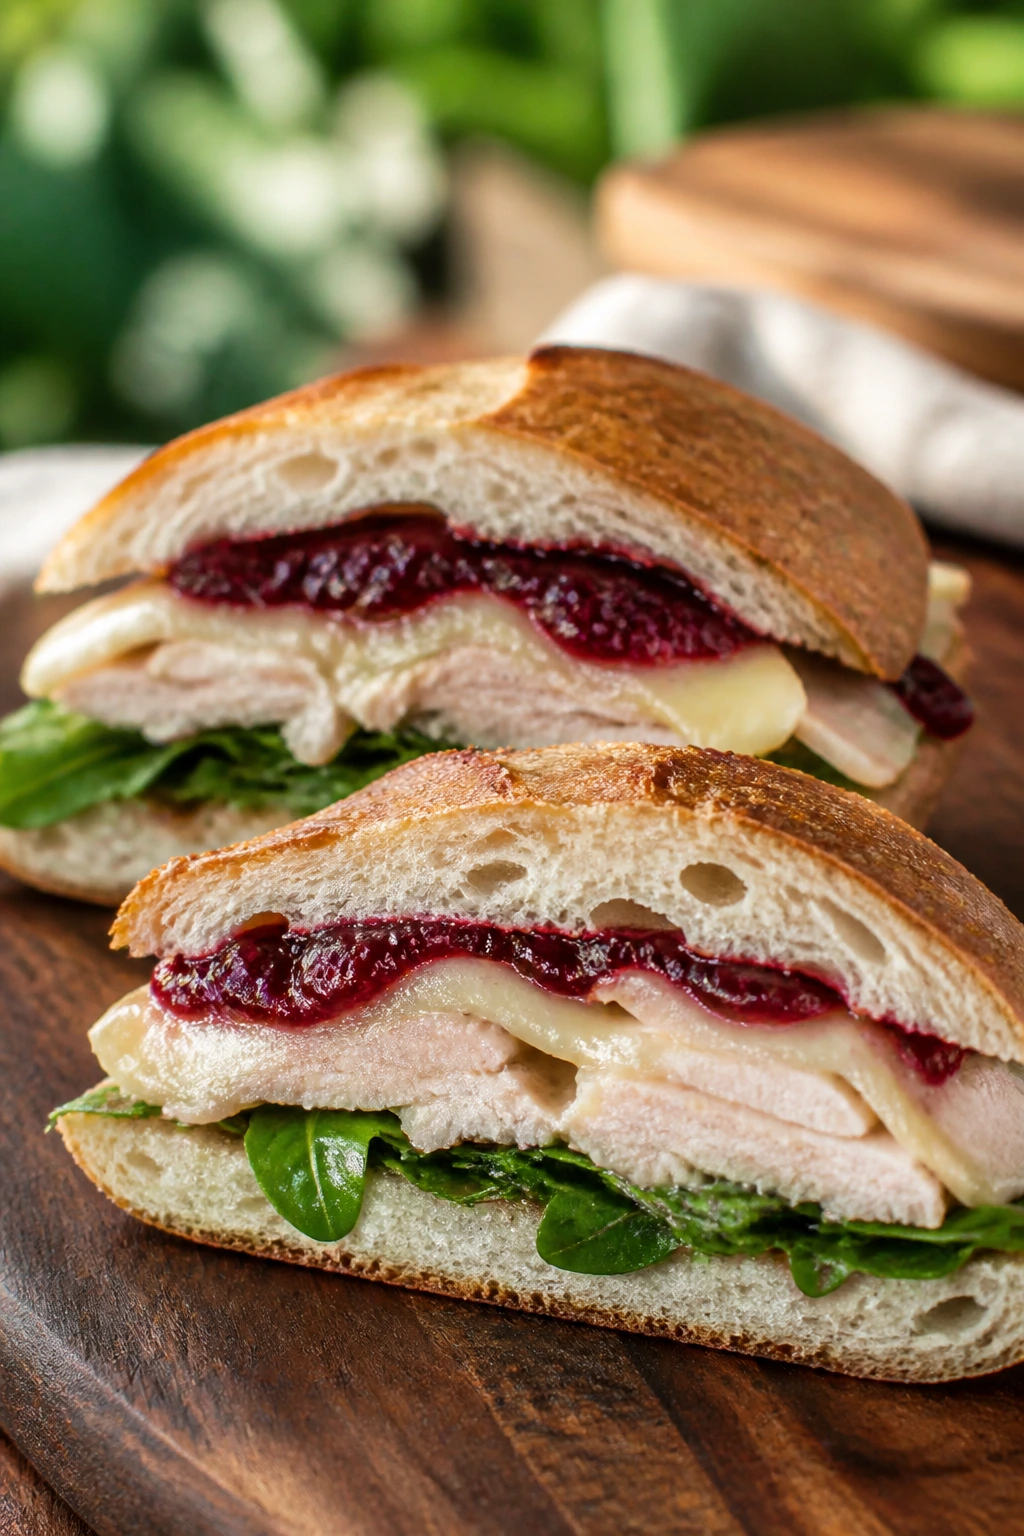
This one leans a little sweet, a little rich, and a little sharp from the cranberry. It feels like a holiday sandwich, but it works just fine at a cookout.
Why It Works:
Brie melts softly and pairs well with turkey because it adds fat without much salt. Cranberry sauce cuts through that richness, and a crusty roll keeps the filling from smearing out when you bite into it.
Key Ingredients:
- 8 oz sliced turkey — deli or leftover roasted.
- 4 oz Brie, sliced — rind optional.
- 1/4 cup cranberry sauce — not too runny.
- 2 sandwich rolls or baguette pieces — split.
- Handful of arugula — optional.
Quick Steps:
- Toast the rolls lightly.
- Spread cranberry sauce on one side.
- Layer turkey, Brie, and arugula.
- Close and serve warm or room temp.
Equipment for This Recipe:
- Serrated knife — for bread.
- Baking sheet — if you want to melt the Brie slightly.
- Small spoon — for cranberry sauce.
How to Serve This Dish:
Cut into smaller pieces if you’re serving a mixed sandwich tray. It goes well with chips, grapes, or a crisp green salad.
Pro Tips for This Recipe:
- Use a thin layer of cranberry sauce; too much makes the bread slippery.
- Warm the Brie just enough to soften it.
- Arugula gives the sandwich a peppery edge.
Variations on This Dish:
- Apple-Brie Turkey: add thin apple slices instead of cranberry.
- Hot Melty Version: broil for a minute so the cheese softens more.
Common Mistakes to Avoid with This Dish:
- Using a very wet cranberry sauce: it leaks through.
- Packing too much Brie: the texture becomes heavy.
23. Buffalo Chicken Ranch Wraps
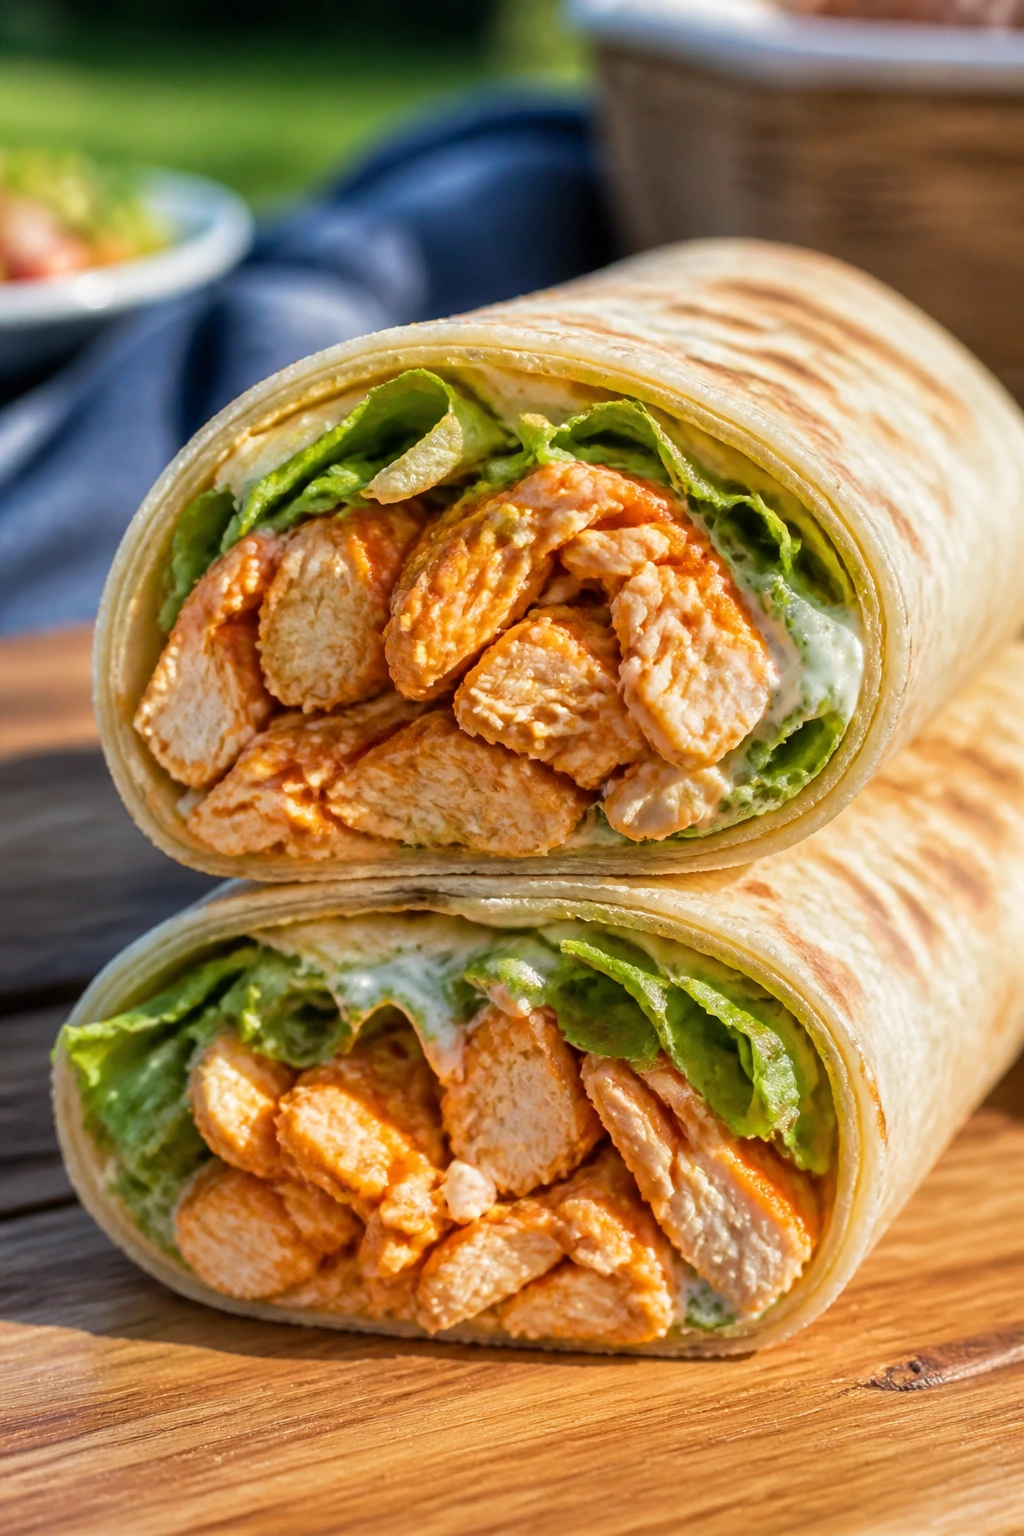
These are messy in the right way. Spicy chicken, cool ranch, and crisp lettuce inside a wrap that can be rolled tight and cut cleanly—that’s why they show up at outdoor lunches again and again.
Why It Works:
Buffalo sauce gives the chicken a sharp, vinegary burn, while ranch pulls it back toward creamy. A wrap contains the filling better than bread when you want heat without drips.
Key Ingredients:
- 2 cups cooked chicken, shredded.
- 1/3 cup buffalo sauce — adjust to heat level.
- 1/4 cup ranch dressing — for cooling.
- 2 large flour tortillas — burrito size.
- 1 cup shredded lettuce — crisp and dry.
- 1/2 cup shredded cheddar — optional but good.
Quick Steps:
- Toss chicken with buffalo sauce.
- Lay tortillas flat and spread with ranch.
- Add chicken, lettuce, and cheddar, then roll tightly.
- Chill 10 minutes before slicing if you want cleaner cuts.
Equipment for This Recipe:
- Mixing bowl — for the chicken.
- Cutting board — for rolling.
- Sharp knife — for slicing cleanly.
How to Serve This Dish:
Serve with celery sticks or chips. These are best slightly chilled, which makes them ideal for cooler bags.
Pro Tips for This Recipe:
- Don’t overfill the tortilla or it tears.
- Let the sauced chicken cool a little before rolling.
- Wrap tightly in parchment before packing.
Variations on This Dish:
- Blue Cheese Buffalo Wrap: swap ranch for blue cheese dressing.
- Crunchy Buffalo Wrap: add shredded carrots and extra lettuce.
Common Mistakes to Avoid with This Dish:
- Using wet chicken: the wrap slips apart.
- Rolling loosely: the filling falls out after the first bite.
24. Falafel Pitas with Tahini Slaw
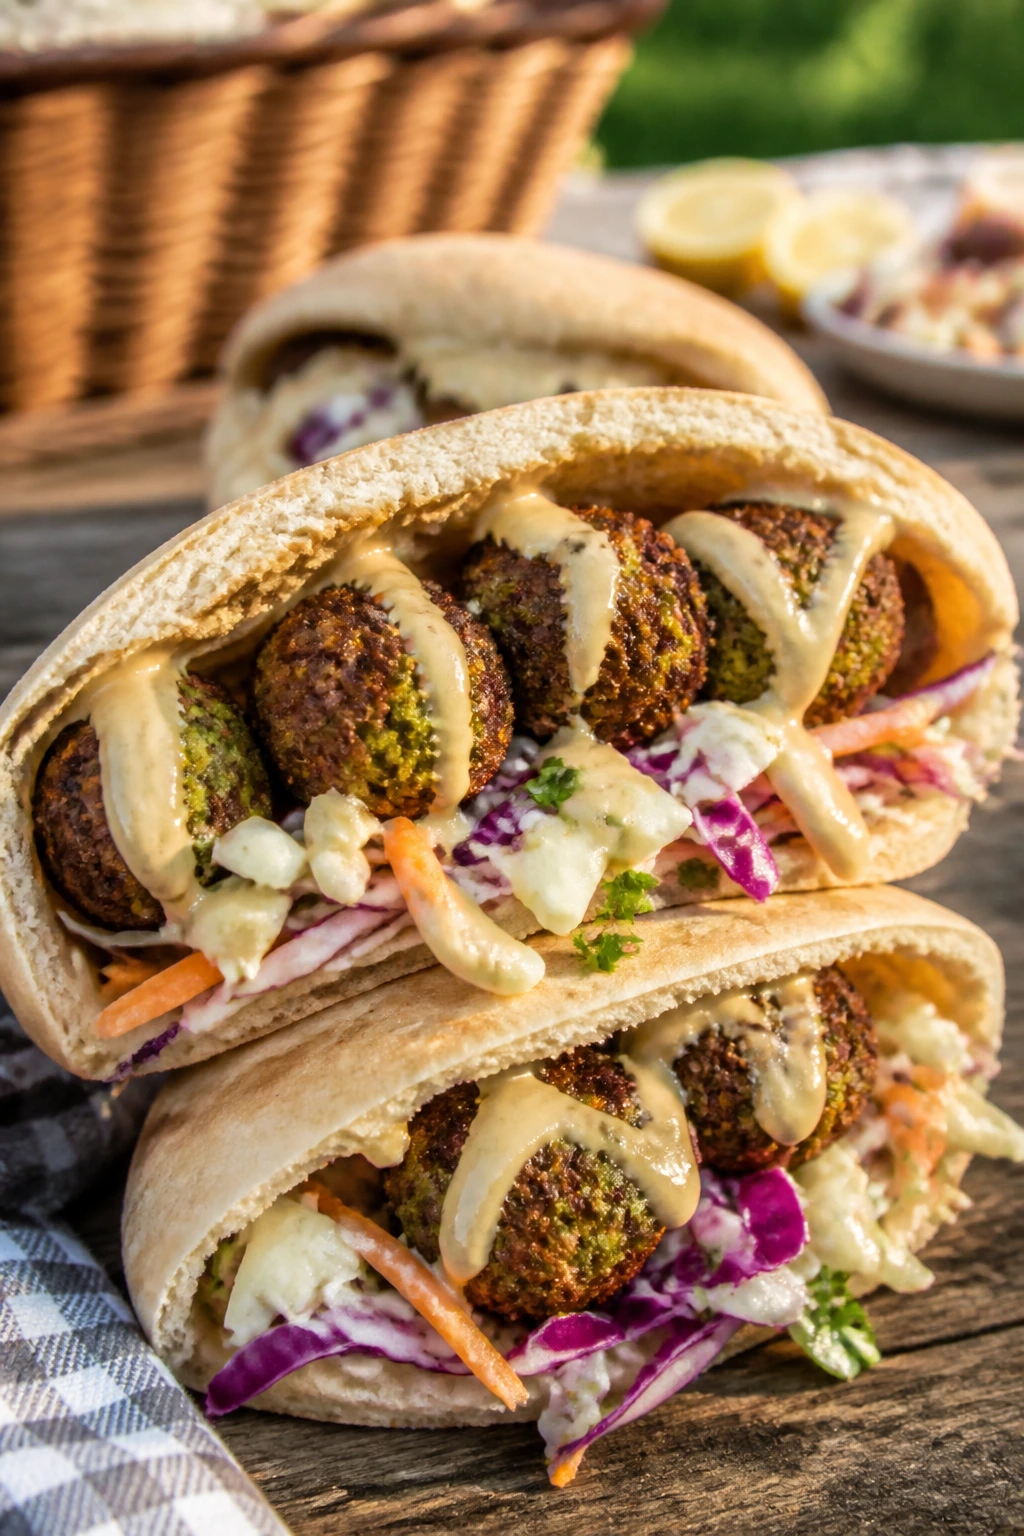
Falafel in a pita is one of those sandwiches that feels sturdy and bright at the same time. The chickpea balls bring crunch, and the slaw keeps the pita from drying out.
Why It Works:
Falafel gives you a crisp, savory core that does not need meat to feel substantial. Tahini adds nuttiness, and the cabbage slaw brings crunch and moisture in a form that doesn’t flood the bread.
Key Ingredients:
- 8 falafel patties or balls, cooked.
- 4 pita rounds — warmed.
- 1/2 cup shredded cabbage slaw — lightly dressed.
- 1/4 cup tahini sauce — thin enough to drizzle.
- 1/4 cup diced cucumber — optional.
- Lemon juice, salt, and pepper.
Quick Steps:
- Warm the pita rounds for 20 seconds.
- Drizzle tahini sauce inside each pocket.
- Add falafel, slaw, and cucumber.
- Wrap and serve.
Equipment for This Recipe:
- Baking sheet or skillet — for reheating falafel.
- Knife — for cucumber and slaw prep.
- Spoon — for tahini sauce.
How to Serve This Dish:
Serve with olives, pickled onions, or a tomato salad. They’re filling enough to stand alone if the falafel is crisp.
Pro Tips for This Recipe:
- Reheat falafel until the outside feels dry and crisp again.
- Keep the slaw lightly dressed.
- Warm the pita so it opens without cracking.
Variations on This Dish:
- Harissa Falafel: add harissa to the tahini.
- Extra Herb Falafel: stuff in parsley and mint.
Common Mistakes to Avoid with This Dish:
- Packing falafel straight from the fridge: it tastes dull and firm.
- Using too much sauce: the pita softens fast.
25. Turkey Pesto Mozzarella Panini
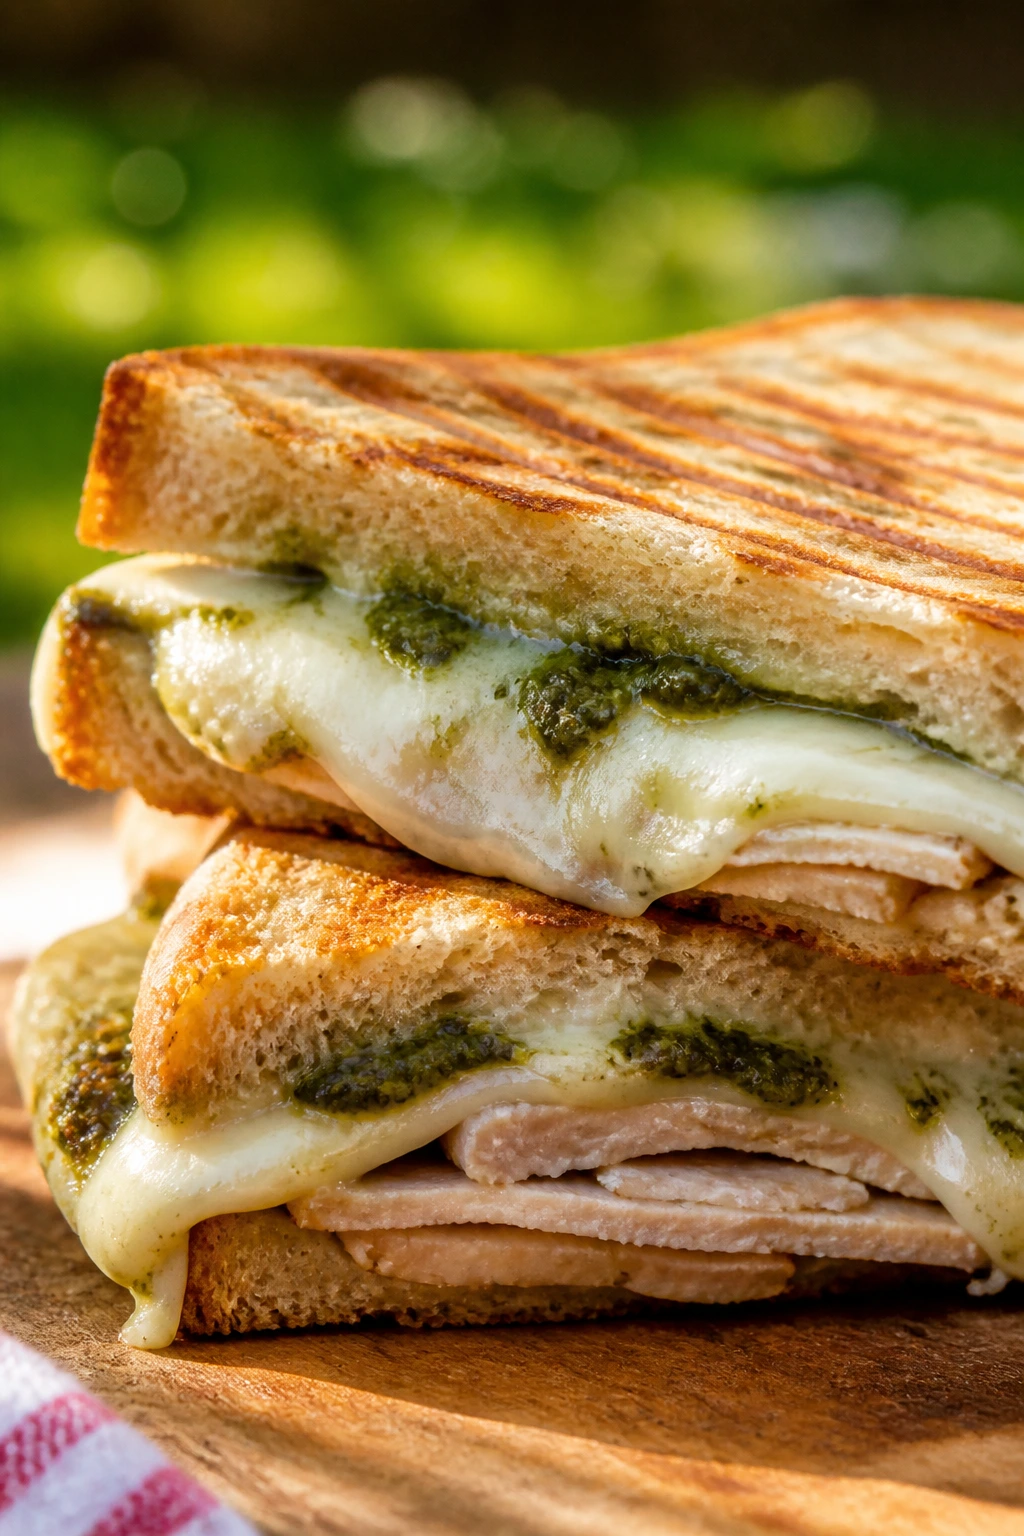
This sandwich is all about that melted middle. Turkey, pesto, and mozzarella are simple pieces, but when they’re pressed hot, they taste like more than the sum of the parts.
Why It Works:
Pesto keeps the turkey from tasting dry, and mozzarella gives you the stretchy, milky middle that makes a pressed sandwich feel worth the skillet time. Ciabatta or sourdough handles the heat without collapsing.
Key Ingredients:
- 8 oz sliced turkey — thick enough to feel meaty.
- 4 slices mozzarella — or 1 cup shredded.
- 2 tablespoons basil pesto — spread thinly.
- 4 slices sourdough or ciabatta.
- 1 tablespoon butter or olive oil — for the outside.
Quick Steps:
- Spread pesto on the inside of the bread.
- Layer turkey and mozzarella.
- Butter the outside of the bread.
- Press in a skillet or press until crisp and melted.
Equipment for This Recipe:
- Cast-iron skillet or panini press — for pressing.
- Spatula — to flip if using a skillet.
- Brush or knife — for buttering.
How to Serve This Dish:
Cut in half and serve warm with chips or a tomato salad. This one tastes best the minute the cheese settles from molten to soft.
Pro Tips for This Recipe:
- Use a thin pesto layer; too much makes the bread greasy.
- Press on medium heat so the bread browns before the cheese leaks out.
- Let it rest for 1 minute before slicing.
Variations on This Dish:
- Tomato Pesto Panini: add thin tomato slices, blotted dry.
- Turkey Melt with Provolone: swap mozzarella for provolone.
Common Mistakes to Avoid with This Dish:
- Heat too high: the bread burns before the cheese melts.
- Too much filling: the sandwich won’t press cleanly.
26. Ham Salad Croissants

Ham salad is one of those deli fillings that makes sense the second you taste it. It’s creamy, chopped fine, and a little tangy, which is exactly what a croissant likes.
Why It Works:
The texture is the whole appeal here. Chopped ham mixed with mayo, mustard, and relish spreads evenly, so every bite tastes the same. Croissants add butter and softness without needing any extra work.
Key Ingredients:
- 2 cups chopped cooked ham — finely chopped, not minced.
- 1/4 cup mayonnaise — binding.
- 1 tablespoon Dijon mustard — sharpens the flavor.
- 2 tablespoons sweet relish or chopped pickles — for tang.
- 4 croissants — split.
Quick Steps:
- Mix ham, mayo, mustard, relish, salt, and pepper.
- Chill 10 minutes.
- Split the croissants and spoon in the filling.
- Serve immediately or wrap for a short trip.
Equipment for This Recipe:
- Knife — for chopping ham.
- Mixing bowl — for the salad.
- Spoon — for filling the croissants.
How to Serve This Dish:
Serve with chips and sliced fruit. Ham salad also works nicely as a small sandwich on a larger platter because it’s rich without being heavy.
Pro Tips for This Recipe:
- Chop the ham evenly so the filling spreads smoothly.
- Use less mayo than you think; the ham should still show through.
- A little pickle juice can wake up the whole bowl.
Variations on This Dish:
- Spicy Ham Salad: add a pinch of cayenne.
- Herb Ham Salad: add chives and parsley.
Common Mistakes to Avoid with This Dish:
- Turning the ham into a paste: keep some texture.
- Overfilling croissants: they split at the seam.
27. Shrimp Po’ Boy Sandwiches

Shrimp po’ boys bring crunch, spice, and a little coastal energy to the cookout table. They’re best when the shrimp is crisp and the bread has enough structure to keep up.
Why It Works:
Crispy shrimp gives you a hot, crunchy middle, while lettuce and tomato add the cool contrast. A po’ boy roll or French bread with a soft inside and firm crust is the right kind of bread here.
Key Ingredients:
- 1 lb shrimp, peeled and deveined — medium size.
- 1 cup flour or cornmeal coating — seasoned.
- 2 po’ boy rolls or baguette pieces — split.
- 1/2 cup shredded lettuce — crisp.
- 1 tomato, sliced and blotted dry.
- Remoulade or mayonnaise — about 1/4 cup.
Quick Steps:
- Coat and fry or air-fry the shrimp until crisp and opaque.
- Toast the bread lightly.
- Spread remoulade, then add lettuce, shrimp, and tomato.
- Serve right away.
Equipment for This Recipe:
- Skillet or air fryer — for shrimp.
- Slotted spoon — if frying.
- Paper towels — for draining.
How to Serve This Dish:
Serve with lemon wedges and fries or chips. These are best hot, while the shrimp still has crunch.
Pro Tips for This Recipe:
- Dry the shrimp well before coating.
- Keep the tomato dry so it doesn’t water the bread.
- Serve immediately after assembling.
Variations on This Dish:
- Spicy Shrimp Po’ Boy: add cayenne to the coating.
- Blackened Shrimp: skip breading and use spice-rubbed shrimp instead.
Common Mistakes to Avoid with This Dish:
- Letting fried shrimp sit too long: it loses crispness.
- Using soft sandwich bread: it can’t hold the filling.
28. Roast Turkey, Cheddar, and Apple Sandwiches
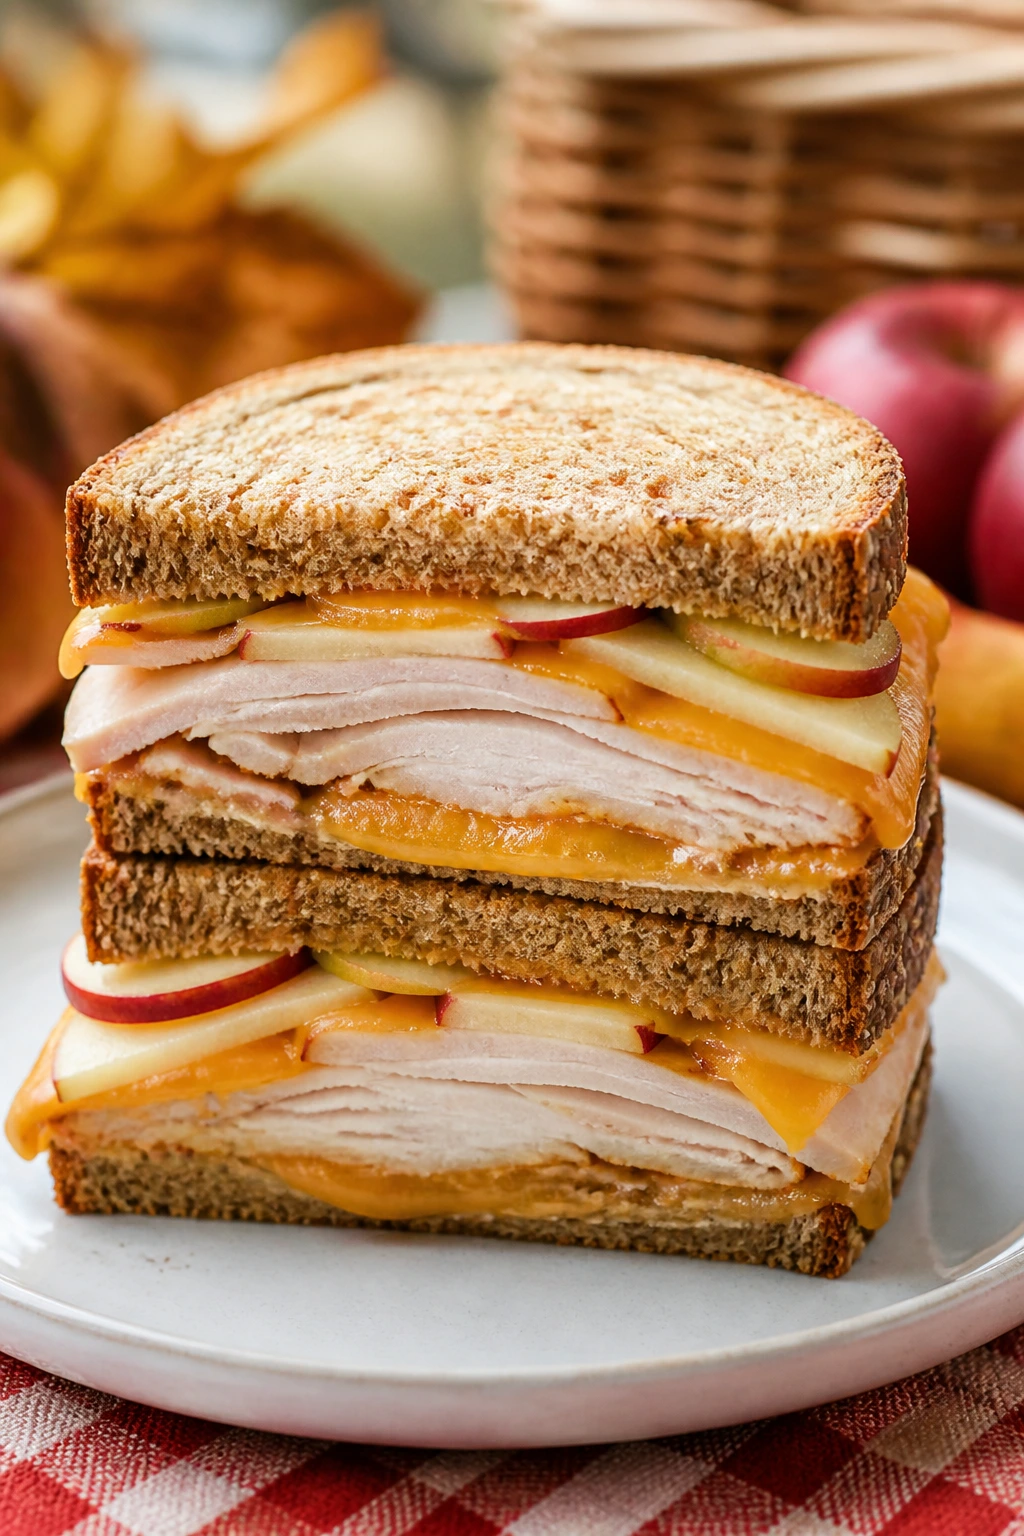
This is the crunchy-salty-sweet combination that never gets old. The apple gives freshness, cheddar brings bite, and turkey keeps the whole thing grounded.
Why It Works:
Cheddar and apple are a classic pair for a reason: the cheese sharpens the fruit, and the fruit keeps the sandwich from feeling dry. A sturdy whole-grain bread makes the filling taste even more structured.
Key Ingredients:
- 8 oz sliced roast turkey — leftover or deli.
- 4 slices sharp cheddar — thinly sliced.
- 1 apple, thinly sliced — crisp varieties like Honeycrisp work well.
- 4 slices whole-grain bread — toasted if desired.
- 2 tablespoons mayonnaise or mustard — your choice.
Quick Steps:
- Toast the bread lightly if using soft slices.
- Spread mayo or mustard.
- Layer turkey, cheddar, and apple slices.
- Close and cut.
Equipment for This Recipe:
- Serrated knife — for bread and apple.
- Cutting board — for quick prep.
- Vegetable peeler — optional if you want peeled apple.
How to Serve This Dish:
Serve with chips or a green salad. It’s also one of the better sandwiches for packing because the apple stays crisp longer than tomato.
Pro Tips for This Recipe:
- Slice the apple thin so the sandwich closes well.
- A little mustard gives the sandwich more bite than mayo alone.
- Choose a firm apple, not a mealy one.
Variations on This Dish:
- Cranberry Turkey Cheddar: add a thin layer of cranberry sauce.
- Brie Apple Turkey: use brie instead of cheddar for a softer fill.
Common Mistakes to Avoid with This Dish:
- Using thick apple slices: they make the sandwich awkward.
- Skipping toast on soft bread: it can get limp.
29. Grilled Cheese with Tomato Jam
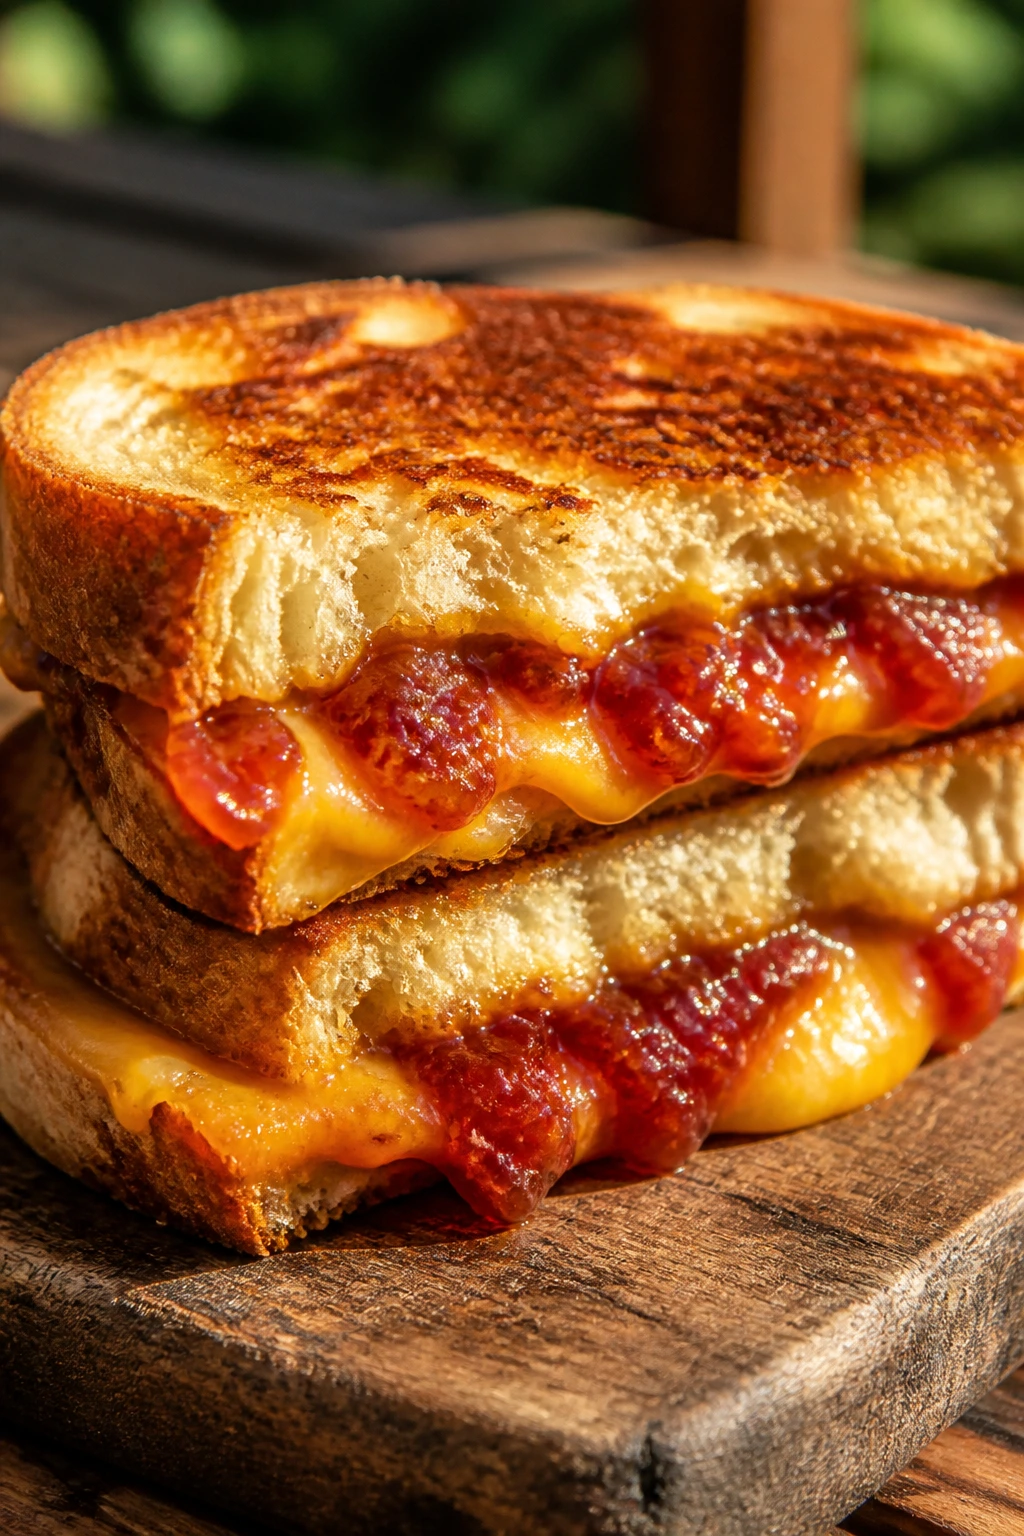
This is the grilled cheese that grew up a little. Tomato jam brings sweetness and acid, and the bread gets crisp enough to hold the molten cheese without losing its mind.
Why It Works:
Tomato jam gives you concentrated tomato flavor without the wetness of raw slices. That matters. You get the tomato note, but the bread stays crisp and the cheese still gets to do the melting.
Key Ingredients:
- 4 slices bread — sourdough or country loaf.
- 4 slices cheddar or American cheese — melty and dependable.
- 4 tablespoons tomato jam — homemade or store-bought.
- 2 tablespoons butter — for the skillet.
Quick Steps:
- Spread butter on the outside of the bread.
- Layer cheese and tomato jam on the inside.
- Cook in a skillet over medium heat for 3 to 4 minutes per side.
- Cook until the bread is golden and the cheese is melted.
Equipment for This Recipe:
- Skillet — cast iron is excellent here.
- Spatula — for flipping.
- Knife — for serving.
How to Serve This Dish:
Serve hot with a small bowl of soup or a crisp green salad if you’re making a lighter lunch spread. Cut into triangles and eat it right away.
Pro Tips for This Recipe:
- Keep the heat medium so the bread browns before the cheese burns.
- Tomato jam should be thick, not runny.
- Cover the pan for a minute if the cheese needs help melting.
Variations on This Dish:
- Bacon Tomato Jam Grilled Cheese: add crisp bacon.
- Sharp Cheddar Version: use extra-sharp cheddar for more bite.
Common Mistakes to Avoid with This Dish:
- Too much jam: it squeezes out.
- High heat: the bread chars before the center melts.
30. Hummus and Roasted Veggie Wraps
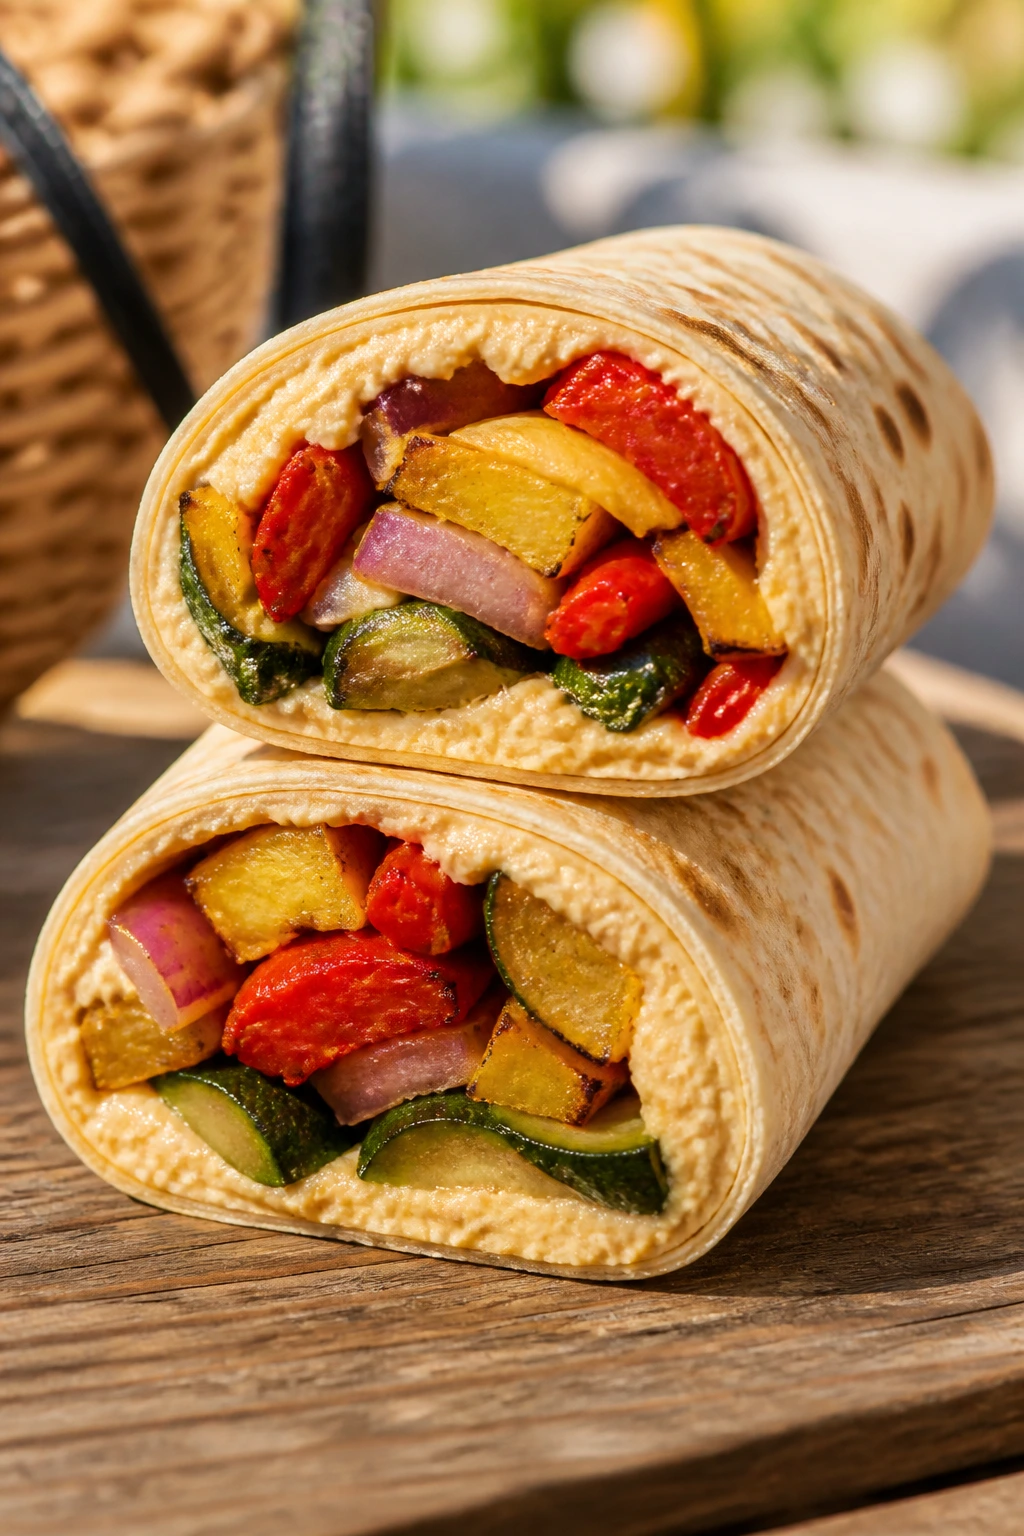
This is the wrap I make when the vegetable tray needs a purpose. Roasted vegetables bring sweetness, hummus brings body, and the tortilla keeps it all neat enough to travel.
Why It Works:
Roasted vegetables dry out a bit in the oven, which makes them better for wraps than raw, juicy ones. Hummus acts like a moisture barrier and a flavor base all at once.
Key Ingredients:
- 2 large tortillas — burrito size.
- 1/2 cup hummus — any flavor you like.
- 1 cup roasted vegetables — zucchini, peppers, onion.
- 1/2 cup spinach or lettuce — optional.
- 2 tablespoons crumbled feta — optional.
Quick Steps:
- Spread hummus over each tortilla.
- Add roasted vegetables, greens, and feta.
- Roll tightly, tucking in the sides.
- Slice in half if serving right away.
Equipment for This Recipe:
- Baking sheet — for roasting vegetables.
- Knife — for slicing.
- Parchment — for wrapping.
How to Serve This Dish:
Serve with olives or a little yogurt dip. These are good at room temperature, which makes them easy for cookout tables and cooler lunches.
Pro Tips for This Recipe:
- Roast vegetables until the edges brown a little.
- Let them cool before rolling or the tortilla softens too fast.
- Thin hummus spreads better than a stiff scoop.
Variations on This Dish:
- Spicy Hummus Wrap: use red pepper hummus.
- Falafel Hummus Wrap: add a couple of falafel balls for more heft.
Common Mistakes to Avoid with This Dish:
- Using wet vegetables: they make the wrap slippery.
- Overfilling: the tortilla tears when you roll it.
31. Philly Cheesesteak Hoagies
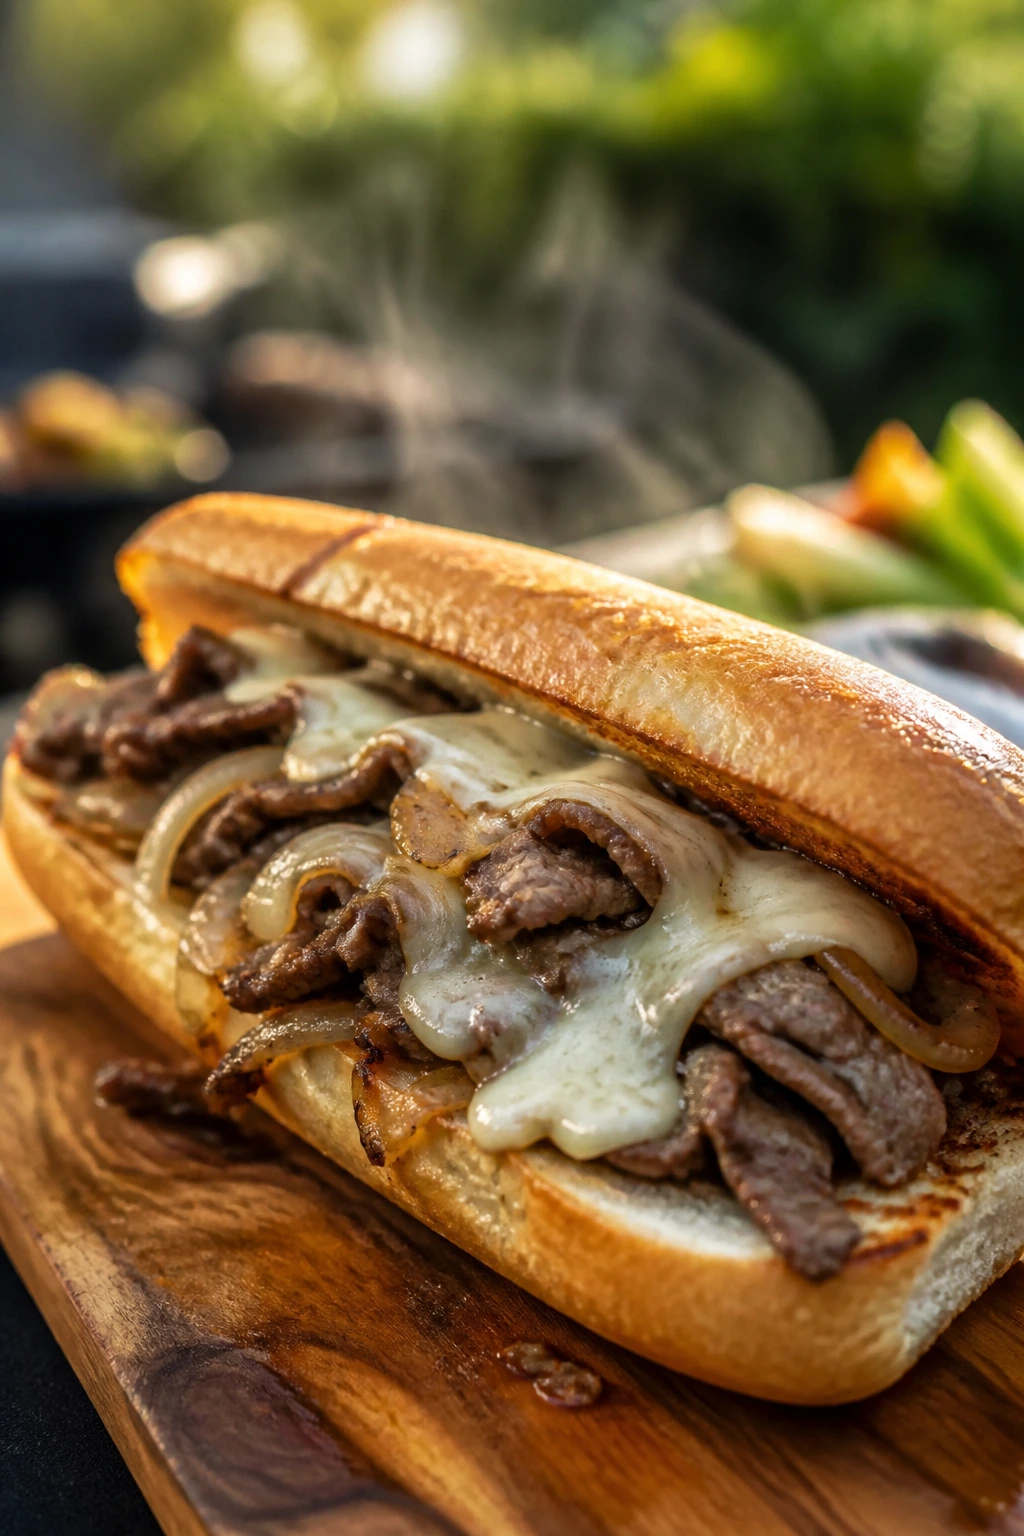
A good cheesesteak hoagie is hot, savory, and a little greasy in the exact way it should be. The bread needs enough strength to hold the beef and cheese without falling apart halfway through.
Why It Works:
Thin-sliced beef cooks fast, onions add sweetness, and provolone melts smoothly without turning stringy or heavy. The hoagie roll should be toasted lightly so it can handle the juices.
Key Ingredients:
- 1 lb thin-sliced beef — ribeye or shaved steak.
- 1 onion, sliced — cooked soft and golden.
- 4 slices provolone — or 1 cup shredded.
- 2 hoagie rolls — split.
- 1 tablespoon oil — for the skillet.
- Salt and pepper.
Quick Steps:
- Cook onions in oil until soft and lightly browned.
- Add beef and cook quickly over medium-high heat.
- Pile onto rolls, top with provolone, and melt.
- Close and serve hot.
Equipment for This Recipe:
- Large skillet or griddle — enough room to spread the beef.
- Spatula — for chopping and turning.
- Baking sheet — for melting the cheese.
How to Serve This Dish:
Serve hot with chips or fries. If you’re making a cookout spread, keep these wrapped in foil until the rest of the food is ready.
Pro Tips for This Recipe:
- Thin beef cooks fast; don’t overwork it.
- A little onion browning adds sweetness.
- Keep the roll toasted but not crunchy.
Variations on This Dish:
- Mushroom Cheesesteak: add sliced mushrooms with the onions.
- Pepper Cheesesteak: add bell peppers for more color and sweetness.
Common Mistakes to Avoid with This Dish:
- Overcooking the beef: it gets chewy.
- Using cold rolls: they make the sandwich feel limp.
32. Breakfast Egg and Bacon Sandwiches

If your cookout starts early, these belong on the table. They’re simple, filling, and built to be eaten with one hand while the coffee is still hot.
Why It Works:
Eggs bring soft texture, bacon brings salt, and cheese helps everything stay in one piece. An English muffin or biscuit is the right kind of bread because it soaks up yolk without disintegrating.
Key Ingredients:
- 4 eggs — scrambled or fried.
- 4 slices bacon — cooked crisp.
- 4 slices cheddar — or 1/2 cup shredded.
- 4 English muffins — split and toasted.
- Butter or mayo — for the inside.
Quick Steps:
- Cook the bacon and set it aside.
- Scramble or fry the eggs.
- Toast the muffins and add butter or mayo.
- Layer egg, bacon, and cheese, then close.
Equipment for This Recipe:
- Skillet — for eggs and bacon.
- Spatula — for turning eggs.
- Toaster — for muffins.
How to Serve This Dish:
Serve with fruit, hash browns, or a simple green salad if you’re doing brunch outdoors. They’re best hot, but they still travel decently in foil.
Pro Tips for This Recipe:
- Cook the eggs gently so they stay tender.
- Add cheese while the eggs are hot so it softens.
- Toast the muffins well for grip.
Variations on This Dish:
- Sausage Egg Sandwich: swap bacon for sausage patties.
- Veggie Breakfast Sandwich: add spinach and tomato.
Common Mistakes to Avoid with This Dish:
- Overcooked eggs: they turn rubbery.
- Assembling too early: the muffin softens.
33. Chicken Bacon Ranch Subs
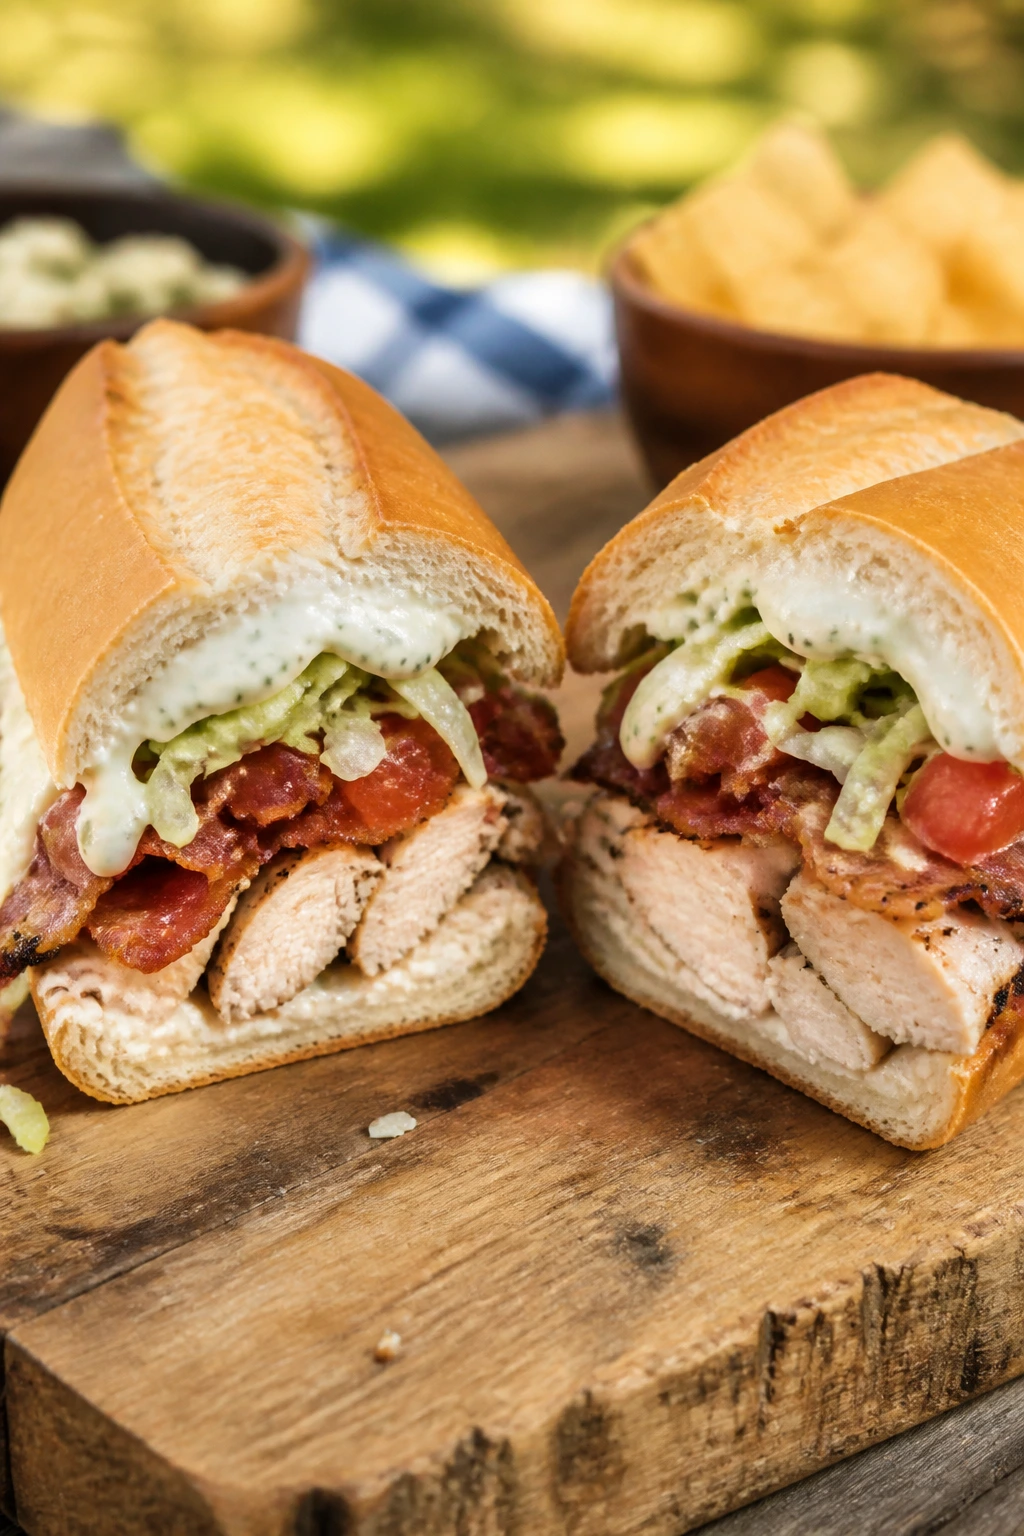
This sandwich is loud in the best way: smoky bacon, creamy ranch, chicken, and enough crunch to keep it from feeling heavy. It’s also a clean use for leftover grilled chicken.
Why It Works:
Ranch brings herbs and tang, bacon brings salt and texture, and chicken makes the sub filling without needing a mountain of meat. A sub roll gives you the shell you need for all that.
Key Ingredients:
- 2 cups cooked chicken, sliced or shredded.
- 4 slices bacon, cooked crisp.
- 2 sub rolls — split.
- 1/4 cup ranch dressing.
- 1 cup shredded lettuce — dry and cold.
- 4 slices tomato or 1 small tomato, blotted dry.
Quick Steps:
- Warm the chicken if desired.
- Toast the rolls lightly.
- Spread ranch, then add chicken, bacon, lettuce, and tomato.
- Close and serve.
Equipment for This Recipe:
- Skillet — for bacon and warming chicken.
- Knife — for slicing tomatoes.
- Spoon — for ranch.
How to Serve This Dish:
Serve with chips or a pickle spear. These are good for a mixed crowd because they hit that rich, familiar note without much effort.
Pro Tips for This Recipe:
- Dry the lettuce well before adding it.
- Keep the tomato layer thin to avoid leaks.
- A little extra black pepper helps the ranch.
Variations on This Dish:
- Buffalo Chicken Bacon Ranch: swap ranch for a ranch-buffalo mix.
- Cheddar Ranch Sub: add sharp cheddar slices.
Common Mistakes to Avoid with This Dish:
- Too much dressing: the bread gets soggy.
- Using limp bacon: the texture gets lost.
34. Salami, Provolone, and Pepperoncini Hoagies
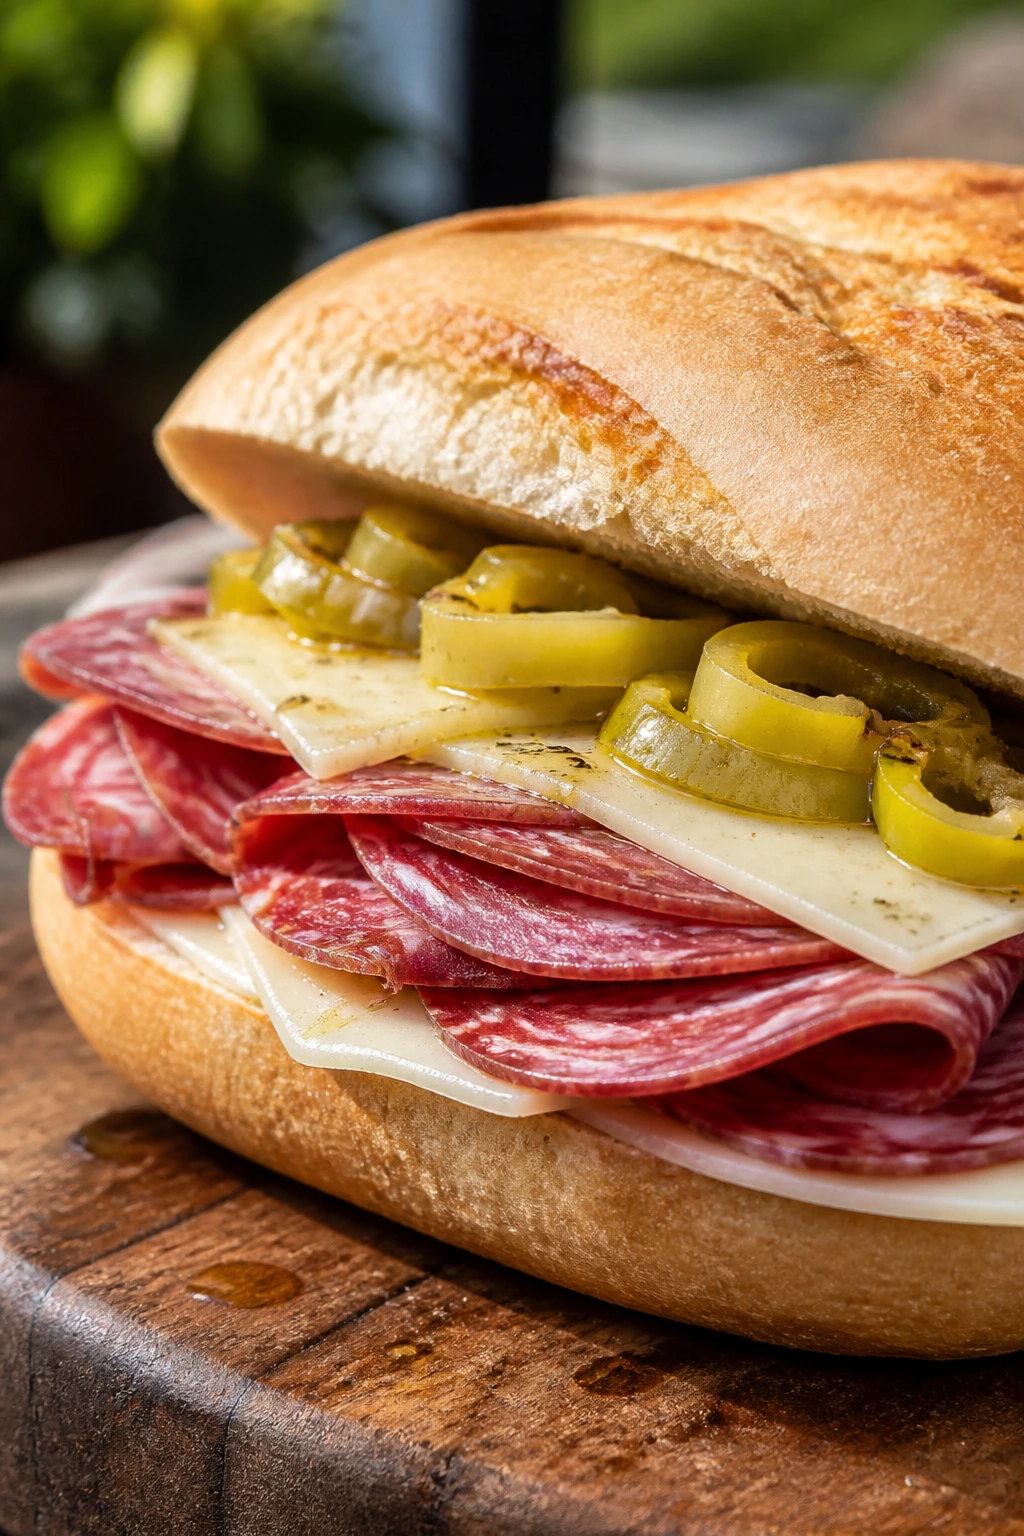
This is the kind of sandwich I trust when I want bold flavor without a lot of steps. Salami, provolone, and pepperoncini know exactly what they’re doing.
Why It Works:
The salty salami and mild provolone are balanced by the tang of pepperoncini. Hoagie rolls keep everything contained, and a little oil or vinegar ties the flavors together without drowning the bread.
Key Ingredients:
- 8 oz salami — thinly sliced.
- 4 slices provolone — or 1 cup shredded.
- 2 hoagie rolls — split.
- 1/4 cup pepperoncini peppers — drained and sliced.
- 1 tablespoon olive oil — optional.
- 1 teaspoon red wine vinegar — optional.
Quick Steps:
- Lightly toast the rolls.
- Layer salami, provolone, and pepperoncini.
- Drizzle with oil and vinegar if using.
- Press and wrap briefly before serving.
Equipment for This Recipe:
- Serrated knife — for rolls.
- Small spoon — for peppers.
- Parchment — for wrapping.
How to Serve This Dish:
Serve with kettle chips and sliced melon. It’s strong enough to stand alone, but it plays well with anything crunchy.
Pro Tips for This Recipe:
- Drain the pepperoncini so the roll stays firm.
- If you like more heat, use hot peppers.
- A brief wrap helps the sandwich settle.
Variations on This Dish:
- Turkey and Provolone Hoagie: lighter, still sharp.
- Muffuletta-Inspired Hoagie: add olive salad.
Common Mistakes to Avoid with This Dish:
- Using too much vinegar: it overwhelms the salami.
- Packing loose peppers: they spill out at the first bite.
35. Chickpea Salad Sandwiches
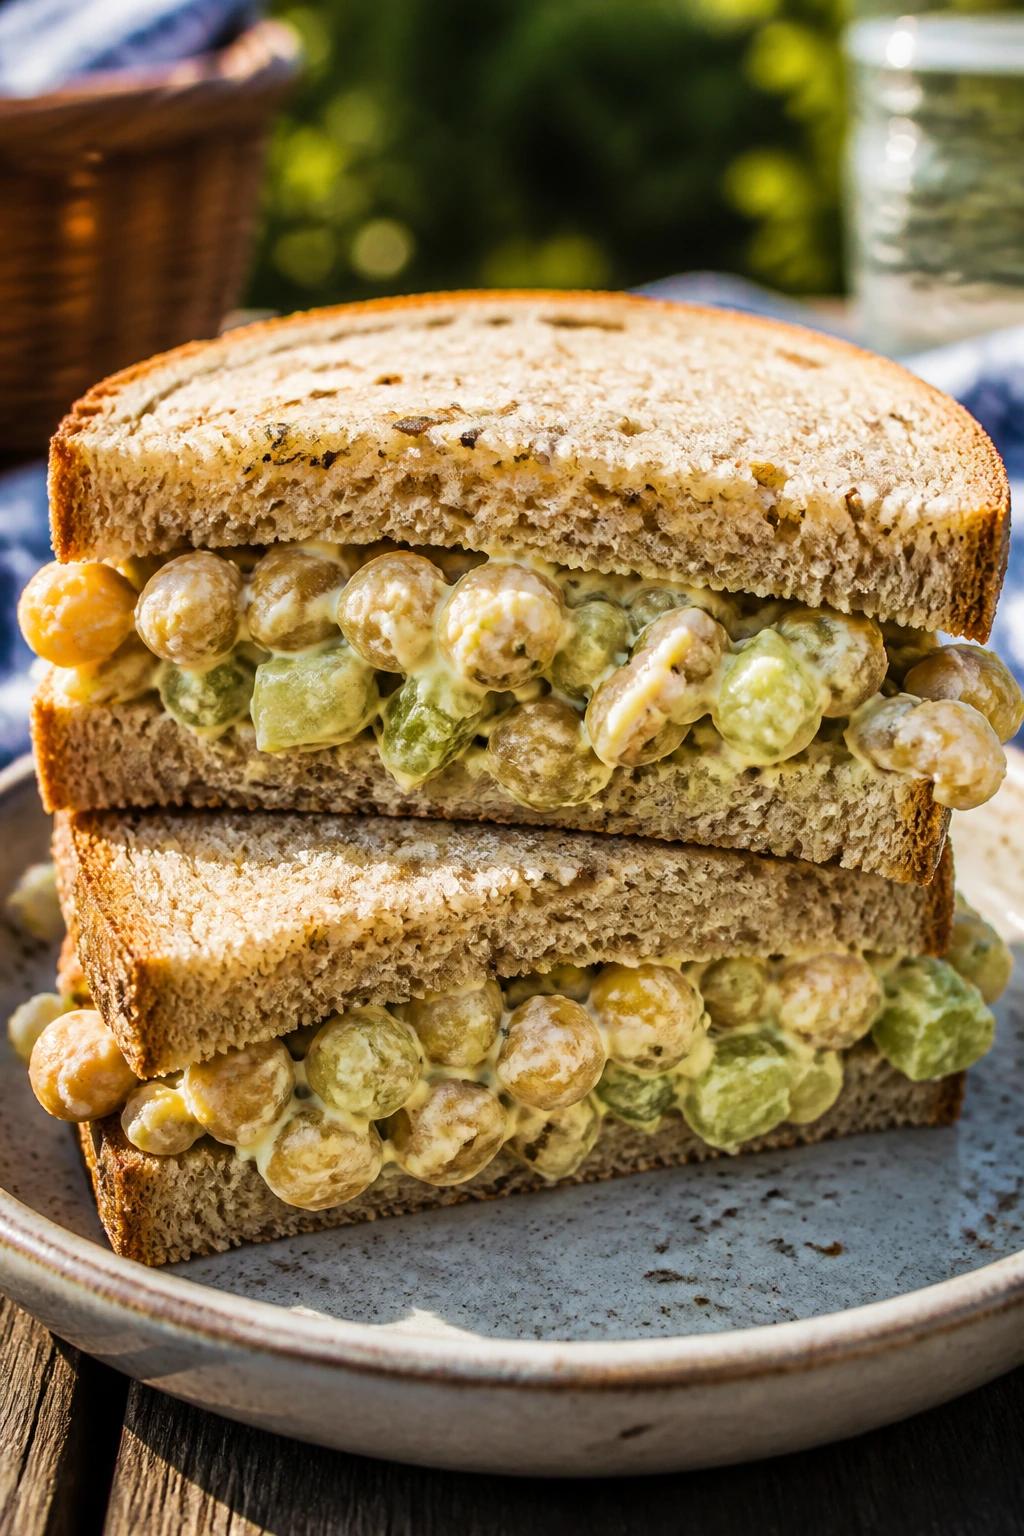
This is the vegetarian sandwich I actually crave, not the one I settle for. Chickpeas give you body, celery gives crunch, and a little mustard keeps the filling awake.
Why It Works:
Mashed chickpeas make a filling that is thick enough to spread but still chunky enough to feel like food. It holds up well in wraps, toast, or soft sandwich bread, and it tastes even better after a short chill.
Key Ingredients:
- 1 can chickpeas, drained and rinsed — about 1 1/2 cups.
- 1/4 cup mayonnaise or yogurt — binding.
- 1 tablespoon Dijon mustard — for bite.
- 2 tablespoons diced celery — crunch.
- 2 tablespoons diced red onion — optional but useful.
- 4 slices bread or 2 rolls.
Quick Steps:
- Mash chickpeas lightly with a fork.
- Mix with mayo, mustard, celery, onion, salt, and pepper.
- Chill for 10 minutes.
- Spoon onto bread or rolls and serve.
Equipment for This Recipe:
- Mixing bowl — medium size.
- Fork or potato masher — for texture.
- Knife — for the vegetables.
How to Serve This Dish:
Serve with lettuce, tomatoes, or cucumber slices. It’s one of the easiest sandwiches to turn into a wrap if you want a cleaner picnic option.
Pro Tips for This Recipe:
- Leave some chickpeas whole for texture.
- Add a squeeze of lemon if the filling tastes dull.
- Chill before assembling for a cleaner spread.
Variations on This Dish:
- Curried Chickpea Salad: add curry powder and chopped apple.
- Pickle Chickpea Salad: stir in chopped pickles and dill.
Common Mistakes to Avoid with This Dish:
- Mashing into paste: the texture disappears.
- Using too much dressing: it turns soft and sloppy.
36. Smoked Turkey Sandwiches with Peach Chutney
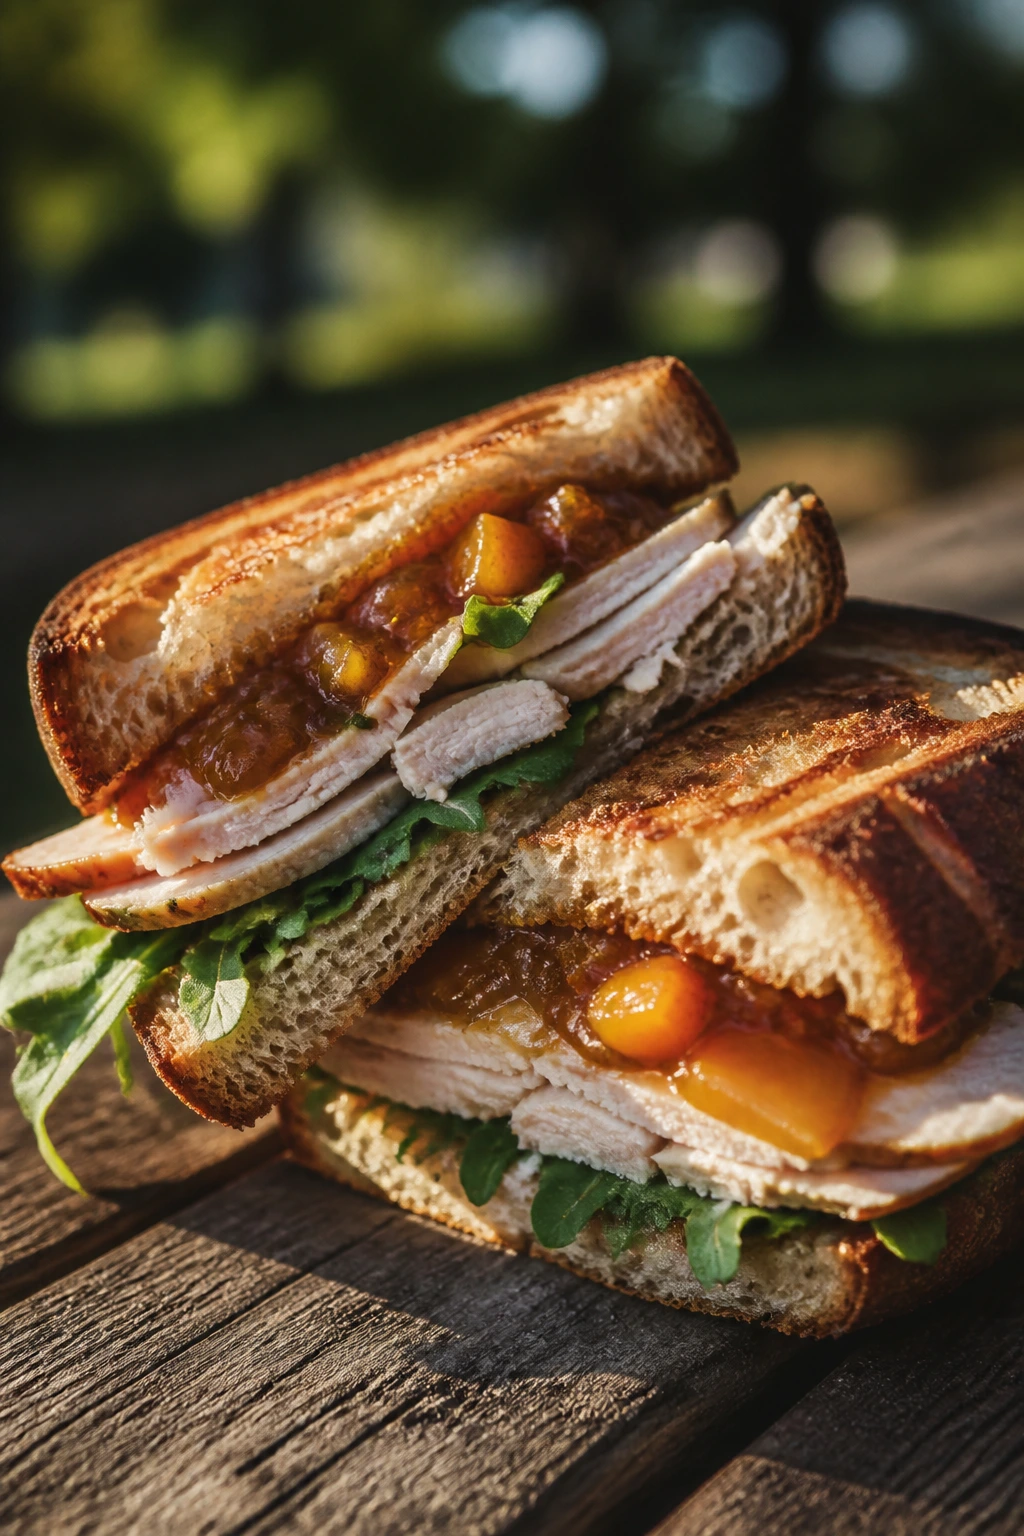
Sweet fruit against smoky meat is a smart move, especially when you want a sandwich that feels a little different from the usual deli stack. Peach chutney gives you that without being fussy.
Why It Works:
Smoked turkey is already flavorful, so the sandwich only needs a sweet-tangy layer to wake it up. Peach chutney does that job better than plain jam because it has acid, spice, and a little texture.
Key Ingredients:
- 8 oz smoked turkey — sliced.
- 2 sandwich rolls or slices bread — sturdy.
- 1/4 cup peach chutney — not too wet.
- 4 slices Swiss or provolone — optional.
- Handful of arugula — optional.
Quick Steps:
- Lightly toast the bread.
- Spread chutney on one side.
- Layer turkey, cheese, and arugula.
- Close and slice.
Equipment for This Recipe:
- Serrated knife — for bread.
- Spoon — for chutney.
- Cutting board — for assembly.
How to Serve This Dish:
Serve with chips or a cucumber salad. It works especially well when you want one sandwich on the sweeter side without moving into dessert territory.
Pro Tips for This Recipe:
- Use chutney with visible fruit pieces.
- Keep the layer thin so it doesn’t leak.
- A peppery green like arugula helps balance the sweetness.
Variations on This Dish:
- Apple Chutney Turkey: swap peach for apple chutney.
- Turkey and Brie: use brie if you want more richness.
Common Mistakes to Avoid with This Dish:
- Too much chutney: the bread gets sticky.
- Using soft bread: the filling slides around.
37. Pastrami and Mustard on Rye

This sandwich does not whisper. It’s salty, peppery, sharp, and plain old satisfying when you want something with edge.
Why It Works:
Pastrami has enough seasoning to carry the whole sandwich, and rye bread matches that flavor with its own earthy bite. Mustard sharpens the edges and keeps the richness from going flat.
Key Ingredients:
- 8 oz pastrami — thin-sliced.
- 4 slices rye bread — toasted if you want firmness.
- 2 tablespoons mustard — yellow or deli style.
- 2 slices Swiss cheese — optional.
- Pickles on the side — strongly recommended.
Quick Steps:
- Toast the rye lightly if desired.
- Spread mustard on the bread.
- Layer pastrami and cheese.
- Warm briefly if you want the cheese softened.
Equipment for This Recipe:
- Knife — for bread and slicing.
- Skillet or microwave — to warm the meat if needed.
- Cutting board — for assembly.
How to Serve This Dish:
Serve with pickles and potato chips. This one tastes best when the rye is still a little warm and the mustard smells sharp.
Pro Tips for This Recipe:
- Use a mustard with enough tang to cut the fat.
- Don’t overheat the pastrami; it can dry out.
- Toasting the rye helps the sandwich stay tidy.
Variations on This Dish:
- Pastrami Reuben: add sauerkraut and Russian dressing.
- Peppery Pastrami: use cracked black pepper mustard.
Common Mistakes to Avoid with This Dish:
- Skipping the mustard: the sandwich loses its spark.
- Using soft white bread: it flattens under the meat.
38. Honey Ham and Gouda Croissants

Honey ham and gouda are mild, buttery, and easy to like, which makes this a solid choice when the group has mixed tastes. Croissants add richness that feels a little special without any extra work.
Why It Works:
Gouda melts smoothly, honey ham brings a sweet saltiness, and the croissant gives you layers that tear softly instead of cracking. It’s one of the easiest sandwiches on the list to pack for a quick picnic.
Key Ingredients:
- 8 oz honey ham — sliced.
- 4 oz gouda, sliced — young gouda melts well.
- 4 croissants — split.
- 1 tablespoon Dijon or honey mustard — optional.
- Handful of baby spinach — optional.
Quick Steps:
- Split the croissants carefully.
- Add mustard if using, then layer ham, gouda, and spinach.
- Close gently.
- Serve cold or warm briefly to soften the cheese.
Equipment for This Recipe:
- Serrated knife — for the croissants.
- Baking sheet — if warming.
- Small knife — for the mustard.
How to Serve This Dish:
Serve with grapes, chips, or a few cornichons. They’re easy to turn into small sandwich halves for a mixed tray.
Pro Tips for This Recipe:
- Use young gouda if you want a softer melt.
- Don’t squish the croissant while cutting.
- Spinach adds a little structure and color.
Variations on This Dish:
- Hot Honey Ham Croissant: add a drizzle of hot honey.
- Turkey Gouda Croissant: swap the ham for turkey.
Common Mistakes to Avoid with This Dish:
- Using an overfilled croissant: it splits in the middle.
- Skipping a sharp knife: the pastry crushes.
39. Cuban Pressed Sandwiches
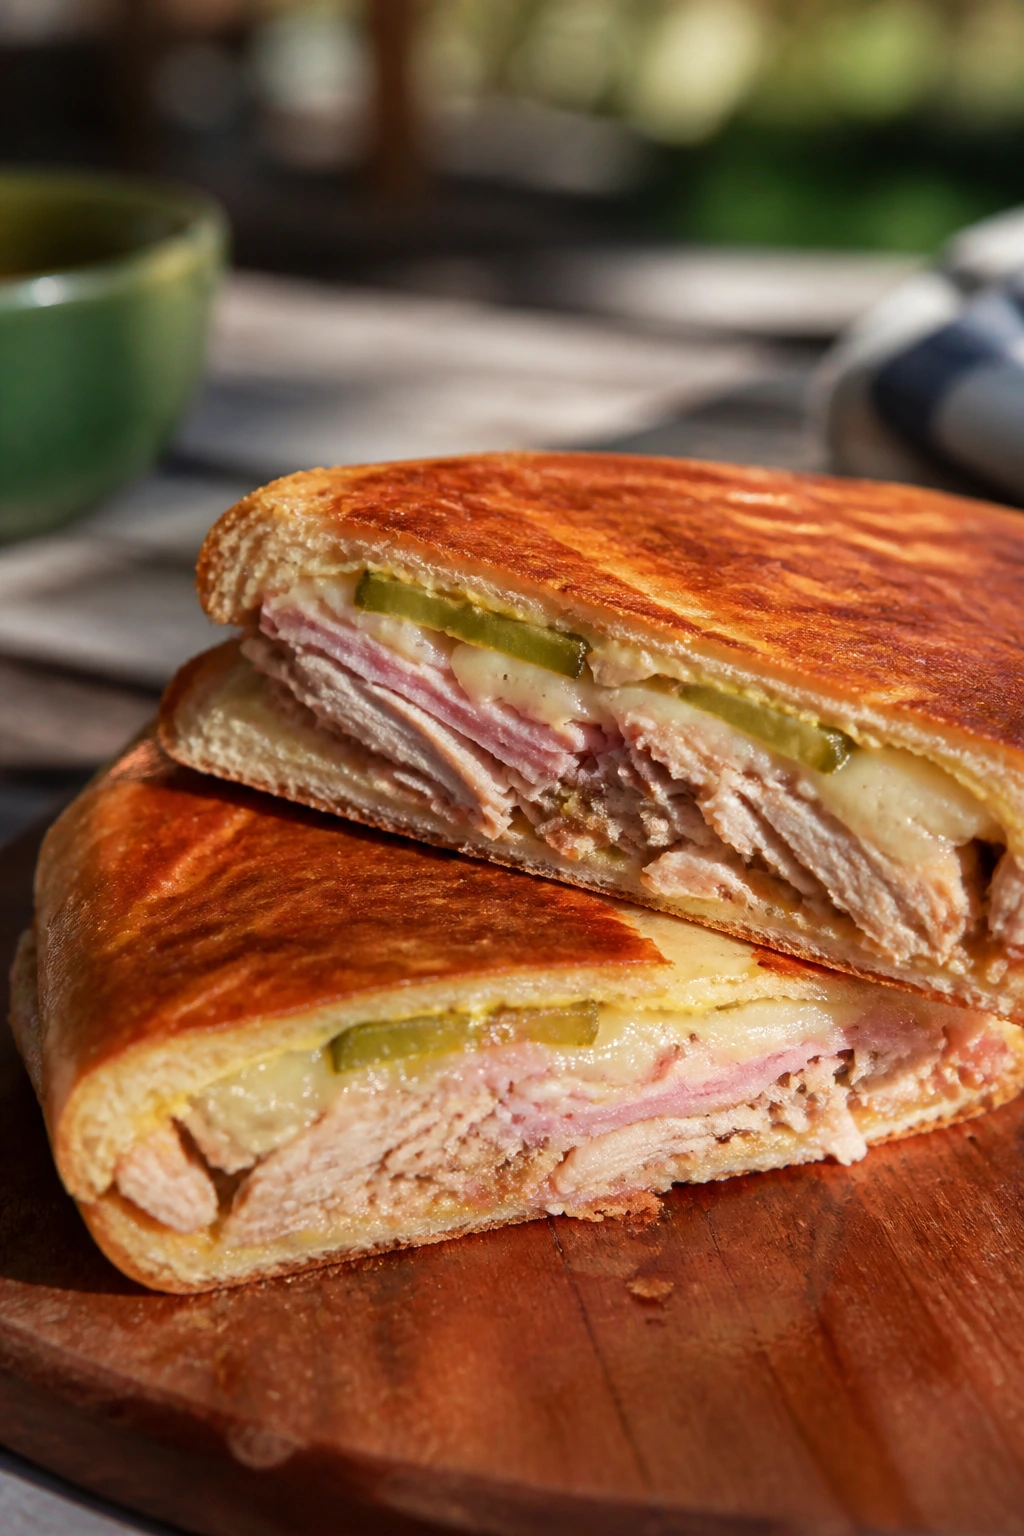
This sandwich is a beast in the best way: pork, ham, cheese, mustard, and pickles pressed until the bread goes crisp and the filling gets hot and unified. It has real personality.
Why It Works:
The press matters here. It compresses the layers, melts the cheese, and turns separate ingredients into one cohesive sandwich. The pickles keep the richness from getting muddy, and the mustard cuts through the fat.
Key Ingredients:
- 2 Cuban-style rolls or soft hoagie rolls — split.
- 4 oz sliced roast pork — or shredded pork.
- 4 oz sliced ham — thin.
- 4 slices Swiss cheese.
- 4 pickle slices or spears, thinly sliced.
- 2 tablespoons yellow mustard.
Quick Steps:
- Spread mustard on the bread.
- Layer pork, ham, Swiss, and pickles.
- Press in a skillet with a heavy pan on top, 3 to 4 minutes per side.
- Slice after the cheese melts.
Equipment for This Recipe:
- Cast-iron skillet — for pressing.
- Heavy pan or foil-wrapped brick — optional weight.
- Spatula — for flipping carefully.
How to Serve This Dish:
Serve hot with chips or black bean salad. If you’re transporting it, wrap it in foil so the crust stays intact.
Pro Tips for This Recipe:
- Use thin pickle slices so the sandwich presses evenly.
- Keep the heat medium, not scorching.
- Press firmly but not so hard that the bread cracks.
Variations on This Dish:
- Turkey Cuban: swap pork for turkey and keep the pickle-mustard combo.
- Spicy Cuban: add a few jalapeño slices.
Common Mistakes to Avoid with This Dish:
- Too much filling: the sandwich won’t compress properly.
- Heat too high: the bread burns before the inside melts.
40. Grilled Halloumi, Tomato, and Mint Pita Pockets
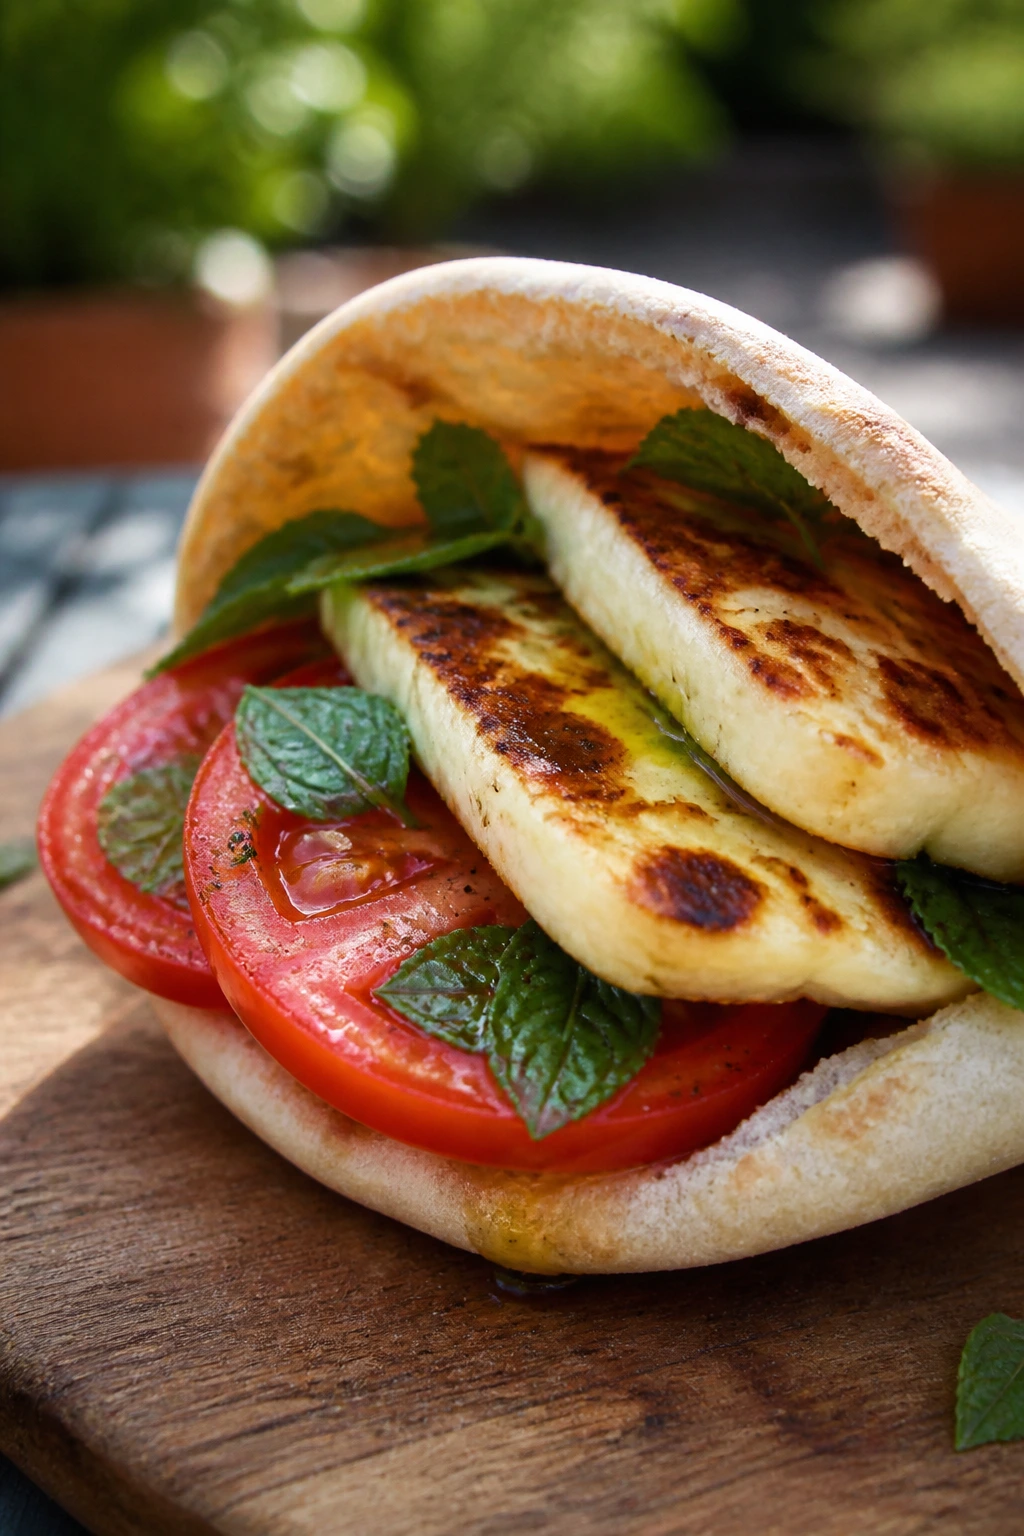
Halloumi is a smart cookout cheese because it gets golden in the skillet and stays put. Paired with tomato and mint, it tastes bright, salty, and a little surprising without asking for much prep.
Why It Works:
Halloumi has the rare habit of browning without turning into a puddle, which makes it excellent for picnic sandwiches that need texture. Mint and tomato keep it from feeling heavy, and pita pockets make the whole thing easy to hold.
Key Ingredients:
- 8 oz halloumi, sliced — about 1/4-inch thick.
- 4 pita rounds — warmed.
- 1 large tomato, sliced and blotted dry.
- Handful of mint leaves — torn.
- 1 tablespoon olive oil — for the pan.
- 2 tablespoons yogurt or tzatziki — optional.
Quick Steps:
- Warm the pita rounds so they open easily.
- Sear the halloumi in olive oil over medium heat for 1 to 2 minutes per side.
- Spread yogurt inside each pita and fill with tomato, halloumi, and mint.
- Wrap and serve while the cheese is still warm.
Equipment for This Recipe:
- Skillet — for searing halloumi.
- Knife — for slicing tomato and cheese.
- Parchment or foil — for wrapping.
How to Serve This Dish:
Serve with olives, cucumber salad, or chips. It’s one of the best warm-vegetarian choices on the list because the cheese has actual chew.
Pro Tips for This Recipe:
- Pat the halloumi dry before it hits the skillet.
- Don’t crowd the pan or it steams instead of browns.
- Use only a thin layer of yogurt so the pita stays firm.
Variations on This Dish:
- Halloumi and Cucumber: add sliced cucumber for extra crunch.
- Spicy Halloumi Pita: add chili flakes or hot sauce.
Common Mistakes to Avoid with This Dish:
- Overcooking halloumi: it gets rubbery.
- Using wet tomatoes: the pita softens too fast.
Why These Sandwiches Hold Up on a Picnic Blanket
A picnic sandwich has a job to do before it ever gets praised. It has to survive the ride, sit on a napkin, and still taste like someone cared when it finally reaches your mouth. That means bread with some backbone, fillings that are dressed rather than drowned, and a plan for moisture before the tomato ever comes near the roll.
The smart move is usually a barrier. Mayo on the bread, lettuce under the tomato, toast on the cut side, pickles drained, roasted vegetables cooled, anything that keeps liquid from soaking straight into the crumb. I also like sandwiches that are built in layers with a little contrast in every bite—rich meat, sharp pickle, crisp leaf, soft cheese. That mix matters more outdoors than it does in a kitchen chair.
Hot sandwiches have their own rules. Don’t send them out undercooked and don’t let them sit uncovered. Wrap them in foil for the trip, then open the foil at the table so the crust doesn’t steam itself limp. Cold sandwiches are the opposite: keep them cold, keep them wrapped, and assemble the wetter ones as close to serving as possible. The whole game is texture control.
Essential Equipment for These Recipes
- Serrated bread knife: the cleanest way to cut rolls, loaves, and croissants without crushing them.
- Cutting board with a damp towel underneath: keeps the board from sliding while you slice or assemble.
- Rimmed baking sheet: useful for sliders, toasting rolls, and melting cheese in batches.
- Cast-iron skillet or heavy pan: perfect for pressing sandwiches and searing halloumi or zucchini.
- Mixing bowls in two sizes: one for fillings, one for quick dressings and sauces.
- Rubber spatula or spoon: folds chicken salad, egg salad, and chickpea salad without mashing them flat.
- Foil and parchment: foil keeps hot sandwiches warm; parchment keeps cold ones from getting sweaty.
- Paper towels: worth their weight in gold for tomatoes, cucumbers, and anything else that leaks.
- Toaster or grill pan: for bread that needs a little grip.
- Cooler with ice packs: especially important for mayo-based salads, cheese, and anything sitting outside for more than a short stretch.
Smart Shopping and Ingredient Tips
Start with bread that has some structure. Rolls with a tight crumb—hoagies, ciabatta, Kaiser rolls, good sandwich bread, pita, croissants with a firm bake—hold up better than airy bakery loaves that split when you look at them sideways. If the bread has giant holes, it tends to lose fillings through the gaps. If it’s too soft, it turns damp fast.
Buy deli meat in thin slices unless the sandwich is meant to be stacked and pressed. Thin slices fold better and create fewer gaps. For cheese, block cheese sliced at home usually tastes better than the pre-shredded kind, and it melts more evenly in warm sandwiches. Mozzarella, Swiss, provolone, cheddar, gouda, Brie, and halloumi all earn their keep here for different reasons.
Tomatoes need respect. Slice them, salt them lightly, wait a minute, then blot them dry. Cucumbers need the same treatment. Pickles and pepperoncini should be drained well before they ever touch bread. Wet ingredients are fine. Wet bread is the problem.
For salads like chicken salad, egg salad, tuna salad, and chickpea salad, aim for a filling that can mound on a spoon without running off it. If it slides like soup, there’s too much mayo or yogurt. If it crumbles like dry sand, add a spoonful of dressing or a touch of mustard. Good sandwich filling should spread, not pour.
How to Serve These Recipes
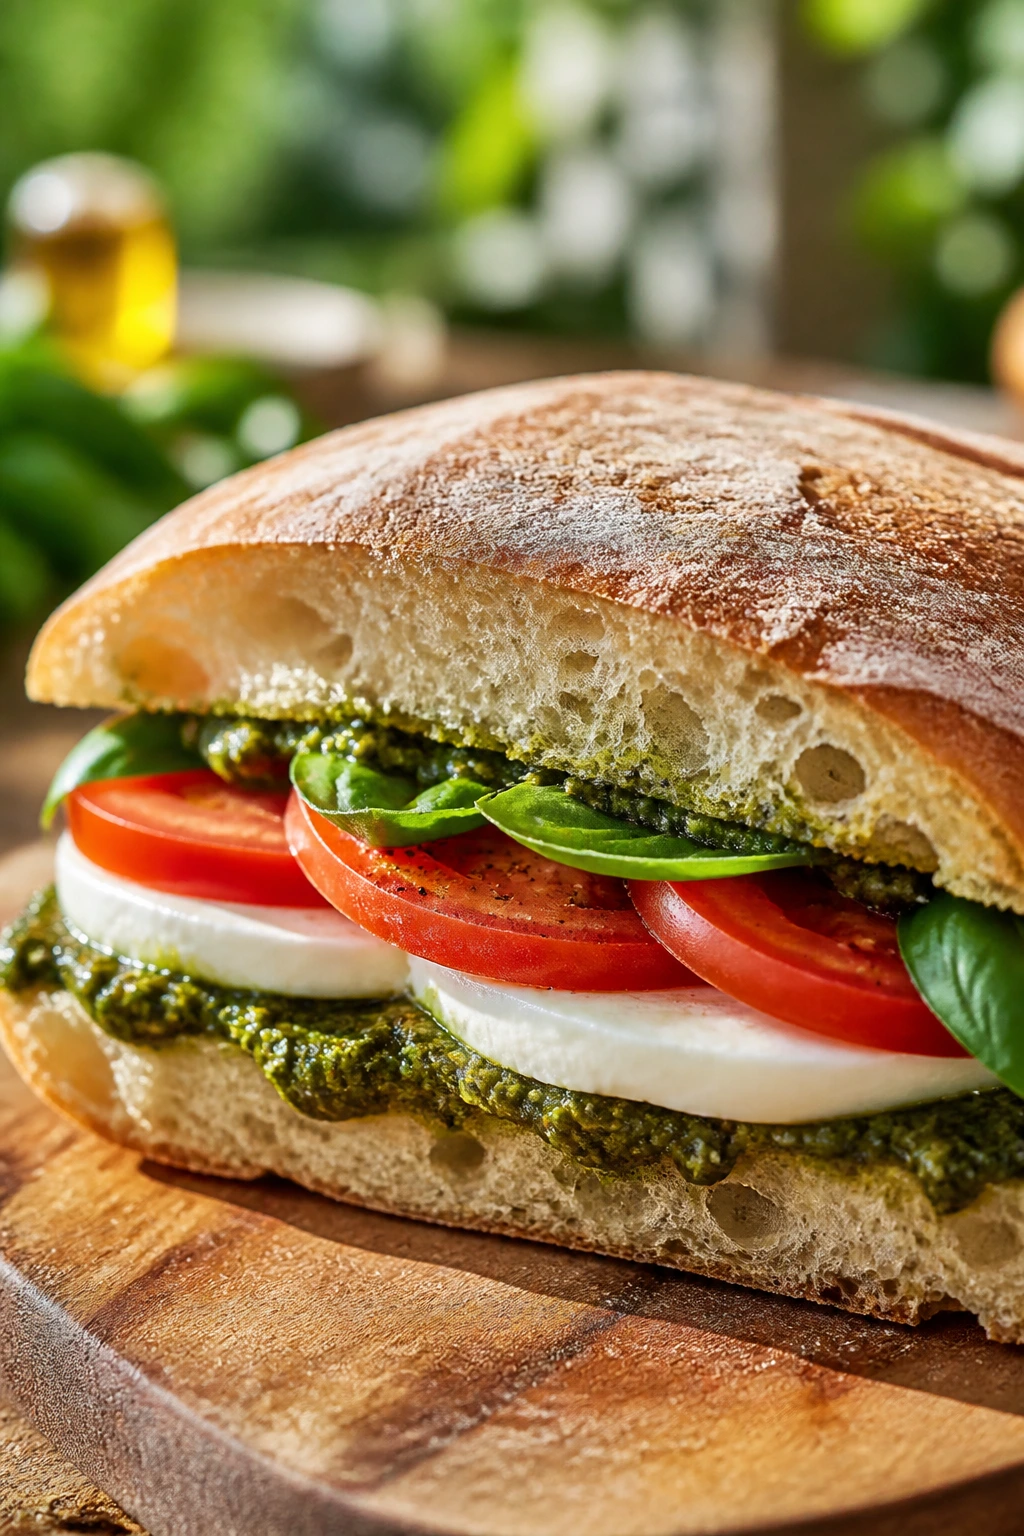
Presentation:
Stack the sandwiches on a sheet pan, wooden board, or plain platter and cut them in a way that shows the filling. Diagonal cuts work well for club sandwiches, hoagies, and paninis; halves or thirds suit sliders, wraps, and pita pockets. For a backyard cookout, I like to leave a few whole pieces uncut so people can see what they’re taking before they pick it up.
Accompaniments:
Think crunchy and cold. Kettle chips, dill pickles, cornichons, slaw, cucumber salad, potato salad, pasta salad, fruit salad, and watermelon all play well with these sandwiches. If you’re serving hot subs or sliders, a simple green salad helps keep the plate from feeling one-note.
Portions:
For smaller sandwiches like sliders, tea sandwiches, and finger sandwiches, count on 2 to 3 per person as a side or 4 to 5 if they’re the main food. For standard sandwiches, plan on 1 per adult, then add a half for very hungry guests. Wraps and pressed sandwiches tend to feel larger than they look, so one is usually enough unless the rest of the spread is very light.
Beverage Pairing:
Iced tea with lemon is the safest all-purpose match. Lemonade or sparkling water with lime works when the sandwiches are rich or salty. For adult cookouts, a cold pilsner or light lager pairs nicely with sliders, deli subs, and anything vinegary or pickled.
Additional Tips and Flavor Boosters
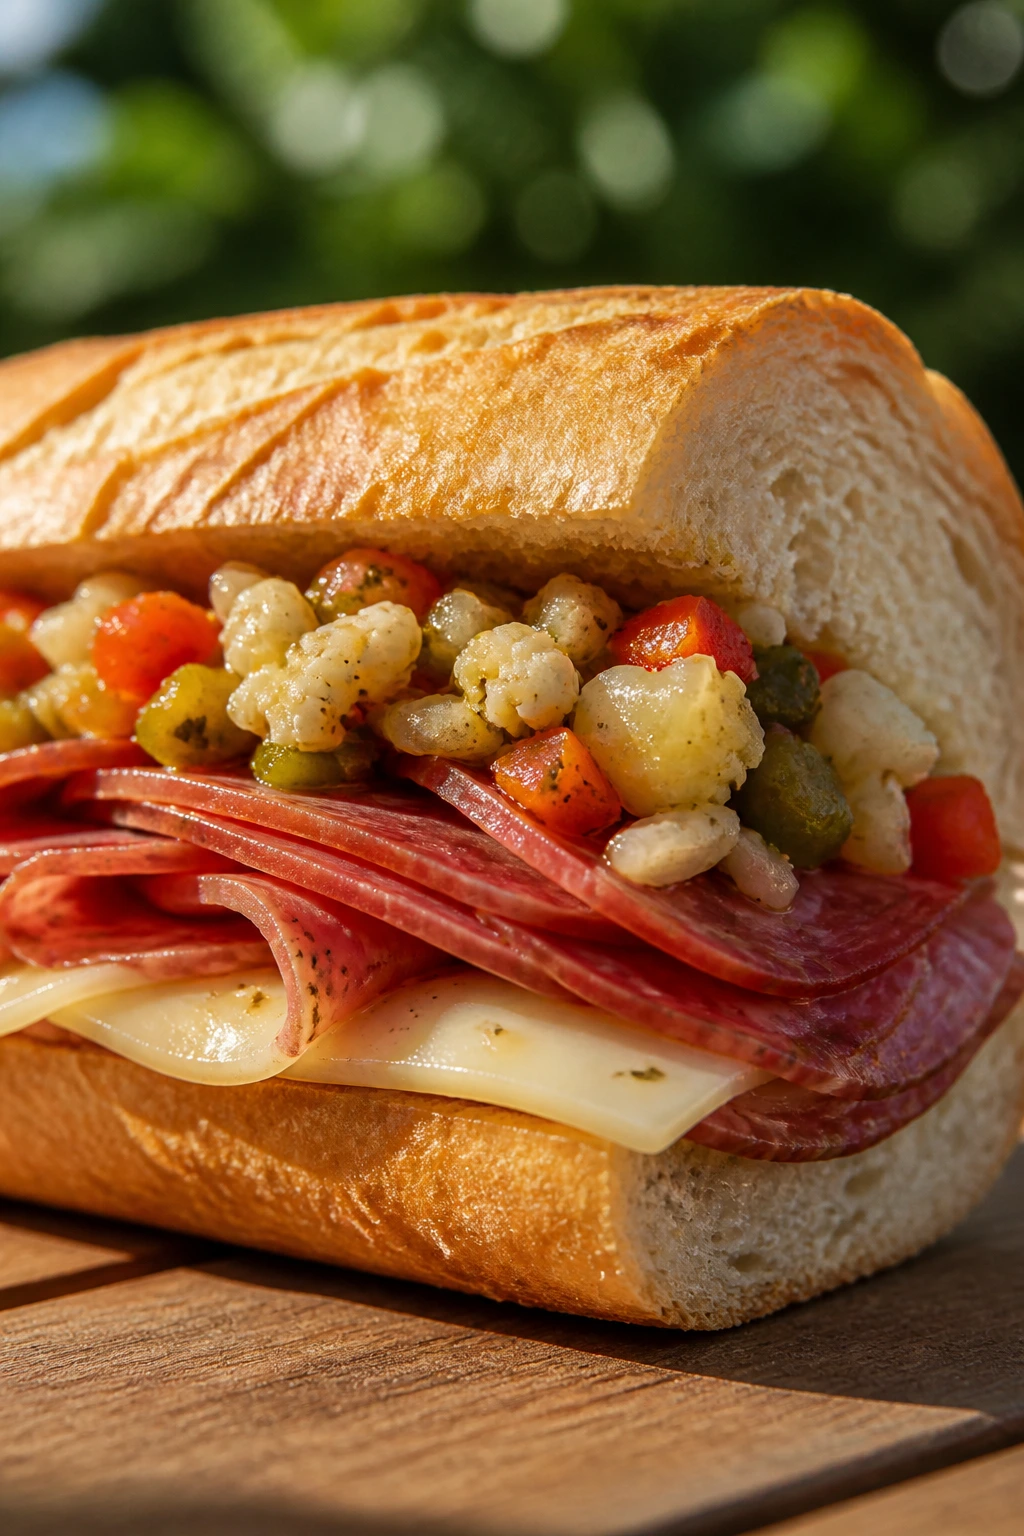
Flavor Enhancement:
A little acid changes everything. A squeeze of lemon, a splash of vinegar, a swipe of mustard, or a spoonful of pickle brine in chicken or tuna salad wakes up the whole sandwich without making it taste sour. If a filling seems flat, this is usually the fix.
Customization:
Chopped herbs, sliced radishes, pickled onions, pepperoncini, avocado, or a few shreds of cabbage can shift the whole sandwich without changing the base recipe. I also like adding crushed kettle chips inside soft sandwiches for a last-minute crunch. It sounds silly. It works.
Serving Suggestions:
Toast the bread when you can, even if only on the cut side. Spread sauces to the edges so the first bite tastes as good as the center. Add herbs at the end—basil, dill, chives, mint—because they smell better when they’re fresh and not buried.
Make-It-Yours:
For a dairy-free version, use mustard, hummus, or olive oil instead of cheese-heavy spreads. For gluten-free sandwiches, choose a bread or wrap that’s built for structure rather than softness. For lower-sodium builds, lean on herbs, citrus, and fresh vegetables instead of extra deli meat or pickled items.
Make-Ahead, Storage, and Reheating Guidance
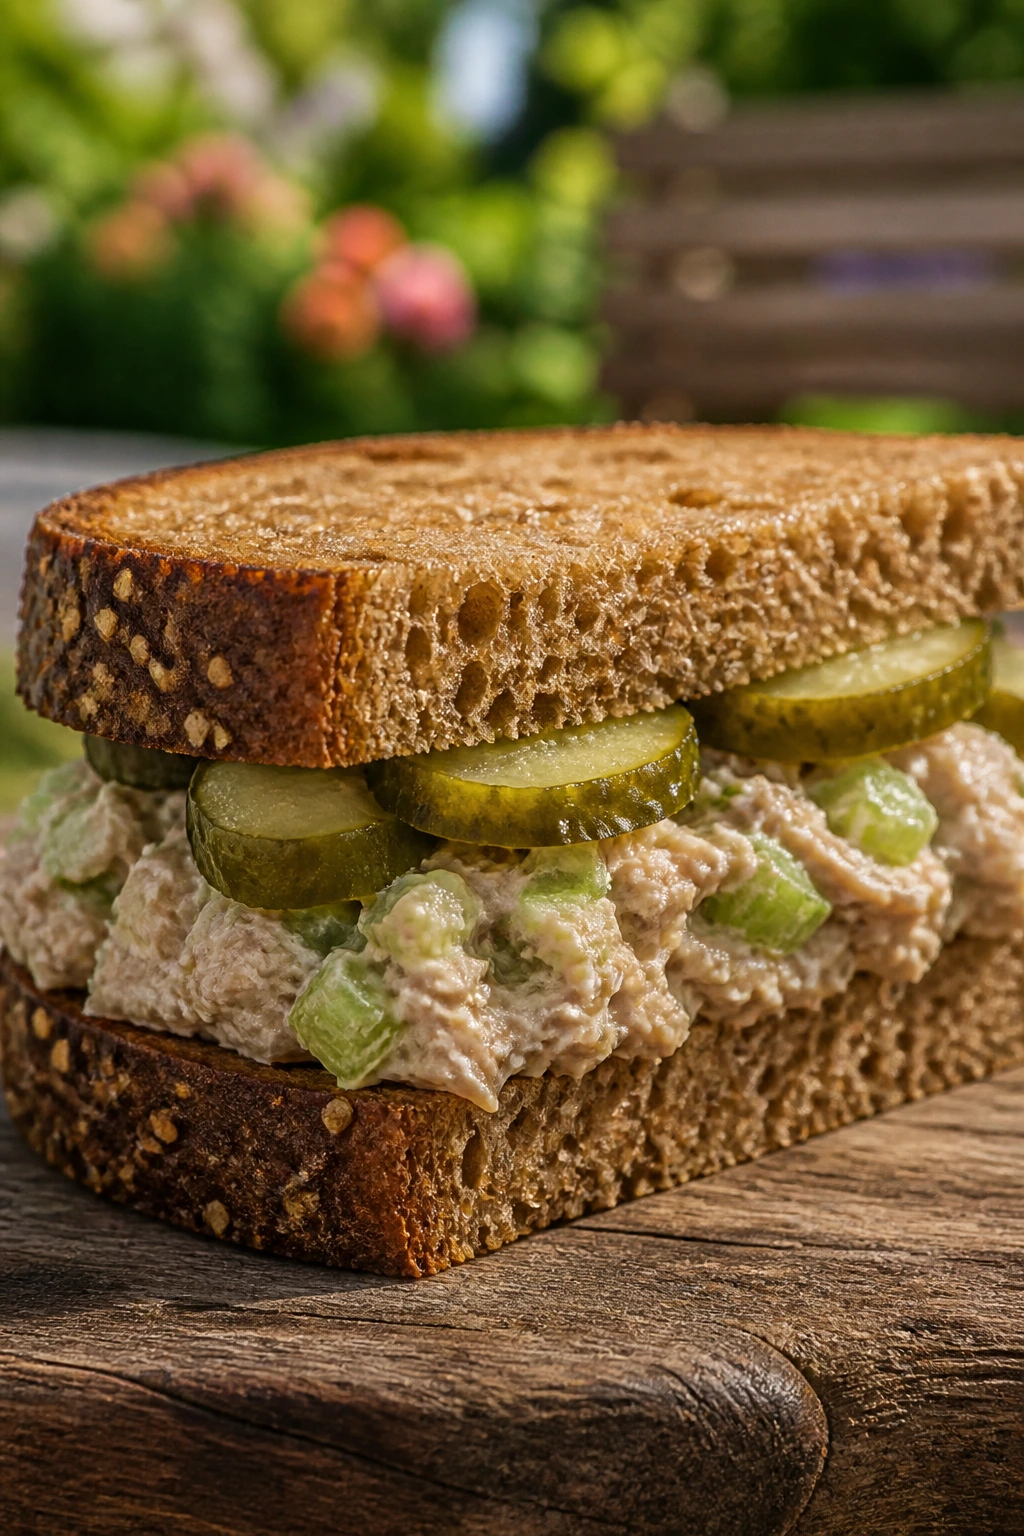
Most of the filling-based sandwiches in this collection—chicken salad, tuna salad, egg salad, chickpea salad, ham salad—keep well in the fridge for 3 to 4 days in a sealed container. They often taste better after a short rest because the seasoning has time to settle. Keep the bread separate until serving if you want the best texture.
Cooked meats like pulled pork, shredded chicken, meatballs, steak, and sliced turkey can be refrigerated for 3 to 4 days and frozen for up to 2 months if wrapped tightly. Reheat them in a skillet over low heat with a splash of broth or sauce, or in a 300°F to 350°F oven until just hot. The goal is warm, not dried out. For sandwiches that will be pressed or baked, assemble just before reheating so the bread doesn’t absorb all the steam.
Cold sandwiches with tomatoes, cucumbers, lettuce, or avocado should be assembled the same day whenever possible. If you need to prep ahead, keep the wet ingredients in one container and the bread in another, then build at the table. Wrapped in parchment and then foil, many of these can travel for a few hours in a cooler, but mayo-based fillings should stay chilled and out of direct sun until serving.
Bread also deserves a storage plan. Rolls and sliced bread can be frozen, then thawed at room temperature and toasted. Croissants are best fresh or frozen before assembly, not after. Pitas and tortillas do fine in the fridge for a short time, but they should be warmed slightly before filling so they don’t crack or fold badly.
Variations and Adaptations to Try
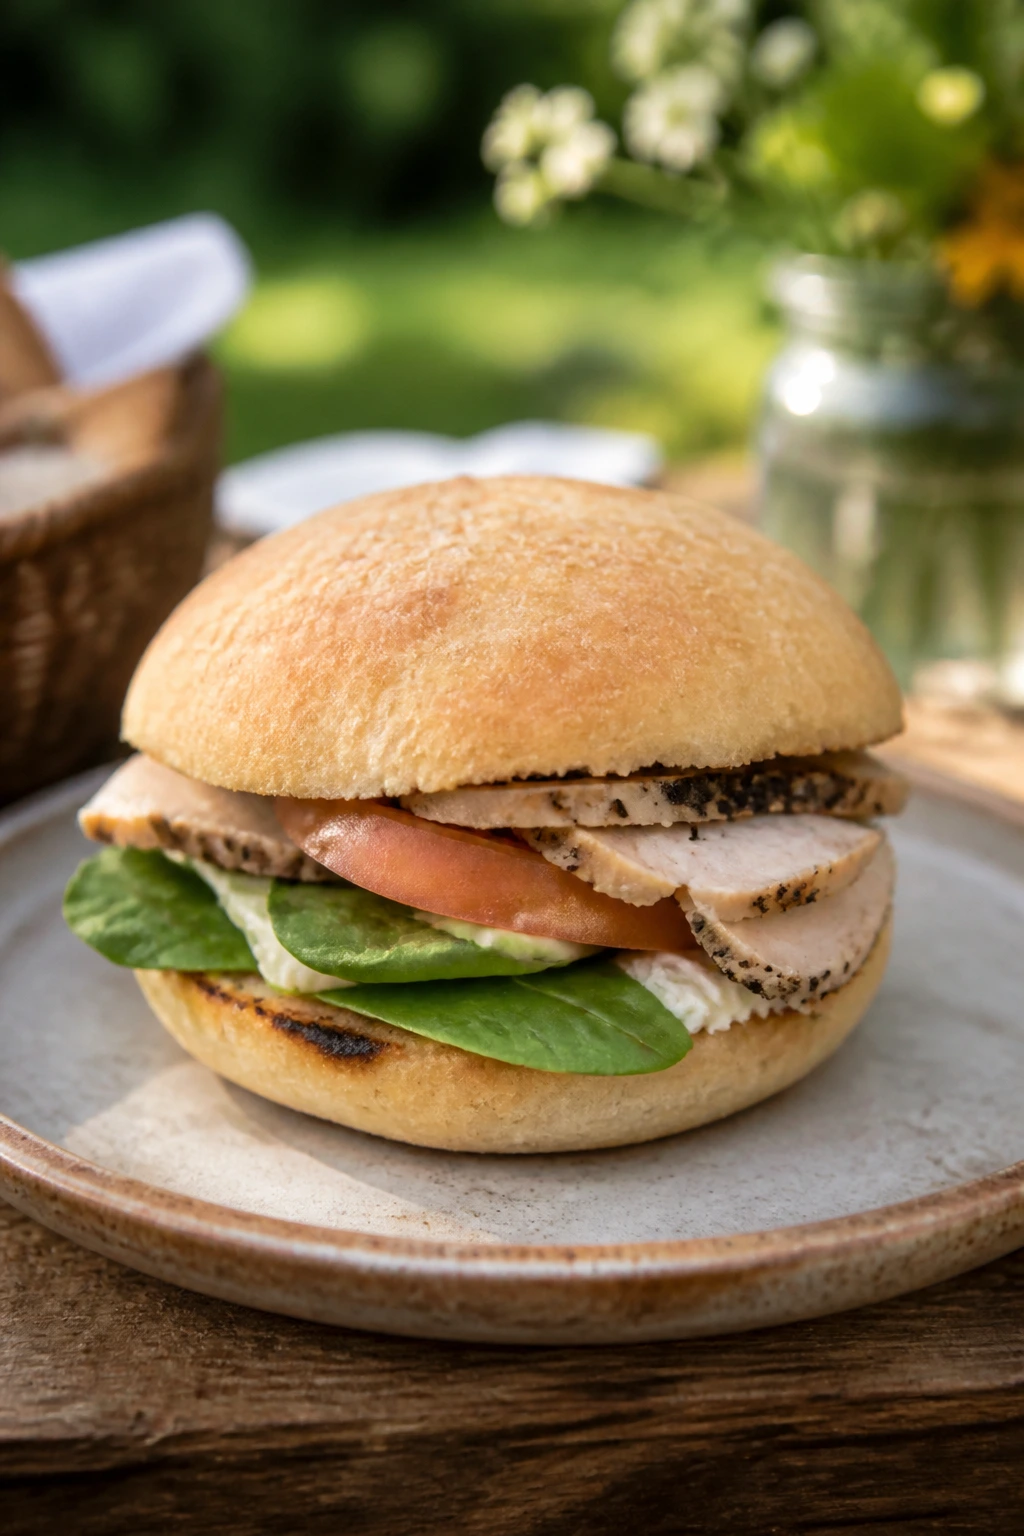
Gluten-Free Picnic Pack:
Use sturdy gluten-free sandwich bread, rice wraps, or lettuce cups for the cold fillings, and gluten-free buns for sliders or pulled pork. The important part is choosing a bread that won’t fall apart when it meets mayo or tomato. Some gluten-free loaves toast well; others need to be handled like delicate crackers.
Dairy-Free Swap Box:
Skip the cheese and lean on hummus, avocado, mustard, olive tapenade, or pesto made without cheese. Turkey clubs, tuna salad, BBQ chicken, and chickpea salad all adapt cleanly this way. If you want the sandwich to feel rich, add avocado or a spoonful of olive oil instead of trying to fake the cheese.
Kid-Friendly Cuts:
Turn sliders, wraps, and tea sandwiches into smaller pieces with less sharp mustard, fewer onions, and milder cheeses like mozzarella or mild cheddar. Kids usually do better with clean, rectangular bites and fillings that don’t drip onto wrists. A half-sandwich often looks huge to a child and still eats like a proper meal.
Heat-Lover’s Picnic:
Add pickled jalapeños, hot sauce, chili crisp, pepper jack, or spicy mustard to the sandwiches that can take it. Buffalo chicken, pulled pork, salami hoagies, and ham sliders all welcome more heat. The trick is to add spice in one clear layer instead of scattering it everywhere.
Vegetarian Cookout Tray:
Use the chickpea salad, Mediterranean pitas, falafel pitas, hummus wraps, grilled zucchini paninis, halloumi pockets, and cucumber finger sandwiches as the anchor. These are not side dishes pretending to be sandwiches. They carry their own weight and hold up well at room temperature.
Pressed-and-Toasted Lineup:
For guests who want warm food, lean into paninis, grilled cheese, cheesesteak hoagies, Cuban sandwiches, and meatball subs. Keep the fillings modest and the bread sturdy. Once you press a sandwich, it should look compact and feel full, not stuffed to the point of tearing.
Common Mistakes to Avoid
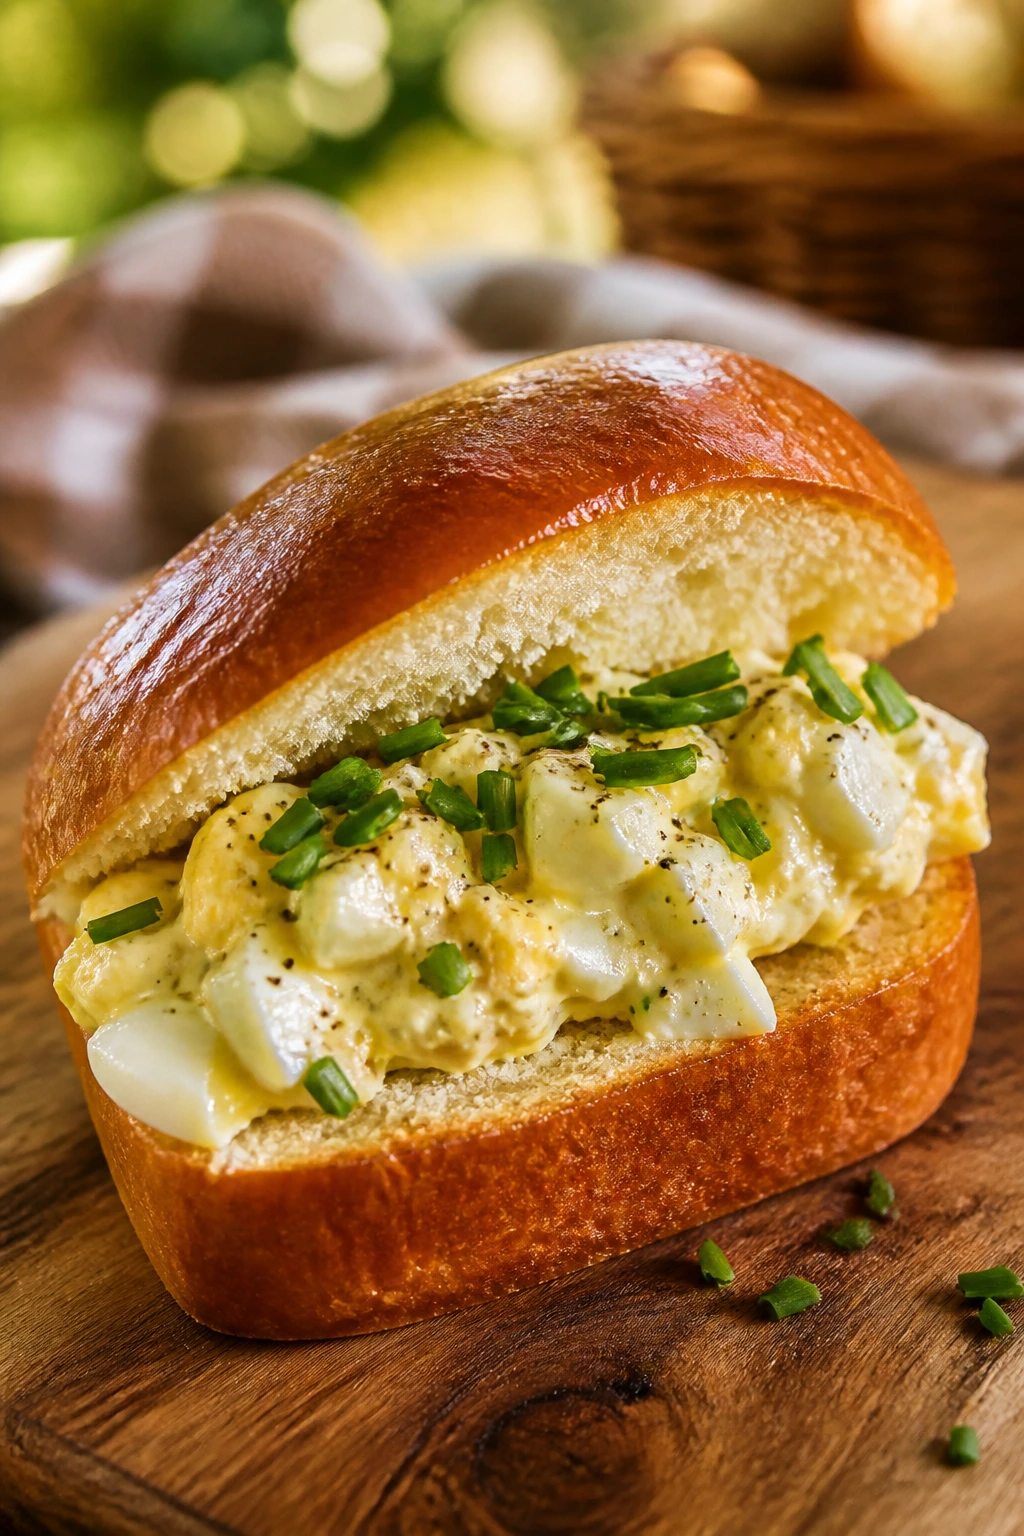
- Using bread that’s too soft or too airy: the sandwich bends, tears, or turns soggy before the first bite. Choose bread with a tighter crumb, toast it, or press it lightly so it has some backbone.
- Adding wet ingredients without drying them: tomatoes, cucumbers, pickles, and even roasted vegetables can carry more water than you think. Blot them, drain them, or cool them before assembly.
- Building too far ahead: mayo-based fillings, lettuce, and avocado all lose their best texture if they sit too long on the bread. Assemble closer to serving, or keep components separate.
- Overstuffing every sandwich: a huge pile looks tempting, but it usually means loose fillings and broken bread. Tight layers are easier to eat and taste better in the hand.
- Ignoring temperature: hot sandwiches need to stay hot enough to melt cheese, while cold ones need to stay cold enough for the fillings to keep their shape. Foil, coolers, and brief resting times solve most of this.
- Cutting with a dull knife: this is the quickest way to crush soft bread and shove all the filling out the side. A sharp serrated knife makes the whole tray look cleaner.
Frequently Asked Questions
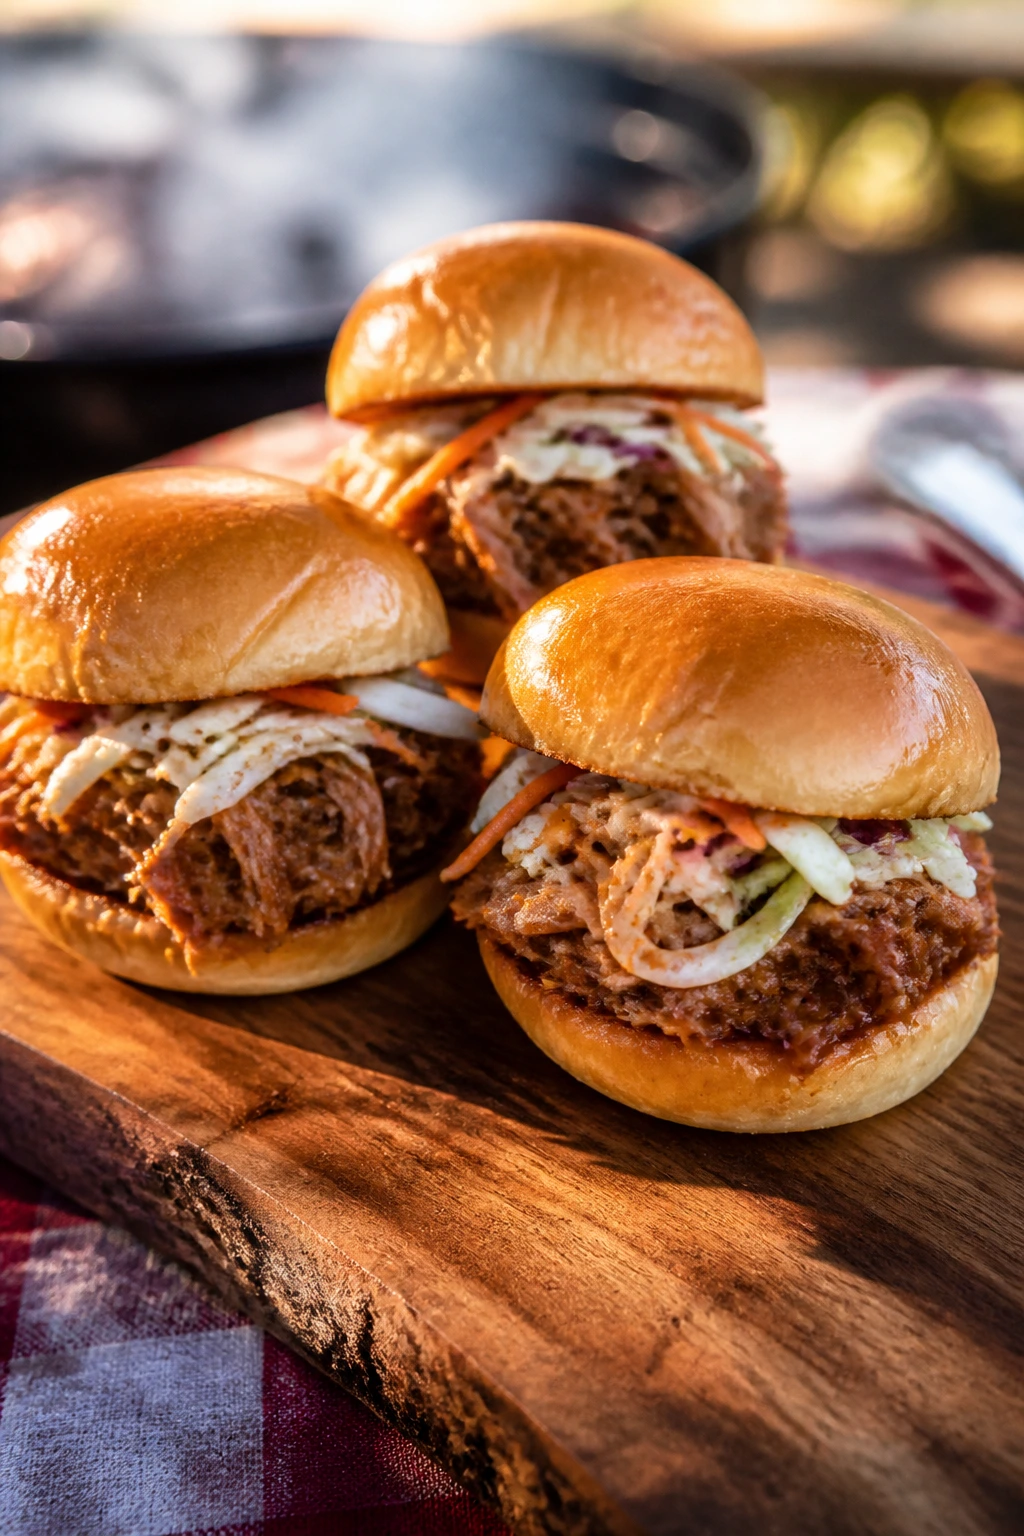
What bread holds up best for picnic sandwiches?
Hoagie rolls, ciabatta, kaiser rolls, pita, baguette pieces, and sturdy sandwich bread are the safest bets. If the filling is wet, toast the bread first or use a bread with a tight crumb. Very airy loaves look nice on a board but usually fail at the first squeeze.
How do I keep sandwiches from getting soggy?
Dry the tomatoes and cucumbers, drain pickles, cool cooked fillings before assembly, and spread a thin layer of mayo, mustard, or hummus directly on the bread as a moisture barrier. Lettuce between the bread and the wet ingredients helps too. If you want the cleanest result, assemble right before serving.
Can I make these the night before?
Many fillings can be made the night before, especially chicken salad, tuna salad, egg salad, pulled pork, and chopped deli salads. Assemble cold sandwiches with tomatoes, avocado, or lettuce as late as possible. Wrap them tightly in parchment and keep them chilled until you leave.
Which sandwiches are best for a cooler bag?
Pulled pork sliders, BBQ chicken sandwiches, chicken salad croissants, tuna salad, egg salad, chickpea salad, and wraps travel well if they’re packed cold. Pressed sandwiches can also go in a cooler if they’re wrapped tightly and not overloaded with juicy fillings. Keep an ice pack beside the sandwiches, not underneath them.
Can I freeze any of these fillings?
Pulled pork, shredded chicken, meatballs, and some cooked beef fillings freeze well. Chicken salad, egg salad, tuna salad, and anything with raw cucumber or lettuce do not freeze well because the texture breaks down. Freeze the bread separately if you want the best result.
What’s the best way to keep lettuce crisp?
Use dry lettuce, cold lettuce, and add it close to serving time. If you’re packing ahead, keep the leaves in a container with a paper towel to absorb moisture. Iceberg and romaine stay crisp longer than softer greens.
How do I transport sandwiches without crushing them?
Wrap them in parchment first, then foil if needed, and pack them snugly in a shallow container so they don’t slide around. For very soft sandwiches, cut them after transport instead of before. Cooler bags with flat ice packs are better than a deep tote where everything stacks on itself.
Can I use wraps instead of bread for most of these ideas?
Yes, especially for chicken salad, buffalo chicken, hummus, falafel, Mediterranean fillings, and chickpea salad. Wraps are easier to roll tight, but they can tear if you overfill them or use cold tortillas straight from the fridge. Warm them for a few seconds first.
Picnic Sandwiches Worth Reaching For Twice

The best part of a cookout sandwich spread is that it lets people choose their own lane. Some want sliders dripping with butter, some want cucumber and cream cheese, some want a pressed Cuban or a buffalo wrap they can eat standing up beside the grill. That mix is what makes the table feel generous instead of random.
If you keep the bread sturdy, the fillings dry where they should be dry, and the wetter ingredients in check, nearly any of these will hold together long enough to matter. That’s the real win here. Not fancy. Not fragile. Just sandwiches that make sense outdoors.