
A decent dessert does not need a pastry degree. It needs a warm oven, a mixing bowl that isn’t too small, and a recipe that behaves when you measure it honestly. That’s why sweet desserts for beginner bakers tend to be the ones with short ingredient lists, forgiving batters, and textures that forgive a minute too long in the oven or a little too much stirring.
I’ve always liked desserts that teach you something while they feed people. A good chocolate chip cookie shows you what creaming butter looks like. A fruit crisp teaches you how to judge a bubbling edge. A loaf cake tells you exactly when a skewer should come out with a few moist crumbs instead of clean and dry. There’s a rhythm to these bakes, and once you get it, the kitchen feels far less mysterious.
Some of the best first desserts are also the least fussy: bars, mugs, no-bake cups, cobblers, simple cookies, and cakes that don’t ask for layers or piping bags. You can make them on an ordinary afternoon, on a weeknight with a tired brain, or when you want something sweet without dragging out every tool in the drawer. The first batch below starts with the classic everyone should learn.
Why These Beginner Desserts Keep the Oven Drama Low
-
Short ingredient lists: Most of these recipes rely on 6 to 10 pantry staples, so you’re not hunting down specialty items before you start.
-
Forgiving textures: Brownies, crisps, bars, and loaf cakes stay tasty even if your timing is a little loose.
-
Simple equipment: A bowl, a spoon, a whisk, and a basic pan cover most of the list.
-
Clear doneness cues: You’ll see the difference between set edges, golden tops, and a center that still has a little give.
-
Easy flavor wins: Vanilla, cinnamon, lemon zest, cocoa, and brown sugar do a lot of heavy lifting here.
-
Room to improvise: Many of these desserts accept fruit swaps, nut swaps, or a different chip or jam without falling apart.
1. Classic Chocolate Chip Cookies
A warm cookie with crisp edges and a soft middle is still the easiest way to win over a kitchen crowd. These are the kind you pull from the tray when the chocolate is still glossy and the centers look slightly underdone.
Why It Works:
The dough uses a basic creaming method, so you get structure without a complicated batter. Chilling is optional, which makes this a friendly first cookie recipe, and the balance of brown sugar and white sugar gives you both chew and spread.
Key Ingredients:
- 1 cup unsalted butter, softened
- 3/4 cup granulated sugar
- 3/4 cup packed brown sugar
- 2 large eggs
- 2 teaspoons vanilla extract
- 2 1/4 cups all-purpose flour
- 1 teaspoon baking soda
- 1 teaspoon fine salt
- 2 cups chocolate chips
Quick Steps:
- Preheat the oven to 350°F and line two baking sheets with parchment.
- Beat the butter and sugars until pale and fluffy, about 2 minutes.
- Beat in the eggs and vanilla, then mix in the flour, baking soda, and salt just until combined.
- Fold in the chocolate chips.
- Scoop 2-tablespoon mounds, bake 9 to 11 minutes, and pull them when the edges are golden but the centers still look soft.
Equipment for This Recipe:
- Mixing bowl
- Hand mixer or sturdy spoon
- Baking sheets
- Parchment paper
How to Serve This Dish:
Stack them on a plate while they’re still a little warm. They’re excellent with cold milk, and even better split in half over vanilla ice cream.
Pro Tips for This Recipe:
- Let the dough rest 20 minutes if it feels greasy; the cookies spread less.
- Use room-temperature eggs or the dough can look curdled.
- Pull the tray early. Carryover heat finishes the center.
Variations on This Dish:
- Salted Chocolate Chip: Finish with flaky salt the second the cookies leave the oven.
- Walnut Crunch: Swap in 1 cup chopped walnuts for a firmer bite.
Common Mistakes to Avoid with This Dish:
- Too much flour: Packed flour makes dry cookies; spoon and level instead.
- Overbaking: If they look fully set in the oven, they’ll turn hard on the rack.
2. Fudgy One-Bowl Brownies
If you want dessert that looks like you meant business, brownies are the move. These are dense, glossy, and chewy at the edges, with a center that stays soft if you don’t push the bake too far.
Why It Works:
Everything mixes in one bowl, which keeps the process simple and the cleanup even simpler. Cocoa powder gives you deep chocolate flavor without melting chocolate over a water bath, and a modest amount of flour keeps the texture fudgy instead of cakey.
Key Ingredients:
- 1/2 cup unsalted butter, melted
- 1 cup granulated sugar
- 2 large eggs
- 1 teaspoon vanilla extract
- 1/3 cup unsweetened cocoa powder
- 1/2 cup all-purpose flour
- 1/4 teaspoon fine salt
- 1/4 teaspoon baking powder
- 1/2 cup chocolate chips, optional
Quick Steps:
- Heat the oven to 350°F and line an 8-inch square pan with parchment.
- Whisk the melted butter and sugar together, then whisk in the eggs and vanilla until shiny.
- Stir in cocoa, flour, salt, and baking powder until no dry streaks remain.
- Fold in chocolate chips if using, then spread the batter evenly in the pan.
- Bake 20 to 25 minutes, until the top is set and a toothpick comes out with a few moist crumbs.
Equipment for This Recipe:
- 8-inch square pan
- Mixing bowl
- Whisk
- Rubber spatula
How to Serve This Dish:
Cut them into small squares and serve them plain or with a scoop of vanilla ice cream. They’re rich enough that you do not need frosting.
Pro Tips for This Recipe:
- Line the pan with parchment so the brownies lift cleanly.
- Stop mixing as soon as the flour disappears.
- Cool completely before cutting if you want tidy squares.
Variations on This Dish:
- Walnut Fudge: Add 3/4 cup chopped walnuts for texture.
- Peppermint Brownies: Stir in 1/2 teaspoon peppermint extract and a handful of crushed candy canes on top.
Common Mistakes to Avoid with This Dish:
- Overbaking: Dry brownies come from waiting for a clean toothpick. A few crumbs are the target.
- Cutting too soon: Warm brownies smear instead of slice.
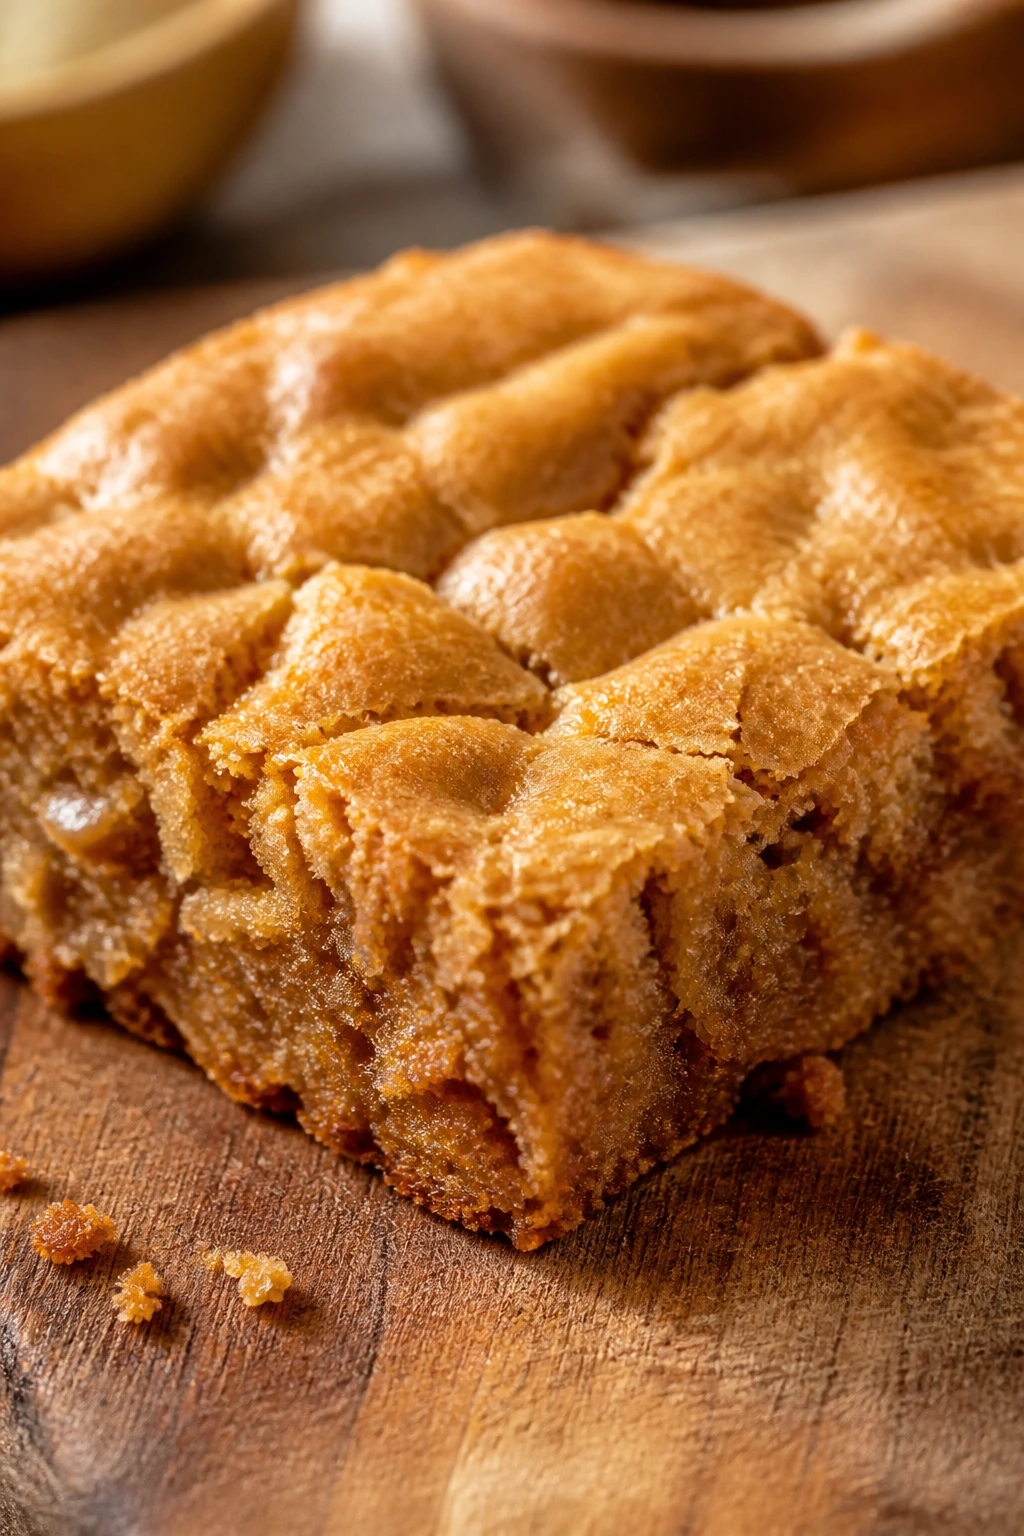
3. Banana Bread With a Brown Sugar Crust
Overripe bananas belong here, period. This loaf bakes into a soft, fragrant slice with a caramel-colored top that tastes like the best part of a banana muffin, only taller.
Why It Works:
Banana bread is one of the most forgiving beginner bakes because the bananas bring moisture and sweetness all by themselves. Brown sugar deepens the flavor, and a simple quick bread method means you mix, pour, and bake without yeast, folding, or decorating.
Key Ingredients:
- 3 very ripe bananas, mashed
- 1/2 cup unsalted butter, melted
- 3/4 cup packed brown sugar
- 2 large eggs
- 1 teaspoon vanilla extract
- 1 3/4 cups all-purpose flour
- 1 teaspoon baking soda
- 1/2 teaspoon fine salt
- 1/2 teaspoon cinnamon, optional
Quick Steps:
- Preheat the oven to 350°F and grease a 9×5-inch loaf pan.
- Mix the mashed bananas, melted butter, brown sugar, eggs, and vanilla until smooth.
- Stir in flour, baking soda, salt, and cinnamon just until the batter comes together.
- Pour into the pan and bake 50 to 60 minutes, until a skewer comes out with a few moist crumbs.
- Cool in the pan for 10 minutes, then move to a rack.
Equipment for This Recipe:
- 9×5-inch loaf pan
- Mixing bowl
- Fork or potato masher
- Cooling rack
How to Serve This Dish:
Slice it thick and serve it at room temperature with salted butter. Toasted slices work well the next day.
Pro Tips for This Recipe:
- Use bananas with heavily speckled skins; they mash sweeter and softer.
- Do not overmix once the flour goes in.
- If the top browns too fast, tent loosely with foil.
Variations on This Dish:
- Chocolate Chip Banana Bread: Fold in 3/4 cup chips.
- Nutty Breakfast Loaf: Add 1/2 cup chopped walnuts or pecans.
Common Mistakes to Avoid with This Dish:
- Bananas that aren’t ripe enough: Pale bananas make a bland loaf.
- Slicing while hot: The crumb needs time to set or it turns gummy.
4. Vanilla Mug Cake
A mug cake is what you make when you want cake in five minutes and you do not want to wash a mixer. This one puffs up in the microwave with a tender crumb and a plain vanilla flavor that takes to berries or chocolate sauce easily.
Why It Works:
The batter is tiny and fast, which makes it ideal for nervous first-timers. A small amount of baking powder gives lift, while oil keeps the cake soft even after a minute in the microwave.
Key Ingredients:
- 4 tablespoons all-purpose flour
- 2 tablespoons granulated sugar
- 1/4 teaspoon baking powder
- Pinch of fine salt
- 3 tablespoons milk
- 2 tablespoons neutral oil
- 1/4 teaspoon vanilla extract
- 1 tablespoon chocolate chips, optional
Quick Steps:
- Stir the flour, sugar, baking powder, and salt together in a large microwave-safe mug.
- Add the milk, oil, and vanilla, then mix until smooth.
- Fold in chocolate chips if using.
- Microwave 60 to 90 seconds, checking at 60, until the top looks set and springy.
- Let it stand for 1 minute before eating.
Equipment for This Recipe:
- Large microwave-safe mug
- Spoon
- Measuring spoons
How to Serve This Dish:
Eat it straight from the mug, or tip it onto a plate and add whipped cream. A few sliced strawberries make it feel less like a stunt and more like dessert.
Pro Tips for This Recipe:
- Use a mug that holds at least 12 ounces so the batter doesn’t climb out.
- Start with less time; microwaves vary a lot.
- Stir well enough to break up flour pockets at the bottom.
Variations on This Dish:
- Cocoa Mug Cake: Replace 1 tablespoon flour with cocoa powder.
- Cinnamon Roll Mug Cake: Add 1/4 teaspoon cinnamon and a teaspoon of brown sugar on top.
Common Mistakes to Avoid with This Dish:
- Overcooking: Two extra seconds can make it rubbery.
- Tiny mug: A small cup can overflow fast.
5. No-Bake Cheesecake Cups
These taste like mini cheesecake jars without the stress of a springform pan. The crust stays sandy and buttery, the filling turns silky, and the fruit on top gives you a clean sweet-tart finish.
Why It Works:
Cream cheese and whipped topping make a filling that firms up in the fridge, so there’s no oven to babysit. Building them in cups keeps the texture neat, and the portions are easy to control.
Key Ingredients:
- 1 cup graham cracker crumbs
- 3 tablespoons melted butter
- 8 ounces cream cheese, softened
- 1/2 cup powdered sugar
- 1 teaspoon vanilla extract
- 1 tablespoon lemon juice
- 1 cup whipped topping or whipped cream
- 1 cup berries or fruit topping
Quick Steps:
- Stir the crumbs and melted butter together, then press into the bottoms of 4 small cups.
- Beat the cream cheese, powdered sugar, vanilla, and lemon juice until smooth.
- Fold in the whipped topping.
- Spoon the filling over the crusts and chill for at least 2 hours.
- Top with berries just before serving.
Equipment for This Recipe:
- Mixing bowl
- Hand mixer
- Small cups or jars
- Spoon
How to Serve This Dish:
Serve them cold with extra berries on the side. A mint leaf on top is optional, but it does make the cups look finished.
Pro Tips for This Recipe:
- Let the cream cheese soften fully or the filling stays lumpy.
- Add fruit right before serving so the crust stays crisp.
- If you want cleaner layers, chill the crust for 10 minutes before filling.
Variations on This Dish:
- Lemon Cheesecake Cups: Double the lemon juice and add zest.
- Chocolate Crumb Version: Use crushed chocolate cookies instead of graham crumbs.
Common Mistakes to Avoid with This Dish:
- Cold cream cheese: It won’t blend smoothly.
- Overfilling the cups: Leave space for toppings and easy spooning.
6. Oatmeal Raisin Cookies
These are chewy, cinnamon-warm cookies with a little edge to them. They’re the sort of bake that smells like brown sugar and toasted oats before they even come out of the oven.
Why It Works:
Oats give the dough body without fancy technique, and raisins bring sweetness in little bursts. The dough comes together fast, and the cookies hold their shape better than many butter-heavy recipes.
Key Ingredients:
- 1/2 cup unsalted butter, softened
- 1/2 cup brown sugar
- 1/4 cup granulated sugar
- 1 large egg
- 1 teaspoon vanilla extract
- 1 cup all-purpose flour
- 1 1/2 cups old-fashioned oats
- 1/2 teaspoon baking soda
- 1 teaspoon cinnamon
- 3/4 cup raisins
Quick Steps:
- Heat the oven to 350°F and line a baking sheet.
- Cream the butter and sugars, then beat in the egg and vanilla.
- Mix in flour, oats, baking soda, cinnamon, and salt, then fold in raisins.
- Scoop mounds and flatten slightly.
- Bake 10 to 12 minutes, until the edges are golden and the centers look set but still soft.
Equipment for This Recipe:
- Mixing bowl
- Baking sheet
- Cookie scoop or spoon
- Parchment paper
How to Serve This Dish:
Serve them with tea, milk, or coffee. They’re also good crumbled over yogurt, which sounds odd until you try it.
Pro Tips for This Recipe:
- Soak the raisins in hot water for 5 minutes if they seem dry.
- Chill the dough 15 minutes for thicker cookies.
- Pull them early for a chewier center.
Variations on This Dish:
- Raisin-Walnut: Swap in 1/2 cup chopped walnuts.
- Cranberry Oatmeal: Use dried cranberries instead of raisins.
Common Mistakes to Avoid with This Dish:
- Too much flour: The cookies turn dry and crumbly.
- Skipping the salt: Oats need that contrast.
7. Lemon Drizzle Loaf
A good lemon loaf is bright, tender, and a little sticky on top where the glaze settles into the crumb. This one tastes clean and sharp, not sour, and the scent alone can wake up a dull kitchen.
Why It Works:
The loaf is built like a simple butter cake, so the method is easy to learn and repeat. Lemon zest carries more flavor than juice alone, and the drizzle soaks into the warm cake, which keeps every slice moist.
Key Ingredients:
- 1 1/2 cups all-purpose flour
- 1 teaspoon baking powder
- 1/2 teaspoon fine salt
- 1/2 cup unsalted butter, softened
- 3/4 cup granulated sugar
- 2 large eggs
- 2 tablespoons lemon zest
- 1/4 cup lemon juice
- 1/2 cup milk
- 1 cup powdered sugar for glaze
Quick Steps:
- Heat the oven to 350°F and line a loaf pan.
- Whisk flour, baking powder, and salt together.
- Beat butter and sugar until fluffy, then add eggs, zest, and lemon juice.
- Alternate in the dry ingredients and milk, mixing until smooth.
- Bake 45 to 55 minutes. Whisk the glaze and pour it over the warm loaf once a skewer comes out with a few crumbs.
Equipment for This Recipe:
- Loaf pan
- Mixing bowls
- Whisk
- Zester or fine grater
How to Serve This Dish:
Serve thin slices with afternoon tea or coffee. A spoonful of berries on the side makes the plate look more polished than the effort required.
Pro Tips for This Recipe:
- Zest the lemons before juicing them.
- Glaze while warm so it soaks in a little.
- Use fresh lemons, not bottled juice.
Variations on This Dish:
- Poppy Seed Lemon Loaf: Add 1 tablespoon poppy seeds.
- Blueberry Lemon Loaf: Fold in 3/4 cup blueberries lightly dusted with flour.
Common Mistakes to Avoid with This Dish:
- Overmixing the batter: That makes the crumb tight.
- Adding glaze to a cold loaf: It sits on top instead of sinking in.
8. Peach Crisp
Soft peaches under a crackly oat topping are a summer dessert cheat code, but honestly, canned peaches make this possible any time. The filling bubbles around the edges while the top turns toasted and sandy.
Why It Works:
A crisp is one of the easiest baked desserts because the fruit does the heavy lifting and the topping is just stirred together. The cornstarch thickens the juices so the pan doesn’t turn watery.
Key Ingredients:
- 6 cups sliced peaches, fresh or drained canned
- 2 tablespoons granulated sugar
- 1 tablespoon cornstarch
- 1 teaspoon lemon juice
- 3/4 cup old-fashioned oats
- 1/2 cup all-purpose flour
- 1/2 cup brown sugar
- 1/2 teaspoon cinnamon
- 1/4 teaspoon salt
- 6 tablespoons cold butter, cubed
Quick Steps:
- Heat the oven to 375°F and grease an 8-inch baking dish.
- Toss peaches with sugar, cornstarch, and lemon juice, then spread in the dish.
- Mix oats, flour, brown sugar, cinnamon, and salt, then cut in butter until crumbly.
- Scatter the topping over the fruit.
- Bake 35 to 40 minutes, until the top is golden and the fruit bubbles at the edges.
Equipment for This Recipe:
- Baking dish
- Mixing bowl
- Fork or pastry cutter
- Spoon
How to Serve This Dish:
Serve it warm with vanilla ice cream. Cold leftovers are fine, but the top loses its crisp edge.
Pro Tips for This Recipe:
- If using canned peaches, drain them well.
- Cold butter makes the topping crumble, not melt.
- Let it sit 10 minutes before scooping so the juices settle.
Variations on This Dish:
- Peach-Blueberry Crisp: Replace 2 cups of peaches with blueberries.
- Ginger Crisp: Add 1 teaspoon grated fresh ginger to the fruit.
Common Mistakes to Avoid with This Dish:
- Watery filling: Usually from fruit that wasn’t drained or thickened.
- Pale topping: Bake until the oats are deeply golden.
9. Strawberry Shortcake Biscuits
Shortcake should taste like butter, strawberries, and cream, not a complicated layer cake pretending to be casual. These biscuits are tender, lightly sweet, and sturdy enough to hold the fruit without collapsing.
Why It Works:
The biscuit base is simple enough for a first-time baker, and the strawberries do the fancy part with almost no work. Cutting the butter into the flour keeps the texture flaky rather than cakey.
Key Ingredients:
- 2 cups all-purpose flour
- 2 tablespoons granulated sugar
- 1 tablespoon baking powder
- 1/2 teaspoon salt
- 1/2 cup cold unsalted butter, cubed
- 3/4 cup milk or buttermilk
- 1 pound strawberries, sliced
- 2 tablespoons sugar for berries
- 1 cup whipped cream
Quick Steps:
- Heat the oven to 425°F and line a baking sheet.
- Mix flour, sugar, baking powder, and salt, then cut in the butter until the mixture looks like coarse crumbs.
- Stir in milk just until the dough comes together.
- Pat out and cut 6 biscuits, then bake 12 to 15 minutes until golden.
- Toss strawberries with sugar and let them sit while the biscuits cool, then split and fill with cream and berries.
Equipment for This Recipe:
- Baking sheet
- Mixing bowl
- Biscuit cutter or glass
- Pastry cutter or fork
How to Serve This Dish:
Serve the biscuits split open with strawberries spilling over the sides. A little extra cream on top is not a flaw.
Pro Tips for This Recipe:
- Keep the butter cold so the biscuits rise.
- Do not twist the cutter; press straight down.
- Macerate the berries for at least 15 minutes.
Variations on This Dish:
- Mixed Berry Shortcake: Use raspberries and blueberries with the strawberries.
- Lemon Shortcake: Add 1 teaspoon lemon zest to the biscuit dough.
Common Mistakes to Avoid with This Dish:
- Overworking the dough: It turns the biscuits tough.
- Skipping the berry sugar: The fruit needs that quick syrup.
10. Peanut Butter Blossoms
These are the cookie jar classic that always disappears first. The peanut butter cookie is soft and sandy, and the chocolate kiss on top gives you that salty-sweet hit in one bite.
Why It Works:
The dough is sturdy and easy to roll, which makes it a good first cookie project for bakers who like clear steps. Pressing the chocolate into the cookies while they’re hot gives you the signature crackled top.
Key Ingredients:
- 1/2 cup unsalted butter, softened
- 3/4 cup peanut butter
- 1/2 cup granulated sugar
- 1/2 cup brown sugar
- 1 large egg
- 1 teaspoon vanilla extract
- 1 1/2 cups all-purpose flour
- 1 teaspoon baking soda
- 1/4 teaspoon salt
- 24 chocolate kisses, unwrapped
Quick Steps:
- Heat the oven to 375°F and line a baking sheet.
- Cream butter, peanut butter, and sugars, then beat in egg and vanilla.
- Mix in flour, baking soda, and salt.
- Roll into balls, bake 8 to 10 minutes, and press a kiss into the center as soon as they come out.
- Cool on the tray so the chocolate sets.
Equipment for This Recipe:
- Mixing bowl
- Baking sheet
- Cookie scoop
- Parchment paper
How to Serve This Dish:
Pile them on a tray once the kisses have set. They travel well, which makes them a smart bake for school boxes or take-along platters.
Pro Tips for This Recipe:
- Chill the dough if it feels sticky.
- Unwrap the kisses before baking; you will not want to do it mid-timer.
- Press the chocolate in gently so the cookie doesn’t crack apart.
Variations on This Dish:
- Dark Chocolate Blossoms: Use dark chocolate kisses or squares.
- Crunchy Peanut Version: Choose crunchy peanut butter for a little texture.
Common Mistakes to Avoid with This Dish:
- Pressing the kiss too late: It won’t stick to the warm cookie.
- Using oily peanut butter without adjusting: Natural peanut butter can make the dough spread.
11. Rice Krispie Treat Bars
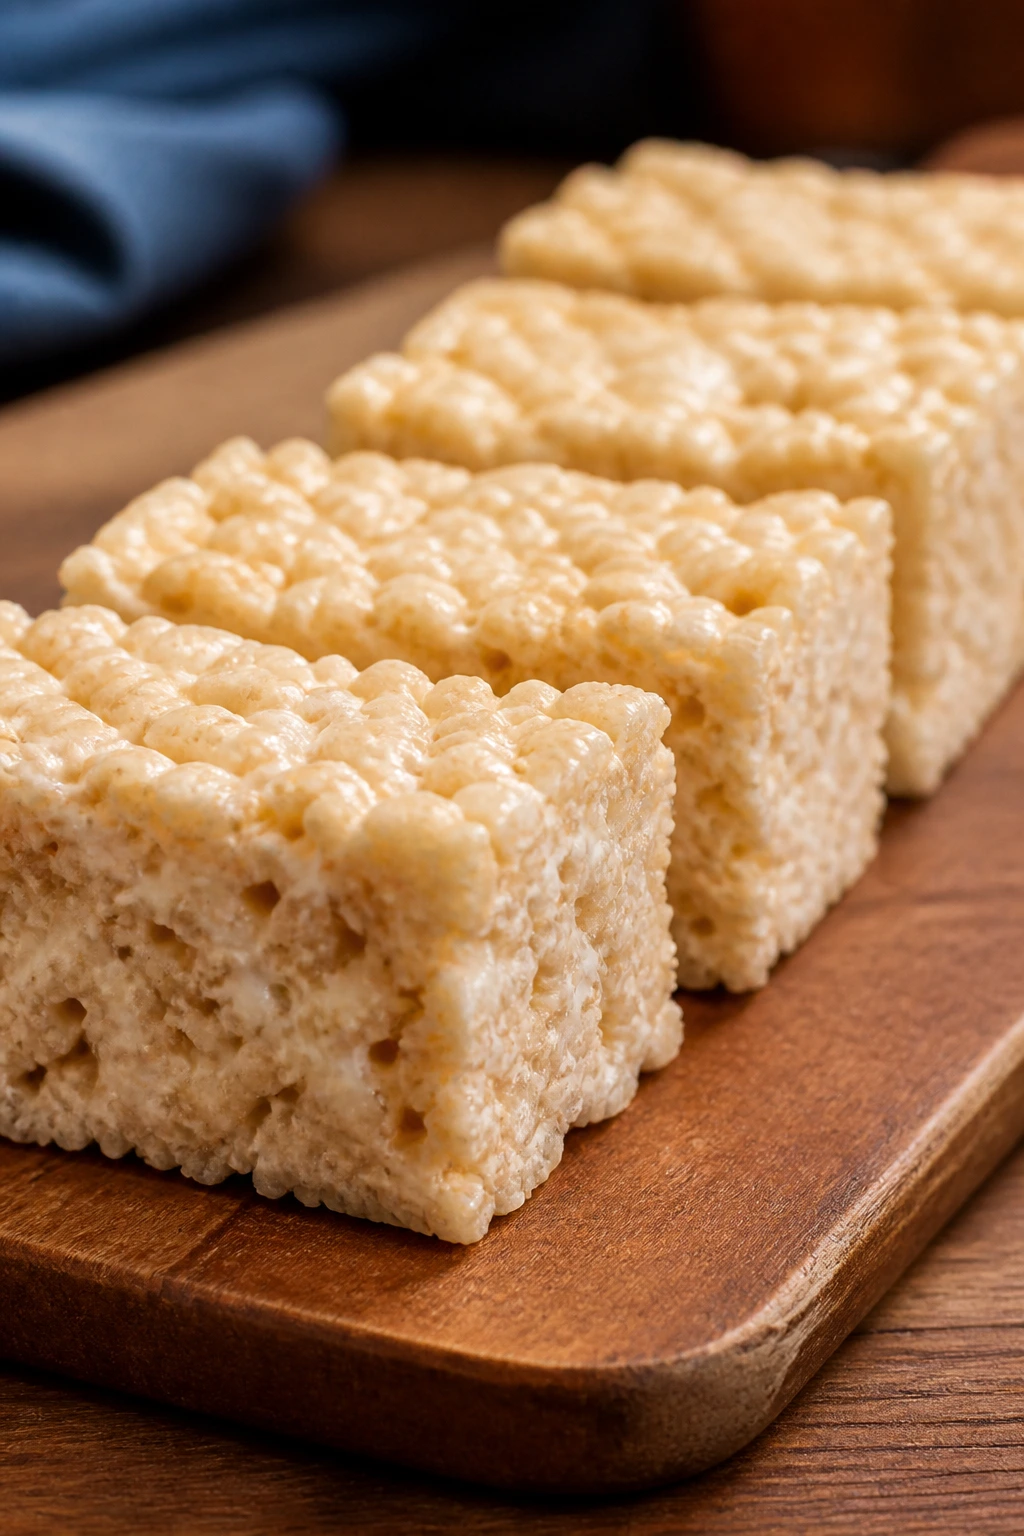
Three ingredients, maybe four if you count vanilla, and the marshmallow pull still feels a little magical. These bars are chewy, buttery, and fast enough to make when you need dessert without turning on the oven.
Why It Works:
Melted marshmallows bind the cereal together, so there’s no batter to overmix or overbake. The recipe teaches timing more than technique, which is exactly why it works for beginners.
Key Ingredients:
- 4 tablespoons unsalted butter
- 10 ounces mini marshmallows
- 1 teaspoon vanilla extract
- 6 cups crisp rice cereal
- Pinch of salt
Quick Steps:
- Grease a 9-inch square pan.
- Melt the butter in a large pot over low heat, then add marshmallows and salt.
- Stir until smooth, then remove from the heat and add vanilla.
- Fold in the cereal until coated.
- Press into the pan with a buttered spatula and cool before cutting.
Equipment for This Recipe:
- Large pot
- 9-inch square pan
- Spatula
- Buttered parchment or wax paper
How to Serve This Dish:
Cut into neat squares and serve at room temperature. They’re easy to pack, stack, and hand around without forks.
Pro Tips for This Recipe:
- Keep the heat low or the marshmallows turn stiff.
- Press gently; packing too hard makes dense bars.
- Add a pinch of flaky salt on top if you like contrast.
Variations on This Dish:
- Chocolate Swirl: Stir in 1/2 cup melted chocolate after mixing.
- Birthday Cake Bars: Add sprinkles once the mixture is off the heat.
Common Mistakes to Avoid with This Dish:
- High heat: It makes the marshmallow mixture hard and chewy in the wrong way.
- Overpacking the pan: The bars become brick-like instead of light.
12. Simple Sugar Cookies
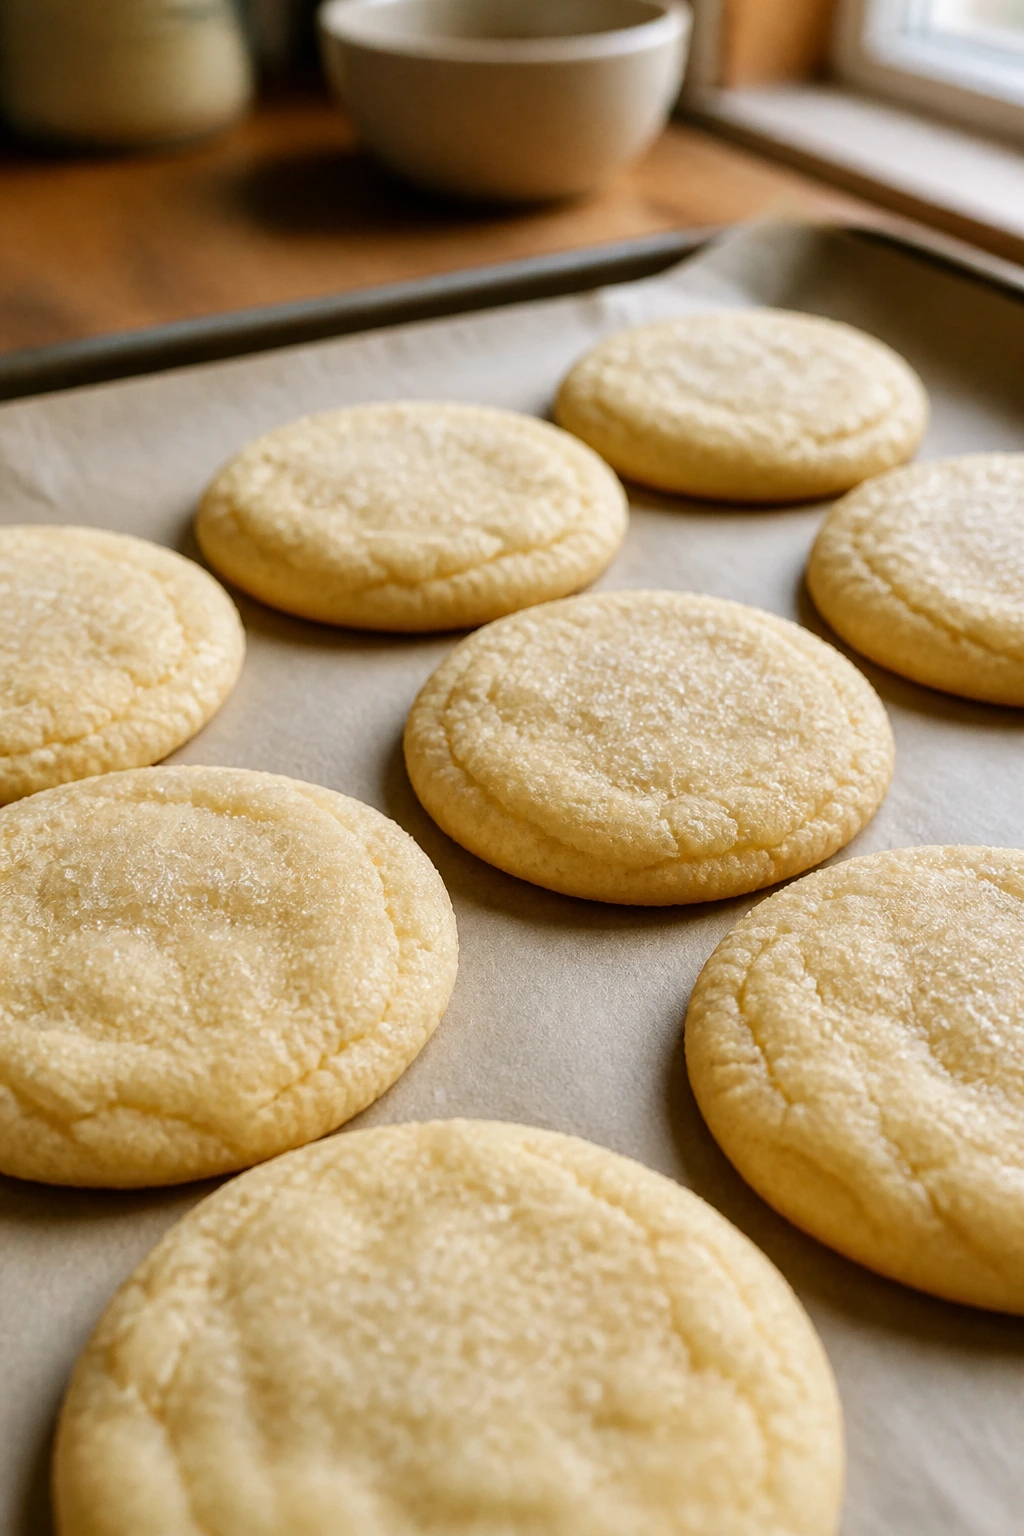
Sugar cookies look plain on purpose, which is why they’re such a good baking teacher. You get a buttery cookie with a clean vanilla finish, and the dough is easy to roll, cut, or flatten into rounds.
Why It Works:
The dough holds shape without being fussy, and the flavor depends on the basics done well: good butter, enough salt, and not too much flour. It is the sort of recipe that rewards patience without demanding skill.
Key Ingredients:
- 1 cup unsalted butter, softened
- 1 cup granulated sugar
- 1 large egg
- 2 teaspoons vanilla extract
- 2 1/2 cups all-purpose flour
- 1 teaspoon baking powder
- 1/2 teaspoon salt
- Extra sugar for topping
Quick Steps:
- Heat the oven to 350°F and line baking sheets.
- Cream butter and sugar until fluffy, then beat in egg and vanilla.
- Mix in flour, baking powder, and salt until a soft dough forms.
- Roll into balls or cut shapes, then sprinkle with sugar.
- Bake 9 to 11 minutes until the edges look barely golden.
Equipment for This Recipe:
- Mixing bowl
- Rolling pin, optional
- Baking sheets
- Cookie cutters, optional
How to Serve This Dish:
Serve them plain, or sandwich two with jam or frosting. They also make a tidy base for simple holiday decorating.
Pro Tips for This Recipe:
- Chill cutout dough for cleaner shapes.
- Bake one test cookie first if your oven runs hot.
- Use parchment so the bottoms don’t brown too fast.
Variations on This Dish:
- Lemon Sugar Cookies: Add 1 tablespoon zest.
- Almond Sugar Cookies: Swap 1/2 teaspoon almond extract for some vanilla.
Common Mistakes to Avoid with This Dish:
- Too much flour during rolling: It dries the dough and roughens the edges.
- Baking until deeply golden: Sugar cookies should stay pale.
13. Blueberry Muffins
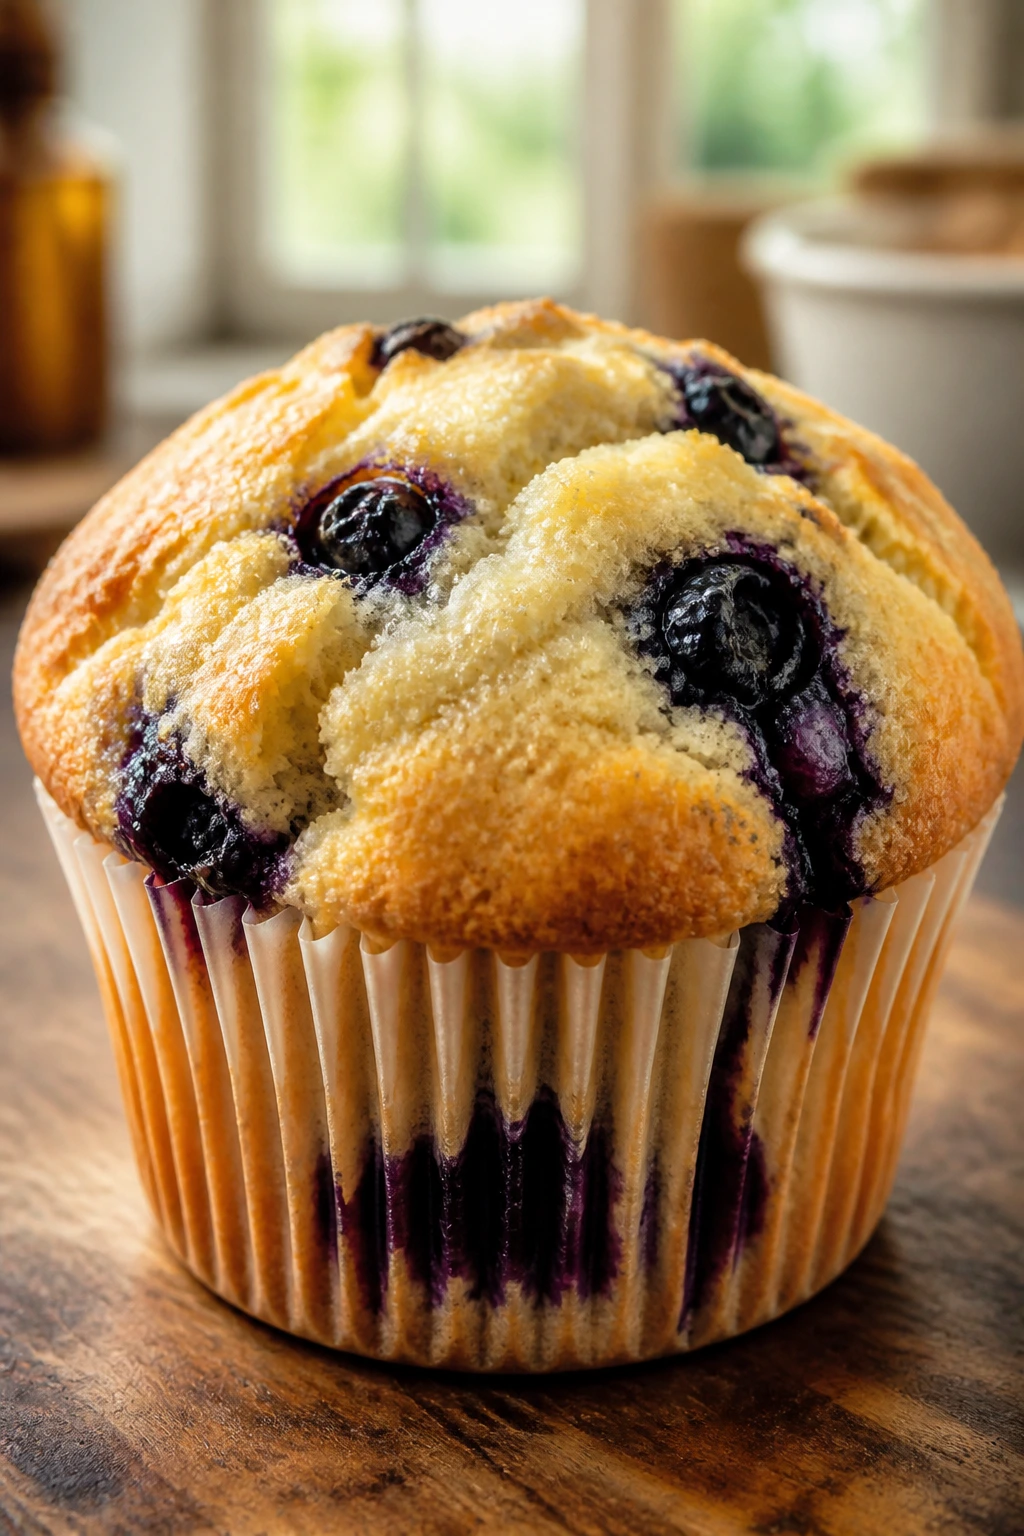
These are the muffins you make when you want breakfast to smell like dessert. The tops rise into a soft dome, the berries burst in little pockets, and the crumb stays tender for days.
Why It Works:
Muffins are a straightforward “mix wet, mix dry, combine” project, which makes them ideal for new bakers. The berries add juice and sweetness, and a quick batter keeps the crumb light.
Key Ingredients:
- 2 cups all-purpose flour
- 3/4 cup granulated sugar
- 2 teaspoons baking powder
- 1/2 teaspoon salt
- 1 large egg
- 1 cup milk
- 1/2 cup melted butter
- 1 teaspoon vanilla extract
- 1 1/2 cups blueberries
Quick Steps:
- Heat the oven to 375°F and line a muffin tin.
- Whisk flour, sugar, baking powder, and salt.
- Whisk egg, milk, melted butter, and vanilla in another bowl.
- Stir wet into dry just until combined, then fold in blueberries.
- Fill cups and bake 18 to 22 minutes until golden and springy.
Equipment for This Recipe:
- Muffin tin
- Mixing bowls
- Whisk
- Paper liners
How to Serve This Dish:
Eat them warm with butter or a smear of cream cheese. They’re good cold too, which is handy when breakfast starts in a hurry.
Pro Tips for This Recipe:
- Toss berries with a teaspoon of flour so they don’t sink.
- Do not beat the batter smooth. A few lumps are fine.
- Check the center with a light press; it should spring back.
Variations on This Dish:
- Lemon Blueberry: Add lemon zest to the batter.
- Streusel Top: Sprinkle with a quick brown sugar crumble before baking.
Common Mistakes to Avoid with This Dish:
- Overmixing: It makes the muffins tough and tunneled.
- Overfilling the cups: They spill instead of doming.
14. Apple Cinnamon Coffee Cake

Coffee cake is what happens when crumb topping meets a soft vanilla cake and nobody complains. The apples stay tender, the cinnamon runs through the middle, and the streusel gives you the best kind of crunch.
Why It Works:
This recipe uses a simple batter and a straightforward crumb topping, so the only real task is layering. The apples add moisture without needing a glaze to save the cake.
Key Ingredients:
- 2 cups all-purpose flour
- 1 teaspoon baking powder
- 1/2 teaspoon baking soda
- 1/2 teaspoon salt
- 1/2 cup unsalted butter, softened
- 3/4 cup brown sugar
- 2 large eggs
- 1 cup sour cream
- 2 apples, peeled and diced
- 1 teaspoon cinnamon
Quick Steps:
- Heat the oven to 350°F and grease an 8-inch square pan.
- Mix flour, baking powder, baking soda, and salt.
- Beat butter and brown sugar, then add eggs and sour cream.
- Stir in the dry ingredients, fold in apples, and spread in the pan.
- Top with cinnamon sugar or streusel, then bake 35 to 45 minutes.
Equipment for This Recipe:
- Square baking pan
- Mixing bowls
- Spatula
- Peeler and knife
How to Serve This Dish:
Serve squares warm or at room temperature with coffee. A little powdered sugar on top is enough; this cake does not need a heavy frosting.
Pro Tips for This Recipe:
- Dice apples small so they bake through.
- Sour cream keeps the crumb plush.
- Let the cake cool before cutting or the middle tears.
Variations on This Dish:
- Pecan Streusel: Add chopped pecans to the topping.
- Pear Coffee Cake: Swap diced pears for apples.
Common Mistakes to Avoid with This Dish:
- Huge apple chunks: They sink and stay firm.
- Skipping the cooling time: The slice falls apart.
15. Chocolate Chip Muffins
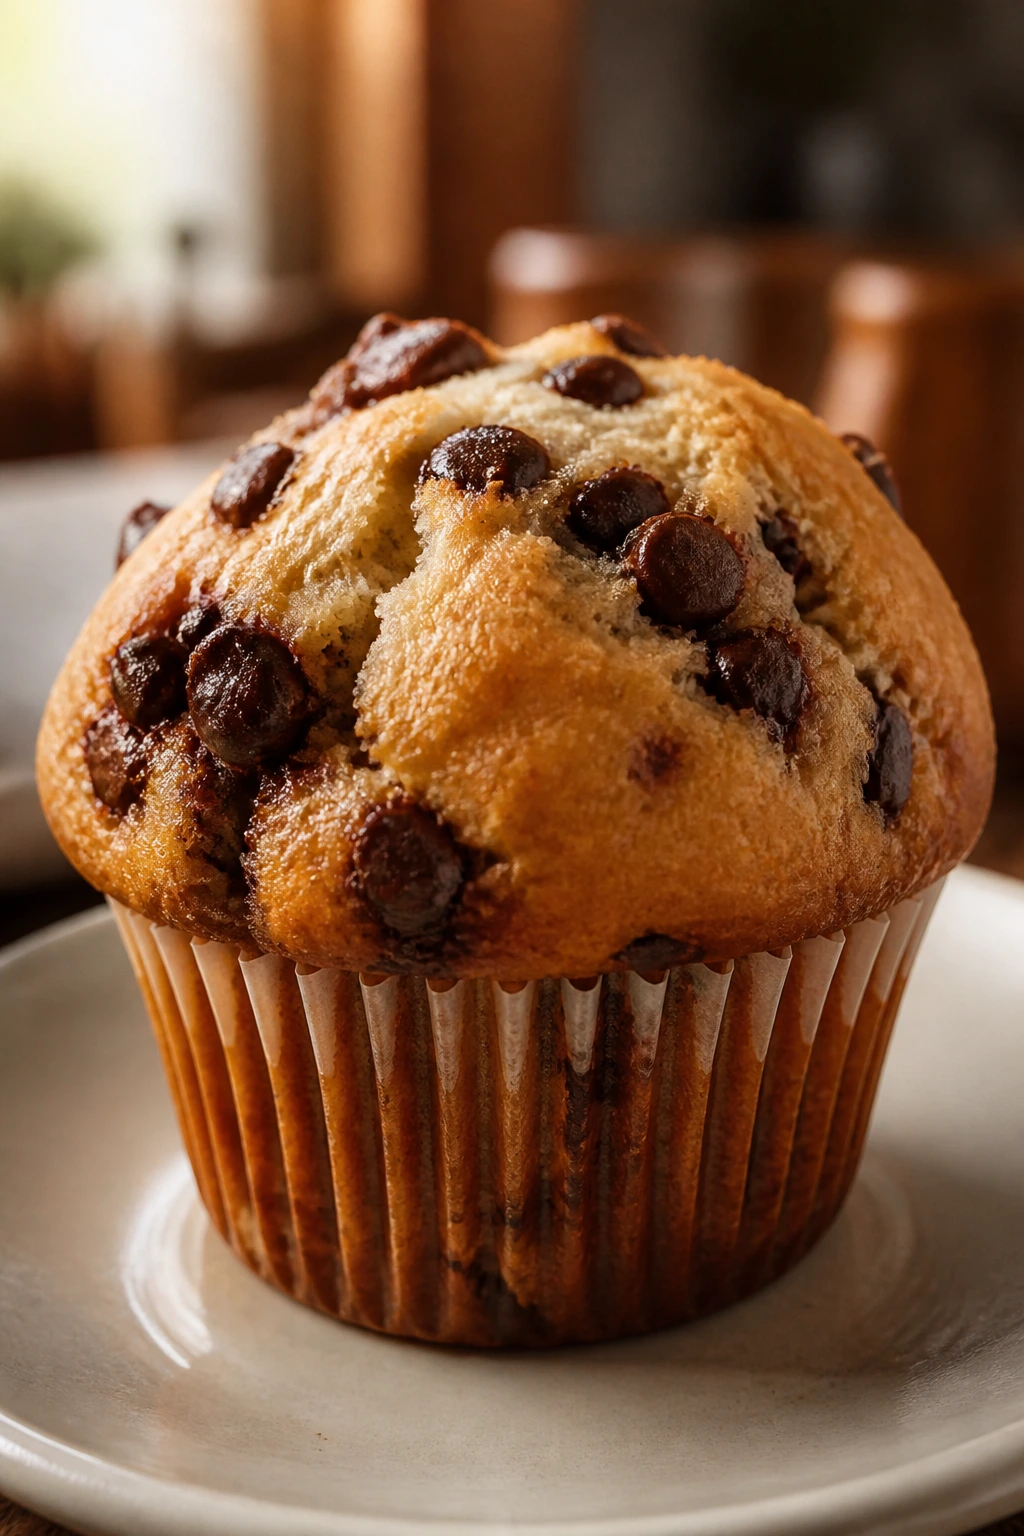
These are part muffin, part snack cake, and all easy. They bake up with little puddles of melted chocolate and a top that cracks just enough to look homemade in a good way.
Why It Works:
The batter uses the muffin method, so you can mix it with two bowls and a spoon. The chocolate chips add sweetness, which means you do not need a sugary glaze to make them feel finished.
Key Ingredients:
- 2 cups all-purpose flour
- 3/4 cup sugar
- 2 teaspoons baking powder
- 1/2 teaspoon salt
- 1 large egg
- 1 cup milk
- 1/2 cup neutral oil
- 1 teaspoon vanilla extract
- 1 cup chocolate chips
Quick Steps:
- Heat the oven to 375°F and line a muffin tin.
- Combine flour, sugar, baking powder, and salt.
- Whisk egg, milk, oil, and vanilla in another bowl.
- Stir wet into dry, fold in chips, and portion into cups.
- Bake 18 to 20 minutes until the tops are golden and spring back.
Equipment for This Recipe:
- Muffin tin
- Mixing bowls
- Whisk
- Spoon or scoop
How to Serve This Dish:
Serve them warm so the chips stay soft. They also make a decent lunchbox dessert because they travel without fuss.
Pro Tips for This Recipe:
- Reserve a few chips to press on top before baking.
- Do not overfill the muffin cups.
- Oil keeps the muffins tender longer than butter here.
Variations on This Dish:
- Mini Chip Version: Use mini chocolate chips for more even distribution.
- Orange Chocolate: Add orange zest to the batter.
Common Mistakes to Avoid with This Dish:
- Overmixing: Tough muffins are almost always mixed too long.
- Underbaking the center: The top can look done before the middle is ready.
16. One-Bowl Blondies
Blondies are brownies’ buttery cousin, and they deserve more love. These bake into chewy bars with a brown sugar flavor and a vanilla base that plays nicely with nuts, chips, or nothing at all.
Why It Works:
Brown sugar gives blondies that toffee-like depth without needing caramel. Because the batter is mixed in one bowl, there’s very little chance of overcomplicating the process.
Key Ingredients:
- 1/2 cup unsalted butter, melted
- 1 cup packed brown sugar
- 1 large egg
- 1 teaspoon vanilla extract
- 1 cup all-purpose flour
- 1/2 teaspoon baking powder
- 1/4 teaspoon salt
- 3/4 cup white chocolate chips or chopped pecans
Quick Steps:
- Heat the oven to 350°F and line an 8-inch square pan.
- Stir melted butter and brown sugar together, then mix in the egg and vanilla.
- Add flour, baking powder, and salt, then fold in chips or nuts.
- Spread in the pan.
- Bake 20 to 24 minutes, until the top is golden and the center no longer looks wet.
Equipment for This Recipe:
- Square pan
- Mixing bowl
- Spatula
- Parchment paper
How to Serve This Dish:
Cut into small squares and serve with coffee or milk. They’re rich enough to work as a dessert bite after a simple dinner.
Pro Tips for This Recipe:
- Slightly underbaked blondies stay chewier.
- Use parchment so the bars lift cleanly.
- Let them cool before slicing or the center smears.
Variations on This Dish:
- White Chocolate Macadamia: Swap in chopped macadamias.
- Cinnamon Blondies: Add 1 teaspoon cinnamon to the batter.
Common Mistakes to Avoid with This Dish:
- Overbaking: The edges can fool you. Pull them when the center still has a soft set.
- Using too much flour: Blondies should not be cakey.
17. Coconut Macaroons
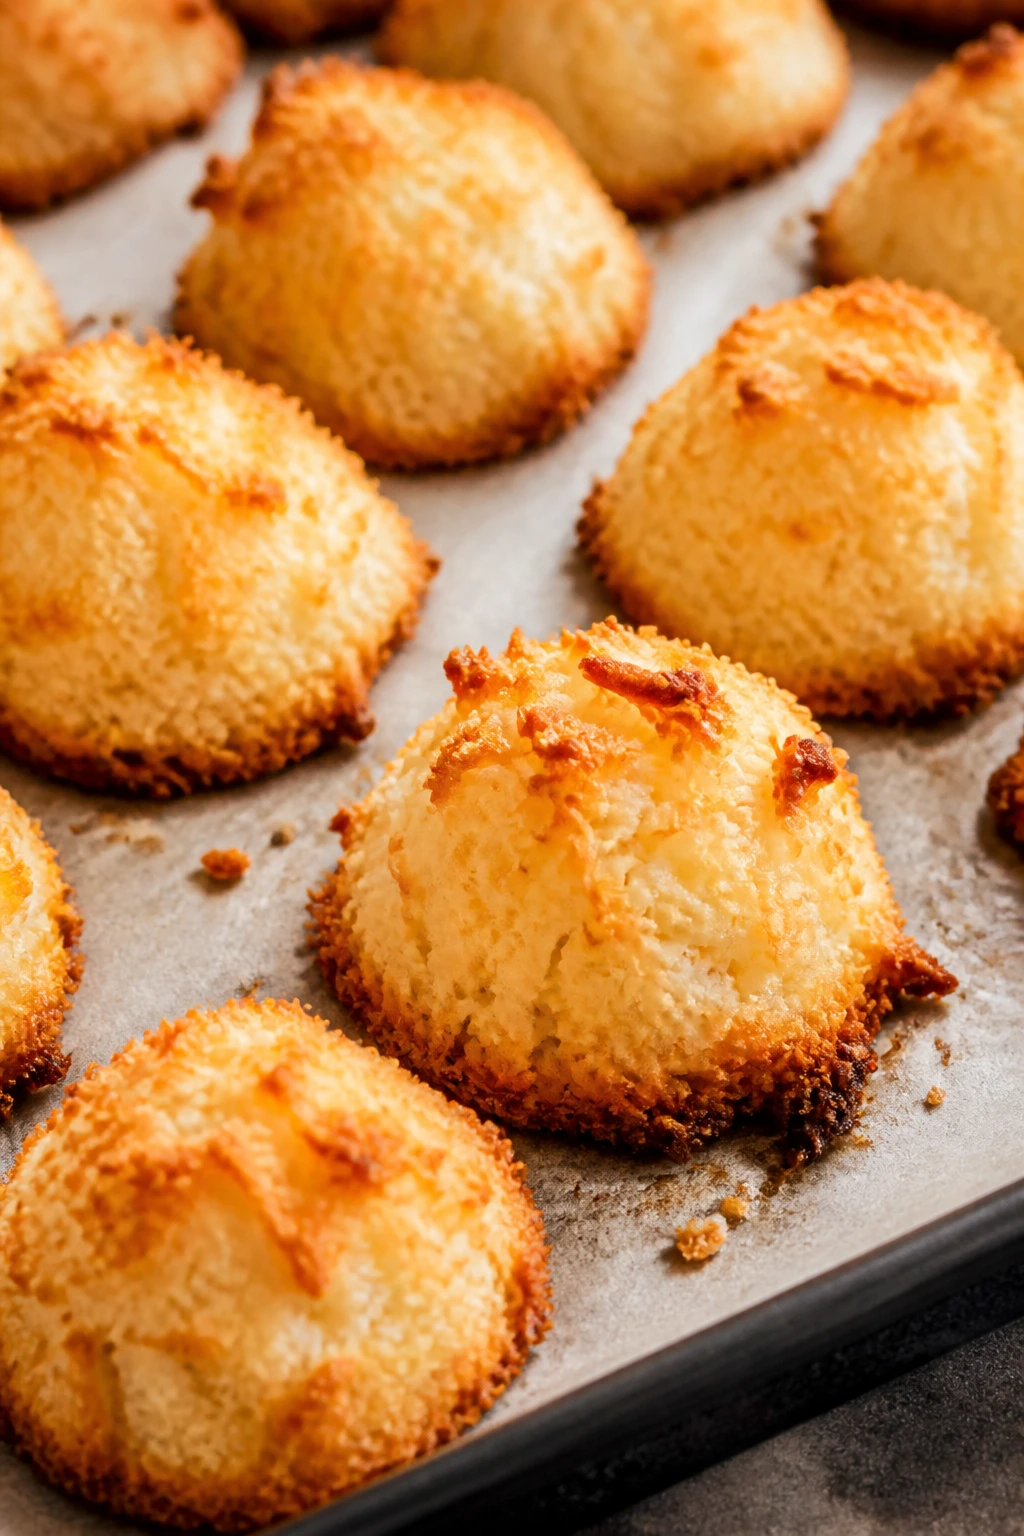
These are the sticky-sweet coconut cookies that somehow look fancy even though they’re one of the easiest bakes on the list. The edges turn toasted, the centers stay chewy, and chocolate drizzle is a nice extra if you want it.
Why It Works:
Macaroons need almost no technique beyond mixing and scooping. Egg whites hold the coconut together, and a short bake gives you crisp edges without drying them out.
Key Ingredients:
- 3 cups sweetened shredded coconut
- 2 large egg whites
- 1/2 cup granulated sugar
- 1 teaspoon vanilla extract
- 1/4 teaspoon salt
- 2 tablespoons all-purpose flour, optional
- 4 ounces melted chocolate, optional
Quick Steps:
- Heat the oven to 325°F and line a baking sheet.
- Stir the coconut, egg whites, sugar, vanilla, salt, and flour if using.
- Scoop mounds onto the sheet.
- Bake 20 to 25 minutes until the tops are golden.
- Cool, then drizzle with chocolate if you want.
Equipment for This Recipe:
- Baking sheet
- Mixing bowl
- Cookie scoop
- Parchment paper
How to Serve This Dish:
Serve them with coffee after dinner or pack them in small paper cups. They hold their shape well once cooled.
Pro Tips for This Recipe:
- If the mixture feels loose, let it sit 5 minutes; coconut absorbs moisture.
- Use sweetened coconut for the right texture.
- Watch the last few minutes closely; they brown fast.
Variations on This Dish:
- Chocolate-Dipped: Dip the bottoms in melted chocolate.
- Almond Coconut: Add 1/4 teaspoon almond extract.
Common Mistakes to Avoid with This Dish:
- Overbaking: Dry macaroons turn hard quickly.
- Using unsweetened coconut without adjusting: The texture and sweetness change a lot.
18. Vanilla Pudding Parfaits
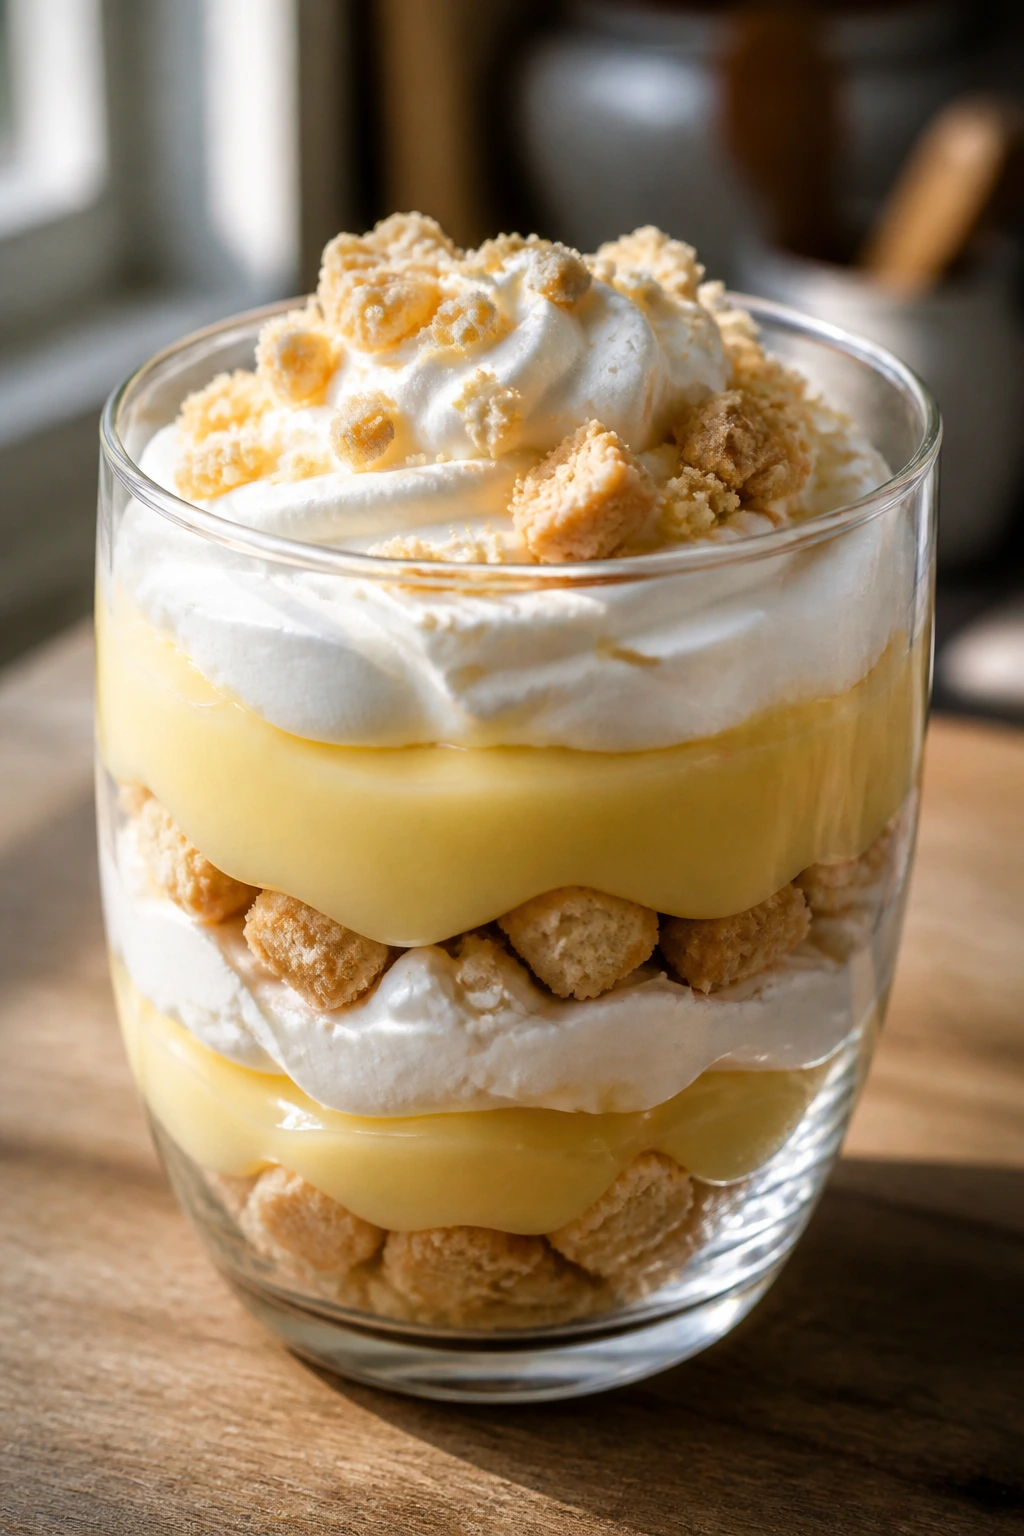
This is the no-bake dessert for people who want layers without a layer cake. You get cool vanilla pudding, creamy whipped topping, and crunchy cookie crumbs in a glass that looks more deliberate than it is.
Why It Works:
Instant pudding does the work fast, and the layered assembly lets beginners practice simple presentation without any baking pressure. The crunchy element keeps the cups from tasting flat.
Key Ingredients:
- 1 package instant vanilla pudding mix
- 2 cups cold milk
- 1 cup whipped topping or whipped cream
- 1 cup crushed vanilla wafers or graham crackers
- 1 cup berries or sliced bananas
- 1 teaspoon vanilla extract, optional
Quick Steps:
- Whisk the pudding mix and milk for about 2 minutes until thick.
- Fold in a little vanilla if you want a deeper flavor.
- Spoon crumbs into the bottom of glasses, then add pudding and fruit.
- Repeat layers once more.
- Chill 30 minutes before serving.
Equipment for This Recipe:
- Mixing bowl
- Whisk
- Serving glasses
- Spoon
How to Serve This Dish:
Serve cold with a spoon that can reach the bottom. Clear glasses show off the layers and make the dessert feel more finished than the effort required.
Pro Tips for This Recipe:
- Chill the pudding before layering if you want sharper lines.
- Use ripe bananas only at the last minute.
- Crush the cookies just enough to keep a little texture.
Variations on This Dish:
- Chocolate Pudding Parfait: Swap in chocolate pudding mix.
- Berry Trifle Style: Use mixed berries and shortcake crumbs.
Common Mistakes to Avoid with This Dish:
- Warm milk: The pudding won’t thicken properly.
- Overloading with fruit juice: It softens the crumb layer fast.
19. No-Bake Chocolate Oat Cookies
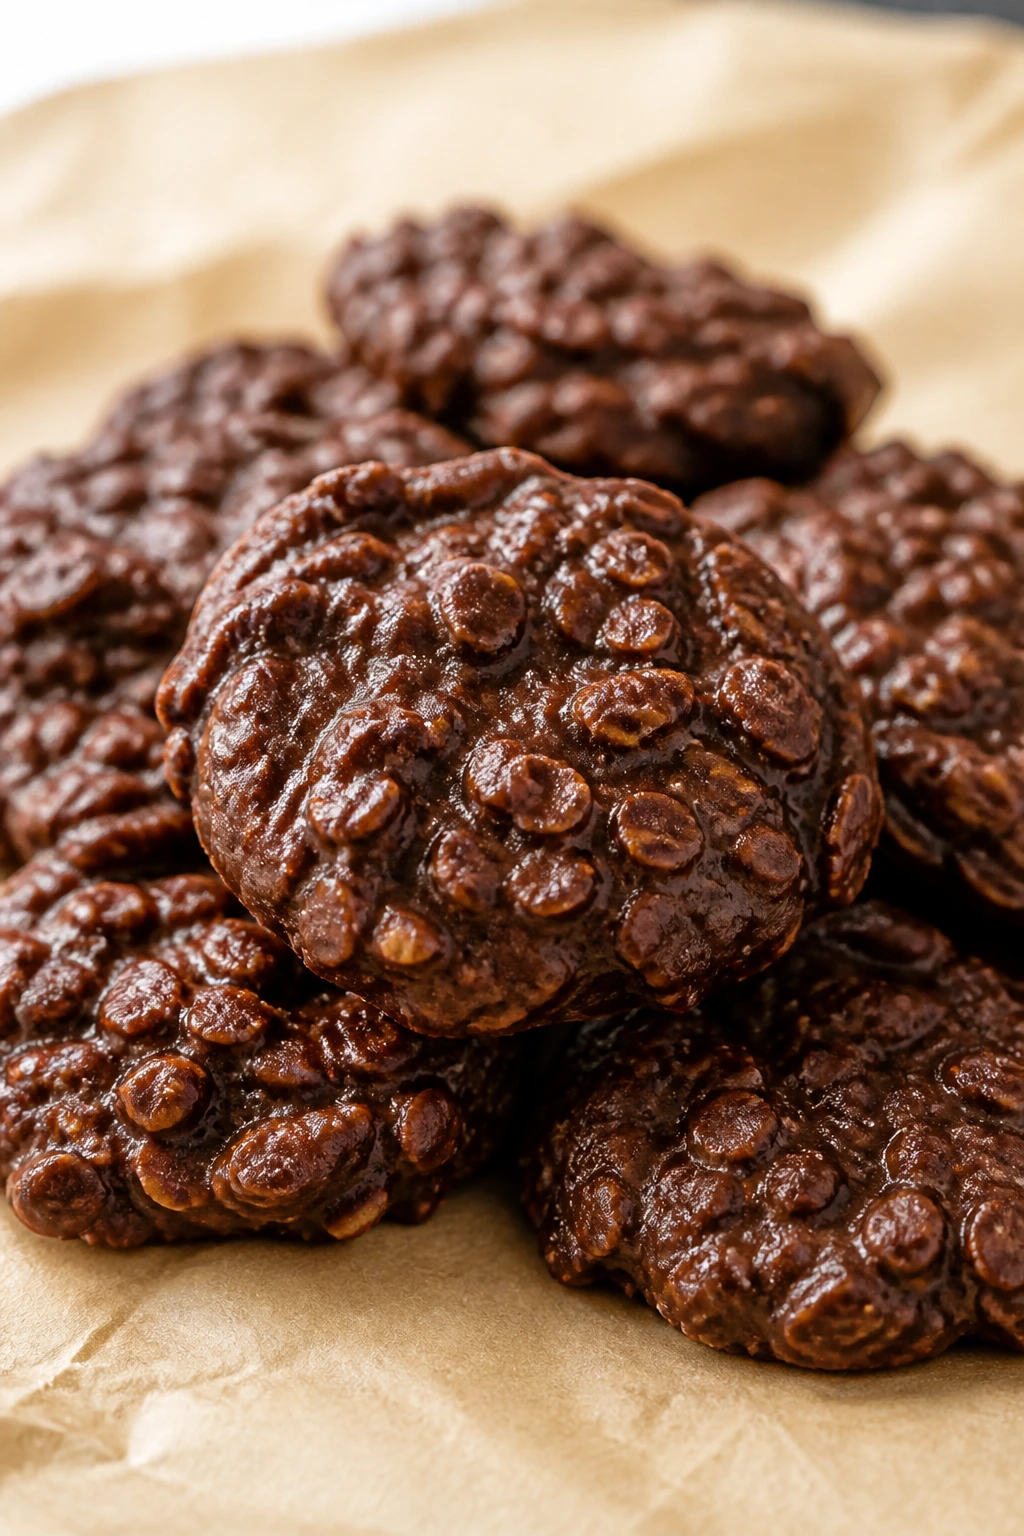
These are messy in the pot and excellent on the plate. They set into chewy little chocolate clusters with a peanut butter note, and they’re the kind of recipe that makes no-bake baking feel useful instead of like a compromise.
Why It Works:
Boiling the sugar mixture briefly sets the texture, so the cookies firm up as they cool. Oats give them body, while peanut butter helps them hold together and adds flavor.
Key Ingredients:
- 2 cups granulated sugar
- 1/2 cup unsalted butter
- 1/2 cup milk
- 1/4 cup unsweetened cocoa powder
- 1/2 cup peanut butter
- 3 cups quick oats
- 1 teaspoon vanilla extract
- Pinch of salt
Quick Steps:
- Line your counter with parchment or wax paper.
- Bring sugar, butter, milk, cocoa, and salt to a rolling boil for 1 minute.
- Remove from heat and stir in peanut butter and vanilla.
- Add oats and mix quickly.
- Drop spoonfuls onto paper and let them set.
Equipment for This Recipe:
- Medium saucepan
- Spoon
- Parchment or wax paper
- Measuring cups
How to Serve This Dish:
Serve once they’re fully set, about 20 to 30 minutes. They’re best stacked in a tin with wax paper between layers.
Pro Tips for This Recipe:
- Boil for a full minute, not a long simmer.
- Work fast once the oats go in.
- Use quick oats if you want a tighter cookie.
Variations on This Dish:
- Coconut Oat Cookies: Add 1/2 cup shredded coconut.
- Nut-Free Version: Use sunflower seed butter instead of peanut butter.
Common Mistakes to Avoid with This Dish:
- Undercooking the sugar mixture: The cookies stay sticky.
- Taking too long to scoop: The mixture starts setting in the bowl.
20. Pumpkin Bread
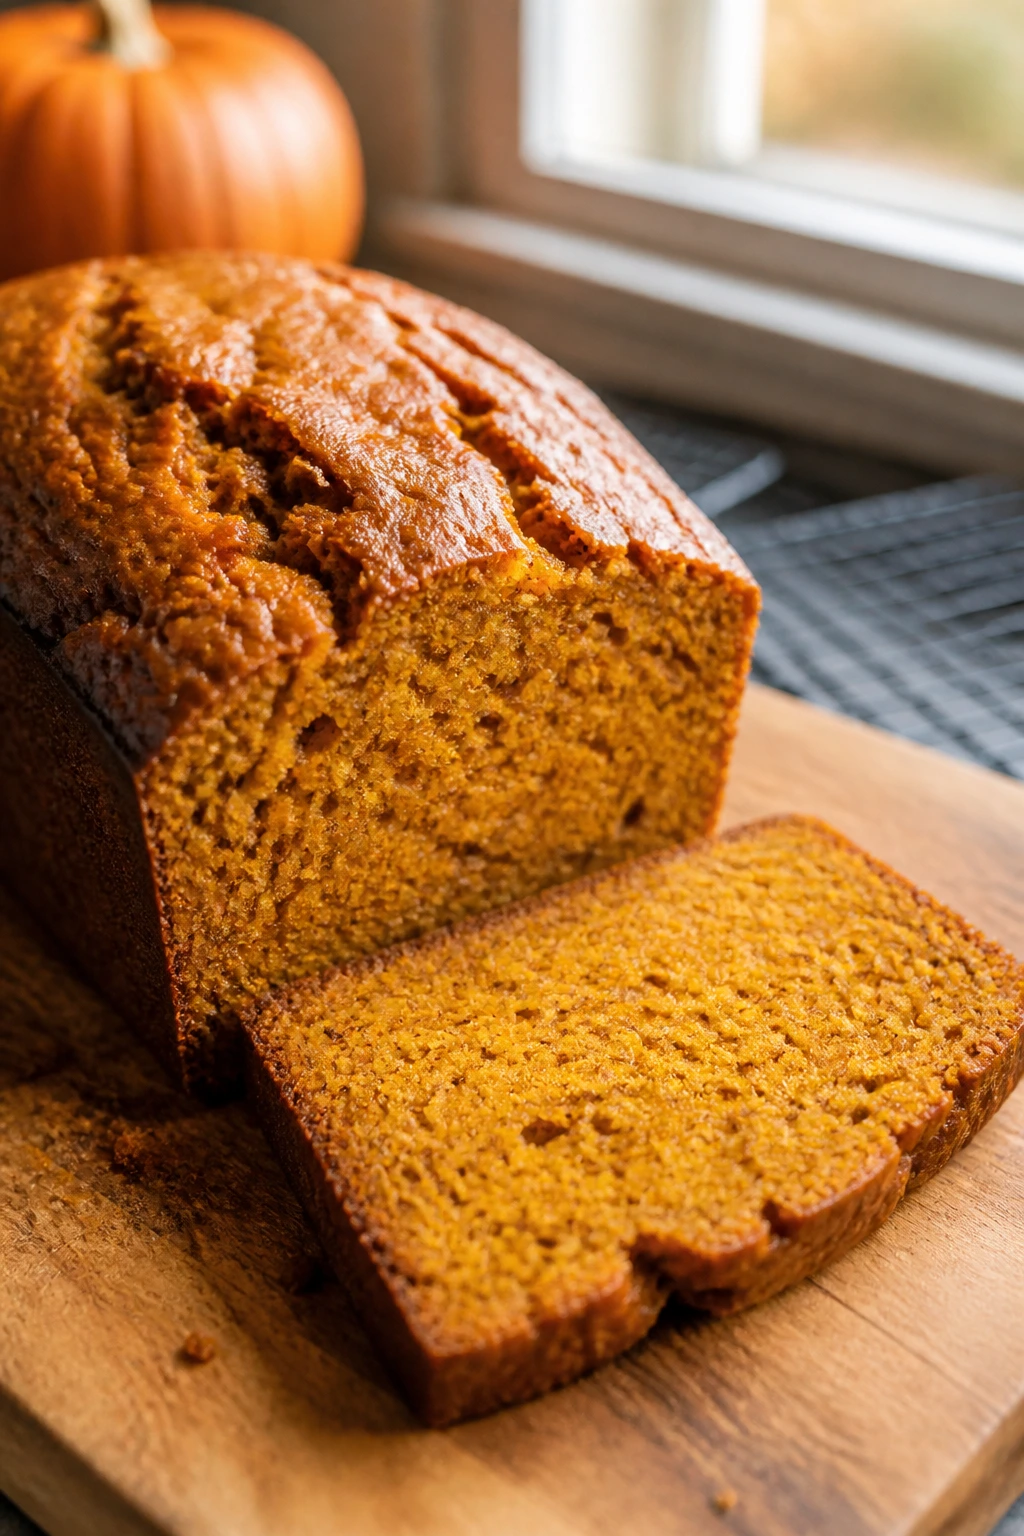
Pumpkin bread is soft, spiced, and honest about what it is. There’s no frosting, no layers, and no trickiness—just a loaf that smells like cinnamon and nutmeg while it bakes.
Why It Works:
Canned pumpkin keeps the batter moist, which is helpful when you’re still learning how to judge doneness. Oil makes the loaf tender, and the spice mix gives it warmth without needing a lot of ingredients.
Key Ingredients:
- 1 3/4 cups all-purpose flour
- 1 teaspoon baking soda
- 1/2 teaspoon baking powder
- 1/2 teaspoon salt
- 1 teaspoon cinnamon
- 1/2 teaspoon nutmeg
- 2 large eggs
- 1 cup pumpkin purée
- 1/2 cup vegetable oil
- 1 cup sugar
Quick Steps:
- Heat the oven to 350°F and grease a loaf pan.
- Whisk flour, baking soda, baking powder, salt, and spices.
- Beat eggs, pumpkin, oil, and sugar together.
- Stir in the dry ingredients just until combined.
- Bake 50 to 60 minutes until a skewer comes out clean or with a few crumbs.
Equipment for This Recipe:
- Loaf pan
- Mixing bowls
- Whisk
- Cooling rack
How to Serve This Dish:
Slice it thick and eat it plain or with cream cheese. It’s good for breakfast, but it still counts as dessert in my book.
Pro Tips for This Recipe:
- Use pure pumpkin purée, not pie filling.
- Cool completely before slicing for neat edges.
- Add walnuts or chocolate chips if you want texture.
Variations on This Dish:
- Chocolate Chip Pumpkin Bread: Fold in 3/4 cup chips.
- Maple Pumpkin Bread: Replace 1/4 cup sugar with maple syrup and reduce the oil slightly.
Common Mistakes to Avoid with This Dish:
- Overbaking the loaf: Pumpkin bread dries out if you wait for a perfect-looking top.
- Cutting it hot: The crumb needs time to set.
21. Cherry Hand Pies
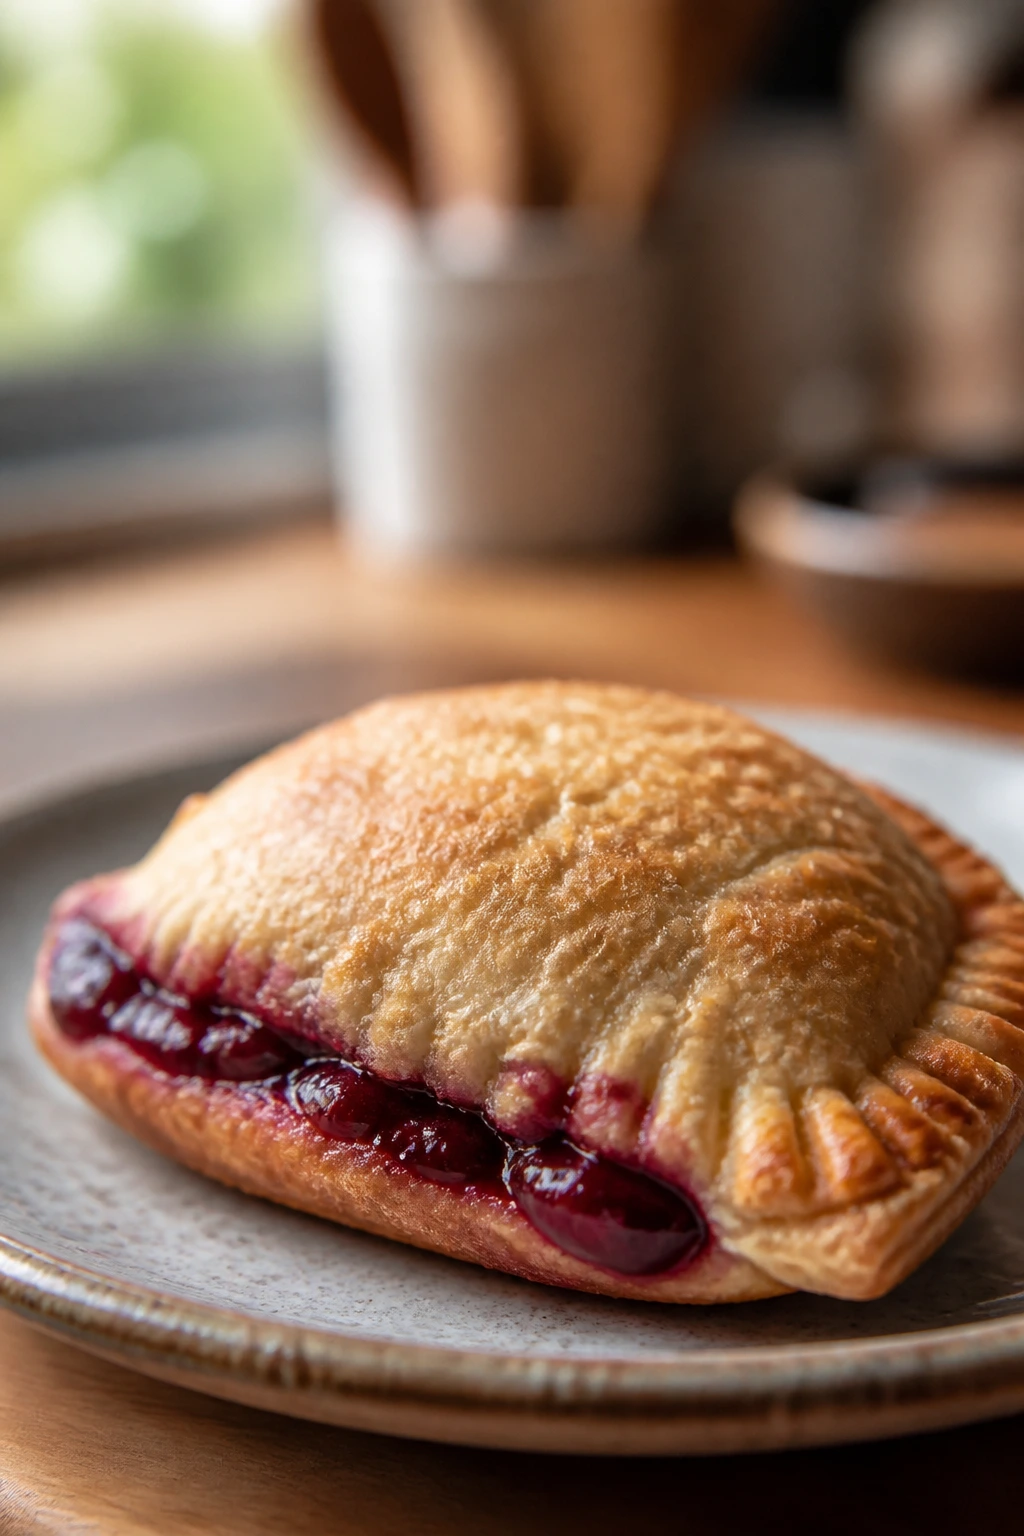
Hand pies are a good first lesson in pastry because they hide small imperfections. If one leaks a little filling, nobody cares once the crust is golden and the cherry center is bubbling.
Why It Works:
Using store-bought pie dough keeps this beginner-friendly, and the sealed edges make the pies portable. Cherry filling thickens nicely with cornstarch, so the pastry doesn’t end up soggy.
Key Ingredients:
- 1 package refrigerated pie dough
- 2 cups pitted cherries, fresh or thawed frozen
- 1/3 cup sugar
- 1 tablespoon cornstarch
- 1 teaspoon lemon juice
- 1 egg, beaten for egg wash
- 1 tablespoon coarse sugar
Quick Steps:
- Heat the oven to 400°F and line a baking sheet.
- Cook cherries, sugar, cornstarch, and lemon juice until slightly thickened, then cool.
- Cut dough into circles or squares and spoon filling onto half of each piece.
- Seal with a fork, brush with egg wash, and sprinkle with coarse sugar.
- Bake 18 to 22 minutes until deep golden.
Equipment for This Recipe:
- Baking sheet
- Saucepan
- Fork
- Pastry brush
How to Serve This Dish:
Serve warm enough for the filling to taste juicy, not molten. A scoop of vanilla ice cream turns them into a proper dessert plate.
Pro Tips for This Recipe:
- Cool the filling before assembling so it doesn’t run.
- Vent the tops with one small slash.
- Chill the assembled pies for 10 minutes before baking if you have time.
Variations on This Dish:
- Mixed Berry Hand Pies: Use berries instead of cherries.
- Almond Cherry: Add a drop of almond extract to the filling.
Common Mistakes to Avoid with This Dish:
- Overfilling: The seams burst in the oven.
- Skipping the egg wash: The crust looks pale and dry.
22. Sheet Pan Brown Sugar Cake
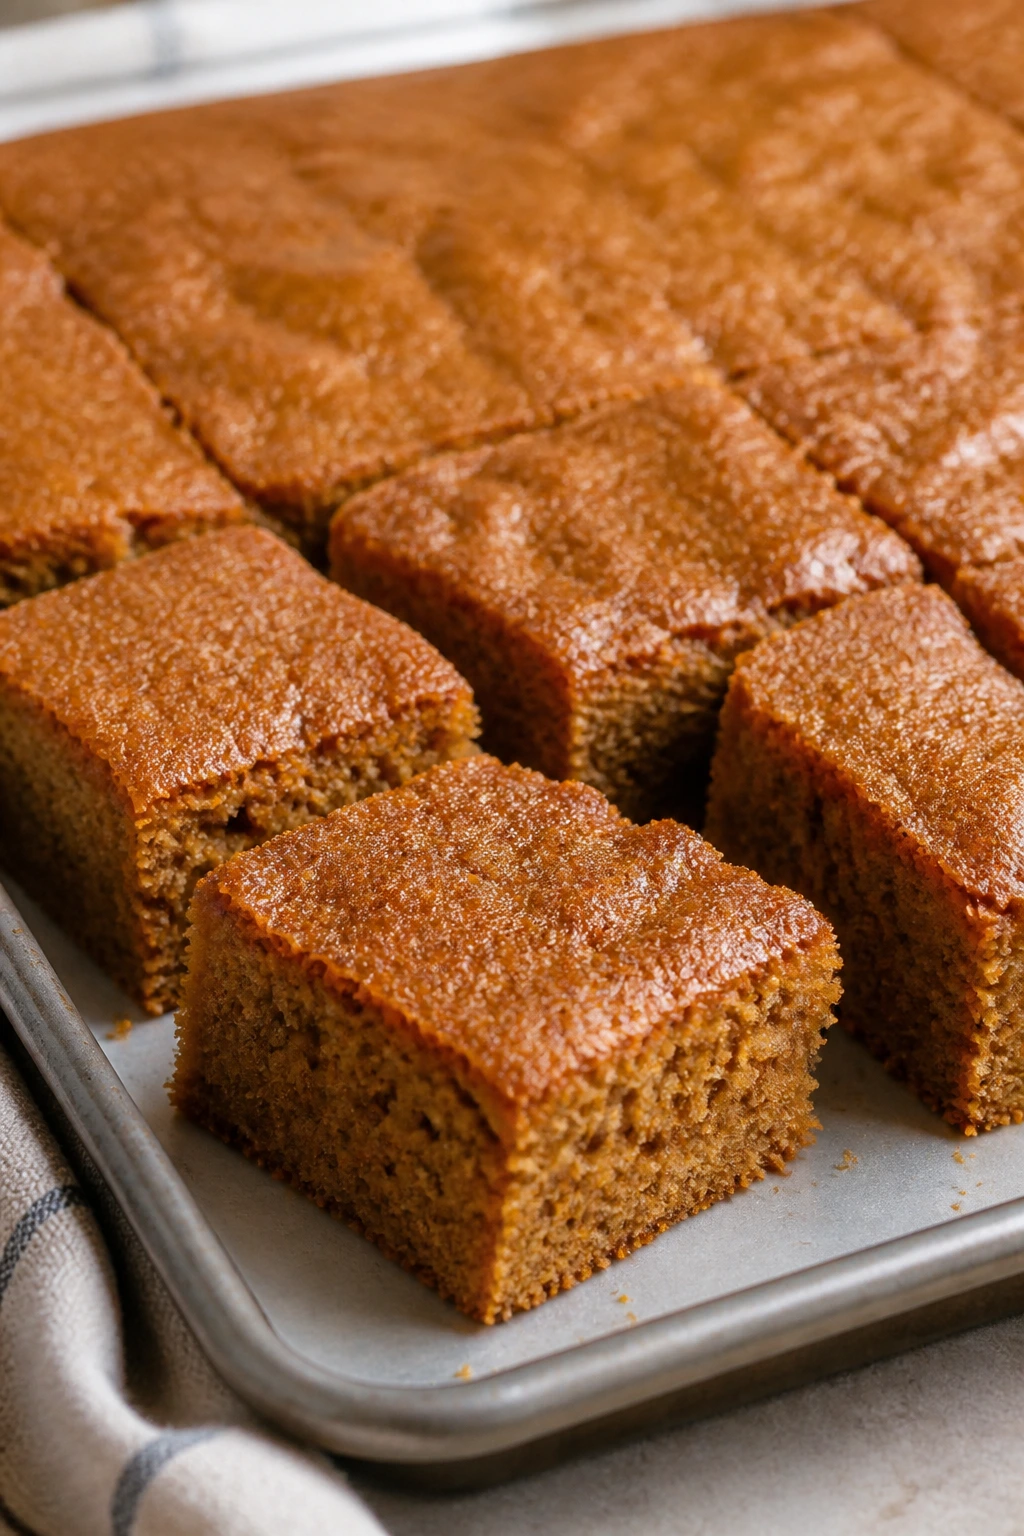
A sheet pan cake is the friendly cousin of layer cake. You get a soft, flat cake that bakes evenly, cools quickly, and slices into squares without any frosting gymnastics.
Why It Works:
Thin batter bakes faster and more evenly than a tall round cake, which makes it far less intimidating. Brown sugar gives the crumb a gentle caramel note, and the shallow pan helps you spot doneness easily.
Key Ingredients:
- 2 cups all-purpose flour
- 1 teaspoon baking powder
- 1/2 teaspoon baking soda
- 1/2 teaspoon salt
- 1/2 cup unsalted butter, softened
- 1 cup brown sugar
- 2 large eggs
- 1 cup sour cream
- 1 teaspoon vanilla extract
- 1/2 cup milk
Quick Steps:
- Heat the oven to 350°F and line a rimmed sheet pan.
- Whisk flour, baking powder, baking soda, and salt.
- Beat butter and brown sugar, then add eggs, sour cream, and vanilla.
- Mix in the dry ingredients and milk until smooth, then spread in the pan.
- Bake 18 to 22 minutes until the center springs back.
Equipment for This Recipe:
- Rimmed sheet pan
- Mixing bowls
- Hand mixer
- Spatula
How to Serve This Dish:
Cut into squares and dust with powdered sugar or spread with a thin glaze. It’s easy to transport and easier to portion than a layer cake.
Pro Tips for This Recipe:
- Use parchment for a clean lift.
- Do not overbake; sheet cakes dry out faster than loaf cakes.
- Cool before glazing or the icing disappears.
Variations on This Dish:
- Cinnamon Sugar Sheet Cake: Add cinnamon to the batter and top.
- Chocolate Frosted Version: Spread on a thin cocoa glaze after cooling.
Common Mistakes to Avoid with This Dish:
- Using a deep cake pan instead of a sheet pan: The bake time changes and the center can stay raw.
- Skipping the sour cream: The cake loses moisture.
23. Baked Apples With Oats
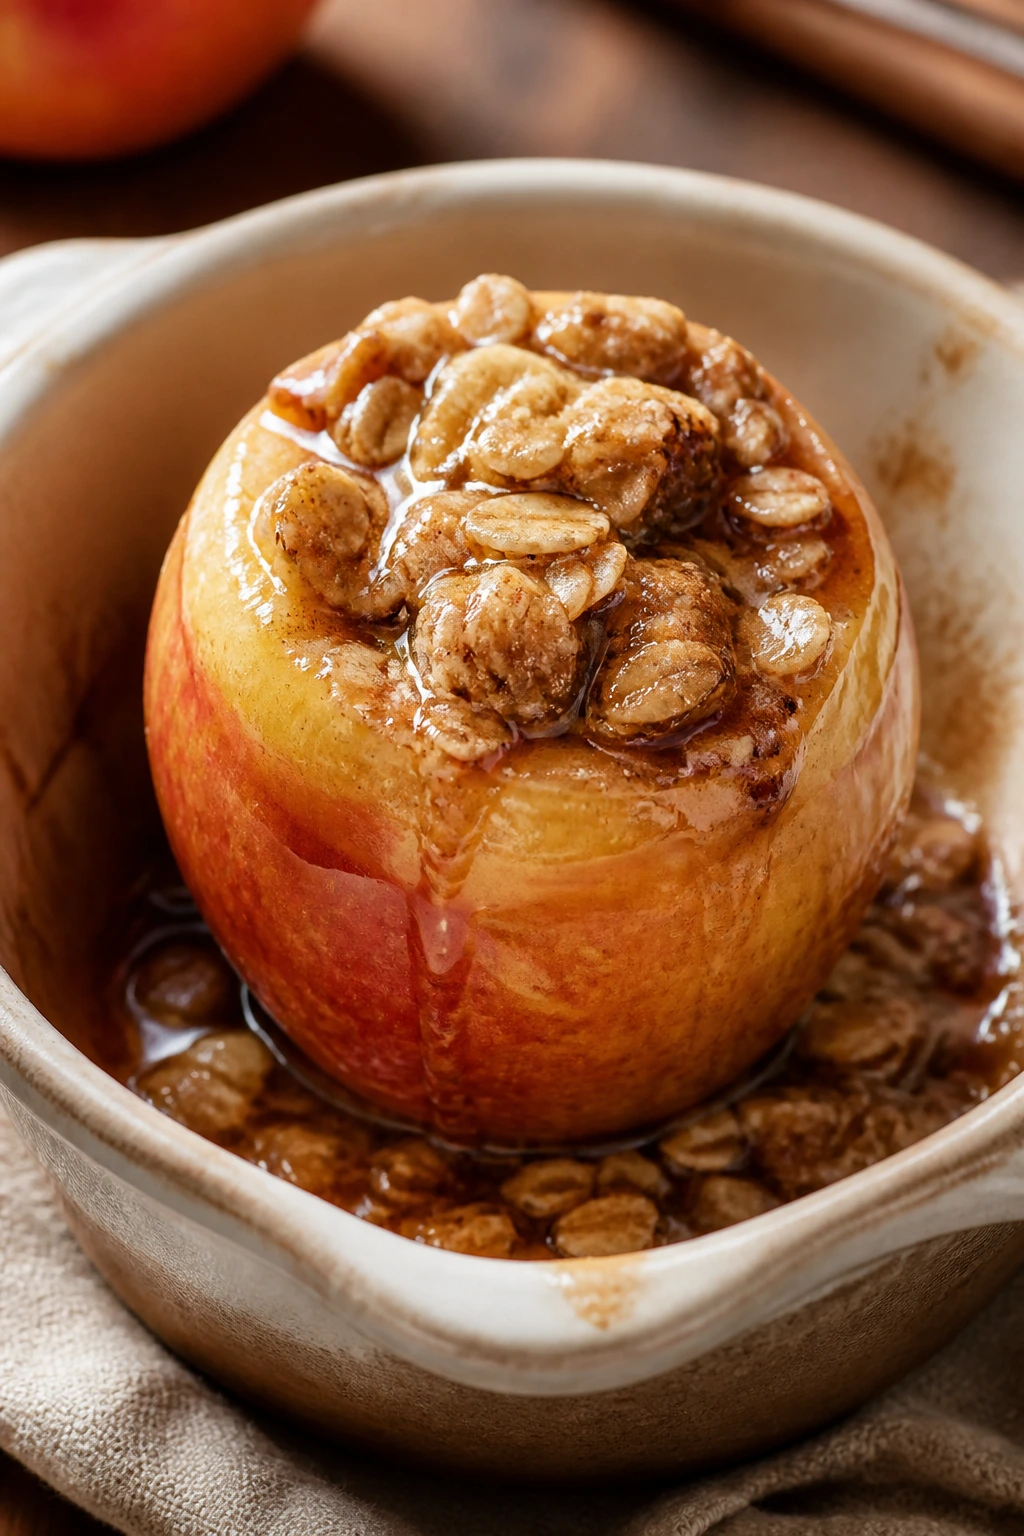
This dessert is simple enough to make on a weeknight and cozy enough to feel like more than a snack. The apples soften, the oat filling turns nutty, and the juices pool in the bottom of the dish.
Why It Works:
Whole apples are forgiving because they keep their shape while the inside turns tender. The oat filling acts like a tiny crisp topping inside each apple, so you get contrast without making a full pie.
Key Ingredients:
- 4 large apples, cored
- 1/2 cup old-fashioned oats
- 1/4 cup brown sugar
- 2 tablespoons melted butter
- 1 teaspoon cinnamon
- 2 tablespoons raisins or chopped nuts
- 1 tablespoon lemon juice
- Pinch of salt
Quick Steps:
- Heat the oven to 375°F and place apples in a baking dish.
- Stir oats, brown sugar, butter, cinnamon, raisins or nuts, lemon juice, and salt.
- Pack the filling into the cores.
- Add a splash of water to the dish and bake 30 to 40 minutes until the apples are tender.
- Spoon the pan juices over the top before serving.
Equipment for This Recipe:
- Baking dish
- Paring knife or apple corer
- Mixing bowl
- Spoon
How to Serve This Dish:
Serve warm with yogurt, cream, or ice cream. The pan juices are worth spooning over each apple.
Pro Tips for This Recipe:
- Choose apples that hold their shape, like Honeycrisp or Fuji.
- Don’t overfill the cores; the topping expands.
- Check with a knife tip for tenderness.
Variations on This Dish:
- Maple Oat Apples: Replace part of the sugar with maple syrup.
- Cranberry Apple: Add dried cranberries to the filling.
Common Mistakes to Avoid with This Dish:
- Using apples that collapse too fast: They turn to sauce before the filling browns.
- Skipping the water in the pan: The bottom can scorch.
24. Cherry Cobbler
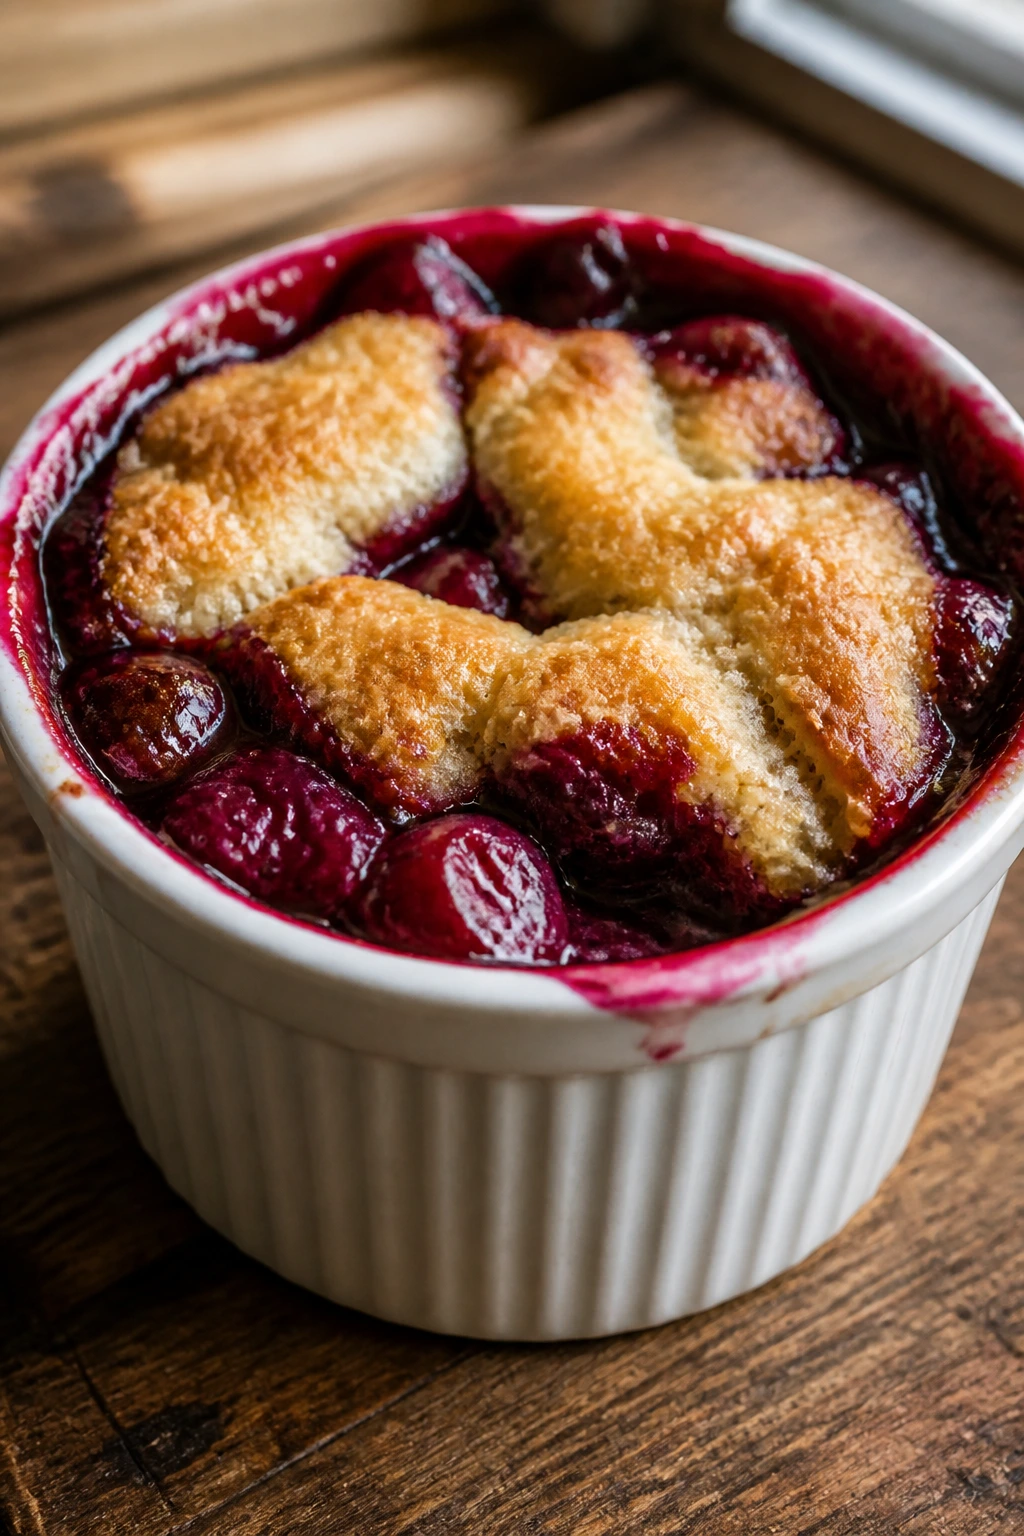
Cobblers are built for people who want fruit under something biscuit-like and do not want to fuss with pie dough. This version bakes into a jammy cherry base with a golden topping that soaks up just enough juice.
Why It Works:
The fruit layer thickens while the topping bakes, and the texture contrast is the whole point. Cobblers forgive uneven spoonfuls of batter, which makes them welcoming for first-time bakers.
Key Ingredients:
- 5 cups pitted cherries
- 1/2 cup sugar
- 1 tablespoon cornstarch
- 1 tablespoon lemon juice
- 1 cup all-purpose flour
- 1/4 cup sugar
- 1 1/2 teaspoons baking powder
- 1/4 teaspoon salt
- 1/2 cup milk
- 4 tablespoons melted butter
Quick Steps:
- Heat the oven to 375°F and grease a baking dish.
- Toss cherries with sugar, cornstarch, and lemon juice, then spread in the dish.
- Stir flour, sugar, baking powder, and salt, then add milk and melted butter.
- Drop the batter over the fruit in spoonfuls.
- Bake 35 to 40 minutes until the top is golden and the filling bubbles.
Equipment for This Recipe:
- Baking dish
- Mixing bowl
- Spoon
- Whisk
How to Serve This Dish:
Serve it warm, preferably with vanilla ice cream. The contrast between the hot fruit and cold cream is the whole appeal.
Pro Tips for This Recipe:
- Don’t spread the topping perfectly; rough spoonfuls bake better.
- Use tart cherries if your fruit is very sweet.
- Let the cobbler rest so the juices thicken.
Variations on This Dish:
- Peach-Cherry Cobbler: Use half peaches, half cherries.
- Biscuit Top Cobbler: Swap the batter for small biscuit dough dollops.
Common Mistakes to Avoid with This Dish:
- Too much cornstarch: The filling can turn gloppy.
- Baking until the topping is pale: You want real color.
25. Easy Fudge
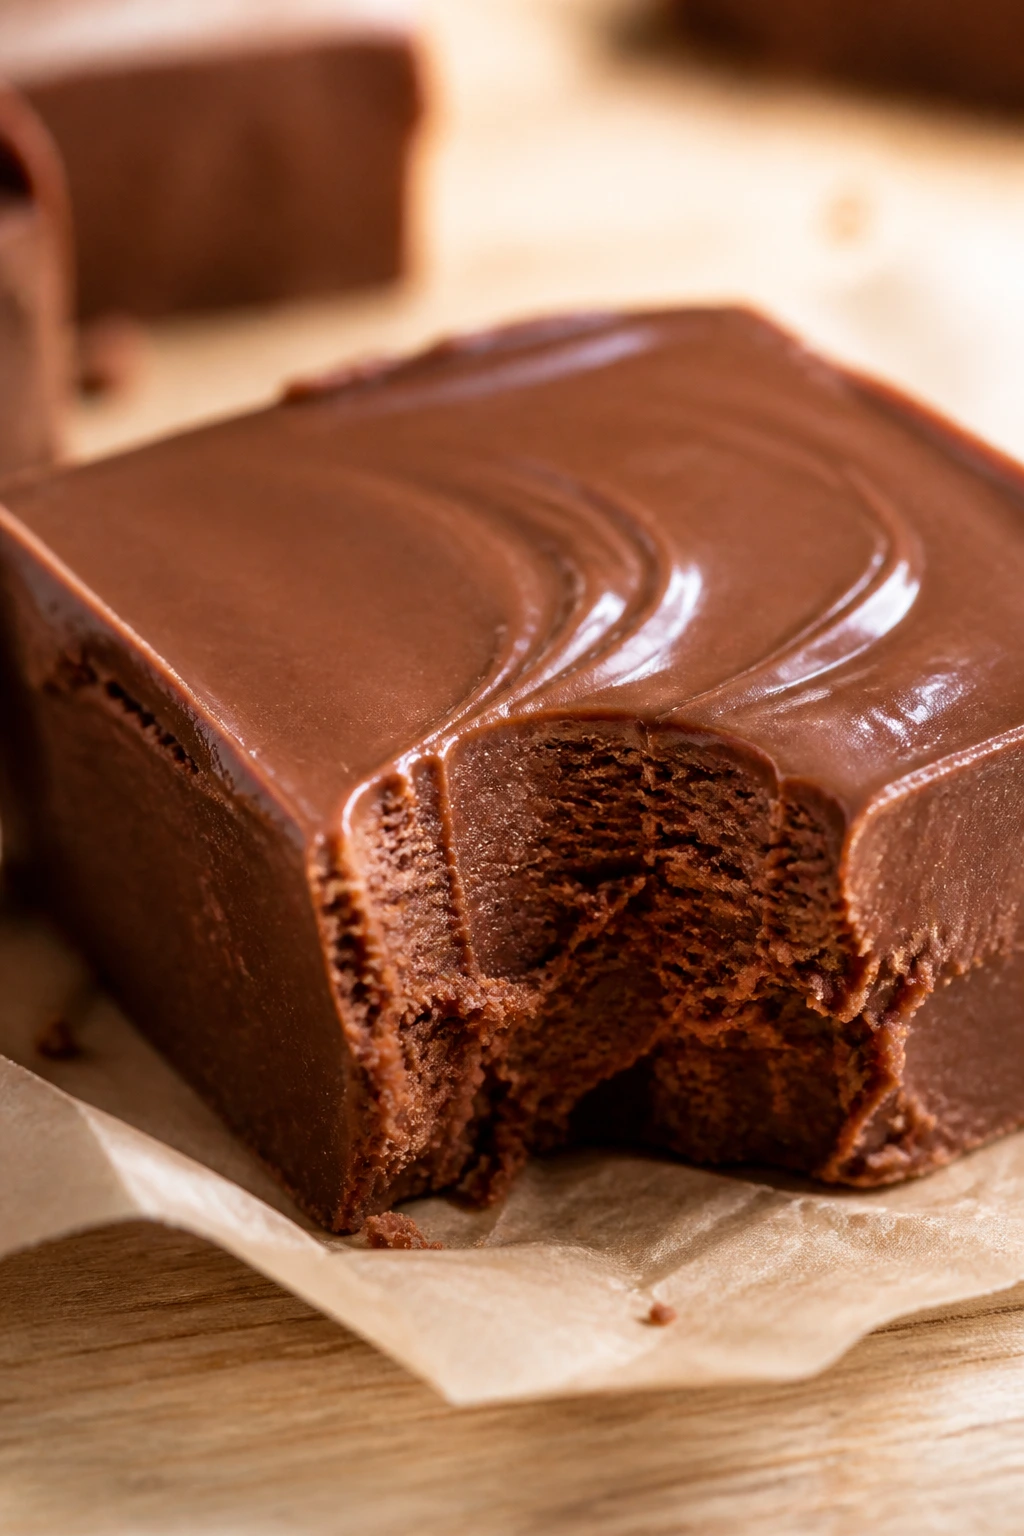
Fudge is the dessert that makes people think you spent more effort than you did. This version sets up in the fridge with a clean chocolate snap and a soft bite that melts slowly.
Why It Works:
Sweetened condensed milk handles the creamy texture, so you do not need a candy thermometer. Melt, stir, chill. That’s the whole dance, and it works.
Key Ingredients:
- 3 cups semi-sweet chocolate chips
- 1 can sweetened condensed milk
- 2 tablespoons unsalted butter
- 1 teaspoon vanilla extract
- Pinch of salt
- 1/2 cup chopped nuts, optional
Quick Steps:
- Line an 8-inch square pan with parchment.
- Melt chocolate chips, condensed milk, and butter together over low heat or in short microwave bursts.
- Stir in vanilla, salt, and nuts if using.
- Spread in the pan.
- Chill at least 2 hours before cutting.
Equipment for This Recipe:
- Saucepan or microwave-safe bowl
- Square pan
- Spatula
- Parchment paper
How to Serve This Dish:
Cut into tiny squares. Fudge is rich enough that a small piece goes a long way.
Pro Tips for This Recipe:
- Use low heat so the chocolate stays smooth.
- Chill fully before slicing.
- Wipe the knife between cuts for cleaner edges.
Variations on This Dish:
- Peanut Butter Swirl: Swirl in a few spoonfuls of warmed peanut butter.
- Rocky Road: Fold in mini marshmallows and nuts.
Common Mistakes to Avoid with This Dish:
- Overheating the chocolate: It can seize and turn grainy.
- Trying to cut it early: The center needs time to firm up.
26. Snickerdoodles

Snickerdoodles are what you get when a sugar cookie wears a cinnamon coat and gets a little tang from cream of tartar. They’re soft, crinkly, and just sturdy enough to survive a lunchbox.
Why It Works:
Cream of tartar gives the cookies their gentle tang and chewy texture. Rolling the dough in cinnamon sugar before baking gives you that crackled top beginners can actually see happen.
Key Ingredients:
- 1 cup unsalted butter, softened
- 1 1/2 cups granulated sugar
- 2 large eggs
- 2 3/4 cups all-purpose flour
- 2 teaspoons cream of tartar
- 1 teaspoon baking soda
- 1/2 teaspoon salt
- 2 tablespoons sugar mixed with 2 teaspoons cinnamon
Quick Steps:
- Heat the oven to 375°F and line baking sheets.
- Cream butter and sugar, then beat in eggs.
- Mix in flour, cream of tartar, baking soda, and salt.
- Roll into balls, coat in cinnamon sugar, and place on the sheet.
- Bake 8 to 10 minutes until puffed and cracked.
Equipment for This Recipe:
- Mixing bowl
- Baking sheet
- Cookie scoop
- Parchment paper
How to Serve This Dish:
Serve them slightly warm so the centers stay soft. They’re especially good with coffee, which cuts the sugar nicely.
Pro Tips for This Recipe:
- Cream of tartar matters here; don’t skip it unless you’re making a different cookie.
- Pull them before they look fully set.
- Roll evenly so they bake at the same speed.
Variations on This Dish:
- Pumpkin Snickerdoodles: Add pumpkin spice and a little extra flour.
- Brown Butter Snickerdoodles: Brown the butter first for a deeper flavor.
Common Mistakes to Avoid with This Dish:
- Skipping the cinnamon sugar coat: That’s the whole point.
- Overbaking: They should stay soft in the center.
27. Chocolate Pudding
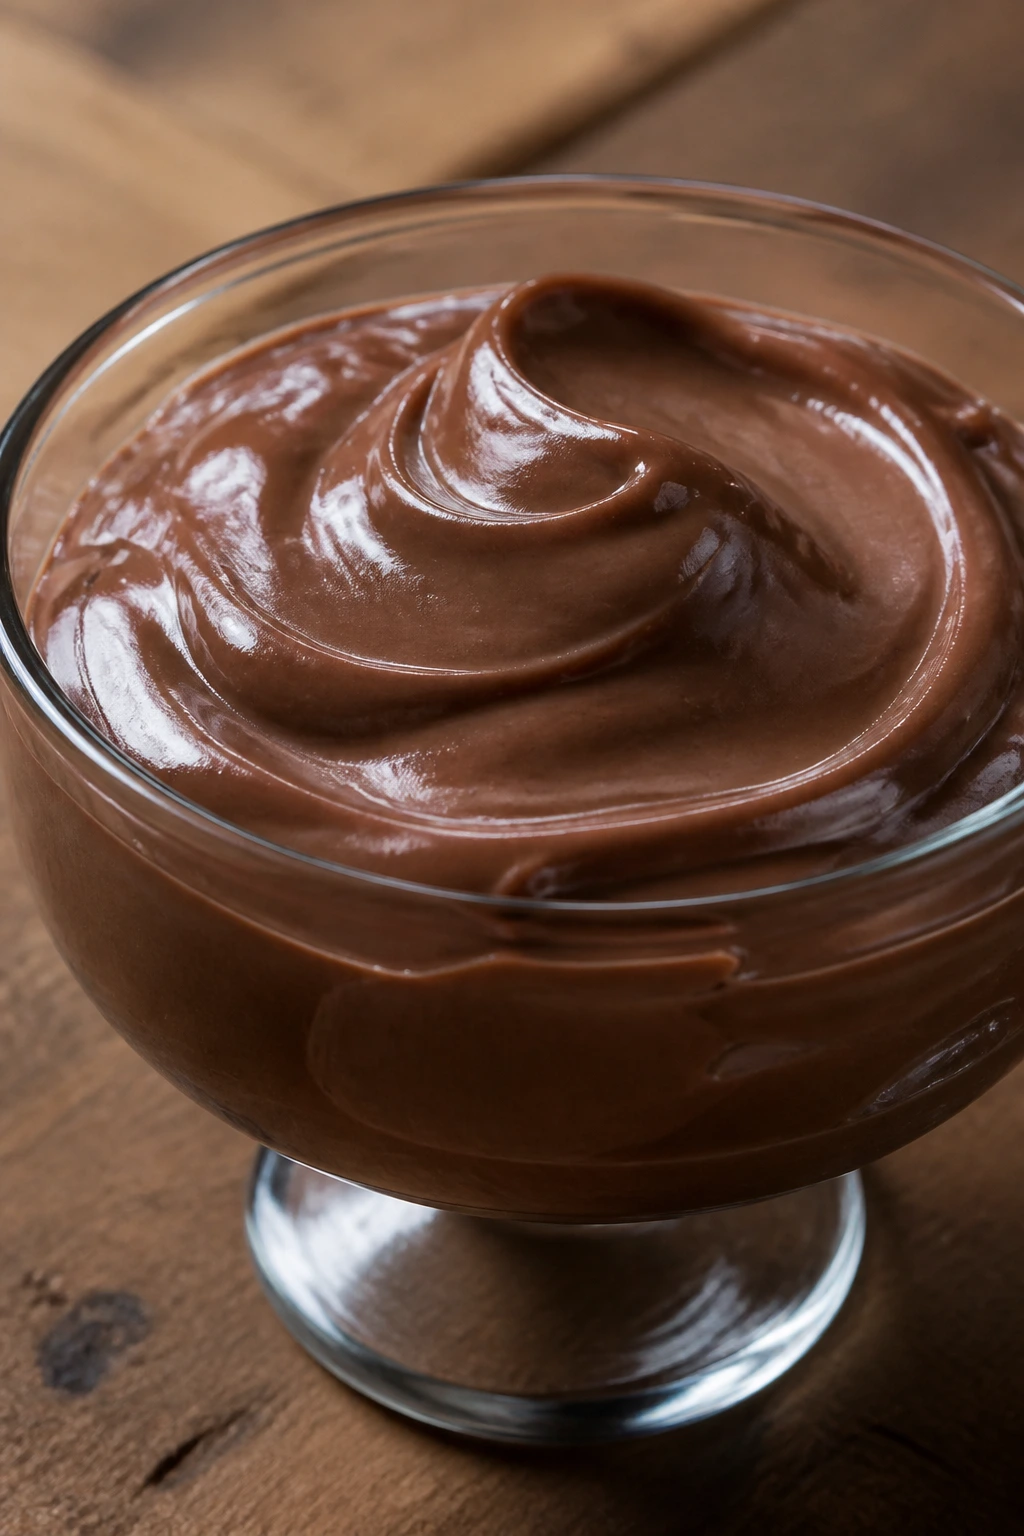
Homemade pudding sounds fancier than it is. This version gives you a silky chocolate bowlful with a spoon-coating texture and no boxed mix shortcut needed.
Why It Works:
Cornstarch thickens the milk on the stovetop, and egg yolks make the pudding richer without turning it into custard-heavy territory. Stirring constantly keeps the bottom from scorching, which is the only real job here.
Key Ingredients:
- 2 cups milk
- 1/2 cup sugar
- 1/4 cup cocoa powder
- 3 tablespoons cornstarch
- 2 egg yolks
- 2 tablespoons butter
- 1 teaspoon vanilla extract
- Pinch of salt
Quick Steps:
- Whisk sugar, cocoa, cornstarch, and salt in a saucepan.
- Add milk and egg yolks, then cook over medium heat, whisking constantly.
- When the pudding thickens and bubbles, cook 1 more minute.
- Remove from heat and stir in butter and vanilla.
- Chill with plastic wrap pressed to the surface.
Equipment for This Recipe:
- Saucepan
- Whisk
- Mixing bowl
- Serving cups
How to Serve This Dish:
Serve cold with whipped cream, shaved chocolate, or crushed cookies. It’s also good layered into parfaits.
Pro Tips for This Recipe:
- Keep the whisk moving, especially around the corners.
- Press plastic wrap right on the surface to stop skin from forming.
- Strain if you want an extra-smooth texture.
Variations on This Dish:
- Dark Chocolate Pudding: Use dark cocoa.
- Mocha Pudding: Add a teaspoon of instant espresso powder.
Common Mistakes to Avoid with This Dish:
- Letting the heat get too high: The eggs can scramble.
- Stopping before it boils: It won’t thicken fully.
28. Berry Galette
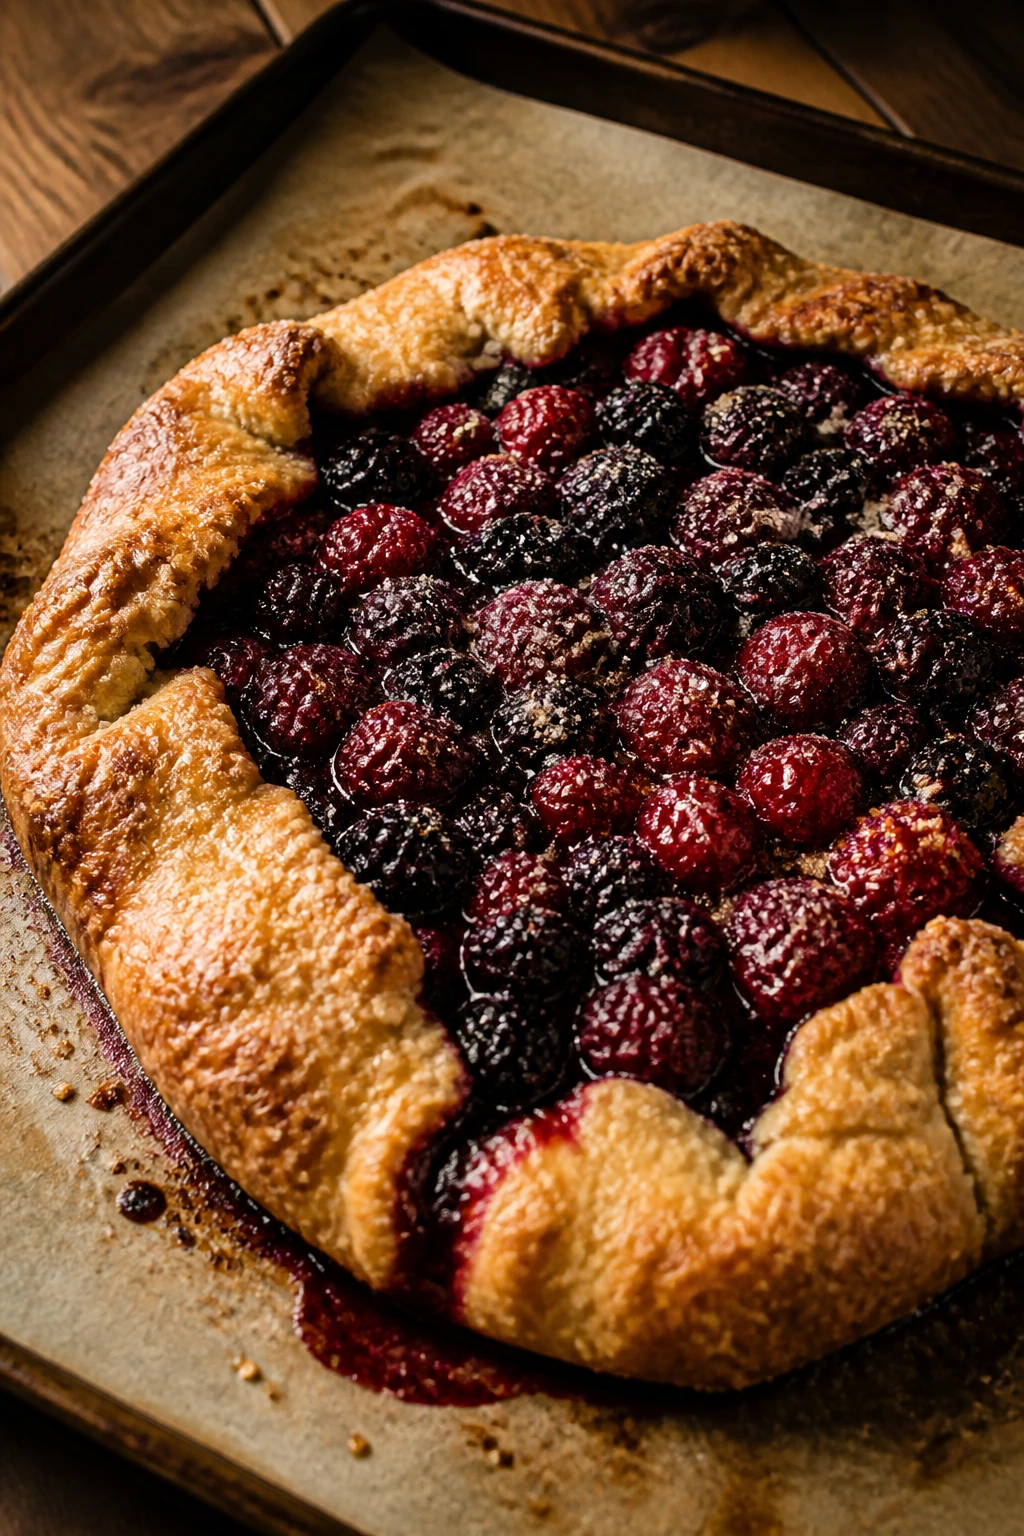
A galette is pie’s relaxed cousin. The edges fold over in messy, rustic pleats, and the fruit bubbles out where the dough doesn’t quite meet, which is part of the charm.
Why It Works:
Store-bought or simple homemade pie dough keeps the process beginner-friendly. You do not need a pie plate, and the free-form shape means cracks and folds look intentional.
Key Ingredients:
- 1 pie dough round, chilled
- 3 cups mixed berries
- 1/4 cup sugar
- 1 tablespoon cornstarch
- 1 teaspoon lemon zest
- 1 tablespoon lemon juice
- 1 tablespoon butter, cut into bits
- 1 egg, beaten
- 1 tablespoon coarse sugar
Quick Steps:
- Heat the oven to 400°F and line a baking sheet.
- Toss berries with sugar, cornstarch, zest, and lemon juice.
- Roll dough into a 12-inch circle and pile the berries in the center.
- Fold the edges over the fruit, brush with egg, and sprinkle with coarse sugar.
- Bake 30 to 35 minutes until the crust is deep golden and the fruit bubbles.
Equipment for This Recipe:
- Baking sheet
- Rolling pin
- Parchment paper
- Mixing bowl
How to Serve This Dish:
Serve warm with whipped cream or ice cream. It’s also pretty good at room temperature the next day.
Pro Tips for This Recipe:
- Chill the assembled galette before baking if the dough softens.
- Don’t overfill the center or the juices run everywhere.
- Use parchment; the berry syrup gets sticky fast.
Variations on This Dish:
- Peach Berry Galette: Add sliced peaches to the mix.
- Jam-Boosted Galette: Stir a spoonful of jam into the berries for extra body.
Common Mistakes to Avoid with This Dish:
- Warm dough: It slumps instead of holding folds.
- Skimping on cornstarch: The filling stays runny.
29. Easy Tiramisu Cups
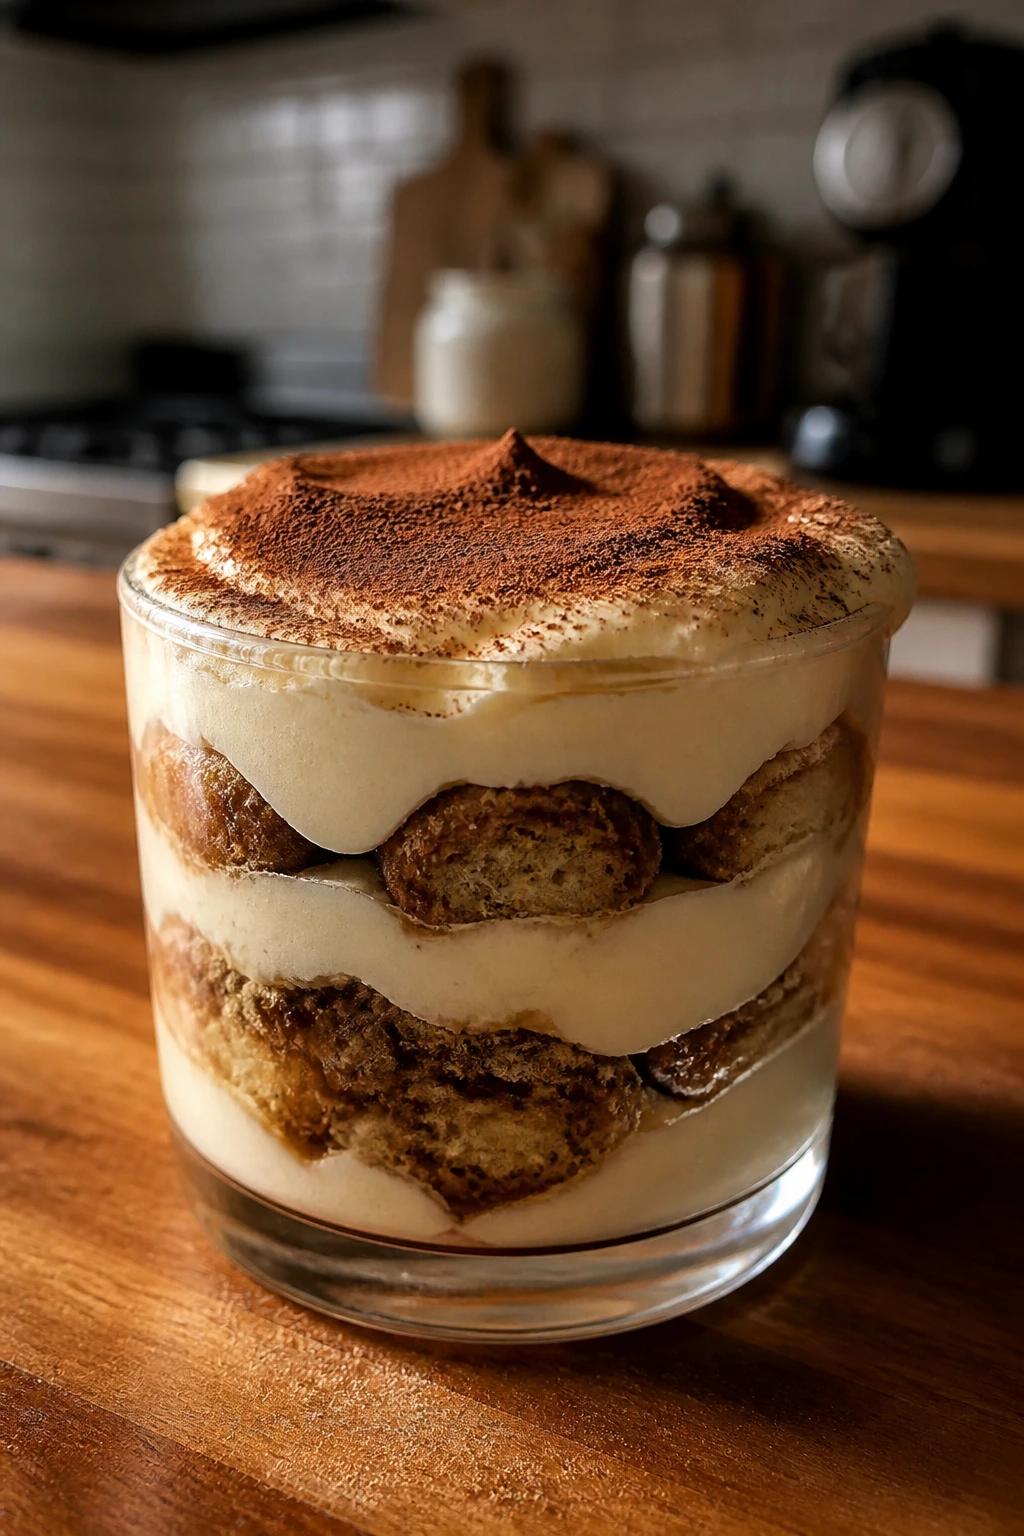
Tiramisu does not have to be a restaurant project. In cups, it becomes a chilled coffee dessert with creamy layers, soft ladyfingers, and cocoa on top that settles into the cream.
Why It Works:
This shortcut version skips the fussy assembly of a large pan and uses small cups so the layers chill quickly. The coffee soak gives the biscuits flavor without making them collapse.
Key Ingredients:
- 1 cup strong brewed coffee, cooled
- 2 tablespoons sugar
- 12 ladyfingers
- 8 ounces mascarpone
- 1 cup whipped cream
- 1/3 cup powdered sugar
- 1 teaspoon vanilla extract
- Cocoa powder for dusting
Quick Steps:
- Stir sugar into the cooled coffee.
- Beat mascarpone, whipped cream, powdered sugar, and vanilla until smooth.
- Dip ladyfingers briefly in coffee.
- Layer soaked ladyfingers and cream in cups.
- Chill 4 hours, then dust with cocoa.
Equipment for This Recipe:
- Mixing bowl
- Hand mixer
- Small glasses or jars
- Spoon
How to Serve This Dish:
Serve very cold with a thick dusting of cocoa. Small cups work better than big ones here; the dessert is rich.
Pro Tips for This Recipe:
- Dip the ladyfingers fast or they turn mushy.
- Use cold mascarpone so the cream stays thick.
- Dust cocoa right before serving.
Variations on This Dish:
- Chocolate Tiramisu: Add shaved chocolate between layers.
- Limoncello Cups: Replace coffee with lemon syrup for a bright version.
Common Mistakes to Avoid with This Dish:
- Soaking too long: The biscuits lose structure.
- Serving too soon: The layers need time to chill and settle.
30. Cream Cheese Swirl Brownies
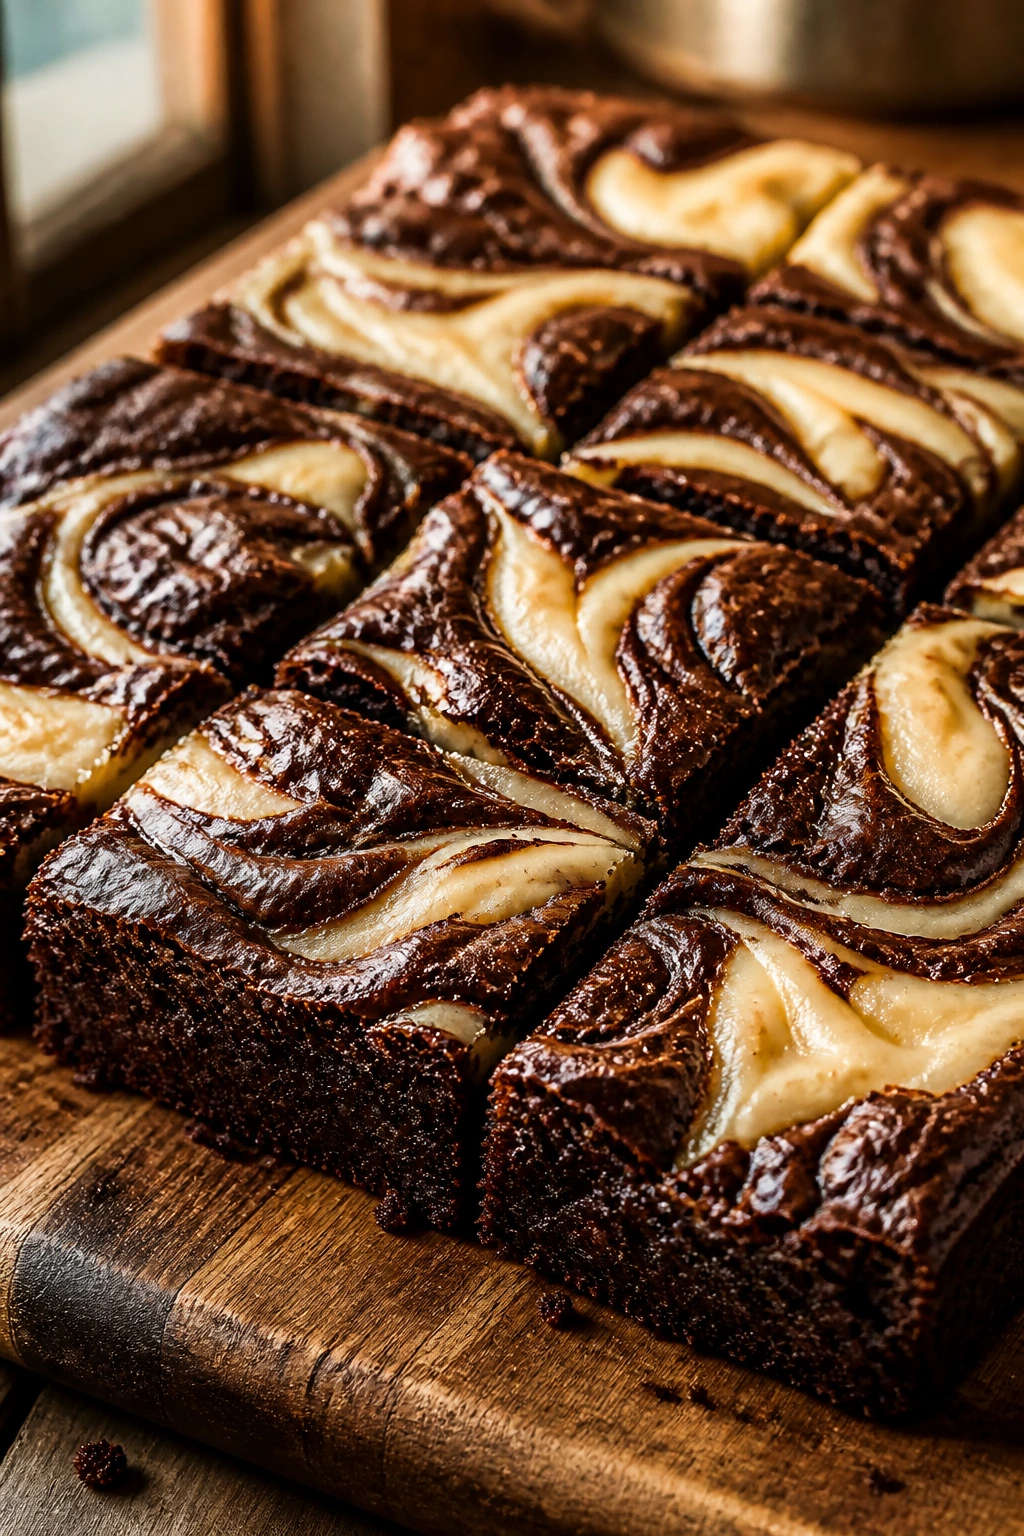
This is the brownie for people who can’t decide between rich chocolate and cheesecake. The cream cheese swirls bake into pale ribbons against the dark batter, and the contrast tastes as good as it looks.
Why It Works:
The brownie base is forgiving, and the cream cheese mixture takes only a minute to whisk together. You get two textures from one pan, which feels more impressive than it is.
Key Ingredients:
- 1/2 cup unsalted butter, melted
- 1 cup sugar
- 2 large eggs
- 1 teaspoon vanilla extract
- 1/3 cup cocoa powder
- 1/2 cup flour
- 1/4 teaspoon salt
- 4 ounces cream cheese, softened
- 2 tablespoons sugar for swirl
- 1 egg yolk
Quick Steps:
- Heat the oven to 350°F and line an 8-inch pan.
- Make the brownie batter with butter, sugar, eggs, vanilla, cocoa, flour, and salt.
- Beat cream cheese, sugar, and egg yolk until smooth.
- Spread brownie batter in the pan, dollop the cream cheese mixture on top, and swirl with a knife.
- Bake 25 to 30 minutes until set at the edges.
Equipment for This Recipe:
- Square pan
- Mixing bowls
- Knife for swirling
- Spatula
How to Serve This Dish:
Cut into small squares and serve chilled or at room temperature. A neat slice shows the swirl best.
Pro Tips for This Recipe:
- Soften the cream cheese fully or the swirl stays lumpy.
- Don’t over-swirl; you want ribbons, not marble mud.
- Cool completely before cutting.
Variations on This Dish:
- Chocolate Chip Swirl: Add chips to the brownie batter.
- Lemon Cheesecake Brownies: Add lemon zest to the cream cheese layer.
Common Mistakes to Avoid with This Dish:
- Overmixing the swirl: The layers blur together.
- Cutting warm: The cream cheese layer tears.
31. Pineapple Upside-Down Cake
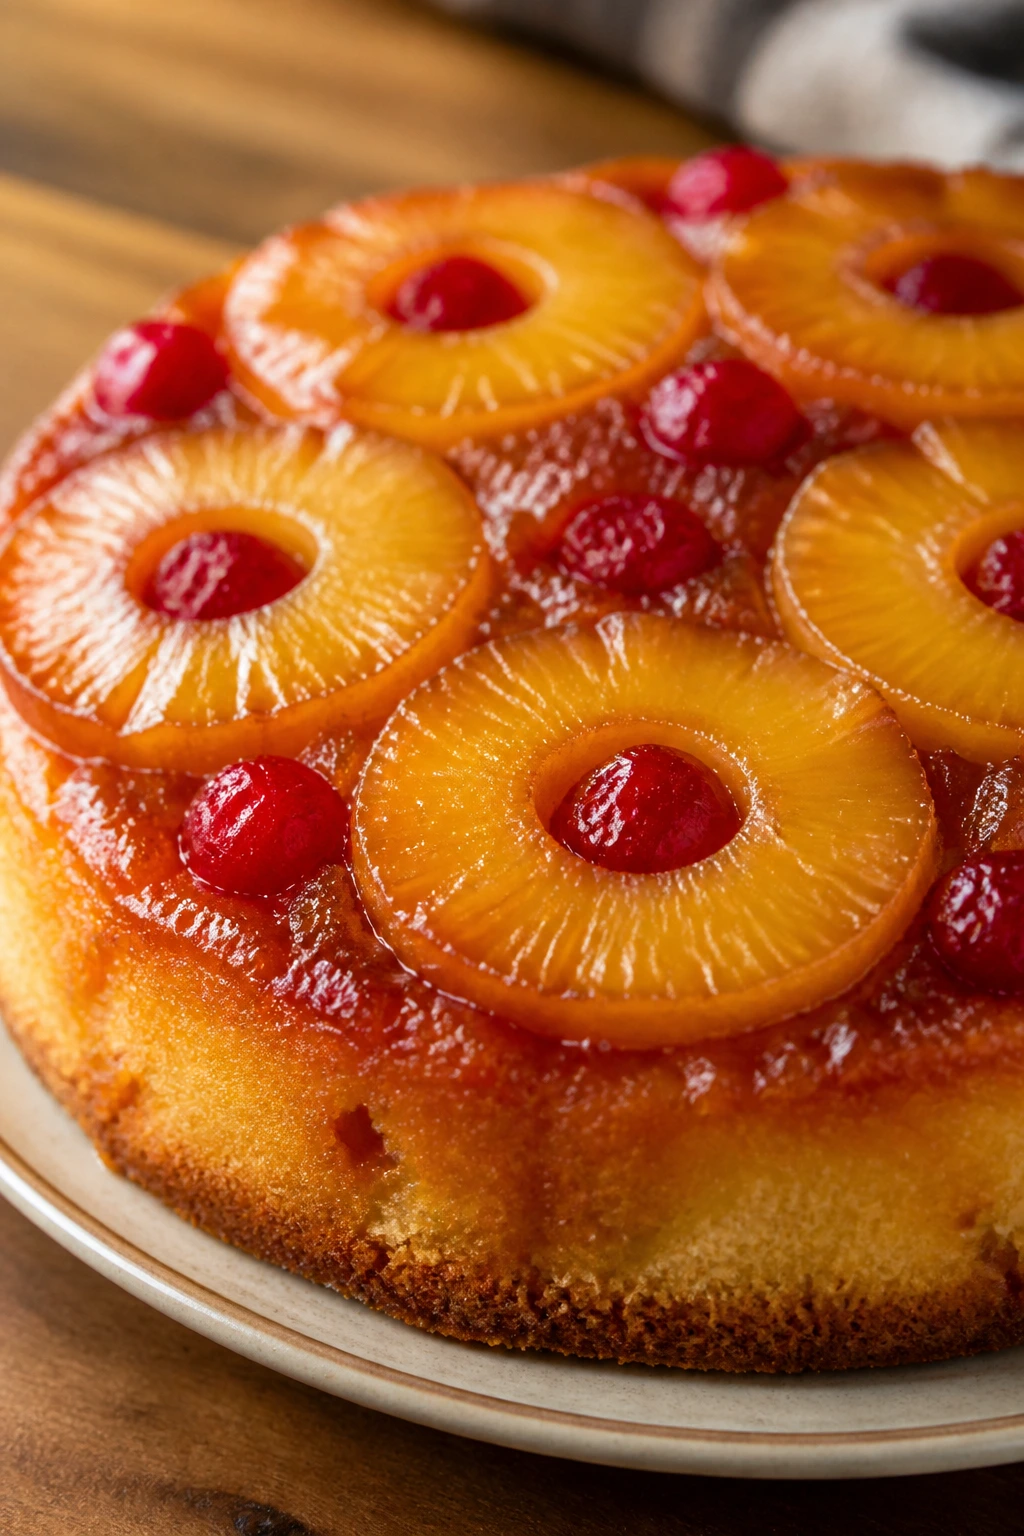
There’s a bit of drama in turning a cake out of the pan and revealing fruit on top. This one gives you caramelized pineapple rings, glossy cherries, and a vanilla cake beneath that stays tender.
Why It Works:
The fruit bakes in brown sugar and butter, which becomes the topping once you flip the cake. It looks far more complicated than it is, and the pan does most of the design work for you.
Key Ingredients:
- 1/4 cup unsalted butter
- 1/2 cup brown sugar
- 6 pineapple rings, drained if canned
- 6 maraschino cherries
- 1 1/2 cups all-purpose flour
- 1 teaspoon baking powder
- 1/2 teaspoon salt
- 1/2 cup butter, softened
- 3/4 cup sugar
- 2 large eggs
- 1/2 cup milk
- 1 teaspoon vanilla extract
Quick Steps:
- Heat the oven to 350°F and melt butter in a cake pan.
- Sprinkle brown sugar over the butter and arrange pineapple rings and cherries.
- Mix the cake batter separately until smooth.
- Pour batter over the fruit and bake 35 to 40 minutes.
- Cool 10 minutes, then invert onto a serving plate.
Equipment for This Recipe:
- Cake pan
- Mixing bowls
- Hand mixer or whisk
- Serving plate
How to Serve This Dish:
Serve slices warm or at room temperature. The caramelized fruit is the point, so keep accompaniments simple.
Pro Tips for This Recipe:
- Let the cake sit before flipping or the topping sticks.
- Pat canned pineapple dry so the topping doesn’t flood.
- Use a pan with straight sides for a cleaner flip.
Variations on This Dish:
- Cherry-Pineapple: Add extra cherries between the pineapple rings.
- Spiced Version: Add cinnamon and a pinch of nutmeg to the batter.
Common Mistakes to Avoid with This Dish:
- Flipping too soon: The cake can break apart.
- Using too much pineapple juice: The bottom turns soggy.
32. Jam Thumbprint Cookies
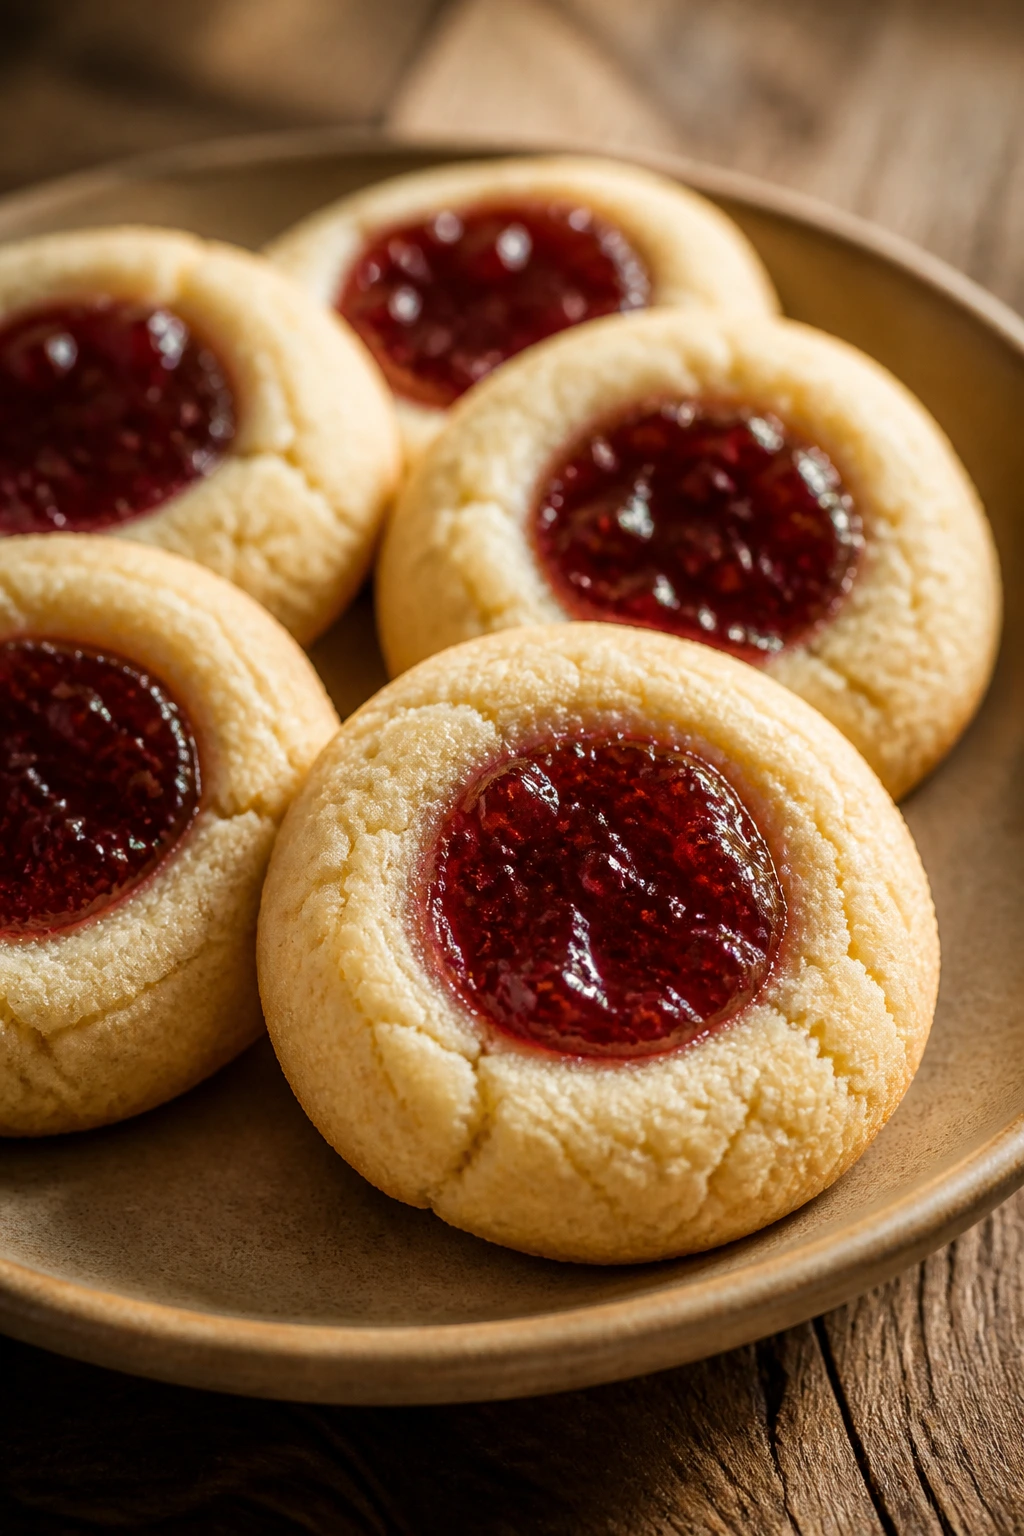
These look like bakery cookies, but the method is almost embarrassingly simple. A buttery dough, a little jam in the center, and a short bake give you a cookie that feels old-fashioned in the best way.
Why It Works:
Thumbprints are beginner-friendly because the shape is hand-formed, so there’s no pressure to make perfect cutouts. The jam adds flavor without requiring a frosting step.
Key Ingredients:
- 1 cup unsalted butter, softened
- 2/3 cup sugar
- 1 large egg yolk
- 2 teaspoons vanilla extract
- 2 cups all-purpose flour
- 1/4 teaspoon salt
- 1/2 cup thick jam or preserves
Quick Steps:
- Heat the oven to 350°F and line a baking sheet.
- Cream butter and sugar, then mix in egg yolk and vanilla.
- Add flour and salt to form a soft dough.
- Roll into balls, press a thumb or spoon into the center, and fill with jam.
- Bake 12 to 14 minutes until the edges are lightly golden.
Equipment for This Recipe:
- Mixing bowl
- Baking sheet
- Small spoon or thumb for indenting
- Parchment paper
How to Serve This Dish:
Let them cool so the jam firms up. They look best in a mixed cookie tray because the jewel-colored centers pop.
Pro Tips for This Recipe:
- Use thick jam so it doesn’t run.
- Re-press the centers halfway through if they puff up.
- Fill with just a small spoonful; less is more.
Variations on This Dish:
- Apricot Almond: Use apricot jam with a touch of almond extract.
- Raspberry Lemon: Add lemon zest to the dough and raspberry jam in the center.
Common Mistakes to Avoid with This Dish:
- Overfilling the center: Jam bubbles out and burns.
- Making the dough too warm: The cookies spread too much.
33. Caramel Banana Bread Bars
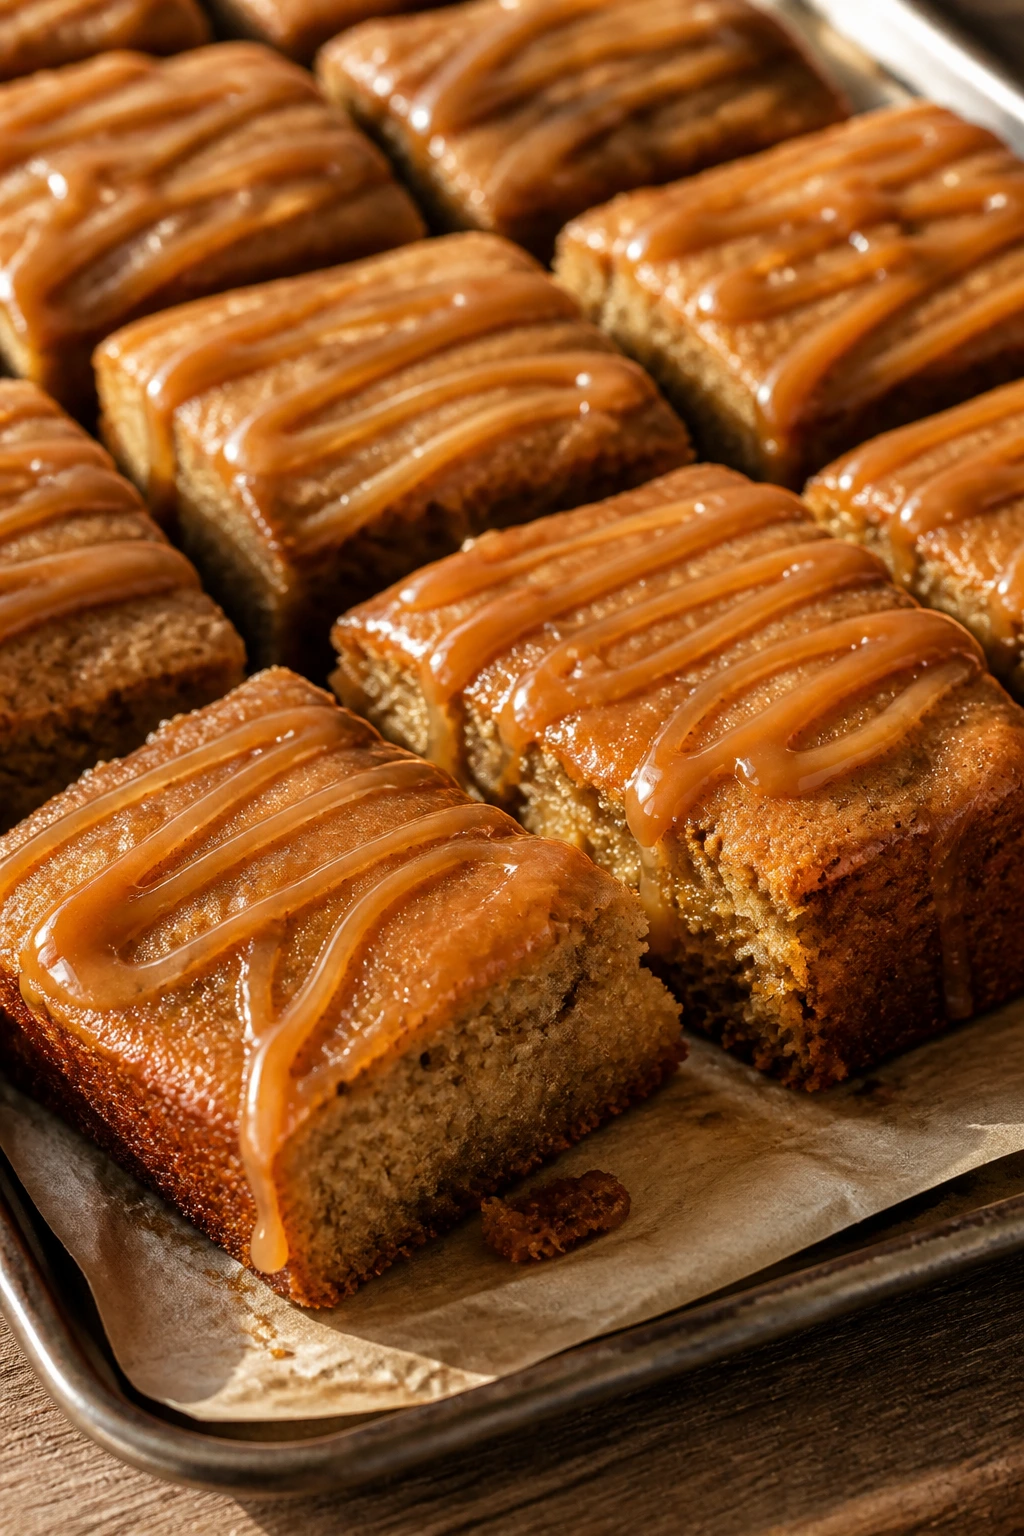
These take the comfort of banana bread and flatten it into a snackable bar with a caramel drizzle. The texture lands somewhere between soft cake and blondie, which is probably why they disappear so fast.
Why It Works:
Bars bake more evenly than a thick loaf, and the banana keeps them moist without much extra effort. A little caramel on top turns a simple pan bake into something that feels finished.
Key Ingredients:
- 2 ripe bananas, mashed
- 1/2 cup unsalted butter, melted
- 1 cup brown sugar
- 1 large egg
- 1 teaspoon vanilla extract
- 1 1/2 cups all-purpose flour
- 1/2 teaspoon baking soda
- 1/2 teaspoon salt
- 1 teaspoon cinnamon
- Caramel sauce for drizzling
Quick Steps:
- Heat the oven to 350°F and line an 8-inch square pan.
- Mix bananas, butter, brown sugar, egg, and vanilla.
- Stir in flour, baking soda, salt, and cinnamon.
- Spread the batter in the pan and bake 22 to 28 minutes.
- Cool, then drizzle with caramel and cut into bars.
Equipment for This Recipe:
- Square pan
- Mixing bowl
- Spatula
- Knife for slicing
How to Serve This Dish:
Serve at room temperature with extra caramel if you want a sweeter finish. A pinch of flaky salt on top makes the banana flavor sharper.
Pro Tips for This Recipe:
- Use ripe bananas with plenty of brown spots.
- Cool before drizzling so the caramel sits on top.
- Don’t overbake; bars dry out faster than loaf cake.
Variations on This Dish:
- Chocolate Chip Banana Bars: Fold in 1/2 cup chips.
- Nutty Caramel Bars: Add toasted pecans to the batter.
Common Mistakes to Avoid with This Dish:
- Too much flour: The bars become bread-like.
- Drizzling while hot: The caramel melts into the crumb and vanishes.
34. Microwave Mug Brownie

This is the emergency chocolate dessert. It’s dense, warm, and ready before you’ve even put the spoon in the sink, which is exactly why it belongs on a beginner list.
Why It Works:
Like the vanilla mug cake, this uses a tiny batter that cooks fast in the microwave. Cocoa and chocolate chips give you enough intensity that it tastes more like a brownie than a snack cake.
Key Ingredients:
- 4 tablespoons all-purpose flour
- 2 tablespoons sugar
- 2 tablespoons cocoa powder
- Pinch of salt
- 3 tablespoons milk
- 2 tablespoons neutral oil
- 1/4 teaspoon vanilla extract
- 1 tablespoon chocolate chips
Quick Steps:
- Mix flour, sugar, cocoa, and salt in a large mug.
- Stir in milk, oil, and vanilla until smooth.
- Top with chocolate chips.
- Microwave 60 to 75 seconds until the top looks set.
- Rest 1 minute before eating.
Equipment for This Recipe:
- Large microwave-safe mug
- Spoon
- Measuring spoons
How to Serve This Dish:
Eat it warm with a spoon, or add ice cream if you want the hot-cold contrast. It is best treated as a single serving.
Pro Tips for This Recipe:
- Use a roomy mug.
- Start with less time than you think you need.
- Add a pinch of espresso powder if you want deeper chocolate flavor.
Variations on This Dish:
- Peanut Butter Mug Brownie: Swirl in a spoonful of peanut butter.
- Mint Chocolate: Add a drop of peppermint extract.
Common Mistakes to Avoid with This Dish:
- Overcooking: The texture turns rubbery almost immediately.
- Skipping the resting minute: The center finishes setting off the heat.
35. Oreo Truffles
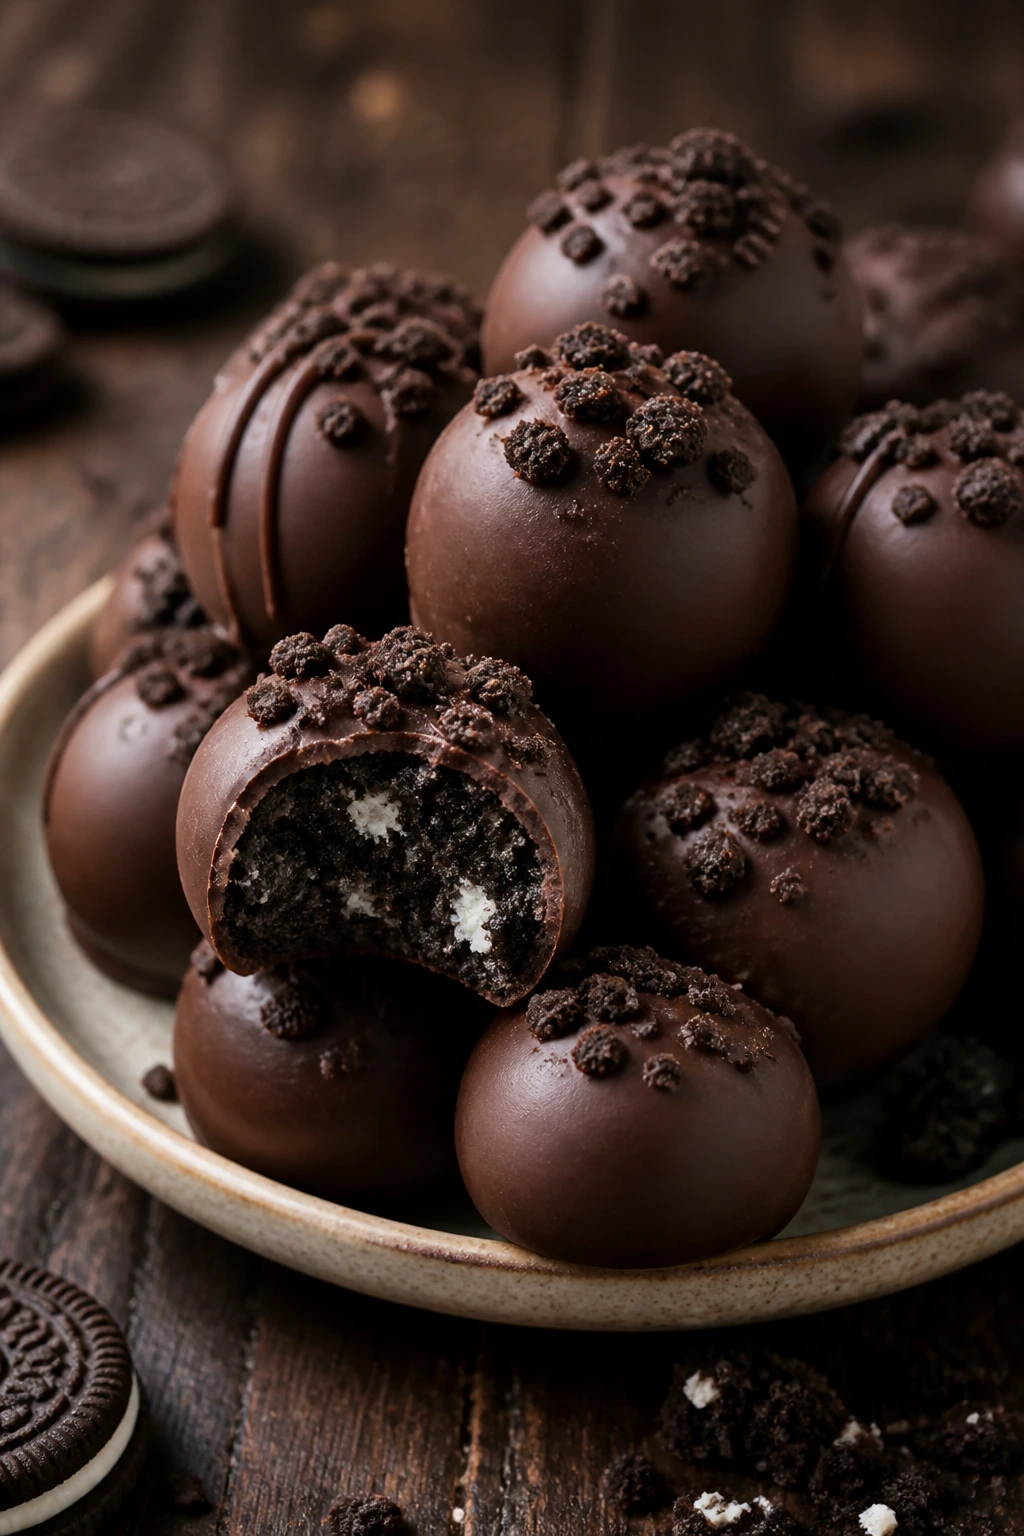
These are no-bake, mildly dangerous, and easy to make in a batch. You crush cookies, mix in cream cheese, dip the balls in chocolate, and suddenly the plate looks like a candy shop cheat code.
Why It Works:
The cookie crumbs and cream cheese create a truffle filling that sets firm in the fridge. Dipping them in melted chocolate gives you a shell that keeps the inside rich and soft.
Key Ingredients:
- 1 package Oreo cookies
- 8 ounces cream cheese, softened
- 12 ounces semi-sweet chocolate, melted
- Sprinkles or crushed cookies for topping
Quick Steps:
- Crush the cookies into fine crumbs.
- Mix crumbs with cream cheese until uniform.
- Roll into 1-inch balls and chill 30 minutes.
- Dip each ball in melted chocolate.
- Decorate before the coating sets, then chill again.
Equipment for This Recipe:
- Food processor or zip-top bag and rolling pin
- Mixing bowl
- Baking sheet
- Fork for dipping
How to Serve This Dish:
Serve cold on a chilled plate if you want the chocolate shell to stay crisp. They work well as party sweets because one batch stretches far.
Pro Tips for This Recipe:
- Chill the balls before dipping or they slide off the fork.
- Use parchment so the chocolate bottoms don’t stick.
- Work in small batches to keep the coating smooth.
Variations on This Dish:
- Mint Oreo Truffles: Use mint cookies or a drop of mint extract.
- White Chocolate Version: Dip in white chocolate and add crushed cookies on top.
Common Mistakes to Avoid with This Dish:
- Cream cheese too warm: The filling gets sticky and hard to roll.
- Chocolate too hot: It can melt the centers.
36. Peach Hand Pies
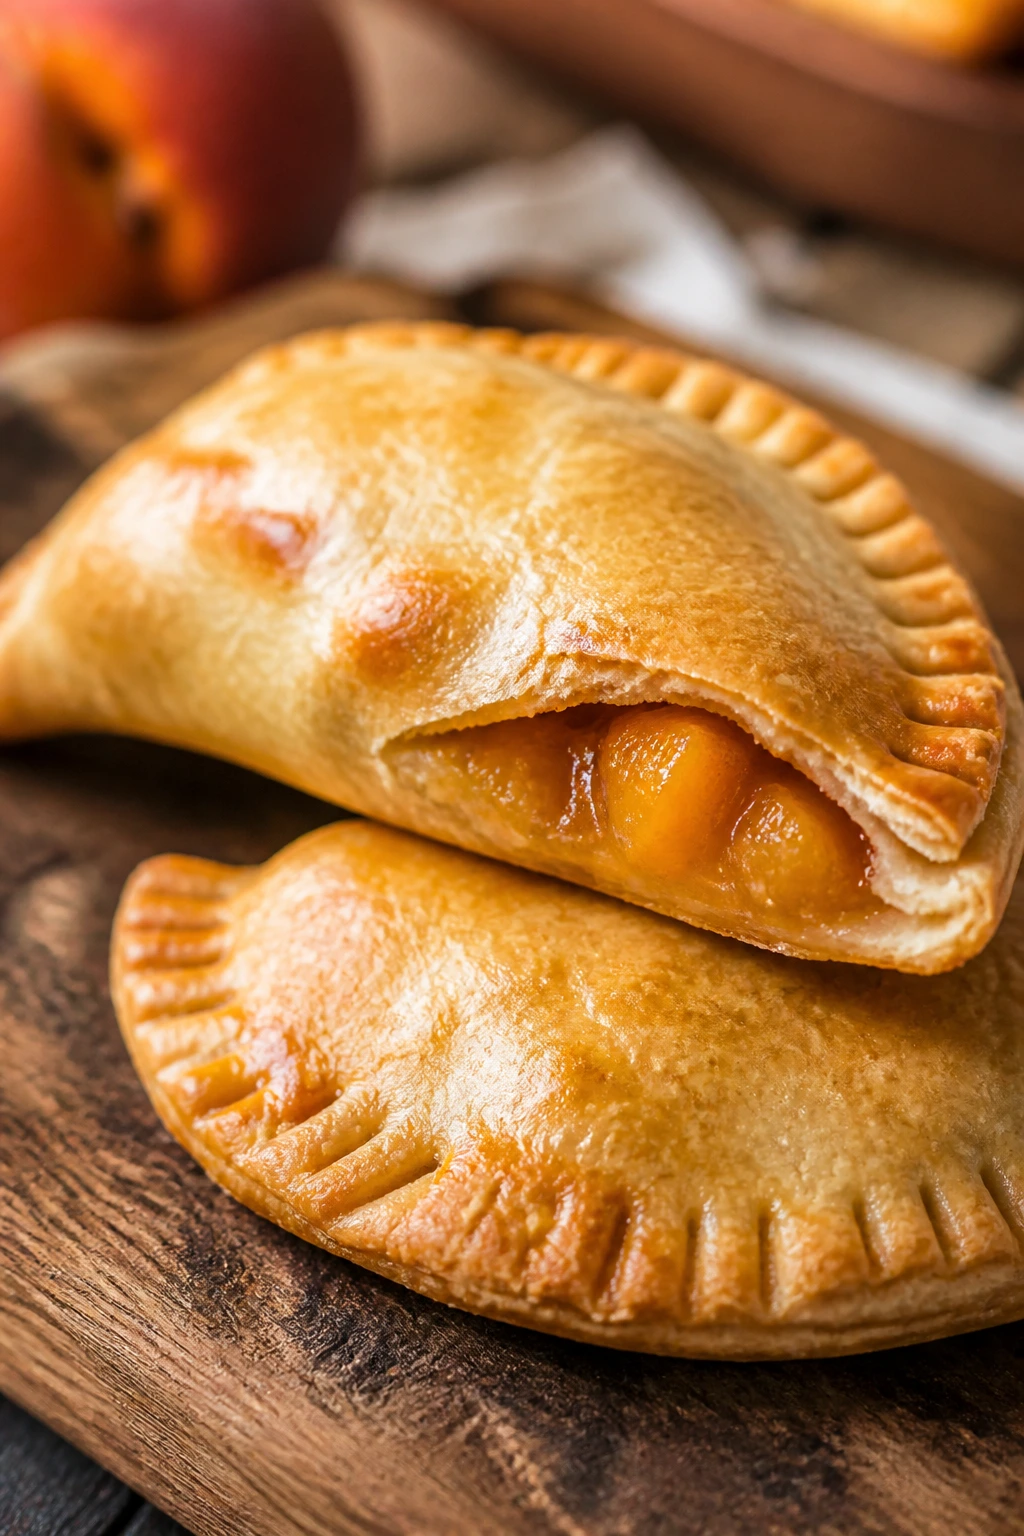
These are the cousin of cherry hand pies, but with a softer, sunnier filling. The peaches cook into a little jam pocket, and the sealed crust makes them easy to eat with your hand, which is half the fun.
Why It Works:
Pie dough is forgiving in hand-pie form because small leaks are less disastrous. The fruit cooks inside a closed parcel, so you get concentrated flavor without needing a whole pie plate.
Key Ingredients:
- 1 package refrigerated pie dough
- 2 cups peeled diced peaches
- 1/4 cup sugar
- 1 tablespoon cornstarch
- 1 teaspoon lemon juice
- 1/2 teaspoon cinnamon
- 1 egg, beaten
- 1 tablespoon coarse sugar
Quick Steps:
- Cook peaches, sugar, cornstarch, lemon juice, and cinnamon until thickened, then cool.
- Heat the oven to 400°F and line a baking sheet.
- Cut dough into circles or squares and fill each piece with a spoonful of peach mixture.
- Seal, crimp, brush with egg wash, and sprinkle with coarse sugar.
- Bake 18 to 22 minutes until golden.
Equipment for This Recipe:
- Baking sheet
- Saucepan
- Fork
- Pastry brush
How to Serve This Dish:
Serve warm with vanilla ice cream or a little whipped cream. They’re also good at room temperature, which makes them picnic-friendly.
Pro Tips for This Recipe:
- Cool the filling fully before sealing.
- Don’t overfill the pies.
- Cut a tiny steam slit in the top if needed.
Variations on This Dish:
- Peach Raspberry: Add a handful of raspberries to the filling.
- Brown Sugar Peach: Use brown sugar instead of white sugar for a deeper flavor.
Common Mistakes to Avoid with This Dish:
- Wet filling: It bursts the dough seams.
- Weak crimping: The pies leak in the oven.
37. Cinnamon Roll Dump Cake
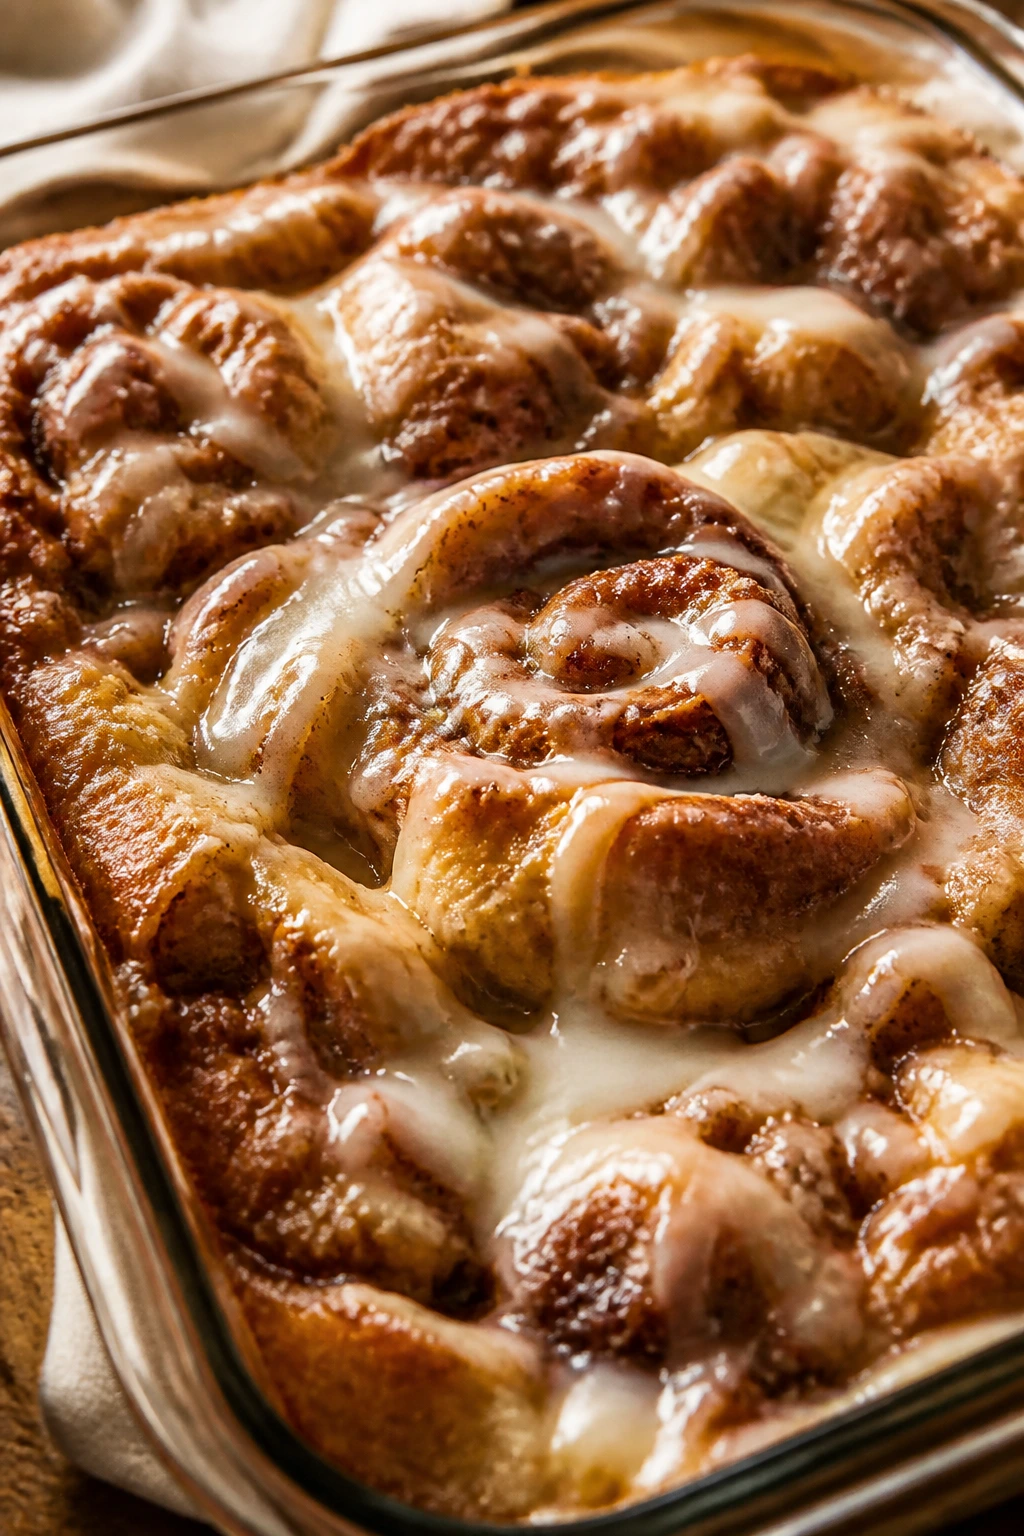
This is the kind of dessert that makes a skeptic blink. Refrigerated cinnamon rolls, a little butter, and a sweet filling bake into a gooey pan of sticky spirals and crisp edges.
Why It Works:
Dump cakes are built for beginners because the layering is the job. You’re not making dough from scratch; you’re combining ready-made pieces and letting the oven do the rest.
Key Ingredients:
- 1 can refrigerated cinnamon rolls with icing
- 1 can apple pie filling
- 2 tablespoons melted butter
- 1 teaspoon cinnamon
- 1 tablespoon brown sugar
- 1/4 cup chopped pecans, optional
Quick Steps:
- Heat the oven to 350°F and grease a baking dish.
- Spread the apple pie filling in the dish.
- Cut cinnamon rolls into quarters and scatter over the filling.
- Drizzle with butter and sprinkle with cinnamon, brown sugar, and pecans if using.
- Bake 25 to 30 minutes until the rolls are cooked through, then drizzle on the icing.
Equipment for This Recipe:
- Baking dish
- Knife or kitchen scissors
- Spoon
- Small bowl
How to Serve This Dish:
Serve it warm with the icing melting into the top. A scoop of vanilla ice cream turns the sticky edges into the best part.
Pro Tips for This Recipe:
- Cut the rolls smaller so they bake evenly.
- Check the center for cooked dough, not just browned tops.
- Add the icing after baking, not before.
Variations on This Dish:
- Peach Version: Swap apple filling for peach filling.
- Maple Pecan: Use maple syrup and extra pecans for a toastier flavor.
Common Mistakes to Avoid with This Dish:
- Leaving the rolls in big chunks: They can stay raw in the middle.
- Adding icing too early: It burns or disappears.
38. No-Bake Key Lime Pie Bars
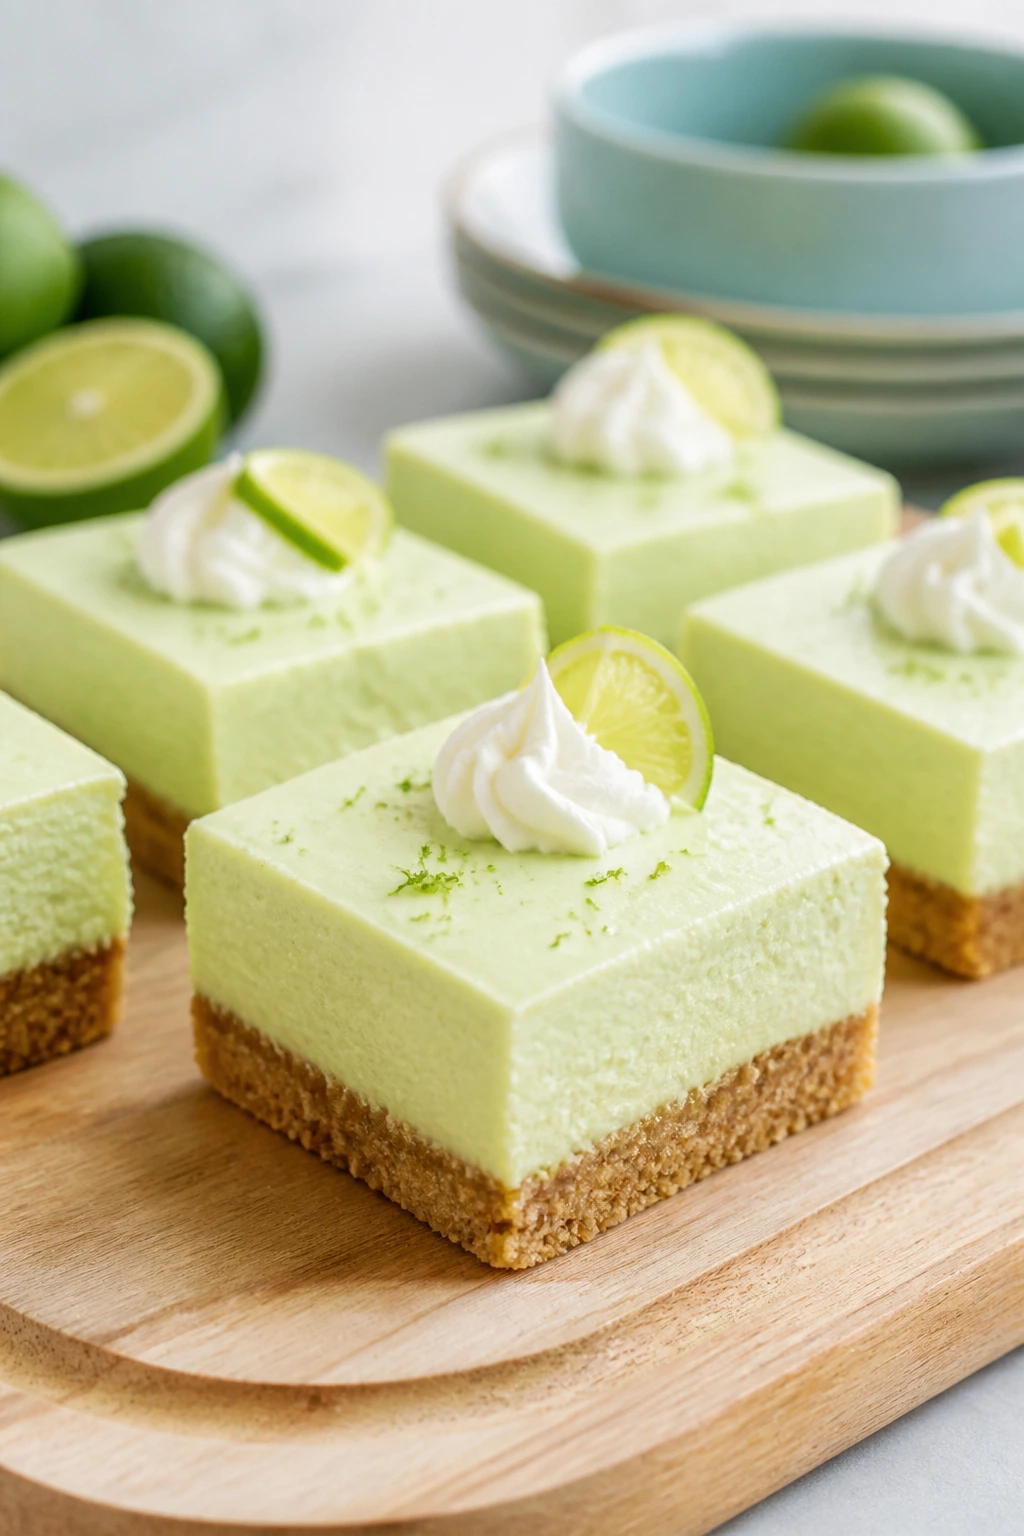
These taste bright and cold, with a graham crust and a lime filling that sets in the fridge. They’re the sort of dessert that tastes more technical than it is, which is a nice trick for a beginner baker.
Why It Works:
Condensed milk gives the filling body, lime juice gives it the tang, and the fridge does the setting. You get pie flavor without a blind bake or a finicky meringue.
Key Ingredients:
- 2 cups graham cracker crumbs
- 1/2 cup melted butter
- 1 can sweetened condensed milk
- 1/2 cup fresh lime juice
- 1 tablespoon lime zest
- 8 ounces cream cheese, softened
- 1 cup whipped cream
- Pinch of salt
Quick Steps:
- Press crumbs and melted butter into a lined square pan.
- Beat condensed milk, lime juice, zest, cream cheese, and salt until smooth.
- Fold in whipped cream.
- Spread over the crust and chill 4 hours.
- Cut into bars and garnish with extra zest.
Equipment for This Recipe:
- Square pan
- Mixing bowl
- Hand mixer
- Zester
How to Serve This Dish:
Serve cold, straight from the fridge. A thin lime slice or a sprinkle of zest gives the bars a clean finish.
Pro Tips for This Recipe:
- Use fresh lime juice. Bottled juice tastes flat.
- Chill long enough for clean cuts.
- Line the pan with parchment for easy lifting.
Variations on This Dish:
- Meyer Lime Bars: Use Meyer limes if you want a softer citrus note.
- Coconut Crust: Mix shredded coconut into the graham crumbs.
Common Mistakes to Avoid with This Dish:
- Under-chilling: The bars won’t slice neatly.
- Overmixing the whipped cream: It can go grainy.
39. Peanut Butter Rice Krispie Squares
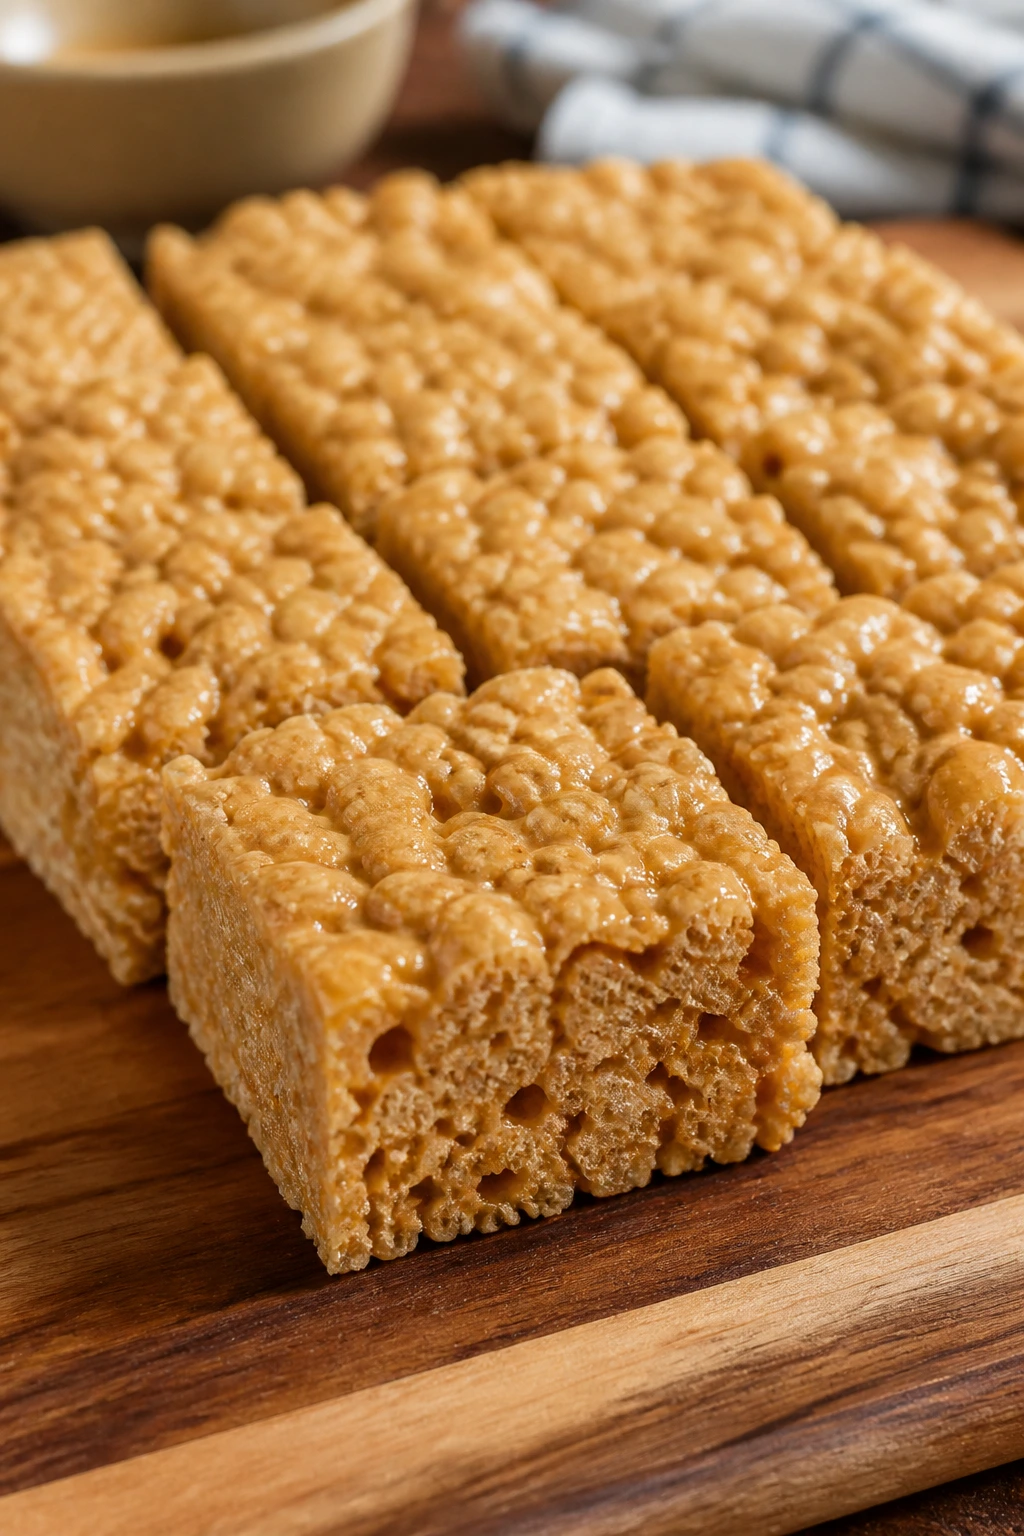
If you like sweet-salty desserts with a little crunch, this one is hard to beat. The peanut butter adds depth, the cereal keeps things light, and the squares hold together without baking.
Why It Works:
Peanut butter gives the bars structure and flavor, while the syrup mixture binds everything in a sticky, chewy sheet. It’s a no-bake formula that behaves if you work quickly.
Key Ingredients:
- 1 cup sugar
- 1 cup light corn syrup
- 1 cup peanut butter
- 1 teaspoon vanilla extract
- 1/2 teaspoon salt
- 6 cups crisp rice cereal
- 1/2 cup chocolate chips, optional
Quick Steps:
- Grease a 9-inch square pan.
- Heat sugar and corn syrup just until it bubbles, then remove from heat.
- Stir in peanut butter, vanilla, and salt.
- Fold in the cereal and press into the pan.
- Sprinkle chocolate chips on top if using, then cool before slicing.
Equipment for This Recipe:
- Saucepan
- Square pan
- Spatula
- Measuring cups
How to Serve This Dish:
Cut them into medium squares and serve at room temperature. They pack well, which makes them useful for lunches or potlucks.
Pro Tips for This Recipe:
- Measure the cereal before you start heating anything.
- Press lightly so the bars stay crisp, not dense.
- Add chocolate chips while the surface is warm if you want them to soften slightly.
Variations on This Dish:
- Chocolate Peanut Squares: Stir cocoa into the syrup mixture.
- Pretzel Crunch: Fold in a handful of broken pretzels.
Common Mistakes to Avoid with This Dish:
- Boiling the syrup too long: The bars turn hard.
- Packing them into the pan too tightly: The texture gets compact.
40. Vanilla Sheet Cake
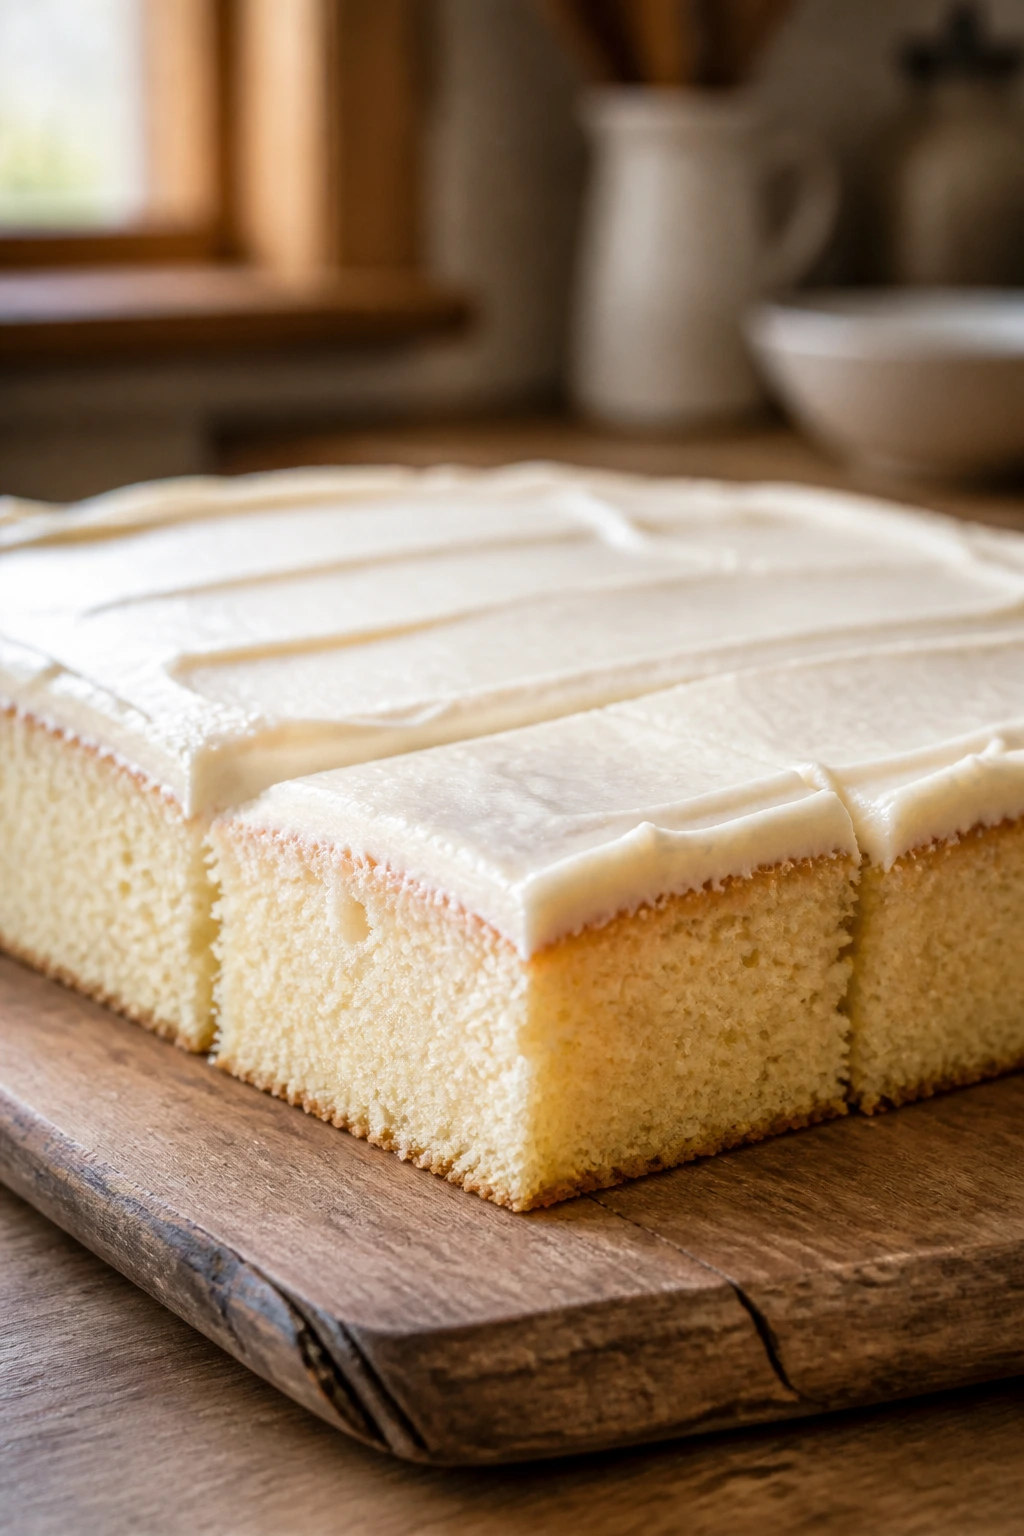
A plain vanilla sheet cake is one of those desserts that earns respect only after you’ve baked one. It’s soft, square, dependable, and easy to frost with the simplest buttercream or glaze.
Why It Works:
Sheet cakes bake evenly and cool fast, which helps beginners avoid the classic problem of a dry outer edge and raw center. The vanilla flavor gives you a blank canvas, but it still tastes like something you made on purpose.
Key Ingredients:
- 2 1/4 cups all-purpose flour
- 2 teaspoons baking powder
- 1/2 teaspoon salt
- 1/2 cup unsalted butter, softened
- 1 1/4 cups sugar
- 3 large eggs
- 2 teaspoons vanilla extract
- 1 cup milk
- 1 batch simple buttercream or glaze, optional
Quick Steps:
- Heat the oven to 350°F and line a rimmed sheet pan or 9×13-inch pan.
- Whisk flour, baking powder, and salt.
- Beat butter and sugar until fluffy, then add eggs and vanilla.
- Mix in the dry ingredients and milk in alternating additions until smooth.
- Bake 22 to 28 minutes until the top springs back and a skewer comes out with a few crumbs.
Equipment for This Recipe:
- Sheet pan or 9×13-inch pan
- Mixing bowls
- Hand mixer
- Spatula
How to Serve This Dish:
Frost it lightly and cut it into squares. Fresh berries on the side keep the plate from looking too plain.
Pro Tips for This Recipe:
- Room-temperature butter and eggs make the batter smoother.
- Don’t overbake a sheet cake; it dries out faster than people expect.
- Cool fully before frosting so the topping stays put.
Variations on This Dish:
- Lemon Sheet Cake: Replace some vanilla with lemon zest and juice.
- Chocolate Frosted: Spread with cocoa buttercream once cool.
Common Mistakes to Avoid with This Dish:
- Using a deep pan without adjusting time: The center may need longer.
- Frosting while warm: The icing slides right off.
Why These Recipes Work So Well for First-Time Bakers
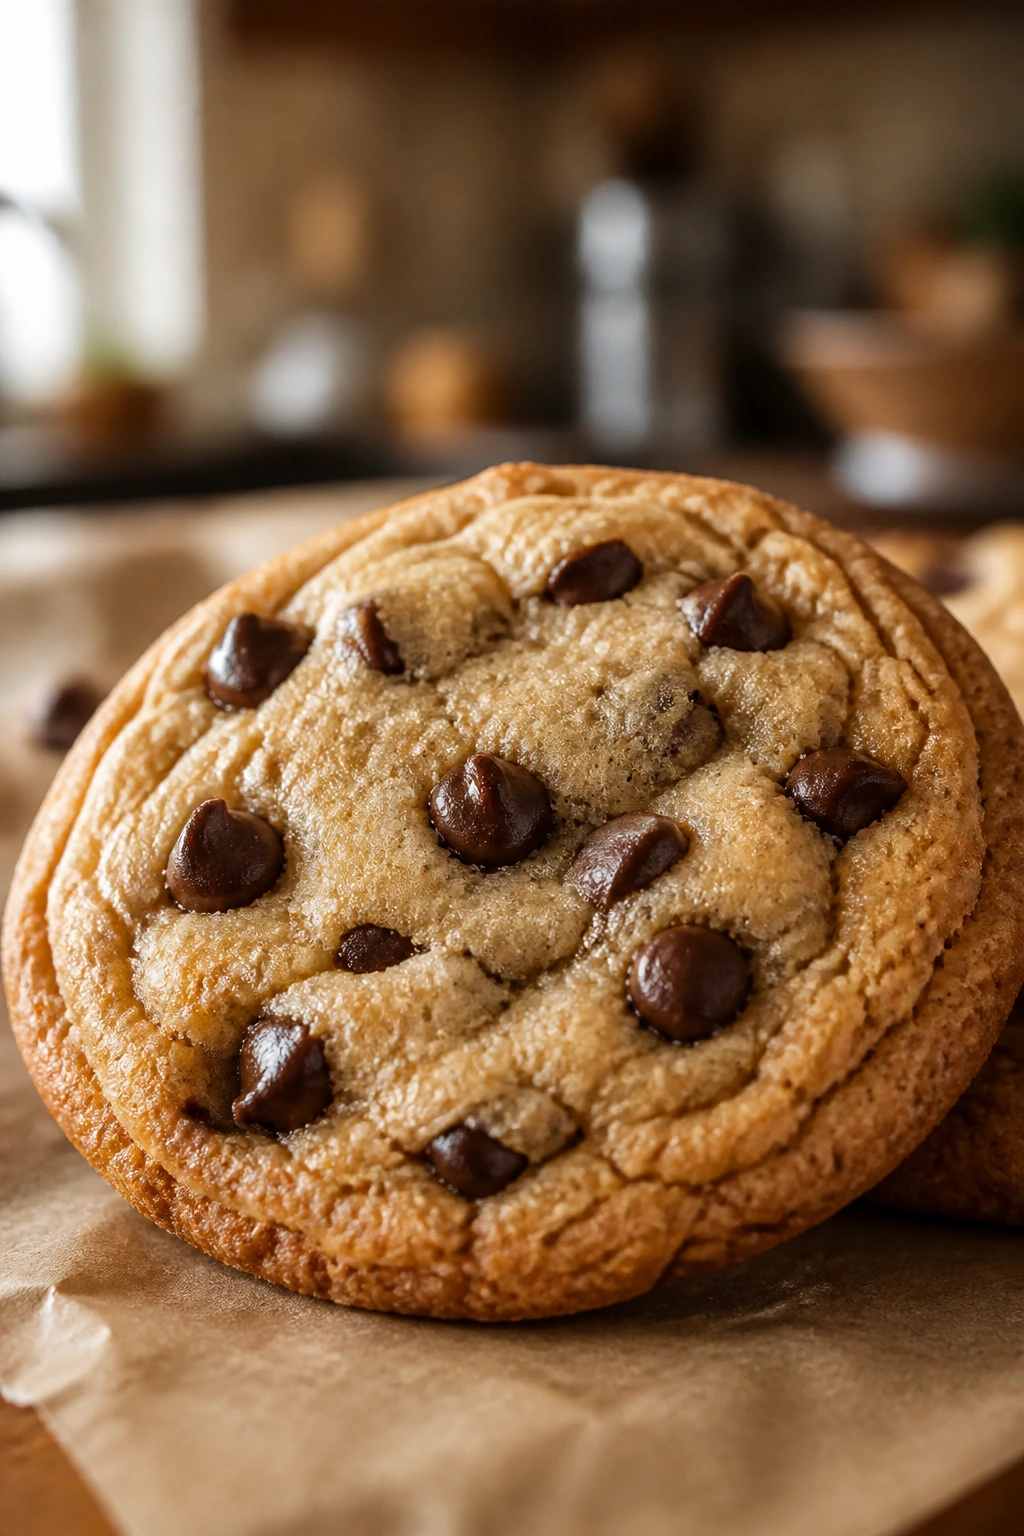
Most beginner dessert recipes fail for one of two reasons: they ask for too many steps, or they punish small mistakes too hard. These recipes dodge both problems. They lean on clear cues like golden edges, set centers, bubbling fruit, and a skewer with a few crumbs instead of vague “until done” language that leaves you guessing.
There’s also a practical reason this collection works. Butter cakes, quick breads, bars, crisps, and no-bake cups all teach a different piece of baking without throwing you into a full pastry class. You learn how to cream butter, how to stir a batter without beating it to death, how to tell when fruit has thickened, and how chilling can be its own form of cooking.
I’ve always thought the smartest way to start baking is not with the hardest cake you can find, but with the desserts that forgive a clumsy hand. That means bars that cut cleanly, cookies that spread in a predictable way, and fruit desserts that still taste right if the topping is a little rough. Good beginner bakes are not dumbed down. They’re simply well designed.
Essential Equipment for These Desserts
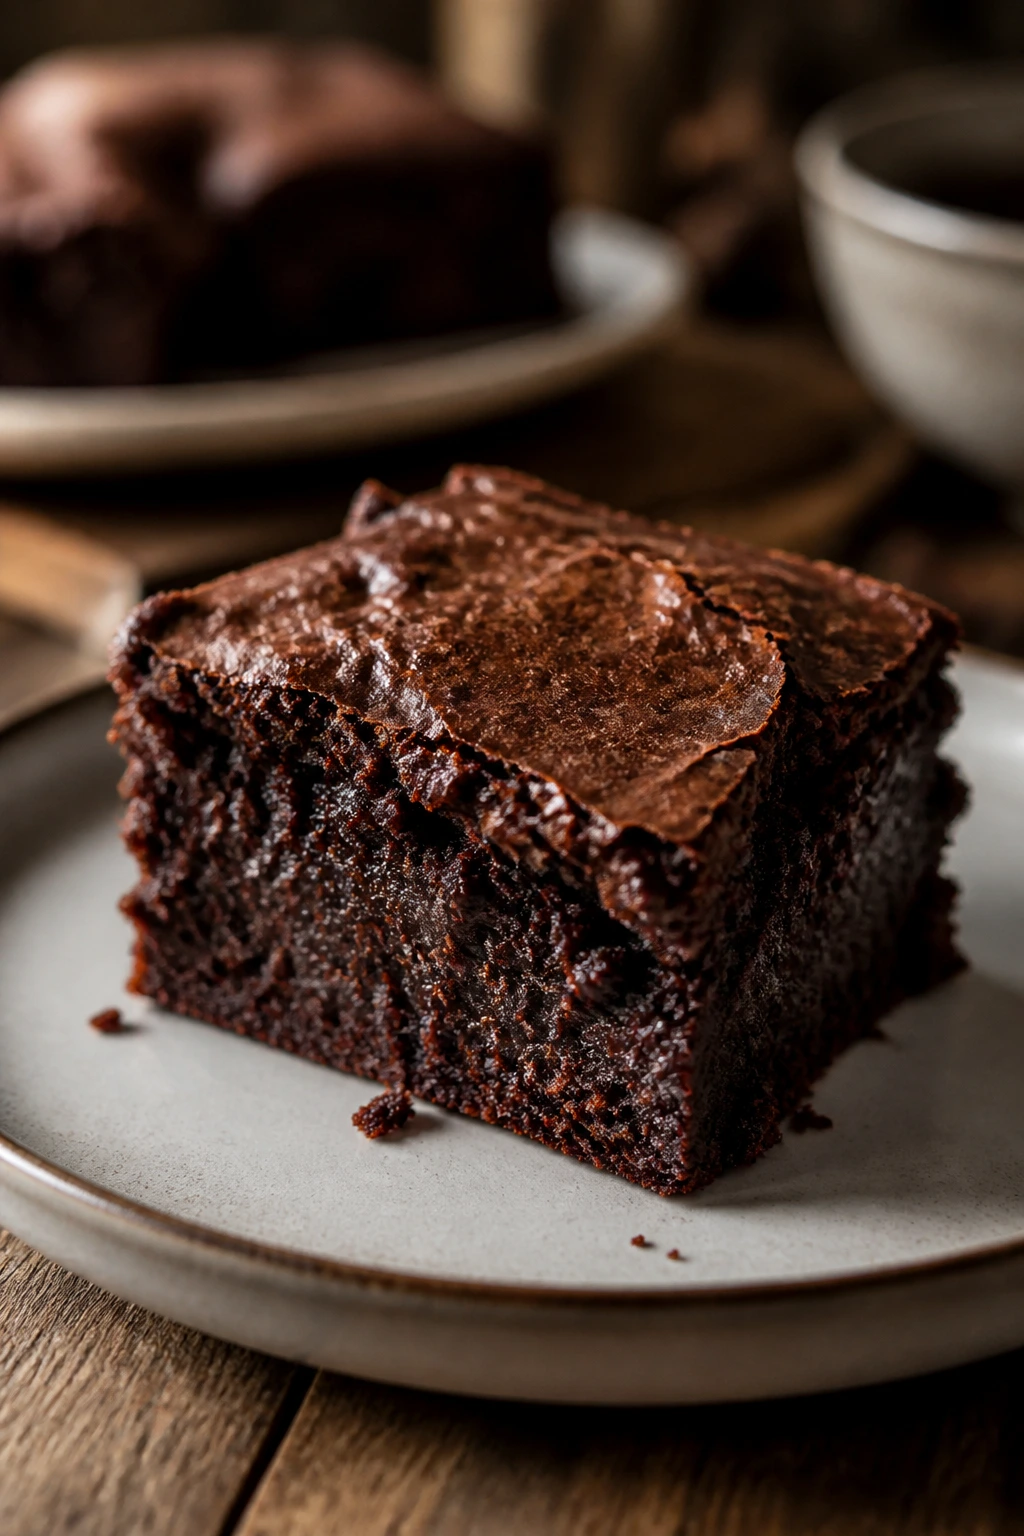
-
Mixing bowls: A medium bowl and a large bowl will cover most of the recipes here.
-
Measuring cups and spoons: Dessert baking is much less mysterious when the amounts are exact.
-
Hand mixer or sturdy whisk: A mixer helps with butter cakes and cookie dough, but a whisk covers plenty of no-bake fillings.
-
Baking sheets: You’ll use them for cookies, hand pies, and sheet-style desserts.
-
9×5-inch loaf pan: Essential for banana bread, pumpkin bread, and similar quick loaves.
-
8-inch square pan: The workhorse for brownies, blondies, fudge, and bar desserts.
-
Rimmed sheet pan or 9×13-inch pan: Useful for sheet cakes and cobblers.
-
Parchment paper: The simplest way to keep bars, brownies, and cookies from sticking.
-
Cooling rack: Not glamorous. Very useful. It keeps bottoms from steaming after the bake.
-
Rubber spatula: Better than a spoon for scraping bowls clean and folding batter gently.
Smart Shopping and Ingredient Tips
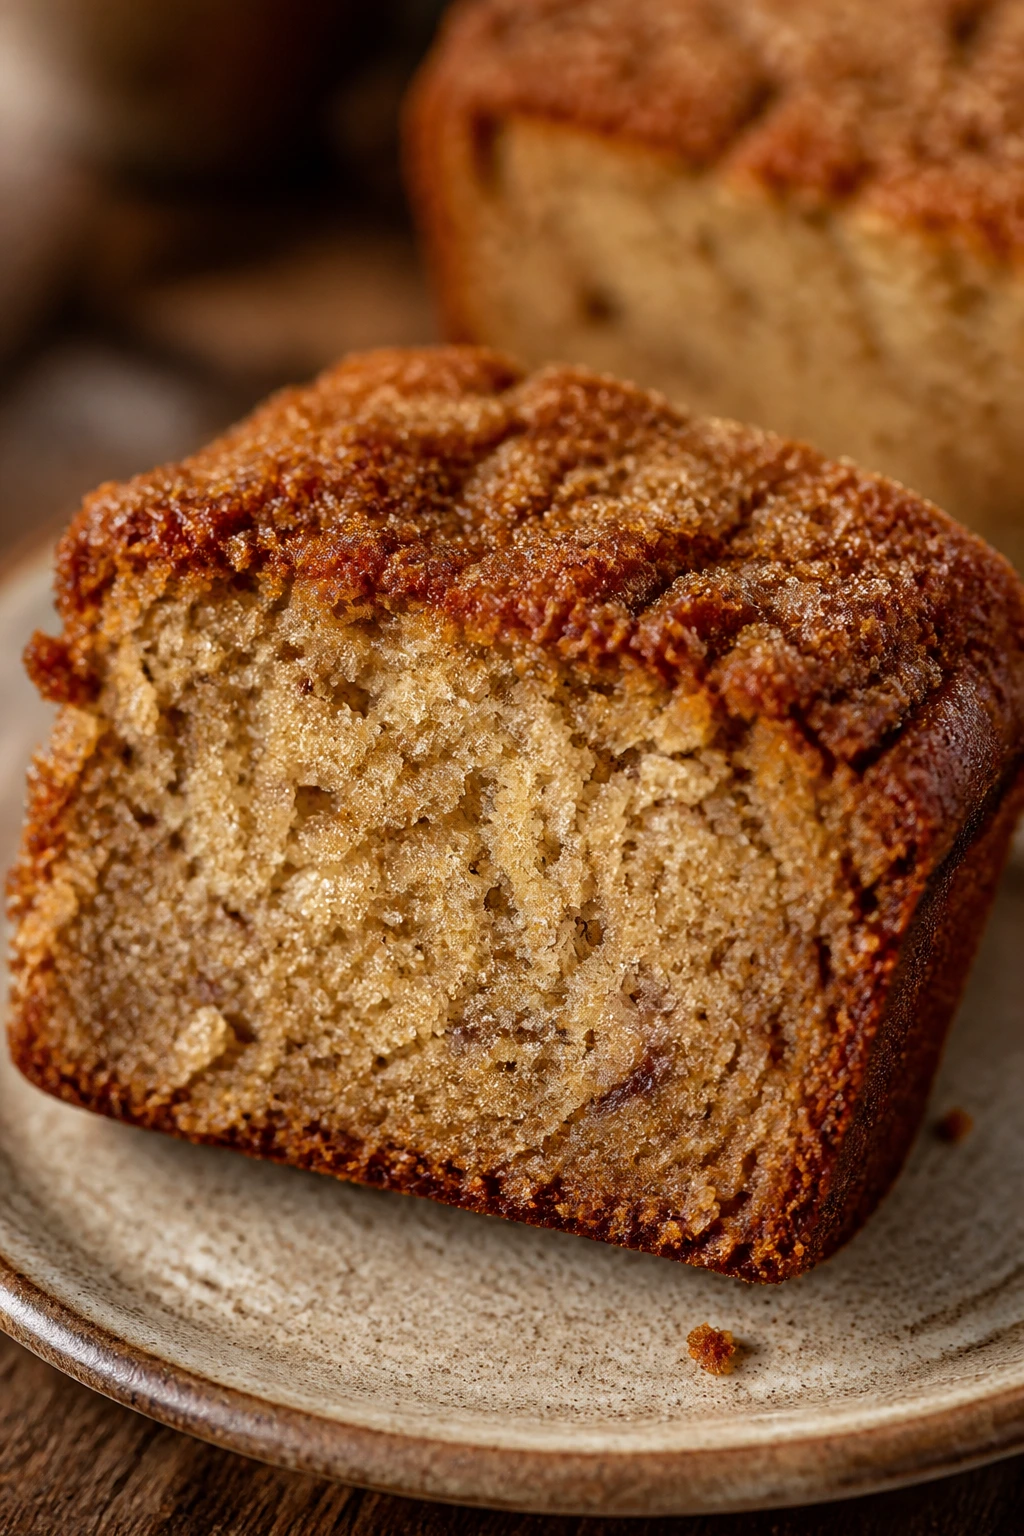
Begin with the basics that make or break dessert baking: butter, eggs, flour, sugar, and leaveners. Butter should be fresh and not overly salty unless the recipe gives you room to adjust; if salted butter is all you have, cut the added salt by about 1/4 teaspoon in most small bakes. Eggs should be the right size if possible, but a slight difference is rarely dramatic in cookies or loaves.
Flour matters more than people think. Spoon it into the cup and level it off instead of digging straight into the bag, which packs in too much and turns cakes dry. For fruit desserts, choose berries or peaches that smell fragrant and feel ripe but not mushy. Frozen fruit is fine in crisps, cobblers, and hand pies if you thaw and drain it first.
Chocolate is one place where quality shows up quickly. Semi-sweet chips, chopped bars, and cocoa powder all behave a little differently, so buy the style the recipe asks for if you can. For no-bake recipes, condensed milk and cream cheese should be full-fat; the low-fat versions can leave fillings thin or grainy. And if a recipe depends on citrus, use fresh lemons and limes. Bottled juice tastes tired next to the real thing.
One more thing: buy the right oats. Old-fashioned oats give crisps, cookies, and bars a better chew than instant oats, which can turn mushy. That small detail changes the whole texture.
How to Serve These Desserts
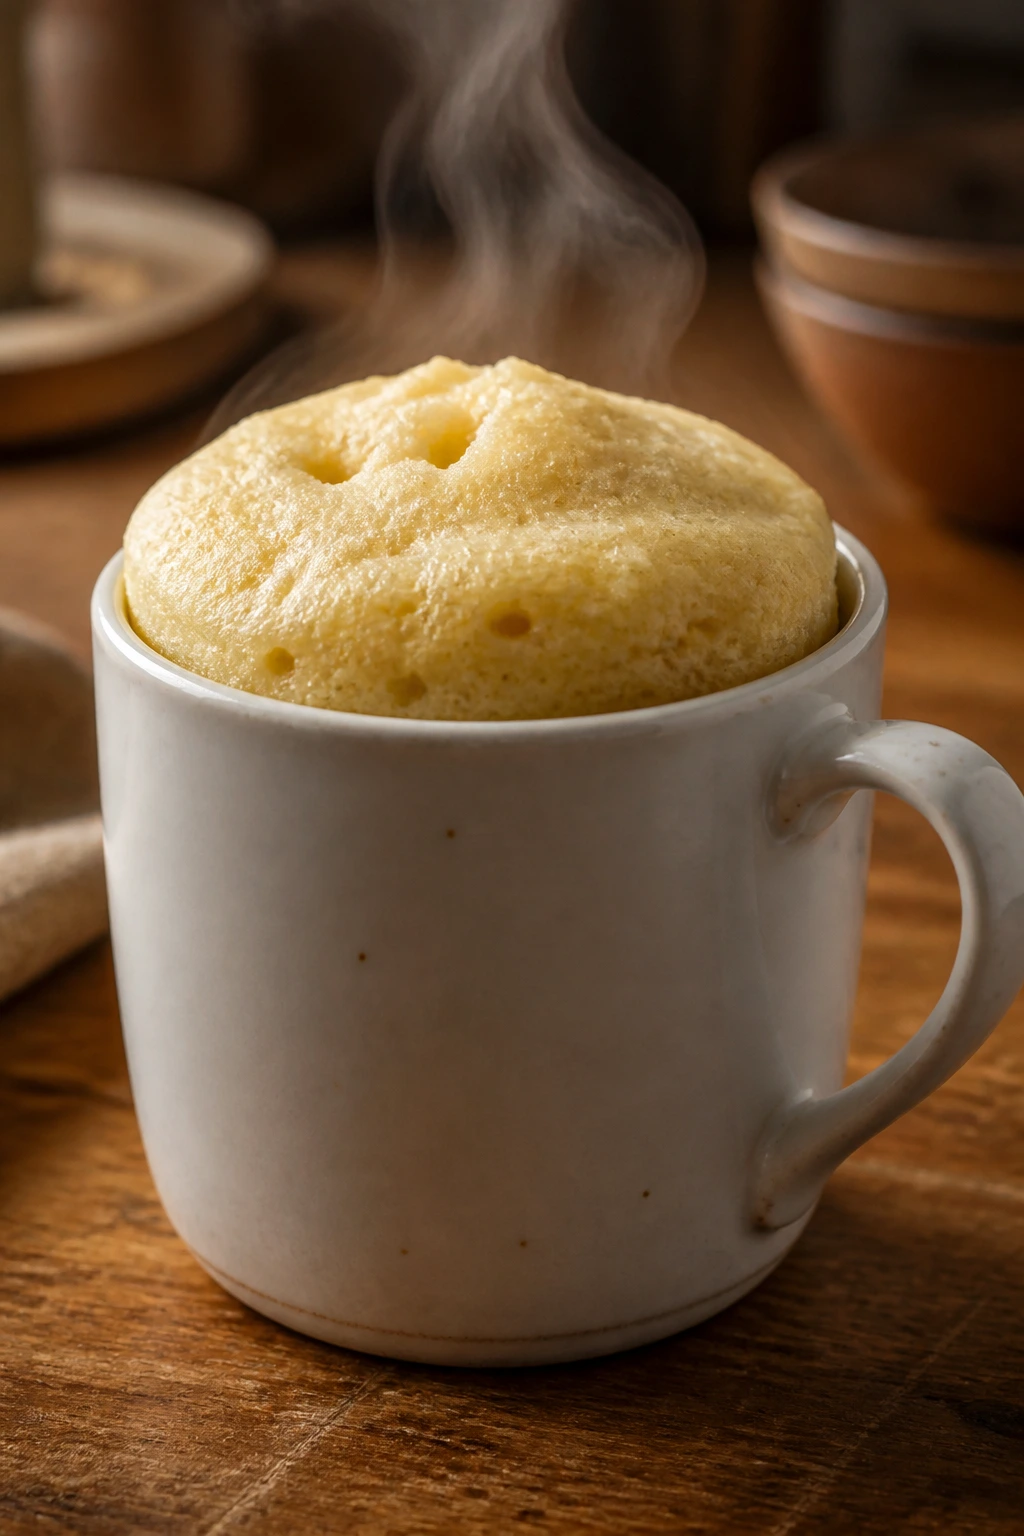
Presentation:
Keep the plating honest. Cookies look good stacked on a plate with one broken in half. Bars and brownies look neat when cut into small squares and lined in rows. Fruit desserts tend to look best when spooned into shallow bowls so the juices stay visible instead of soaking into a deep dish.
Accompaniments:
Vanilla ice cream works with nearly everything here, especially crisps, cobblers, brownies, and warm pies. Whipped cream belongs on shortcake, pudding, and fruit cups. Coffee and tea pair well with loaf cakes, blondies, snickerdoodles, and sheet cake. For a sharper contrast, add berries, citrus zest, or a spoonful of yogurt beside sweeter bakes.
Portions:
Cookies and bars are usually best in smaller pieces than you think. Rich desserts like fudge, tiramisu cups, and cheesecake cups can be cut or spooned into modest servings because they carry a lot of flavor per bite. Fruit desserts and sheet cakes scale up nicely for crowds, while mug cakes and pudding are more of a single-serving move.
Beverage Pairing:
Cold milk is a natural match for chocolate chip cookies, brownies, and peanut butter bakes. Coffee works with anything cinnamon, vanilla, or caramel-heavy. Black tea or Earl Grey fits lemon loaf, sugar cookies, and shortcake better than most people expect.
Additional Tips and Flavor Boosters
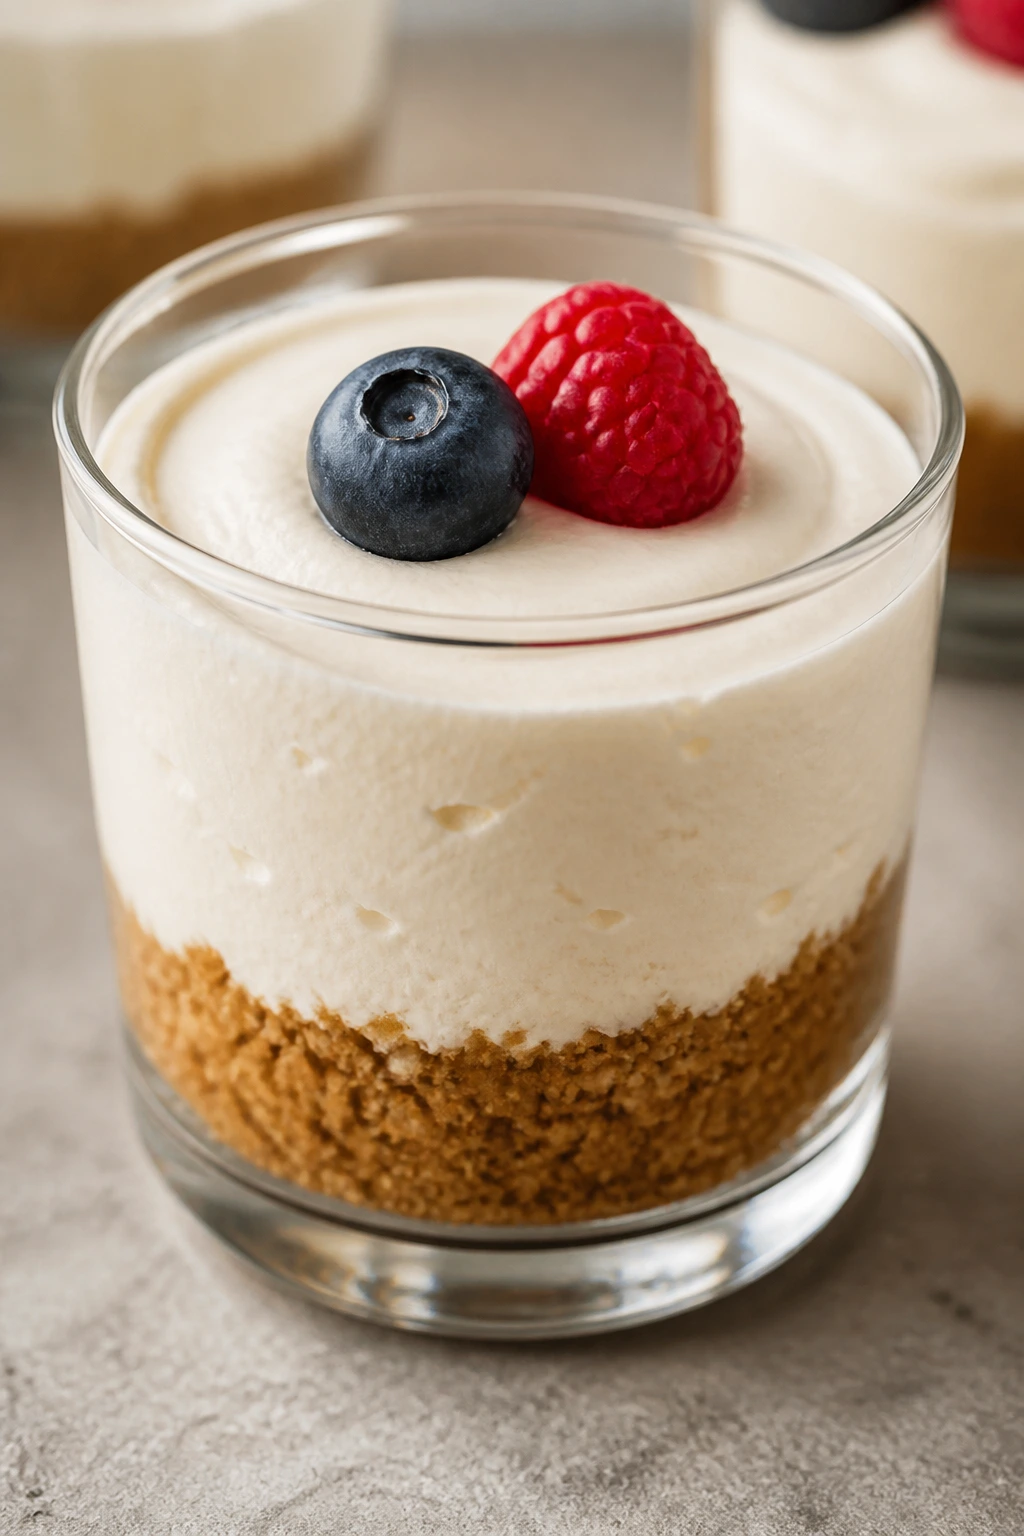
Flavor Enhancement: A pinch of flaky salt on brownies, blondies, caramel bars, or even chocolate chip cookies makes the sweetness taste sharper. Citrus zest does the same trick for vanilla cakes and berry desserts.
Customization: Chopped nuts, chocolate chips, dried fruit, and jam all travel well through the recipes in this collection. Add them sparingly at first so the base recipe still behaves the way you expect.
Serving Suggestions: Warm desserts usually benefit from one cold thing beside them: ice cream, whipped cream, or chilled yogurt. Room-temperature bars and cookies look better with a dusting of powdered sugar or a few extra chips or berries scattered on top.
Make-It-Yours: For a dairy-free version, use plant butter in cookies and bars, oat milk in simple cakes, and coconut cream in chilled fillings. For a gluten-free version, a good 1:1 baking flour swap works best in cookies, brownies, and sheet cakes; fruit crisps and puddings need less help. For a lower-sugar bend, lean on fruit desserts, reduce frosting, and choose tart berries or citrus to keep the flavor awake.
Make-Ahead, Storage, and Reheating Guidance
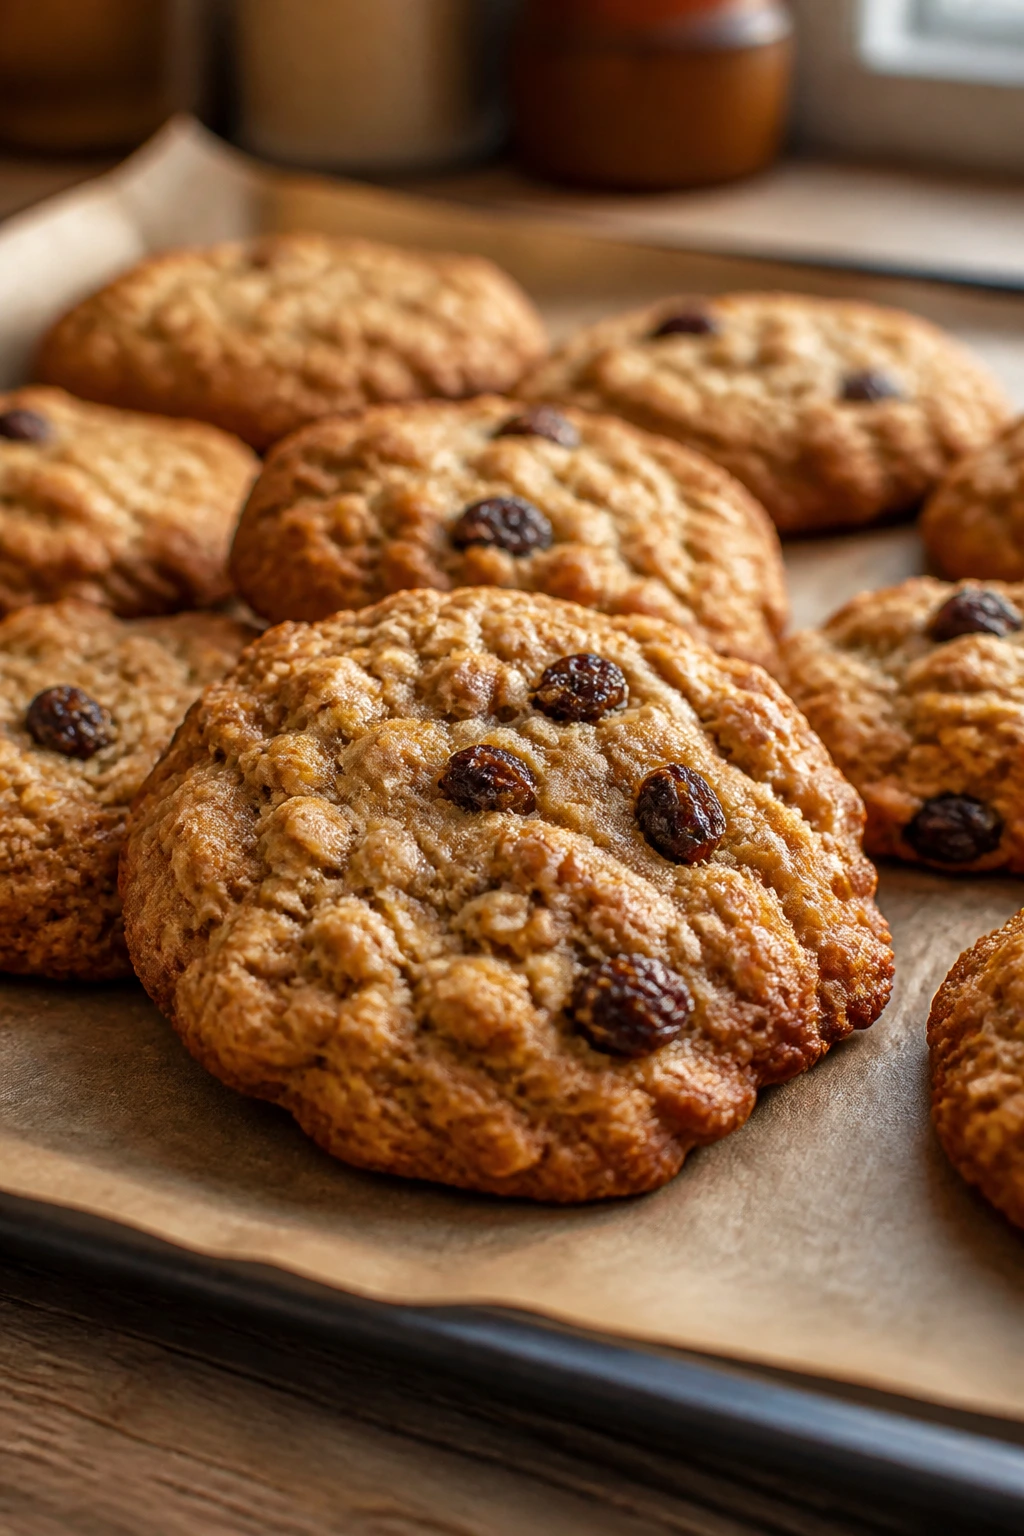
Cookies, brownies, blondies, bars, and fudge usually keep 3 to 4 days at room temperature in an airtight container, and most of them freeze well for up to 2 months if you wrap them tightly and slip parchment between layers. Loaf cakes and sheet cakes keep 3 to 5 days in the fridge if they have cream cheese frosting or fruit filling; plain cakes are often better at room temperature for the first day, then chilled once cut.
For reheating, use the oven for anything with a crust or crumb that you want to revive. A 300°F oven for 8 to 10 minutes brings life back to brownies, crisp, cobbler, hand pies, and sheet cake slices without turning them hard. Microwaves work for mug cakes, pudding, and a quick warm-up of banana bread, but use short bursts so the texture stays soft instead of rubbery.
No-bake desserts need different treatment. Cheesecake cups, tiramisu cups, and key lime bars should stay chilled and can often hold for 2 to 4 days in the refrigerator, depending on the fruit topping. If you’re making them ahead, keep crunchy toppings separate until serving. That one step saves the texture more than any trick I know.
Doughs and batters can also be made ahead. Cookie dough often chills well for 24 to 48 hours, which improves flavor and makes scooping easier. Quick bread batters, though, should go into the oven soon after mixing because the leavening starts working right away. That’s one of those small baking rules that saves a lot of disappointment.
Variations and Adaptations to Try
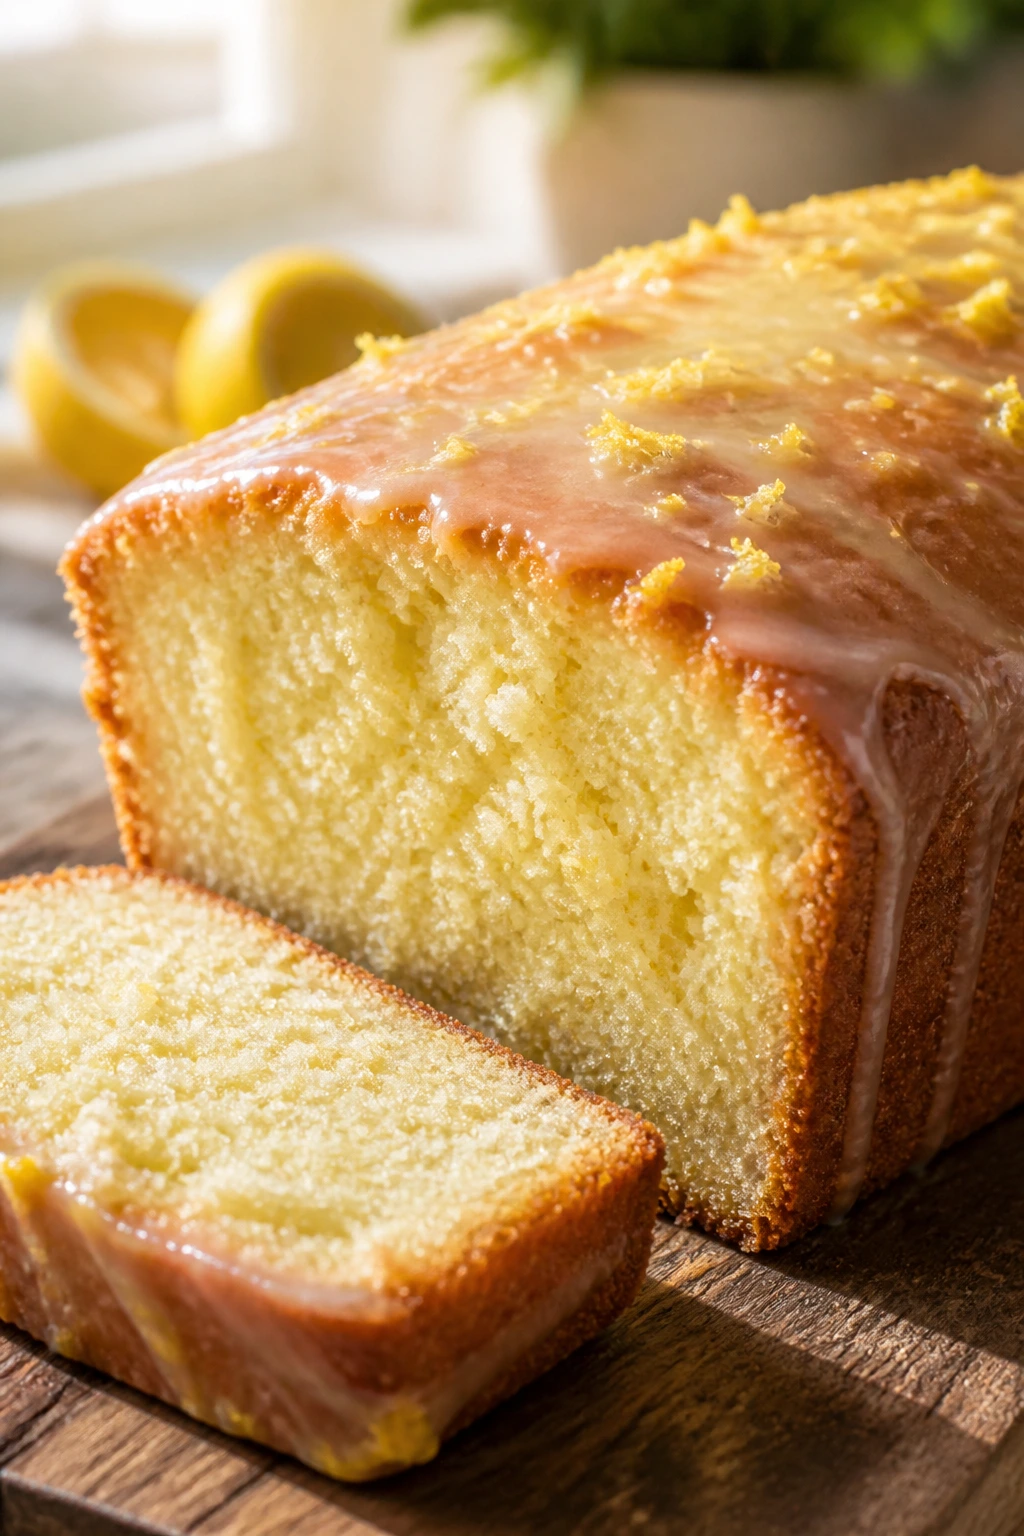
Gluten-Free Pantry Swap:
Use a reliable 1:1 gluten-free flour blend in chocolate chip cookies, brownies, blondies, sheet cake, and simple muffins. These bakes depend less on strong gluten structure, so the swap usually behaves well if the blend contains xanthan gum. Fruit crisps and no-bake cups are even easier, since the crust or topping can be changed without touching the filling.
Dairy-Free Dessert Box:
Plant butter, oat milk, coconut cream, and dairy-free chocolate chips cover most of the recipes here. The big caution is texture in chilled fillings; coconut cream and dairy-free cream cheese need a full chill to firm up. For brownies and bars, the swap is usually painless.
Fruit-First Version:
Lean toward crisps, cobblers, baked apples, galettes, and hand pies when you want a dessert that feels lighter and more seasonal without using that word too much. Tart fruit keeps the sugar in check and gives beginners a good lesson in balancing sweetness with acid.
Chocolate-Sweet Tooth Route:
Choose brownies, fudge, mug cake, chocolate pudding, Oreo truffles, and chocolate chip cookies when you want the richest payoff for the least technique. A little espresso powder in the chocolate desserts makes them taste deeper, not like coffee, and it’s a trick worth keeping.
Kid-Helper Bakes:
Rice Krispie treats, Oreo truffles, mug cakes, thumbprints, and no-bake cups are the easiest for small hands. Let kids measure, stir, and decorate; save the hot pans and sharp knives for the adult. The point is participation, not perfection.
Small-Batch Nights:
Mug cakes, pudding, cheesecake cups, and two-batch cookies are useful when you want dessert without leftovers living on the counter for days. It’s a good way to practice technique without making a giant pan you have to finish by force.
Common Mistakes to Avoid
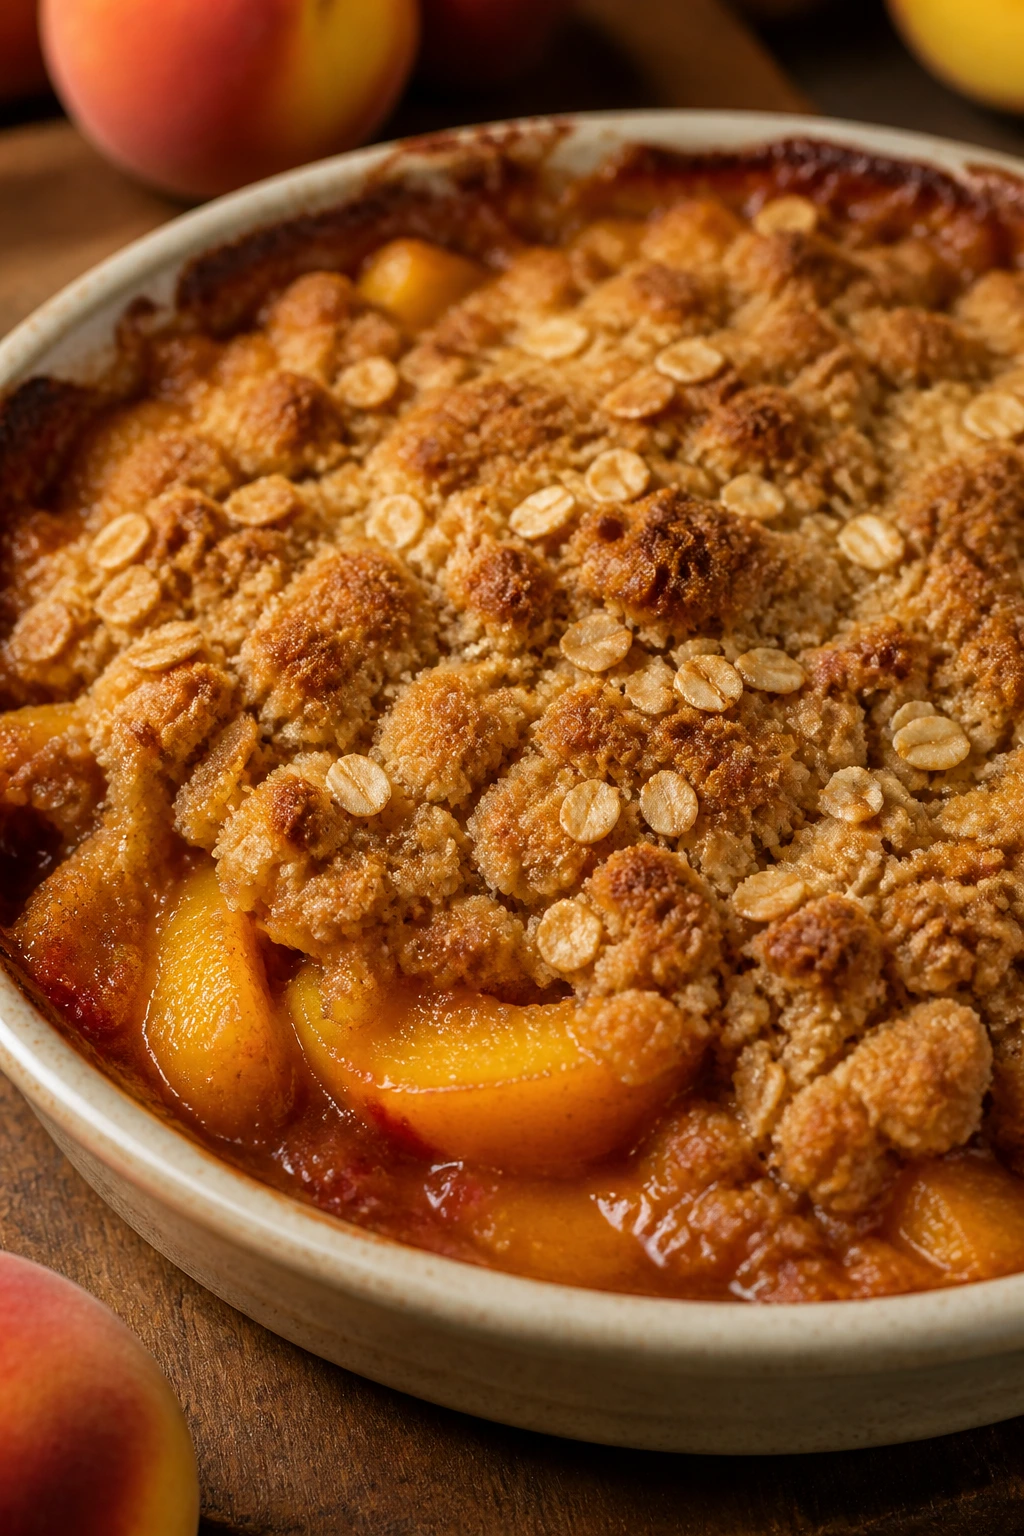
The first mistake is packing too much flour into the cup. The symptom is a dry loaf, a stiff cookie dough, or muffins with a heavy crumb. Spoon flour into the measuring cup and level it off, or use a scale if you have one. That one habit fixes more beginner baking problems than people admit.
The second is pulling desserts from the oven too late. Cookies should still look soft in the middle, brownies should have moist crumbs, loaf cakes should spring back, and fruit desserts should bubble at the edges before you call them done. If you wait for the exact color you imagine in your head, the bake often ends up a little too far along.
Another common problem is mixing batter until it looks perfectly smooth. Muffins, quick breads, and sheet cakes get tough when you keep stirring after the flour disappears. A few lumps are not a crime. They are often the reason the crumb stays tender.
Skipping cooling time causes its own mess. Brownies smear, bars fall apart, cheesecake fillings slump, and hand pies leak if you move them too soon. Let the pan do its job before you start slicing.
Finally, using the wrong fruit texture can ruin an otherwise solid dessert. Watery peaches, overripe berries, or apples that collapse too fast all change the bake. Drain, dice, or choose firmer fruit when the recipe depends on structure.
Frequently Asked Questions
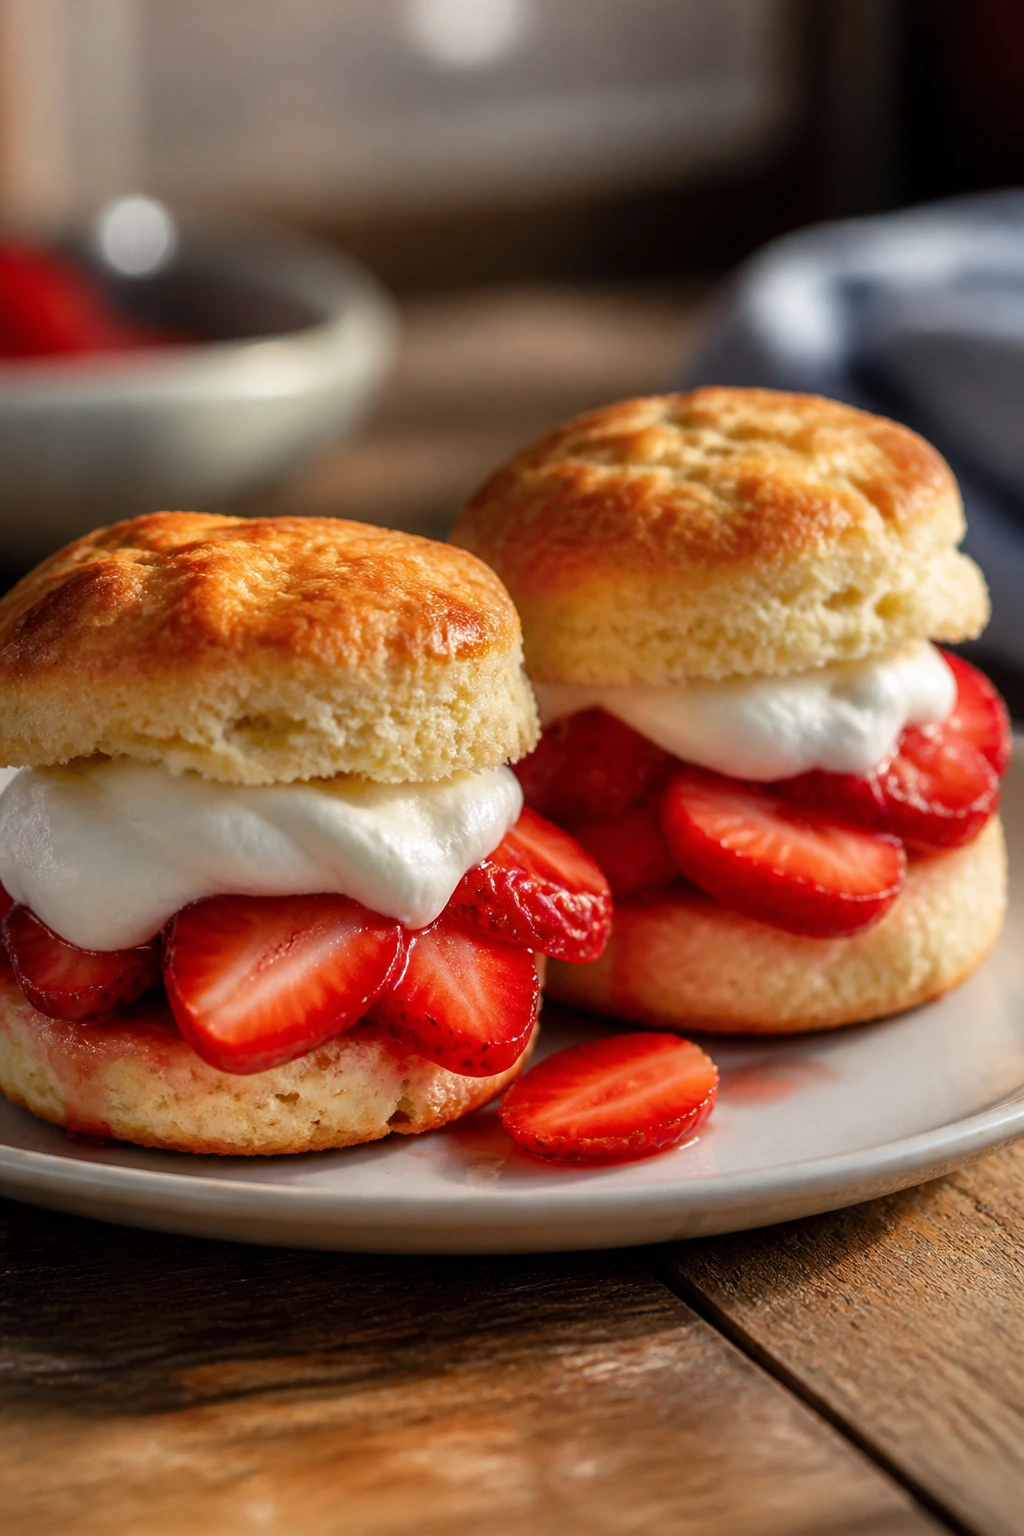
Can I substitute salted butter in these desserts?
Yes, in most of them. Reduce the added salt a little, usually by about 1/4 teaspoon in small recipes, and taste the finished result in your head before deciding whether to add more next time. In no-bake recipes and cookie dough, the difference is usually minor.
Do I need a mixer for these recipes?
Not always. Brownies, crisps, mug cakes, pudding, and no-bake cups can be made with a whisk and spoon. A hand mixer helps with butter cakes, frosting, and some cookies, but it is not a gatekeeper.
How do I know when brownies or bars are done?
Look for set edges and a center that still has a little softness. A toothpick should come out with moist crumbs, not wet batter. If the top is fully dry and the pan smells deeply toasted, they may already be past the sweet spot.
Can I make these recipes with less sugar?
A little, yes. Start by reducing sugar by 10 to 15 percent in cookies, cakes, and muffins, but do not slash it aggressively in fudge, pudding, or no-bake fillings because sugar affects structure there. Fruit desserts are the easiest place to cut back because the fruit brings its own sweetness.
What if my cookies spread too much?
Chill the dough for 20 to 30 minutes, check that your butter wasn’t melted instead of softened, and make sure you measured the flour correctly. Warm trays can also cause extra spread, so use a cool baking sheet for each batch.
Can I freeze these desserts?
Most bars, cookies, brownies, and loaf cakes freeze well for up to 2 months. Frosted cakes, puddings, and fruit desserts can be trickier because texture changes after thawing, so freeze those only if the recipe is sturdy and already chilled well.
What’s the easiest dessert here for a complete beginner?
Rice Krispie treats, mug cake, no-bake cheesecake cups, and Oreo truffles are probably the lowest-stress starting points. They teach timing and assembly without making you worry about oven temperature, rise, or doneness for long stretches.
Can I use frozen fruit in crisps, cobblers, and pies?
Yes. Thaw it first and drain off excess liquid so the filling doesn’t turn watery. If the fruit still seems very wet, add a little extra cornstarch and bake until the juices bubble thickly at the edges.
How do I stop loaf cakes from drying out?
Measure flour carefully, avoid overbaking, and cool the cake before wrapping it. Quick breads stay softer when they contain bananas, pumpkin, sour cream, or oil, so those are good recipes to choose first.
A Sweet Starting Point

The nicest thing about beginner desserts is that they do not stay beginner forever. Once you’ve made a few cookies, a loaf cake, a crisp, and one or two no-bake treats, the rules start to feel less like rules and more like habits your hands already know.
That’s when baking gets fun. Not because every dessert turns out perfect, but because you know what to trust: a golden edge, a set center, a fruit filling that bubbles where it should, and a recipe that leaves enough room for you to breathe. Pick one from the list, gather the bowl you like best, and bake something that makes the kitchen smell like you meant it.