
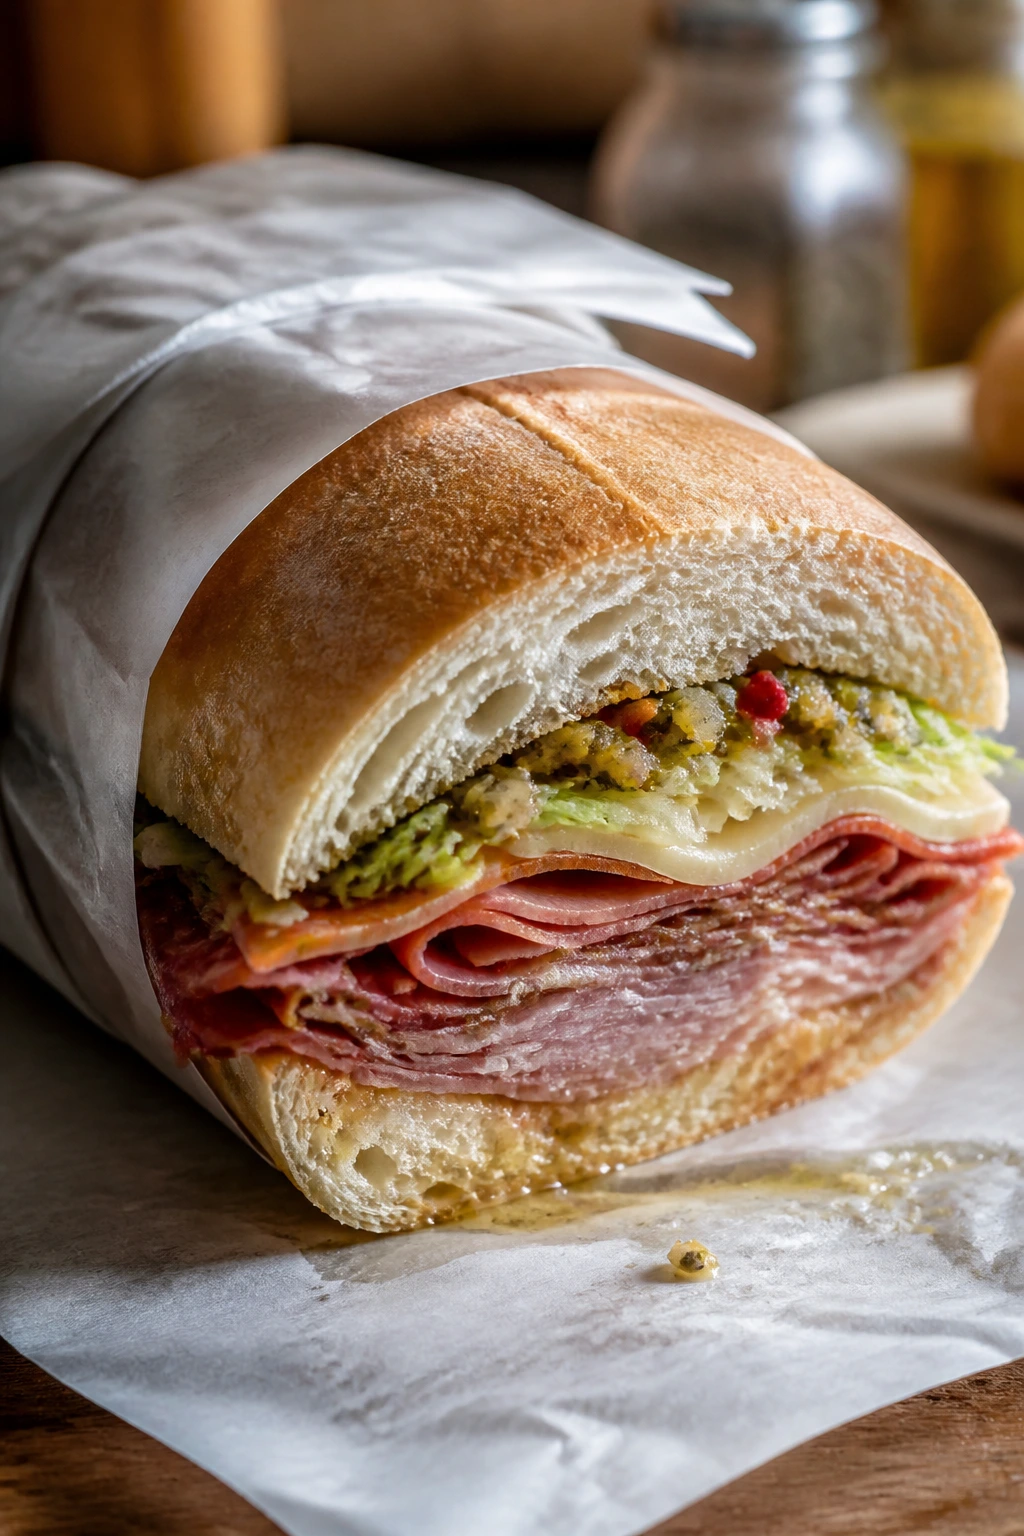
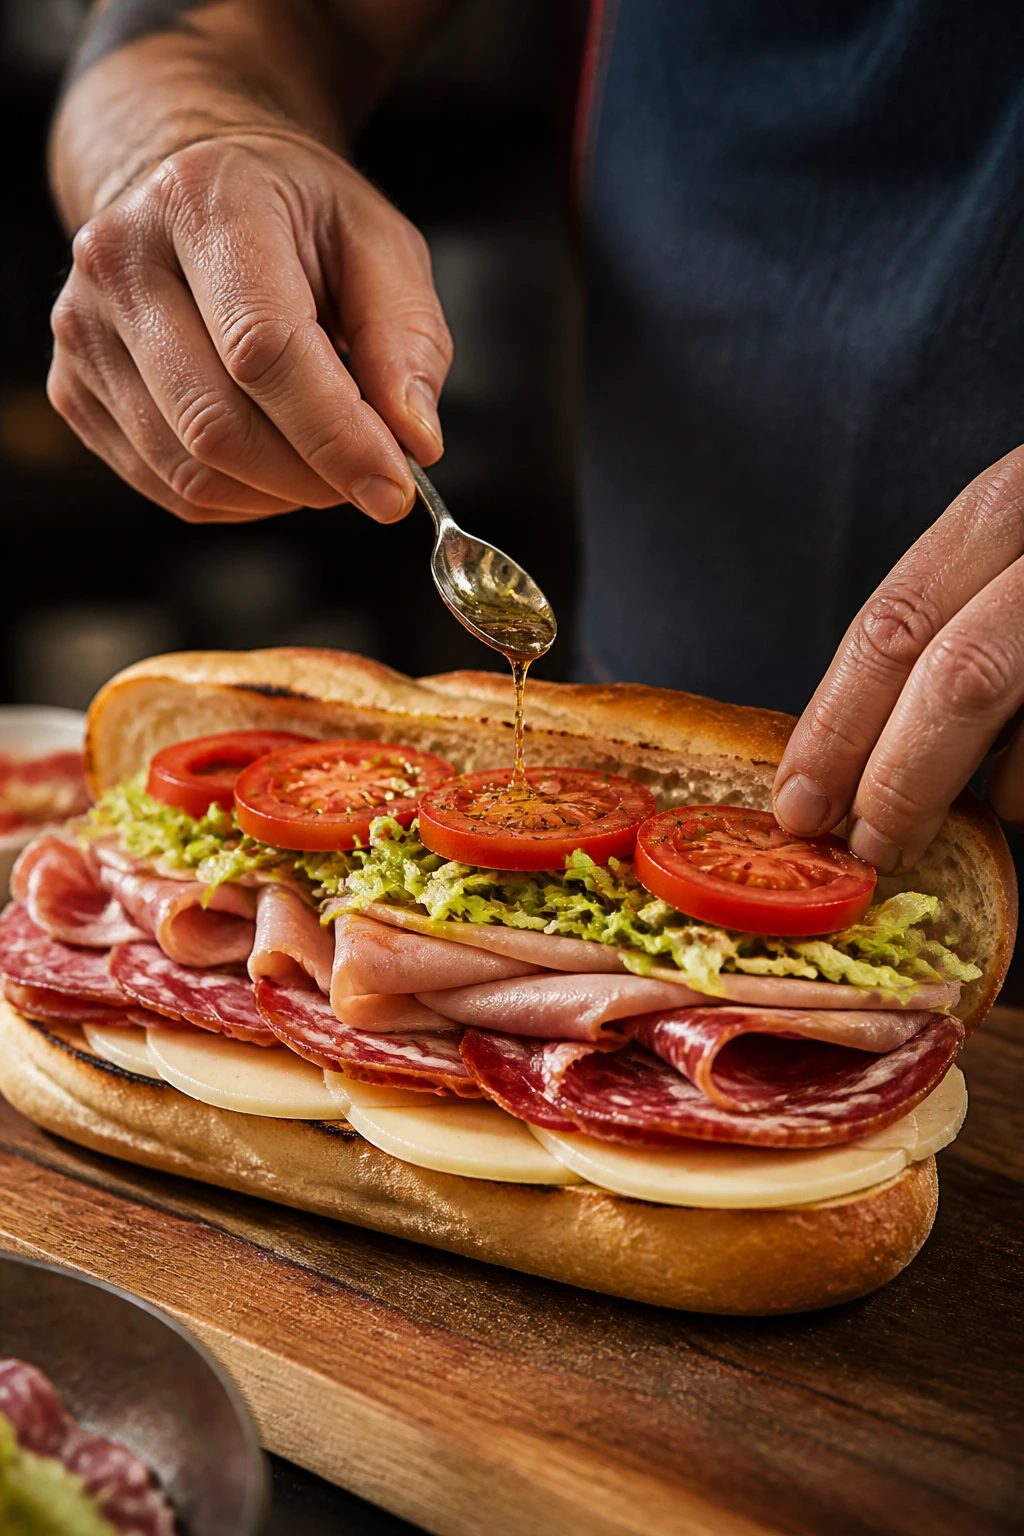
Authentic Italian subs like Nonna used to make are not polite sandwiches. They’re blunt, salty, oily in the right spots, and built so the first bite gives you bread, meat, vinegar, and pepper all at once. When they’re done well, the roll stays tender but not soggy, the provolone gives a little resistance, and the red onion brings that sharp snap that wakes up the whole thing.
The version most people mean when they say Italian sub is really Italian-American deli food, which is its own tradition and worth treating with respect. It doesn’t need a sauce pan or a long ingredient list. It needs a good roll, thin-cut salumi, sharp cheese, dry tomatoes, and enough oil and vinegar to season the bread without drowning it. That’s the whole trick. And it’s not a small trick.
A sandwich like this lives or dies on the order of operations. Put wet tomatoes straight on soft bread and you’ve made lunch into a damp disappointment. Fold the meat loosely, keep the lettuce cold and crisp, and give the inside of the roll a light sheen of dressing, and suddenly it tastes like it came from a deli counter that’s been doing this longer than you’ve been alive.
Why This Sandwich Has Real Staying Power
-
It hits salt, acid, fat, and crunch in one bite: The salami and capicola bring salt and spice, the provolone smooths the edges, and the vinegar keeps the whole thing from feeling heavy.
-
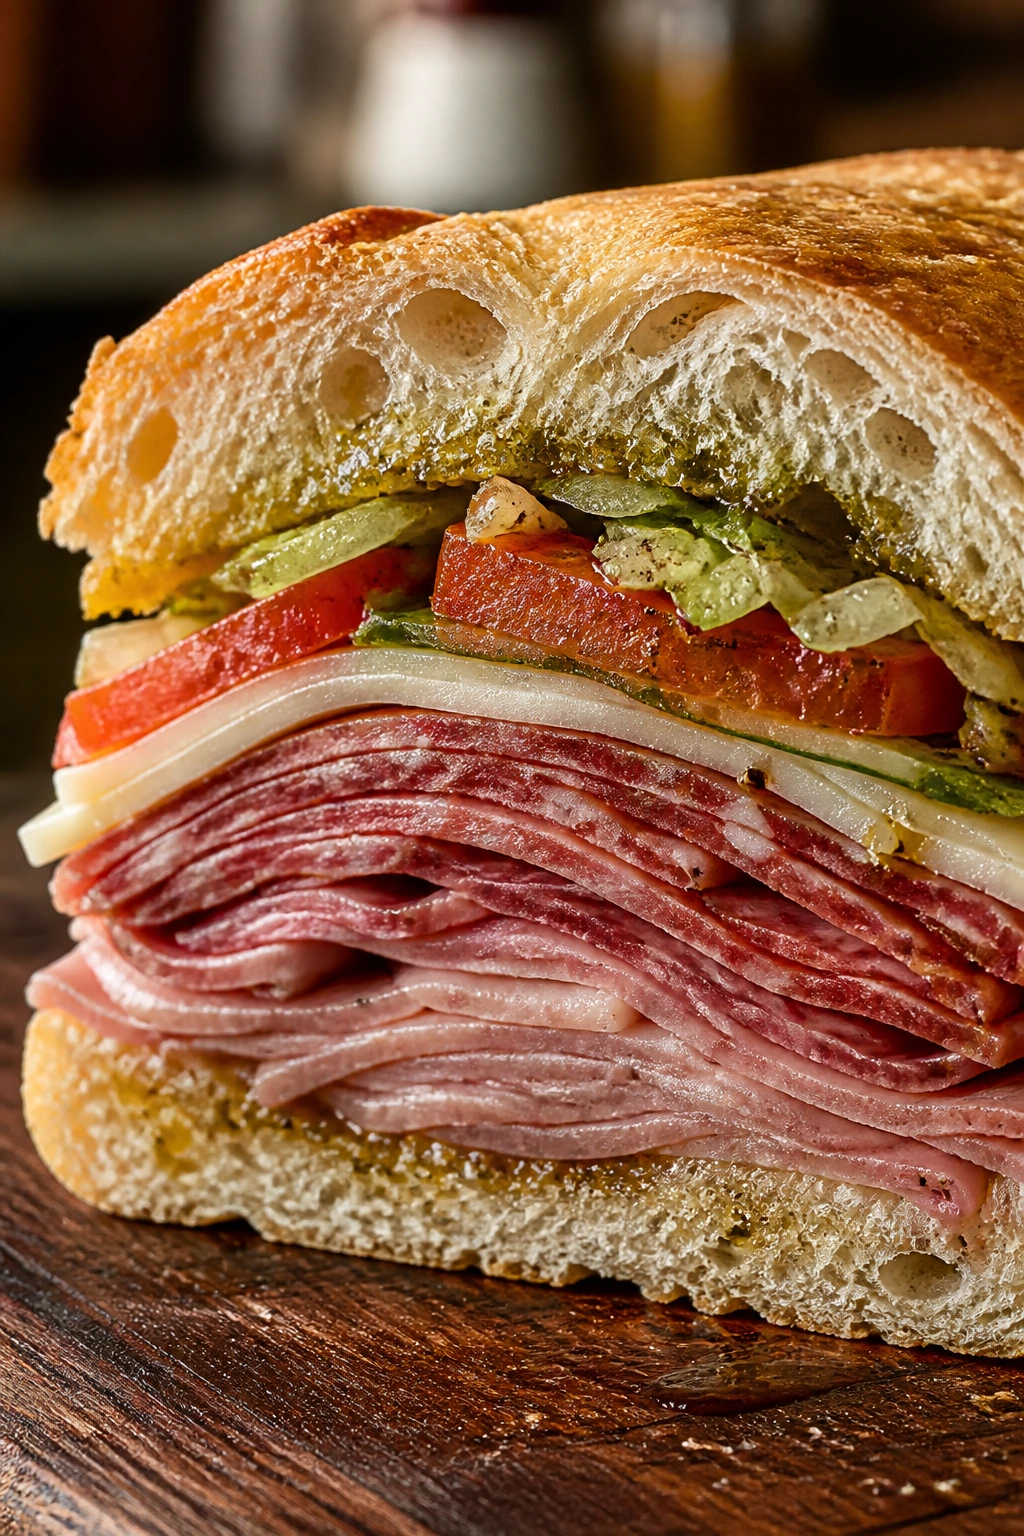
The texture contrast does half the work: Soft bread, cold meat, crisp lettuce, juicy tomato, and a little chew from the roll keep each bite from blurring into mush.
-
You can buy everything at a normal deli counter: No specialty pantry raid required. If your store slices salami, capicola, mortadella, and provolone, you’re already most of the way there.
-
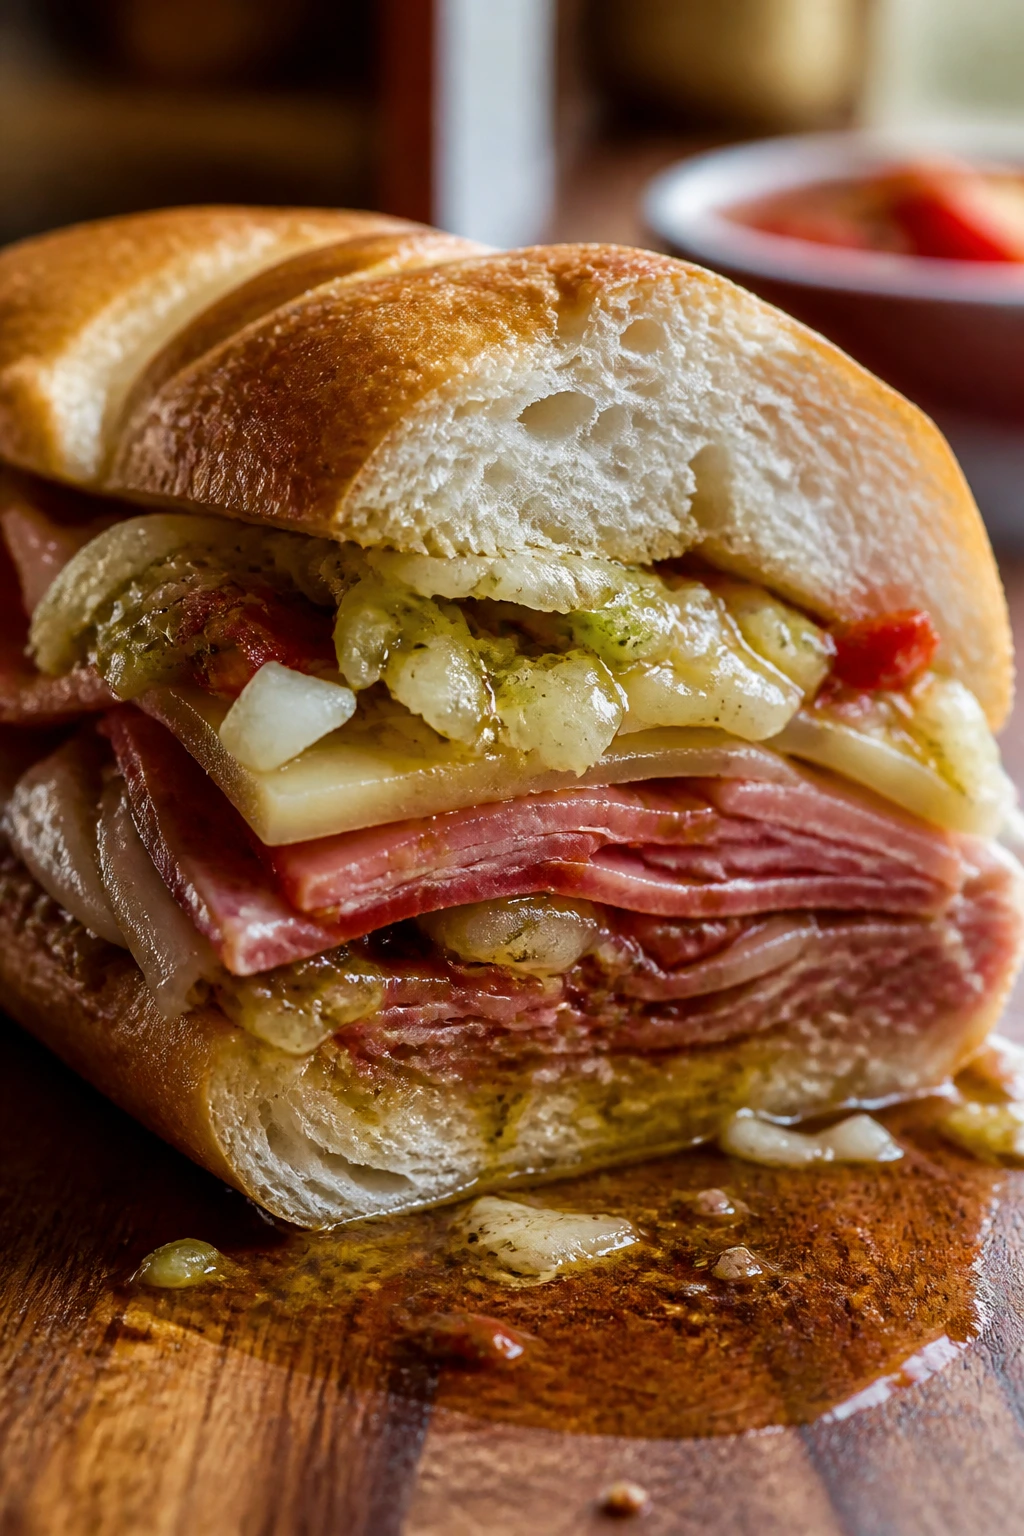
It tastes better after a short rest: Wrapped in paper for 2 to 5 minutes, the dressing starts to soak into the crumb and the sandwich tastes seasoned all the way through.
-
It scales without drama: Make one, four, or twelve. The ratios stay the same, which is more than you can say for a lot of “easy” lunch ideas.
-
It’s one of the few sandwiches that can be cold or gently toasted: You can keep it deli-style and crisp, or warm the meat and cheese and add the vegetables after. Both versions have a place.
Timing Without the Guesswork
Yield: 4 large Italian subs
Prep Time: 20 minutes
Cook Time: 3 minutes
Total Time: 23 minutes
Chill/Rest Time: 2 to 5 minutes, optional but helpful
Difficulty: Beginner — the work is slicing, whisking, and layering, not cooking.
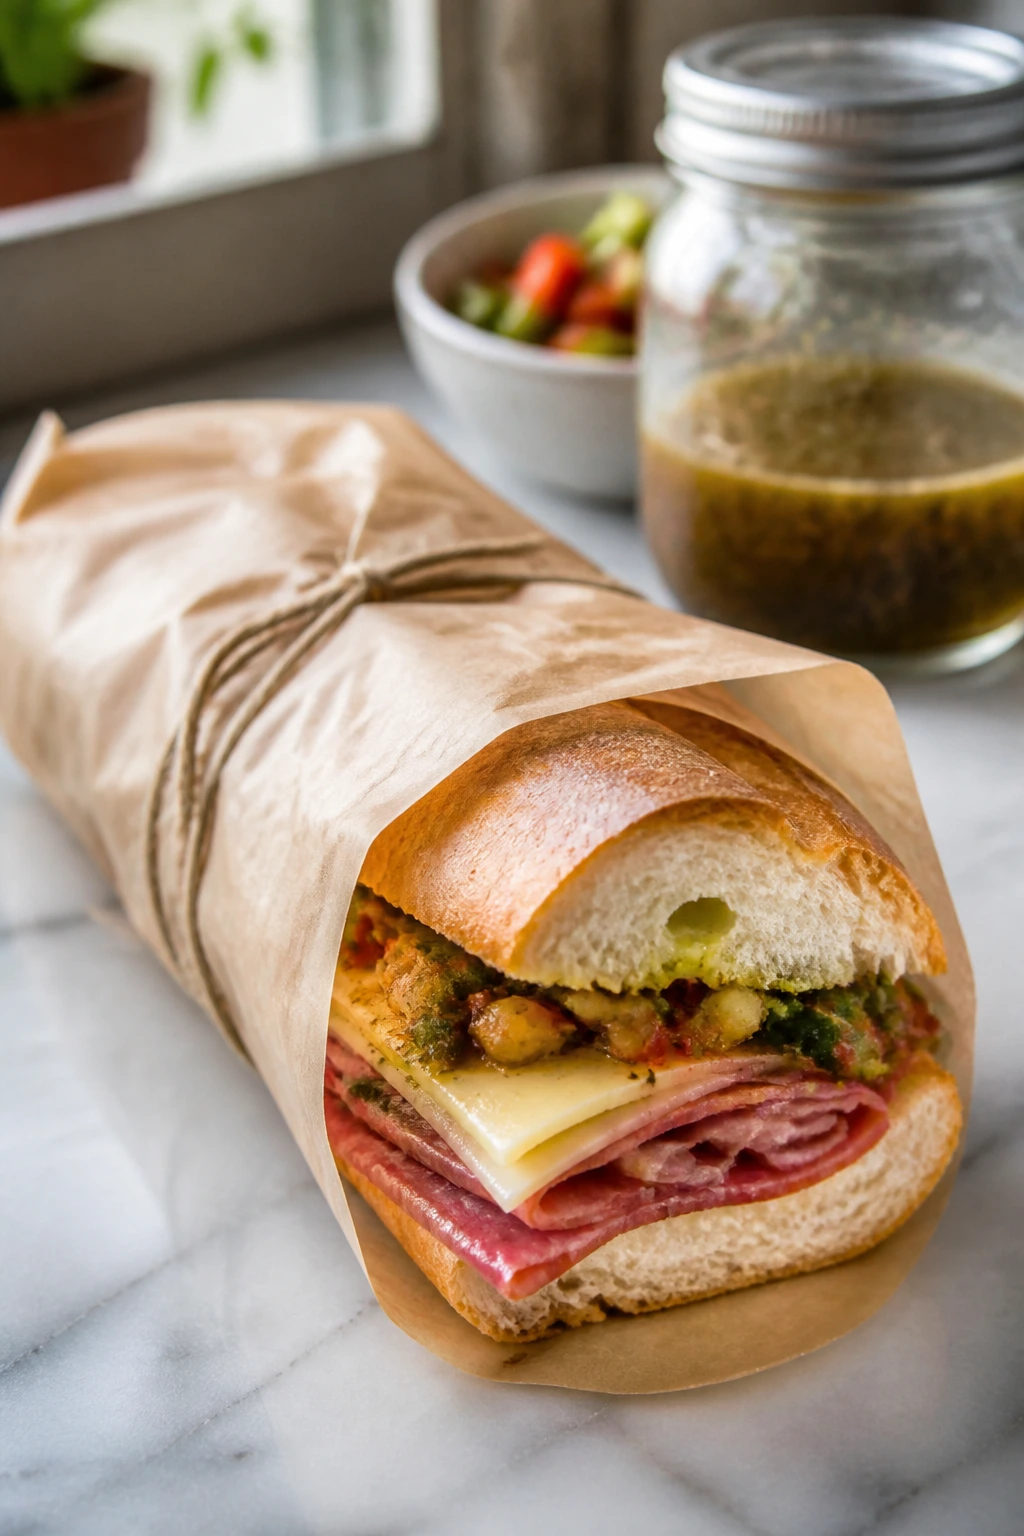
Best Served: Right away, wrapped in parchment or deli paper, with the cut side facing up for the first few bites
A sandwich can look fast on paper and still fall apart in the hands. This one is actually fast, but only if you prep the vegetables before you start assembling. The dressing takes a minute, the toast takes a minute, and the rest is just smart stacking.
If you want the bread to drink the dressing without collapsing, give the finished sandwich a brief wrap-and-rest before cutting. That tiny pause changes the texture more than people expect.
The Bread, Meats, Cheese, and Dressing That Matter Most
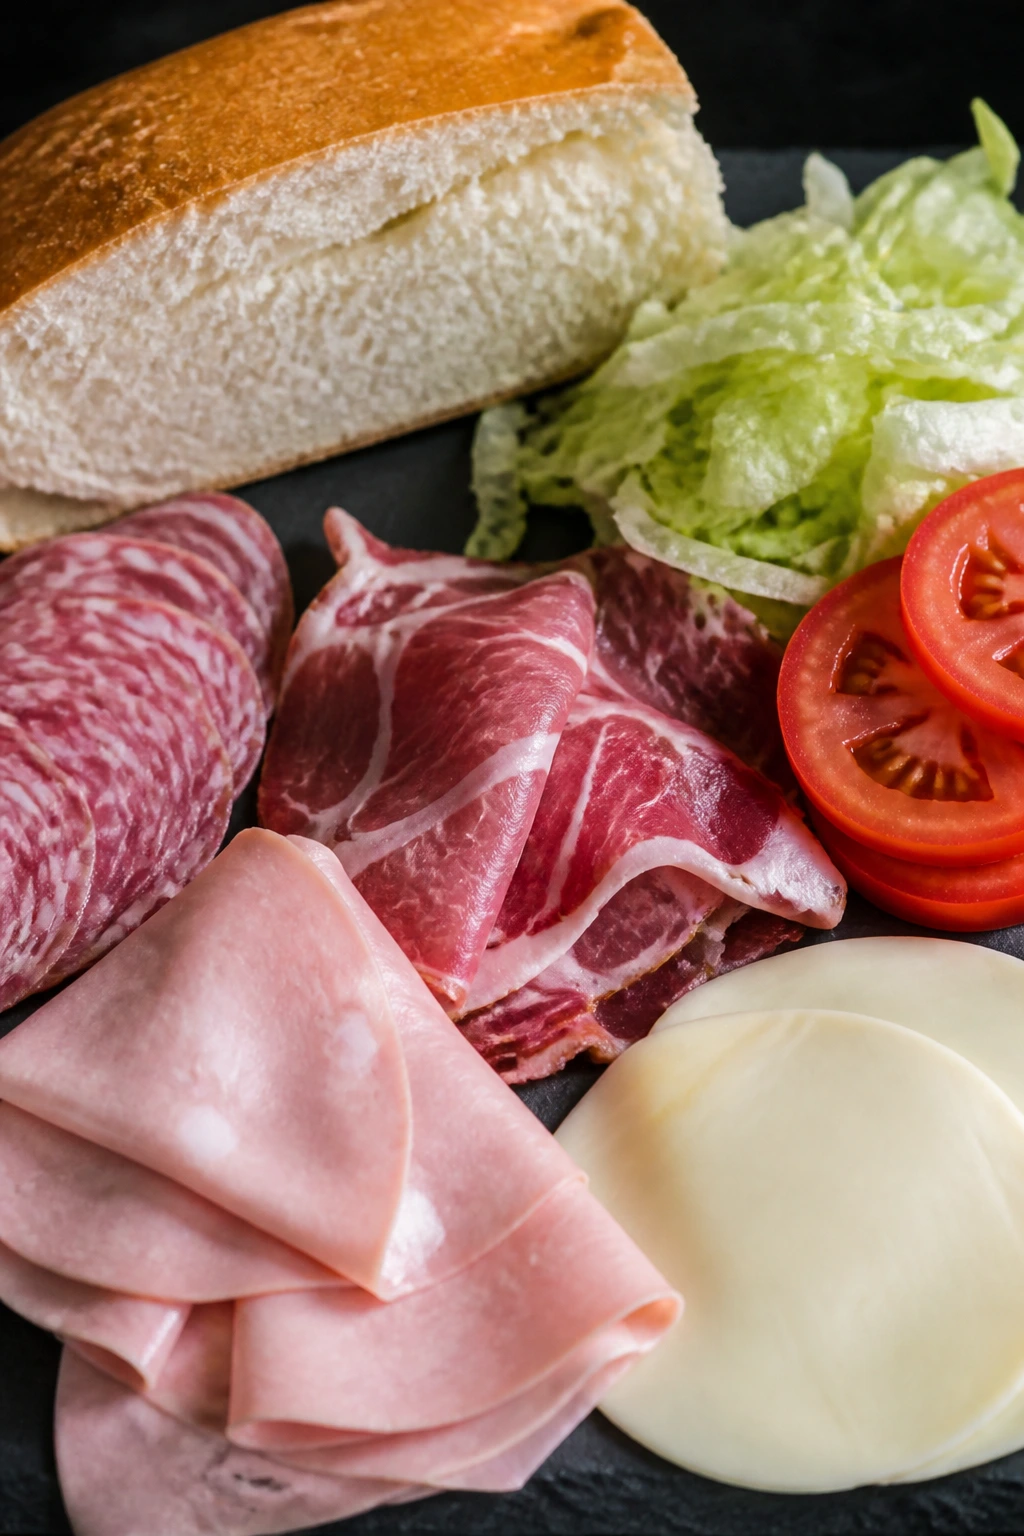
The ingredient list is short because this sandwich is doing its work with texture and balance, not volume. You do not need a pile of extras. You need the right bread, a few properly sliced deli meats, a cheese that melts in your mouth instead of disappearing, and vegetables that stay crisp instead of turning the inside into a wet mess.
For the Subs:
- 4 Italian sub rolls, 8 to 10 inches each, split lengthwise
- 6 ounces Genoa salami, thinly sliced
- 6 ounces capicola, thinly sliced
- 6 ounces mortadella, thinly sliced
- 8 ounces provolone, sliced
- 2 cups shredded iceberg lettuce
- 1 large tomato, thinly sliced and patted dry
- 1 small red onion, very thinly sliced
- 8 to 12 pepperoncini, drained
- Optional: a handful of sliced banana peppers if you like a sharper bite
For the Dressing:
- 1/4 cup extra-virgin olive oil
- 2 tablespoons red wine vinegar
- 1 tablespoon pepperoncini brine
- 1 small garlic clove, finely grated
- 1 teaspoon dried oregano
- 1/2 teaspoon kosher salt
- 1/2 teaspoon freshly ground black pepper
- Pinch of red pepper flakes, optional
The Rolls
What to use: 4 long Italian sub rolls, about 8 to 10 inches each, with a soft interior and a thin crust that gives a little under your fingers.
Preparation: Split them lengthwise and, if the center is very fluffy, scoop out a little of the soft crumb so the dressing has somewhere to settle. Toast the cut sides just enough to dry them, not so much that they turn brittle.
Substitutions: Good hoagie rolls work fine, and bakery Italian bread cut into sandwich-sized lengths will do the job if that’s what you can find. A crusty baguette is not my first choice here; it fights the fillings instead of supporting them.
Tips: Buy the bread the same day if you can. Stale bread soaks badly and loses the spring that makes an Italian sub feel like a sandwich instead of a pile of fillings.
The Meats
What to use: 6 ounces Genoa salami, 6 ounces capicola, and 6 ounces mortadella, all sliced thin enough to fold without snapping.
Preparation: Ask the deli counter for slices that are thin but not shaved. You want the meat to fold in loose ribbons so it eats with a little chew, not collapse into a slick layer that slides around.
Substitutions: Soppressata can stand in for capicola, and thin-sliced ham can replace mortadella if that’s what your deli carries. If you only want two meats, use 12 ounces total and make salami the loudest flavor.
Tips: Cold meat is easier to stack neatly. If the slices stick together, fan them out on the board for a minute before building.
The Cheese
What to use: 8 ounces provolone, sliced into wide pieces or folded straight from the deli paper.
Preparation: Keep the slices intact if you can. Provolone should sit against the bread as a barrier, not disappear into shredded bits that leave gaps.
Substitutions: Sharp provolone gives more bite. Mozzarella can work in a pinch, but it softens the sandwich’s edge and makes the flavor milder. If you use mozzarella, I’d keep the pepperoncini in the mix.
Tips: Don’t let the cheese warm too much before assembly. Slightly chilled provolone holds its shape and keeps the layering cleaner.
The Crunchy Fillings
What to use: 2 cups shredded iceberg lettuce, 1 large tomato, 1 small red onion, and 8 to 12 pepperoncini.
Preparation: Shred the lettuce, slice the tomato thinly, and pat the tomato slices dry with paper towels. Slice the onion so thin you can almost see through it; that keeps the bite sharp instead of harsh.
Substitutions: Romaine works if you want a little more structure. Roasted red peppers can replace some of the tomato if tomatoes are bland or watery. Giardiniera can stand in for pepperoncini if you want more heat and tang.
Tips: Iceberg is the right lettuce here. It stays cold and crunchy, and it doesn’t wilt under oil the way softer greens do.
The Dressing
What to use: 1/4 cup extra-virgin olive oil, 2 tablespoons red wine vinegar, 1 tablespoon pepperoncini brine, 1 grated garlic clove, 1 teaspoon dried oregano, 1/2 teaspoon kosher salt, 1/2 teaspoon black pepper, and a pinch of red pepper flakes if you like some heat.
Preparation: Whisk everything together until it looks slightly cloudy and smells sharp, herby, and a little garlicky. You want a dressing that wakes up the bread, not a thin vinaigrette that vanishes.
Substitutions: White wine vinegar works if that’s what you have, and lemon juice can step in for part of the vinegar if you want a brighter finish. If you don’t keep pepperoncini brine around, a little extra vinegar plus a chopped pepperoncini or two does the trick.
Tips: Taste the dressing before it goes on the bread. It should taste a little aggressive in the bowl, because the bread and vegetables will tame it once it’s assembled.
Why the Layers Go in This Order
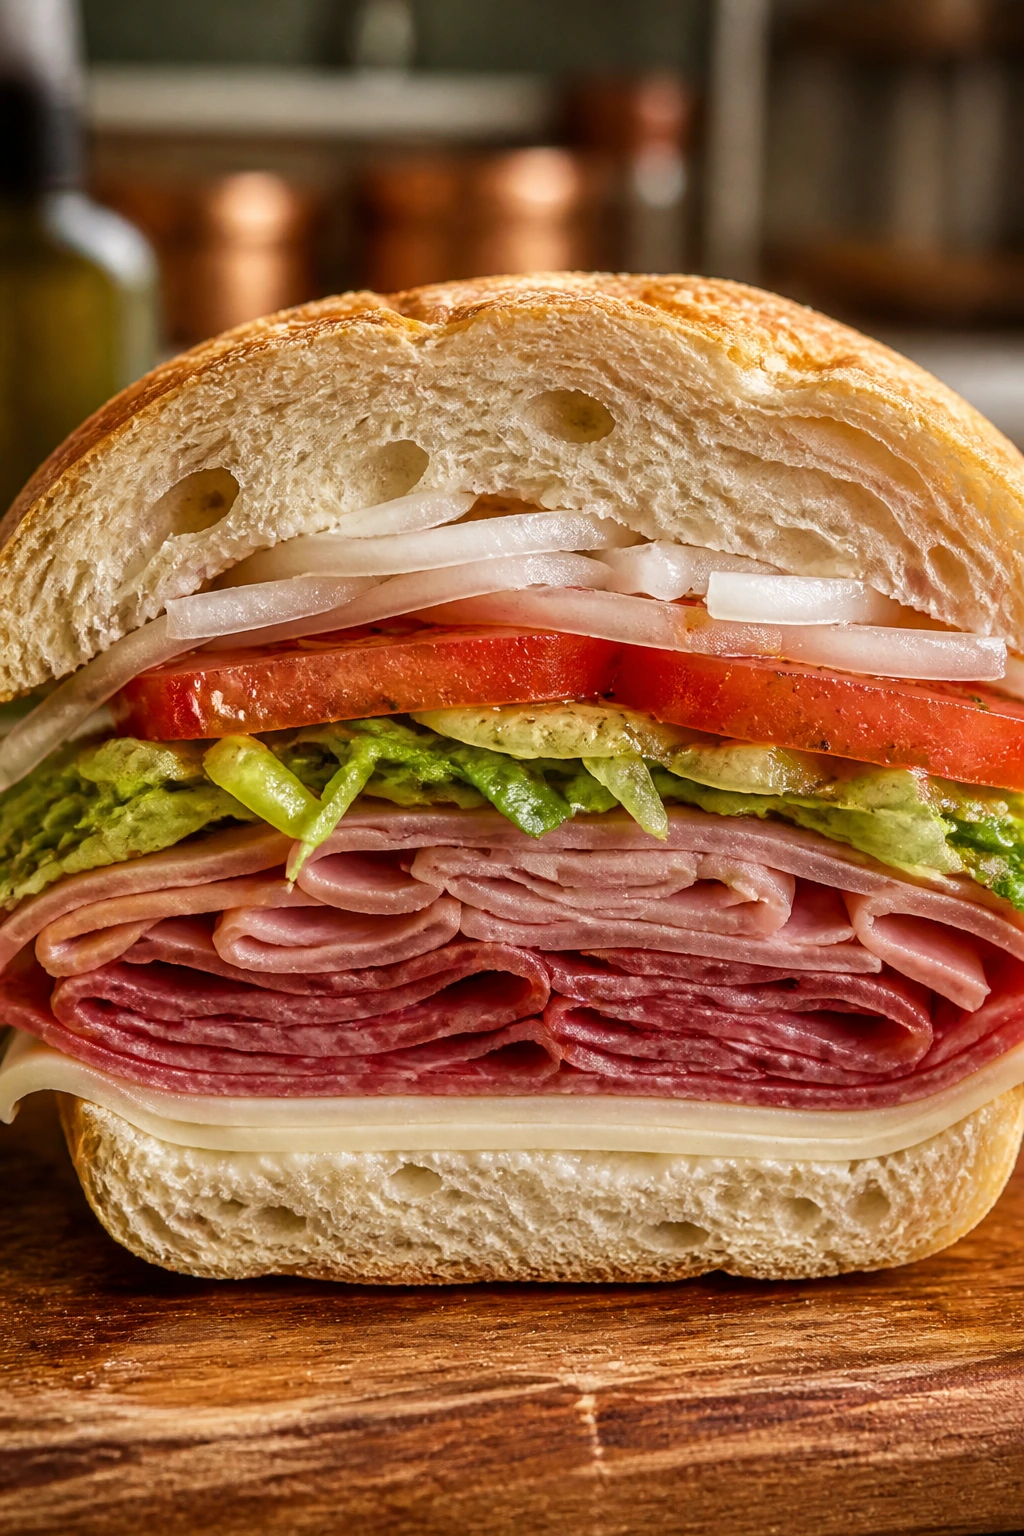
An Italian sub is one of those sandwiches that looks casual and behaves like a structure problem. Put the layers in the wrong order and the bread gets damp, the meat slides out, and the tomato juices turn into a tiny flood. Put them in the right order and the thing eats cleanly enough to hold together, even though it’s still gloriously messy.
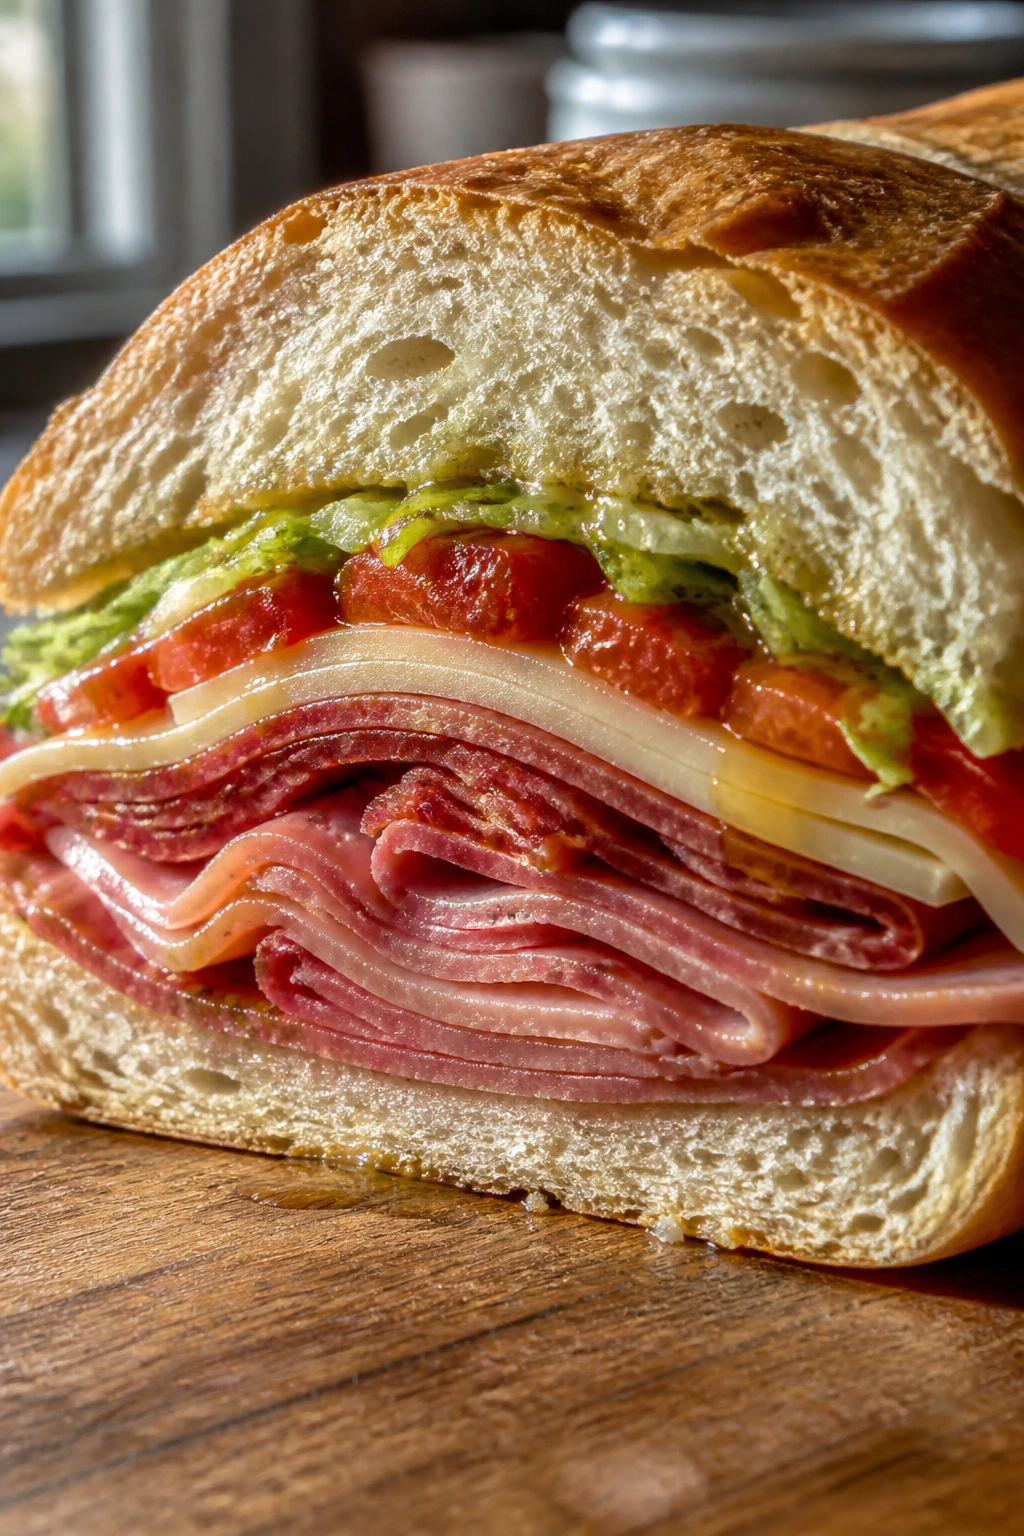
Cheese Against the Bread
I always put the provolone directly on the roll first. That layer acts like a shield between the dressing and the crumb, which matters more than people think. The cheese catches some of the oil, softens slightly, and keeps the bread from soaking through too fast.
That doesn’t mean you need a thick blanket of cheese. A few good slices are enough. The goal is coverage, not excess.
Wet Ingredients Need a Buffer
Tomatoes are the main troublemaker. Delicious troublemaker, but still trouble. If you pile them straight onto the bread, the juices cut through the crumb in minutes, especially if the bread is soft.
So I keep the tomato slices dry, add them after the meats, and let the lettuce and onion help spread the moisture around. The sandwich still tastes juicy. It just doesn’t fall apart while you’re eating it.
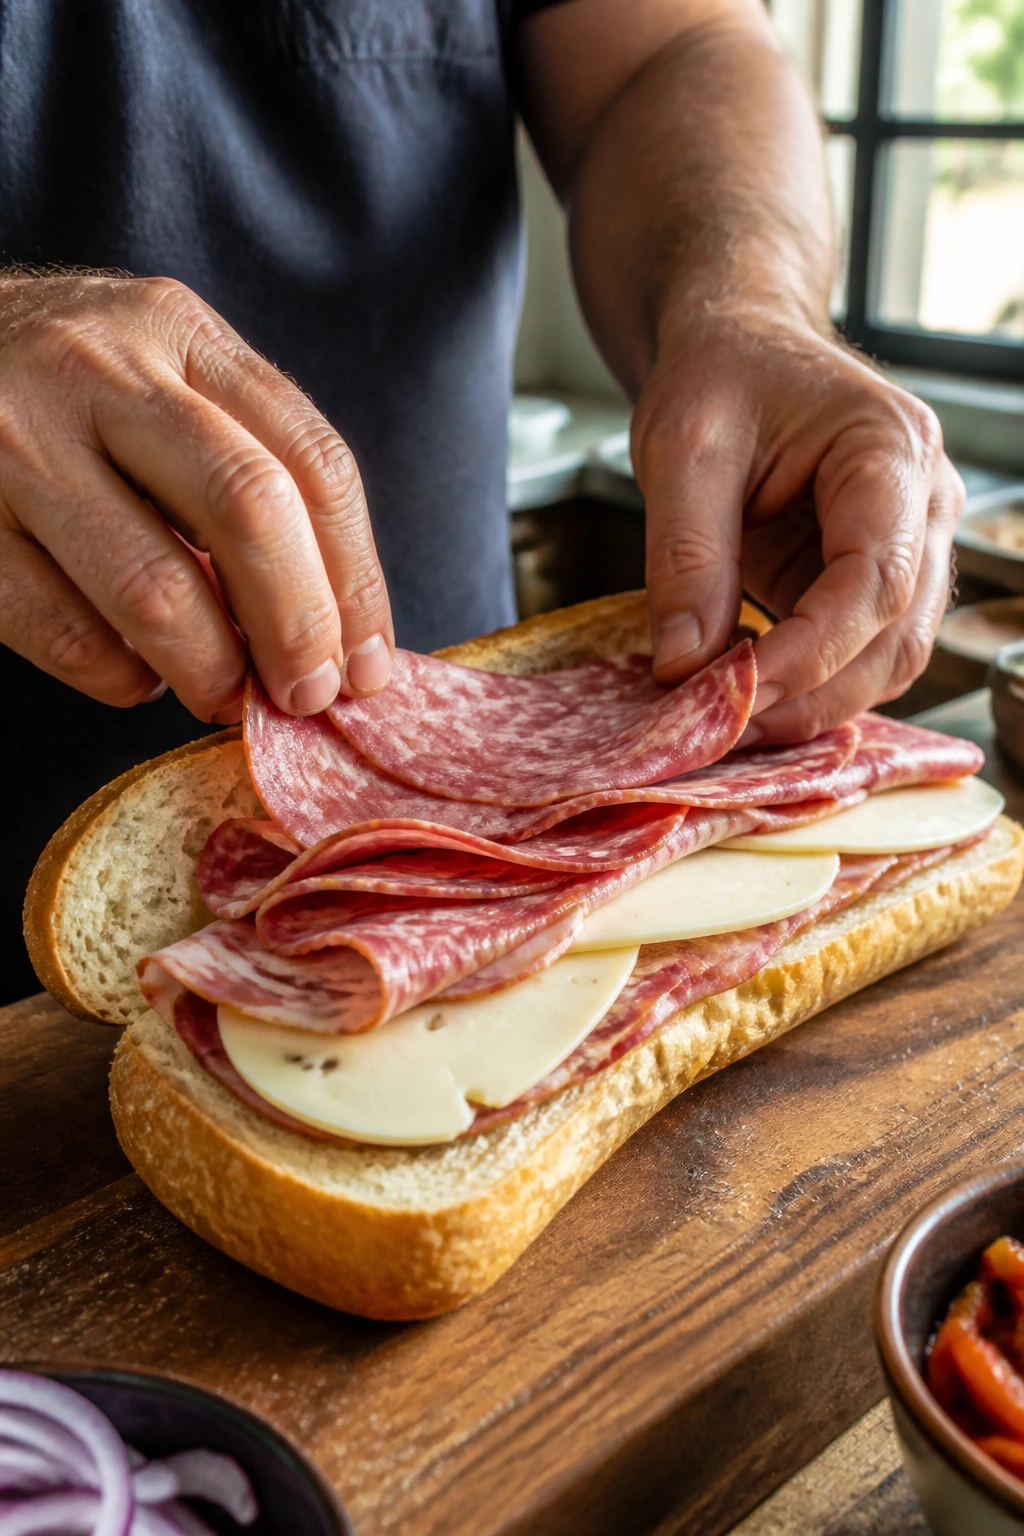
Why a Loose Stack Beats a Tight Pile
Meat folded into ribbons eats better than meat stacked flat. A tight pile can turn slippery and dense, which makes each bite feel compressed. Loose folds create pockets, and those pockets catch dressing and give the sandwich a better bite.
It also matters for the visual shape. A flat pile turns into a plank. Folded meat gives the sub a little lift and keeps the fillings from sliding toward one end.
The Rest Is Not Optional
A wrapped sandwich that sits for 2 to 5 minutes tastes more integrated. The bread absorbs a little of the oil and vinegar, the oregano spreads, and the sharpness of the onion settles down just enough. Cut it immediately and you get separate parts. Wait a few minutes and it feels like one sandwich.
The Gear That Makes Assembly Easier
You do not need a lot of equipment for an Italian sub, but the right tools make the difference between a neat build and a paper towel emergency.
-
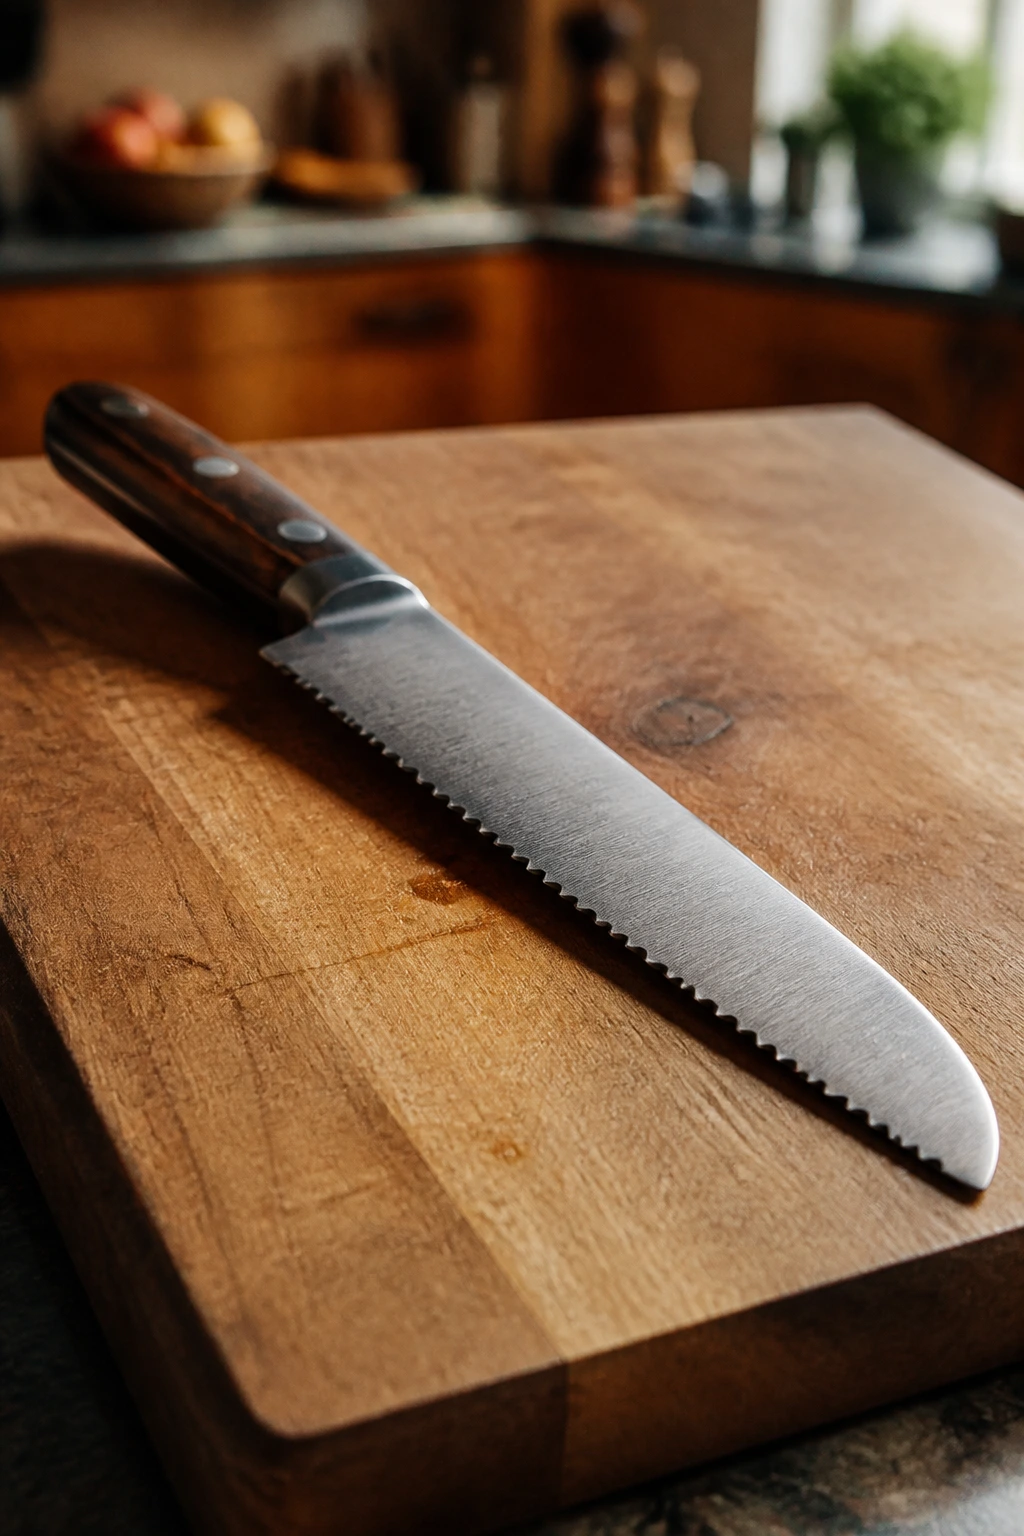
Serrated bread knife: Cuts through the roll without crushing the crumb or dragging the fillings loose.
-
Small whisk or fork: For emulsifying the oil, vinegar, and pepperoncini brine into a dressing that clings to the bread.
-
Cutting board: A large board gives you room to fold meat, slice vegetables, and assemble without clutter.
-
Sheet pan or broiler pan: Useful if you want to toast the rolls under the broiler instead of in a skillet.
-
Parchment paper or deli paper: Wraps the finished subs so they stay together long enough to cut and eat.
-
Paper towels: Not glamorous, but absolutely necessary for drying tomatoes and blotting pepperoncini if they’re wet from the jar.
-
Small bowl: For dressing, unless you enjoy whisking over a cutting board while olive oil threatens to escape.
Building the Sandwich Step by Step
Prep the Dressing and the Vegetables:
-
In a small bowl, whisk together the olive oil, red wine vinegar, pepperoncini brine, grated garlic, oregano, salt, black pepper, and red pepper flakes until the mixture looks cloudy and smells sharp.
-
Slice the tomato into thin rounds and pat each slice dry with paper towels. Slice the red onion paper-thin, drain the pepperoncini, and shred the iceberg lettuce if it is not already shredded.
-
Set the vegetables aside in separate piles. Do not mix them together yet; keeping them separate makes the sandwich easier to build and helps you control the moisture.
Toast and Layer:
-
Split the sub rolls lengthwise and, if the centers are very fluffy, pull out a small amount of the soft crumb from each roll. Toast the cut sides under a broiler for 60 to 90 seconds, or in a dry skillet over medium heat, until the surfaces are lightly golden and dry to the touch.
-
Brush or spoon a little of the dressing onto the warm cut sides of each roll. You want a sheen, not a puddle. If the bread looks glossy but not wet, you’re in the right zone.
-
Lay the provolone on the bottom half of each roll so it covers as much surface as possible. Add the salami, capicola, and mortadella in loose folds over the cheese.
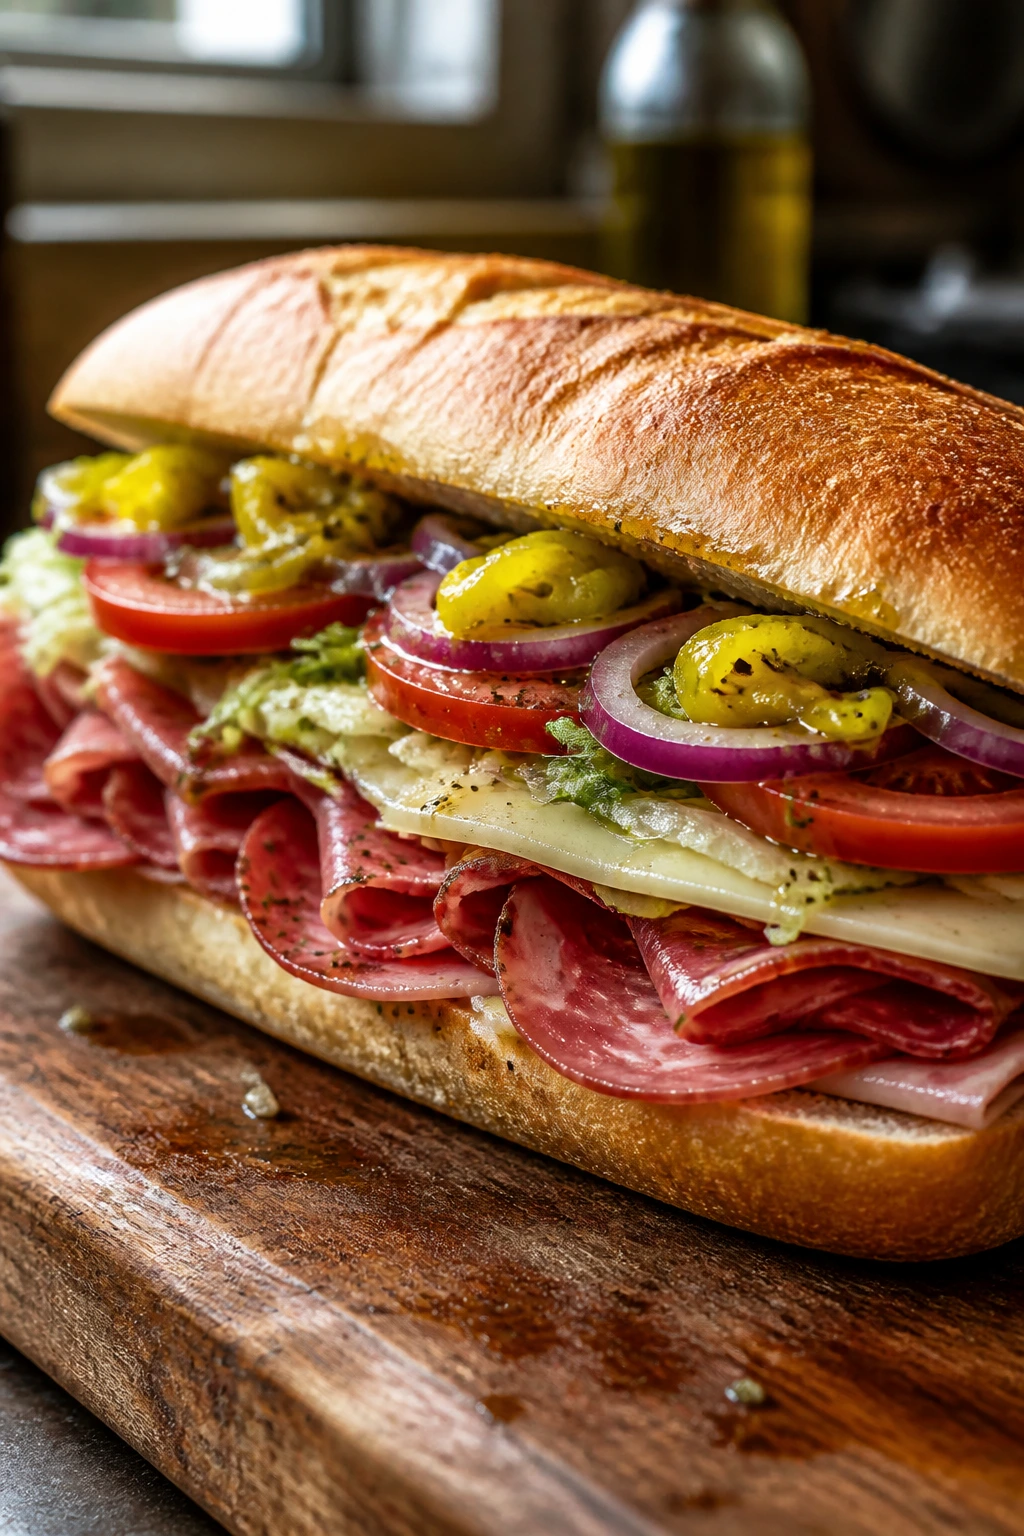
Finish and Press:
-
Pile on the shredded lettuce, then add the tomato slices, red onion, and pepperoncini. Spoon a few more drops of dressing over the vegetables if you want a brighter finish, but stop before the bread starts to slosh.
-
Close the sandwiches and press them gently with the heel of your hand. Wrap each one in parchment or deli paper and let it sit for 2 to 5 minutes so the dressing settles into the bread.
-
Cut each sandwich on a deep diagonal with a serrated knife and serve immediately. If the bread starts to squish while you cut, the knife is too dull or you pressed too hard.
How to Serve It Like a Real Deli Lunch

Presentation: Cut the sub on a diagonal and wrap the bottom half in parchment or deli paper before serving. That keeps the fillings in place and gives you the kind of neat, old-school deli look that makes the whole thing feel more intentional than a bare sandwich on a plate.
Accompaniments: Kettle chips are the easy answer, but a bowl of marinated olives, dill pickles, or a little pile of extra pepperoncini works just as well. If you want something fresher, a simple tomato-cucumber salad or a vinegar-dressed slaw keeps the plate from feeling too heavy.
Portions: One full 8- to 10-inch sub is a lunch by itself. If you’re serving these with sides, you can cut each one in half and let people choose their own size. For a crowd, figure on one sandwich per hungry adult or two halves per lighter eater.
Beverage Pairing: Sparkling water with lemon keeps the palate clean between bites. A cold Italian lager or a plain iced tea also works because both stand up to the oil and vinegar without making the sandwich taste sweeter than it should.
Practical Tips That Make the Last Bite Better
Flavor Enhancement: Add a teaspoon of pepperoncini brine to the dressing and taste it before you build. That little bit of brine gives the sandwich a sharper, deli-style edge that plain vinegar doesn’t quite deliver.
Time-Saver: Ask the deli counter to slice all three meats and the provolone in one go, then stack the paper-wrapped slices in the fridge until you’re ready. You save yourself from babysitting a slippery cutting board, which is worth the five seconds of awkwardness at the counter.
Pro Move: Toast the rolls, then let them sit for 30 seconds before dressing them. If you dress bread that is too hot, the oil runs faster than it should and the crumb softens unevenly. Slightly warm bread absorbs better.
Cost-Saver: If you do not want to buy three meats, make the sandwich with salami and capicola only, or salami and mortadella only. It still tastes like an Italian sub. The flavor changes a little, but the sandwich doesn’t fall apart.
My Favorite Small Upgrade: A tiny pinch of dried oregano over the tomatoes right before closing the sandwich. It sounds almost silly, then you taste it and realize the sandwich needed that last herbal nudge.
Where Italian Subs Usually Go Sideways
-
Using bread that’s too soft: The sandwich tastes fine for about two bites, then the roll compresses into a squashed sponge. Use a roll with a little structure, and toast the cut sides long enough to dry them out.
-
Skipping the tomato blotting: Tomato juice is not subtle. If you slide wet slices straight onto the bread, the center turns damp and the fillings start to drift. Pat the slices dry, and if the tomatoes are very juicy, leave the seeds behind.
-
Overdressing the bread: A heavy pour of oil and vinegar makes the bread greasy instead of seasoned. Brush or spoon lightly first, then add more only if the sandwich still feels dry after the first bite.
-
Packing the fillings too tightly: Pressing everything into a brick makes the bread split and the meat slide. Loose folds and even layers give you better bite structure and less collapse.
-
Cutting with a dull knife: Dull serrations drag the bread and shove the fillings out the back end. A sharp serrated knife makes one clean pull through the crust and saves the shape of the sandwich.
-
Serving it ice-cold straight from the fridge: Deli meat can be cold, sure, but a sandwich that’s been wrapped and rested for a few minutes tastes more complete. The bread softens just enough, and the dressing behaves better once it’s not fridge-stiff.
Variations That Still Taste Like the Same Sandwich
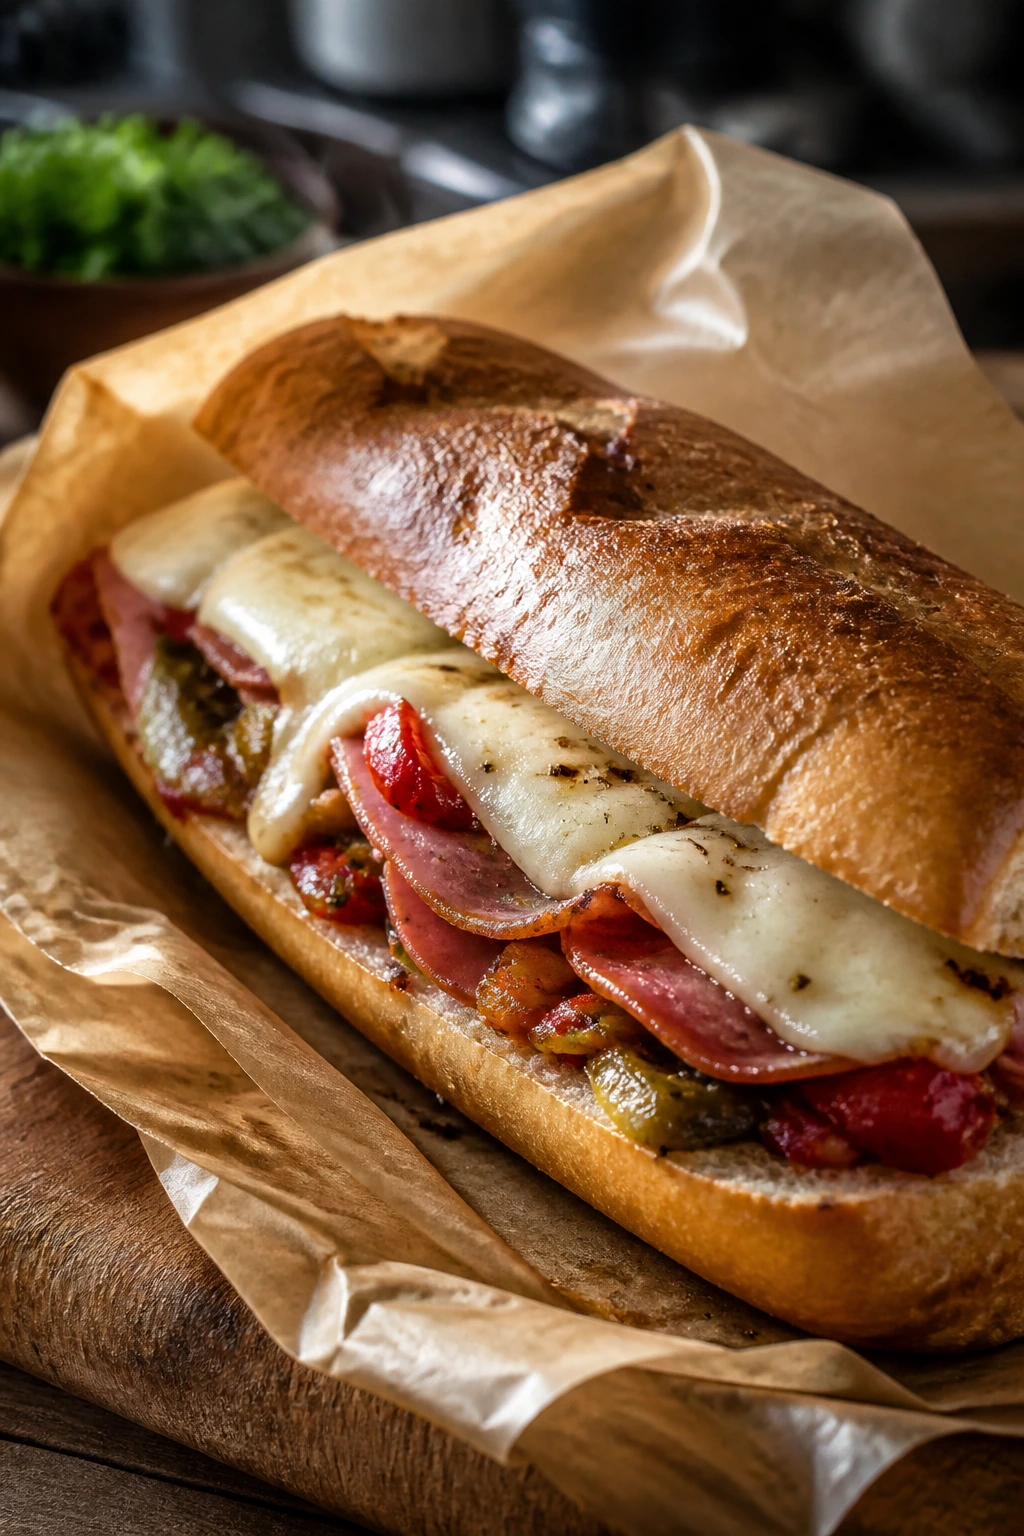
Hot Oven-Baked Italian Sub: Assemble the sandwich without lettuce and tomato, wrap it loosely in foil, and bake it at 375°F for about 5 to 7 minutes until the provolone softens and the meat warms through. Add the lettuce, tomato, and onion after baking so they stay crisp.
Spicy Soppressata Stack: Swap the capicola for soppressata and add sliced cherry peppers or extra pepperoncini. The sandwich gets a deeper, more peppery bite that feels a little louder without drifting away from the original shape.
Garden-Heavy Deli Sub: Reduce the meat to 12 ounces total and add roasted red peppers, a few paper-thin cucumber slices, and extra iceberg. This version still tastes like an Italian sub, but the vegetables take up more space on the palate and lighten the finish.
Gluten-Free Roll Fix: Use the sturdiest gluten-free hoagie roll you can find and toast it a little longer than a wheat roll so it holds together under the dressing. Build carefully, wrap in parchment, and cut only after a short rest so the crumb has a chance to settle.
Make-Ahead, Storage, and Leftover Rules
The sandwich itself is best eaten soon after assembly. That’s the honest answer. Once the tomato and dressing meet the bread, the clock starts ticking, and the bread will soften over time.
You can, however, prep the parts ahead. The dressing keeps in a sealed jar in the fridge for up to 5 days. Let it sit at room temperature for a few minutes and shake it before using, because olive oil firms up when it chills. The sliced meats and cheese should stay refrigerated and used within the timeframe on the package, but once opened, I’d plan to use them within 3 to 4 days for the best texture and flavor.
Bread is the thing that punishes delay the fastest. Keep rolls at room temperature if you’re using them the same day, or freeze them for up to 1 month in a tightly sealed bag. Thaw at room temperature and refresh in a 300°F oven for a few minutes if they feel tired.
If you need to make the sandwiches ahead for lunch, assemble them without the tomatoes and lettuce, wrap them tightly in parchment, and refrigerate for up to 4 to 6 hours. Add the tomatoes and lettuce right before eating if you can. That keeps the roll from turning damp and makes the sandwich taste closer to freshly built.
A reheating note, because people ask: the cold version does not need reheating. If you choose the hot-baked variation, rewarm it in a 350°F oven for 8 to 10 minutes. The microwave will make the bread chewy and the lettuce limp, which is a poor trade.
Food safety matters here, even though this is a simple sandwich. Deli meats, cheese, and cut tomatoes should not sit out for more than 2 hours. If the sandwich has been out in warm conditions longer than that, it’s time to let it go.
Questions People Ask Before They Make One
What makes an Italian sub “authentic” in the first place?
In home kitchens, “authentic” usually means Italian-American deli style: Italian bread or a hoagie roll, salami, capicola, provolone, oil and vinegar, and crunchy vegetables. It is less about one rigid recipe and more about the flavor pattern — salty meats, sharp cheese, and a dressed roll that holds together.
Can I use mayonnaise?
You can, but it changes the sandwich into something softer and creamier, which is not what this version is chasing. If you want the classic deli flavor, stick with olive oil, vinegar, oregano, and a little pepperoncini brine.
What bread works if I can’t find Italian sub rolls?
Look for long hoagie rolls, sesame sub rolls, or a soft bakery Italian loaf cut into sandwich lengths. Avoid bread that is too crusty or too airy, because it either fights the fillings or collapses under the dressing.
Should I scoop out the bread?
If the roll has a very fluffy center, yes, a little bit. You’re not hollowing it out; you’re making room for the dressing and fillings so the sandwich eats cleanly instead of turning gummy.
Can I make it ahead for a picnic or lunch box?
Yes, with one caveat: keep the tomatoes and lettuce separate until the last minute if you can. If you must assemble it ahead, wrap it tightly and eat it within a few hours so the bread doesn’t soften too much.
What if my tomatoes are bland?
Salt them lightly after slicing and let them sit on a paper towel for 5 minutes. That pulls out some water and sharpens the flavor. If they still taste flat, add a few roasted red peppers or extra pepperoncini to carry the acidity.
Can I turn this into a hot sandwich?
Absolutely. Bake the sandwich without the lettuce and tomato, or just warm the meat and cheese so they relax a little. Add the cold vegetables after heating, because wilted lettuce on a hot roll is one of those mistakes you only make once.
The Sandwich Worth Wrapping Twice
A good Italian sub does not ask for much, but it is picky about the details. The roll has to be sturdy. The tomatoes have to be dry. The dressing needs enough bite to season the bread without flooding it. Get those things right and the sandwich tastes like more than the sum of its parts — which is exactly what Nonna-style cooking is supposed to feel like.
I like recipes like this because they reward common sense more than cleverness. No tricks. No gimmicks. Just the right order, the right texture, and a little patience before the first cut. If you make it once the way it’s written here, you’ll probably stop improvising and start guarding your deli paper like it matters.
Authentic Italian Subs Like Nonna Used to Make — Recipe Card
Recipe Name: Authentic Italian Subs Like Nonna Used to Make
Description: A classic Italian-American deli-style sub with salami, capicola, mortadella, provolone, crisp lettuce, tomato, red onion, pepperoncini, and a sharp oil-and-vinegar dressing. Built to stay crunchy, salty, and neatly messy.
Prep Time: 20 minutes
Cook Time: 3 minutes
Total Time: 23 minutes
Course: Lunch / Main Course
Cuisine: Italian-American
Servings: 4 large sandwiches
Calories: About 720 kcal per sandwich
Ingredients
For the Subs:
- 4 Italian sub rolls, 8 to 10 inches each, split lengthwise
- 6 ounces Genoa salami, thinly sliced
- 6 ounces capicola, thinly sliced
- 6 ounces mortadella, thinly sliced
- 8 ounces provolone, sliced
- 2 cups shredded iceberg lettuce
- 1 large tomato, thinly sliced and patted dry
- 1 small red onion, very thinly sliced
- 8 to 12 pepperoncini, drained
For the Dressing:
- 1/4 cup extra-virgin olive oil
- 2 tablespoons red wine vinegar
- 1 tablespoon pepperoncini brine
- 1 small garlic clove, finely grated
- 1 teaspoon dried oregano
- 1/2 teaspoon kosher salt
- 1/2 teaspoon freshly ground black pepper
- Pinch of red pepper flakes, optional
Instructions
-
Whisk together the olive oil, red wine vinegar, pepperoncini brine, garlic, oregano, salt, black pepper, and red pepper flakes in a small bowl.
-
Slice the tomato and pat it dry, slice the onion thinly, drain the pepperoncini, and shred the lettuce.
-
Split the rolls lengthwise and toast the cut sides under a broiler or in a dry skillet for 60 to 90 seconds, until lightly golden.
-
Brush a little dressing onto the warm bread, then lay the provolone on the bottom half of each roll.
-
Fold the salami, capicola, and mortadella loosely and layer them over the cheese.
-
Top with lettuce, tomato, onion, and pepperoncini. Add a few more drops of dressing if needed, but do not soak the bread.
-
Close the sandwiches, wrap them in parchment or deli paper, rest for 2 to 5 minutes, then cut diagonally with a serrated knife and serve.
Notes: Dry the tomatoes well, or the bread will soften faster. Wrap the finished subs before cutting for cleaner slices. For a hot version, bake the assembled sandwich without lettuce and tomato at 375°F for 5 to 7 minutes, then add the cold vegetables after warming.