
Garlicky pizza punishes laziness. If the garlic burns, you know it. If the dough stays pale, you know it. And if the cheese turns watery, the whole pie slides into that dull, greasy middle ground nobody remembers after the second bite.
What saves it is restraint. A good garlicky pizza doesn’t need a pile of toppings or a dramatic sauce situation. It needs olive oil that tastes like warm grass, garlic handled so it turns sweet instead of sharp, and a crust with enough chew to fold without drooping. That’s the whole trick, and it’s a better trick than most glossy pizza recipes bother to admit.
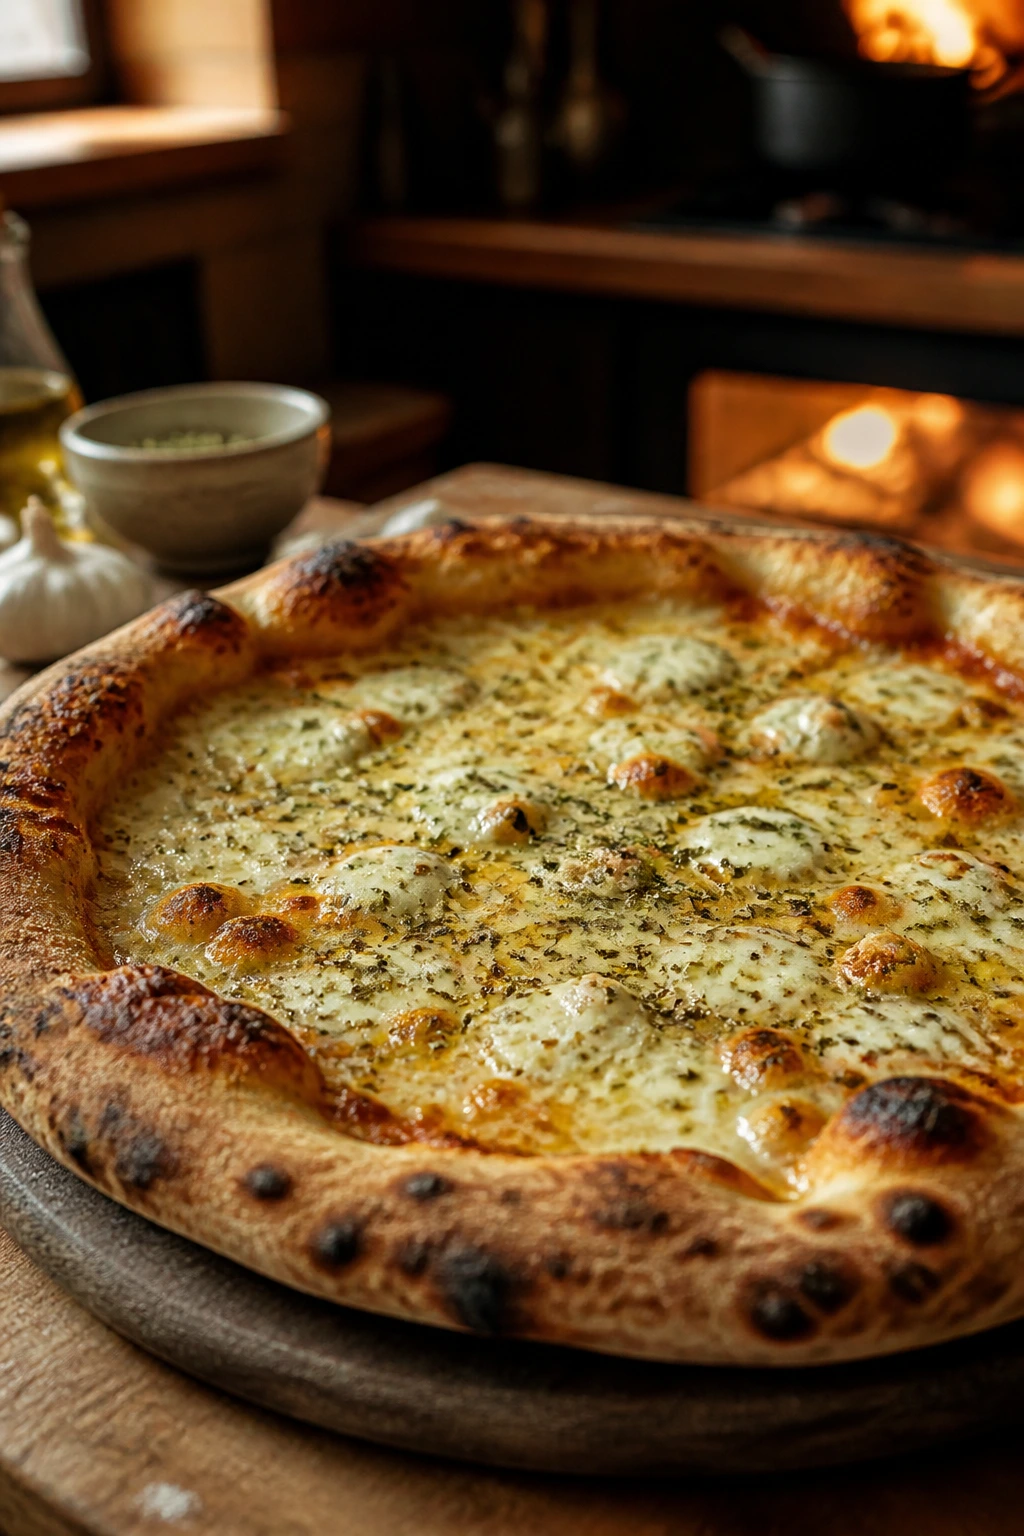
The best versions taste like they came from a kitchen with a battered wooden board, a flour-dusted apron, and a very opinionated cook who knew the oven by smell. Not fancy. Not fussy. Just a pie that comes out hot, fragrant, and gone before anyone remembers to ask for the salad.
Why This Pie Feels Like a Family Kitchen
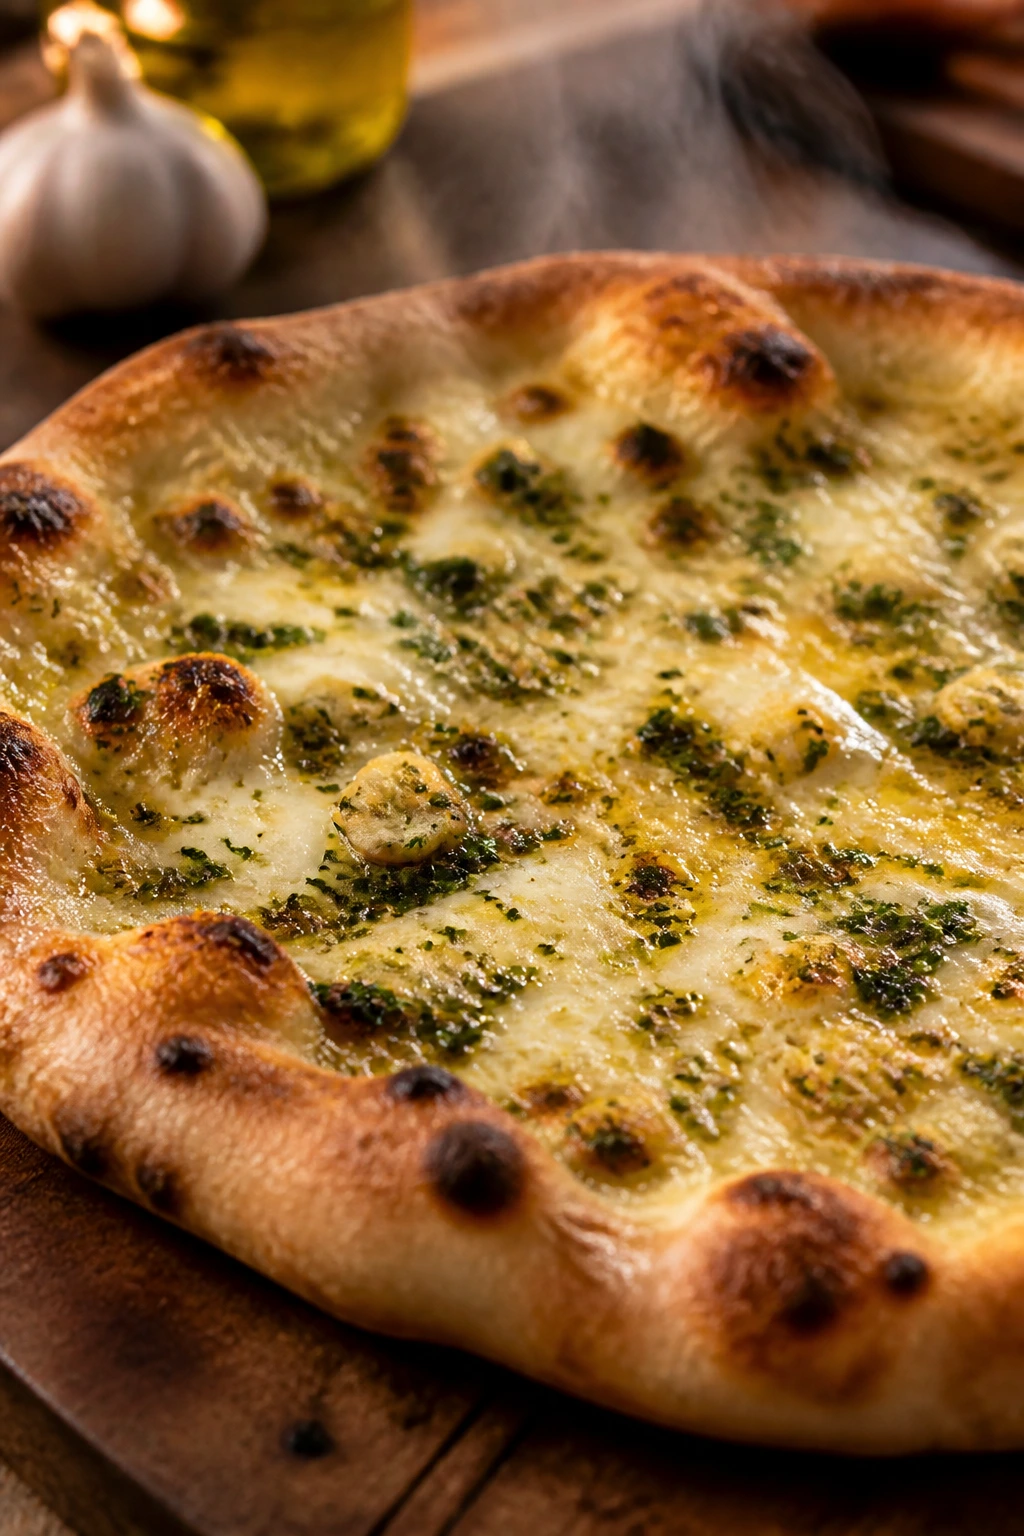
A pizza like this lives and dies on balance. Too much garlic, and it turns aggressive. Too little, and the name stops meaning anything. What makes this version feel old-school is that the garlic gets spread across the pie in layers: a little cooked into the oil, a little caught in the cheese, a little fresh bite from the herbs at the end.
That layered approach is what nonna-style cooking does so well. It doesn’t scream. It lands. One bite gives you sweet garlic, milky mozzarella, salty Pecorino, and a crust that has just enough blistering on the edges to feel like it spent time in a serious oven. The flavor is direct, but it isn’t blunt.
I also like that this kind of pizza respects the dough. A lot of home pizza gets buried under toppings because people are trying to make up for a weak crust. This one does the opposite. The crust has to carry the whole thing, so it’s worth giving it a little time, a little heat, and a little space.
And yes, there’s a reason this style works in so many Italian-American kitchens. Garlic, olive oil, oregano, and bread are a very strong quartet. You don’t need much else when the dough is well made and the oven is hot enough to do its job.
Why You’ll Love This Pizza
-
Garlic, Two Ways: The garlic goes into the oil first, then finishes with fresh herbs, so you get sweetness and bite instead of one flat note.
-
A Chewy Crust Without Drama: Bread flour and a short knead give the dough enough strength to stretch thin without tearing or turning cracker-hard.
-
No Heavy Sauce Needed: The olive oil and cheese carry the flavor, which keeps the center from getting wet and lets the crust stay crisp underneath.
-
Fast Once the Dough Rises: The hands-on work is short. Most of the time is waiting for the dough to relax and the oven to get properly hot.
-
Easy to Adjust: A pinch of chili, a little more cheese, a few olives, or a swipe of tomato can change the mood without wrecking the balance.
-
Smells Like Something People Remember: The moment the garlic oil hits the hot oven, the kitchen starts smelling like dinner is nearly over and everyone should stand closer.
Quick Timing and Yield

Yield: 1 large 14-inch pizza, about 4 dinner servings or 6 appetizer slices
Prep Time: 25 minutes
Cook Time: 12 to 14 minutes
Total Time: About 1 hour 25 minutes, including the rise and oven preheat
Difficulty: Intermediate — the ingredients are plain, but dough handling and hot-oven baking need a little attention
Chill/Rest Time: 45 to 60 minutes for the first rise, plus 10 minutes for the dough to relax before shaping
Best Served: Hot from the oven, with the basil still fragrant and the cheese just set
The Ingredient List for One Big Pizza
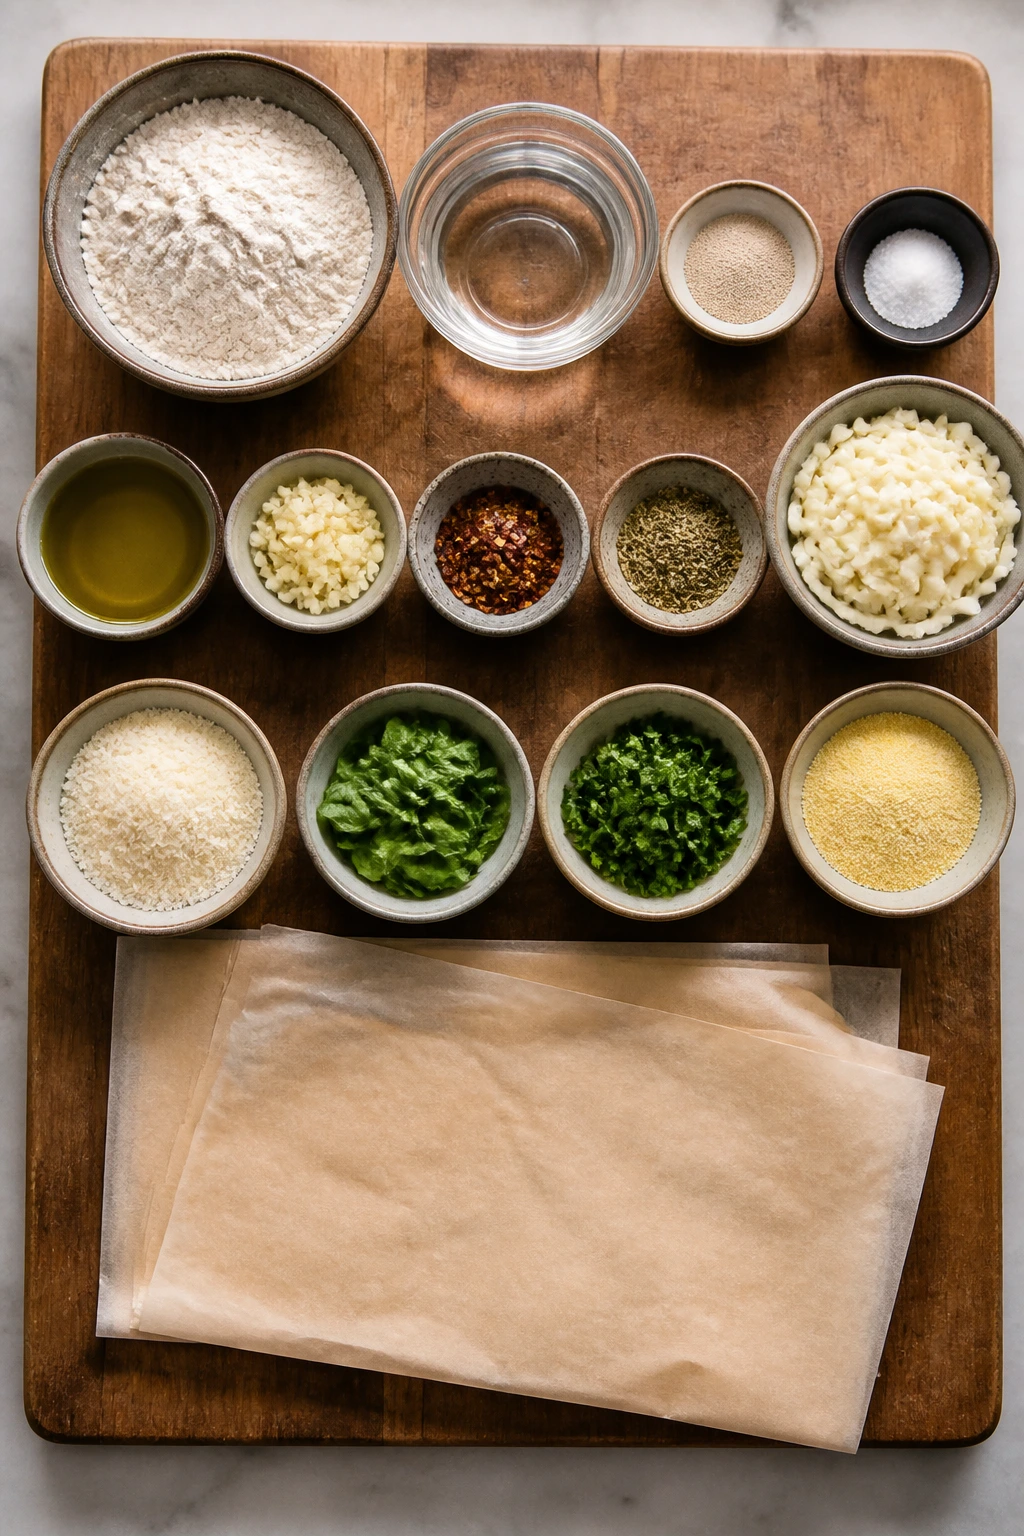
For the Dough:
- 3 cups bread flour (390 g), plus more for dusting
- 1 teaspoon instant yeast
- 1 1/4 cups warm water (about 105 to 110°F / 40 to 43°C)
- 1 1/2 teaspoons fine sea salt
- 1 tablespoon extra-virgin olive oil, plus more for the bowl
For the Garlic Oil and Toppings:
- 3 tablespoons extra-virgin olive oil
- 5 large garlic cloves, minced very fine or grated
- 1/2 teaspoon red pepper flakes
- 1/2 teaspoon dried oregano
- 8 ounces low-moisture whole-milk mozzarella, shredded
- 1/2 cup grated Pecorino Romano or Parmesan
- 2 tablespoons fresh basil leaves, torn
- 1 tablespoon flat-leaf parsley, chopped
- 1 tablespoon semolina or cornmeal, for the peel or pan
- Flaky sea salt, for finishing, optional
Why Each Ingredient Earns Its Place
Dough
What to use: 3 cups bread flour, 1 teaspoon instant yeast, 1 1/4 cups warm water, 1 1/2 teaspoons fine sea salt, and 1 tablespoon olive oil.
Preparation: Stir the dough until it looks shaggy, then knead until smooth and a little tacky, not sticky enough to glue itself to your fingers.
Substitutions: All-purpose flour works if that’s what you have, though the crust will be a touch less chewy; if using active dry yeast, bloom it in the warm water for 5 to 10 minutes first.
Tips: Bread flour gives you more structure and a better bite in the finished crust, which matters here because the pizza isn’t overloaded with toppings. That leaner topping style makes the dough taste better, not worse.
Garlic Oil
What to use: 3 tablespoons olive oil, 5 garlic cloves, 1/2 teaspoon red pepper flakes, and 1/2 teaspoon dried oregano.
Preparation: Warm the garlic gently in the oil just until it smells sweet and the oil looks glossy; stop before the garlic browns.
Substitutions: Garlic confit can stand in if you have it, and a pinch of crushed fennel seed is nice if you want a slightly more rustic edge.
Tips: Garlic burns fast on pizza. Cooking it briefly in oil first keeps the flavor round, and that one move makes the whole pie taste more deliberate.
Cheese
What to use: 8 ounces low-moisture whole-milk mozzarella and 1/2 cup grated Pecorino Romano or Parmesan.
Preparation: Shred the mozzarella yourself if you can; pre-shredded will work, but the fresh-grated stuff melts more evenly and browns better.
Substitutions: Fontina can replace some of the mozzarella for a softer melt, and provolone adds a little sharper edge if you want more bite.
Tips: Low-moisture mozzarella is the better choice here because fresh mozzarella releases water. A wet center is the enemy of good pizza.
Finishes
What to use: 2 tablespoons basil, 1 tablespoon parsley, and a pinch of flaky salt if you want a brighter finish.
Preparation: Tear the basil instead of chopping it to keep the edges from bruising, and add the herbs after baking.
Substitutions: Fresh oregano can replace the parsley if you want a more assertive herb note, though I’d keep the basil if possible.
Tips: Fresh herbs are not decoration here. They keep the garlic from tasting too heavy and give the pizza that lifted, just-baked smell the minute the slices hit the board.
What You Need on the Counter Before the Oven Heats
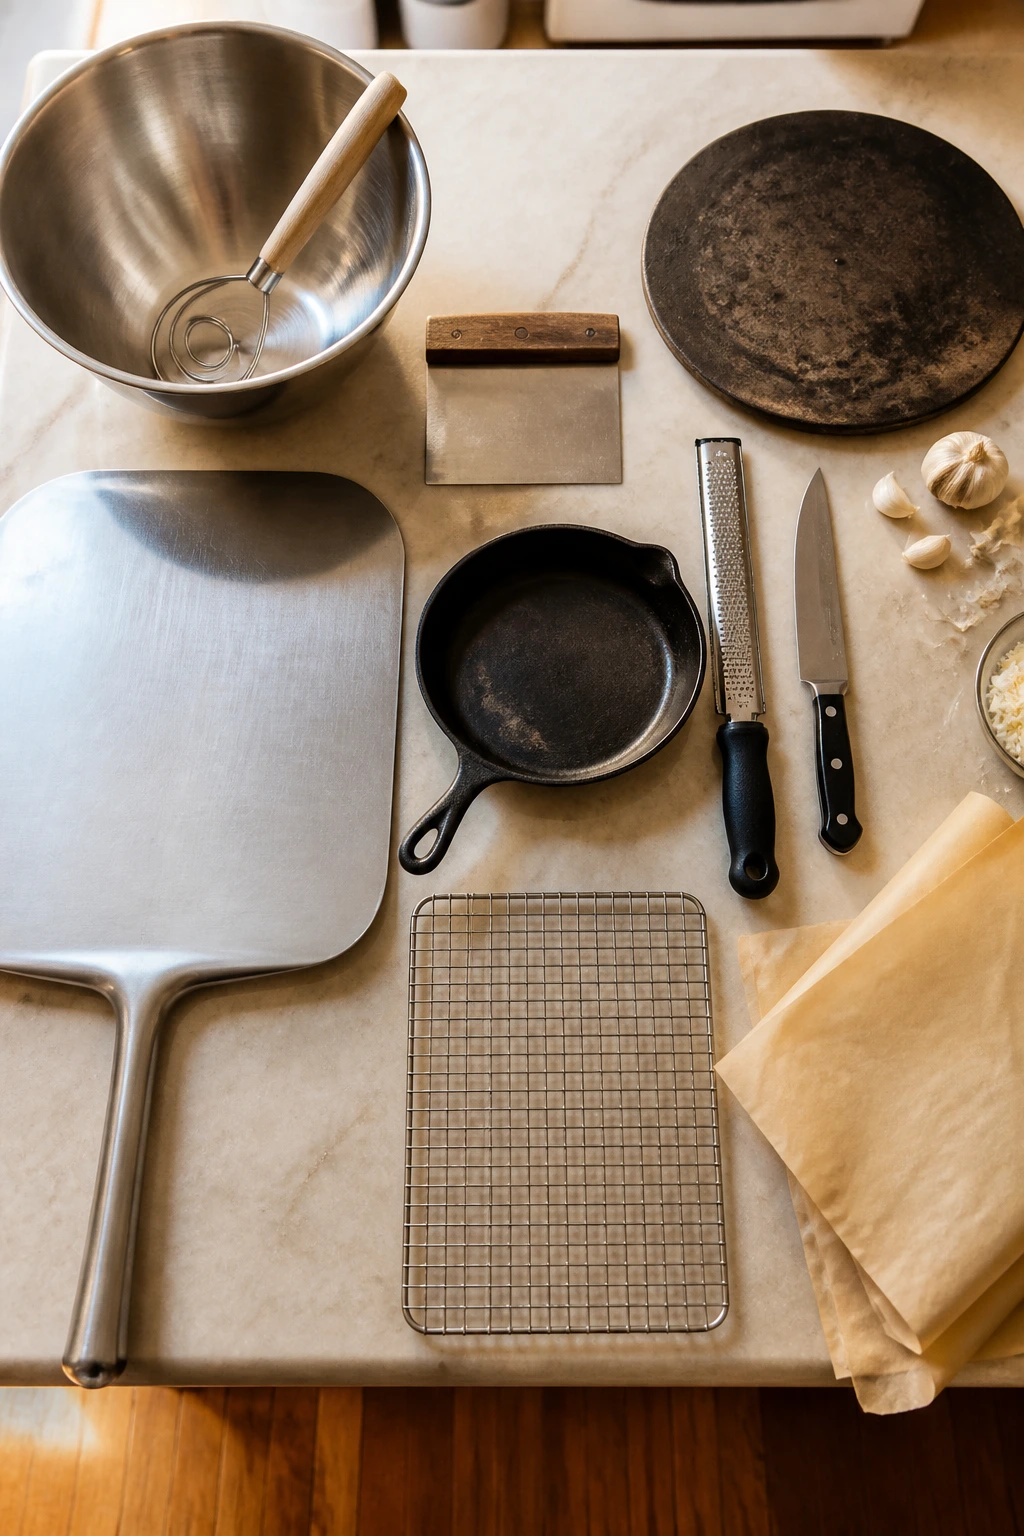
- Large mixing bowl: Big enough to hold the dough as it rises without climbing over the rim.
- Wooden spoon or dough whisk: Good for mixing the shaggy dough before kneading starts.
- Bench scraper: Makes it easier to move sticky dough and clean the counter fast.
- Pizza steel or pizza stone: This gives the bottom a hard, fast hit of heat; a flipped, preheated sheet pan also works.
- Pizza peel or rimless baking sheet: Needed to slide the pizza into the oven without wrecking the shape.
- Microplane or sharp knife: Best for mincing garlic fine enough that it disperses evenly.
- Small skillet or saucepan: Used for warming the garlic oil gently.
- Cooling rack: Handy if you want the crust to stay crisp after baking, not steam under its own heat.
- Parchment paper: Optional, but useful if you’re nervous about transferring the pizza.
How to Mix, Rest, and Shape the Dough
Make the Dough:
-
In a large bowl, whisk together the bread flour, instant yeast, and fine sea salt until the yeast is evenly spread through the flour.
-
Pour in the warm water and 1 tablespoon olive oil, then stir with a wooden spoon until a shaggy dough forms and no dry flour remains at the bottom of the bowl.
-
Turn the dough onto a lightly floured counter and knead for 8 to 10 minutes, adding only a dusting of flour if it sticks badly. The dough should become smooth, stretchy, and slightly tacky; do not bury it in flour or the crust will bake up dry.
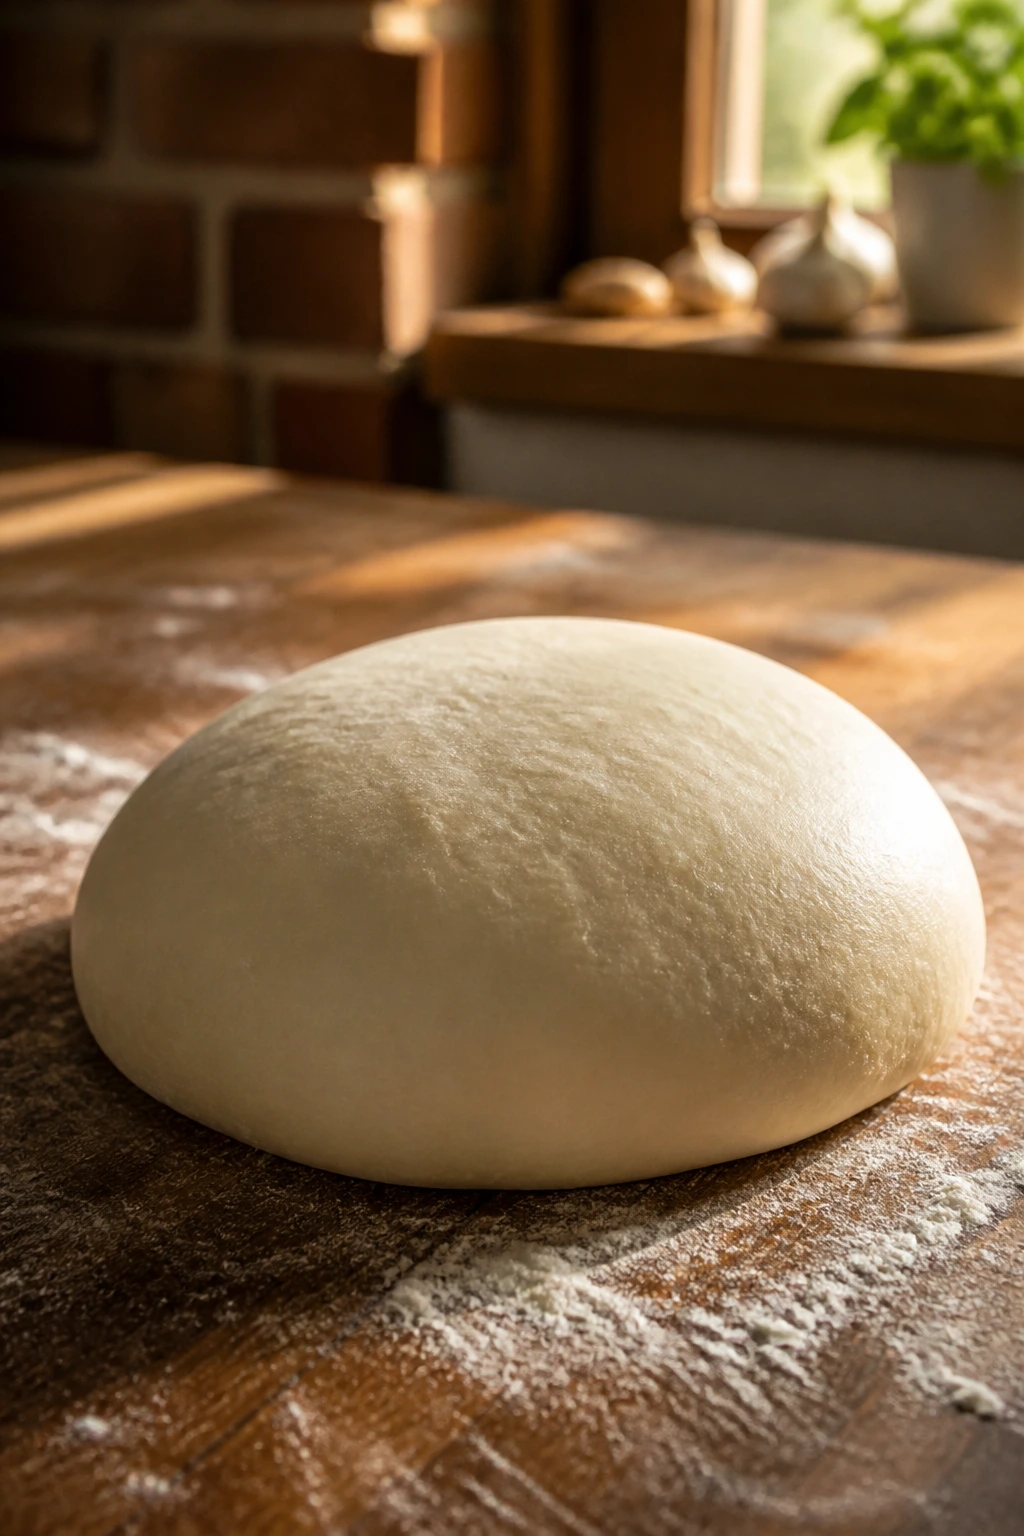
Let It Rise:
- Lightly oil the bowl, return the dough to it, and turn once so the surface is coated. Cover with plastic wrap or a damp towel and let it rise for 45 to 60 minutes, until it has roughly doubled and feels puffy when nudged.
Make the Garlic Oil:
- While the dough rises, combine the olive oil, minced garlic, red pepper flakes, and oregano in a small skillet over low heat. Warm for 45 to 60 seconds, just until the garlic smells sweet and the edges start to sizzle; if it starts to brown, pull it off the heat immediately. Set aside for 5 minutes.
Heat the Oven:
- Place a pizza stone or steel on the middle rack and preheat the oven to 500°F (260°C) for at least 45 minutes. If you’re using a flipped sheet pan instead, preheat that upside down on the rack so the pizza can slide onto the flat surface.
Shape the Pizza:
-
Turn the risen dough onto a lightly floured counter and press it gently into a round. Cover it with a towel and let it relax for 10 minutes if it keeps springing back; then stretch it to about 14 inches across.
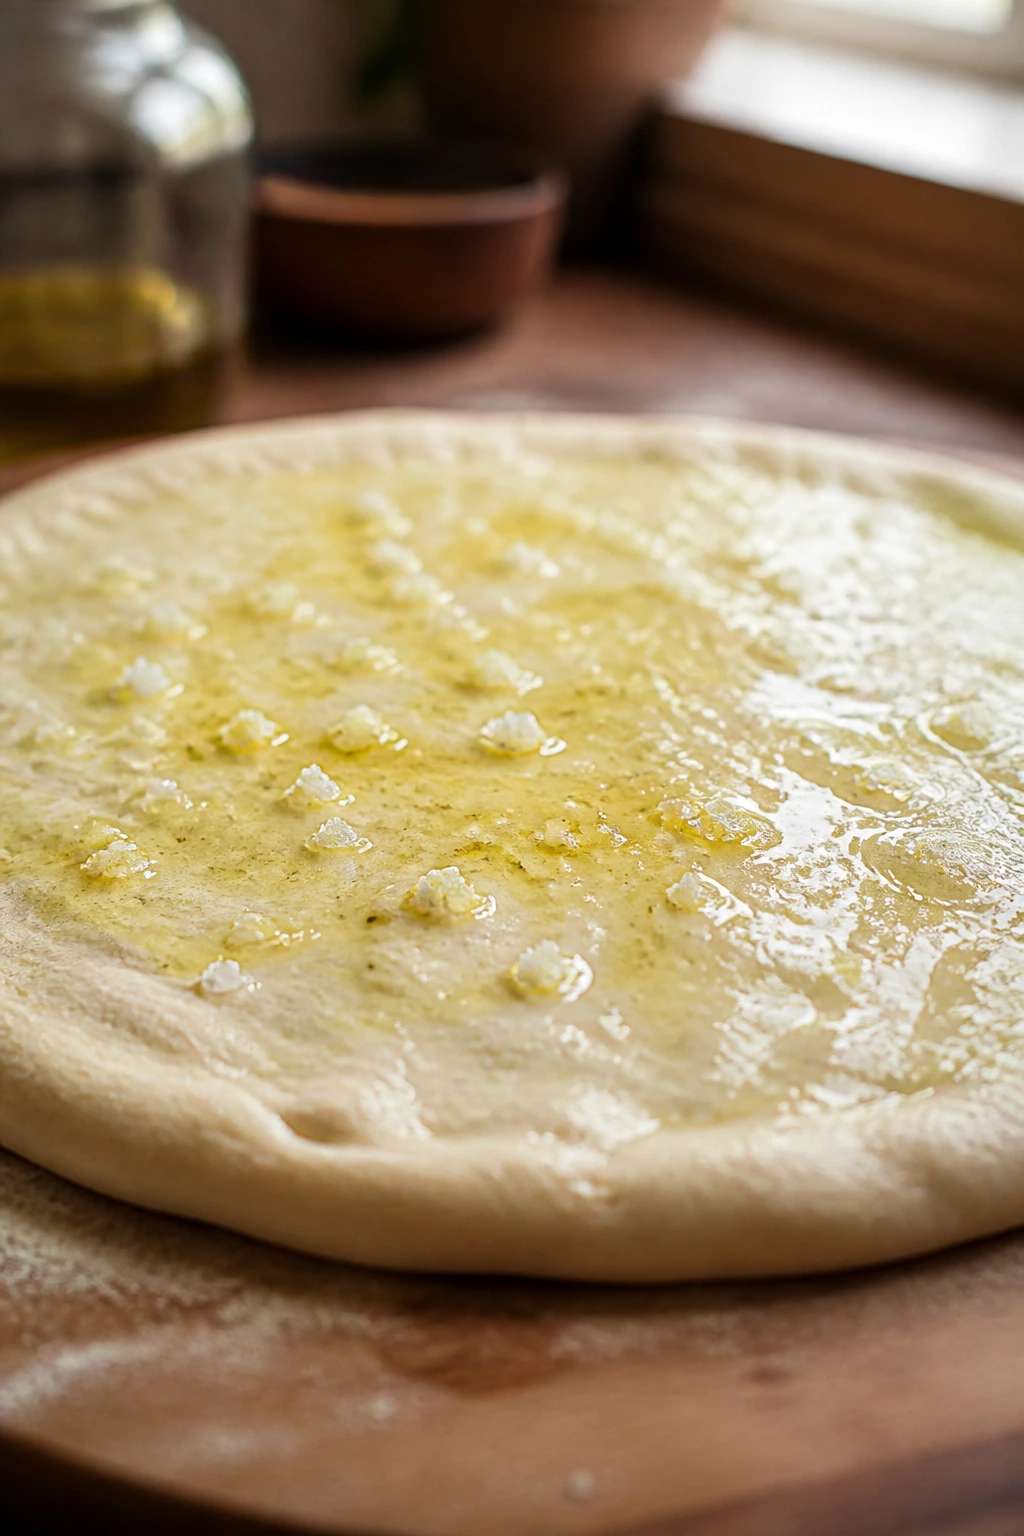
-
Transfer the dough to a pizza peel dusted with semolina or cornmeal, or set it on a piece of parchment if you’re using a sheet pan. Brush the surface with the garlic oil, leaving a 1-inch border around the edge, then scatter the mozzarella and Pecorino over the top in an even layer.
Bake and Finish:
- Slide the pizza onto the hot stone, steel, or sheet pan and bake for 12 to 14 minutes, until the crust is deeply golden at the edges and the cheese has melted with a few toasted spots. If you want more color, broil for 30 to 45 seconds at the end, watching it like a hawk. Finish with basil, parsley, and a pinch of flaky salt, then let it rest for 2 minutes before slicing.
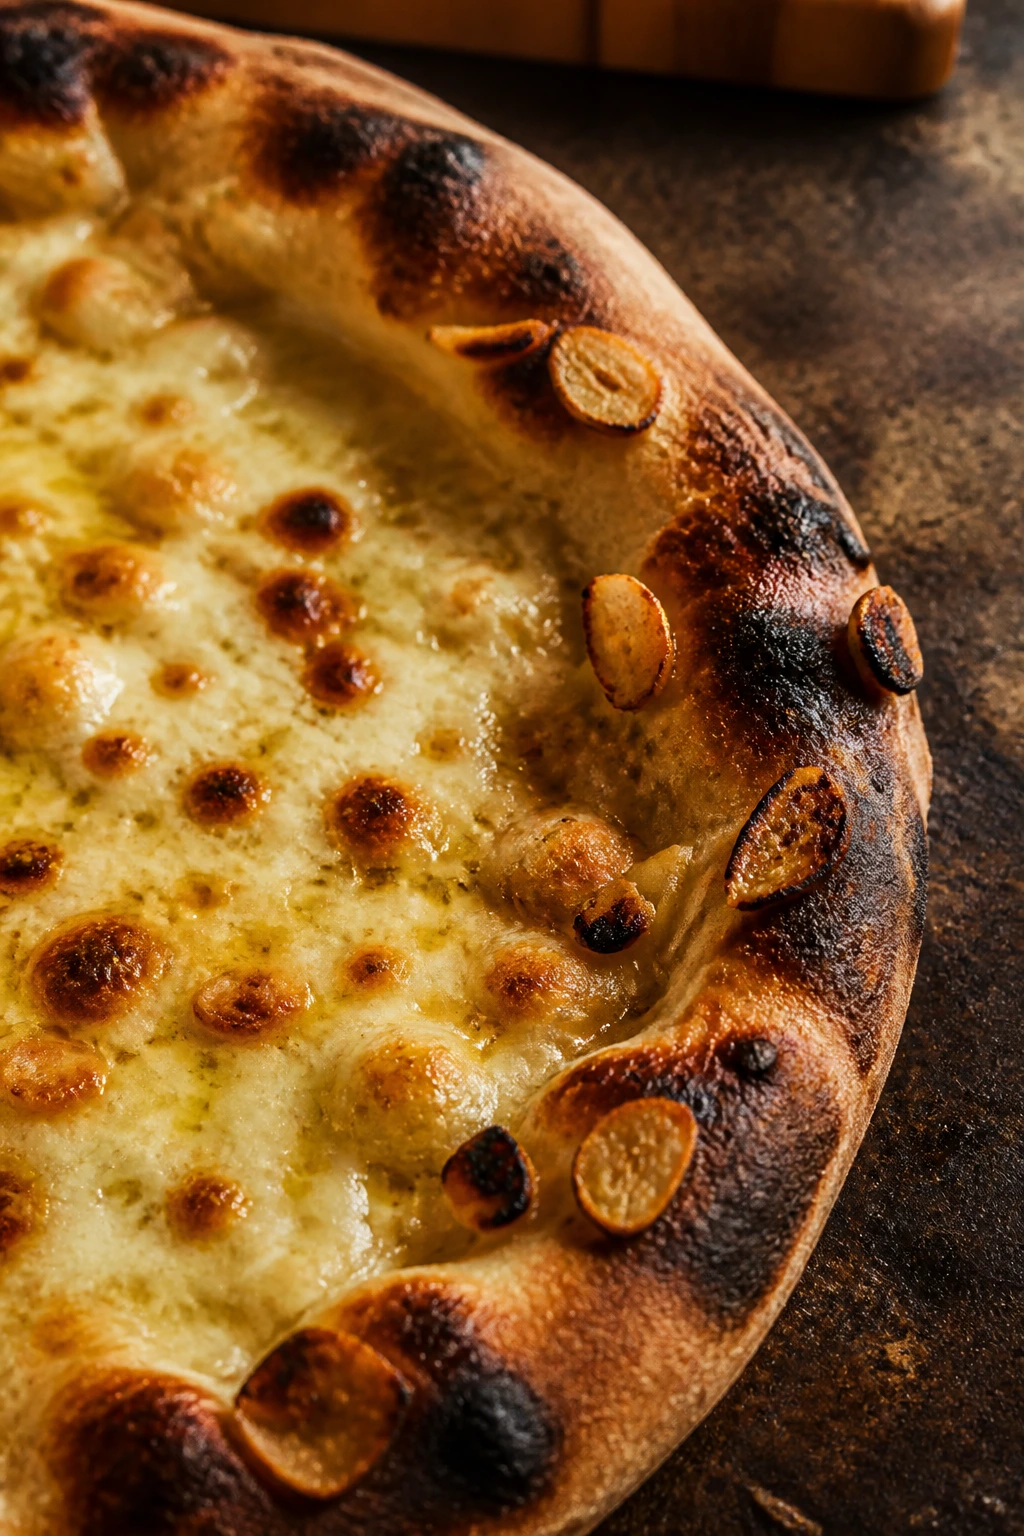
Why a Hot Baking Surface Changes the Crust
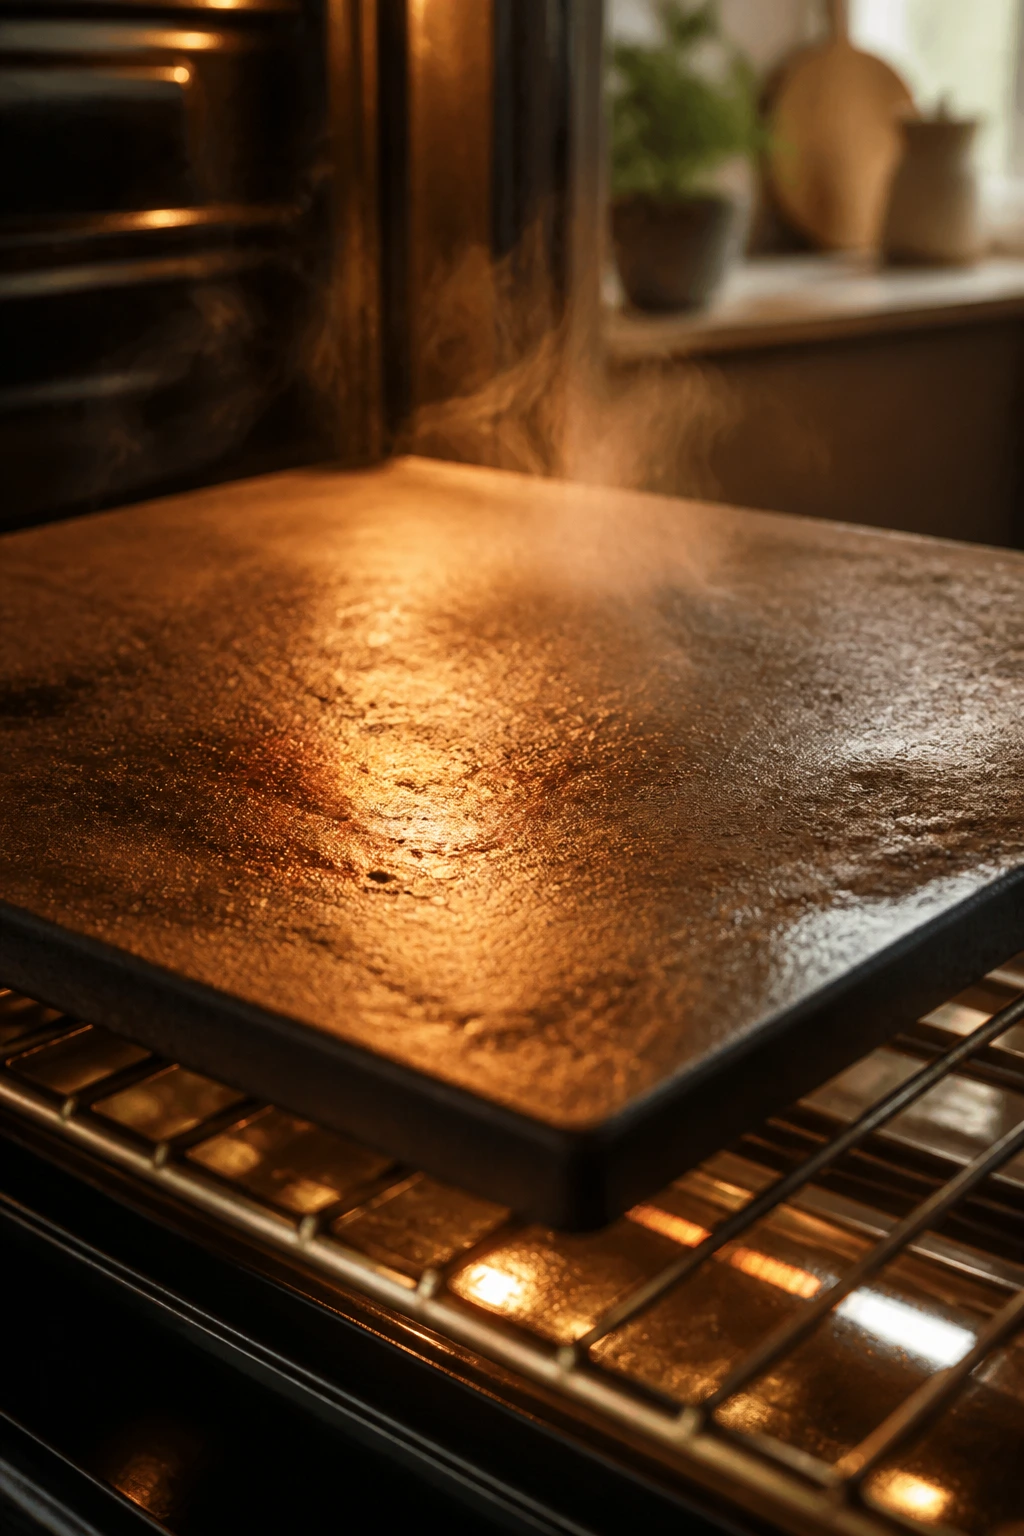
A lot of home pizza problems start before the toppings even go on. The oven floor matters. A lot.
A pizza stone or steel gives the dough an immediate burst of heat from below, which is what helps the bottom set before the cheese has time to melt into a pale puddle. Steel conducts heat faster than stone, so it browns the base more aggressively. Stone is a little gentler. Either one beats a cold sheet pan by a mile.
That matters even more with a garlicky white pizza, because the toppings don’t have tomato sauce to shield the dough from moisture. The oil helps, but the crust still needs a hot landing spot. If you skip the preheat, the center stays soft and the edges don’t blister the way they should.
Parchment can help with transfer, but it’s not a replacement for heat. Use it if you need to, then think of it as a temporary crutch, not the main event. The real work happens when the dough hits that hot metal or stone and starts to puff at the rim.
One more thing. Don’t crowd the pizza with cheese because you’re nervous about the crust. That instinct is how people end up with a heavy top and a pale bottom. The oven wants a thin layer, not a cheese blanket.
Little Touches That Make It Taste Like a Pizzeria Oven
Flavor Enhancement: Save a teaspoon of the garlic oil after it’s warmed and drizzle it over the finished slices. It adds a sharper garlic perfume right at the end, and that fresh hit makes the pizza taste brighter without making it raw.
Customization: If you want more depth, tuck 4 to 6 paper-thin slices of sweet onion under the cheese. They soften in the heat and bring a faint sweetness that plays nicely with the garlic. I’d avoid thick onion chunks; they steam instead of caramelizing.
Serving Suggestions: A few extra basil leaves, torn by hand, look better than a pile of chopped herbs and taste cleaner too. A dusting of Pecorino over the cut slices is another good move if you like the salty edge of a sharper cheese.
Make-It-Yours: If you need a dairy-free version, use a low-moisture vegan mozzarella that melts, not one that just softens. If you want more heat, add 1 teaspoon of Calabrian chile paste to the garlic oil before it goes on the dough. For a richer finish, rub one cut garlic clove over the baked crust while it’s still hot; it sounds tiny, but it gives the edge a bright little snap.
How to Serve It So the Garlic Stays the Star
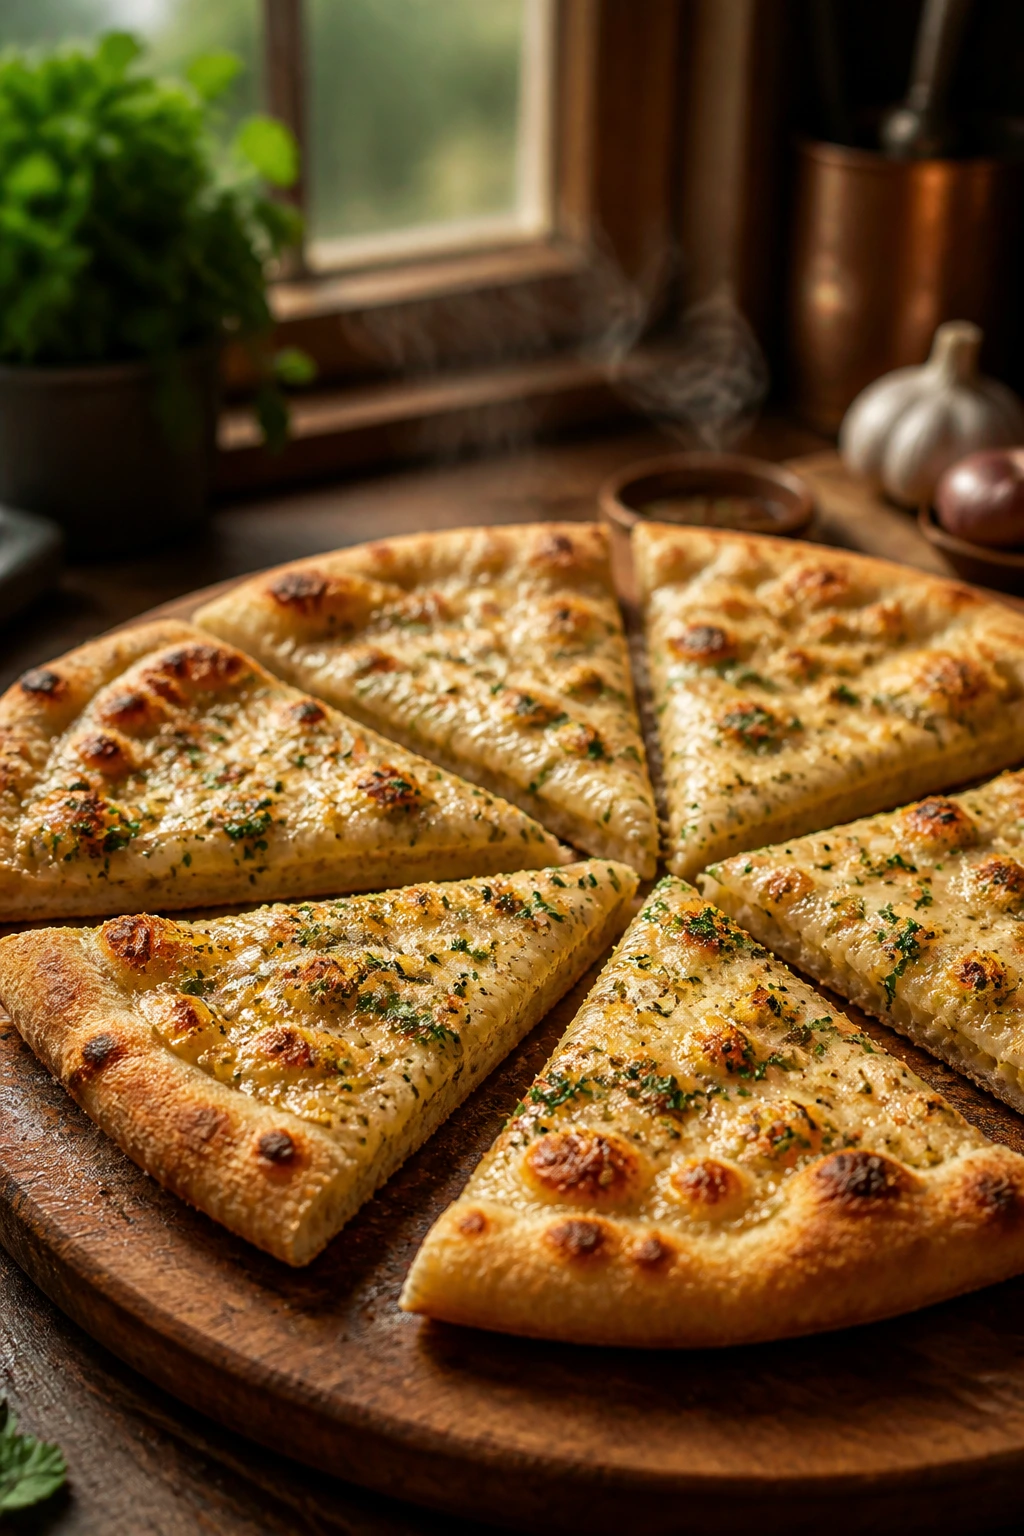
Presentation: Cut the pizza into 6 or 8 wedges and stack the slices slightly off-center on a wooden board instead of laying them flat in a perfect circle. That loose arrangement lets the steam escape, which keeps the bottom from softening while you carry it to the table.
Accompaniments: A bitter greens salad with lemon and olive oil works better than another rich side. So do marinated olives, roasted peppers, or a bowl of tomatoes dressed with salt and basil. If you want bread, keep it simple; the pizza already owns the carb slot.
Portions: Plan on 2 slices per person for a light meal, 3 slices for hungry eaters, or 1 slice each if you’re serving it with a full spread of salads and antipasti. If the crowd is large, make a second dough ball rather than stretching one pizza too thin.
Beverage Pairing: A crisp Vermentino, Pinot Grigio, or a dry sparkling wine keeps the garlic from feeling heavy. If you want something nonalcoholic, chilled sparkling water with lemon or a bitter orange soda fits the pizza’s salty, herb-slick finish.
Variations on the Pie
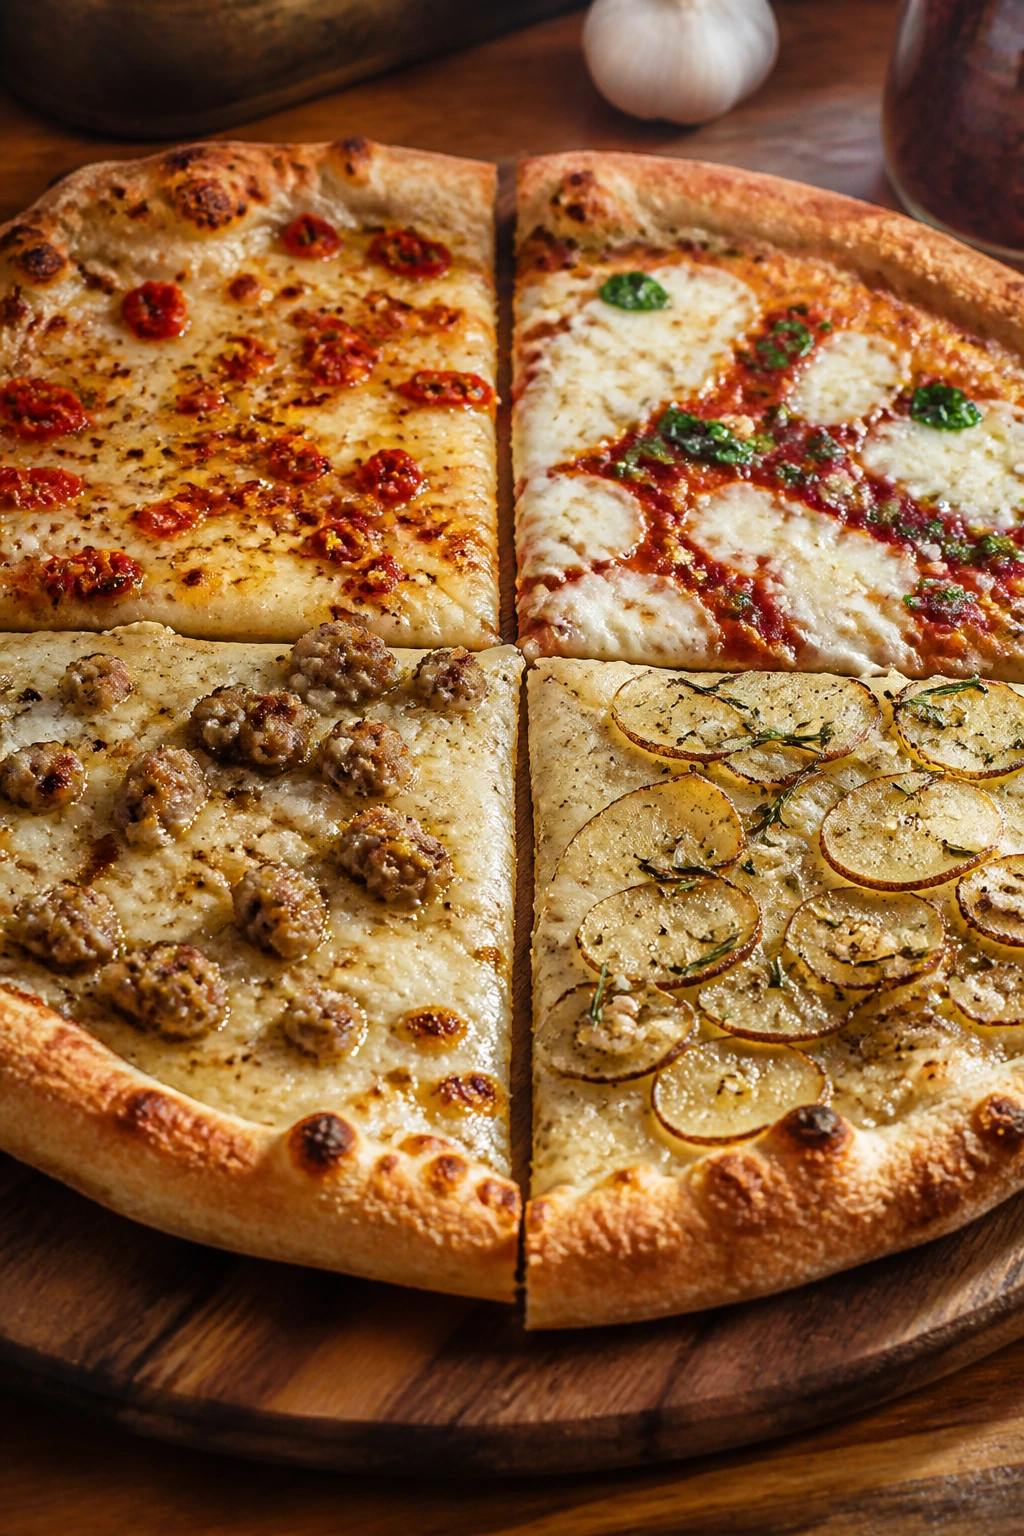
Calabrian Heat: Stir 1 to 2 teaspoons of Calabrian chile paste into the garlic oil and finish with a few sliced pepperoncini. This version wakes the whole pie up and works especially well if you like the garlic to share space with something smoky and spicy.
Tomato Stripe Bianca: Smear 2 to 4 tablespoons of crushed tomato across the dough before the cheese goes on. You still get the garlicky, nonna-style feel, but the tomato gives the middle a little more acidity and makes the pizza taste closer to a classic neighborhood slice.
Sausage and Garlic Sizzle: Brown 6 ounces of Italian sausage first, break it into small pieces, and scatter it over the mozzarella. This is the move for people who want the pizza to feel more like dinner than a snack.
Rosemary Potato Pie: Add very thin slices of Yukon Gold potato, a little extra olive oil, and 1 teaspoon chopped rosemary. The potatoes soften in the oven and soak up the garlic oil, which makes the whole pie taste old-world in a way that’s hard to argue with.
Dairy-Free Herb Pie: Use a melty dairy-free mozzarella and finish with extra basil and parsley. The pizza won’t taste identical, but the garlic oil and oregano still give it enough backbone that you won’t feel like you’re eating a compromise.
Mistakes That Turn Garlic Bitter or the Crust Soggy
-
Letting the garlic brown in the oil: Brown garlic tastes harsh fast, and the bitterness shows up even more once the pizza bakes. Keep the heat low and stop as soon as the garlic smells sweet.
-
Using too much mozzarella: A thick blanket of cheese traps steam and turns the center wet. Stick to the measured 8 ounces, and don’t feel bad about that restraint; the pizza tastes cleaner for it.
-
Skipping the rise after the dough resists stretching: If the dough keeps snapping back, it needs a short rest, not brute force. Ten minutes under a towel usually fixes the problem.
-
Starting with a cold stone or pan: A cold baking surface gives you a pale, soft base. Preheat for the full 45 minutes so the crust gets a hard hit of heat the second it lands.
-
Cutting the pizza the second it comes out: Cheese needs a minute to settle or it runs off the slice like it wants out of the room. Give it 2 minutes on the board, then cut.
-
Piling on wet toppings: Fresh mozzarella that hasn’t been drained, mushrooms that weren’t cooked first, or tomato sauce spread too thick all push the crust into soggy territory. Keep moisture under control and the pie stays sharp.
Storing, Reheating, and Make-Ahead
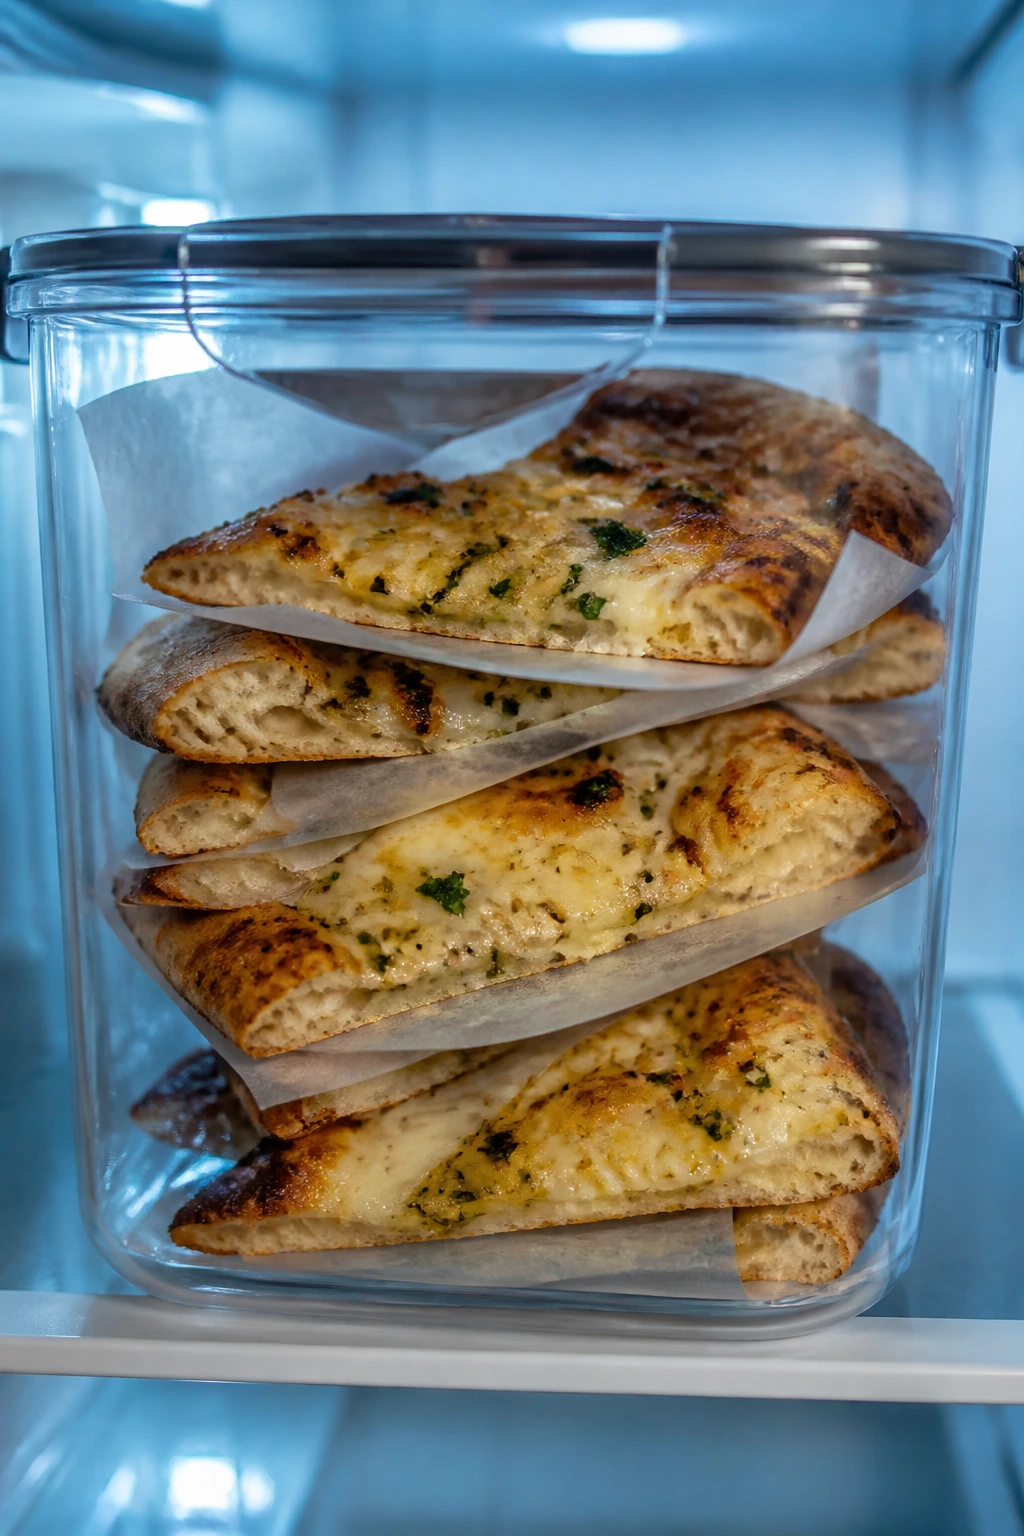
Leftover slices keep well in the refrigerator for up to 3 days if you tuck them into an airtight container or wrap them tightly in foil. Put parchment between the slices if you’re stacking them so the cheese doesn’t glue them together overnight. The flavor holds up better than a lot of pizzas because the garlic oil and herbs don’t disappear when they cool.
Freezing works too. Wrap individual slices tightly and freeze for up to 2 months. Reheat them straight from frozen in a 400°F oven for 10 to 12 minutes, or thaw overnight in the fridge first if you want a slightly softer crumb.
For the best texture, use the oven or a skillet instead of the microwave. A 425°F oven for 6 to 8 minutes brings the crust back to life, while a dry skillet over medium heat takes about 2 to 3 minutes on the bottom with a quick cover at the end to melt the cheese. The skillet method is my favorite for lunch slices. It gives the bottom a little crunch that the oven sometimes softens.
The dough can be made ahead, too. After the first rise, punch it down lightly, oil it, and refrigerate it for up to 72 hours. That cold rest gives the crust a deeper flavor and makes it easier to stretch. If you want to go farther, freeze the dough in a lightly oiled bag after the first rise for up to 1 month, then thaw it overnight in the fridge before shaping.
Garlic oil is best made the same day, though it will keep in the fridge for up to 3 days if you store it in a sealed container. Rewarm it gently if the olive oil firms up. Don’t leave raw garlic hanging around in oil at room temperature; use it promptly and refrigerate leftovers.
Questions People Actually Ask

Can I use store-bought dough?
Yes, and there’s no shame in that. One pound of store-bought dough will make a pizza in the same size range; let it sit at room temperature for 30 to 45 minutes before shaping so it stops fighting you.
Do I need a pizza stone or steel?
No, but the pizza is better with one. A flipped, preheated sheet pan gets you most of the way there if that’s what you have, though the bottom won’t brown as deeply.
Can I use fresh mozzarella instead of low-moisture mozzarella?
You can, but drain it well first and use less of it. Fresh mozzarella brings a softer, milkier melt, yet it also releases more water, so the crust needs a drier hand elsewhere.
How do I keep the garlic from burning?
Cook it only until it smells sweet and the oil looks glossy. If you’re nervous, pull the pan from the heat the second tiny bubbles appear around the garlic edges; the oven will do the rest of the work.
Can I make the dough ahead of time?
Yes. A cold ferment in the fridge for 24 to 72 hours gives the crust more flavor and makes shaping easier. Just bring the dough out long enough to lose the chill before you stretch it.
What if my oven only reaches 475°F?
Bake at 475°F and give the pizza a couple of extra minutes, watching the bottom and the cheese closely. If the top needs color before the base is done, a brief broil at the end fixes that faster than waiting around.
Can I add tomato sauce without ruining the style?
A thin swipe is fine. Keep it light — 2 to 4 tablespoons — so the pizza still tastes garlicky rather than turning into a red-sauce pie with garlic as an afterthought.
Is active dry yeast okay in this dough?
Yes. Bloom it in the warm water for 5 to 10 minutes before mixing, and use the same amount. The dough may rise a little more slowly, but the texture ends up in the same neighborhood.
A Pizza Worth Repeating
There’s a reason this style sticks. It doesn’t lean on tricks, and it doesn’t need a grocery cart full of extras. The garlic is the point, the dough is the frame, and the cheese gives the whole thing that stretchy, salty middle that keeps people reaching for one more slice.
Make it once, and you’ll start noticing where the real flavor lives in a pizza. Not in a mountain of toppings. In the hot oil. In the browned edge. In the moment the basil hits the steam and the kitchen smells like someone actually knew what they were doing.
Garlicky Pizza with Mozzarella and Herbs — Recipe Card
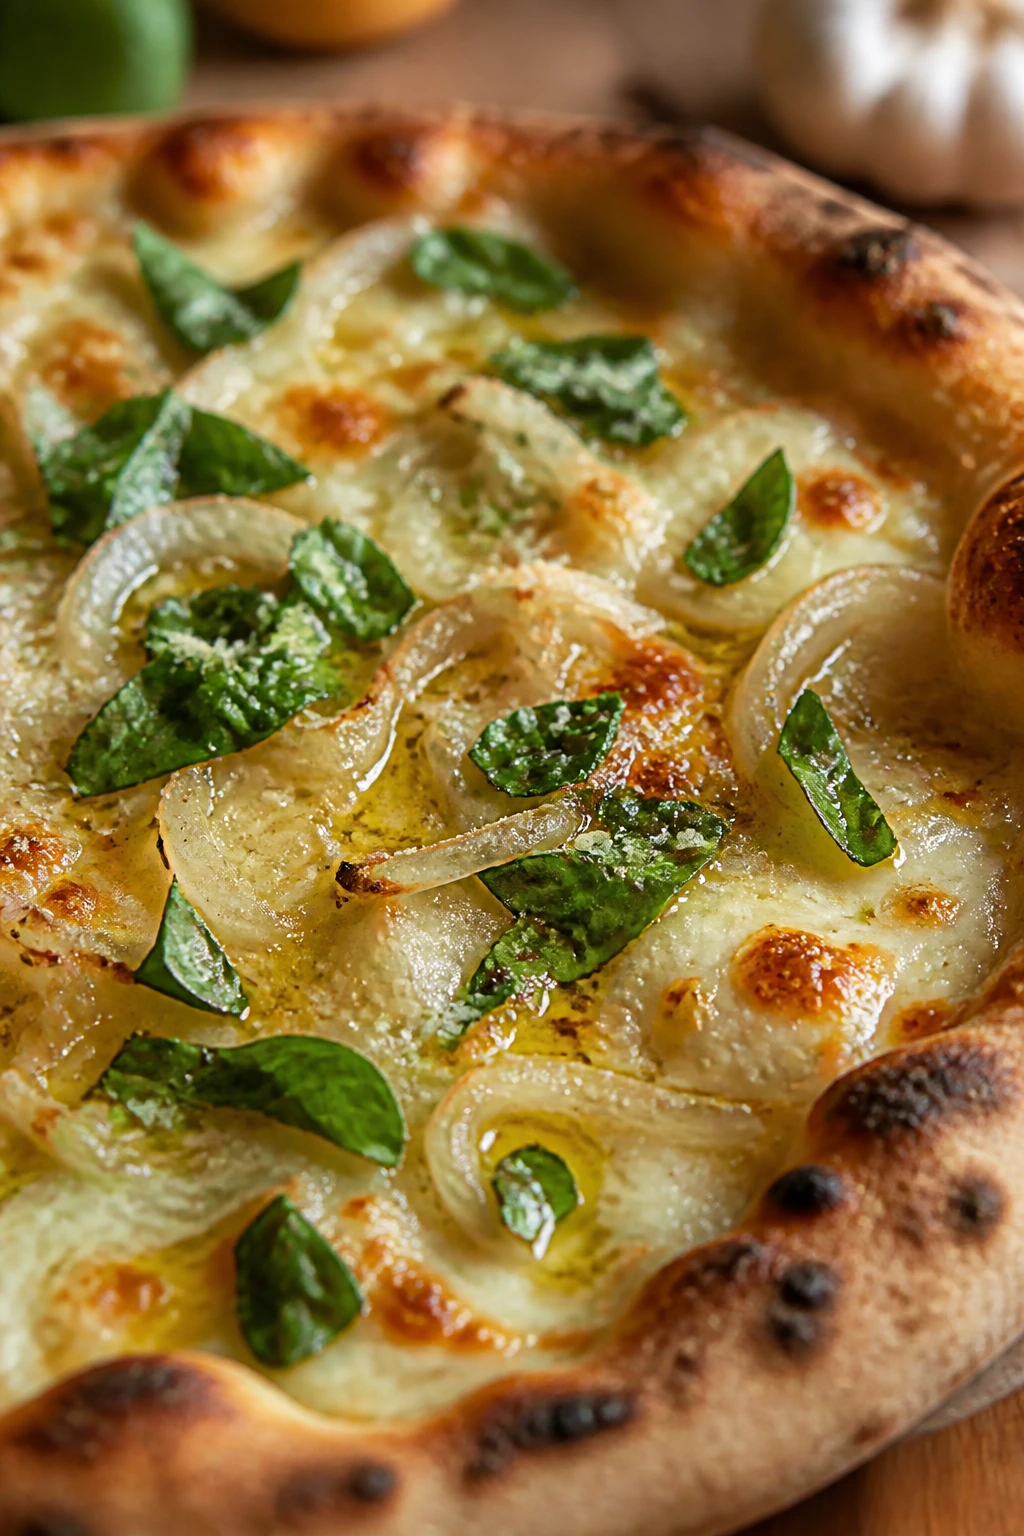
Recipe Name: Garlicky Pizza with Mozzarella and Herbs
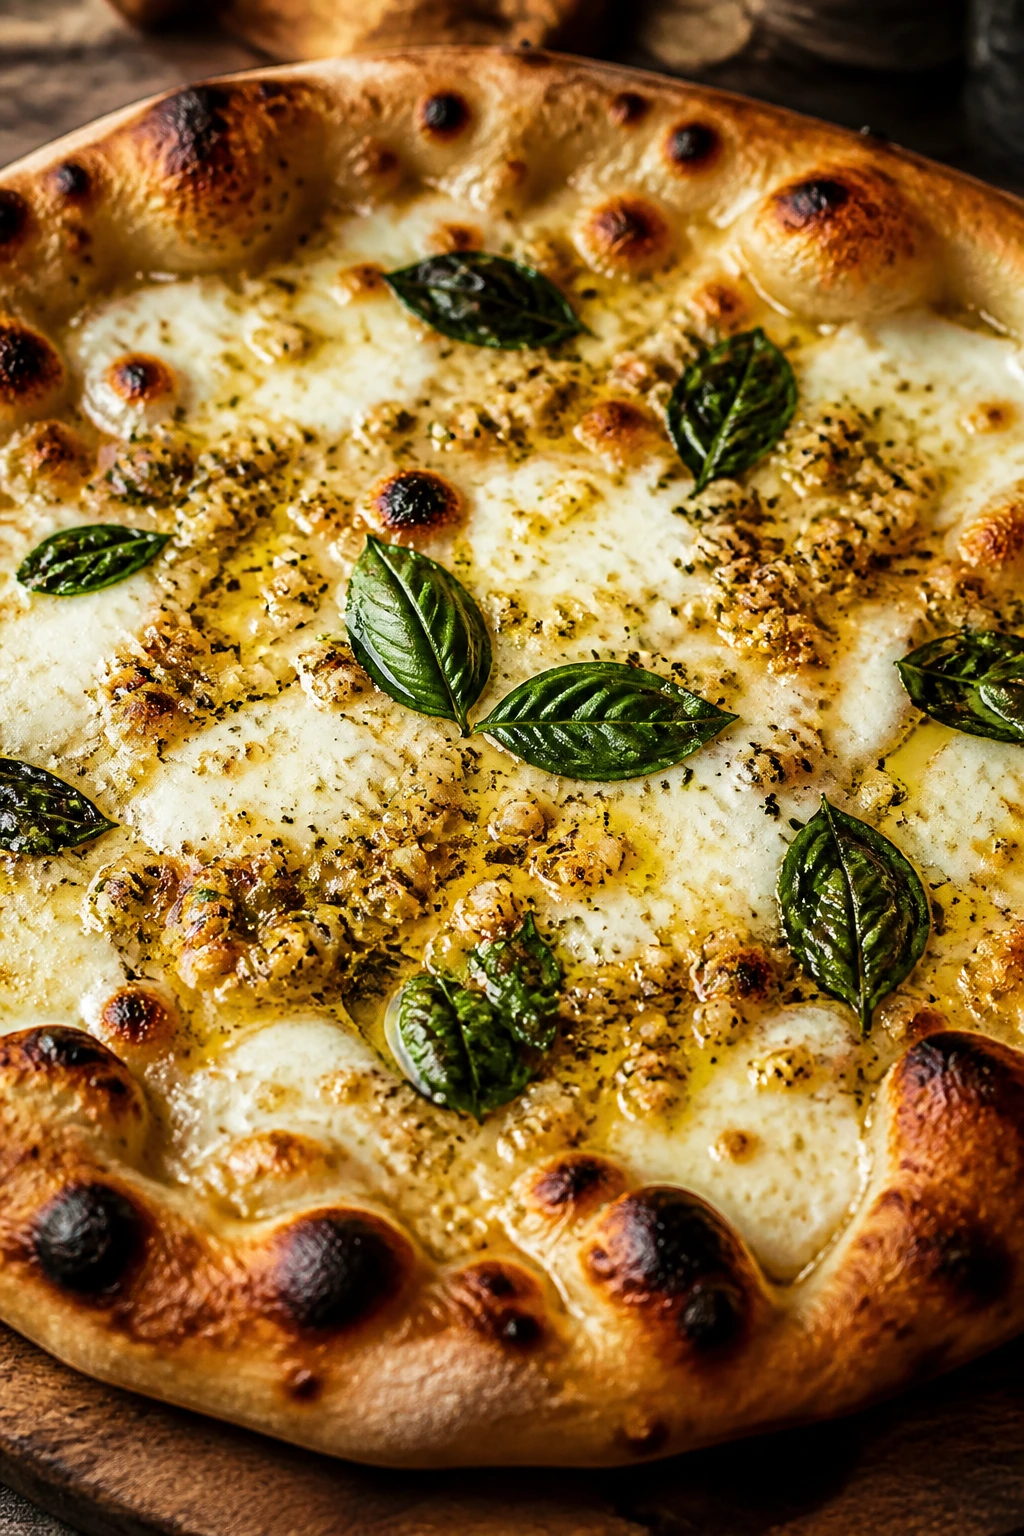
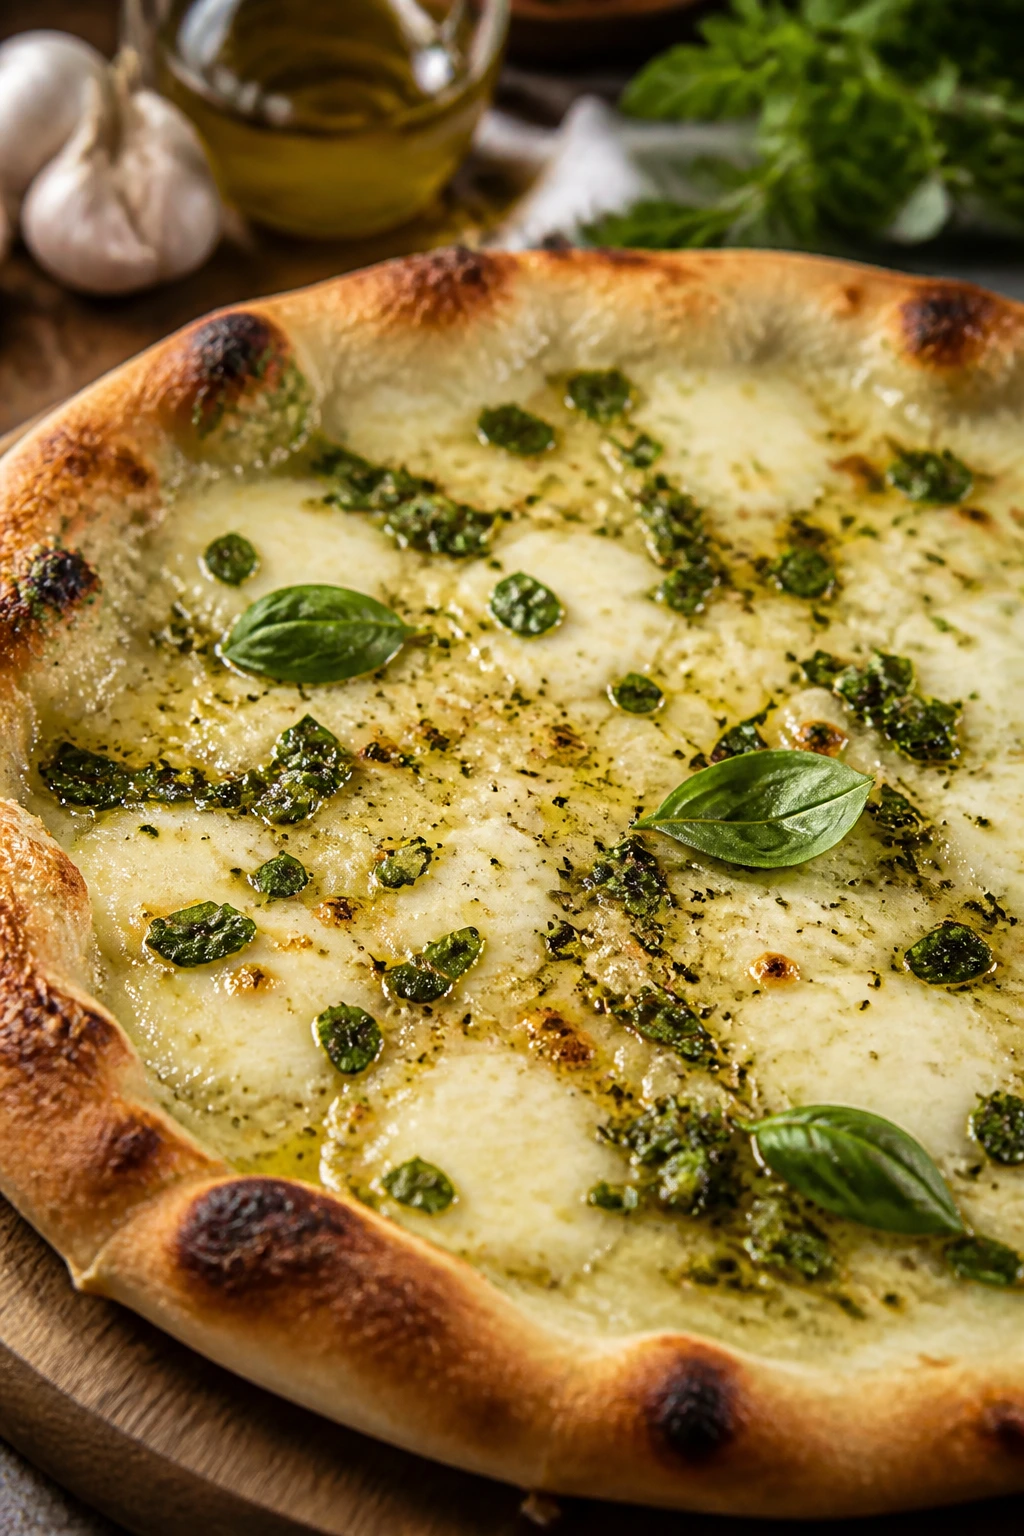
Description: A crisp, chewy white pizza brushed with garlic oil, topped with mozzarella and Pecorino, then finished with basil and parsley. It tastes like the kind of pie that comes out of a busy family kitchen and disappears before it cools.
Prep Time: 25 minutes
Cook Time: 12 to 14 minutes
Total Time: About 1 hour 25 minutes, including rise and oven preheat
Course: Main Course
Cuisine: Italian-American / Italian
Servings: 4 servings
Calories: About 650 kcal per serving
Ingredients
For the Dough:
- 3 cups bread flour (390 g), plus more for dusting
- 1 teaspoon instant yeast
- 1 1/4 cups warm water (about 105 to 110°F / 40 to 43°C)
- 1 1/2 teaspoons fine sea salt
- 1 tablespoon extra-virgin olive oil, plus more for the bowl
For the Garlic Oil and Toppings:
- 3 tablespoons extra-virgin olive oil
- 5 large garlic cloves, minced very fine or grated
- 1/2 teaspoon red pepper flakes
- 1/2 teaspoon dried oregano
- 8 ounces low-moisture whole-milk mozzarella, shredded
- 1/2 cup grated Pecorino Romano or Parmesan
- 2 tablespoons fresh basil leaves, torn
- 1 tablespoon flat-leaf parsley, chopped
- 1 tablespoon semolina or cornmeal, for the peel or pan
- Flaky sea salt, for finishing, optional
Instructions
-
Whisk together the flour, yeast, and salt, then add the warm water and olive oil and stir into a shaggy dough.
-
Knead the dough for 8 to 10 minutes until smooth and slightly tacky, then place it in an oiled bowl and let it rise for 45 to 60 minutes.
-
Warm the olive oil, garlic, red pepper flakes, and oregano over low heat for 45 to 60 seconds, just until fragrant, then cool slightly.
-
Preheat the oven to 500°F (260°C) with a pizza stone or steel inside for at least 45 minutes.
-
Stretch the dough into a 14-inch round, transfer it to a peel or parchment-lined pan dusted with semolina, and brush on the garlic oil.
-
Top with mozzarella and Pecorino, then bake for 12 to 14 minutes until the crust is golden and the cheese is melted with browned spots.
-
Finish with basil, parsley, and flaky salt, rest for 2 minutes, then slice and serve.
Notes:
Use low-moisture mozzarella for the driest, crispiest result.
If your oven runs cool, bake 1 to 2 minutes longer and watch the crust color closely.
Leftover slices reheat well in a 425°F oven or a dry skillet.