
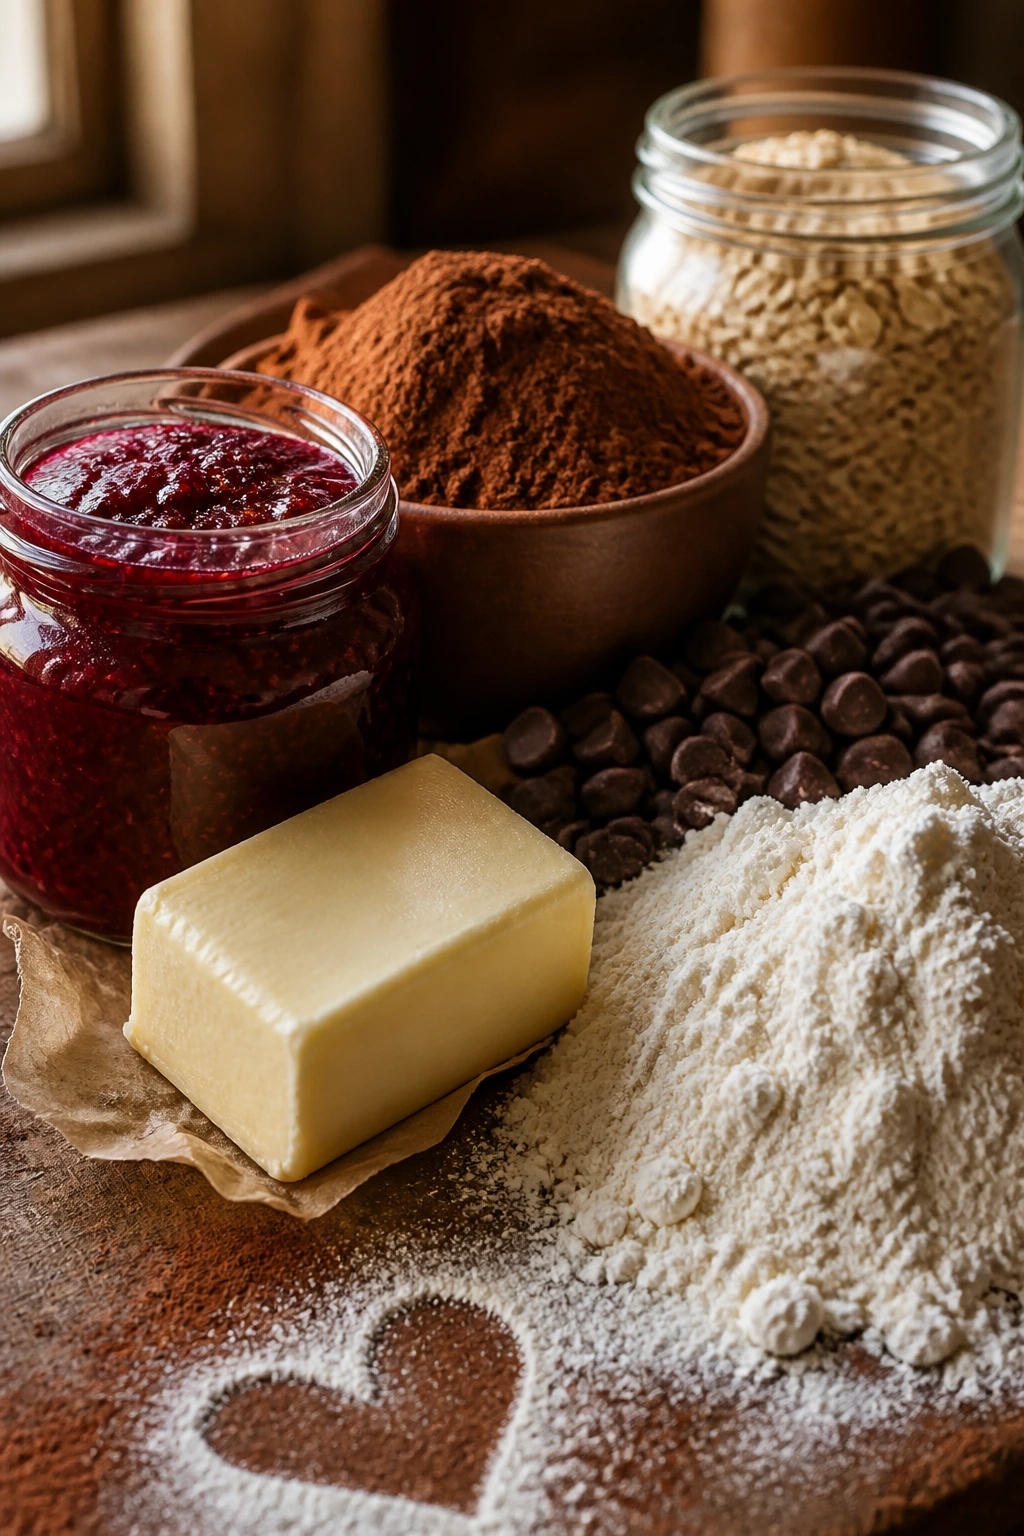
A Valentine dessert does not need a grocery run. A bowl of cocoa, a jar of jam, a stick of butter, and a little sugar can get you a long way, especially when the goal is something warm, sweet, and shaped like it knows what day it is.
Pantry staples do not mean plain. They mean the flavor has to come from smarter moves: blooming cocoa in melted butter, rolling cookie dough a little thicker so the edges stay clean, or sliding a spoonful of jam into the center of a shortbread heart so the color shows when you break it open.
There’s a reason I keep coming back to desserts like these. They do not ask for a special trip to three stores, and they still look deliberate on the plate. A good heart-shaped cookie can do more work than a fussy layer cake when you want dessert to feel personal, not theatrical.
Why These Pantry-Staple Valentine Desserts Earn Their Keep
- No extra shopping drama: Most of these recipes lean on flour, sugar, cocoa, oats, jam, butter, and chocolate chips, so you can bake from what’s already sitting in the cupboard.
- They still look like Valentine’s desserts: Hearts, swirls, glossy chocolate, ruby jam, powdered sugar, and a little flaky salt do the decorating without a specialty ingredient aisle.
- Small-batch and make-ahead friendly: Several of these desserts bake as cookies, bars, fudge, or pudding, which means you can finish them earlier and stop thinking about dessert for a while.
- Easy to scale for two or for a crowd: The same dough or batter often turns into a skillet cookie, a tray of brownies, or a tin of mini cupcakes with almost no extra work.
- Built for texture, not gimmicks: Pantry desserts win when you pay attention to crisp edges, chewy centers, and clean slices. That’s where the satisfaction lives.
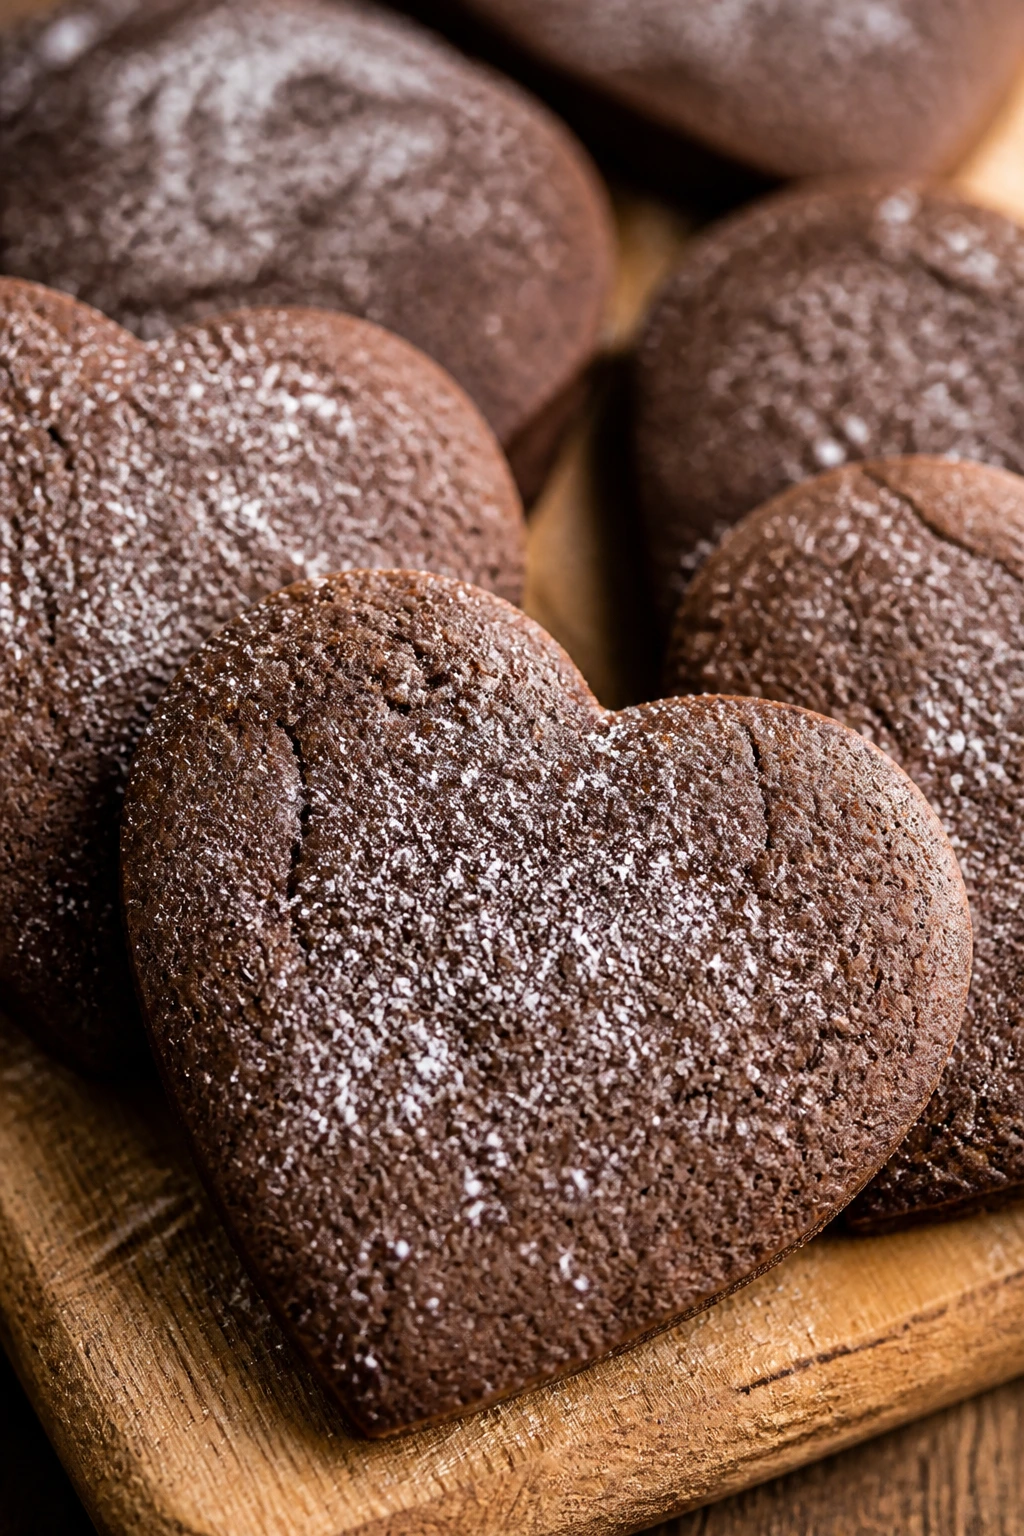
1. Heart-Shaped Chocolate Sugar Cookies
These cookies are crisp at the edge, a little tender in the middle, and dark enough to taste like chocolate instead of sweet dust. I like them because the heart cutter does half the decorating for you; a dusting of sugar or a thin chocolate drizzle is enough.
Why It Works: Cocoa gives you a Valentine look without food coloring, and the short chill keeps the dough from spreading into blobs. The butter and sugar cream into a light base, so the cookies stay sturdy enough for sharp edges. That matters when the shape is the whole point.
Key Ingredients:
- 2 1/2 cups all-purpose flour
- 1/2 cup unsweetened cocoa powder
- 1/2 teaspoon baking powder
- 1/2 teaspoon fine salt
- 1 cup unsalted butter, softened
- 1 cup granulated sugar
- 1 large egg
- 2 teaspoons vanilla extract
- 1 to 2 tablespoons milk, only if the dough feels dry
Quick Steps:
- Whisk the flour, cocoa, baking powder, and salt in a bowl.
- Cream the butter and sugar for 3 to 4 minutes, until pale and fluffy.
- Beat in the egg and vanilla.
- Add the dry mix and stir just until no dry streaks remain, then chill the dough for 30 minutes.
- Roll to 1/4 inch thick, cut hearts, and bake at 350°F for 8 to 10 minutes until the edges look set.
- Cool on the pan for 5 minutes before moving to a rack.
Equipment for This Recipe:
- Mixing bowl
- Hand mixer or stand mixer
- Rolling pin
- Heart-shaped cookie cutter
- Rimmed baking sheet
How to Serve This Dish: Stack them on a white plate and dust the tops with powdered sugar right before serving. They pair well with cold milk, hot coffee, or a little bowl of chocolate sauce for dipping.
Pro Tips for This Recipe:
- Chill the dough before rolling. Warm dough spreads fast.
- Roll between two sheets of parchment if the cocoa dough sticks.
- If you want a sharper heart, freeze the cut shapes for 10 minutes before baking.
Variations on This Dish:
- Peppermint Heart Cookies: Add 1/2 teaspoon peppermint extract and a few crushed candies on top.
- Chocolate-Dipped Hearts: Dip half of each cooled cookie in melted chocolate and let it set on parchment.
- Espresso Version: Stir 1 teaspoon instant espresso powder into the dry ingredients for a darker finish.
Common Mistakes to Avoid with This Dish:
- Skipping the chill: The cookies spread and lose their heart shape.
- Overbaking: They should look set, not dry and hard; they firm up as they cool.
- Using too much flour while rolling: That makes the cookies chalky. Dust lightly and stop.
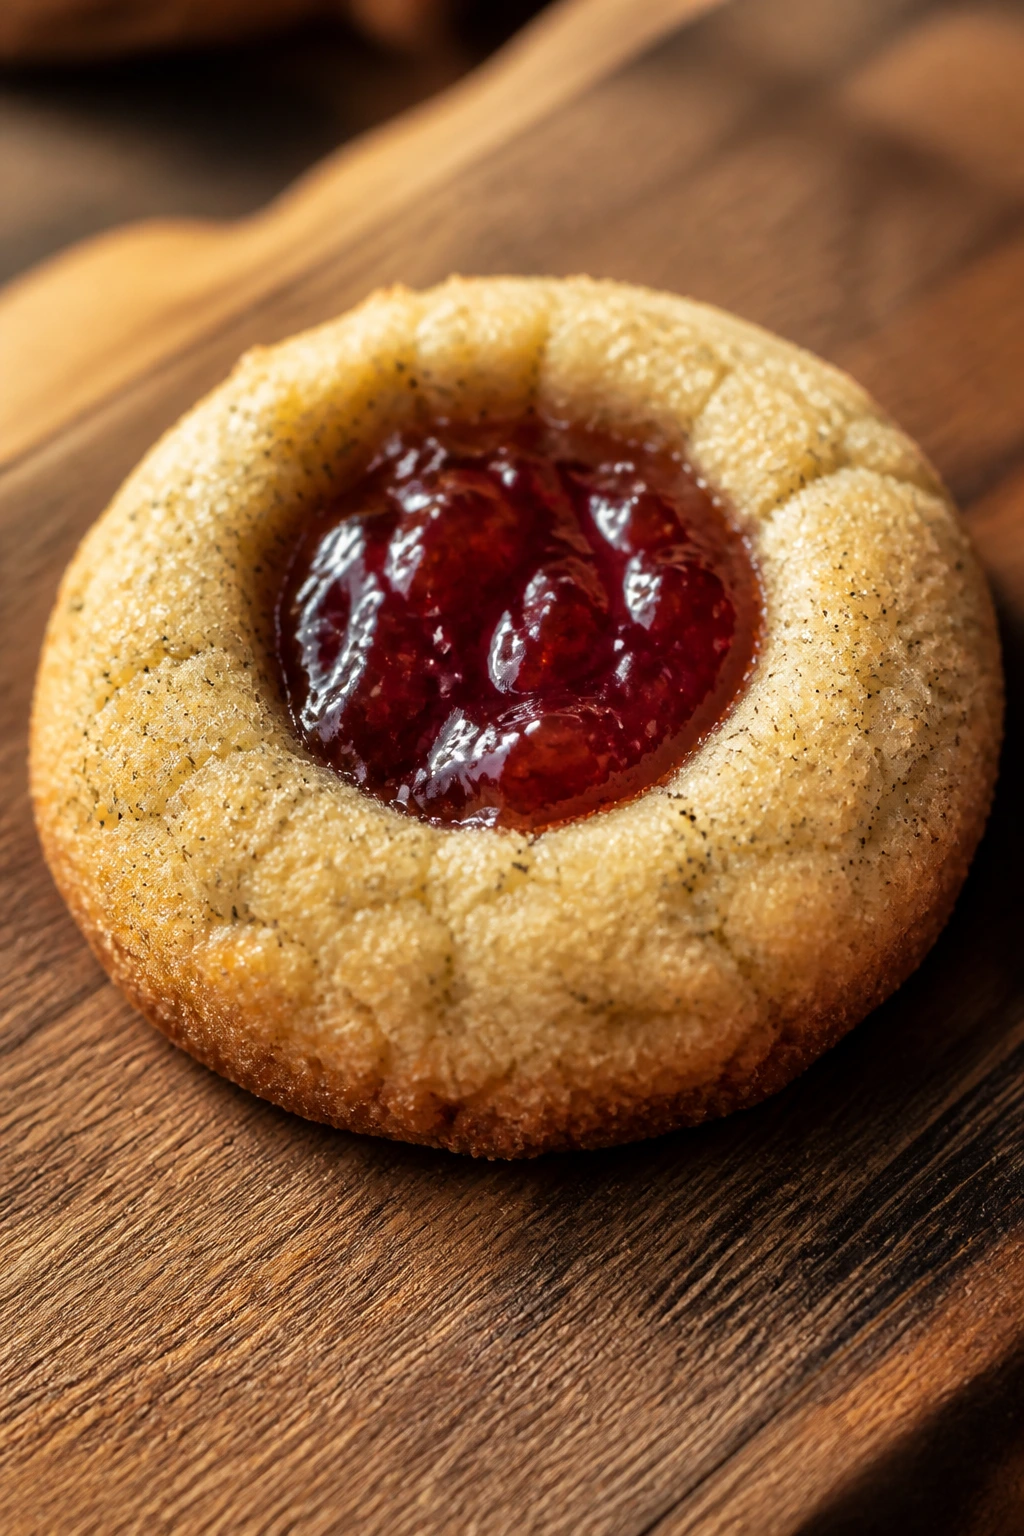
2. Raspberry Jam Thumbprint Cookies
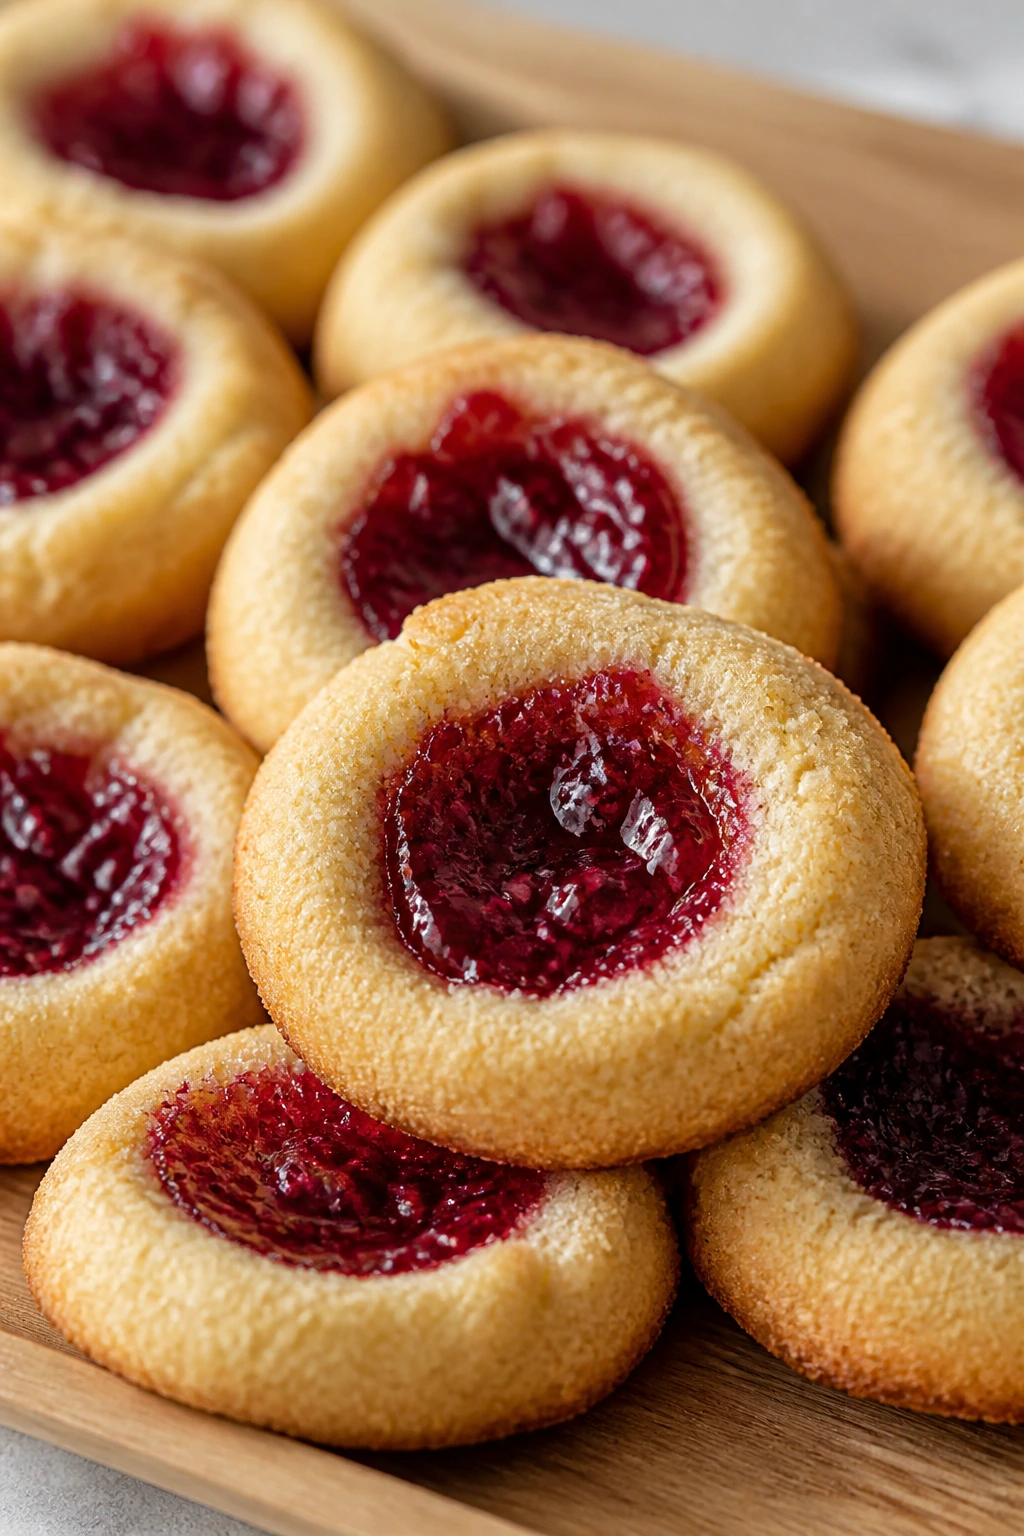
Thumbprint cookies look delicate, but the trick is almost stubbornly simple: thick dough, a deep enough well, and jam that stays put. Raspberry gives the sharp red color most people want for Valentine’s baking.
Why It Works: The egg yolk adds richness without turning the dough cakey, and almond extract makes the jam taste brighter. A quick second press after baking helps the center stay open instead of puffing shut.
Key Ingredients:
- 2 cups all-purpose flour
- 1/2 teaspoon fine salt
- 1 cup unsalted butter, softened
- 2/3 cup granulated sugar
- 1 large egg yolk
- 1 teaspoon vanilla extract
- 1/2 teaspoon almond extract
- 1/2 cup thick raspberry jam
- Powdered sugar for finishing, optional
Quick Steps:
- Whisk flour and salt together.
- Cream the butter and sugar until smooth and light.
- Beat in the egg yolk, vanilla, and almond extract.
- Mix in the flour, then chill the dough for 20 to 30 minutes.
- Roll into 1-inch balls, press a thumbprint or teaspoon into each one, fill with a small spoonful of jam, and bake at 350°F for 11 to 13 minutes.
- If the centers puff, press them gently again while warm.
Equipment for This Recipe:
- Mixing bowl
- Hand mixer
- Rimmed baking sheet
- Teaspoon or small measuring spoon
- Cooling rack
How to Serve This Dish: Arrange them in a circle and dust the edges with powdered sugar. They’re nice with tea, but I like them best beside black coffee because the jam cuts through the bitterness.
Pro Tips for This Recipe:
- Use thick jam, not a thin spread. Thin jam runs.
- Make the indent before baking and touch it up after.
- Let the cookies cool fully before stacking or the jam will smear.
Variations on This Dish:
- Strawberry Heart Fill: Swap the raspberry jam for strawberry preserves.
- Apricot and Almond: Use apricot jam and keep the almond extract.
- Chocolate Thumbprints: Add 2 tablespoons cocoa to the dough for a darker cookie.
Common Mistakes to Avoid with This Dish:
- Overfilling the centers: Jam bubbles over and burns.
- Skipping the cooling step: Warm cookies fall apart when moved.
- Using watery jam: The centers sink and leak.
3. Peanut Butter Blossoms with Chocolate Kisses
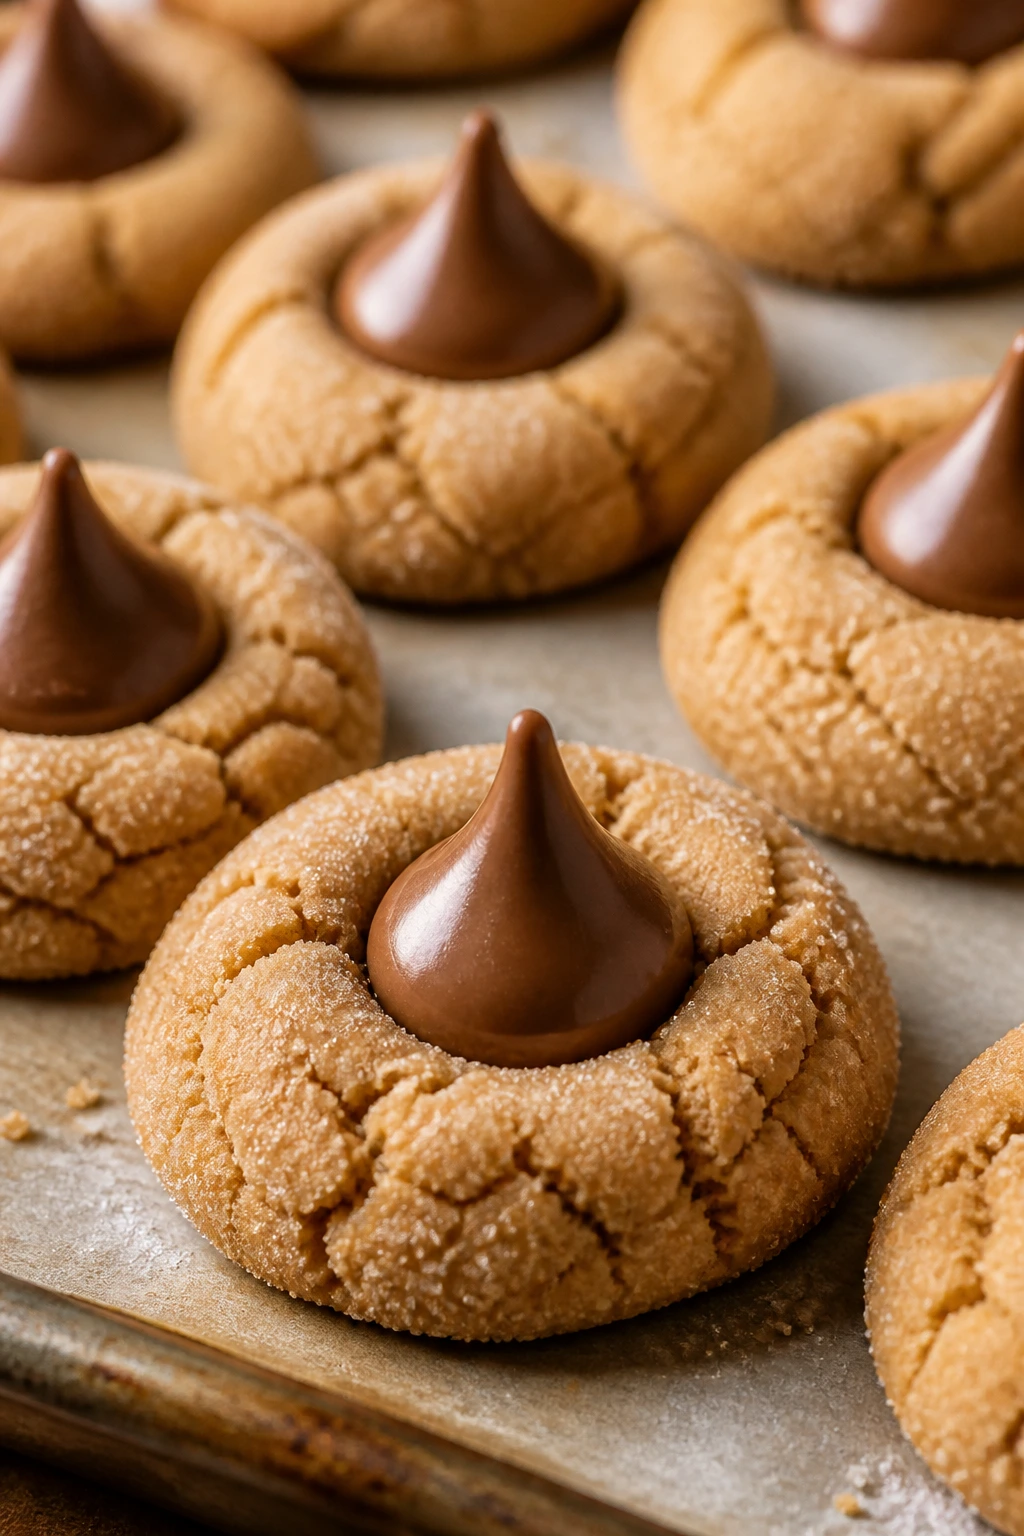
There is something almost unfair about peanut butter and chocolate together. The cookie is soft, the sugar shell gives a little crunch, and the kiss on top melts just enough to look like it belongs there.
Why It Works: Peanut butter gives the dough a dense, nutty chew that handles the chocolate candy on top. Rolling the dough in sugar before baking keeps the exterior crisp without making the whole cookie dry.
Key Ingredients:
- 1 3/4 cups all-purpose flour
- 1 teaspoon baking soda
- 1/2 teaspoon fine salt
- 1/2 cup unsalted butter, softened
- 1/2 cup creamy peanut butter
- 1/2 cup brown sugar
- 1/2 cup granulated sugar, plus extra for rolling
- 1 large egg
- 1 teaspoon vanilla extract
- 24 chocolate kisses, unwrapped
Quick Steps:
- Whisk the flour, baking soda, and salt.
- Cream the butter, peanut butter, brown sugar, and granulated sugar.
- Beat in the egg and vanilla, then mix in the dry ingredients.
- Roll into 1-inch balls, coat in sugar, and bake at 375°F for 8 to 10 minutes.
- Press a chocolate kiss into each cookie the second they come out of the oven.
- Let them set on the pan for 5 minutes before moving.
Equipment for This Recipe:
- Mixing bowl
- Baking sheet
- Cookie scoop or spoon
- Cooling rack
How to Serve This Dish: Pile them high on a small cake stand so the chocolate tops catch the light. They’re good with milk, but they also hold up beside hot cocoa with a pinch of cinnamon.
Pro Tips for This Recipe:
- Unwrap the kisses before baking. You do not want to do that with hot hands.
- Press the candy in once, not three times, or the cookie cracks too much.
- If your kitchen runs warm, chill the shaped dough for 15 minutes.
Variations on This Dish:
- Dark Chocolate Top: Swap the kisses for dark chocolate stars or discs.
- Sunflower Butter Version: Use sunflower seed butter for a nut-free batch.
- Crunchy Peanut Finish: Roll the dough in finely chopped peanuts instead of sugar.
Common Mistakes to Avoid with This Dish:
- Putting the kiss in too early: It melts into a puddle.
- Overbaking: The centers should stay soft.
- Using natural peanut butter: The dough can turn oily and spread too much.
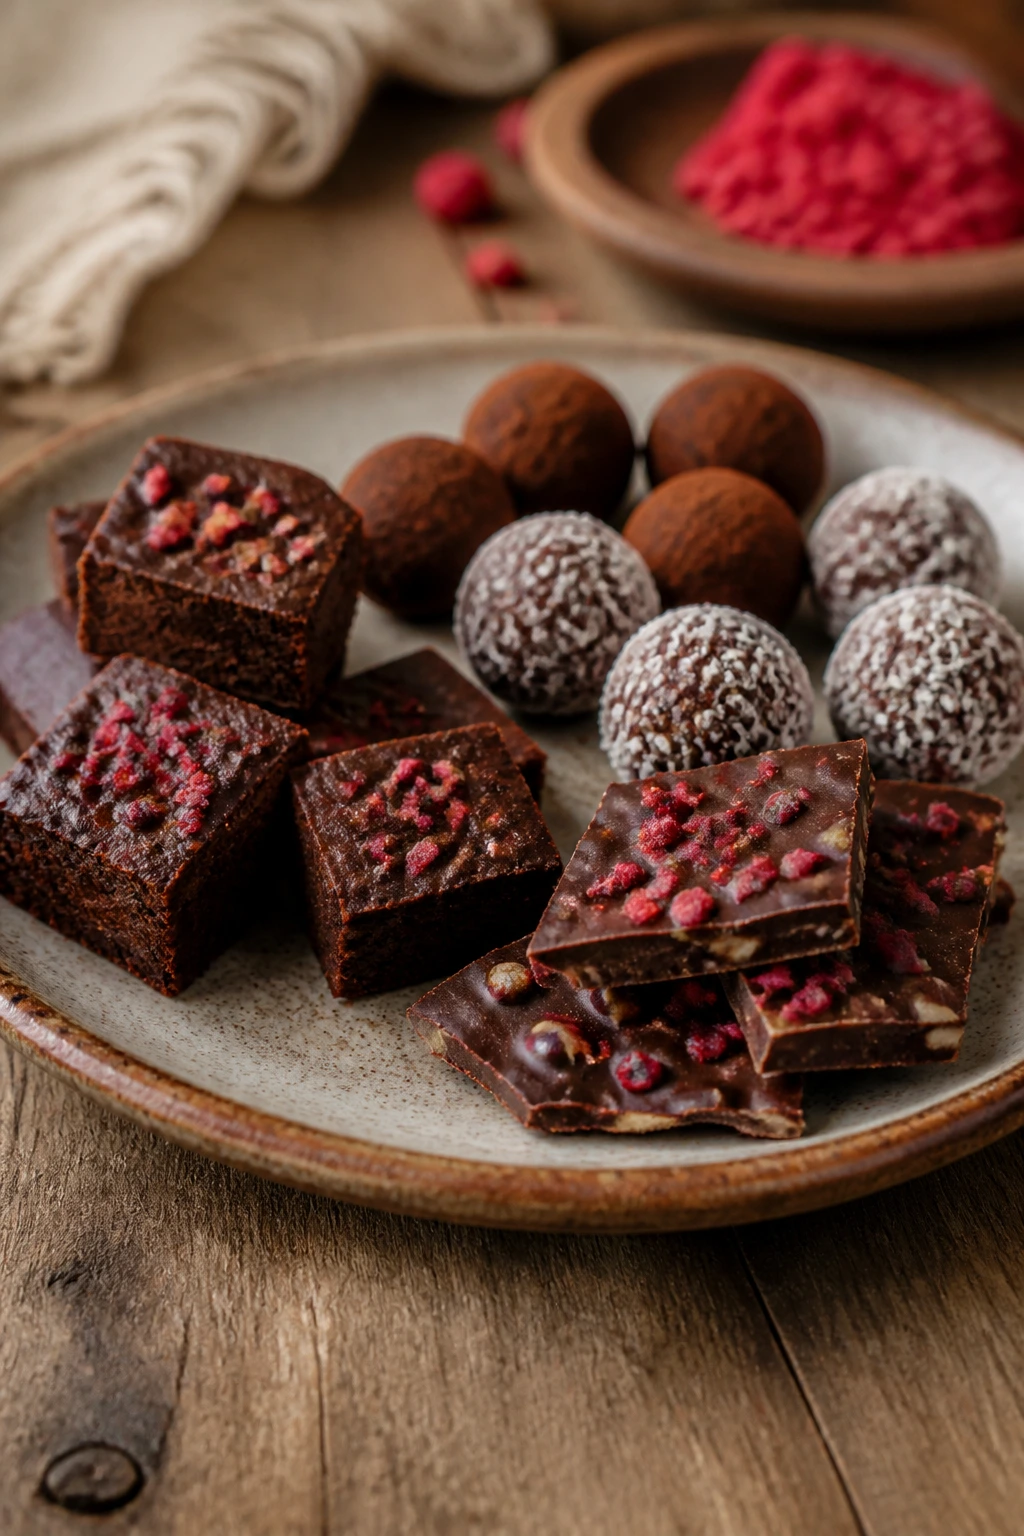
4. Fudgy Brownies with Flaky Salt
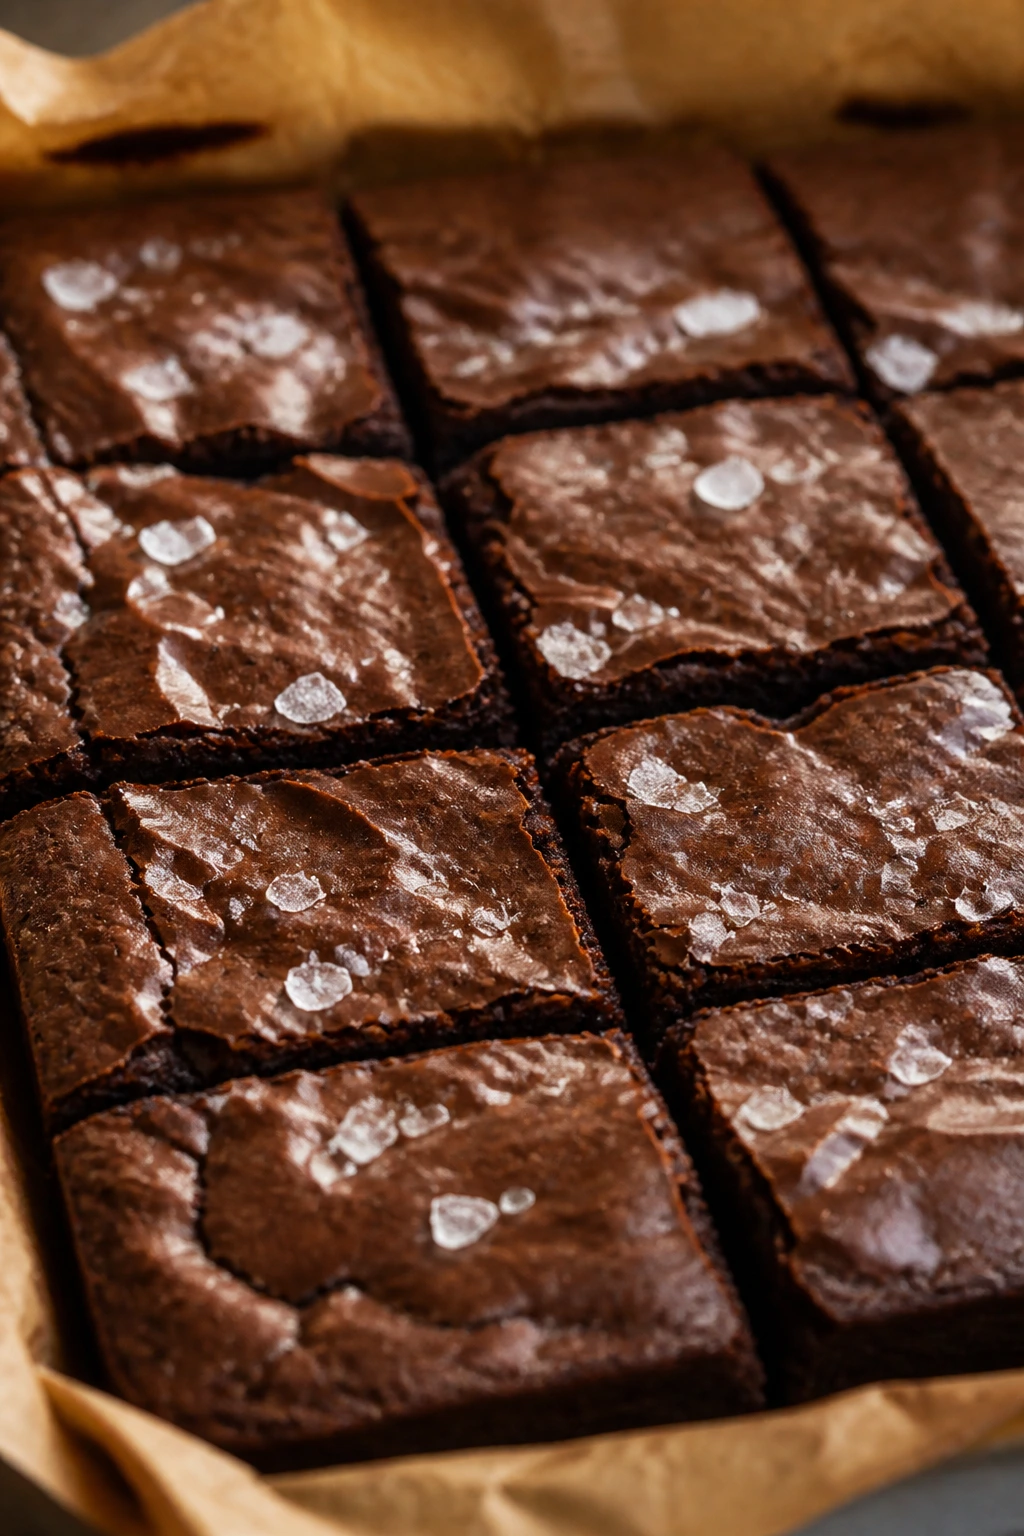
Brownies do not need frosting to feel dressed up. A pan of deep, fudgy squares finished with salt and a clean cut is enough, and honestly, it’s the version I reach for most.
Why It Works: Melted butter carries the cocoa flavor, and the eggs give the brownies that dense, glossy crumb people are usually chasing. A small amount of flour keeps them squarely in fudgy territory instead of drifting into cake.
Key Ingredients:
- 1 cup unsalted butter
- 3/4 cup unsweetened cocoa powder
- 2 cups granulated sugar
- 4 large eggs
- 2 teaspoons vanilla extract
- 1 cup all-purpose flour
- 1/2 teaspoon fine salt
- 1 cup chocolate chips, optional
- Flaky salt for the top
Quick Steps:
- Melt the butter, then whisk in the cocoa until smooth.
- Stir in the sugar, then beat in the eggs one at a time.
- Add the vanilla, flour, and salt, mixing only until combined.
- Fold in chocolate chips if using, then spread the batter in an 8×8-inch pan lined with parchment.
- Bake at 350°F for 28 to 32 minutes, until a toothpick comes out with moist crumbs.
- Cool fully before slicing.
Equipment for This Recipe:
- Medium saucepan
- Mixing bowl
- Whisk
- 8×8-inch baking pan
- Parchment paper
How to Serve This Dish: Cut them into neat squares and finish with flaky salt right before serving. They’re strong with vanilla ice cream, or just a mug of coffee if you want something simpler.
Pro Tips for This Recipe:
- Pull them early; brownies keep cooking in the hot pan.
- Line the pan with parchment so you can lift the slab cleanly.
- Want cleaner slices? Chill the cooled brownies for 30 minutes before cutting.
Variations on This Dish:
- Espresso Brownies: Add 1 teaspoon instant espresso powder to the cocoa.
- Walnut Crunch: Fold in 3/4 cup chopped walnuts.
- Cherry Brownies: Scatter 1/2 cup dried cherries over the batter before baking.
Common Mistakes to Avoid with This Dish:
- Overbaking: Dry brownies are the fastest way to ruin them.
- Slicing too soon: The center tears and smears.
- Using too much flour: Measure lightly, or the texture tightens up.
5. Vanilla Shortbread Hearts
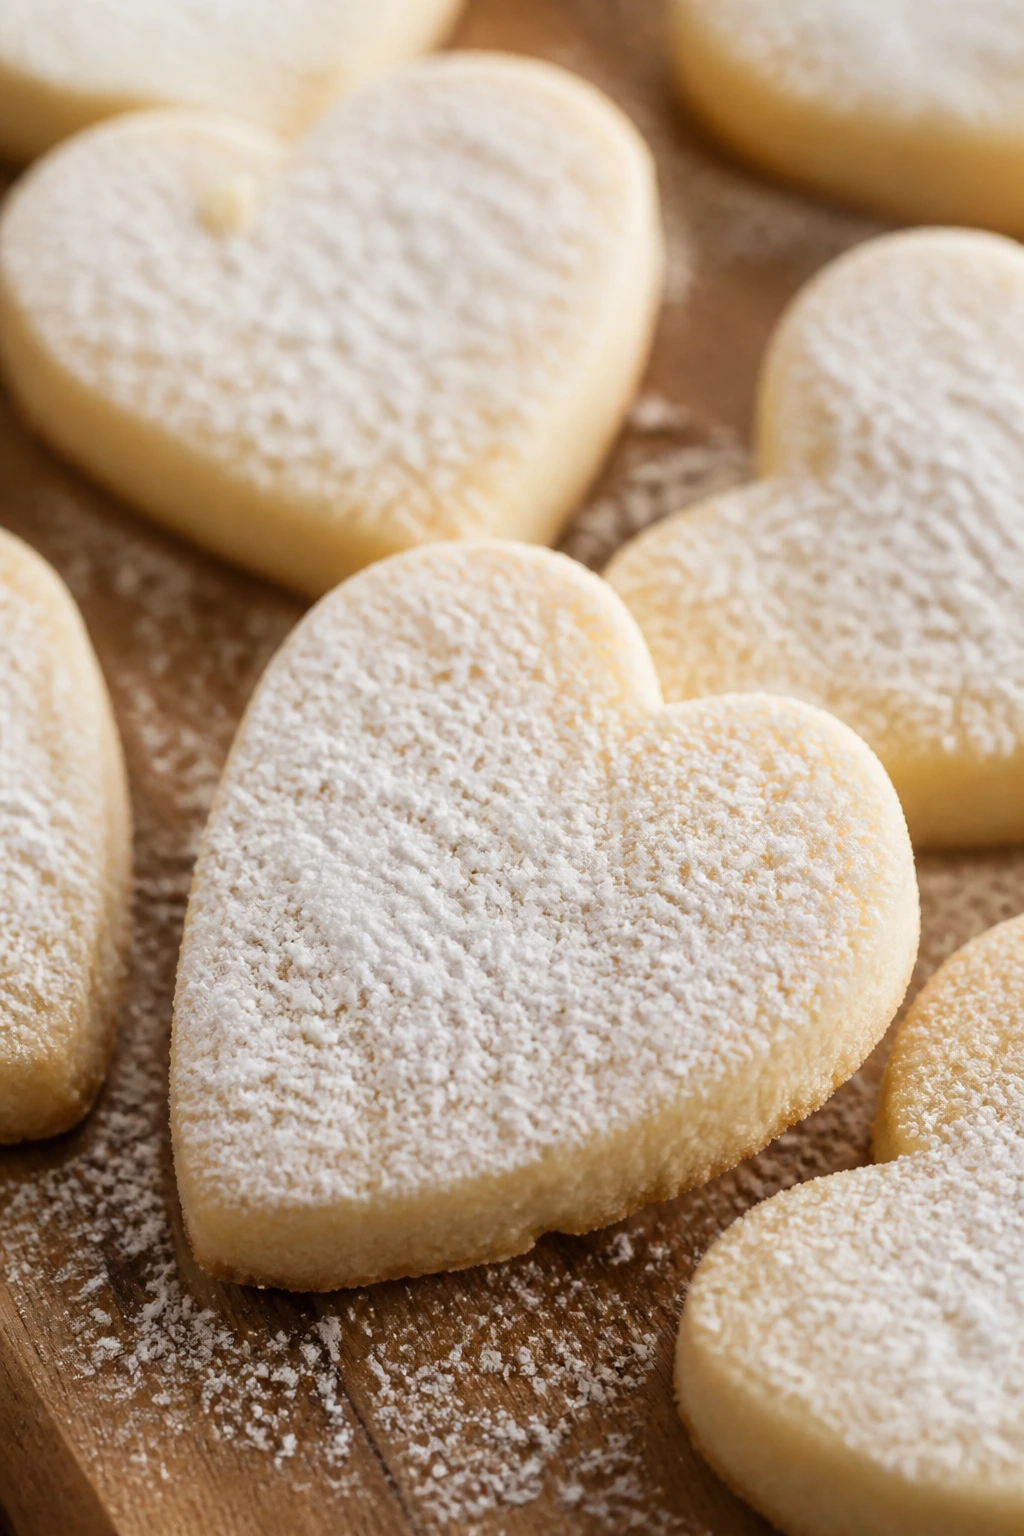
Shortbread is all restraint. No leavening drama, no frosting pile, no apology. Just butter, sugar, flour, and a crumb that snaps cleanly before it melts on your tongue.
Why It Works: Powdered sugar gives the dough a fine texture, and cornstarch softens the bite without making the cookies fragile. The dough rolls smoothly once it’s chilled, which helps the heart cutter stay crisp.
Key Ingredients:
- 1 cup unsalted butter, softened
- 1/2 cup powdered sugar
- 1 tablespoon vanilla extract
- 2 cups all-purpose flour
- 1/4 cup cornstarch
- 1/2 teaspoon fine salt
- Melted chocolate or jam, optional for finishing
Quick Steps:
- Cream the butter and powdered sugar until smooth.
- Mix in the vanilla.
- Stir in the flour, cornstarch, and salt until a soft dough forms.
- Chill for 30 minutes, then roll to 1/4 inch thick and cut hearts.
- Bake at 325°F for 12 to 14 minutes, until the bottoms are just turning pale gold.
- Cool completely before adding chocolate or jam.
Equipment for This Recipe:
- Mixing bowl
- Rolling pin
- Heart cutter
- Baking sheet
- Cooling rack
How to Serve This Dish: Keep them plain and stacked in a tin, or dip half in dark chocolate for a sharper look. They sit well beside tea, especially if you add a second cookie and pretend it’s for sharing.
Pro Tips for This Recipe:
- Do not overmix after the flour goes in. Shortbread rewards a gentle hand.
- Chill the cut cookies for 10 minutes before baking if the kitchen is warm.
- Bake until the edges are barely golden, not brown.
Variations on This Dish:
- Chocolate-Dipped Hearts: Dip one end in melted chocolate and let it set.
- Jam Sandwich Hearts: Spread raspberry jam between two cooled cookies.
- Citrus Shortbread: Add 1 teaspoon lemon zest to the dough.
Common Mistakes to Avoid with This Dish:
- Letting the butter get too soft: The dough turns greasy.
- Browning them too much: Shortbread should stay pale.
- Skipping the chill: The shapes lose their clean edges.
6. Cocoa Crinkle Cookies
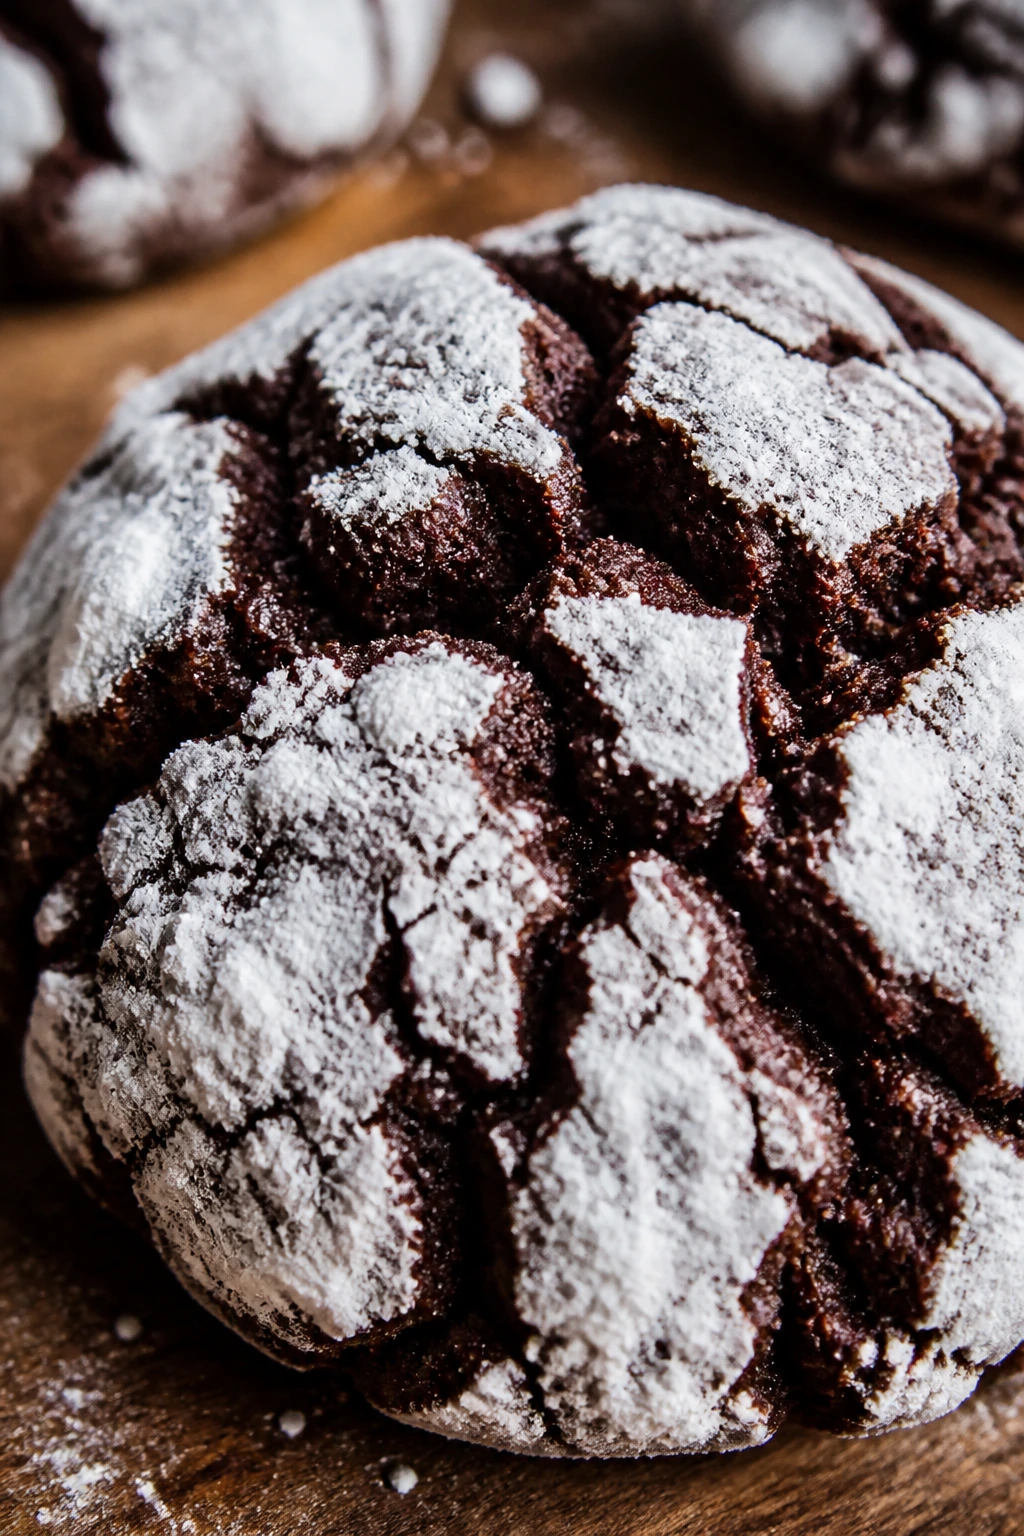
These are the cookies that look like they went to the trouble of dressing up, even though the dough is a simple stir-together job. The crackled powdered-sugar shell gives them that snowy Valentine look, and the center stays soft and brownie-like.
Why It Works: Oil keeps the texture tender, while a long chill firms up the dough so it can be rolled heavily in powdered sugar. The contrast between the dark cookie and the white coating is the whole show.
Key Ingredients:
- 1 cup all-purpose flour
- 1/2 cup unsweetened cocoa powder
- 2 teaspoons baking powder
- 1/4 teaspoon fine salt
- 1 1/2 cups granulated sugar
- 1/2 cup neutral oil
- 4 large eggs
- 2 teaspoons vanilla extract
- 1 cup powdered sugar, for rolling
Quick Steps:
- Whisk the flour, cocoa, baking powder, and salt.
- Stir the sugar, oil, eggs, and vanilla together until glossy.
- Add the dry ingredients and mix until the dough is thick and sticky.
- Chill for at least 2 hours.
- Scoop into balls, roll heavily in powdered sugar, and bake at 350°F for 10 to 12 minutes.
- Cool on the pan for 5 minutes, then move to a rack.
Equipment for This Recipe:
- Mixing bowl
- Whisk
- Baking sheet
- Cookie scoop
- Shallow bowl for powdered sugar
How to Serve This Dish: Stack them in a small bowl so the cracked tops show. They look especially nice with strawberries or a strong cup of coffee, since the sugar coating keeps the bitterness in check.
Pro Tips for This Recipe:
- Coat the balls generously in powdered sugar; a thin dusting disappears.
- Bake straight from the fridge or they spread too much.
- Stop baking when the tops are puffed and crackled, not dry.
Variations on This Dish:
- Peppermint Crinkles: Add a little peppermint extract and crushed candy on top.
- Orange Cocoa Crinkles: Stir orange zest into the wet mix.
- Double-Chocolate Crinkles: Fold in mini chocolate chips.
Common Mistakes to Avoid with This Dish:
- Skipping the chill: The cookies flatten.
- Using too little powdered sugar: You lose the crinkle look.
- Overbaking: They go from fudgy to dry in a minute.
7. Strawberry Jam Linzer Cookies
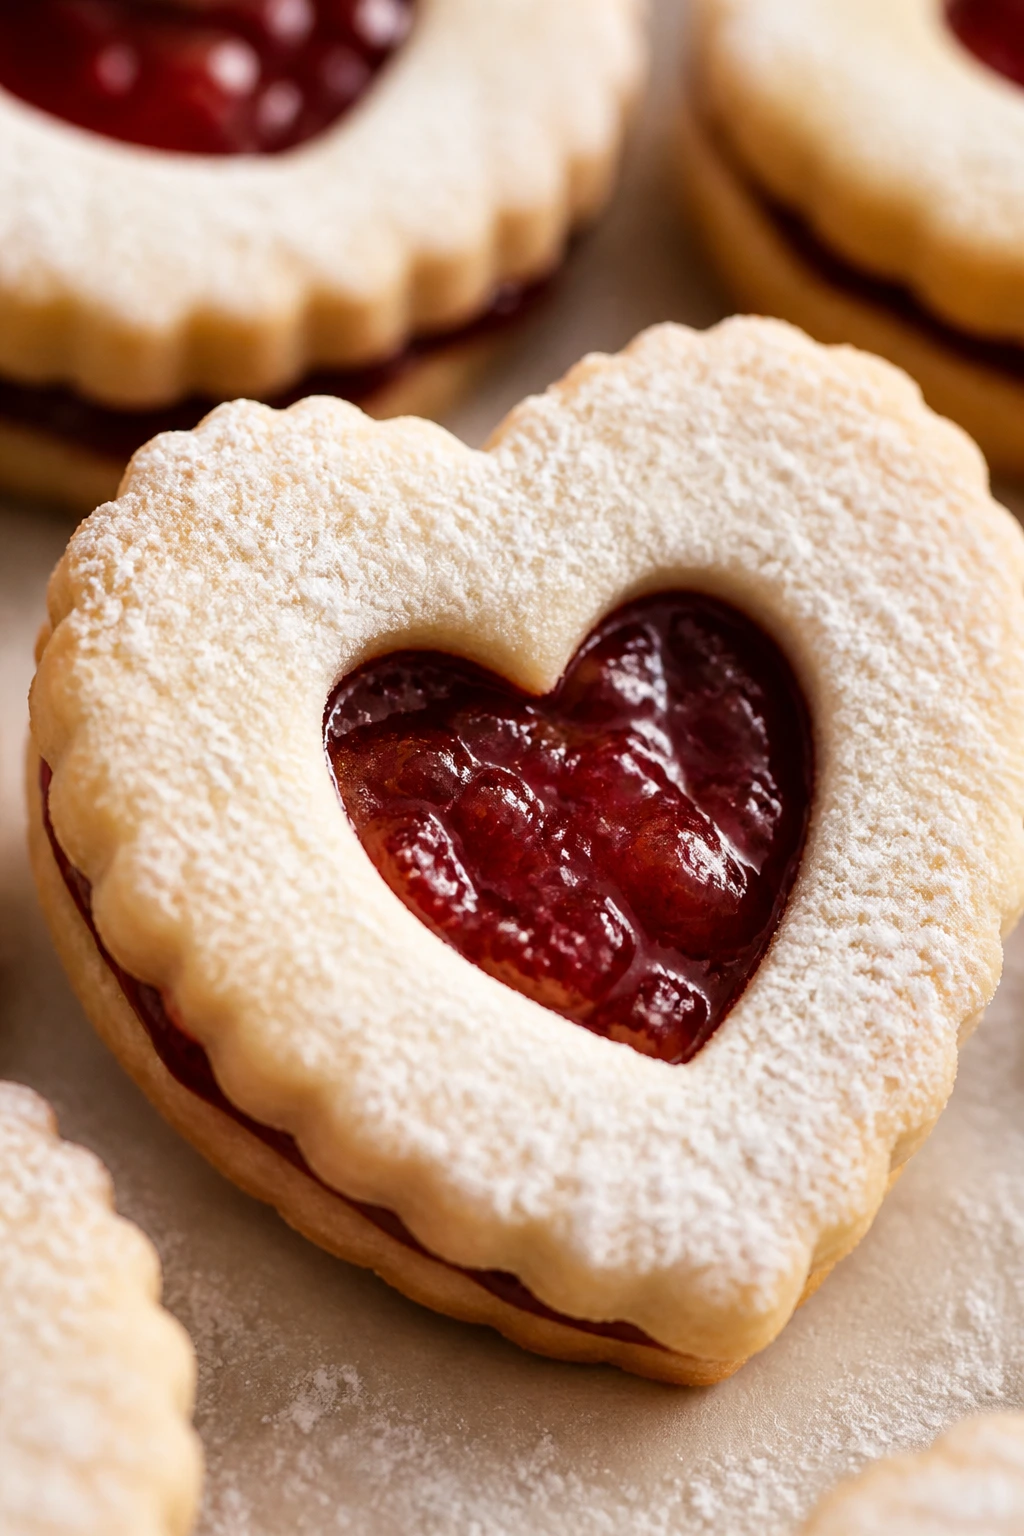
Linzer cookies bring the fancy look without fancy ingredients. The jam window turns them into little stained-glass hearts, and the almond flour gives the dough a soft, nutty snap.
Why It Works: Almond flour keeps the cookie tender and gives the dough a richer flavor than plain sugar cookies. Cutting a small center from the top cookie lets the jam show through, which is half the appeal here.
Key Ingredients:
- 2 cups all-purpose flour
- 1 cup almond flour
- 1/2 teaspoon fine salt
- 1 cup unsalted butter, softened
- 3/4 cup granulated sugar
- 1 large egg yolk
- 1 teaspoon vanilla extract
- 1/2 cup strawberry jam
- Powdered sugar for dusting
Quick Steps:
- Whisk the flours and salt.
- Cream the butter and sugar, then beat in the yolk and vanilla.
- Mix in the dry ingredients and chill the dough for 30 minutes.
- Roll to 1/8 to 1/4 inch thick, cut heart shapes, and cut a smaller center from half of them.
- Bake at 350°F for 10 to 12 minutes.
- Cool, dust the tops with powdered sugar, and sandwich with warmed jam.
Equipment for This Recipe:
- Mixing bowl
- Rolling pin
- Heart cutters, one large and one small
- Baking sheet
- Sifter or fine sieve
How to Serve This Dish: Stack them so the jam windows line up and the powdered sugar looks snowy around the edges. They’re good with tea, but they also hold up beside a little dessert wine if that’s the plan.
Pro Tips for This Recipe:
- Warm the jam slightly so it spreads in a thin layer.
- Dust only the tops before sandwiching.
- Let the cookies cool fully or the jam will slide.
Variations on This Dish:
- Raspberry Linzers: Swap in raspberry preserves for a brighter filling.
- Chocolate Linzers: Add 2 tablespoons cocoa to the dough.
- Apricot-Almond Linzers: Use apricot jam and keep the almond flour.
Common Mistakes to Avoid with This Dish:
- Making the dough too warm: The cookies distort in the oven.
- Overfilling with jam: It squeezes out the sides.
- Assembling too soon: Warm cookies break easily.
8. Oatmeal Chocolate Chip Cookies
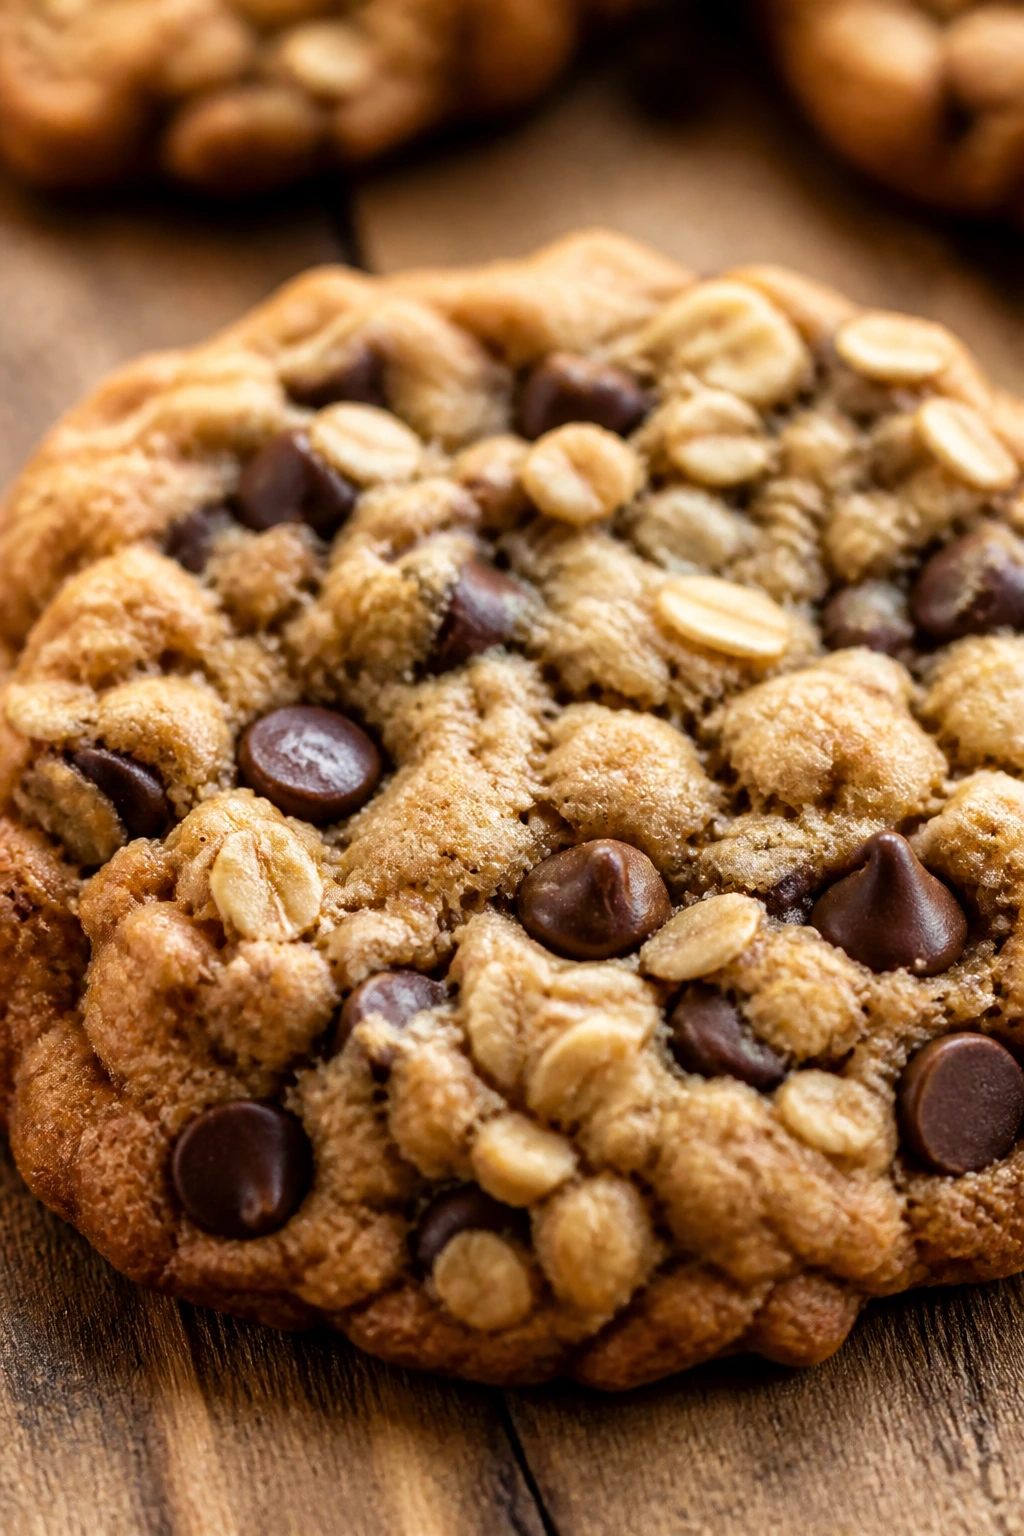
These are the cookies for people who like a little chew and a little melt in the same bite. Oats give them structure, chocolate chips keep them in dessert territory, and a brown-sugar base makes the whole pan smell toasty.
Why It Works: Old-fashioned oats hold their shape better than quick oats, so the cookies stay chewy instead of turning pasty. Brown sugar adds moisture, which keeps them soft for days.
Key Ingredients:
- 1 cup unsalted butter, softened
- 1 cup brown sugar
- 1/2 cup granulated sugar
- 2 large eggs
- 2 teaspoons vanilla extract
- 1 1/2 cups all-purpose flour
- 3 cups old-fashioned oats
- 1 teaspoon baking soda
- 1 teaspoon fine salt
- 1 1/2 cups chocolate chips
Quick Steps:
- Cream the butter and sugars.
- Beat in the eggs and vanilla.
- Stir in the flour, baking soda, and salt.
- Fold in the oats and chocolate chips.
- Scoop onto a parchment-lined sheet and bake at 350°F for 10 to 12 minutes.
- Let them sit on the pan for 5 minutes before moving.
Equipment for This Recipe:
- Large bowl
- Hand mixer
- Baking sheet
- Cookie scoop
- Cooling rack
How to Serve This Dish: Pile them in a basket lined with a napkin and let the chocolate show on top. They go well with cold milk or a cup of black tea if you want the sweetness to stay in check.
Pro Tips for This Recipe:
- Use old-fashioned oats, not instant.
- Pull them when the centers still look a little soft.
- Add a handful of chopped dried cherries if you want a red Valentine note.
Variations on This Dish:
- Cherry Chocolate Oatmeal: Swap half the chips for dried cherries.
- Walnut Chew: Add 3/4 cup chopped walnuts.
- Cinnamon Oatmeal: Add 1 teaspoon cinnamon to the dry ingredients.
Common Mistakes to Avoid with This Dish:
- Using quick oats: The texture turns mushy.
- Overbaking: They dry out as they cool.
- Packing the flour too hard: The cookies turn dense.
9. One-Bowl Chocolate Snack Cake
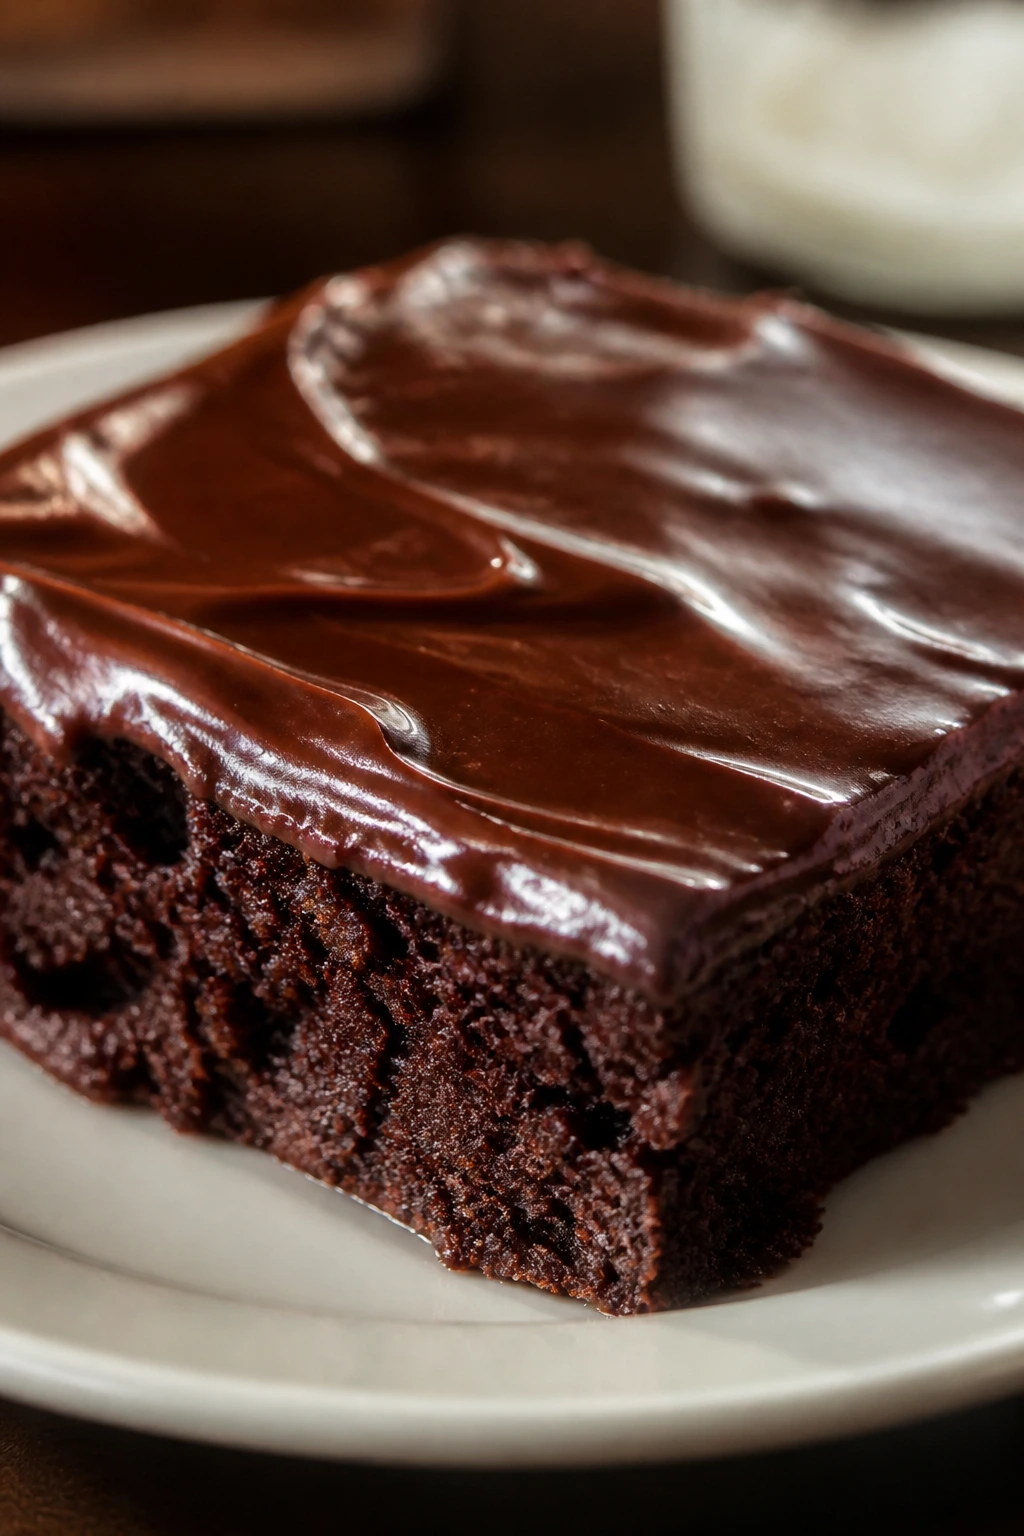
A simple chocolate cake can still feel dressed for the night if you finish it with a glossy glaze and a few clean slices. This one-bowl version stays soft, slices neatly, and does not ask for much more than a whisk and a steady oven.
Why It Works: Hot coffee deepens the cocoa flavor without making the cake taste like coffee, and oil keeps the crumb tender. Because the batter is loose, the cake bakes up evenly in a single pan instead of doming awkwardly.
Key Ingredients:
- 2 cups all-purpose flour
- 2 cups granulated sugar
- 3/4 cup unsweetened cocoa powder
- 1 1/2 teaspoons baking powder
- 1 1/2 teaspoons baking soda
- 1 teaspoon fine salt
- 2 large eggs
- 1 cup milk
- 1/2 cup neutral oil
- 2 teaspoons vanilla extract
- 1 cup hot coffee
For the Cocoa Glaze:
- 1 cup powdered sugar
- 3 tablespoons cocoa powder
- 2 to 3 tablespoons milk
- 1 teaspoon vanilla extract
Quick Steps:
- Whisk the flour, sugar, cocoa, baking powder, baking soda, and salt in a large bowl.
- Add the eggs, milk, oil, and vanilla; whisk until smooth.
- Stir in the hot coffee.
- Pour into a greased 9×13-inch pan and bake at 350°F for 30 to 35 minutes.
- Cool completely, then whisk the glaze and spread it over the top.
- Let the glaze set before cutting.
Equipment for This Recipe:
- Large mixing bowl
- Whisk
- 9×13-inch baking pan
- Offset spatula or spoon
- Cooling rack
How to Serve This Dish: Cut it into squares and finish with a few chocolate curls or a dusting of cocoa. It sits nicely beside whipped cream or vanilla ice cream, though a plain slice is already doing enough.
Pro Tips for This Recipe:
- Do not panic when the batter looks thin; that’s normal.
- Use hot coffee, not lukewarm, so the cocoa blooms.
- Wait until the cake is cool before glazing or the topping slides off.
Variations on This Dish:
- Raspberry Sheet Cake: Spread a thin layer of raspberry jam under the glaze.
- Chocolate Layer Cake: Bake the batter in two 8-inch pans for 22 to 25 minutes.
- Mocha Cake: Add 1 tablespoon espresso powder to the dry mix.
Common Mistakes to Avoid with This Dish:
- Overmixing after the coffee goes in: The cake gets tough.
- Cutting warm cake: The crumb tears.
- Skipping the cooling time for the glaze: It runs straight off the top.
10. Chocolate Cupcakes with Cocoa Frosting
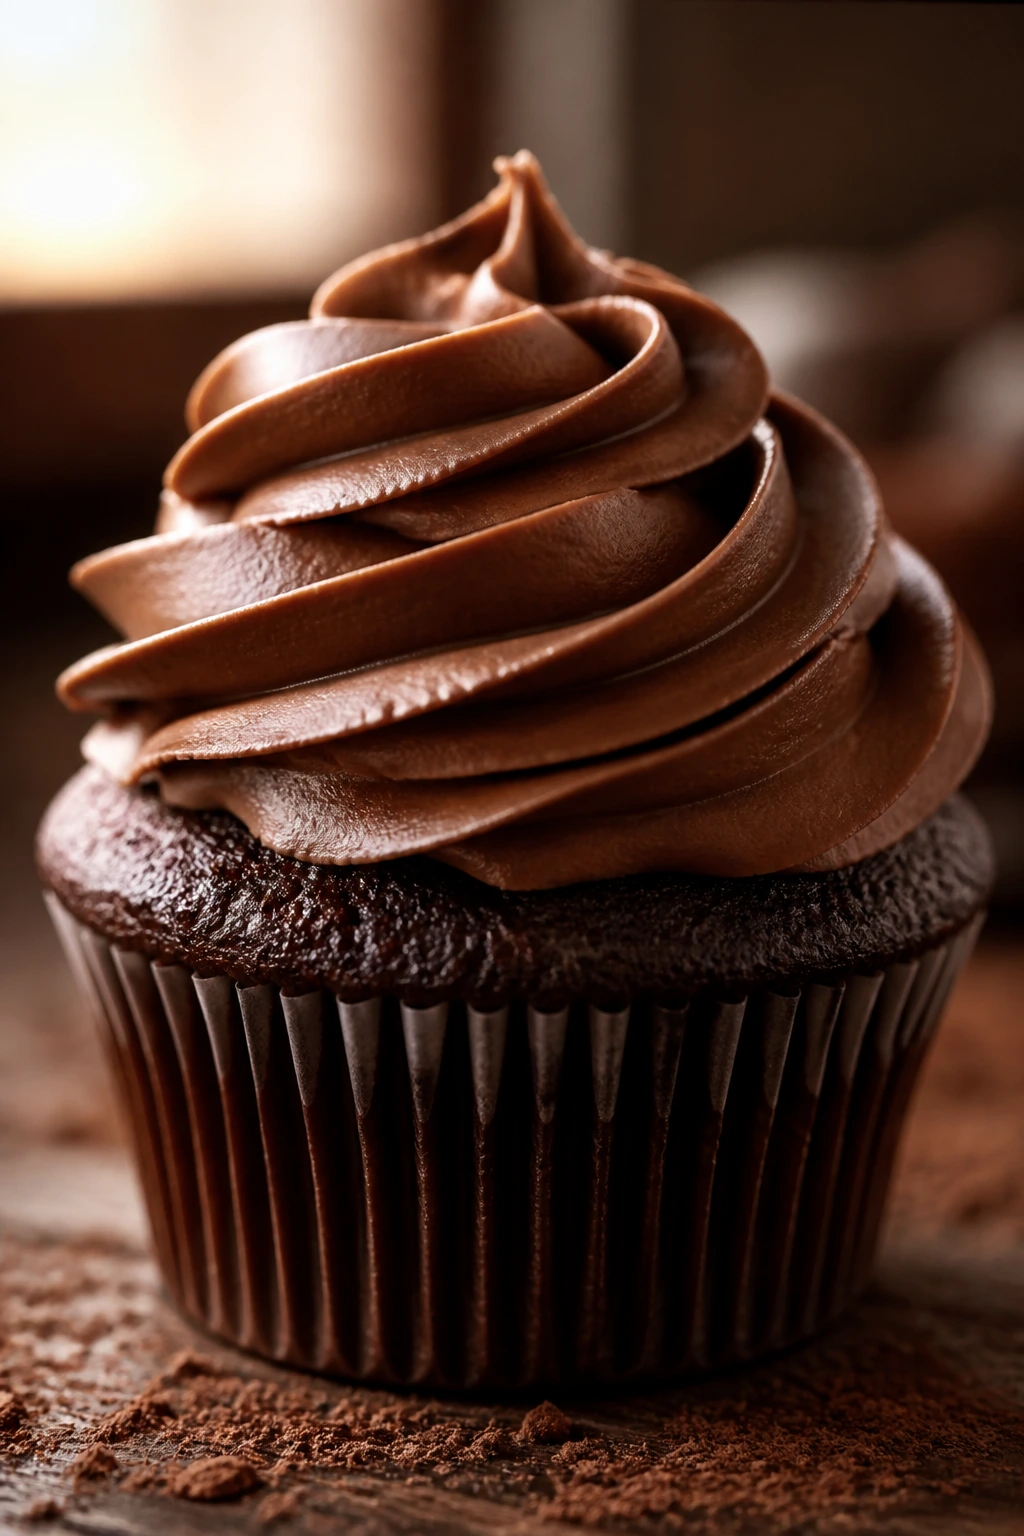
Cupcakes are the small, tidy answer when you want a dessert that feels a little more polished than a sheet cake. These bake up light but not flimsy, and the cocoa frosting gives you a deep chocolate finish without turning the whole thing heavy.
Why It Works: Oil keeps the crumb soft even after chilling, and the frosting uses cocoa plus butter instead of relying on fancy ingredients. The cupcakes stay tender enough for a day or two, which matters when you do not want to bake and frost in the same hour.
Key Ingredients:
- 1 1/2 cups all-purpose flour
- 1 cup granulated sugar
- 1/3 cup unsweetened cocoa powder
- 1 teaspoon baking powder
- 1/2 teaspoon baking soda
- 1/2 teaspoon fine salt
- 2 large eggs
- 3/4 cup milk
- 1/3 cup neutral oil
- 1 teaspoon vanilla extract
For the Frosting:
- 1/2 cup unsalted butter, softened
- 2 cups powdered sugar
- 1/4 cup cocoa powder
- 2 to 3 tablespoons milk
- 1 teaspoon vanilla extract
- Pinch of salt
Quick Steps:
- Whisk the dry cupcake ingredients.
- Beat in the eggs, milk, oil, and vanilla until smooth.
- Divide the batter among 12 lined muffin cups and bake at 350°F for 18 to 20 minutes.
- Cool completely.
- Beat the frosting ingredients until fluffy, adding milk a teaspoon at a time.
- Pipe or spread onto the cupcakes.
Equipment for This Recipe:
- Muffin tin
- Paper liners
- Mixing bowls
- Hand mixer
- Piping bag or spoon
How to Serve This Dish: Set one cupcake on each plate and finish with a few chocolate shavings or a pinch of sanding sugar. They taste good with cold milk, and they look neat enough for a small dinner table.
Pro Tips for This Recipe:
- Fill the liners about two-thirds full.
- Let the cupcakes cool all the way before frosting.
- If the frosting looks stiff, add milk a few drops at a time.
Variations on This Dish:
- Raspberry Center Cupcakes: Add a teaspoon of jam to the middle before baking.
- Mint Chocolate Cupcakes: Stir a little peppermint extract into the frosting.
- Blackout Cupcakes: Add mini chocolate chips to the batter.
Common Mistakes to Avoid with This Dish:
- Overfilling the cups: The tops mushroom over and crack.
- Frosting too soon: The buttercream slips.
- Overbaking: Cupcakes dry out fast.
11. Skillet Cookie for Two
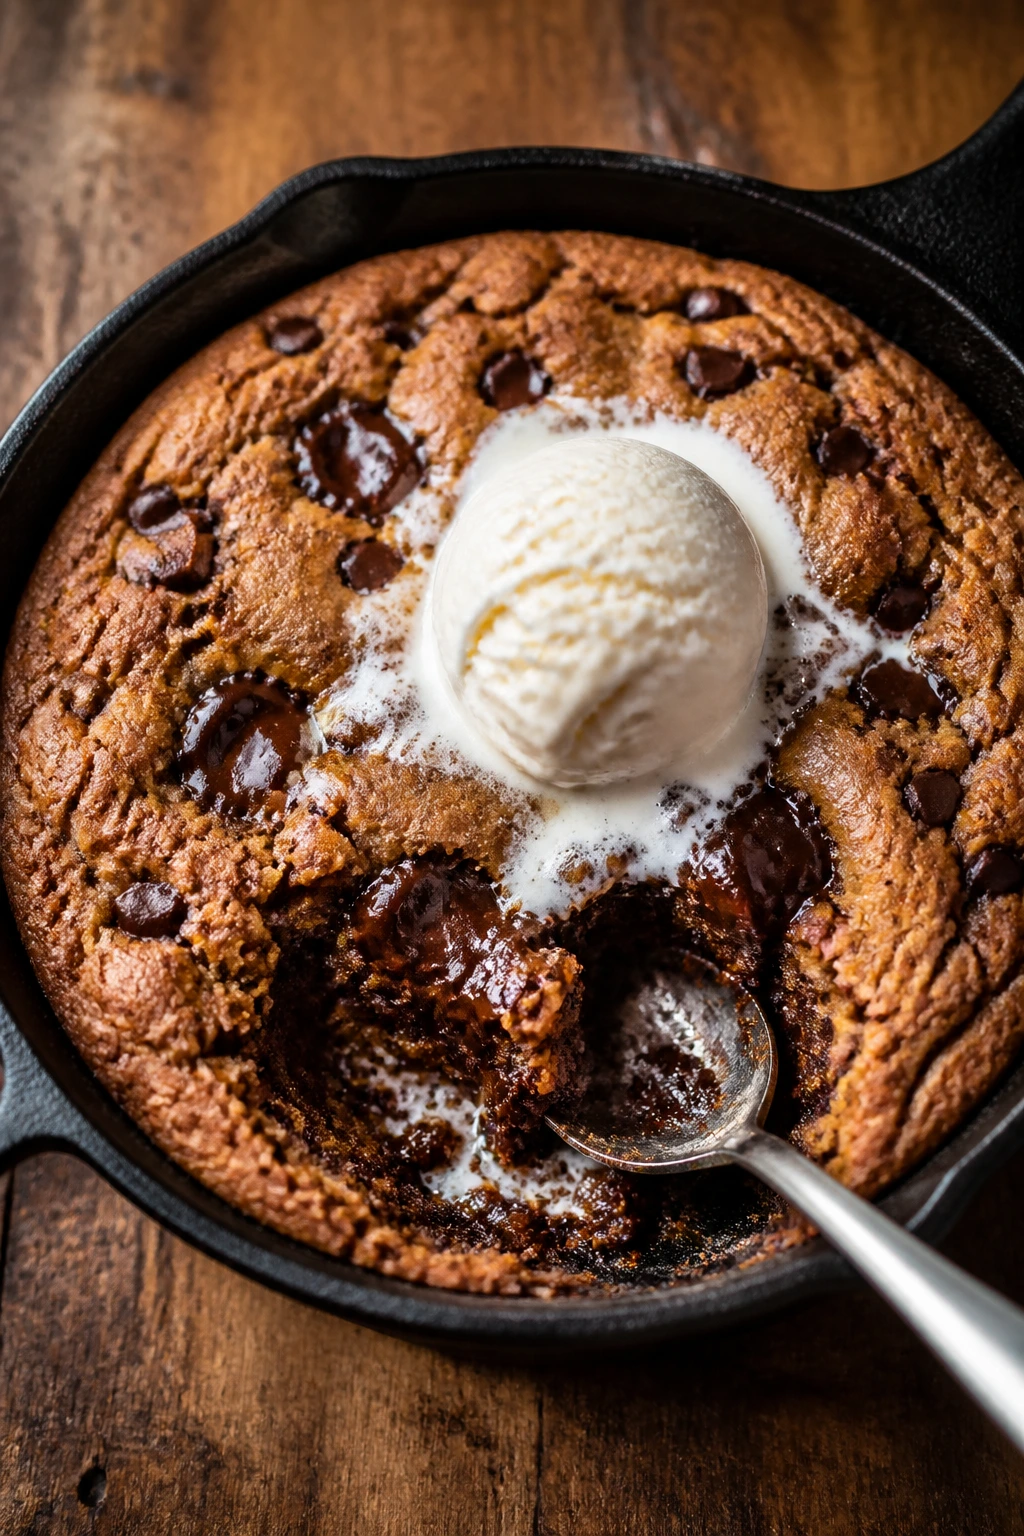
This is the dessert you make when the night is small on purpose. One skillet, one warm cookie, two spoons if you want to be civilized, and a scoop of ice cream melting into the middle.
Why It Works: Brown sugar keeps the center soft, while the skillet gives the edges a deep, toasted finish. A single egg yolk adds richness without turning the dough cakey.
Key Ingredients:
- 1/4 cup unsalted butter, softened
- 1/4 cup brown sugar
- 2 tablespoons granulated sugar
- 1 large egg yolk
- 1 teaspoon vanilla extract
- 1/2 cup all-purpose flour
- 1/4 teaspoon baking soda
- Pinch of fine salt
- 1/3 cup chocolate chips
Quick Steps:
- Heat the oven to 350°F and lightly grease a 6-inch cast-iron skillet.
- Cream the butter and sugars.
- Beat in the egg yolk and vanilla.
- Stir in the flour, baking soda, and salt, then fold in the chocolate chips.
- Press the dough into the skillet and bake for 15 to 18 minutes.
- Cool for 5 minutes, then serve warm.
Equipment for This Recipe:
- 6-inch cast-iron skillet
- Mixing bowl
- Spoon or spatula
- Oven mitt
How to Serve This Dish: Put the skillet in the middle of the table with two spoons and a scoop of vanilla ice cream on top. A little flaky salt or a drizzle of chocolate sauce gives it enough polish for Valentine’s night.
Pro Tips for This Recipe:
- Use an egg yolk, not a whole egg; the cookie stays rich and dense.
- Pull it when the center still looks slightly underdone.
- Serve straight from the skillet while the edges are still crisp.
Variations on This Dish:
- Peanut Butter Skillet Cookie: Swirl 1 tablespoon peanut butter into the dough.
- Oatmeal Skillet Cookie: Swap 1/4 cup flour for quick oats.
- Double-Chocolate Version: Add 1 tablespoon cocoa and extra chips.
Common Mistakes to Avoid with This Dish:
- Baking until firm in the middle: It turns dry.
- Using a too-large skillet: The cookie spreads too thin.
- Waiting too long to serve: The magic is in the heat.
12. No-Bake Peanut Butter Bars
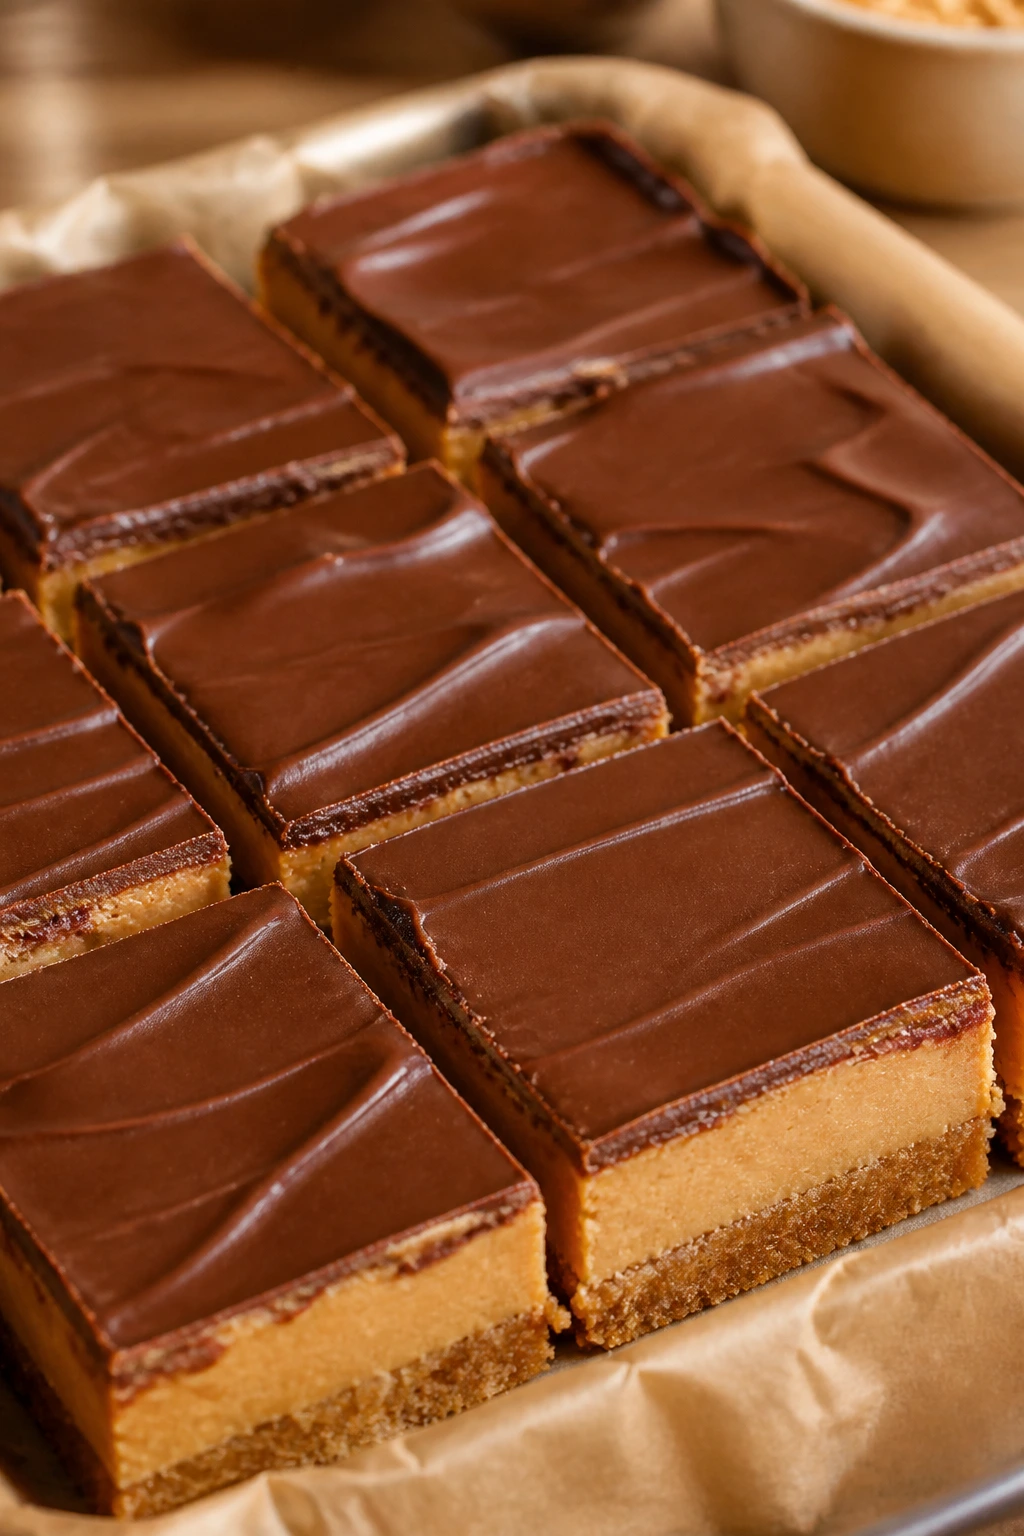
These bars taste like a peanut butter cup in square form, minus the trip to the candy aisle. The base is rich and slightly sandy in the best way, and the chocolate top sets into a clean snap.
Why It Works: Peanut butter and powdered sugar create a firm filling without any baking, and graham crumbs give the bars enough body to slice cleanly. A thin chocolate layer on top seals the deal.
Key Ingredients:
- 2 cups graham cracker crumbs
- 2 cups powdered sugar
- 1 cup creamy peanut butter
- 1/2 cup unsalted butter, melted
- 1/4 teaspoon fine salt
- 1 1/2 cups semi-sweet chocolate chips
- 1 tablespoon butter, for the topping
Quick Steps:
- Mix the crumbs, powdered sugar, peanut butter, melted butter, and salt until thick.
- Press into a parchment-lined 8×8-inch pan.
- Melt the chocolate chips with the butter.
- Spread the chocolate over the peanut butter layer.
- Chill for 1 to 2 hours, until firm.
- Slice with a hot knife.
Equipment for This Recipe:
- Mixing bowl
- Spatula
- 8×8-inch pan
- Parchment paper
- Small saucepan or microwave-safe bowl
How to Serve This Dish: Cut them into neat squares and stack them on a tray with parchment between layers. They’re strong with coffee, but cold milk makes them taste like childhood in a cleaner outfit.
Pro Tips for This Recipe:
- Line the pan generously so the bars lift out cleanly.
- Warm the knife under hot water before slicing.
- Use creamy peanut butter for the smoothest filling.
Variations on This Dish:
- Crunchy Peanut Version: Add 1/2 cup chopped peanuts to the filling.
- White Chocolate Top: Swap the topping for melted white chocolate.
- Pretzel Base: Replace 1/2 cup crumbs with crushed pretzels for salt.
Common Mistakes to Avoid with This Dish:
- Not chilling long enough: The bars smear when cut.
- Using natural peanut butter: The filling can separate.
- Cutting with a dry knife: The chocolate cracks unevenly.
13. Pantry Chocolate Pudding
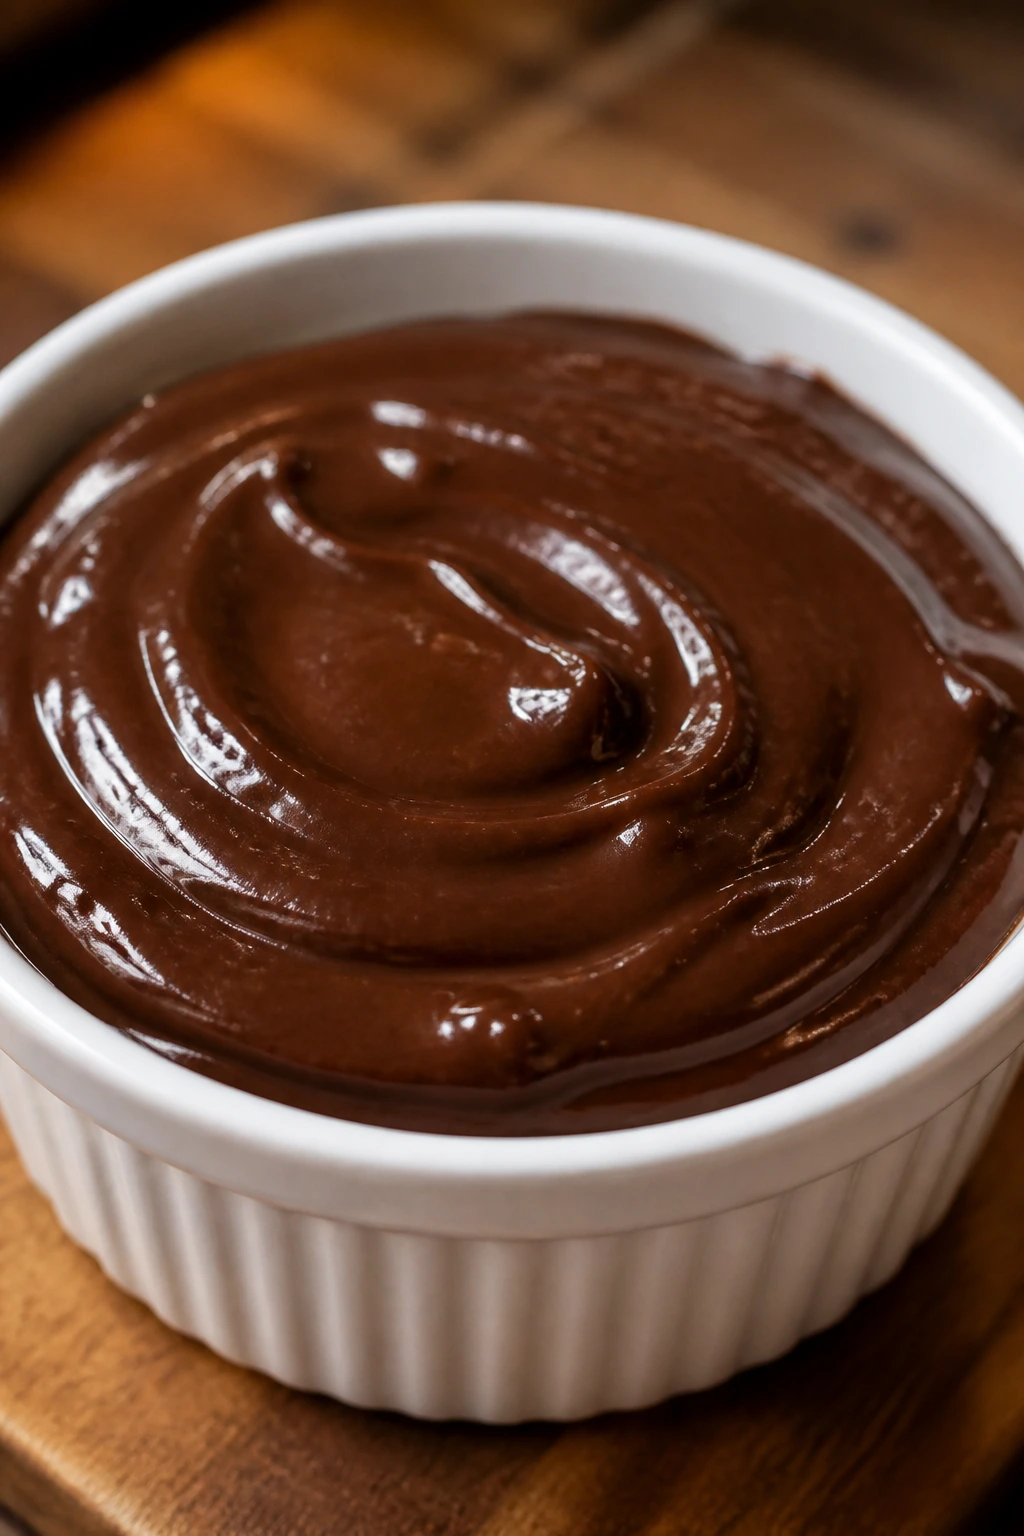
A good chocolate pudding tastes like it took more effort than it did. This one is silky, dark, and steady enough to sit in little glasses with whipped cream if you want to make it feel more formal.
Why It Works: Cornstarch thickens the pudding without making it gluey, and cocoa gives you a clean chocolate flavor that does not depend on melted chips. A spoonful of butter at the end gives the pudding a softer finish.
Key Ingredients:
- 3/4 cup granulated sugar
- 1/3 cup unsweetened cocoa powder
- 1/4 cup cornstarch
- 1/4 teaspoon fine salt
- 3 cups milk
- 2 large egg yolks
- 2 tablespoons unsalted butter
- 2 teaspoons vanilla extract
Quick Steps:
- Whisk the sugar, cocoa, cornstarch, and salt in a saucepan.
- Slowly whisk in the milk until smooth.
- Cook over medium heat, stirring constantly, until the pudding bubbles and thickens.
- Temper the yolks with a little hot pudding, stir them back in, and cook for 1 minute.
- Remove from the heat, stir in butter and vanilla, then pour into cups.
- Chill for at least 2 hours.
Equipment for This Recipe:
- Medium saucepan
- Whisk
- Fine-mesh strainer, optional
- Serving cups or ramekins
How to Serve This Dish: Spoon it into small glasses and top with whipped cream or a few chocolate curls. It also works with crushed cookies on top, which gives you a little crunch against the silkiness.
Pro Tips for This Recipe:
- Stir constantly once the heat goes on; pudding scorches fast.
- Temper the yolks so they do not scramble.
- Chill with plastic wrap pressed to the surface if you hate skin.
Variations on This Dish:
- Mocha Pudding: Stir in 1 teaspoon espresso powder.
- Dark Chocolate Pudding: Add a little more cocoa and reduce the sugar slightly.
- Orange Chocolate Pudding: Add orange zest to the milk before cooking.
Common Mistakes to Avoid with This Dish:
- Walking away from the stove: It can scorch in seconds.
- Not cooking long enough: The pudding stays loose.
- Skipping the chill: It needs time to set.
14. Warm Cinnamon Apple Crisp
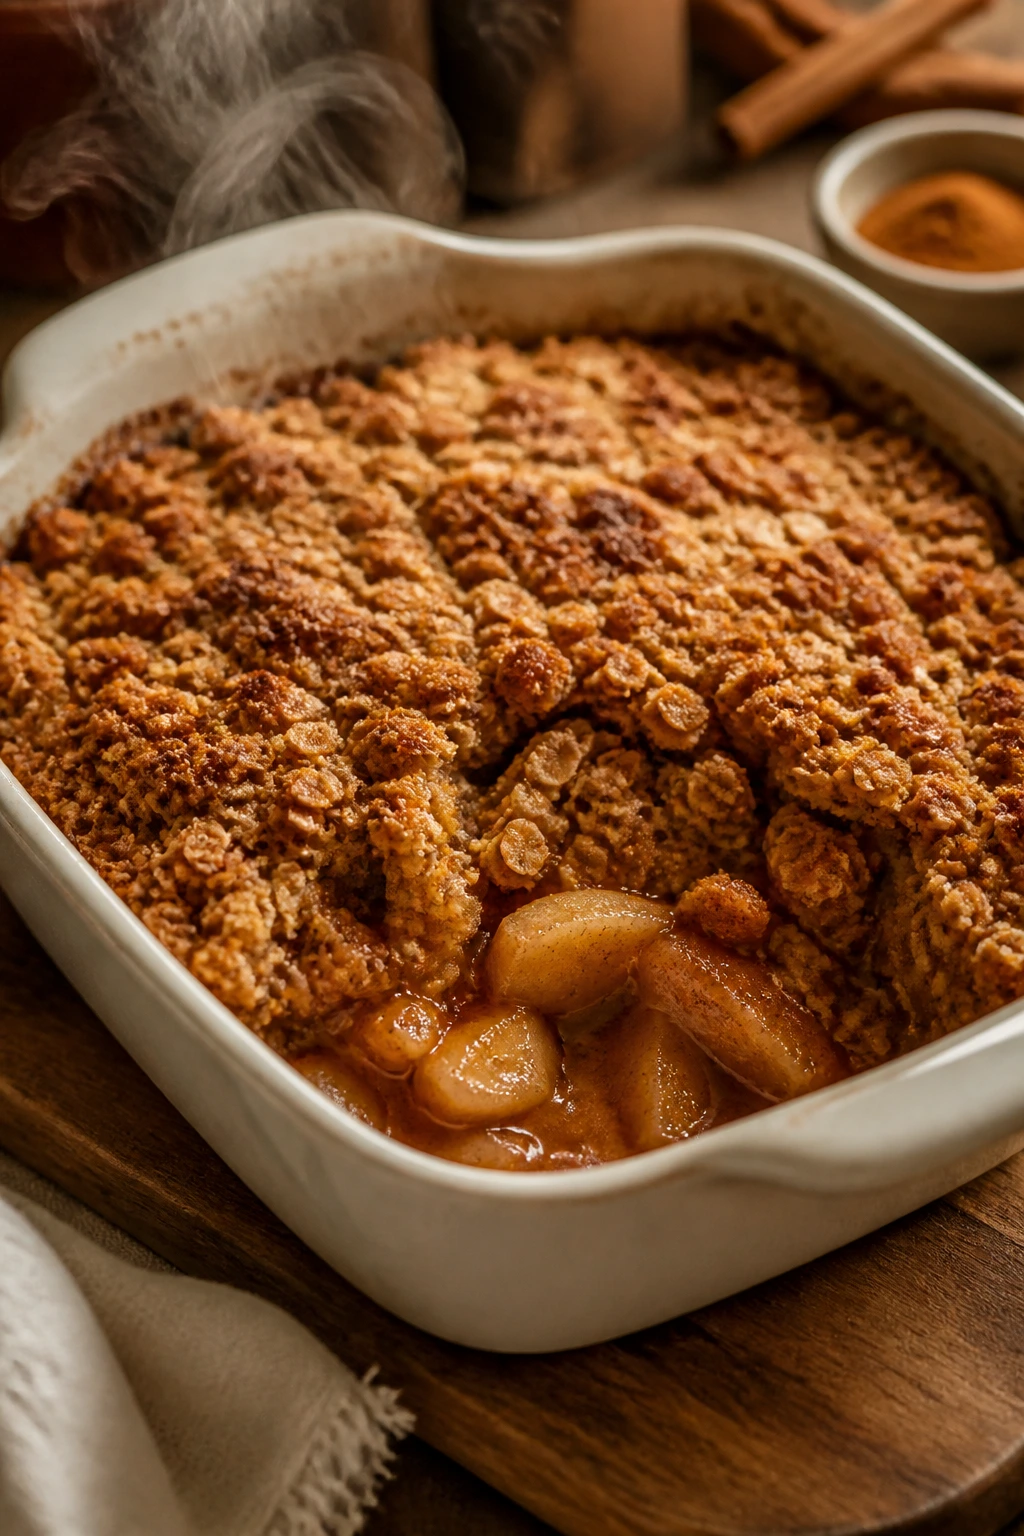
Apple crisp is the dessert equivalent of a sweater that fits right. The fruit gets soft and syrupy, the oat topping turns sandy and golden, and the whole dish smells like cinnamon before it finishes baking.
Why It Works: The topping uses oats, butter, and brown sugar, which bake into a crunchy layer that contrast the soft apples underneath. A little lemon juice keeps the filling from tasting flat.
Key Ingredients:
- 5 medium apples, peeled and sliced
- 1 tablespoon lemon juice
- 1/4 cup granulated sugar
- 1 teaspoon cinnamon
- 3/4 cup all-purpose flour
- 1 cup old-fashioned oats
- 3/4 cup brown sugar
- 1/2 cup unsalted butter, cold and diced
- 1/4 teaspoon fine salt
Quick Steps:
- Toss the apples with lemon juice, granulated sugar, and cinnamon.
- Spread them in a buttered 8×8-inch baking dish.
- Mix the flour, oats, brown sugar, and salt.
- Cut in the butter until the topping looks like coarse crumbs.
- Sprinkle over the apples and bake at 375°F for 35 to 40 minutes.
- Let it rest for 10 minutes before serving.
Equipment for This Recipe:
- Mixing bowls
- Peeler and knife
- 8×8-inch baking dish
- Pastry cutter or fork
How to Serve This Dish: Serve it warm in shallow bowls with vanilla ice cream or whipped cream. A tiny pinch of salt on top makes the apples taste fuller and keeps the dessert from leaning too sweet.
Pro Tips for This Recipe:
- Use apples that hold shape, not apples that collapse into sauce.
- Keep the butter cold for a crisp topping.
- If the top browns early, tent it loosely with foil.
Variations on This Dish:
- Pear Crisp: Swap half the apples for pears.
- Pecan Crisp: Add 1/2 cup chopped pecans to the topping.
- Cranberry Apple Crisp: Stir in 1/2 cup dried cranberries.
Common Mistakes to Avoid with This Dish:
- Using too-soft apples: The filling turns mushy.
- Packing the topping down: It bakes dense instead of crunchy.
- Serving too soon: The juices need a few minutes to settle.
15. Cherry Cobbler with Biscuit Top
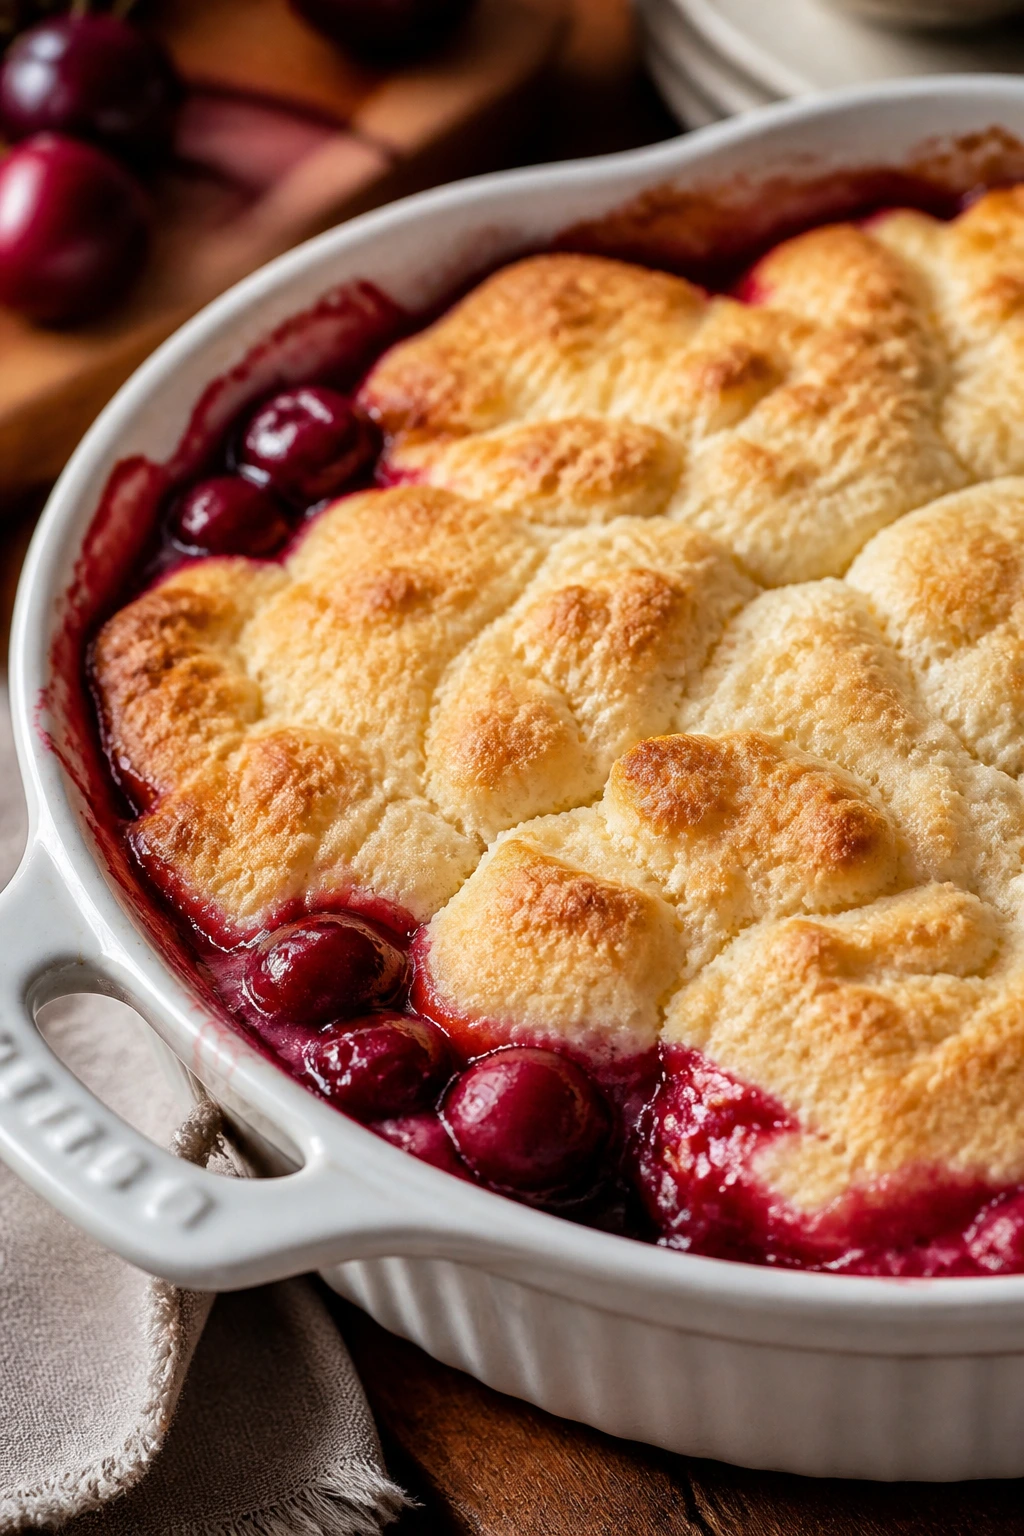
Cherry cobbler brings the red without any decoration trickery. The fruit turns jammy, the biscuit topping bakes up pale and tender, and each spoonful gives you sauce, fruit, and a soft top all at once.
Why It Works: Cornstarch thickens the cherry filling so it does not flood the dish, and the biscuit batter stays fluffy because it goes on top in spoonfuls, not in a careful sheet. That rough top is part of the charm.
Key Ingredients:
- 2 cans pitted cherries, or 4 cups frozen cherries
- 1/2 cup granulated sugar
- 2 tablespoons cornstarch
- 1 teaspoon vanilla extract
- 1 tablespoon lemon juice
- 1 1/2 cups all-purpose flour
- 1/4 cup granulated sugar
- 2 teaspoons baking powder
- 1/2 teaspoon fine salt
- 1/2 cup unsalted butter, cold
- 3/4 cup milk
Quick Steps:
- Toss the cherries with sugar, cornstarch, vanilla, and lemon juice.
- Spread the filling in a baking dish.
- Mix the flour, sugar, baking powder, and salt, then cut in the butter.
- Stir in the milk to make a thick batter.
- Drop spoonfuls over the fruit and bake at 375°F for 30 to 35 minutes.
- Cool for 10 minutes before serving.
Equipment for This Recipe:
- Mixing bowl
- Spoon
- 8×8-inch or 9-inch baking dish
- Pastry cutter or fork
How to Serve This Dish: Spoon it into bowls while it’s still warm and let the biscuit top soak up a little fruit syrup. Vanilla ice cream is the obvious partner, and it earns the spot.
Pro Tips for This Recipe:
- Keep the butter cold so the topping stays tender.
- If the cherries are very juicy, add another teaspoon of cornstarch.
- Drop the batter in rough mounds; don’t smooth it flat.
Variations on This Dish:
- Mixed Berry Cobbler: Use frozen berries instead of cherries.
- Almond Cherry Cobbler: Add 1/2 teaspoon almond extract to the filling.
- Spiced Cobbler: Add a pinch of cinnamon to the fruit.
Common Mistakes to Avoid with This Dish:
- Making the filling too thin: You get soup, not cobbler.
- Overmixing the batter: It turns bready.
- Serving before it rests: The juices run everywhere.
16. Baked Cinnamon Donut Holes

These are the kind of dessert that disappear before you think to plate them. They’re soft, warm, and coated in cinnamon sugar, which means they feel festive without a lot of machinery.
Why It Works: Baking powder gives the holes a light lift, and brushing them with melted butter right after baking helps the cinnamon sugar stick. The mini muffin tin does the shaping for you, so there’s no frying mess.
Key Ingredients:
- 2 cups all-purpose flour
- 1/2 cup granulated sugar
- 2 teaspoons baking powder
- 1/2 teaspoon fine salt
- 1 teaspoon cinnamon
- 1 cup milk
- 1 large egg
- 4 tablespoons unsalted butter, melted
- 1 teaspoon vanilla extract
For the Coating:
- 4 tablespoons unsalted butter, melted
- 1/2 cup granulated sugar
- 1 teaspoon cinnamon
Quick Steps:
- Whisk the flour, sugar, baking powder, salt, and cinnamon.
- Stir in the milk, egg, melted butter, and vanilla until just combined.
- Spoon the batter into a greased mini muffin tin, filling each cup about three-quarters full.
- Bake at 375°F for 10 to 12 minutes.
- Brush the warm tops with melted butter and roll in cinnamon sugar.
- Serve right away.
Equipment for This Recipe:
- Mini muffin tin
- Mixing bowl
- Small bowl for coating
- Pastry brush
- Cooling rack
How to Serve This Dish: Pile them into a bowl and let people grab them warm. They work with coffee, hot chocolate, or a simple dusting of powdered sugar if you want less crunch.
Pro Tips for This Recipe:
- Do not fill the cups to the top or they crown too high.
- Coat them while warm so the sugar sticks.
- Eat them the same day for the softest texture.
Variations on This Dish:
- Nutmeg Donut Holes: Add 1/4 teaspoon nutmeg to the batter.
- Chocolate Glaze: Dip cooled donut holes in a simple cocoa glaze.
- Cardamom Sugar Coating: Add a pinch of cardamom to the sugar.
Common Mistakes to Avoid with This Dish:
- Overmixing the batter: The holes turn chewy.
- Waiting too long to coat them: The sugar slides off.
- Overbaking: They dry out fast.
17. Coconut Macaroons
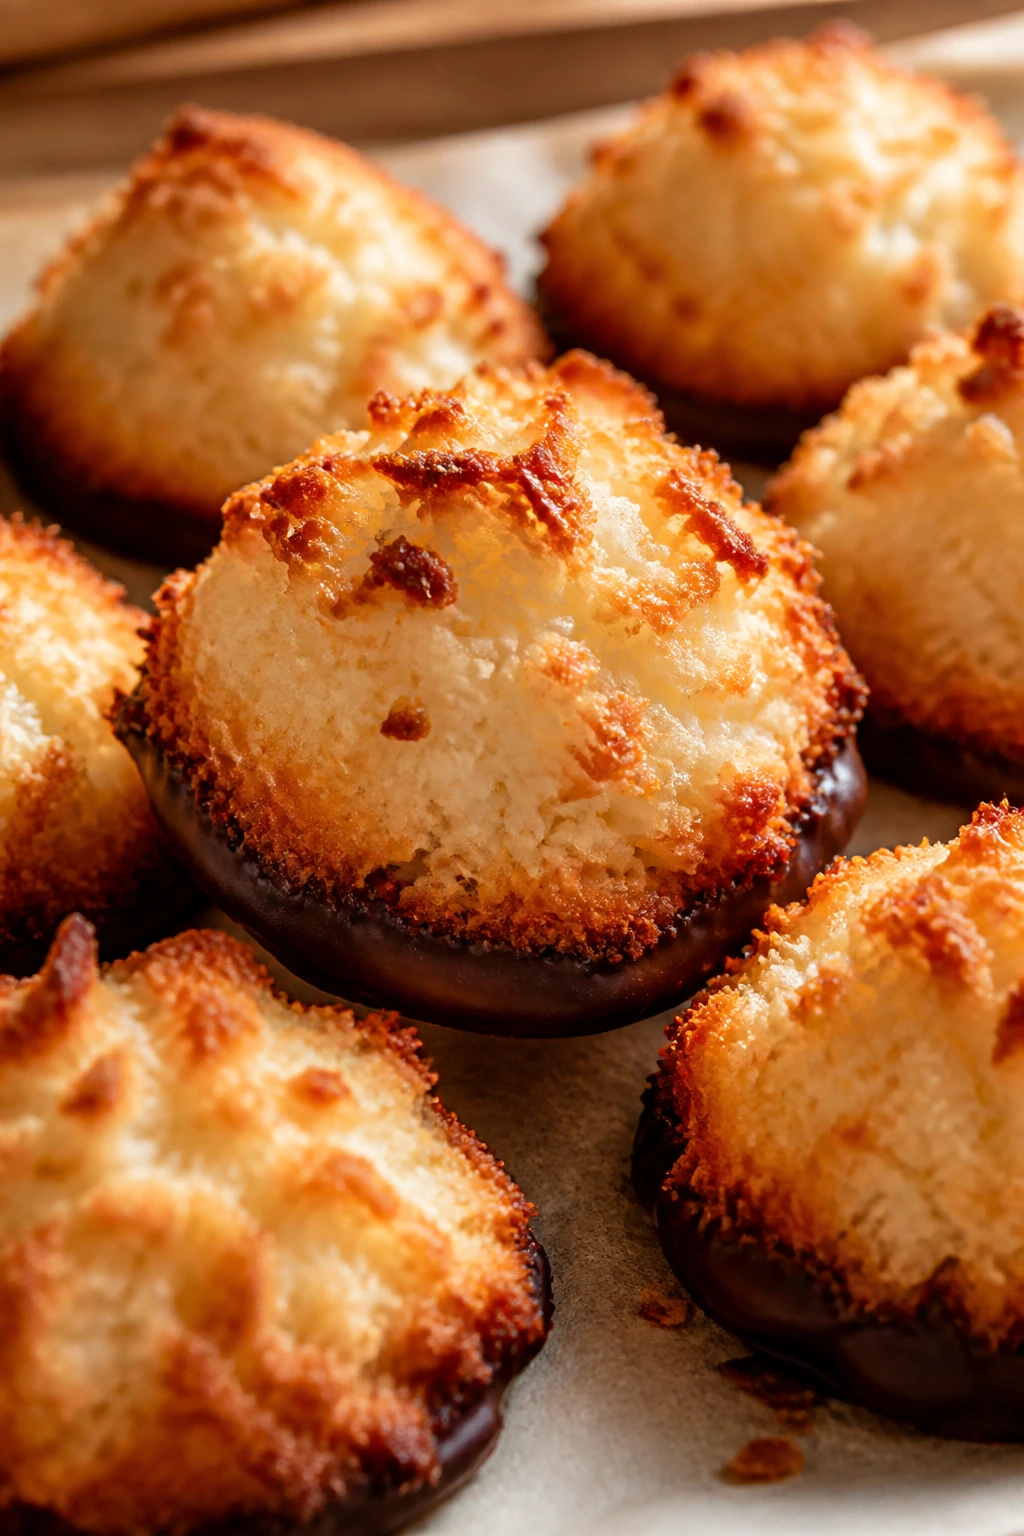
Macaroons are one of those desserts that look fancier than the effort they ask for. Coconut, condensed milk, and egg whites bake into little golden mounds that taste toasty and sweet, with a crisp shell around the edges.
Why It Works: Sweetened condensed milk binds the coconut and keeps the centers chewy, while egg whites give the cookies enough lift to hold a rounded shape. A light chocolate dip turns them into a Valentine treat with almost no extra work.
Key Ingredients:
- 4 cups sweetened shredded coconut
- 1 can sweetened condensed milk, 14 ounces
- 2 large egg whites
- 1 teaspoon vanilla extract
- 1/4 teaspoon fine salt
- 4 ounces semi-sweet chocolate, optional for dipping
Quick Steps:
- Heat the oven to 325°F and line a baking sheet with parchment.
- Stir the coconut, condensed milk, egg whites, vanilla, and salt until combined.
- Scoop mounds onto the sheet and press them lightly so they hold together.
- Bake for 18 to 20 minutes, until the edges are golden.
- Cool completely.
- Dip or drizzle with melted chocolate if you want the Valentine finish.
Equipment for This Recipe:
- Mixing bowl
- Cookie scoop or spoon
- Baking sheet
- Parchment paper
- Microwave-safe bowl for chocolate
How to Serve This Dish: Arrange them in a tight cluster with a few chocolate-dipped ones on top. They’re good with espresso or tea, and they bring a nice chewy contrast to a table full of cookies.
Pro Tips for This Recipe:
- Use sweetened shredded coconut, not large flakes.
- Pack the scoops lightly so they do not spread.
- Let the macaroons cool before dipping in chocolate.
Variations on This Dish:
- Almond Coconut Macaroons: Add 1/2 teaspoon almond extract.
- Lemon Coconut Macaroons: Stir in a little lemon zest.
- Chocolate Coconut Macaroons: Fold in mini chocolate chips.
Common Mistakes to Avoid with This Dish:
- Overbaking: Coconut turns dry and bitter.
- Using the wrong coconut texture: The cookies fall apart.
- Moving them too soon: They need to set on the pan.
18. Salted Chocolate Bark with Cranberries and Pistachios
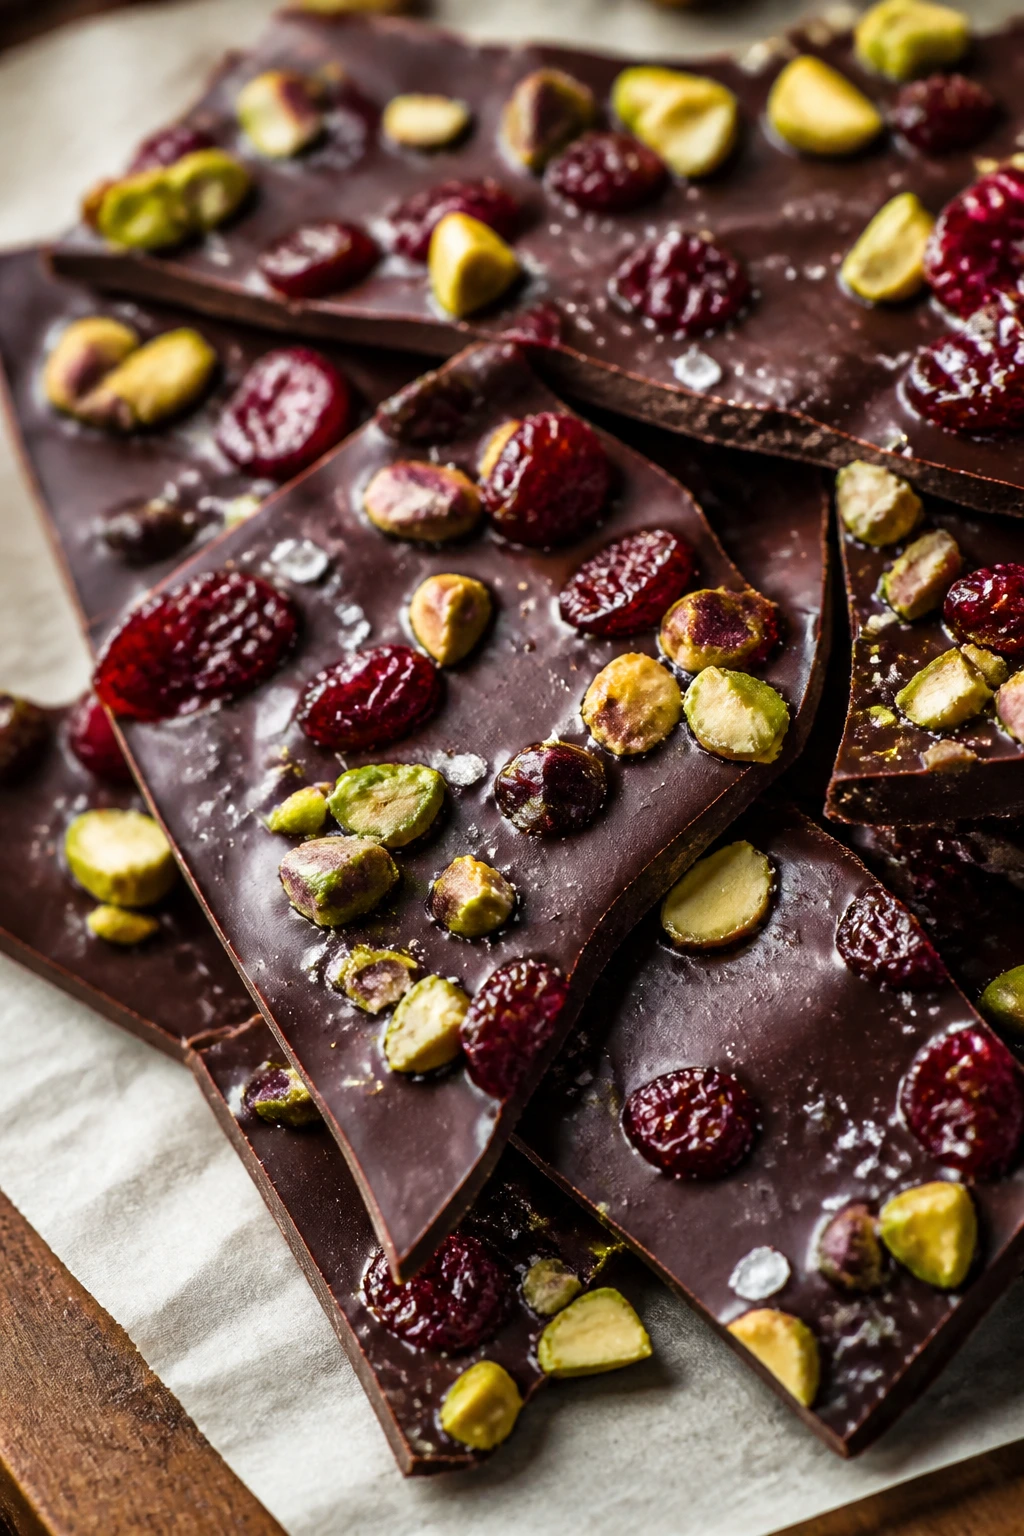
Chocolate bark is the no-nonsense dessert that still looks polished. Melt, spread, sprinkle, chill. Done. The red cranberries and green pistachios give you Valentine color without a single drop of dye.
Why It Works: Chocolate sets cleanly when it’s spread thin, and the mix of tart fruit, salty nuts, and flaky salt keeps each bite from feeling flat. The surface looks handmade in the best way.
Key Ingredients:
- 12 ounces semi-sweet chocolate chips or chopped chocolate
- 4 ounces white chocolate, optional
- 1/2 cup dried cranberries
- 1/2 cup pistachios, chopped
- Flaky salt, to finish
Quick Steps:
- Melt the chocolate gently in short bursts or over low heat.
- Spread it on a parchment-lined baking sheet into a thin layer.
- Drizzle with melted white chocolate if using.
- Scatter cranberries and pistachios over the top.
- Finish with flaky salt and chill until firm.
- Break into shards.
Equipment for This Recipe:
- Baking sheet
- Parchment paper
- Microwave-safe bowl or double boiler
- Spatula
How to Serve This Dish: Break the bark into irregular pieces and stack them in a bowl or gift box. It’s a smart ending to a dessert board because it adds crunch where the cookies are soft.
Pro Tips for This Recipe:
- Keep all water away from the chocolate.
- Chop the nuts and fruit so they stay on the bark instead of rolling off.
- Chill just until set; leave it too long and condensation can dull the surface.
Variations on This Dish:
- Pretzel Bark: Swap some pistachios for crushed pretzels.
- Peanut Butter Bark: Swirl a little melted peanut butter into the chocolate.
- Cherry Almond Bark: Use dried cherries and sliced almonds.
Common Mistakes to Avoid with This Dish:
- Overheating the chocolate: It turns grainy.
- Making the layer too thick: The bark snaps awkwardly.
- Adding wet toppings: They can make the chocolate seize.
19. Pretzel Toffee Clusters
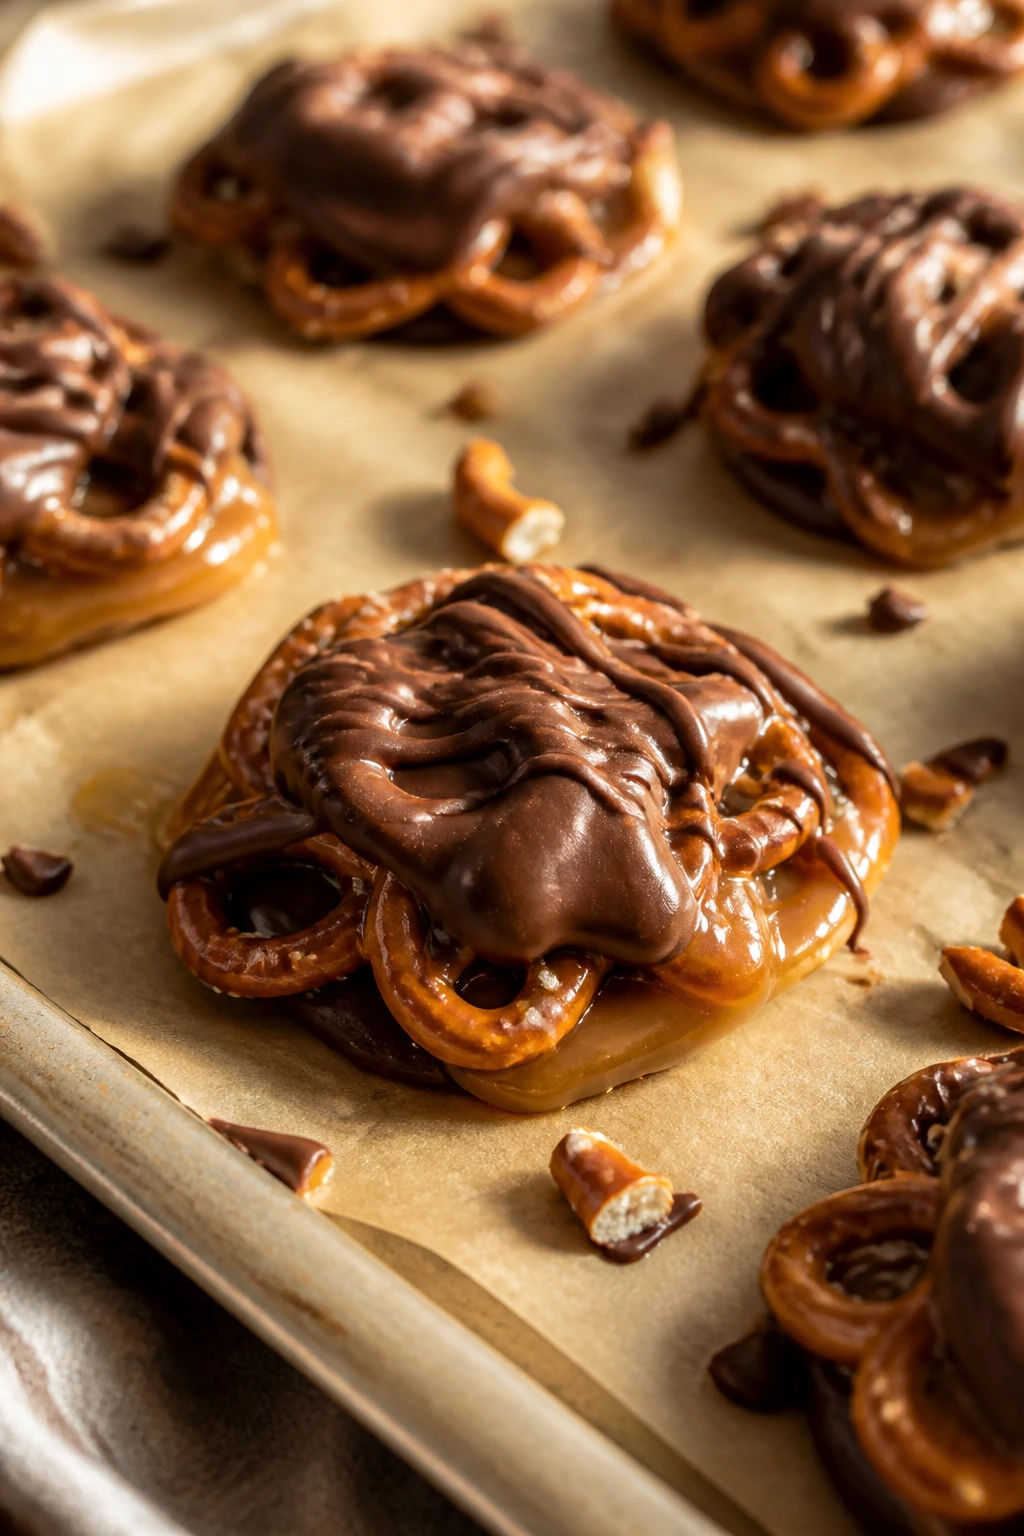
These clusters hit every note at once: salty, buttery, crunchy, and chocolatey. They are the sort of thing people keep walking back to, which is a useful trait in a Valentine dessert spread.
Why It Works: Quick caramel made from butter and brown sugar clings to the pretzels and bakes into a crisp toffee shell. Chocolate on top softens the edge and gives the clusters a clean finish.
Key Ingredients:
- 4 cups mini pretzels
- 1 cup unsalted butter
- 1 cup brown sugar
- 1/2 teaspoon fine salt
- 1 teaspoon vanilla extract
- 1 1/2 cups chocolate chips
- 1/2 cup chopped peanuts, optional
Quick Steps:
- Line a baking sheet with parchment and spread the pretzels on it.
- Cook the butter, brown sugar, and salt in a saucepan for 3 minutes, until bubbling.
- Stir in the vanilla and pour over the pretzels.
- Bake at 350°F for 10 minutes.
- Scatter chocolate chips over the hot pretzels, wait 2 minutes, then spread.
- Cool completely and break into clusters.
Equipment for This Recipe:
- Saucepan
- Baking sheet
- Parchment paper
- Spatula
How to Serve This Dish: Serve them in a bowl with the broken edges facing up so the chocolate and toffee layers show. They’re nice beside berries or any softer cookie that needs a crunchy neighbor.
Pro Tips for This Recipe:
- Use parchment, not bare metal, or the toffee sticks hard.
- Let the chocolate sit on the hot tray before spreading.
- Sprinkle a little extra salt on top if your pretzels are plain.
Variations on This Dish:
- Peanut Butter Toffee Clusters: Add a peanut butter drizzle after the chocolate sets.
- Graham Toffee Clusters: Use crushed graham crackers under the toffee.
- Almond Toffee Clusters: Swap peanuts for sliced almonds.
Common Mistakes to Avoid with This Dish:
- Undercooking the caramel: It stays soft and sticky.
- Spreading the chocolate too soon: It can melt into the toffee.
- Skipping the parchment: You will regret it.
20. Vanilla Rice Pudding with Cinnamon
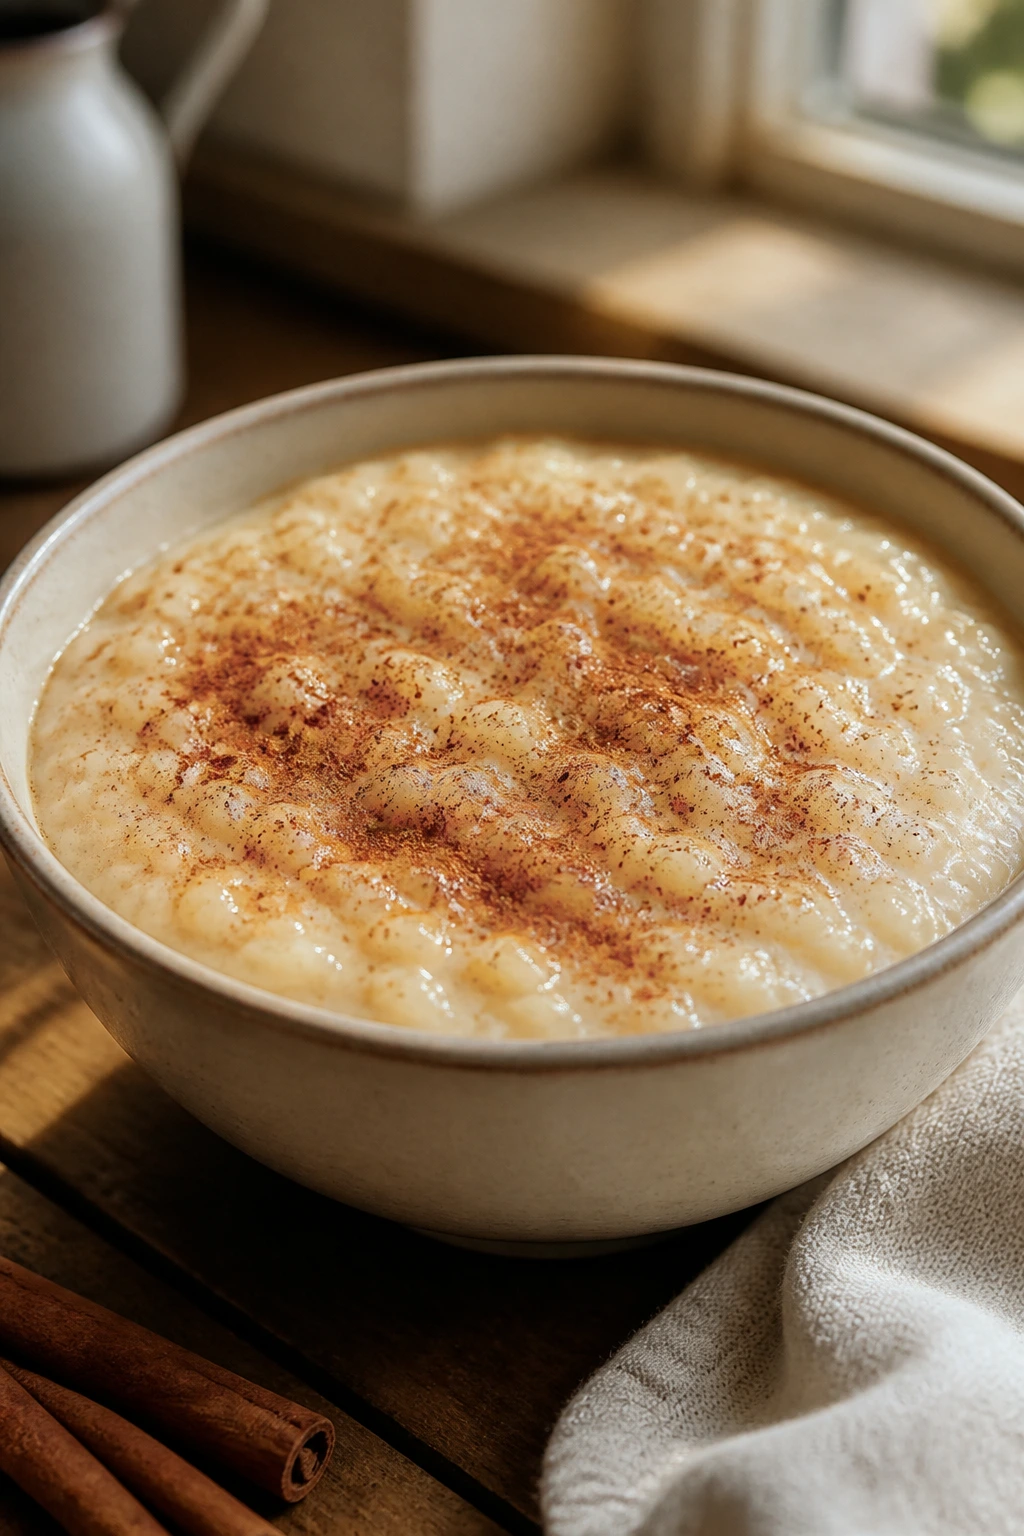
Rice pudding is quiet in the best way. It tastes creamy, vanilla-sweet, and a little nostalgic, with cinnamon on top if you want the whole bowl to lean warmer and more Valentine-friendly.
Why It Works: Short-grain rice releases enough starch to thicken the milk naturally, and the egg yolk at the end gives the pudding a silkier finish. Vanilla carries the flavor, so the dessert tastes like more than sweetened milk.
Key Ingredients:
- 3/4 cup short-grain rice
- 4 cups milk
- 1/2 cup granulated sugar
- 1/4 teaspoon fine salt
- 1 large egg
- 2 teaspoons vanilla extract
- 1 tablespoon unsalted butter
- Ground cinnamon, for serving
Quick Steps:
- Rinse the rice briefly.
- Simmer the rice, milk, sugar, and salt over low heat, stirring often, for 25 to 30 minutes.
- Whisk the egg in a bowl, then temper it with a few spoonfuls of hot pudding.
- Stir the egg mixture back into the pot and cook for 2 more minutes.
- Remove from the heat, add butter and vanilla, and cool slightly.
- Spoon into bowls and dust with cinnamon.
Equipment for This Recipe:
- Medium saucepan
- Whisk
- Wooden spoon
- Serving bowls
How to Serve This Dish: Serve it warm in small bowls with a little cinnamon or cocoa on top. It’s also good chilled, with a spoonful of jam folded into the center for a red color streak.
Pro Tips for This Recipe:
- Keep the heat low so the milk does not scorch.
- Stir often along the bottom of the pot.
- Add a splash more milk if you want it looser after chilling.
Variations on This Dish:
- Coconut Rice Pudding: Replace 1 cup milk with coconut milk.
- Raisin Rice Pudding: Stir in 1/3 cup raisins near the end.
- Cardamom Rice Pudding: Add a pinch of ground cardamom.
Common Mistakes to Avoid with This Dish:
- Boiling too hard: The milk can catch and taste cooked.
- Forgetting to stir: The bottom sticks.
- Adding the egg without tempering: You get scrambled bits.
21. Molasses Cookies
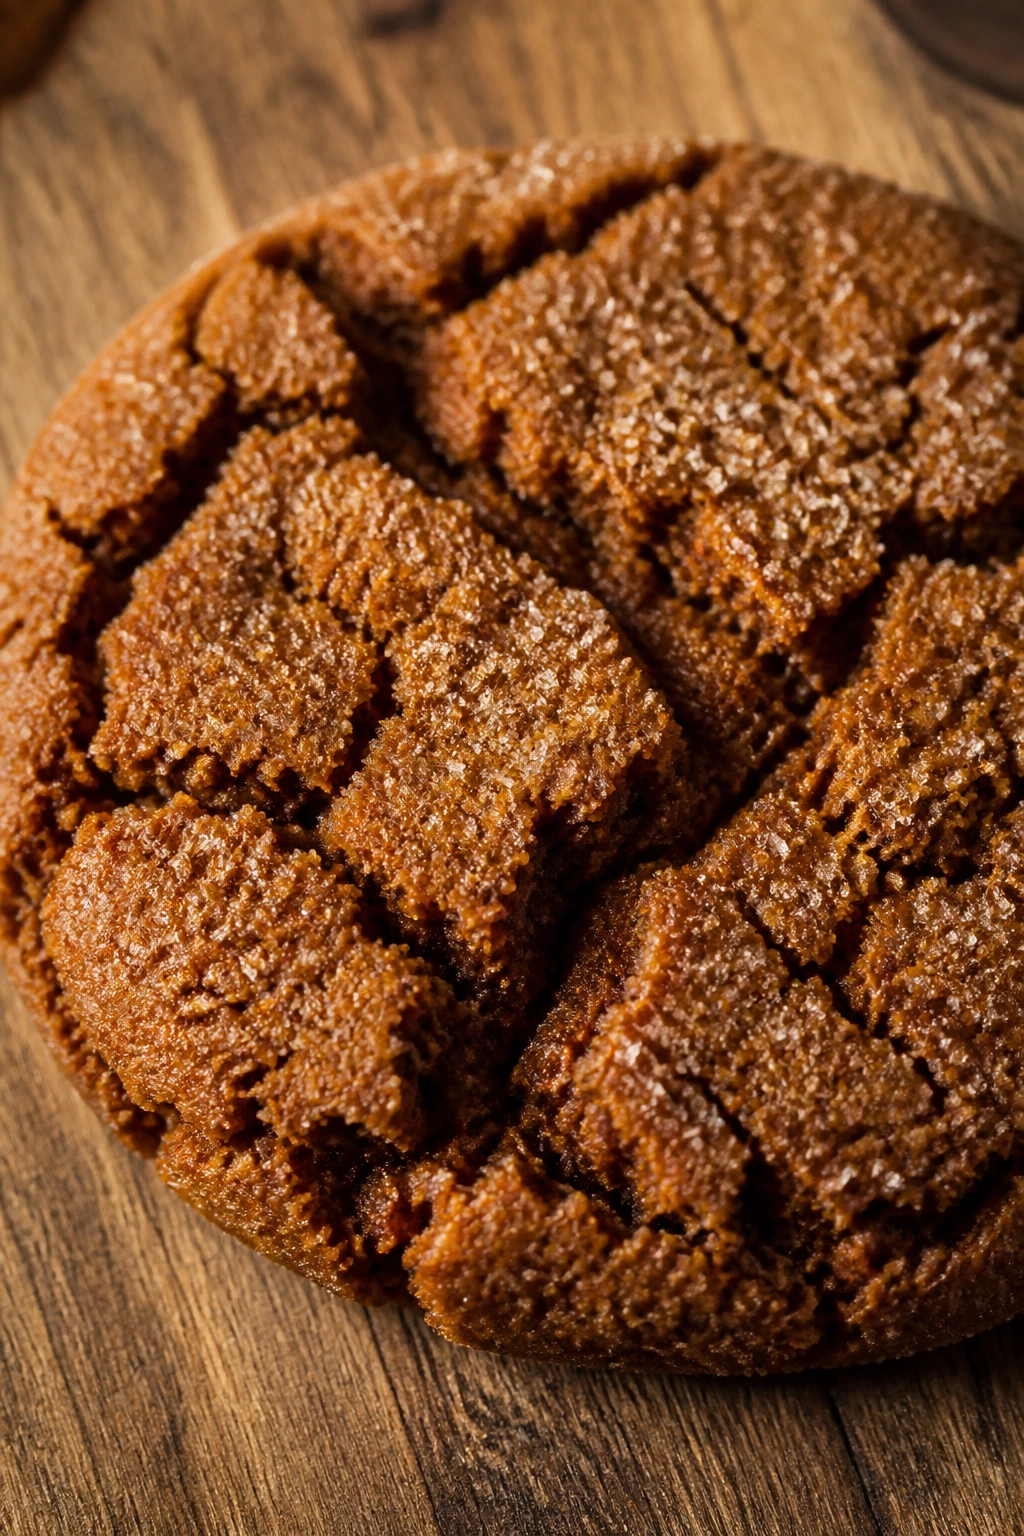
Molasses cookies have a dark, spicy smell that seems made for cold kitchens and candlelight. They’re chewy in the center, crinkled on top, and dusted with sugar so they look like they know how to behave.
Why It Works: Molasses brings depth and moisture, while ginger, cinnamon, and cloves give you the warm spice note that keeps each bite from tasting flat. Chilling the dough helps the cookies keep their round shape.
Key Ingredients:
- 2 1/4 cups all-purpose flour
- 2 teaspoons baking soda
- 2 teaspoons ground ginger
- 1 teaspoon cinnamon
- 1/2 teaspoon ground cloves
- 1/2 teaspoon fine salt
- 3/4 cup unsalted butter, softened
- 3/4 cup brown sugar
- 1/2 cup molasses
- 1 large egg
- Granulated sugar, for rolling
Quick Steps:
- Whisk the flour, baking soda, spices, and salt.
- Cream the butter and brown sugar.
- Beat in the molasses and egg.
- Mix in the dry ingredients and chill for 30 minutes.
- Roll into balls, coat in sugar, and bake at 350°F for 10 to 12 minutes.
- Cool on the pan for 5 minutes.
Equipment for This Recipe:
- Mixing bowl
- Hand mixer
- Baking sheet
- Cooling rack
How to Serve This Dish: Set them out with coffee or a deep black tea. They also work beside chocolate desserts, because the spice keeps the whole plate from turning one-note.
Pro Tips for This Recipe:
- Chill sticky dough or it spreads.
- Roll generously in sugar for the crackled top.
- Pull them while the centers still look soft.
Variations on This Dish:
- Orange Molasses Cookies: Add 1 teaspoon orange zest.
- Chocolate Molasses Cookies: Add 2 tablespoons cocoa.
- Extra-Spice Version: Add a pinch of black pepper for a sharper finish.
Common Mistakes to Avoid with This Dish:
- Using too much flour on the counter: The cookies dry out.
- Skipping the sugar roll: You lose the classic crackle.
- Baking until firm: They should finish soft.
22. Chocolate Pecan Pie Bars
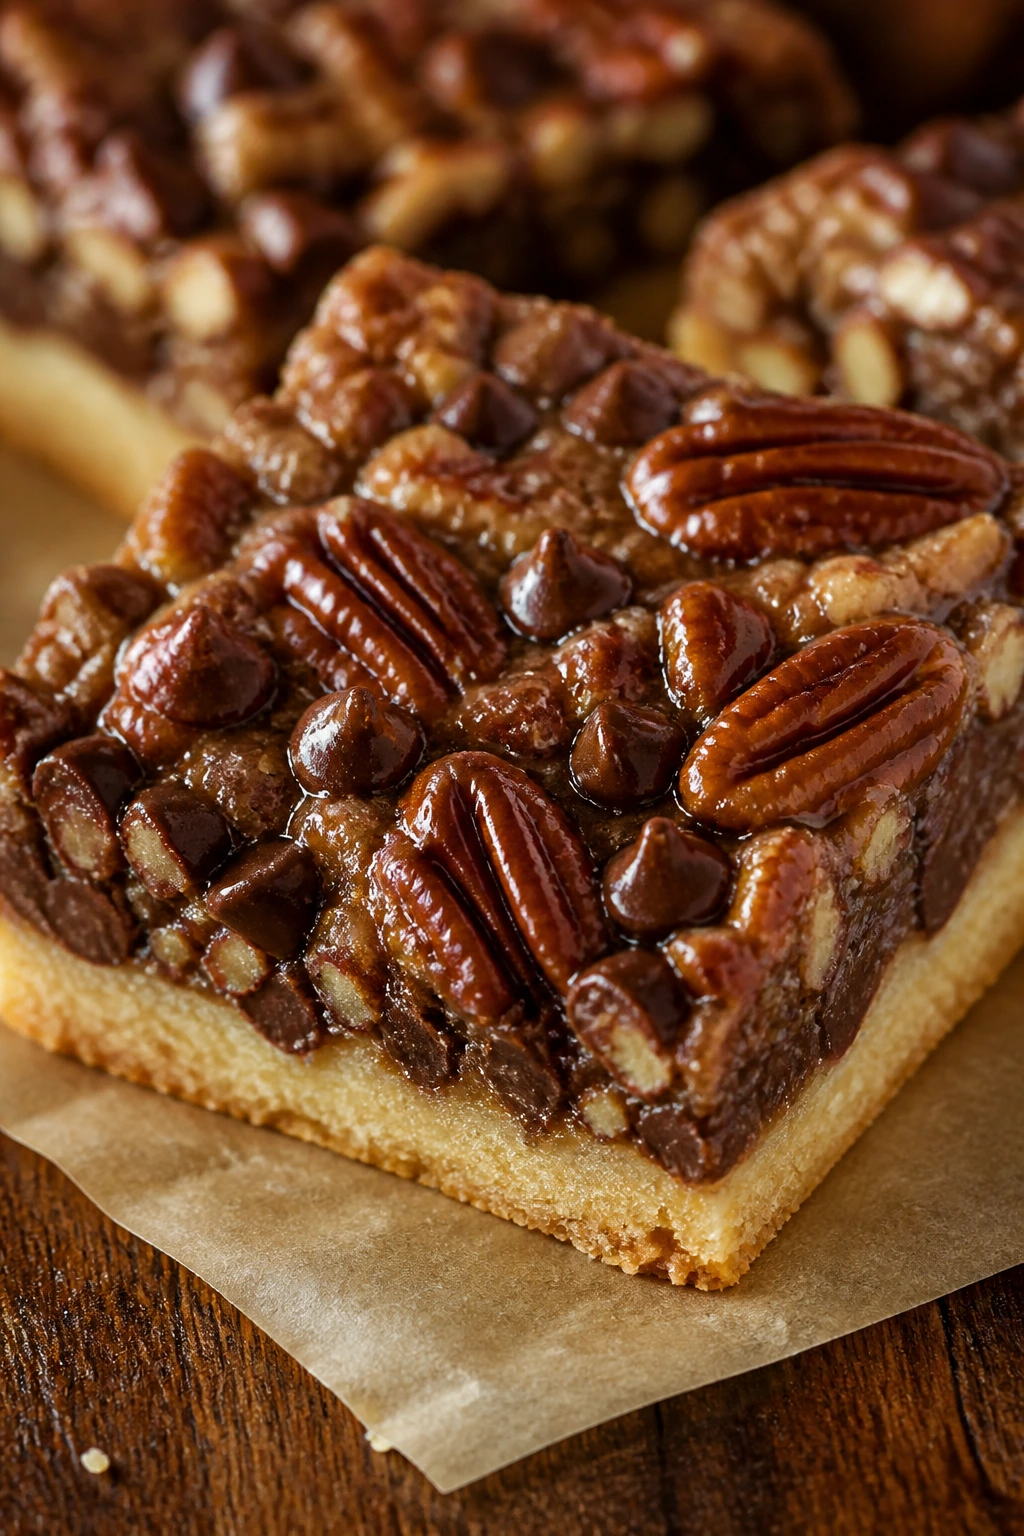
These bars taste like pecan pie took a practical turn. You still get the gooey filling and toasted nuts, but the crust and square shape make them easier to serve than a full pie.
Why It Works: A shortbread-style crust gives a sturdy base, and the egg-syrup filling sets into a sticky, sliceable layer. Chocolate chips melt into the nuts and make the whole thing feel richer without extra fuss.
Key Ingredients:
- 2 cups all-purpose flour
- 1 cup unsalted butter, softened
- 1/4 cup granulated sugar
- 1/2 teaspoon fine salt
- 3 large eggs
- 1 cup brown sugar
- 1/2 cup corn syrup or maple syrup
- 2 tablespoons melted butter
- 1 teaspoon vanilla extract
- 2 cups chopped pecans
- 1 cup chocolate chips
Quick Steps:
- Mix the flour, butter, sugar, and salt into a crumbly crust.
- Press into a parchment-lined 9×13-inch pan and bake at 350°F for 15 minutes.
- Whisk the eggs, brown sugar, syrup, melted butter, and vanilla.
- Stir in the pecans and chocolate chips.
- Pour over the crust and bake 25 to 30 minutes more.
- Cool completely before cutting.
Equipment for This Recipe:
- Mixing bowls
- Whisk
- 9×13-inch pan
- Parchment paper
How to Serve This Dish: Slice into small bars; they are rich. A little whipped cream or a few tart berries on the side helps cut the sweetness.
Pro Tips for This Recipe:
- Cool fully or the filling oozes out.
- Use parchment overhang to lift the slab cleanly.
- Toast the pecans first if you want a stronger nut flavor.
Variations on This Dish:
- Walnut Pie Bars: Swap pecans for walnuts.
- Salted Chocolate Bars: Add a pinch more flaky salt on top.
- Bourbon Pecan Bars: Stir in 1 tablespoon bourbon if you keep that in the pantry.
Common Mistakes to Avoid with This Dish:
- Cutting while warm: The bars collapse.
- Underbaking the filling: It stays loose.
- Using too few nuts: You lose the pecan-pie feel.
23. Jam Swirl Blondies
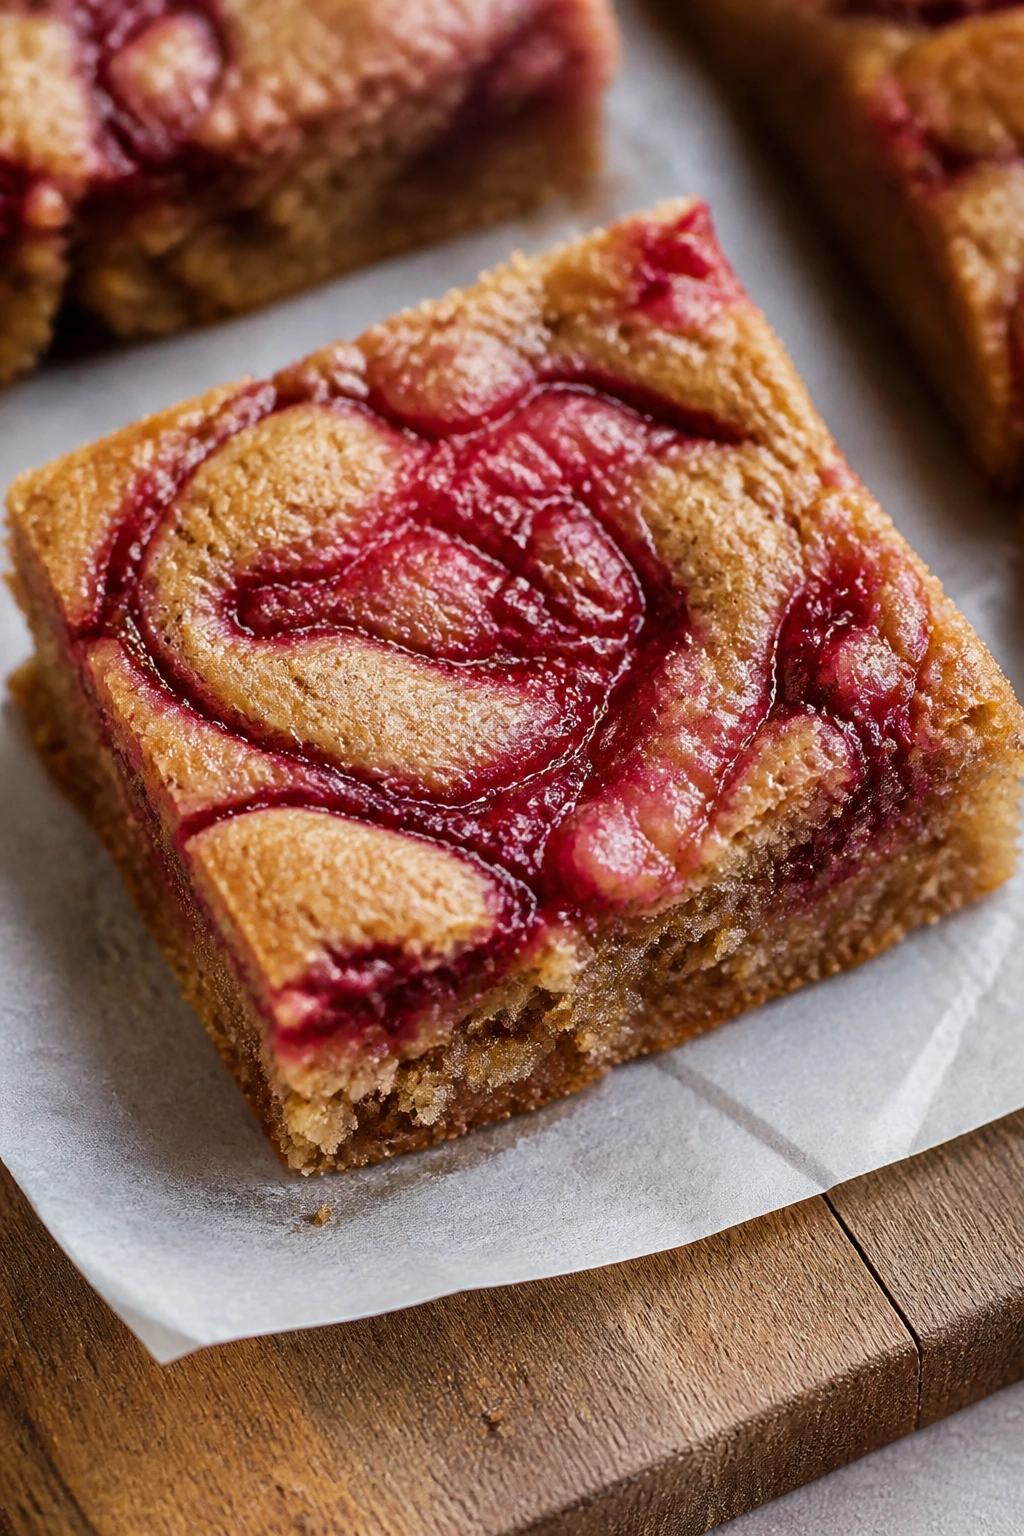
Blondies are what happens when brown sugar gets to be the main event. Add a red jam swirl and a few white chocolate chips, and the pan starts looking like Valentine’s dessert without any decoration marathon.
Why It Works: Brown sugar gives the bars their caramel note, while the jam cuts through the sweetness with a sharp fruit line. A light swirl, not a thorough mix, keeps the color visible after baking.
Key Ingredients:
- 1/2 cup unsalted butter, melted
- 1 cup brown sugar
- 2 large eggs
- 2 teaspoons vanilla extract
- 1 1/2 cups all-purpose flour
- 1 teaspoon baking powder
- 1/2 teaspoon fine salt
- 1/2 cup strawberry or raspberry jam
- 1 cup white chocolate chips, optional
Quick Steps:
- Whisk the melted butter and brown sugar together.
- Beat in the eggs and vanilla.
- Stir in the flour, baking powder, and salt.
- Fold in the white chocolate chips if using.
- Spread in a lined 8×8-inch pan, dollop with jam, and swirl lightly with a knife.
- Bake at 350°F for 25 to 30 minutes, then cool before slicing.
Equipment for This Recipe:
- Mixing bowl
- Whisk
- 8×8-inch pan
- Knife for swirling
- Parchment paper
How to Serve This Dish: Cut the blondies into squares and show the pink swirl on top. They’re good plain, or with a spoonful of whipped cream if you want them to feel more like a plated dessert.
Pro Tips for This Recipe:
- Swirl once or twice only; too much turns the whole pan muddy.
- Use thick jam so it does not sink.
- Chill before cutting for the cleanest squares.
Variations on This Dish:
- Cherry Blondies: Use cherry jam instead of strawberry.
- Peanut Butter Swirl Blondies: Drop in a few spoonfuls of peanut butter alongside the jam.
- Nutty Blondies: Add chopped pecans for extra bite.
Common Mistakes to Avoid with This Dish:
- Over-swirl the jam: You lose the pretty streaks.
- Cutting too soon: The bars smear.
- Underbaking the center: The middle stays gummy.
24. Pantry S’mores Bars
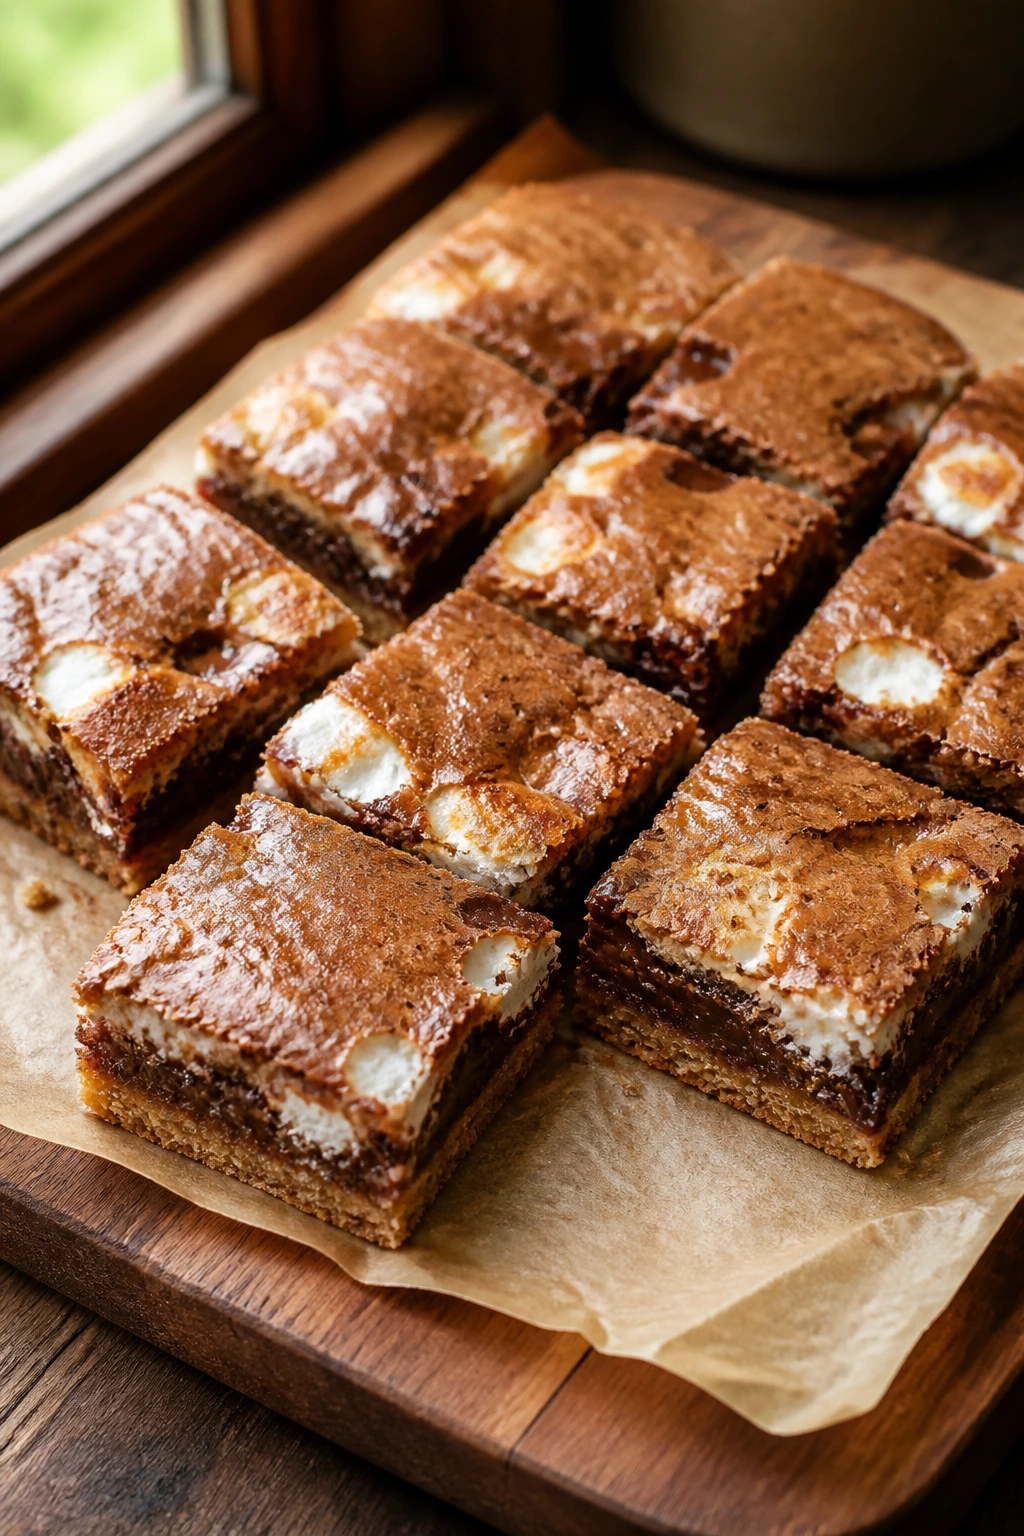
S’mores bars bring the campfire feeling indoors, minus the smoke and cold fingers. They’re sticky, chocolatey, and just messy enough to feel fun, which is a useful quality when you want dessert to loosen up the table.
Why It Works: Graham crumbs give the bars a toasty base, chocolate chips melt into the middle, and marshmallows blister on top. The pan bakes into a chewy bar instead of separate layers, which keeps the whole thing easy.
Key Ingredients:
- 1/2 cup unsalted butter, melted
- 1 cup brown sugar
- 1 large egg
- 1 teaspoon vanilla extract
- 1 1/4 cups all-purpose flour
- 1 cup graham cracker crumbs
- 1 teaspoon baking powder
- 1/2 teaspoon fine salt
- 1 1/2 cups chocolate chips
- 2 cups mini marshmallows
Quick Steps:
- Stir the butter and brown sugar together, then beat in the egg and vanilla.
- Mix in the flour, crumbs, baking powder, and salt.
- Spread half the batter in a lined 8×8-inch pan.
- Sprinkle with chocolate chips, then top with the remaining batter in rough spoonfuls.
- Bake at 350°F for 18 minutes, add the marshmallows, and bake 5 to 7 minutes more.
- Cool before slicing.
Equipment for This Recipe:
- Mixing bowl
- 8×8-inch pan
- Parchment paper
- Spatula
How to Serve This Dish: Cut into thick bars and serve them while the marshmallows are still a little soft. They’re great with cold milk or a hot mug of cocoa, which is a very on-brand pairing.
Pro Tips for This Recipe:
- Add the marshmallows near the end or they melt away.
- Use parchment so the sticky edges do not fight you.
- Let the bars cool or the chocolate layer runs.
Variations on This Dish:
- Peanut Butter S’mores Bars: Add a peanut butter drizzle.
- Graham-Only Bars: Skip the marshmallows and add chopped nuts.
- Chocolate Overload Bars: Use dark chocolate chips plus milk chocolate chips.
Common Mistakes to Avoid with This Dish:
- Burning the marshmallows: They go from toasted to black fast.
- Slicing hot bars: They smear into a mess.
- Undermeasuring the crumbs: The base gets too soft.
25. Almond Biscotti with Chocolate Dip
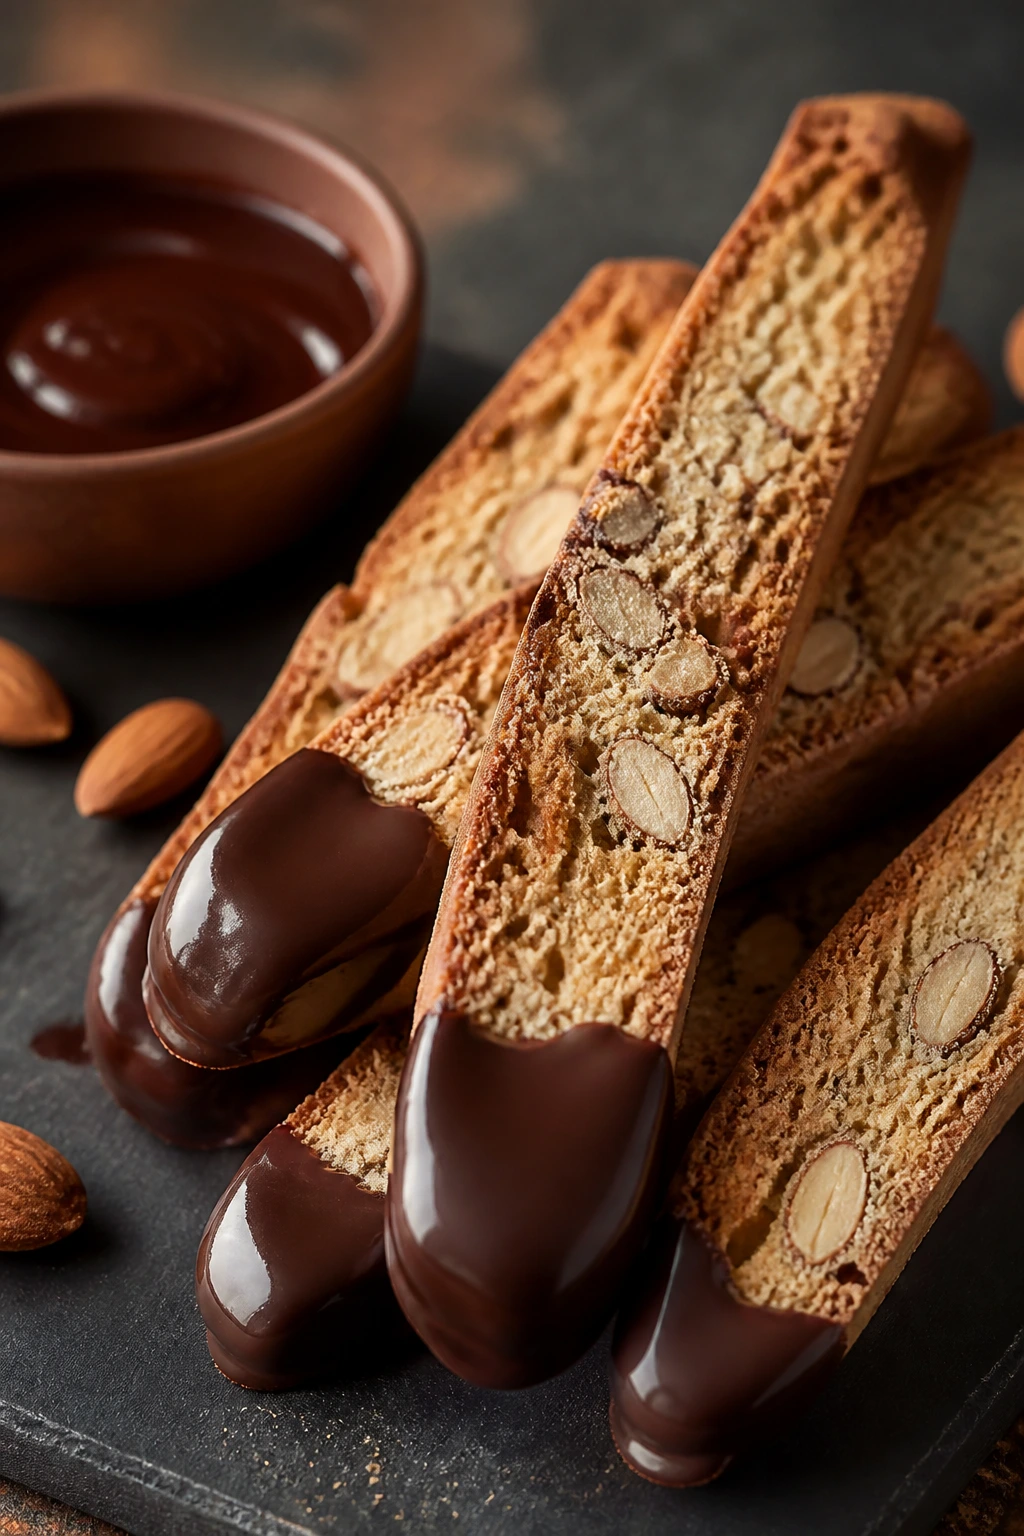
Biscotti has a dry crunch that makes sense next to coffee, tea, or hot chocolate. The almond flavor reads clean and grown-up, and a chocolate dip gives the cookies enough Valentine mood to earn their place.
Why It Works: Biscotti is baked twice, which dries it enough for a crisp snap. Almond extract and sliced almonds make the flavor unmistakable without needing a long ingredient list.
Key Ingredients:
- 2 cups all-purpose flour
- 3/4 cup granulated sugar
- 1 teaspoon baking powder
- 1/2 teaspoon fine salt
- 2 large eggs
- 1 teaspoon almond extract
- 1 teaspoon vanilla extract
- 1 cup sliced almonds
- 6 ounces semi-sweet chocolate, melted for dipping
Quick Steps:
- Whisk the flour, sugar, baking powder, and salt.
- Beat in the eggs, almond extract, and vanilla.
- Fold in the almonds and shape into a log on a baking sheet.
- Bake at 350°F for 25 to 30 minutes, then cool 10 minutes.
- Slice diagonally and bake the slices again for 10 to 12 minutes per side.
- Dip the ends in melted chocolate after cooling.
Equipment for This Recipe:
- Mixing bowl
- Baking sheet
- Sharp serrated knife
- Cooling rack
How to Serve This Dish: Line the biscotti up beside espresso cups or hot chocolate mugs. The chocolate-dipped ends make them feel polished enough for a small dessert board.
Pro Tips for This Recipe:
- Slice while the loaf is still slightly warm, not hot.
- Keep the second bake low and even so they dry, not burn.
- Dip only one end if you want the cookie to stay crunchy longer.
Variations on This Dish:
- Cranberry Almond Biscotti: Add 1/2 cup dried cranberries.
- Chocolate Almond Biscotti: Mix 2 tablespoons cocoa into the dough.
- Orange Almond Biscotti: Add orange zest to the batter.
Common Mistakes to Avoid with This Dish:
- Slicing too late: The loaf hardens and cracks.
- Skipping the second bake: The cookies stay soft.
- Adding too many almonds: The dough gets crumbly.
26. Chocolate Truffles
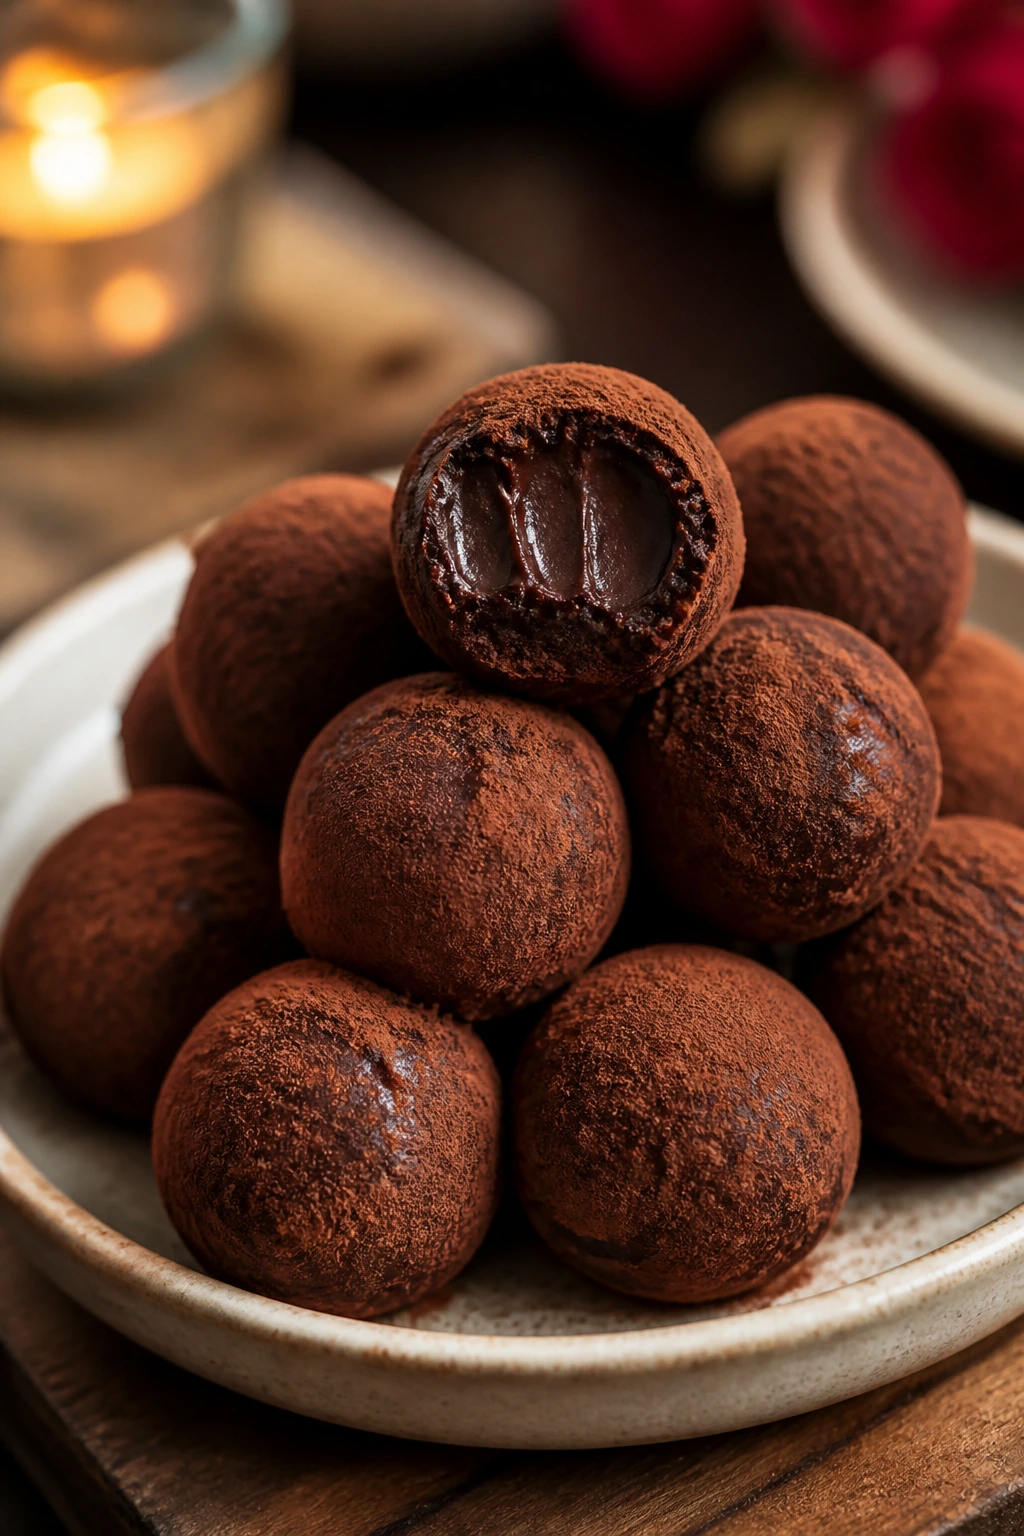
Truffles are the neatest trick in the whole collection. Two main ingredients, a little chilling, and suddenly you have a dessert that looks like it came from a candy case instead of your fridge.
Why It Works: Warm cream melts the chocolate into a ganache, and a little butter gives the truffles a smoother bite. Rolling them in cocoa keeps them from sticking together and adds a dry finish against the rich center.
Key Ingredients:
- 8 ounces dark chocolate, chopped
- 1/2 cup heavy cream
- 2 tablespoons unsalted butter
- 1 teaspoon vanilla extract
- Pinch of fine salt
- Unsweetened cocoa powder, for rolling
Quick Steps:
- Heat the cream until it just starts to steam.
- Pour over the chocolate and wait 1 minute.
- Stir until smooth, then mix in the butter, vanilla, and salt.
- Chill for 1 to 2 hours, until scoopable.
- Scoop small portions and roll in cocoa.
- Chill again for 20 minutes before serving.
Equipment for This Recipe:
- Saucepan
- Mixing bowl
- Spoon or melon baller
- Baking sheet or plate
- Shallow dish for cocoa
How to Serve This Dish: Set them in little paper cups or pile them on a small plate with a few berry jam dots nearby. They are rich enough to serve in twos or threes.
Pro Tips for This Recipe:
- Use chopped chocolate, not dusty chips, if you want the smoothest texture.
- If the ganache is too soft, chill it longer instead of adding more cocoa.
- Roll with cool hands or the truffles melt fast.
Variations on This Dish:
- Espresso Truffles: Stir in 1 teaspoon espresso powder.
- Orange Truffles: Add orange zest to the warm ganache.
- Nut-Coated Truffles: Roll in finely chopped nuts instead of cocoa.
Common Mistakes to Avoid with This Dish:
- Overheating the cream: It can make the chocolate grainy.
- Trying to roll too soon: The mixture sticks everywhere.
- Using too much cocoa on the outside: The flavor gets dusty, not smooth.
27. Quick Fudge
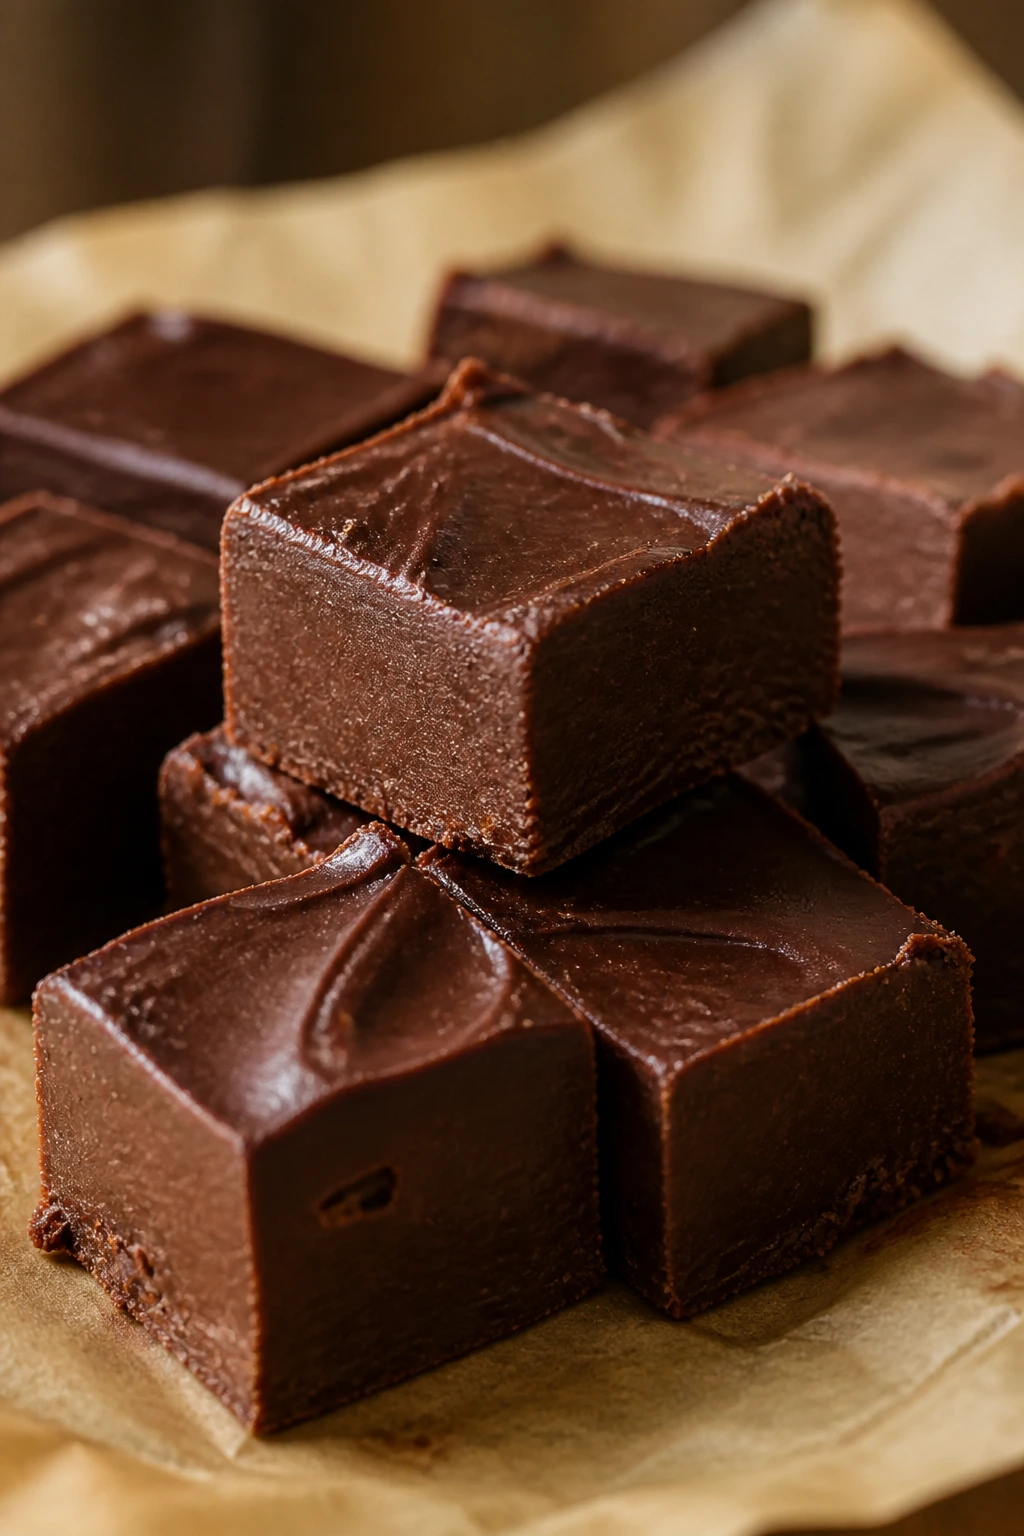
Fudge is the dessert equivalent of a strong shortcut. It sets up cleanly, slices into tidy squares, and carries a lot of chocolate flavor with almost no ceremony.
Why It Works: Sweetened condensed milk already has the sugar and milk solids you need, so the chocolate melts into a thick, stable mixture fast. A little butter and salt keep the sweetness from becoming one-note.
Key Ingredients:
- 3 cups semi-sweet chocolate chips
- 1 can sweetened condensed milk, 14 ounces
- 2 tablespoons unsalted butter
- 1 teaspoon vanilla extract
- Pinch of fine salt
- 1/2 cup chopped nuts, optional
Quick Steps:
- Line an 8×8-inch pan with parchment.
- Warm the chocolate chips, condensed milk, and butter over low heat or in the microwave.
- Stir until smooth, then add vanilla, salt, and nuts if using.
- Spread into the pan.
- Chill for 2 hours, until firm.
- Lift out and cut into squares.
Equipment for This Recipe:
- Saucepan or microwave-safe bowl
- Spatula
- 8×8-inch pan
- Parchment paper
How to Serve This Dish: Cut the fudge small; it is rich. A tiny square beside a cup of coffee or a few fresh berries is usually enough.
Pro Tips for This Recipe:
- Keep the heat low so the chocolate does not seize.
- Add nuts only after the mixture is smooth.
- Use parchment overhang for clean lifting.
Variations on This Dish:
- Peanut Butter Fudge: Swirl in 1/3 cup peanut butter.
- Marshmallow Fudge: Add a handful of mini marshmallows at the end.
- Salted Fudge: Finish with flaky salt before chilling.
Common Mistakes to Avoid with This Dish:
- Boiling the mixture: The texture goes grainy.
- Not chilling long enough: The squares collapse.
- Cutting with a dull knife: The edges crumble.
28. Oatmeal Raisin Hearts
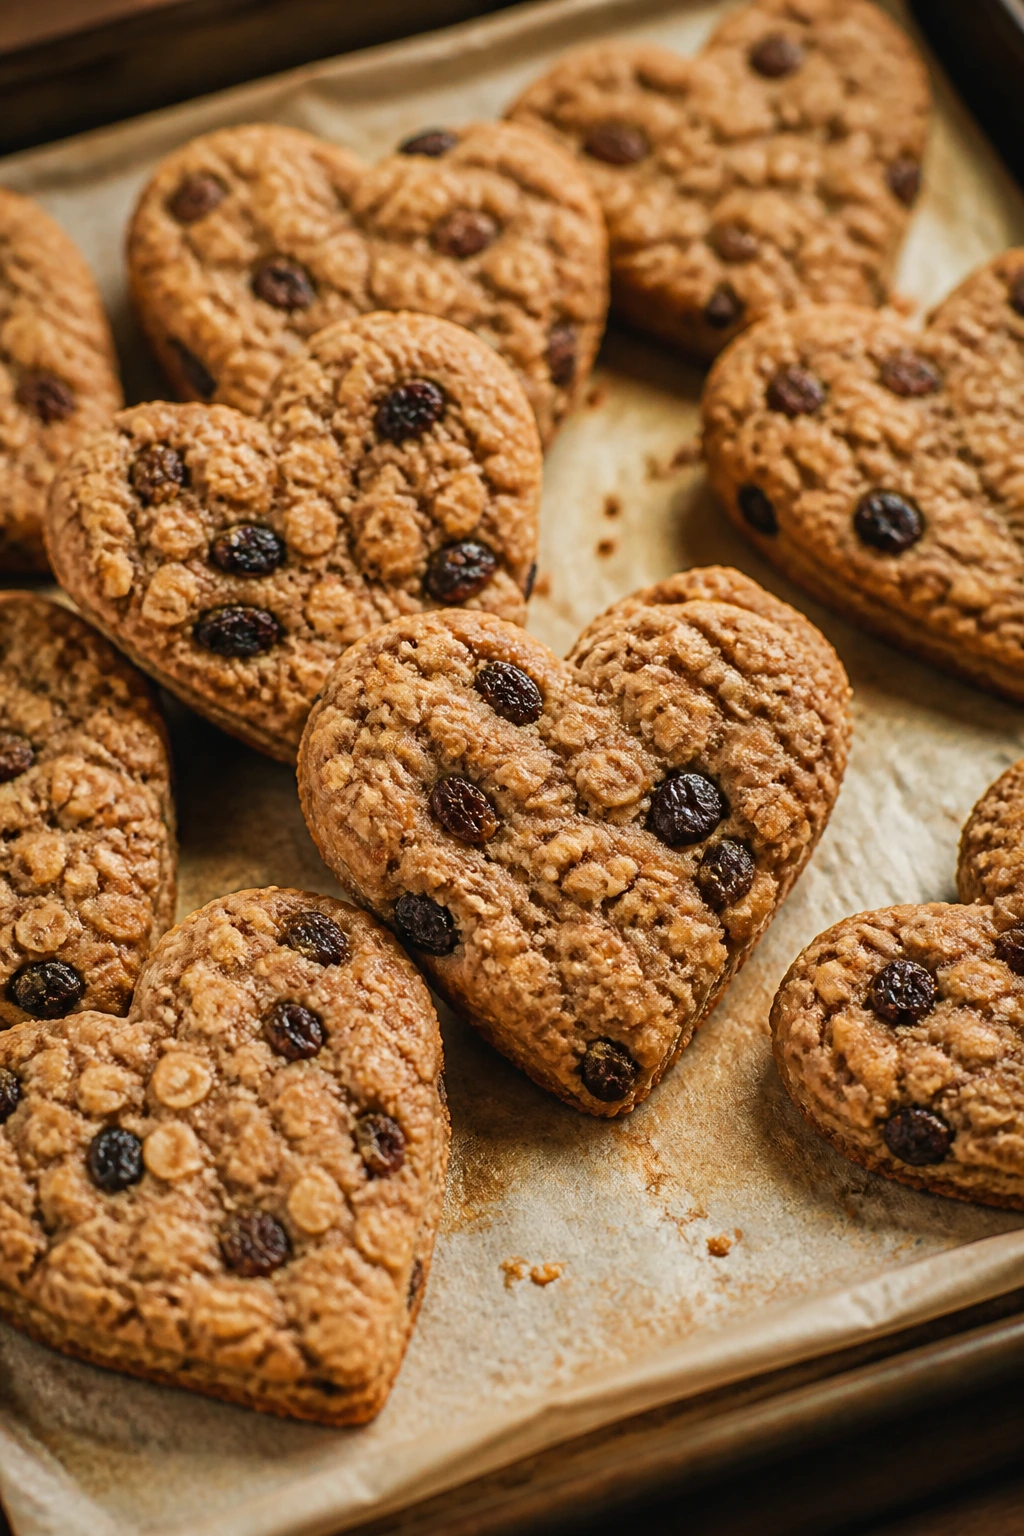
Oatmeal raisin cookies have a quiet charm, and cutting them into hearts gives them just enough occasion without turning them into a different dessert. The chew from the oats and the sweetness from the raisins make them easy to keep reaching for.
Why It Works: Brown sugar and oats create a dense chew that holds a cutter better than a loose dough. Cinnamon brings the warm note that keeps the raisins from tasting flat.
Key Ingredients:
- 1 cup unsalted butter, softened
- 1 cup brown sugar
- 1 large egg
- 2 teaspoons vanilla extract
- 1 1/4 cups all-purpose flour
- 2 1/2 cups old-fashioned oats
- 1 teaspoon cinnamon
- 1 teaspoon baking soda
- 1/2 teaspoon fine salt
- 1 cup raisins
Quick Steps:
- Cream the butter and brown sugar.
- Beat in the egg and vanilla.
- Stir in the flour, oats, cinnamon, baking soda, and salt.
- Fold in the raisins, chill the dough for 20 minutes, and roll or cut into hearts.
- Bake at 350°F for 10 to 12 minutes.
- Cool on the pan for 5 minutes.
Equipment for This Recipe:
- Mixing bowl
- Hand mixer
- Baking sheet
- Heart cutter or cookie scoop
How to Serve This Dish: Stack them on a plate with a few dried berries scattered around for color. They pair well with tea, and they also make a good breakfast cookie if the morning gets romantic and practical at the same time.
Pro Tips for This Recipe:
- Chill the dough so the hearts hold shape.
- Use plump raisins; dry ones can get leathery.
- Pull them while the center still looks slightly soft.
Variations on This Dish:
- Cranberry Oat Hearts: Swap raisins for dried cranberries.
- Chocolate Chip Oat Hearts: Replace half the raisins with chips.
- Walnut Oat Hearts: Add chopped walnuts for crunch.
Common Mistakes to Avoid with This Dish:
- Using instant oats: The texture gets mushy.
- Overbaking: The hearts turn hard.
- Adding too many raisins: The dough breaks apart.
29. Caramel Popcorn Clusters
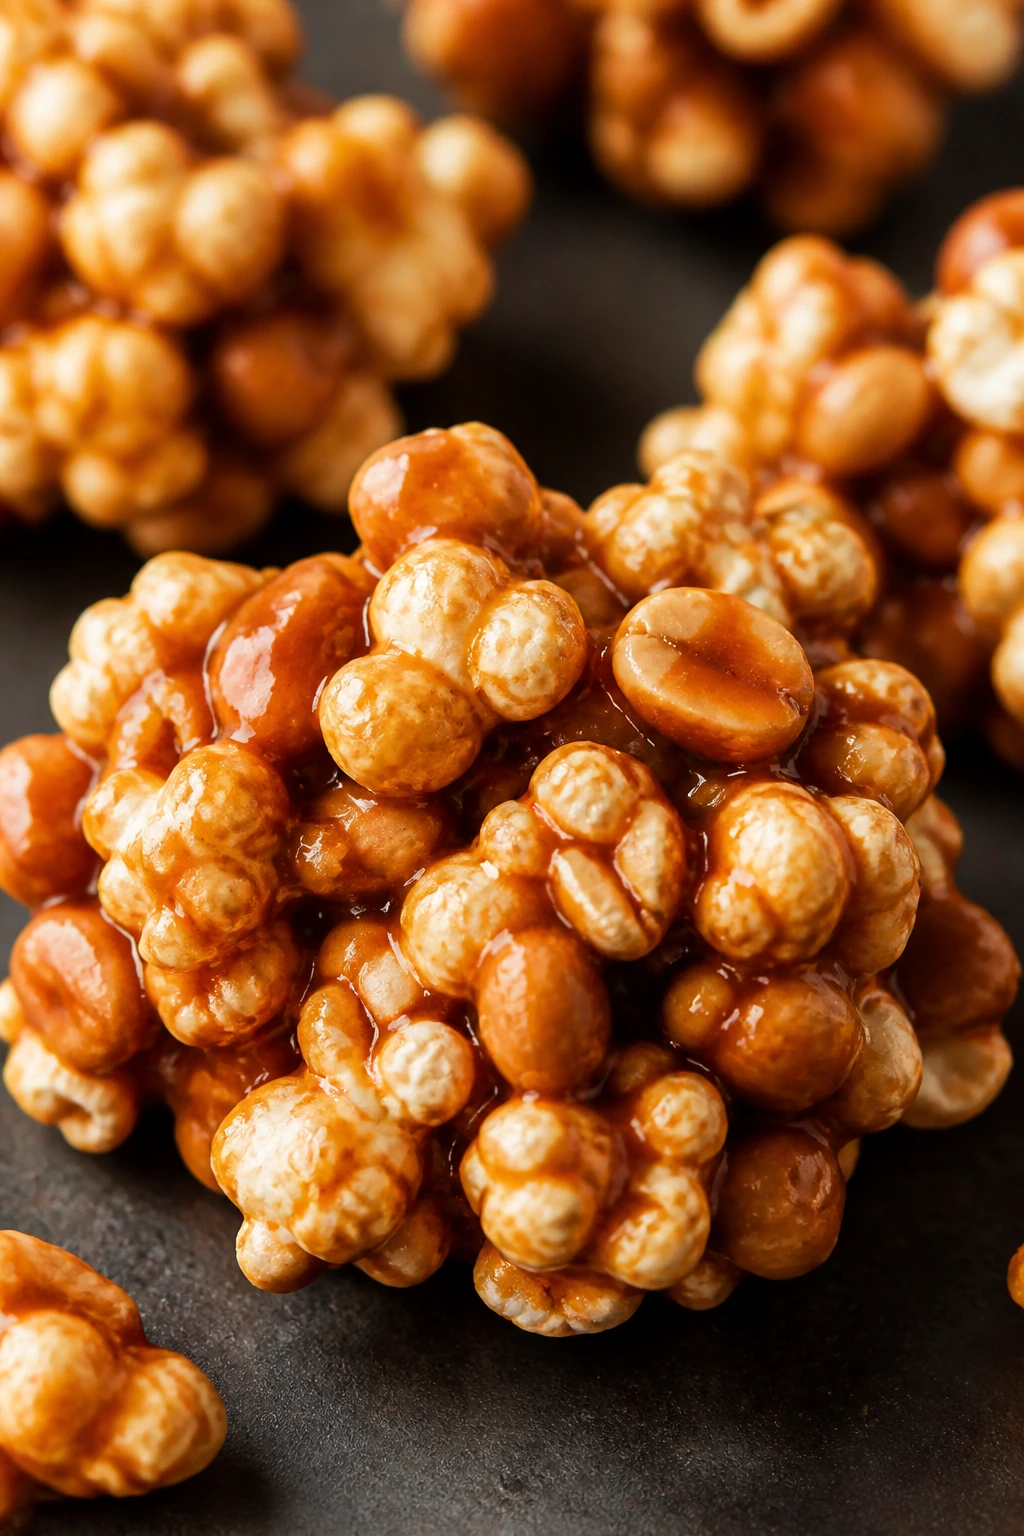
Caramel popcorn clusters are loud in the right way. Crunchy, buttery, a little salty, and easy to pull apart. They belong on a Valentine spread because they break the pattern of soft cookies and bars.
Why It Works: A quick caramel coats the popcorn and bakes into a crisp shell, while baking soda helps the caramel stay light instead of turning into hard candy. The clusters are easy to portion, which is useful when the dessert table already has enough richness.
Key Ingredients:
- 12 cups popped popcorn
- 1 cup granulated sugar
- 1/2 cup unsalted butter
- 1/4 cup light corn syrup or honey
- 1 teaspoon fine salt
- 1 teaspoon vanilla extract
- 1/2 teaspoon baking soda
- 1 cup peanuts, optional
Quick Steps:
- Spread the popcorn in a large bowl or roasting pan.
- Cook the sugar, butter, corn syrup, and salt until bubbling and golden.
- Stir in vanilla and baking soda.
- Pour over the popcorn and toss quickly.
- Bake at 250°F for 45 minutes, stirring once or twice.
- Cool, then break into clusters.
Equipment for This Recipe:
- Large bowl or roasting pan
- Saucepan
- Wooden spoon
- Baking sheet, optional
How to Serve This Dish: Serve the clusters in a wide bowl so the pieces do not crush each other. A few chocolate cookies alongside them make the sweet-salty mix even better.
Pro Tips for This Recipe:
- Remove any unpopped kernels before you start.
- Work quickly once the caramel is ready.
- Let the popcorn cool fully before storing or it turns sticky.
Variations on This Dish:
- Chocolate Drizzle Clusters: Drizzle cooled popcorn with melted chocolate.
- Pretzel Popcorn Clusters: Add broken pretzels for more crunch.
- Nutty Caramel Clusters: Use pecans instead of peanuts.
Common Mistakes to Avoid with This Dish:
- Cooking the caramel too dark: It tastes bitter.
- Not stirring during baking: Some pieces burn while others stay soft.
- Packing it away warm: The clusters clump together.
30. Cardamom Sugar Cookies with Jam Centers
These cookies feel a little more elegant than a plain sugar cookie, but they still come from pantry ingredients. Cardamom gives the dough a clean, floral spice, and the jam center keeps the Valentine color where you can see it.
Why It Works: Sugar cookie dough holds shape well, and cardamom lifts the flavor without taking over. A small pocket of jam bakes into the middle, so you get a soft center and a clean ring around it.
Key Ingredients:
- 2 1/2 cups all-purpose flour
- 1 teaspoon baking powder
- 1/2 teaspoon fine salt
- 1 teaspoon ground cardamom
- 1 cup unsalted butter, softened
- 1 cup granulated sugar
- 1 large egg
- 2 teaspoons vanilla extract
- 1/2 cup thick strawberry or raspberry jam
Quick Steps:
- Whisk the flour, baking powder, salt, and cardamom.
- Cream the butter and sugar, then beat in the egg and vanilla.
- Mix in the dry ingredients and chill the dough for 30 minutes.
- Roll into balls, press a deep thumbprint in each, and fill with a small spoonful of jam.
- Bake at 350°F for 10 to 12 minutes.
- Cool before moving.
Equipment for This Recipe:
- Mixing bowl
- Hand mixer
- Baking sheet
- Teaspoon or small scoop
How to Serve This Dish: Put these on a plate with the jam centers facing up. They look clean and intentional with almost no extra decoration, though a little powdered sugar around the edges never hurts.
Pro Tips for This Recipe:
- Use thick jam so the centers stay neat.
- Make a deep indent before baking and nudge it again if needed.
- Cool fully before stacking or the jam smears.
Variations on This Dish:
- Lemon-Cardamom Cookies: Add lemon zest to the dough.
- Chocolate-Cardamom Cookies: Add 2 tablespoons cocoa.
- Apricot-Cardamom Cookies: Swap in apricot jam for a softer fruit note.
Common Mistakes to Avoid with This Dish:
- Using too much jam: It bubbles over.
- Skipping the chill: The cookies spread.
- Overbaking the edges: They get dry before the centers set.
Why Pantry Staples Pull Their Weight in Valentine Desserts

A pantry dessert succeeds for a simple reason: the flavor has to come from the cooking, not from a shopping list that’s trying too hard. Butter browns, cocoa blooms, sugar caramelizes, jam brightens, and oats toast. That’s real work, and it shows.
The best part is how few ingredients need to do the heavy lifting. A bar cookie with brown sugar and chocolate chips can feel more thoughtful than a cake covered in decoration, because the texture is doing the talking. Crisp edges, soft middles, shiny ganache, a clean jam line in the center — those details land harder than novelty does.
I like the honesty of pantry baking. You can tell when someone paid attention to the oven, the cooling time, and the final finish. That’s why these desserts work for Valentine’s night: they feel intentional without acting precious.
The Pans, Bowls, and Tools That Show Up Again and Again
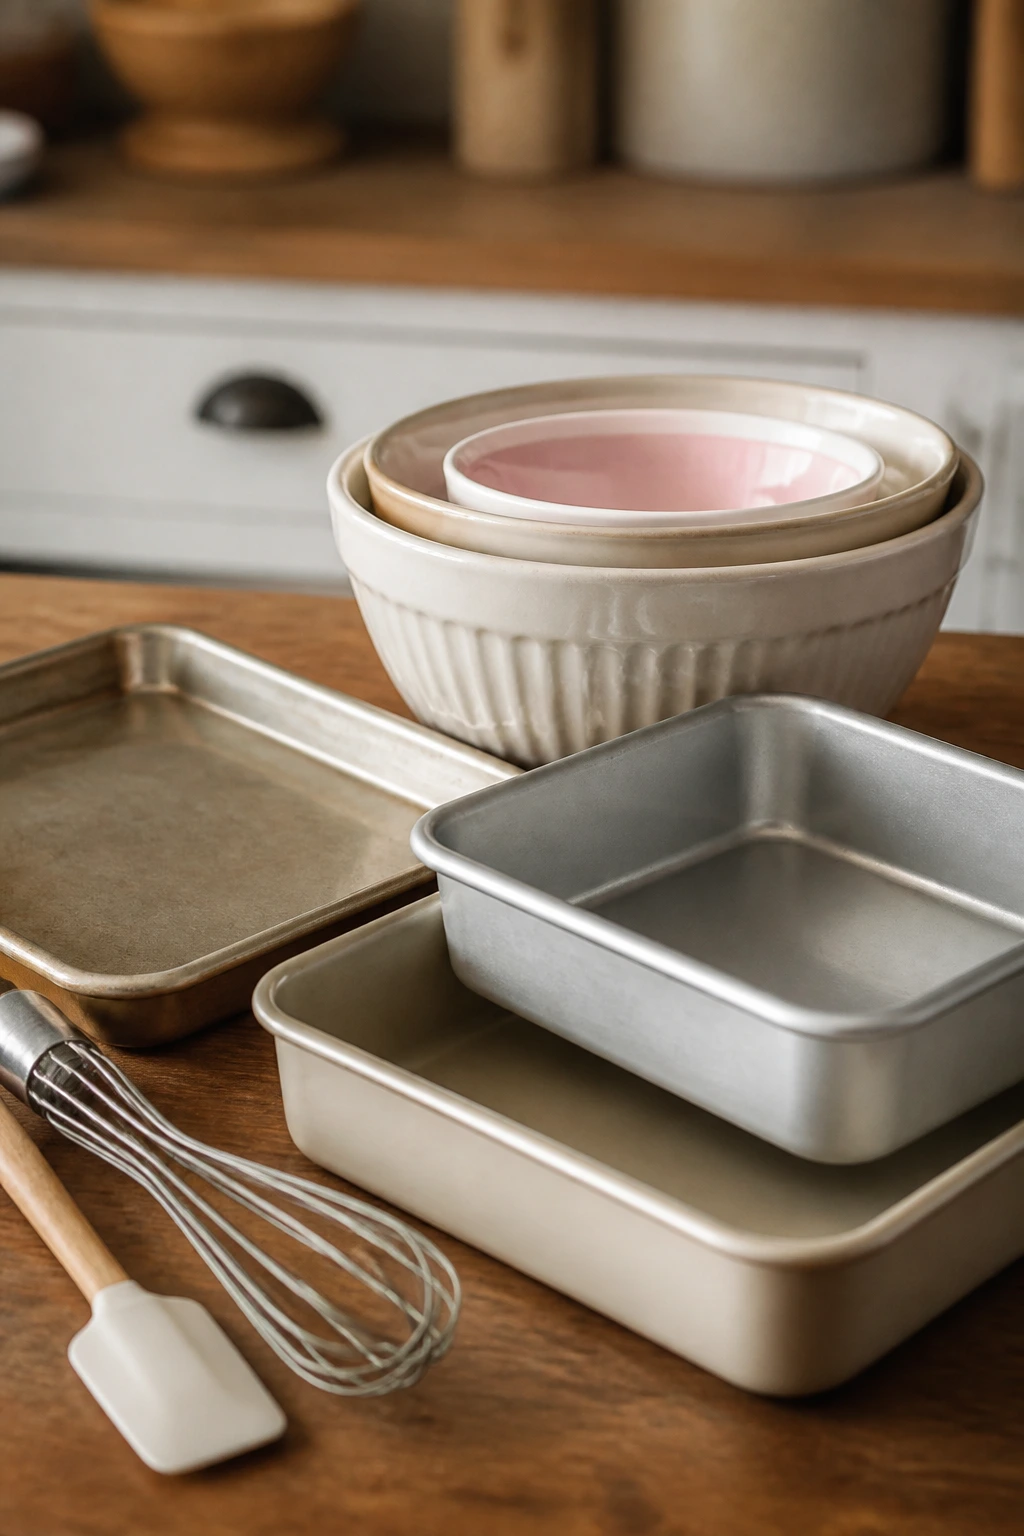
- Mixing bowls in two or three sizes: One large bowl for batter and one medium bowl for dry ingredients keeps things moving without a sink full of dishes.
- Hand mixer or stand mixer: Useful for butter-heavy cookies, frostings, and anything that needs real creaminess.
- Rimmed baking sheets: The safest choice for cookies, biscotti, bark, and clusters. Rimmed sheets also catch the occasional spill.
- 8×8-inch and 9×13-inch pans: The 8×8-inch pan is for brownies, bars, and fudge; the 9×13-inch pan handles cake, cobbler, and larger blondies.
- Parchment paper: Worth using almost every time. It prevents sticking and gives you clean lifting edges.
- Cooling rack: Cookies and bars finish better when air can move under them.
- Whisk and rubber spatula: The whisk clears dry lumps; the spatula gets into the corners and keeps batter from sitting behind.
- Rolling pin and heart cutter: Needed for the cookies that should look like hearts and not just taste like them.
- Saucepan: Handy for fudge, pudding, caramel, and any topping that starts on the stove.
- Fine sieve or sifter: Best for powdered sugar, cocoa dusting, and a cleaner finish.
- Offset spatula: Not required, but it helps with frosting, glaze, and bark.
- Mini muffin tin or 6-inch skillet: These are the special shapes that make the smaller desserts feel intentional.
Smart Shopping for Cocoa, Jam, Chocolate, and Flour
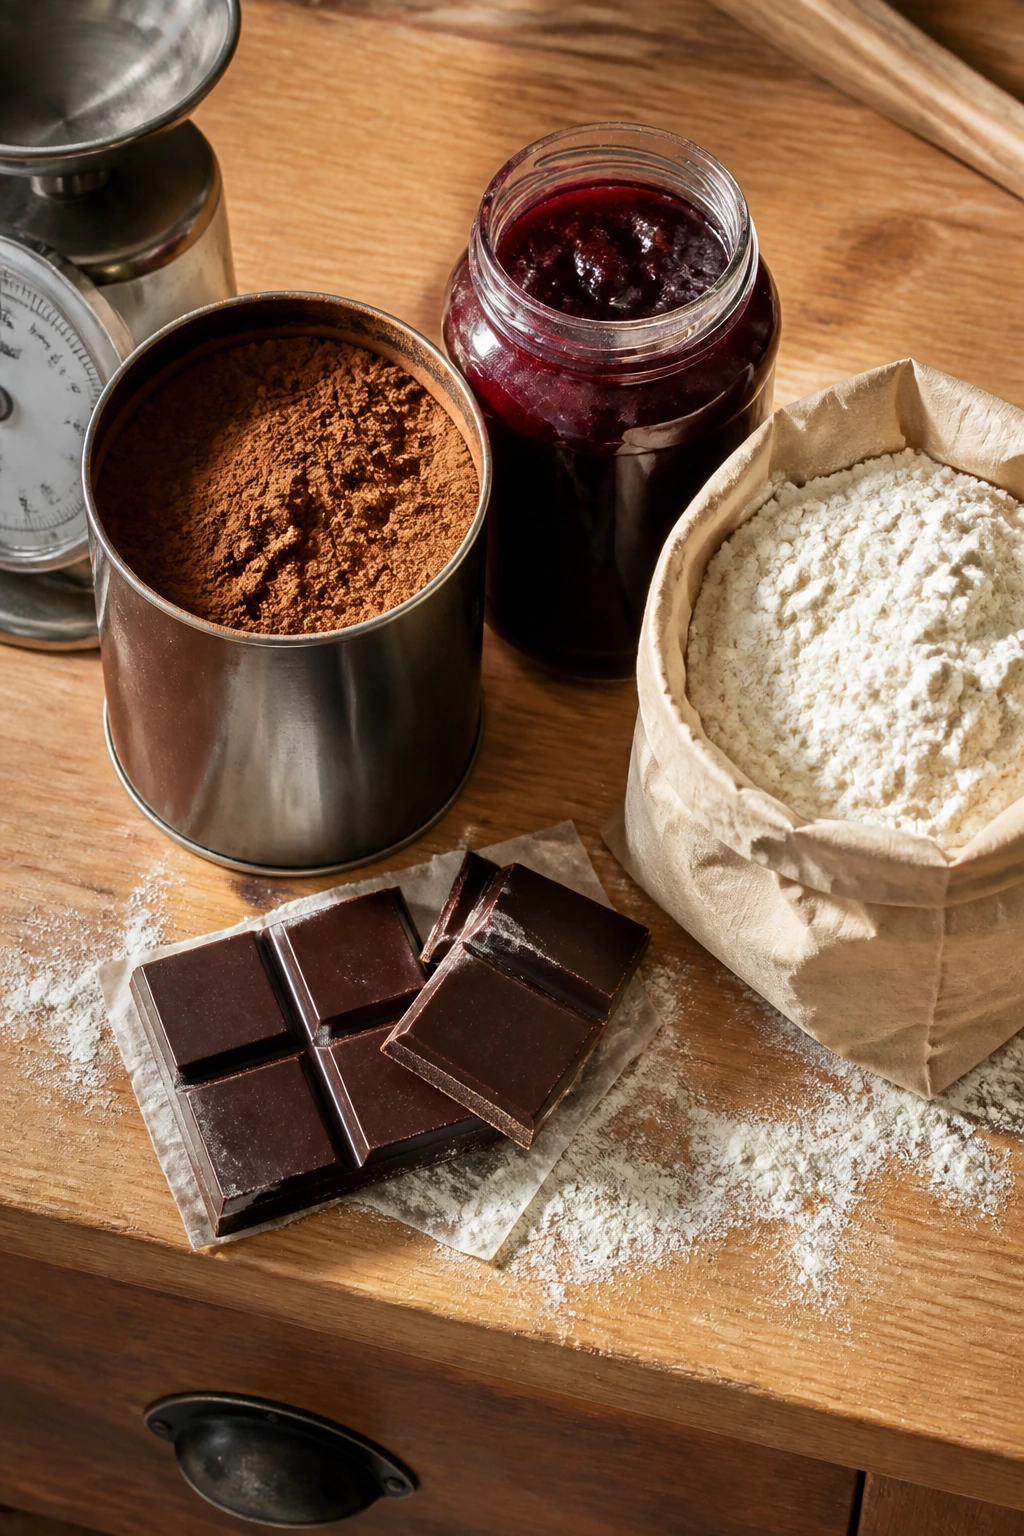
Chocolate desserts live or die on the cocoa powder. Natural cocoa tastes sharper and works best with baking soda in cookies and cakes that need a lighter lift. Dutch-process cocoa is darker and smoother, and it gives brownies and frosting a deeper color. If a recipe calls for one, stick with it unless the recipe gives you room to swap.
Jam matters more than people think. Thick raspberry or strawberry preserves hold their shape in thumbprints, linzers, and swirl bars, while runny jam leaks into the dough and disappears. Seedless jam gives cleaner slices, but seeded jam can add a little texture if you do not mind it.
For cookies, use unsalted butter when you can. It keeps the salt level under control, and that matters when cocoa, chocolate chips, and nuts are already working in the same pan. If salted butter is what you have, use it and reduce the added salt a touch, not all the way.
Old-fashioned oats are the right call for oatmeal cookies and crisps because they stay chewy. Quick oats break down too much and make the texture softer than it should be. The same goes for nuts: buy them fresh, or keep them in the freezer so they do not taste stale and oily.
When a recipe uses chocolate chips, semi-sweet is the safest default. Dark chocolate chips feel sharper and less sweet, which is useful in bark, truffles, and fudge. White chocolate can work too, but only if you want the dessert to lean sweeter and look lighter on the plate.
How to Serve a Pantry-Staple Dessert Spread
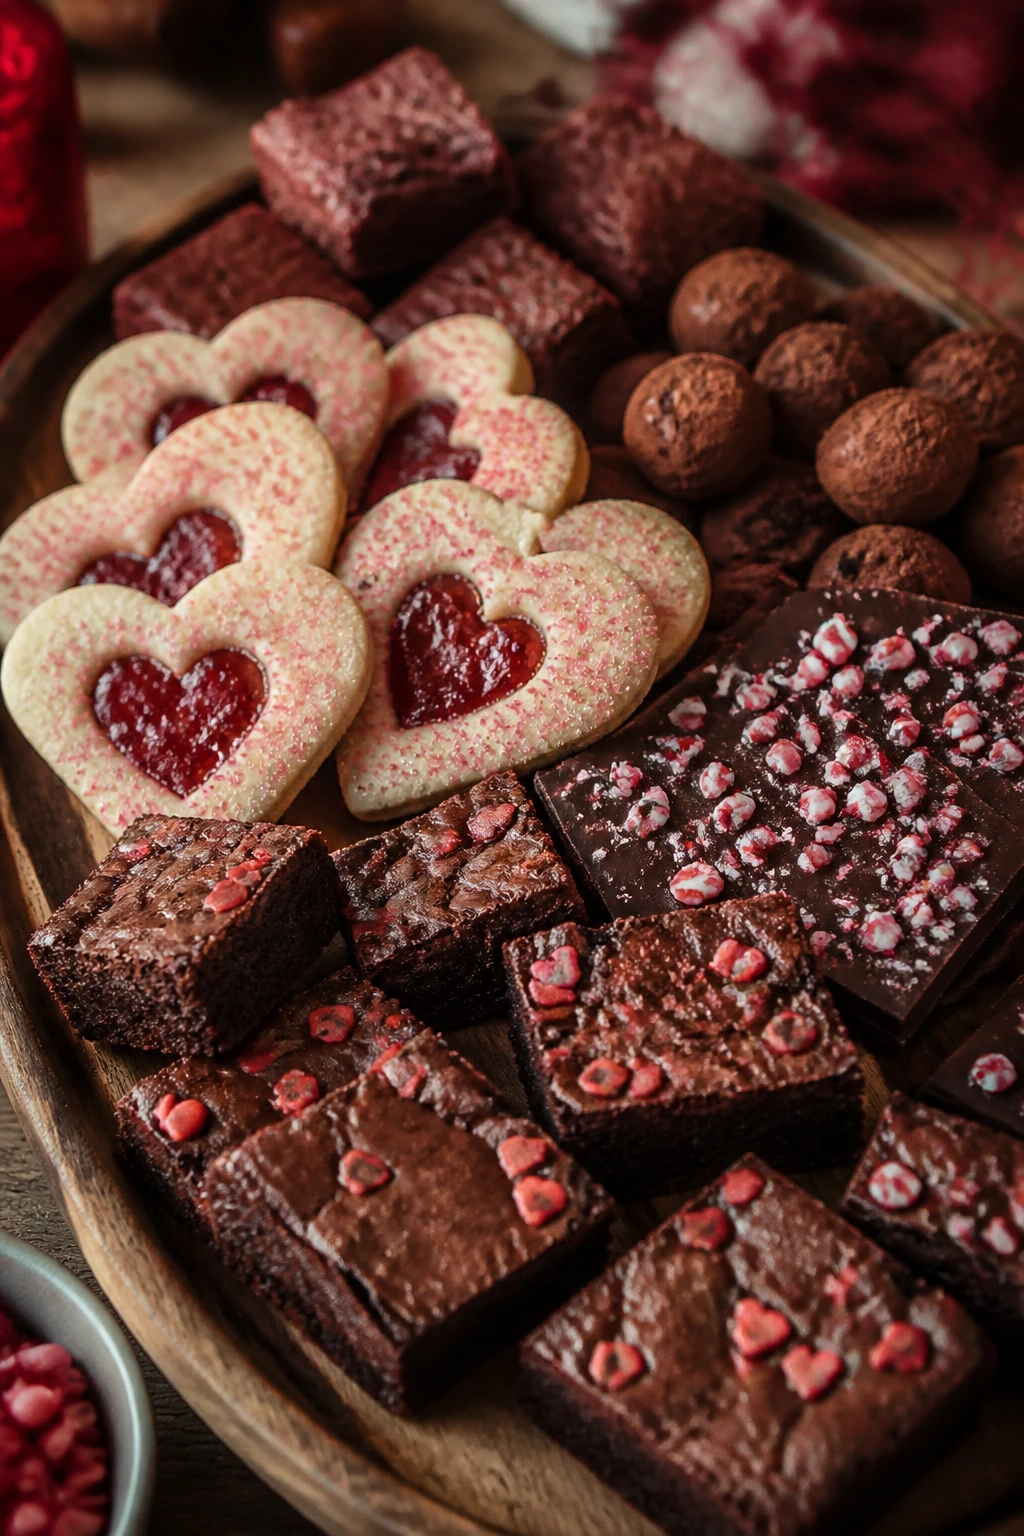
Presentation: Mix soft, chewy, and crisp desserts on the same platter so the table does not all feel the same. A stack of heart cookies beside a bowl of bark and a plate of brownies looks more thoughtful than a line of identical squares. Powdered sugar, flaky salt, and a few jam streaks do a lot of the visual work.
Accompaniments: Keep the sides simple. Vanilla ice cream for crisps and cobblers, whipped cream for pudding and cake, cold milk for cookies, and coffee for brownies, truffles, and biscotti. A few fresh berries can brighten the richer sweets, but they should stay in the supporting role.
Portions: For a dessert board, plan on 2 cookies, 1 small brownie or bar, or 2 to 3 pieces of bark per person. A skillet cookie or cake slice usually covers one generous serving, while truffles and fudge are richer and do better in smaller bites. If you’re feeding a small table, a half batch of bars often disappears faster than a whole tray of cookies.
Beverage Pairing: Strong coffee, espresso, or hot chocolate fits nearly everything here. For a softer pairing, use black tea or sparkling cider. The point is contrast: something hot with cold ice cream, something bitter with sweet chocolate, or something fizzy with a dense bar.
Flavor Tweaks That Make These Desserts Feel Special
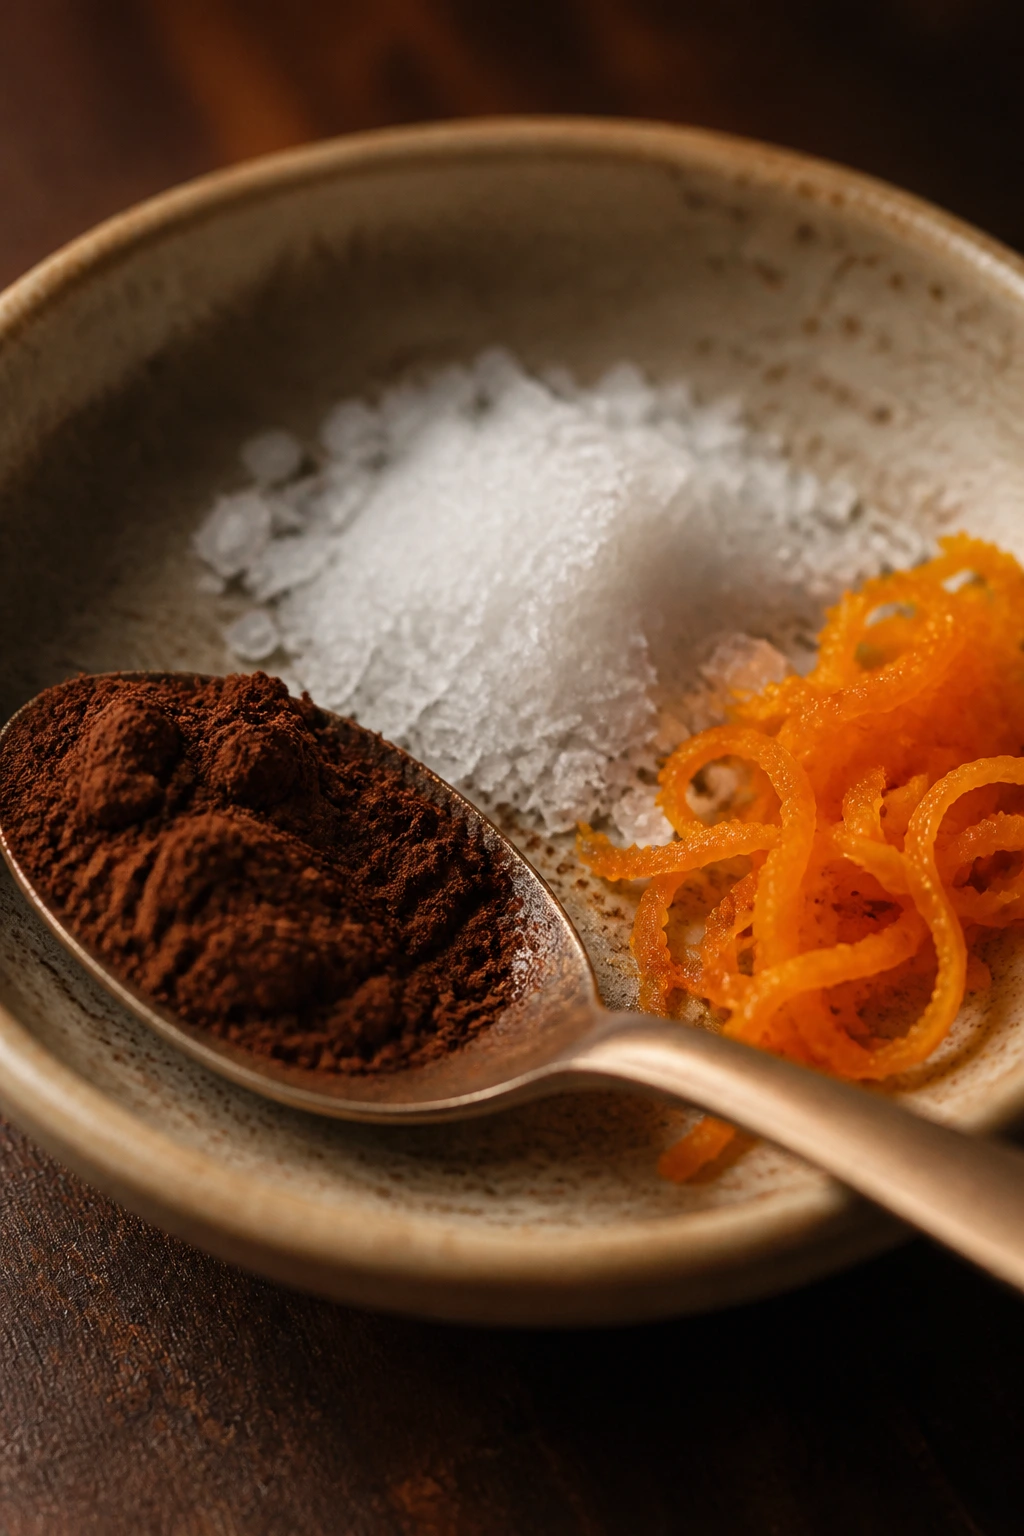
Flavor Enhancement: Bloom cocoa in melted butter, hot coffee, or warm milk when the recipe allows it. That one move makes chocolate taste fuller and less dusty. A pinch of flaky salt on brownies, bark, or fudge also wakes the whole bite up.
Customization: Keep a few pantry add-ins nearby: chopped nuts, dried cherries, orange zest, espresso powder, and a jar of raspberry jam. They let you pivot a cookie dough into a new flavor without changing the base recipe. That’s the kind of flexibility pantry baking should give you.
Serving Suggestions: Use heart cutters on brownies or blondies after they cool, dust shortbread with powdered sugar, or drizzle melted chocolate over cookies in a loose zigzag. A dessert does not need a complicated garnish. It needs one finish that makes the plate look deliberate.
Make-It-Yours: For a dairy-free version, use plant butter and dark chocolate where the recipe is forgiving, like bark, cookies, or bars. For a gluten-free version, a good 1:1 flour blend works best in cookies, brownies, and some bar desserts. If you want less sugar, lean on dark chocolate, unsweetened cocoa, and fruit-forward jams instead of piling on extra frosting.
Make-Ahead, Storage, and Reheating Notes

Most of these desserts handle make-ahead work better than people expect. Cookie doughs for sugar cookies, thumbprints, blossoms, and shortbread can usually be chilled overnight and baked the next day. Brownie batter, blondie batter, and bar-cookie dough should be baked the day they’re mixed, but the finished bars keep well once cooled.
Soft cookies, brownies, blondies, and cake slices hold at room temperature for 3 to 4 days in airtight containers. Crisp cookies like shortbread, biscotti, and some sugar cookies can go 5 to 7 days if they stay dry. Keep crisp and soft cookies separate, because one kind steals moisture from the other and turns the whole box odd.
Fudge, truffles, rice pudding, and chocolate pudding belong in the fridge. Fudge usually keeps for about 2 weeks chilled, truffles for 1 to 2 weeks, and puddings for 3 to 4 days. Bring truffles back to room temperature for 10 to 15 minutes before serving so the centers soften a little.
Fruit desserts like apple crisp and cherry cobbler can be refrigerated for 2 to 3 days. Reheat them in a 300°F oven for 10 to 15 minutes, loosely covered with foil if the top is already browned. Microwave reheating works in a pinch, but the topping will go soft, and that is part of what makes the oven worth the trouble.
Most cookies and bars freeze well for up to 2 months. Wrap them tightly, then slide them into a freezer bag or container. Thaw at room temperature while still wrapped so condensation does not hit the surface all at once.
Pantry-Friendly Variations Worth Trying
Gluten-Free Pantry Swaps: Brownies, fudge, bark, truffles, and puddings are the easiest place to start, because several of them need little or no flour. For cookies and bars, use a 1:1 gluten-free baking blend that already contains xanthan gum. The dough may need a shorter chill, since some blends absorb liquid faster than all-purpose flour.
Dairy-Free Dessert Box: Plant butter works well in chocolate chip cookies, sugar cookies, and many bar recipes. Coconut milk can replace some or all of the milk in pudding and rice pudding, and dark chocolate is usually the easiest dairy-free candy option. The result leans a little richer and a little less buttery.
Egg-Light Baking: Fudge, bark, caramel clusters, and some no-bake bars barely care about eggs at all. Where eggs matter more, use a flax egg in chewy bar recipes rather than delicate cookies. You will lose a little lift, so keep the desserts dense and square instead of trying to make them fluffy.
Extra-Chocolate Valentine: This is the easy route if you want the whole table to feel cohesive. Add cocoa to sugar cookies, drizzle chocolate over bark and shortbread, and finish brownies with a thin ganache instead of frosting. It reads as intentional without turning every dessert into the same thing.
Jam-Forward Pink Finish: Raspberry and strawberry jam are the fastest way to bring in Valentine color with no food dye. Use it in thumbprints, linzers, swirl blondies, and jam-centered sugar cookies. Thick jam gives you the cleanest look, and seedless jam gives the smoothest slice.
Lower-Sugar Adjustments: The best place to trim sugar is in toppings, frostings, and glazes, not the cookie or cake base itself. Swap some chocolate chips for dark chocolate, lean on spice and vanilla for flavor, and use tart fruit to keep sweetness in check. Cut the bars smaller, too. That helps more than people think.
Common Mistakes That Make Simple Desserts Taste Flat
- Using stale baking soda or baking powder: Cookies spread too much, cakes stay low, and nothing seems to rise the way it should. Replace both when they have been open a while and test them if you are unsure.
- Scooping flour too hard: Packing flour into the cup makes cookies dry and bars dense. Spoon it in, level it off, and stop there.
- Skipping the chill on cut cookies: Heart shapes, thumbprints, and Linzer cookies lose their edges when the dough is warm. Ten to thirty minutes in the fridge changes the result more than people expect.
- Cutting brownies and bars before they cool: The knife drags through the middle and you get a crumbly mess instead of clean squares. Let the pan cool all the way down, or chill it briefly if you want neat edges.
- Overbaking for color alone: Chocolate desserts often look done before they are done, and fruit desserts keep tightening after the oven switch turns off. Pull them when the centers still have a little give.
- Adding jam, chocolate, or marshmallows at the wrong moment: Too early and they burn or sink; too late and they never melt into the dessert. The last few minutes matter.
Questions People Ask Before Baking

Can I make most of these desserts with ingredients I already have?
Yes. Flour, sugar, butter, eggs, cocoa, oats, chocolate chips, jam, and vanilla cover a huge stretch of the list. Once those are in place, you’re mostly choosing shape and texture.
Which recipes are best when I need dessert fast?
Bark, fudge, truffles, no-bake peanut butter bars, and skillet cookie are the quickest wins. They also require less cooling time than layer cakes or filled cookies, which matters when dinner runs late.
What if I only have salted butter?
Use it. Just reduce the added salt slightly, especially in cookies, brownies, and bars. Salted butter is not a problem; double-salting is.
Can I freeze these Valentine desserts ahead of time?
Yes, especially cookies, brownies, bars, and bark. Freeze them in a single layer until firm, then pack them tightly so they do not pick up freezer smells. Thaw at room temperature while still wrapped.
How do I keep heart-shaped cookies from spreading?
Chill the dough, roll it evenly, and bake on a cool sheet lined with parchment. If the dough feels soft in your hands, it is too warm for clean shapes.
What can I use instead of raspberry jam?
Strawberry, cherry, and apricot all work well. Pick a thick preserve rather than a thin jelly if you want the filling to stay where you put it.
Do I need fancy decorating tools for any of these?
No. A spoon, a fork, a sieve, and a cookie cutter cover almost everything here. Good finishing matters more than special equipment.
Why did my chocolate turn grainy?
Heat or water usually caused it. Melt chocolate slowly, keep all bowls and spoons dry, and avoid letting steam hit the bowl while it’s over the pot.
A Sweet Finish From the Cupboard
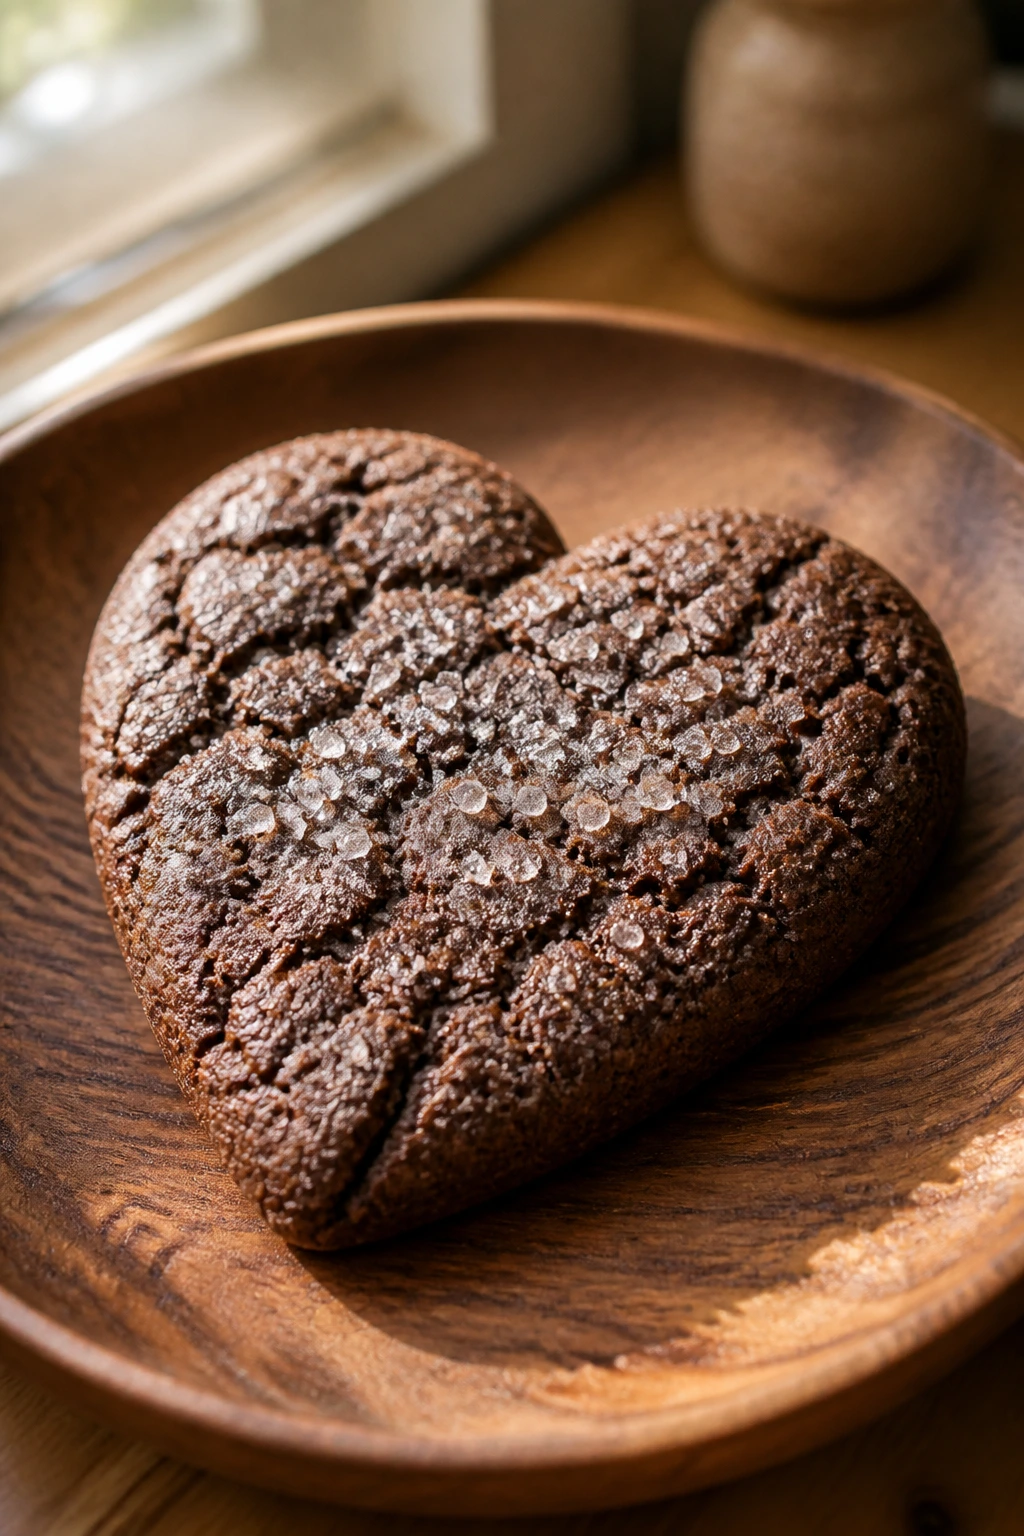
There’s a particular satisfaction in making a Valentine dessert from the things already waiting in the kitchen. The pantry does not always feel romantic at first glance, but cocoa, jam, butter, sugar, oats, and chocolate can still put on a proper show when you give them the right shape and a little attention.
If you want the easiest path to a polished table, start with the heart-shaped chocolate sugar cookies, the raspberry thumbprints, or the no-bake peanut butter bars. If you want something a little richer, the brownies, truffles, and chocolate cake are right there waiting.
A good Valentine dessert is not the one with the longest ingredient list. It’s the one you can make cleanly, serve warm or chilled at the right moment, and enjoy without thinking about the store you never had to visit.