
The first time a pan of caramelized vegetables smells like sweet onion, toasted brassicas, and a little smoke from the edge of the skillet, you realize how wrong the word “healthy” can sound when people use it badly. Steamed vegetables are obedient. Roasted vegetables are useful. But vegetables that are browned properly — with enough heat to make the cut sides darken and the edges go crisp — taste like they were cooked by someone who pays attention.
That matters for dinner more than people admit. If the vegetable on the plate has some color, some bite, and that deep savory edge from browning, the whole meal feels finished. A bowl of plain rice becomes dinner. A tray of carrots and onions becomes dinner. Even the stubborn vegetables that usually get pushed aside — cauliflower, Brussels sprouts, cabbage, mushrooms — turn into something people actually go back for when they’re cooked this way.
The trick is not a secret ingredient. It’s the handling. Dry surfaces. Enough space. Heat that stays steady. A little patience at the moment when the vegetables would rather steam than brown. Get those parts right and you can make vegetables taste rich without piling on cream, butter, or cheese. That’s the sweet spot: deeply flavorful food that still eats like a weeknight meal you can feel good about.
Why This Approach Works on a Weeknight Table
-
Browning creates depth without extra clutter. A hot pan gives you savory notes that taste almost meaty in mushrooms, nutty in cauliflower, and sweet in onions, all from the vegetables themselves.
-
You do not need a heavy sauce to make the plate feel complete. A squeeze of lemon, a spoon of yogurt, or a sprinkle of herbs can wake up browned vegetables faster than a thick, rich topping.
-
The same method works across a wide range of vegetables. Carrots, Brussels sprouts, cabbage, fennel, mushrooms, and cauliflower all like high heat, so one basic technique can carry a whole dinner plan.
-
The texture is half the point. A browned edge on a carrot or a Brussels sprout cut face gives you contrast: soft center, crisp outside, no mush.
-
Leftovers hold up better than you’d expect. Cooked vegetables with some caramelization tend to taste better after a night in the fridge because the seasoning settles in and the flavors stop shouting at each other.
-
It fits a healthy dinner without feeling austere. You can keep the oil modest, use a lot of vegetables, and still end up with something satisfying enough to anchor a plate.
Why Browning Changes the Way Vegetables Taste
What people call “caramelized” is often a mix of two things, and that distinction matters. Pure caramelization is the browning of sugars. The Maillard reaction is what happens when amino acids and sugars meet dry heat and start building that toasty, savory flavor we all associate with roasted meat, toast, and a good crust on bread. Vegetables give you both, in different amounts.
Onions are the obvious example. They carry enough sugar to turn soft, golden, and almost jammy when you give them time. Carrots do something similar, though they keep a little more snap if you don’t cook them into submission. Brussels sprouts and cauliflower lean harder on the Maillard side; their cut surfaces go brown and nutty while the inside stays tender. That’s why the same pan can taste so different depending on what’s in it.
There’s also a psychological piece here, and I think it’s worth saying plainly. Brown food reads as cooked food. Pale food can look underdone even when it’s safe and tender. If your vegetables have color — not scorched, not black, just genuinely browned — the plate feels more intentional. The flavor lands faster, too. Your tongue gets sweetness, salt, a little bitterness, and a clean finish instead of one flat note.
The nice part is that this doesn’t require a big sauce rescue operation. The vegetables themselves are doing the work. When you stop short of steaming and let the surfaces dry out enough to brown, you get that deep, almost slow-cooked taste in a much shorter window. That’s the whole trick, and it never gets old.
Which Vegetables Caramelize Beautifully and Which Ones Need Help
Some vegetables walk into a hot pan ready to behave. Others need a little coaching. Knowing which is which saves you from throwing everything in together and wondering why half the tray is gorgeous while the rest turns limp and watery.
Vegetables that brown with almost no drama
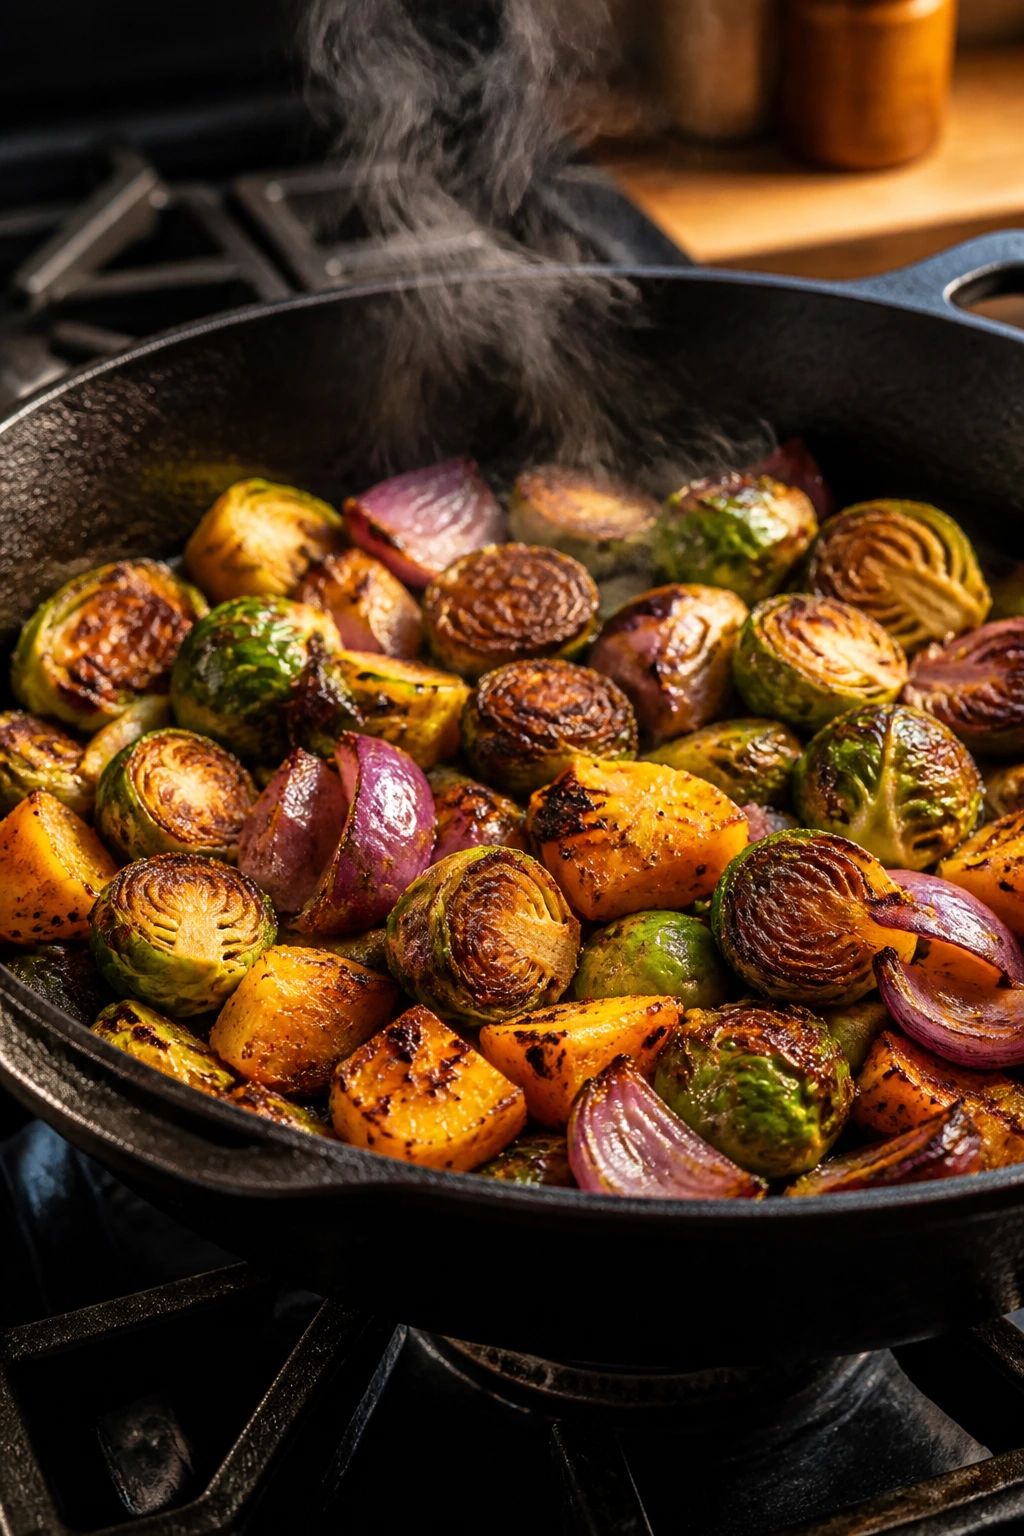
Onions are the obvious star. Yellow onions cook into sweet ribbons when sliced from pole to pole and left alone long enough to soften, then color. Red onions work too, though they can taste a touch sharper. Mushrooms are also excellent, especially cremini and shiitake, because they release moisture first and then soak up seasoning once that moisture cooks off.
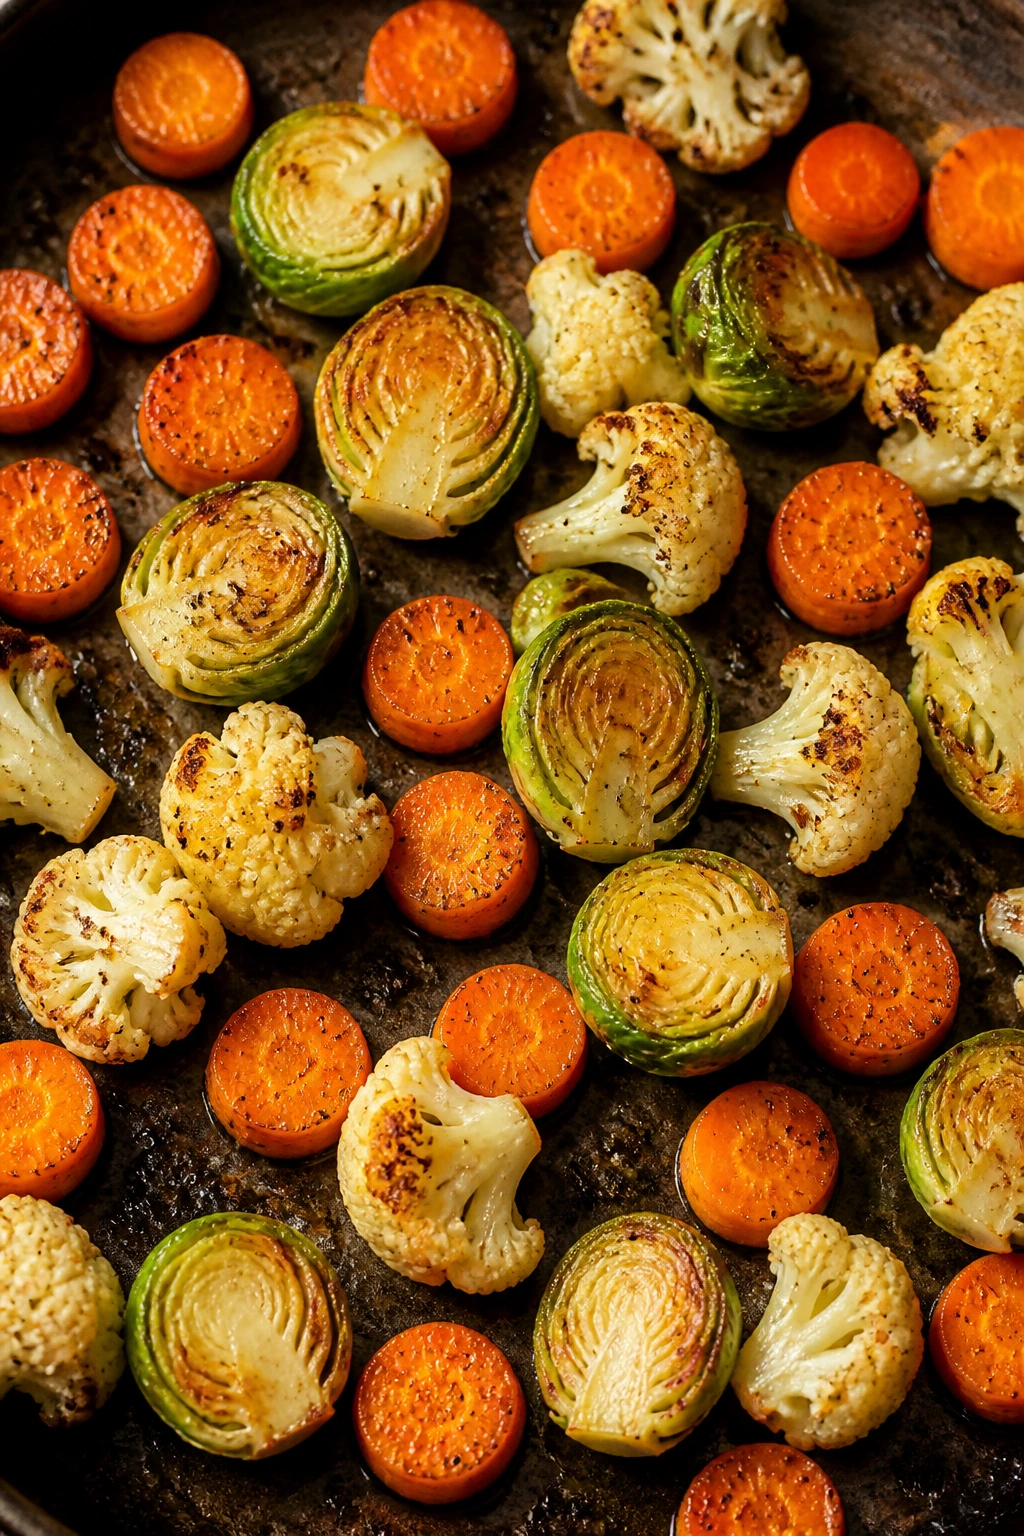
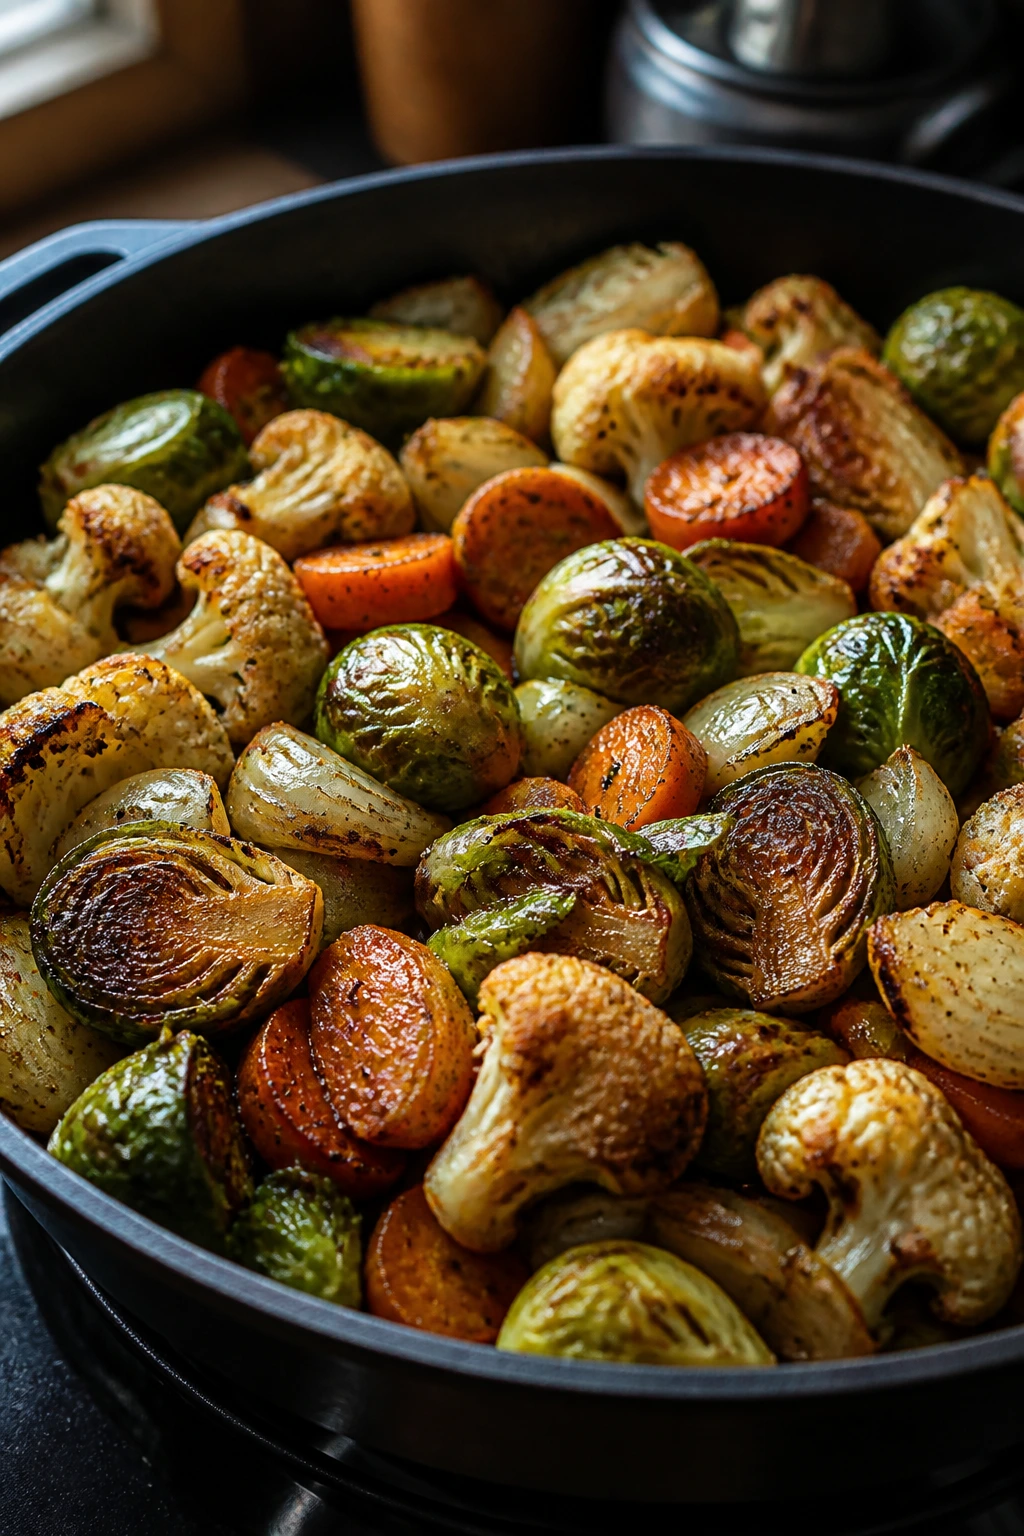
Brussels sprouts are one of my favorite vegetables for this method. Cut them in half, get the flat side down, and they’ll turn bronze and crisp at the edge. Cauliflower is in the same camp, especially when the florets have broad cut faces. Cabbage, sliced into wedges or thick strips, develops a faint sweetness that catches people off guard in a good way.
Vegetables that need a longer runway
Carrots, parsnips, sweet potatoes, and beets all caramelize well, but they take longer because they’re dense. You want smaller pieces here — half-moons, batons, or 1/2-inch chunks — so the outside can brown before the center turns chalky. Fennel is another one worth mentioning. It goes from crisp and a little sharp to soft, sweet, and almost perfumed if the heat is steady.
Eggplant is a special case. It browns beautifully, but it drinks oil if you let it, so it needs enough fat to coat the surface and enough heat to set the exterior quickly. If you underdo the oil, it can dry out before it gets that lush, silky texture people want from it.
Vegetables that need staging or separate treatment
Zucchini and summer squash are tricky because they carry a lot of water. You can absolutely use them, but they do not belong in the pan at the same moment as carrots or cauliflower unless you like a soft, slightly soggy finish. Tomatoes are similar. They burst, collapse, and flood the pan before they brown unless you use them as a late addition.
Spinach, kale, chard, and other leafy greens wilt fast enough that they’re better treated as finishers, not the main event. Toss them into the warm vegetables at the end, or lay them over the top and let the residual heat do the work. They’re useful. They just aren’t the ones doing the browning.
One quiet rule helps here: the harder the vegetable, the earlier it goes in. Keep that in your head and dinner gets easier immediately.
The Pan, Oil, and Heat That Change the Outcome
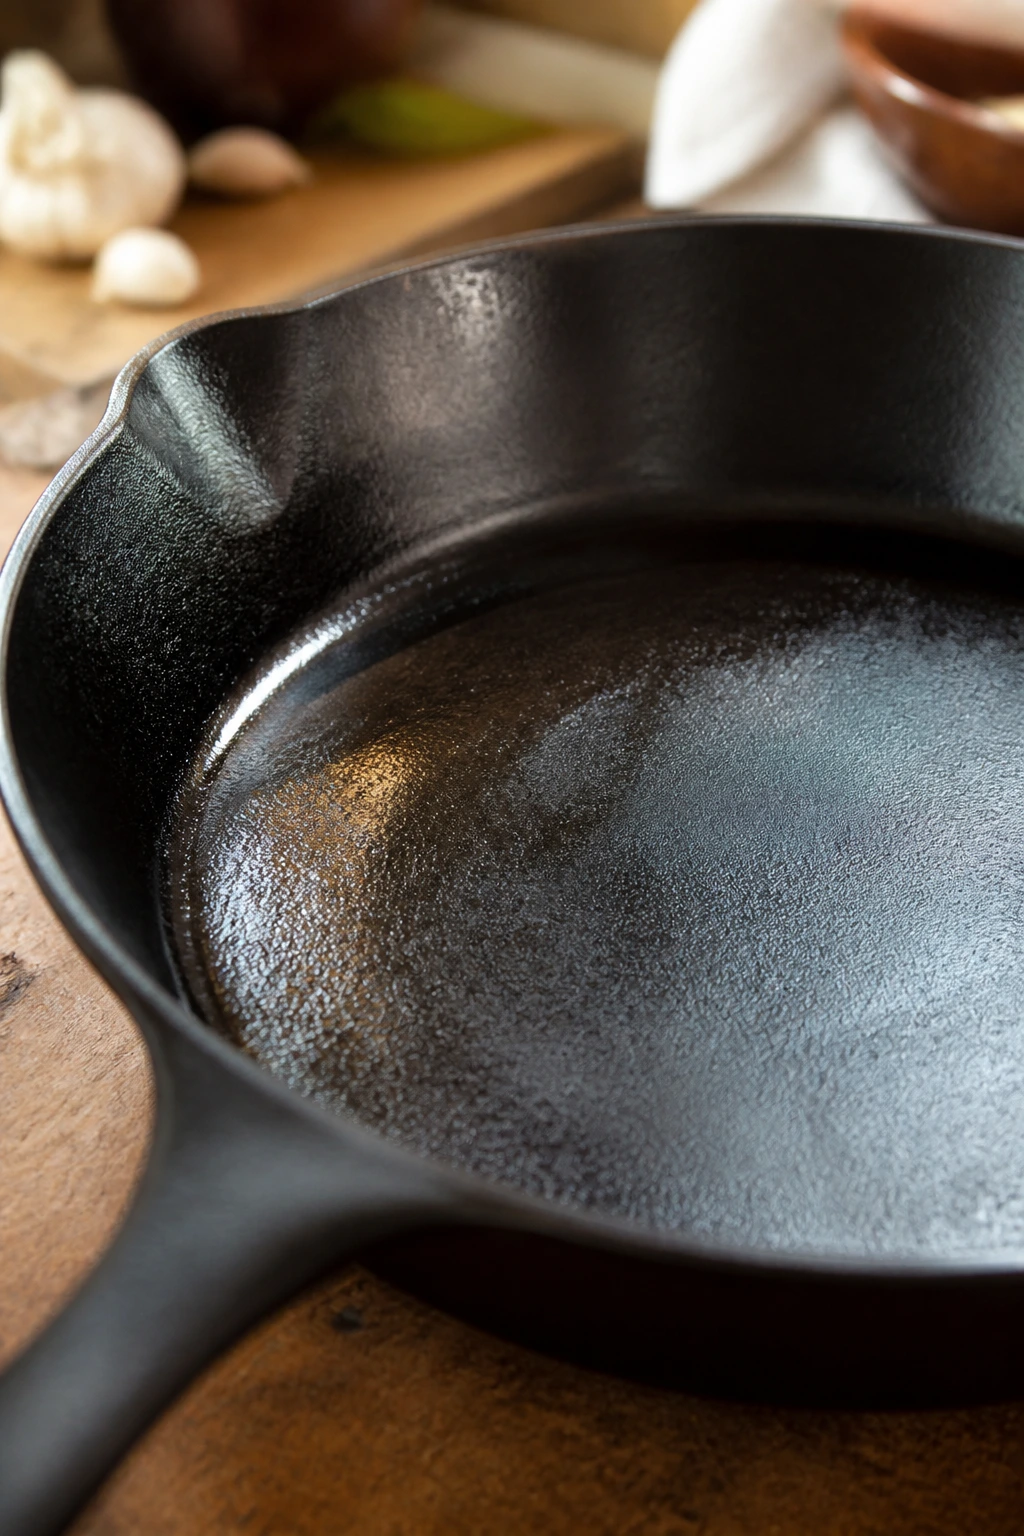
A lot of bad vegetable cooking comes from using the wrong vessel and then acting surprised when the result looks pale. A flimsy pan loses heat every time you add food. A pan that’s too small traps steam. And oil alone can’t save you if the vegetables are crowded so tightly they basically braise in their own water.
Cast iron is the obvious workhorse. It holds heat well, gives you steady browning, and forgives small mistakes. Stainless steel also works nicely if you’re comfortable watching the heat. I’m less enthusiastic about nonstick for high-heat caramelizing; it can do the job at a lower temperature, but it’s not my first pick for a serious brown edge.
For oil, you want enough to coat the vegetables lightly and keep them from sticking, but not so much that they swim. Olive oil gives a good flavor and handles moderate-high heat fine. Avocado oil is even more tolerant if you like cooking hot. Grapeseed and refined sunflower oil are neutral and behave well when you want the vegetable flavor to stay front and center.
Heat should be hot enough to make the vegetables hiss when they hit the pan, but not so ferocious that the outside blacks out before the inside softens. Medium-high is the sweet spot for a skillet. On a sheet pan, 425°F to 450°F is usually where the color starts to show up without turning the whole pan into a char trap.
A simple visual check helps. If the vegetables sit in silence when they hit the pan, the pan is too cool. If the oil smokes hard and the garlic turns bitter in less than a minute, the pan is too hot. You’re aiming for the middle ground where the vegetables start to color within a few minutes and the smell turns nutty, not burnt.
Cut Size, Salt, and Surface Moisture
Cut size is not a small detail. It decides whether the center stays tender, whether the exterior can brown, and whether everything finishes at the same time. The more uniform the pieces, the less babysitting you need. That sounds obvious, but it’s the difference between vegetables that cook together and vegetables that make you chase them around the pan.
Hard vegetables do better in smaller, even cuts. Carrots cut into 1/2-inch coins or batons brown faster than giant chunks. Brussels sprouts halved from stem to tip expose a flat side that browns beautifully. Cauliflower florets should be about golf-ball size or a little smaller, with enough flat surface to touch the pan. If you leave pieces too big, the outside can look done while the inside still feels raw.
Water is the other sneaky issue. Freshly washed vegetables need to be dry, not just rinsed. Mushrooms are especially annoying here; if they’re wet, they steam first and brown later, and later is not what you want. A clean kitchen towel or paper towels can save you a lot of frustration. Pat the surfaces dry before they hit the pan.
Salt deserves some thought, too. Light seasoning before cooking helps vegetables taste like themselves, but too much salt too early can pull water out before browning starts. I like salting in stages. A little before cooking, then a final pinch after the vegetables come off the heat, plus acid at the end if the flavor needs brightness. That gives you seasoning that lands in layers, not one flat blast of salt.
A useful way to think about cut size
- Large, dense vegetables: 3/4-inch chunks for roasting, 1/2-inch for skillet cooking.
- Medium vegetables: Halves or thick wedges work better than tiny dice.
- Tender vegetables: Keep them larger than you think so they don’t collapse before the browning is done.
You can break that rule on purpose, of course. Smaller pieces mean more surface area and faster color. Bigger pieces mean more contrast and a little more bite. Pick the outcome first, then cut to match it.
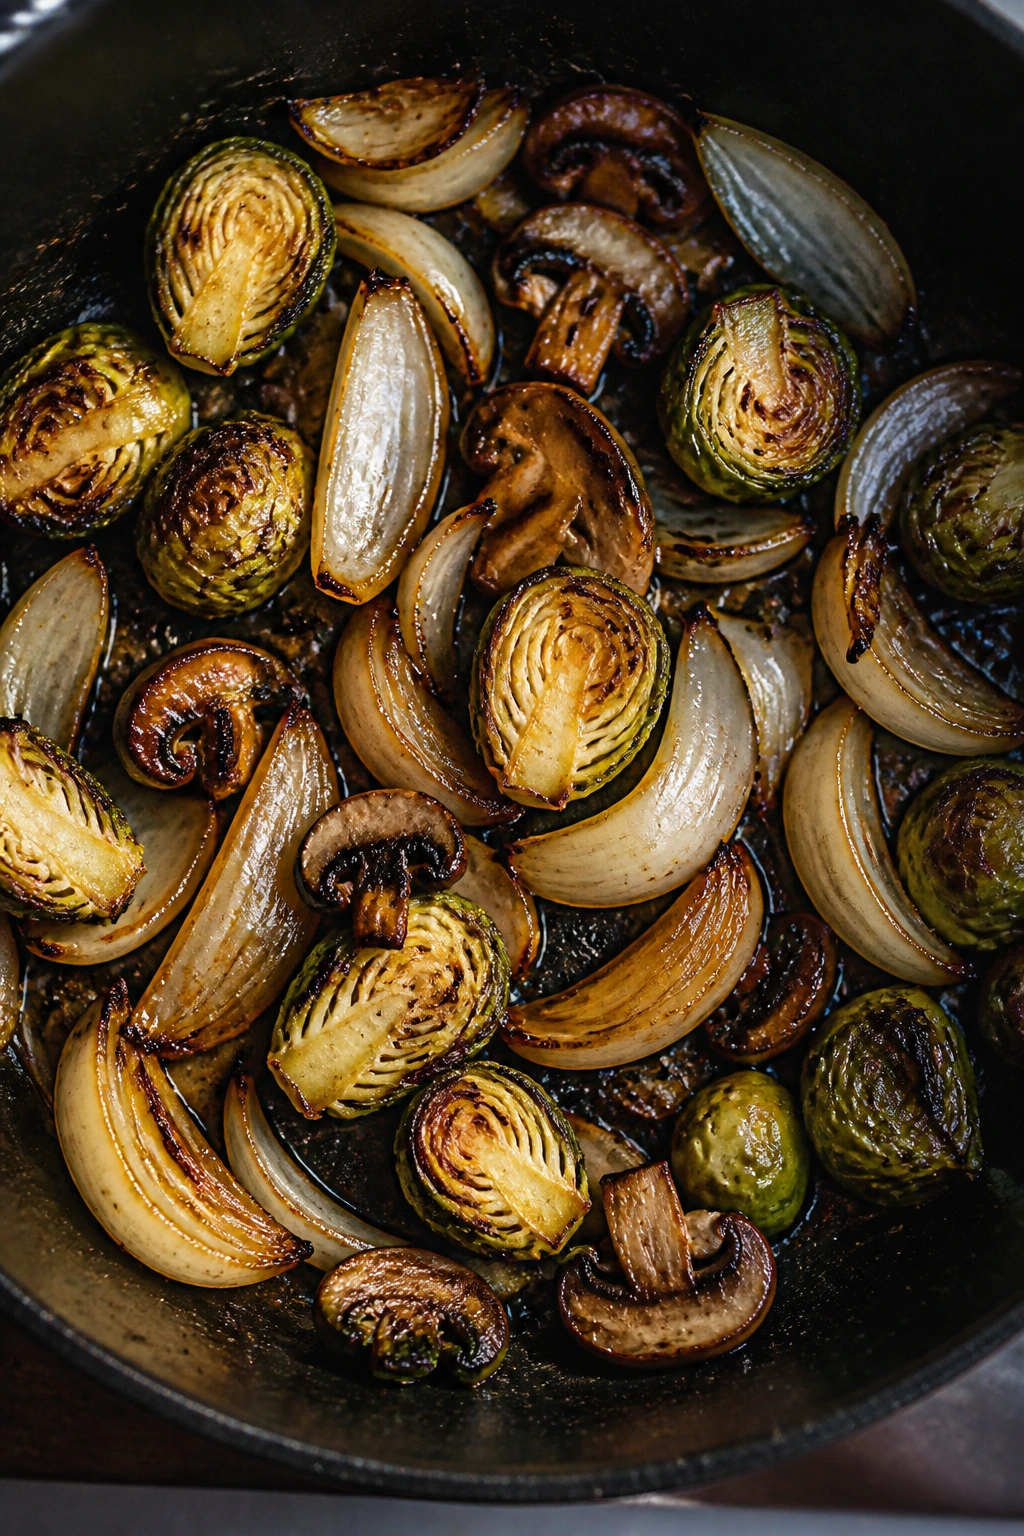
A Stovetop Method for Deep Brown Edges
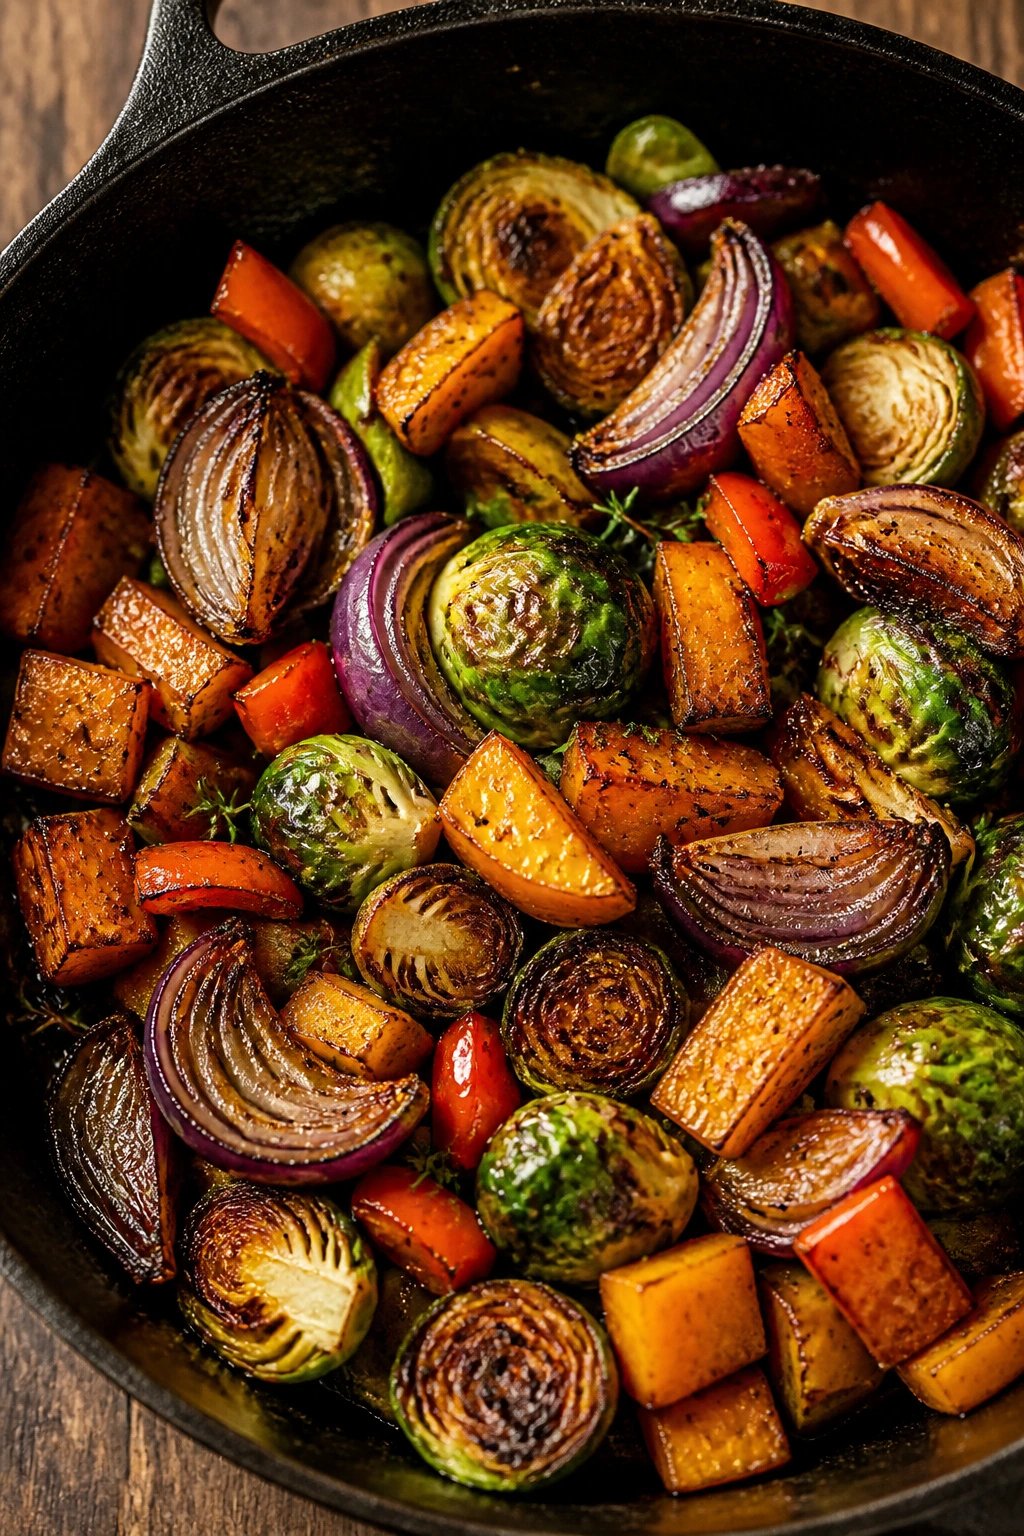
A skillet gives you the most control. It’s the right move when you want a smaller batch, a mix of vegetables, or enough browning to make the kitchen smell like someone knows what they’re doing.
Start with the vegetables that need the most time. Heat a 12-inch cast-iron or stainless skillet over medium-high heat for 2 to 3 minutes. Add 1 to 2 tablespoons of oil, just enough to coat the bottom in a thin sheen. When the oil shimmers, add the hard vegetables in a single layer. Carrots, parsnips, cauliflower, Brussels sprouts, and fennel all fit this first round.
Leave them alone long enough to matter. Two to four minutes without stirring is usually enough for the first side to brown. If you keep moving them too soon, they never get the chance to pick up color. Stir or flip, then give them another few minutes. The smell should shift from raw and grassy to sweet, nutty, and a little toasted.
Add softer vegetables later. Mushrooms, onions, and cabbage can join early or midstream depending on how brown you want them. Zucchini, peppers, and greens should go in after the dense vegetables are already halfway there, or they’ll collapse before they’ve had a chance to brown. If the pan looks dry, add another teaspoon of oil rather than splashing in water. Water kills browning.
Season in stages. A pinch of salt early helps draw flavor out. Garlic goes in near the end, usually in the last 30 to 60 seconds, because it burns faster than almost anything else in the pan. Fresh herbs can go in after the heat comes off. Dried herbs can go in a bit earlier, with the oil, so they have time to bloom.
Finish with a bright note. A teaspoon or two of lemon juice, red wine vinegar, sherry vinegar, or balsamic vinegar wakes the whole pan up. Not much. Just enough to make the sweetness feel balanced instead of heavy.
If the bottom of the pan builds up fond — those dark little browned bits — that’s good flavor, not an emergency. A tablespoon of water or broth can loosen it if it starts to get too dark, but don’t add liquid too early. Let the vegetables do some real browning first.
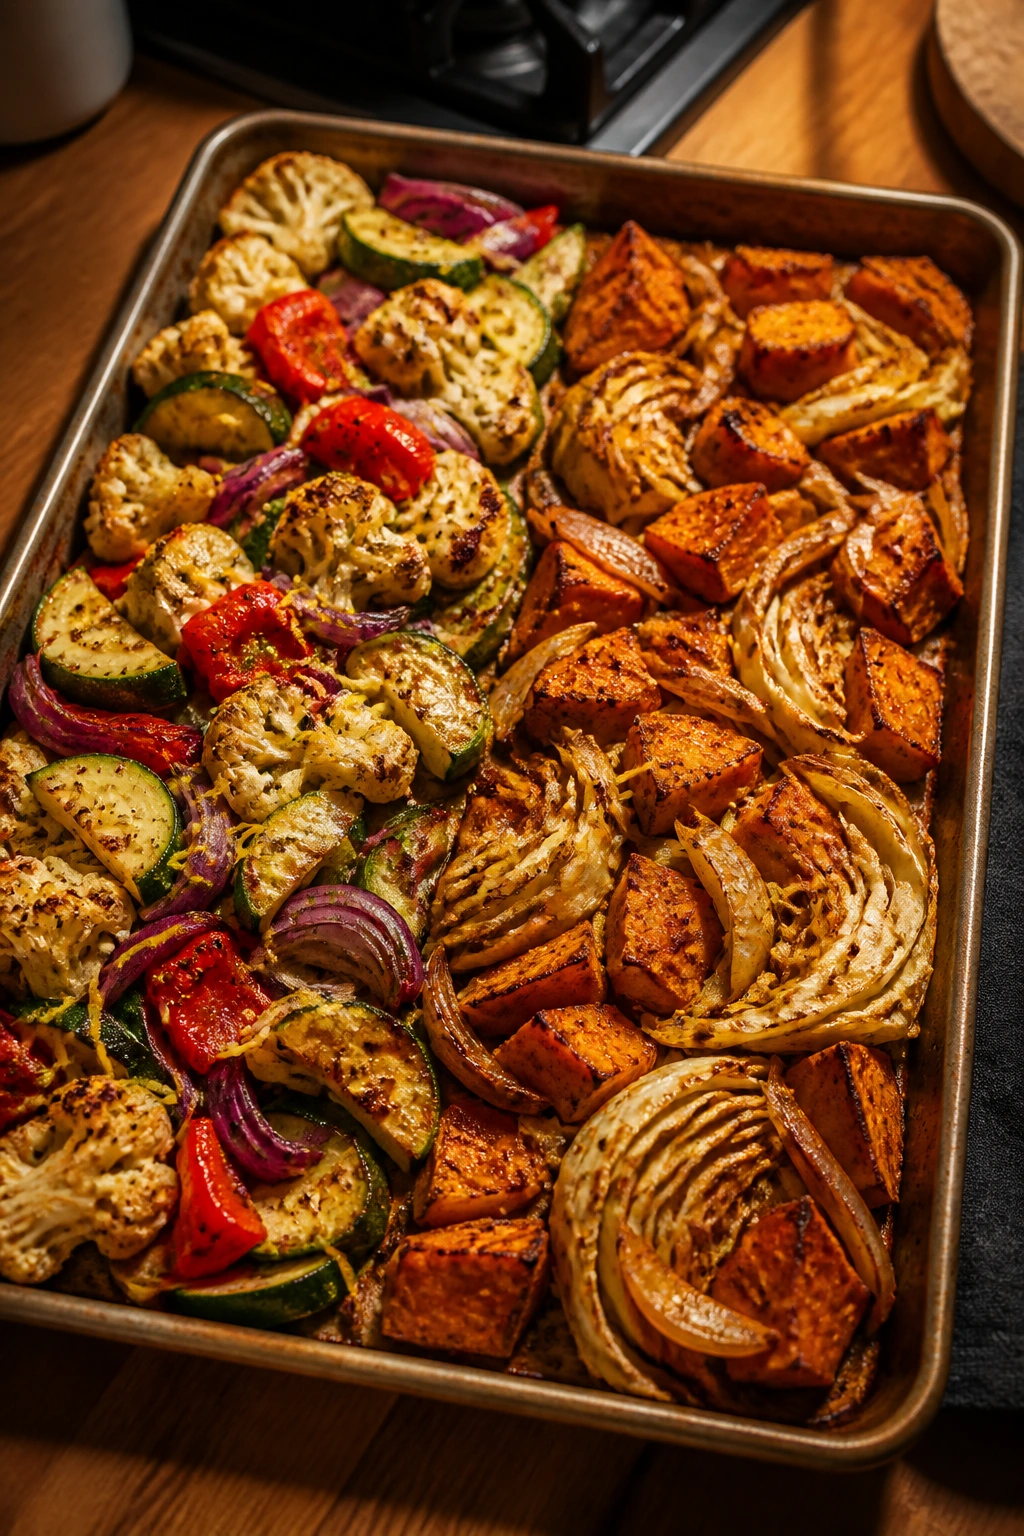
A Sheet-Pan Method for Bigger Batches
When you want enough vegetables for a whole family or a few days of leftovers, the oven is easier to manage. It gives you less hands-on stirring and a more even roast, which is handy when dinner is moving in five directions at once.
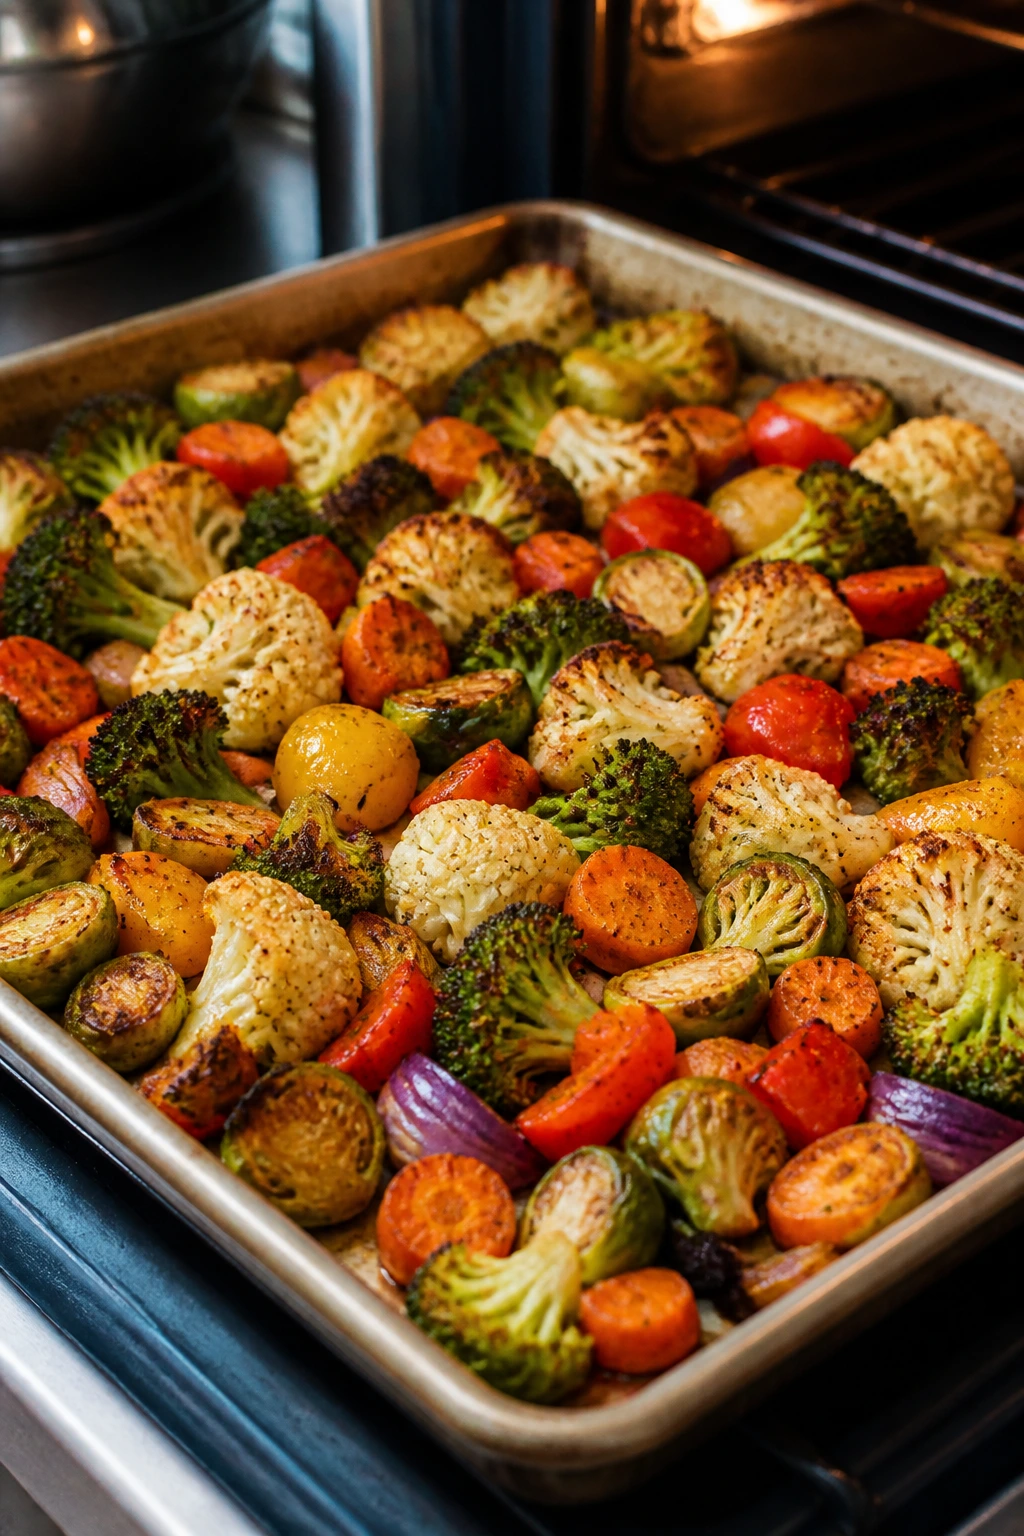
Preheat the oven to 425°F to 450°F. Lower heat can work, but you lose some of the crisping that makes these vegetables worth the trouble. Line a heavy sheet pan with parchment only if you want easier cleanup; if you want a little more direct browning, go bare metal. A second pan is often smarter than crowding one.
Toss the vegetables lightly with oil and seasoning. Use about 1 to 2 tablespoons of oil per pound of vegetables. That sounds modest, and it is. You’re aiming for a glossy coat, not a slick. Add salt, pepper, and any sturdy spices before roasting. If you’re using garlic, either use sliced cloves that can tolerate heat or add minced garlic near the end so it doesn’t go bitter.
Spread everything in one layer. This is the rule that people ignore and then complain about. If the vegetables overlap heavily, they steam. Leave little gaps between pieces. Cut the denser vegetables smaller if needed so they can finish with the softer ones. Brussels sprouts should sit cut side down. Cauliflower wants its flat sides touching the pan. Carrots should have space around them.
Roast until the edges darken. Most mixed vegetables need 20 to 35 minutes, depending on size and density. Flip once halfway through if you want more even browning, or leave the cut sides down the whole time if you’re chasing a more dramatic crust. You’re looking for browned corners, soft centers, and a smell that shifts from raw vegetable to toasted and sweet.
Use the broiler carefully. A minute or two under the broiler can sharpen the color on a tray that’s already close. Watch it the whole time. That last little burst can rescue a pale tray, but it can also burn the top layer before the middle catches up.
The sheet-pan method is the one I reach for when I want dinner to feel easy without tasting lazy. That matters. There’s no virtue in making things harder than they need to be.
Seasonings That Support the Vegetables Instead of Smothering Them
The mistake people make here is reaching for too much at once. A pile of spices can bury the sweet, browned notes you worked for. Better to choose one or two flavor directions and let the vegetables keep their own voice.
Salt and pepper are the backbone, and they should not be treated like background noise. Salt sharpens the sweet notes, especially in onions, carrots, and fennel. Black pepper gives a little edge, but if you grind it too early and cook it hard, it can get dusty. I prefer a final grind over the finished vegetables.
Garlic is useful, but it needs timing. Whole smashed cloves can roast with the vegetables and mellow into something soft and sweet. Minced garlic is better near the end of stovetop cooking or tucked into the last 5 minutes of a roast. Burnt garlic tastes bitter fast, and bitterness is the one thing browned vegetables do not need more of.
Herbs can go in two directions. Sturdy dried herbs like thyme, oregano, rosemary, and sage can handle the oven or skillet heat if they’re mixed with oil. Fresh herbs — parsley, dill, chives, cilantro, mint — are better sprinkled on at the end. They keep the vegetables from feeling heavy.
A little acid changes everything. Lemon zest gives fragrance. Lemon juice or vinegar gives snap. A spoonful of tahini thinned with water and lemon can turn a tray of vegetables into a meal. So can yogurt, miso, pesto, chimichurri, or a light drizzle of sesame oil if you want to move the flavor in a different direction.
One thing I like doing: finishing the vegetables with a tiny amount of something salty and savory, then a tiny amount of something bright. Think parmesan and lemon. Or soy sauce and rice vinegar. Or tahini and parsley. That contrast makes the browned edges seem deeper than they are.
How to Build a Healthy Dinner Around Caramelized Vegetables
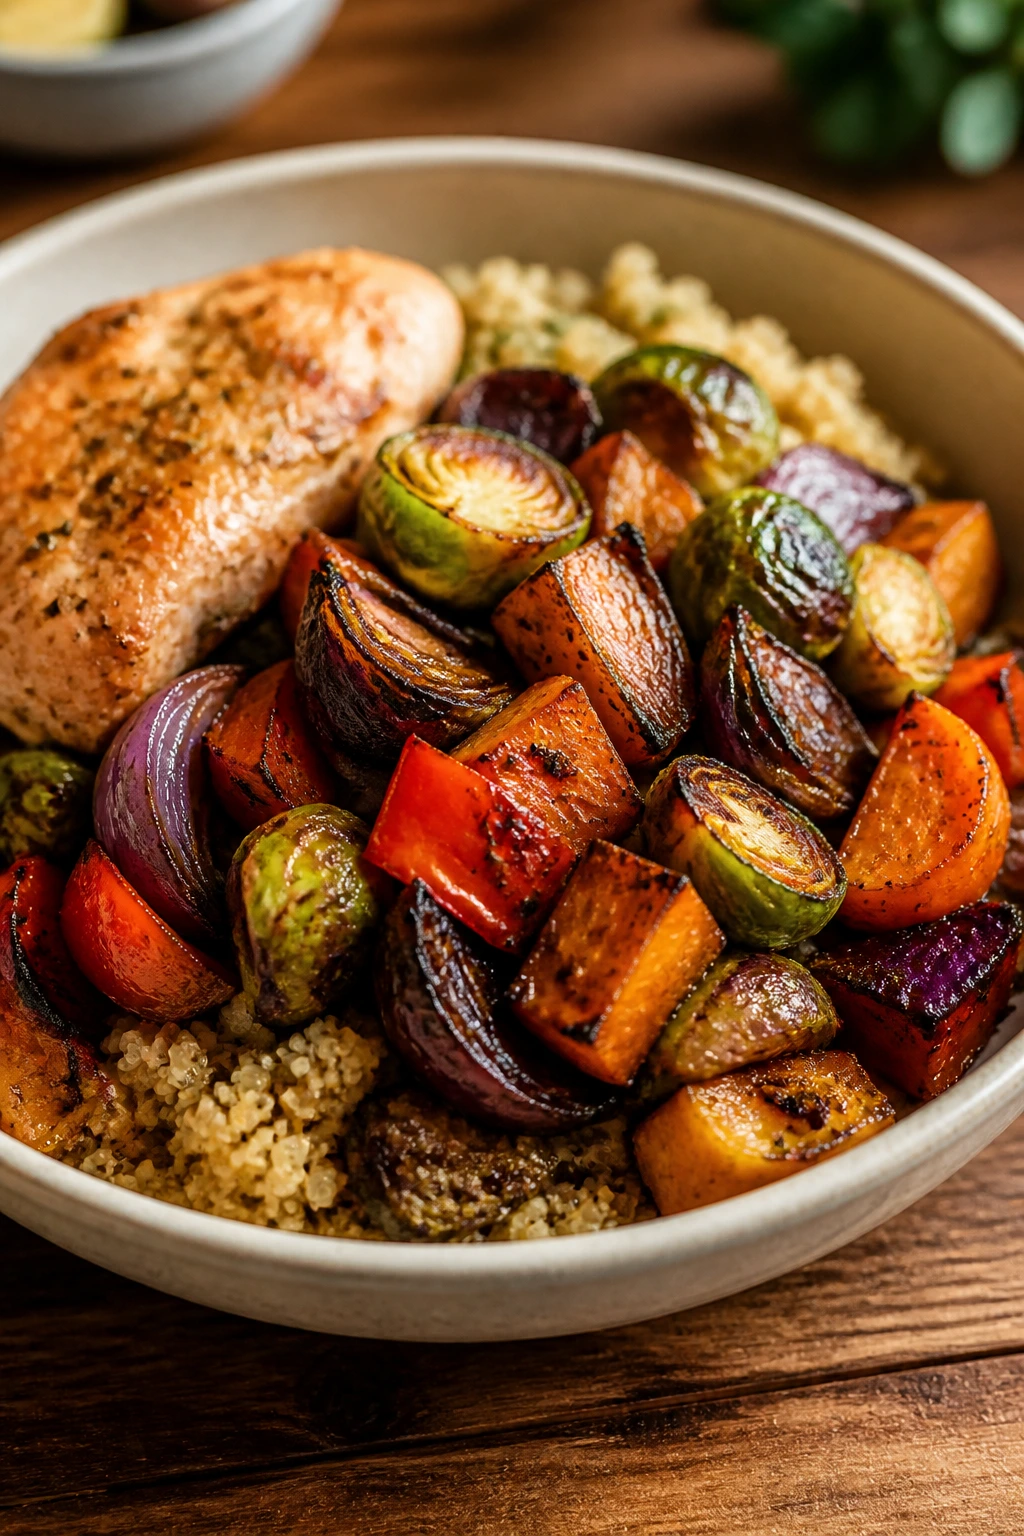
A pan of browned vegetables is not a side dish if you build the plate properly. It becomes dinner when you give it something soft, something substantial, and something with enough protein to keep it satisfying past the first bite.
Think in simple plate formulas
A very workable dinner formula is 2 cups of vegetables, 4 to 6 ounces of protein, and 1/2 to 1 cup of a grain or starch. That might look like roasted cauliflower with salmon and brown rice, or skillet onions and mushrooms with tofu and quinoa. It might also be as simple as carrots and Brussels sprouts over couscous with a fried egg on top. The vegetables carry the flavor. The rest gives the plate shape.
Grain bowls are the easiest route
Warm rice, farro, bulgur, quinoa, or barley gives you a base that soaks up juices from the vegetables. Spoon the vegetables over the grain, add chickpeas, chicken, tofu, or beans, and finish with a dressing that has acid. A yogurt-tahini drizzle, a lemon vinaigrette, or a spoonful of pesto does the job without making the bowl feel overloaded.
Protein can be very plain
You do not need to season every component like a separate dish from a restaurant menu. Plain roast chicken, seared tofu, baked salmon, or soft scrambled eggs work because the vegetables already have the loudest flavor. That’s one reason this style of dinner is so useful. The vegetables do the heavy lifting, and the rest of the plate can stay calm.
Use starch sparingly if you want the meal to feel lighter
A healthy dinner doesn’t have to be low-carb, but it does need balance. Sometimes a pile of vegetables with a small scoop of potatoes or a slice of crusty bread is enough. Other times you want a larger grain portion because the vegetables are especially spicy or acidic. Trust the plate, not a rigid rule.
If you’re cooking for people with different appetites, put the vegetables in the center and let the starches and proteins orbit around them. That way everyone gets the good part first.
What to Serve Beside Them on the Plate
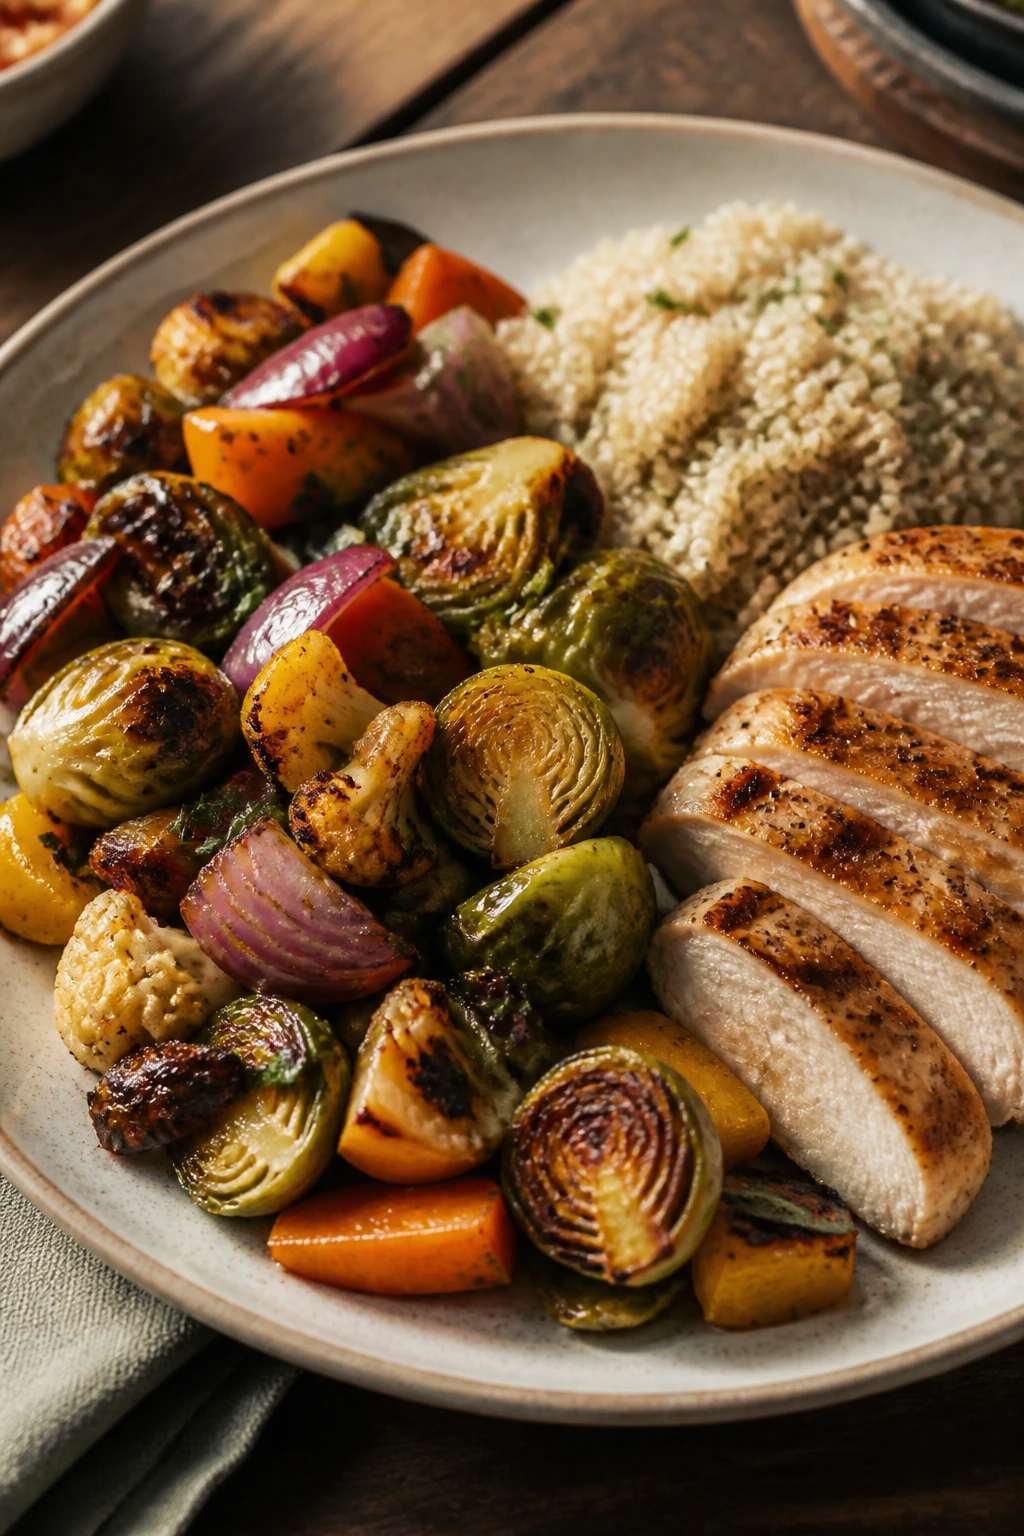
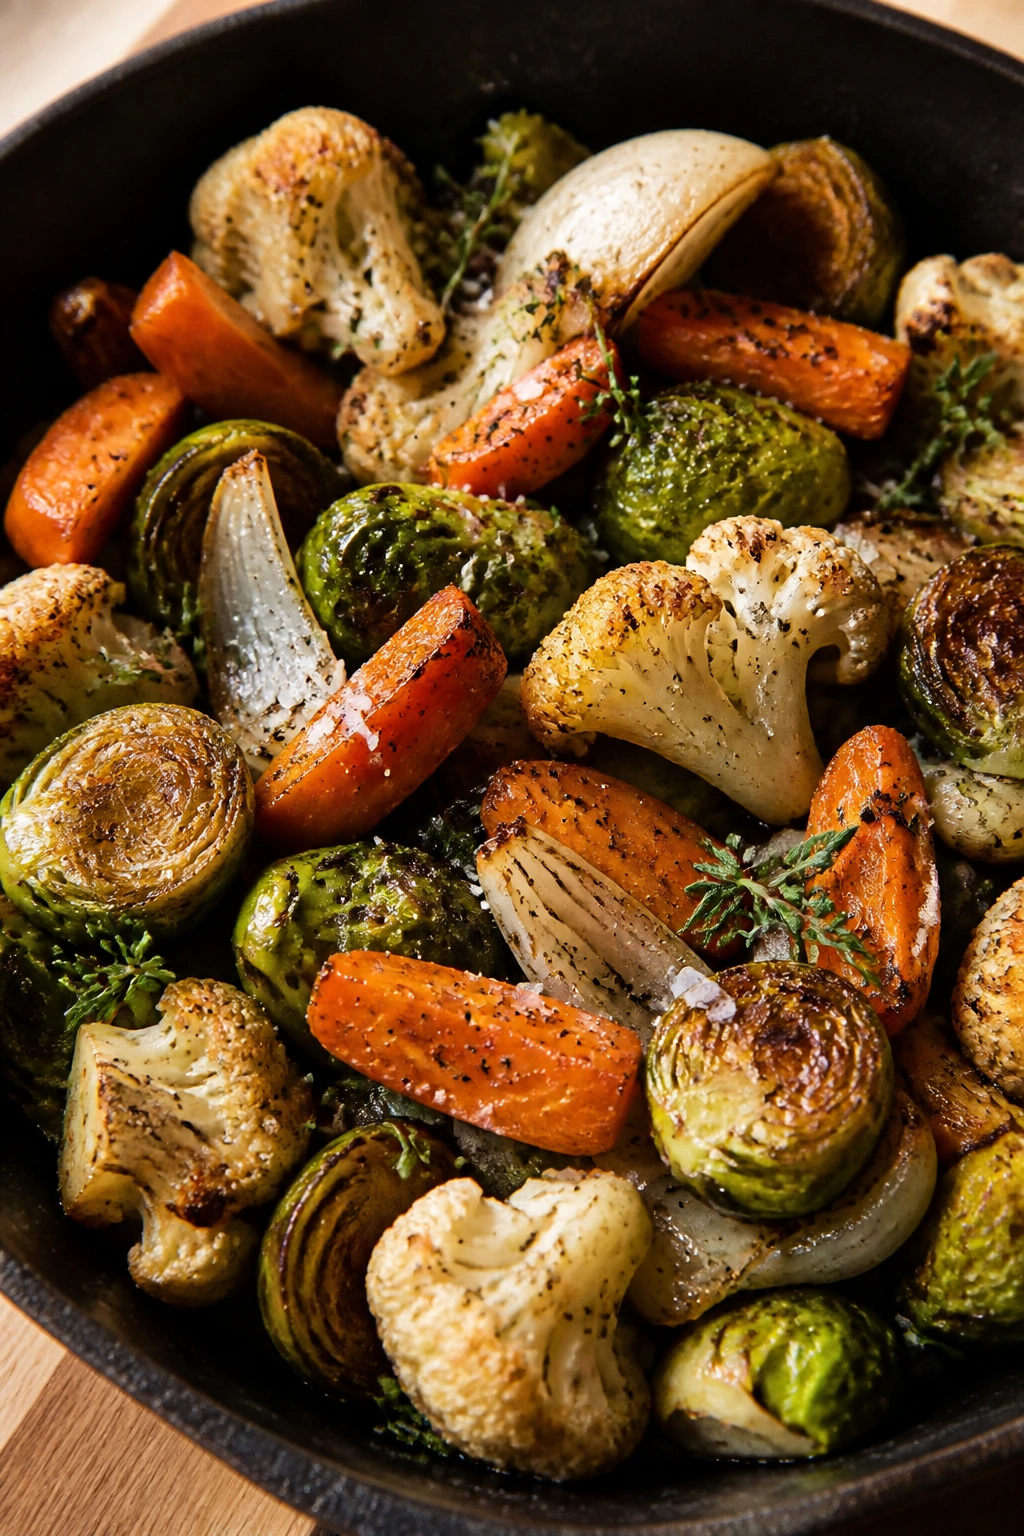
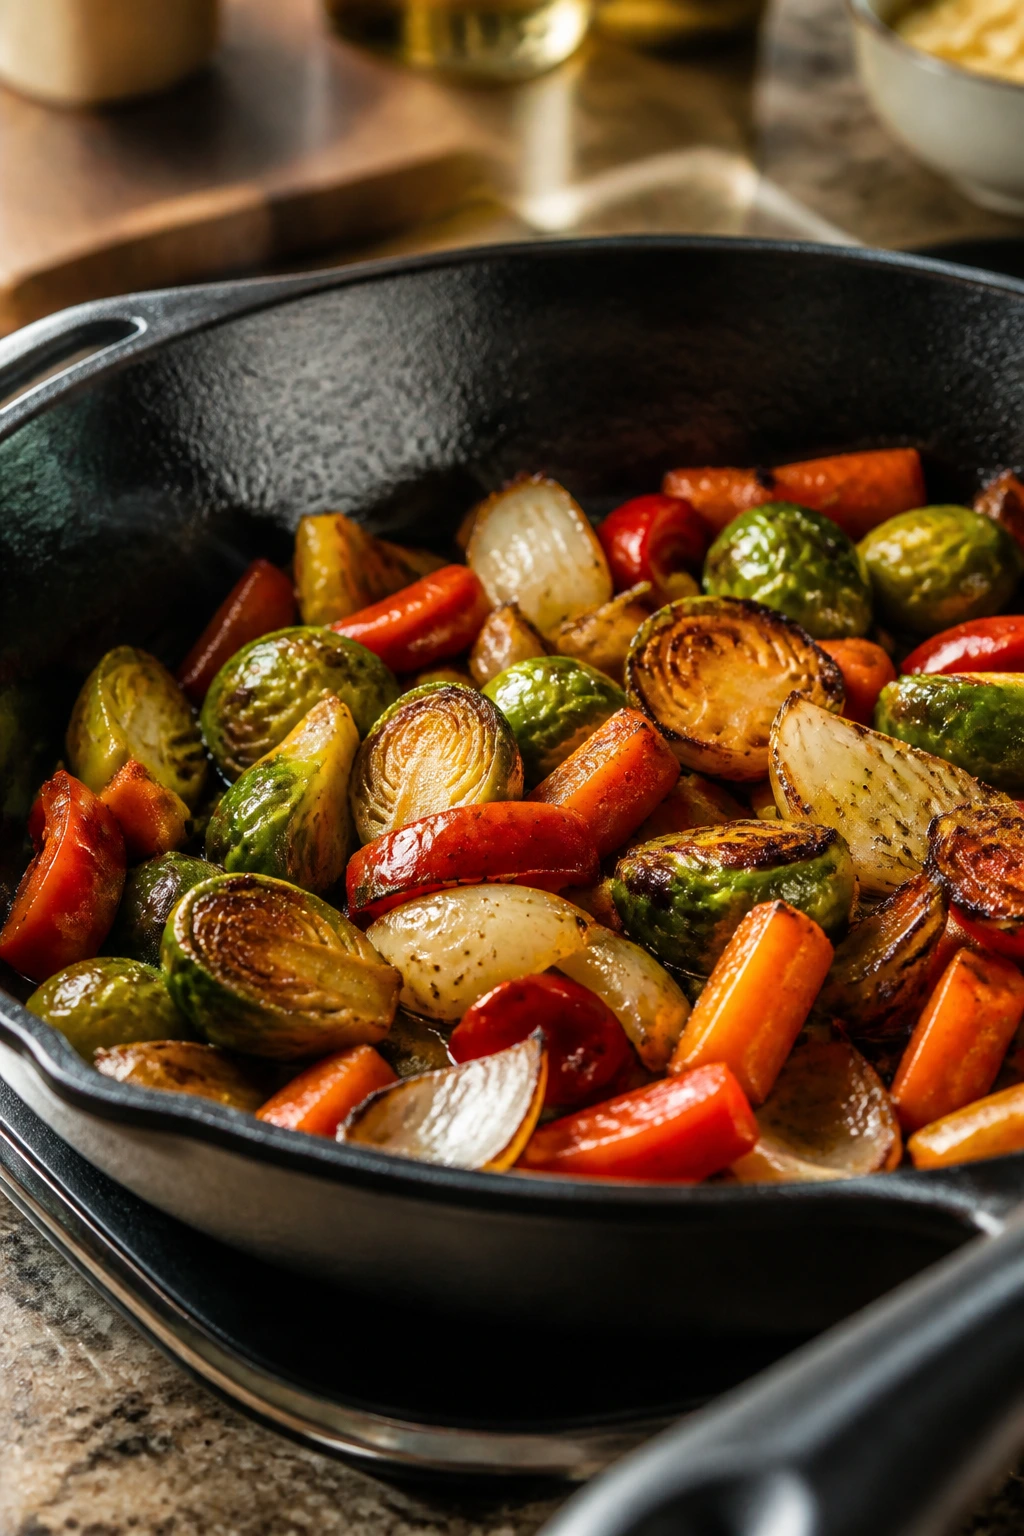
Presentation: Serve the vegetables in a shallow bowl or on a wide plate so the browned faces stay visible. A squeeze of lemon, a spoonful of yogurt, or a scatter of chopped herbs at the end makes the colors look intentional instead of muddy. If you’re using a mix of vegetables, keep the darker ones on top where the browning shows.
Accompaniments: Brown rice, quinoa, couscous, toasted pita, polenta, sourdough, or a soft flatbread all work. For protein, I like eggs, chickpeas, white beans, tofu, salmon, chicken thighs, or lamb if you want something richer. A simple green salad with a sharp vinaigrette can help if the vegetables are deeply roasted and need something fresh next to them.
Portions: A comfortable serving is about 1 1/2 to 2 cups of vegetables per person if they’re part of a larger plate, or closer to 3 cups if they’re the main event. If you’re stretching the meal for a group, use the vegetables as the anchor and scale the protein and grains around them, not the other way around.
Beverage Pairing: Sparkling water with lemon is the easy answer, but dry white wine does a nice job too — something crisp, not sweet. If you want nonalcoholic and warm, unsweetened green tea or a lightly brewed herbal tea keeps the plate feeling clean. The vegetables already bring plenty of flavor; the drink should step out of the way.
Small Tweaks That Pay Off in Flavor and Timing
Flavor Enhancement: A teaspoon of miso whisked with lemon juice and a splash of warm water makes an excellent finishing glaze for roasted cauliflower, Brussels sprouts, or mushrooms. It gives you savory depth without turning the plate into a sauce-heavy project.
Time-Saver: Cut the hardest vegetables the night before and keep them in a sealed container lined with a paper towel. Carrots, cauliflower, Brussels sprouts, and cabbage all hold up well that way, and you can throw the batch together fast when dinner starts feeling late and loud.
Pro Move: Roast or sauté by density, not by color. Two vegetables can look similar on the cutting board and still cook at different speeds because one is wetter, one is harder, and one carries more sugar. Give the dense one a head start. Your tray will thank you.
Cost-Saver: Cabbage, onions, carrots, and cauliflower are some of the cheapest vegetables to brown well, and they make a surprisingly generous dinner when you pair them with beans, rice, or eggs. You do not need heirloom produce to make this taste good. You need heat and a little attention.
Serving Suggestions: Finish with chopped parsley, dill, chives, or mint, depending on the flavor direction. A dusting of flaky salt at the end is worth it when the vegetables are otherwise simple. If you want crunch, toasted pumpkin seeds or sunflower seeds add texture without weighing the plate down.
One more thing: if you like heat, add chili flakes or a spoonful of harissa after cooking rather than before. Heat in the spices and heat in the pan are not the same thing. One tastes lively. The other can taste burned.
Mistakes That Leave Vegetables Pale, Wet, or Oddly Flat
Crowding the pan is the classic one. If the vegetables sit in a heap, they release steam and stay soft instead of browning. The fix is boring but effective: use a bigger pan, divide the batch into two, or roast in layers with space between the pieces.
Starting with wet vegetables causes the same problem in a different costume. Water on the surface has to cook off before browning can begin, which means the vegetables spend too long in the steam phase. Dry them well after washing, and if you’re working with mushrooms, wipe them instead of soaking them.
Adding garlic too early is another easy way to ruin a good pan. Garlic turns bitter fast when it burns, and that bitterness hangs around. Add minced garlic at the end of sautéing or use whole cloves for longer cooking so they mellow instead of blacken.
Using too much oil can make the vegetables feel greasy rather than browned. A thin coat is enough. If the pan looks shiny with pools of oil, you’ve gone past the sweet spot. Worse, the oil can carry seasoning off the vegetables and leave the tray tasting flat.
Salting only at the very end is a sneaky mistake. The vegetables may look browned but taste oddly hollow. Season in stages so the flavor builds while the vegetables cook, then finish with a little acid or flaky salt to make everything pop.
And then there’s the heat problem. People either cook too cool and get limp vegetables, or they crank the heat so high that the outside burns before the center softens. Medium-high on the stovetop and 425°F to 450°F in the oven are reliable starting points. Adjust from there. Don’t guess wildly.
Flavor Variations That Keep the Same Method Fresh
Mediterranean Lemon Pan: Use zucchini, red onion, bell pepper, and cauliflower, then finish with oregano, lemon zest, and a spoonful of crumbled feta. The vegetables stay bright and savory, and the feta gives you a salty edge without drowning the tray.
Smoky Pantry Mix: Toss sweet potatoes, cabbage wedges, and onions with olive oil, smoked paprika, garlic powder, and black pepper. A splash of apple cider vinegar at the end sharpens the sweetness and keeps the whole thing from feeling heavy.
Sesame-Ginger Skillet: Brown mushrooms, broccoli, and carrots, then finish with grated ginger, a little soy sauce, and toasted sesame oil. Add scallions at the end. This one works well over rice with a soft egg on top.
Herb Roast with Yogurt: Roast cauliflower, fennel, and carrots with thyme and olive oil, then serve them over plain Greek yogurt with dill and lemon. The cold yogurt against the warm vegetables is a nice contrast, and it makes the plate feel more like dinner than side dish.
Chili-Lime Brassicas: Brussels sprouts and cabbage take well to chili flakes, lime zest, and a tiny drizzle of honey or maple at the end. That sweet-sour-spicy trio gives you a bolder finish without changing the basic cooking method.
You can mix and match these ideas, but I’d resist the urge to stack too many flavors at once. A good browned vegetable plate needs room to breathe.
Tools and Equipment Worth Having Nearby
-
12-inch cast-iron skillet — My first choice for stovetop browning because it holds heat and gives you steady color.
-
Large stainless steel skillet — A good alternative if you like a little more control and don’t mind watching the heat closely.
-
Heavy rimmed sheet pan — Thin pans warp, and warped pans brown unevenly.
-
Chef’s knife — Clean, even cuts matter here more than fancy knife work.
-
Cutting board with a damp towel underneath — The board should not slide when you’re breaking down carrots or cauliflower.
-
Large mixing bowl — Handy for tossing vegetables with oil and seasonings before they hit the pan.
-
Wide spatula or tongs — Useful for turning vegetables without smashing the browned sides.
-
Clean kitchen towels or paper towels — Dry vegetables brown better. Simple as that.
-
Parchment paper, optional — Great for cleanup on the sheet pan, though bare metal browns a little harder.
-
Microplane or fine grater, optional — Nice for lemon zest, garlic, or ginger when you want a finer finish.
Make-Ahead, Storage, and Reheating
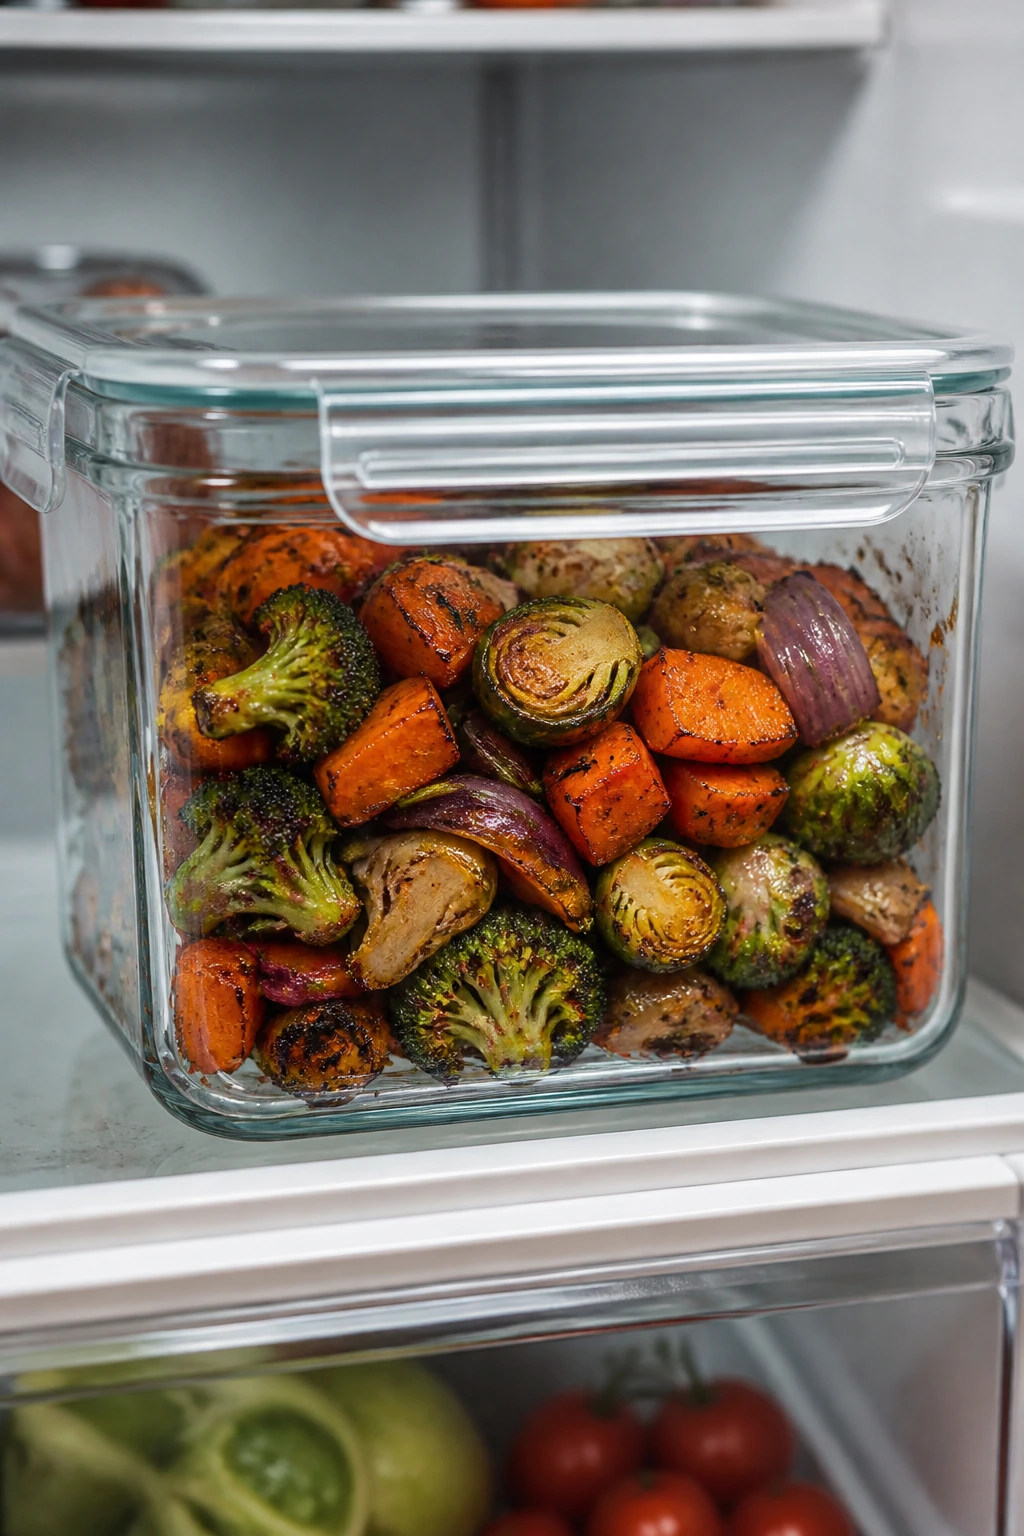
Cooked caramelized vegetables keep well in the fridge for 3 to 4 days in an airtight container. Let them cool before sealing them up, or the trapped steam will soften the browned edges more than you want. If you’re packing them for lunches, keep any sauce or yogurt on the side until serving.
Freezing works, but not every vegetable behaves the same way. Onions, mushrooms, cauliflower, carrots, cabbage, and Brussels sprouts freeze fairly well for up to 2 months if they were browned first and cooled fully. Zucchini, tomatoes, and eggplant get softer after freezing, so I’d use them for soups, grain bowls, or pasta rather than expecting them to reheat with perfect texture.
For reheating, the oven is the cleanest option. Spread the vegetables on a sheet pan and warm them at 400°F for 8 to 12 minutes, just until hot and a little crisp again. A skillet over medium heat works too, especially if you want to wake up the browned edges with a teaspoon of oil. The microwave is fine in a pinch, but it softens the vegetables and erases some of the texture you worked for.
Raw prep can also be done ahead. Hard vegetables can be washed and cut a day in advance if you store them dry and covered. Mushrooms are better prepped the same day if you can manage it. They brown better when they’re fresh and dry, not damp and boxed up.
One small thing: if the leftovers taste a little dull after reheating, a squeeze of lemon or a pinch of salt usually fixes them. That’s not a sign you cooked them badly. It’s just what vegetables do after resting.
Frequently Asked Questions About Caramelized Vegetables
Do I need to add sugar to caramelize vegetables?
No. Most vegetables already carry enough natural sugar to brown and taste sweet once the water cooks off. If you add sugar, honey, or maple too early, it can burn before the vegetables are done.
Can I use frozen vegetables?
Yes, but choose them carefully. Frozen cauliflower, Brussels sprouts, broccoli, and peppers can work if you roast or sauté them at high heat and don’t thaw them into a wet mess first. I would skip frozen zucchini for this method; it turns soft fast.
What’s the best oil for browning vegetables?
Olive oil is a good everyday choice because it tastes nice and handles the heat you need for vegetables. Avocado oil is a little more heat-tolerant, while refined neutral oils keep the flavor simple. The real rule is to use enough oil to coat the surfaces, not drown them.
Why do my vegetables steam instead of brown?
Usually because the pan is crowded, too cool, or the vegetables are wet. Dry them well, give them space, and resist the urge to stir constantly. They need contact with the hot surface to develop color.
Can I make this in an air fryer?
Yes, especially for smaller batches. Use about 375°F to 400°F, shake the basket once or twice, and keep the pieces cut evenly so the dense vegetables don’t lag behind. Air fryers brown well, but they don’t like overcrowding any more than a skillet does.
Should I salt before or after cooking?
Both, in small amounts. Light seasoning before cooking helps flavor the vegetables from the inside, and a final pinch after cooking gives the finished plate more life. If you salt heavily too early, some vegetables will leak more water than you want.
How do I keep leftovers from getting mushy?
Store them quickly, reheat them in a hot oven or skillet, and keep sauce separate if you can. The vegetables won’t be as crisp as they were on day one, but they should still taste brown and savory, not soggy and tired.
What vegetables should I avoid mixing in the same pan?
Anything very wet with anything very dense is a risky combo. Zucchini with carrots, or tomatoes with cauliflower, usually needs staging. Cook the hard vegetables first, then add the quick ones near the end so they finish together.
A Better Way to Make Dinner Feel Finished
A good pan of vegetables changes the shape of dinner. It stops being a side note and becomes the part of the plate that has the most personality. That’s the quiet power of browning: it takes ordinary produce and gives it a sharper smell, a deeper color, and a flavor that lands before you even reach for the fork.
The next time the fridge looks full of carrots, onions, cabbage, or cauliflower and you’re tempted to treat them like something to get through, give them heat instead. Give them space. Let them color. Dinner gets better fast when the vegetables stop being background noise and start doing the talking.