
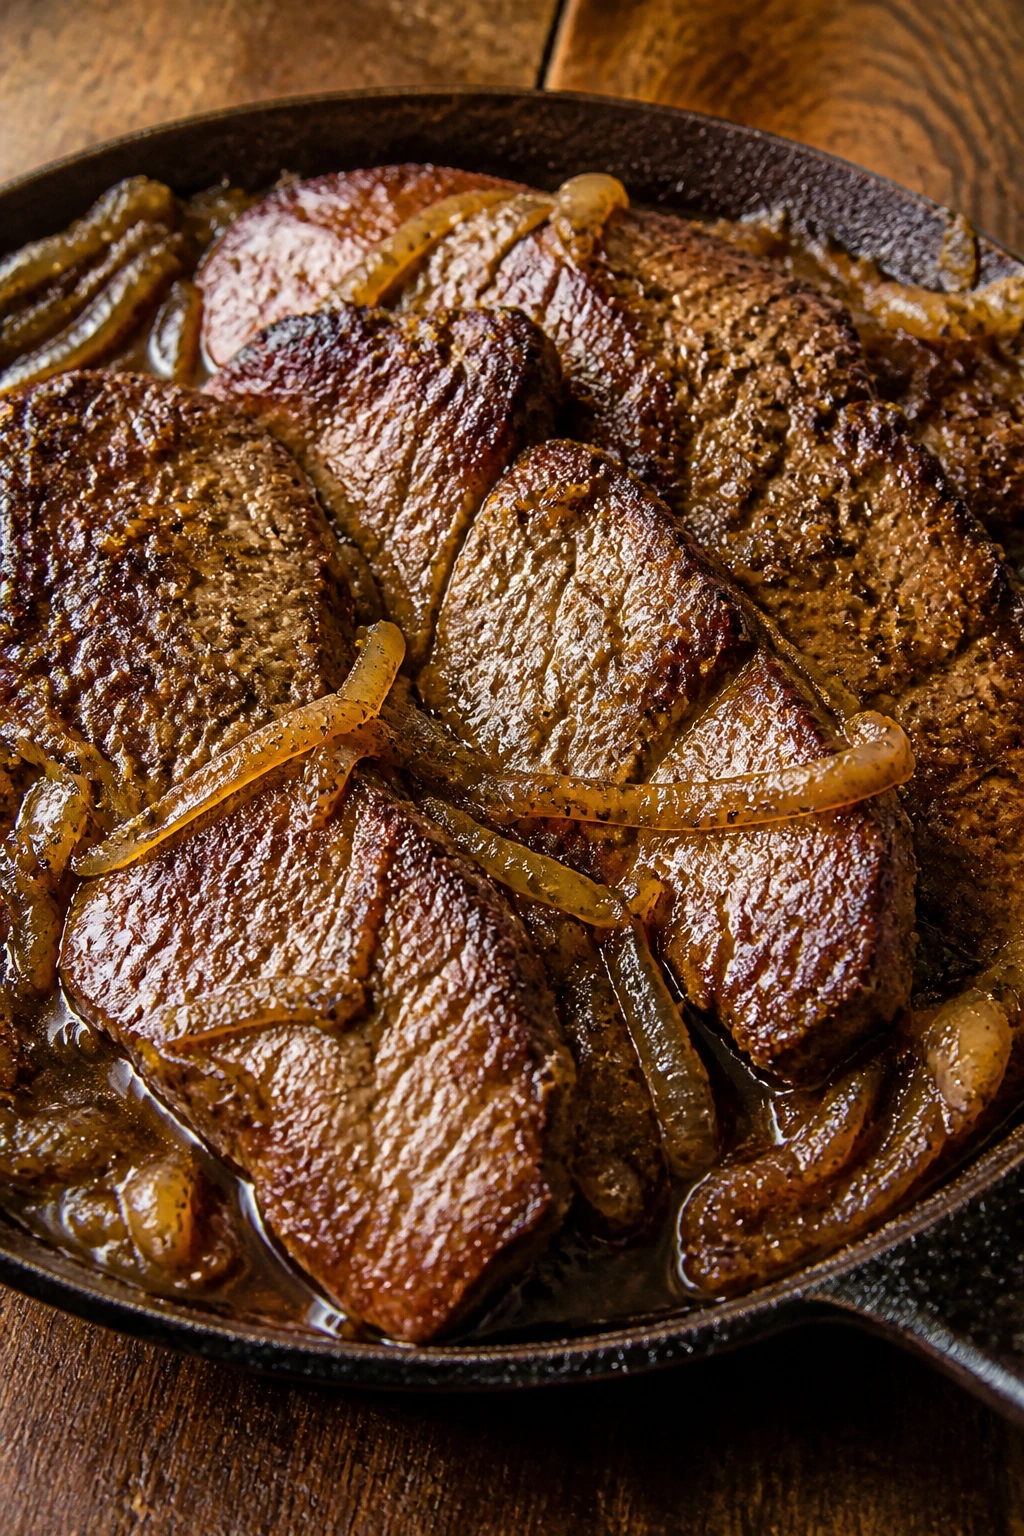
A hot skillet, a slick of oil, and beef that hits the pan dry enough to sing—that’s where a proper fried beef dinner starts. Not with a complicated sauce. Not with a grocery list that looks like a ransom note. Just the smell of onions softening in fat, the edges of beef turning mahogany, and a gravy built from the browned bits that stick to the pan because you had the patience not to rush them away.
That’s the charm of classic fried beef. It’s a sturdy, old-school dinner that knows exactly what it wants to be: beef with a crust, onions with sweetness, and enough gravy to soak into mashed potatoes, rice, or a pile of egg noodles without apology. It feels honest on the plate. A little rustic. The kind of food that makes the table quiet for a minute.
There’s a trick to making it taste like more than “beef in a skillet,” and it comes down to a few small decisions that matter a lot. Slice the meat against the grain. Dry it well. Keep the pan hot enough to brown, not so hot that the flour burns before the beef has a chance to color. Then stop fussing with it. Let the skillet do the work.
Why Classic Fried Beef Earns a Spot on the Table
-
A Short Ingredient List Actually Works Here: Beef, onion, broth, flour, and a few pantry seasonings are enough because the skillet builds flavor as it goes. Nothing feels dragged in for decoration.
-
The Pan Gravy Tastes Like Dinner, Not Afterthought: The browned bits from the beef and onions turn into the sauce, so the gravy has real depth instead of tasting like watered-down stock.
-
Cheaper Cuts Can Still Eat Well: Top round and sirloin tip are far easier on the budget than ribeye, and they behave nicely if you slice them thin and don’t overcook them.
-
It Puts Food on the Plate That Holds Up: This is a dinner that can sit for a few minutes while you call everyone to the table without collapsing into mush. The beef stays beefy. The gravy stays glossy.
-
It Plays Well With Sides You Already Know: Mashed potatoes, buttered noodles, white rice, green beans, and crusty bread all make sense here. No special side quest required.
-
Leftovers Reheat Better Than You’d Expect: Because the meat finishes in gravy, a second meal still tastes like a meal, not a sad pan of dried-out steak strips.
Why Classic Fried Beef Tastes Better Than It Looks in the Pan
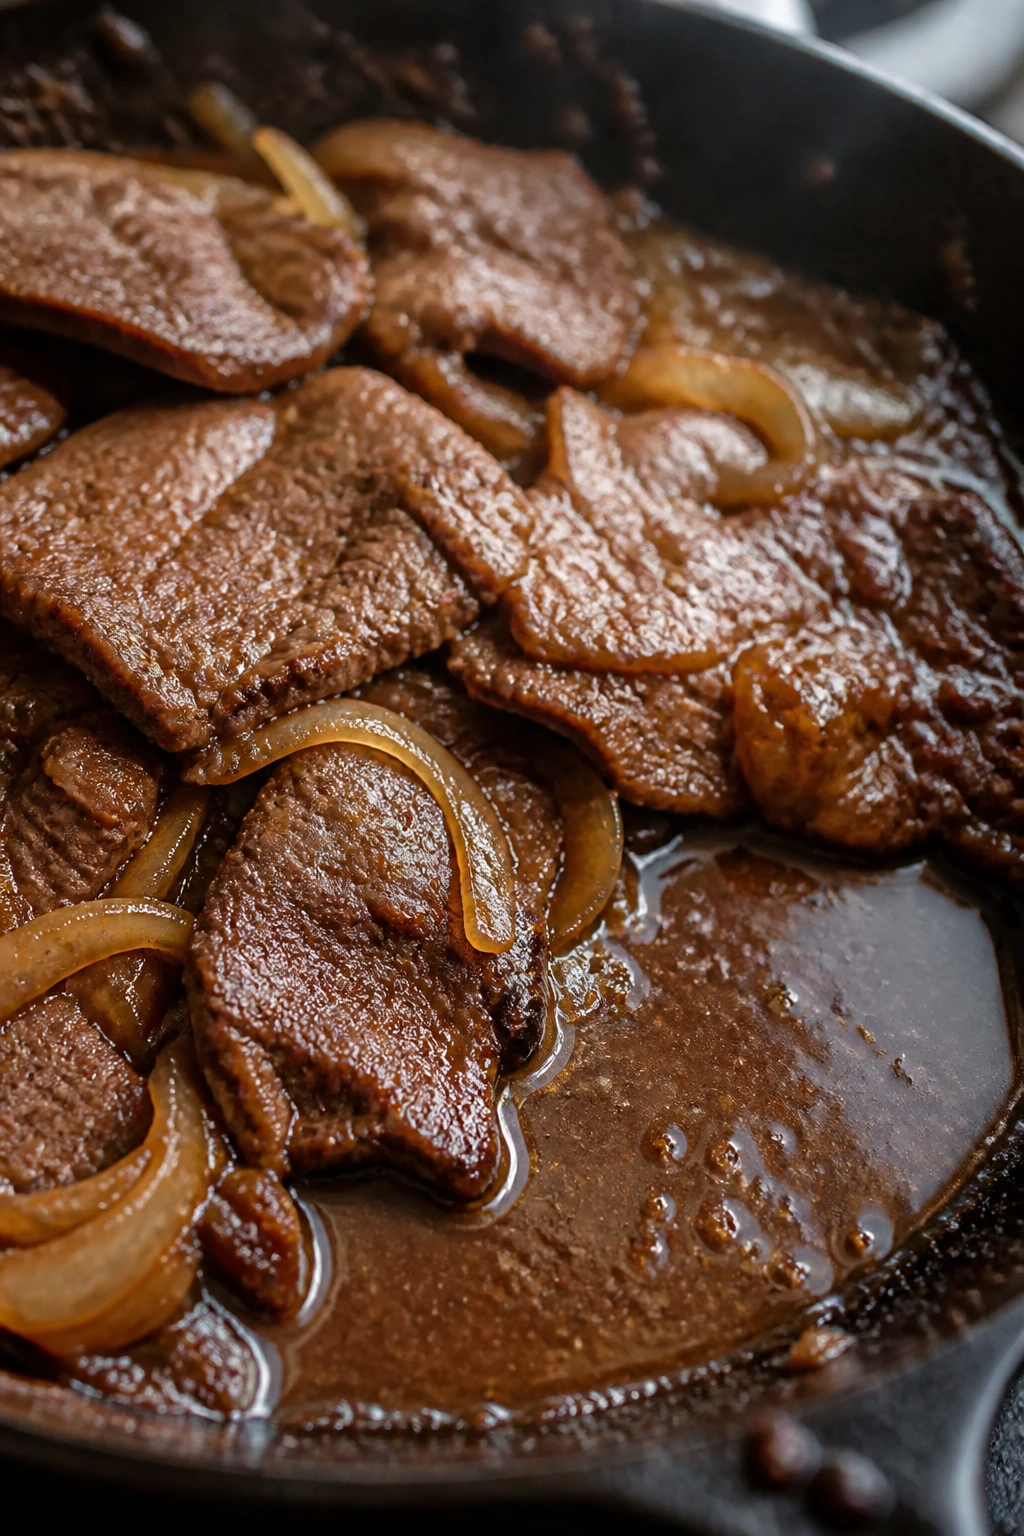
This is not a dainty dinner. It’s built for people who want something that lands with weight on the plate and a little swagger in the pan. The old appeal of fried beef is that it turns a modest cut into something that feels richer than it is, and it does that with heat, flour, fat, and timing rather than a stack of fancy additions.
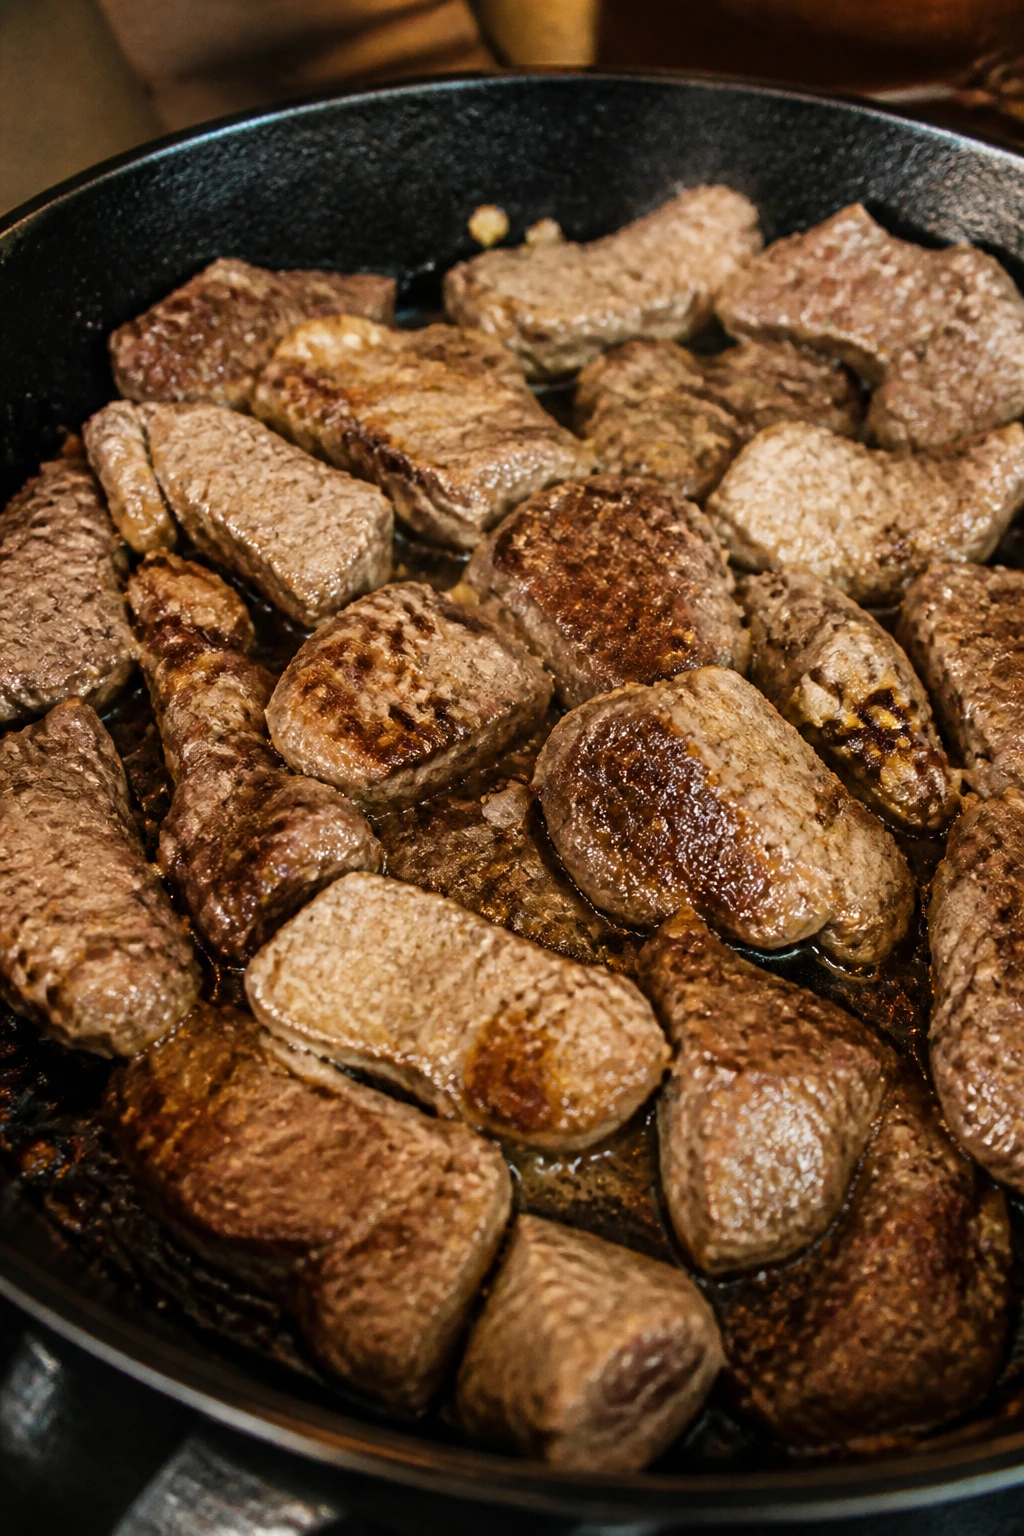
The beef takes the first hit. You want a browned crust, not a pale gray rinse. That crust is where the flavor lives, and the flour gives the meat a dry surface that catches color quickly. Once the onions go in, they pick up the bits left behind, and the broth pulls all of that into a sauce that tastes like it was planned from the start.
A lot of home cooks think of pan-fried beef as a one-note dish, but the little details pull it in a better direction. Worcestershire gives the gravy a dark, savory edge. Dijon keeps it from flattening out. A tiny splash of vinegar at the end wakes everything up without making the sauce taste sharp. And if you add chopped parsley right before serving, the plate stops looking like a brown-on-brown situation—which, frankly, is a mercy.
The best part is how forgiving the format is once you understand the rhythm. Brown. Lift. Soften. Deglaze. Simmer. Serve. That’s the whole song. You can hear it happening if the pan is hot enough.
What Goes Into the Skillet Before You Turn on the Heat

Yield: Serves 4 to 6
Prep Time: 25 minutes
Cook Time: 30 minutes
Total Time: 55 minutes
Difficulty: Intermediate — the steps are straightforward, but browning in batches and building a smooth gravy take some attention.
Best Served: Hot from the skillet with mashed potatoes, buttered noodles, or steamed rice
For the Beef and Dredge:
- 2 pounds beef top round steak or sirloin tip steak, sliced 1/4-inch thick against the grain
- 3/4 cup all-purpose flour
- 2 tablespoons cornstarch
- 1 1/2 teaspoons kosher salt
- 1 teaspoon black pepper
- 1 teaspoon smoked paprika
- 1/2 teaspoon garlic powder
For Frying and the Gravy:
- 1/3 cup neutral oil
- 2 tablespoons unsalted butter
- 1 large yellow onion, thinly sliced
- 3 cloves garlic, minced
- 1 1/2 cups beef broth, warmed
- 1 tablespoon Worcestershire sauce
- 1 teaspoon Dijon mustard
- 1 teaspoon soy sauce
- 1 teaspoon apple cider vinegar
- 1 tablespoon chopped parsley
Shopping the Beef, Flour, and Gravy Ingredients With a Sharp Eye
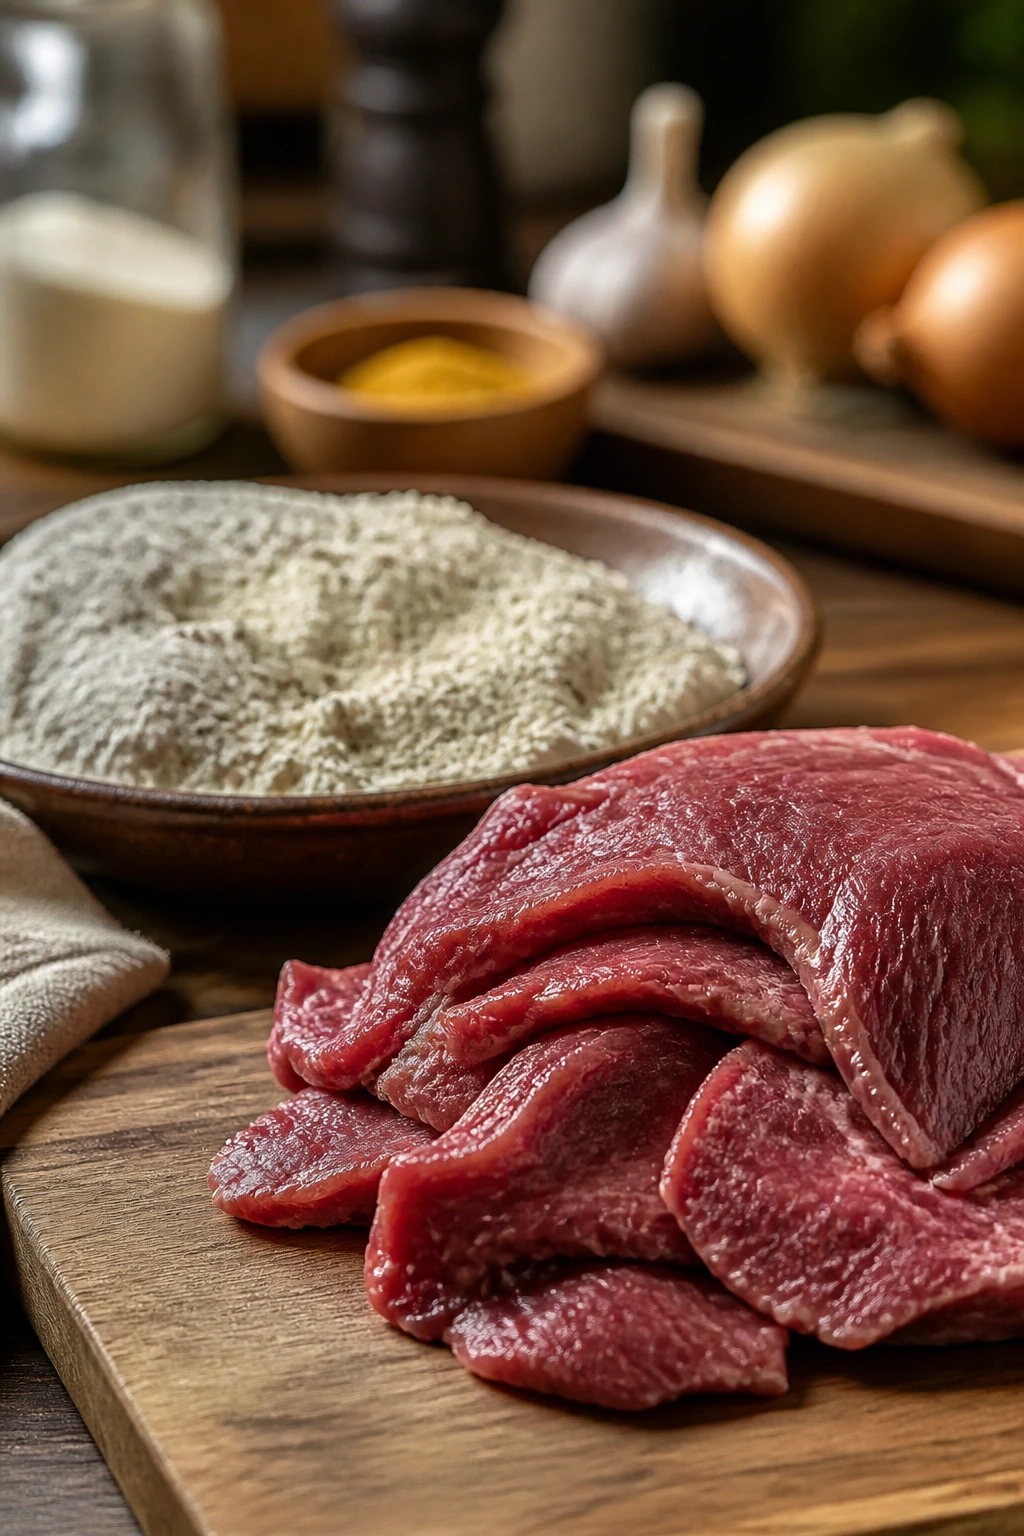
The Beef
- What to use: 2 pounds of top round or sirloin tip steak gives you enough lean beef to feed four hungry adults or six people with sides.
- Preparation: Slice it into 1/4-inch strips against the grain. If the steak is soft and floppy, chill it for 15 to 20 minutes first so the knife can make cleaner cuts.
- Substitutions: Flank steak works if you slice it thin; chuck steak works if you’re willing to cook it a little longer; cube steak works if you want a more tender texture with less knife work.
- Tips: Even thickness matters more than almost anything here. Thin ends turn dry fast, thick ends lag behind, and a mixed batch gives you a pan full of moods.
The Coating
- What to use: 3/4 cup all-purpose flour, 2 tablespoons cornstarch, 1 1/2 teaspoons kosher salt, black pepper, smoked paprika, and garlic powder make a seasoned dredge that browns well and lightly thickens the sauce later.
- Preparation: Whisk the dry ingredients in a shallow dish until the color looks even, then spread them out so the beef can be coated without clumps.
- Substitutions: A good gluten-free all-purpose blend can stand in for the flour, and rice flour makes a crispier crust if you like a drier finish.
- Tips: The coating should taste a touch oversalted if you try a pinch. Some of it stays behind in the bowl, and some falls into the pan. That is normal.
The Fat, Onion, and Garlic
- What to use: 1/3 cup neutral oil and 2 tablespoons butter give you the heat tolerance of oil with the flavor of butter, while 1 large yellow onion and 3 cloves garlic bring the sweet-savory base.
- Preparation: Slice the onion into thin half-moons so it softens quickly and picks up browned bits without burning. Mince the garlic finely so it melts into the gravy instead of floating around in chunks.
- Substitutions: Ghee works in place of butter, though it loses some of the old-fashioned dairy note; shallots can replace onion if you want a gentler flavor.
- Tips: Oil does the heavy lifting at the beginning. Butter comes in after the beef is browned, because butter alone can scorch before the meat has a chance to color properly.
The Broth, Seasonings, and Finish
- What to use: 1 1/2 cups warmed beef broth, 1 tablespoon Worcestershire sauce, 1 teaspoon Dijon mustard, 1 teaspoon soy sauce, 1 teaspoon apple cider vinegar, and 1 tablespoon chopped parsley finish the pan.
- Preparation: Warm the broth before it goes into the skillet. Chop the parsley at the last minute so it stays bright and doesn’t slump.
- Substitutions: Low-sodium broth is a smart choice if your Worcestershire or soy sauce runs salty. Tamari can replace soy sauce, and lemon juice can stand in for vinegar if that’s what you have.
- Tips: The vinegar should not taste loud. It should cut the heaviness just enough so the gravy tastes finished instead of muddy.
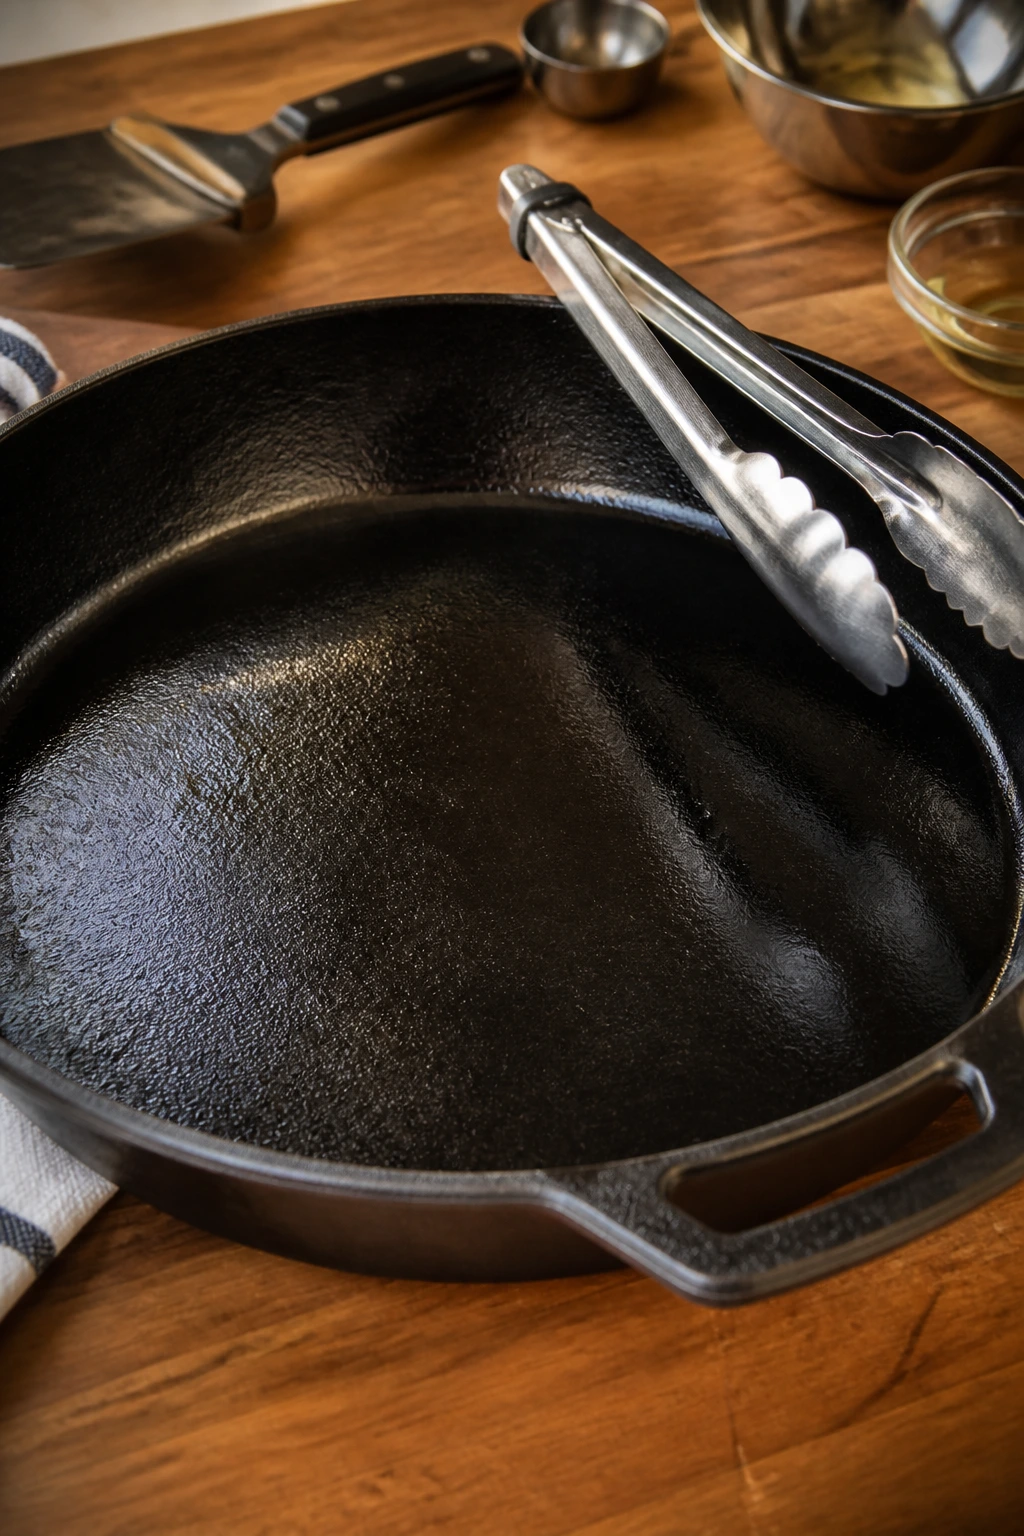
The Cast-Iron Skillet, Tongs, and Other Small Tools That Matter
-
12-inch cast-iron or heavy stainless-steel skillet: You need a wide, hot surface so the beef can brown in batches instead of steaming in a pile. A thin pan will work harder and give you less control.
-
Sharp chef’s knife: Thin slices are the whole point, and a dull knife smashes more than it cuts. If you can’t shave the beef cleanly, chill it longer before slicing.
-
Cutting board with a damp towel underneath: This keeps the board from skating across the counter while you work. Beef slicing gets messy fast, and a sliding board is a bad surprise.
-
Shallow dish or pie plate: Perfect for the flour dredge. You want enough surface area to coat the beef without having to dig through a deep bowl.
-
Tongs: These make it easier to flip the beef quickly and keep your hands away from the hottest part of the pan.
-
Wooden spoon or flat spatula: Use it to scrape the browned bits loose when the broth goes in. Those bits are the point.
-
Measuring cups and spoons: The seasoning balance matters here, especially in the flour and the gravy.
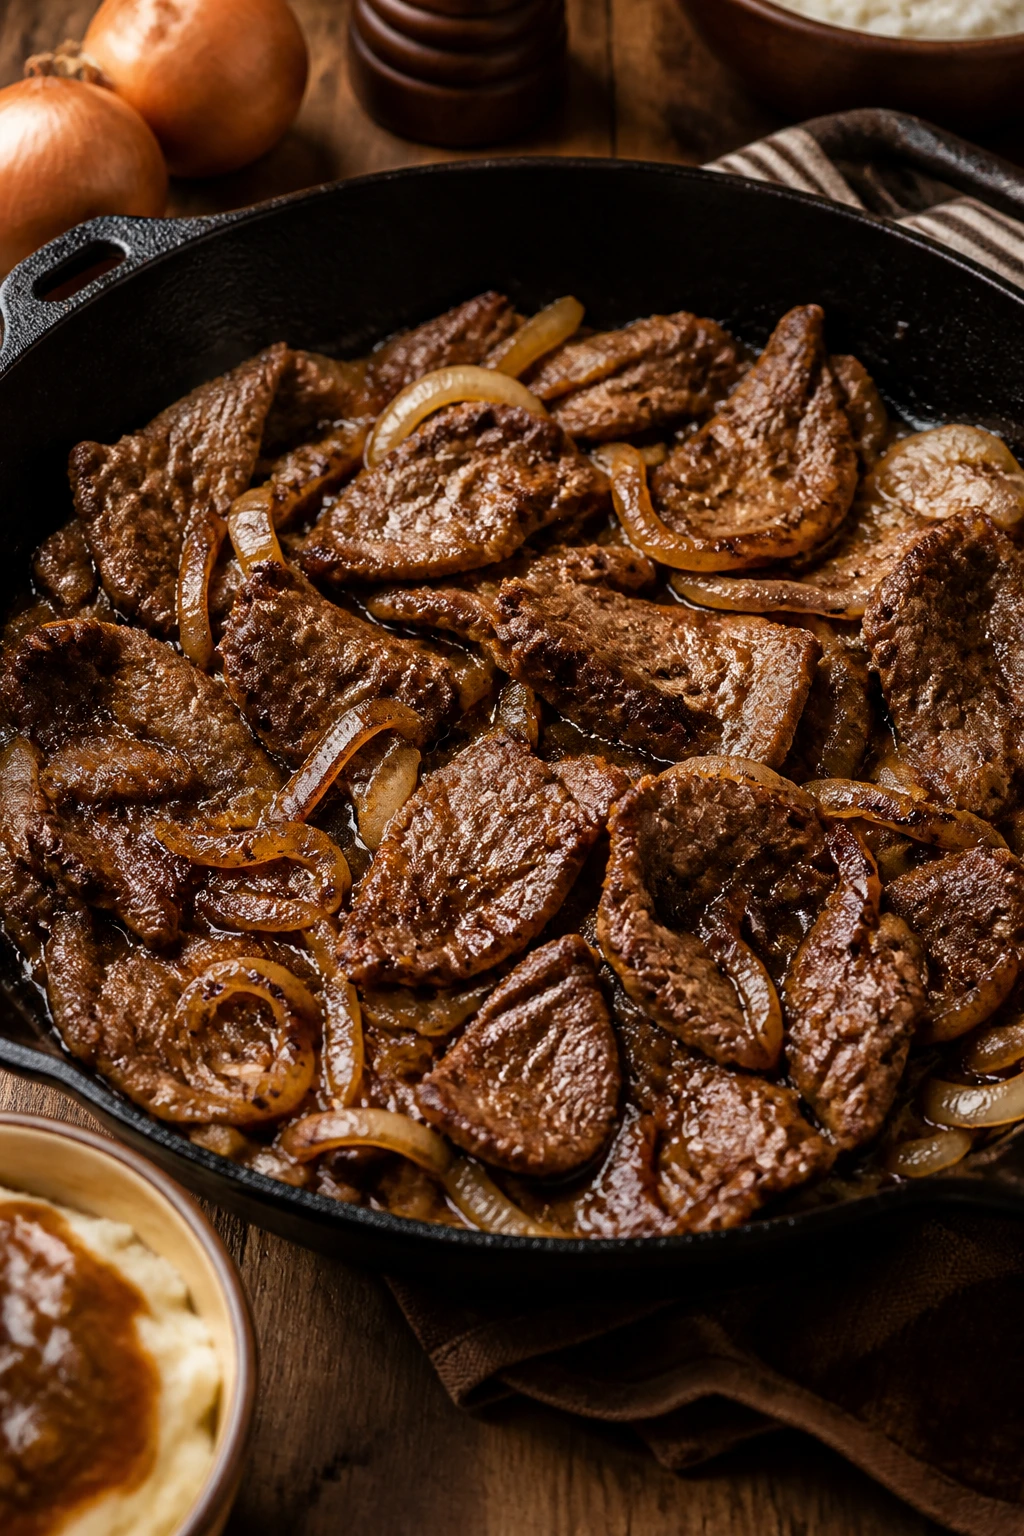
How to Fry the Beef So It Browns Instead of Steams
Prep the Beef and Coating
-
Pat the beef dry with paper towels, then slice it into 1/4-inch strips against the grain if it isn’t already cut. Sprinkle the beef with 1 teaspoon of the salt and let it sit for 10 minutes while you mix the dredge.
-
In a shallow dish, whisk together the flour, cornstarch, remaining salt, black pepper, smoked paprika, and garlic powder until the color is even. Pull out 2 tablespoons of the mixture and set it aside for the gravy.
-
Toss the beef in the seasoned flour a handful at a time, pressing lightly so the coating clings to the surface. Shake off the excess. You want a thin, dusty coat, not a thick shell.
Brown the Beef
-
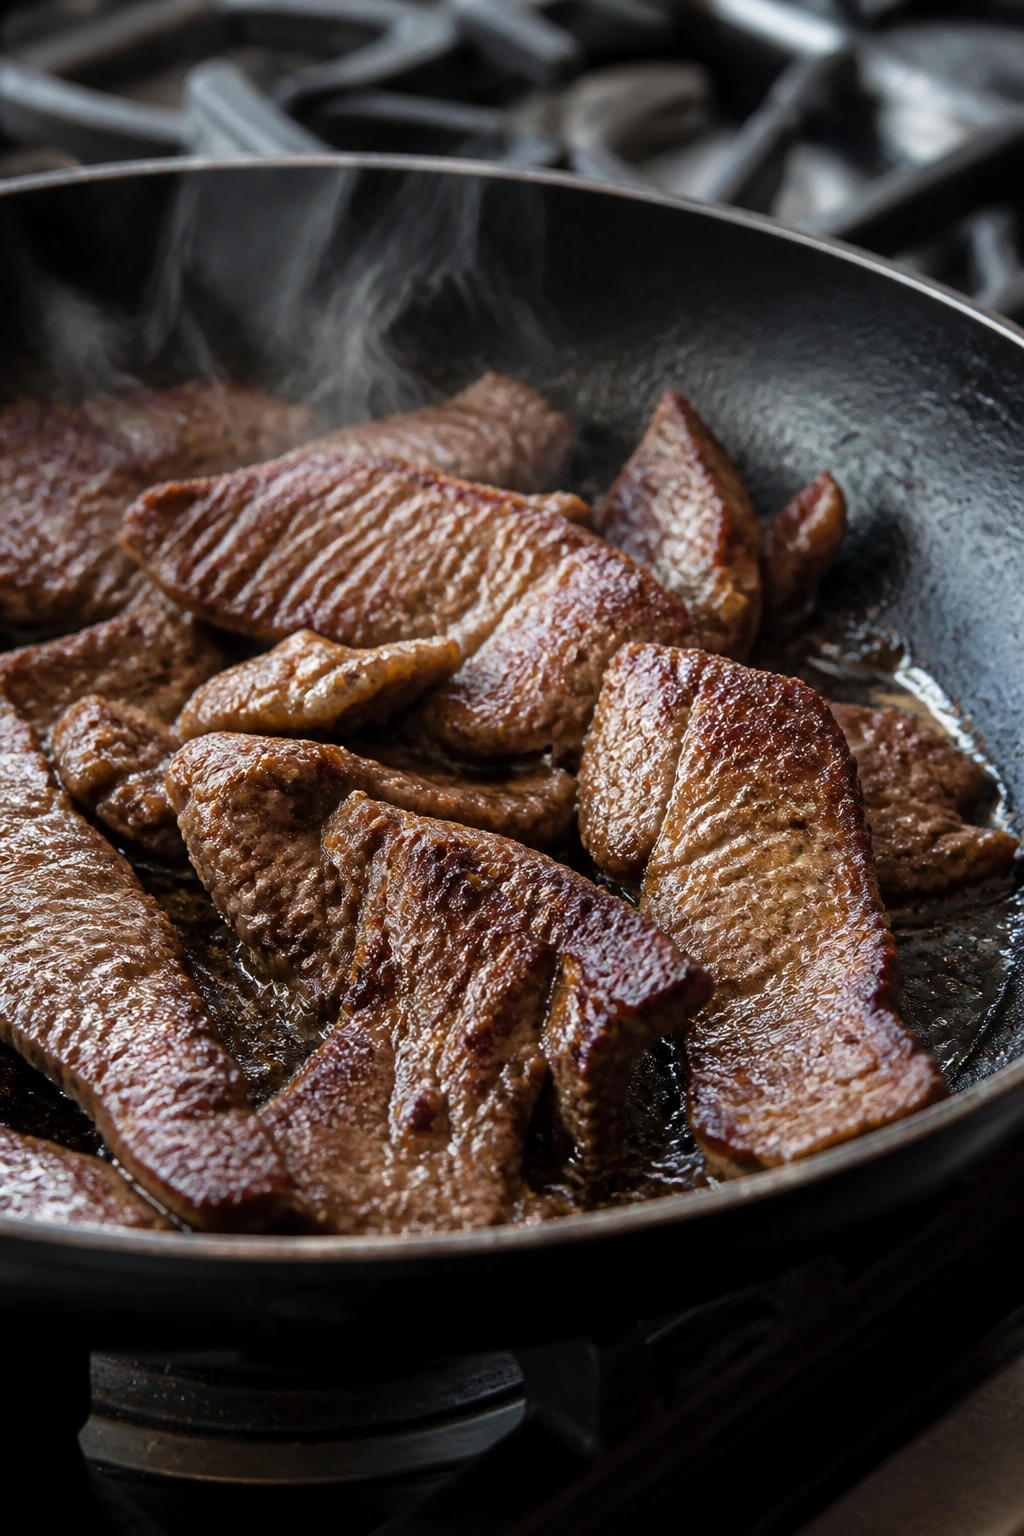
Set a 12-inch skillet over medium-high heat and add the oil. Let it heat for 2 minutes, until the oil shimmers and a pinch of flour sizzles immediately on contact.
-
Add half the beef in a single layer. Do not crowd the pan. Let it sear for 2 to 3 minutes on the first side without moving it much, then flip and brown the second side for another 1 to 2 minutes. The coating should turn deep tan with a few darker edges.
-
Transfer the browned beef to a plate and repeat with the remaining beef, adding a small splash more oil if the skillet looks dry. If the pan starts smoking hard, lower the heat by a notch. You want browning, not bitter black flour.
Build the Flavor Base
-
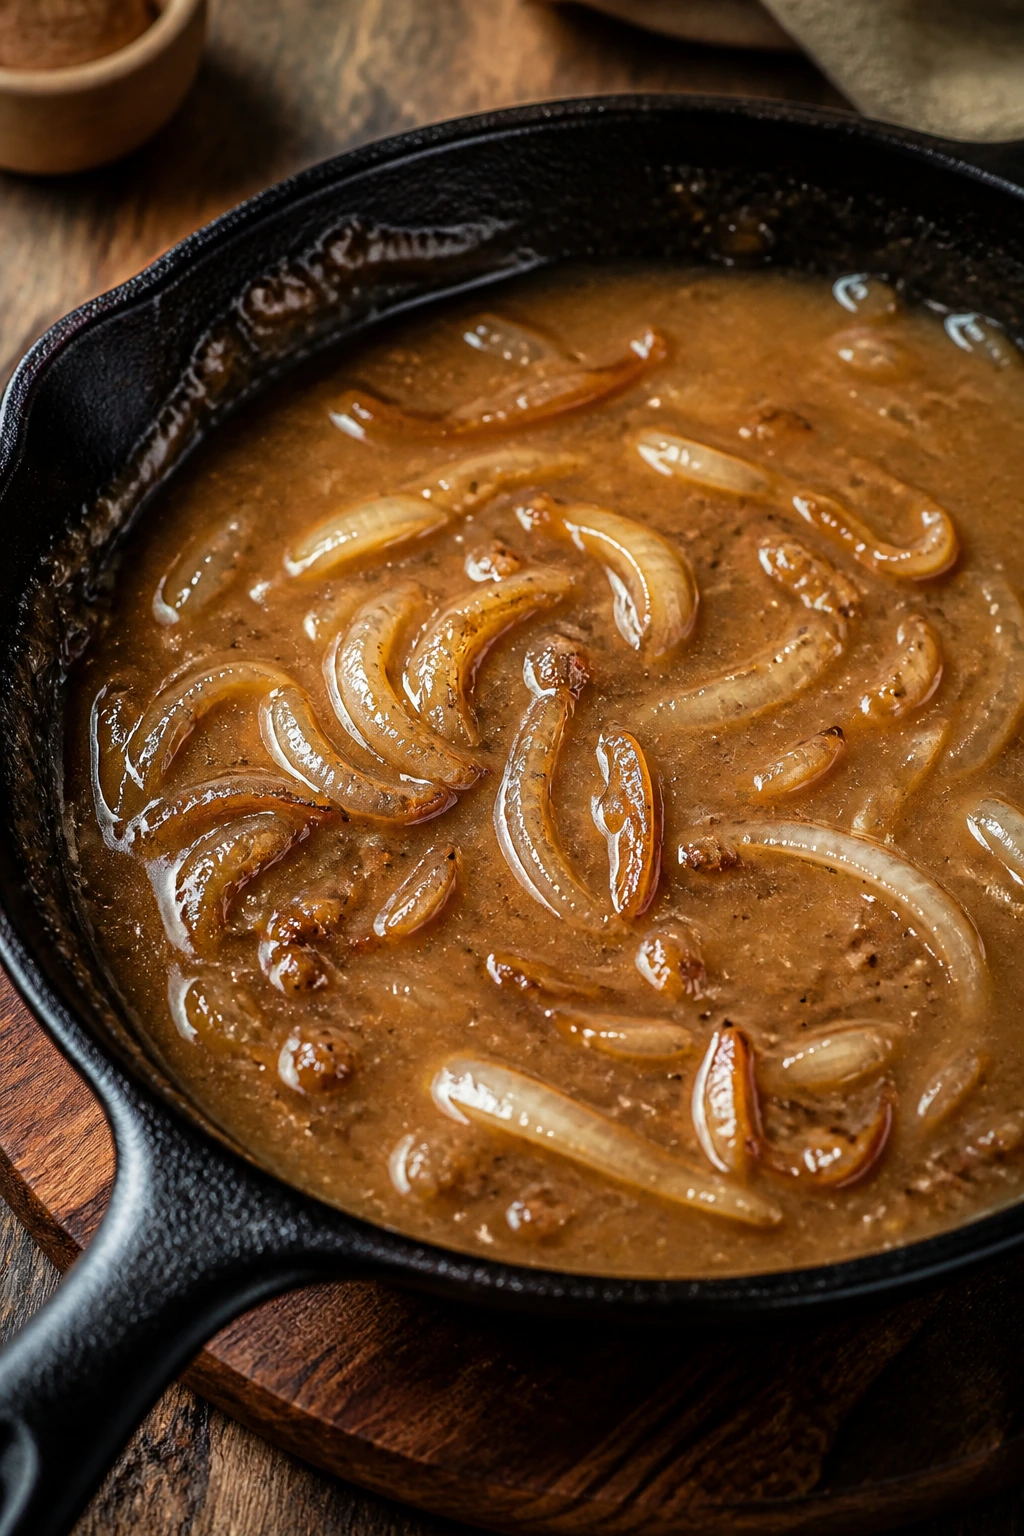
Reduce the heat to medium and add the butter. Once it melts, add the sliced onion and stir to coat. Cook for 6 to 8 minutes, stirring now and then, until the onion turns soft, golden at the edges, and a little glossy.
-
Stir in the garlic and cook for 30 seconds, just until it smells sweet. Sprinkle the reserved 2 tablespoons of dredge over the onions and stir for 1 minute. The raw flour smell should fade, and the onion mixture will start to look a little pasty around the edges.
-
Slowly pour in the warm beef broth while stirring and scraping the bottom of the skillet with a wooden spoon. Add the Worcestershire sauce, Dijon mustard, and soy sauce. Keep stirring until the sauce turns smooth and begins to thicken, about 3 to 5 minutes.
-
Return the beef and any juices on the plate to the skillet. Simmer gently for 2 to 4 minutes, stirring once or twice, until the beef is hot all the way through and the gravy clings to the meat in a thin, glossy coat. Finish with the apple cider vinegar and parsley, then taste and adjust salt and pepper. Do not let the gravy boil hard. A low simmer keeps the meat from turning leathery.
How to Build Onion Gravy From the Same Pan
The gravy is not a side note. It is the bridge between the browned beef and the plate you actually want to eat. If the pan is hot enough and you scraped it properly, the gravy practically makes itself.
Start with the onion fat and the little crusty bits left behind from the beef. That’s the base. When the reserved dredge goes in, it helps soak up the fat and gives the broth something to thicken against. Then the warm broth loosens everything at once, and the skillet goes from messy to glossy in about a minute if you keep stirring.
The trick is not to dump in cold liquid and hope for the best. Cold broth drops the temperature, and that’s how you end up with a grainy sauce and limp onions. Warm broth slides in smoother, picks up the fond faster, and stays on the right side of silky. Small thing. Big difference.
If the gravy looks too thin after a few minutes, keep simmering before you reach for more flour. The starch from the coating needs a little time to do its job. If it looks too thick, a splash of broth will loosen it without washing out the flavor. This part rewards calm hands.
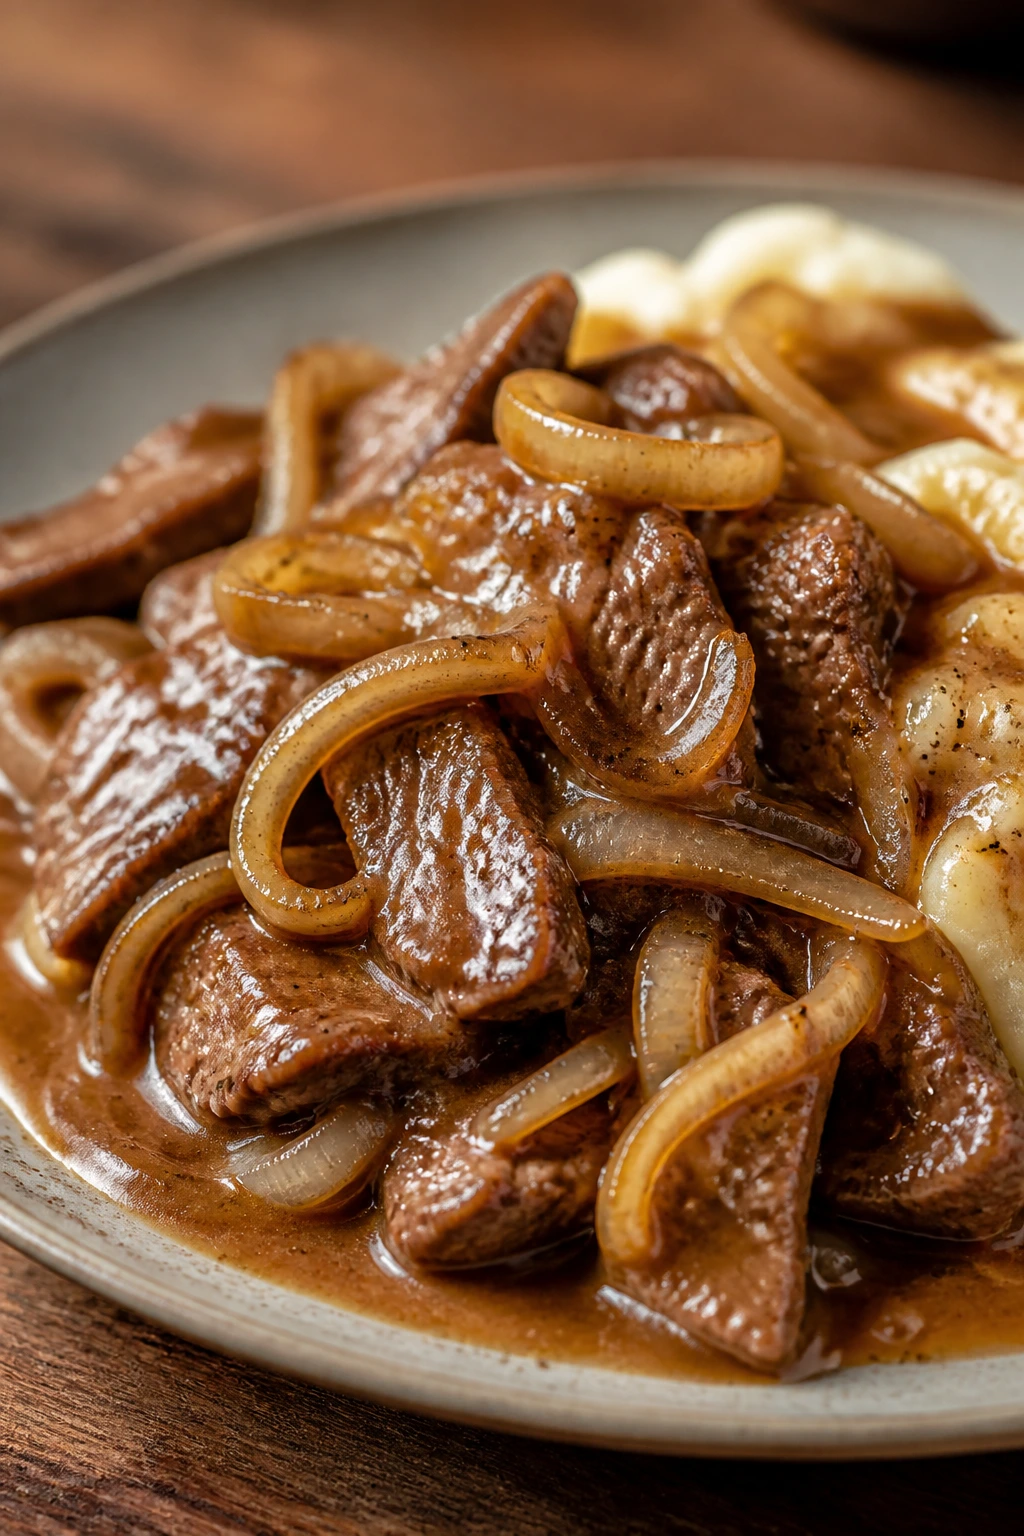
How to Plate It So the Dinner Feels Finished
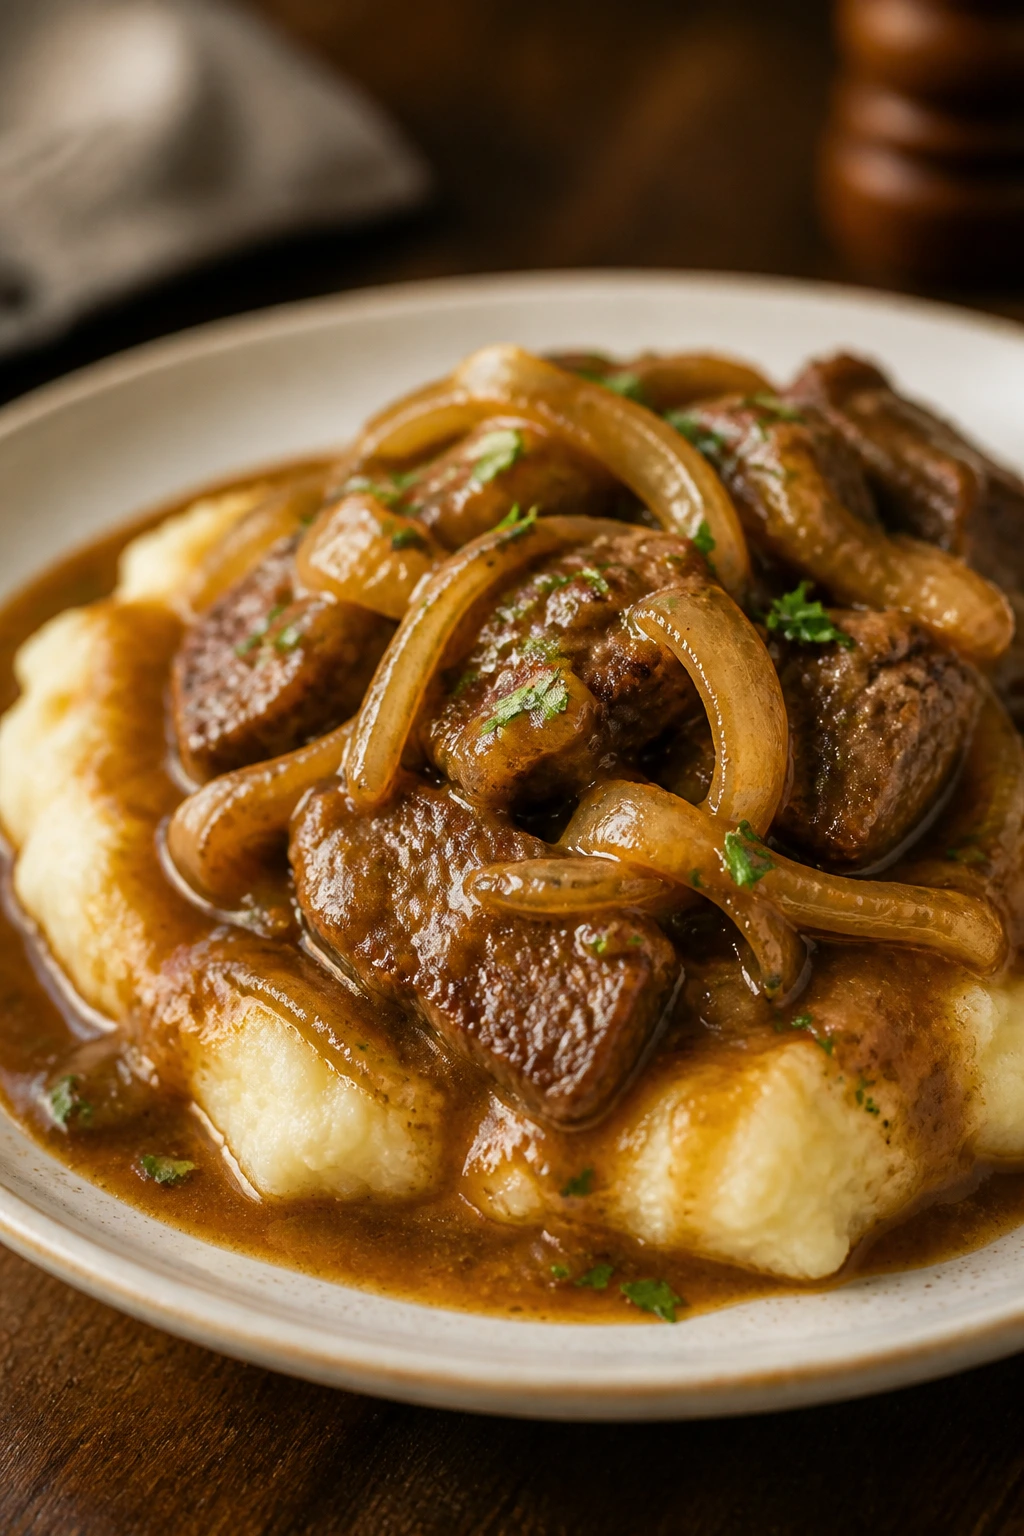
Presentation: Spoon mashed potatoes, rice, or noodles onto the plate first, then arrange the beef and onions beside or over them so the gravy can run into the starch instead of disappearing under it. A small handful of parsley over the top keeps the dish from looking flat and brown.
Accompaniments: Buttered egg noodles are the easiest match, but mashed potatoes win if you want the gravy to work harder. Steamed green beans, sautéed cabbage, or a simple vinegary slaw add a clean edge that keeps the plate from feeling heavy. A thick slice of bread is not optional if you like to mop.
Portions: Figure on about 6 to 8 ounces of cooked beef per adult when this is the main event. If you’re feeding people who treat gravy like a sport, make the potatoes or noodles generous and keep extra broth warm on the side so you can loosen the sauce at the table.
Beverage Pairing: Unsweetened iced tea with lemon cuts through the richness cleanly. A cold lager works too. If you want wine, pick something dry and low in oak, not a heavy bottle that fights the onions.
Small Upgrades That Make the Pan Taste Deeper
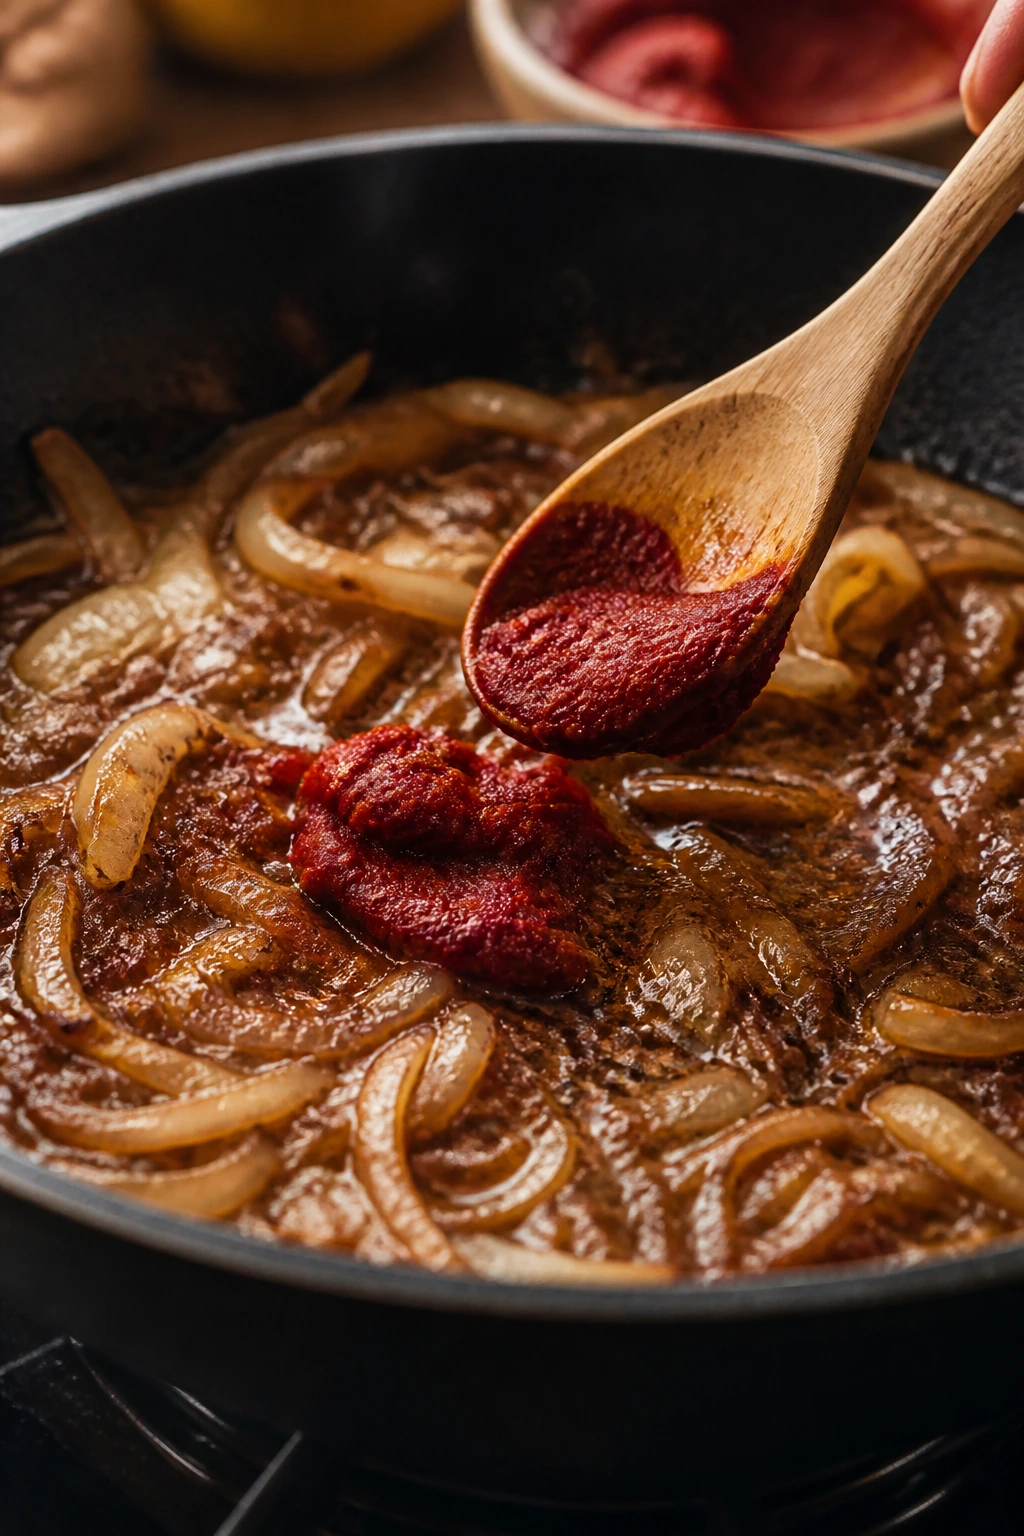
Flavor Enhancement: A teaspoon of tomato paste stirred into the onions for 30 seconds before the broth goes in gives the gravy a darker, rounder flavor. It won’t taste like tomato. It will taste like the sauce has been cooking longer than it has.
Time-Saver: Slice the beef and onions the day before and keep them in separate containers in the fridge. The actual cooking moves fast enough that the prep is usually the slowest part, not the frying.
Cost-Saver: Top round is usually the friendliest cut for this dish, and it pays you back if you slice it thin and don’t overcook it. If the beef is lean, keep the simmer short so the meat doesn’t go from tender to dry in the span of a few bubbles.
Serving Suggestions: A last-minute knob of cold butter swirled into the gravy right before serving makes the sauce look silkier and taste fuller. A pinch of black pepper over the plated beef gives the dish a sharp finish that the onions alone can’t supply.
The Missteps That Turn Fried Beef Chewy or Flat
-
Crowding the skillet: If too much beef goes in at once, the temperature drops and the flour turns pale and gummy instead of brown. Cook in batches, even if it feels slower.
-
Starting with wet beef: Moisture on the surface creates steam before the crust can set. Pat the meat dry with paper towels and give it a minute before dredging.
-
Using cold broth straight from the fridge: Cold liquid cools the pan too fast and makes the gravy lumpy around the edges. Warm the broth first, even if it’s just for a minute in the microwave.
-
Boiling the gravy hard after the beef goes back in: A rolling boil makes lean beef tighten up and chew like shoe leather. Keep it at a gentle simmer and pull it off the heat as soon as the sauce looks glossy.
-
Slicing with the grain: Long muscle fibers stay stringy when you cut them in the same direction they run. Turn the steak and slice across those lines instead.
-
Letting the flour stay raw in the pan: If the reserved dredge goes in and you pour in liquid too quickly, the sauce can taste dusty. Stir the flour into the onions for a full minute before the broth goes in.
Variations for Different Pans and Different Moods
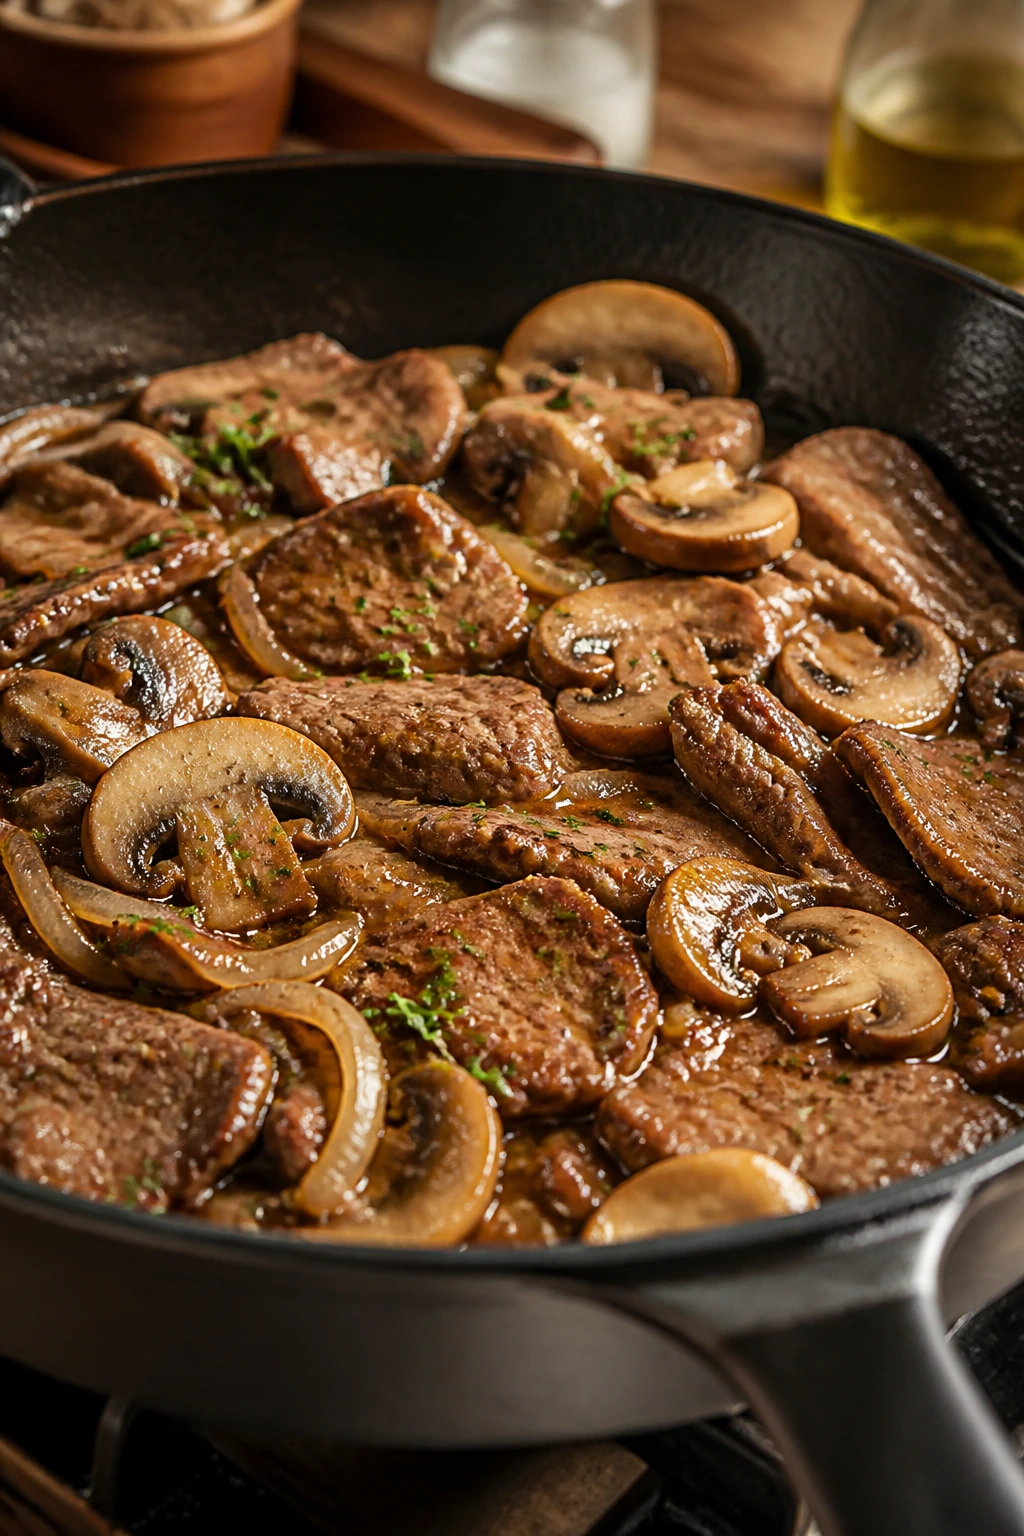
Mushroom-Onion Skillet Beef
Add 8 ounces of sliced cremini mushrooms after the onions have softened. Let them cook until they lose their moisture and start to brown at the edges, then carry on with the garlic and broth. The mushrooms bring a deeper, earthier flavor that works especially well over noodles.
Peppery Country-Style Beef
Increase the black pepper to 1 1/2 teaspoons and add a small pinch of cayenne to the dredge. This version has more bite and tastes right at home with mashed potatoes and green beans. It’s the one I’d choose when I want the gravy to feel a little sharper.
Creamed Skillet Beef
Stir in 1/4 cup heavy cream or half-and-half after the broth has thickened, then simmer for 1 minute more. The sauce turns pale and richer, with a softer finish that leans toward diner-style comfort. Use this one if you want the gravy to cling to noodles.
Gluten-Free Fried Beef
Swap the flour for a good gluten-free all-purpose blend and keep the cornstarch in the mix. The coating browns a little differently, so give it an extra minute before flipping and use a slightly lower simmer so the sauce stays smooth.
Storing, Reheating, and Making It Ahead
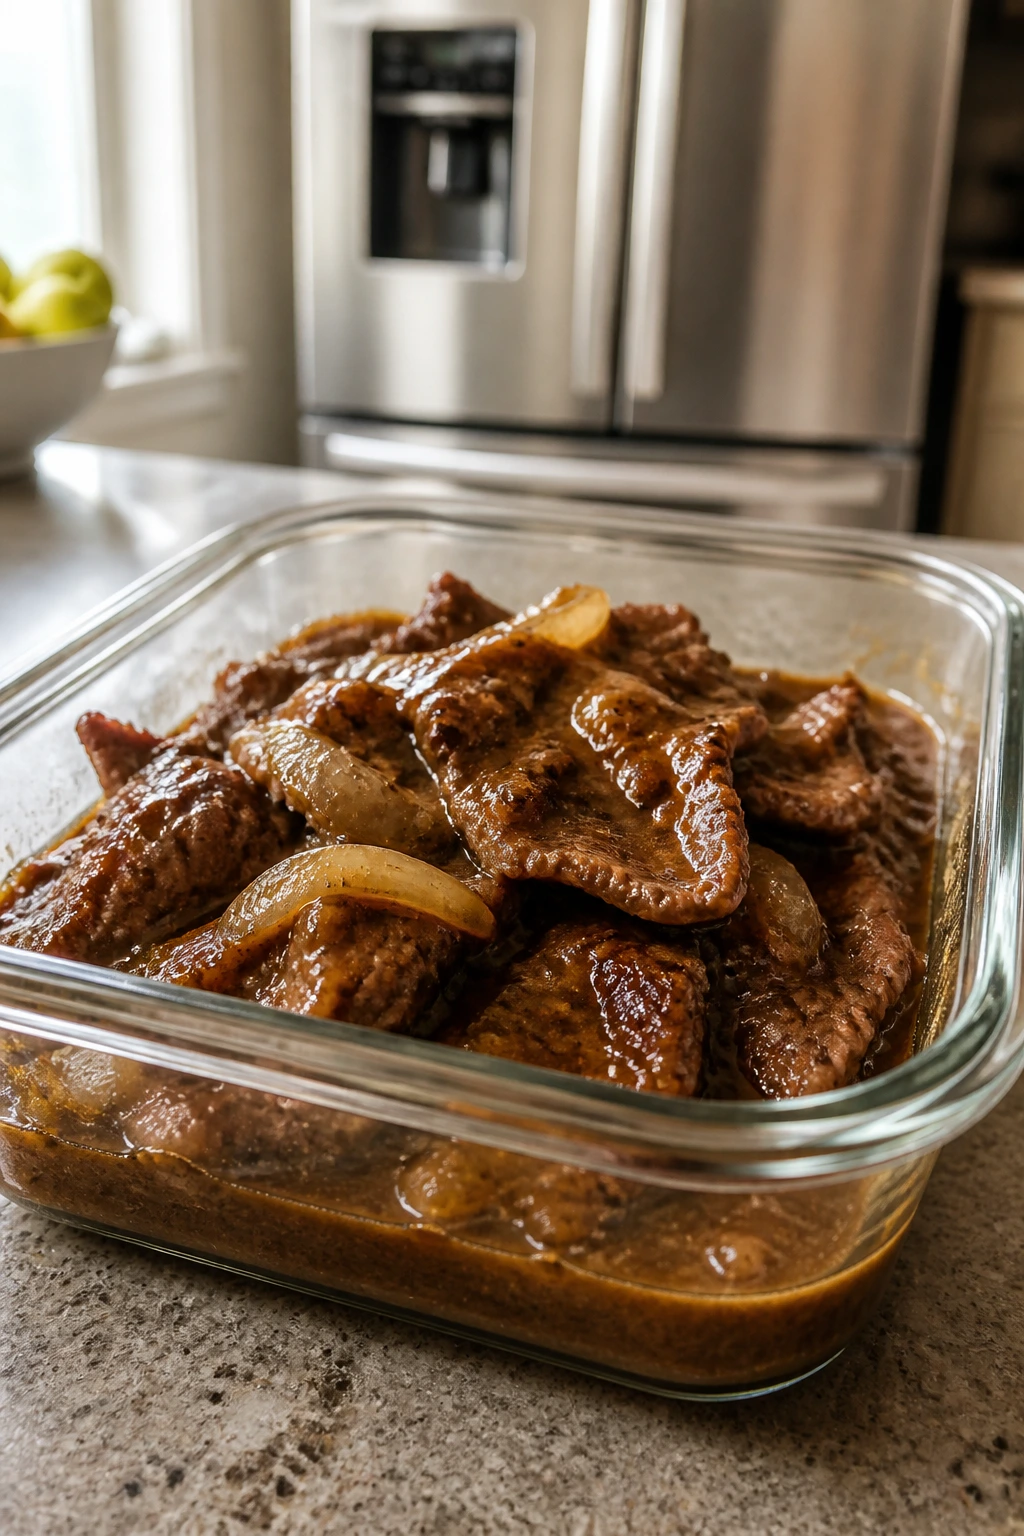
Classic fried beef keeps well, but the texture changes a little once it sits. Leave it at room temperature no longer than 2 hours, then move it to the fridge in a shallow container so it cools fast. If you tuck a big hot mass into the fridge, the middle stays warm too long and the gravy gets uneven.
In the refrigerator, it holds for 3 to 4 days. The gravy will thicken as it chills, which is normal. If it seems too tight when you reheat it, add a tablespoon or two of broth or water and stir until it loosens.
For the freezer, pack the beef and gravy in airtight containers or freezer bags and flatten them a bit so they freeze evenly. It will keep for up to 2 months. Thaw it overnight in the fridge before reheating. Reheat gently in a skillet over medium-low heat, covered loosely, with a splash of broth for 5 to 8 minutes. The microwave works in a pinch, but use 50% power and stir halfway through so the edges do not turn stringy while the center stays cold.
If you want to make part of it ahead, slice and season the beef up to a day in advance. You can also slice the onion and mince the garlic the day before. I would not dredge the beef too far ahead, though. The coating behaves better when it meets the pan fresh.
Questions People Ask About Classic Fried Beef
Can I use a different cut of beef?
Yes. Flank steak, chuck steak, and cube steak all work in different ways. Flank cooks fast and stays lean, chuck brings more beef flavor but benefits from a slightly longer simmer, and cube steak gives you a softer bite with less knife work.
Do I have to use cornstarch in the dredge?
No, but it helps the crust brown a little cleaner and keeps the gravy from feeling heavy. If you skip it, use all flour and keep the heat steady so the coating does not absorb too much fat.
How do I keep the gravy from getting lumpy?
Use warm broth and stir while you pour it into the skillet. If you still get a few lumps, keep whisking over low heat until they break up. A flat wooden spoon works too if you stay patient and scrape the bottom well.
Can I make this without onions?
You can, but the dish loses some of its character. If onions are a problem, try shallots or a smaller amount of finely sliced leeks. You still want some sweet savory base under the beef.
What if my beef turns chewy?
That usually means the pan was too crowded, the slices were too thick, or the beef simmered too long after it went back into the gravy. Thin slices and a short finish are your best defense. If it already happened, slice the leftover beef a little thinner and reheat it gently in extra broth.
Can I cook this in cast iron?
Yes, and I’d argue cast iron is the easiest choice if you know how it behaves. It holds heat well for browning the beef, then settles into a steady simmer for the gravy. Just avoid cranking it so hot that the flour burns.
What should I do if the gravy tastes flat?
Add a pinch more salt first, then a tiny splash of vinegar or an extra dash of Worcestershire. Flat gravy usually needs salt and brightness, not more thickener. Taste after each small change so you don’t push it too far.
Can I freeze the finished dish?
Yes, though the beef will be softer after thawing. Freeze it with plenty of gravy so the meat stays protected, then reheat slowly from thawed. A splash of broth in the skillet brings it back better than a microwave blast.
A Final Plate Worth Coming Back To
There’s a reason this kind of skillet dinner keeps showing up in home kitchens. It doesn’t ask for much, but it gives you a lot back if you pay attention for half an hour. Dry the beef, brown it properly, keep the onions honest, and the gravy takes care of the rest.
I like recipes like this because they don’t pretend to be more refined than they are. They’re practical. They’re generous. They make the kind of plate that can handle a rough day and still feel like you did something right when you sat down.
Classic Fried Beef for a Hearty Dinner — Recipe Card
Recipe Name: Classic Fried Beef for a Hearty Dinner
Description: Tender strips of beef are dredged in seasoned flour, browned in batches, and finished with sweet onions and a savory pan gravy. Serve it over mashed potatoes, rice, or noodles for a plate that eats like a full meal.
Prep Time: 25 minutes
Cook Time: 30 minutes
Total Time: 55 minutes
Course: Main Course
Cuisine: American
Servings: 4 to 6 servings
Calories: About 480 kcal per serving
Ingredients
For the Beef and Dredge:
- 2 pounds beef top round steak or sirloin tip steak, sliced 1/4-inch thick against the grain
- 3/4 cup all-purpose flour
- 2 tablespoons cornstarch
- 1 1/2 teaspoons kosher salt
- 1 teaspoon black pepper
- 1 teaspoon smoked paprika
- 1/2 teaspoon garlic powder
For Frying and the Gravy:
- 1/3 cup neutral oil
- 2 tablespoons unsalted butter
- 1 large yellow onion, thinly sliced
- 3 cloves garlic, minced
- 1 1/2 cups beef broth, warmed
- 1 tablespoon Worcestershire sauce
- 1 teaspoon Dijon mustard
- 1 teaspoon soy sauce
- 1 teaspoon apple cider vinegar
- 1 tablespoon chopped parsley
Instructions
-
Pat the beef dry, season it with 1 teaspoon of the salt, and let it sit for 10 minutes.
-
Whisk together the flour, cornstarch, remaining salt, black pepper, smoked paprika, and garlic powder in a shallow dish. Reserve 2 tablespoons of the mixture for the gravy.
-
Dredge the beef in the seasoned flour and shake off the excess.
-
Heat the oil in a large skillet over medium-high heat. Brown the beef in batches for 2 to 3 minutes per side, then transfer it to a plate.
-
Lower the heat to medium and add the butter and onions. Cook for 6 to 8 minutes, stirring now and then, until the onions are soft and golden at the edges.
-
Stir in the garlic and cook for 30 seconds, then sprinkle in the reserved dredge and cook for 1 minute.
-
Slowly whisk in the warm beef broth, Worcestershire sauce, Dijon mustard, and soy sauce, scraping up the browned bits. Simmer for 3 to 5 minutes until slightly thickened.
-
Return the beef and any juices to the skillet. Simmer gently for 2 to 4 minutes, then finish with the apple cider vinegar and parsley. Taste and adjust seasoning before serving.
Notes: Warm broth keeps the gravy smooth; if you want a looser sauce, add a splash more broth at the end. Keep the simmer gentle so the beef stays tender.