
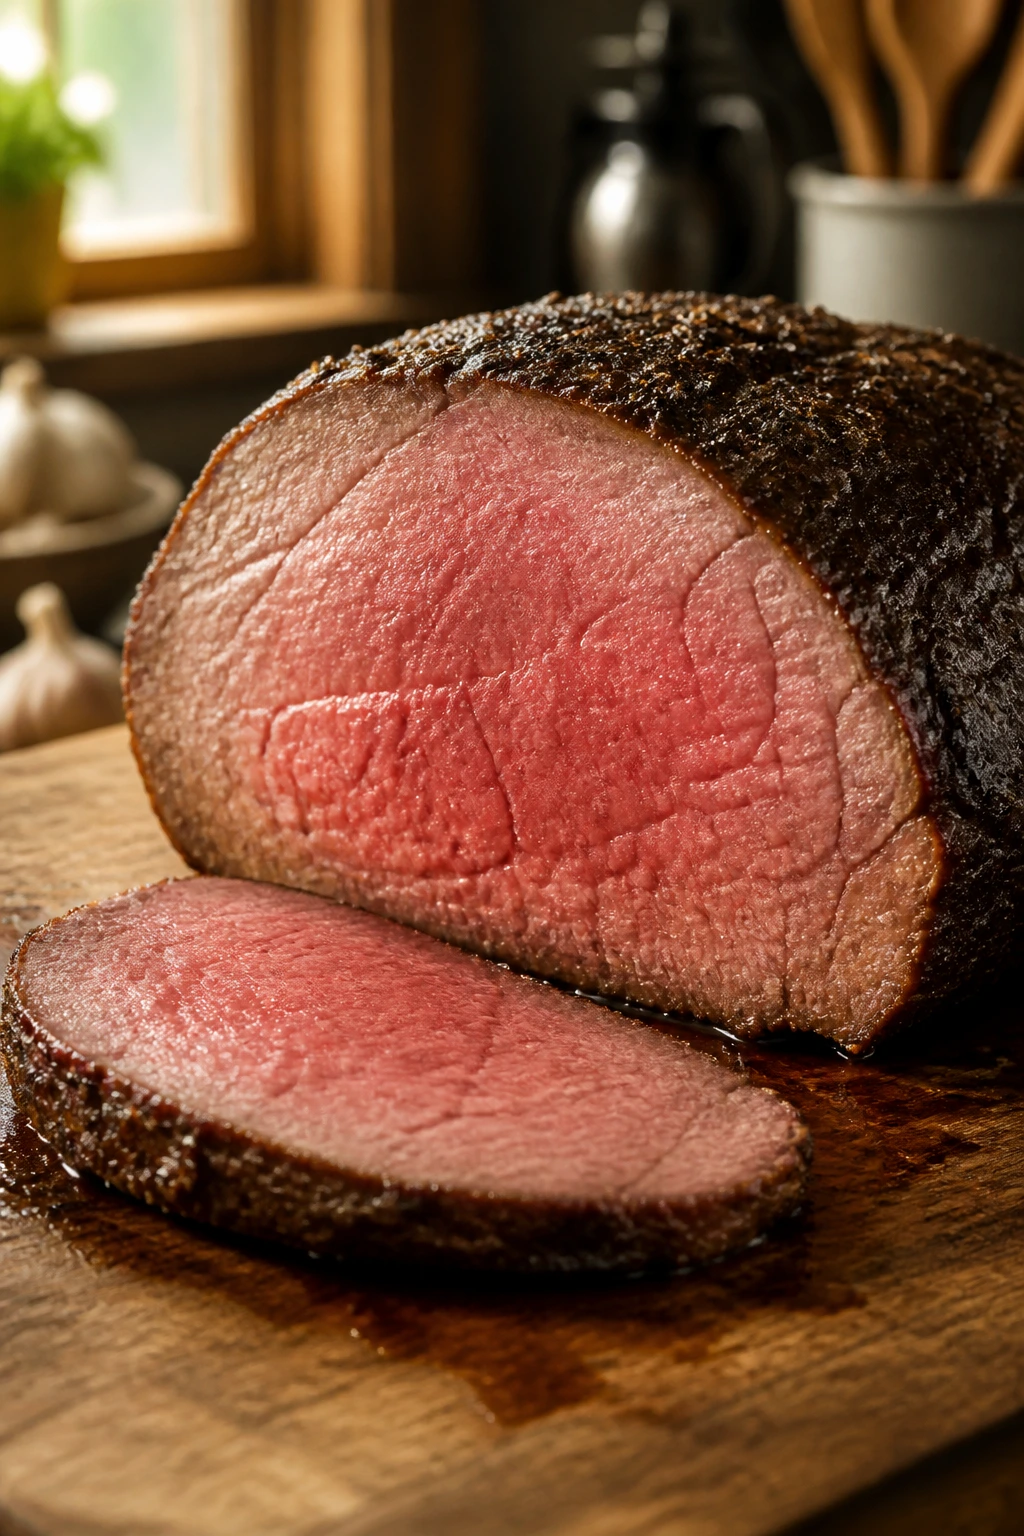
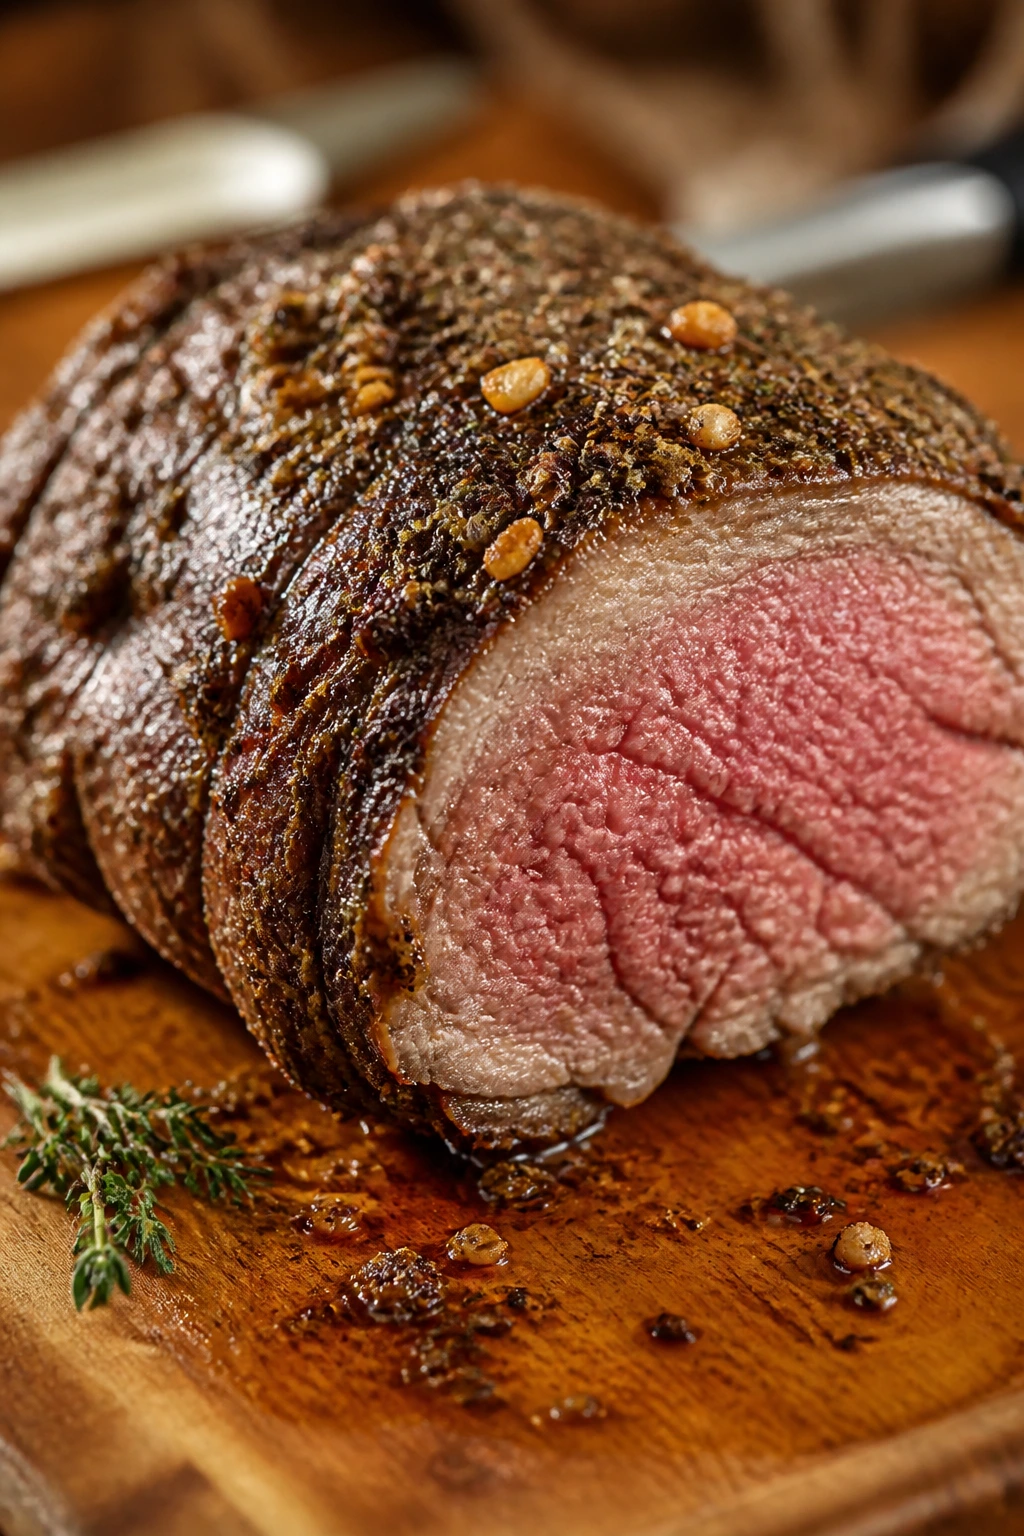
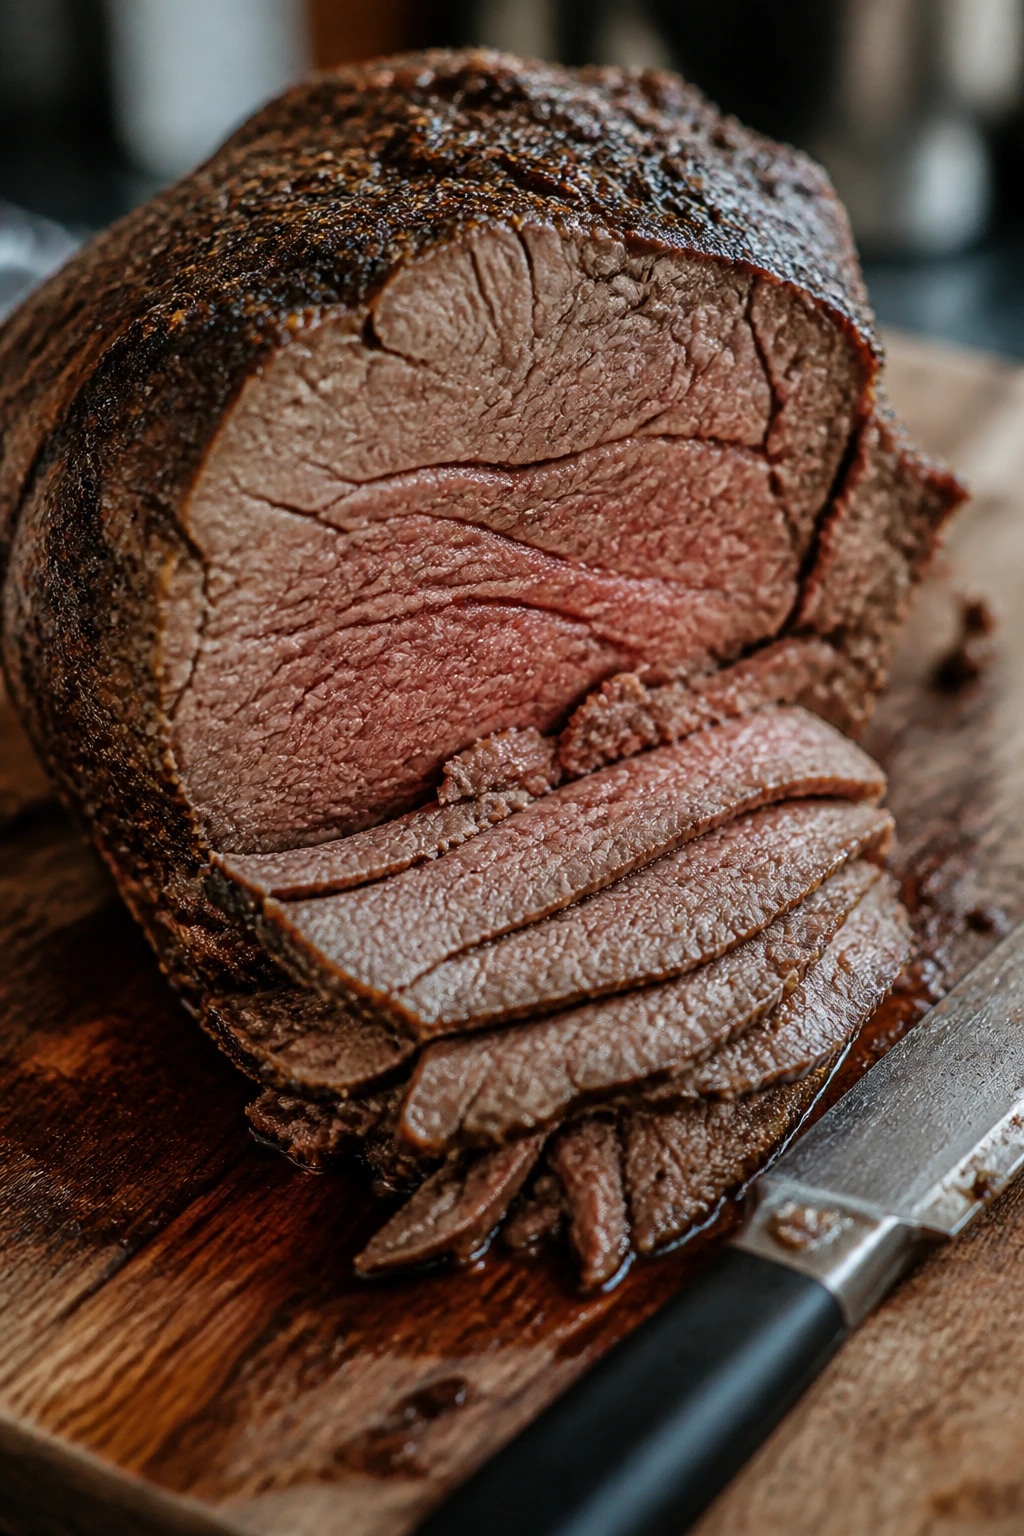
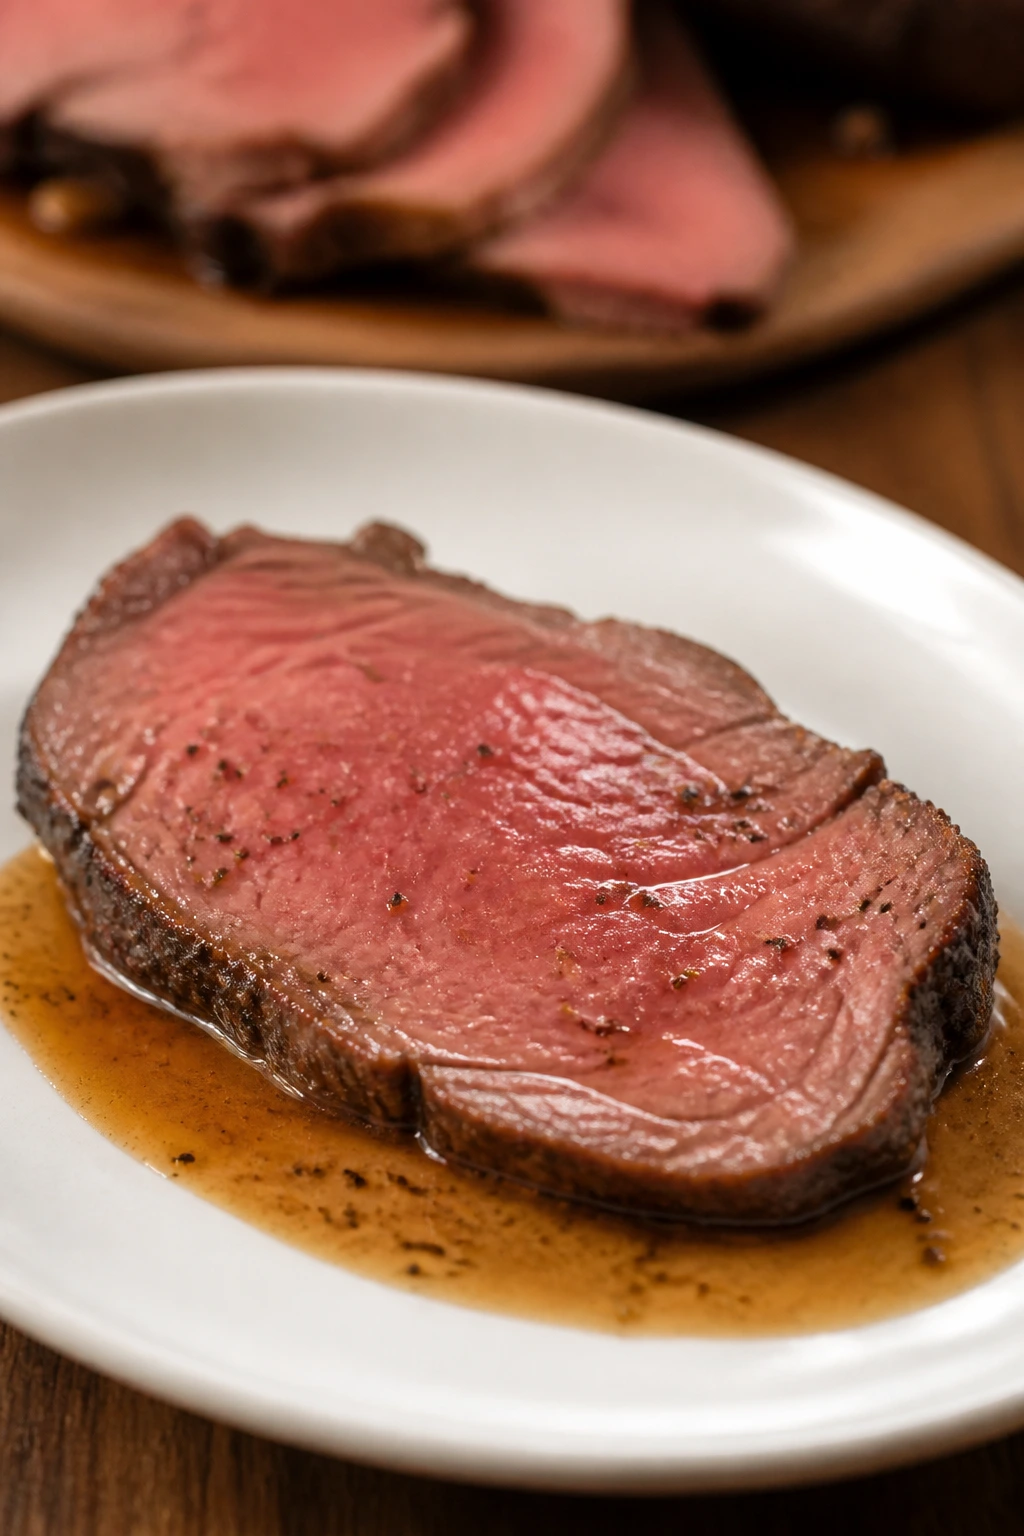
A good sliced roast beef has one job: come out rosy in the middle, hold its shape on the board, and give you thin slices that still feel tender when you bite them. When it works, the knife glides through with a soft, dry whisper, the crust smells like pepper, garlic, and browned beef, and the center shows that clean blush that tells you you stopped at the right moment.
When it fails, it fails loudly. The slices go gray and stringy, the cutting board fills with juice, and the flavor tastes flatter than it should for something that spent an hour in a hot oven. That’s usually not a problem with the beef itself. It’s timing, slicing, and a little bit of nerve.
What I like about this style of roast is that it behaves like a proper dinner without asking for much drama. You season it ahead, roast it hot enough to build a crust, then back off the heat and let the thermometer do the talking. A top round roast is lean, yes, but it has the tight grain and clean slice you want for a family table, sandwich leftovers, or a plate with gravy and mashed potatoes piled next to it.
Why This Roast Beef Earns Its Place on the Table
-
Thin slices, not shreds: A properly roasted top round gives you neat, pink slices with a firmer bite than prime rib, which is exactly what you want when gravy is part of the plan.
-
The crust carries the flavor: Salt, black pepper, garlic, onion powder, and thyme build a savory outer layer that tastes deeper than the ingredient list looks on paper.
-
A thermometer saves dinner: Pulling the roast at 125°F to 130°F for medium-rare keeps the center tender after carryover cooking does its work.
-
The gravy uses the pan, not a packet: You get browned bits, beef drippings, and a quick roux. That’s where the flavor lives.
-
Leftovers don’t feel like leftovers: Cold slices are excellent in sandwiches, and a quick warm-up in broth keeps them from drying out the next day.
-
It fits an actual dinner table: Mashed potatoes, green beans, roasted carrots, a little horseradish if you like a bite — everything on the plate has a job.
The Roast Beef I Keep Coming Back To
There’s a reason sliced roast beef has stayed in the dinner rotation for so long. It’s not fancy in the showy sense. It’s practical, calm, and a little old-fashioned in the best way. A roast like this gives you carved beef for the table, enough drippings for gravy, and leftovers that feel useful instead of sad.
I prefer a top round roast for this kind of meal. It’s lean, which means you have to treat it with respect, but it slices cleanly and stays tidy on the plate. Eye of round works too, though I think it’s a touch less forgiving. If you overcook either one by much, it reminds you immediately. No mystery there.
The flavor profile is straightforward and satisfying: browned beef, pepper, garlic, onion, thyme, and a pan gravy that tastes like it came from the roast rather than from a separate pot on the stove. That matters. A lot of recipes promise roast beef dinner and then bury the meat under so much sauce you could swap in anything. Not here. The beef should still taste like beef.
And the texture? That’s where this dish earns its keep. You want a crust with some resistance, a center that’s just warm and pink, and slices that can be layered on a plate without falling apart. The roast is not meant to be fall-apart tender like brisket. Different animal, different goal.
Timing and Yield at a Glance
Yield: Serves 6 to 8
Prep Time: 20 minutes, plus 4 to 24 hours for dry-brining if you choose to do it
Cook Time: 65 to 85 minutes, depending on the roast’s thickness and your preferred doneness
Total Time: 1 hour 25 minutes to 1 hour 45 minutes active, plus dry-brining time if used
Difficulty: Intermediate — the steps are simple, but the roast rewards attention to temperature, rest time, and slicing direction.
Chill/Rest Time: 20 to 30 minutes resting after roasting; optional overnight uncovered dry-brine in the refrigerator
Best Served: Warm, sliced thin across the grain, with pan gravy and something starchy on the side
Ingredients That Build a Proper Roast
For the Roast Beef:
- 1 boneless beef top round roast, 3½ to 4 pounds, tied if uneven
- 2½ teaspoons kosher salt
- 1 teaspoon freshly ground black pepper
- 1 teaspoon garlic powder
- 1 teaspoon onion powder
- 1 teaspoon dried thyme
- 2 tablespoons olive oil
- 3 cloves garlic, smashed
For the Roasting Pan and Vegetables:
- 1 large yellow onion, cut into 1/2-inch wedges
- 2 carrots, cut into 2-inch chunks
- 2 celery stalks, cut into 2-inch chunks
- 1 cup beef broth
For the Pan Gravy:
- 2 tablespoons unsalted butter
- 2 tablespoons all-purpose flour
- 1½ cups beef broth, plus more as needed
- 1 tablespoon Worcestershire sauce
- 1 teaspoon Dijon mustard
- 1/4 cup dry red wine, optional
- Salt and black pepper, to taste
Why These Ingredients Matter More Than the Label on the Package
The Beef
- What to use: A 3½- to 4-pound boneless top round roast is the sweet spot here. It’s lean, slices neatly, and doesn’t collapse when carved.
- Preparation: Tie any loose end with butcher’s twine so the roast cooks evenly instead of tapering into one overdone end.
- Substitutions: Eye of round works if that’s what you can find, though it’s leaner and benefits from being sliced extra thin; sirloin tip roast is another workable option.
- Tips: Look for a roast with a fairly even shape and a thin fat cap rather than thick chunks of external fat. You want the heat to cook the whole piece at the same rate.
Seasoning Rub
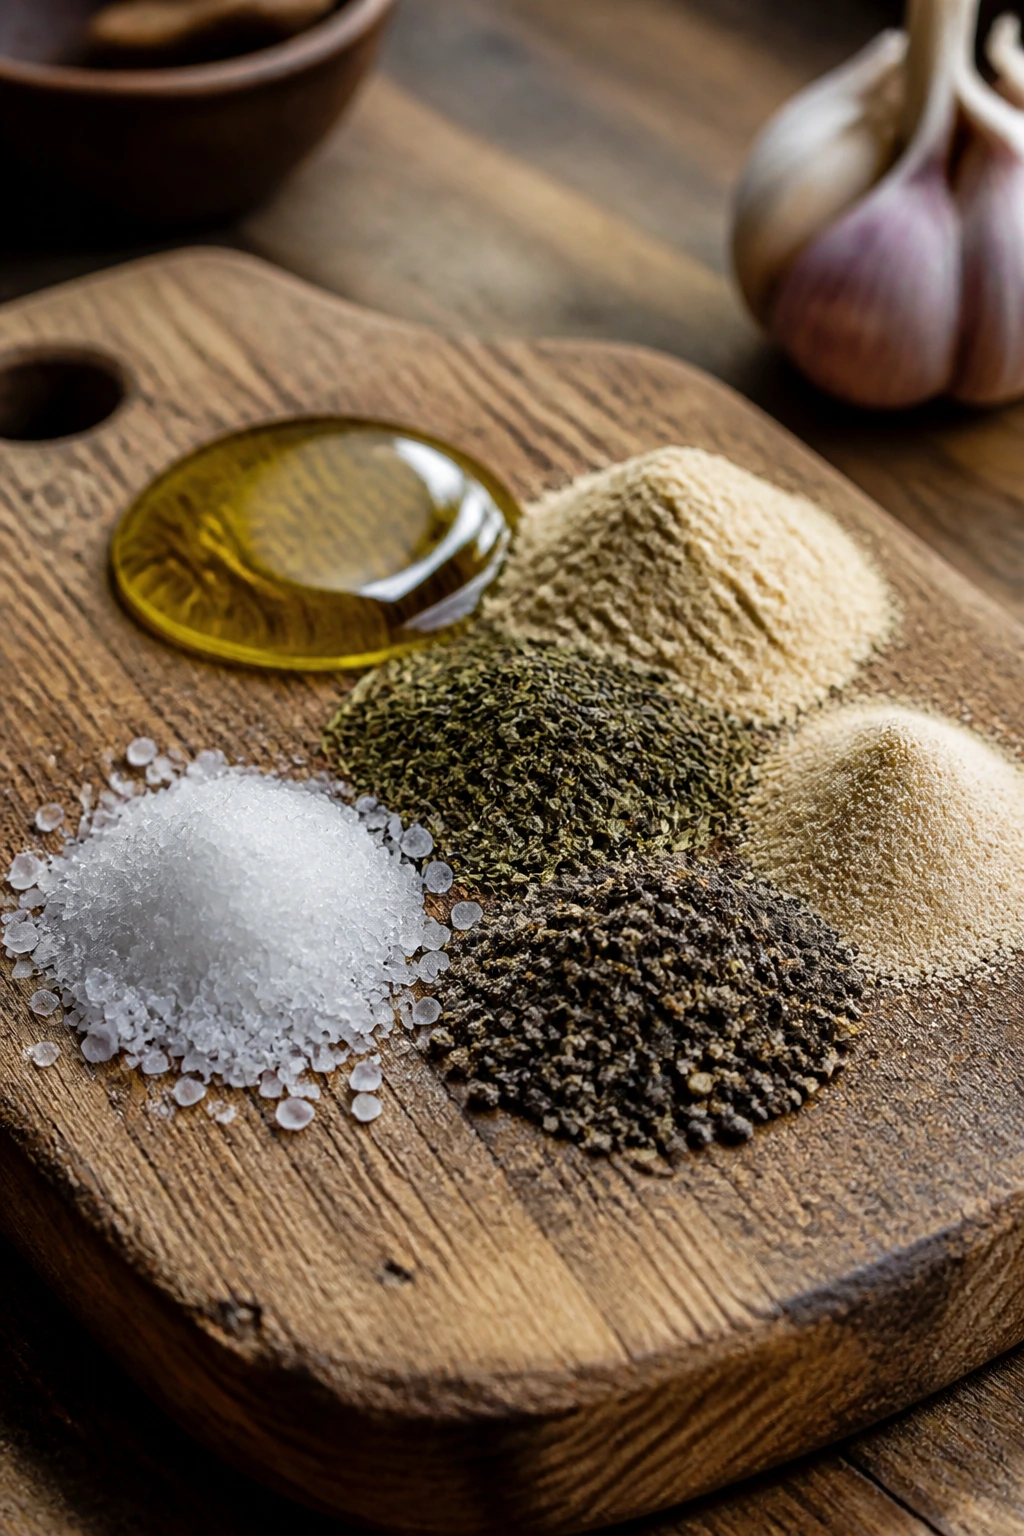
- What to use: Kosher salt, black pepper, garlic powder, onion powder, dried thyme, and olive oil make the basic crust.
- Preparation: Mix the dry seasonings first, then rub them over the roast with the oil so everything sticks and the surface looks evenly coated.
- Substitutions: Rosemary can stand in for thyme if that’s what’s in your spice cabinet, and smoked paprika can be used in a pinch for a slightly deeper finish.
- Tips: Salt has more time to work if you season the roast ahead. Even a few hours helps the meat taste seasoned all the way through instead of only on the outside.
Roasting Vegetables and Aromatics
- What to use: Onion wedges, carrot chunks, celery chunks, and smashed garlic cloves form the base under or around the roast.
- Preparation: Cut the vegetables into larger pieces so they don’t dissolve into mush during the roast.
- Substitutions: Shallots can replace some of the onion, and parsnips can stand in for carrots if you want a sweeter gravy base.
- Tips: These vegetables are there for flavor first and garnish second. If you chop them too small, they can scorch before the roast is done.
Gravy Ingredients
- What to use: Butter, flour, beef broth, Worcestershire sauce, Dijon mustard, and a small splash of red wine if you want one.
- Preparation: Keep the broth warm if you can; it helps the gravy come together smoothly once the roux is ready.
- Substitutions: If you don’t want wine, use extra broth and a teaspoon of red wine vinegar or apple cider vinegar for brightness.
- Tips: Worcestershire sauce adds depth fast. Don’t overdo it, though — too much and the gravy starts tasting sharp instead of round.
The Equipment That Makes This Easier
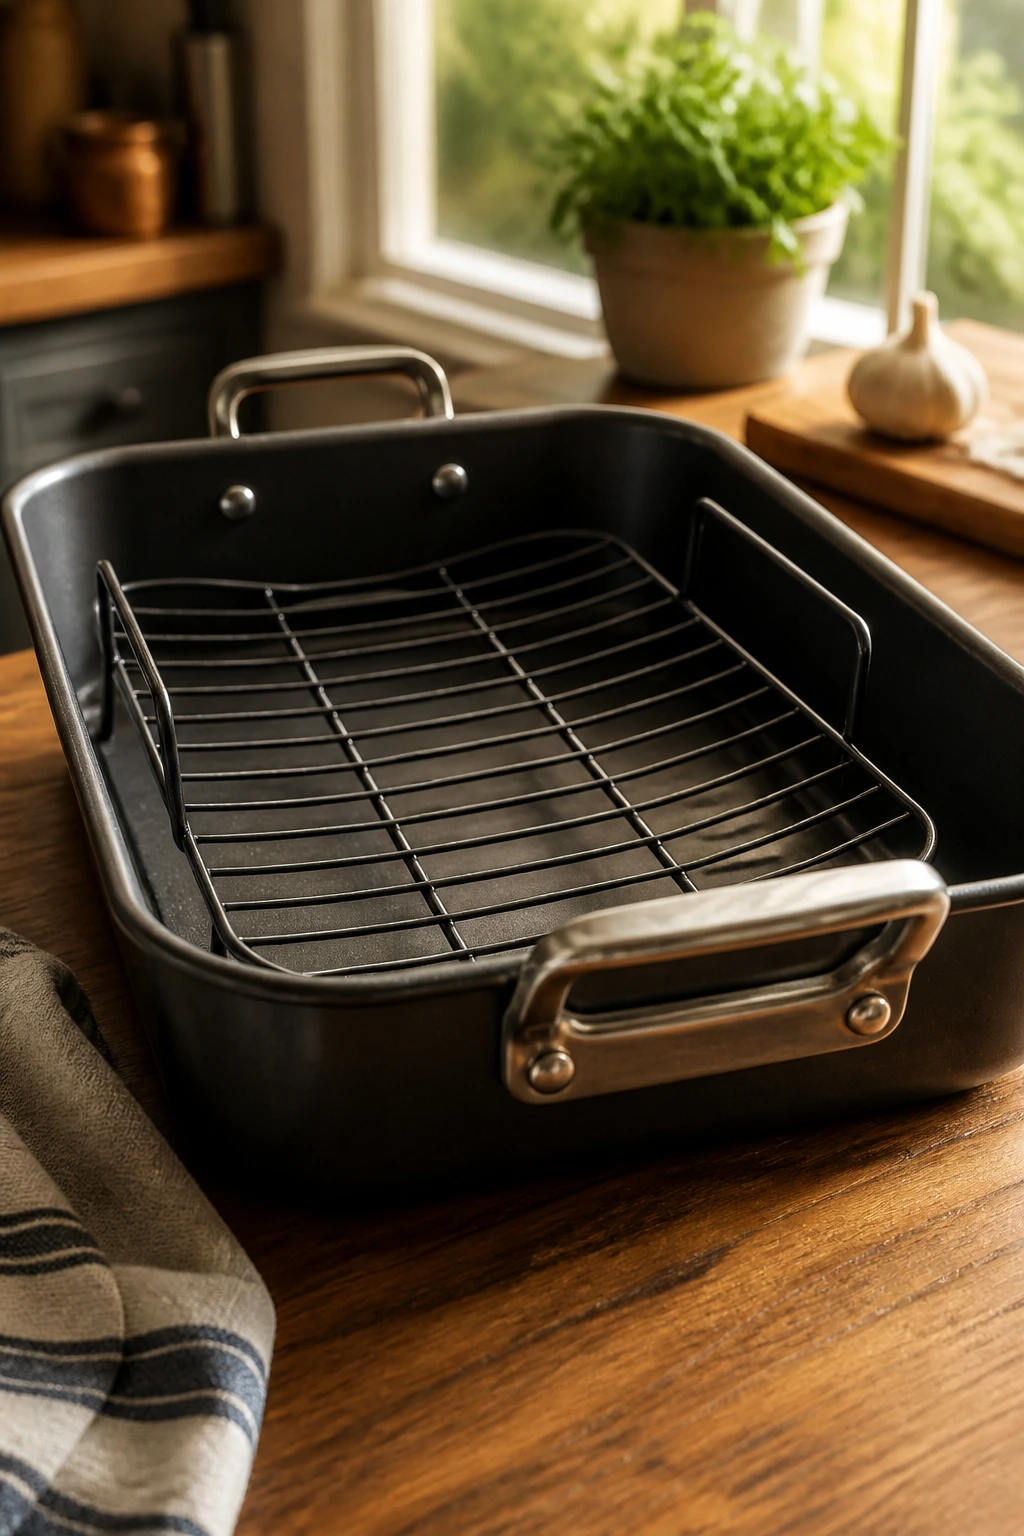
- Roasting pan or large cast-iron skillet: You need something sturdy enough to go from oven to stovetop if you’re making gravy in the same pan.
- Roasting rack: Helpful for air circulation, though a bed of onions and carrots can do the job if you don’t own one.
- Instant-read thermometer: This is the piece that saves the roast. Guessing is how you end up with gray slices.
- Sharp carving knife: A dull knife shreds the crust and makes the roast leak more juice than it should.
- Cutting board with a groove or rim: Keeps the resting juices from sliding all over the counter.
- Whisk: Needed for the gravy so the flour dissolves cleanly.
- Tongs or a sturdy spatula: Useful for lifting the roast and moving vegetables without tearing them apart.
- Fine-mesh strainer: Optional, but nice if you want a smoother gravy.
How to Roast Beef Without Drying It Out
Dry-Brine and Prep
-
Pat the roast dry with paper towels. If it has an uneven shape, tie it with butcher’s twine at 1½-inch intervals so it cooks in a more even cylinder.
-
In a small bowl, mix the kosher salt, black pepper, garlic powder, onion powder, and dried thyme. Rub the roast all over with olive oil, then coat it evenly with the seasoning mix.
-
For the best flavor, place the seasoned roast on a rack set over a tray or on a plate in the refrigerator, uncovered, for at least 4 hours or up to 24 hours. If you skip the dry-brine, season the roast right before it goes into the oven instead.
Roast and Monitor
-
Take the roast out of the refrigerator about 45 minutes before cooking so the chill comes off the surface a little. Preheat the oven to 450°F (232°C) and position a rack in the lower-middle part of the oven.
-
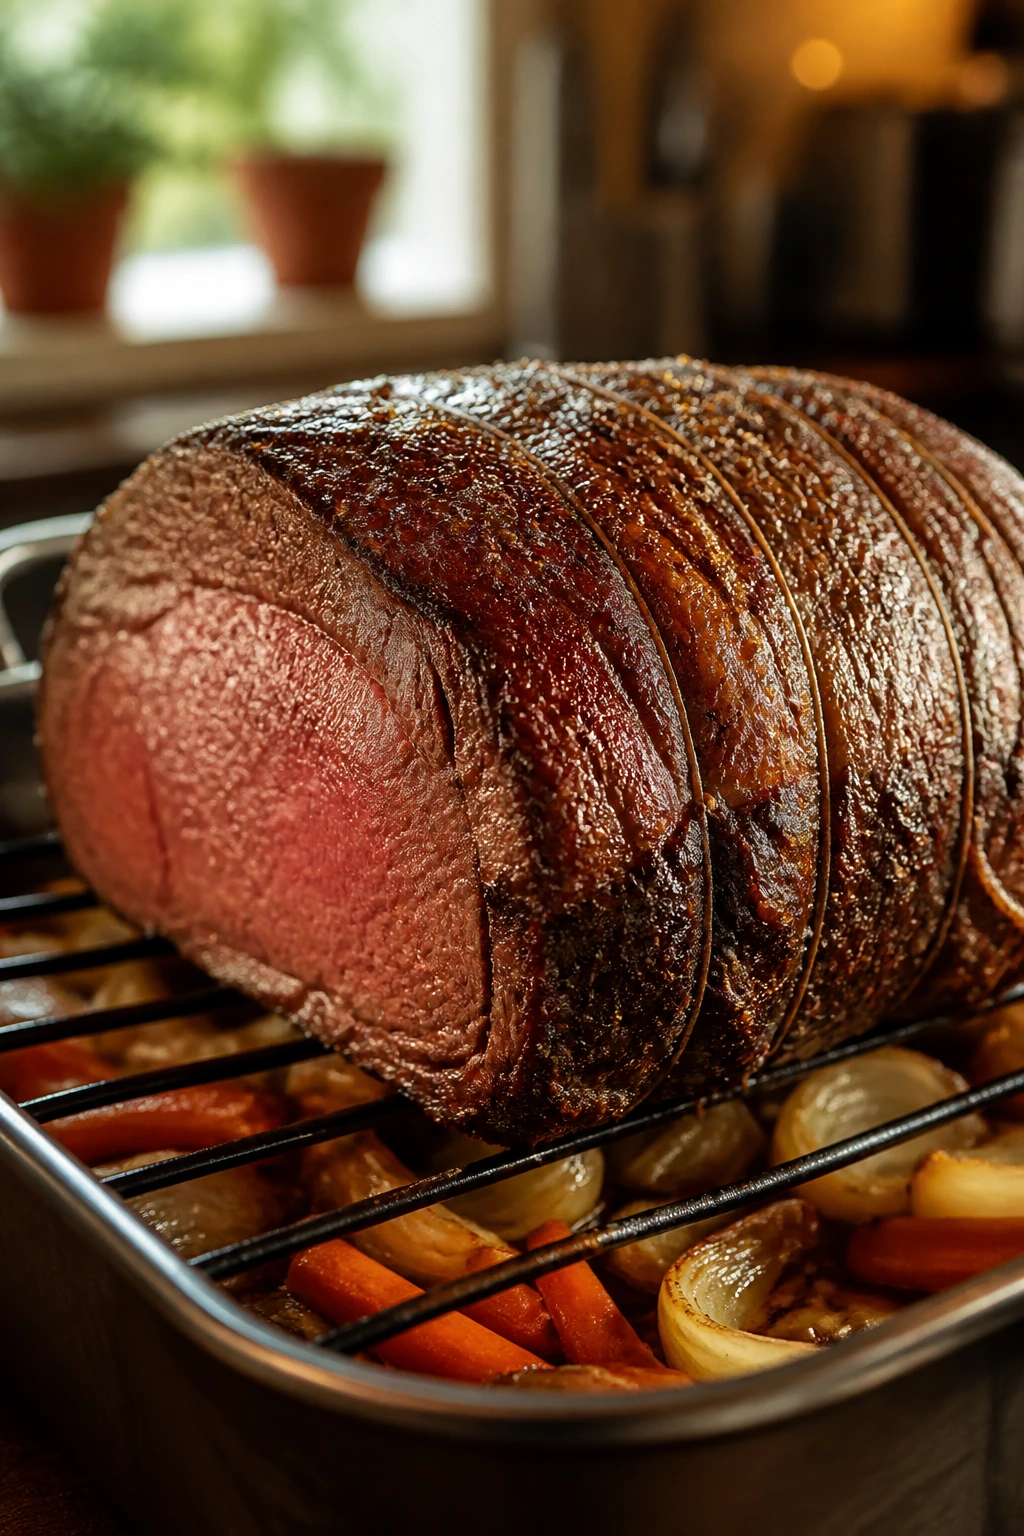
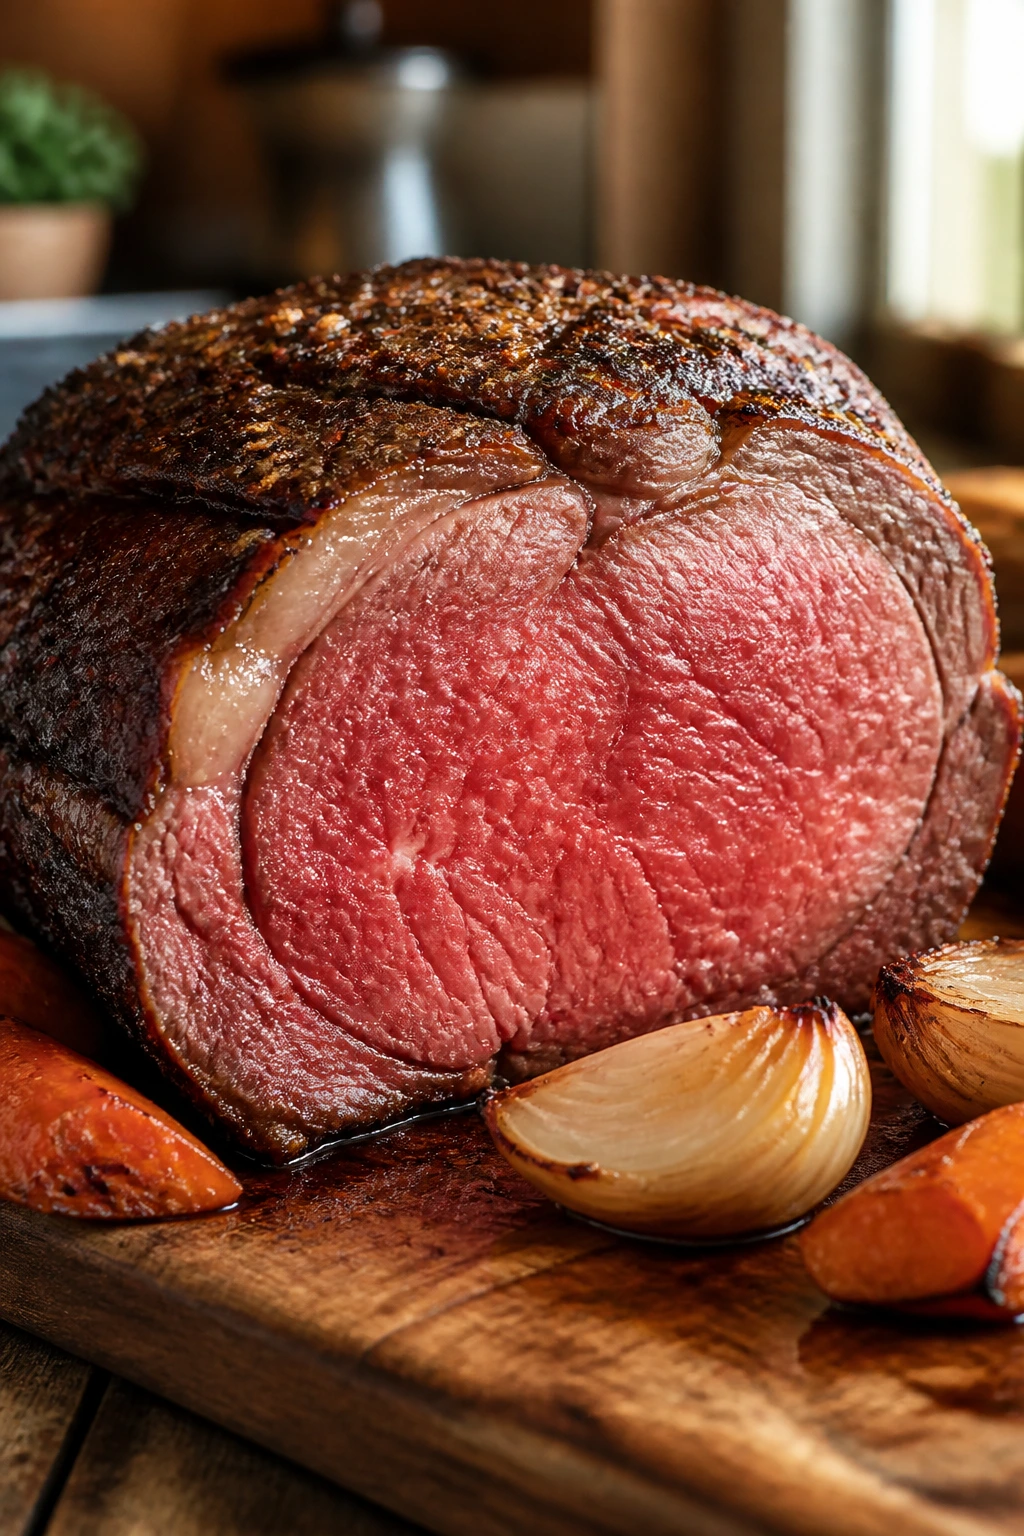
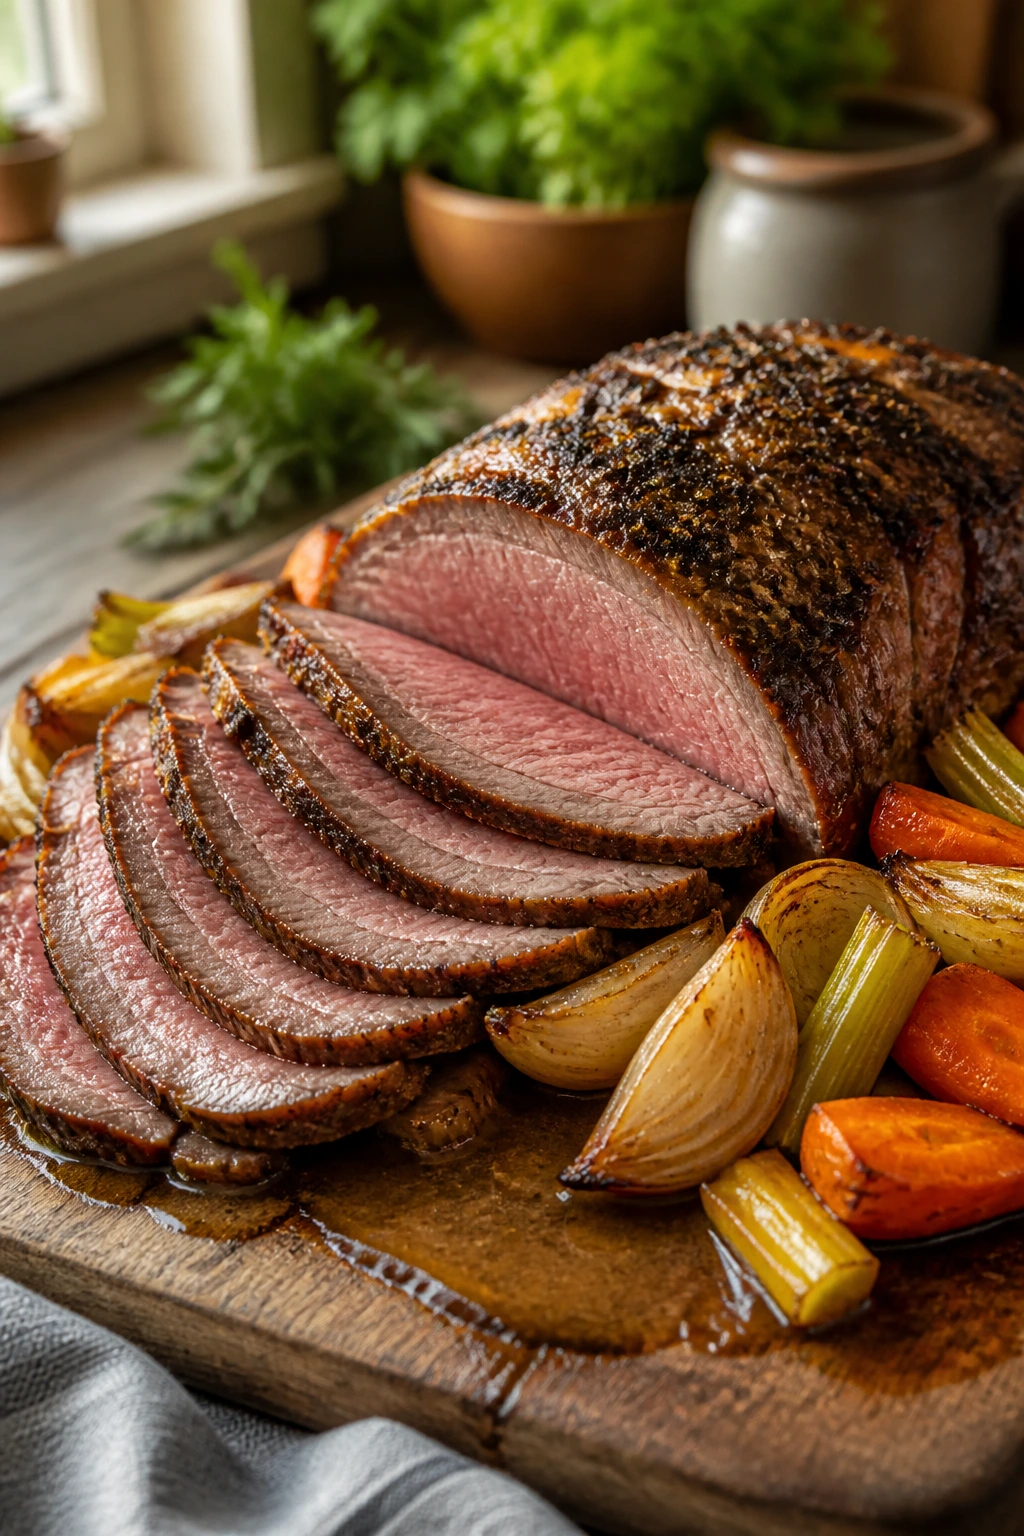
Arrange the onion wedges, carrots, celery, and smashed garlic in the bottom of a roasting pan or large cast-iron skillet. Pour in 1 cup of beef broth. Set the roast on a rack over the vegetables, or directly on top of them if you’re using the vegetables as a bed.
-
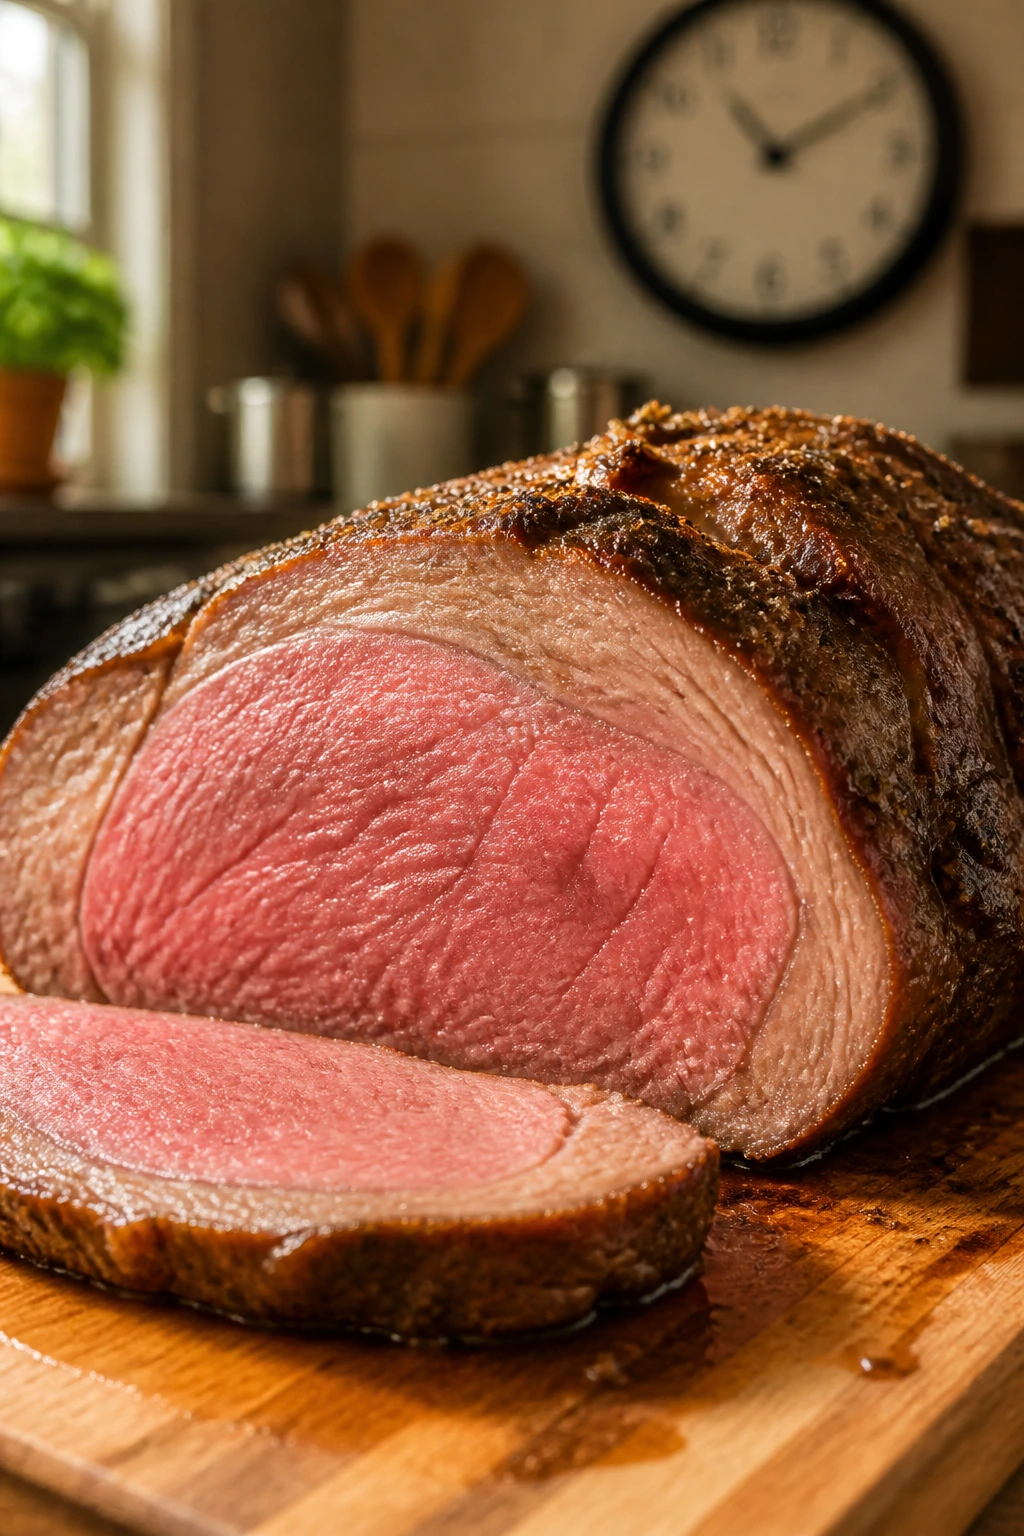
Roast at 450°F for 15 minutes to brown the exterior, then reduce the oven temperature to 325°F (163°C) without opening the door for long. Continue roasting for 50 to 70 minutes, until the thickest part of the roast reads 125°F to 130°F for medium-rare or 135°F for medium. Start checking early if your roast is on the smaller side — a lean roast can move from perfect to overdone in a short stretch.
Rest and Make the Gravy
-
Transfer the roast to a cutting board and tent it loosely with foil. Let it rest for 20 to 30 minutes. Do not wrap it tightly; you want the crust to stay dry, not steam-softened.
-
Set the roasting pan over medium heat. Spoon off excess fat, leaving about 2 tablespoons behind. Add the butter if the pan looks dry, then whisk in the flour and cook for 1 minute, until the mixture smells nutty and looks pale golden.
-
Pour in the red wine, if using, and scrape up the browned bits from the bottom of the pan. Let it bubble for about 30 seconds, then add the 1½ cups of beef broth, Worcestershire sauce, and Dijon mustard. Simmer for 5 to 8 minutes, whisking often, until the gravy thickens enough to coat the back of a spoon.
-
Taste and season with salt and black pepper. Strain the gravy if you want it smooth, or leave the cooked vegetables in for a more rustic look.
Slice and Serve
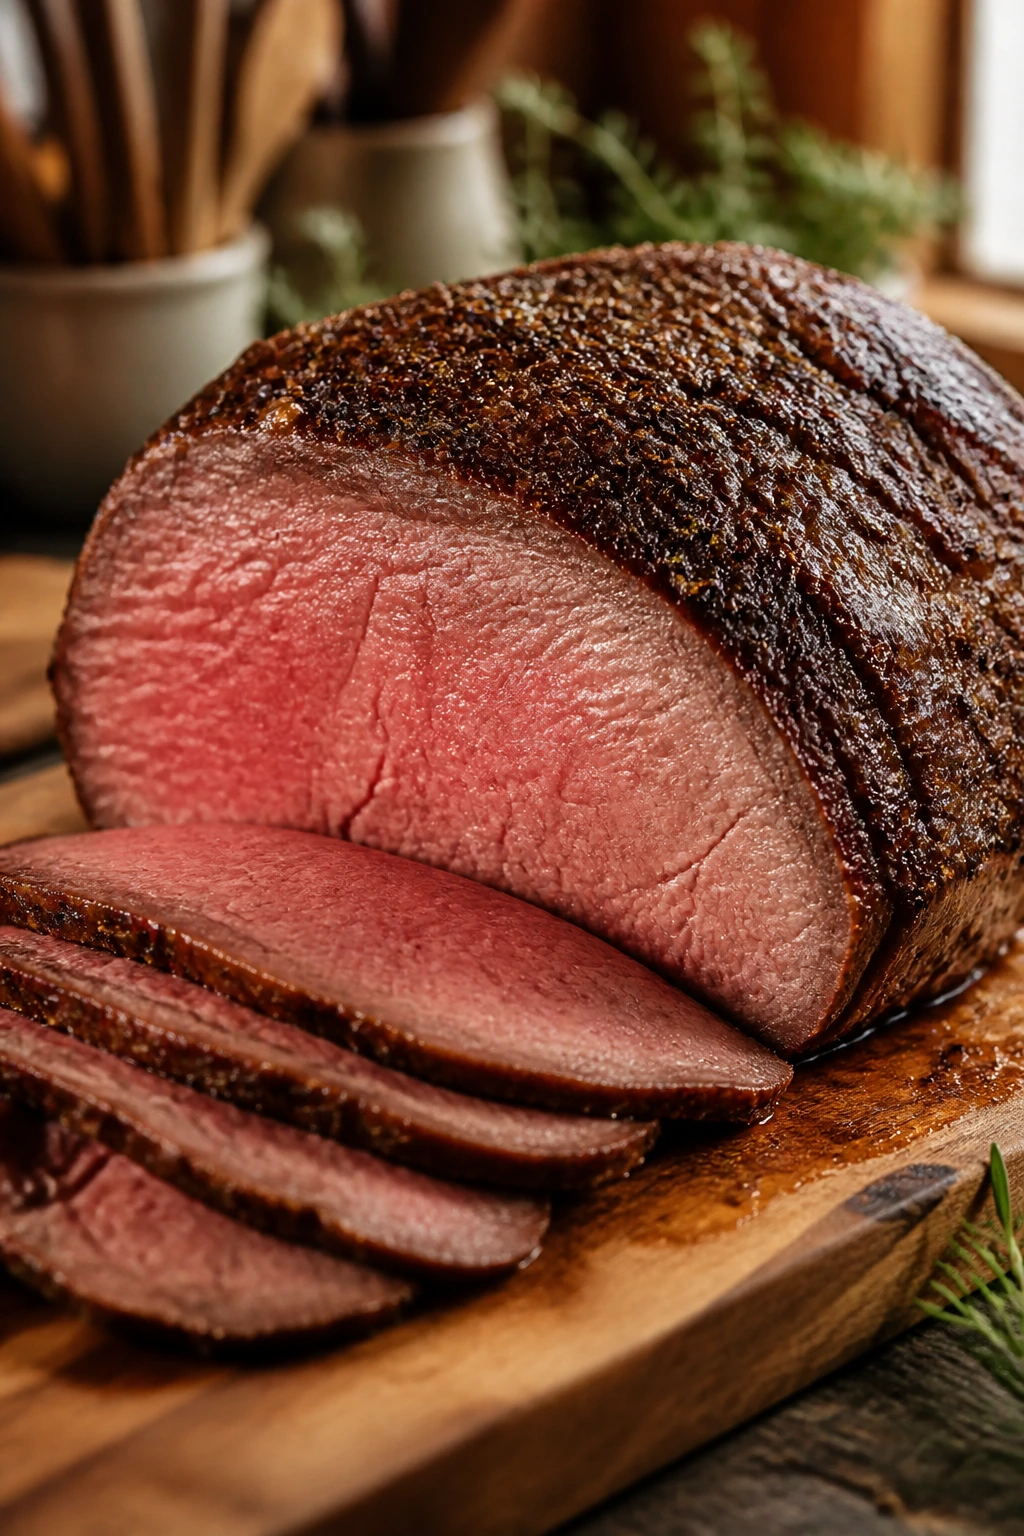
- Remove the twine, if used, and slice the roast thinly against the grain. Serve immediately with the pan gravy spooned over the top or passed at the table.
What to Put on the Plate Next to It
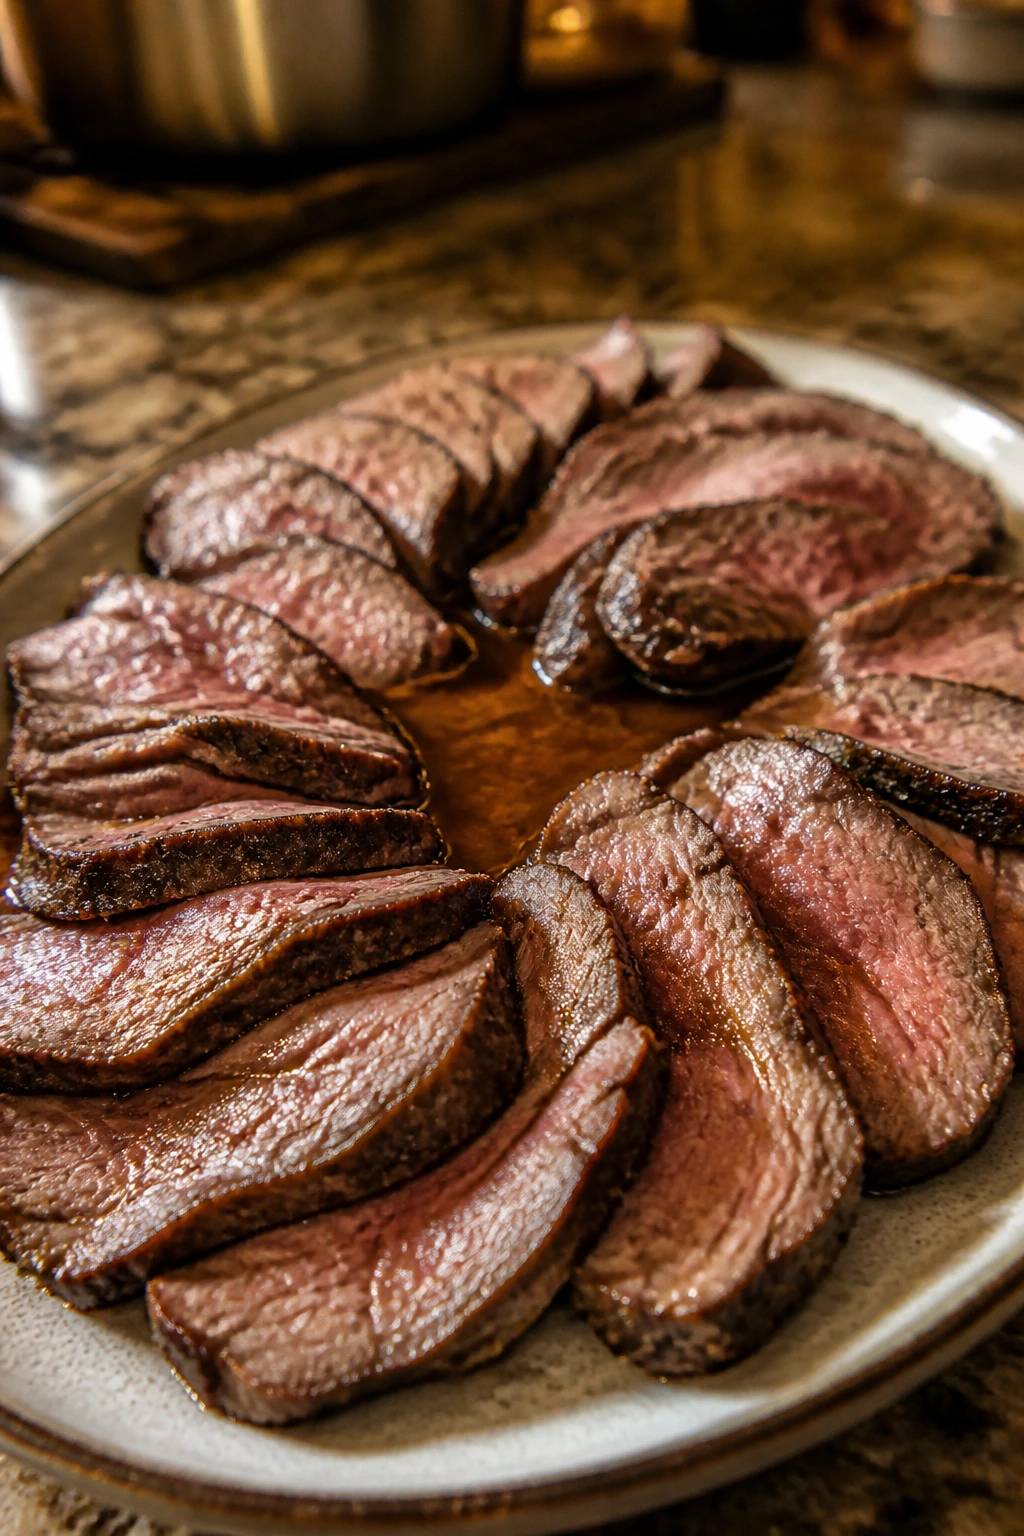
Presentation: Arrange the roast beef slices in a loose overlap on a warmed platter, then spoon a little gravy over the center so the edges stay visible. I like to leave a few slices slightly fanned out; it looks generous and keeps the crust from disappearing under sauce.
Accompaniments: Mashed potatoes are the obvious move, and I’m not arguing with them. Roasted carrots, buttered peas, green beans with garlic, or a crisp salad with sharp vinaigrette all give the plate some balance. A hunk of crusty bread earns its place if there’s gravy left in the bowl, which there usually is.
Portions: Figure on about 6 ounces of cooked roast beef per person for a full dinner, or 4 ounces if the roast is part of a bigger spread with sides and bread. If you’re feeding larger eaters, roast a little extra; thin slices disappear faster than you think.
Beverage Pairing: A medium-bodied red wine like cabernet sauvignon, merlot, or malbec fits the beef and the gravy without fighting them. If you want something nonalcoholic, go with sparkling water and lemon, or a strong iced tea that doesn’t lean too sweet.
Small Moves That Make a Big Difference

Flavor Enhancement: Rub a teaspoon of Dijon mustard into the olive oil before you season the roast. You won’t taste mustard in a loud, sandwichy way, but you will get a cleaner, brighter crust.
Time-Saver: If you don’t want to make gravy in the roasting pan, whisk a little cornstarch into cold broth and simmer it in a small saucepan with the drippings. It’s not as rich as a pan roux, but it saves cleanup.
Pro Move: Slice only what you need for the table, then cover the cut face of the roast with foil and keep the rest intact. Whole roast holds moisture better than slices sitting out on a platter.
Cost-Saver: Top round is usually less expensive than rib roast, and it still gives you that proper carving experience. You’re paying for shape and sliceability here, not for a thick ribbon of fat.
Mistakes That Leave Roast Beef Chewy
-
Roasting by the clock instead of the thermometer: The oven time is a rough guide, not a verdict. A roast that looks fine on the outside can still be too far along in the middle, especially if it’s thicker at one end.
-
Skipping the rest: Cut too early and the juices rush out onto the board. Wait the full 20 to 30 minutes, then slice. The carryover heat finishes the job while the juices settle back into the meat.
-
Slicing with the grain: Top round has a visible grain, and cutting the wrong direction gives you long, chewy strands. Turn the roast and slice across the grain in thin, even pieces.
-
Overcrowding the pan with liquid: Too much broth turns the roast into a steam bath, which softens the crust and dulls the flavor. One cup in the bottom of the pan is enough for aroma and drippings.
-
Using a dull knife: A jagged blade tears the crust and mashes the slices. A long, sharp carving knife or slicing knife gives you cleaner cuts and prettier plates.
-
Letting the roast cook straight from the fridge without planning for timing: A very cold center takes longer to reach target temperature, and the outside can overbake before the middle catches up. Let it sit out for a little while before roasting so the heat moves more evenly.
Variations Worth Trying When You Want a Different Mood
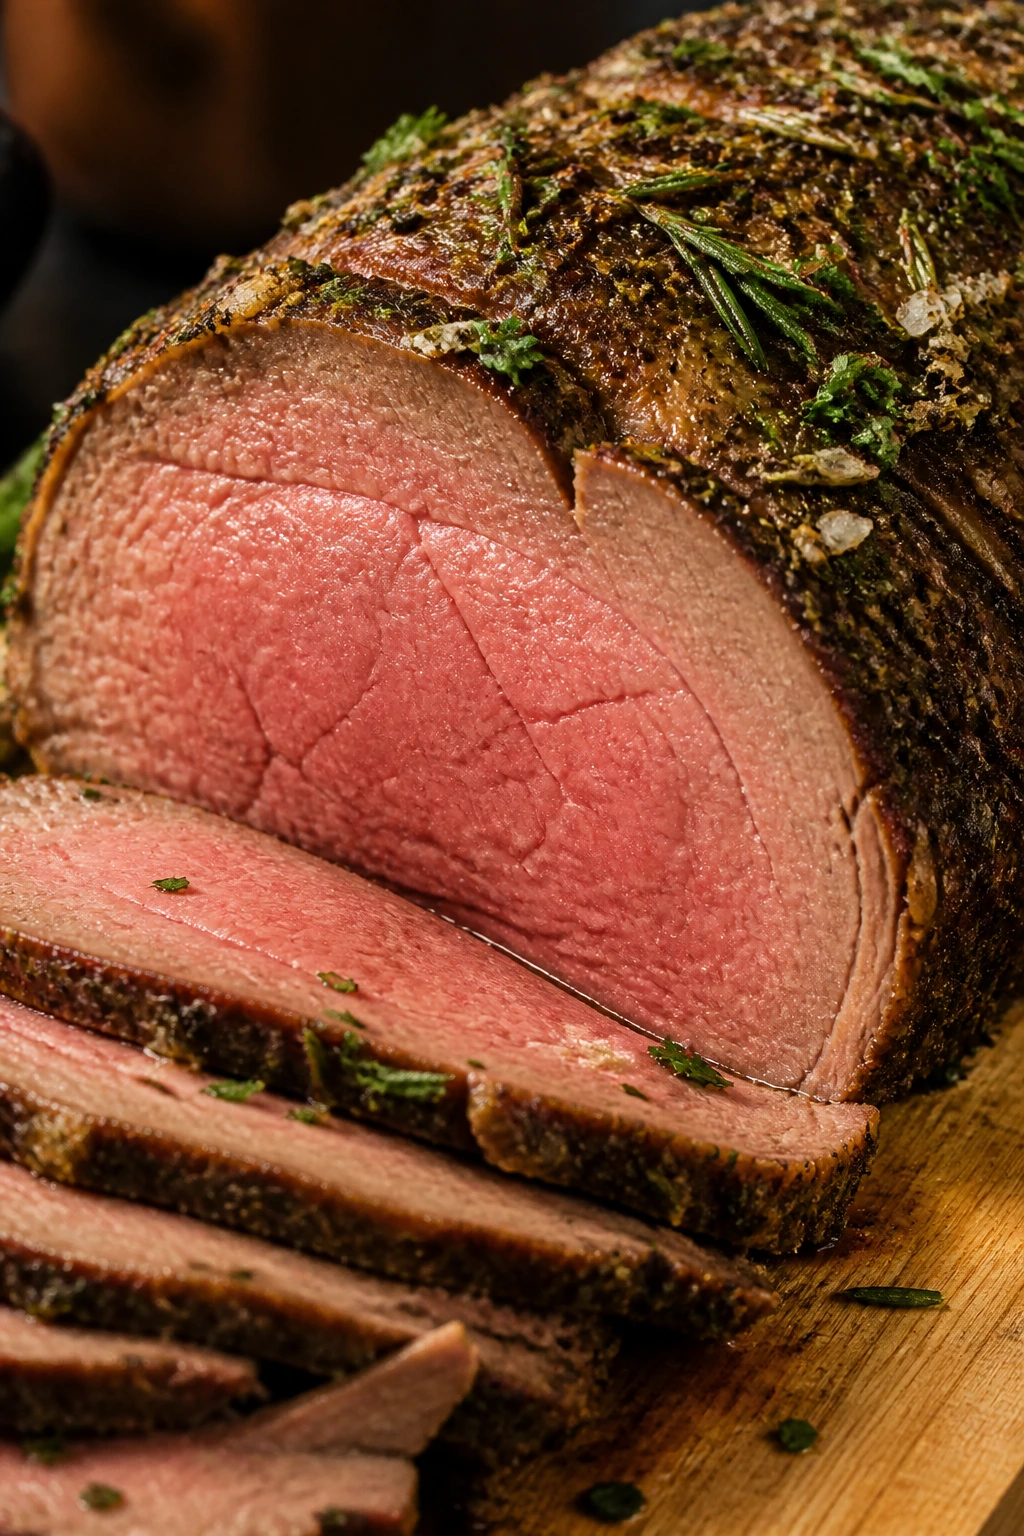
Herb-Garlic Sunday Roast: Add 1 tablespoon chopped rosemary and 1 tablespoon chopped parsley to the seasoning mix, then rub the roast with minced garlic instead of garlic powder. The flavor turns greener and a little brighter, which works nicely if you’re serving roast potatoes and a sharp salad.
Peppercorn Crust Roast Beef: Crush the black pepper more coarsely and bump it up to 1½ teaspoons. That gives the crust a bolder snap, the kind that stands up well to mashed potatoes and a darker gravy.
Horseradish Finish: Stir 1 to 2 teaspoons prepared horseradish into the gravy right before serving, or serve it on the side with a spoonful of sour cream. That sharp bite cuts through the richness and makes the roast feel a little livelier.
No-Wine Gravy: Skip the red wine and use an extra 1/4 cup beef broth plus 1 teaspoon apple cider vinegar. The gravy stays beefy and a touch brighter, with none of the wine flavor hanging around.
Garlic-Butter Slice Finish: Melt 2 tablespoons butter with one smashed garlic clove and brush it lightly over the carved roast before serving. Use this one if you want a glossy finish on the cut surface and a richer first bite.
Keeping Roast Beef Good for Tomorrow Too
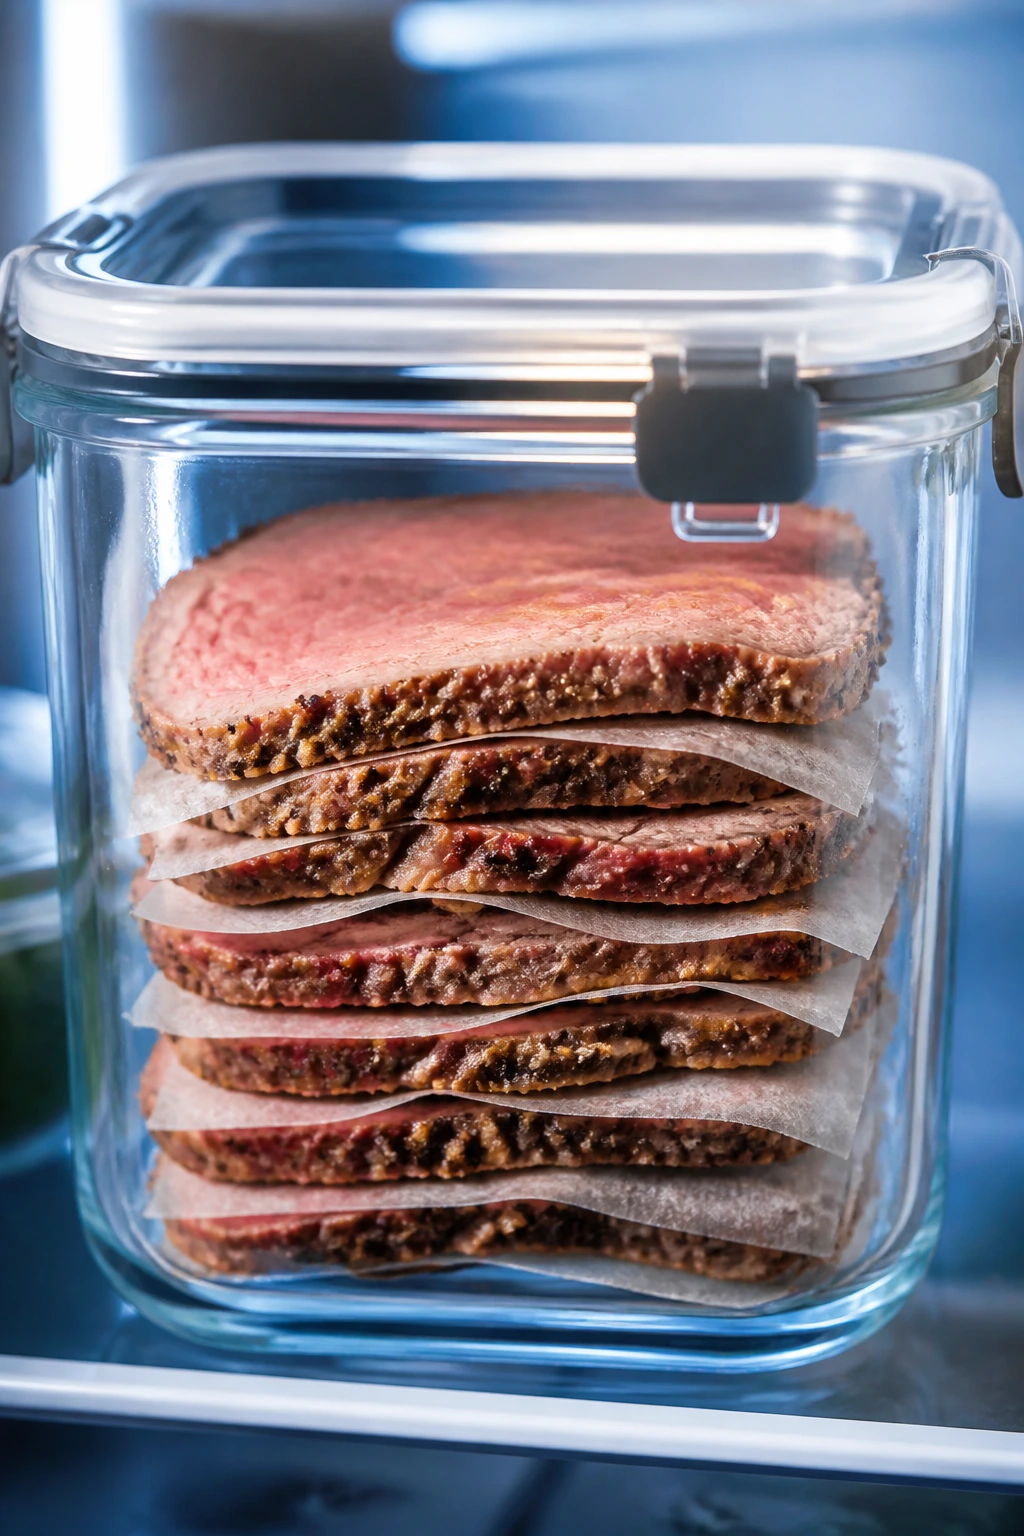
Refrigerator: Store leftover sliced roast beef in an airtight container for 3 to 4 days. Keep the gravy separate if you can; the meat stays in better shape when it isn’t sitting in hot liquid.
Freezer: Freeze sliced roast beef for up to 2 months. Layer the slices with parchment or wax paper so you can lift out only what you need later, then wrap the stack tightly and tuck it into a freezer bag.
Room Temperature: Don’t leave cooked roast beef out for more than 2 hours. If the kitchen is hot, shorten that to 1 hour.
Reheating: For the best texture, warm slices gently in a skillet with a few spoonfuls of broth or gravy over low heat, just until they’re heated through. A microwave works in a pinch, but use 50% power and a splash of liquid so the edges don’t turn rubbery.
Make-Ahead: You can season the roast the day before and let it dry-brine uncovered in the refrigerator. You can also roast it a day ahead, chill it, and slice it cold for sandwich meat or a second dinner; thin slices from a chilled roast actually cut cleaner than hot ones.
Questions People Usually Ask About Roast Beef Dinner
Can I use eye of round instead of top round?
Yes, and it will still slice well if you keep an eye on the temperature. Eye of round is leaner, so I’d cut it a little thinner and pull it as soon as it reaches the lower end of the target range.
What internal temperature should I aim for?
For medium-rare, pull the roast at 125°F to 130°F in the thickest part. For medium, pull at about 135°F. The roast will rise a few degrees while it rests, which is part of the plan.
Do I need a roasting rack?
No, though it helps with airflow. If you don’t have one, set the roast on a thick bed of onions, carrots, and celery so air can move around it and the drippings still have somewhere to fall.
Can I make the gravy without wine?
Absolutely. Use a little extra broth and a teaspoon of vinegar for brightness. The gravy will still taste like the roast, which is what you want.
Why did my roast turn out tough?
Most of the time, it was overcooked or sliced with the grain. Lean roast beef gets chewy fast once it passes medium, so a thermometer and a sharp knife matter more than they do with fattier cuts.
Can I roast potatoes in the same pan?
You can, but cut them large enough that they don’t collapse before the roast is done. I usually prefer to roast potatoes separately so the beef gets the pan space it needs, and so the potatoes don’t steal the drippings before the gravy starts.
How thin should I slice it?
Thin enough that each slice bends a little when you lift it, but not so thin that it tears apart. If you chill the roast slightly after resting, the slices come off even cleaner, which is handy for leftovers or sandwiches.
The Last Slice Is the Best One
There’s something deeply satisfying about putting a roast like this on the table. It’s not showy, and that’s part of the appeal. A good sliced roast beef dinner gives you a calm, sturdy center for the whole meal: carved beef, honest gravy, and sides that can lean on it.
The part that matters most is also the least glamorous. Watch the temperature. Let it rest. Slice across the grain. Those three habits do more for roast beef than any clever seasoning trick ever will.
Classic Sliced Roast Beef for a Hearty Dinner — Recipe Card
Recipe Name: Classic Sliced Roast Beef for a Hearty Dinner
Description: A lean top round roast seasoned with garlic, thyme, and black pepper, roasted until rosy in the center, then sliced thin and served with a simple pan gravy. It’s the kind of dinner that feels steady and useful, with leftovers that never sit around for long.
Prep Time: 20 minutes, plus 4 to 24 hours for dry-brining if used
Cook Time: 65 to 85 minutes
Total Time: 1 hour 25 minutes to 1 hour 45 minutes active, plus dry-brining time if used
Course: Dinner, Main Course
Cuisine: American
Servings: 6 to 8 servings
Calories: About 390 kcal per serving
Ingredients
For the Roast Beef:
- 1 boneless beef top round roast, 3½ to 4 pounds, tied if uneven
- 2½ teaspoons kosher salt
- 1 teaspoon freshly ground black pepper
- 1 teaspoon garlic powder
- 1 teaspoon onion powder
- 1 teaspoon dried thyme
- 2 tablespoons olive oil
- 3 cloves garlic, smashed
For the Roasting Pan and Vegetables:
- 1 large yellow onion, cut into 1/2-inch wedges
- 2 carrots, cut into 2-inch chunks
- 2 celery stalks, cut into 2-inch chunks
- 1 cup beef broth
For the Pan Gravy:
- 2 tablespoons unsalted butter
- 2 tablespoons all-purpose flour
- 1½ cups beef broth, plus more as needed
- 1 tablespoon Worcestershire sauce
- 1 teaspoon Dijon mustard
- 1/4 cup dry red wine, optional
- Salt and black pepper, to taste
Instructions
-
Pat the roast dry, tie it if needed, and rub it with olive oil. Mix the salt, pepper, garlic powder, onion powder, and thyme, then coat the roast evenly. Dry-brine uncovered in the refrigerator for 4 to 24 hours if you have time.
-
Take the roast out of the refrigerator about 45 minutes before roasting. Preheat the oven to 450°F (232°C).
-
Arrange the onion, carrots, celery, and garlic in a roasting pan or large cast-iron skillet. Pour in 1 cup beef broth and set the roast on a rack over the vegetables, or directly on the vegetables if needed.
-
Roast for 15 minutes at 450°F, then lower the oven to 325°F (163°C). Continue roasting for 50 to 70 minutes, until the thickest part reads 125°F to 130°F for medium-rare or 135°F for medium.
-
Transfer the roast to a cutting board and rest it loosely tented with foil for 20 to 30 minutes.
-
Set the roasting pan over medium heat. Spoon off excess fat, then whisk in the butter and flour and cook for 1 minute. Add the wine, if using, and scrape up the browned bits.
-
Whisk in 1½ cups beef broth, Worcestershire sauce, and Dijon mustard. Simmer for 5 to 8 minutes until the gravy thickens. Season to taste.
-
Slice the roast thinly against the grain and serve with gravy.
Notes: Pull the roast early rather than late; carryover heat will finish the center. For cleaner slices, chill the roast briefly after resting and carve it with a sharp knife. Keep the gravy separate from leftovers if possible.