
A pot of beef stew meat can change the mood of a house in about ten minutes. The onions hit the fat, the garlic softens, the browned bits loosen from the bottom, and the kitchen starts smelling like dinner has already made a promise it intends to keep. On a cold night, that smell matters. It feels like a jacket for the room.
The tricky part is that beef stew meat can be either deeply comforting or annoyingly chewy. The cut itself is not the problem. The problem is usually size, heat, and impatience. Stew meat needs a hard sear, a gentle simmer, and enough time for collagen to melt into the broth. That’s the whole game. Rush it, and you get tough cubes in thin liquid. Give it time, and the meat turns spoon-tender while the broth thickens into something glossy and rich.
I’ve always liked this kind of stew more than the fancy versions loaded with extra ingredients for the sake of it. A proper pot only needs a few things done well: beef browned in batches, vegetables cooked until they smell sweet, broth that gets scraped up from the bottom of the pot, and potatoes that stay intact instead of collapsing into mush. When those details are right, the bowl tastes like it spent all afternoon becoming itself. That’s the kind of dinner worth making.
Why This Stew Earns a Spot on a Cold Night
-
The beef gets better, not worse, with time: stew meat from chuck or a similar braising cut turns tender after a long, gentle cook, which is exactly what you want when the weather outside has teeth.
-
One pot does the heavy lifting: the same Dutch oven sears the beef, cooks the vegetables, and braises the stew, so the browned flavor stays in the pot instead of being washed away.
-
The broth tastes layered, not flat: tomato paste, wine, Worcestershire, and beef broth each do a different job, and together they make the liquid taste like it has depth instead of just salt.
-
The leftovers improve overnight: the broth settles, the seasoning spreads through the beef and potatoes, and the stew is even easier to reheat the next day.
-
It feeds a table without fuss: a single pot makes enough for a family meal, and a slice of sourdough or a small salad is all you need beside it.
-
It smells like dinner before it even hits the bowl: that mix of browned beef, thyme, and soft onion is the sort of aroma that gets people wandering into the kitchen for “just a taste.”
Timing, Yield, and the Pace of a Proper Braise
Yield: Serves 6 to 8
Prep Time: 25 minutes
Cook Time: 2 hours 45 minutes
Total Time: 3 hours 10 minutes
Difficulty: Intermediate — the steps are straightforward, but the stew needs proper browning, a careful simmer, and enough time for the beef to relax.
Chill/Rest Time: 15 minutes before serving, or overnight if you want to make it ahead
Best Served: After the final rest, while the broth is still steamy and the potatoes are holding their shape
What Beef Stew Meat Actually Needs Before It Gets Tender
Chuck Beats Mystery Trimmings
Beef stew meat is often sold as pre-cut cubes, but the package is not the whole story. Sometimes it’s chuck, sometimes it’s round, and sometimes it’s whatever the butcher had left after trimming. Chuck is my pick every time. It has enough connective tissue and fat to turn silky in a long braise, while leaner cuts can dry out before they ever soften properly.
If you’re standing at the meat case and have a choice, buy a chuck roast and cut it yourself. A roast cut into 1½-inch pieces browns better than random grocery-store cubes, which are often a mix of sizes. That uneven size matters more than most recipes admit. Big pieces stay juicy while smaller ones shrink and toughen.
Why the Heat Has to Stay Gentle
Stew meat doesn’t get tender because it’s cooked hot. It gets tender because it’s cooked long enough for collagen to melt. That change happens above the boiling point of water, but the pot itself should never be at a boil. A hard boil tightens the muscle fibers and shakes the meat around so aggressively that the broth turns greasy and the texture gets mean.
A slow simmer is the difference between a spoonable stew and a pot of overcooked cubes. In the oven, 325°F / 165°C is the sweet spot. On the stove, you want tiny bubbles, not a rolling churn. That’s the part a lot of people skip, then wonder why the beef feels stubborn after two hours.
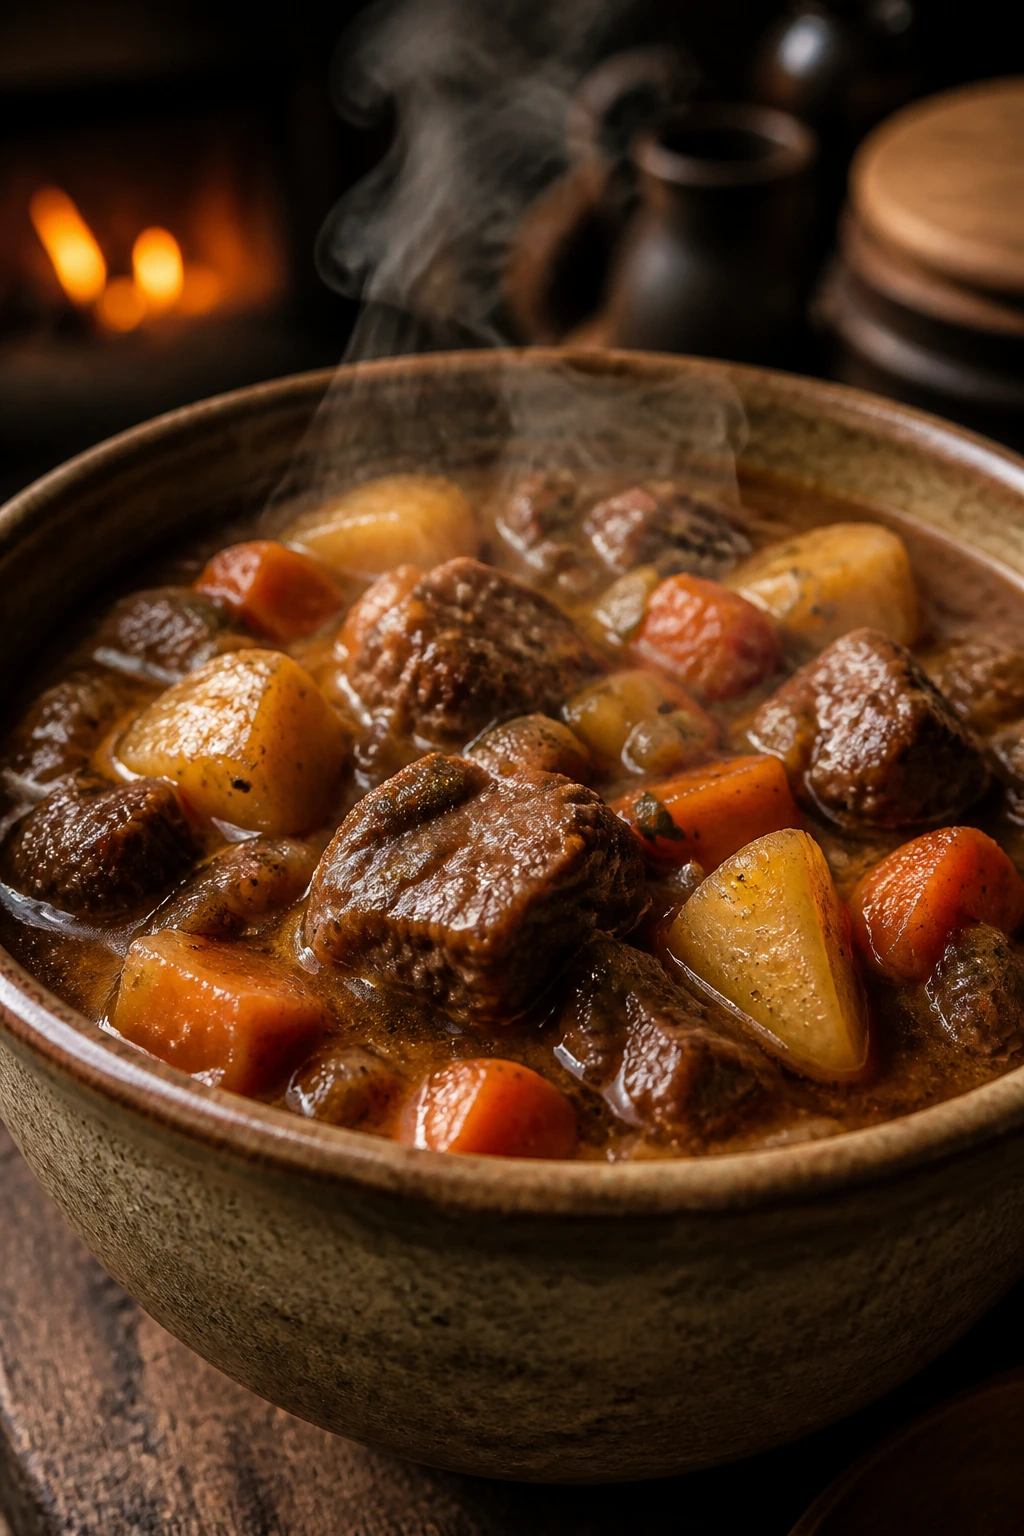
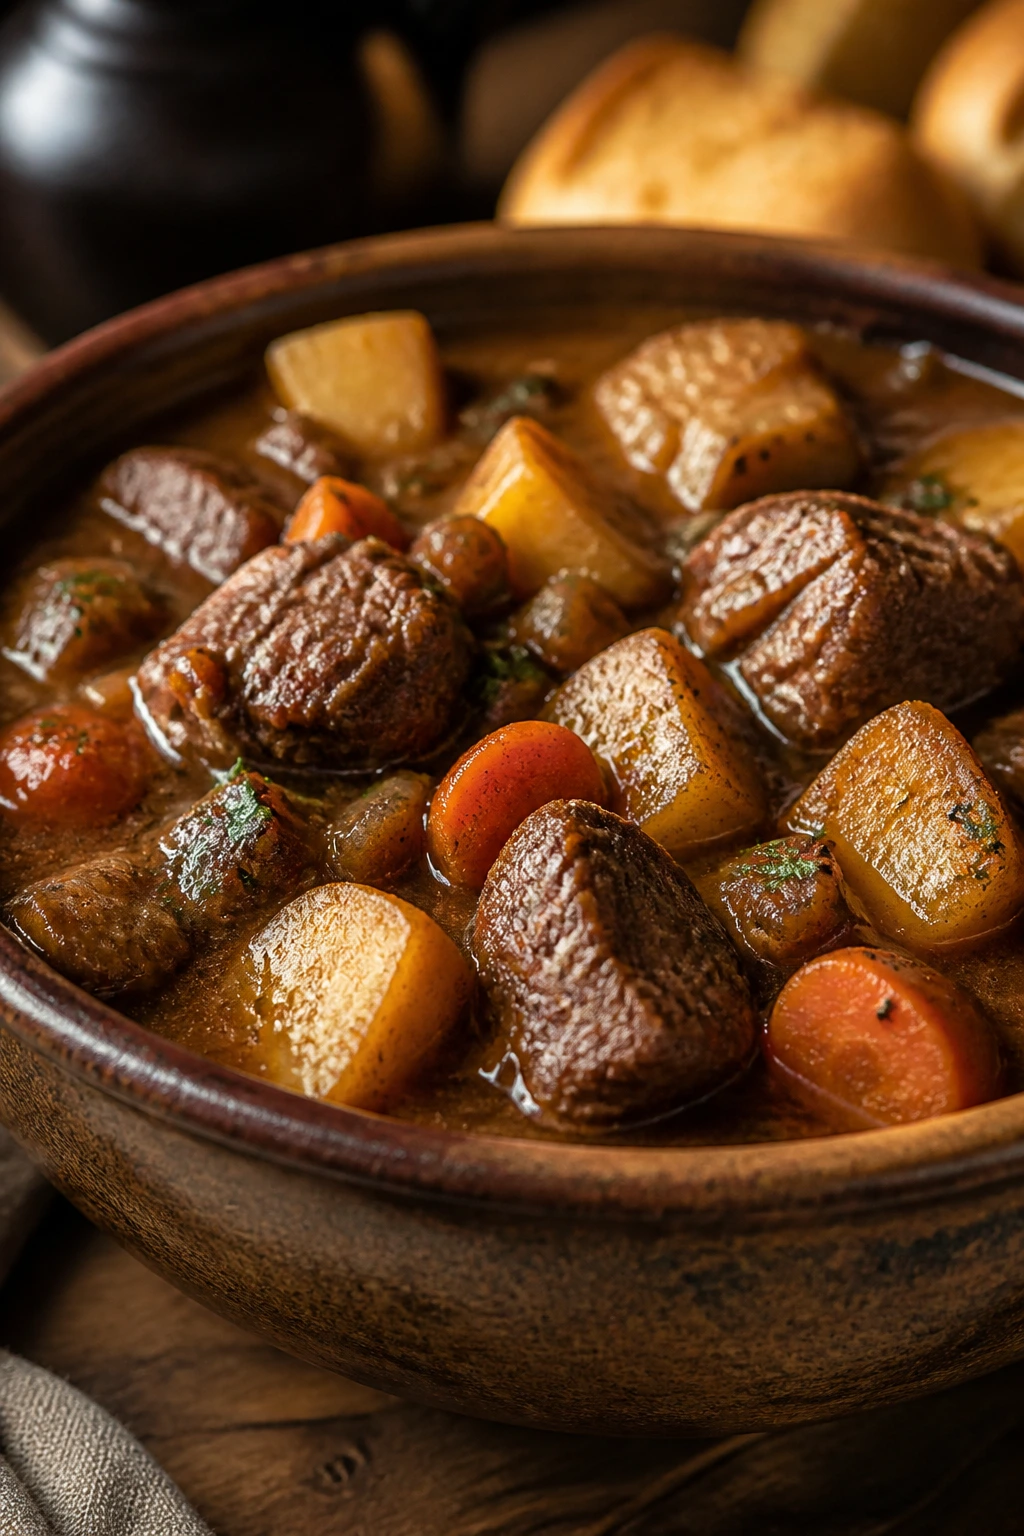
The Texture You’re Chasing
Well-cooked stew meat should not slice cleanly like steak. It should give way at the edge of a fork, then split into soft strands when you press it. The potatoes should be tender but still hold their corners. The carrots should be sweet and intact. And the broth should coat a spoon lightly instead of sliding off like water.
That texture doesn’t happen by accident. It comes from the slow part of the process, which is the part people try to hurry past. Don’t. The wait is what turns a rough-looking cut into the thing everyone reaches for first.
The Shopping List for a Rich, Brothy Stew
For the Beef and Browning
- 3 pounds beef stew meat, ideally from chuck, cut into 1½-inch pieces if needed
- 3 tablespoons all-purpose flour
- 2 teaspoons kosher salt
- 1 teaspoon black pepper
- 2 tablespoons vegetable oil or avocado oil
For the Vegetables
- 1 large yellow onion, diced
- 2 medium carrots, peeled and sliced into ½-inch rounds
- 2 celery stalks, sliced
- 4 garlic cloves, minced
- 1 ½ pounds Yukon Gold potatoes, cut into 1½-inch chunks
For the Braising Liquid
- 2 tablespoons tomato paste
- 1 cup dry red wine
- 4 cups low-sodium beef broth
- 1 tablespoon Worcestershire sauce
- 2 bay leaves
- 1 teaspoon dried thyme
- ½ teaspoon dried rosemary, crushed between your fingers
For Finishing
- 1 cup frozen peas
- 2 tablespoons chopped fresh parsley
- 1 tablespoon unsalted butter
Why Each Ingredient Has a Job to Do
The Beef and Its Coating
What to use: 3 pounds beef stew meat, cut into 1½-inch pieces, plus 3 tablespoons all-purpose flour, 2 teaspoons kosher salt, and 1 teaspoon black pepper.
Preparation: Pat the beef dry with paper towels before seasoning it. If the cubes are wildly different sizes, trim the biggest ones so they cook at the same pace; that small step pays off at the end.
Substitutions: Chuck roast, cut into cubes yourself, is the best substitute. Boneless short ribs make the stew richer, though they usually cost more.
Tips: The flour does two things here: it helps the beef brown and gives the broth a little body. Don’t add so much that the meat looks caked; you want a light dusting, not a paste.
The Vegetables That Build the Base
What to use: 1 large yellow onion, 2 medium carrots, 2 celery stalks, 4 garlic cloves, and 1 ½ pounds Yukon Gold potatoes.
Preparation: Dice the onion so it softens quickly, slice the carrots into ½-inch rounds so they keep their shape, and cut the potatoes into 1½-inch chunks. The potato size matters more than people think; too small, and they vanish into the broth.
Substitutions: Red potatoes work well if you want a firmer bite. Parsnips can replace some of the carrots for a deeper, sweeter edge.
Tips: Yukon Gold potatoes are the safest choice because they hold together without turning chalky. Russets can work, but they break down faster and make the stew thicker in a more rustic, less tidy way.
The Liquid Layer That Makes It Taste Deep
What to use: 2 tablespoons tomato paste, 1 cup dry red wine, 4 cups low-sodium beef broth, 1 tablespoon Worcestershire sauce, 2 bay leaves, 1 teaspoon dried thyme, and ½ teaspoon dried rosemary.
Preparation: Keep the tomato paste near the stove so you can cook it for a minute before adding liquid. Crumble the rosemary between your fingers first; that wakes it up and keeps it from floating around like little twigs.
Substitutions: If you don’t use wine, add 1 extra cup of broth plus 1 tablespoon red wine vinegar or balsamic at the end. No Worcestershire? A teaspoon of soy sauce plus a small pinch of sugar gets you part of the way there.
Tips: Use low-sodium broth so you can control the seasoning yourself. Regular broth can push the stew into salty territory once it reduces.
The Finish That Keeps It Bright
What to use: 1 cup frozen peas, 2 tablespoons chopped fresh parsley, and 1 tablespoon unsalted butter.
Preparation: Keep the peas frozen until the last few minutes. Chop the parsley right before you finish the stew so it stays vivid and doesn’t wilt into the board.
Substitutions: Green beans cut into 1-inch pieces can replace peas. If you want a softer finish, skip the parsley and use chopped chives instead.
Tips: The butter at the end smooths the broth and gives it a little shine. It’s a small move, but the stew tastes fuller after it melts in.
The Dutch Oven and Other Tools That Make This Easier
-
5- to 7-quart Dutch oven: The heavy bottom helps the beef brown without scorching, and the lid keeps the braise steady.
-
Wooden spoon or flat-edged spatula: You’ll need something sturdy enough to scrape up the browned bits after deglazing.
-
Chef’s knife: A sharp knife makes it easier to cut stew meat, onions, carrots, and potatoes into even pieces.
-
Cutting board: Use a large board with a damp towel underneath so it won’t slide while you work.
-
Measuring cups and spoons: The broth, wine, and seasonings matter here; eyeballing them can make the stew thin or too sharp.
-
Tongs: These make it easier to turn the beef without tearing the coating off before it browns.
-
Ladle: Useful for serving, and even more useful if you want to skim a little fat from the surface before plating.
-
Instant-read thermometer, optional: Not required, but handy if you like checking tenderness. Stew meat usually feels properly soft when it has spent enough time above roughly 190°F / 88°C.
The Braise, Step by Step
Brown the Beef and Start the Oven
-
Preheat the oven to 325°F / 165°C and move a rack to the lower-middle position. Set a 5- to 7-quart Dutch oven on the stove.
-
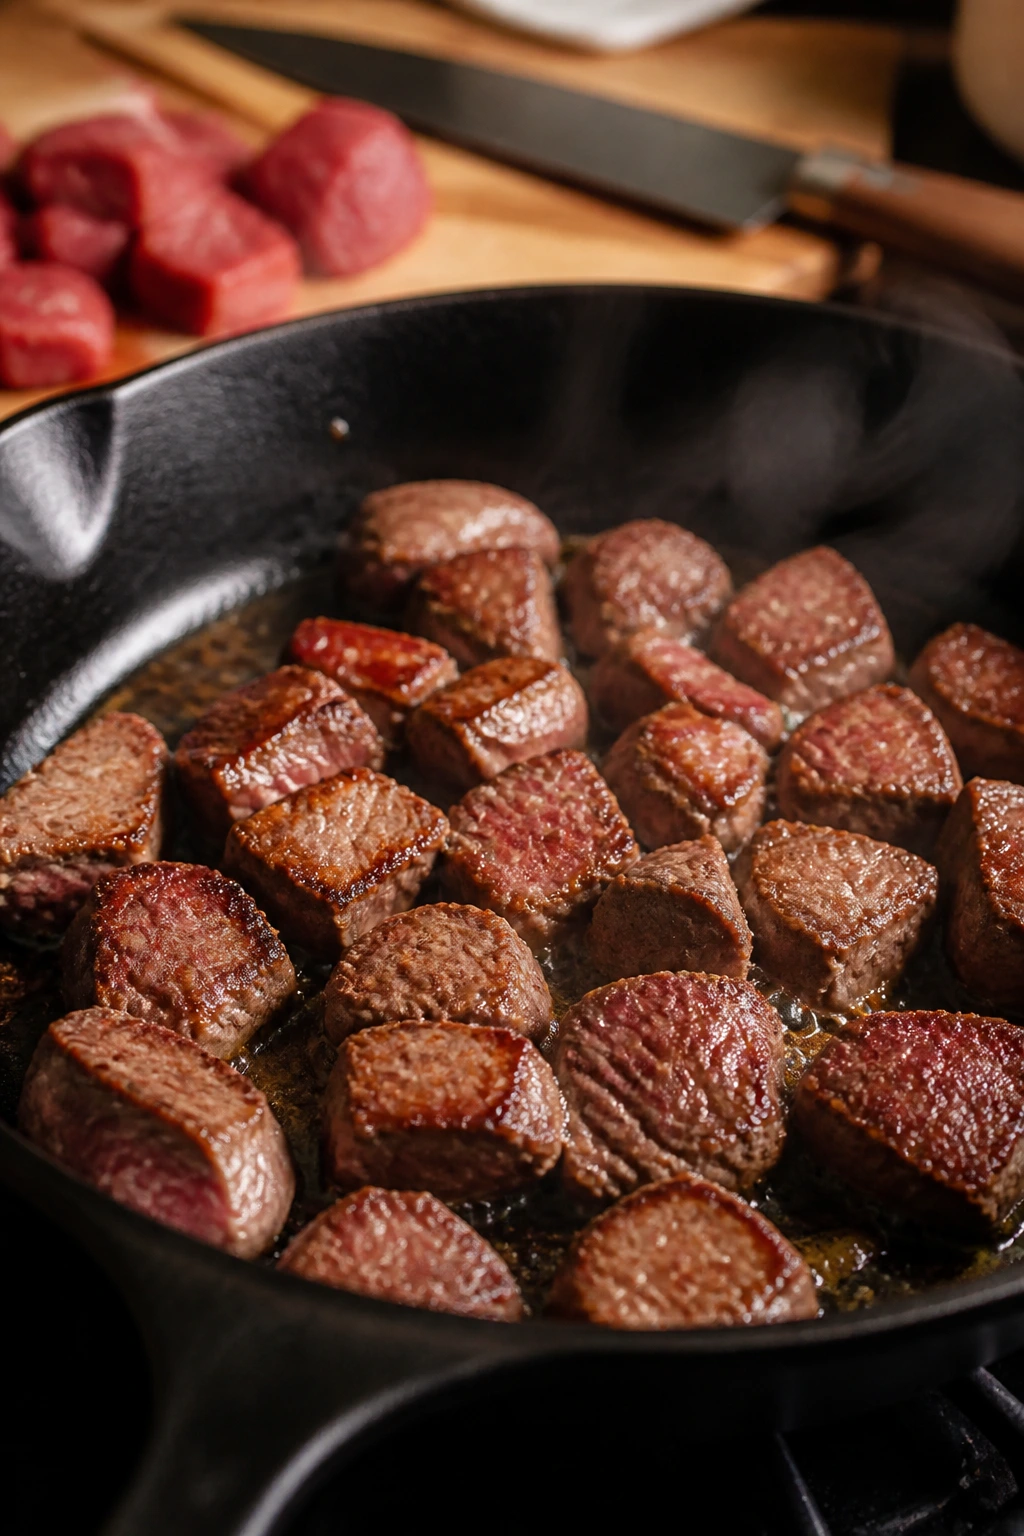
Pat the beef dry with paper towels, then season it with the kosher salt and black pepper. Sprinkle the flour over the meat and toss until each piece has a light, even dusting. Do not pack on extra flour; too much will make the stew pasty instead of glossy.
-
Heat the oil in the Dutch oven over medium-high heat until it shimmers. Add the beef in two batches, leaving space around each piece, and brown for 4 to 5 minutes per side. The meat should be deeply colored on the outside but not cooked through. Transfer the browned beef to a plate.
Build the Base
-
Reduce the heat to medium. Add the onion, carrots, and celery, then cook for 6 to 8 minutes, stirring often, until the onion turns translucent and the edges of the carrots begin to take on color. Add the garlic and cook for 30 seconds, just until fragrant. If the garlic starts to brown, the pot is too hot.
-
Stir in the tomato paste and cook for 1 minute, pressing it into the vegetables so it darkens from bright red to a deeper brick color. Pour in the red wine and scrape the bottom of the pot with a wooden spoon, loosening every browned bit. Simmer for 2 to 3 minutes, until the wine smells softer and the sharp edge has faded.
-
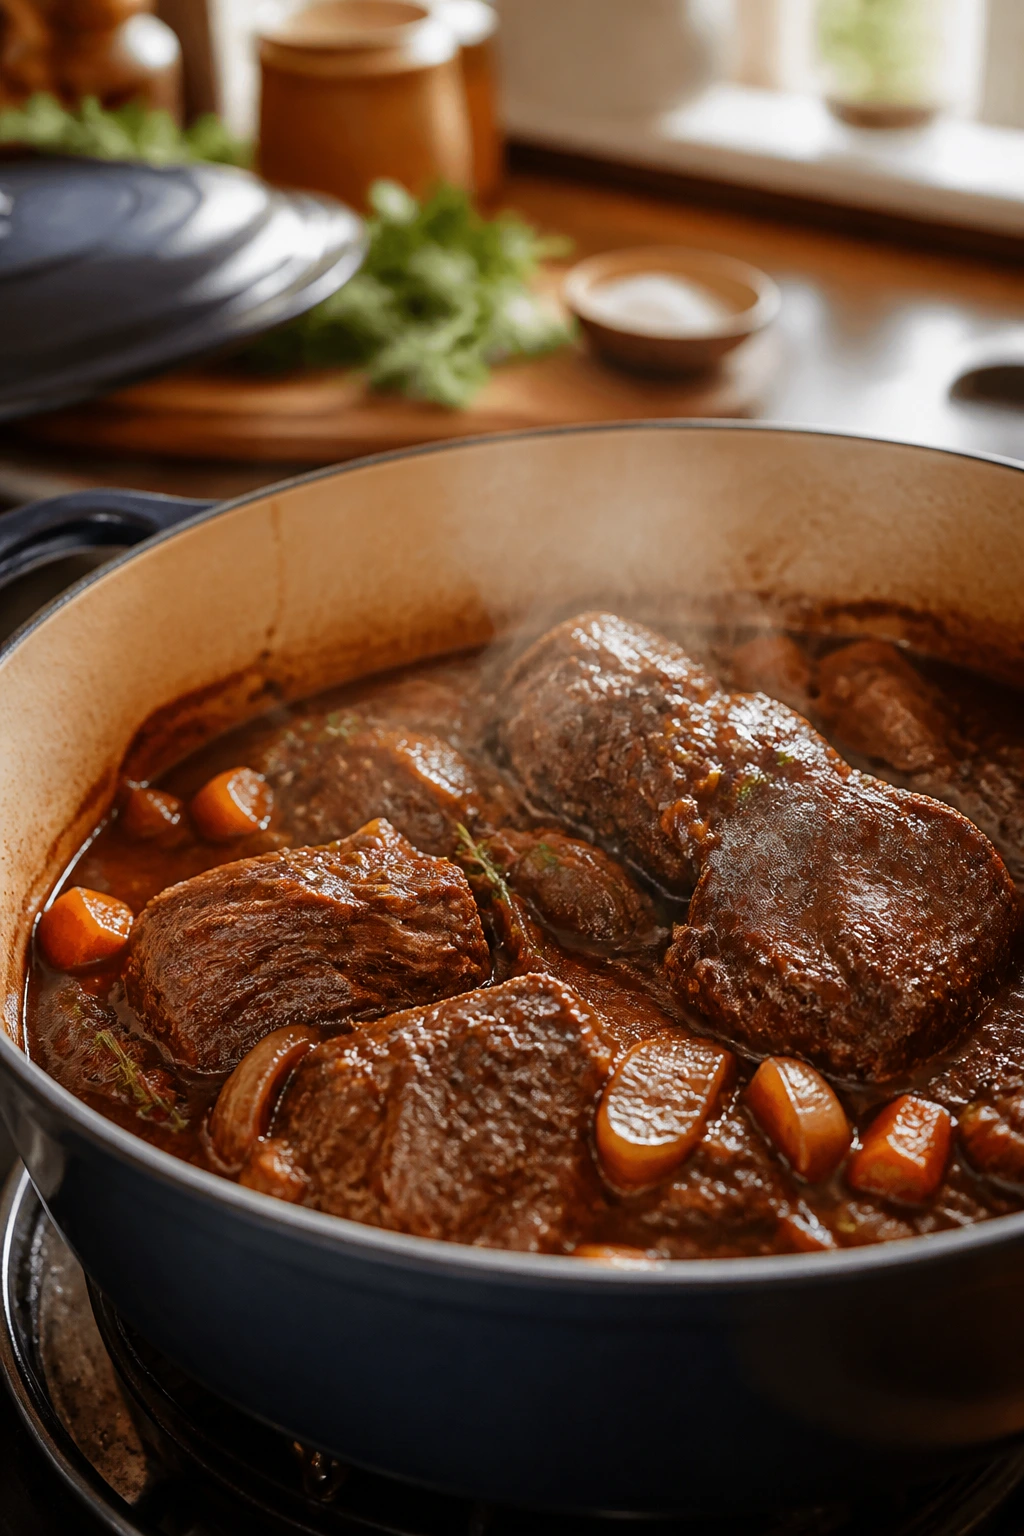
Add the beef broth, Worcestershire sauce, bay leaves, thyme, rosemary, and browned beef along with any juices on the plate. Bring the pot to a gentle simmer on the stove, then cover it with the lid. Transfer the Dutch oven to the oven and braise for 1 hour 30 minutes. The liquid should barely bubble; if it boils hard, lower the heat.
Add the Potatoes and Finish the Pot
-
Remove the pot from the oven and stir in the potatoes. The beef should already be starting to soften, but not falling apart yet. Cover again and return the pot to the oven for 45 to 55 minutes, until the beef is fork-tender and the potatoes are cooked through. A fork should slide into the meat with little resistance.
-
Stir in the frozen peas during the last 5 minutes of cooking, then remove the pot from the oven. Discard the bay leaves. Stir in the butter and parsley, then taste and adjust with more salt and pepper if needed. If the broth seems thinner than you want, mash a few potato chunks against the side of the pot and stir them back in.
-
Let the stew rest for 15 minutes before serving. The broth settles, the heat evens out, and the spoonfuls look better in the bowl. That resting time matters more than it sounds like it should.
How to Serve It So the Bowl Feels Complete
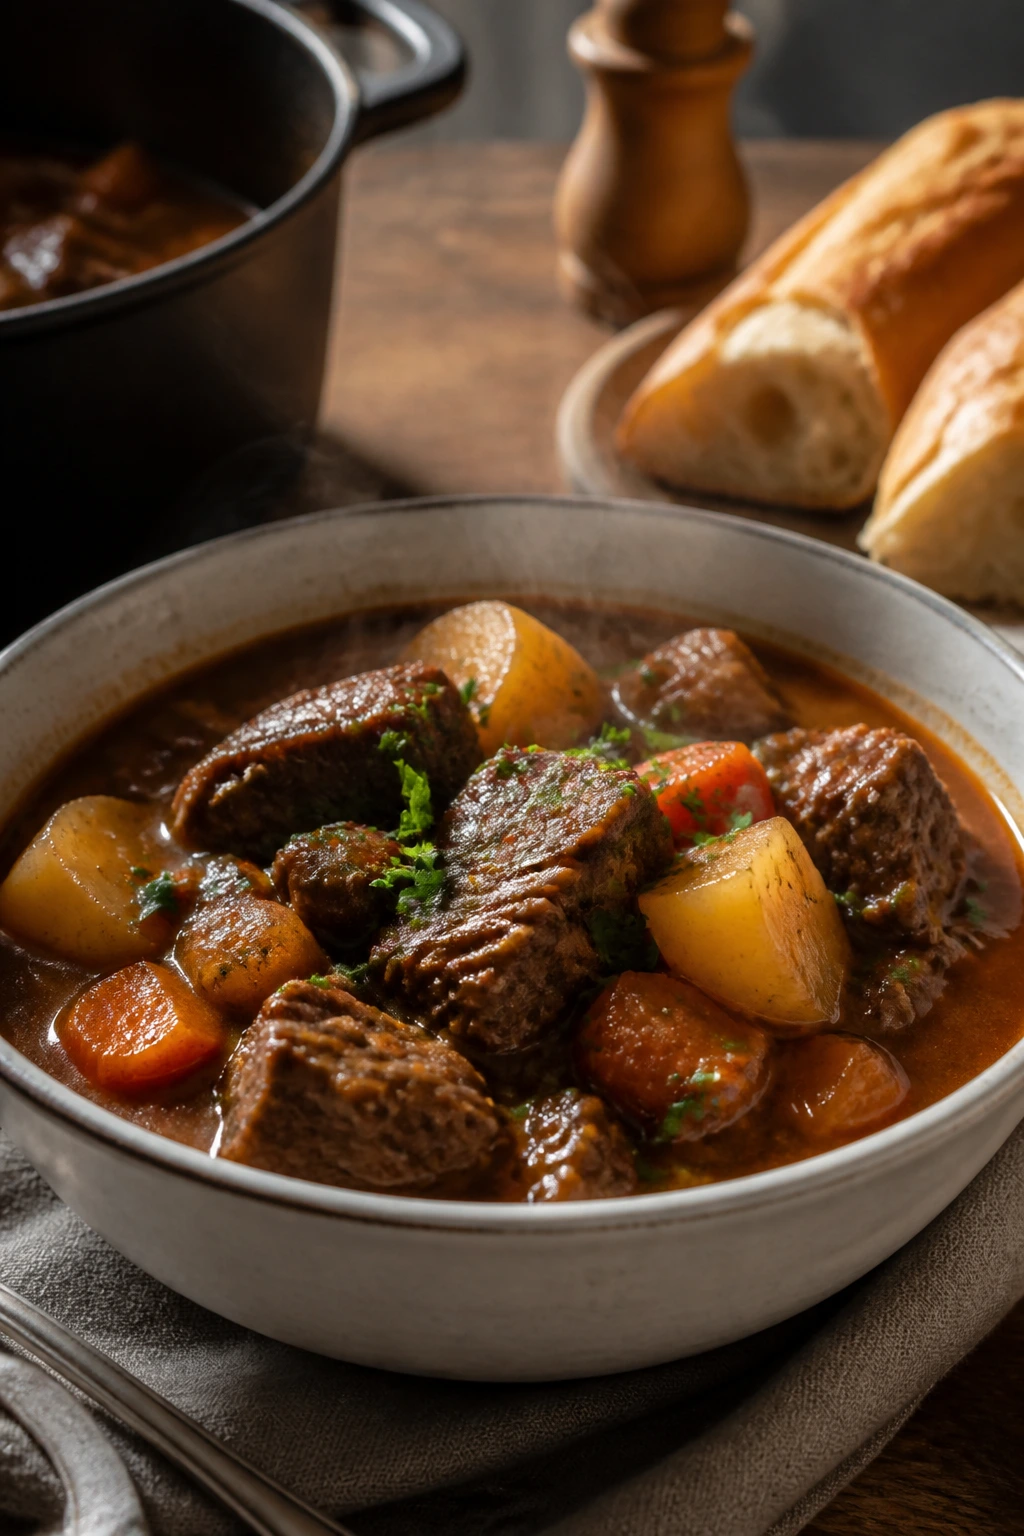
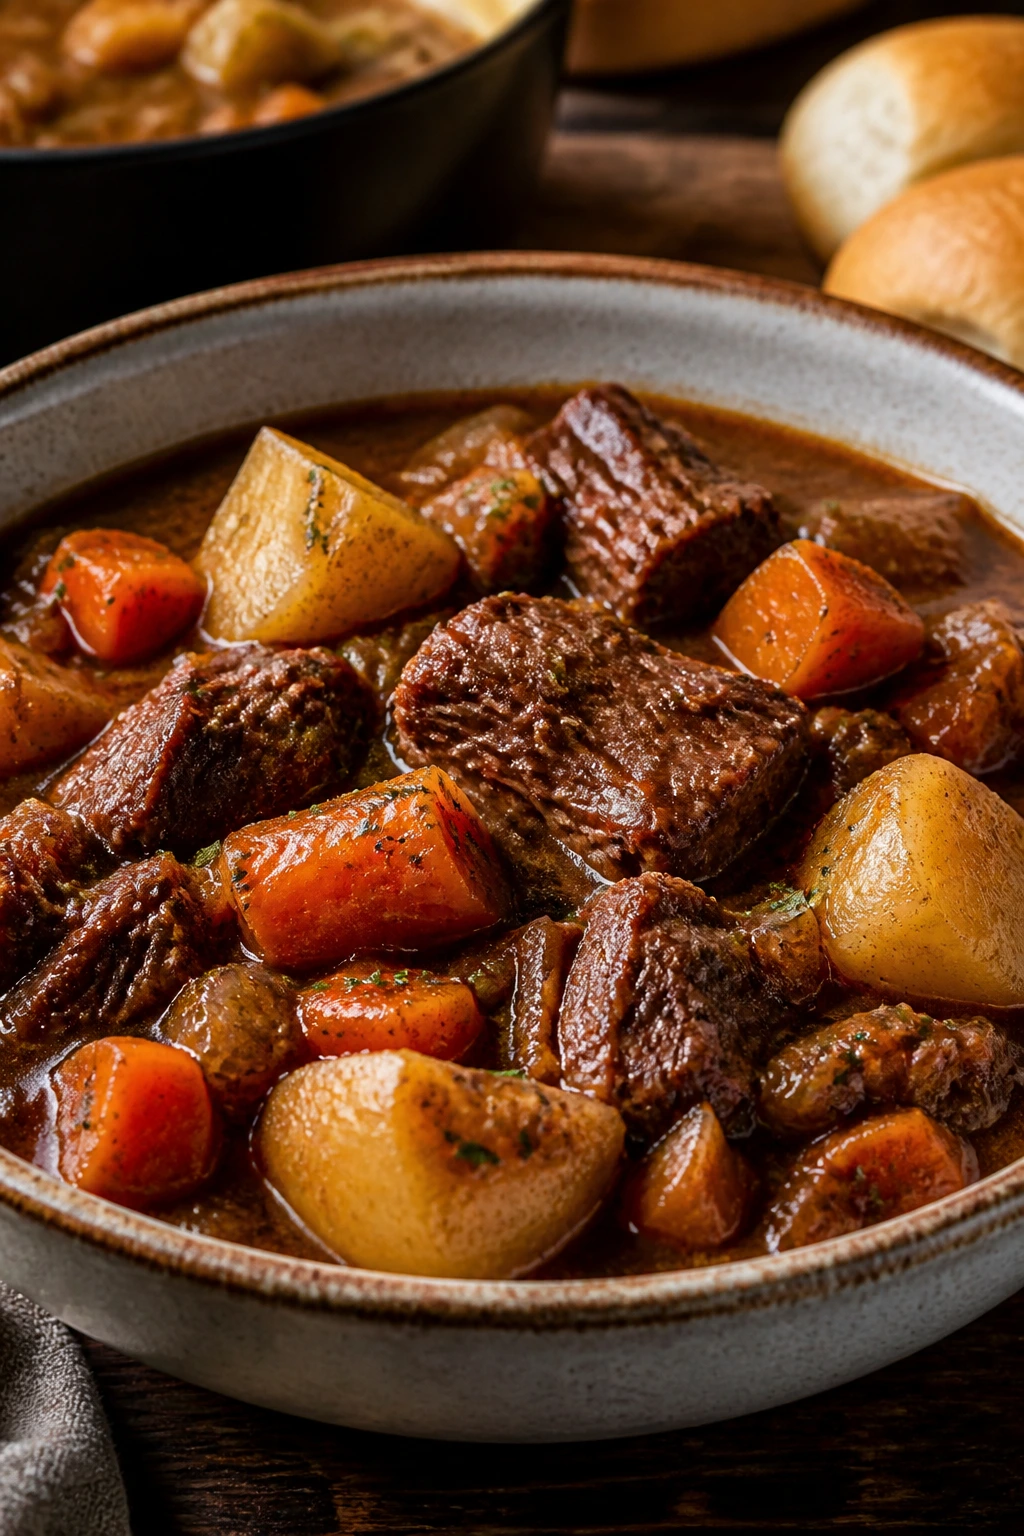
Presentation: Ladle the stew into warmed bowls so it stays hot longer. Spoon enough broth over the top to glisten around the beef and potatoes, then finish with a little parsley and a twist of black pepper. I like a deep bowl here, not a wide shallow plate. It keeps the heat in.
Accompaniments: A thick slice of sourdough, a piece of crusty baguette, or a buttered heel of rye bread belongs beside this stew. If you want a second side, keep it simple: a sharp green salad with lemon dressing, or roasted green beans with garlic.
Portions: Plan on 1½ to 2 cups per person if the stew is the whole meal. With bread on the side, 6 servings feels generous; without bread, 8 smaller portions work well.
Beverage Pairing: A dry cabernet, a malty brown ale, or a mug of strong black tea all work. The stew has enough savory depth to stand up to something with a little backbone.
Small Moves That Pay Off in the Finished Pot
Flavor Enhancement: A teaspoon of red wine vinegar stirred in at the end can wake up the broth if it tastes heavy. Don’t pour in a lot. You want a quiet lift, not a sour note.
Texture Saver: Keep the potatoes in 1½-inch chunks. Smaller pieces break down faster, and once they start collapsing, the stew turns cloudy in a way that looks less intentional and more accidental.
Make-Ahead Trick: If you have time, cook the stew a day ahead and reheat it gently. The fat rises and firms up in the fridge, so you can lift off any excess before warming it again. The flavor also settles in a way that makes the second bowl taste more complete.
Cost-Saver: Buy a chuck roast and cut it yourself if the price on pre-cut stew meat is annoying. You’ll usually get bigger, cleaner cubes, and those cubes brown better. Less shrinkage too. That matters.
Mistakes That Leave Beef Stew Flat, Thin, or Tough
-
Crowding the pot: If the beef is piled on top of itself, it steams instead of browns. The fix is simple: sear in batches and give each piece a little space.
-
Boiling the stew hard: A rolling boil tightens the beef and can make the broth oily. Keep the liquid at a gentle simmer on the stove, or use the oven and let the Dutch oven do the work at 325°F / 165°C.
-
Adding the potatoes too early: They absorb too much heat and turn mealy or broken. Add them after the beef has already had time to soften.
-
Underseasoning the layers: If you only salt at the end, the broth tastes thin and the beef tastes separate from it. Season the meat before browning, then taste and adjust again at the end.
-
Skipping the deglaze: Those browned bits on the bottom are flavor, not mess. If you leave them there, you’re wasting the best part of the sear.
-
Using a cut that is too lean: Some packages of stew meat are trimmed more aggressively than they should be. If the pieces look dry and tight before cooking, they’re not going to magically become rich. Choose chuck when you can.
Different Ways to Play With the Pot
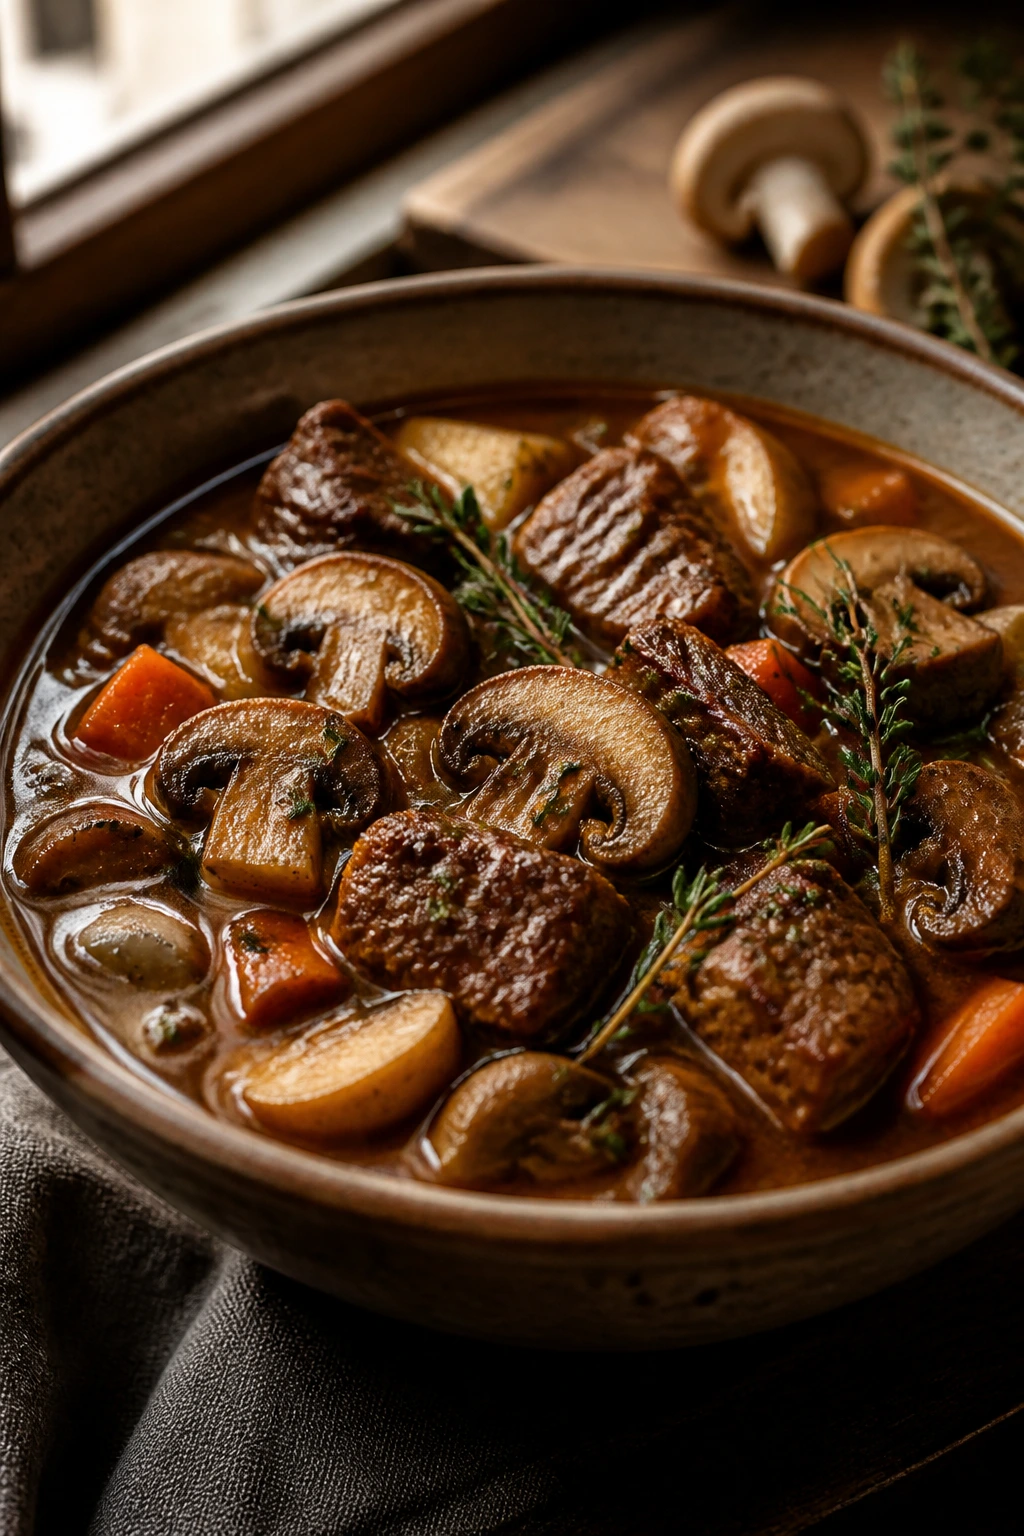
Mushroom and Thyme Stew: Add 8 ounces of sliced cremini mushrooms with the onions and let them cook until their moisture cooks off. They give the broth a darker, woodsy edge and make the pot smell deeper before it even reaches the oven.
Smoky Paprika Version: Stir 1 teaspoon smoked paprika into the tomato paste before the wine goes in. The stew gets a gentle campfire note that plays well with the beef, especially if you’re serving it with rye bread.
Root Vegetable Swap: Replace half the potatoes with peeled parsnips or turnips cut into large chunks. The stew gets a slightly sweeter, earthier finish, and the vegetables hold their shape beautifully.
No-Wine Braise: Skip the wine and use an extra cup of beef broth plus 1 tablespoon apple cider vinegar at the end. The broth will taste cleaner and a little less deep, but it still makes a solid bowl.
Gluten-Free Version: Replace the flour with 2 tablespoons cornstarch mixed into 3 tablespoons cold water near the end of cooking, then simmer for 3 to 4 minutes until the broth thickens. Brown the beef without flour, and the rest of the stew stays the same.
Storing, Freezing, and Reheating Leftovers
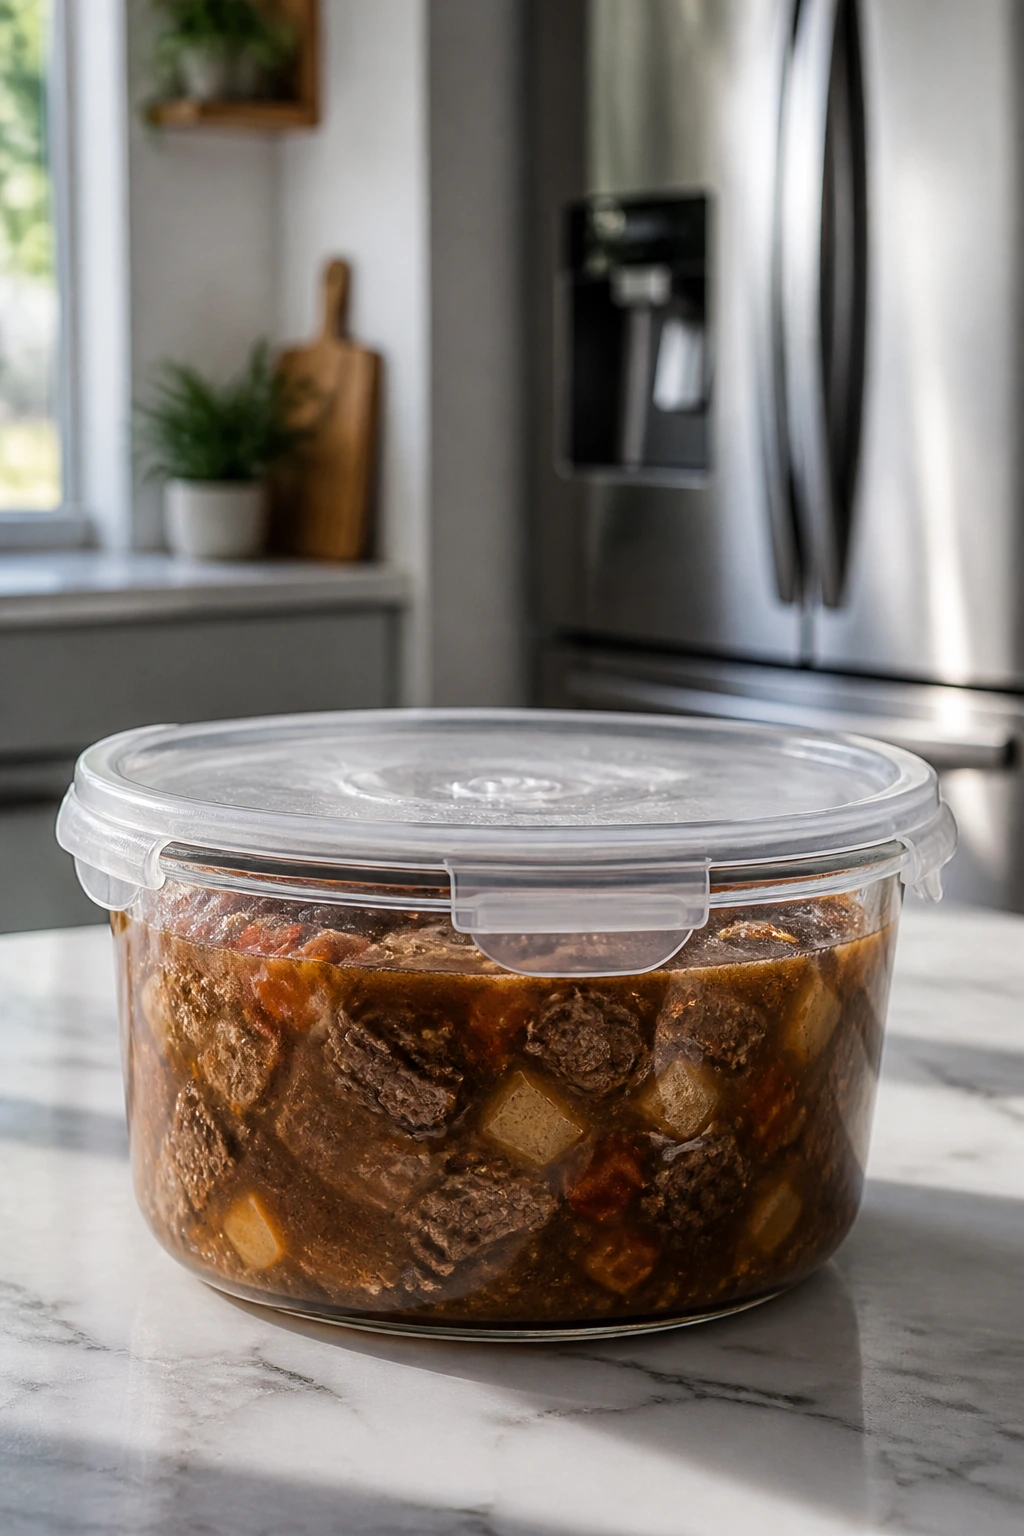
Let the stew cool for no more than 2 hours at room temperature, then move it to storage containers. In the refrigerator, it keeps well for 4 days. In the freezer, it holds for up to 3 months, though the potatoes soften a little after thawing. If you know you’re freezing part of the batch, undercook the potatoes slightly so they don’t go mealy later.
For reheating, the stovetop gives the best texture. Put the stew in a pot over low heat, add a splash of broth or water if the broth has tightened, and warm it slowly until it’s steaming and the beef is hot through. Stir every few minutes so the bottom doesn’t catch. The microwave works in a pinch, but use 60-second bursts and stir between them so the meat stays tender instead of drying out.
This stew makes a fine make-ahead meal. In fact, I think it tastes better the next day. The beef settles into the broth, the thyme softens, and the whole pot feels more unified after a night in the fridge. If you’re planning ahead for guests, cook it a day early and reheat it right before dinner.
Questions People Ask Before They Start the Pot
Can I use pre-cut stew meat from the store?
Yes, but look at the pieces before you buy. If the cubes are wildly uneven or look very lean, they can cook at different speeds and turn dry faster. Chuck roast cut at home gives you more control, but a decent package of stew meat works if you sear it well and give it enough time.
Why do you brown the beef first instead of just simmering it?
Browning adds the dark, savory flavor that makes the stew taste cooked instead of merely heated. It also leaves browned bits on the bottom of the pot, and those bits become part of the broth once you deglaze.
Can I make this without wine?
You can. Replace the wine with an extra cup of beef broth and stir in 1 tablespoon of apple cider vinegar or balsamic at the end. That gives the stew a little lift without making it taste sharp.
What if my stew is still chewy after the full cooking time?
Keep cooking it. Chewy stew meat usually needs more time, not more heat. If the liquid is low, add a splash of broth and continue at a gentle simmer or in the oven until the meat gives way easily to a fork.
How do I thicken the broth if it feels too thin?
Mash a few potatoes against the side of the pot and stir them back in, then let the stew sit for 10 minutes. If you want a firmer finish, simmer it uncovered on the stove for 5 to 10 minutes. A cornstarch slurry works too, but it gives a slightly more polished texture than a rustic stew usually needs.
Can I make this in a slow cooker?
Yes, but brown the beef and cook the tomato paste on the stove first. Then transfer everything except the peas, parsley, and butter to the slow cooker and cook on low for 7 to 8 hours. Add the peas near the end and finish with butter and parsley after the heat is off.
Can I freeze it with the potatoes in it?
Yes, though the potatoes will soften a bit more after thawing. If you want cleaner texture for freezing, make the stew without potatoes and add fresh ones when you reheat it. That version keeps the best texture.
A Stew Worth the Wait
There’s a reason beef stew meat still has a place on cold nights. It doesn’t ask for fancy treatment. It asks for a hot pot, a little patience, and enough time for the tough parts to give up and become tender. That trade is the whole charm. You start with rough-looking cubes and end with a bowl that feels patient, steady, and deeply satisfying.
What I like most is how little drama the pot needs once you respect the basics. Brown the beef well. Keep the simmer gentle. Add the potatoes late enough that they keep their shape. The rest falls into place with the kind of quiet reliability that makes a recipe worth keeping around.
Classic Beef Stew with Beef Stew Meat — Recipe Card
Recipe Name: Classic Beef Stew with Beef Stew Meat
Description: A rich, one-pot beef stew built with browned stew meat, carrots, Yukon Gold potatoes, wine, and a savory broth that turns glossy after a slow braise. It’s hearty enough for a cold night and even better the next day.
Prep Time: 25 minutes
Cook Time: 2 hours 45 minutes
Total Time: 3 hours 10 minutes
Course: Dinner, Main Course
Cuisine: American
Servings: 8 servings
Calories: 430 kcal per serving
Ingredients
For the Beef and Browning:
- 3 pounds beef stew meat, ideally from chuck, cut into 1½-inch pieces if needed
- 3 tablespoons all-purpose flour
- 2 teaspoons kosher salt
- 1 teaspoon black pepper
- 2 tablespoons vegetable oil or avocado oil
For the Vegetables:
- 1 large yellow onion, diced
- 2 medium carrots, peeled and sliced into ½-inch rounds
- 2 celery stalks, sliced
- 4 garlic cloves, minced
- 1 ½ pounds Yukon Gold potatoes, cut into 1½-inch chunks
For the Braising Liquid:
- 2 tablespoons tomato paste
- 1 cup dry red wine
- 4 cups low-sodium beef broth
- 1 tablespoon Worcestershire sauce
- 2 bay leaves
- 1 teaspoon dried thyme
- ½ teaspoon dried rosemary, crushed between your fingers
For Finishing:
- 1 cup frozen peas
- 2 tablespoons chopped fresh parsley
- 1 tablespoon unsalted butter
Instructions
-
Preheat the oven to 325°F / 165°C and position a rack in the lower-middle part of the oven.
-
Pat the beef dry, season it with salt and pepper, then toss it with the flour until lightly coated.
-
Heat the oil in a Dutch oven over medium-high heat. Brown the beef in two batches for 4 to 5 minutes per side, then transfer it to a plate.
-
Reduce the heat to medium. Cook the onion, carrots, and celery for 6 to 8 minutes, then add the garlic and cook for 30 seconds.
-
Stir in the tomato paste and cook for 1 minute. Add the wine and scrape up the browned bits, then simmer for 2 to 3 minutes.
-
Add the broth, Worcestershire sauce, bay leaves, thyme, rosemary, and browned beef. Bring to a gentle simmer, cover, and transfer to the oven for 1 hour 30 minutes.
-
Remove the pot from the oven and stir in the potatoes. Cover and return to the oven for 45 to 55 minutes, until the beef is fork-tender and the potatoes are cooked through.
-
Stir in the peas during the last 5 minutes. Remove the bay leaves, then stir in the butter and parsley. Taste and adjust the seasoning.
-
Rest for 15 minutes before serving.
Notes: For a gluten-free version, skip the flour and thicken the broth with a cornstarch slurry at the end. The stew tastes even better the next day, and leftovers reheat best on the stovetop over low heat.