
The fastest way to ruin crispy teriyaki chicken and rice is to drown the chicken before the crust has had a chance to set. Once that happens, you don’t get a glossy bowl with a little edge and snap; you get soft breading, pale sauce, and rice that tastes like it spent too long under a heat lamp.
The version I keep coming back to is built around a simple idea: crisp the chicken first, glaze it last, and keep the rice fluffy enough to catch the extra sauce without collapsing under it. That sounds obvious, but plenty of home versions miss the timing by a minute or two, and those minutes matter. A chicken thigh that goes into hot oil dry-coated in cornstarch and flour will give you the kind of rough, craggy edges that hold teriyaki like lacquer. A chicken thigh that gets sauced while it’s still sitting around in a bowl? Much less interesting.
There’s also a smell to this dish that I never get tired of. Ginger and garlic hit the pan first. Soy and brown sugar simmer into something dark, shiny, and a little sticky around the edges. Steam comes off the rice when you fluff it, and if you’ve done it right, the whole bowl smells like a better version of the place you used to order from when cooking felt like too much work.
Why You’ll Love This Crispy Teriyaki Chicken and Rice
-
The chicken stays crisp until the last second: The coating is built for frying, then the sauce goes on only after the glaze has thickened, so the crust doesn’t vanish on contact.
-
The sauce tastes bright instead of flat: Rice vinegar, ginger, garlic, and a little mirin keep the sweetness in check, which matters because teriyaki can turn sticky-sweet fast.
-
You can get the rice and chicken done in the same window: While the rice rests, the chicken fries and the sauce comes together. Nothing sits around getting tired.
-
It uses ordinary pantry ingredients in a way that feels smarter than ordinary: Soy sauce, brown sugar, honey, cornstarch, and sesame oil do a lot of heavy lifting here. No weird shopping list.
-
It’s easy to adjust for your table: Add broccoli, cucumber, chili crisp, or a splash of lime. The bowl takes to extras without losing its shape.
-
It eats like takeout, but cleaner: You decide how salty the sauce gets, how much oil stays on the chicken, and how much glaze lands in the bowl. That control shows.
Where the Glossy Teriyaki Flavor Comes From
Teriyaki, at its core, is about shine. The word itself points to that lacquered surface, the kind of finish that clings to food instead of running off in a thin puddle at the bottom of the container. Outside Japan, people often think of teriyaki as a single sauce, but what most of us crave is that sweet-salty glaze with ginger, garlic, and a little heat from the pan.
That distinction matters here. This dish is not pretending to be a museum piece. It’s a home-cook bowl built from the same flavor profile, but tuned for crunch. The chicken gets its own dry coating so it can brown properly, and the sauce is reduced separately so the sugar dissolves and the texture turns shiny before it ever touches the meat.
Takeout versions usually lean sweet because sweetness survives a short ride in a box. Home versions can do better. A touch of vinegar gives the sauce a sharper edge. Fresh ginger makes the whole thing smell alive. Sesame oil, used with a light hand, adds that toasted note that sits under the soy and keeps the bowl from tasting one-dimensional.
And the rice? That’s the quiet part that keeps everything from getting sloppy. Jasmine rice is my first choice because the grains stay distinct and carry sauce well, but it has to be cooked with some care. Fluffy rice under crisp chicken is a different dish from mushy rice under sauced chicken. One feels assembled. The other feels thrown together.
Timing, Yield, and Difficulty
Yield: Serves 4
Prep Time: 20 minutes
Cook Time: 25 minutes
Total Time: 45 minutes
Difficulty: Intermediate — the steps are straightforward, but you need to manage frying, sauce reduction, and rice timing without letting any part sit too long.
Chill/Rest Time: 10 minutes for the rice to rest after cooking
Best Served: Right after the chicken is tossed with sauce
The Ingredient List
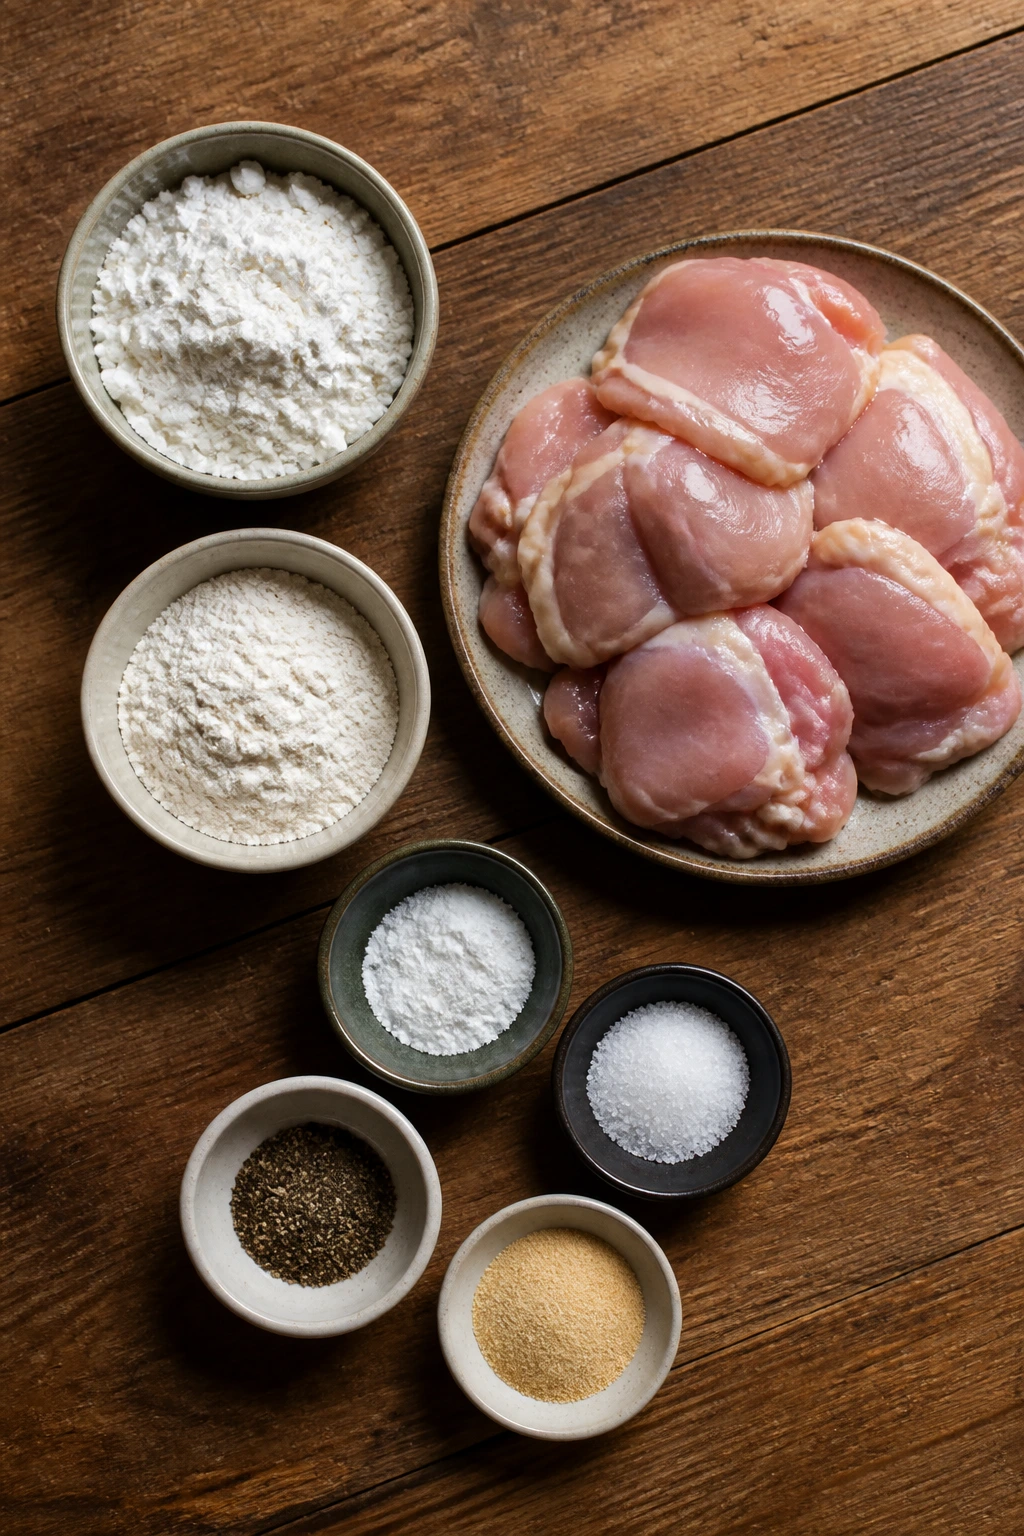
For the Chicken
- 1 ½ pounds boneless, skinless chicken thighs, cut into 1-inch pieces
- 1 tablespoon soy sauce
- 1 tablespoon rice vinegar
- 1 large egg, beaten
- ½ cup cornstarch
- ½ cup all-purpose flour
- 1 teaspoon baking powder
- 1 teaspoon kosher salt
- ½ teaspoon freshly ground black pepper
- ½ teaspoon garlic powder
- ¼ teaspoon white pepper, optional
- ⅓ cup neutral oil, for pan-frying
For the Teriyaki Sauce
- ½ cup soy sauce
- ⅓ cup water
- ¼ cup light brown sugar, packed
- 2 tablespoons honey
- 2 tablespoons rice vinegar
- 1 tablespoon mirin
- 2 cloves garlic, finely grated
- 1 tablespoon fresh ginger, finely grated
- 1 teaspoon toasted sesame oil
- 1 tablespoon cornstarch mixed with 2 tablespoons cold water
For the Rice and Finish
- 1 ½ cups jasmine rice, rinsed well
- 2 ¼ cups water
- ½ teaspoon salt
- 2 scallions, thinly sliced
- 1 teaspoon sesame seeds
- 1 cup steamed broccoli florets, optional
- ½ cup sliced cucumber, optional
- Chili crisp or sliced fresh chili, optional for heat
Why Each Ingredient Matters in the Pan
Chicken Thighs
- What to use: 1 ½ pounds boneless, skinless chicken thighs cut into 1-inch pieces.
- Preparation: Pat the chicken dry before cutting it so the coating grabs instead of sliding off.
- Substitutions: Boneless chicken breast works if that’s what you have, but cut it a little larger so it doesn’t dry out; extra-firm tofu also works if you press it well.
- Tips: Thighs forgive a hot pan better than breasts. They stay juicy even if the edges get deeply browned, which is exactly what you want here.
Coating Mix
- What to use: ½ cup cornstarch, ½ cup all-purpose flour, 1 teaspoon baking powder, 1 teaspoon kosher salt, ½ teaspoon black pepper, ½ teaspoon garlic powder, and ¼ teaspoon white pepper if you like a little extra bite.
- Preparation: Whisk the dry ingredients together before they touch the chicken so every piece gets an even coating.
- Substitutions: Use potato starch in place of cornstarch for a slightly lighter crunch, or a gluten-free flour blend instead of all-purpose flour.
- Tips: Baking powder gives the crust a rougher, more craggy surface. Don’t skip it if you want that takeout-style texture.
Sauce Base
- What to use: ½ cup soy sauce, ⅓ cup water, ¼ cup brown sugar, 2 tablespoons honey, 2 tablespoons rice vinegar, 1 tablespoon mirin, 2 grated garlic cloves, 1 tablespoon grated ginger, and 1 teaspoon sesame oil.
- Preparation: Grate the garlic and ginger finely so they melt into the sauce instead of floating around in sharp little bits.
- Substitutions: Tamari works for a gluten-free version, and maple syrup can stand in for honey if that’s what you’ve got. If you don’t keep mirin around, use 1 extra teaspoon of brown sugar and a splash more water.
- Tips: The sauce should taste a little more intense than you think you want before it hits the chicken. The rice will soften it, and the chicken will dilute it a little too.
Rice and Garnishes
- What to use: 1 ½ cups jasmine rice, 2 ¼ cups water, ½ teaspoon salt, scallions, sesame seeds, and optional broccoli or cucumber.
- Preparation: Rinse the rice until the water looks almost clear, then let it rest covered after cooking so the grains finish steaming.
- Substitutions: Short-grain rice gives a stickier bowl, brown rice gives more chew, and cauliflower rice works if you want something lighter.
- Tips: Fluff the rice with a fork, not a spoon. A spoon tends to mash the grains together, and once that happens, the bowl loses its clean texture.
The Tools That Make the Job Easier
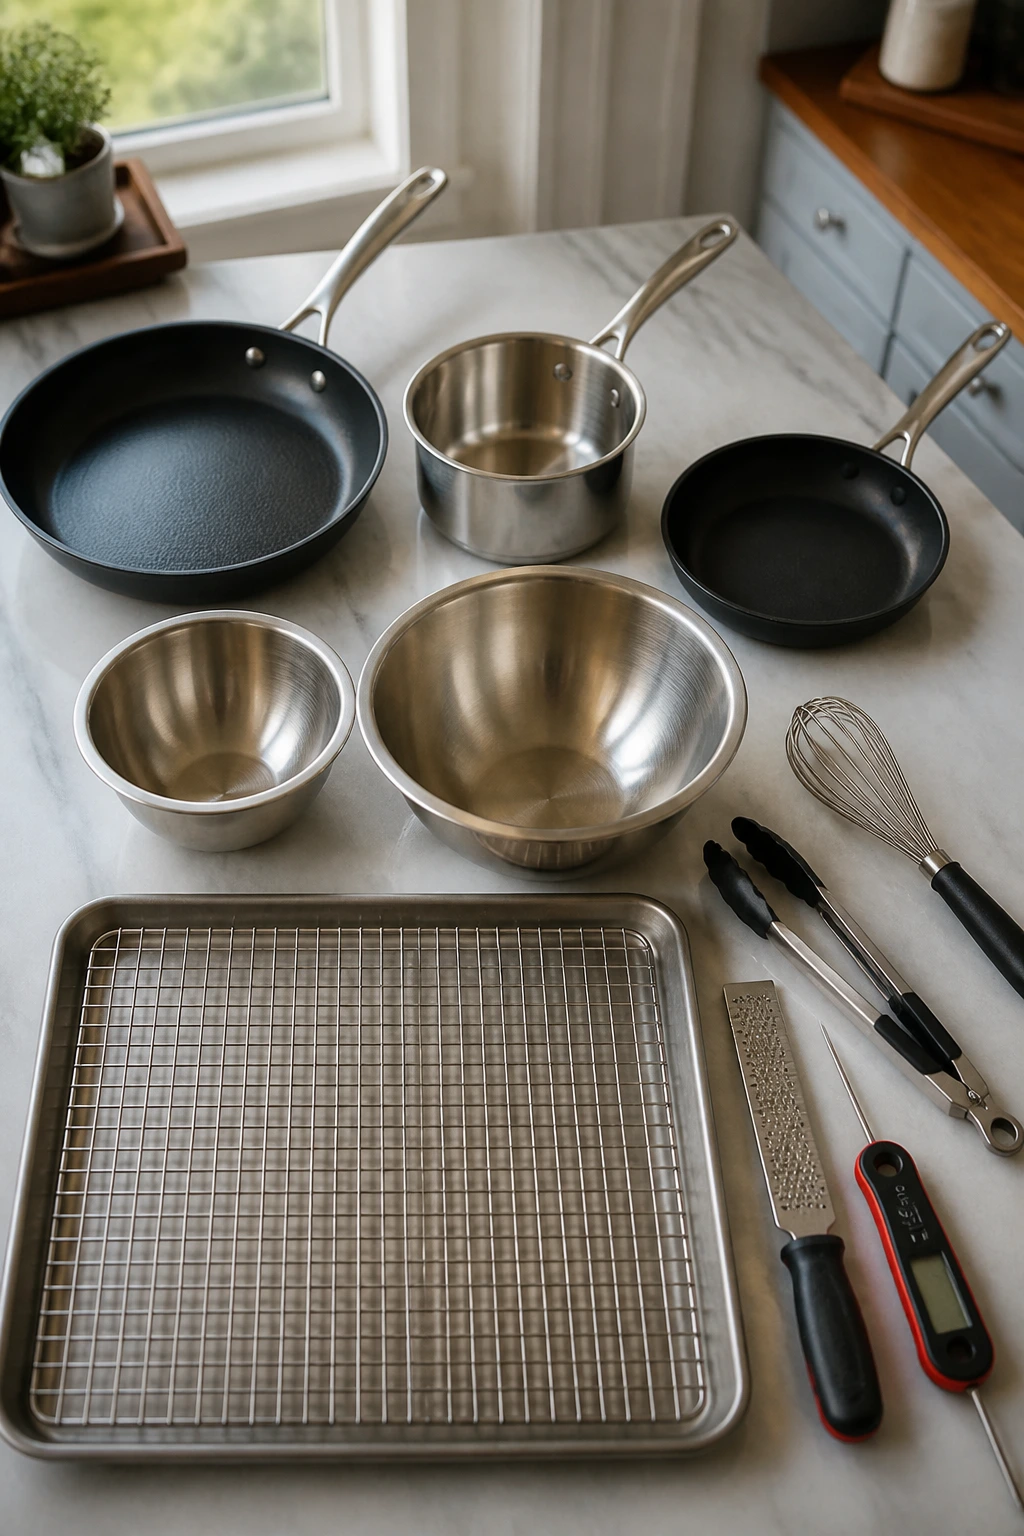
- 12-inch skillet: A wide skillet gives the chicken room to brown instead of steam.
- Medium saucepan with a tight lid: Needed for the rice unless you use a rice cooker.
- Small saucepan or skillet: Best for reducing the teriyaki sauce without crowding the chicken.
- Mixing bowls, at least 2: One for the coating and chicken, one for the sauce.
- Whisk: Helps dissolve the sugar and keep the slurry smooth.
- Tongs or a slotted spatula: Useful for turning the chicken without tearing the coating.
- Wire rack set over a sheet pan: Better than paper towels if you want the crust to stay crisp while you finish the batch.
- Microplane or fine grater: Makes short work of the garlic and ginger.
- Instant-read thermometer: Not required, but useful if you don’t want to guess when the chicken is done.
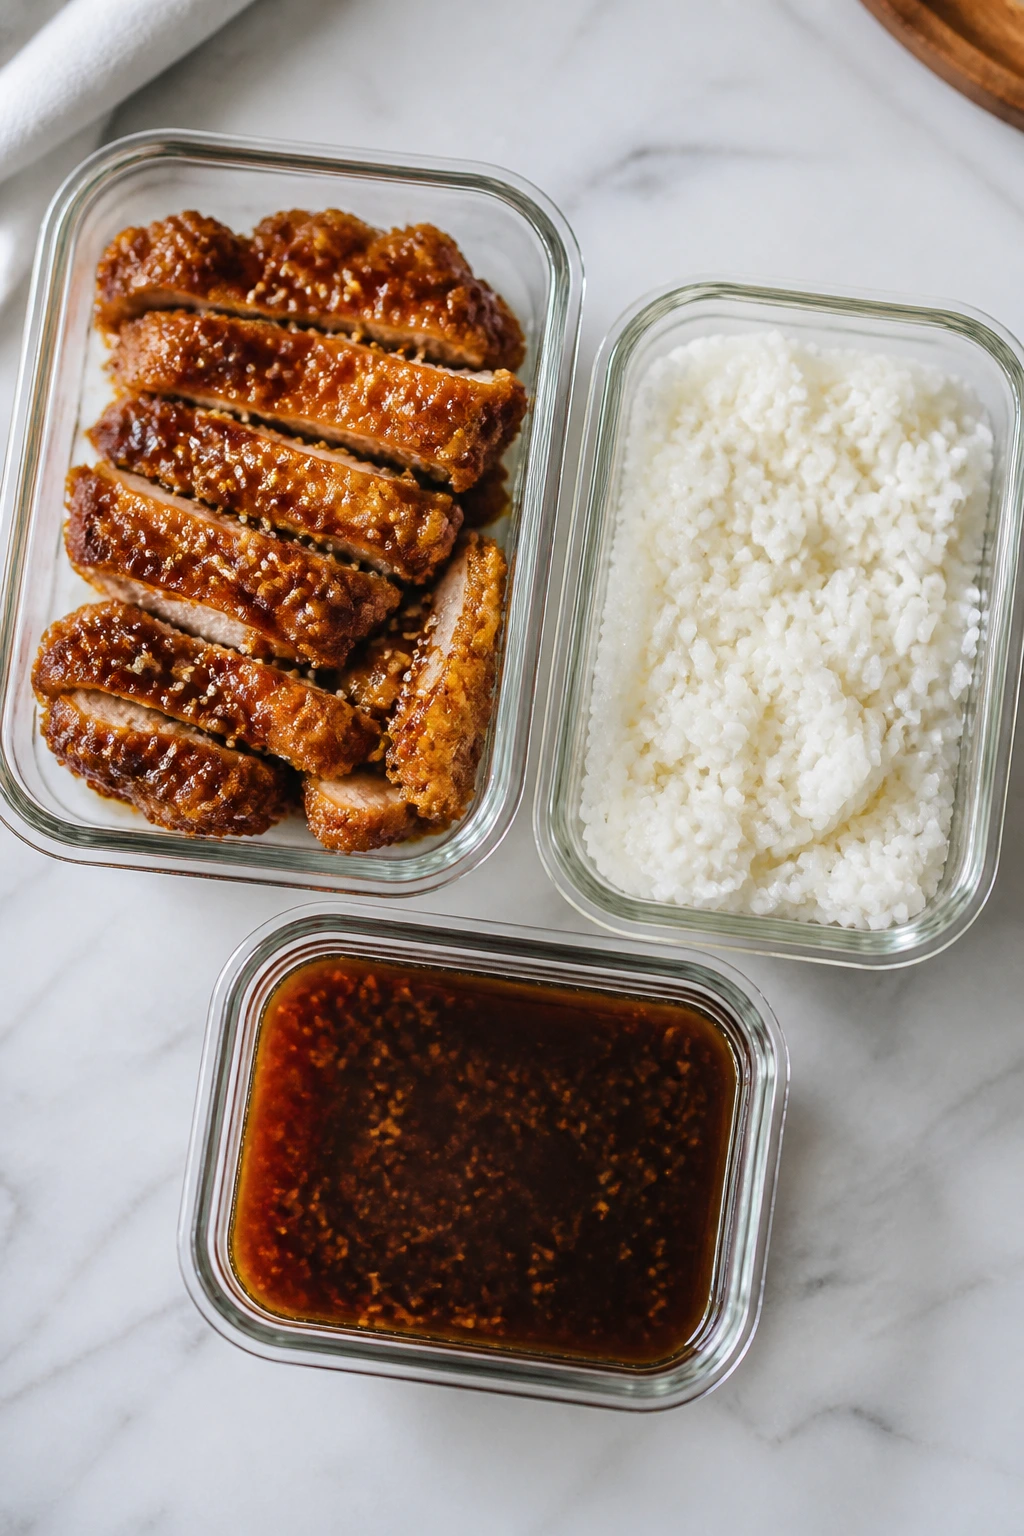
How to Make Crispy Teriyaki Chicken and Rice
Phase 1: Cook the Rice and Mix the Sauce
-
Rinse and start the rice. Place 1 ½ cups jasmine rice in a fine-mesh strainer and rinse under cool running water until the water runs almost clear. Transfer it to a medium saucepan with 2 ¼ cups water and ½ teaspoon salt. Bring to a boil over medium-high heat, then cover, reduce to low, and cook for 15 minutes without lifting the lid.
-
Let the rice rest. Turn off the heat and keep the lid on for 10 minutes. The rice should finish steaming and look fluffy when you lift the lid; do not stir it while it rests, or you’ll mash the grains.
-
Whisk the sauce base. In a small saucepan or skillet, combine ½ cup soy sauce, ⅓ cup water, ¼ cup brown sugar, 2 tablespoons honey, 2 tablespoons rice vinegar, 1 tablespoon mirin, the grated garlic, grated ginger, and 1 teaspoon sesame oil. Whisk until the sugar looks mostly dissolved.
-
Mix the slurry separately. Stir 1 tablespoon cornstarch with 2 tablespoons cold water in a small bowl until smooth. Set it beside the stove. If you add dry cornstarch straight into the sauce, you’ll get little clumps. Not worth it.
Phase 2: Coat and Fry the Chicken
-
Season and coat the chicken. Pat the chicken pieces dry, then toss them in a large bowl with 1 tablespoon soy sauce and 1 tablespoon rice vinegar. Add the beaten egg and stir until the chicken looks lightly slicked. Sprinkle in the cornstarch, flour, baking powder, salt, black pepper, garlic powder, and white pepper, then toss until every piece is coated and no dry flour remains.
-
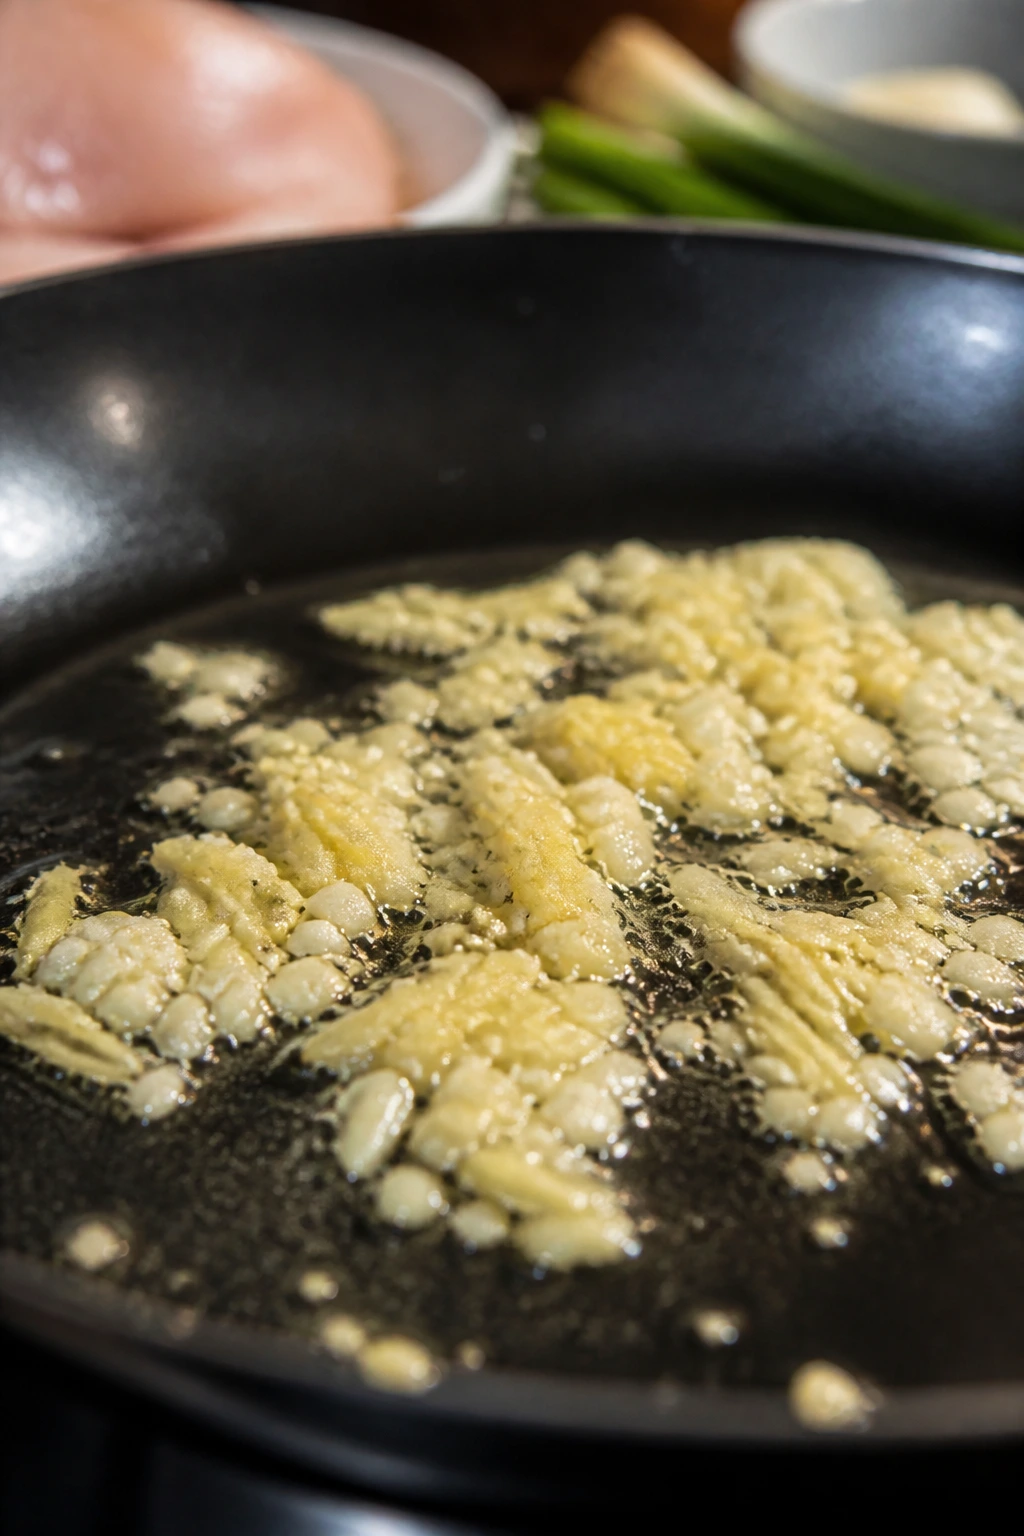
Heat the oil. Pour ⅓ cup neutral oil into a 12-inch skillet and heat over medium-high until shimmering. If you have a thermometer, aim for about 350°F to 360°F. If not, a pinch of flour should sizzle right away without smoking. If the oil smokes, it’s too hot.
-
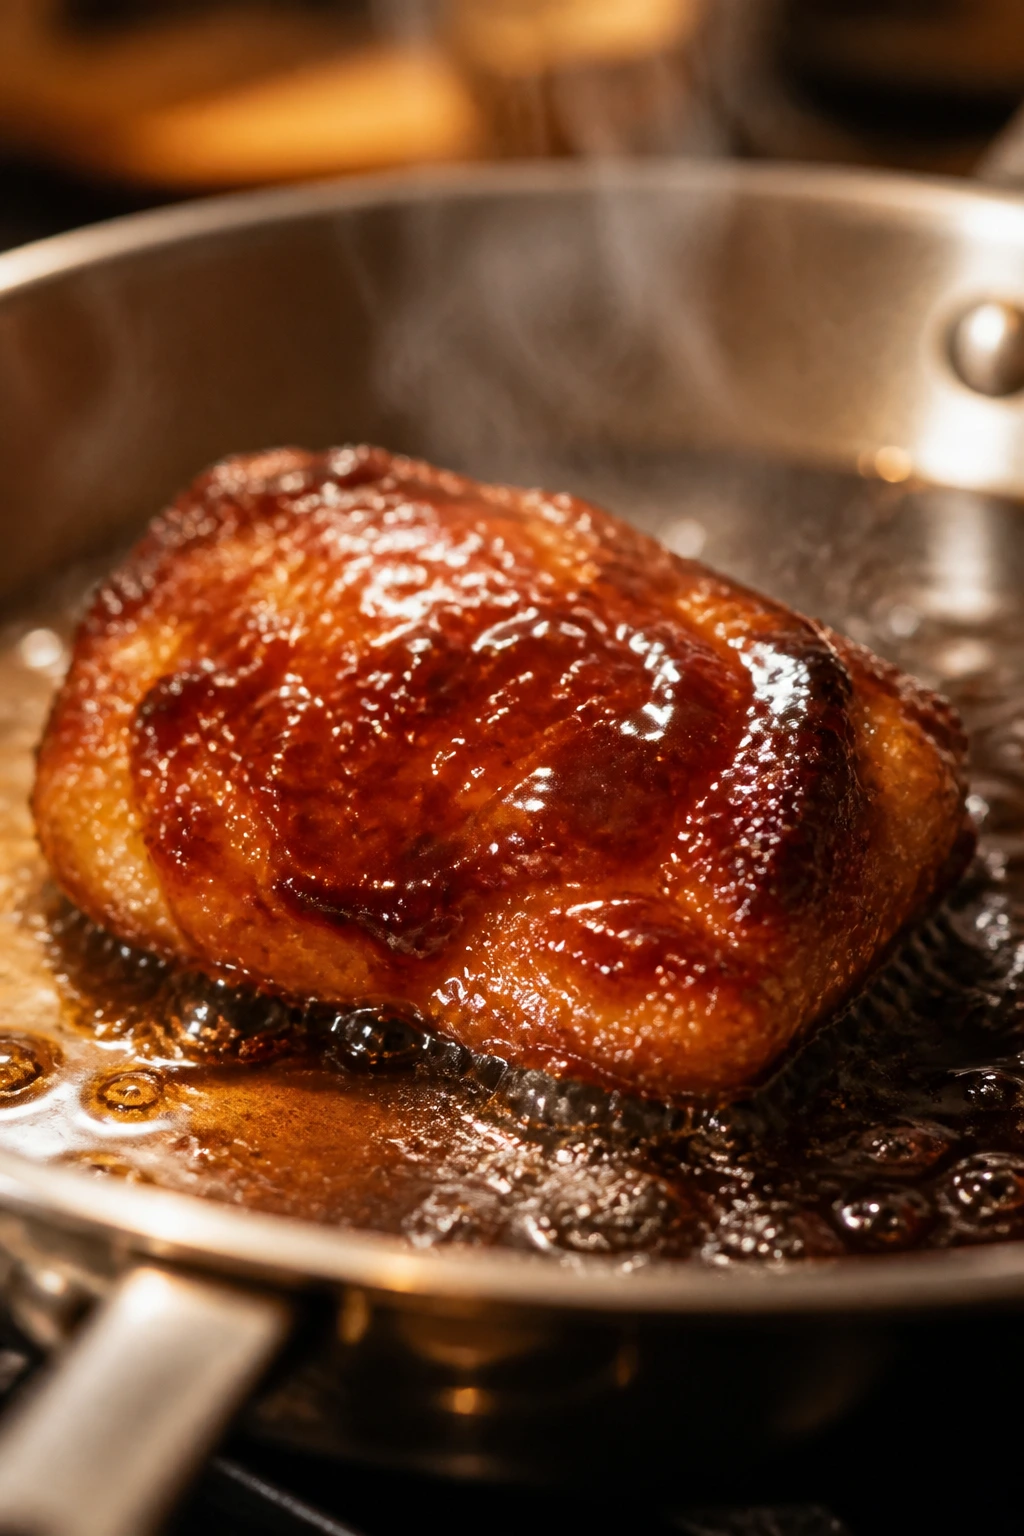
Fry the first batch. Add half the chicken in a single layer and fry for 3 to 4 minutes on the first side, then 2 to 3 minutes on the second side. The coating should turn deep golden and the chicken should reach 165°F in the thickest piece. Move it to a wire rack while you cook the rest. Do not crowd the skillet or the coating will soften before it browns.
-
Fry the second batch. Cook the remaining chicken the same way, lowering the heat a touch if the pan starts to darken too fast. If the crust looks pale, give it another minute; if it gets too dark before the center is cooked, the heat is too high.
Phase 3: Reduce the Sauce and Finish the Bowl
-
Thicken the teriyaki sauce. Pour off all but about 1 tablespoon of oil from the skillet, or use a clean small saucepan if you prefer a cleaner sauce. Add the sauce base and bring it to a gentle simmer over medium heat. Stir for 1 to 2 minutes until the sugar dissolves and the sauce looks glossy.
-
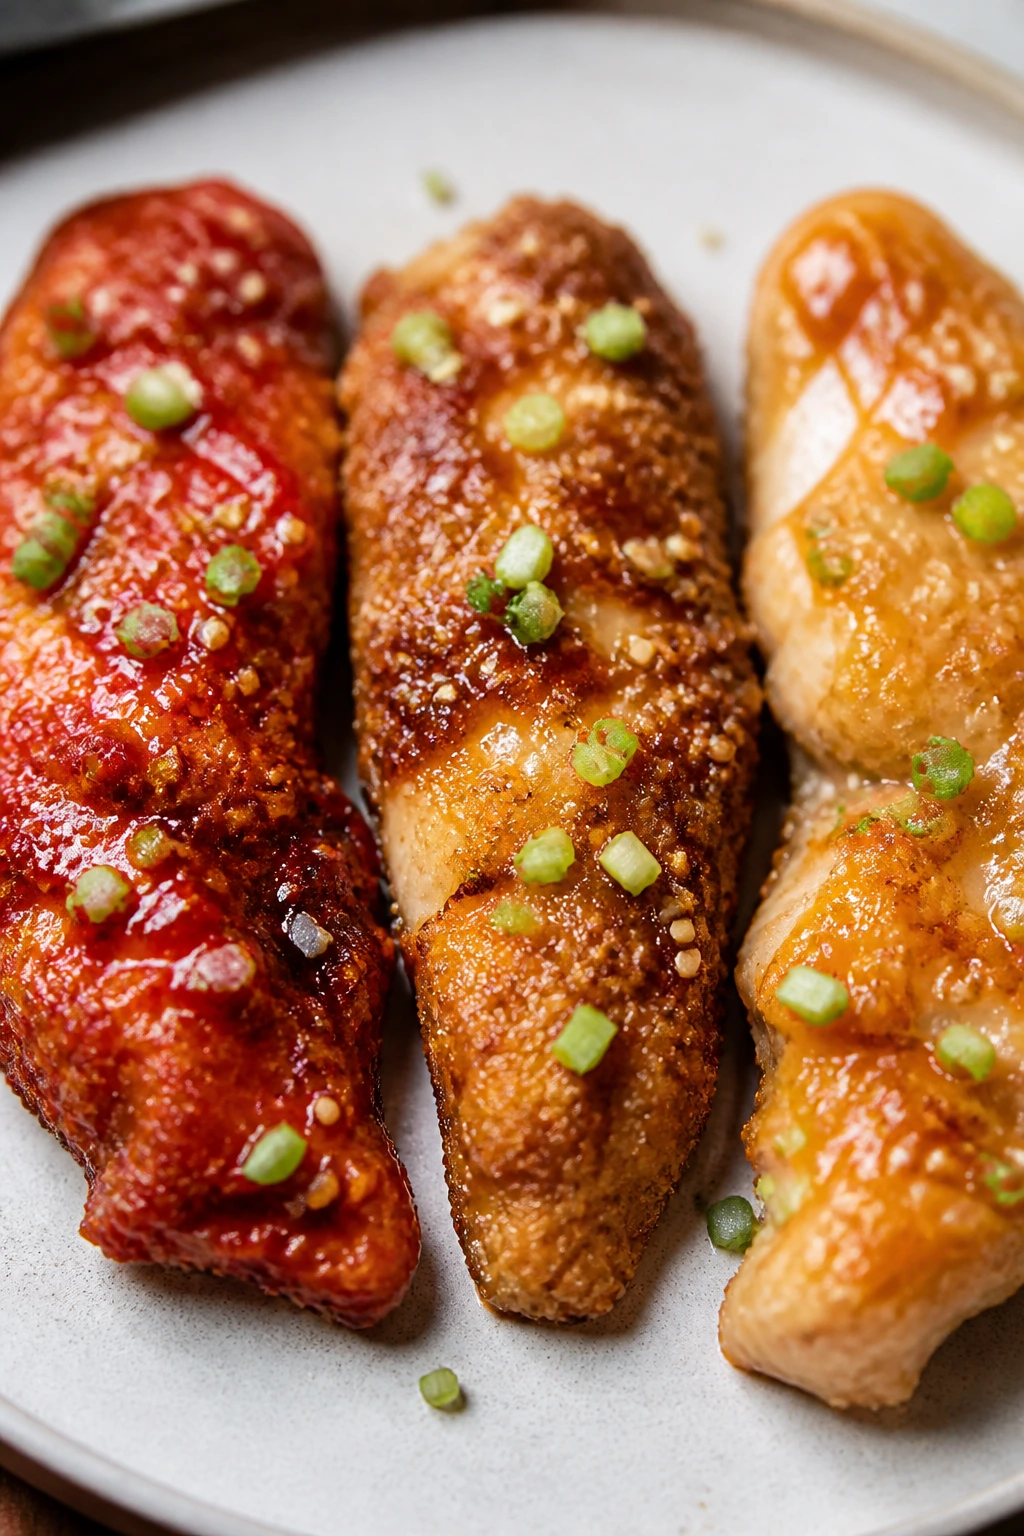
Add the slurry. Whisk the cornstarch slurry again, then stream it into the simmering sauce while whisking constantly. Cook for 30 to 60 seconds, until the sauce thickens enough to coat the back of a spoon and leaves a clean line when you drag a finger through it. Do not let it boil hard for long or it can turn gluey.
-
Toss the chicken quickly. Add the fried chicken to the sauce and stir just until every piece is lacquered, about 20 to 30 seconds. You want the chicken coated, not boiled. If the sauce seems too thick, splash in 1 tablespoon water.
-
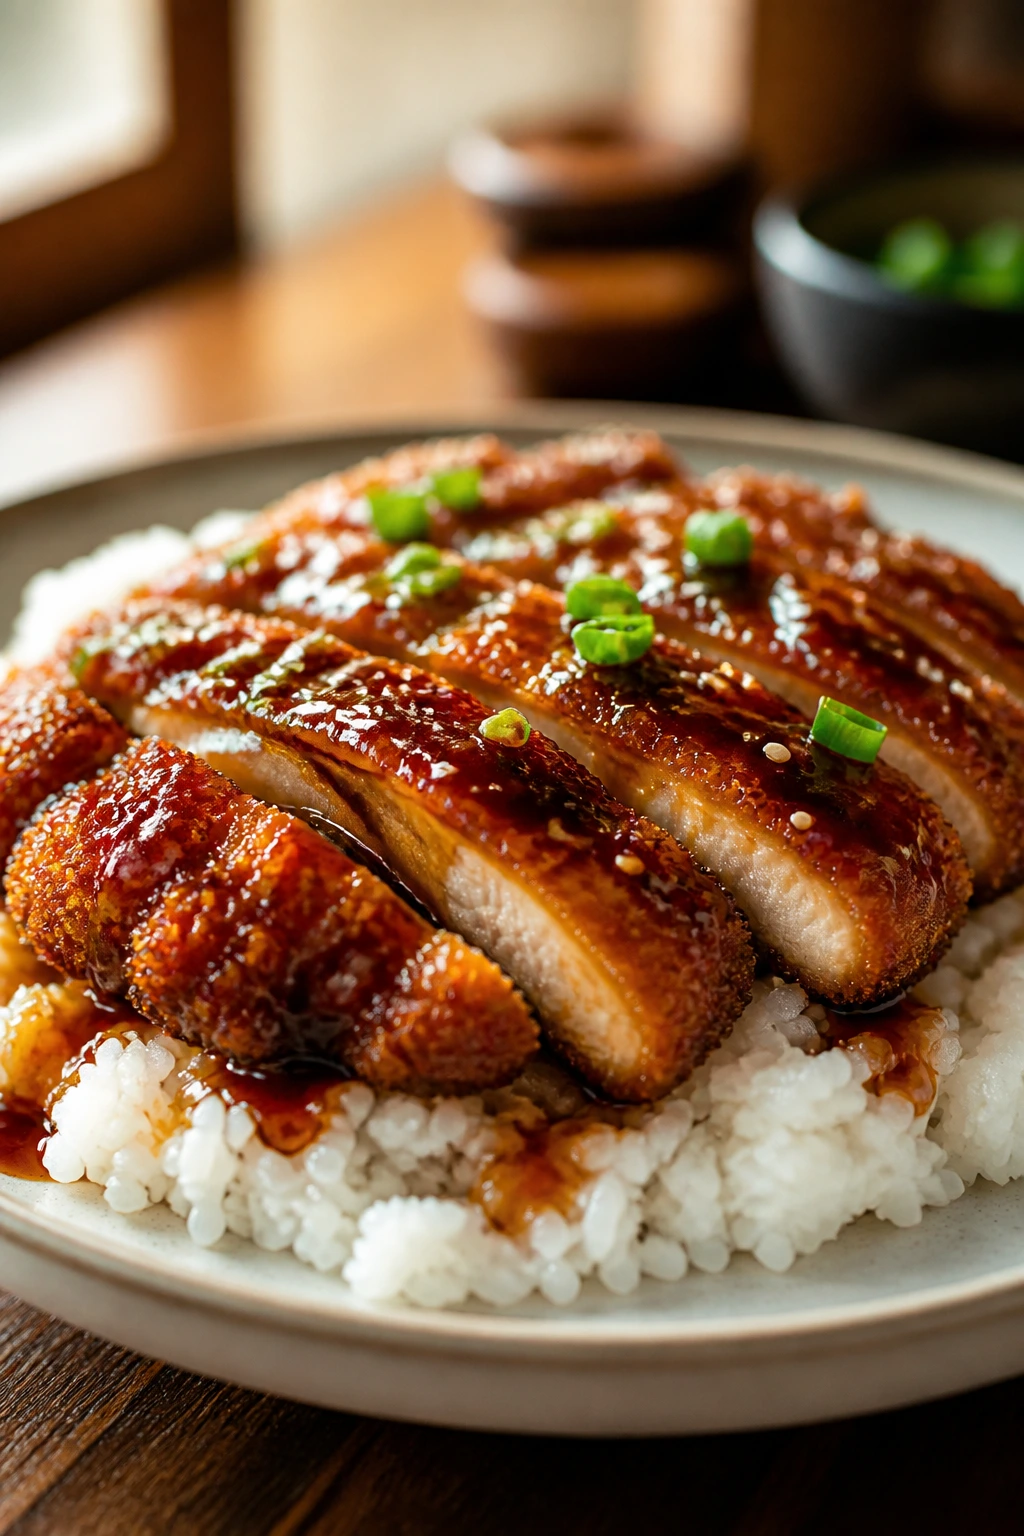
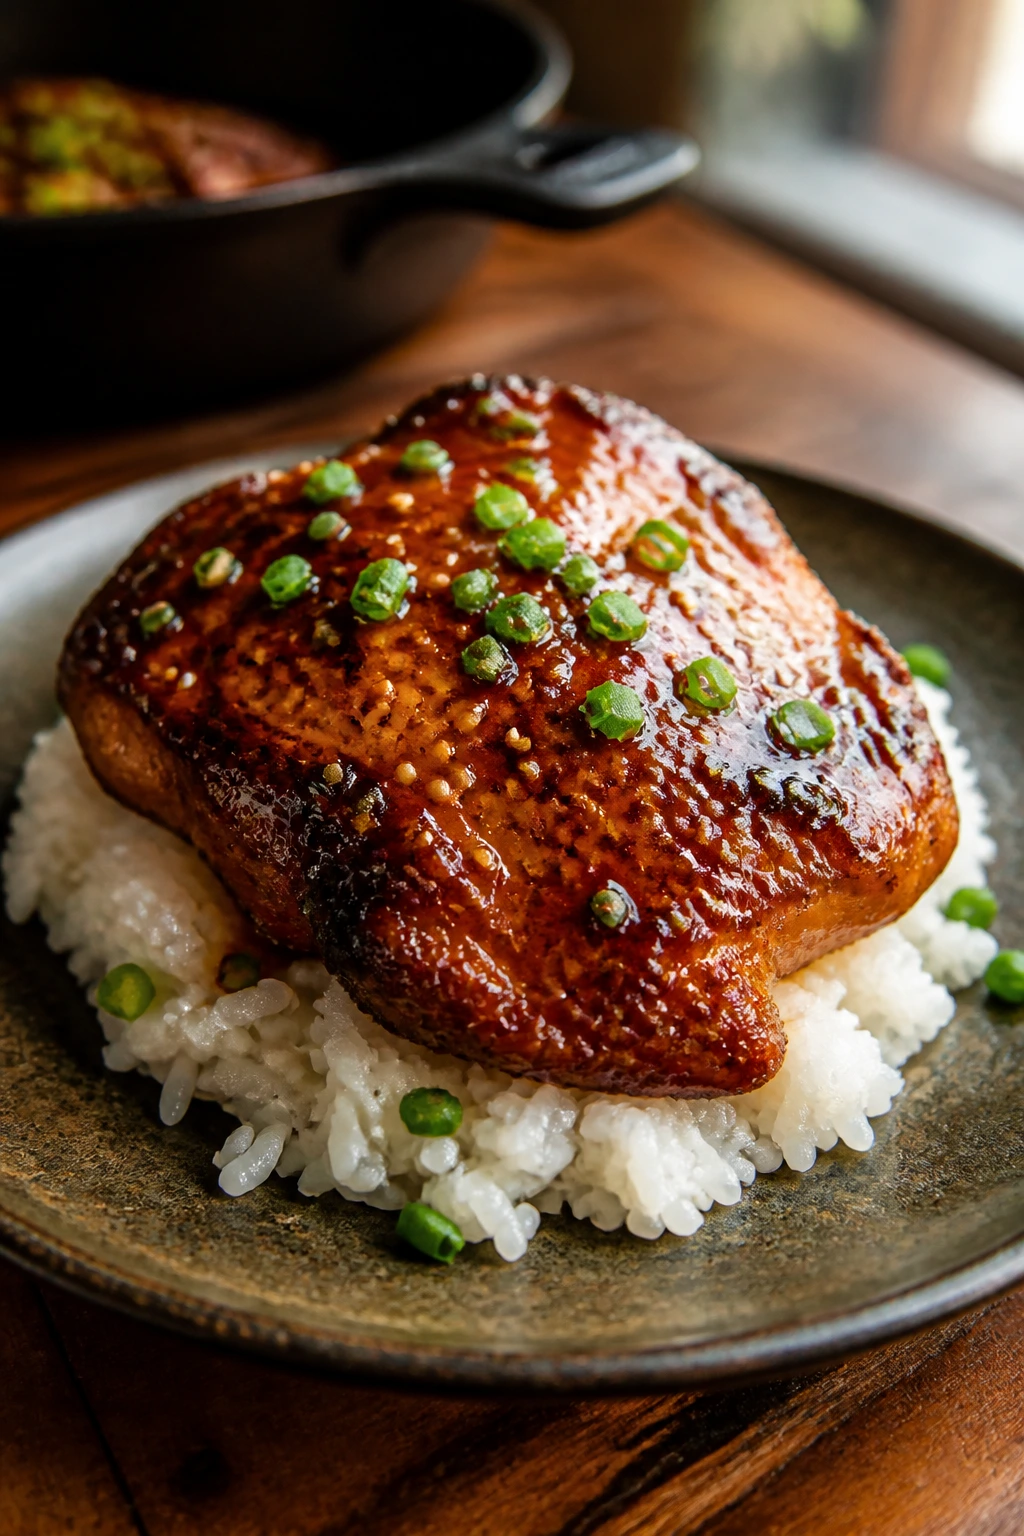
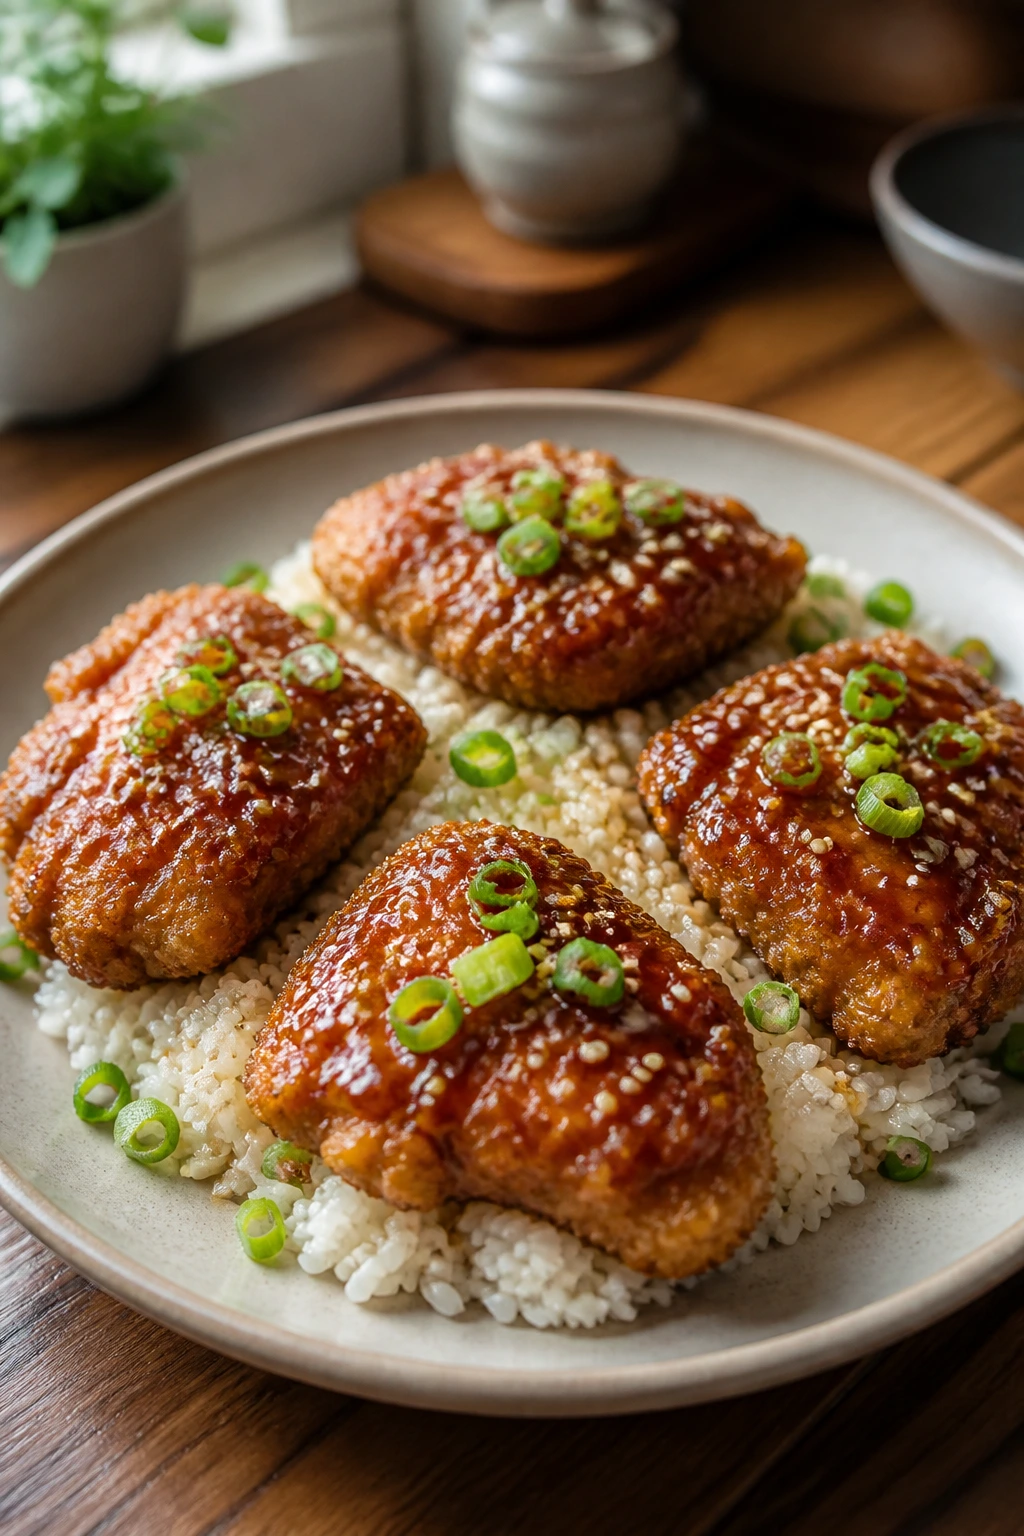
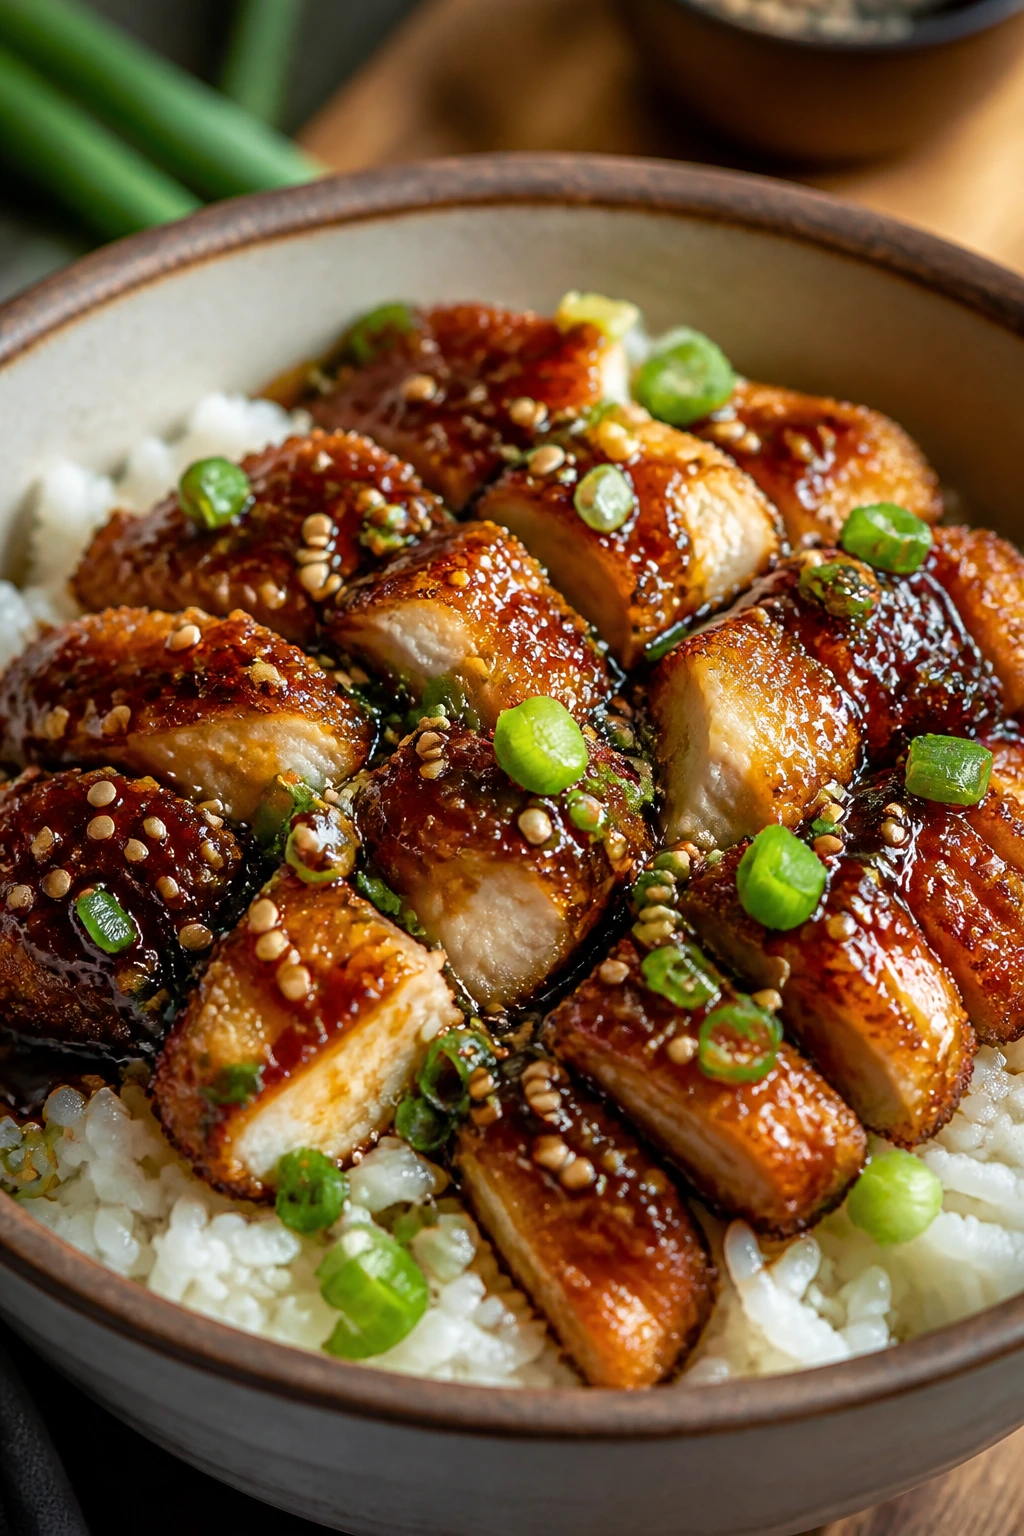
Assemble and serve. Fluff the rice with a fork and divide it among four bowls. Top with the crispy teriyaki chicken, spoon over any extra sauce, then finish with scallions, sesame seeds, broccoli, cucumber, and chili crisp if you want heat. Serve immediately while the edges are still crisp.
How to Plate It So the Chicken Stays Crisp
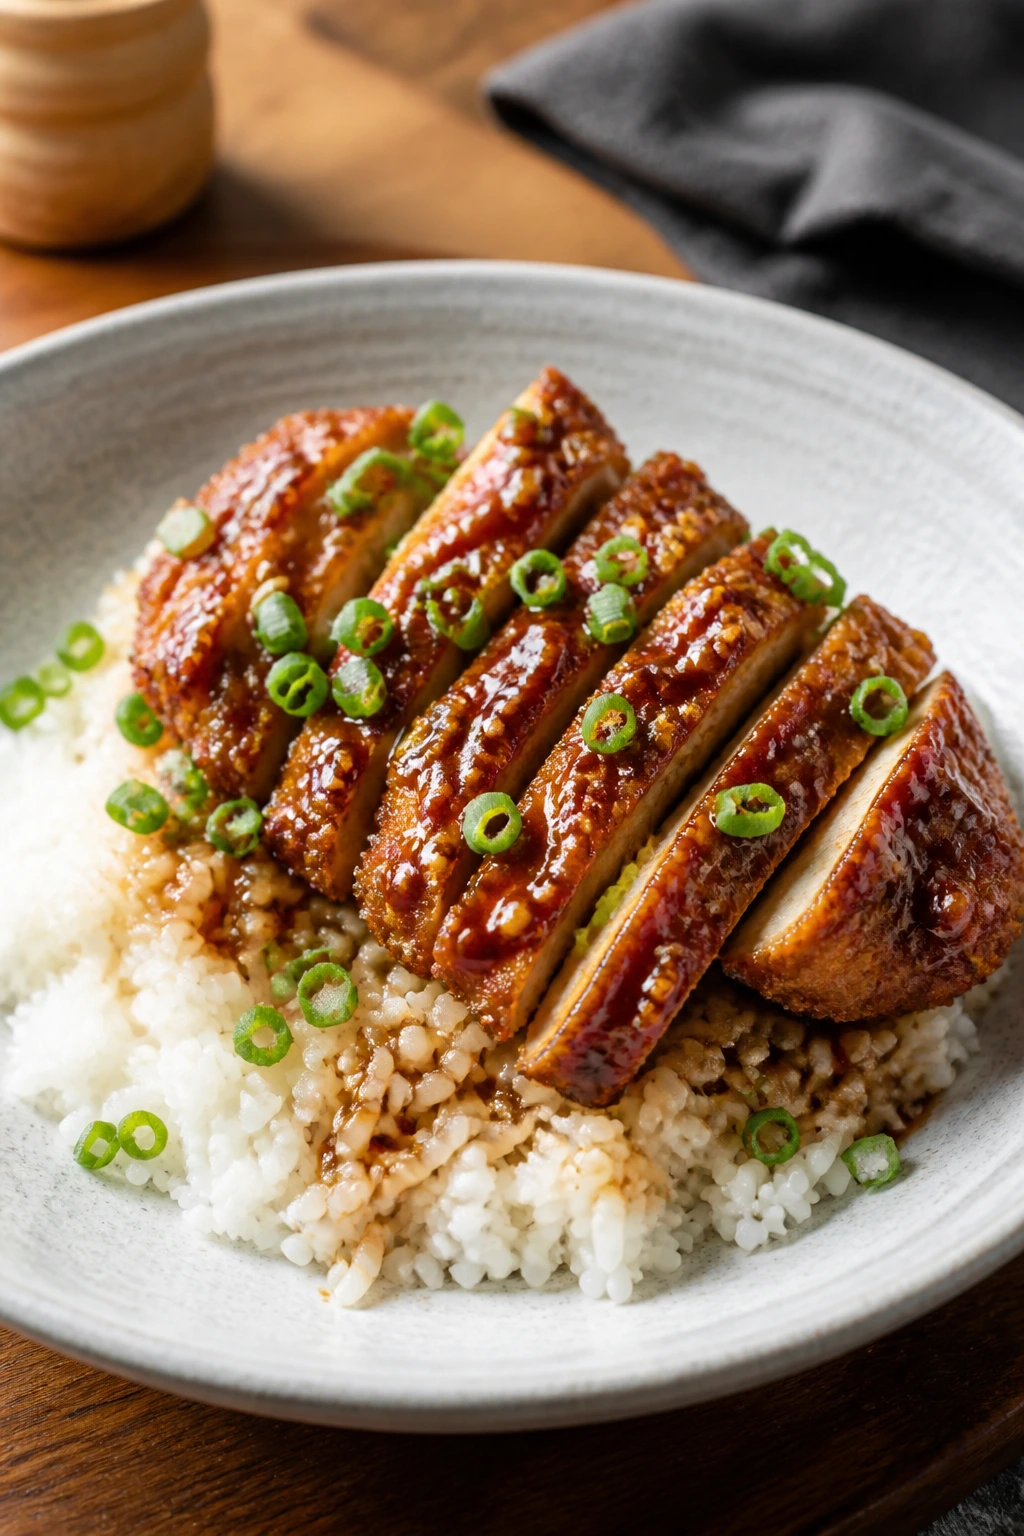
Presentation: Spoon the rice into shallow bowls first, then pile the chicken slightly off-center so the glaze stays on top instead of soaking into the rice too fast. A little sauce goes a long way when the crust is still warm and crackly.
Accompaniments: Steamed broccoli, quick cucumber slices with a pinch of salt, or blistered snap peas all work well here. I also like a tiny pile of pickled ginger on the side when I want something sharper to cut through the sweetness.
Portions: Figure on about 1 ½ cups finished bowl per adult. If you’re feeding people who eat like they haven’t seen a meal in hours, keep extra rice ready and sauce the chicken in batches so nothing sits and softens.
Beverage Pairing: Unsweetened iced green tea is my favorite match because it clears the sweet soy glaze without fighting it. A cold lager works too, and plain sparkling water with lime is the quiet, practical option.
Extra Tips That Make the Bowl Better
Flavor Enhancement: A teaspoon of toasted sesame seeds stirred into the sauce right at the end gives the glaze a faint nutty note that hangs around after the first bite. If you like a brighter finish, add a small splash of rice vinegar after the sauce thickens, not before.
Time-Saver: Cook the rice first. It can sit covered for a good 15 to 20 minutes while you handle the chicken, and that breathing room keeps the stove from turning into a traffic jam. If you own a rice cooker, this is the place to use it without apology.
Pro Move: Put the fried chicken on a wire rack while you reduce the sauce. Paper towels trap steam. Steam is the enemy here. The rack keeps the bottom edges from going limp before they ever meet the glaze.
Cost-Saver: Chicken thighs are the smart buy for this dish. They’re usually cheaper than breasts, and they tolerate a little overcooking without turning dry. That matters when you’re frying in batches and not every piece gets perfect timing.
Make-It-Yours: If you like a little burn, keep chili crisp on the table and let people finish their own bowls. If you want a lighter plate, add extra cucumber and steamed greens, then use less sauce on the rice and more on the chicken itself.
Mistakes That Turn Crunch Into Sog
Saucing the chicken too early is the fastest way to lose the texture you worked for. The coating starts out crisp, then the sauce warms it, then it softens. Fix it by waiting until the sauce is glossy and ready, and toss the chicken only at the last second before serving.
Crowding the skillet makes the chicken steam instead of fry. The coating will look blond and a little soggy at first, then it may finally brown unevenly. Keep the batch size small enough that each piece has space, even if that means frying in three rounds instead of two.
Using a sauce that never really thickens gives you the shiny look but none of the cling. If the sauce is still thin after the slurry goes in, keep simmering for another 20 to 30 seconds. The texture should feel like warm maple syrup, not soup.
Leaving wet rice at the bottom of the bowl creates a mushy middle that ruins the contrast. Rinse the rice well, cook it with the right amount of water, and let it rest before fluffing. If the rice looks wet on top, leave the lid off for a minute before serving.
Cutting the chicken pieces too small is a sneaky problem. Tiny pieces brown fast, but they also dry out fast and the coating can fall off during tossing. One-inch chunks are the sweet spot: big enough to stay juicy, small enough to eat with a spoon.
Variations for Spice, Gluten-Free, and Meatless Nights
Spicy Gochujang Bowl: Stir 1 to 2 tablespoons gochujang into the sauce base and cut the brown sugar back to 2 tablespoons. The heat lands slowly, then lingers under the soy and ginger, which makes the bowl taste deeper rather than just hotter.
Gluten-Free Sesame Chicken: Use tamari in place of soy sauce, swap the all-purpose flour for a gluten-free flour blend, and make sure your mirin is gluten-free or replace it with a little extra water and sugar. The crust will still crisp if you fry it hot and fast.
Air-Fryer Crunch Bowl: Toss the coated chicken with 1 to 2 teaspoons oil, arrange it in a single layer, and air-fry at 400°F until golden and cooked through, usually 10 to 14 minutes depending on your machine. It won’t taste exactly like skillet-fried chicken, but it keeps the kitchen cleaner and still gives you a strong crunch.
Pineapple Teriyaki Version: Replace ¼ cup of the water in the sauce with pineapple juice and add a few chunks of fresh pineapple to the bowl. The fruit plays well with the glaze and gives the sauce a brighter, almost tropical edge.
Crispy Tofu Bowl: Press extra-firm tofu for 20 to 30 minutes, cut it into 1-inch cubes, and coat it the same way you would the chicken. Pan-fry until the edges are deep gold before saucing. It’s a different texture, but the sauce logic stays exactly the same.
Storage, Reheating, and Make-Ahead Plans
The chicken is best the minute it meets the sauce, but leftovers still have a place. Store the chicken, rice, and sauce separately if you can. In the refrigerator, the chicken keeps for 3 to 4 days, the rice for 4 days, and the sauce for up to 1 week in a sealed container.
Freezing works too, though the coating won’t be as crisp after thawing. Freeze the cooked chicken for up to 2 months, wrapped tightly or packed in an airtight container. The sauce can be frozen on its own for about the same amount of time, and it usually thaws more gracefully than the chicken.
For reheating, the oven or air fryer is your friend. Spread the chicken on a rack or lined tray and warm it at 375°F for 6 to 10 minutes until hot through; the air fryer usually needs less time, around 4 to 6 minutes. The rice likes a tablespoon or two of water and a covered microwave reheat so the grains steam back to life instead of drying out.
Make the sauce ahead if you want to move faster at dinner. It can be mixed and chilled a day or two before cooking, then reheated gently with a splash of water if it thickens in the fridge. The rice can also be cooked a few hours ahead and kept covered; just fluff it again before serving so it doesn’t set into a dense block.
Questions Home Cooks Usually Ask
Can I use chicken breast instead of thighs?
Yes, but cut the breast into slightly larger pieces and watch the cooking time closely. Breast meat dries out faster, especially once it’s cut small and fried, so pull it as soon as it hits 165°F.
How do I keep the chicken crispy if I’m cooking for guests?
Fry the chicken, set it on a wire rack, and keep it in a low oven at about 200°F for a short stretch while you finish the sauce and rice. Don’t sauce it until the last minute. That little delay is the difference between crisp and soggy.
Can I bake the chicken instead of frying it?
You can, though the crust will be drier and less craggy. Bake the coated pieces on a well-oiled sheet pan at 425°F, flipping once, until golden and cooked through. I still prefer frying for this dish because the sauce clings better to a fried crust.
What if my teriyaki sauce gets too thick?
Whisk in water a teaspoon or tablespoon at a time over low heat until it loosens. If it cools and turns almost sticky, that’s still fixable; a small splash of hot water usually brings it back.
Is mirin necessary?
No, but it rounds out the sauce in a way plain sugar doesn’t. If you leave it out, use a touch more brown sugar and maybe a small extra splash of rice vinegar so the sauce doesn’t taste blunt.
What rice works best if I don’t have jasmine rice?
Short-grain rice gives a stickier bowl, long-grain white rice gives a drier one, and brown rice brings more chew. Jasmine sits in the middle, which is why I reach for it here. It carries sauce well without becoming glue.
Can I make the sauce less sweet?
Yes. Cut the honey to 1 tablespoon and the brown sugar to 3 tablespoons, then add a little more rice vinegar for balance. The goal is glossy and savory with sweetness in the background, not syrup on chicken.
Can I freeze leftovers in a single container?
You can, but the rice and chicken will suffer more texture loss than if you freeze them separately. If you plan to freeze, pack the chicken and rice in separate portions so you can reheat each one the right way.
A Bowl Worth Making Twice
There’s a reason this kind of bowl keeps showing up in home kitchens. It gives you a crisp edge, a shiny sauce, and a soft bed of rice that catches every drop without making the whole thing collapse into one texture. That contrast is the whole trick, and once you get it right, the dish starts to feel almost automatic.
The part I like most is how little it asks for once you understand the rhythm. Dry the chicken. Fry it in batches. Reduce the sauce until it clings. Serve at once. Simple, yes — but not flat, and not boring, which is a much better standard to aim for anyway.
Crispy Teriyaki Chicken and Rice — Recipe Card
Recipe Name: Crispy Teriyaki Chicken and Rice
Description: Crispy chicken thighs are pan-fried until golden, then tossed in a glossy soy-ginger teriyaki sauce and served over fluffy jasmine rice. The chicken stays crunchy at the edges because the sauce is added at the very end.
Prep Time: 20 minutes
Cook Time: 25 minutes
Total Time: 45 minutes
Course: Dinner, Main Course
Cuisine: Asian-Inspired, Chinese-Inspired
Servings: 4 servings
Calories: About 720 kcal per serving
Ingredients
For the Chicken
- 1 ½ pounds boneless, skinless chicken thighs, cut into 1-inch pieces
- 1 tablespoon soy sauce
- 1 tablespoon rice vinegar
- 1 large egg, beaten
- ½ cup cornstarch
- ½ cup all-purpose flour
- 1 teaspoon baking powder
- 1 teaspoon kosher salt
- ½ teaspoon freshly ground black pepper
- ½ teaspoon garlic powder
- ¼ teaspoon white pepper, optional
- ⅓ cup neutral oil, for pan-frying
For the Teriyaki Sauce
- ½ cup soy sauce
- ⅓ cup water
- ¼ cup light brown sugar, packed
- 2 tablespoons honey
- 2 tablespoons rice vinegar
- 1 tablespoon mirin
- 2 cloves garlic, finely grated
- 1 tablespoon fresh ginger, finely grated
- 1 teaspoon toasted sesame oil
- 1 tablespoon cornstarch mixed with 2 tablespoons cold water
For the Rice and Finish
- 1 ½ cups jasmine rice, rinsed well
- 2 ¼ cups water
- ½ teaspoon salt
- 2 scallions, thinly sliced
- 1 teaspoon sesame seeds
- 1 cup steamed broccoli florets, optional
- ½ cup sliced cucumber, optional
- Chili crisp or sliced fresh chili, optional
Instructions
- Rinse the rice, then cook it with the water and salt. Bring to a boil, cover, reduce to low, cook for 15 minutes, and rest for 10 minutes off heat.
- Whisk together the sauce base ingredients in a small saucepan. Mix the cornstarch slurry in a separate bowl.
- Toss the chicken with soy sauce and rice vinegar, then add the egg and coat with the cornstarch, flour, baking powder, salt, pepper, and garlic powder.
- Heat the neutral oil in a large skillet over medium-high. Fry the chicken in two batches until golden and cooked through, about 5 to 7 minutes per batch.
- Pour off excess oil, then simmer the sauce base until the sugar dissolves. Whisk in the slurry and cook until glossy and thick enough to coat a spoon.
- Toss the chicken in the sauce for 20 to 30 seconds, then serve over fluffed rice with scallions, sesame seeds, and optional vegetables.
Notes: Keep the sauce separate until the very end so the coating stays crisp. For a spicier bowl, add chili crisp at the table. If the sauce thickens too much, loosen it with a tablespoon of water.