
A tray of little pizza shapes does something a full pie never quite manages: it makes the kitchen smell like warm dough, garlic, and oregano long before dinner lands on the table. The edges go bronze and a little crisp, the centers stay soft, and the sauce settles into the little hollows as if the dough was shaped for it. That’s the charm right there.
Nonna-style baking was never about precision for its own sake. It was about using what was there, cutting dough into stars or rounds or tiny twists, and making sure nobody left the table hungry. The best versions don’t try to be restaurant pizza. They taste like home ovens, flour on the counter, and a hand that knows when the dough feels right.
I like these herbed pizza shapes because they solve two annoyances at once. First, they let you make something playful without turning dinner into a project. Second, they bake fast enough that the bottoms get color before the cheese has time to turn greasy. If you’ve ever watched scraps of dough disappear faster than the main pizza, you already know why this style survives in family kitchens.
Why These Herbed Pizza Shapes Feel So Much Like a Nonna Tray
These little shapes work because they keep the good parts of pizza and lose the fussy ones. You get browned edges, chewy centers, and little pockets of tomato and cheese without needing a giant peel, a blazing stone, or a perfect round circle that somehow always comes out a little lopsided anyway. The irregular shapes are part of the appeal. They look handmade because they are handmade.
There’s also a practical reason they show up so often in old-school Italian kitchens: scraps matter. A bit of dough left after a pie gets cut into stars, diamonds, ribbons, or small rounds, then brushed with oil and dotted with tomato. Nothing fancy. Nothing wasted. Children eat the little ones first, adults pretend they’re saving room, and the tray is empty before anyone starts asking who wants the corner piece.
The herb part matters too. Pizza dough on its own is good. Dough that carries a little oregano and gets finished with basil or parsley tastes deeper, cleaner, and more complete. The herbs bloom in the oil and warm up in the oven, so you don’t get that flat “sprinkled on top” taste. You get the smell that hits when the pan comes out and everyone drifts into the kitchen, which is honestly the whole point.
Why You’ll Love This Recipe
-
Hand-held and tidy: These shapes give you all the pizza flavor without the floppy-slice problem that turns dinner into a balancing act.
-
Flexible enough for scraps: If your dough circle is weird, that’s fine; stars, hearts, rounds, knots, and little rectangles all bake well here.
-
Herbs show up in every bite: Oregano in the dough, basil in the sauce, and fresh herbs at the end mean the flavor doesn’t disappear after the first chew.
-
Better texture than a loaded pie: Small shapes bake faster, so the bottoms brown before the toppings overcook or leak.
-
Easy to scale up or down: One batch makes a snack tray for a few people or a full platter for a bigger table.
-
Good warm or reheated: These shapes keep their structure better than a big slice, which makes them a smart make-ahead option.
Yield: Makes 16 small pizza shapes
Prep Time: 25 minutes
Cook Time: 15 minutes
Total Time: 1 hour 40 minutes, including rising
Chill/Rest Time: 60 to 75 minutes for the dough to rise
Difficulty: Intermediate — the dough itself is straightforward, but shaping, topping, and baking small pieces without drying them out takes a little attention.
Best Served: Warm, after a 5-minute rest from the oven
The Pantry Lineup for the Dough, Sauce, and Finish
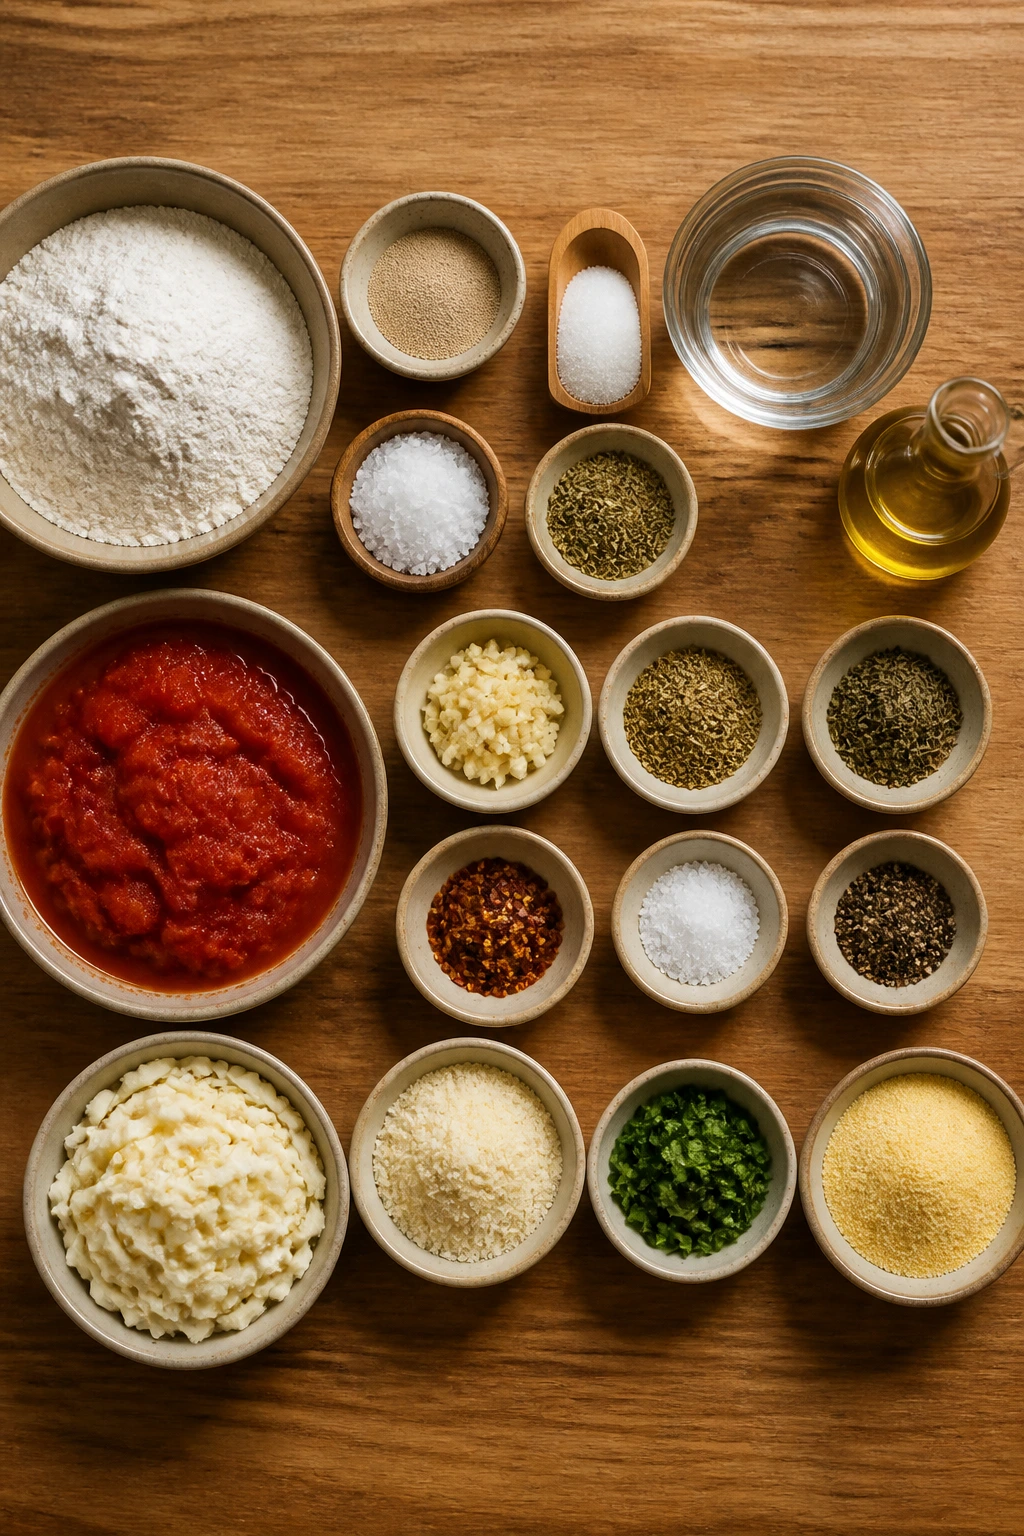
For the Dough:
-
3 1/2 cups (440 g) bread flour or all-purpose flour
-
2 1/4 teaspoons instant yeast, 1 packet
-
1 teaspoon granulated sugar
-
1 1/2 teaspoons fine sea salt
-
1 teaspoon dried oregano
-
1 1/4 cups warm water, 105°F to 110°F
-
2 tablespoons extra-virgin olive oil, plus more for the bowl
For the Herbed Tomato Topping:
-
1 cup crushed tomatoes
-
2 tablespoons extra-virgin olive oil
-
2 garlic cloves, finely grated or minced
-
1 teaspoon dried oregano
-
1 teaspoon dried basil
-
1/4 teaspoon crushed red pepper flakes
-
1/2 teaspoon fine sea salt
-
1/4 teaspoon black pepper
For the Cheese and Finish:
-
8 ounces low-moisture mozzarella, shredded
-
1/3 cup finely grated Parmigiano-Reggiano
-
2 tablespoons chopped fresh basil or parsley
-
1 tablespoon cornmeal or semolina, for dusting pans
-
1 tablespoon extra-virgin olive oil, for finishing
What Each Ingredient Is Doing in the Bowl
For the Dough
What to use: 3 1/2 cups flour, instant yeast, sugar, salt, dried oregano, warm water, and olive oil. Bread flour gives a little more chew, while all-purpose flour makes a softer bite and is easier if you’re baking for a mixed crowd.
Preparation: Whisk the dry ingredients together first so the yeast and salt are evenly spread, then add the warm water and oil. The dough should start shaggy, then become smoother with kneading.
Substitutions: You can use all-purpose flour without changing anything else. If you want a more rustic crumb, replace 1/2 cup of the flour with whole wheat and add 1 to 2 tablespoons extra water.
Tips: Keep the water warm, not hot. If it feels like bath water, you’re in the right zone. Too hot and the yeast sulks or dies; too cool and the rise drags.
For the Herbed Tomato Topping
What to use: 1 cup crushed tomatoes, olive oil, garlic, oregano, basil, red pepper flakes, salt, and black pepper. This is a short-cooked sauce, not a long-simmered ragù.
Preparation: Cook it just long enough for the garlic to lose its sharp edge and the sauce to thicken. You want it spoonable, not watery, because small shapes don’t forgive runny sauce.
Substitutions: Tomato paste loosened with a splash of water works in a pinch, though the flavor is tighter and more concentrated. If you don’t want heat, leave out the red pepper flakes.
Tips: Crushed tomatoes vary a lot. If yours taste sharp or metallic, let the sauce simmer a minute or two longer and add a pinch more salt. That edge smooths out fast.
For the Cheese and Finish
What to use: Low-moisture mozzarella, Parmigiano-Reggiano, fresh basil or parsley, cornmeal or semolina, and a little olive oil for the finish.
Preparation: Shred the mozzarella yourself if you can. Pre-shredded works, and I won’t pretend otherwise, but the freshly shredded stuff melts a little more cleanly and gives you fewer rubbery strands.
Substitutions: Provolone can stand in for part of the mozzarella. If you need a dairy-free version, use a meltable plant-based mozzarella and add a few extra herbs to keep the flavor awake.
Tips: Skip fresh mozzarella unless you’re willing to drain it well. It brings too much moisture for these small shapes, and moisture is the enemy of crisp edges.
Mixing the Dough Until It Feels Smooth and Elastic
Make the dough base:
-
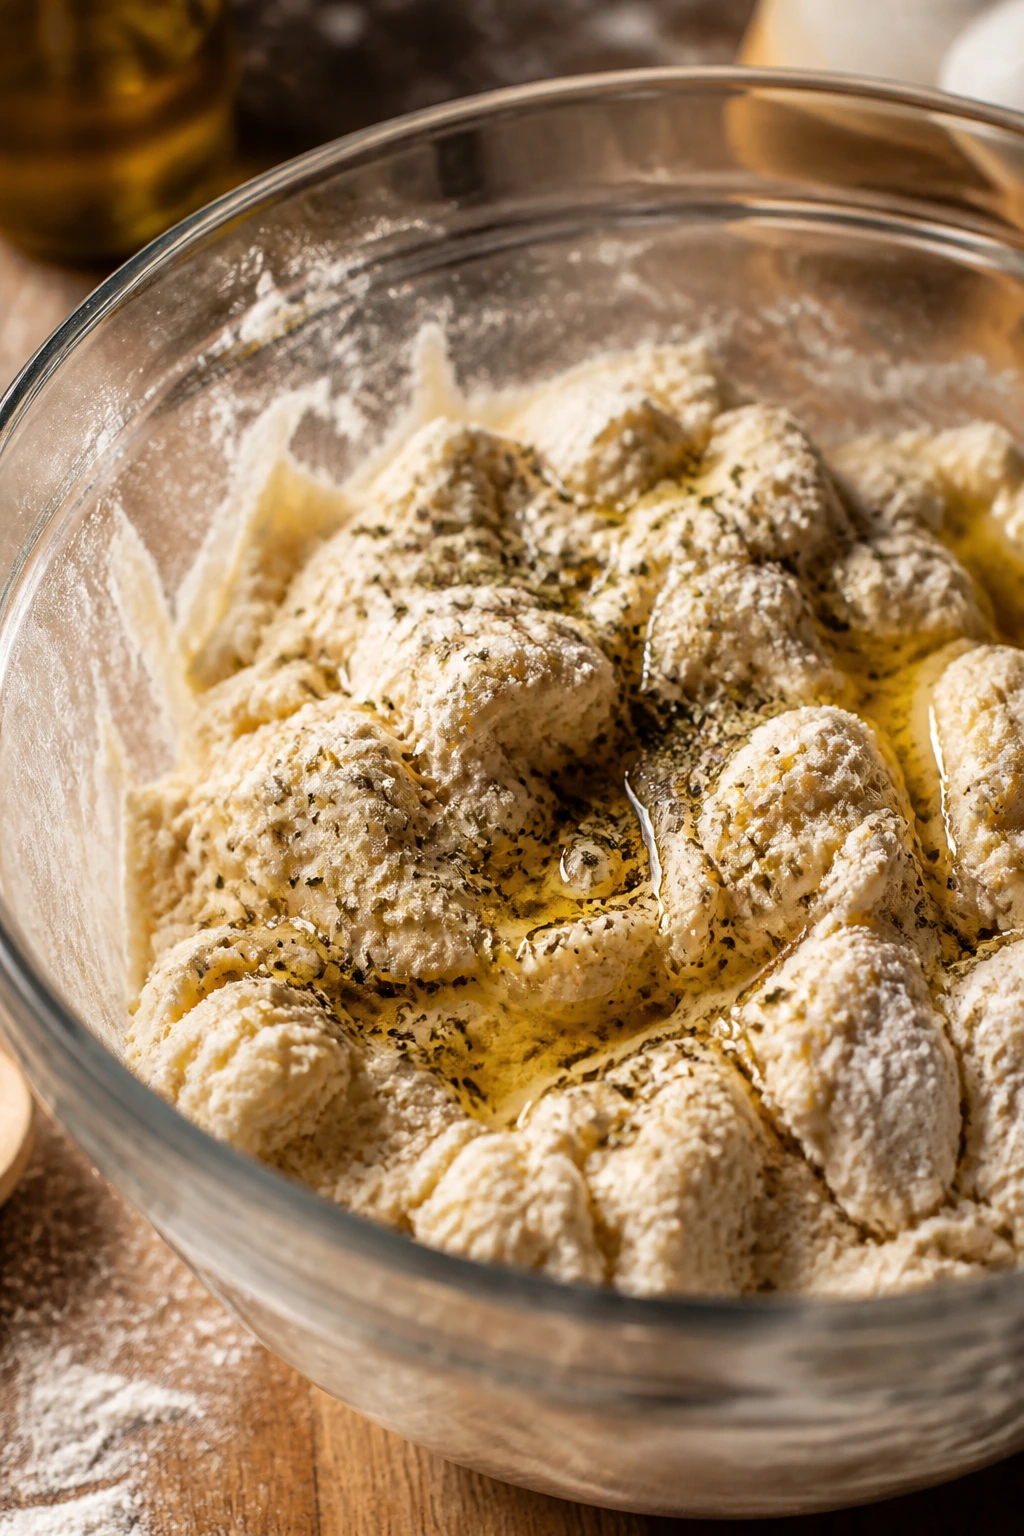
In a large bowl, whisk together the flour, instant yeast, sugar, salt, and dried oregano until the mixture looks evenly combined.
-
Pour in the warm water and 2 tablespoons of olive oil. Stir with a wooden spoon or dough whisk until the flour hydrates and a shaggy, rough dough forms. Do not worry if it looks messy at first; that stage is normal.
-
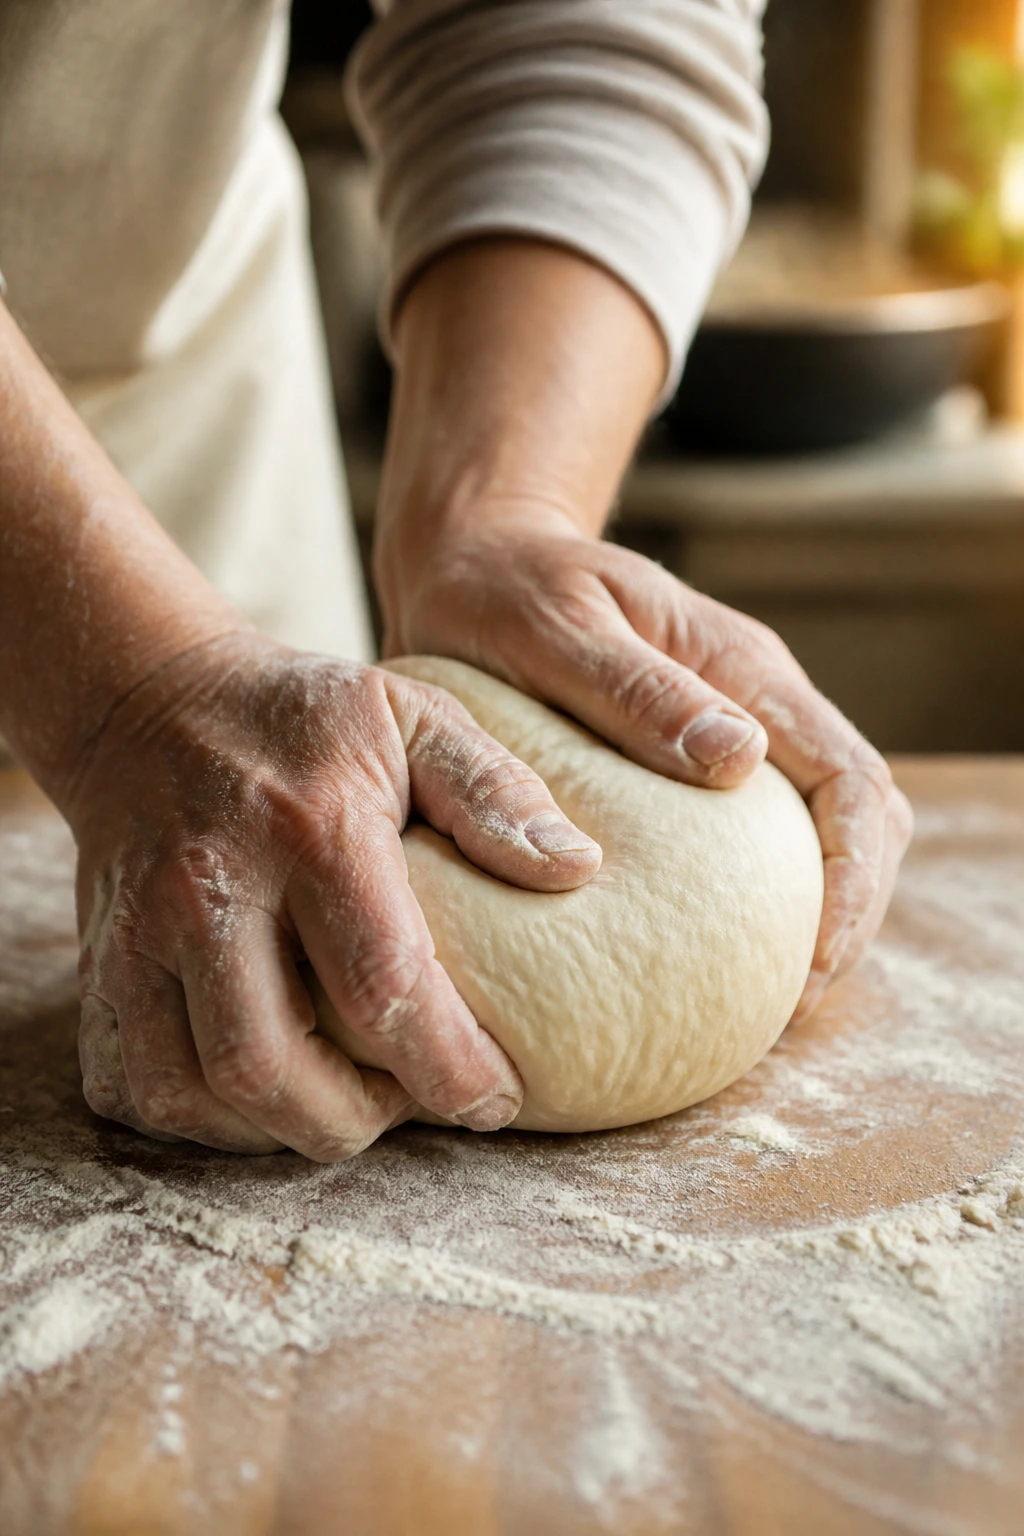
Turn the dough onto a lightly floured counter and knead for 8 to 10 minutes by hand, or 6 to 7 minutes with a stand mixer fitted with the dough hook. The dough should become smooth, springy, and only slightly tacky. If it tears when you stretch it, keep kneading.
-
Shape the dough into a ball and set it in a lightly oiled bowl. Turn it once so the surface gets a thin film of oil, then cover with a damp towel or plastic wrap.
-
Let the dough rise in a warm spot for 60 to 75 minutes, until it has roughly doubled and springs back slowly when pressed with a fingertip. If your kitchen runs cool, give it the full 75 minutes.
A good pizza dough is not dramatic. It doesn’t need to be beaten into submission. It should feel alive, pliable, and a little bouncy, like a firm pillow that relaxes when you press it. That texture matters because you’re about to cut it into shapes, and tight dough snaps back in the rolling stage like a stubborn rubber band.
If the dough feels sticky, dust your hands lightly with flour instead of dumping a pile onto the board. Too much flour on the outside makes the shapes dry and dull after baking. A little tackiness is fine. More than that, and you’re probably under-kneaded or over-watered. Both are fixable.
Building the Herbed Sauce and Cheese Filling
Cook the tomato layer:
-
Set a small saucepan over medium heat and add 2 tablespoons of olive oil and the grated garlic. Stir for about 30 seconds, just until the garlic smells sweet and soft. If it starts to brown, pull the pan off the heat for a moment.
-
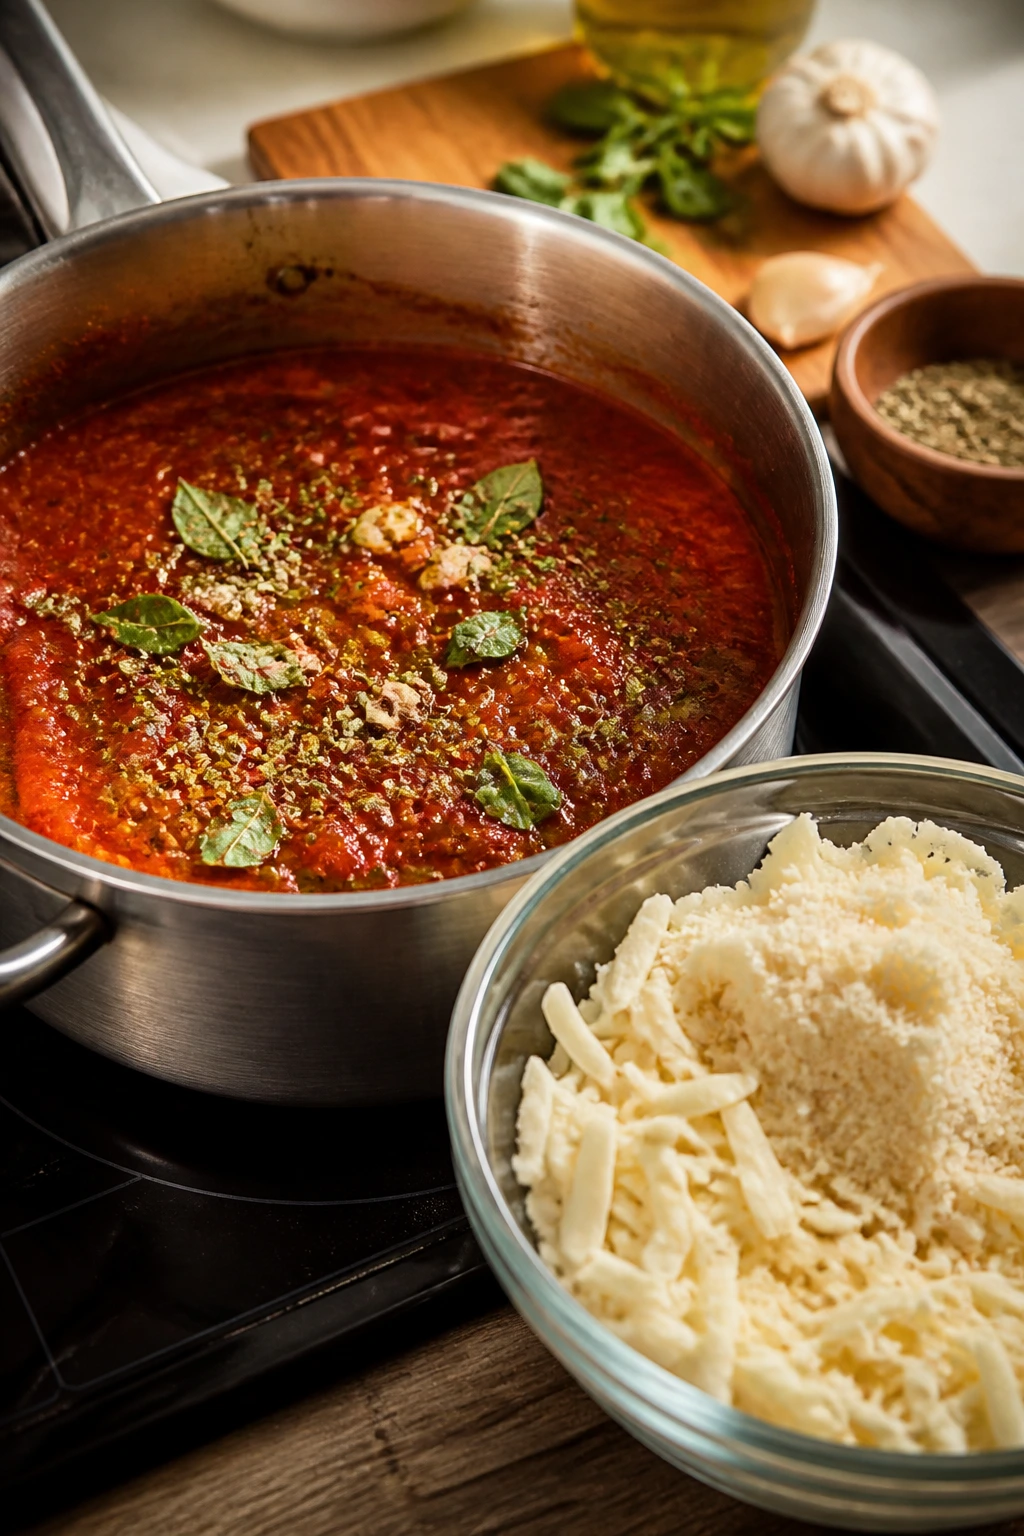
Add the crushed tomatoes, oregano, basil, red pepper flakes, salt, and black pepper. Stir well and bring the mixture to a gentle simmer.
-
Cook for 8 to 10 minutes, stirring every minute or so, until the sauce thickens enough to cling to a spoon and loses the raw, watery smell. Taste and adjust with a pinch more salt if needed. Set aside to cool.
-
In a medium bowl, combine the mozzarella, Parmigiano-Reggiano, and chopped basil or parsley. Toss lightly so the cheeses are evenly mixed.
You want the sauce thick enough that it sits where you put it. That sounds obvious, but it’s the difference between a tray of neat little pizza shapes and a tray of soft, soggy puddles. Small pieces bake fast, so they never get much time to dry out a sloppy topping.
I like crushed tomatoes here more than a jarred pizza sauce. They taste fresher, and the short cook lets the garlic and oregano stay bright. A long-cooked sauce can be lovely on a big pie. Here, it gets muddy. The shapes are small enough that you want the tomato to stay lively.
The cheese mixture should look airy, not clumped. Tossing the mozzarella with Parmigiano gives you a little stretch, a little salt, and a little nutty edge. That combo melts in a softer, cleaner way than mozzarella alone.
Cutting, Shaping, and Baking the Pizza Shapes
Prepare the oven and pans:
-
Position two oven racks in the upper-middle and lower-middle positions. Preheat the oven to 450°F (232°C). Line two sheet pans with parchment and dust them lightly with cornmeal or semolina.
-
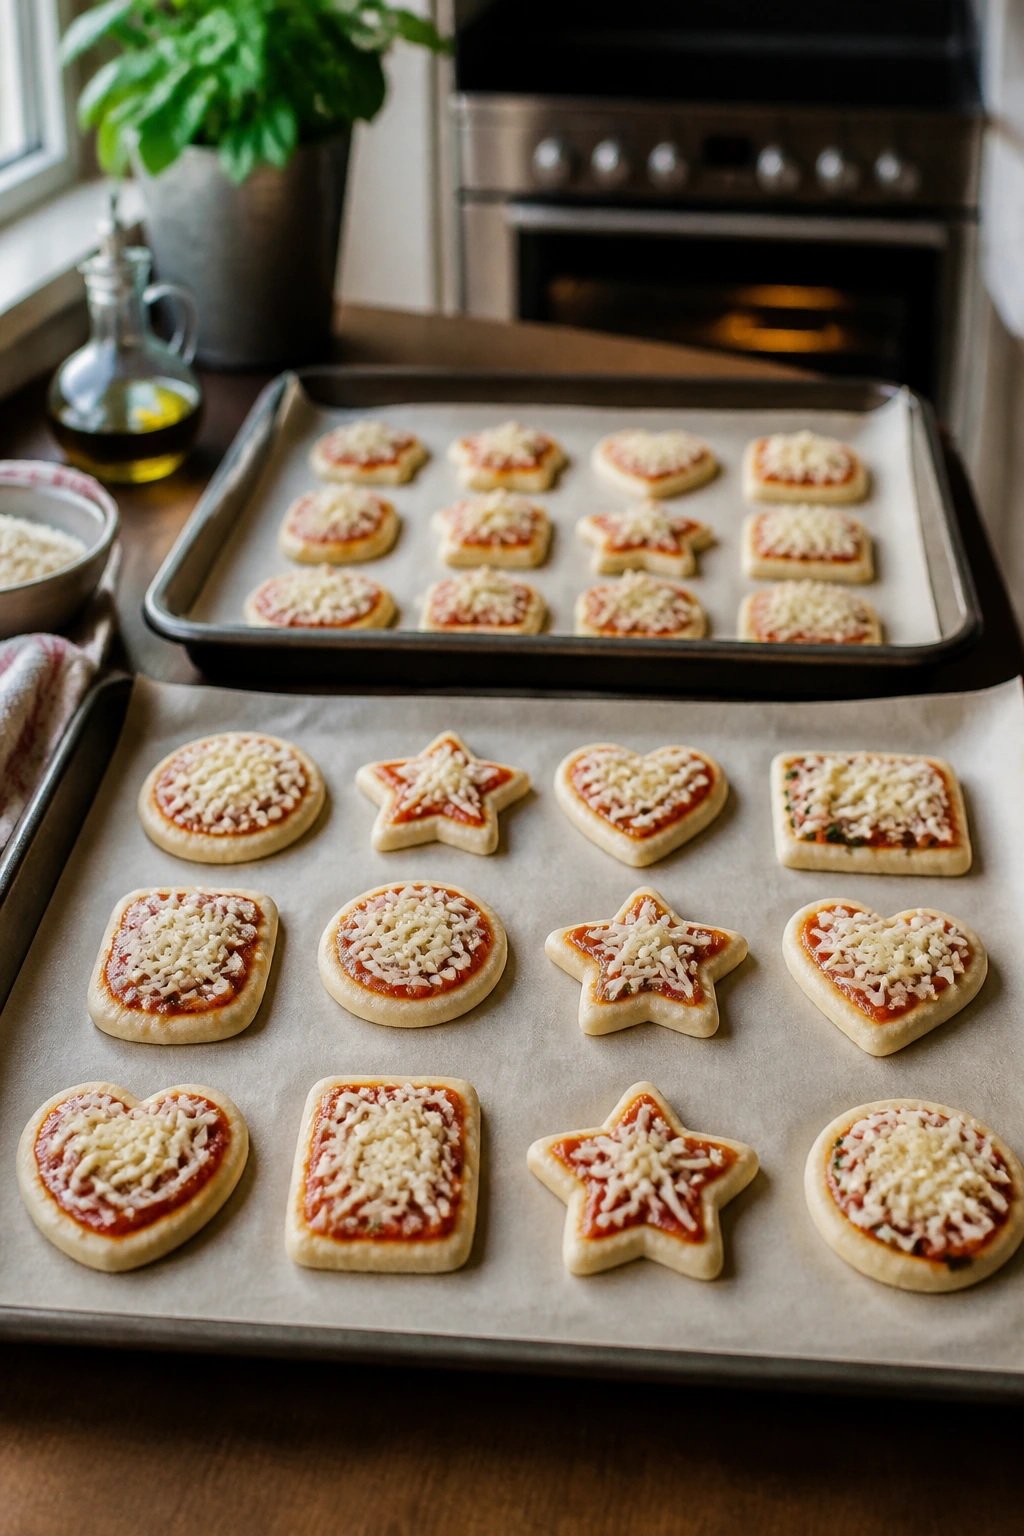
Punch down the risen dough and turn it onto a lightly floured counter. Divide it into 16 equal pieces. If you want exact portions, use a scale; if not, cut the dough in half, then half again, and keep splitting until the pieces look even.
-
Working with one piece at a time, roll the dough to about 1/8 to 1/4 inch thick. Cut into circles, stars, hearts, rectangles, or simple rounds using cookie cutters, a knife, or a small glass. Re-roll scraps once. After that, stop re-rolling or the dough gets tight and flat.
-
Transfer the cut shapes to the prepared pans, leaving about 1 inch between each piece. If the shapes have puffed centers, press them lightly with your fingertips or dock the middle once or twice with a fork.
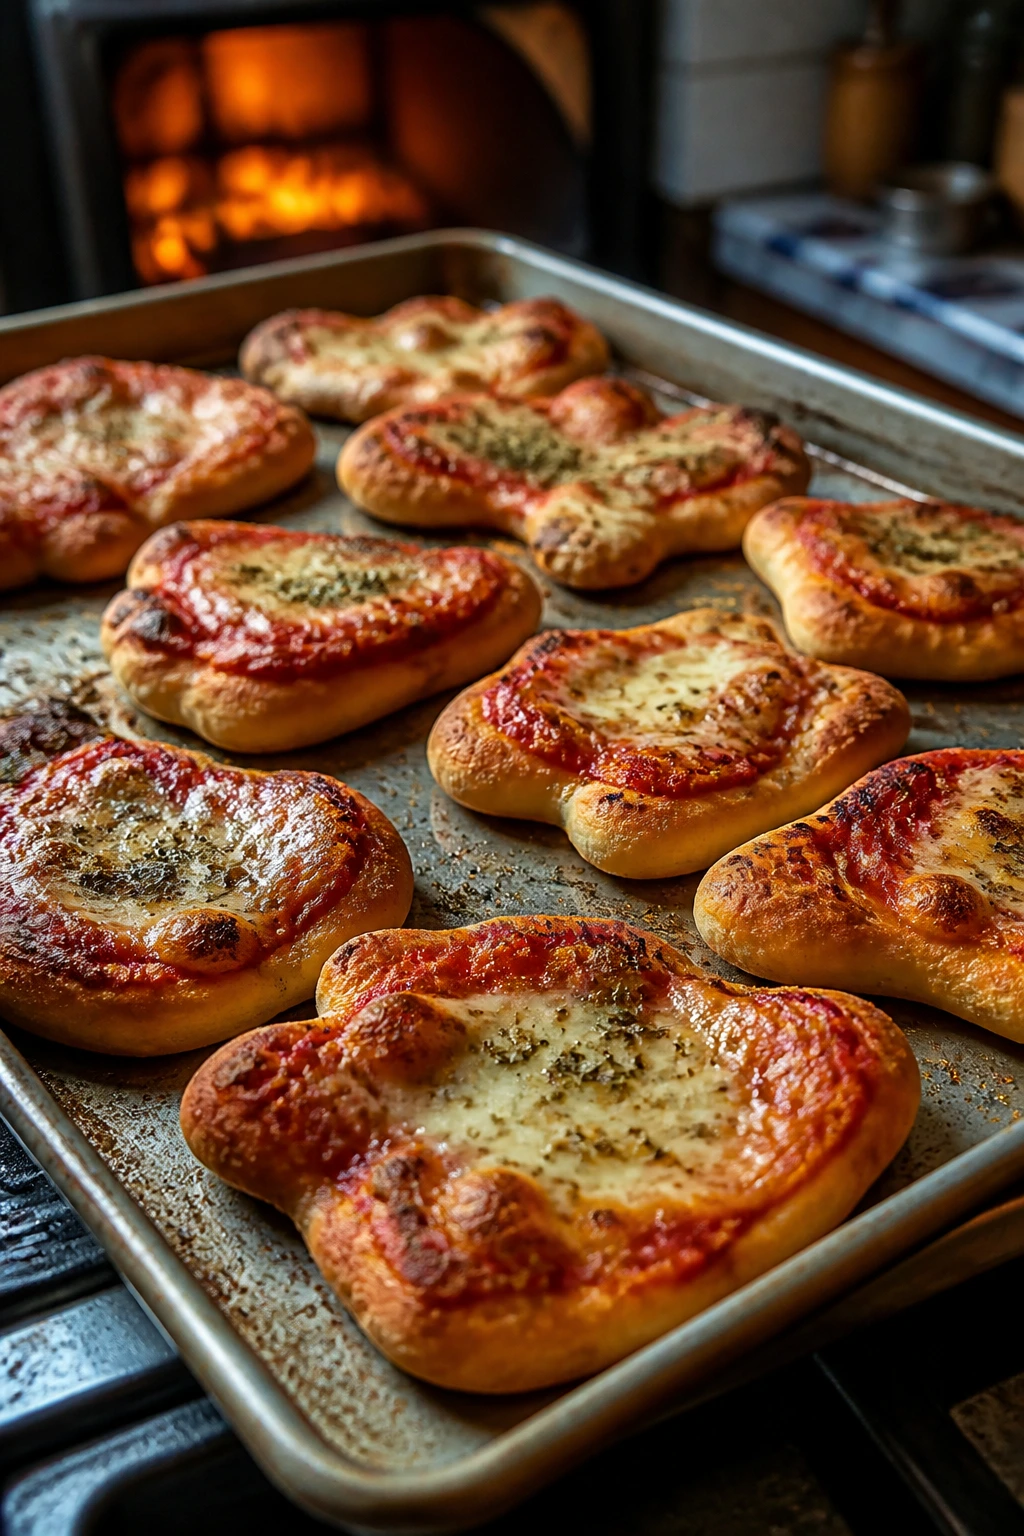
Top and bake:
-
Spoon 1 to 2 teaspoons of the cooled tomato sauce onto each shape, keeping a small border around the edge. Sprinkle the cheese mixture over the sauce. Don’t bury the shapes under a thick blanket of topping; a light hand keeps the bottoms crisp.
-
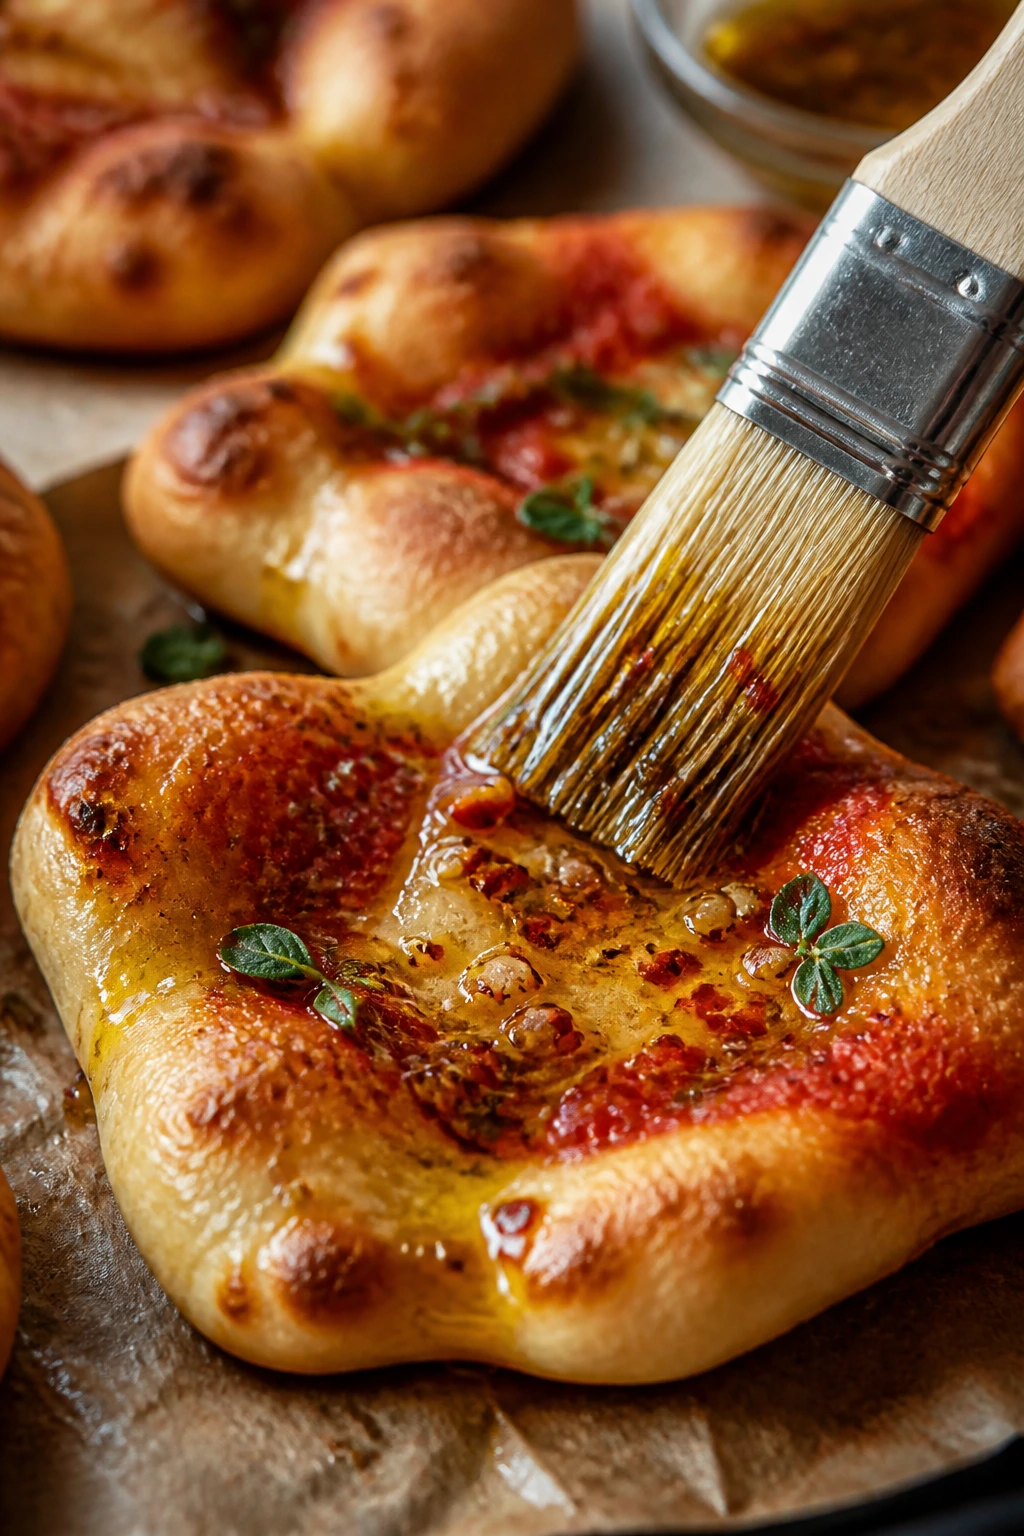
Brush the exposed edges with a little olive oil and, if you like, add a tiny pinch of dried oregano or flaky salt. Slide the pans into the oven and bake for 12 to 15 minutes, rotating the pans halfway through, until the edges are golden and the cheese is melted with a few toasted spots. If one corner of the pan browns faster, turn that pan front to back.
-
Let the shapes rest on the pans for 5 minutes, then transfer to a wire rack or serving board. Finish with the fresh basil or parsley and a thin drizzle of olive oil.
A short bake is the whole trick here. If you go too far, the herbs darken and the tiny edges dry out before the centers set. Watch for the moment when the cheese just starts to spot and the bottoms have enough color to lift cleanly from the parchment.
The shapes should feel delicate but not fragile. If you pick one up and the center droops like a wet towel, it needed another minute or less in the oven. If the cheese is blistered and the edge is too dark, that’s a sign your oven runs hot, not that the recipe failed. Ovens are moody. They lie.
Serving the Tray While the Edges Are Still Crisp
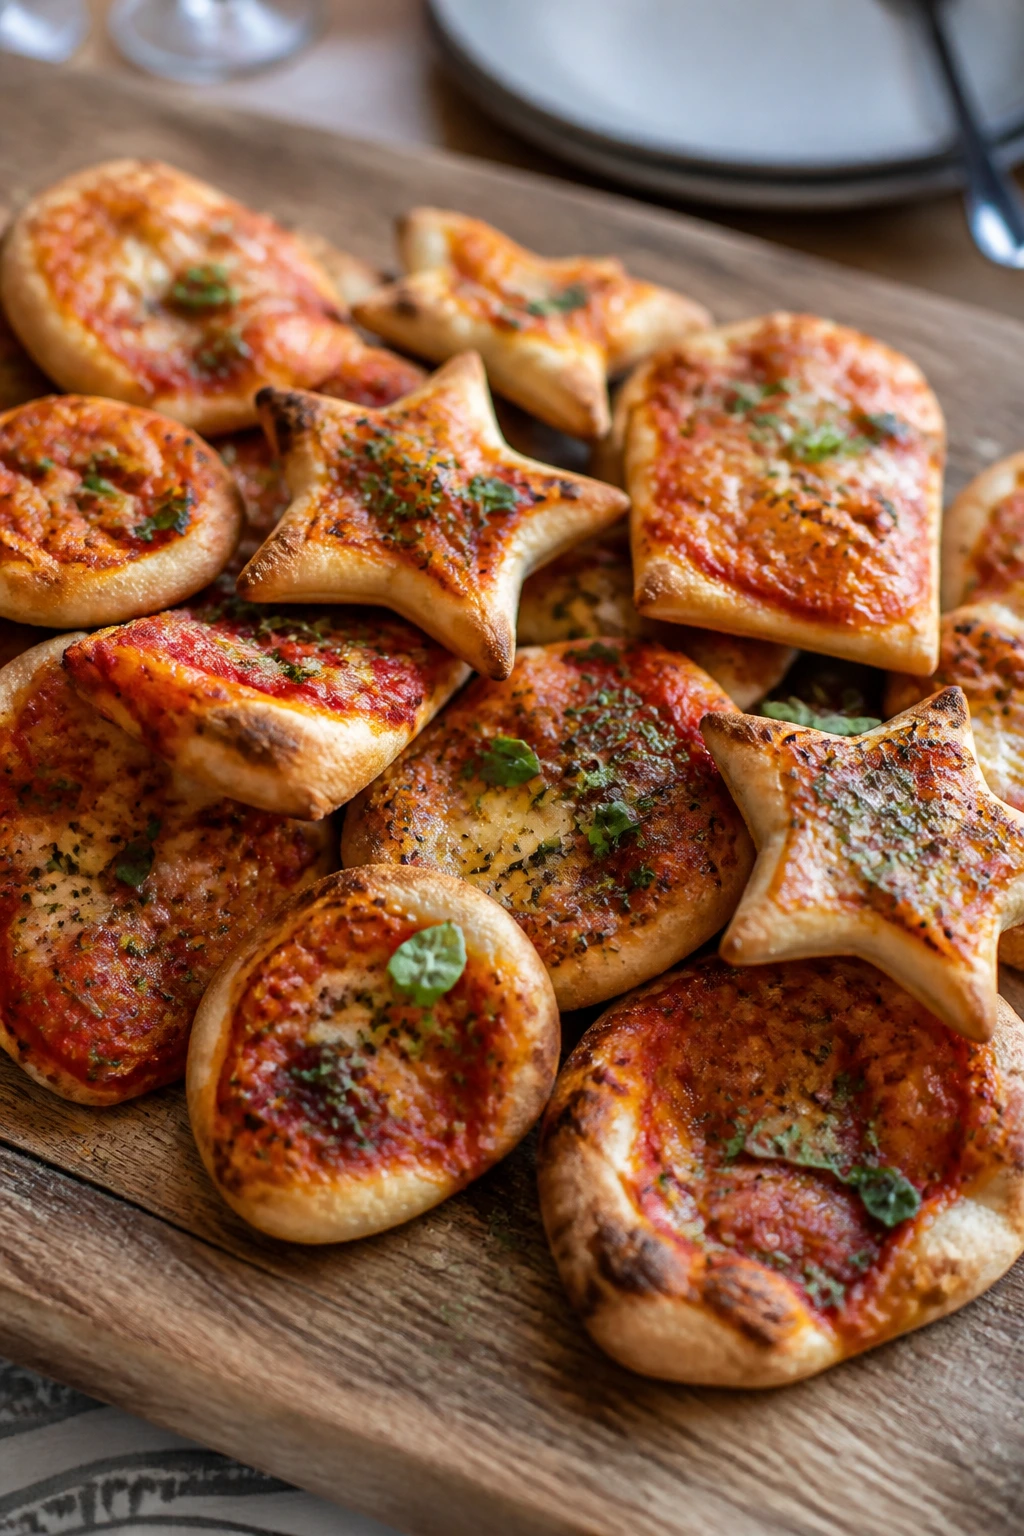
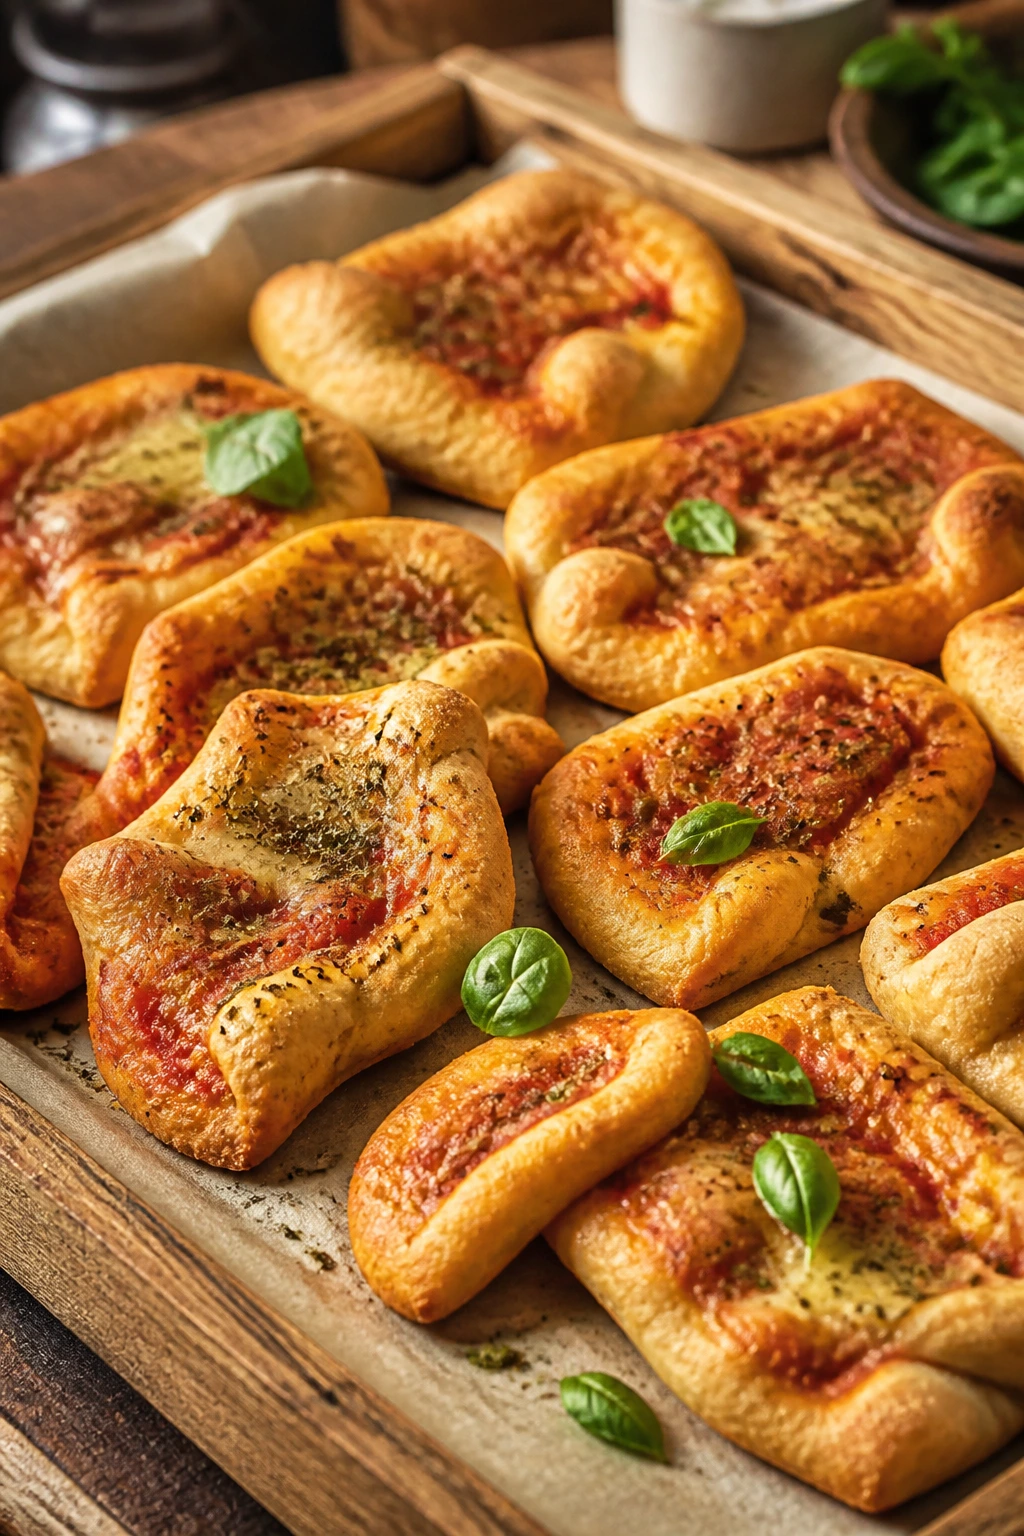
Presentation: Pile the shapes on a large wooden board or a wide platter while they’re still a little warm. The mix of stars, rounds, and little squares looks best when it feels casual, not lined up like a catalog shoot. Scatter the herbs over the top right before serving so they stay green instead of wilting into the cheese.
Accompaniments: Serve them with a bowl of extra warm tomato sauce for dipping, a bitter green salad with shaved fennel, or a plate of olives and marinated artichokes. If you want a fuller spread, add roasted peppers and a loaf of crusty bread, though honestly the shapes do a lot of the work on their own.
Portions: Plan on 2 to 3 shapes per person as a snack or starter, 4 to 5 shapes if they’re the main event, and a few extra if you have a table full of people who hover near the tray. The recipe makes 16 small shapes, which usually feeds 4 to 6 depending on appetite and what else is on the table.
Beverage Pairing: A dry Lambrusco or a crisp Italian white like Verdicchio sits well beside the herbs and tomato. If you’re skipping wine, sparkling water with lemon or a cold blood orange soda keeps the plate feeling bright.
The nicest way to serve these is with a bowl of something extra, even if the shapes don’t need it. People like a dip. They like a little choice. A spoonful of sauce on the side makes the whole tray feel more generous, and it gives the crispest edges a chance to stay crisp instead of soaking up whatever sauce was on top.
Small Tweaks That Make the Whole Batch Better
Flavor Enhancement: Finish the baked shapes with a tiny drizzle of olive oil that’s been warmed with a smashed garlic clove and a pinch of chili flakes. It smells like someone knew what they were doing all along, which is nice, even if it only took 30 seconds.
Time-Saver: Make the sauce while the dough rises. You only need one saucepan and about 10 minutes, and cooling the sauce during the rise means you’re not waiting around at the end. If you’re using a stand mixer, the whole prep gets easier fast.
Texture Trick: Dust the parchment with semolina or cornmeal, not a heavy layer of flour. Flour burns and turns pasty in spots. Semolina gives you a drier, cleaner bottom and keeps the shapes from clinging to the pan like glue.
Make-It-Yours: For a more savory tray, add a few thin slices of black olive, a couple of chopped capers, or a strip of roasted red pepper on top of the cheese. For a milder version, keep the herbs in the dough and sauce, then skip the red pepper altogether.
Finish Matters: Fresh herbs go on after baking, not before. Basil that sits in a hot oven turns dark and loses its bright smell. Parsley holds up a little better, but even that tastes better if it lands on the tray at the end.
There’s also a little trick I use when I want these to taste a bit richer without adding more toppings. I brush the edges with olive oil the second they come out of the oven, not before. The oil settles into the crust while it’s hot and gives the outside a soft sheen and a deeper baked smell. Small move. Big payoff.
Common Mistakes That Make the Shapes Flat or Soggy
-
Rolling the dough too thin at the points. The edges of stars, hearts, and flowers burn before the center is done, so the whole shape ends up dry and brittle. Keep delicate shapes a little thicker than you think, and avoid knife-thin tips unless you want crisp crackers.
-
Using sauce that’s still loose and watery. The symptom is obvious: shiny puddles on the pan and a soft bottom that won’t lift cleanly. Fix it by simmering the sauce until it coats a spoon and cooling it before topping.
-
Dumping on too much cheese. A thick layer looks generous for about two minutes, then it melts into a heavy blanket that steams the dough. Use a light sprinkle. The mozzarella should sit on top of the sauce, not bury it.
-
Skipping the rest after baking. Hot cheese slides and hot steam softens the crust. Give the tray 5 minutes before serving so the bottoms set and the topping settles down.
-
Re-rolling scraps over and over. The dough gets tight, the shapes shrink in the oven, and the final batch bakes up denser than the first. Re-roll once, maybe twice if you’re patient, then turn the last scraps into a rustic knot or one small round.
-
Baking on a cold, crowded pan. If the pan is packed, the shapes steam instead of browning. If the pan is cold and thick with parchment folds, the bottoms lag. Leave space between pieces and use a lined, prepped sheet that can take heat fast.
I see the same problem with these shapes more than anything else: people think small means forgiving. Sometimes it does. Here, it means the opposite. Small pizza pieces give you less room to hide sloppy sauce or wet cheese. The good news is that the fix is simple. Keep the topping restrained, and the oven does the rest.
Variations That Still Taste Like Family Pizza Night
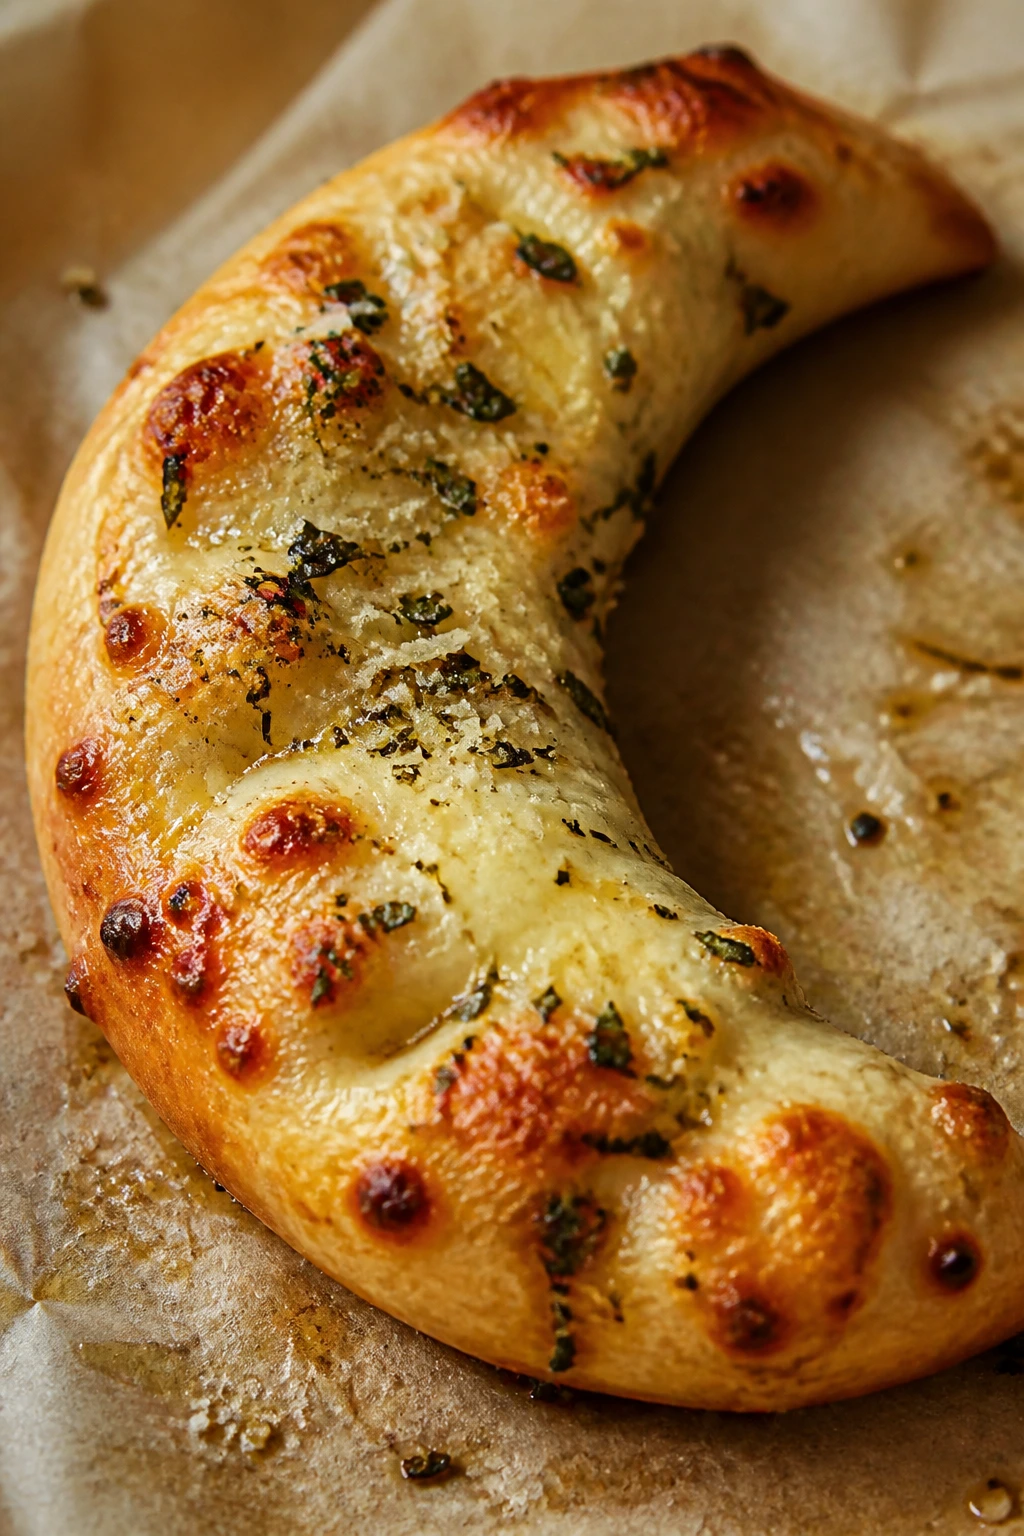
Garlic-Parmesan Moon Shapes
Skip the tomato sauce and brush the dough with garlic oil, then top with mozzarella, Parmigiano, and a little chopped parsley. These bake into soft, savory bites with a crisp edge and are especially good when you want something less saucy on the table.
Sicilian Garden Patch
Add finely chopped olives, a few capers, and thin strips of roasted red pepper to the tomato topping. The briny bits cut through the cheese and give the little shapes a sharper, more grown-up flavor without making them feel busy.
Spicy Soppressata Stars
Tuck a small piece of soppressata or thin pepperoni under the cheese on each shape, then finish with crushed red pepper. The meat crisps at the edges and gives you a salty bite that works well for game-day snacking or a heavier starter.
Dairy-Free Herb Tray
Use a meltable dairy-free mozzarella and skip the Parmigiano. Add a little extra basil and a drizzle of olive oil after baking so the flavor still feels full. The texture won’t be identical, but the shape and herbed tomato base still carry the idea well.
Whole-Wheat Rustic Rounds
Replace 1 cup of the flour with whole-wheat flour and add 1 to 2 tablespoons more water during mixing. The dough comes out nuttier and a bit earthier, which suits the tomato sauce nicely. Keep the shapes slightly thicker so they stay tender.
Each variation should still behave like a pizza shape, not a pile of toppings on bread. That means light hands, warm oven, and a willingness to let the dough show through. Once you keep that rule, you can wander pretty far without losing the soul of the tray.
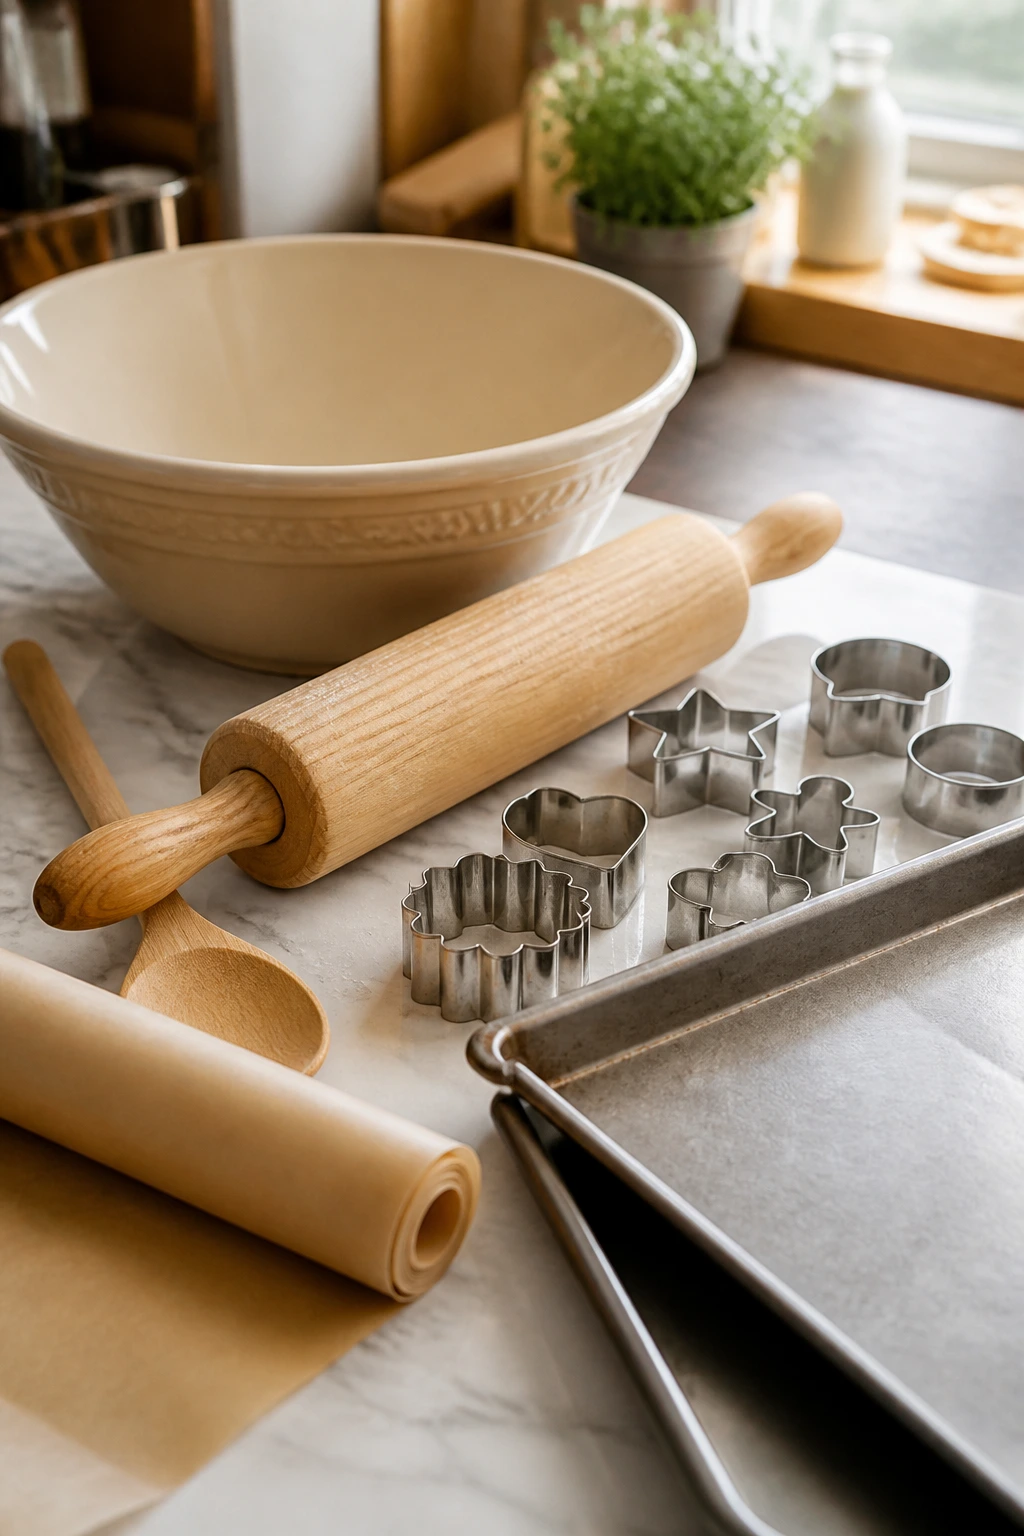
Tools You’ll Reach For More Than Once
-
Large mixing bowl: Big enough to let the dough rise without climbing the sides.
-
Wooden spoon or dough whisk: Useful for bringing the dough together before kneading.
-
Stand mixer with dough hook, optional: Nice to have, not required.
-
Rolling pin: Keeps the shapes even; a wine bottle works in a pinch, but it’s less pleasant.
-
Cookie cutters, small glass, or sharp knife: Use whatever makes the shapes you want.
-
Two rimmed sheet pans: The rim keeps melted cheese and oil from wandering off the pan.
-
Parchment paper: Keeps the bottoms from sticking and makes cleanup easier.
-
Small saucepan: For the tomato sauce.
-
Pastry brush: Handy for the olive oil finish on the edges.
-
Wire rack: Helps the bottoms stay crisp after baking.
-
Measuring cups and spoons or a kitchen scale: A scale gives more even dough pieces, which helps the tray bake at the same pace.
Keeping Leftovers, Dough, and Sauce in Good Shape

Leftover baked shapes keep best once they’ve cooled fully. Pack them in an airtight container and store them in the fridge for up to 4 days. If you stack them, slip a piece of parchment between layers so the tops don’t stick to each other.
Reheat them in a 375°F (190°C) oven for 6 to 8 minutes, or until the cheese softens and the edges feel lively again. A toaster oven works well for small batches. The microwave will make them soft and a little limp, which is fine if you’re desperate, but it does not respect the crust you worked for.
You can freeze the baked shapes for up to 2 months. Freeze them in a single layer first, then transfer to a freezer bag or container. Reheat straight from frozen at 375°F for about 10 to 12 minutes. They won’t taste exactly like fresh-from-the-oven pieces, but they hold up better than most homemade pizza leftovers.
The dough itself can be made ahead too. After the first rise, punch it down, wrap it tightly, and refrigerate it for up to 24 hours. Let it sit at room temperature for 30 to 45 minutes before rolling so it relaxes. The sauce also keeps well in the fridge for 4 days, which makes the whole recipe easy to split across two days without feeling like you’ve committed to a kitchen marathon.
One old kitchen rule still holds here: once baked pizza pieces sit out for about 2 hours, they belong in the fridge. That matters more when cheese is involved, and these shapes usually disappear quickly enough that it’s a non-issue. Still, good habits save arguments later.
Questions People Ask Before They Bake Herbed Pizza Shapes

Can I use all-purpose flour instead of bread flour?
Yes. All-purpose flour makes a softer, slightly less chewy dough, and it’s the easier pick if you want a lighter bite. Bread flour gives a bit more stretch and a more obvious pizza chew, but either one works.
Do I have to make the dough by hand?
No. A stand mixer with a dough hook saves time and keeps your counter cleaner. The dough still needs a quick hand check, though; you want it smooth and elastic, not just mixed.
Can I use fresh mozzarella?
You can, but I wouldn’t make it my first choice here. Fresh mozzarella carries too much moisture unless you drain and pat it dry very well, and these small shapes bake fast, so extra water shows up as soggy bottoms.
How do I stop the centers from puffing up?
Dock the dough with a fork after shaping or press it gently with your fingertips before adding sauce. If bubbles still form, tap them down halfway through the bake with the tip of a knife or a fork. A little puff is fine; ballooning isn’t.
Can I freeze the dough before baking?
Yes. Freeze the dough after the first rise and divide it into portions first if you want easier handling later. Thaw it in the fridge overnight, then let it rest at room temperature until it softens enough to roll.
Is an air fryer a good option for these?
It can work for a small batch. Keep the shapes in a single layer, lower the temperature a bit to around 350°F, and start checking at 6 minutes. The edges brown fast, so don’t walk away and get distracted by a text message.
What if my dough keeps shrinking back when I roll it?
That usually means it needs more rest. Cover it for 10 minutes, then try again. Gluten tightens when it’s been worked, and a short pause lets the dough relax so you can cut cleaner shapes.
A Tray Worth Waiting For
There’s a reason these little pizza shapes hang around in family kitchens long after fancier doughs and clever toppings come and go. They’re humble, practical, and a little playful, which is a good combination when you want dinner to feel warm without turning into a project. A tray like this gives you crisp edges, soft centers, and the smell of oregano and tomato that pulls everyone closer to the oven.
What I like most is how forgiving they are without being careless. If you keep the sauce thick, the dough relaxed, and the toppings light, they reward you with the kind of bake that disappears fast and gets talked about later. That’s the sort of recipe Nonna would understand at a glance. If you’ve got a bowl, a sheet pan, and a little time, cut the dough into shapes and let the oven do what it does best.
Herbed Pizza Shapes Like Nonna Used to Make — Recipe Card
Recipe Name: Herbed Pizza Shapes Like Nonna Used to Make
Description: Tender pizza dough cut into little shapes, topped with a thick herbed tomato sauce, mozzarella, and Parmigiano-Reggiano, then baked until the edges turn golden. The tray comes out with crisp bottoms, soft centers, and a smell that fills the kitchen fast.
Prep Time: 25 minutes
Cook Time: 15 minutes
Total Time: 1 hour 40 minutes, including rise time
Course: Appetizer, Snack, Main Course
Cuisine: Italian-American, Mediterranean
Servings: 4 to 6
Calories: About 430 kcal per serving
Ingredients
For the Dough:
- 3 1/2 cups (440 g) bread flour or all-purpose flour
- 2 1/4 teaspoons instant yeast, 1 packet
- 1 teaspoon granulated sugar
- 1 1/2 teaspoons fine sea salt
- 1 teaspoon dried oregano
- 1 1/4 cups warm water, 105°F to 110°F
- 2 tablespoons extra-virgin olive oil, plus more for the bowl
For the Herbed Tomato Topping:
- 1 cup crushed tomatoes
- 2 tablespoons extra-virgin olive oil
- 2 garlic cloves, finely grated or minced
- 1 teaspoon dried oregano
- 1 teaspoon dried basil
- 1/4 teaspoon crushed red pepper flakes
- 1/2 teaspoon fine sea salt
- 1/4 teaspoon black pepper
For the Cheese and Finish:
- 8 ounces low-moisture mozzarella, shredded
- 1/3 cup finely grated Parmigiano-Reggiano
- 2 tablespoons chopped fresh basil or parsley
- 1 tablespoon cornmeal or semolina, for dusting pans
- 1 tablespoon extra-virgin olive oil, for finishing
Instructions
-
Whisk together the flour, yeast, sugar, salt, and oregano. Add the warm water and olive oil, then stir until a shaggy dough forms.
-
Knead the dough for 8 to 10 minutes by hand, or 6 to 7 minutes with a stand mixer, until smooth and elastic. Place it in an oiled bowl, cover, and let it rise for 60 to 75 minutes, until doubled.
-
Make the topping by heating olive oil and garlic in a small saucepan over medium heat for about 30 seconds. Add the tomatoes, oregano, basil, red pepper flakes, salt, and pepper, then simmer for 8 to 10 minutes until thick. Cool slightly.
-
Mix the mozzarella, Parmigiano-Reggiano, and fresh herbs in a bowl. Preheat the oven to 450°F (232°C) and line two sheet pans with parchment. Dust lightly with cornmeal or semolina.
-
Punch down the dough, divide it into 16 pieces, and roll each piece to 1/8 to 1/4 inch thick. Cut into shapes with cutters or a knife, then transfer to the pans.
-
Spoon 1 to 2 teaspoons of sauce onto each shape, top with the cheese mixture, and brush the edges with olive oil. Bake for 12 to 15 minutes, rotating the pans halfway through, until the edges are golden and the cheese is melted.
-
Rest the shapes for 5 minutes, then finish with fresh basil or parsley and a small drizzle of olive oil before serving.
Notes: Keep the sauce thick, use low-moisture mozzarella, and don’t overfill the shapes. For a dairy-free version, swap in a meltable plant-based mozzarella and add extra basil at the end.