
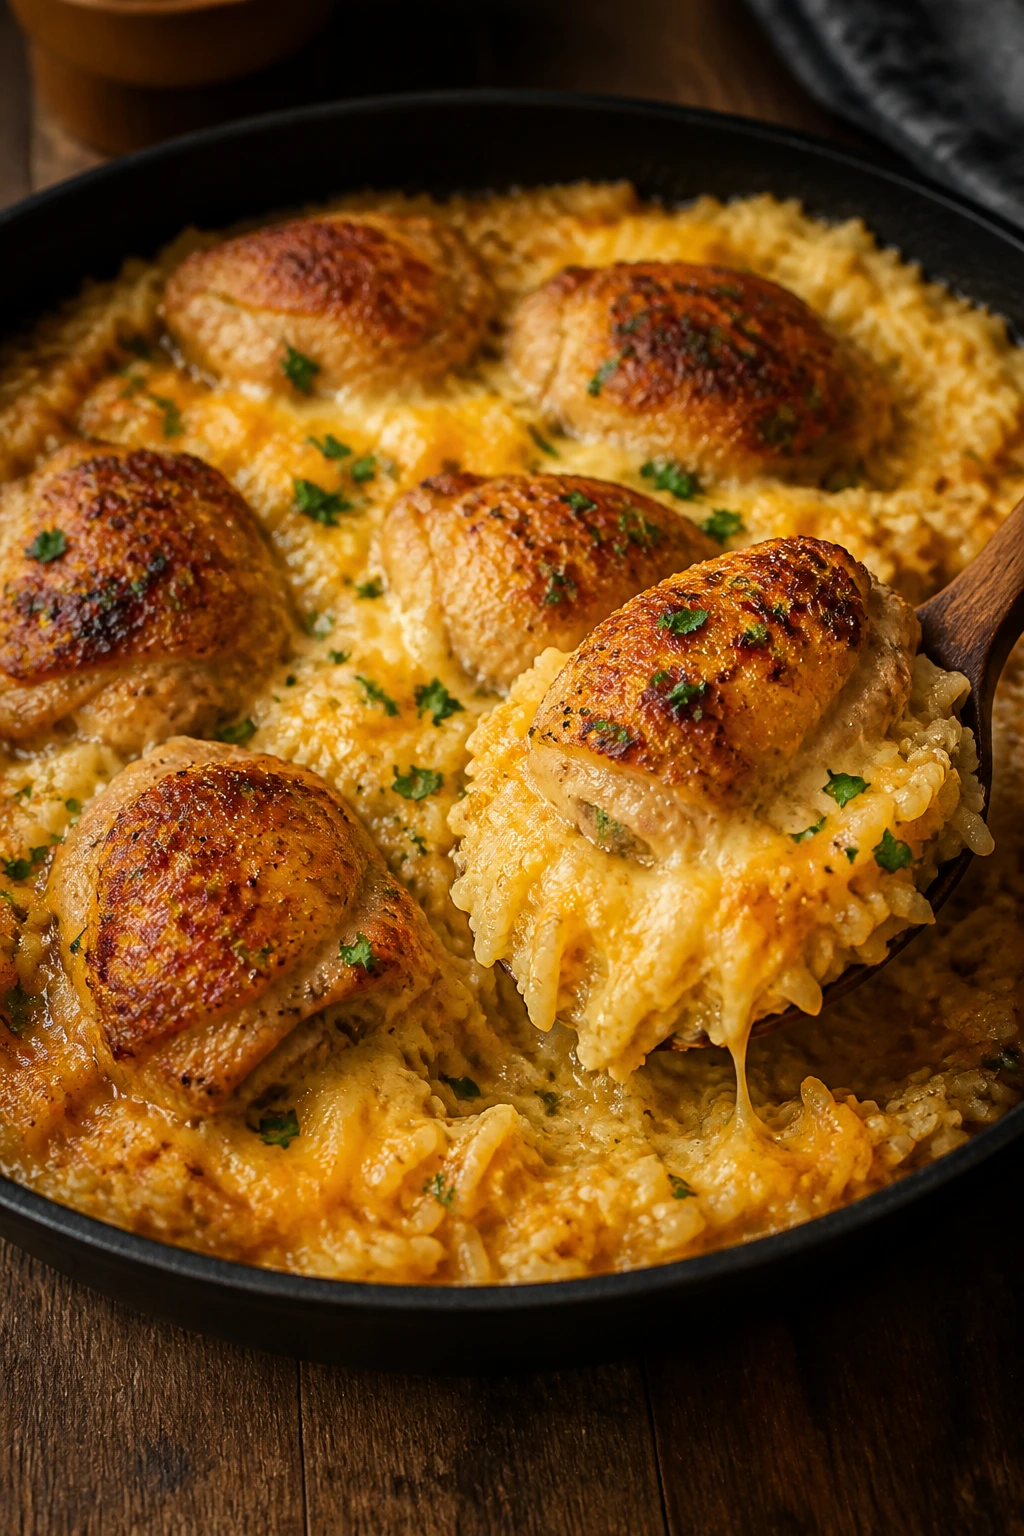
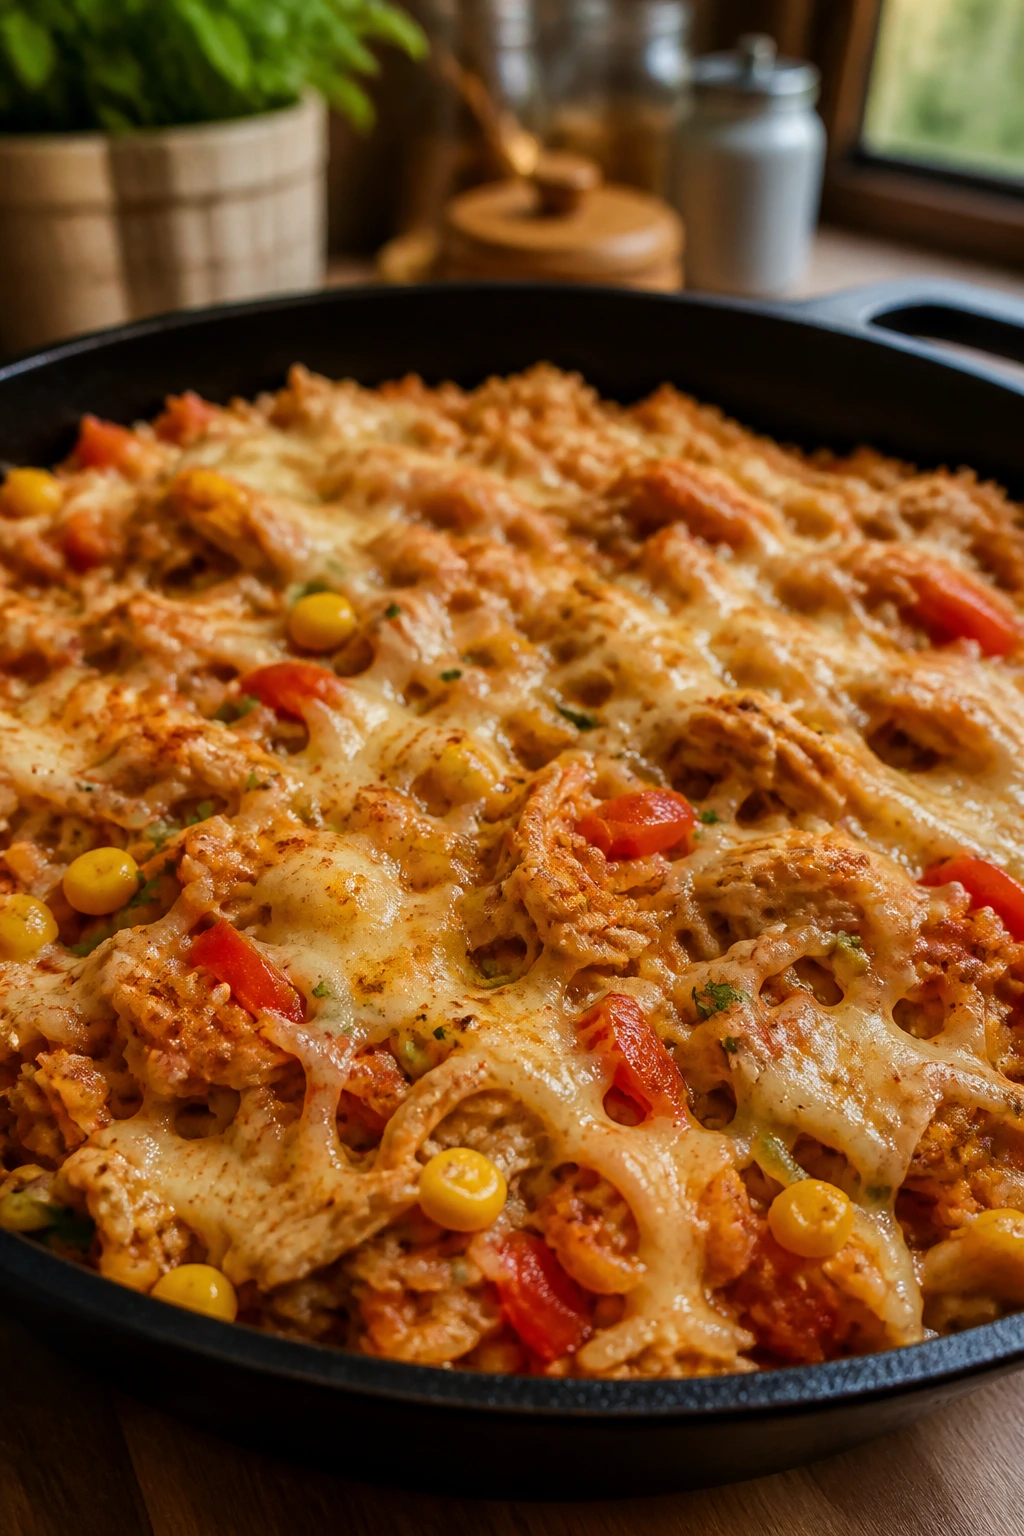
Some dinners look easy and taste tired. Others look a little plain in the pan and turn into the kind of meal people keep sneaking back to the stove for. Juicy cheesy chicken and rice lives in that second camp: browned chicken thighs, rice that soaks up savory broth instead of collapsing into mush, and a layer of cheddar that melts into the grains without turning the whole thing heavy.
The trick is not magic. It’s order. Brown the chicken first so the skillet gets those deep, salty bits stuck to the bottom, toast the rice for a minute so each grain holds itself together, then let the oven finish the job while the lid traps steam. That sequence is what keeps the chicken tender and the rice rich without becoming soft in a sad, gluey way.
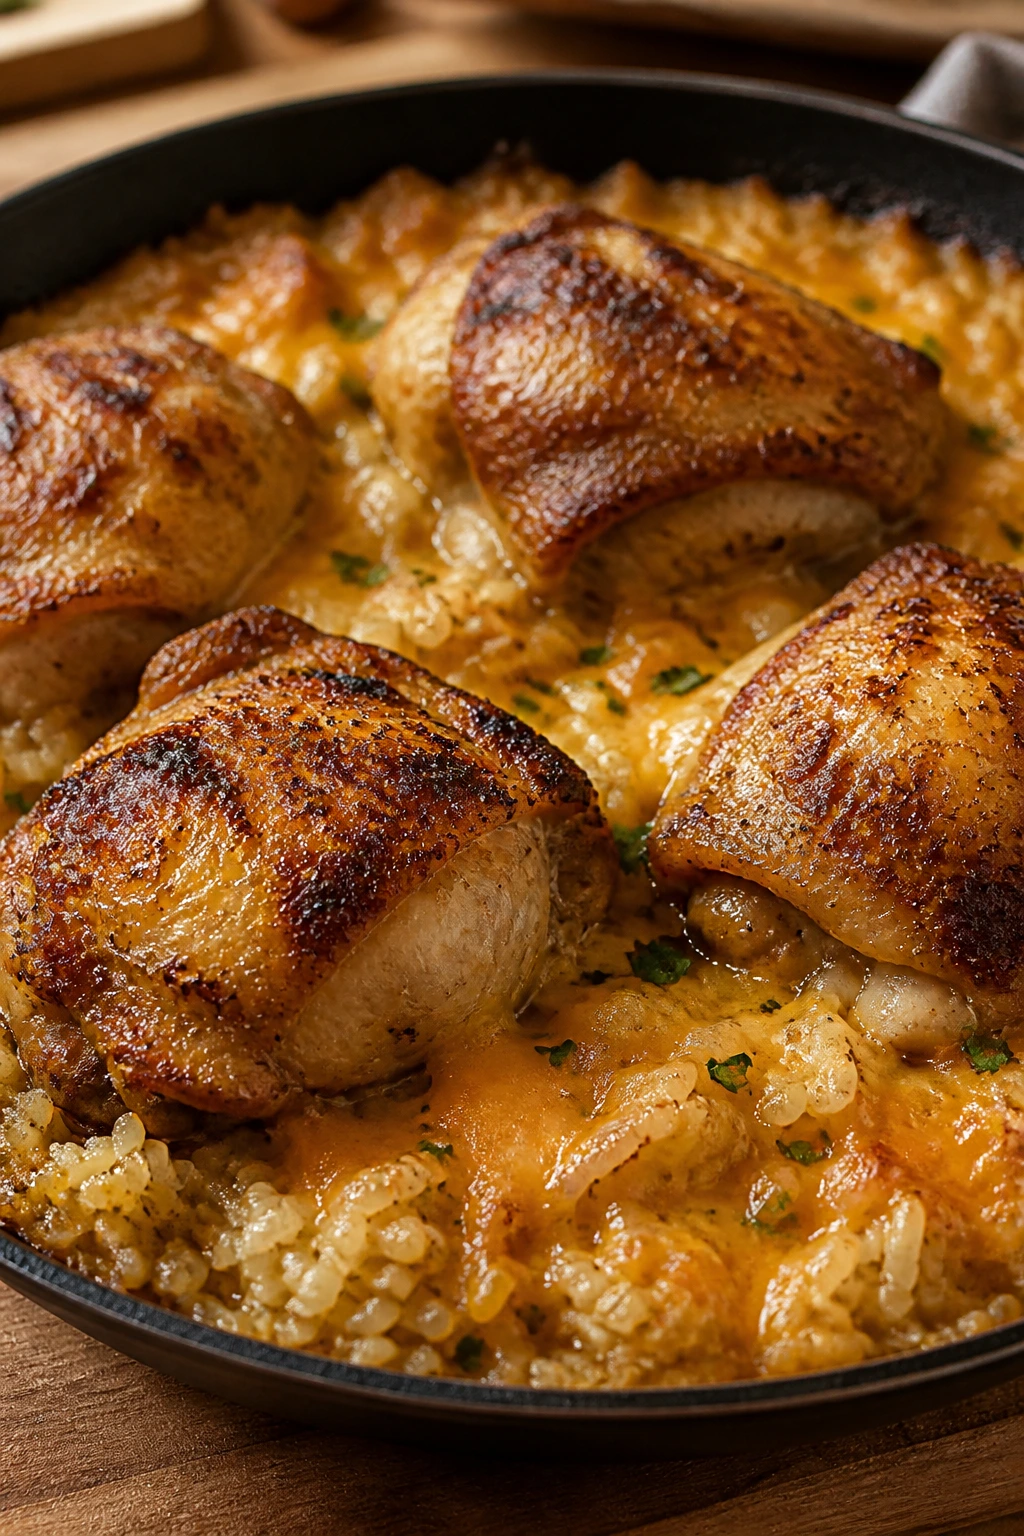
I like thighs here because they forgive a hot oven and a distracted cook. I also like sharp cheddar instead of mild, because mild cheese disappears. Sharp cheddar stays present; you taste it in every forkful. The finished pan smells like onion, garlic, broth, and toasted rice under a blanket of melted cheese — the sort of smell that makes the house feel fed before anyone sits down.
Why Juicy Cheesy Chicken and Rice Earns Its Keep
- The chicken stays juicy on purpose: Boneless thighs finish over the rice, so they cook gently in the oven instead of drying out on a bare sheet pan.
- The rice gets real flavor, not just salt: The browned chicken drippings, onion, garlic, and broth season every grain, which is why the pan tastes richer than the ingredient list looks.
- The cheese does two jobs: Some melts into the rice to make it creamy, and the rest goes on top for those gooey edges that stick to the spoon.
- The whole meal uses ordinary groceries: Rice, broth, onion, garlic, chicken, cheddar. Nothing strange, nothing fussy, nothing you have to hunt down.
- Leftovers still behave: The rice firms up a little after chilling, but a splash of broth brings it back without wrecking the texture.
- It scales without drama: A bigger skillet gives you more surface area; a smaller family just means more leftovers, which are honestly useful for lunch.
The real reason this dish sticks around in a rotation is that it feels more deliberate than a dump-and-bake casserole. It asks for a sear. It asks for a minute of attention while the onion softens. That’s it.
And those tiny bits of attention matter. The skillet does a lot of heavy lifting, but it only works if you give it a browned base and enough steam to finish the rice from the inside out. Skip the browning and you lose depth. Rush the lid and you lose moisture. Keep both, and the result lands in that sweet spot between homey and useful.
Yield, Timing, and the Kind of Night This Fits Best
How fast can a dinner that tastes this rich actually happen? Faster than a roast, slower than a sandwich, which is why it fits the exact sort of evening when everyone is hungry and nobody wants to babysit a pot for an hour.
Yield: Serves 5
Prep Time: 15 minutes
Cook Time: 35 minutes
Total Time: 50 minutes
Difficulty: Beginner — the steps are simple, but the rice needs a tight cover and a little patience.
Chill/Rest Time: 5 to 10 minutes
Best Served: Right after the rest, while the cheese is still soft and the chicken is hot.
Fifty minutes is not “hands-on for fifty minutes.” That’s the nice part. You spend a short stretch at the stove, then the oven takes over while you set the table, wash the cutting board, or just stand there and smell the skillet doing its thing. The rest at the end matters too; the rice settles, the cheese thickens, and the pan stops feeling soupy.
If you rush the final rest, the first scoop slides around on the plate. Wait a few minutes, and it becomes scoopable instead of loose. That tiny difference is worth the pause.
The Shopping List for a Juicy Skillet Dinner
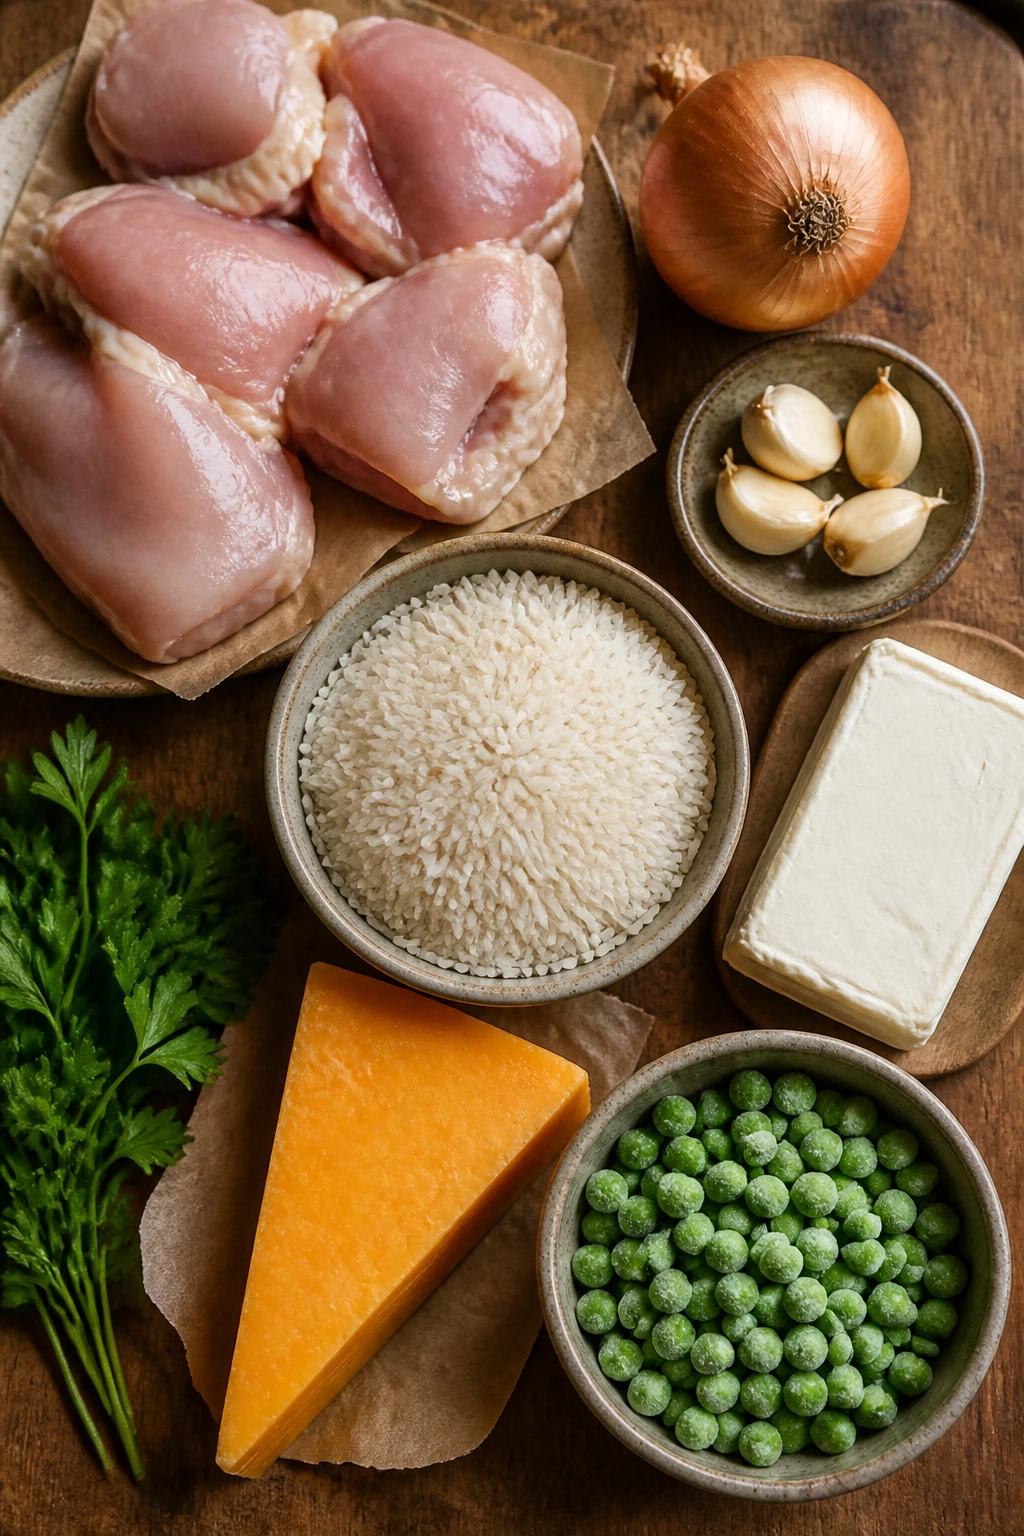
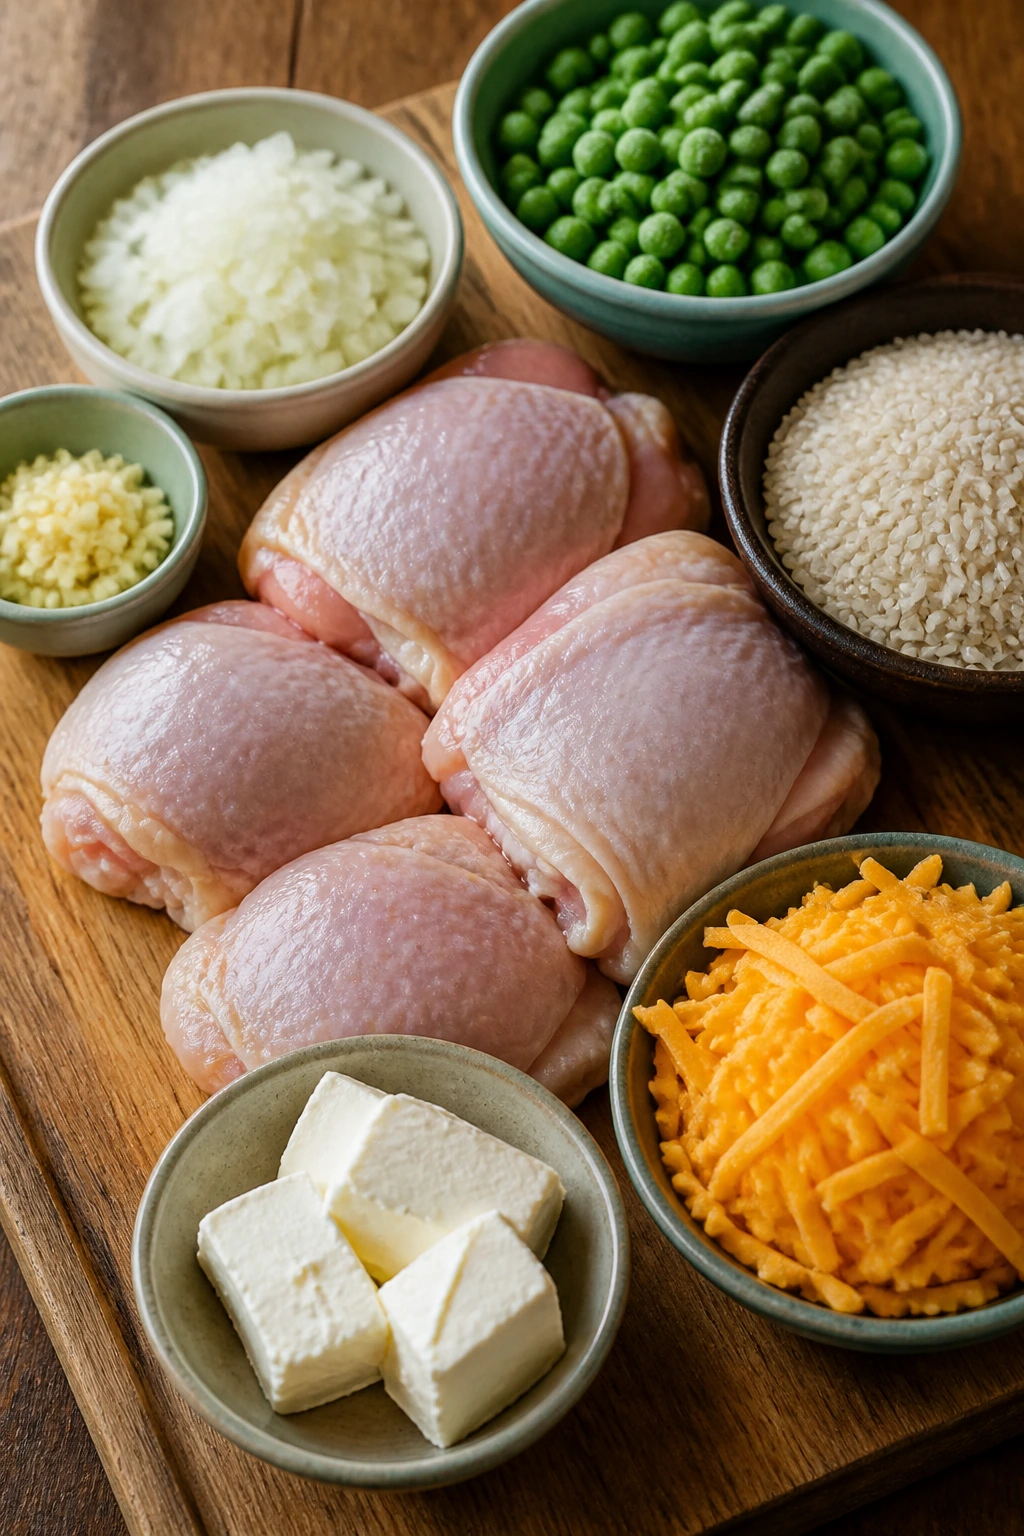
The ingredient list is short, which is exactly why the details matter. A pan this simple gives nowhere to hide, so every item needs to earn its place.
For the Chicken
- 1 1/2 pounds boneless, skinless chicken thighs, trimmed of excess fat
- 1 1/2 teaspoons kosher salt, divided
- 1 teaspoon black pepper, divided
- 1 teaspoon smoked paprika
- 1 teaspoon garlic powder
- 2 tablespoons olive oil
- 1 tablespoon unsalted butter
For the Rice and Sauce
- 1 medium yellow onion, finely diced
- 3 cloves garlic, minced
- 1 1/2 cups long-grain white rice, rinsed and drained
- 3 cups low-sodium chicken broth, warmed
- 4 ounces cream cheese, softened and cubed
- 1 1/2 cups shredded sharp cheddar cheese, divided
- 1 cup frozen peas, optional
- 2 tablespoons chopped fresh parsley or sliced scallions, for serving
If you only change one shopping habit here, make it the cheese. Buy a block of sharp cheddar and shred it yourself if you can spare the minute. Pre-shredded cheese works in a hurry, but block cheese melts smoother and does not leave the same faint dusty finish in the sauce.
Long-grain rice matters too. It stays separate enough to hold the cheese, which is the whole point. Short-grain rice gets softer and stickier, and quick-cook rice turns the pan into something that feels rushed in the wrong way.
Why Each Ingredient Matters in This Cheesy Chicken and Rice Skillet
Chicken Thighs: the part that keeps the dish juicy
What to use: 1 1/2 pounds boneless, skinless chicken thighs. That amount gives you enough meat for five solid servings without crowding the skillet.
Preparation: Pat the thighs dry with paper towels and trim any large pieces of fat. If some pieces are much thicker than others, press them lightly so they sit more evenly in the pan.
Substitutions: Boneless skinless chicken breasts work if you pound them to an even thickness and shave a few minutes off the bake time. Chicken tenders can work in a pinch, but they need a shorter oven stay or they dry out fast.
Tips: Dry chicken browns faster than damp chicken. If you want real color on the outside, do not skip the paper towel step.
Long-Grain Rice: the backbone of the skillet
What to use: 1 1/2 cups long-grain white rice. It holds shape and gives the skillet that clean, separate grain texture instead of turning into porridge.
Preparation: Rinse the rice under cold water until the water runs mostly clear, then drain it well. Wet rice straight from the colander adds extra water you never asked for.
Substitutions: Jasmine rice works if you like a softer, slightly fragrant result. Basmati is a decent backup too, though it cooks a bit drier and a touch longer. Brown rice is not a direct swap; it needs more liquid and more time.
Tips: Skip instant rice here. It cooks on a different clock and collapses into softness once the cheese and broth move in.
Broth, Cream Cheese, and Cheddar: the creamy part without the slump
What to use: 3 cups low-sodium chicken broth, 4 ounces cream cheese, and 1 1/2 cups shredded sharp cheddar cheese.
Preparation: Warm the broth if you can, and let the cream cheese soften before it hits the skillet. Grate the cheddar from a block if you want it to melt smoothly.
Substitutions: Turkey broth works. Vegetable broth can stand in if that’s what you have, though the flavor gets lighter. Monterey Jack can replace part of the cheddar, and pepper jack brings heat without changing the method.
Tips: Low-sodium broth gives you room to season the chicken and rice properly. If you start with salted broth and salty cheese, the final pan can taste louder than it should.
Onion and Garlic: the base that makes the rice taste cooked
What to use: 1 medium yellow onion and 3 cloves garlic.
Preparation: Dice the onion small so it melts into the rice base instead of sitting in big soft chunks. Mince the garlic finely so it cooks fast and disappears into the sauce.
Substitutions: Shallot gives a softer, sweeter edge than onion. In a real pinch, 1/2 teaspoon onion powder can stand in for the onion, though the texture changes.
Tips: The onion should turn translucent and smell sweet, not sharp. Garlic goes from fragrant to bitter in a hurry, so it only needs about 30 seconds in the hot pan.
Seasonings and Finishers: the small details that keep the pan awake
What to use: 1 1/2 teaspoons kosher salt, 1 teaspoon black pepper, 1 teaspoon smoked paprika, 1 teaspoon garlic powder, 1 cup frozen peas if you want them, and 2 tablespoons chopped parsley or scallions for the end.
Preparation: Mix the seasonings into the chicken before searing so the meat starts flavored from the outside in. Keep the peas frozen until the end, and hold the herbs back until serving.
Substitutions: If you want a gentler pan, swap smoked paprika for sweet paprika. Frozen chopped spinach can replace peas if you want something that melts into the rice more quietly.
Tips: The seasoning should taste like chicken and rice, not paprika soup. That sounds obvious, but a heavy hand with smoked paprika can take over the whole skillet.
The Stovetop-to-Oven Method, Step by Step
Prepare the Chicken and Heat the Oven
-
Preheat the oven to 375°F (190°C) and position a rack in the center.
-
Pat the chicken thighs dry with paper towels. Season them with 1 teaspoon of the salt, 1/2 teaspoon of the black pepper, the smoked paprika, and the garlic powder, rubbing the seasoning into both sides.
-
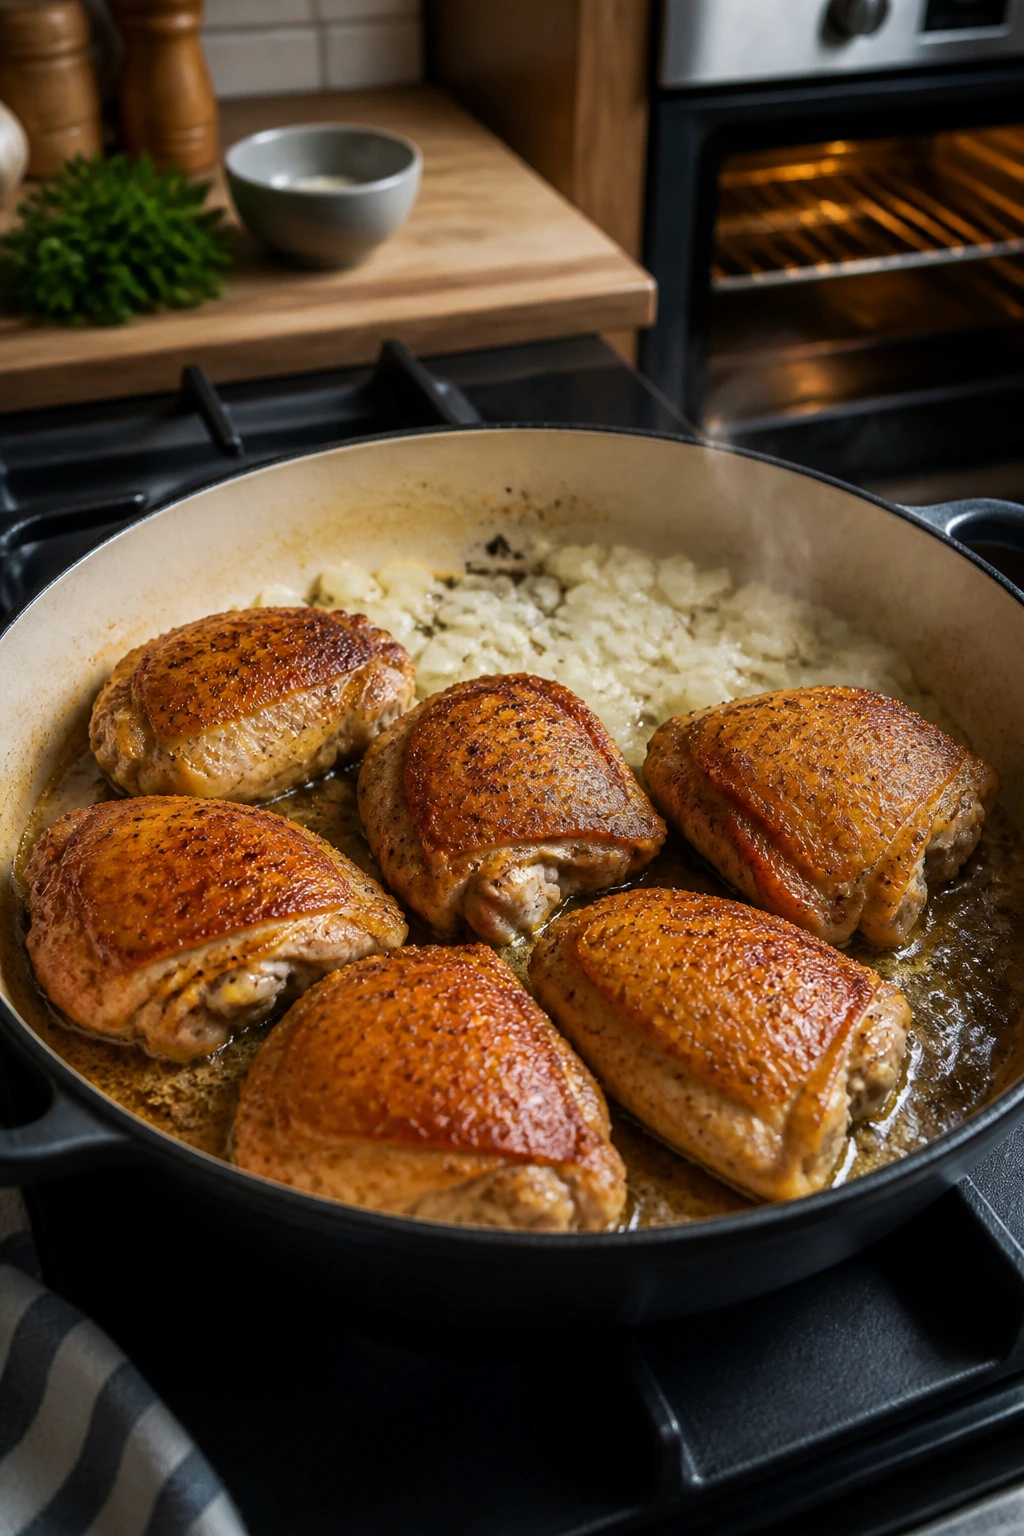
Set a 12-inch oven-safe skillet over medium-high heat. Add 1 tablespoon of the olive oil and the butter, and wait until the butter foams and the pan looks hot and glossy.
-
Lay the chicken in the skillet in a single layer. Sear for about 3 minutes on the first side and 2 to 3 minutes on the second side, until the outside is deep golden brown but the center is still undercooked. Transfer the chicken to a plate. Do not cook it all the way through here; the oven will finish the job, and over-seared chicken turns dry fast.
Build the Rice Base
-
Lower the heat to medium and add the remaining 1 tablespoon of olive oil. Stir in the onion with a small pinch of salt and cook for 4 to 5 minutes, until the pieces are soft, glossy, and just starting to turn pale gold at the edges.
-
Add the garlic and cook for about 30 seconds, stirring constantly. The garlic should smell sweet and sharp in a good way; if it starts to brown hard, pull the pan off the heat for a moment.
-
Stir in the rice, the remaining salt, and the remaining black pepper. Let the grains toast for 1 minute, stirring so they all pick up the fat and turn shiny. This step matters more than people think. Toasted rice stays separate; raw rice can go muddy.
-
Pour in the warm chicken broth and scrape the bottom of the pan with a wooden spoon to release the browned bits. Stir in the cream cheese until it melts into the broth and leaves only a few soft lumps.
Bake, Melt, and Rest
-
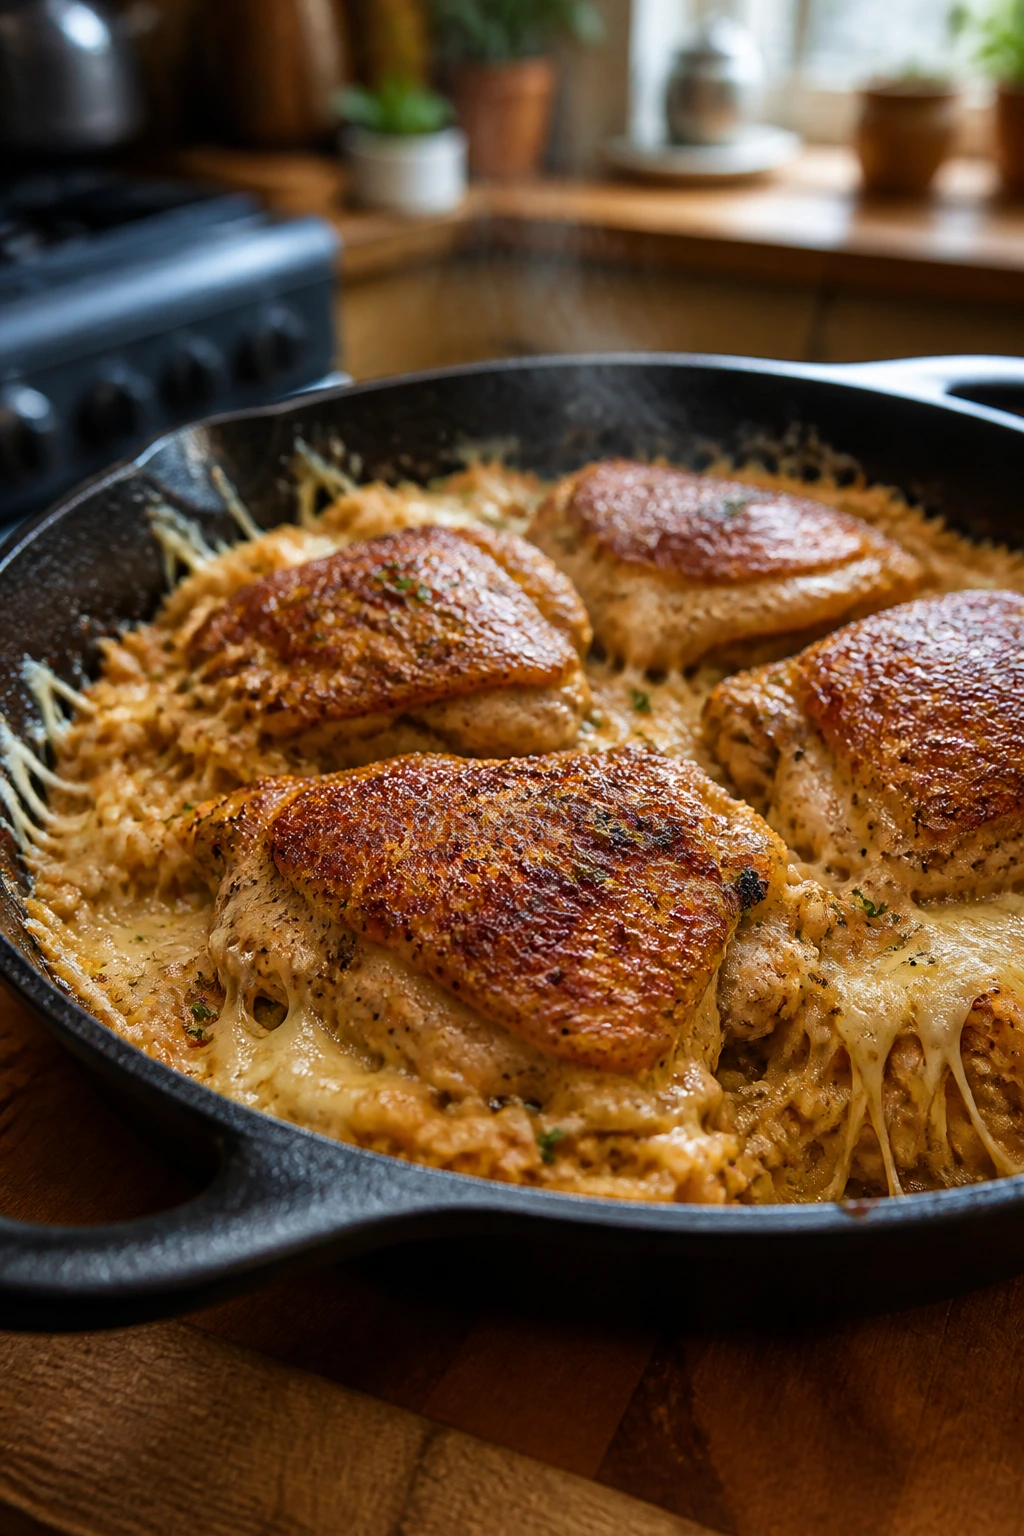
Stir in 1 cup of the cheddar until it starts to disappear into the rice. Nestle the chicken and any juices back into the skillet, pressing the pieces partly into the rice so they sit in the steam but still show a little on top.
-
Cover the skillet tightly with a lid or foil and bake for 22 to 25 minutes, until the rice is tender and the chicken reaches 165°F in the thickest part. If the rice is still a little firm at the end of that time, add 1/4 cup of hot broth, re-cover, and bake for 5 more minutes. Keep the lid on during most of the bake; that trapped steam is doing the hard work.
-
If you’re using peas, stir them into the hot rice now so they warm through. Scatter the remaining 1/2 cup of cheddar over the top and bake uncovered for 4 to 5 minutes, just until the cheese melts into glossy pockets.
-
Let the skillet rest for 5 to 10 minutes off the heat, then shower it with parsley or scallions. The rice should settle, the cheese should thicken, and the whole pan should be ready to spoon instead of pour.
That is the rhythm. Brown, toast, steam, melt, rest. Keep that order intact and the dish behaves.
The Tools That Make This Easier to Pull Off
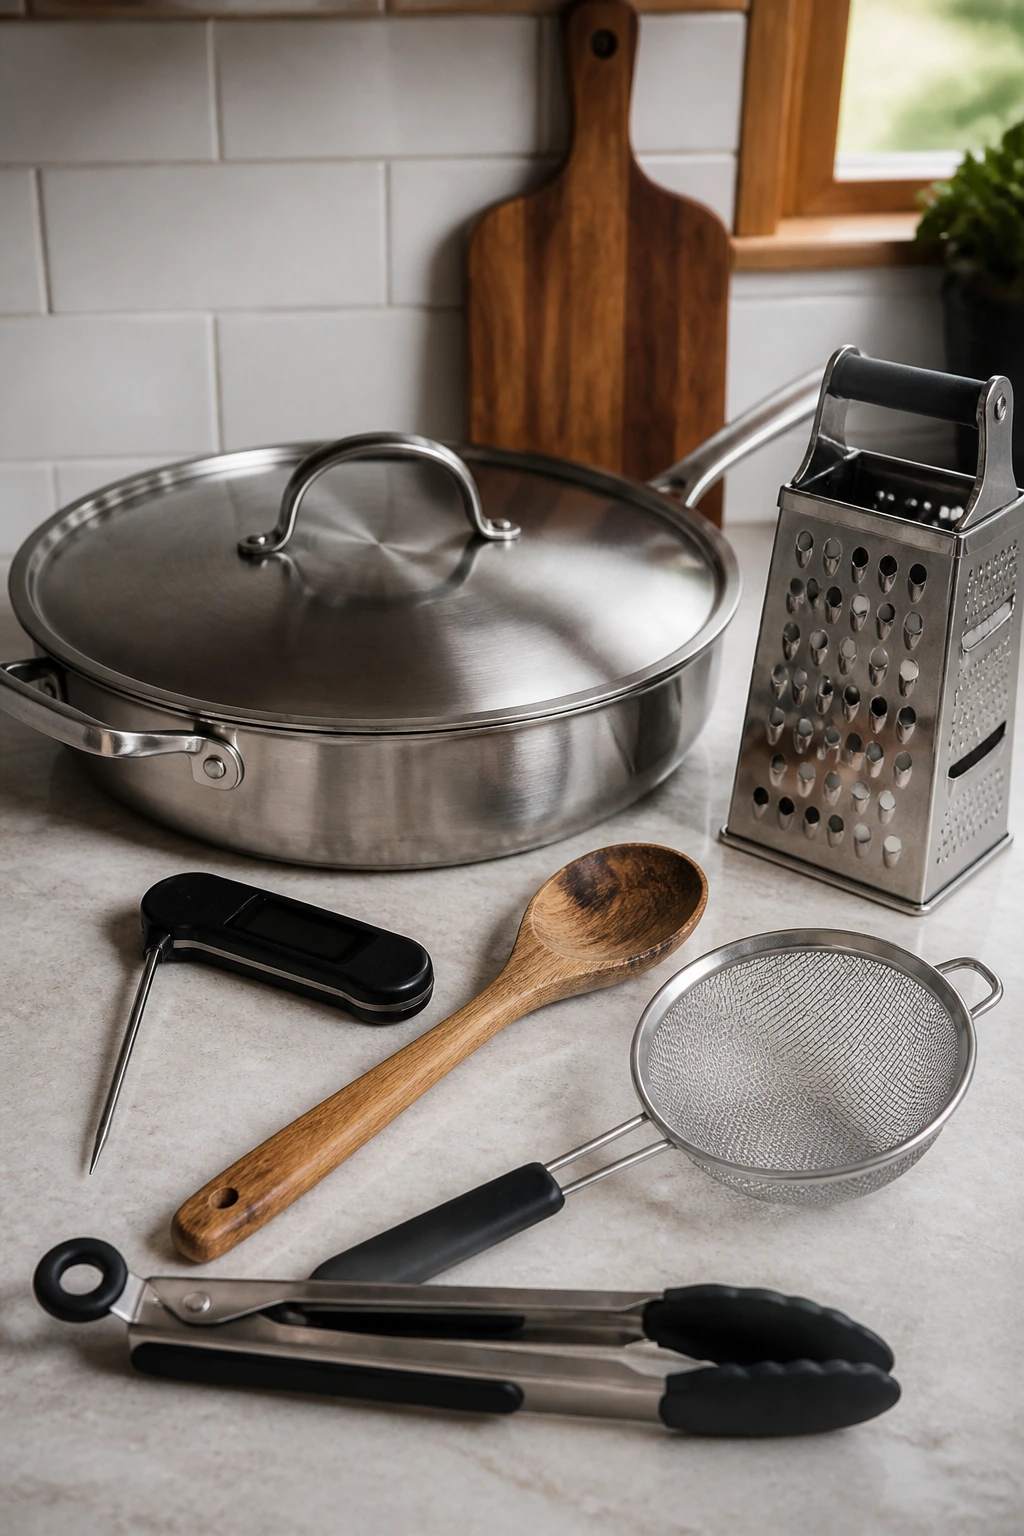
A few tools make this kind of skillet dinner far less annoying than it sounds.
- 12-inch oven-safe skillet with a lid — Wide enough for the rice to cook in an even layer; if your skillet has no lid, a tight sheet of foil works.
- Instant-read thermometer — The quickest way to know when the chicken is done without cutting into it and letting the juices run out.
- Wooden spoon or silicone spatula — Useful for scraping up the browned bits without scratching the pan.
- Fine-mesh sieve or colander — Helpful for rinsing the rice until the water runs mostly clear.
- Box grater — Makes cheddar that melts smoother than bagged shreds.
- Tongs — Easier for turning the chicken than a fork, which tends to tear the browned crust.
A Dutch oven can stand in for the skillet if that’s what you own. A deep sauté pan also works if it has a lid and enough width for the rice to spread out. If you have neither, use a skillet for the browning and move the rice base to a covered baking dish.
Serving the Skillet So It Looks Like Real Dinner
Presentation: Spoon the rice into shallow bowls or plates first, then place a piece of chicken on top so the browned side stays visible. Finish with parsley or scallions and a few cracks of black pepper. The skillet looks best when the cheese is glossy, not crusted into a hard top.
Accompaniments: A lemony green salad cuts through the cheddar nicely. Roasted broccoli, steamed green beans, cucumber slices, or garlicky carrots all fit without fighting the rice. If you want bread, pick something crusty enough to swipe through the edges of the pan.
Portions: Count on one thigh and about a heaping cup of rice per adult. If the crowd eats lightly, the pan stretches to 6 portions. If the crowd eats like a linebacker after practice, plan on 4 and add a side salad so nobody starts digging for seconds too early.
Beverage Pairing: Unsweetened iced tea with lemon keeps the meal clean. If you want something with a little more bite, a crisp white wine or a cold lager both work because they cut through the cheese instead of piling onto it.
I like serving this straight from the skillet at the table, with a big spoon and a smaller one for fighting over the browned bits. That little edge of cheese around the rim is the part people remember.
Small Tweaks That Make the Pan Better Every Time
Flavor Enhancement: Stir 1 teaspoon of Dijon mustard into the broth before it goes in, or finish the pan with a squeeze of lemon. Either move sharpens the cheese and keeps the rice from tasting flat.
Time-Saver: Grate the cheese and dice the onion before you turn on the stove. If a weeknight is already getting away from you, that 10-minute head start keeps the rest of the process from feeling rushed.
Cost-Saver: Buy thighs in family packs when they’re on sale and freeze them flat in one-pound portions. That’s the cheapest way to keep a real dinner within reach without swapping in something dry and disappointing.
Texture Trick: Toast the rice for the full minute after the onion softens. That tiny step gives the grains a little protective coating and helps them hold their shape under all that liquid and cheese.
Make-It-Yours: Fold in baby spinach right before the final cheese layer, or swap the peas for corn if you want a sweeter pan. A pinch of crushed red pepper adds a little heat without changing the character of the dish.
One small note I always come back to: if your cheese is already shredding in the bag and the pantry is chaos, that’s fine. The dinner still works. Just know that block cheddar gives you a smoother melt and a cleaner finish.
The Few Places This Pan Can Go Wrong
Using chicken breasts like they’re thighs: Breasts are leaner, so they dry faster if you give them the same bake time. If that’s the cut you have, pound them to an even thickness and start checking them early.
Skipping the rice rinse: Starchy rice can make the skillet thick and gummy, which is the opposite of what you want here. Rinse until the water is mostly clear, then drain well so you don’t water down the broth ratio.
Letting the broth boil hard: A hard boil can send rice cooking unevenly and leave the bottom scorched while the top stays underdone. You want a gentle simmer before the skillet goes into the oven, not a rolling boil that slaps the sides of the pan.
Dumping all the cheese in too early: Cheese that cooks too long can turn grainy or oily. Add part of it before the bake so it melts into the rice, then save the rest for the top near the end.
Opening the lid every few minutes: Steam escapes fast, and steam is what cooks the rice. Every peek adds a little more dryness and a little more risk that you’ll end up adding too much liquid later.
Serving the skillet the second it leaves the oven: The rice needs a short rest to absorb the last bit of moisture. Without that pause, the pan looks loose and the first few scoops spread out instead of holding together.
Variations That Still Feel Like the Same Dinner
Southwest Skillet: Add 1 teaspoon chili powder and 1/2 teaspoon ground cumin to the chicken seasoning, swap half the cheddar for pepper jack, and fold in 1/2 cup corn with the peas. A spoonful of salsa on top makes the whole pan feel brighter and a little more laid-back.
Broccoli Cheddar Bake: Replace the peas with small broccoli florets and tuck them into the rice during the last 10 minutes of baking. They steam in the covered pan and keep a little bite, which is better than the limp broccoli some casseroles end up with.
Mushroom and Thyme Pan: Sauté 8 ounces of sliced cremini mushrooms with the onion and add 1 teaspoon fresh thyme or 1/2 teaspoon dried thyme to the rice. The flavor moves earthier and deeper, and the dish feels a little more like Sunday dinner without becoming fussy.
Rotisserie Shortcut: Skip the raw chicken and stir 3 cups shredded rotisserie chicken into the rice during the last 5 minutes of baking. Reduce the broth by 1/2 cup, because the cooked chicken is not soaking up liquid the way raw thighs do.
Dairy-Light Version: Swap the cream cheese for 1/3 cup evaporated milk and drop the cheddar to 1 cup. The pan will be less plush, but it still lands in creamy territory and keeps the rice from feeling dry.
If you like to tinker, start with the seasoning before you start ripping apart the method. A different cheese, a different herb, or one vegetable swap changes the mood faster than you’d expect.
Make-Ahead, Storage, and Reheating
Room Temperature: Keep the finished dish out for no more than 2 hours. Rice and chicken both fall into the same food-safety bucket there, and it is not worth pushing that line.
Refrigerator: Store leftovers in airtight containers for 3 to 4 days. The rice will firm up a little in the fridge, and the cheese will set, which is normal.
Freezer: Freeze portions for up to 2 months. The texture softens a bit after thawing, especially the rice, but it still makes a decent lunch or an emergency dinner when you don’t want to cook.
Reheating: For the microwave, add 1 to 2 tablespoons of broth or water per serving, cover, and heat in 60-second bursts at about 50 percent power until hot. For a larger portion, cover the dish and reheat in a 325°F oven for 15 to 20 minutes; uncover for the last 5 minutes if you want the cheese on top to loosen again.
Make-Ahead: You can season and sear the chicken, then cook the onion-rice base up through the point where the broth goes in, up to 1 day ahead. Hold everything in the fridge, then bring it back to a simmer, add the cream cheese and cheddar, and finish in the oven when you’re ready. I would not fully assemble the whole pan too far ahead; the rice starts drinking liquid before the oven gets a vote.
If the leftovers seem dry, do not drown them. A small splash of broth or water is enough. Too much liquid makes the rice slack and the cheese thin.
Questions People Ask Before They Start
Can I use chicken breasts instead of thighs? Yes, but watch them closely. Pound the breasts to an even thickness, sear them the same way, and start checking for doneness a few minutes early so they do not dry out.
Do I really need to rinse the rice? I would. Rinsing removes surface starch, which is what keeps the pan from turning gluey. It only takes a minute, and it makes the finished texture cleaner.
Can I use brown rice? You can, but not as a straight swap. Brown rice needs more liquid and more time, so the chicken may finish before the rice does unless you adjust the method and plan for a longer bake.
What if my rice is still hard after baking? Add 1/4 cup of hot broth, cover the skillet again, and bake for 5 more minutes. Hard rice usually means the liquid evaporated too quickly or the lid was not tight enough.
Can I use pre-shredded cheese? Yes, if that is what you have. It melts a little less smoothly than block cheddar because of the coating on the shreds, but the dish still works.
Can I make this without an oven-safe skillet? Absolutely. Brown everything in a regular skillet, then move the rice base and chicken to a covered baking dish before it goes into the oven. The flavor stays the same; the shape of the pan changes.
Can I cook it entirely on the stovetop? Yes, though you need to babysit it more. Keep the heat low, cover tightly, and simmer until the rice is tender and the chicken reaches 165°F. Stir once near the end if the bottom starts to catch.
How do I keep leftovers from drying out? Reheat with a small splash of broth or water and keep the dish covered until it is hot. The rice should loosen, not swim. If you want the top cheese to look lively again, uncover it for the last few minutes in the oven.
The Skillet That Keeps Pulling Its Weight
A good weeknight dinner should behave. It should brown where it needs to brown, steam where it needs to steam, and not demand a second round of dishes just because everyone is hungry at the same time. This one does that. The chicken gets color first, the rice gets flavor from the pan, and the cheese ties everything together without hiding the texture underneath.
What I like most is that the method stays useful even after you tweak it. Swap the seasoning, change the vegetable, use a different cheese, and the structure still holds. That is the sign of a recipe worth keeping around — not that it’s rigid, but that it can bend without breaking.
The next time the clock slips later than you wanted and the kitchen needs a real dinner, pull out the skillet and trust the rhythm: brown, toast, steam, melt, rest. It’s a simple pattern, and it earns its place.
Juicy Cheesy Chicken and Rice — Recipe Card

Recipe Name: Juicy Cheesy Chicken and Rice for Weeknight Dinners
Description: A one-skillet chicken and rice dinner with browned thighs, creamy cheddar rice, and a quick oven finish that keeps the chicken tender and the grains separate.
Prep Time: 15 minutes
Cook Time: 35 minutes
Total Time: 50 minutes
Course: Dinner, Main Course
Cuisine: American
Servings: 5
Calories: About 580 kcal per serving
Ingredients
For the Chicken
- 1 1/2 pounds boneless, skinless chicken thighs, trimmed of excess fat
- 1 1/2 teaspoons kosher salt, divided
- 1 teaspoon black pepper, divided
- 1 teaspoon smoked paprika
- 1 teaspoon garlic powder
- 2 tablespoons olive oil
- 1 tablespoon unsalted butter
For the Rice and Sauce
- 1 medium yellow onion, finely diced
- 3 cloves garlic, minced
- 1 1/2 cups long-grain white rice, rinsed and drained
- 3 cups low-sodium chicken broth, warmed
- 4 ounces cream cheese, softened and cubed
- 1 1/2 cups shredded sharp cheddar cheese, divided
- 1 cup frozen peas, optional
- 2 tablespoons chopped fresh parsley or sliced scallions, for serving
Instructions
-
Preheat the oven to 375°F (190°C).
-
Pat the chicken dry and season it with 1 teaspoon salt, 1/2 teaspoon pepper, the smoked paprika, and the garlic powder.
-
Heat 1 tablespoon olive oil and the butter in a 12-inch oven-safe skillet over medium-high heat. Sear the chicken for about 3 minutes per side, until browned but not cooked through. Remove to a plate.
-
Add the remaining 1 tablespoon olive oil, then cook the onion over medium heat for 4 to 5 minutes. Stir in the garlic and cook for 30 seconds.
-
Stir in the rice, remaining salt, and remaining pepper. Toast for 1 minute.
-
Pour in the warm broth and stir in the cream cheese until mostly melted. Bring the mixture to a gentle simmer.
-
Stir in 1 cup of the cheddar. Nestle the chicken and its juices back into the rice.
-
Cover and bake for 22 to 25 minutes, until the chicken reaches 165°F and the rice is tender. If needed, add 1/4 cup hot broth and bake 5 minutes more.
-
Stir in the peas, if using, then top with the remaining 1/2 cup cheddar. Bake uncovered for 4 to 5 minutes until melted.
-
Rest for 5 to 10 minutes, then top with parsley or scallions and serve.
Notes: Use block cheddar if you can, keep the lid tight while baking, and add a small splash of broth when reheating leftovers if the rice seems dry.