
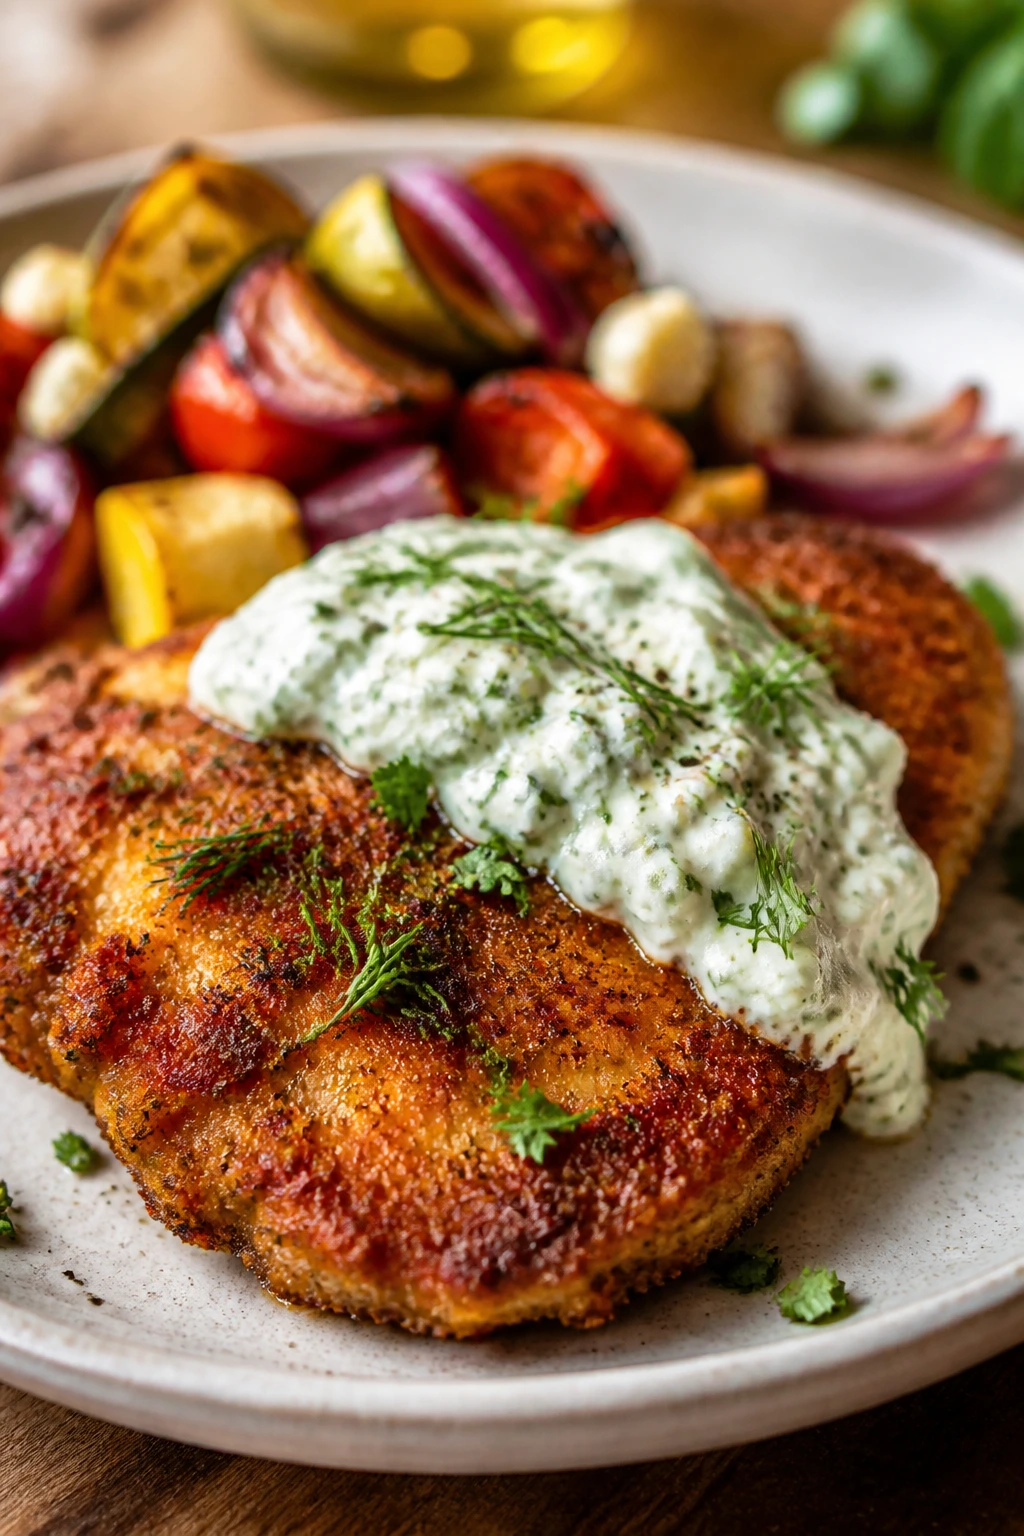
Crispy chicken and cottage cheese sounds like the sort of thing someone throws together from a half-empty fridge and then forgets to write down. But give the chicken a real crust, keep the cutlets thin, and turn the cottage cheese into a cool lemon-herb spoonful, and the plate changes completely. You get hot and cold, sharp and mild, crunch and cream — the kind of contrast that makes a plain weeknight dinner feel deliberate.
What I like most here is how little drama it asks for. No deep fryer. No long marinade. No sauce that needs a whisk and a prayer. Thin chicken breasts cook in minutes, panko stays crisp if you give it enough oil and enough space, and cottage cheese handles the creamy part without dragging the whole dish into heaviness. If you’ve ever cut into a breaded cutlet only to find the crust already sliding off, this version fixes that by keeping the sauce separate until the last second.
I’m stubborn about one thing: blend the cottage cheese. Don’t leave the curds hanging around next to the crunch unless you actively want that texture clash. Smooth it out, add lemon, garlic, and herbs, and it becomes cool, tangy, and spoonable instead of lumpy and distracting.
The trick is simple, but the details matter. Get the cutlets thin, season the flour properly, press the crumbs on with enough conviction, and do not drown the crust before the first bite. That’s where the good part lives.
Why This Dinner Belongs on a Monday
-
Crunch and cream on the same fork: The panko-Parmesan crust gives you that brittle, audibly crisp bite, while the whipped cottage cheese lands cool and tangy beside it.
-
Fast enough to survive a tired evening: Thin cutlets cook in 3 to 4 minutes per side, so the whole pan is done before the table starts asking repetitive questions.
-
Ordinary groceries, better-than-ordinary results: Flour, eggs, breadcrumbs, chicken, and cottage cheese do most of the work here; the rest is lemon, herbs, and a little heat control.
-
High-protein without a heavy sauce: Chicken breast and cottage cheese make this feel filling without needing cream, a butter sauce, or a pile of melted cheese.
-
Easy to scale without changing the method: Two skillets or a second batch of cutlets lets you feed more people without rewriting the recipe in your head.
-
Flexible enough for different plates: Serve it with greens, roasted potatoes, rice, or sliced tomatoes, and the same chicken still feels right at home.
Quick Timing and Yield
Yield: Serves 4
Prep Time: 20 minutes
Cook Time: 20 minutes
Total Time: 40 minutes
Difficulty: Beginner — the method is straightforward, but the skillet temperature and the breading step deserve your attention.
Chill/Rest Time: 5 minutes for the breaded cutlets to sit before frying, plus 3 minutes after frying before serving.
Best Served: Right away, while the crust still has a sharp crackle and the cottage cheese is cool.
The Ingredients That Make the Crust and Sauce Work
Here’s the full list first, because I like seeing the whole map before I start cooking. Then I’ll break down why each piece matters, because some of these ingredients earn their keep in very specific ways.
For the Chicken:
- 1½ pounds boneless, skinless chicken breasts, sliced horizontally into 4 thin cutlets
- 1 teaspoon kosher salt
- ½ teaspoon black pepper
- 1 teaspoon garlic powder
- ½ teaspoon smoked paprika
For the Coating:
- ½ cup all-purpose flour
- 2 large eggs
- 1 tablespoon Dijon mustard
- 1¾ cups panko breadcrumbs
- ½ cup finely grated Parmesan cheese
- ½ teaspoon kosher salt
- ¼ cup neutral oil, such as canola, avocado, or grapeseed
For the Cottage Cheese Sauce:
- 2 cups cottage cheese, full-fat or 2%
- 1 small garlic clove, finely grated
- 1 tablespoon lemon juice
- 1 teaspoon lemon zest
- 2 tablespoons chopped fresh dill or parsley
- 1 tablespoon chopped chives
- ½ teaspoon kosher salt, plus more to taste
- ¼ teaspoon black pepper
- 1 to 2 tablespoons water or milk, only if needed
For Serving:
- 1 lemon, cut into wedges
Chicken Cutlets
What to use: 1½ pounds boneless, skinless chicken breasts, sliced horizontally into 4 thin cutlets.
Preparation: Slice each breast in half horizontally, then pound the pieces to an even ½-inch thickness so they cook at the same speed and brown evenly.
Substitutions: Boneless chicken thighs work if you want richer meat, but they need a little more time in the skillet and won’t look quite as tidy on the plate. Turkey cutlets also work well.
Tips: Pat the chicken dry before you season it. Moisture on the surface is the enemy of browning; it turns the coating slippery and makes the crust less reliable.
The Crunchy Coating
What to use: ½ cup all-purpose flour, 2 large eggs, 1 tablespoon Dijon mustard, 1¾ cups panko breadcrumbs, ½ cup finely grated Parmesan, and ½ teaspoon kosher salt.
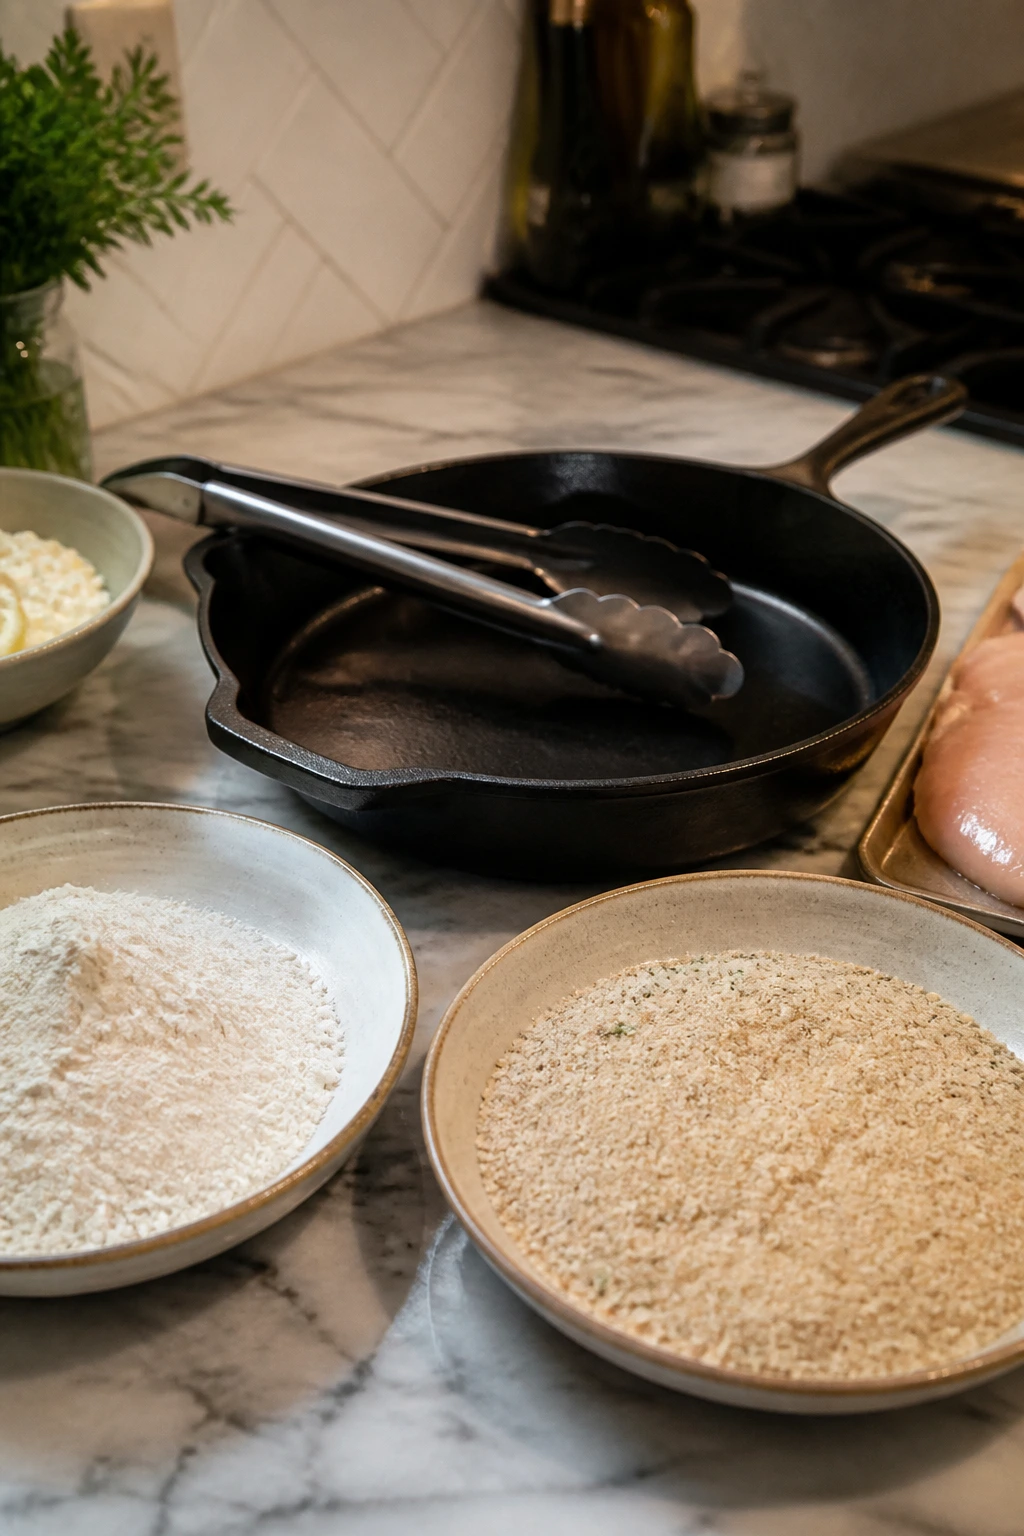
Preparation: Set the flour in one shallow dish, whisk the eggs with Dijon in a second, and mix the panko, Parmesan, and salt in a third. Keep the Parmesan finely grated so it disappears into the crumbs instead of clumping.
Substitutions: Gluten-free flour and gluten-free panko work fine. If you only have regular breadcrumbs, use them, but expect a tighter, less jagged crust.
Tips: Panko is the right call here. It fries into little ridges and edges that stay crisp longer than standard breadcrumbs, especially when the chicken sits for a minute before serving.
Cottage Cheese Sauce
What to use: 2 cups cottage cheese, 1 small garlic clove, 1 tablespoon lemon juice, 1 teaspoon lemon zest, 2 tablespoons dill or parsley, 1 tablespoon chives, ½ teaspoon kosher salt, ¼ teaspoon black pepper, and 1 to 2 tablespoons water or milk if needed.
Preparation: Blend everything until smooth. If the cottage cheese has a watery layer sitting on top, drain that off first; otherwise the sauce can turn loose before it even reaches the plate.
Substitutions: Ricotta gives you a softer, sweeter sauce, while Greek yogurt gives you a sharper one. Cottage cheese still hits the best balance of tang, body, and protein for this dish.
Tips: Taste the sauce after blending. Cottage cheese brands vary in salt, and the difference between bland and bright is usually one extra pinch and 15 seconds of blending.
Lemon and Herbs for the Finish
What to use: 1 lemon cut into wedges, plus the dill, parsley, and chives already in the sauce.
Preparation: Cut the lemon right before serving so the wedges are juicy. If you want a brighter finish, zest the lemon before you juice it and keep a little extra on the side.
Substitutions: Basil works if you want a softer, sweeter herb profile. Mint is a surprising but pleasant choice if you’re serving the chicken with cucumbers or a very simple salad.
Tips: Acid matters here. A squeeze of lemon right at the table wakes up the salty crust and keeps the cottage cheese from tasting flat.
What You Need on the Counter
-
12-inch heavy skillet or cast-iron pan: A wider skillet gives the cutlets room, which means less steaming and more browning.
-
Three shallow dishes or pie plates: These make the breading line easy to move through and keep the flour, egg, and crumbs from turning into one sticky mess.
-
Tongs: Cleaner than fingers for flipping the chicken and safer than poking at the cutlets with a fork.
-
Instant-read thermometer: The surest way to know when the chicken hits 165°F without overcooking it.
-
Blender, food processor, or immersion blender: Needed for a smooth cottage cheese sauce. A tall cup works well with an immersion blender.
-
Wire rack set over a sheet pan: This keeps the bottom of the chicken from steaming while it rests. A paper towel-lined plate works in a pinch, but it softens the crust faster.
-
Microplane or fine grater: Useful for garlic and lemon zest. It disappears the garlic into the sauce instead of leaving sharp little bits behind.
Whipping the Cottage Cheese Sauce
Make the sauce:
-
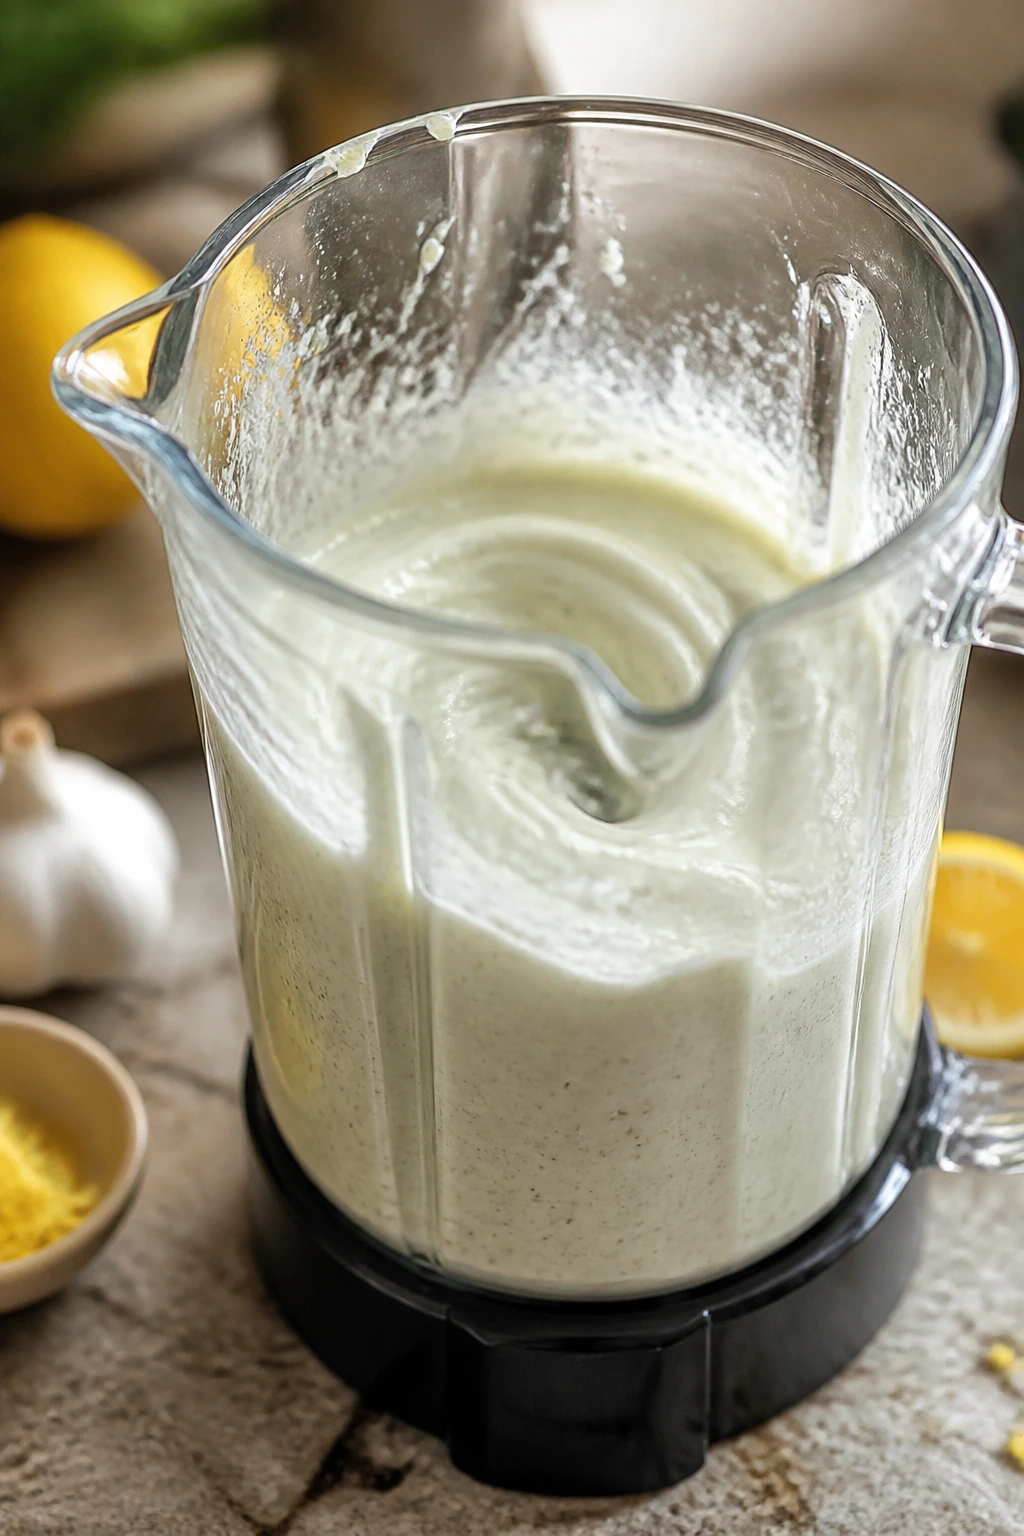
Put the cottage cheese, grated garlic, lemon juice, lemon zest, dill or parsley, chives, salt, pepper, and 1 tablespoon of water or milk into a blender or food processor. Blend for 30 to 45 seconds, stopping once to scrape down the sides, until the mixture is completely smooth and spoonable.
-
Taste the sauce and adjust it before you move on. Add another pinch of salt if it tastes flat, another teaspoon of lemon juice if it feels heavy, or a splash more water or milk if you want it looser. Blend again for 10 seconds after each adjustment so the final texture stays even.
A smooth sauce is not a fancy detail. It’s the difference between something you want to spoon onto the plate and something you keep pushing around because the texture fights the chicken.
Set the sauce in the fridge while you handle the cutlets. Cold sauce next to hot chicken is the whole point, and it also thickens up a touch while it sits.
Breading the Chicken So the Crust Stays Put
Prep the cutlets:
-
Pat the chicken dry with paper towels, then slice each breast horizontally to make 4 cutlets. If any piece is noticeably thicker at one end, place it between two sheets of parchment and pound it to an even ½-inch thickness.
-
Season both sides of the chicken with the kosher salt, black pepper, garlic powder, and smoked paprika. Let the cutlets sit for 2 to 3 minutes while you set up the breading line. Do not skip the dry surface; wet chicken makes the crust slide around later.
Set up the coating:
- Put the flour in the first shallow dish. Whisk the eggs and Dijon in the second dish until the mustard disappears into the eggs. In the third dish, combine the panko, Parmesan, and salt with your fingers until the cheese is evenly mixed through the crumbs.
Bread the chicken:
-
Dredge one cutlet in the flour, shake off the excess, dip it into the egg mixture, and press it into the panko-Parmesan mixture. Use your free hand to nudge crumbs onto any bare spots. Put the coated cutlet on a plate or rack and repeat with the rest.
-
Let the breaded cutlets sit for 5 minutes while you heat the oil. That short pause helps the coating cling better and keeps the breading from flaking off in the pan. If you move straight from breading to frying, the crust tends to shed more than it should.
This is the part where people get impatient and regret it later. The rest is small, but it matters.
Frying the Cutlets Until They Turn Deep Gold
Cook in batches:
-
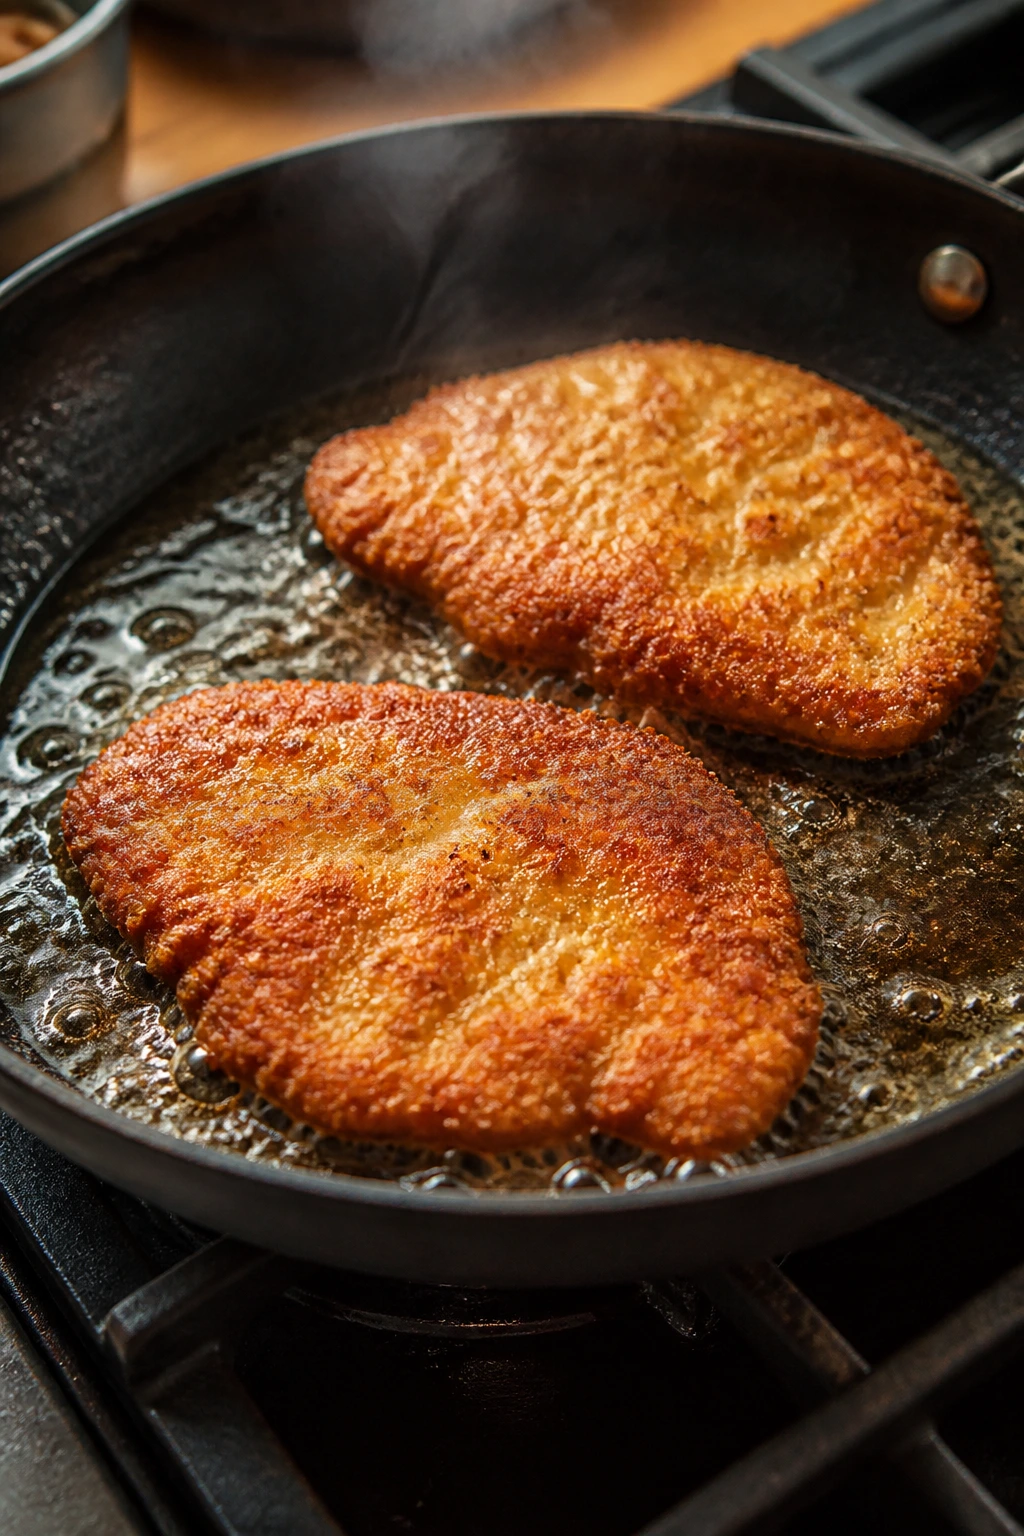
Heat the neutral oil in a 12-inch skillet over medium heat until it shimmers and a few crumbs sizzle immediately on contact, about 350°F if you’re using a thermometer. Add 2 cutlets at a time and fry for 3 to 4 minutes per side, until the crust is deep golden and the chicken reaches 165°F in the thickest part. Do not crowd the skillet.
-
Transfer the cooked cutlets to a wire rack set over a sheet pan. If you need a second batch, let the skillet recover for a minute before adding the next cutlets, and add another teaspoon or two of oil if the pan looks dry. Keep the finished chicken uncovered while you cook the rest so steam doesn’t soften the crust.
-
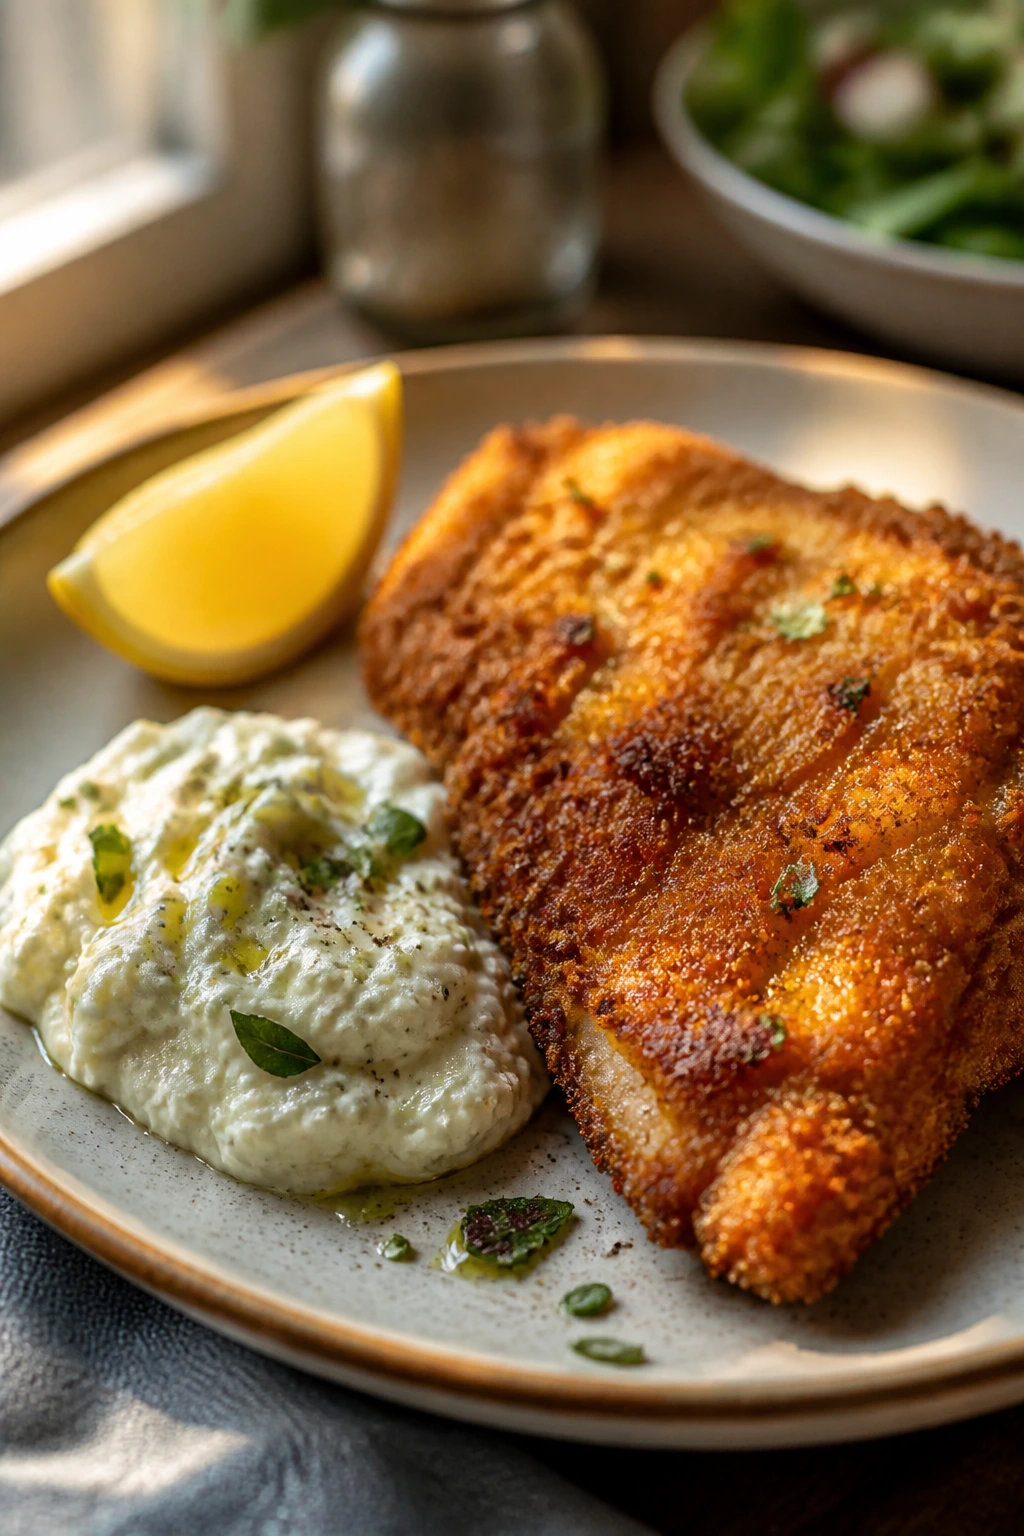
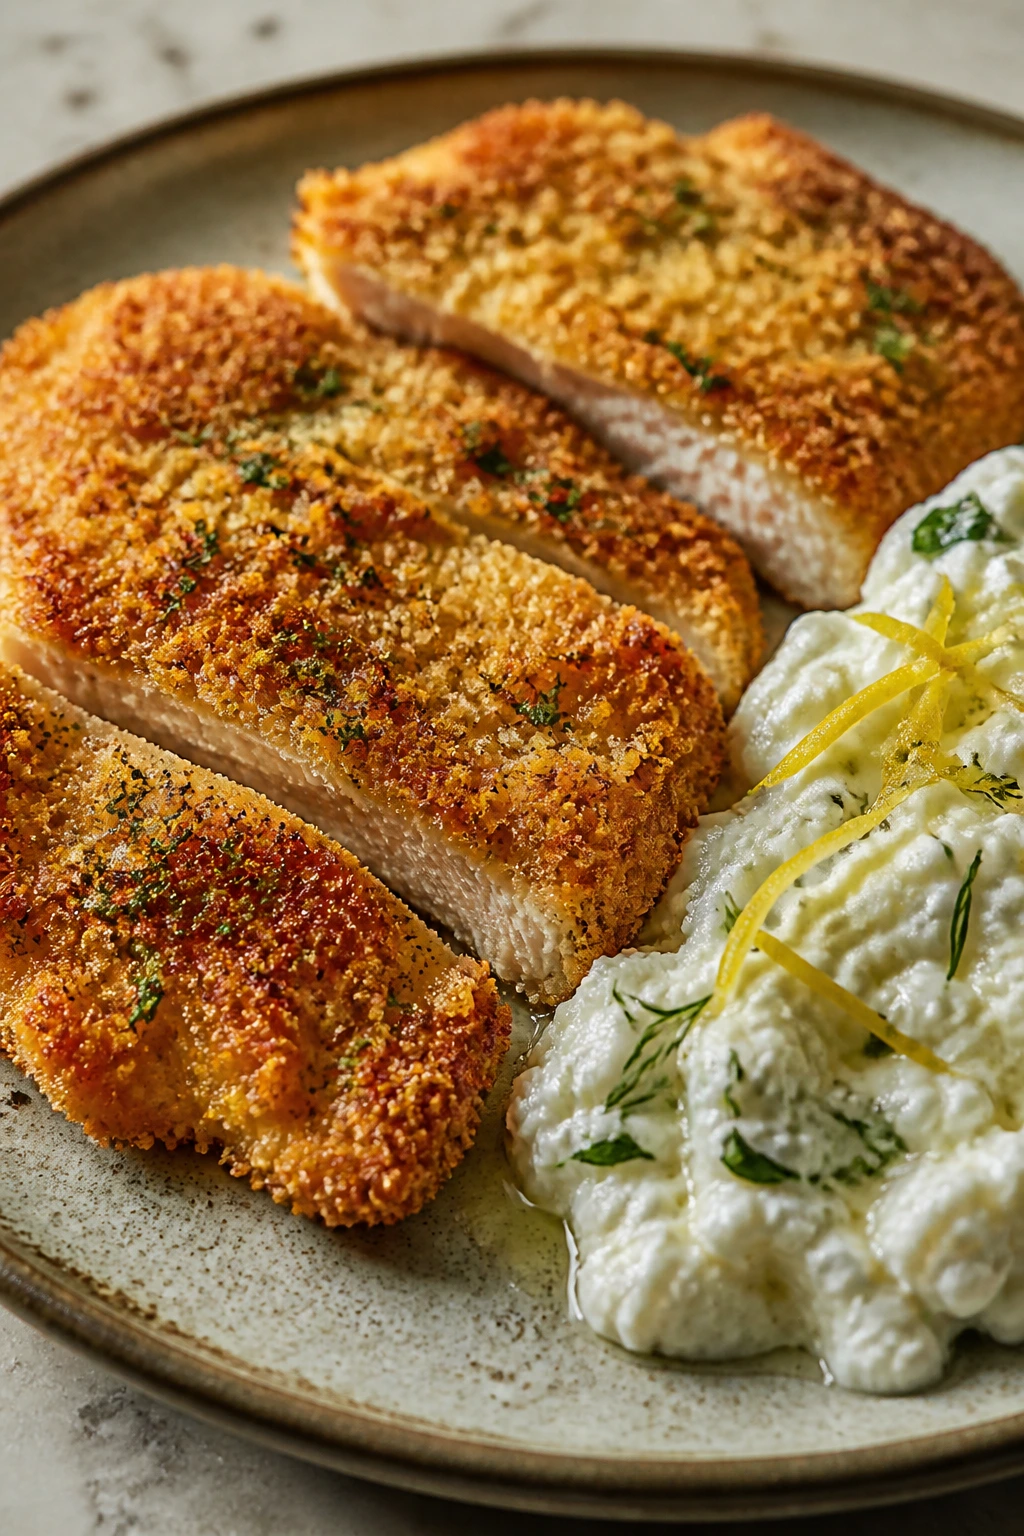
Spoon the cottage cheese sauce onto plates, set the chicken beside it or partly over it, and finish with lemon wedges. A squeeze of lemon right at the table wakes up the whole dish. If you want extra crispness, serve the sauce beside the chicken rather than under it.
The crust should sound dry and light when you cut into it, not damp or gummy. That little crackle is the reward for all the boring details.
How to Serve It So the Crunch Survives
Presentation: I like to smear or spoon a small pool of cottage cheese sauce onto a wide plate, then set the chicken slightly off-center so part of the crust stays exposed. A lemon wedge on the side does more work than people think, and a few chopped herbs on top make the plate look intentional without crowding the chicken.
Accompaniments: Roasted broccoli, garlicky green beans, buttered peas, or a simple arugula salad all fit without arguing with the sauce. If you want something more filling, roasted potatoes or a scoop of rice soak up the extra cottage cheese nicely. I would skip heavy cream sides here; they flatten the contrast that makes the dish work.
Portions: One cutlet per person is enough if you’ve got a side dish or salad alongside it. If you’re feeding bigger appetites, cut the breasts into 6 smaller cutlets instead of 4 and keep the frying time a little shorter. That gives everyone more crispy edges, which is the good part anyway.
Beverage Pairing: A dry sparkling water with lemon keeps the plate bright. If you want wine, go with a crisp Sauvignon Blanc or an unoaked Chardonnay. A light lager also works well because it doesn’t bully the crust.
Practical Tips for Better Flavor and Easier Cleanup
Flavor Enhancement: Add a pinch of lemon zest to the panko mixture if you want the crust to taste brighter. The citrus doesn’t shout; it just keeps the crust from feeling one-note.
Time-Saver: Buy chicken cutlets already sliced if your knife skills are rusty or your evening is tight. You still need to pound them for even thickness, but that step takes less time than splitting full breasts.
Pro Move: Put the breaded cutlets on a rack, not a plate, while you heat the oil. Air around the cutlets keeps the bottom coating dry and helps the first side fry up crisp instead of patchy.
Cost-Saver: 2% cottage cheese works fine here if full-fat feels like overkill. Once it’s blended with garlic, herbs, and lemon, the difference is mostly in richness, not in whether the sauce behaves.
Make-It-Yours: Stir a teaspoon of chopped capers into the sauce if you like a briny edge, or add a tiny pinch of chili flakes to the crumbs if you want the chicken to come in with a little heat. That’s enough; you do not need to turn the whole meal into a fireworks show.
Cleanup Trick: Wipe the skillet once between batches if the crumbs start to darken. Small burnt bits smell louder than they should, and they can tint the second batch too dark.
Common Mistakes That Send the Chicken Soft

-
Starting with damp chicken: If the surface is wet, the flour turns pasty and the crumbs slip. Pat the cutlets dry, season them, and let them sit for a minute before breading.
-
Skipping the resting time after breading: Fresh coating falls off more easily than coating that has had 5 minutes to settle. If you fry immediately, the crust often lifts at the edges.
-
Crowding the skillet: Two cutlets at a time is about right for a 12-inch pan. Push in more than that and the oil temperature drops, which gives you a pale crust and chicken that tastes steamed instead of crisp.
-
Running the heat too high: Parmesan browns faster than plain breadcrumbs, so a hot pan can give you a dark crust before the chicken is fully cooked. Medium heat is steady and more forgiving; if the crumbs are coloring too fast, turn the knob down.
-
Putting the sauce directly on top too early: If the cottage cheese sits on the crust for too long, the bottom side softens fast. Spoon it beside the chicken or add it at the table if you care about keeping the crackle.
-
Using grainy sauce straight from the blender without tasting it: Cottage cheese varies a lot by brand. If the sauce tastes dull, it usually needs salt, lemon, or another 10 seconds in the blender.
Variations and Swaps Worth Making
Lemon-Herb Bright Cutlets: Add extra dill and a little more lemon zest to the sauce, then finish the chicken with chopped parsley. This version tastes sharper and lighter, and it’s the one I reach for when I’m serving the chicken with a salad or roasted vegetables.
Spicy Paprika Chicken: Add ½ teaspoon cayenne to the panko mixture and a pinch of chili flakes to the cottage cheese sauce. The heat stays in the background, which is where it belongs; you still want the crust and the cool sauce to talk to each other.
Gluten-Free Crunch: Replace the flour with rice flour or a gluten-free all-purpose blend and use gluten-free panko. Press the crumbs on firmly, because some gluten-free crumbs are a little more fragile and need extra help staying attached.
Air-Fryer Shortcut: Lightly spray the breaded cutlets with oil and air-fry at 400°F for 10 to 12 minutes, flipping halfway through, until the chicken reaches 165°F. The crust won’t be as shattery as pan-fried chicken, but it’s still a solid option when you want less cleanup.
Turkey Cutlet Swap: Use thin turkey cutlets instead of chicken and shave a minute or two off the frying time. Turkey gives you the same crisp shell with a slightly leaner bite, which is useful if that’s what you have in the freezer.
Make-Ahead, Storage, and Reheating
Refrigerating Leftovers
Cooked chicken keeps in an airtight container in the fridge for 3 days. The cottage cheese sauce also keeps for 3 days, but store it separately so the chicken doesn’t go soft from trapped moisture. If you know you’ll have leftovers, keep the sauce in its own small container and spoon it on only when you eat.
Freezing the Chicken
Cooked cutlets freeze well for up to 2 months. Let them cool completely, then wrap each piece individually or lay them in a single layer with parchment between them before sealing them in a freezer bag or container. I do not recommend freezing the cottage cheese sauce; it tends to separate and turn grainy after thawing.
Reheating
The best way to reheat the chicken is in a 375°F oven or air fryer until hot and crisp again, usually 8 to 12 minutes depending on thickness. Set it on a rack if you’re using the oven so the bottom crust doesn’t steam. The microwave works only if you care more about speed than texture; if you use it, heat the chicken briefly and finish it in a dry skillet or toaster oven for a minute or two.
Make-Ahead Moves
You can blend the cottage cheese sauce up to 3 days ahead. The chicken can be sliced and pounded earlier in the day, then kept covered in the fridge until you’re ready to season and bread it. I would not bread the chicken too far ahead; the crust loses some of its edge if it sits overnight in the fridge.
The nicest part of this recipe is that the sauce gets better after a short rest. The garlic settles in, the lemon stops tasting sharp, and the herbs stop being just chopped green flecks.
Questions People Ask About Crispy Chicken and Cottage Cheese
Can I use chicken thighs instead of breasts?
Yes. Boneless thighs work well if you want a juicier piece of meat, but they cook a little longer and won’t flatten out as neatly. Keep the pieces even and watch the internal temperature rather than trusting the clock.
Do I really need to blend the cottage cheese?
If you want a smooth sauce, yes. Unblended cottage cheese can taste fine on its own, but next to crunchy chicken it reads as lumpy in a way that distracts from the plate. A blender turns it into something you can spoon and swipe across the plate.
Can I bake or air-fry the chicken instead of frying it?
You can. The air fryer gives you the crispest non-skillet result, while baking on a rack at 425°F is the cleanest option if you want less hands-on time. Either way, spray or brush the crumbs lightly with oil so they brown instead of drying out.
What if the breading keeps falling off?
Usually the chicken was too wet, the crumbs weren’t pressed on firmly, or the cutlets were moved too early in the skillet. Pat the chicken dry, press the coating on with some force, and let the breaded pieces rest for 5 minutes before frying.
Can I make the cottage cheese sauce ahead of time?
Yes, and it’s one of the easiest parts to get out of the way early. Make it up to 3 days ahead, keep it covered in the fridge, and stir or blend it again for a few seconds before serving if it thickens.
What should I serve with this besides a salad?
Roasted broccoli, green beans, peas, potatoes, or rice all fit. I especially like something with a little green and a little starch, because the sauce wants something to cling to and the chicken wants a clean counterpoint.
Can I use ricotta or Greek yogurt instead of cottage cheese?
Ricotta gives you a softer, milder sauce, and Greek yogurt gives you a sharper, tangier one. Both can work, but cottage cheese is the best compromise if you want body, brightness, and a sauce that doesn’t collapse under the chicken.
A Dinner Worth Repeating
What makes this plate worth making again isn’t that it tries to be fancy. It’s that it solves a very specific problem: how to get a crisp, satisfying chicken dinner on the table without turning the evening into a project. The crust gives you the crunch. The cottage cheese gives you the cool, tangy counterweight. Put them together and the whole meal feels balanced in a way that plain grilled chicken never quite manages.
I keep coming back to dinners like this because they behave. Thin cutlets cook fast, the sauce can be made ahead, and the ingredients are the sort of things you can keep around without fuss. If you want a chicken dinner that still tastes like someone paid attention, this one earns its spot.
Crispy Chicken and Cottage Cheese — Recipe Card
Recipe Name: Crispy Chicken and Cottage Cheese
Description: Thin chicken cutlets with a panko-Parmesan crust, served with a smooth lemon-herb cottage cheese sauce for a sharp, creamy contrast. It’s crisp, bright, and quick enough for a weeknight.
Prep Time: 20 minutes
Cook Time: 20 minutes
Total Time: 40 minutes
Course: Dinner, Main Course
Cuisine: American
Servings: 4 servings
Calories: About 520 kcal per serving
Ingredients
For the Chicken:
- 1½ pounds boneless, skinless chicken breasts, sliced horizontally into 4 thin cutlets
- 1 teaspoon kosher salt
- ½ teaspoon black pepper
- 1 teaspoon garlic powder
- ½ teaspoon smoked paprika
For the Coating:
- ½ cup all-purpose flour
- 2 large eggs
- 1 tablespoon Dijon mustard
- 1¾ cups panko breadcrumbs
- ½ cup finely grated Parmesan cheese
- ½ teaspoon kosher salt
- ¼ cup neutral oil, such as canola, avocado, or grapeseed
For the Cottage Cheese Sauce:
- 2 cups cottage cheese, full-fat or 2%
- 1 small garlic clove, finely grated
- 1 tablespoon lemon juice
- 1 teaspoon lemon zest
- 2 tablespoons chopped fresh dill or parsley
- 1 tablespoon chopped chives
- ½ teaspoon kosher salt, plus more to taste
- ¼ teaspoon black pepper
- 1 to 2 tablespoons water or milk, only if needed
For Serving:
- 1 lemon, cut into wedges
Instructions
-
Blend the cottage cheese, garlic, lemon juice, lemon zest, dill or parsley, chives, salt, pepper, and 1 tablespoon of water or milk until smooth. Adjust the texture and seasoning, then chill.
-
Pat the chicken dry, slice it into 4 thin cutlets, and pound to an even ½-inch thickness if needed. Season both sides with salt, pepper, garlic powder, and smoked paprika.
-
Set up three shallow dishes: flour in the first, eggs whisked with Dijon in the second, and panko mixed with Parmesan and salt in the third.
-
Dredge each cutlet in flour, dip it into the egg mixture, then press it firmly into the crumbs. Let the breaded chicken sit for 5 minutes.
-
Heat the oil in a 12-inch skillet over medium heat until shimmering. Fry the cutlets in batches for 3 to 4 minutes per side, until deep golden and the internal temperature reaches 165°F.
-
Transfer the chicken to a wire rack and rest for 3 minutes. Serve with the cottage cheese sauce and lemon wedges.
Notes: Blend the cottage cheese until completely smooth for the best texture. Keep the chicken on a rack after frying so the bottom crust stays crisp.