
The best honey garlic chicken doesn’t need a long simmer or a dramatic ingredient list. It needs a hot skillet, a little patience, and the sense to stop cooking the second the meat hits done. Get those three things right and you end up with glossy chicken that smells like caramelized garlic and tastes like someone actually paid attention.
I keep coming back to this kind of dinner because it respects the clock. You can get it on the table after a late commute, between homework and dishes, or on the kind of evening when the sink is already full and nobody wants to wash a mountain of pots. The sauce starts thin and sharp, then turns sticky and shiny in the pan, clinging to the chicken instead of running off into a puddle. That’s the part people usually want, even if they don’t say it out loud.
Thighs make the whole thing easier. They brown well, stay tender when the heat runs a touch high, and keep that juicy center even if you’re distracted for a minute. Breast meat can work too, but it asks for more discipline — thinner pieces, more watchfulness, less patience with the heat. I prefer a recipe that gives you a little slack.
Why This Recipe Earns a Spot in the Rotation
- Fast enough for a real weeknight: The chicken cooks in one skillet in about 15 minutes, and the sauce comes together while the pan is still hot.
- Juiciness is built in: Boneless thighs keep their moisture better than breasts, so you’re less likely to land in dry-chicken territory.
- Pantry-friendly flavor: Honey, soy sauce, garlic, vinegar, and butter are the whole backbone here, which means no hunt through a specialty store.
- The sauce actually clings: Cornstarch and a short simmer turn the glaze glossy instead of watery, so it coats rice, noodles, or vegetables.
- Easy to scale: Double it for a fuller pan or a second dinner later in the week; the method doesn’t change much.
- Leftovers hold up well: The flavor deepens after a night in the fridge, and the sauce reheats without turning grainy if you warm it gently.
Timing, Yield, and the Shape of the Dinner
Yield: Serves 4
Prep Time: 15 minutes
Cook Time: 20 minutes
Total Time: 35 minutes
Difficulty: Beginner — the steps are straightforward, but the pan heat and the chicken temperature need your attention.
Best Served: Hot from the skillet over rice, noodles, or something that can catch the extra sauce.
That timing assumes you’ve got your ingredients lined up before the stove turns on. If you’re still chopping garlic while the chicken sears, the pan will get ahead of you fast. No catastrophe. Just more juggling than necessary.
This dish is at its best when the chicken comes off the heat at the exact right moment, not three minutes later because you were answering a text or hunting for the sesame seeds. A thermometer takes the guesswork out of it, and I’d call that money well spent for any chicken recipe that depends on juiciness.
The Short Ingredient List That Makes the Sauce Stick
For the Chicken
- 1 1/2 pounds boneless, skinless chicken thighs, patted dry
- 1 teaspoon kosher salt
- 1/2 teaspoon black pepper
- 1/2 teaspoon garlic powder
- 1 tablespoon cornstarch
- 1 tablespoon olive oil
- 2 tablespoons unsalted butter, divided
For the Honey Garlic Sauce
- 5 cloves garlic, minced
- 1/3 cup honey
- 1/3 cup low-sodium soy sauce
- 1 tablespoon rice vinegar
- 2 tablespoons water
- 1 teaspoon cornstarch
- 1 tablespoon cold water
- 1/2 teaspoon crushed red pepper flakes, optional
For Garnish
- 2 scallions, thinly sliced
- 1 tablespoon sesame seeds
The list is short on purpose. There’s nowhere for clutter to hide in a skillet sauce, and that’s one reason this recipe works so well on nights when you don’t want to think too hard.
Why Each Ingredient Matters in the Pan
Chicken Thighs and the Browning You Can Trust
What to use: 1 1/2 pounds boneless, skinless chicken thighs, trimmed of loose fat and patted dry.
Preparation: Dry the surface with paper towels, then season evenly so the salt reaches the meat before it hits the pan. A light dusting of cornstarch gives the thighs a thin crust and helps the glaze cling later.
Substitutions: Boneless, skinless chicken breasts work if you pound them to an even thickness and cook them a little more carefully. Chicken tenderloins can also work, though they cook faster and need less searing time.
Tips: Thighs are forgiving, but they’re not invincible. If the pan is crowded, they steam instead of brown, and the whole dish loses that deep, savory edge that makes the sauce taste richer than it really is.
Honey, Soy Sauce, and the Sweet-Salty Backbone
What to use: 1/3 cup honey and 1/3 cup low-sodium soy sauce.
Preparation: Whisk them together before the pan gets hot so the sauce is ready the second the garlic is fragrant. Low-sodium soy sauce is the move here because honey brings plenty of sweetness and the butter adds its own saltiness.
Substitutions: Tamari is a clean swap if you need gluten-free sauce. Coconut aminos will work in a pinch, though the flavor is milder and the glaze can taste softer, so you may want a small pinch of salt.
Tips: Don’t go heavy on the honey. Too much and the sauce turns candy-sweet before it turns savory; the balance is what makes the garlic taste round instead of sharp.
Garlic, Vinegar, and the Little Sharp Edge That Keeps It Interesting
What to use: 5 cloves garlic, 1 tablespoon rice vinegar, and 1/2 teaspoon crushed red pepper flakes, if you want a faint kick.
Preparation: Mince the garlic finely so it softens fast and disappears into the glaze instead of sitting in chunks. The vinegar goes into the sauce, not the pan alone, so it can cut the sweetness all the way through.
Substitutions: Apple cider vinegar works if that’s what’s in the cupboard. A small spoonful of lime juice can stand in, but it tastes brighter and less round, so use it only if you like a sharper finish.
Tips: Garlic burns fast. Fast. Once it goes from fragrant to browned, the whole pan tastes bitter, and there’s no sugar in the world that fixes that cleanly.
Butter, Oil, and the Finish That Makes the Sauce Look Glossy
What to use: 1 tablespoon olive oil and 2 tablespoons unsalted butter, divided.
Preparation: Use the oil for the sear because it handles the higher heat. Add the butter in two parts so one tablespoon can carry the garlic and the last tablespoon can finish the glaze with shine.
Substitutions: Neutral oil works if olive oil tastes too assertive for you. If you want a dairy-free version, replace the butter with another tablespoon of oil, though the sauce won’t look quite as silky.
Tips: Butter tastes best here when it’s used with purpose, not as a flood. A small amount gives the glaze that spoon-coating finish without making it greasy.
Cornstarch and the Thin Film That Makes the Sauce Behave
What to use: 1 tablespoon cornstarch for the chicken and 1 teaspoon cornstarch mixed with 1 tablespoon cold water for the sauce.
Preparation: Toss the chicken lightly so the coating stays thin. Whisk the sauce slurry until the cornstarch disappears before it ever meets the heat.
Substitutions: Arrowroot can stand in for the sauce thickener if that’s what you keep around. Flour is not my first choice here; it can make the glaze look dull and a little pasty.
Tips: Cornstarch doesn’t need a long boil. A short simmer is enough to shift the sauce from thin and shiny to sticky and spoonable.
The Skillet, the Spoon, and the One Thermometer Worth Owning
A recipe like this doesn’t need a lot of gear, but the right gear makes the difference between a glossy pan sauce and a sticky mess.
- 12-inch skillet, preferably stainless steel or cast iron: You want enough surface area for the thighs to brown instead of crowding each other.
- Tongs: These let you turn the chicken cleanly without puncturing the meat and leaking juices into the pan.
- Instant-read thermometer: The cleanest way to know when the chicken is done; 165°F in the thickest part is the line you care about.
- Small bowl: For whisking the sauce before it hits the heat.
- Whisk: Helps dissolve the cornstarch so the glaze thickens evenly.
- Cutting board and sharp knife: For trimming chicken and slicing scallions without tearing them to pieces.
- Spatula or wooden spoon: Handy for scraping up the browned bits when the sauce goes in.
- Measuring spoons and cups: Sauce balance matters here; eyeballing honey is how you end up with dessert chicken.
I like a skillet with a heavy bottom because it keeps the heat steadier when the cold chicken goes in. Thin pans cool fast, and that temperature drop is how you lose the sear.
Searing, Simmering, and Glazing the Chicken
Prep the Chicken and Sauce:
-
Pat the chicken thighs dry with paper towels, then season them on both sides with 1 teaspoon kosher salt, 1/2 teaspoon black pepper, and 1/2 teaspoon garlic powder.
-
Sprinkle 1 tablespoon cornstarch over the thighs and toss until each piece has a very thin coating. Do not pile on extra cornstarch; a dusty layer is what you want, not a paste.
-
In a small bowl, whisk together 1/3 cup honey, 1/3 cup low-sodium soy sauce, 1 tablespoon rice vinegar, 2 tablespoons water, 1 teaspoon cornstarch, 1 tablespoon cold water, and 1/2 teaspoon crushed red pepper flakes if you want a little heat. The mixture should look smooth and slightly opaque.
Sear and Build the Glaze:
-
Set a 12-inch skillet over medium-high heat and let it heat for 2 minutes. Add 1 tablespoon olive oil and swirl it around the pan; it should shimmer, not smoke.
-
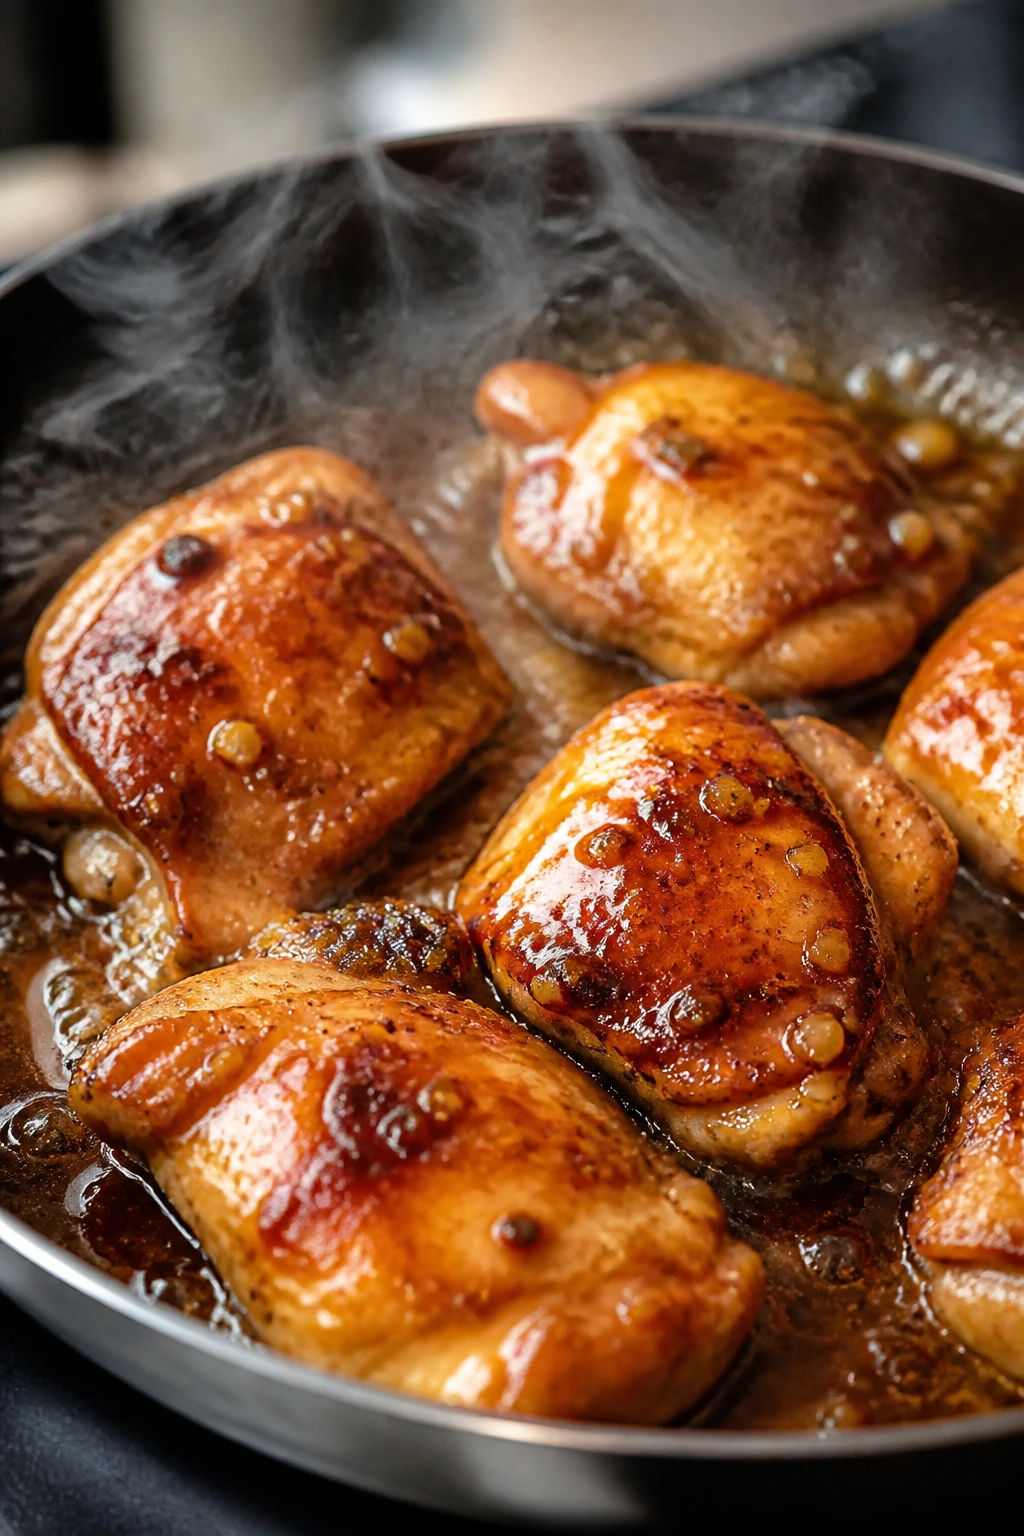
Lay the chicken thighs in the skillet in a single layer. Cook for 4 to 5 minutes on the first side, until the bottoms are deep golden brown and the chicken releases from the pan without fighting you.
-
Flip the thighs and cook for another 3 to 4 minutes, until the second side is browned and the center is still a little underdone. Transfer the chicken to a plate. That’s correct; the chicken finishes later in the sauce.
-
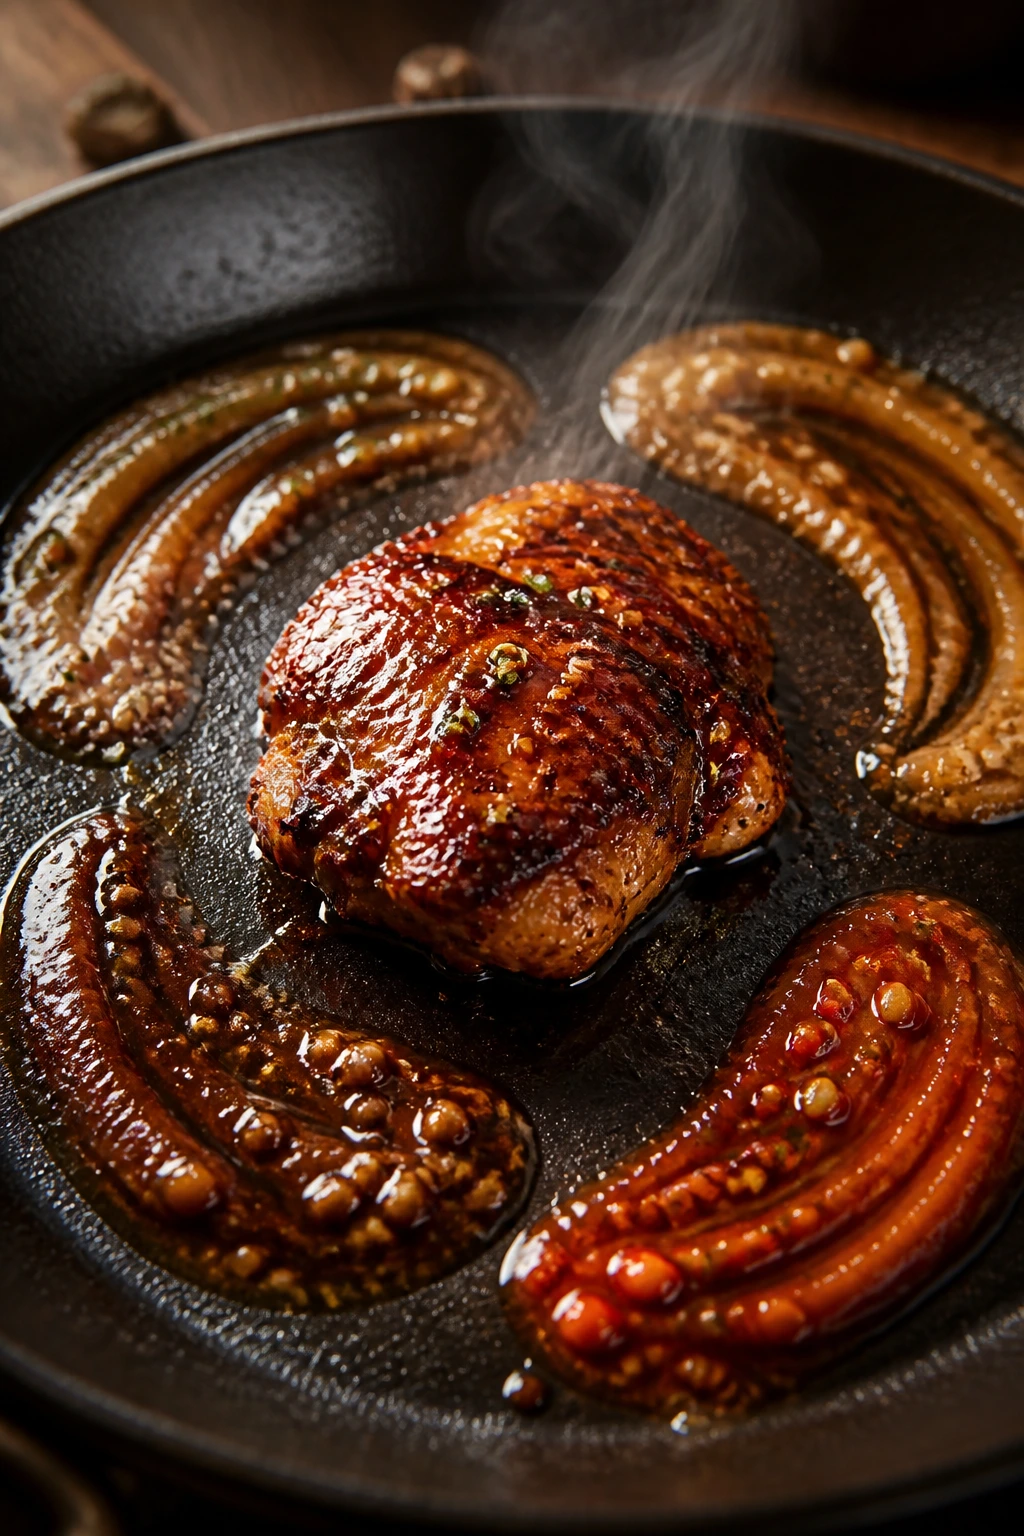
Reduce the heat to medium and add 1 tablespoon butter to the pan. Once it melts, add the minced garlic and stir for 20 to 30 seconds, just until it smells sweet and strong. If the garlic starts browning, move fast.
-
Pour in the honey-soy mixture and scrape the bottom of the pan with a wooden spoon to lift the browned bits. Let the sauce simmer for 1 to 2 minutes, stirring once or twice, until it starts to thicken and looks glossy.
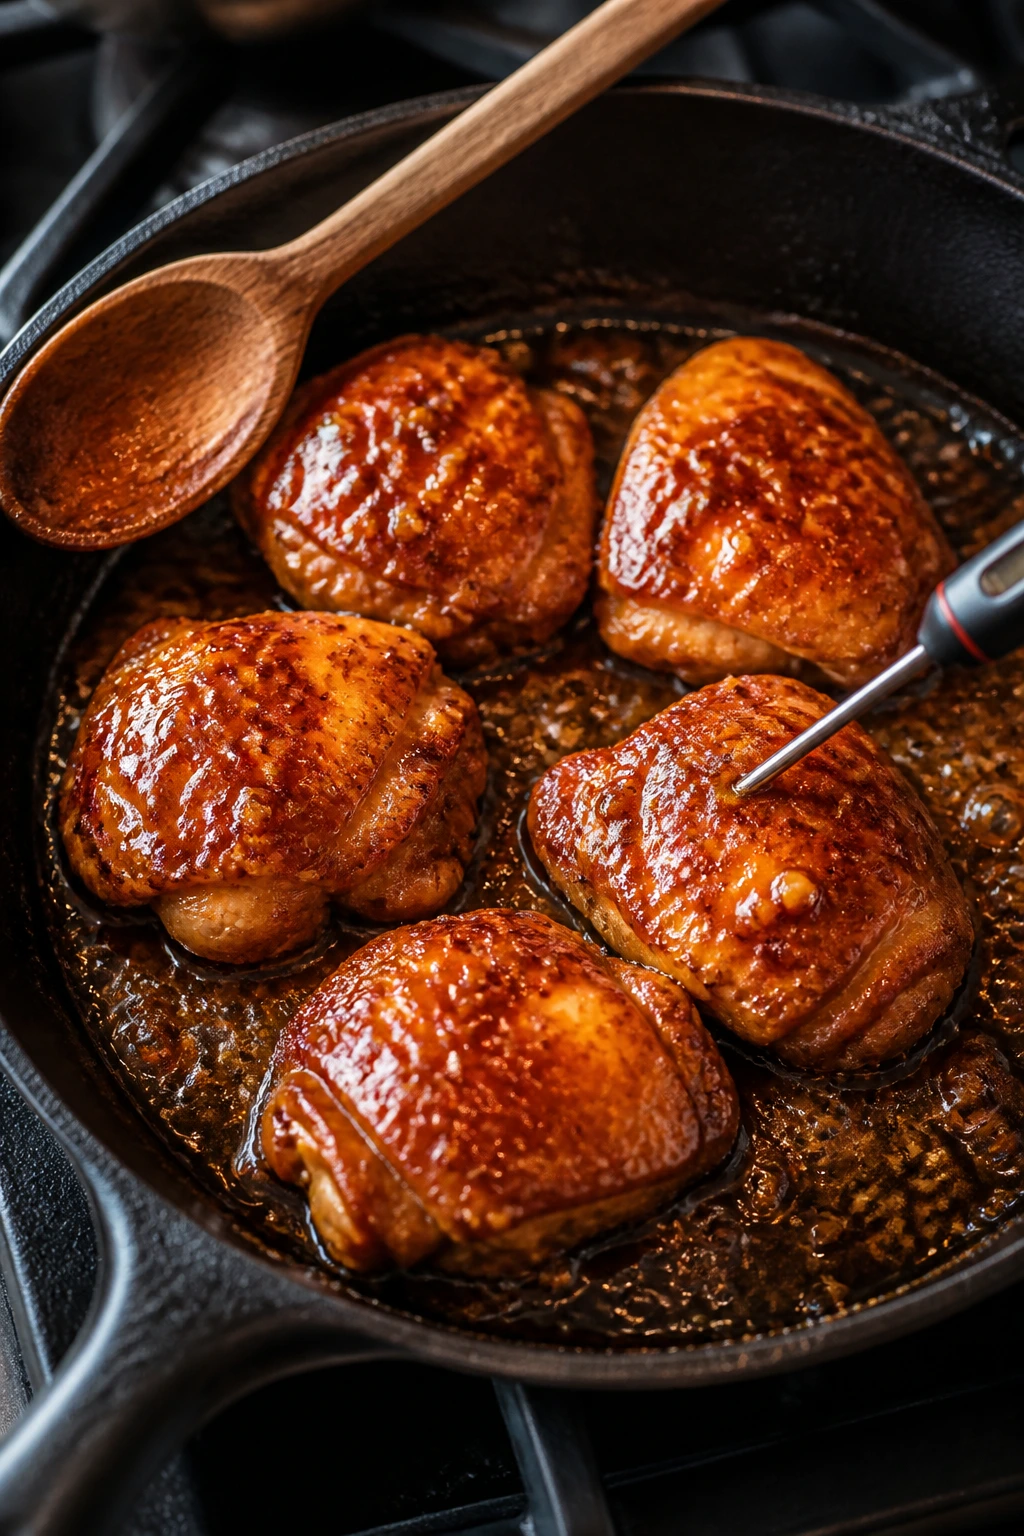
Finish and Serve:
-
Return the chicken and any juices on the plate to the skillet. Simmer for 2 to 4 minutes, spooning sauce over the top, until the chicken reaches 165°F in the thickest part.
-
Turn off the heat and swirl in the remaining 1 tablespoon butter. The sauce should look silky and cling to the spoon in a thin coat.
-
Scatter the sliced scallions and sesame seeds over the top, then let the chicken rest for 3 minutes before serving.
A thermometer makes this easy. Without one, you’re guessing at the exact moment when thighs go from juicy to dry, and that’s a game I wouldn’t bother playing.
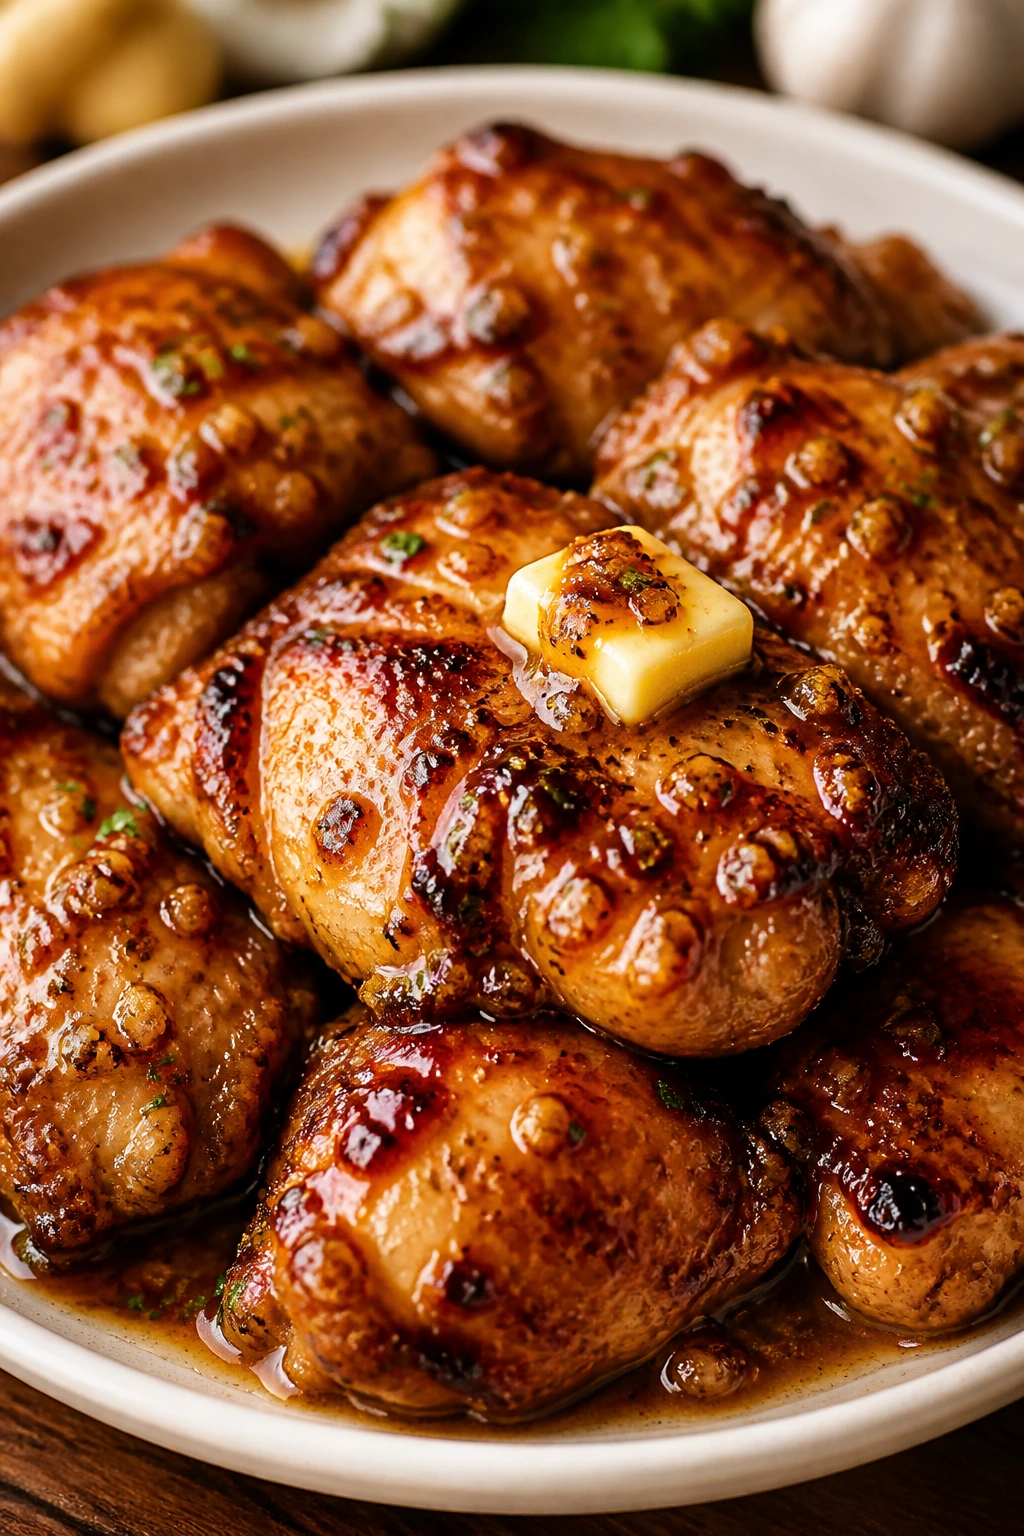
How I’d Plate It on a Real Tuesday Night
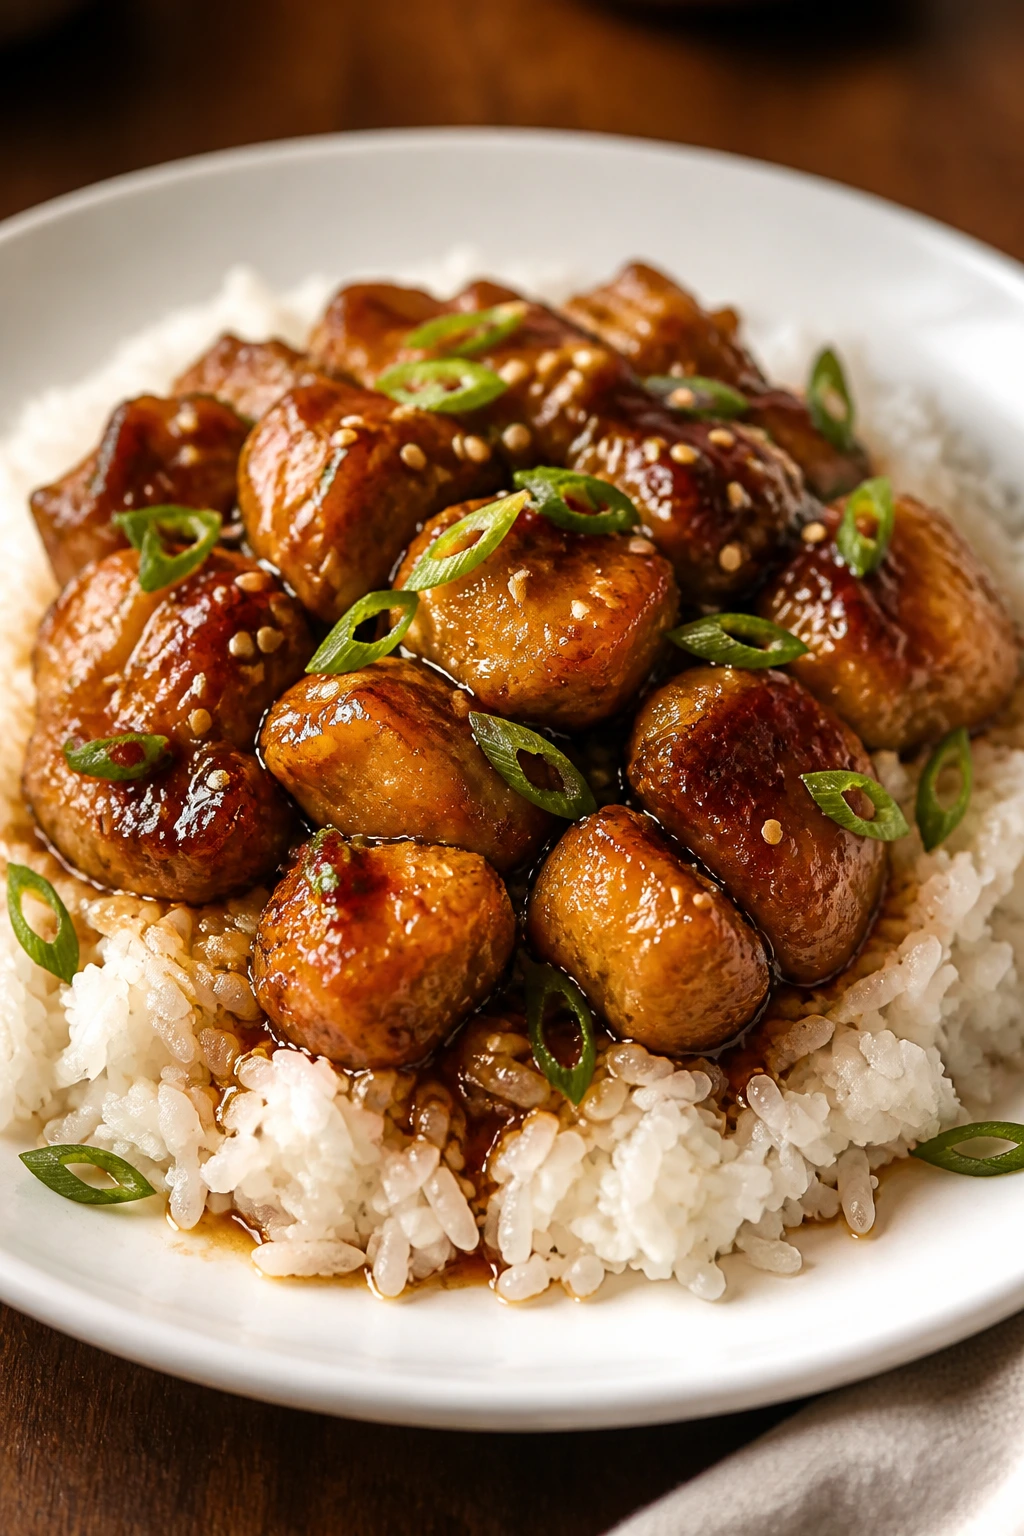
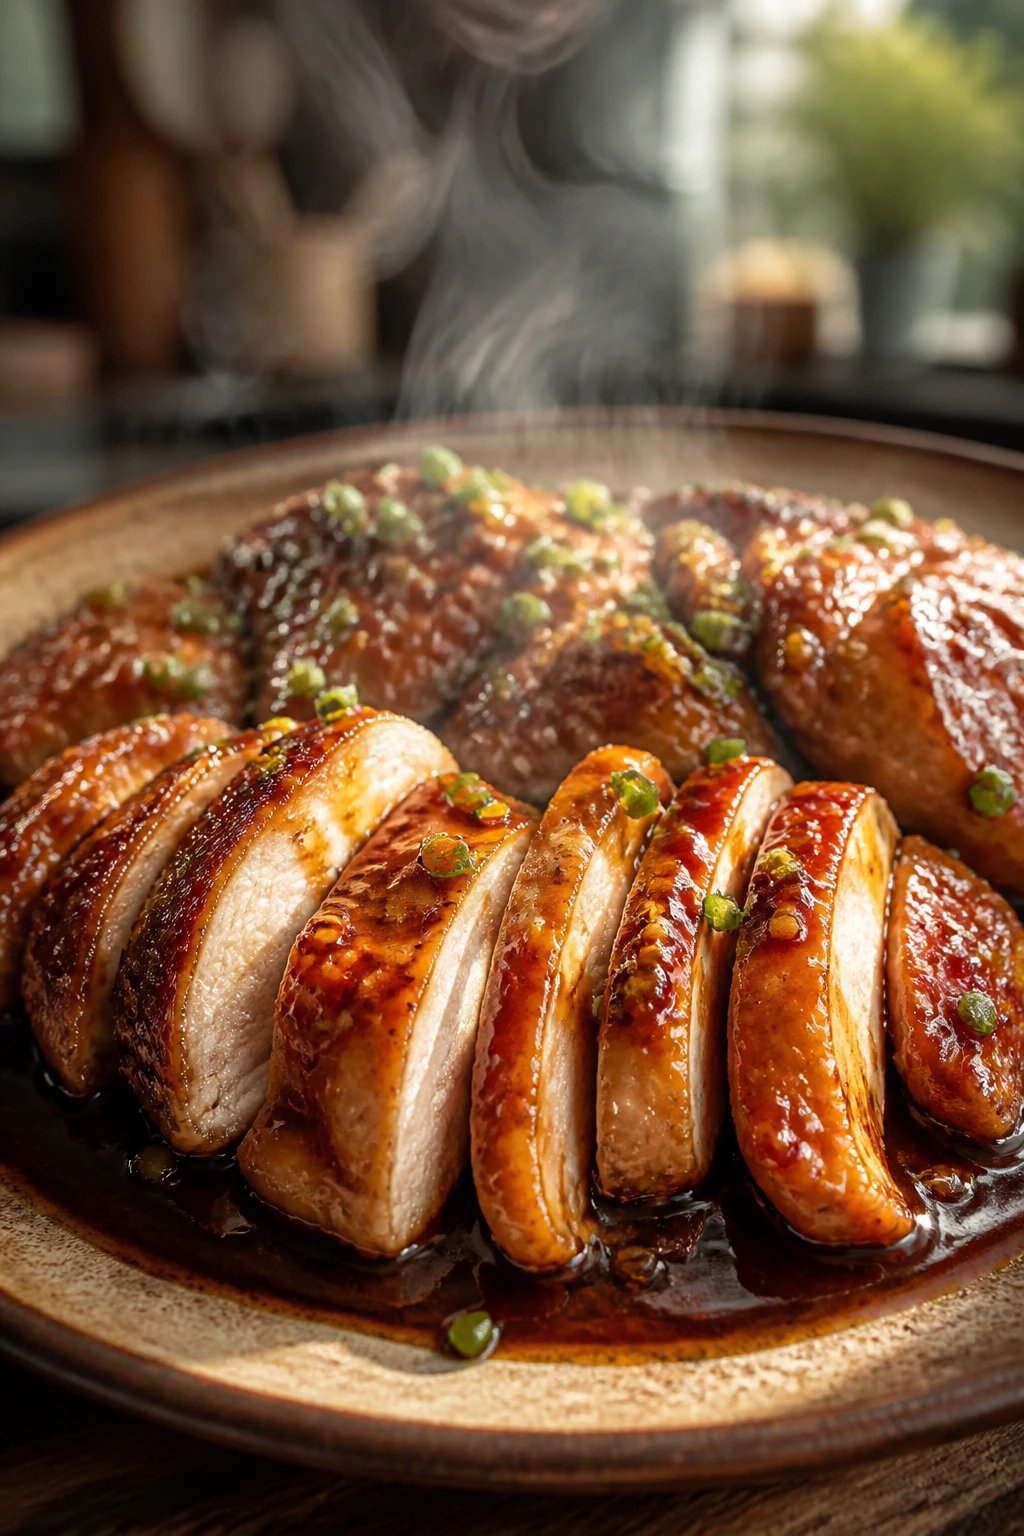
Presentation: Spoon a little sauce onto the plate first, then set the chicken on top so the glaze catches the light and runs into the rice instead of disappearing into the bowl. The scallions and sesame seeds look best right at the end, while the sauce is still warm enough to make them settle into place.
Accompaniments: Steamed jasmine rice is the obvious partner because it drinks up the sauce without getting in the way. Broccoli, snap peas, green beans, or a quick cucumber salad all work, and I especially like something crisp on the side if the chicken is rich that night. Noodles are fine too — even better if you toss them with a spoonful of the pan glaze.
Portions: Four thighs usually serve four people if you’re adding rice and vegetables. If you’re feeding bigger appetites, plan on one and a half thighs per person and a fuller pile of rice underneath.
Beverage Pairing: I’d reach for iced green tea, sparkling water with lime, or a dry lager if you want something cold and plain that cuts through the sweetness. The sauce already carries the flavor; the drink should clean the palate, not wrestle it.
Practical Tweaks That Make the Dish Taste More Finished
Flavor Enhancement: Add 1 teaspoon toasted sesame oil right at the end if you like a deeper, nutty finish. It’s potent, so use it as a last-minute accent rather than a cooking fat.
Time-Saver: Mix the sauce in the morning and keep it in the fridge, then season the chicken separately so dinner only asks for heat and attention. That tiny bit of prep makes the actual cooking feel half as long.
Texture Move: Leave the chicken alone once it hits the skillet. If you keep nudging it, the surface never browns properly, and the sauce has less flavor to work with later.
Cost-Saver: Buy the thighs in a larger pack and freeze them in dinner-sized portions. The sauce ingredients are cheap enough that the chicken is the only part that really moves the grocery bill.
Small Upgrade: Use fresh garlic instead of jarred mince if you can. Jarred garlic works in a pinch, but fresh has a sweeter smell when it hits butter, and that shows up in the finished sauce.
The Mistakes That Turn Sticky Sauce Into Soup or Candy
Crowding the skillet: If the chicken pieces are packed together, they release steam and the surface goes pale instead of browned. Use a wider pan or cook in two batches; that extra minute is cheaper than losing the crust.
Letting the garlic burn: Garlic only needs 20 to 30 seconds in butter. If it goes dark brown, the whole sauce picks up a bitter edge, and the sweetness makes that bitterness stand out even more.
Boiling the sauce too hard: A furious boil can make the honey taste flat and can reduce the liquid too far before the chicken is back in the pan. Keep it at a steady simmer and watch for a syrupy sheen instead of trying to race it.
Skipping the thermometer: Thighs are forgiving, but they still dry out if they sit on the heat too long. Pull them at 165°F and rest them for a few minutes; that’s how you get juicy meat without cutting into every piece.
Using full-sodium soy sauce without adjusting anything else: The sauce can swing too salty once the glaze tightens. Low-sodium soy gives you room to taste and finish the dish instead of trying to rescue it afterward.
Adding the butter too early: Butter can brown too fast in a hot pan, which muddles the glaze. Save the final tablespoon for the finish so the sauce turns glossy instead of greasy.
Four Smart Ways to Change the Recipe
Sesame-Ginger Skillet Chicken: Add 1 tablespoon finely grated fresh ginger to the pan with the garlic and finish with an extra pinch of sesame seeds. The ginger brings a warmer, sharper smell that works especially well if you’re serving the chicken with plain rice.
Spicy Chili Crisp Version: Stir 1 to 2 teaspoons chili crisp into the sauce after it thickens, then drizzle a little more over the plated chicken. This version leans saltier, hotter, and more textured, which is a nice shift when you want the dish to feel less sweet.
Chicken Breast Swap: Use 1 1/2 pounds boneless, skinless chicken breasts, sliced into cutlets or pounded to even thickness. Cook them over medium heat for less time, and pull them as soon as they reach 160°F because they’ll carry over to 165°F while resting.
Gluten-Free Pantry Version: Replace soy sauce with tamari and keep the cornstarch as written. The flavor stays close to the original, and the sauce thickens the same way, which is about as painless a swap as you’ll find.
Orange-Honey Finish: Add 2 tablespoons fresh orange juice and 1 teaspoon orange zest to the sauce. The citrus gives the glaze a brighter edge, especially if you’re serving broccoli or roasted carrots on the side.
Storing the Glazed Chicken Without Ruining the Texture
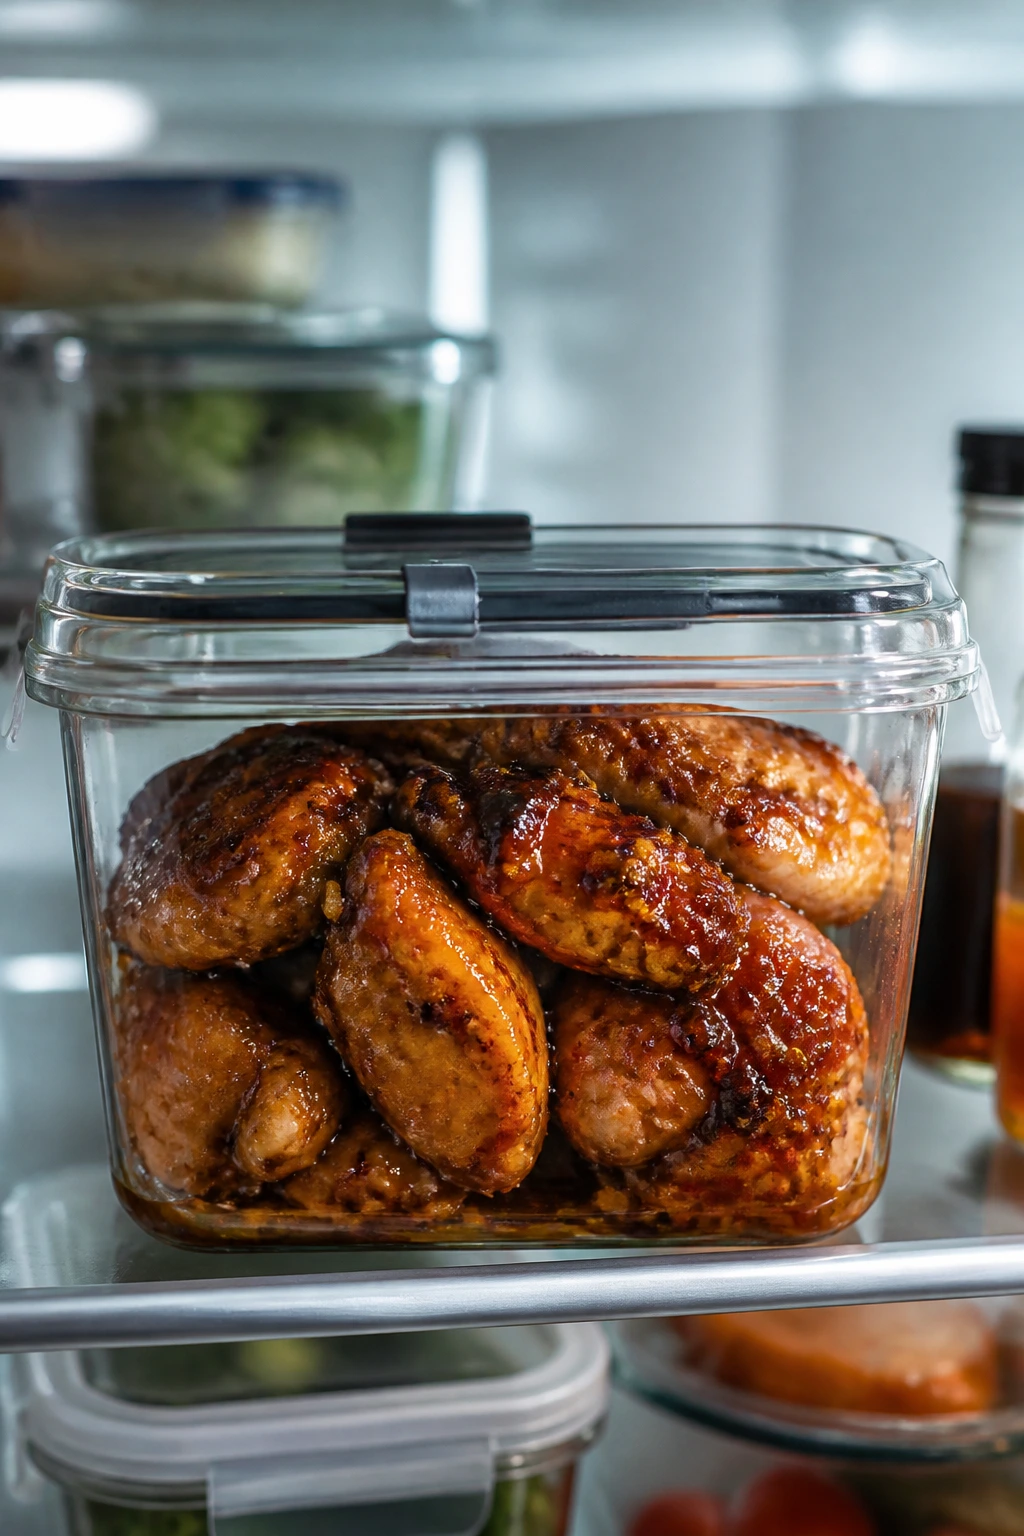
Leftovers keep well if you treat the chicken and sauce like a small rescue mission instead of a throwaway container. Cool the chicken for no more than 2 hours at room temperature, then store it in an airtight container in the refrigerator for up to 4 days.
The sauce will thicken in the fridge, which is normal. It tends to look a little sticky and opaque the next day, and that’s not a problem — it loosens again with heat and a tablespoon or two of water.
For freezing, tuck the chicken and sauce into a freezer-safe container for up to 2 months. Thaw it overnight in the refrigerator rather than on the counter, because the sauce reheats more evenly when the chicken starts cold but not icy.
Reheat gently. A skillet over low to medium-low heat is the best choice: add a splash of water, cover for a minute, then uncover and spoon the sauce over the chicken until it’s hot through. The microwave works in a pinch, but use 50% power and stop once or twice to stir the sauce around the edges so it doesn’t split.
If you want to make ahead, whisk the sauce up to 3 days in advance and keep it chilled. You can also season the chicken a day ahead and leave it uncovered on a rack in the fridge for a drier surface, which helps the browning happen faster.
Honey Garlic Chicken Questions People Ask Before They Start Cooking
Can I use chicken breasts instead of thighs?
Yes, but you’ll want to pound them to an even thickness or slice them into cutlets so they cook at the same speed. Pull them a little earlier than thighs and let carryover heat finish the job; that’s the part that keeps them from turning stringy.
Why does my sauce turn too thin?
Usually it’s either not simmered long enough or the pan was too cool when the sauce went in. Let it bubble gently for another minute or two, then return the chicken and spoon the glaze over the top; the sauce thickens more as it coats the meat.
What if I don’t have rice vinegar?
Apple cider vinegar works, and white wine vinegar is fine too if that’s what you have. You only need a little sharpness to stop the honey from tasting flat, so the exact vinegar matters less than the balance it creates.
Can I bake this instead of cooking it on the stove?
You can, though the glaze won’t get the same deep pan flavor. Bake the seasoned chicken on a lined sheet pan at 425°F until nearly done, then brush on the sauce and finish under the broiler for a minute or two, watching it closely so the sugar doesn’t scorch.
How do I keep the garlic from burning?
Add it after the chicken comes out of the skillet and lower the heat to medium first. Garlic needs only a short bloom in butter; if it starts to brown, your pan is too hot and you should move to the sauce immediately.
Is this recipe too sweet for people who don’t love sweet dinners?
Not if you keep the soy sauce low-sodium and don’t overshoot the honey. The vinegar, garlic, and browned chicken balance the sweetness, and the glaze tastes savory first if you let the pan do its job.
What’s the best side if I want the sauce to stretch farther?
Rice, buttered noodles, or mashed potatoes all help because they catch the extra glaze. A crisp vegetable on the side keeps the plate from feeling heavy, which matters when the sauce is shiny and rich.
A Sticky Pan Worth Keeping
There’s a reason this kind of chicken ends up in rotation so often: it behaves like a much fancier dinner than it is. A hot skillet gives you browned edges, a quick sauce gives you gloss, and the final minute of patience gives you chicken that stays juicy instead of stringy.
The other nice thing is that once you’ve made it a few times, you stop thinking of it as a recipe and start thinking of it as a method. Brown the chicken. Keep the garlic from burning. Let the sauce tighten just enough. That’s the whole rhythm, and it’s one worth keeping around.
Juicy Honey Garlic Chicken — Recipe Card
Recipe Name: Juicy Honey Garlic Chicken
Description: Boneless chicken thighs seared until golden, then coated in a sticky honey garlic glaze with soy sauce, vinegar, and butter. It’s fast enough for a busy night and stays juicy enough to earn repeat status.
Prep Time: 15 minutes
Cook Time: 20 minutes
Total Time: 35 minutes
Course: Main Course
Cuisine: American-Asian Inspired
Servings: 4 servings
Calories: About 360 kcal per serving
Ingredients
For the Chicken:
- 1 1/2 pounds boneless, skinless chicken thighs, patted dry
- 1 teaspoon kosher salt
- 1/2 teaspoon black pepper
- 1/2 teaspoon garlic powder
- 1 tablespoon cornstarch
- 1 tablespoon olive oil
- 2 tablespoons unsalted butter, divided
For the Honey Garlic Sauce:
- 5 cloves garlic, minced
- 1/3 cup honey
- 1/3 cup low-sodium soy sauce
- 1 tablespoon rice vinegar
- 2 tablespoons water
- 1 teaspoon cornstarch
- 1 tablespoon cold water
- 1/2 teaspoon crushed red pepper flakes, optional
For Garnish:
- 2 scallions, thinly sliced
- 1 tablespoon sesame seeds
Instructions
-
Pat the chicken thighs dry and season them with salt, pepper, and garlic powder. Toss with the 1 tablespoon cornstarch until lightly coated.
-
Whisk together the honey, soy sauce, rice vinegar, 2 tablespoons water, 1 teaspoon cornstarch, 1 tablespoon cold water, minced garlic, and red pepper flakes.
-
Heat the olive oil in a large skillet over medium-high heat. Sear the chicken 4 to 5 minutes on the first side and 3 to 4 minutes on the second side until browned. Remove to a plate.
-
Reduce the heat to medium. Add 1 tablespoon butter and the garlic if any remains separate, then pour in the sauce mixture and simmer until slightly thickened.
-
Return the chicken and any juices to the skillet. Simmer 2 to 4 minutes, spooning sauce over the top, until the chicken reaches 165°F and the glaze looks glossy.
-
Turn off the heat, swirl in the remaining 1 tablespoon butter, and top with scallions and sesame seeds. Rest 3 minutes before serving.
Notes: Use low-sodium soy sauce so the glaze stays balanced. If the sauce looks thin, simmer it a little longer before returning the chicken. Reheat gently with a splash of water so the glaze loosens again.