
Sesame chicken goes wrong fast when the pieces are cut too small, the pan is crowded, or the sauce gets poured in before the chicken has a chance to brown. You end up with pale cubes in a sugary glaze that tastes fine but feels tired on the tongue. The fix is not fancy. It’s mostly about heat, size, and restraint.
That’s why tender chicken sesame for weeknight dinners works so well when it’s built around chicken thighs instead of lean breast meat. Thighs stay forgiving in a hot skillet, they keep a little chew without turning stringy, and they handle a glossy soy-sesame sauce without drying out under pressure. I like that. A lot. Breast meat can work, but thighs give you a wider margin, and on a Tuesday night that margin matters.
The other piece is the sauce. Good sesame chicken should smell like toasted sesame oil the second it hits the pan, then turn sticky and shiny in a way that clings to the chicken instead of pooling under it. Garlic and ginger need only a moment. Honey wants heat, but not too much. Cornstarch needs to be whisked in cleanly. Miss one of those small things and the dish still cooks; it just loses its snap.
Why This Sesame Chicken Belongs in the Weeknight Rotation
- Thighs stay tender under heat: Boneless, skinless chicken thighs give you juicy bites even if the skillet runs a little hot or you leave the pieces in an extra minute.
- The sauce uses pantry staples: Soy sauce, honey, rice vinegar, sesame oil, garlic, ginger, and cornstarch do the job without a special shopping trip.
- The texture stays interesting: A light cornstarch coating gives the chicken a thin crust that soaks up sauce without turning soggy.
- It moves quickly once the prep is done: The actual cooking is brisk. If the chicken is cut and the sauce is whisked ahead, dinner lands in about 20 minutes.
- It tastes like takeout, but fresher: The glaze is brighter than the heavy bottled versions, and you can keep the salt and sweetness in check.
- Leftovers still behave: Reheated gently, the chicken keeps its tenderness better than most stir-fry-style dishes.
Yield: Serves 4
Prep Time: 20 minutes
Cook Time: 20 minutes
Total Time: 40 minutes
Difficulty: Beginner — the steps are straightforward, but the chicken does need room in the pan so it browns instead of steaming.
Best Served: Hot over rice, with the sauce still glossy
The Short Ingredient List That Builds a Sticky Glaze
For the Chicken:
- 1 1/2 pounds boneless, skinless chicken thighs, trimmed and cut into 1-inch pieces
- 1/2 teaspoon kosher salt
- 1/2 teaspoon black pepper
- 1/4 cup cornstarch
- 2 tablespoons neutral oil, such as avocado or canola
For the Sesame Sauce:
- 1/3 cup low-sodium soy sauce
- 1/4 cup honey
- 2 tablespoons rice vinegar
- 2 tablespoons cool water
- 1 tablespoon toasted sesame oil
- 3 cloves garlic, minced
- 1 tablespoon fresh ginger, finely grated
- 1 tablespoon cornstarch
- 1/4 teaspoon crushed red pepper flakes, optional
For Finishing:
- 2 tablespoons toasted sesame seeds
- 2 scallions, thinly sliced
What Each Ingredient Is Doing in the Pan
Chicken Thighs
What to use: 1 1/2 pounds boneless, skinless chicken thighs, trimmed of loose fat and cut into 1-inch pieces.
Preparation: Pat the chicken dry before seasoning. Dry surfaces brown; damp surfaces steam. Cut the pieces into a fairly even size so the pan finishes them at the same pace.
Substitutions: Boneless chicken breast works if that’s what you have, but cut it into thicker 1 1/4-inch pieces and watch it closely. Firm tofu can stand in for a vegetarian version, though it needs a longer press and a more careful sear.
Tips: Thighs are the reason this recipe stays tender under a fast, hot cook. They forgive a little more than breast meat, and on a weeknight that forgiveness is worth having.
Cornstarch Coating
What to use: 1/4 cup cornstarch for the chicken, plus 1 tablespoon cornstarch for the sauce.
Preparation: Dust the chicken lightly. You want a thin, even coating, not a paste. The sauce cornstarch should be whisked into the water before it goes anywhere near the hot pan.
Substitutions: Arrowroot can replace cornstarch in the sauce if needed, though the glaze may look a touch more translucent. Potato starch also works, but it thickens fast, so don’t walk away.
Tips: Cornstarch is doing two jobs here: it helps the chicken brown and gives the sauce that lacquered finish. Too much coating and the chicken gets chalky on the outside. Too little and the sauce slides off.
Soy, Honey, and Vinegar
What to use: 1/3 cup low-sodium soy sauce, 1/4 cup honey, and 2 tablespoons rice vinegar.
Preparation: Whisk them together before cooking so the honey dissolves and the vinegar doesn’t hit the pan in one sharp burst. Measure the soy sauce carefully; it sets the salt level for the whole dish.
Substitutions: Tamari works for gluten-free cooking. If you want a deeper sweetness, swap 1 tablespoon of the honey for light brown sugar. Apple cider vinegar can stand in for rice vinegar in a pinch, though it brings a rougher edge.
Tips: Low-sodium soy sauce gives you room to control the salt. Regular soy sauce can work, but it narrows your margin fast once the sauce reduces.
Garlic, Ginger, Sesame Oil, and Finish
What to use: 3 cloves garlic, 1 tablespoon fresh ginger, 1 tablespoon toasted sesame oil, 2 tablespoons toasted sesame seeds, and 2 scallions.
Preparation: Mince the garlic finely and grate the ginger so they melt into the sauce instead of hanging in sharp little bits. Slice the scallions thin so they land lightly on top rather than clumping.
Substitutions: Ground ginger is possible, but it tastes flatter. If toasted sesame oil is all you can find, use it sparingly; plain sesame oil has far less aroma. The sesame seeds can be white, black, or a mix.
Tips: Toasted sesame oil should go in the sauce, not into a screaming-hot empty pan. Its flavor is delicate enough to suffer if you treat it like frying oil.
The Tools That Make the Chicken Stay Tender
A dish like this does not need a pile of gear, but the right pan and a few small tools matter more than most people think.
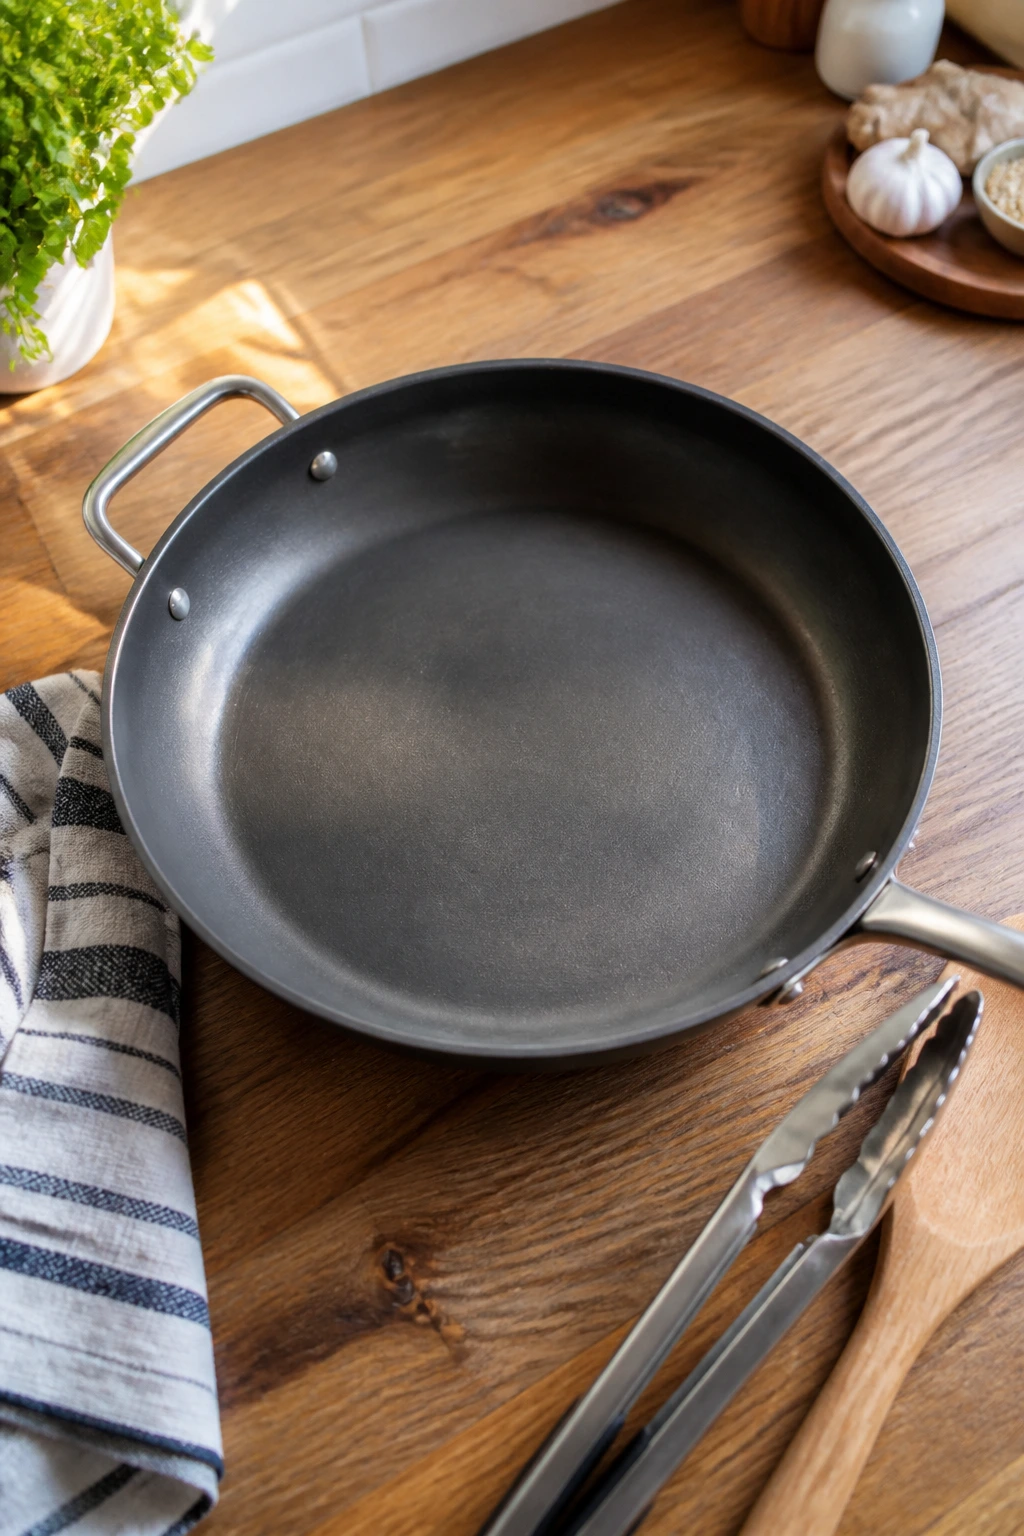
- 12-inch skillet or wide sauté pan: A wide surface gives the chicken room to brown. A deep pot traps steam and works against you.
- Medium mixing bowl: For tossing the chicken with salt, pepper, and cornstarch, and for whisking the sauce.
- Whisk: You need this to dissolve the honey and cornstarch cleanly.
- Tongs or a thin spatula: Handy for turning the chicken without scraping off the crust.
- Instant-read thermometer: The surest way to stop at 165°F without guessing.
- Microplane or fine grater: Ginger turns better when it disappears into the sauce.
- Measuring spoons and cups: The sauce depends on balance; eyeballing it is where things drift.
- Small bowl or ramekin: Useful for the cornstarch-water mix and for holding sesame seeds until the end.
The Stovetop Method That Keeps the Pieces Juicy
Patting the chicken dry takes thirty seconds, and it changes the whole pan. Moisture is the enemy of browning. If the thighs go into the skillet wet, the cornstarch slips, the oil sputters, and the first minute turns into a steam bath instead of a sear.
Step 1: Season and Coat the Chicken
- Pat the chicken thighs dry with paper towels, then trim away any hard pieces of fat and cut the meat into 1-inch chunks.
- Toss the chicken with 1/2 teaspoon kosher salt and 1/2 teaspoon black pepper in a medium bowl.
- Sprinkle on the 1/4 cup cornstarch and toss until every piece has a thin, even coating. The chicken should look dusty, not clumpy.
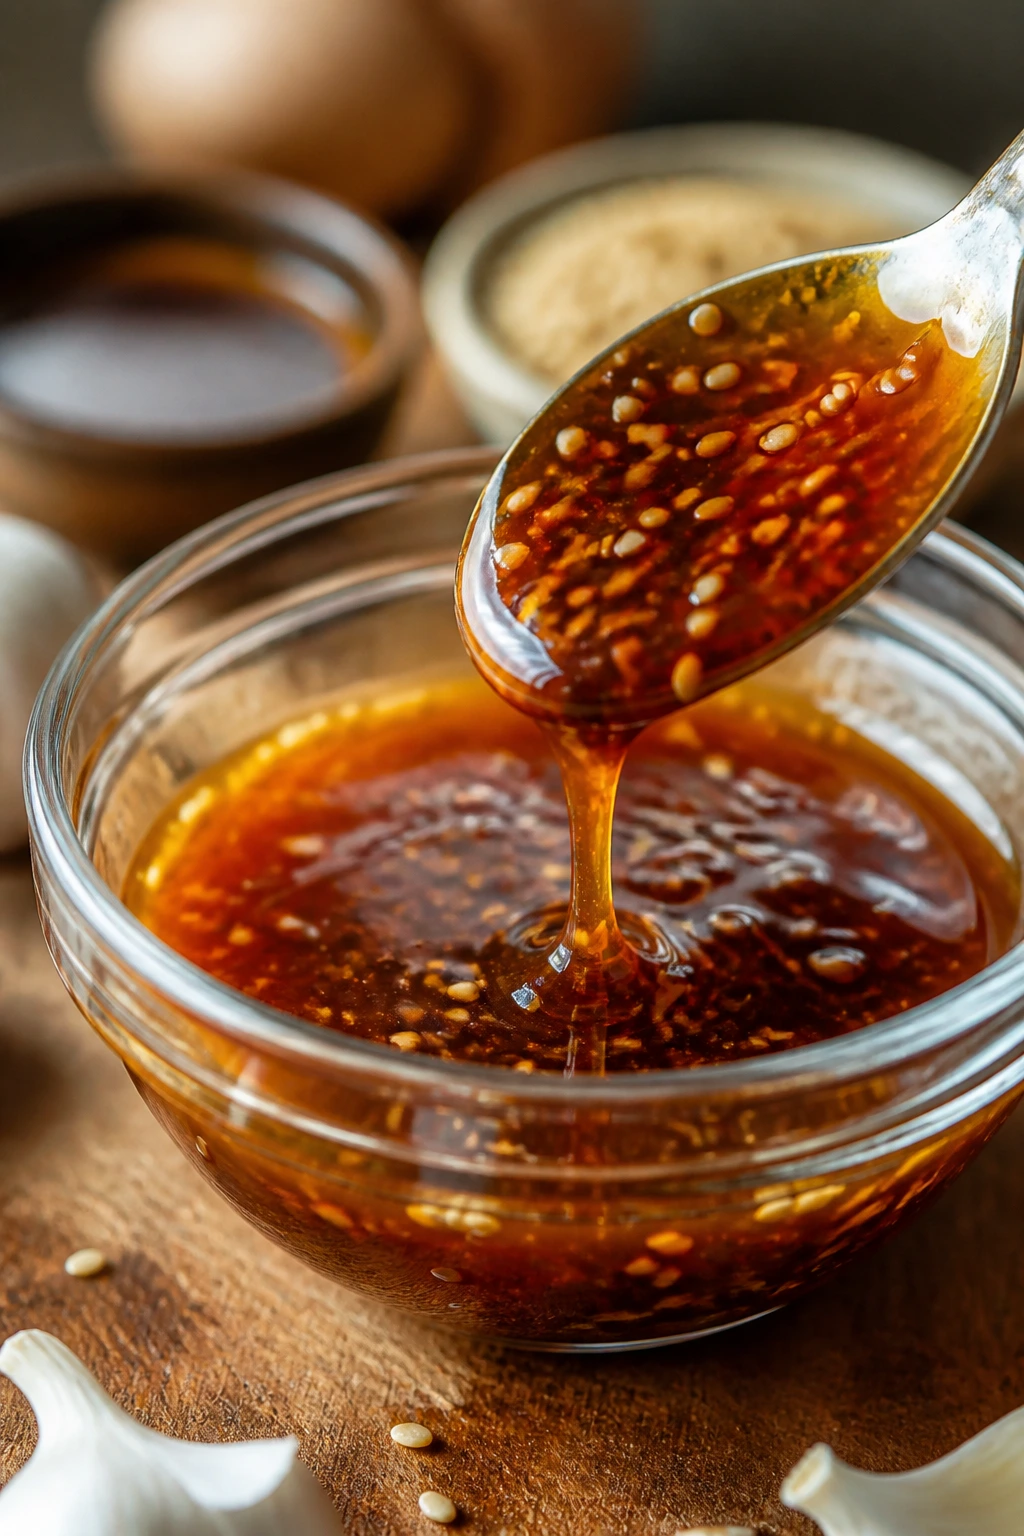
Step 2: Mix the Sauce
- In a separate bowl, whisk together the 1/3 cup low-sodium soy sauce, 1/4 cup honey, 2 tablespoons rice vinegar, 2 tablespoons cool water, 1 tablespoon toasted sesame oil, 3 minced garlic cloves, 1 tablespoon grated ginger, 1 tablespoon cornstarch, and 1/4 teaspoon crushed red pepper flakes if you want heat.
- Keep whisking until the cornstarch disappears and the honey loosens into the rest of the liquid. The mixture should look smooth and a little glossy.
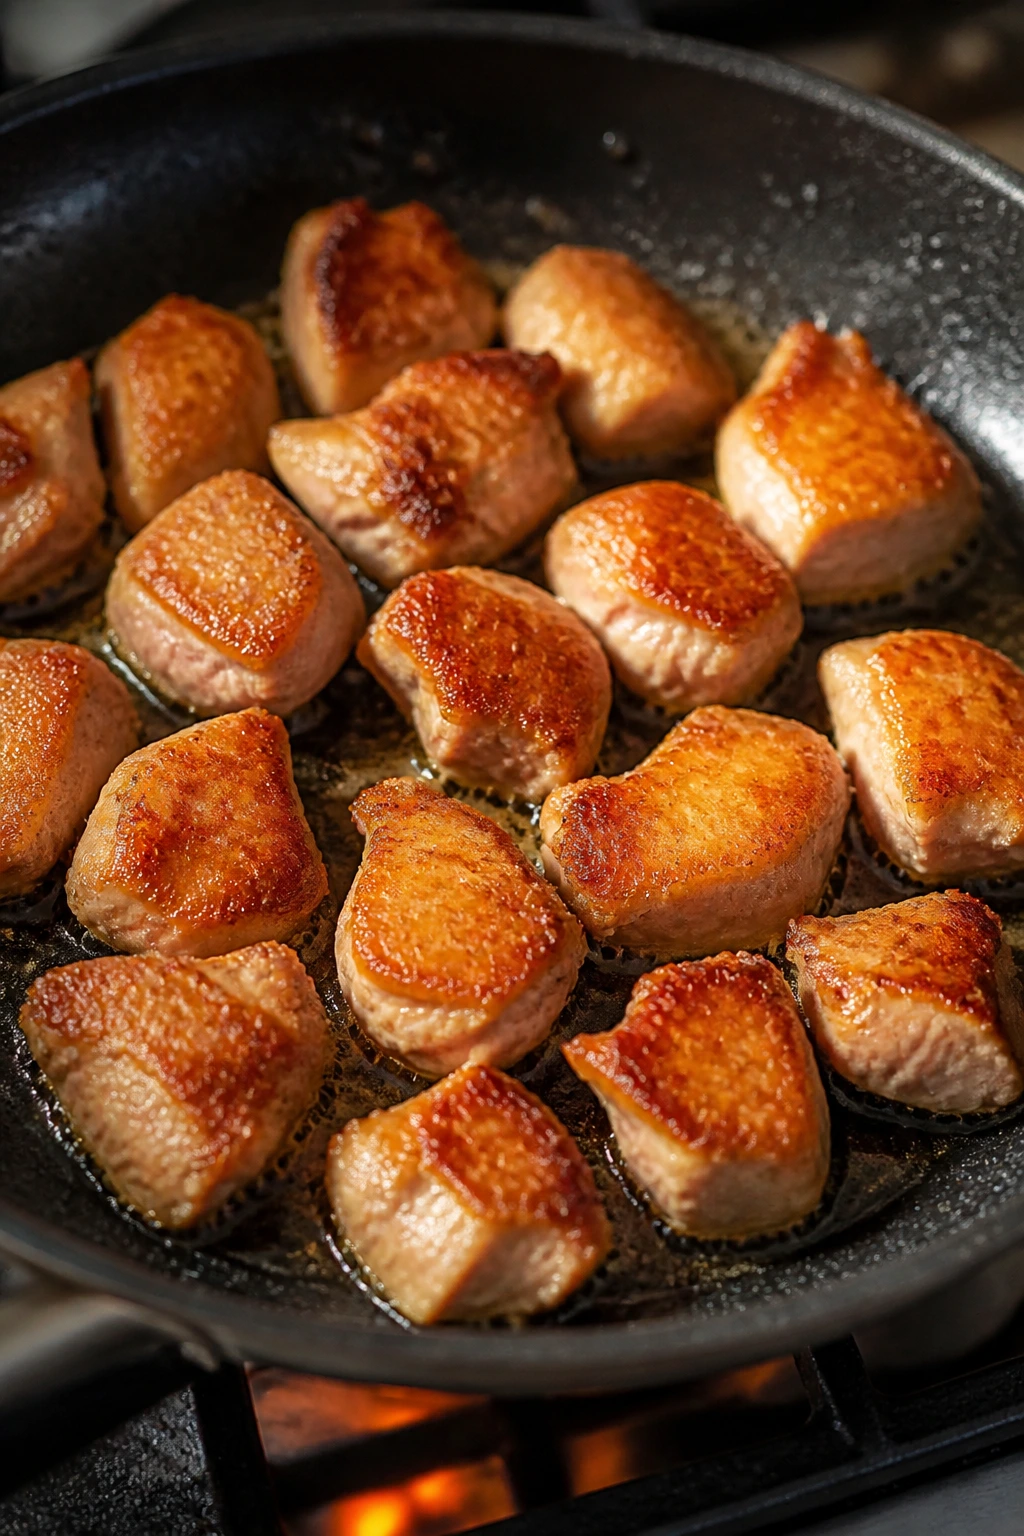
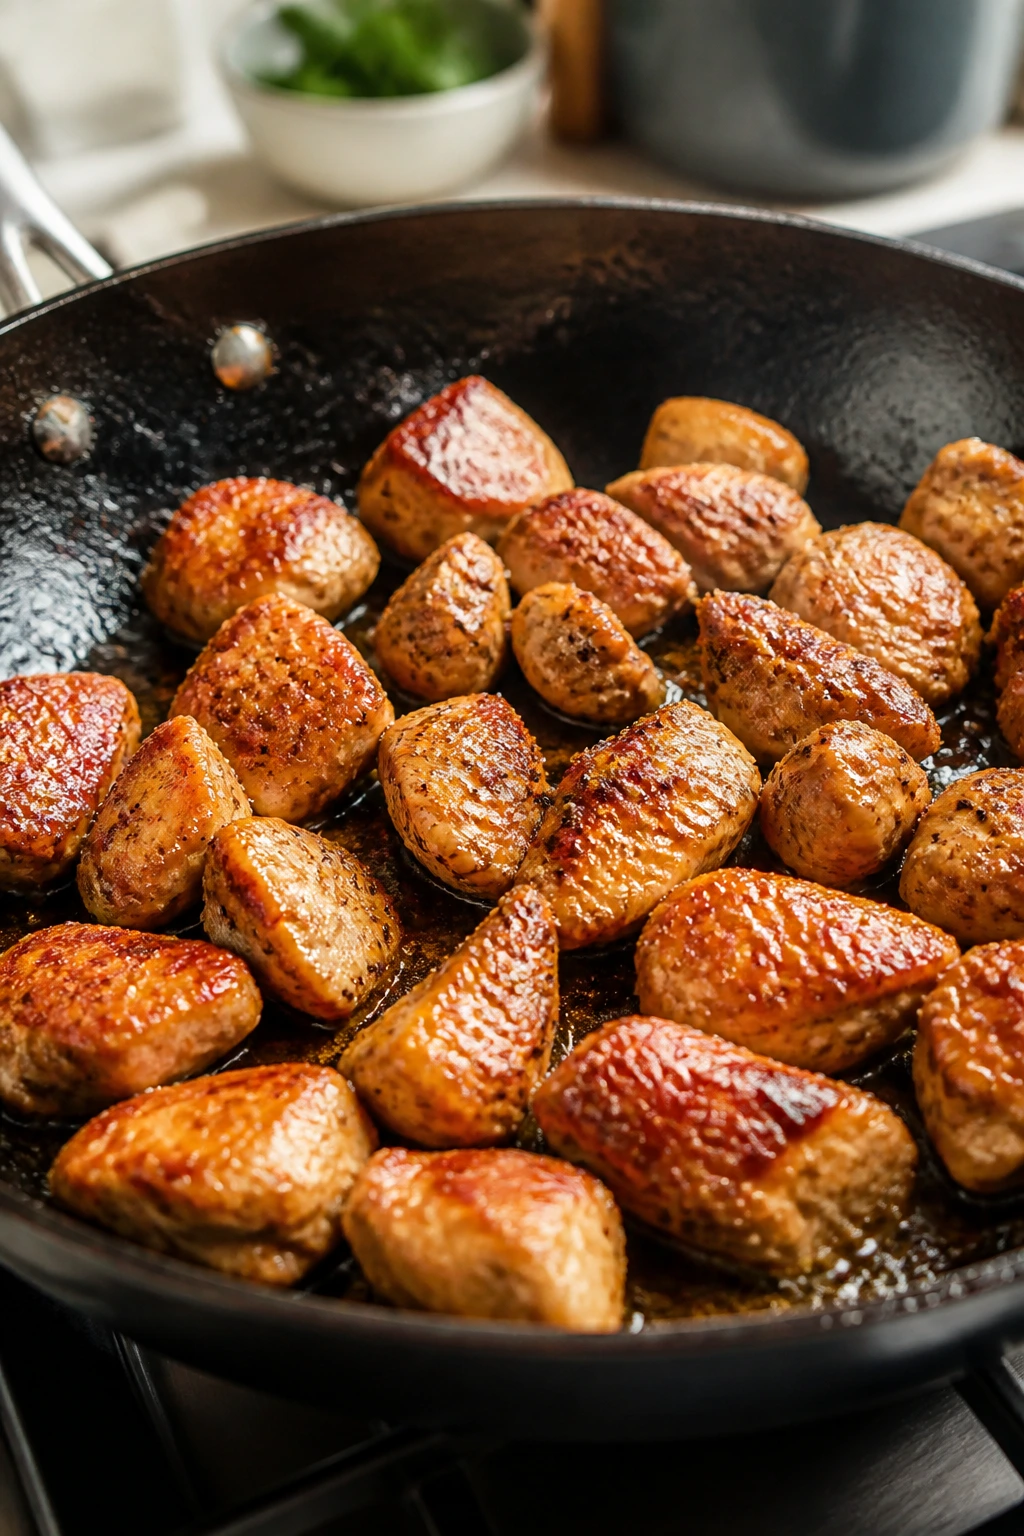
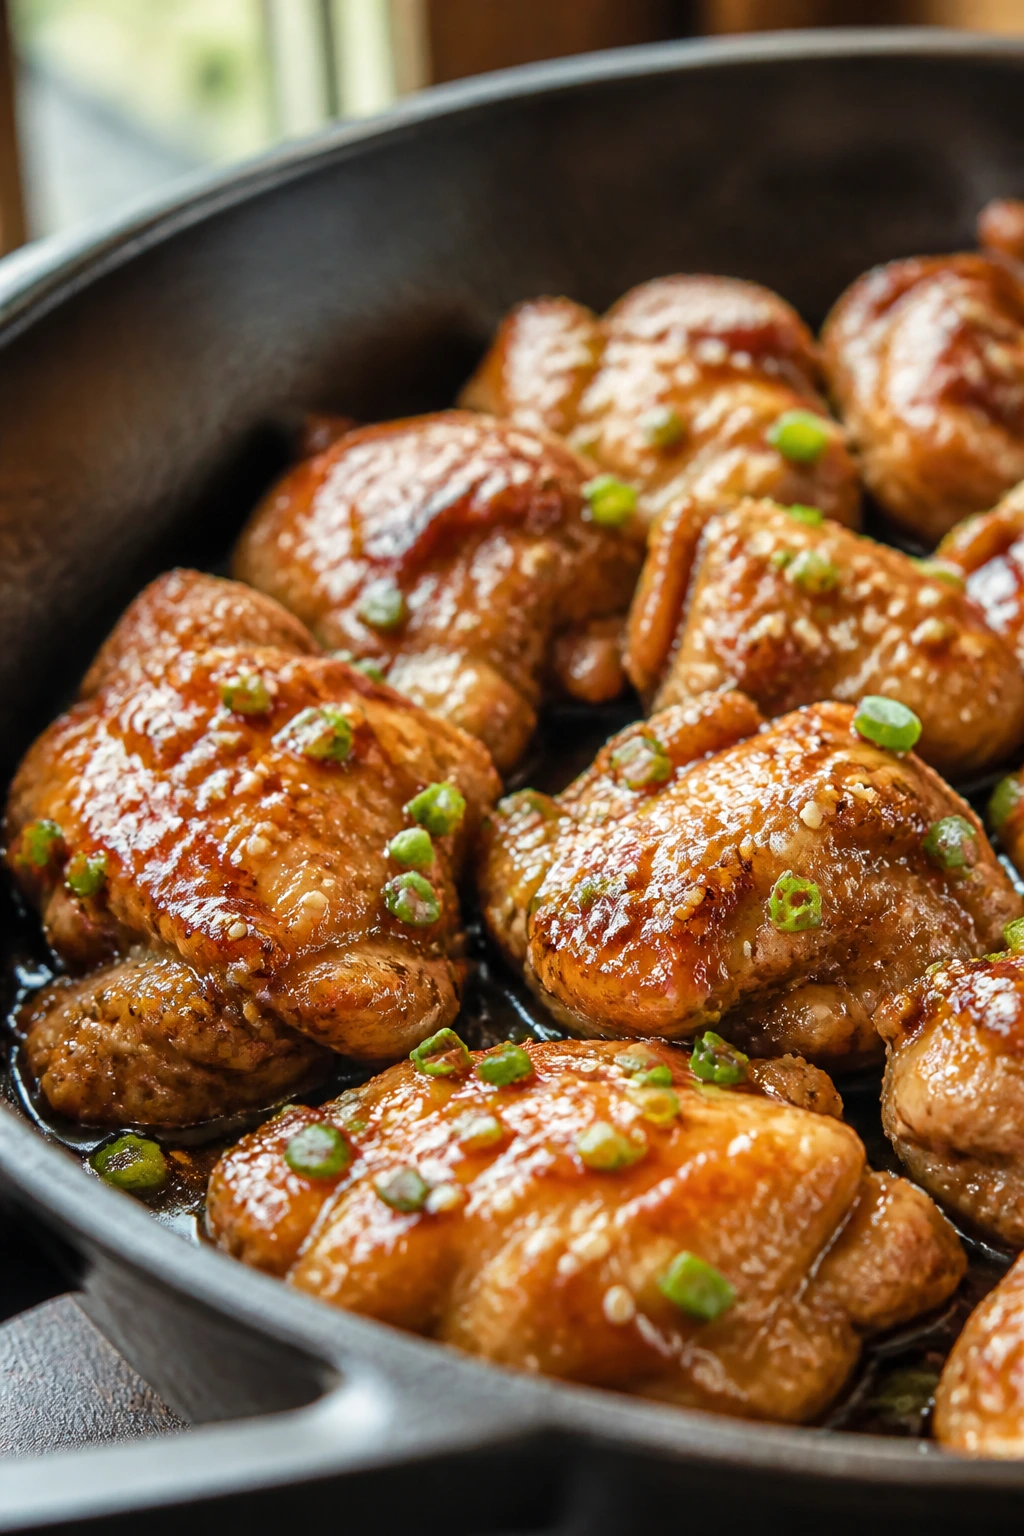
Step 3: Brown the Chicken
- Set a 12-inch skillet over medium-high heat and add the 2 tablespoons neutral oil. When the oil shimmers and slides easily across the surface, add half the chicken in a single layer.
- Cook for 3 to 4 minutes without moving the pieces, then turn and cook the other side for 2 to 3 minutes until golden and cooked through. An instant-read thermometer should register 165°F in the thickest piece.
- Transfer the cooked chicken to a clean plate and repeat with the second batch. Do not crowd the pan. If the pieces sit on top of one another, they release moisture and lose the crust you just built.
Step 4: Build the Sauce
- Lower the heat to medium and pour off any excess oil, leaving about 1 tablespoon in the skillet if the pan looks dry. Add the garlic-ginger bits left in the pan only if they have not already been fully mixed into the sauce.
- Stir the sauce again, then pour it into the skillet. Cook for 1 to 2 minutes, stirring constantly, until it bubbles and turns thick enough to coat the back of a spoon.
- If the sauce thickens too fast, add 1 tablespoon water and stir. If it still looks thin after 2 minutes, give it another 30 seconds. You want a syrupy glaze, not a loose broth.
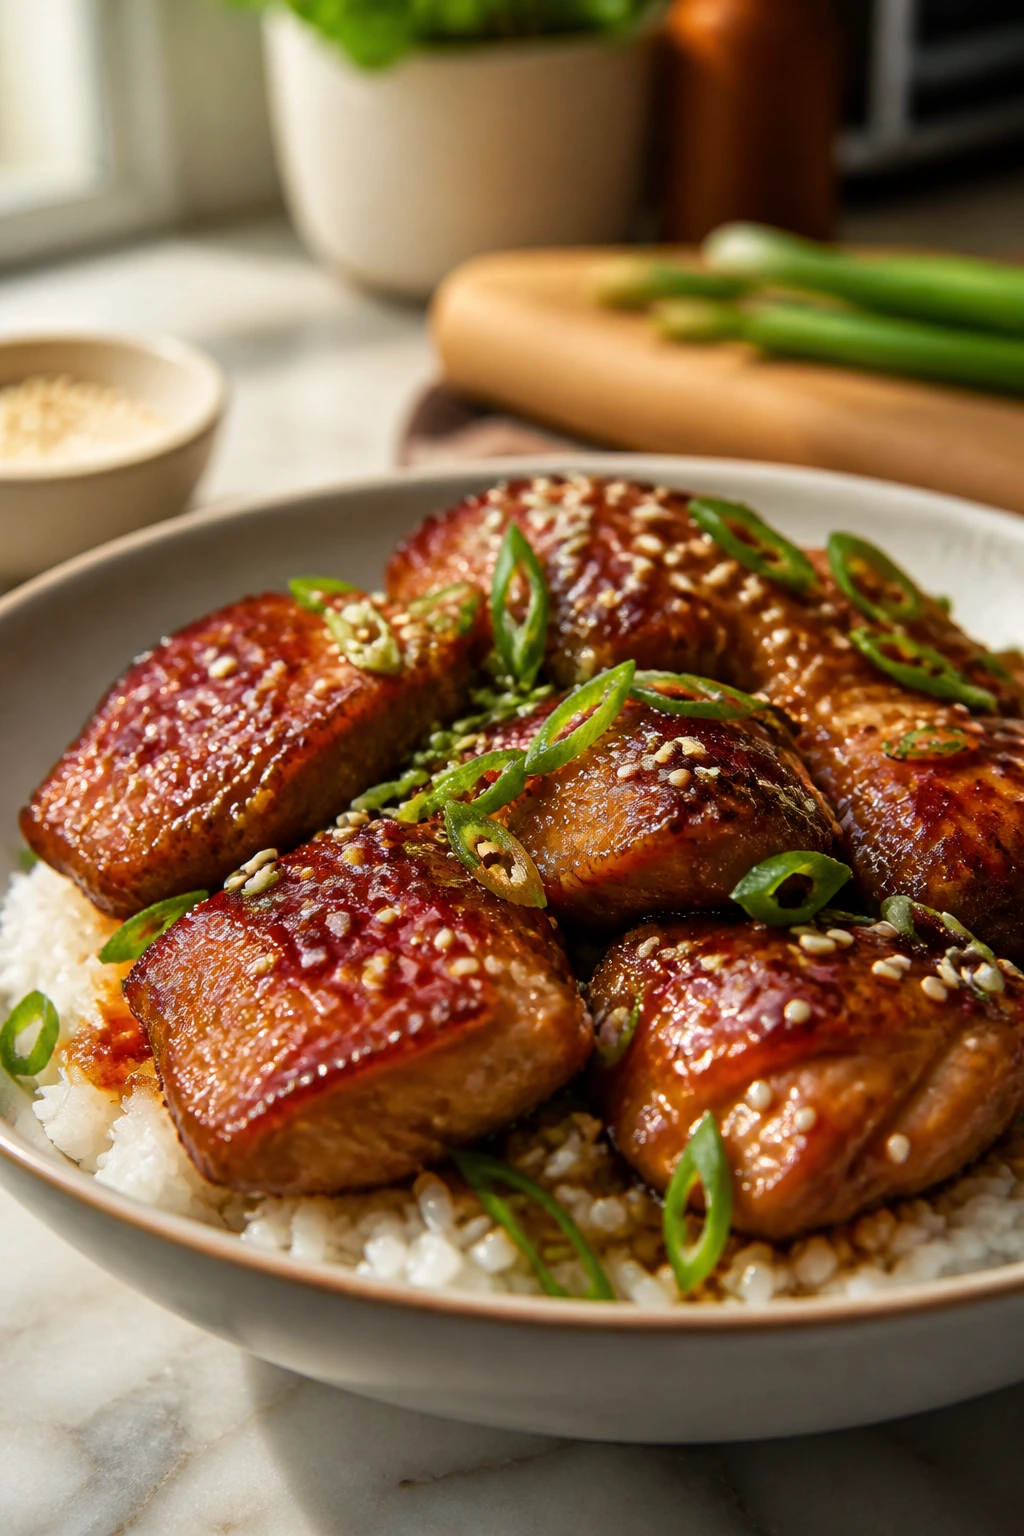
Step 5: Finish and Serve
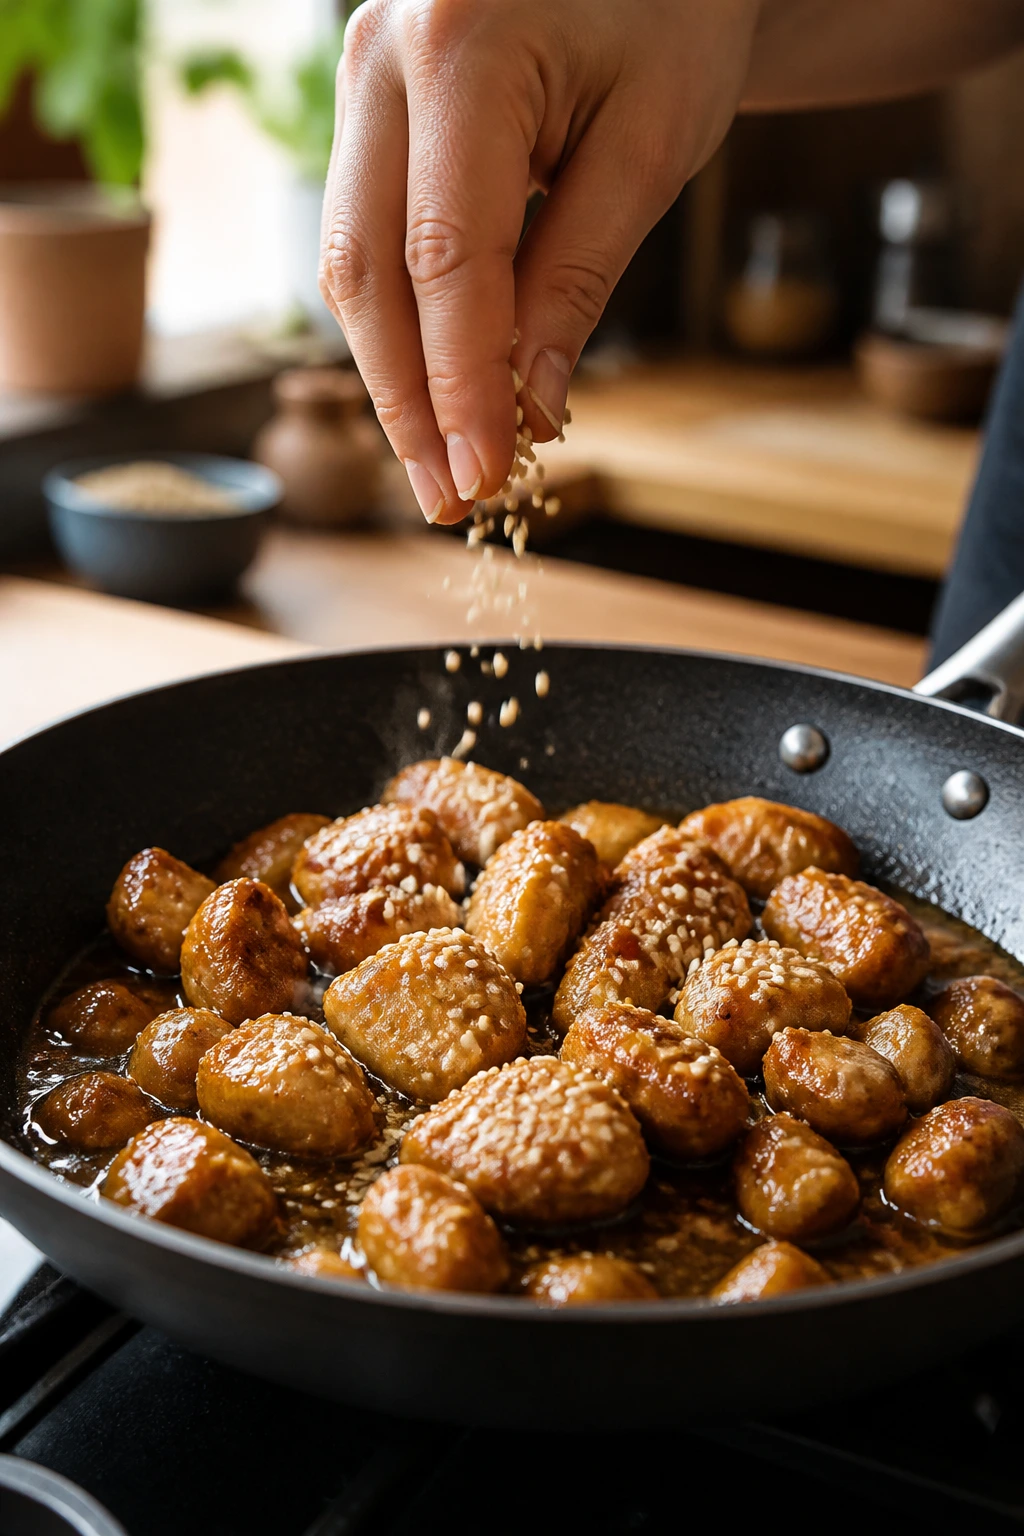
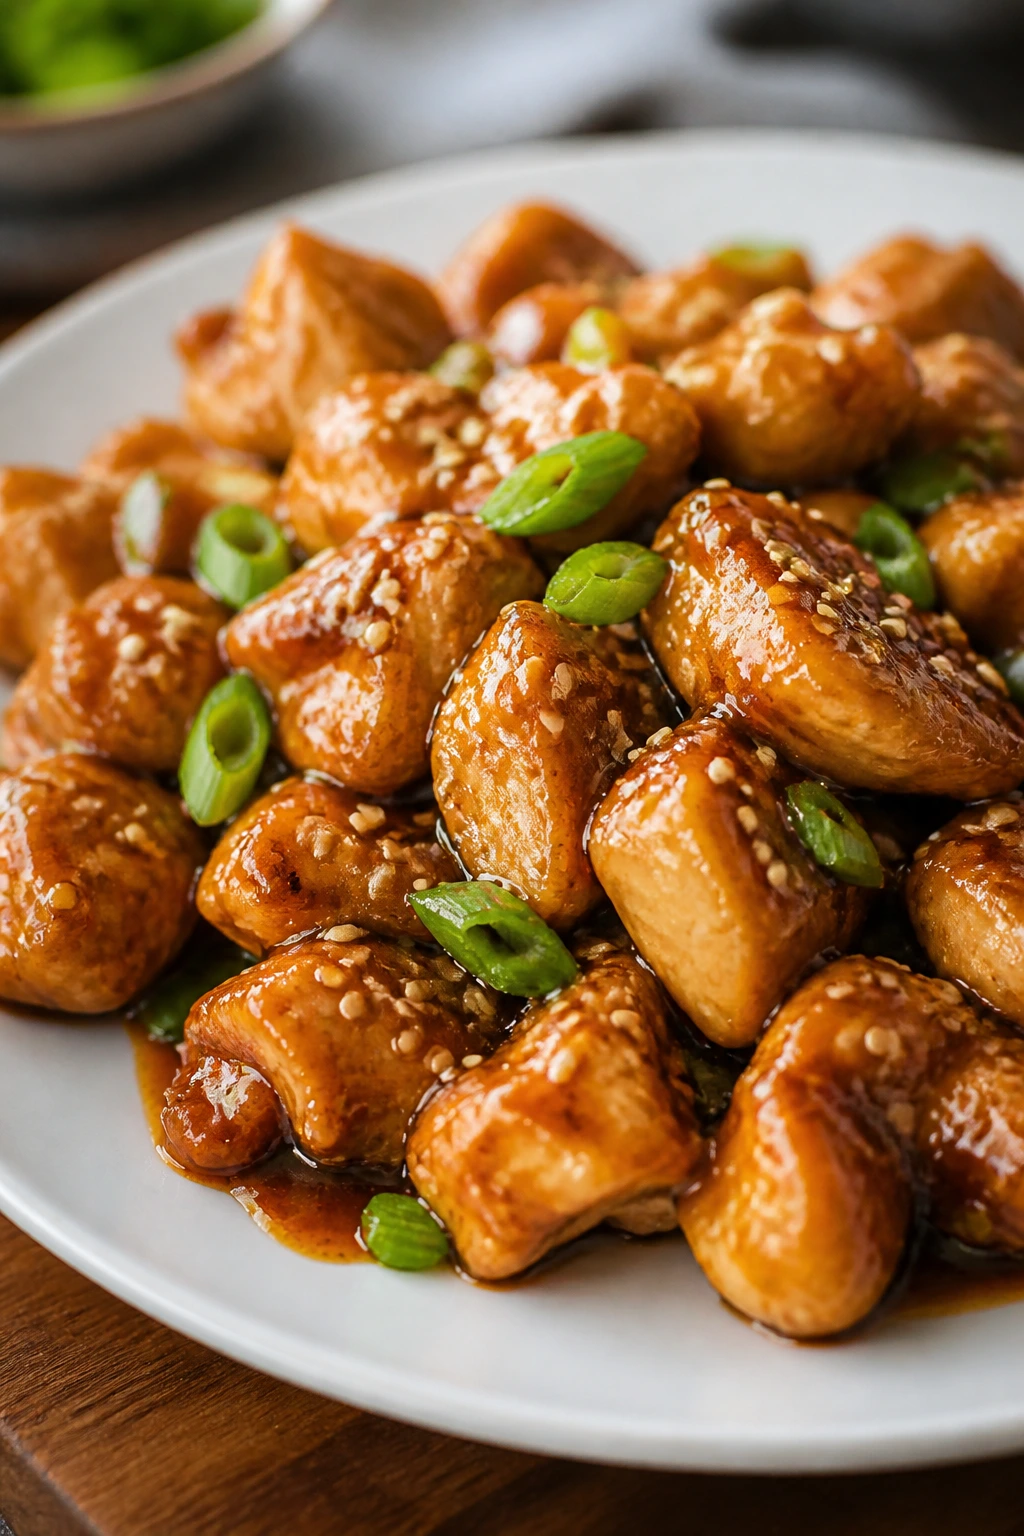
- Return the chicken to the skillet and toss for 1 to 2 minutes until every piece is coated and glossy.
- Sprinkle in the 2 tablespoons toasted sesame seeds and half the sliced scallions, then toss once more.
- Remove from the heat and top with the remaining scallions. Serve right away while the sauce still clings.
How to Plate Sesame Chicken So It Feels Like Dinner, Not Just Takeout

Rice alone is fine, but a better plate takes two extra minutes. Spoon the chicken over a shallow mound of jasmine rice or short-grain white rice, then let a little sauce run around the edges of the bowl. That small pool matters; it keeps the rice from feeling dry and makes the whole thing look intentional instead of hurried.
Presentation: I like a wide bowl rather than a deep one. The chicken sits in a single layer, the sesame seeds stay visible, and the scallions land like a fresh green line across the top. If you pile the chicken too high, you bury the good part—the glaze.
Accompaniments: Steamed broccoli, snap peas, or bok choy are the cleanest side choices because they bring crunch without fighting the sauce. If you want more contrast, a cucumber salad with rice vinegar, a pinch of sugar, and salt cuts the sweetness fast. Noodles can work too, but rice soaks up the glaze more neatly.
Portions: Four servings is the sweet spot for 1 1/2 pounds of chicken. If you’re feeding very hungry eaters, stretch it with extra vegetables or an extra cup of rice rather than adding more sauce. The chicken should stay the star, not vanish under starch.
Beverage Pairing: Cold green tea is the easy answer. A crisp lager or a light pilsner also plays well with the sesame oil and soy sauce. If you want something nonalcoholic and brighter, sparkling water with lime keeps the plate from feeling heavy.
Small Moves That Make the Sauce Shine and the Chicken Stay Juicy
Flavor Enhancement: Toast the sesame seeds in a dry skillet for 2 minutes before the chicken cooks. They should smell nutty and look a shade darker, not burnt. That tiny step gives the finished dish a warmer, richer top note that plain seeds never quite deliver.
Time-Saver: Mix the sauce up to 3 days ahead and keep it in a jar in the fridge. You can also trim and cut the chicken the night before, then store it covered on a plate or in a container. When dinner time hits, the skillet work is almost comically fast.
Pro Move: Use a wide skillet and a hot one. The chicken wants contact with metal, not a crowded pile. If you hear only a faint hiss when the chicken goes in, the pan is too cool. Wait until the oil shimmers first.
Sauce Control: Taste the sauce before it goes into the pan. If your soy sauce is salty, keep the vinegar and honey as written. If it tastes sharp, add another teaspoon of honey. If it tastes flat, a few drops more toasted sesame oil can wake it up without making the whole dish oily.
Make-It-Yours: For a lighter version, serve the chicken with extra broccoli or shredded cabbage and a smaller scoop of rice. For a gluten-free plate, swap in tamari and check that your sesame oil and vinegar are plain, not blended with anything odd. For more heat, add chili crisp at the table instead of overloading the sauce in the pan.
Where Sesame Chicken Goes Wrong
The mistakes are small, and that is why they keep showing up.
- Crowding the skillet: When too many chicken pieces go in at once, they steam instead of browning. The coating turns gummy and the sauce has less grip later. Cook in two batches, even if the first batch looks like it will take longer.
- Adding sauce to a dry, blazing-hot pan: Garlic and ginger can burn in seconds, which gives the glaze a bitter edge. Lower the heat to medium before the sauce goes in, and keep it moving once the cornstarch starts to thicken.
- Using too much cornstarch on the chicken: A thick coating can turn pasty after the sauce hits it. You want a light dusting, enough to encourage browning and cling, not a shell.
- Cooking the chicken until it looks dry: Thighs can take a little heat, but they do not improve by hanging around. Pull them as soon as they hit 165°F. A piece that climbs much past that starts to tighten up and lose its juices.
- Letting the sauce boil too long: Honey reduces fast. If you walk away, it can go from glossy to sticky in under a minute. Once it coats a spoon and clings to the chicken, stop.
- Saving the sesame seeds for the end but never toasting them: Untoasted seeds are fine, but they taste flat. Toasting gives the dish a deeper, almost nutty smell that people notice before they can name it.
Variations Worth Cooking More Than Once
Spicy Chili Crisp Sesame Chicken: Stir 1 to 2 teaspoons of chili crisp into the sauce, then finish with an extra pinch of red pepper flakes. The heat lands in little pulses instead of one blunt burn, which works especially well with rice.
Orange-Sesame Chicken: Replace the 2 tablespoons water with 2 tablespoons fresh orange juice and add 1 teaspoon orange zest to the sauce. The orange cuts the sweetness and gives the glaze a brighter edge, closer to what you’d want with broccoli or snap peas.
Gluten-Free Weeknight Bowl: Use tamari in place of soy sauce and make sure your other condiments are gluten-free. Serve it over rice with cucumber ribbons and shredded carrots, and the bowl still feels complete without any flour-based help.
Crunchier Sesame Chicken: After coating the chicken, let it sit on a plate for 5 minutes before frying. That short pause hydrates the cornstarch just enough to cling, and it helps the crust hold together a bit better in the skillet.
Vegetable-Heavy Sesame Chicken: Add 2 cups broccoli florets or sliced bell peppers after the chicken comes out of the pan. Stir-fry the vegetables for 2 to 3 minutes before the sauce goes in, then return the chicken and finish everything together. You get more color and more bite without changing the sauce at all.
Storing, Reheating, and Making It Ahead Without Ruining the Texture
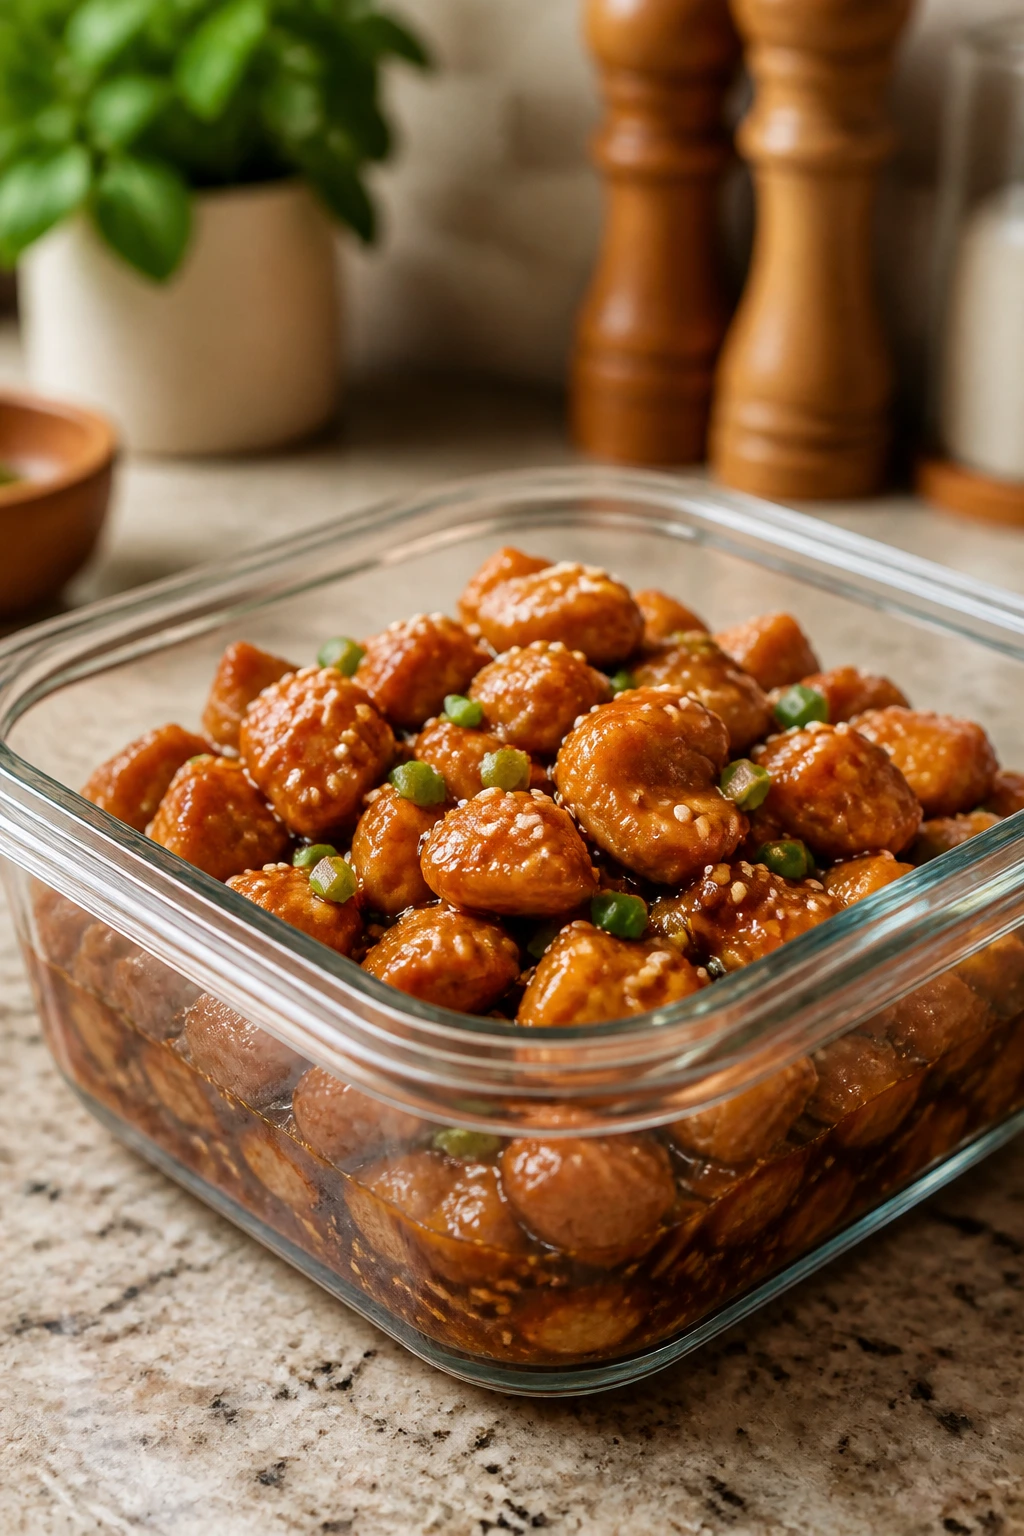
Sesame chicken holds up better than a lot of saucy chicken dishes, but the texture still depends on how you store it. Put leftovers in an airtight container once they’ve cooled for about 20 minutes. Don’t leave the chicken sitting out for long stretches; the sauce gets thicker as it cools, and the rice underneath can turn damp if everything is packed together too soon.
Fridge: Store the chicken for 3 to 4 days. If you’ve already mixed it with rice, it will still keep, but the rice will soften faster than the chicken does. I prefer storing the chicken and rice separately, then bringing them back together at the table.
Freezer: Freeze for up to 2 months in a sealed container or freezer bag. The sauce may separate a little on thawing, but a quick stir in the pan fixes most of that. Freeze in flat portions if you want faster thawing later.
Reheating: The best method is a skillet over medium-low heat with 1 to 2 tablespoons water. Stir gently for 3 to 5 minutes until the chicken is hot and the sauce loosens again. Microwaving works too, but use 50% power and short bursts so the chicken does not go rubbery on the edges.
Make-ahead: The sauce can be mixed 3 days ahead. The chicken can be cut and seasoned a day ahead, then refrigerated. I would not brown the chicken early unless you have to; the crust is at its best when it goes from pan to sauce in the same stretch of time.
Best reheating trick: Add fresh scallions and a few more sesame seeds after reheating. The old ones go soft. A fresh topping makes the leftovers taste like a planned second meal rather than a reheated one.
Sesame Chicken Questions People Ask at the Stove

Can I use chicken breasts instead of thighs?
Yes, but cut the breasts into larger 1 1/4-inch pieces and cook them a little more cautiously. Breast meat dries out faster, so pull it the second it reaches 165°F. If thighs are available, I’d still choose them for this dish.
Why is my sauce not thickening?
Either the pan is too cool or the cornstarch was not fully whisked into the liquid. Keep the sauce at a steady bubble and give it another 30 to 60 seconds. If it still looks thin, mix 1 teaspoon cornstarch with 1 tablespoon cool water and stir that in.
Can I bake the chicken instead of frying it?
You can, though the coating will be less crisp. Bake the coated chicken on a greased sheet pan at 425°F for about 18 to 22 minutes, turning once halfway through, then toss it with the sauce on the stovetop. The flavor stays close, but the skillet version has a better crust.
What if I want it less sweet?
Drop the honey to 3 tablespoons and add 1 tablespoon more rice vinegar. That shift keeps the glaze balanced without turning it sharp. You can also add a little extra scallion at the end for a fresh bite.
Does toasted sesame oil matter that much?
Yes. Plain sesame oil has a quieter flavor, and the toasted version gives the sauce its roasted, nutty smell. If you use plain sesame oil, keep the sesame seeds toasted so the dish still has that warm finish.
How do I keep the chicken from going soggy after I add the sauce?
Return the chicken to the pan only once the sauce has thickened first. If you toss raw chicken into a thin sauce, the coating loosens and softens before the glaze has a chance to cling. That extra minute of bubbling makes a real difference.
Can I make this for lunch meal prep?
Absolutely, and it holds up better than a lot of chicken bowls. Keep the chicken and rice in separate containers if you can, then reheat the chicken first and spoon it over the rice. Add fresh scallions after reheating so the top doesn’t taste flat.
A Dish Worth Keeping on the Repeat List
A good weeknight dinner has to earn its place. It needs to move fast, taste like you cared, and survive the gap between the cutting board and the plate without losing its shape. This sesame chicken does that when the chicken is cut evenly, the pan isn’t crowded, and the sauce is pulled the moment it turns glossy.
The nice part is that none of those moves are hard. They’re just specific. Once you’ve made it once or twice, the process stops feeling like a recipe and starts feeling like a habit—the kind you reach for when the fridge is half-full and the clock is not being kind.
Tender Chicken Sesame — Recipe Card
Recipe Name: Tender Chicken Sesame
Description: Juicy chicken thighs are lightly coated, pan-seared, and tossed in a glossy soy-honey sesame glaze with garlic, ginger, and scallions. Serve it over rice for a fast weeknight dinner with a clean, sticky finish.
Prep Time: 20 minutes
Cook Time: 20 minutes
Total Time: 40 minutes
Course: Dinner, Main Course
Cuisine: American-Asian Inspired
Servings: 4 servings
Calories: About 430 kcal per serving
Ingredients
For the Chicken:
- 1 1/2 pounds boneless, skinless chicken thighs, trimmed and cut into 1-inch pieces
- 1/2 teaspoon kosher salt
- 1/2 teaspoon black pepper
- 1/4 cup cornstarch
- 2 tablespoons neutral oil, such as avocado or canola
For the Sesame Sauce:
- 1/3 cup low-sodium soy sauce
- 1/4 cup honey
- 2 tablespoons rice vinegar
- 2 tablespoons cool water
- 1 tablespoon toasted sesame oil
- 3 cloves garlic, minced
- 1 tablespoon fresh ginger, finely grated
- 1 tablespoon cornstarch
- 1/4 teaspoon crushed red pepper flakes, optional
For Finishing:
- 2 tablespoons toasted sesame seeds
- 2 scallions, thinly sliced
Instructions
- Pat the chicken thighs dry, trim any hard fat, and cut the meat into 1-inch pieces.
- Toss the chicken with salt, pepper, and 1/4 cup cornstarch until lightly coated.
- Whisk the soy sauce, honey, rice vinegar, water, sesame oil, garlic, ginger, 1 tablespoon cornstarch, and red pepper flakes until smooth.
- Heat the oil in a 12-inch skillet over medium-high heat. Cook the chicken in two batches for 3 to 4 minutes per side until browned and cooked through to 165°F.
- Lower the heat to medium. Pour the sauce into the skillet and cook for 1 to 2 minutes, stirring, until glossy and thick enough to coat a spoon.
- Return the chicken to the skillet and toss for 1 to 2 minutes until coated.
- Stir in the sesame seeds, add half the scallions, then top with the remaining scallions and serve hot.
Notes: Toast the sesame seeds for deeper flavor. If the sauce thickens too fast, add 1 tablespoon water. Serve right away for the best texture.