
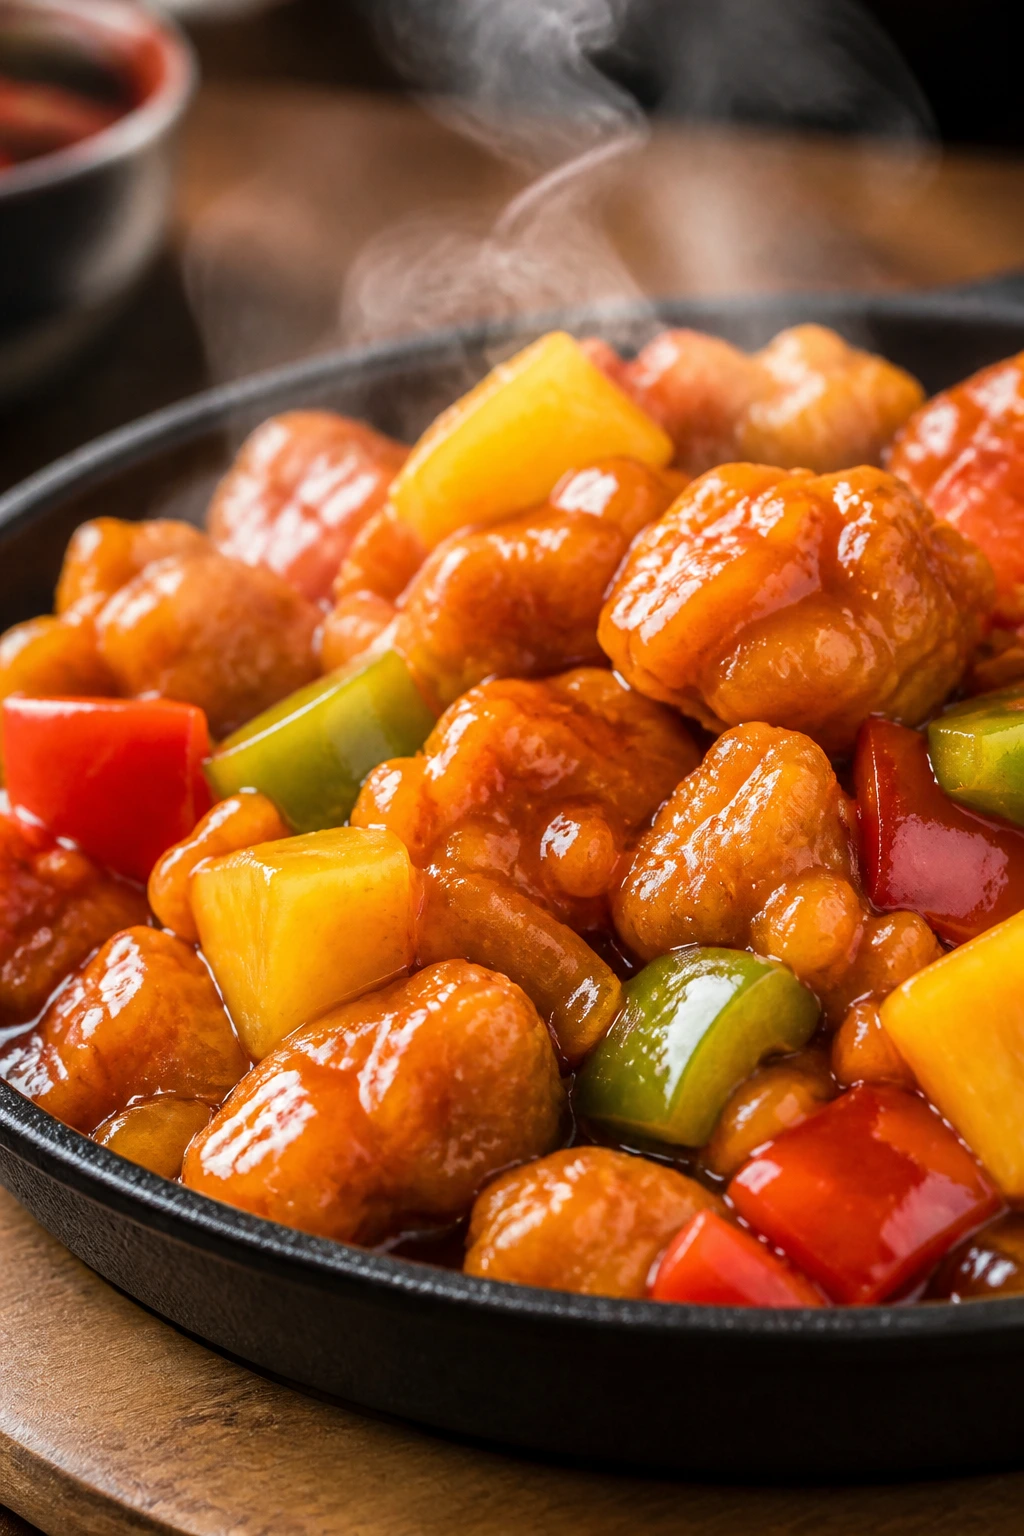
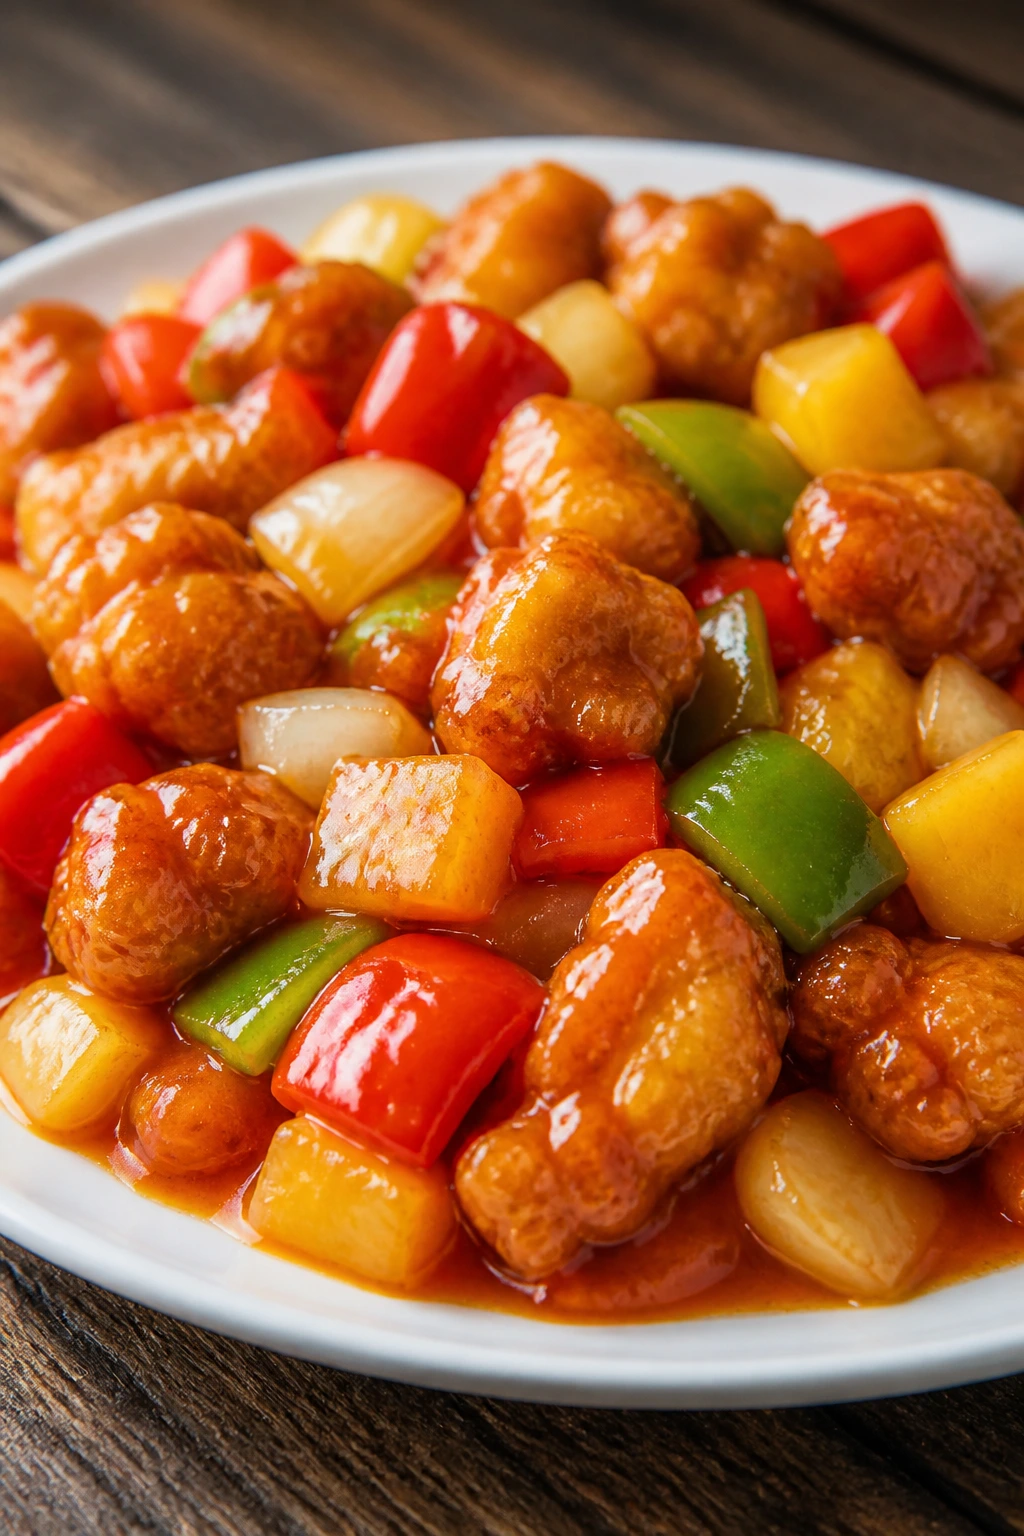
Sweet and sour Chinese chicken should hit in layers: crisp chicken first, then vinegar, then pineapple and ketchup, then that sticky gloss that clings to rice instead of sliding off into the bottom of the container. The box from a restaurant usually gets the order wrong. The chicken sits in steam, the sauce thins out, and what should be a sharp, bright dinner turns a little limp and tired.
A hot batch from your own stove changes that. You get to control the oil temperature, the sauce thickness, and the exact second the chicken meets the pan. That sounds fussy until you taste the difference. The coating stays brittle for a few precious minutes longer, which is enough for the dish to feel alive on the plate instead of merely warm.
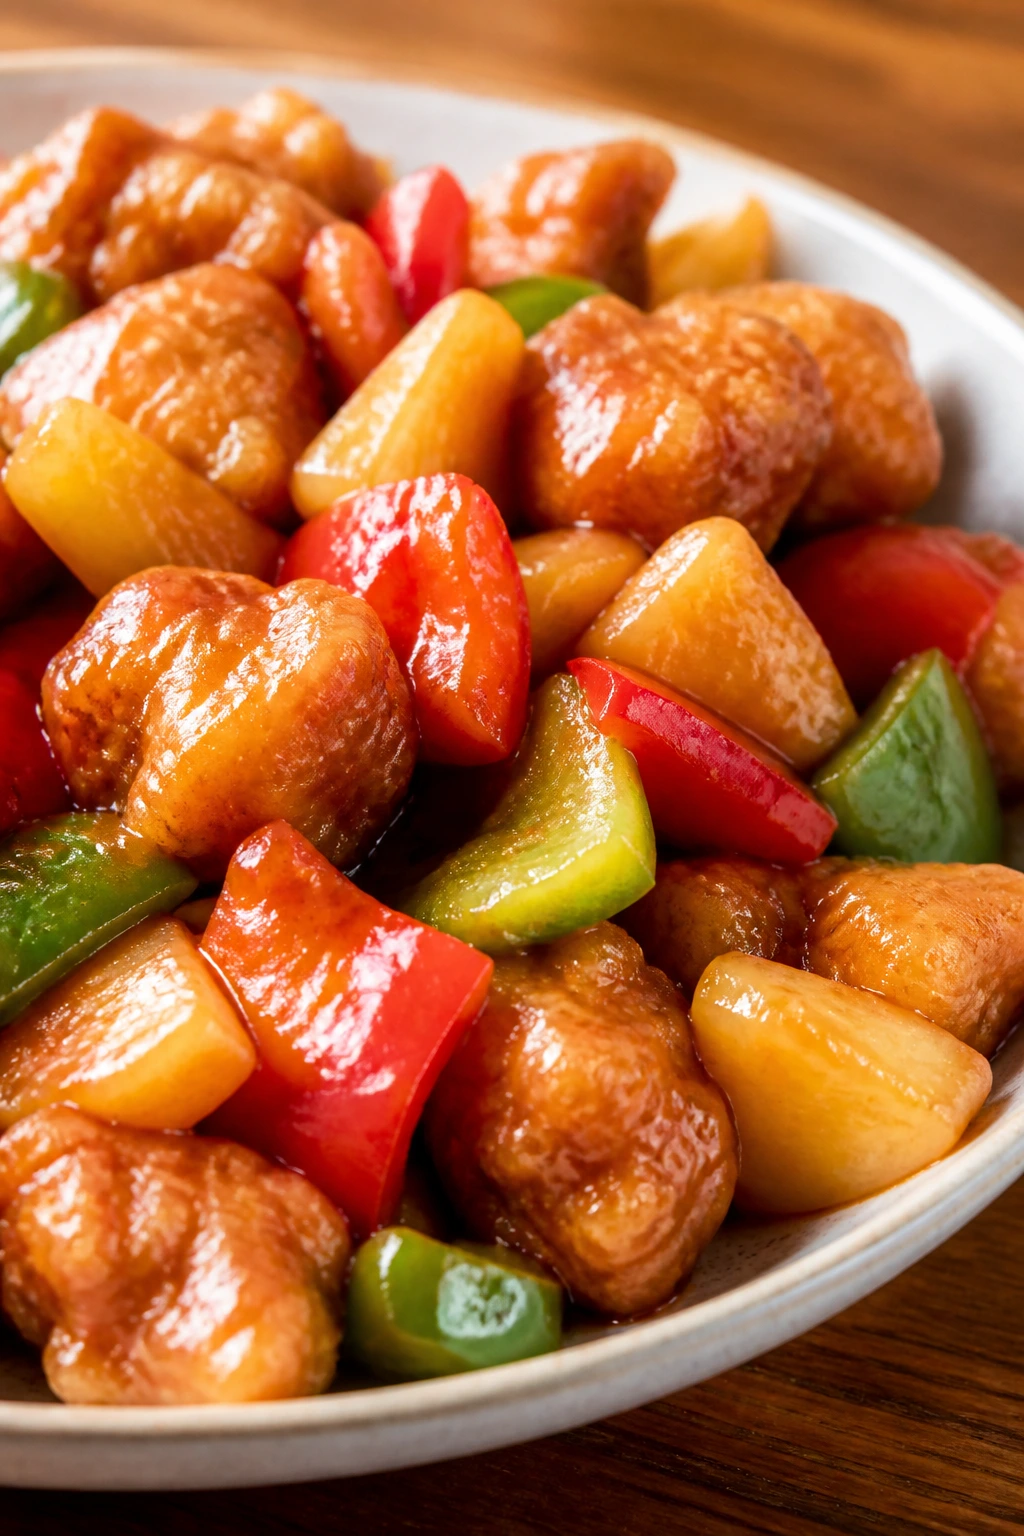
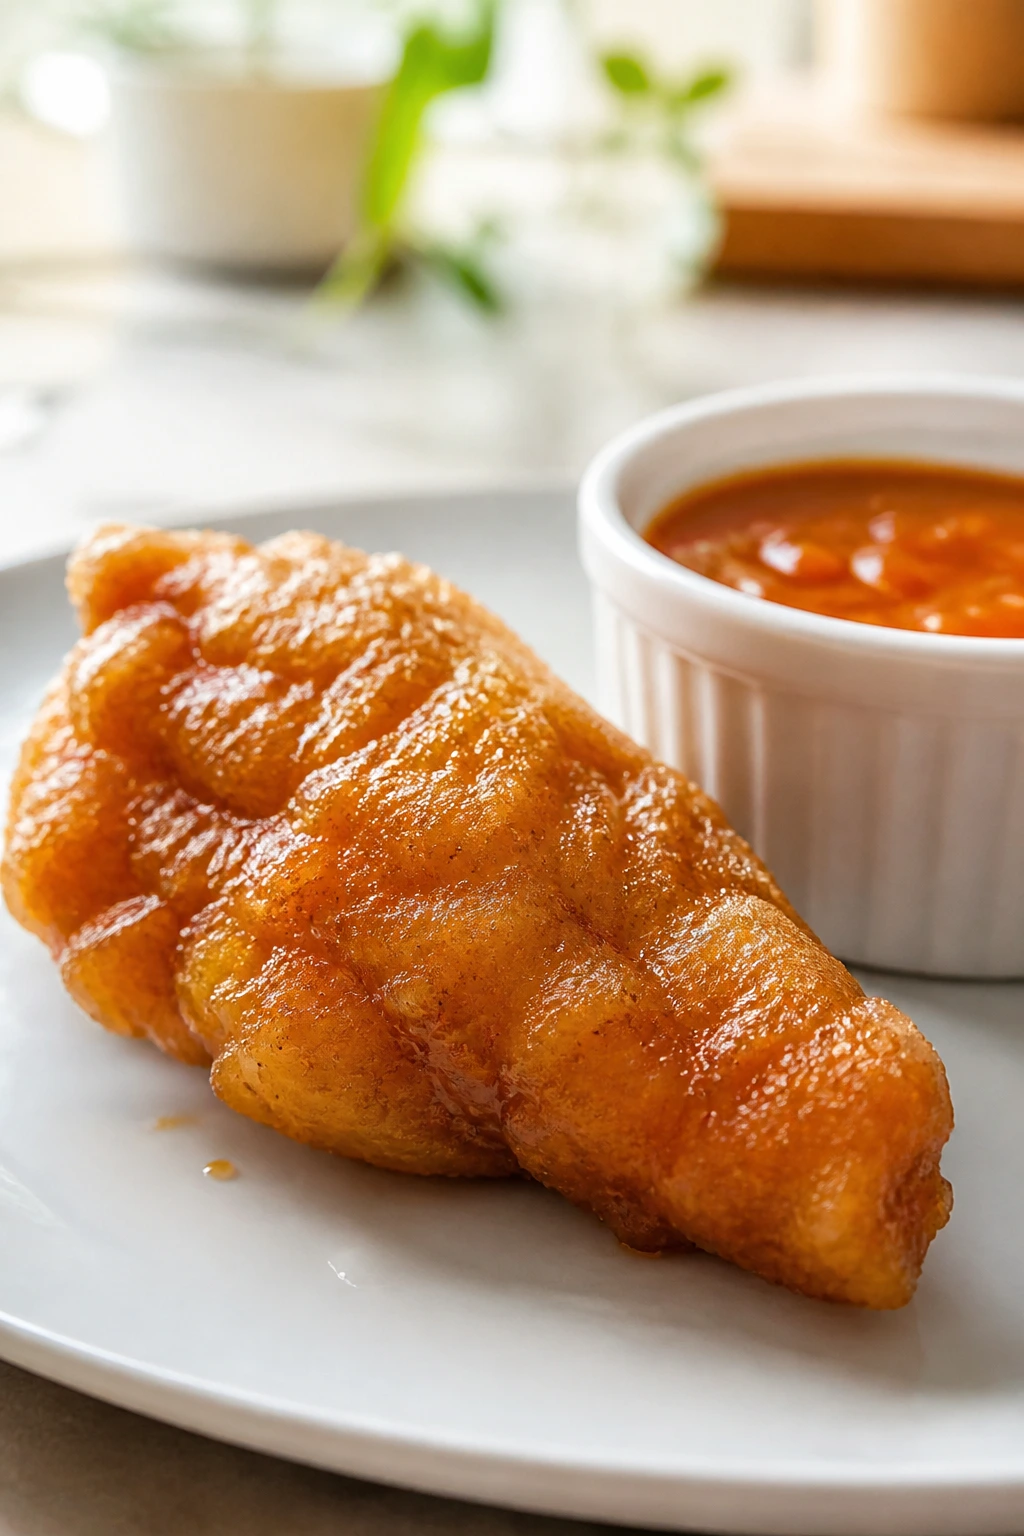
This version leans into the Chinese-American takeout style most people mean when they say sweet and sour chicken: golden chicken, bell peppers, onion, pineapple, and a red-orange sauce that’s sweet, tangy, and a little glossy. The red color comes from ketchup and reduced sauce, not from some mystery bottle. That’s part of the charm. It should taste familiar, just sharper around the edges.
Why Sweet and Sour Chinese Chicken Works Better When You Control the Pan
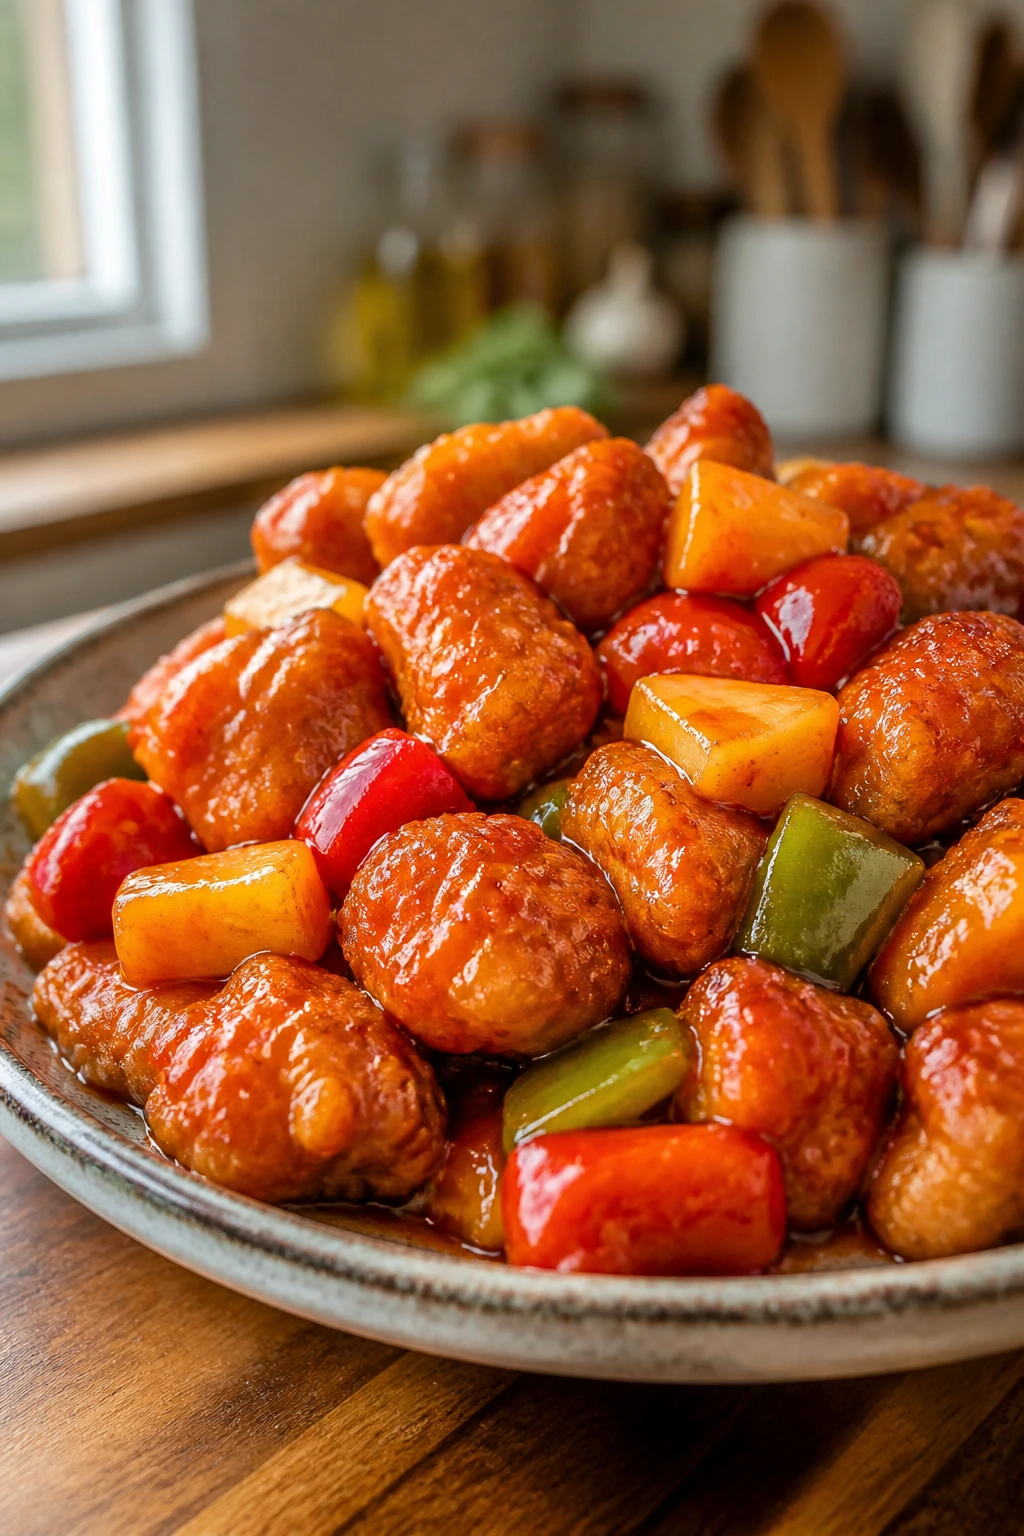
Sweet and sour chicken lives or dies on contrast. The bite should go from crisp to juicy to glossy in one mouthful, and that only happens if the chicken is fried hot enough that the coating sets before it ever meets the sauce. If the oil is too cool, the breading drinks fat and turns heavy. If the sauce is too thin, it slips right off and pools like a thin glaze that never quite decides what it wants to be.
The sauce matters just as much as the chicken. Pineapple juice gives it round sweetness, rice vinegar gives it bite, ketchup gives it body and color, and a little soy sauce keeps the whole thing from tasting like candy. That balance is why the dish works. Push the sugar too far and it turns syrupy. Push the vinegar too far and it tastes harsh. The sweet spot is a little brighter than you expect, because the fried chicken dulls the sharp edges once everything comes together.
There’s also a small but important practical advantage here: you do not need a restaurant setup to make this taste right. A deep skillet, a thermometer, and one steady hand are enough. A wok is nice, but I’d rather have a heavy pan that holds heat than a lightweight wok that drops 20 degrees the second the chicken goes in.
Yield: Serves 4
Prep Time: 25 minutes
Cook Time: 20 minutes
Total Time: 45 minutes
Rest Time: 10 minutes
Difficulty: Intermediate — the steps are straightforward, but frying in batches and keeping the oil at 350°F takes a little attention.
Best Served: Right away, while the coating is still crisp.
Why This Version Belongs in Your Regular Dinner Lineup
Crisp bite: The coating uses both flour and cornstarch, so the shell fries up with a little fracture and crunch instead of turning bready and thick.
Balanced sauce: Pineapple juice, rice vinegar, ketchup, and soy sauce keep the flavor sharp, sweet, and savory at the same time, which is the whole point of this dish.
Normal-grocery ingredients: You can buy everything here at a regular supermarket. No special trip, no mystery bottles that spend a year in the back of the fridge.
Flexible heat: A spoonful of chili garlic sauce or a pinch of red pepper flakes turns the sauce from sweet-sour into sweet-sour-heat without wrecking the balance.
Worth the pan time: The frying step looks dramatic, but it’s fast. Once the chicken is coated, the rest moves quickly enough that dinner does not drag.
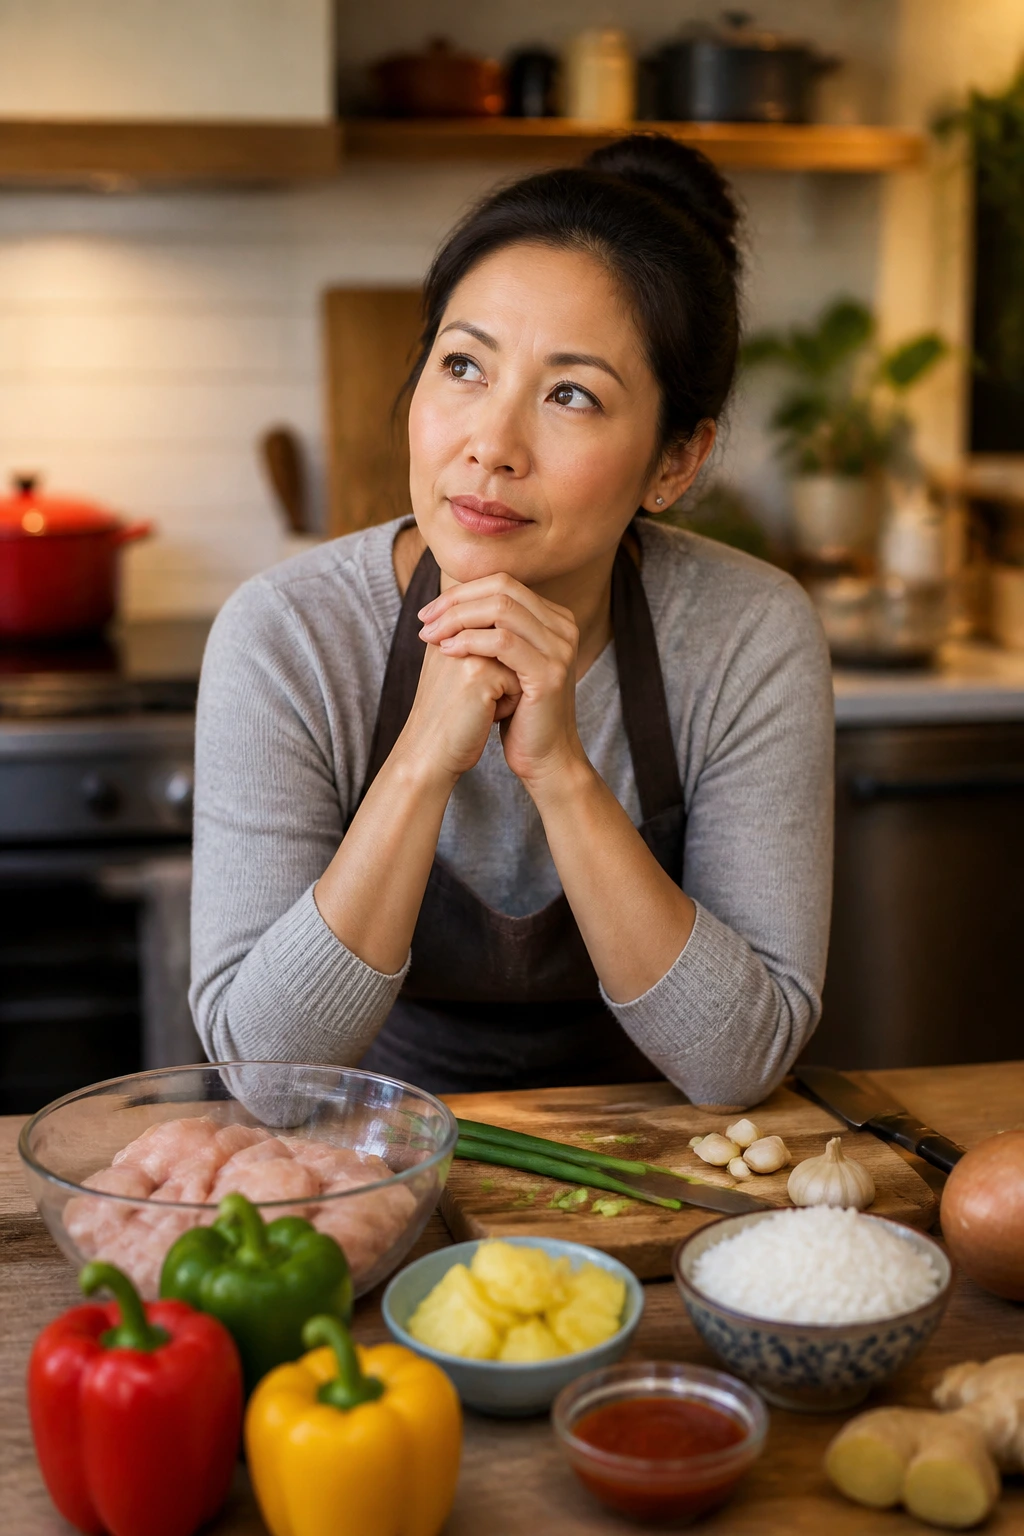
The Ingredients That Build the Crunch, the Gloss, and the Sharp-Sweet Sauce
You do not need a giant pantry for sweet and sour Chinese chicken. You do need the right ratio of chicken, starch, acid, and sugar. The chicken gives the dish its shape, the coating gives it texture, and the sauce gives it the bright, sticky finish that makes the whole plate recognizable from across the table.
Clean Ingredient List
For the Chicken and Coating:
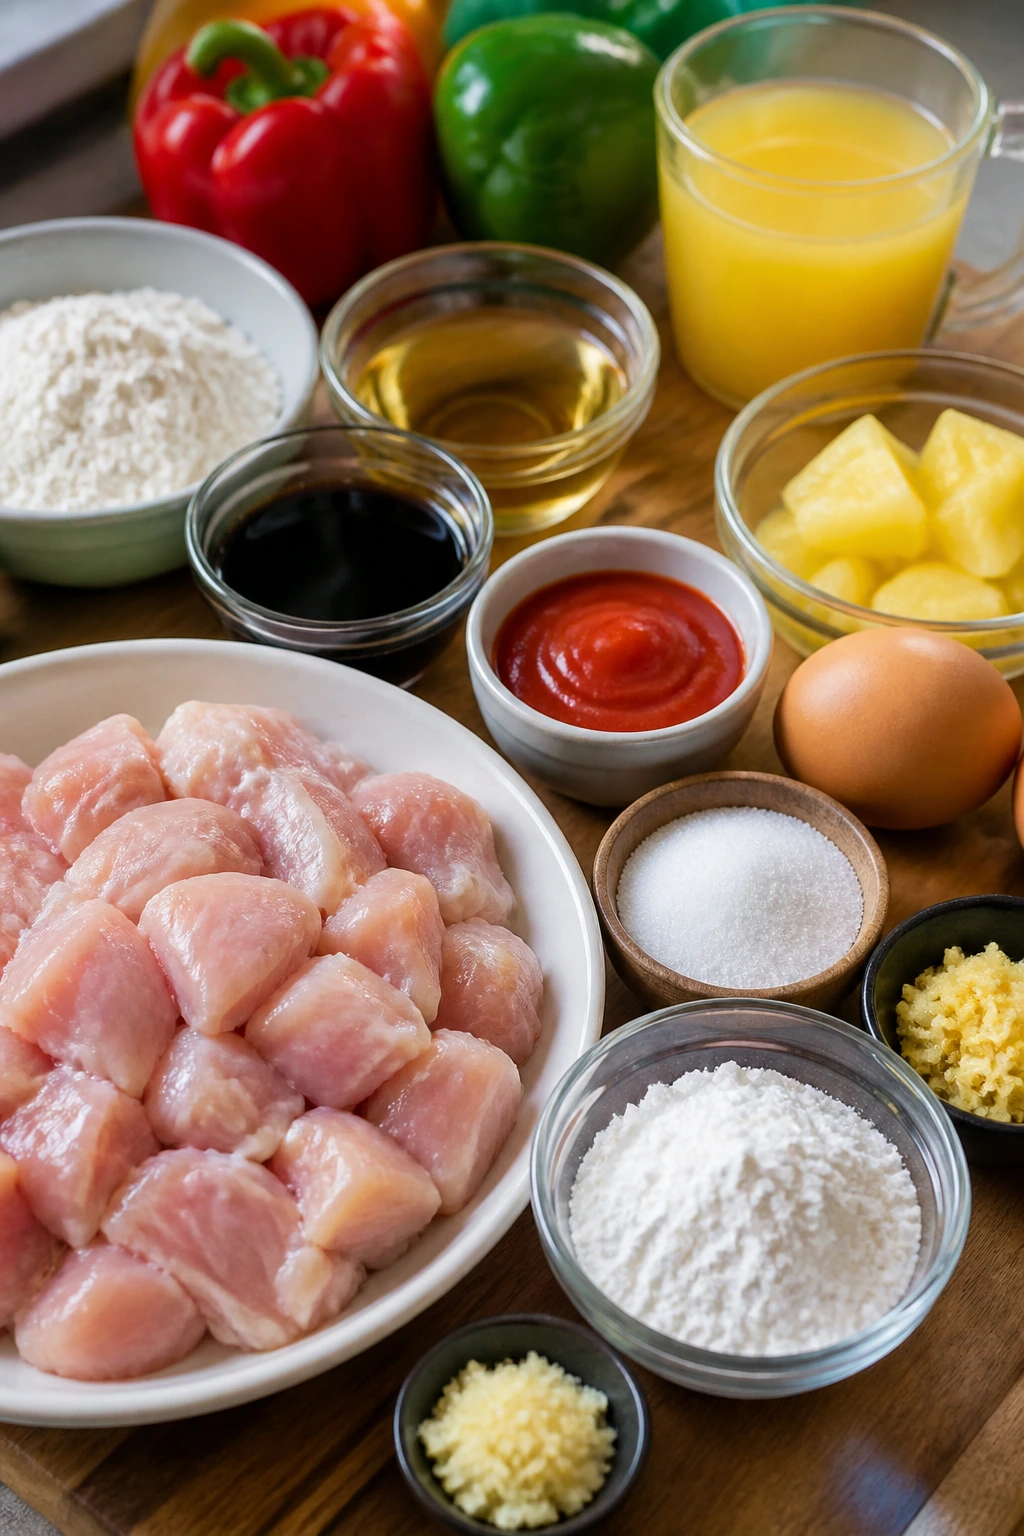
- 1½ lb boneless, skinless chicken thighs, trimmed and cut into 1-inch pieces
- 1 tsp kosher salt
- ½ tsp white pepper
- 1 large egg, lightly beaten
- 2 tbsp low-sodium soy sauce
- ½ cup cornstarch
- ½ cup all-purpose flour
For the Sweet and Sour Sauce:
- ½ cup pineapple juice
- ⅓ cup rice vinegar
- ⅓ cup ketchup
- ⅓ cup granulated sugar
- 2 tbsp low-sodium soy sauce
- 2 tbsp water
- 1 tbsp cornstarch
- 2 garlic cloves, finely minced
- 1 tsp fresh ginger, finely grated
For the Stir-Fry and Finish:
- 1 red bell pepper, cut into 1-inch squares
- 1 green bell pepper, cut into 1-inch squares
- 1 small yellow onion, cut into wedges
- 1 cup pineapple chunks, drained if canned
- 2 scallions, thinly sliced
- 2½ to 3 cups neutral oil, for shallow frying
- 1 tsp toasted sesame seeds, for garnish, optional
The Chicken
- What to use: 1½ lb boneless, skinless chicken thighs, trimmed and cut into 1-inch pieces.
- Preparation: Pat the pieces dry before seasoning. Even pieces cook at the same speed, and dry surfaces grab the coating better than slick, wet ones.
- Substitutions: Boneless chicken breasts work if that’s what you have, but cut them slightly larger and pull them as soon as they reach 165°F so they do not dry out.
- Tips: Thighs stay juicy if you fry a batch a minute longer than you meant to. Breasts do not forgive that same mistake. That is why I lean toward thighs here.
The Crispy Coat
- What to use: ½ cup cornstarch and ½ cup all-purpose flour, plus 1 egg and 2 tbsp soy sauce to help the coating cling.
- Preparation: Mix the egg and soy first, then toss the chicken until each piece is tacky before adding the dry ingredients. The coating should look pale and shaggy, not wet and runny.
- Substitutions: Rice flour can replace the all-purpose flour if you want a lighter, slightly more fragile crunch. Gluten-free tamari also works in place of soy sauce.
- Tips: The cornstarch is doing the heavy lifting for crispness. Flour gives the coating enough body to stick, but cornstarch gives you that brittle, crackly edge you want after frying.
The Sweet and Sour Sauce
- What to use: ½ cup pineapple juice, ⅓ cup rice vinegar, ⅓ cup ketchup, ⅓ cup granulated sugar, 2 tbsp soy sauce, 2 tbsp water, 1 tbsp cornstarch, 2 minced garlic cloves, and 1 tsp grated ginger.
- Preparation: Whisk the sauce in a bowl until the cornstarch disappears. If you leave a little starch lump at the bottom, it will show up later as a pale blob in the pan.
- Substitutions: Apple cider vinegar works in a pinch if you are out of rice vinegar, though it tastes a little rougher. Canned pineapple in juice is a good stand-in for fresh juice; I would not use pineapple in syrup unless you cut the sugar back.
- Tips: Ketchup gives the sauce its familiar takeout color and body. If your ketchup is very sweet, reduce the sugar to ¼ cup and taste after simmering.
The Vegetables and Finish
- What to use: 1 red bell pepper, 1 green bell pepper, 1 small yellow onion, 1 cup pineapple chunks, 2 sliced scallions, and optional sesame seeds.
- Preparation: Cut the peppers into large bite-size squares so they stay a little crisp after a quick stir-fry. Wedges of onion are better than tiny dice because they keep their shape and bring a clean bite.
- Substitutions: Snow peas, broccoli florets, or even a handful of snap peas can stand in for one of the peppers. If you want more fruit, add a few extra pineapple chunks, but drain them well.
- Tips: Fresh pineapple tastes brighter, but canned pineapple in juice is easier to manage and makes the sauce more consistent. Either way, let the fruit drain a little before it hits the pan so the sauce does not thin out.
The Tools That Make Frying Less Fussy
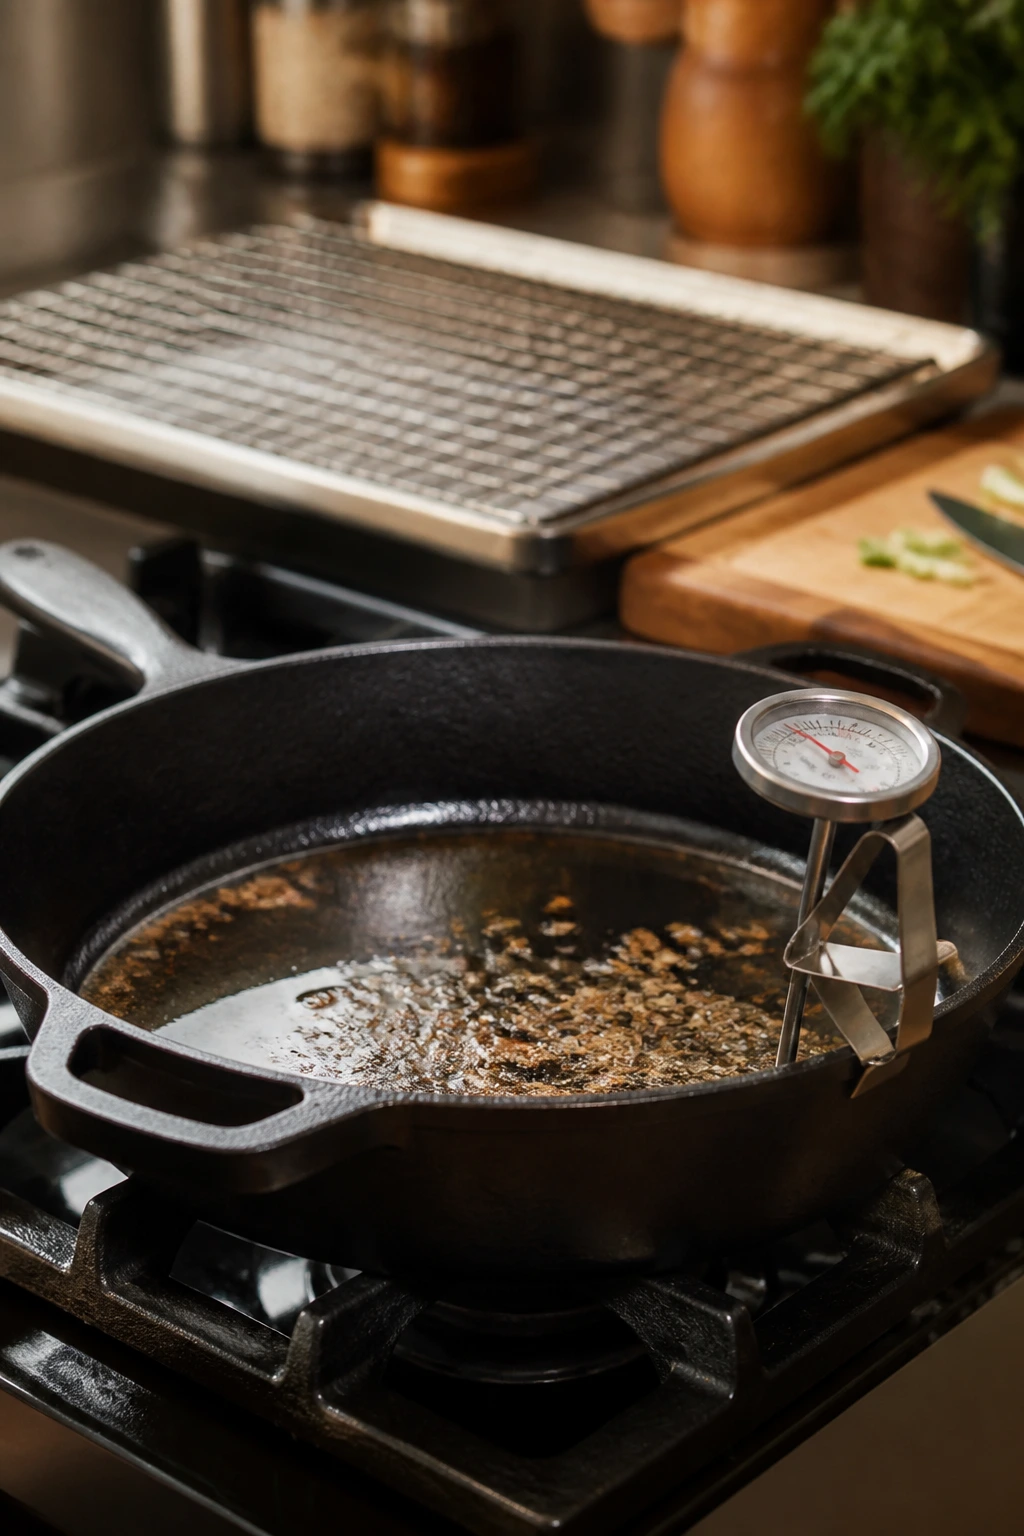
You do not need a restaurant setup. You do need a few tools that make the difference between crisp chicken and a greasy mess.
- 12-inch deep skillet or wok: A deep skillet holds oil more steadily than a thin wok. If you only have a wok, use it; if you can choose, pick the heavier pan.
- Instant-read thermometer: This is the one tool I would not skip. It keeps the oil near 350°F and tells you when the chicken actually reaches 165°F inside.
- Wire rack set over a sheet pan: The rack lets air move around the fried chicken, which keeps the crust from steaming soft.
- Large and medium mixing bowls: One for the chicken coating, one for the sauce. Keep them separate so you do not cross wires halfway through.
- Tongs or a spider strainer: Either one helps you move the chicken quickly and safely in and out of the oil.
- Sharp chef’s knife and cutting board: Even 1-inch chicken pieces and similar-size pepper chunks cook at the same pace. Sloppy knife work creates uneven frying.
- Whisk: The sauce needs to be smooth before it touches heat. A fork works in an emergency, but a whisk is better.
- Splatter screen, optional: Handy if you hate oil popping on your stove. Not required, but nice to have.
The Pan-to-Plate Method for Crisp Sweet and Sour Chicken

Prep the Chicken and Sauce
-
Pat the chicken dry with paper towels and trim off any loose fat or sinew. Cut the thighs into 1-inch pieces so they fry evenly. Season them with the kosher salt and white pepper.
-
In a large bowl, whisk the egg and 2 tbsp soy sauce until smooth. Add the chicken and toss until every piece is lightly coated. Sprinkle in the cornstarch and flour, then toss again until the pieces look tacky and pale. Let the coated chicken rest for 10 minutes while you make the sauce. That short rest helps the starch hydrate, which keeps the coating from flaking off in the oil.
-
In a medium bowl, whisk together the pineapple juice, rice vinegar, ketchup, sugar, 2 tbsp soy sauce, water, 1 tbsp cornstarch, garlic, and ginger. Whisk until the cornstarch disappears and the sauce looks uniform. Set it by the stove. If the sauce sits for a bit, whisk it again before it goes into the pan.
-
Slice the peppers, onion, pineapple, and scallions. Keep everything within reach. Once the chicken hits the oil, the rest of the dish moves quickly, and you will not want to stop and chop a pepper in the middle of frying.
Fry and Finish
-
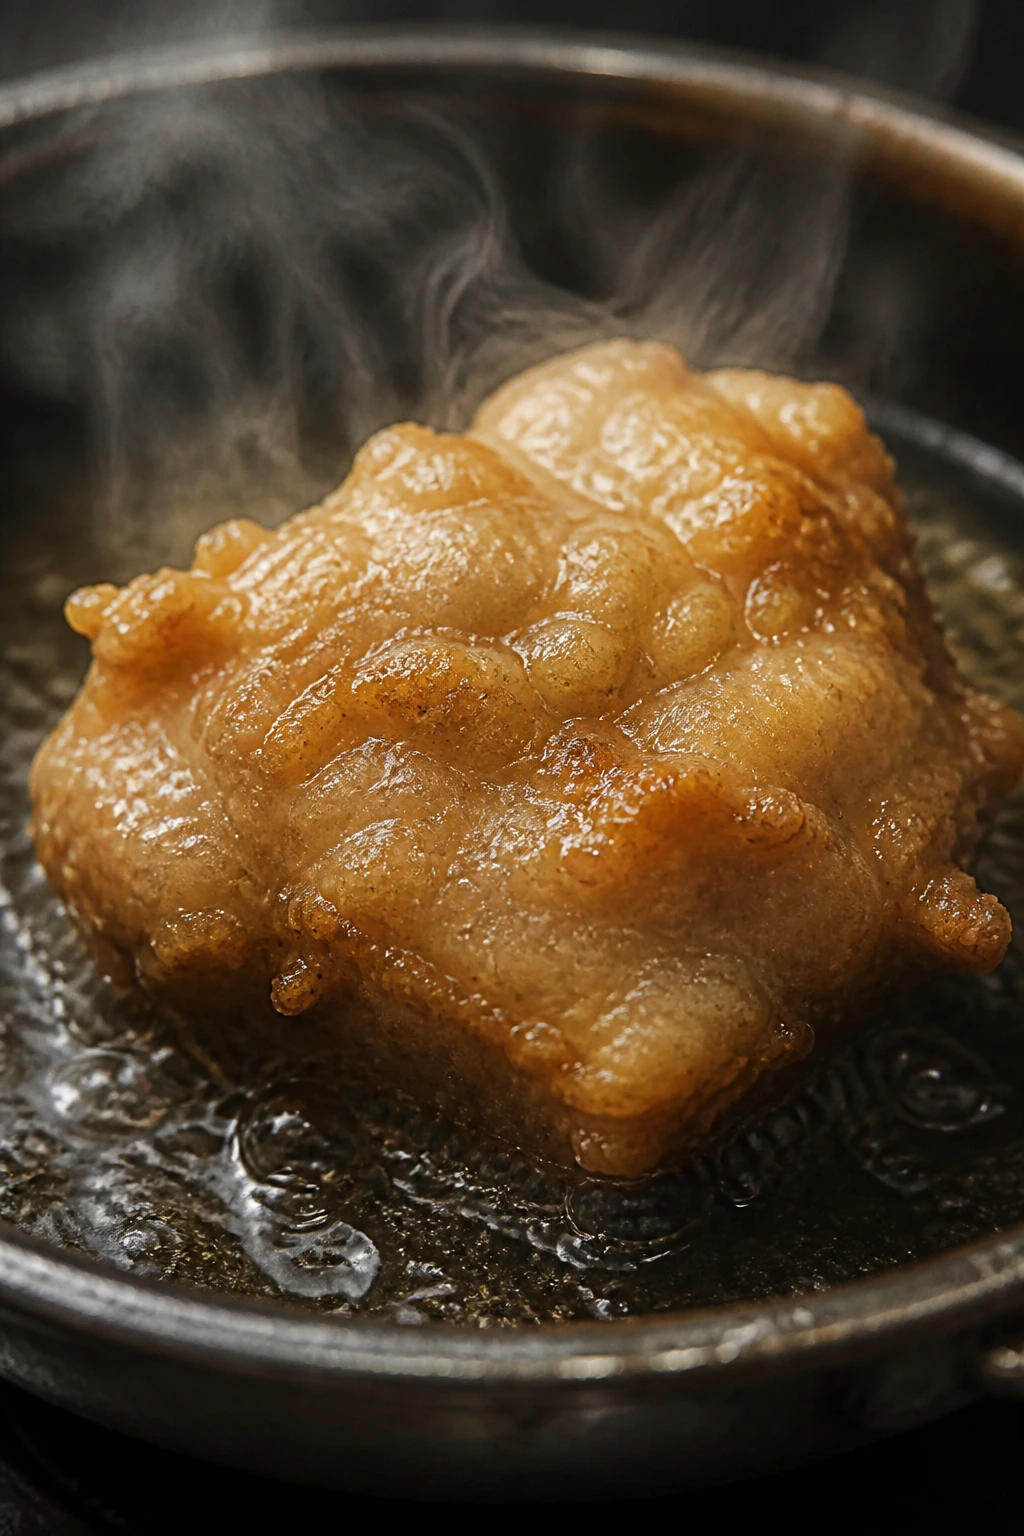
Pour 2½ to 3 cups neutral oil into a large deep skillet or wok to a depth of about 1 inch. Heat it over medium-high until it reaches 350°F. Line a sheet pan with a wire rack and set it beside the stove. If the oil smokes, lower the heat and wait; smoked oil tastes bitter, and it burns the coating before the chicken cooks through.
-
Fry the chicken in 2 to 3 batches, 4 to 5 minutes per batch, turning once or twice so the pieces brown evenly. The coating should turn deep golden, and the thickest piece should read 165°F in the center. Move the cooked chicken to the wire rack. Do not pile the pieces on top of one another, or the bottom ones will steam soft. Let the oil climb back to 350°F between batches.
-
Pour off all but 1 tablespoon of oil. Add the bell peppers and onion, then stir-fry for 2 minutes until the onion looks glossy and the peppers still have a little snap. Add the pineapple chunks and cook for 20 seconds more, just long enough to warm them through.
-
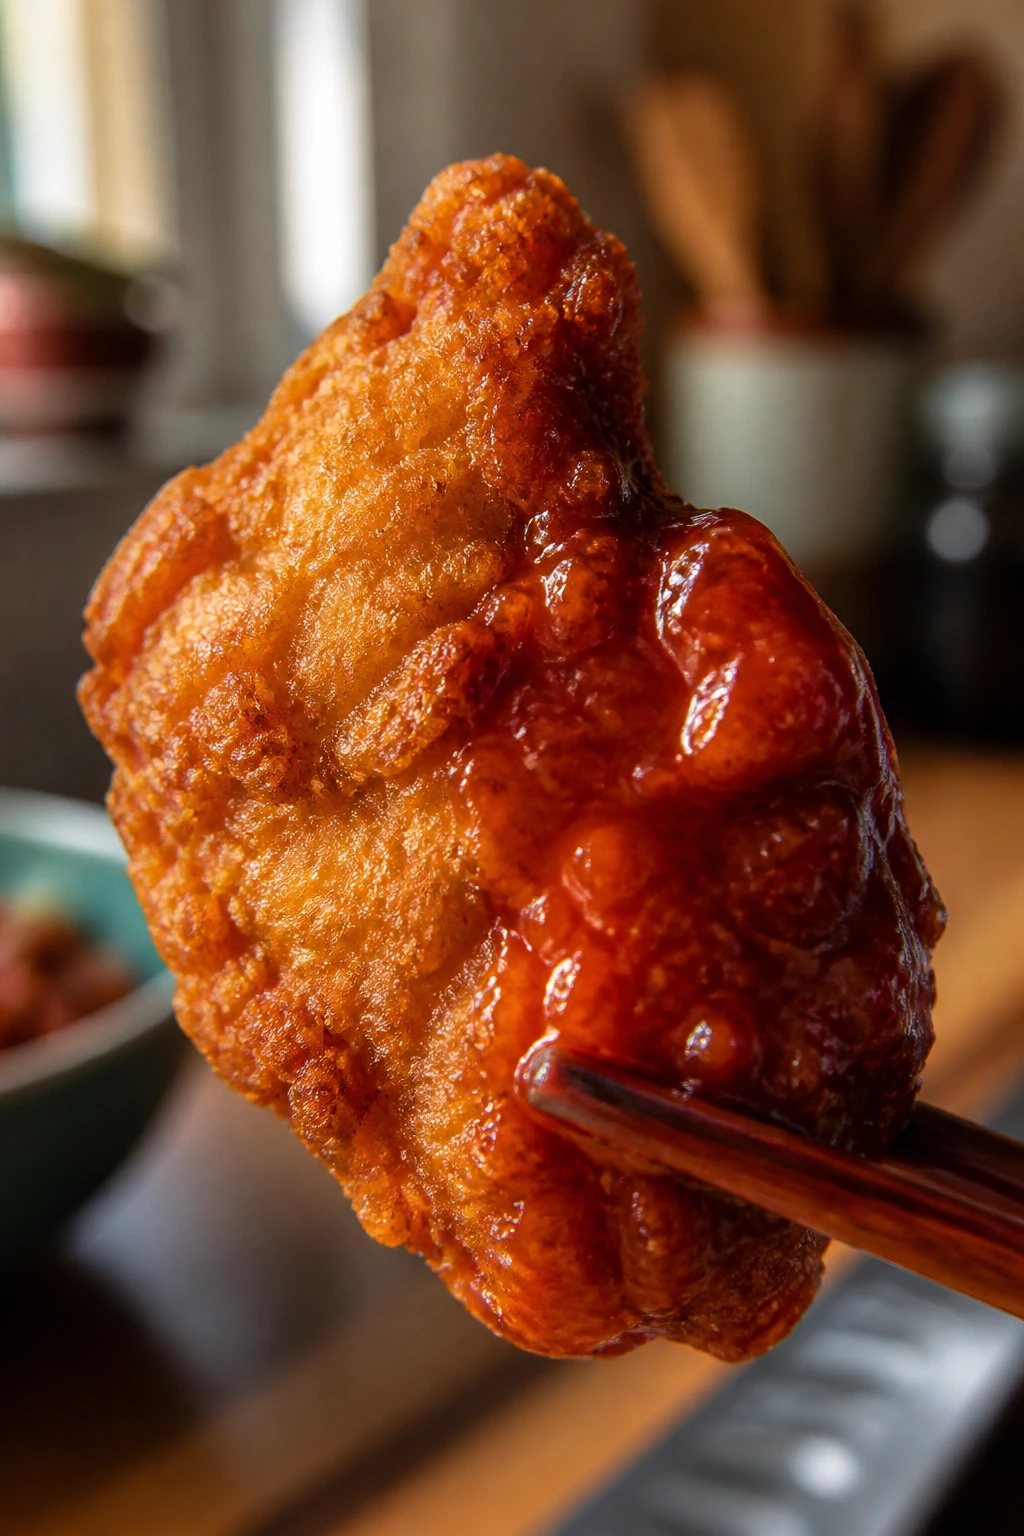
Give the sauce one last whisk, then pour it into the pan. Stir constantly and simmer for 1 to 2 minutes until it turns shiny and thick enough to leave a clear trail on the bottom of the pan for a second before closing back in. If it gets too thick, splash in 1 to 2 tbsp water. If it still looks thin, give it another 30 seconds.
-
Return the chicken to the pan and toss for 30 to 45 seconds, just until every piece is coated and the glaze looks even. Add the scallions and sesame seeds, then move it to plates immediately. Once the chicken is sauced, the crunch timer starts.
How to Serve It So the Chicken Stays Bright and Crisp
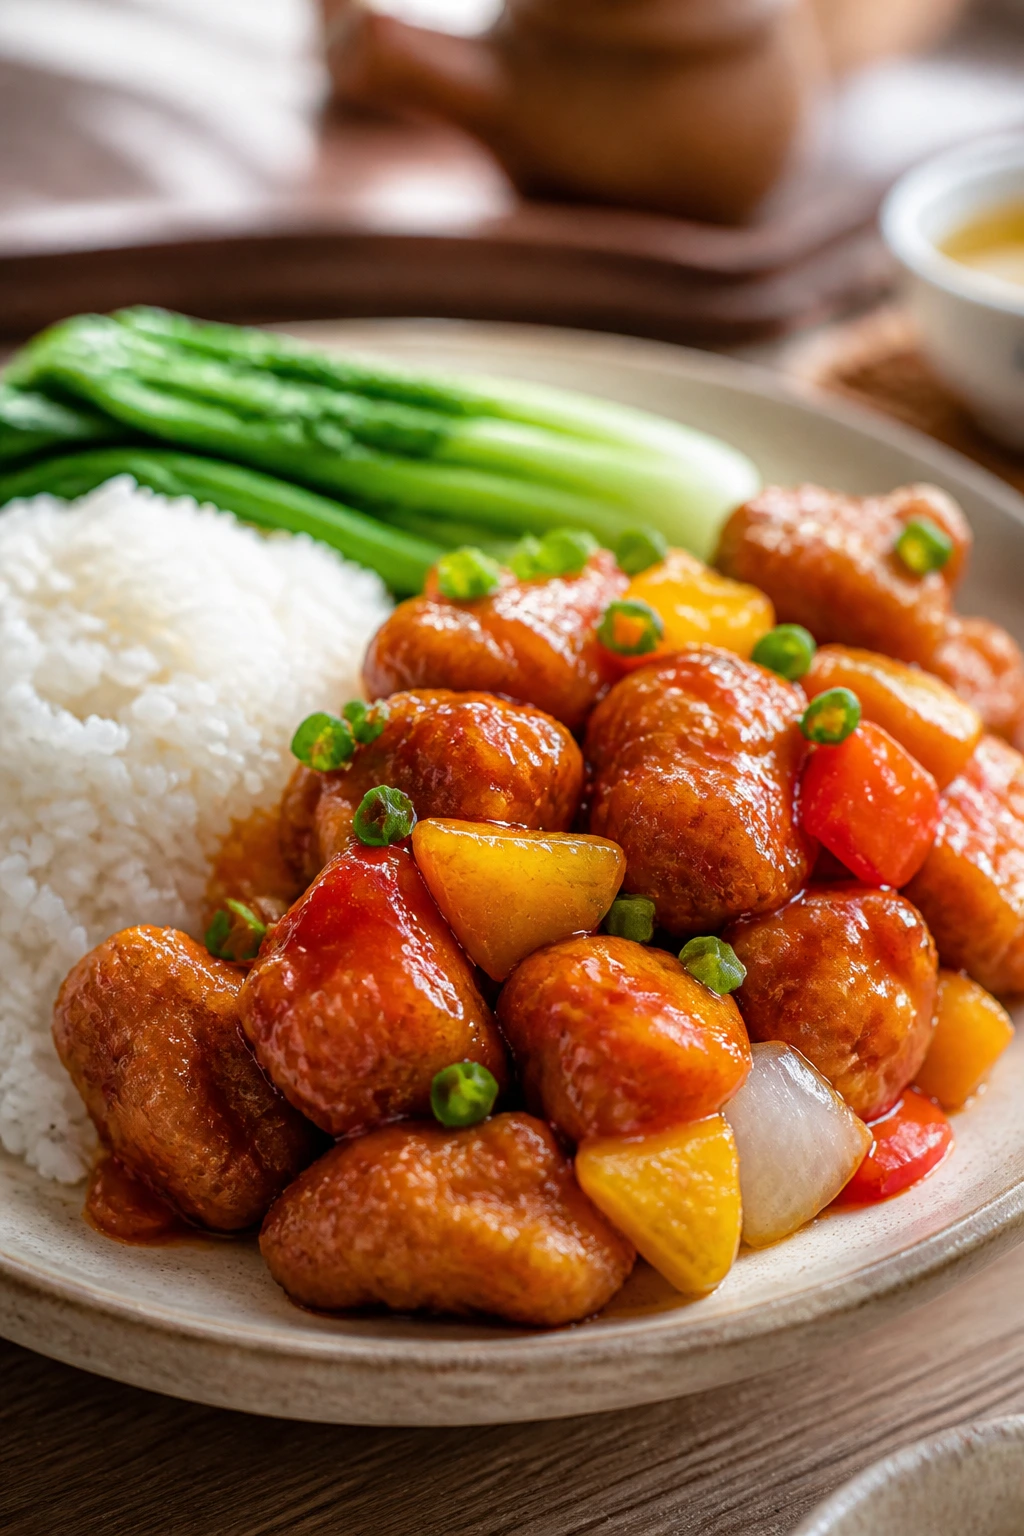
Presentation: Spoon steamed jasmine rice onto warm plates, then pile the chicken and vegetables beside it rather than burying everything underneath one thick mound of sauce. That keeps the rice from steaming the crust before you get to the table. A few scallions over the top make the whole thing look finished without turning fussy.
Accompaniments: Plain jasmine rice is the cleanest match because it catches the sauce without competing with it. If you want more on the table, add garlicky bok choy, steamed broccoli, or a cold cucumber salad tossed with rice vinegar and sesame oil. Egg fried rice works too, but keep it light on soy sauce so the sweet-sour glaze still leads.
Portions: Plan on about 1½ to 2 cups of the finished chicken and vegetables per adult when rice is part of the meal. If you are serving several sides, 1 cup per person is enough. For a bigger group, fry the chicken in batches and keep it on a rack in a 200°F oven while you finish the rest. That little holding step keeps the coating from turning soggy in a closed dish.
Beverage Pairing: Cold jasmine tea is my first choice because it clears the sugar and acid without fighting them. A dry lager works too, and sparkling water with a squeeze of lime does the job if you want something nonalcoholic. I would skip anything sugary; this dish already brings enough sweetness to the table.
Small Flavor Moves That Make a Big Difference

Flavor Enhancement: Add 1 tsp toasted sesame oil at the very end, after the heat is off. It gives the sauce a nutty smell that hangs around just long enough to make the plate feel fuller. If you want a sharper finish, stir in another teaspoon of rice vinegar after the sauce thickens.
Time-Saver: Whisk the sauce and cut the vegetables before you touch the oil. Once the chicken is fried, the final stir-fry takes only a few minutes, and you will not be scrambling for a knife while the sauce waits in the pan.
Cost-Saver: Canned pineapple in juice is the smart buy here. Fresh pineapple is lovely, but the canned version gives you both fruit and juice without extra prep, and the dish is already doing enough. If peppers are expensive, use one pepper and an extra half onion; the onion adds more flavor than it gets credit for.
Make-It-Yours: For more heat, add chili garlic sauce or a pinch of red pepper flakes to the sauce. For a lighter plate, tuck in snap peas or broccoli florets. For a stronger restaurant-style edge, finish with a few drops of dark soy sauce, but go light or the color turns muddy fast.
The Mistakes That Turn a Sharp Sauce Heavy and a Crisp Coating Limp
-
Crowding the pan: If too many chicken pieces go into the oil at once, the temperature drops and the coating starts drinking fat instead of crisping. Fry in batches, and let the oil come back to 350°F before adding the next round.
-
Using pineapple in syrup: Syrup-packed fruit makes the sauce taste heavy and sticky. Buy pineapple packed in juice, or if syrup is all you have, drain it well and cut the sugar in the sauce by 1 to 2 tbsp.
-
Letting the sauce boil hard: A hard boil can make the ketchup taste flat and the sugar turn tacky. Keep the simmer gentle and stop when the sauce coats a spoon in a thin, shiny layer.
-
Skipping the wire rack: Paper towels trap steam underneath the chicken, which softens the crust you just worked to build. A rack keeps air moving around every piece, and that matters more than people think.
-
Tossing too early or too long: If you add the chicken before the sauce is thick enough, the coating absorbs liquid and loses its snap. If you leave it in the sauce too long, the same thing happens from the other direction. Toss once, coat quickly, and serve.
Variations for Different Kitchens and Different Levels of Heat
Air-Fryer Crunch: Coat the chicken as written, spray it lightly with oil, and air fry at 400°F for 10 to 12 minutes, shaking once halfway through. The crust will be a little drier and lighter than fried chicken, but it still gives you a decent bite. Toss it with sauce only right before serving.
Oven-Baked Shortcut: Arrange the coated chicken on a rack set over a sheet pan, mist it with oil, and bake at 425°F for 18 to 22 minutes, flipping once. This version is not as crackly as frying, yet it handles larger batches with less mess. It is the one I’d use if I were feeding more people and did not want to stand at the stove.
Heat-Lovers’ Version: Stir 1 to 2 tsp chili garlic sauce and ½ tsp red pepper flakes into the sauce before it hits the pan. Cut the sugar to 2 tbsp so the heat has somewhere to go. This version tastes louder and more direct, which works well if you like a little burn under the sweetness.
Gluten-Free Crunch: Swap the all-purpose flour for rice flour and use tamari instead of soy sauce. Rice flour fries into a thinner, more brittle crust, which is a nice thing here. The sauce still behaves the same way, so the adjustment is mainly about the coating and the soy.
Storing, Reheating, and Making Ahead Without Losing the Point
Fridge: Store leftovers in airtight containers for 3 to 4 days. If you can separate the fried chicken from the sauce, do it. The sauce keeps fine on its own, and the chicken loses less of its texture when it is not sitting in liquid.
Freezer: Freeze the fried chicken and the sauce separately for up to 2 months. Thaw them overnight in the fridge before reheating. If you freeze the dish already tossed together, the flavor survives, but the coating softens and never fully comes back.
Reheat: For unsauced chicken, use a 400°F oven for 8 to 10 minutes or an air fryer at 375°F for 5 to 7 minutes. For sauced leftovers, rewarm them in a skillet over medium heat with 1 to 2 tbsp water, stirring just until hot. The microwave works in a pinch, but it turns the crust soft fast.
Make-Ahead: The sauce can be whisked 2 to 3 days ahead and kept in the fridge. The vegetables can be cut a day ahead and stored in a covered container lined with a paper towel. The chicken should be cut earlier if needed, but coat and fry it close to serving time. Once you put the starch on the chicken, it should not sit around too long or it gets pasty.
Questions Home Cooks Ask Before They Start
Can I use chicken breasts instead of thighs?
Yes. Use boneless breasts, cut them into slightly larger pieces, and pull them the moment they hit 165°F. They dry out faster than thighs, so I would keep the batches small and watch the timer closely.
Do I have to deep-fry the chicken?
No, but frying gives you the best crackle. The oven-baked and air-fryer versions work if you want less oil, yet the crust will be lighter and a little less dramatic. If you go that route, still toss the chicken with sauce at the very end so it does not soften before the plate reaches the table.
Can I make the sauce less sweet?
Absolutely. Start with ¼ cup sugar instead of ⅓ cup, simmer the sauce, then taste it once it thickens. If your ketchup is especially sweet or your pineapple is syrupy, you can cut the sugar even more and still keep the balance.
Why did my sauce turn lumpy or too thin?
Lumps usually mean the cornstarch was not whisked out well before heating. Thin sauce usually means it did not simmer long enough to wake the starch up. Whisk the sauce cold, then give it a full minute or two in the pan until it turns glossy and clings to the spoon.
What can I use instead of rice vinegar?
Apple cider vinegar will work, though it tastes a little sharper and less clean. White vinegar is stronger still, so use a little less if that is all you have. In each case, taste the sauce before the chicken goes in and adjust with a teaspoon of sugar if needed.
Can I make this ahead for guests?
You can prep the sauce and vegetables ahead, and you can even fry the chicken a little earlier in the day. For the best result, re-crisp the chicken in a hot oven for 5 to 6 minutes, warm the sauce on the stove, and toss them together right before serving. That extra step saves the crust.
How do I keep the chicken crisp after it’s sauced?
You do not keep it crisp for long once the sauce coats every piece. The trick is to keep the sauce hot, the chicken well-drained, and the tossing short. If you need to hold it for a few minutes, keep the chicken on a rack and the sauce separate, then combine them at the last second.
A Hot Plate Worth Making Again
Sweet and sour Chinese chicken rewards a little attention in the right places. Hot oil. A sauce that tastes balanced before it meets the pan. Chicken that goes from fryer to rack to plate without hanging around in its own steam. That is the whole trick, and it is a good one.
What you get at the table is the version people keep hoping for when they open a delivery box: crisp edges, bright sauce, pineapple that still tastes like fruit, and enough tang to make the next bite interesting. Make it once and the method starts to feel obvious. Make it twice and you stop ordering the soggy version out of habit.
Sweet and Sour Chinese Chicken — Recipe Card
Recipe Name: Sweet and Sour Chinese Chicken
Description: Crisp chicken thighs tossed with bell peppers, onion, pineapple, and a glossy sweet-sour sauce built from pineapple juice, rice vinegar, ketchup, and ginger.
Prep Time: 25 minutes
Cook Time: 20 minutes
Total Time: 45 minutes
Course: Main Course
Cuisine: Chinese-American
Servings: 4 servings
Calories: About 560 kcal per serving
Ingredients
For the Chicken and Coating:
- 1½ lb boneless, skinless chicken thighs, trimmed and cut into 1-inch pieces
- 1 tsp kosher salt
- ½ tsp white pepper
- 1 large egg, lightly beaten
- 2 tbsp low-sodium soy sauce
- ½ cup cornstarch
- ½ cup all-purpose flour
- 2½ to 3 cups neutral oil, for shallow frying
For the Sweet and Sour Sauce:
- ½ cup pineapple juice
- ⅓ cup rice vinegar
- ⅓ cup ketchup
- ⅓ cup granulated sugar
- 2 tbsp low-sodium soy sauce
- 2 tbsp water
- 1 tbsp cornstarch
- 2 garlic cloves, minced
- 1 tsp fresh ginger, grated
For the Stir-Fry and Finish:
- 1 red bell pepper, cut into 1-inch squares
- 1 green bell pepper, cut into 1-inch squares
- 1 small yellow onion, cut into wedges
- 1 cup pineapple chunks, drained if canned
- 2 scallions, sliced
- 1 tsp toasted sesame seeds, optional
Instructions
-
Pat the chicken dry, season with salt and white pepper, then toss with egg and soy sauce. Add cornstarch and flour and let the coated chicken rest for 10 minutes.
-
Whisk the pineapple juice, rice vinegar, ketchup, sugar, soy sauce, water, cornstarch, garlic, and ginger until smooth.
-
Heat 2½ to 3 cups neutral oil in a deep skillet or wok to 350°F. Fry the chicken in batches for 4 to 5 minutes per batch, until golden and cooked through. Drain on a wire rack.
-
Pour off all but 1 tablespoon oil. Stir-fry the bell peppers and onion for 2 minutes, then add the pineapple for 20 seconds.
-
Add the sauce and simmer 1 to 2 minutes, stirring, until glossy and thick enough to coat a spoon.
-
Return the chicken to the pan, toss for 30 to 45 seconds, then add scallions and sesame seeds. Serve immediately.
Notes: Fry in batches so the oil stays near 350°F. Use pineapple packed in juice, not syrup, if possible. Best served right away for the crispiest coating.