
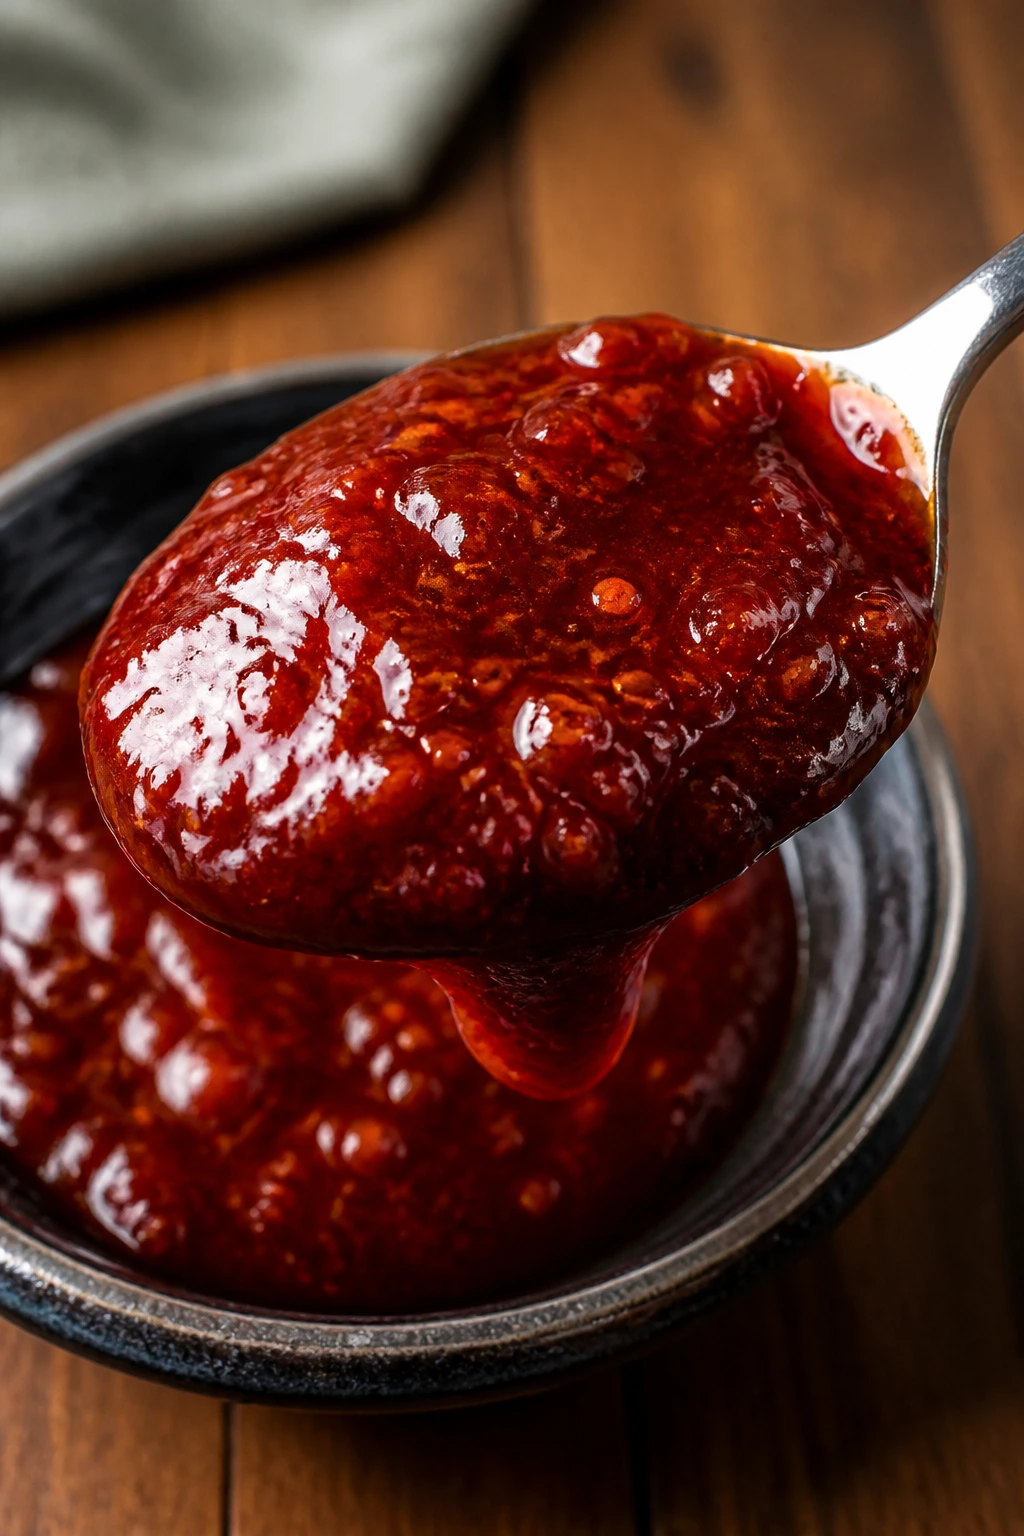
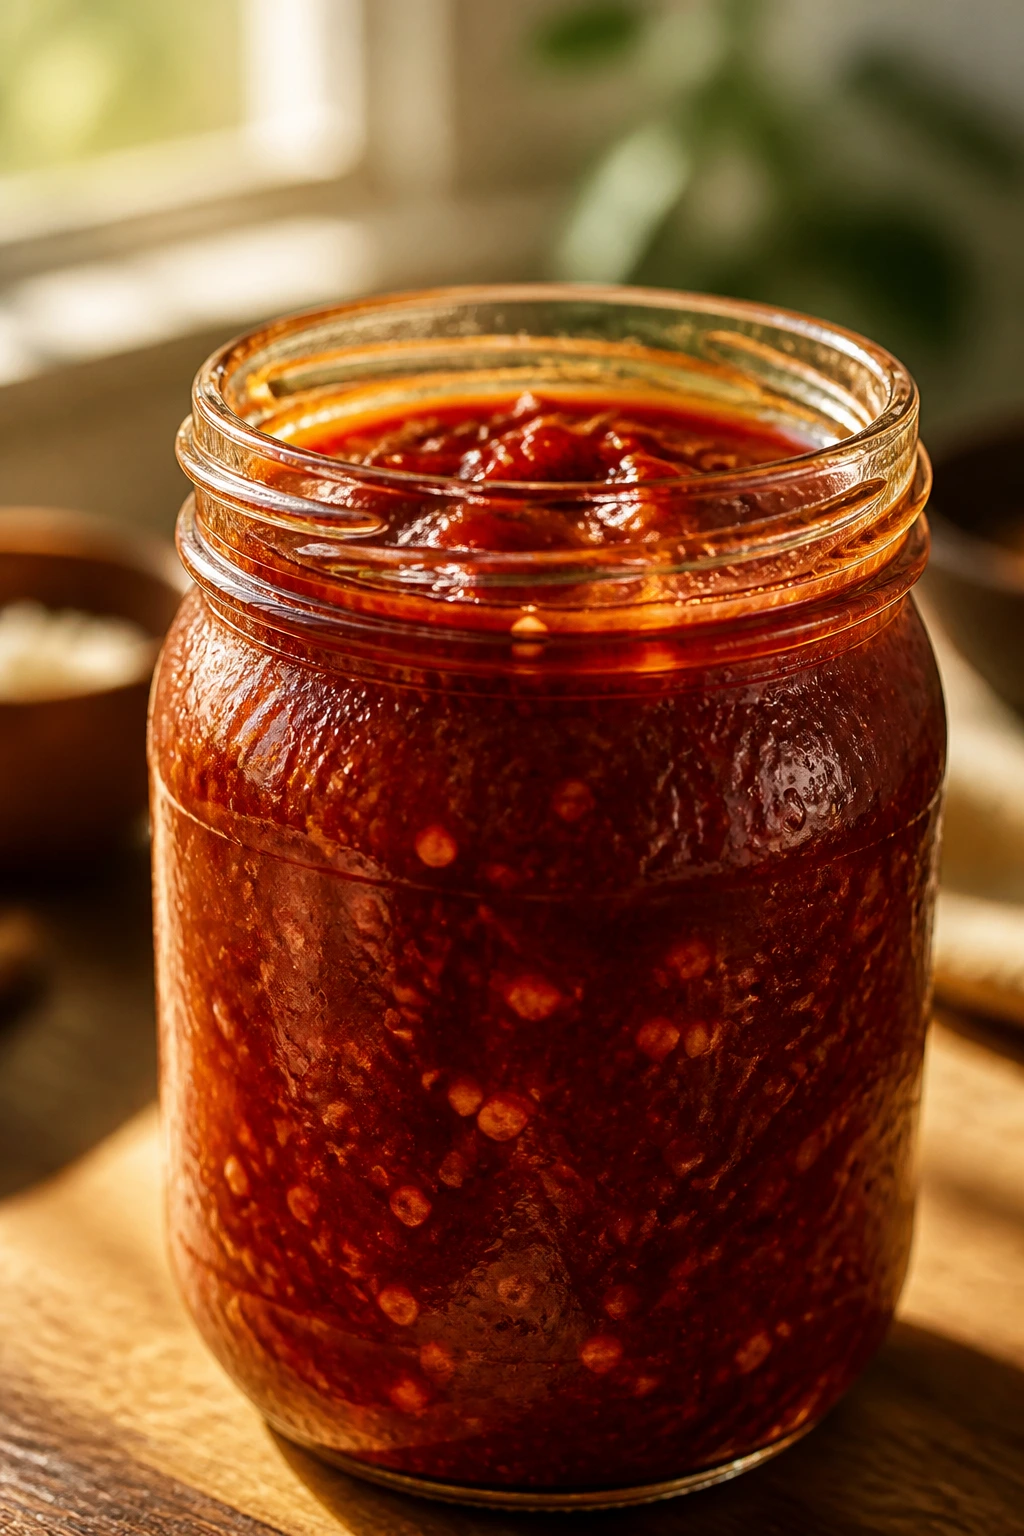
The best bibimbap sauce doesn’t puddle. It clings.
That sticky, glossy red gloss is what turns a bowl of rice and vegetables into something you keep mixing with your spoon because the first bite was good and the second one is somehow better. A lot of takeout versions miss that part. They lean thin, a little sharp, and they slide straight to the bottom of the bowl before the rice has a chance to catch any of it.
This version fixes that. Gochujang gives the sauce its deep chili backbone, honey and brown sugar bring the tacky shine, rice vinegar keeps the sweetness from going flat, and a spoon of toasted sesame oil at the end gives the whole thing that nutty smell that hits before the bowl even reaches the table. If you’ve ever wished the sauce in your bibimbap would actually stay on the rice instead of disappearing into it, this is the jar you want in the fridge.
And the nice part? It’s a tiny recipe with a big payoff. A few minutes on the stove, one whisk, one small pot, and you’ve got a sauce that works on bibimbap, fried eggs, tofu, grilled beef, roasted carrots, leftover rice, and whatever vegetables are hanging around and looking lonely.
Why This Sauce Earns Its Keep
-
Sticky on purpose: The honey, brown sugar, and brief simmer give the sauce a clingy texture that coats rice instead of running under it.
-
Balanced heat, not blunt heat: Gochujang brings fermenty depth, while rice vinegar keeps the sweetness from feeling heavy or syrupy.
-
One small pot, no drama: You do not need a blender, food processor, or any special gear to make a sauce that tastes polished.
-
Better the next day: The garlic mellows after a short rest, and the sesame oil settles into the base instead of sitting on top in a greasy layer.
-
Easy to steer: A teaspoon more water makes it drizzle better, a little more honey makes it glossier, and a splash more vinegar wakes the whole thing up.
-
Works beyond bibimbap: Spoon it over fried eggs, grain bowls, noodle bowls, or crispy tofu and it still makes sense.
Why Bibimbap Sauce Needs to Be Thick, Not Watery
A proper bibimbap bowl lives or dies by the sauce. The rice is warm, the vegetables are usually seasoned lightly, and the egg yolk or fried egg brings richness. If the sauce is thin, it behaves like a dressing on a salad—fine, but not what you want here.
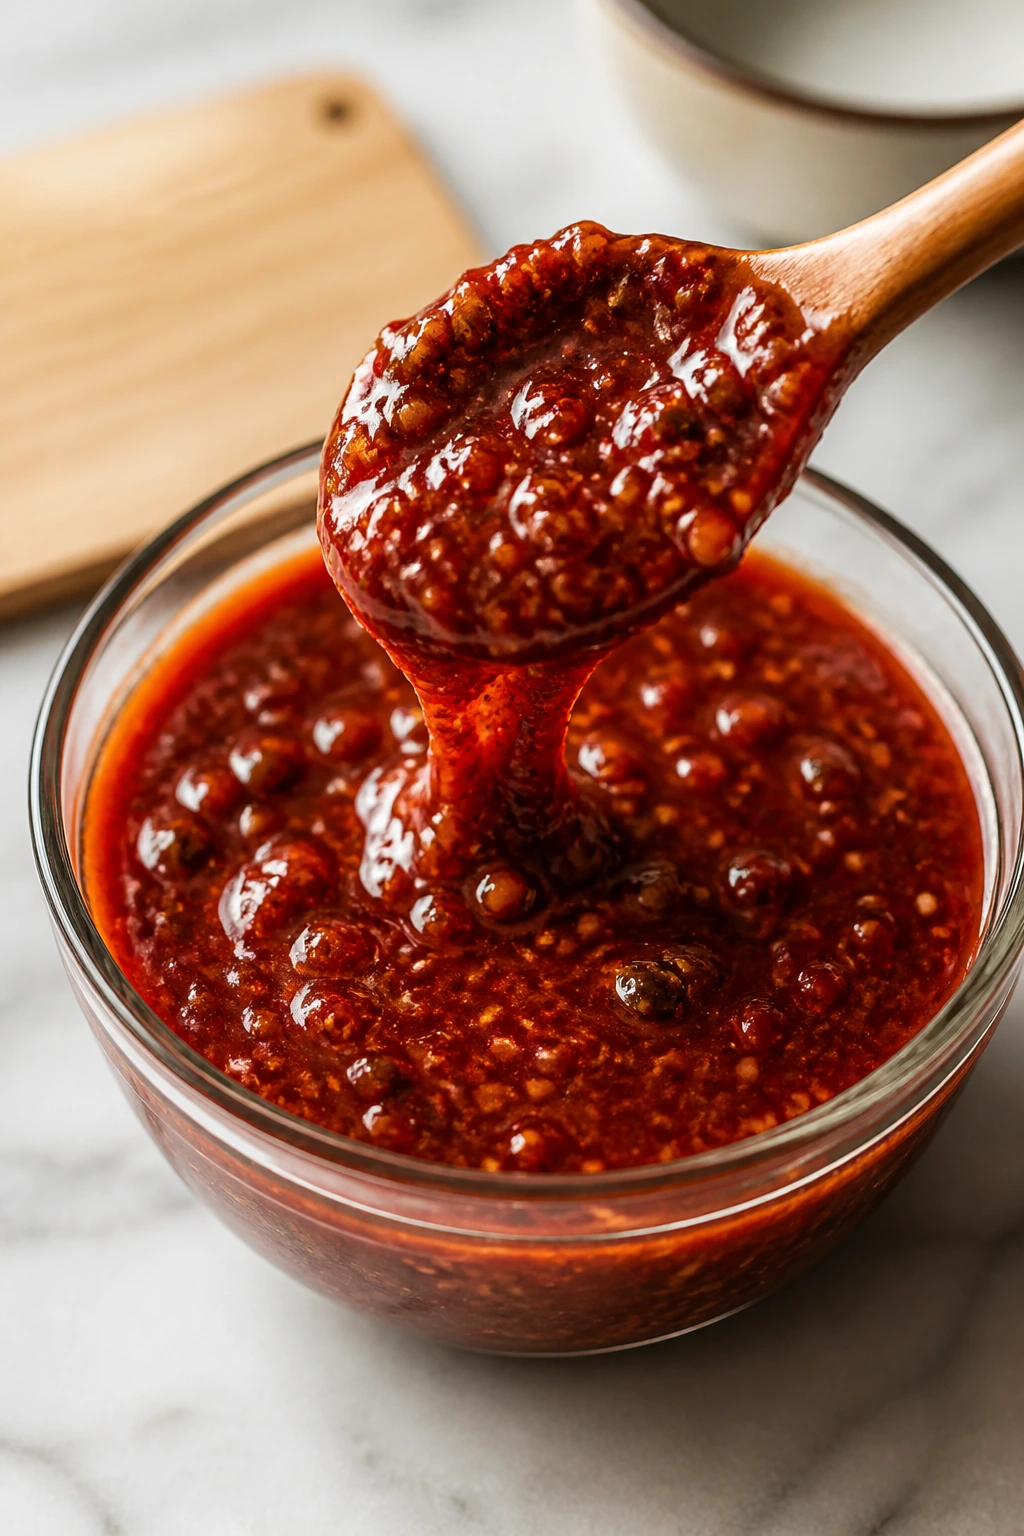
Sticky bibimbap sauce needs body. It should drag a little when you stir it, coat the back of a spoon, and leave a red sheen on whatever it touches. That texture matters because bibimbap is mixed, not assembled. Once you stir, the sauce has to travel across rice grains, bean sprouts, spinach, mushrooms, and whatever else is in the bowl without vanishing after the first pass.
Gochujang does a lot of the heavy lifting. It’s a fermented chili paste, so it already brings salt, sweetness, and depth before you add anything else. But alone, it can be too thick and a little flat. Honey and brown sugar smooth the edges, rice vinegar cuts through the richness, and a short simmer wakes the whole mixture up. You get a sauce that tastes composed instead of pasted together at the last minute.
I also like that this version feels useful in real life. It’s not a one-night recipe you make, forget, and never repeat. Keep a jar around, and the next bowl of rice has a head start.
Time, Yield, and How Hard It Really Is
Yield: About 3/4 cup, enough for 4 to 6 bibimbap bowls
Prep Time: 10 minutes
Cook Time: 2 minutes
Total Time: 12 minutes
Rest Time: 5 to 10 minutes optional, for the garlic to mellow and the sauce to thicken
Difficulty: Beginner — one small saucepan and a whisk are enough, and the texture tells you what to do.
Best Served: Warm or at room temperature
The Ingredient List That Makes It Stick
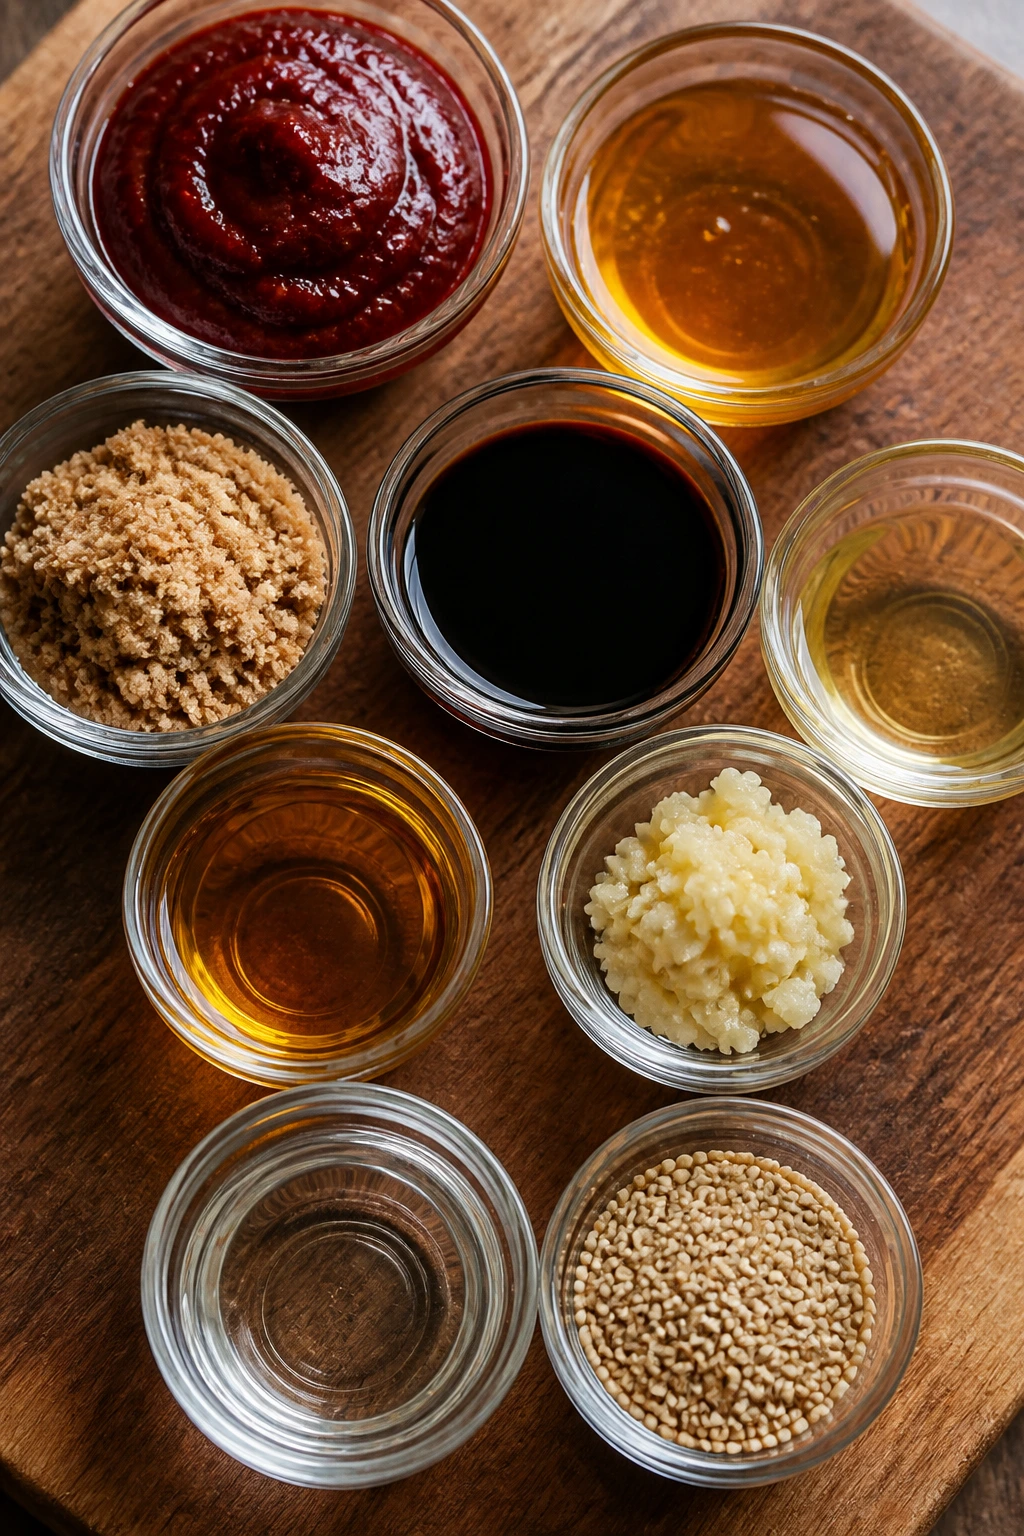
For the Sauce:
- 1/2 cup gochujang
- 2 tablespoons honey
- 1 tablespoon packed light brown sugar
- 2 tablespoons soy sauce or tamari
- 2 tablespoons rice vinegar
- 1 tablespoon toasted sesame oil
- 2 cloves garlic, finely grated or pressed
- 2 to 4 tablespoons warm water, plus more as needed
- 1 teaspoon toasted sesame seeds
Why Each Ingredient Matters in a Good Bibimbap Sauce
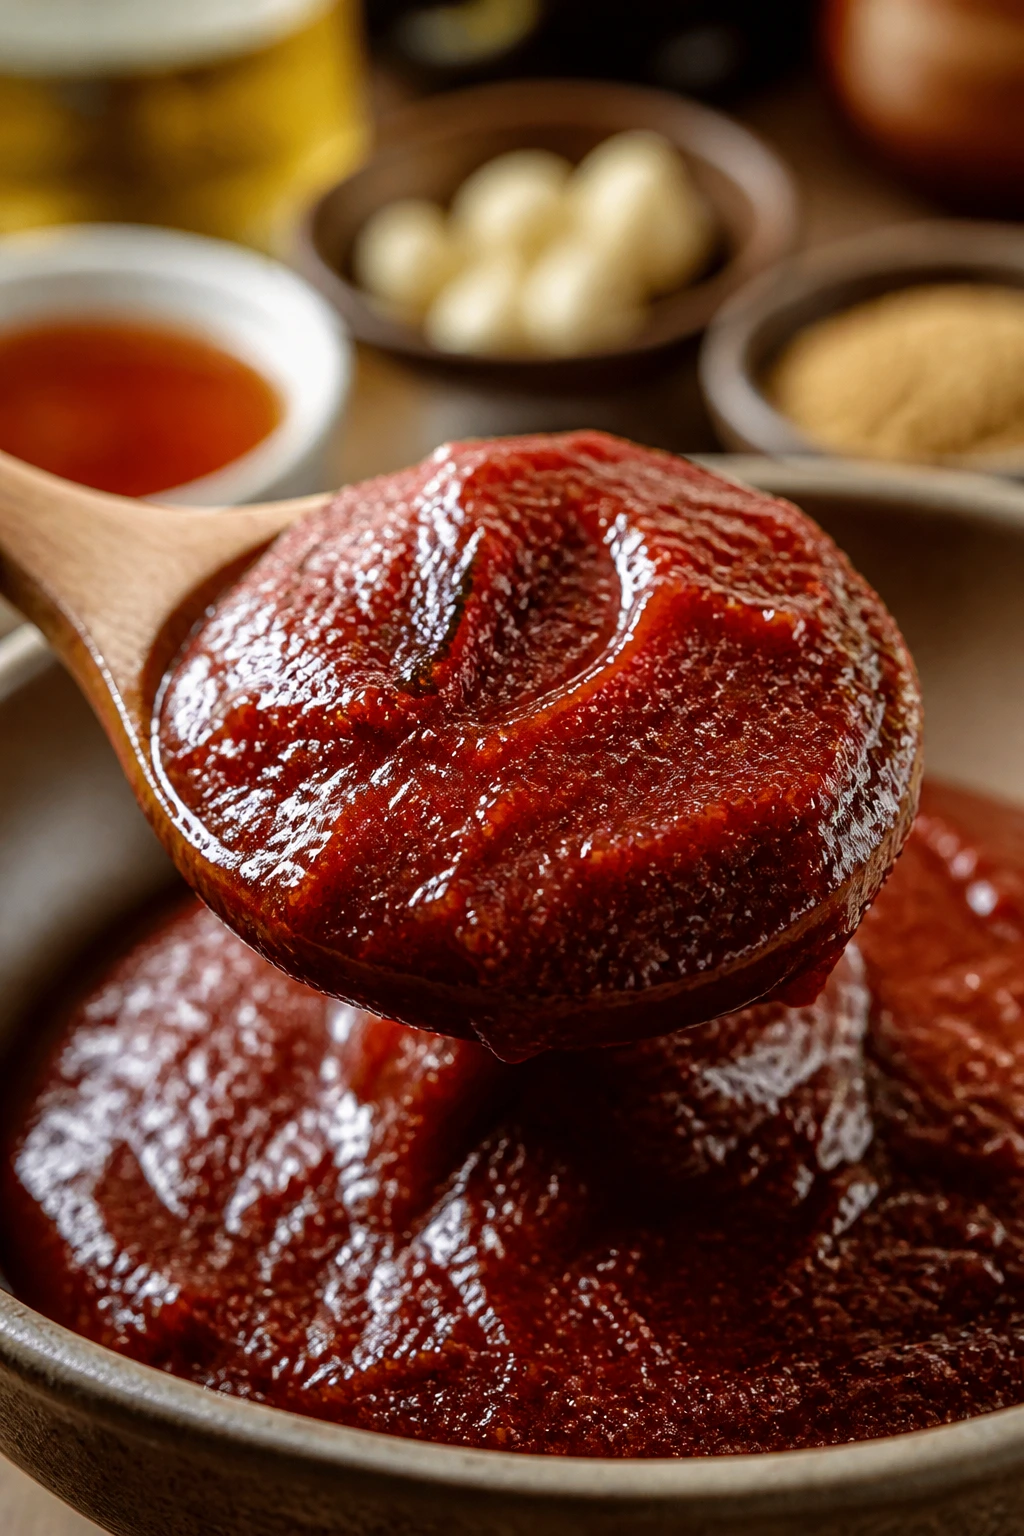
Gochujang: The Red Backbone
What to use: 1/2 cup gochujang, the thick Korean chili paste that gives bibimbap sauce its color, heat, and fermented depth.
Preparation: Stir it in the jar before measuring if the top has gone a little dry. A quick mix keeps the paste consistent, and it helps the sauce blend smoothly without stubborn little red clumps.
Substitutions: There is no perfect stand-in, which is inconvenient but true. In a pinch, a mix of chili garlic sauce, a spoon of miso, and extra honey can approximate the body, though the flavor will be sharper and less rounded.
Tips: Buy the thick stuff, not a thin chili sauce. Good gochujang should look dense and glossy, almost like a paste that holds a ridge when you swipe it with a spoon.
Sweeteners: Honey and Brown Sugar Do Different Jobs
What to use: 2 tablespoons honey and 1 tablespoon packed light brown sugar.
Preparation: Measure the brown sugar packed, not loose, so the sauce gets enough depth to feel sticky without turning sugary.
Substitutions: Maple syrup works if you want a vegan version, and rice syrup gives a more classic glossy finish if you have it on hand. Coconut sugar can replace brown sugar, though it adds a slightly darker, almost caramel note.
Tips: Honey gives shine, brown sugar gives roundness. I wouldn’t skip both unless you want a sharper, thinner sauce that behaves more like chili paste than bibimbap sauce.
Salt and Acid: The Parts That Keep It From Tasting Like Paste
What to use: 2 tablespoons soy sauce and 2 tablespoons rice vinegar.
Preparation: Measure these before you heat the pan, because once the sauce starts warming, you’ll want to move fast and stir constantly.
Substitutions: Tamari is the cleanest gluten-free swap for soy sauce. If you don’t have rice vinegar, use apple cider vinegar in the same amount, but taste carefully—it’s a little louder.
Tips: Soy sauce brings salt and savory depth, but the rice vinegar is what keeps the sweetness from sticking to your tongue. Skip the acid and the sauce gets heavy fast.
Garlic and Sesame: The Final Lift
What to use: 2 cloves garlic, finely grated or pressed, plus 1 tablespoon toasted sesame oil and 1 teaspoon toasted sesame seeds.
Preparation: Grate the garlic on a microplane or press it so it melts into the sauce. Then add the sesame oil after the heat comes off; that preserves the nutty aroma instead of cooking it away.
Substitutions: If raw garlic feels too aggressive for you, use 1 small clove instead of 2 and let the sauce rest longer. There isn’t a true sesame oil substitute, though a neutral oil with extra sesame seeds will do in a pinch.
Tips: Toasted sesame oil should smell warm and nutty, not pale or oily. If it smells flat, the sauce will too.
Water: Small Amount, Big Difference
What to use: 2 to 4 tablespoons warm water, plus more if needed.
Preparation: Add the water in small amounts after the first stir so you can control the texture instead of flooding the sauce.
Substitutions: A spoonful of hot rice-cooking water works if you’re already at the stove, and it blends in nicely. Broth is possible, but it muddies the clean bibimbap flavor, so I’d only use it if that’s what you have.
Tips: Warm water loosens the paste without making it thin. Cold water tends to make the sauce seize slightly, which is not dramatic, just annoying.
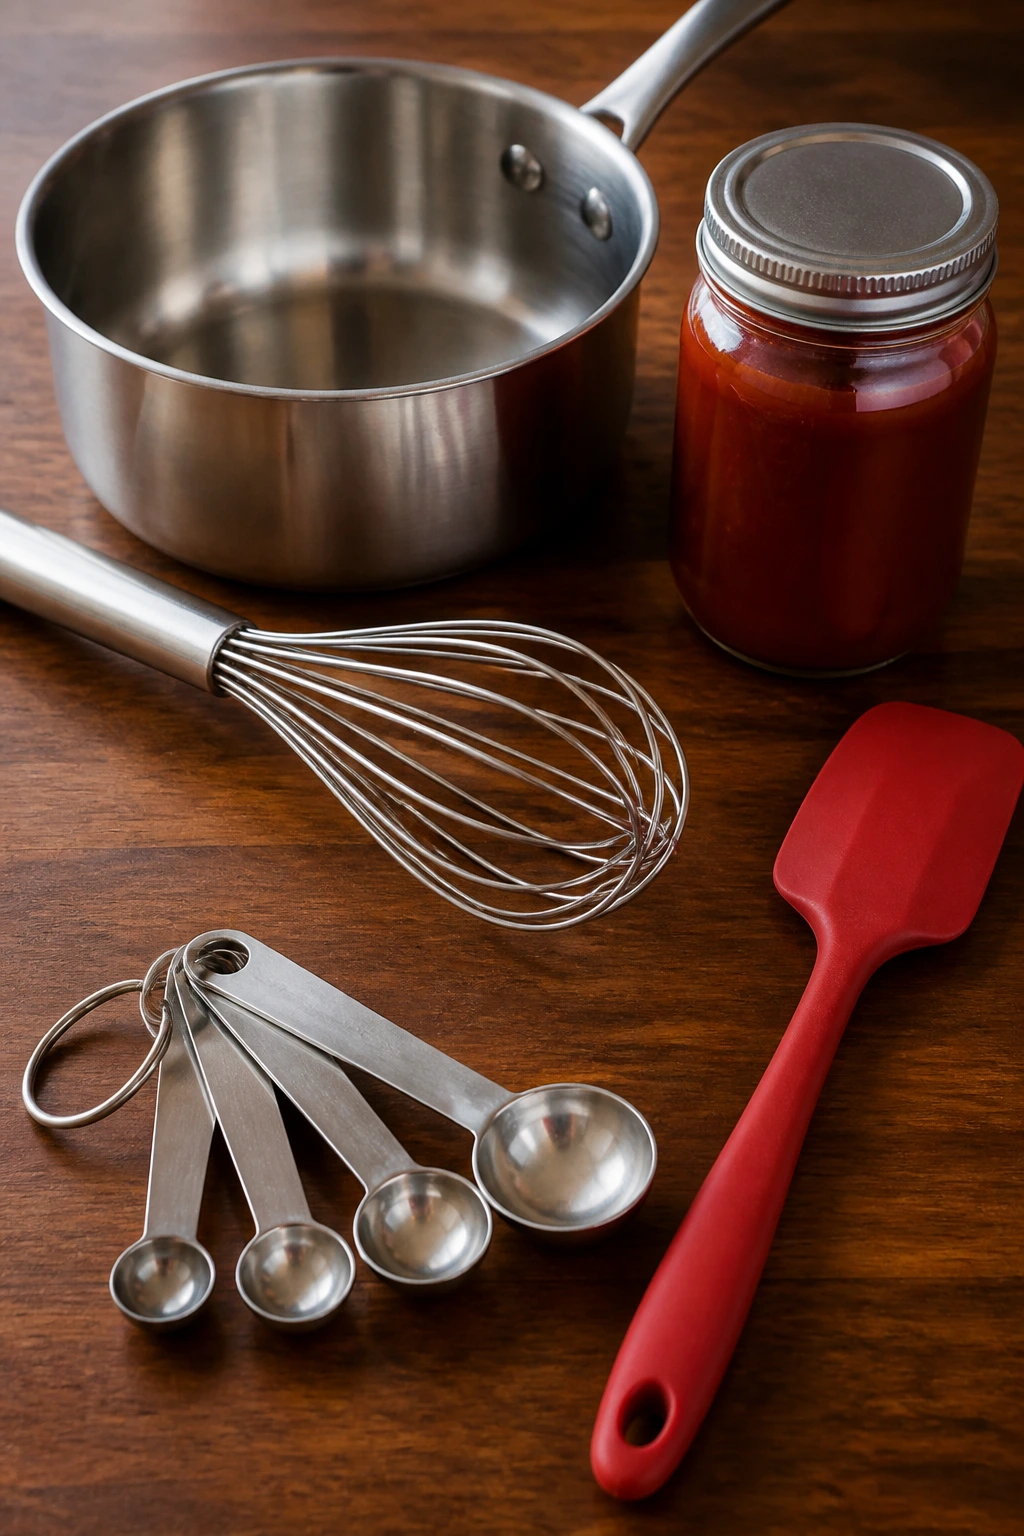
The Only Tools You Actually Need
-
Small saucepan, 1-quart or 2-quart: Big enough to stir without splashing the sauce onto the stove.
-
Whisk: This is the fastest way to blend gochujang, honey, and sugar into one smooth sauce.
-
Microplane or fine grater: Best for garlic, because grated garlic disappears into the sauce instead of showing up in sharp little pieces.
-
Measuring spoons and cups: The balance here matters. Free-pouring can push the sauce too sweet or too salty.
-
Silicone spatula: Useful for scraping the pan clean, especially once the sauce thickens.
-
Small jar with a lid or squeeze bottle: Handy for storing leftovers and drizzling the sauce over bowls without making a mess.
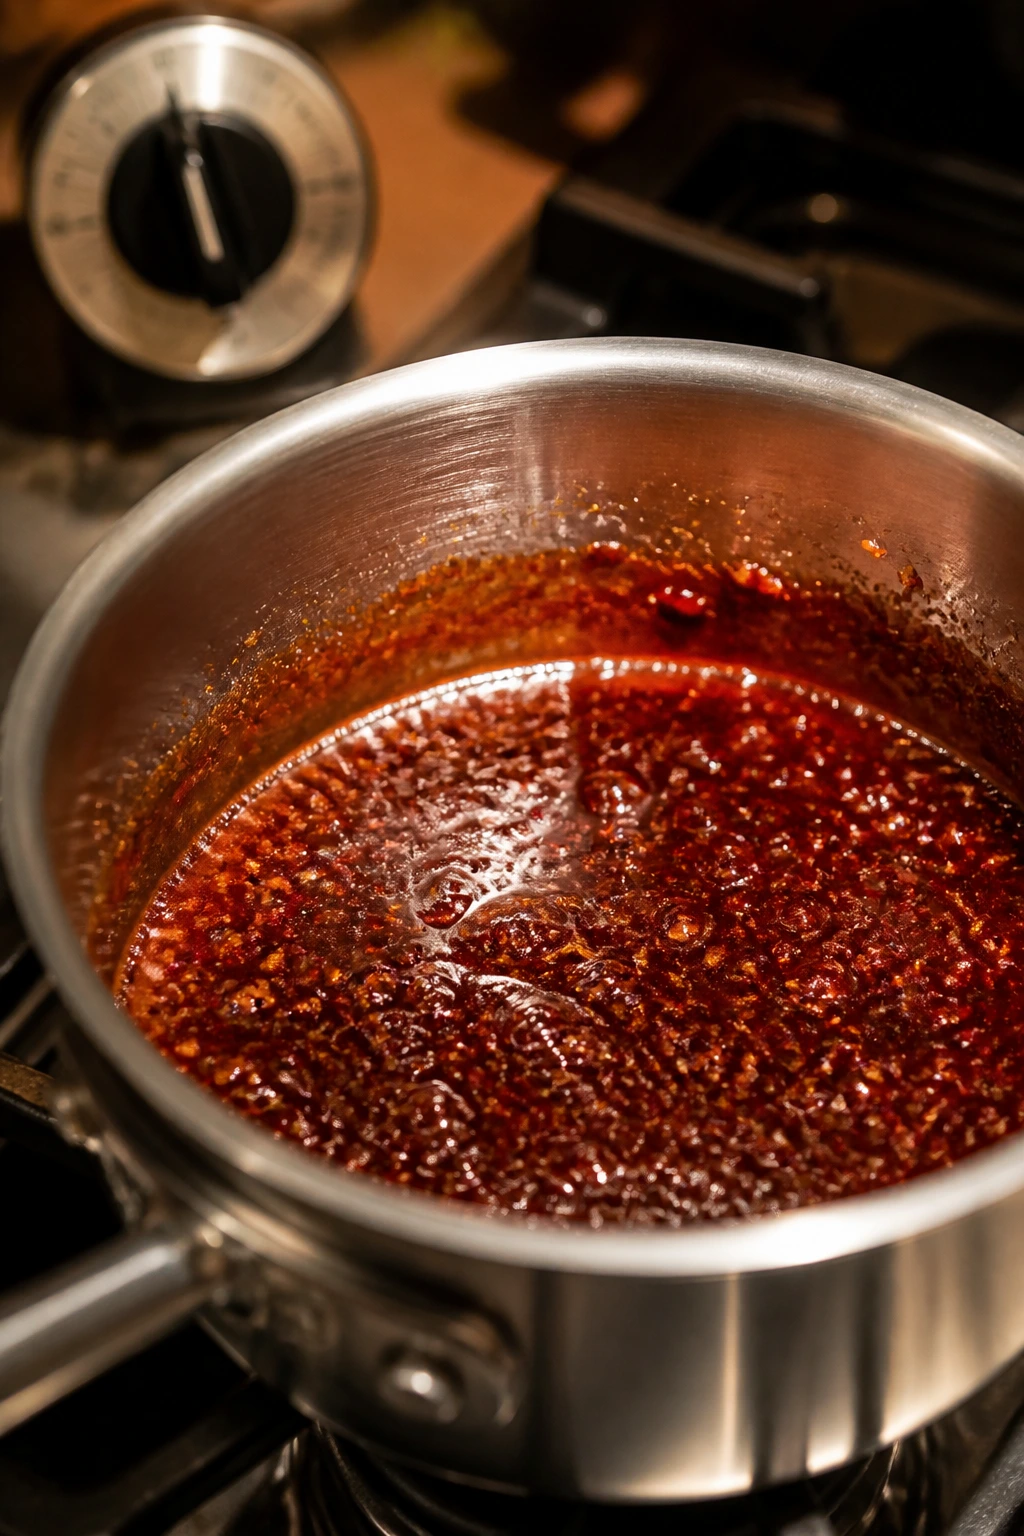
The Two-Minute Simmer That Changes the Texture
A lot of people whisk bibimbap sauce in a bowl and stop there. That works. It’s fine. But a brief warm-up on the stove gives you a different sauce—smoother, glossier, and more cohesive.
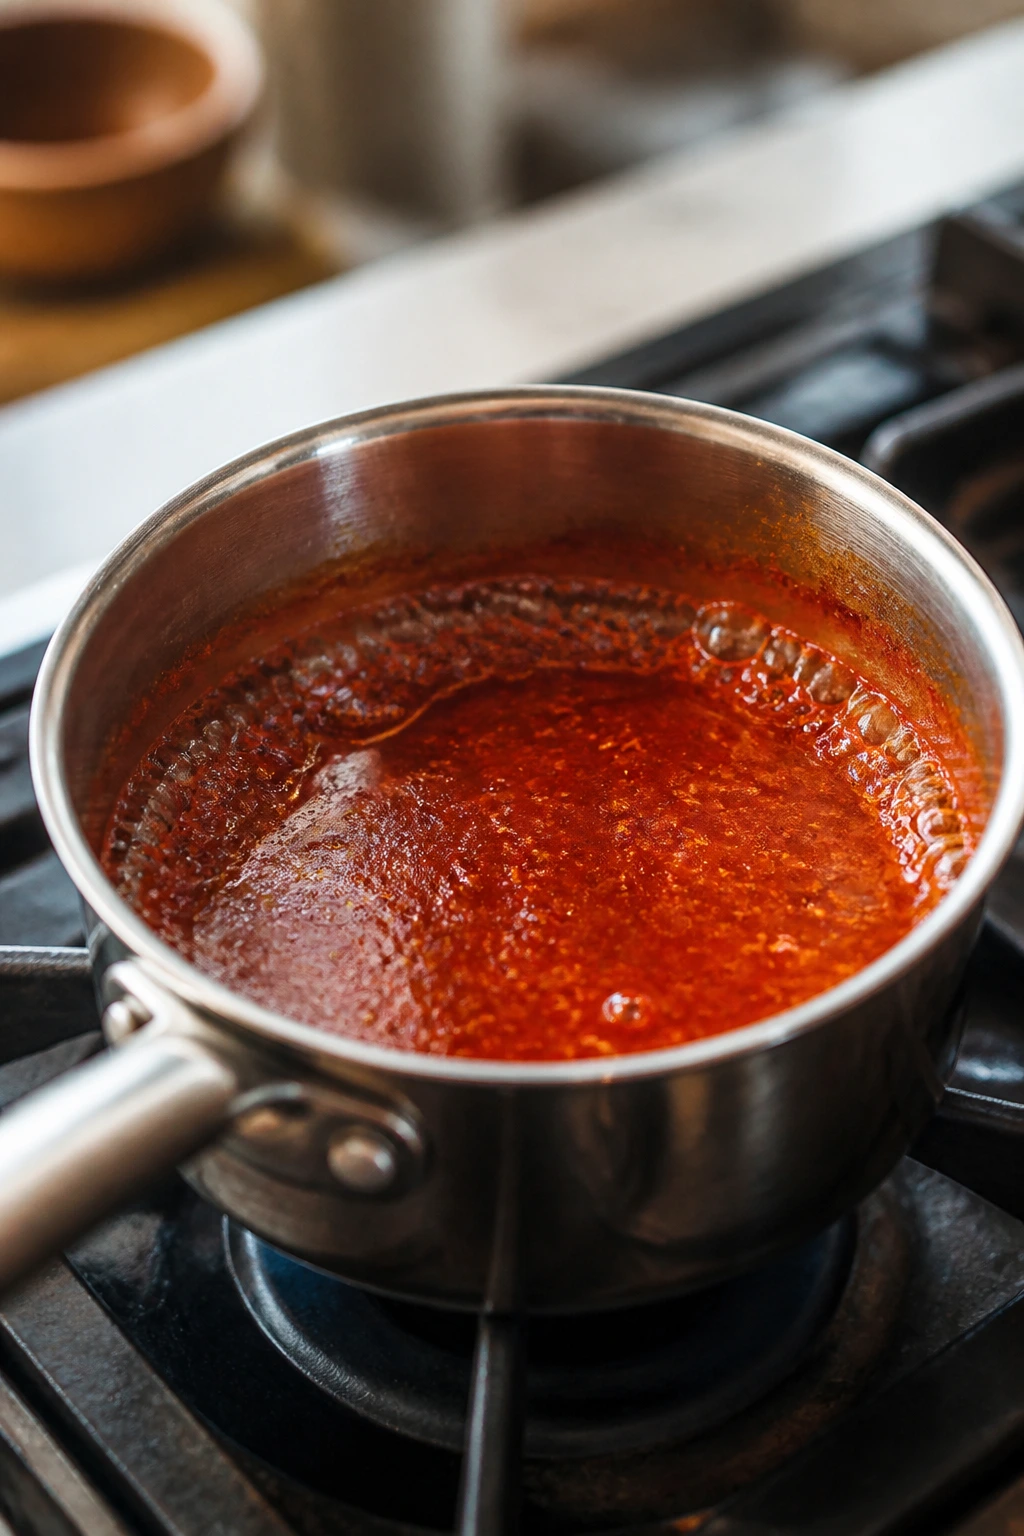
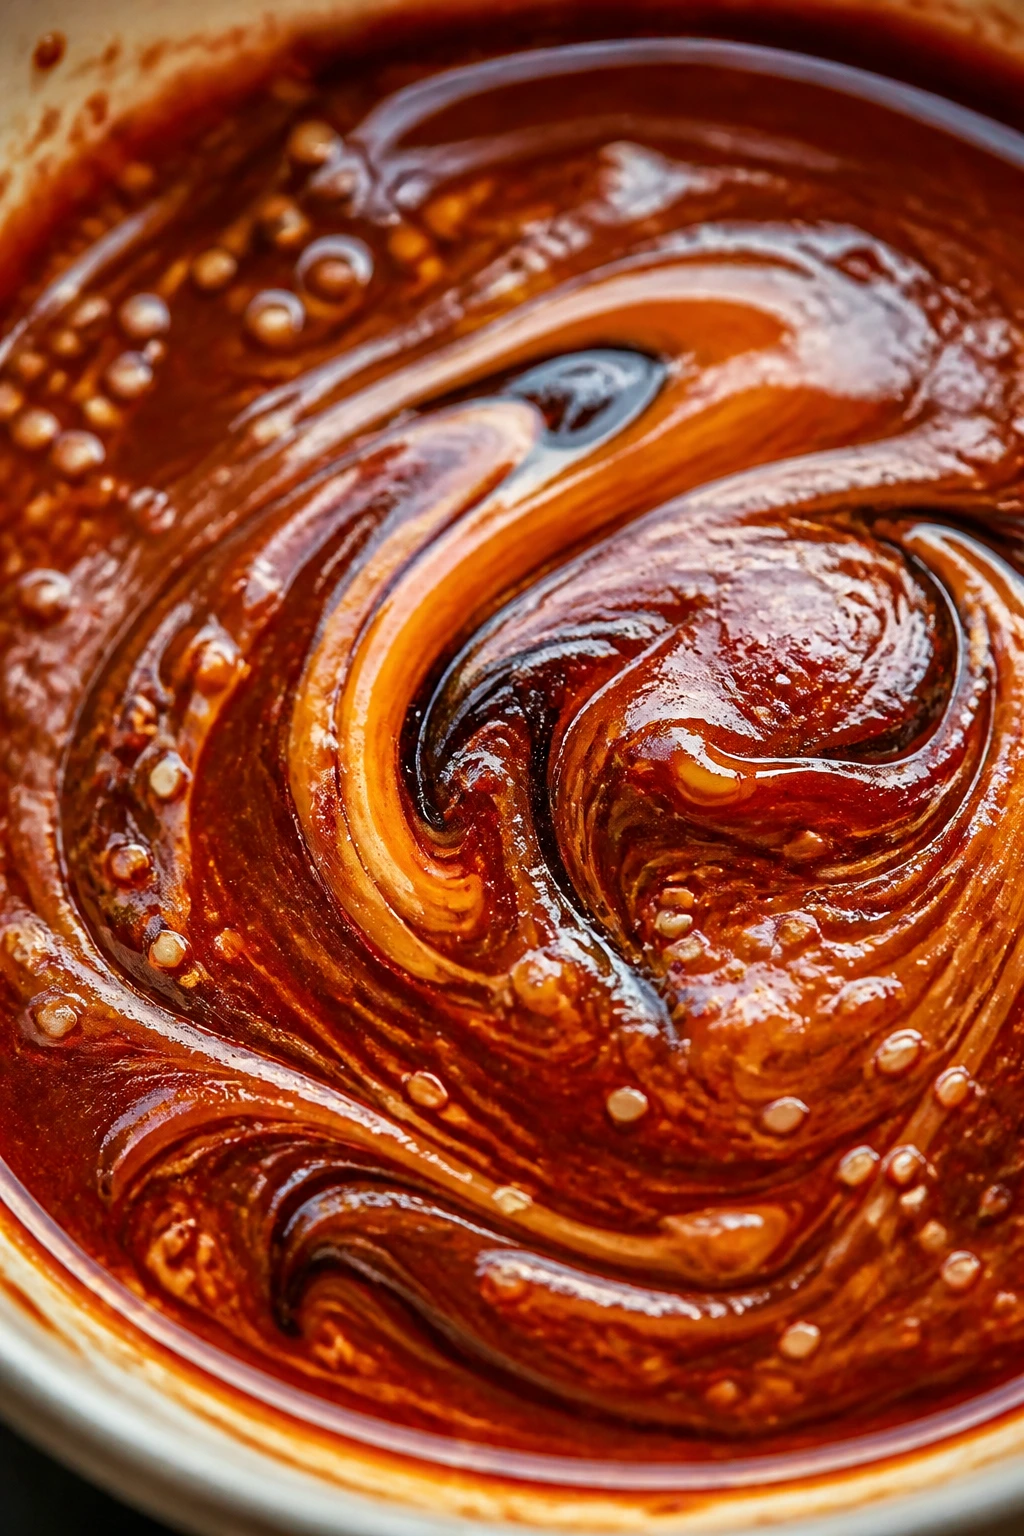
Start by combining the gochujang, honey, brown sugar, soy sauce, rice vinegar, garlic, and warm water in a small saucepan. The goal is not to cook the sauce hard. You’re just warming it enough to dissolve the sugar and loosen the paste so it turns silky instead of chunky. If you rush this part, the sauce can feel gritty in the bowl, which is a small problem that somehow becomes the only thing you notice.
The simmer should be gentle. Tiny bubbles around the edge are enough. If the sauce starts popping hard or sputtering, the heat is too high. Gochujang can handle a little warmth, but honey turns harsh when it scorches, and sesame oil loses its fragrance if you cook it too long.
The finishing move matters. Sesame oil goes in off the heat. Sesame seeds go in after that, unless you want them to toast a little in the residual heat, which I sometimes do when I want the sauce to smell more like a proper Korean pantry than a bottled dressing. Either way, give the sauce a brief rest before serving. Ten minutes is enough for the garlic to mellow and for the sauce to thicken slightly on its own.
How to Make the Sauce Without Messing Up the Texture
Build the Base:
-
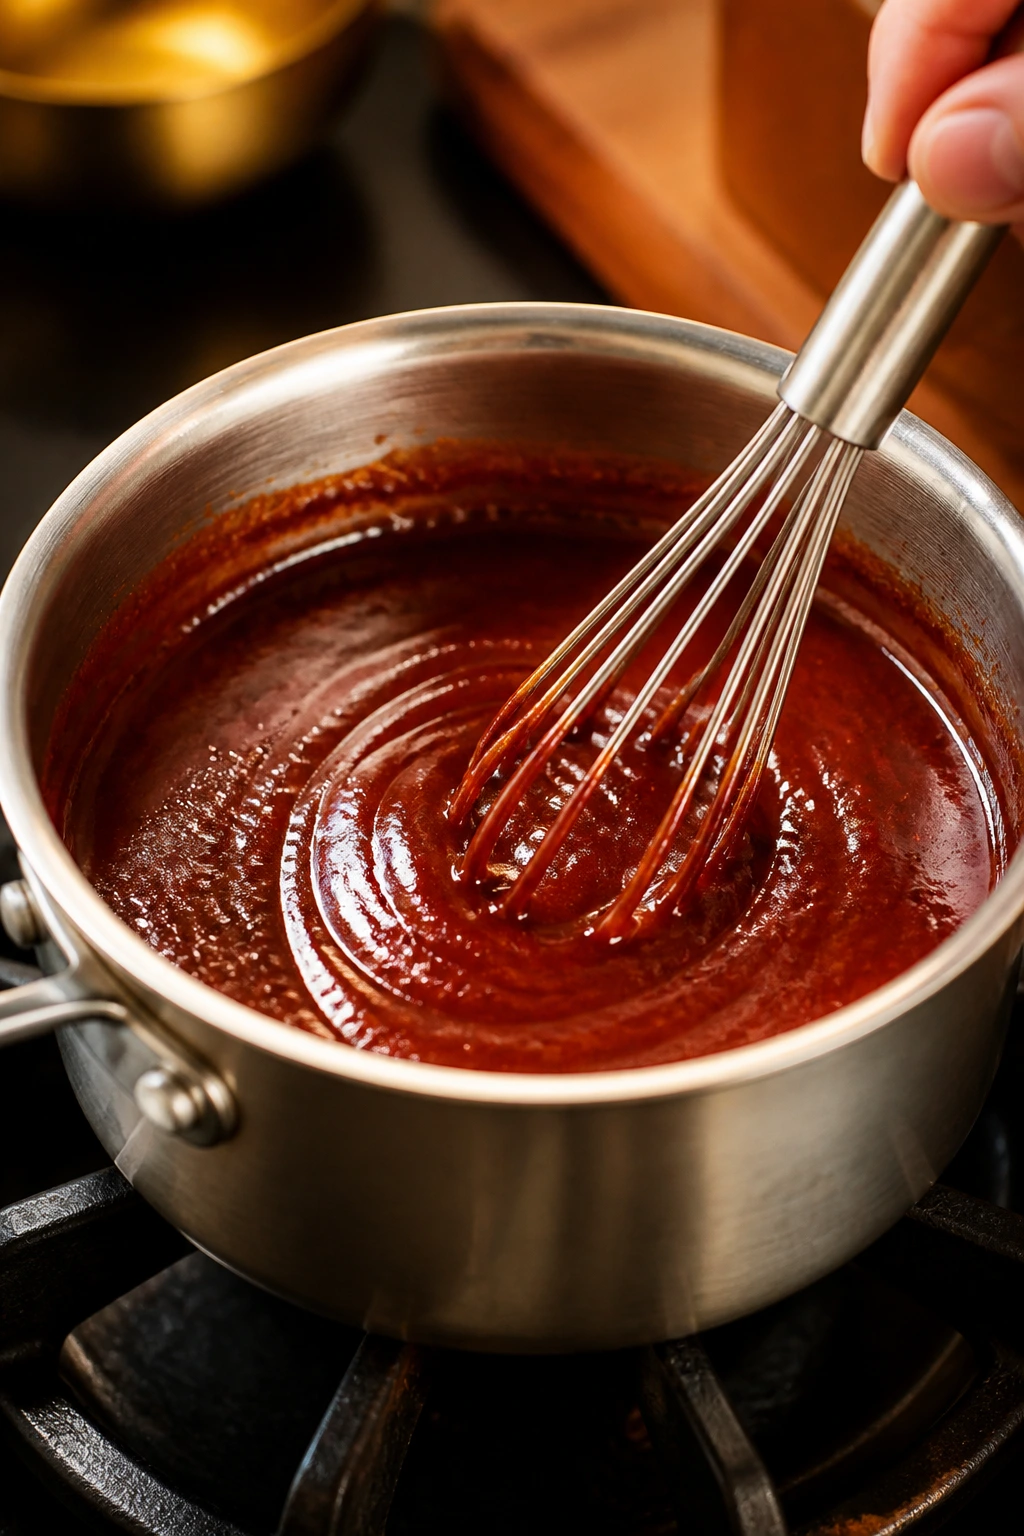
In a small saucepan, whisk together the gochujang, honey, brown sugar, soy sauce, rice vinegar, garlic, and 2 tablespoons warm water until the mixture looks smooth and glossy. If you see streaks of paste hiding at the bottom of the pan, keep whisking until they disappear.
-
Set the pan over medium-low heat and stir constantly for 1 to 2 minutes, until the sugar dissolves and the sauce starts to bubble in lazy pops around the edges. Do not let it boil hard; that can make the honey taste sharp and can tighten the sauce too quickly.
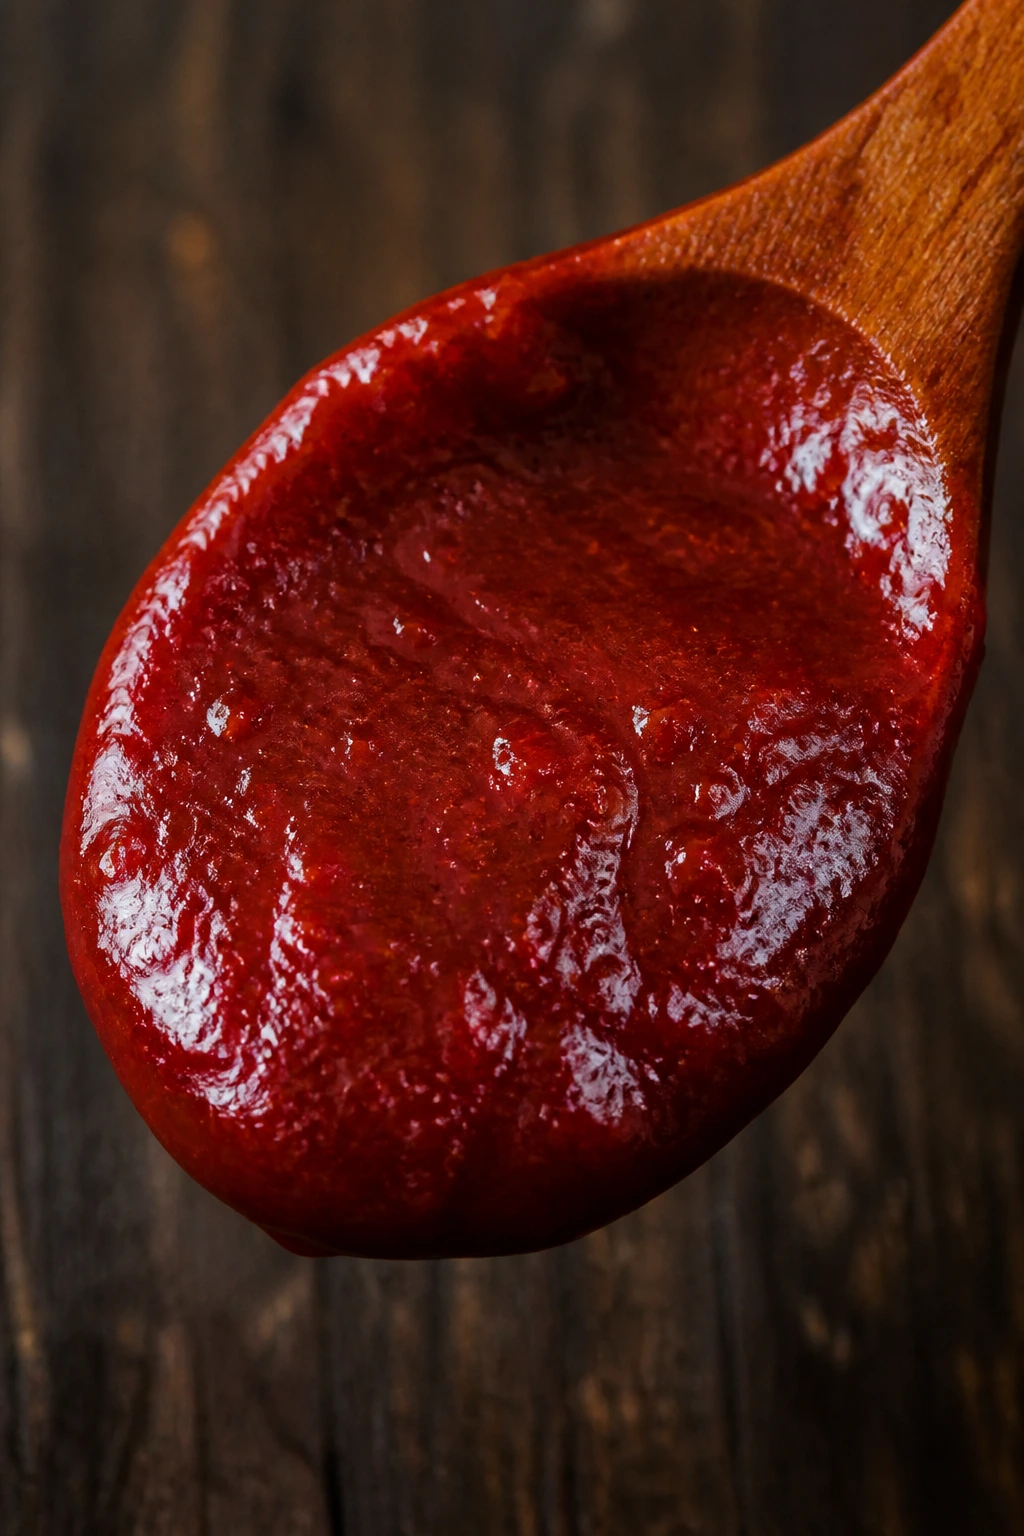
Finish and Adjust: 3. Remove the pan from the heat and stir in the toasted sesame oil and sesame seeds. The sauce should look shiny and thick enough to coat a spoon; if it still seems too dense, whisk in warm water 1 teaspoon at a time until it reaches a clingy, pourable texture.
-
Taste the sauce on a spoon, not just from the pan. If it feels too sweet, add 1 teaspoon more rice vinegar. If it feels too sharp, add 1 teaspoon honey. Small changes matter here, because bibimbap sauce should hit rice, vegetables, and egg in one balanced swipe.
-
Let the sauce rest for 5 to 10 minutes before serving, or transfer it to a jar and cool it to room temperature. The garlic softens, the sesame aroma settles in, and the texture thickens just enough to cling instead of run.
How to Spoon It Onto a Bibimbap Bowl
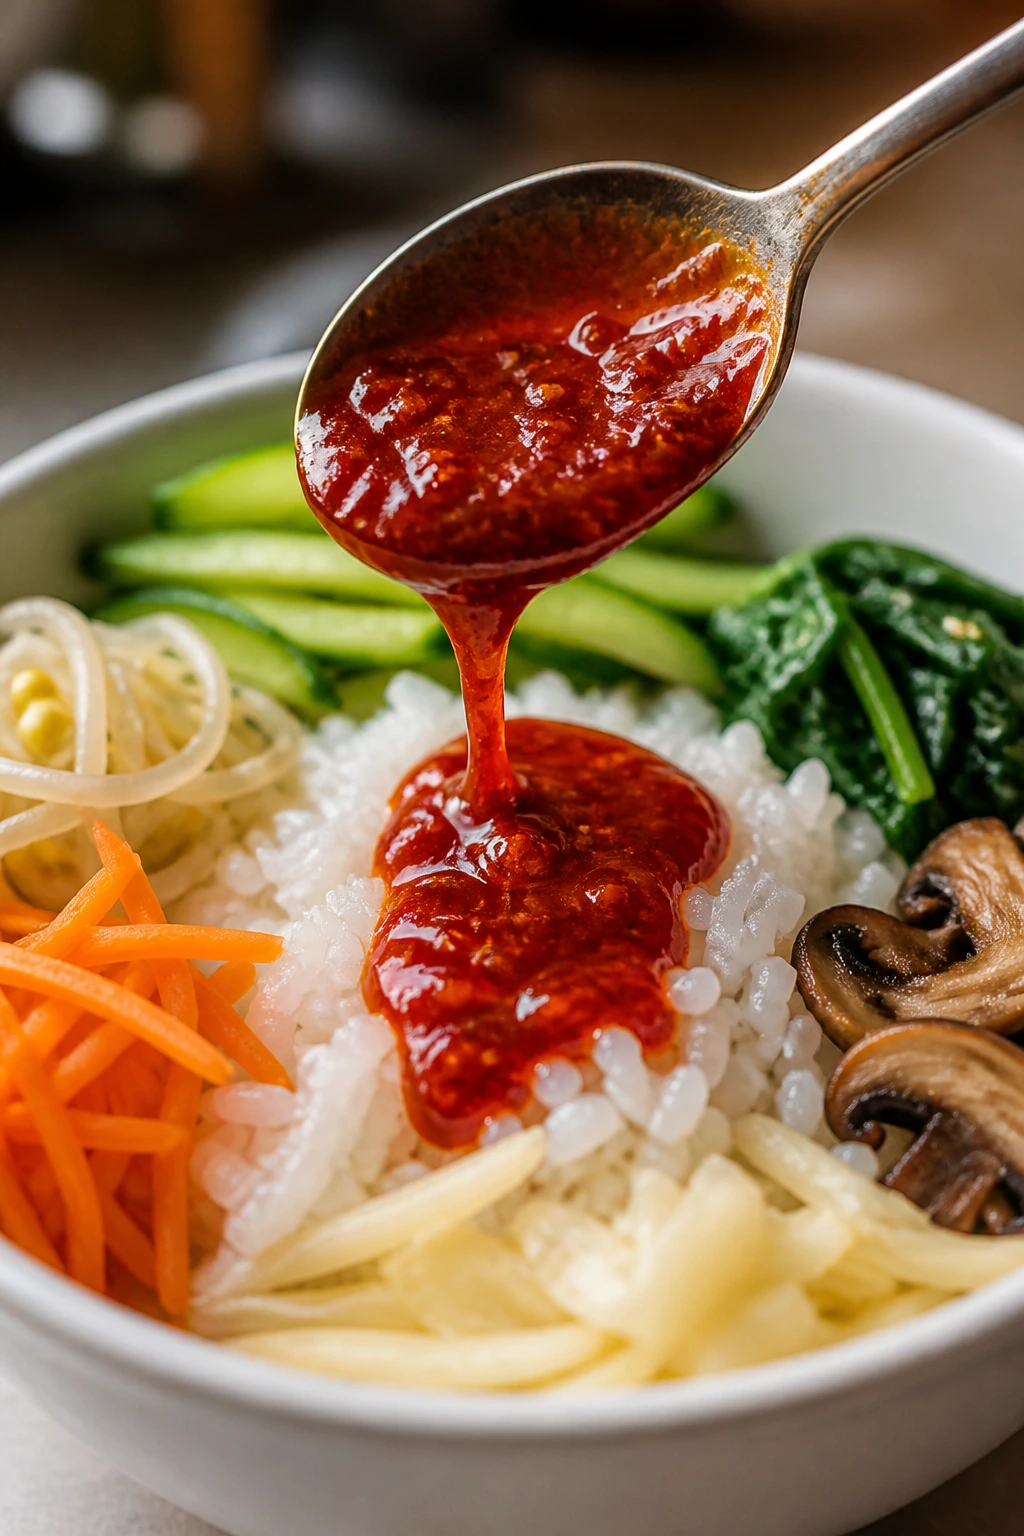
Presentation: Spoon 1 to 2 tablespoons into the center of each bowl, then add more at the table if needed. On a finished bibimbap bowl, I like the sauce to sit in a glossy red ribbon across the rice rather than flooding the vegetables before the first stir.
Accompaniments: This sauce belongs with short-grain rice, sautéed spinach, julienned carrot, seasoned bean sprouts, mushrooms, zucchini, a fried egg, and crisp cucumber. It also plays nicely with bulgogi, crispy tofu, leftover roast chicken, or even plain rice when the fridge is looking empty.
Portions: Plan on about 2 tablespoons for a smaller bowl and 3 tablespoons for a larger one with plenty of rice. If you’re serving a group, make the full batch and put the jar on the table—people almost always want one more spoonful after the first mix.
Beverage Pairing: Cold barley tea is the cleanest match, but a dry lager or sparkling water with cucumber keeps the heat from building up. I would skip anything sweet here; it makes the sauce feel stickier in the wrong way.
Small Upgrades That Make the Sauce Taste More Finished
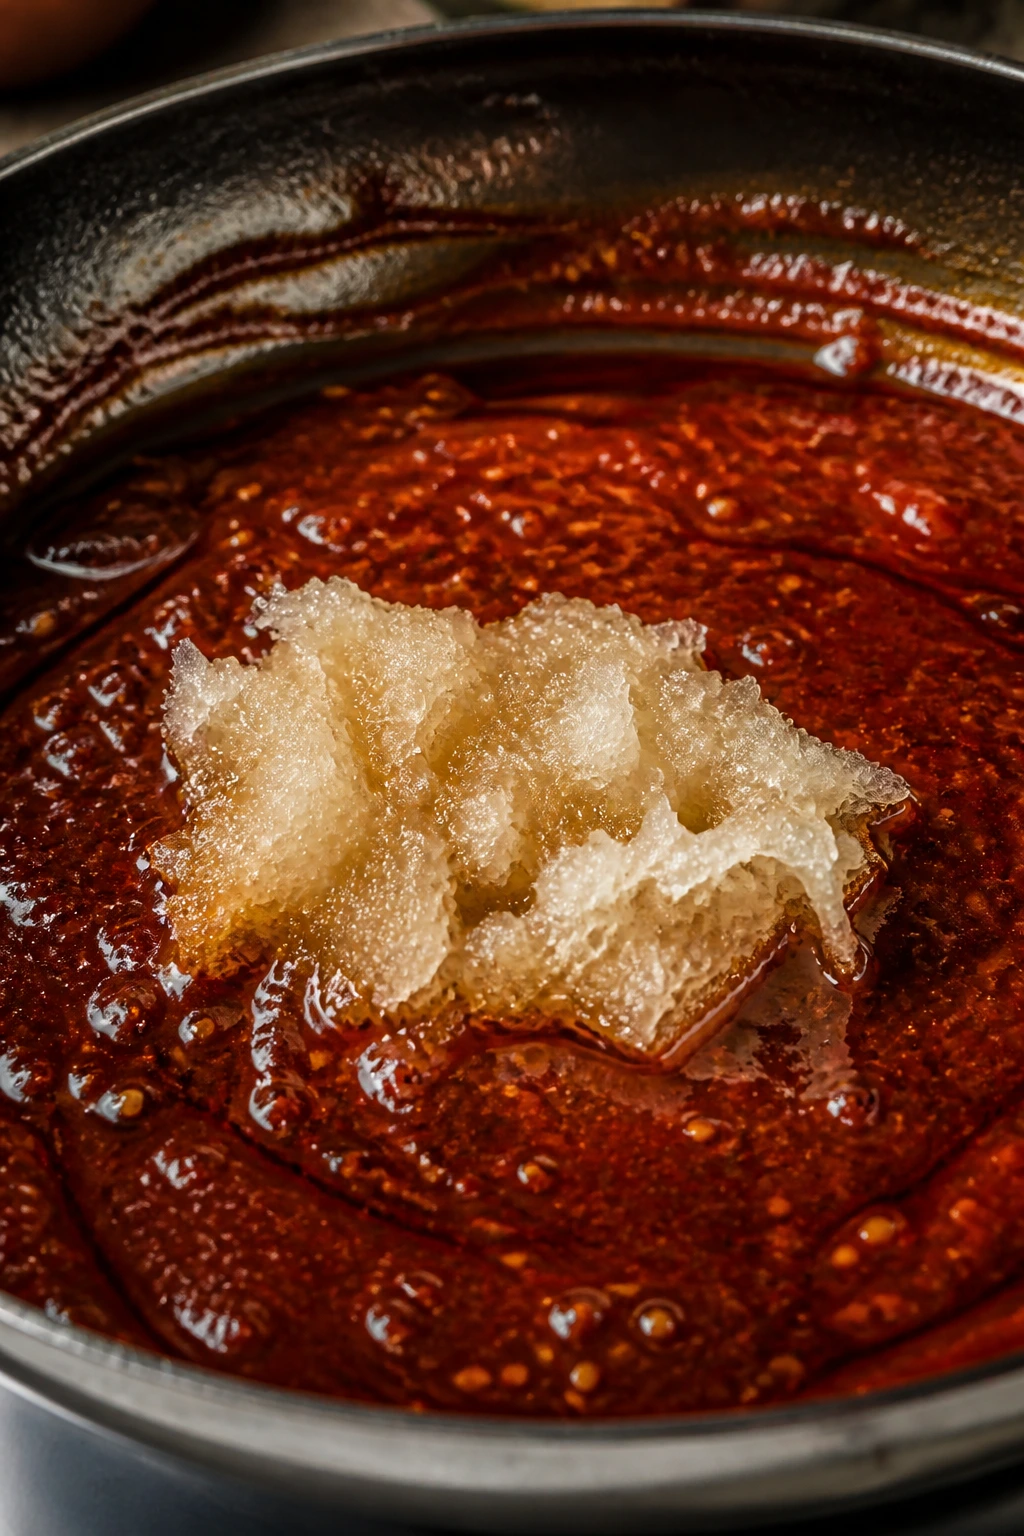
Flavor Enhancement: Add 1 teaspoon of grated Asian pear or apple to the saucepan before you warm the sauce. It melts into the base and gives the sweetness a softer edge, the way a good restaurant sauce tastes rounded even when it’s still bright.
Customization: If you want more heat, add 1/2 teaspoon gochugaru after the simmer. If you want the sauce less sweet and more punchy, cut the honey to 1 tablespoon and add an extra teaspoon of rice vinegar, then taste it on warm rice before you call it done.
Serving Suggestions: Finish bowls with extra sesame seeds, sliced scallions, and a tiny drizzle of sesame oil around the rim. One teaspoon is enough; if you pour more than that, the whole bowl starts tasting oily instead of fragrant.
Make-It-Yours: Use tamari for a gluten-free version, maple syrup for a vegan sweetener swap, or a little extra water if you want a thinner sauce for noodle bowls. You can also double the garlic if you like a sharper bite, though I’d only do that if you’re serving it the same day.
Common Mistakes That Make Bibimbap Sauce Flat
-
Using a thin chili sauce instead of gochujang: The sauce turns sharp, watery, and oddly one-note. Fix it by using thick gochujang paste; the body is part of the flavor.
-
Boiling the sauce hard: Honey can taste burnt, and the sauce gets sticky in a stiff, unpleasant way. Keep the heat at medium-low and look for small bubbles, not a rolling boil.
-
Adding sesame oil too early: Sesame oil is aromatic, not a cooking oil here. If you cook it too long, the nutty smell fades and the sauce loses its best detail.
-
Skipping the rest time: Right off the stove, the garlic can taste prickly and the sweetness can feel too sharp. Letting the sauce sit for 5 to 10 minutes smooths the whole thing out.
-
Over-thinning it with water: A runny bibimbap sauce slides straight to the bottom of the bowl. Add water by the teaspoon, not by the splash.
-
Not tasting it on rice: Sauce in the pan tastes different from sauce on hot rice. If you can, test a spoonful on a grain or two before you decide it needs more salt, acid, or sweetness.
Variations Worth Trying
Milder Red Bowl Sauce: Cut the gochujang to 1/3 cup and add 1 extra tablespoon of honey plus 1 tablespoon more water. This keeps the sauce friendly for people who want bibimbap flavor without a direct hit of heat.
Heat-First Version: Stir in 1/2 to 1 teaspoon gochugaru after the simmer and let it sit for 10 minutes before serving. The result is brighter and sharper, with a little more red pepper bite at the finish.
Tamari and Maple Swap: Replace the soy sauce with tamari and the honey with maple syrup. The flavor stays balanced, and the sauce stays gluten-free and vegan without losing its glossy texture.
Pear-Sweet Restaurant Style: Add 1 tablespoon grated Asian pear before heating the sauce. That small amount gives the sauce a softer sweetness and a slightly fresher finish that works especially well with beef or mushrooms.
Extra-Sticky Glaze: Simmer the sauce for another 30 to 45 seconds and whisk in 1 teaspoon rice syrup or light corn syrup. This version clings especially well to grilled meat and roasted vegetables, though you should keep the heat low so it doesn’t seize into a paste.
Make It Ahead, Store It Properly, and Use It Later Without Ruining It
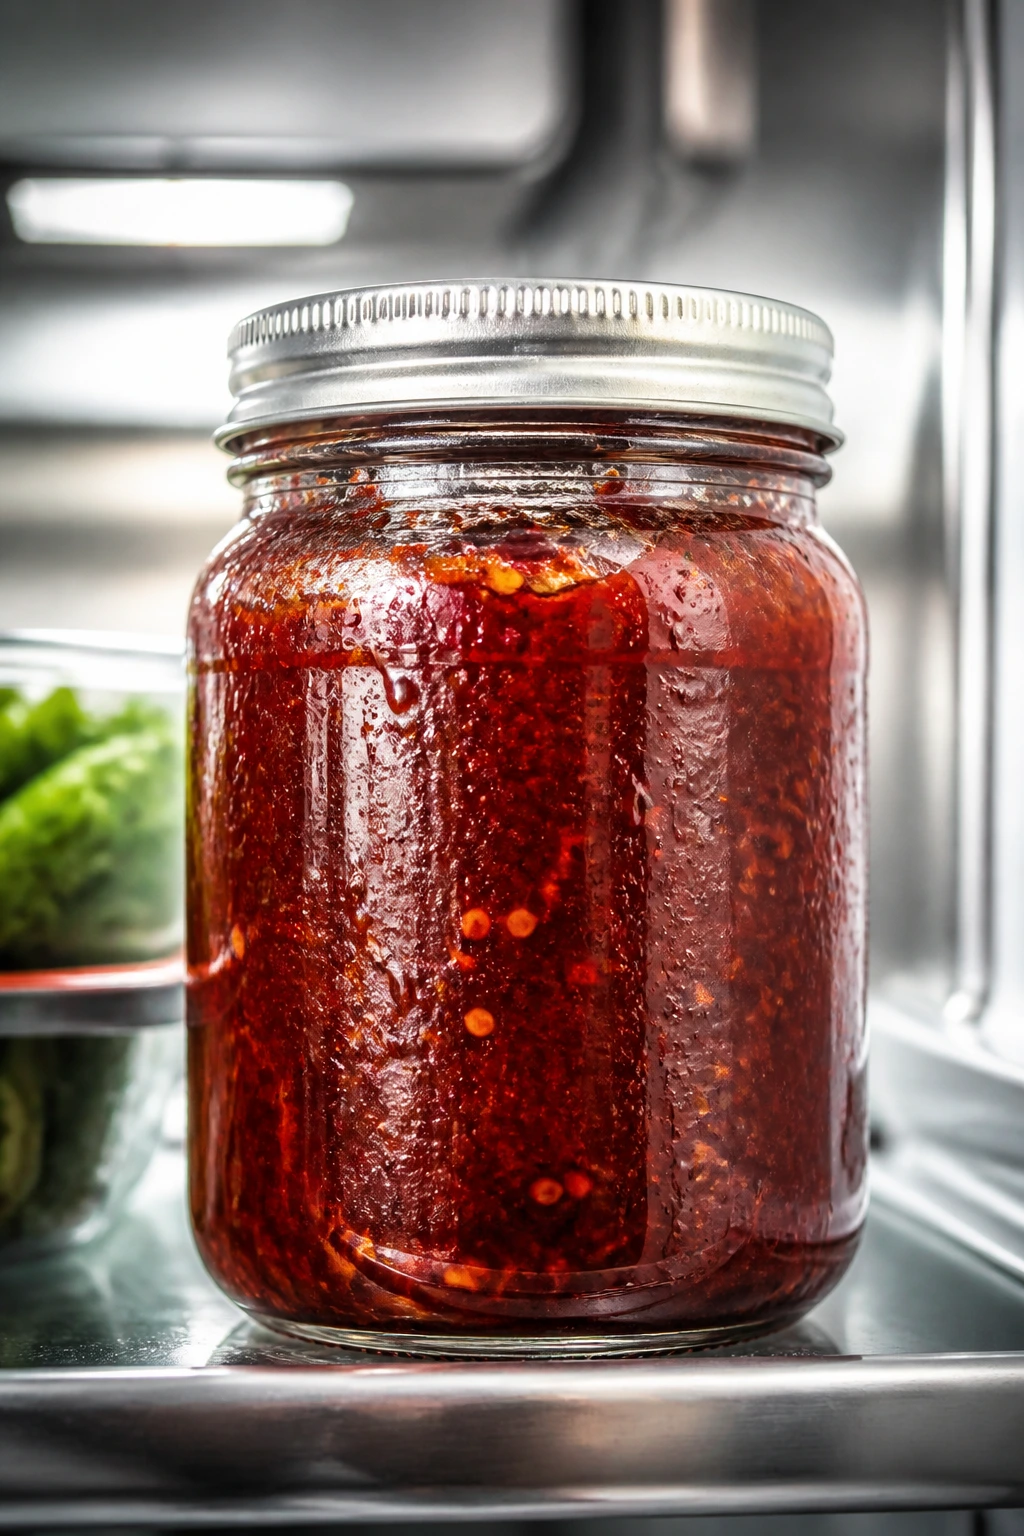
This sauce keeps well in the fridge. Store it in a sealed jar for 5 to 7 days, and if you used fresh garlic, I’d treat the earlier part of that range as the sweet spot. The flavor actually settles after a night in the fridge, so the sauce often tastes calmer and better integrated the next day.
For freezing, portion the sauce into a small container or an ice cube tray and freeze it for up to 3 months. One-tablespoon cubes are handy if you want to pull out just enough for a lunch bowl or a single fried egg. Thaw in the fridge overnight, or set the cube in a small bowl and let it loosen on its own while the rice cooks.
Reheating is simple. Warm the sauce in the microwave for 5 to 10 seconds, or set the jar in a bowl of hot water for a few minutes and stir it once or twice. If it thickens too much in the fridge, add 1 teaspoon of warm water at a time until it loosens again. The sesame oil smell comes back fast, so there’s no need to blast it with heat.
Room temperature is fine for serving, but only for a short stretch. Keep it out for the meal and then put it back in the fridge. Bibimbap sauce is not fussy, but it does like a clean lid.
Questions People Ask About Bibimbap Sauce
Can I make this without gochujang?
You can, but it won’t taste like bibimbap sauce anymore. A chili garlic sauce mixed with a little miso and honey can stand in for the texture and heat, though the fermented depth of gochujang is hard to fake.
How spicy is this recipe?
With a standard gochujang, it lands in the medium range: warm enough to matter, not hot enough to swamp the bowl. If your brand of gochujang leans sharp, start with 1/3 cup and add more after you taste it on rice.
Do I have to cook the sauce?
No, but the quick simmer gives you a smoother texture and dissolves the sugar cleanly. If you want a raw version, whisk everything together in a bowl and let it sit for 10 minutes so the garlic softens and the honey loosens the paste.
What if my sauce is too thick after chilling?
Add warm water 1 teaspoon at a time and stir well after each addition. Don’t pour in a big splash all at once, because that’s how a clingy sauce turns into a thin red dressing.
Is this bibimbap sauce gluten-free?
It can be. Use tamari or a certified gluten-free soy sauce, and check the gochujang label, because some brands include wheat. That one label check matters more than people think.
What else can I put this on besides bibimbap?
Fried eggs, grilled chicken, tofu, roasted broccoli, mushrooms, rice noodles, and even leftover dumplings all benefit from a spoonful. It’s a strong sauce, so start small and add more if the dish needs it.
Can I make it a day ahead for meal prep?
Yes, and I’d actually recommend it. The garlic mellows overnight, the sesame oil settles in, and the whole sauce gets easier to spread on rice or vegetables the next day.
Why does my sauce taste flat even though I followed the recipe?
Usually it needs one of three things: a pinch more salt from soy sauce, a teaspoon more vinegar, or a touch more sweetness. Taste it on warm rice, not from the spoon alone—the bowl changes everything.
A Jar Worth Keeping Close
The thing I like most about a good bibimbap sauce is that it solves a boring problem with a small, sharp answer. Rice bowls need help. Leftover vegetables need help. Plain eggs, plain tofu, and plain rice all need help. This sauce does that work without turning into some overworked kitchen project.
Get the texture right once, and you stop thinking of it as a sauce packet replacement. It becomes the part of the bowl that pulls everything together and makes the whole dish taste like somebody cared about it.
Make a jar, keep it in the fridge, and the next bowl of rice will already know what to do.
Sticky Bibimbap Sauce Better than Takeout — Recipe Card
Recipe Name: Sticky Bibimbap Sauce Better than Takeout
Description: A glossy, clingy Korean-inspired bibimbap sauce made with gochujang, honey, brown sugar, soy sauce, rice vinegar, garlic, and toasted sesame oil. It coats rice and vegetables instead of sliding to the bottom of the bowl.
Prep Time: 10 minutes
Cook Time: 2 minutes
Total Time: 12 minutes
Course: Condiment, Sauce
Cuisine: Korean-Inspired
Servings: About 8 servings, roughly 2 tablespoons each
Calories: About 50 kcal per serving
Ingredients
For the Sauce:
- 1/2 cup gochujang
- 2 tablespoons honey
- 1 tablespoon packed light brown sugar
- 2 tablespoons soy sauce or tamari
- 2 tablespoons rice vinegar
- 1 tablespoon toasted sesame oil
- 2 cloves garlic, finely grated or pressed
- 2 to 4 tablespoons warm water, plus more as needed
- 1 teaspoon toasted sesame seeds
Instructions
-
In a small saucepan, whisk together the gochujang, honey, brown sugar, soy sauce, rice vinegar, garlic, and 2 tablespoons warm water until smooth.
-
Set over medium-low heat and stir constantly for 1 to 2 minutes, until the sugar dissolves and the sauce starts to bubble gently at the edges.
-
Remove from the heat and stir in the toasted sesame oil and sesame seeds.
-
Taste and adjust with a little more water if needed, 1 teaspoon at a time, until the sauce is thick but pourable.
-
Let the sauce rest for 5 to 10 minutes before serving, or cool and store it in a jar.
Notes:
Add the sesame oil off heat for the best aroma. The sauce thickens as it sits, so loosen it with warm water if needed. Refrigerate up to 1 week, or freeze in small portions for longer storage.