
A beef roast can look almost stubborn when it goes into the oven — a heavy, plain piece of meat with a little fat on top and not much else to recommend it. Then the heat starts working. The onions slump, the garlic softens, the drippings turn dark and glossy, and the whole pot takes on that slow-cooked smell that makes people drift into the kitchen asking how much longer dinner has to wait.
Tender roast beef is not about brute force. It is about giving the meat enough salt, enough brown color, and enough time for the connective tissue to relax instead of tightening into strings. A chuck roast can be a little grumpy at first, but once it gets the right heat and a covered braise, it turns from chewy to fork-tender in a way that feels almost unfair. That shift is the whole reason this method earns a place in the weeknight-to-weekend rotation.
What I like most here is the balance: beefy enough to feel substantial, soft enough to slice without a fight, and rich enough that the vegetables taste like they were invited on purpose instead of tossed in as an afterthought. The pan turns into its own gravy boat, which is a pretty good trick for a dinner that also gives you potatoes, carrots, and enough sauce to chase a few slices of bread around the plate.
Why This Roast Deserves a Spot on the Table
-
It gives you tenderness without babysitting the oven: A covered Dutch oven and a low oven do the heavy lifting, so the beef softens steadily instead of drying out at the edges.
-
The drippings become dinner, not waste: Onion, wine, stock, and tomato paste build a gravy that tastes like it had all afternoon to think.
-
The vegetables cook in the same pot: Carrots and potatoes soak up the beefy liquid, which means they taste seasoned all the way through, not just salted on the outside.
-
It handles a full plate well: Thick slices of roast, a spoonful of gravy, and a pile of potatoes make sense together in a way lighter meals never quite do.
-
Leftovers keep their dignity: Chilled roast beef can be rewarmed in gravy and tucked into sandwiches, hash, or a skillet supper without falling apart.
-
It feels special without being fussy: The ingredient list is plain, but the finished pan smells like you paid more attention than you actually had to.
Yield: Serves 6 to 8
Prep Time: 25 minutes
Cook Time: 3 hours 20 minutes
Total Time: 3 hours 45 minutes, including resting
Difficulty: Intermediate — the steps are straightforward, but searing, timing the vegetables, and judging tenderness take a little attention.
Chill/Rest Time: 20 minutes
Best Served: Warm, with the gravy still glossy and the vegetables holding their shape
What Makes This Roast Beef Tender Instead of Dry
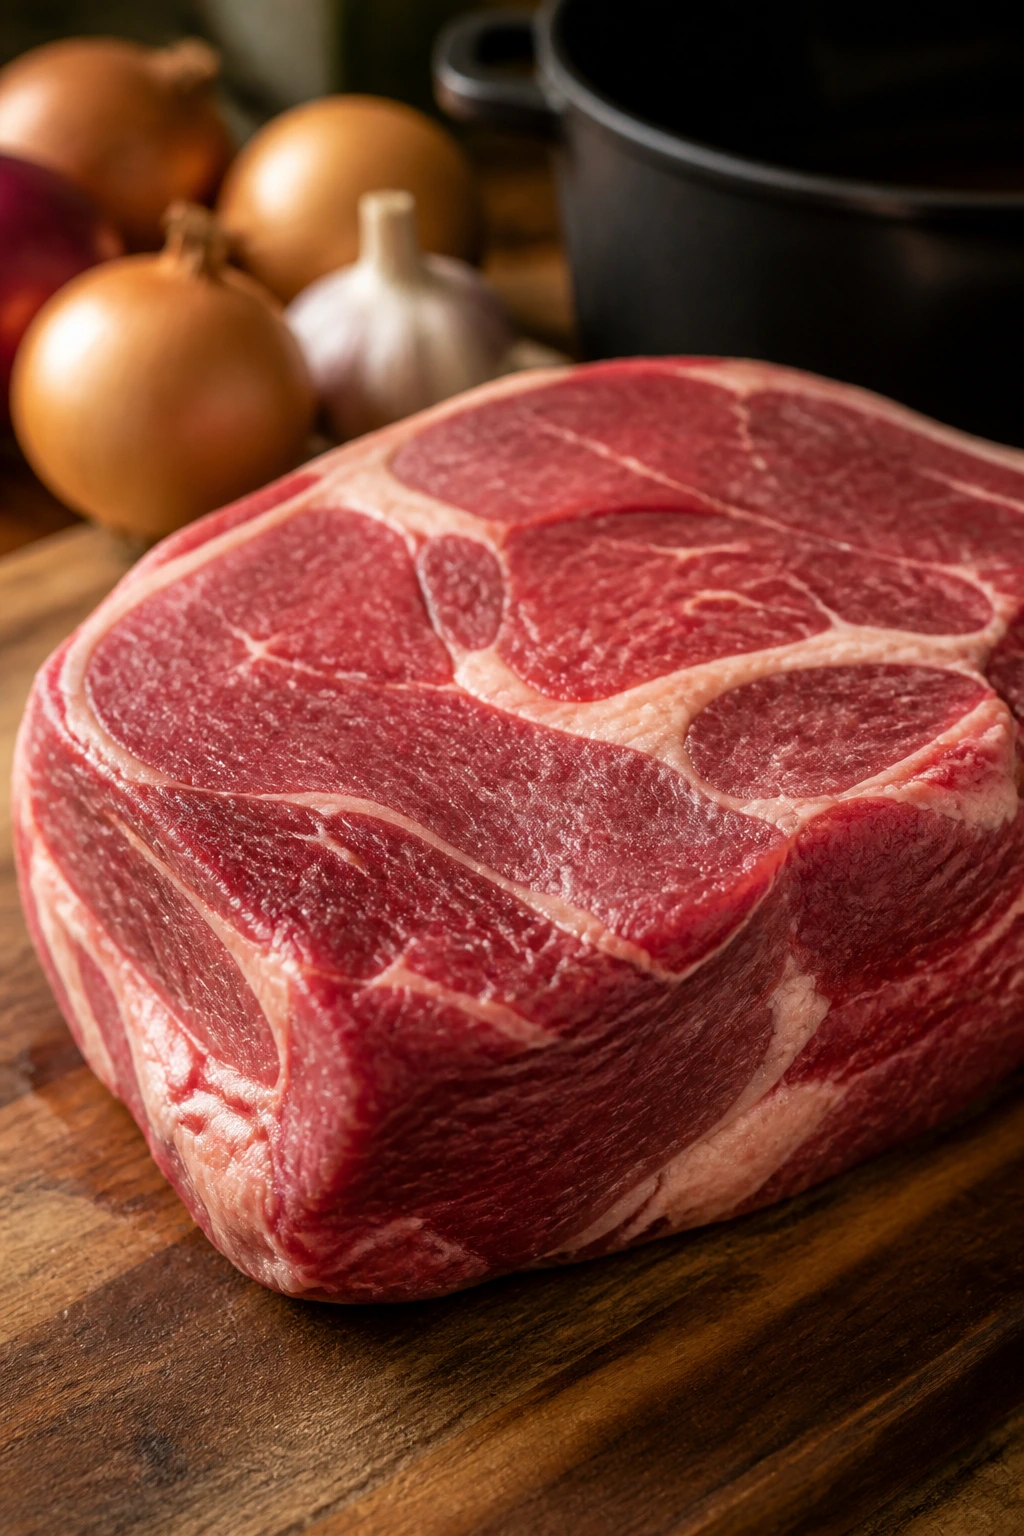
A good roast beef recipe starts with one honest decision: use a cut that can handle slow heat. Chuck roast is the cut I reach for here because it has enough marbling and connective tissue to turn plush after a long covered cook. That connective tissue is collagen, and collagen does not melt on a schedule that respects your impatience. It needs time. It needs heat. It needs the kind of environment a lidded Dutch oven gives it.
That is also why this dish behaves differently from a lean oven roast. A top round or sirloin roast wants a shorter cook and a more sliceable finish. Chuck is a more relaxed animal. It can go longer, take more liquid, and still give you beef that slices thickly but gives way easily under the fork. The edges get almost spoon-soft, which is exactly what makes the gravy worth making.
There is a reason old-school roasts stayed popular for so long. They do not require perfect precision, only patience and a decent pot. That said, patience is not a blank check for overcooking. If you treat tender roast beef like a lean steak and pull it early, you get resistance. If you blast it hot and uncovered from the start, you get dry strings and a scorched pan. The sweet spot sits in the middle: a hard sear at the front, then a long covered braise at 325°F until the meat reaches that soft, yielding stage where a fork slides in with almost no drama.
One detail people miss: the beef can be safe long before it is tender. The USDA-safe temperature for beef roasts is 145°F with a rest, but that is not the target for a chuck roast like this. Tenderness usually shows up when the center climbs much higher, often around 195°F to 205°F, and the roast feels relaxed instead of tight. That is the difference between meat that is merely cooked and meat that is worth carving at the table.
What Goes Into the Pot
For the Roast and Braise:
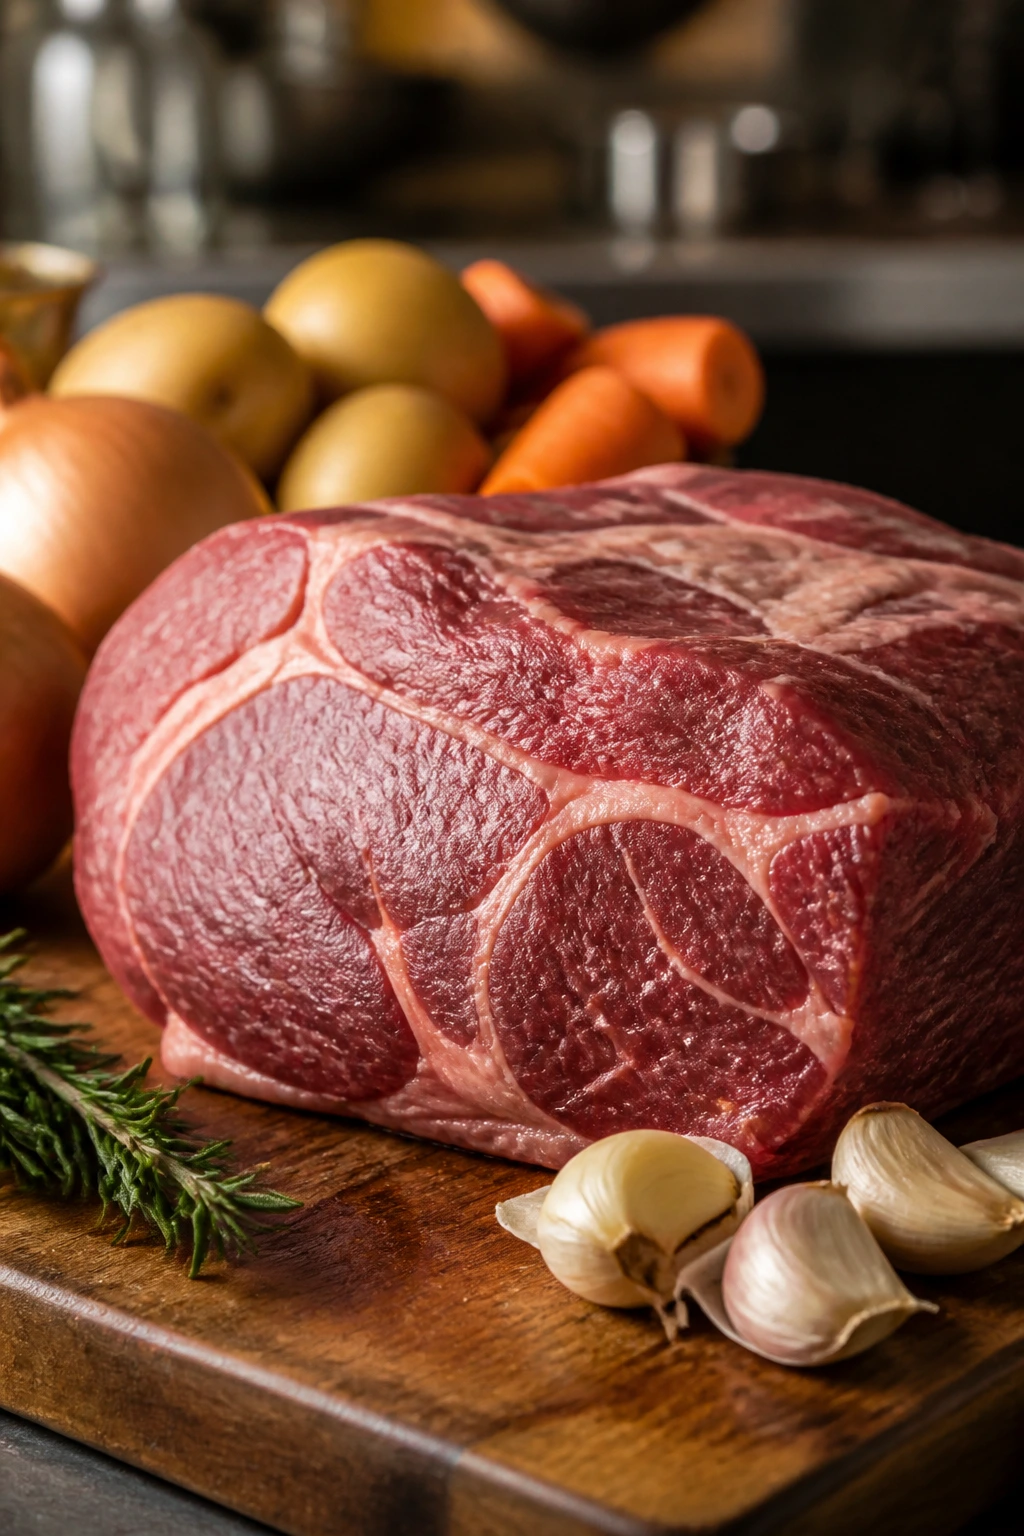
- 3½ to 4 lb boneless beef chuck roast
- 2½ teaspoons kosher salt
- 1½ teaspoons freshly ground black pepper
- 2 tablespoons neutral oil, such as avocado or canola
- 2 medium yellow onions, cut into ½-inch wedges
- 6 garlic cloves, smashed
- 2 tablespoons tomato paste
- 2 tablespoons all-purpose flour
- 1 cup dry red wine
- 2½ cups low-sodium beef stock
- 2 tablespoons Worcestershire sauce
- 2 sprigs fresh rosemary
- 4 sprigs fresh thyme
- 2 bay leaves
- 1 pound carrots, peeled and cut into 2-inch pieces
- 1½ pounds Yukon Gold potatoes, halved if large
For Finishing:
- 2 tablespoons unsalted butter
- 1 teaspoon red wine vinegar
- 2 tablespoons chopped fresh parsley
That list is plain on purpose. The beef gives you the deep, meaty base; the onions and tomato paste add sweetness and color; the wine and stock turn the pot into something spoonable. The carrots and potatoes are there to catch all of it.
Why Each Ingredient Matters
Main Beef
- What to use: 3½ to 4 lb boneless beef chuck roast with visible marbling and a little surface fat.
- Preparation: Pat it dry with paper towels and let it sit salted for 15 to 20 minutes before searing.
- Substitutions: Bone-in chuck works if you want even more flavor, and top round can be used if you prefer neater slices over spoon-tender edges.
- Tips: Choose a roast with white fat marbling running through the meat, not a lean, uniform-looking piece. Chuck is forgiving; a dry-looking roast is not.
Aromatics and Vegetables
- What to use: 2 medium yellow onions, 6 garlic cloves, 1 pound carrots, and 1½ pounds Yukon Gold potatoes.
- Preparation: Cut the onions into thick wedges so they soften without disappearing, and keep the carrots and potatoes in larger pieces so they survive the long cook.
- Substitutions: Parsnips can replace some of the carrots, and small red potatoes can stand in for Yukon Golds if that is what is in the pantry.
- Tips: Add the carrots and potatoes later in the cook, not at the beginning. Otherwise they turn soft before the beef is ready.
Braising Liquid
- What to use: 1 cup dry red wine, 2½ cups low-sodium beef stock, and 2 tablespoons Worcestershire sauce.
- Preparation: Have the stock measured before the onions finish cooking so you can deglaze the pot while the browned bits are still loose.
- Substitutions: Skip the wine and use another 1 cup of stock plus 1 teaspoon red wine vinegar at the end if you do not cook with alcohol.
- Tips: Low-sodium stock gives you control. Regular stock can push the gravy toward salty, especially after reduction.
Seasoning and Thickening
- What to use: 2½ teaspoons kosher salt, 1½ teaspoons black pepper, 2 tablespoons tomato paste, and 2 tablespoons flour.
- Preparation: Mix nothing fancy here. Salt the beef directly, then use the flour with the tomato paste and onions to build body in the sauce.
- Substitutions: If you need gluten-free gravy, replace the flour with 1 tablespoon cornstarch mixed with 1 tablespoon cold water at the end.
- Tips: Tomato paste seems small, but it darkens in the pot and gives the gravy that deep, almost mahogany note that cheap shortcuts never deliver.
Finishing Touches
- What to use: 2 tablespoons unsalted butter, 1 teaspoon red wine vinegar, and 2 tablespoons chopped parsley.
- Preparation: Keep the butter cold until the end and chop the parsley just before serving so it stays bright.
- Substitutions: A small spoonful of prepared horseradish can replace part of the vinegar if you want a sharper finish.
- Tips: Acid at the end matters. Without it, gravy can taste heavy and flat, even when the seasoning is technically right.
The Tools That Make the Cook Easier
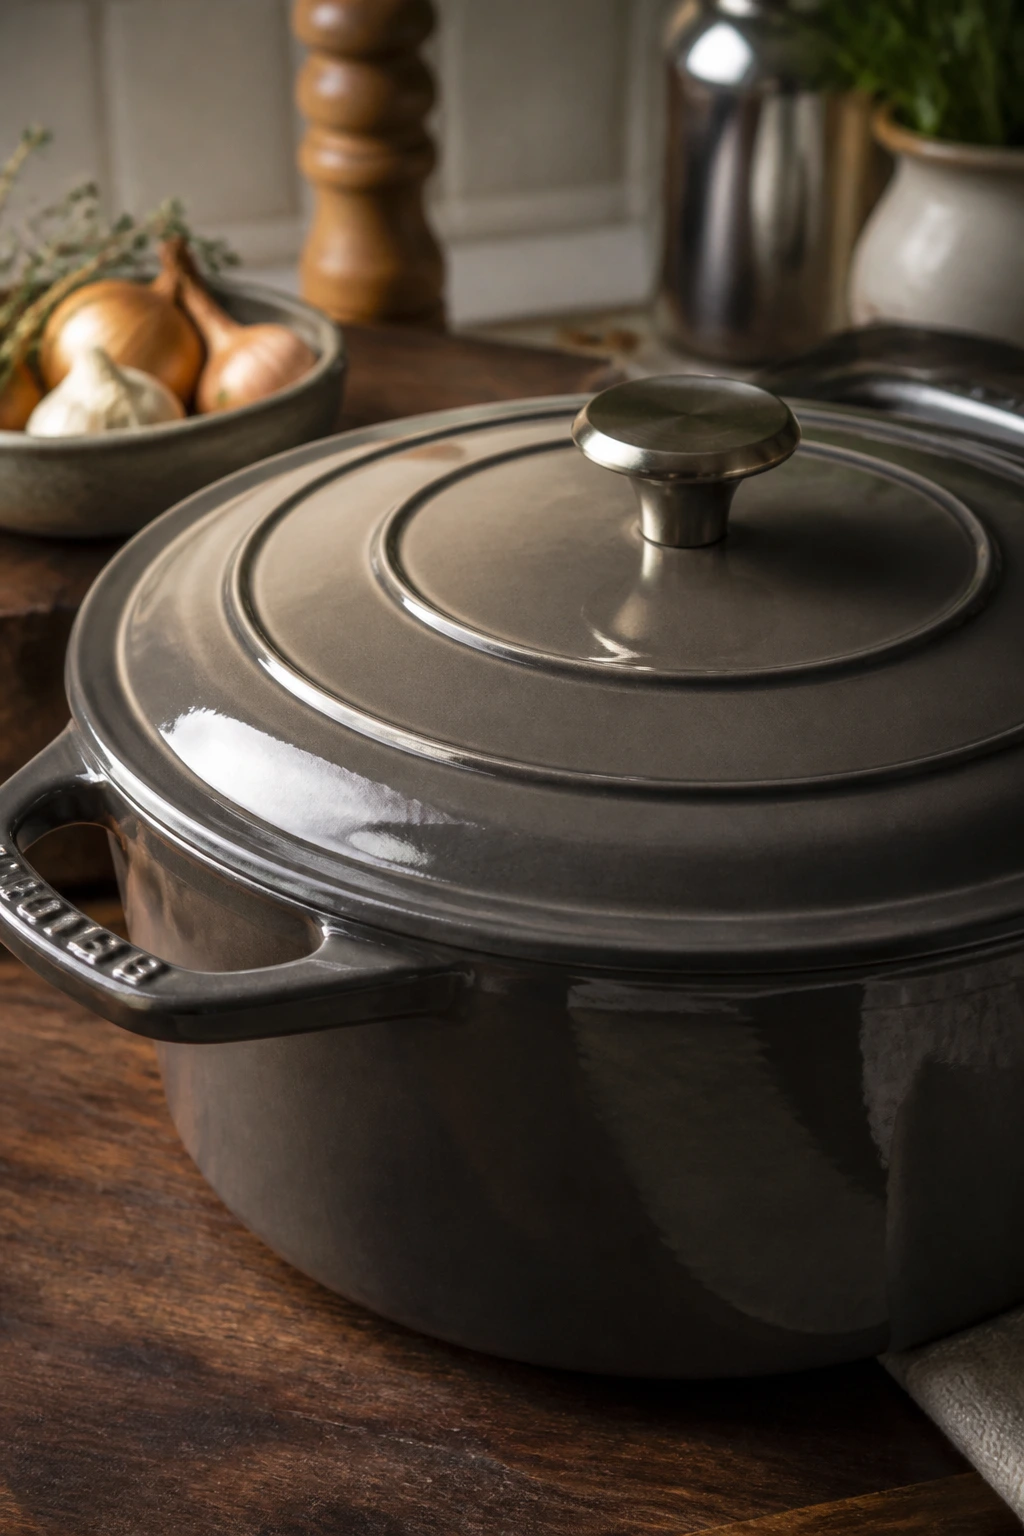
- 5- to 6-quart Dutch oven with a tight lid — This is the main vessel; the heavy bottom browns well and the lid holds in enough moisture for a long roast.
- Instant-read thermometer — Useful for checking the center of the roast and confirming when it has moved from cooked to tender.
- Long tongs — Better than a fork for turning the beef without puncturing it and losing juices too soon.
- Sharp chef’s knife — Needed for clean onion wedges and for slicing the rested roast against the grain.
- Cutting board with a groove — Catches the carving juices so they do not run all over the counter.
- Wooden spoon or heatproof spatula — Scrapes up the browned bits after deglazing, which is where a lot of flavor lives.
- Fine-mesh strainer — Helps you strain the gravy for a smoother finish.
- Fat separator or ladle — Optional, but useful if the drippings are oily and you want a cleaner gravy.
Season, Dry, and Sear the Beef
Step 1: Preheat and position the oven.
- Preheat the oven to 325°F (165°C) and position a rack in the lower-middle level. You want enough heat for a slow roast, not a blast that tightens the beef before the center warms through.
Step 2: Season the roast.
2. Pat the chuck roast dry on all sides with paper towels, then rub it evenly with the kosher salt and black pepper. Let it sit at room temperature for 15 to 20 minutes while you finish the vegetables. The surface should look dry, not damp.
Step 3: Build a dark crust.
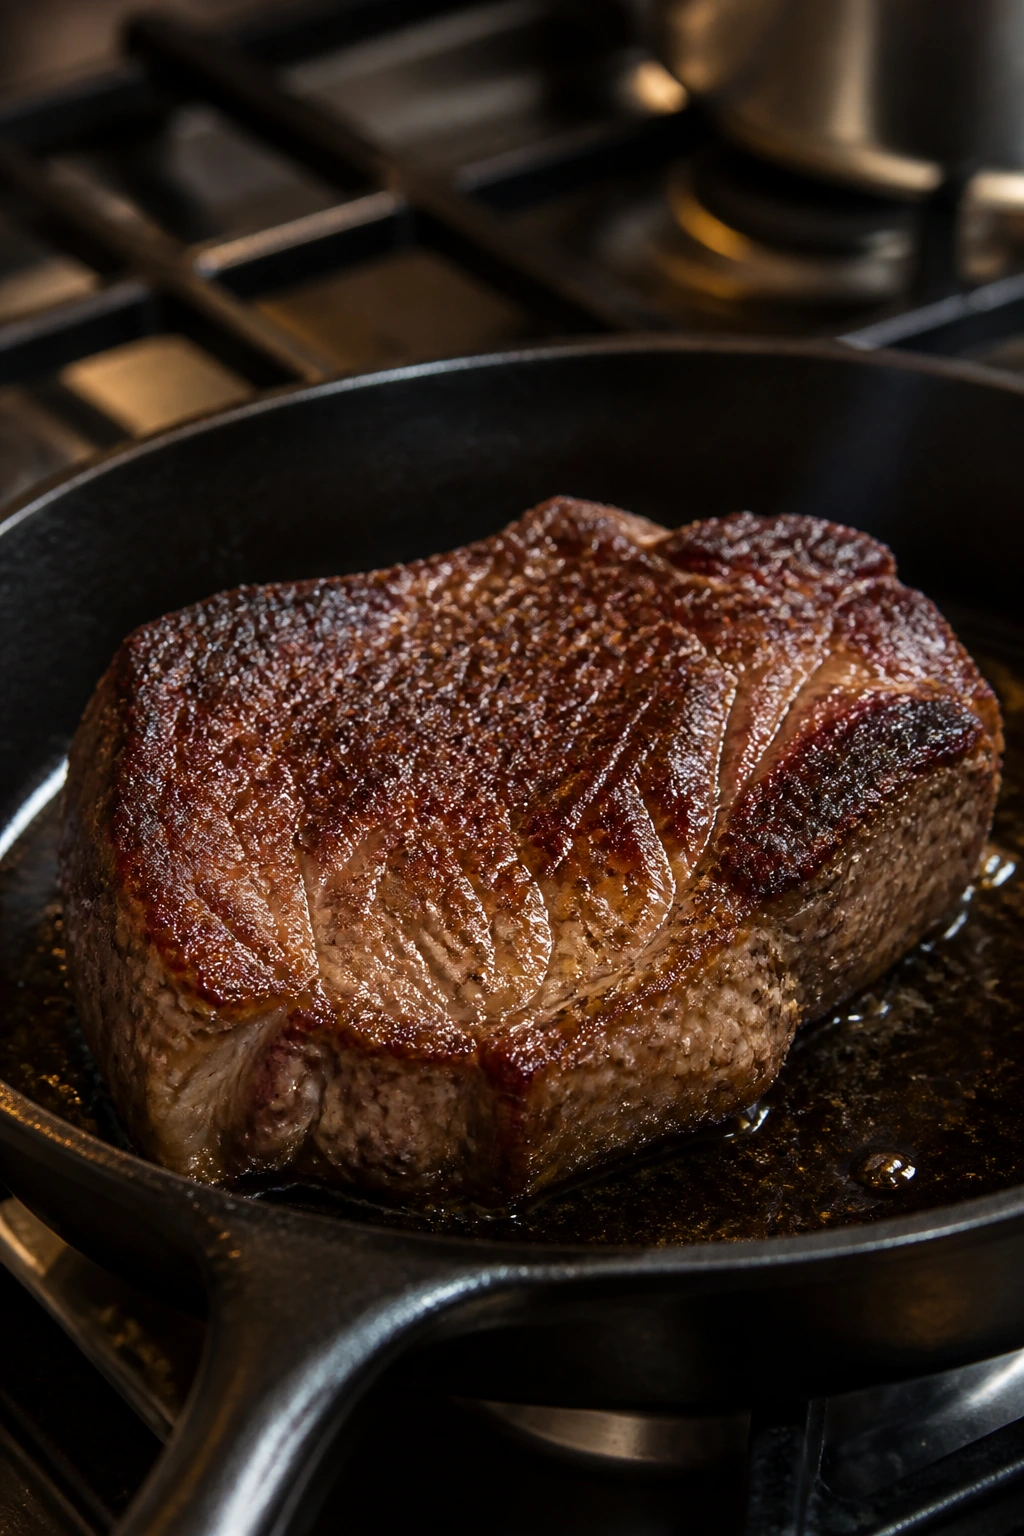
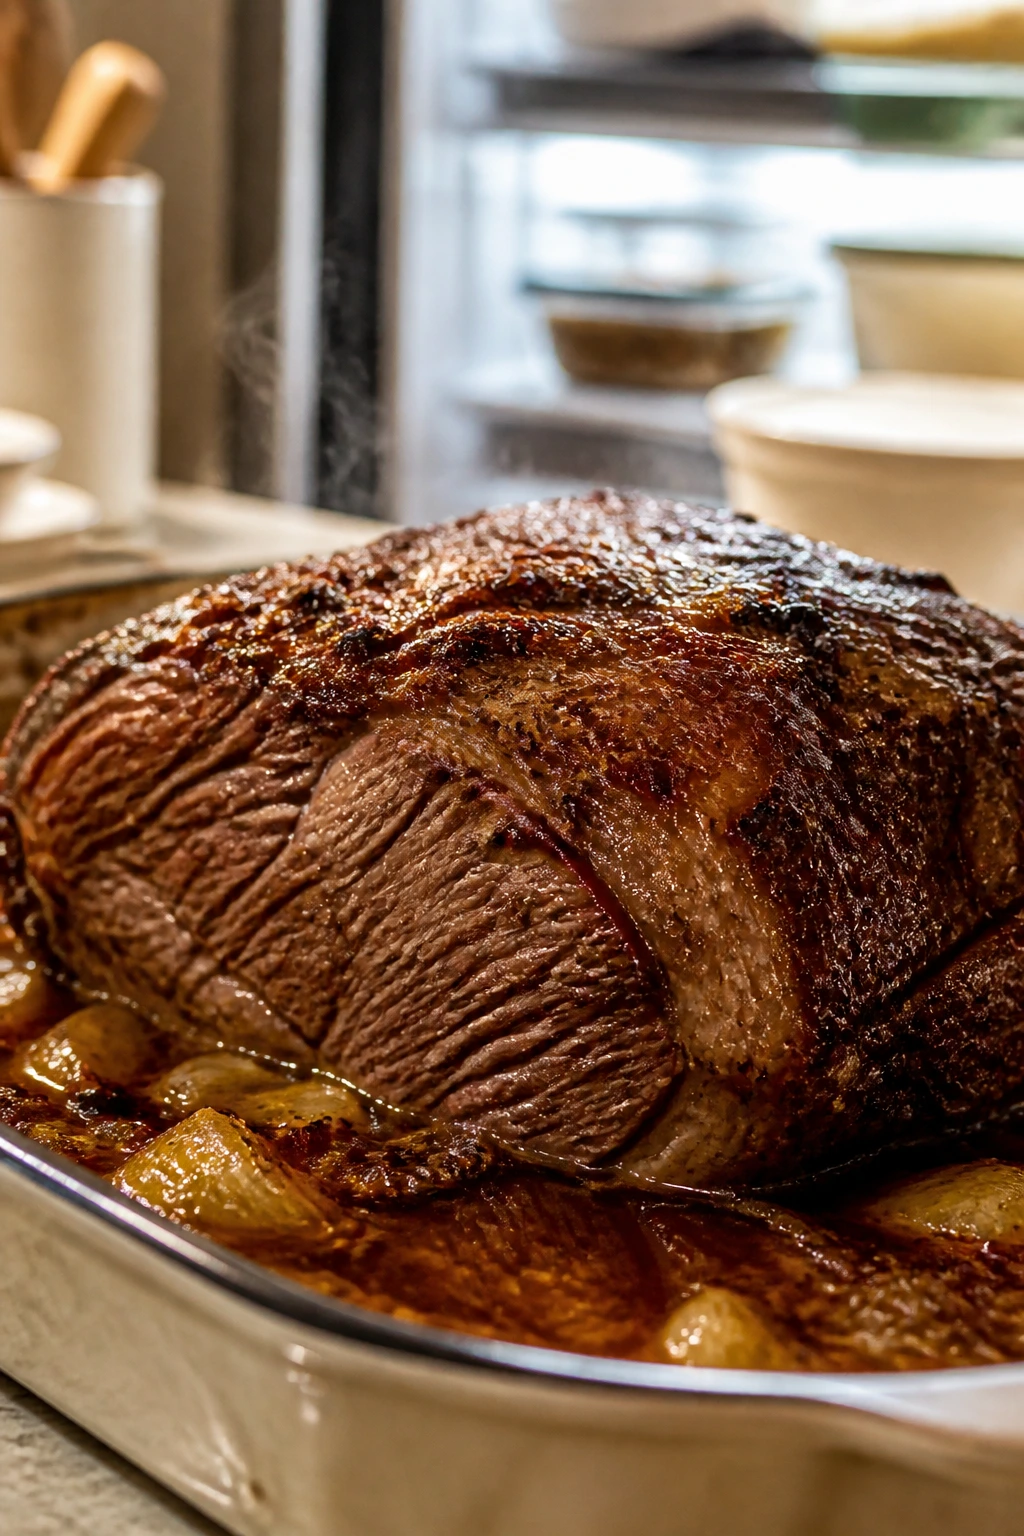
3. Set a Dutch oven over medium-high heat and add the neutral oil. When the oil shimmers, lay in the roast and sear it for 4 to 5 minutes per side, including the ends, until it is deeply browned and releases without tearing. Do not move it too soon; pale meat tastes boiled later. Transfer the roast to a plate.
That first brown crust is not cosmetic. It is the difference between a roast that tastes roasted and one that tastes merely hot.
Build the Braising Base
Step 4: Soften the onions and garlic.
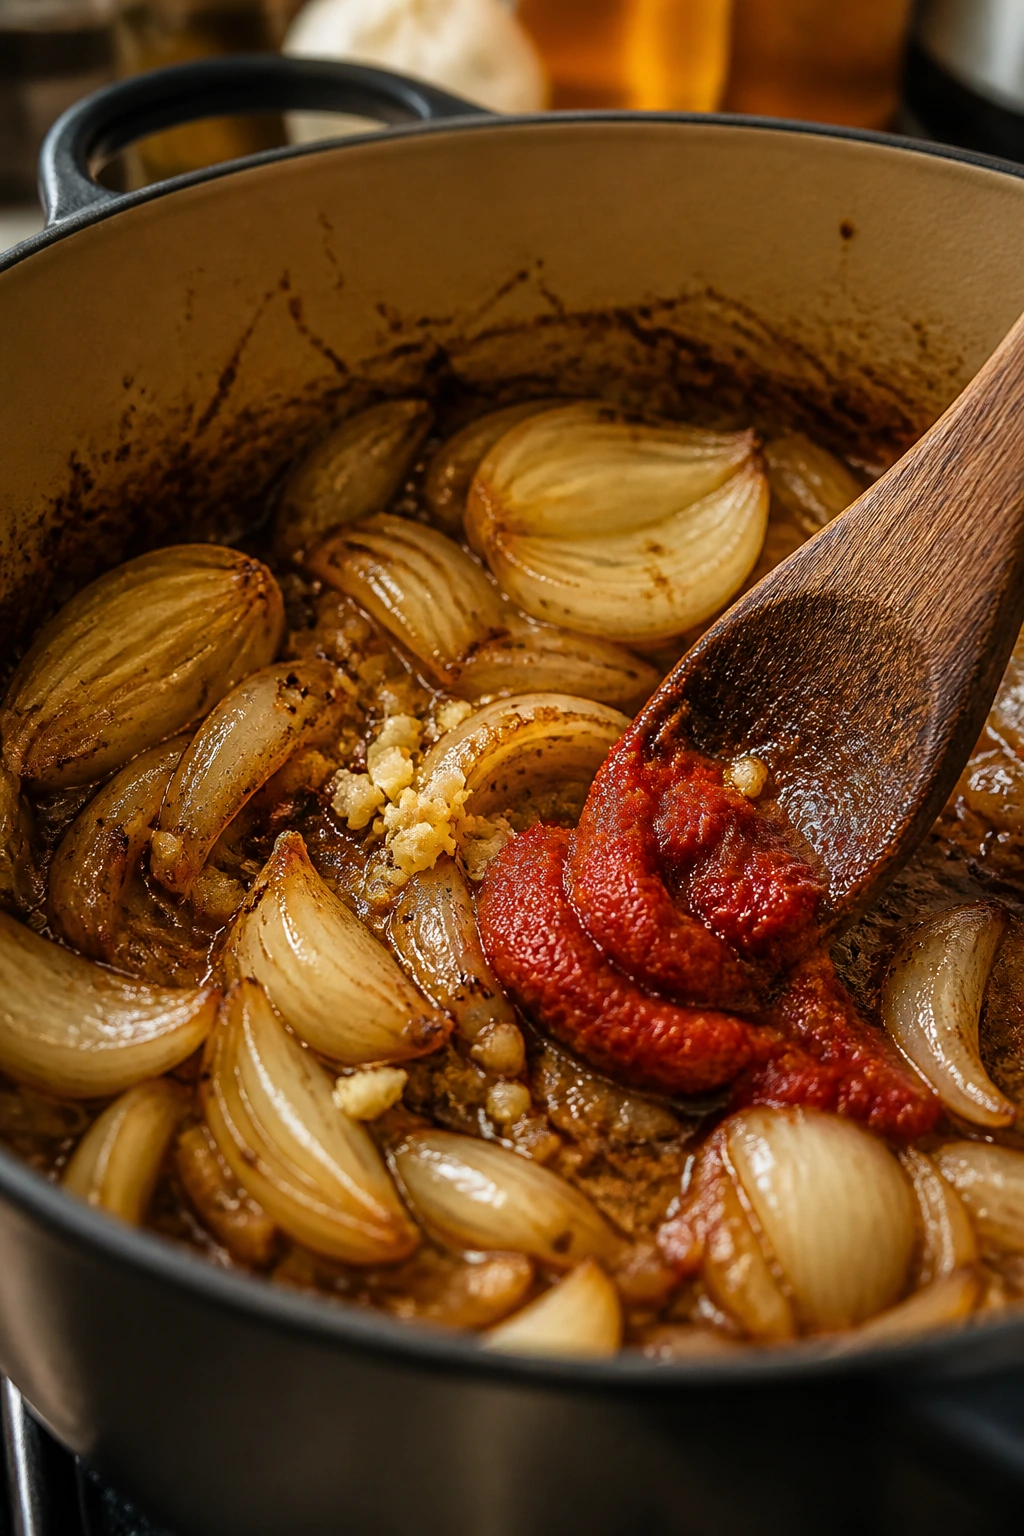
4. Reduce the heat to medium and add the onion wedges to the pot. Cook for 5 to 6 minutes, stirring now and then, until the edges start to brown and the onions turn soft and glossy. Add the smashed garlic and cook for 30 seconds more, just until it smells sweet.
Step 5: Stir in the tomato paste and flour.
5. Add the tomato paste and cook for 1 minute, stirring so it darkens from bright red to a deeper brick color. Sprinkle in the flour and stir for another 1 minute so it picks up the fat in the pot and stops tasting raw. That minute matters.
Step 6: Deglaze and assemble the braise.
6. Pour in the red wine and scrape the bottom of the pot with a wooden spoon until the browned bits dissolve into the liquid. Let the wine bubble for 2 minutes, then stir in the beef stock and Worcestershire sauce. Return the roast to the pot, tuck the rosemary, thyme, and bay leaves around it, and spoon a little liquid over the top. The liquid should reach about one-third of the way up the sides of the meat, not submerge it.
The pot should smell like onions, beef, and wine at this point, with a sharp little lift from the Worcestershire. If it smells dull, the bottom of the pot probably needs more scraping.
Roast Until the Beef Gives Up
Step 7: Cook the roast before adding the vegetables.
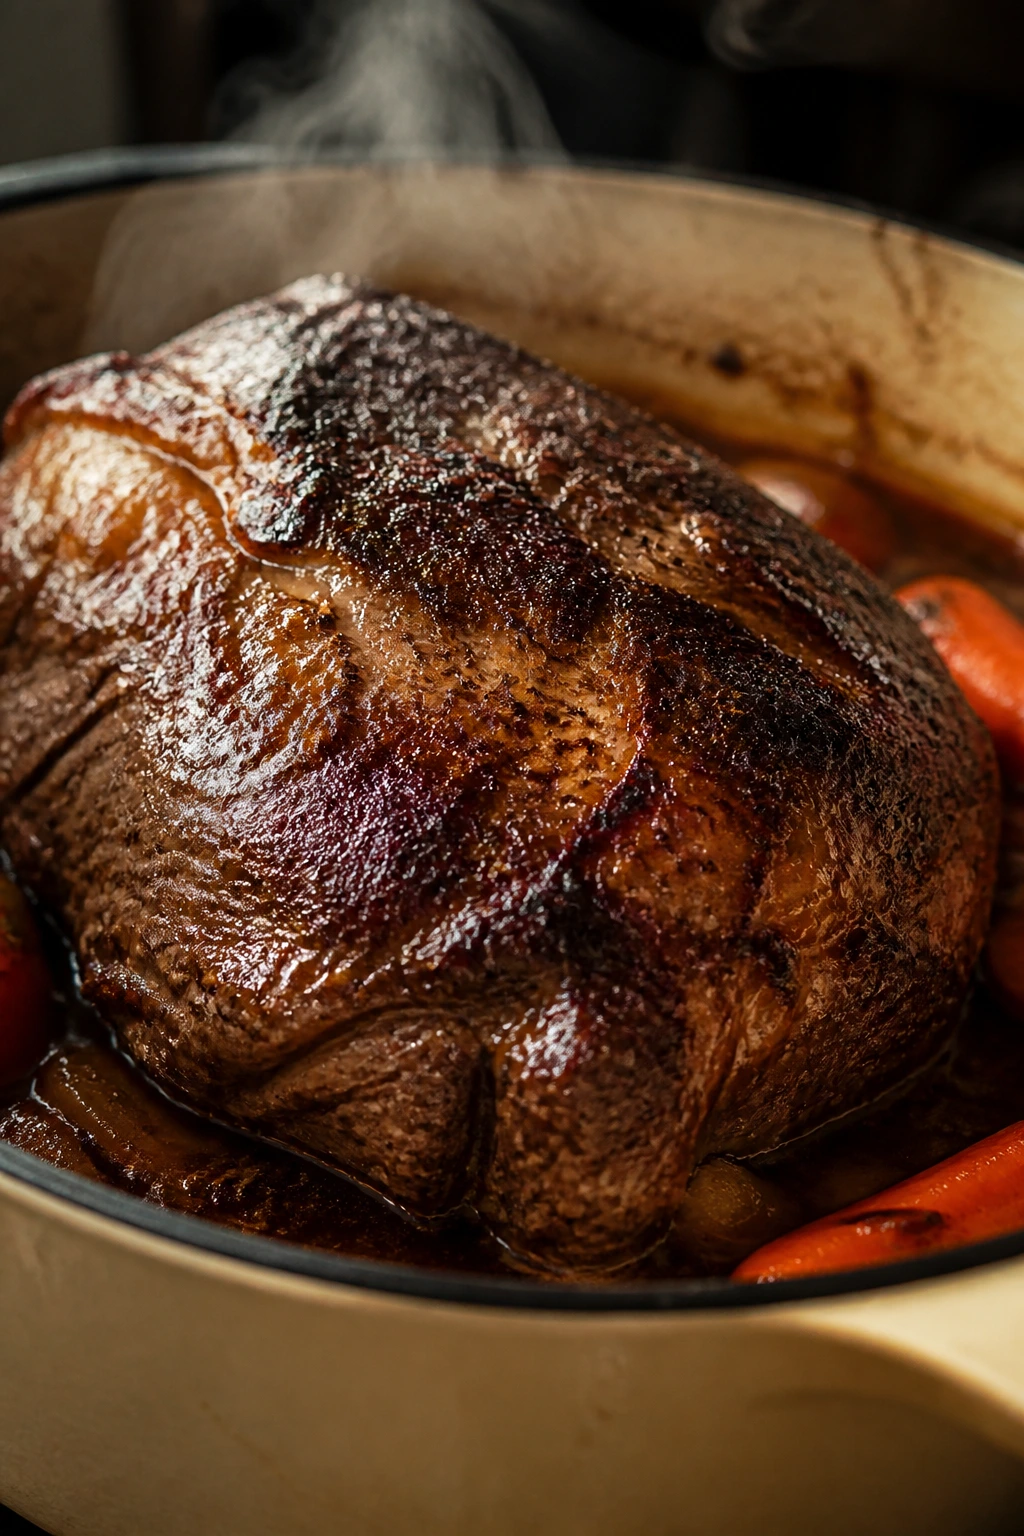
7. Cover the Dutch oven and place it in the oven for 2 hours. The roast will not look finished yet, and that is fine. It should be gently bubbling around the edges, the onions will look soft enough to smear, and the kitchen will smell halfway between a steakhouse and a Sunday supper.
Step 8: Add the carrots and potatoes.
8. Remove the pot from the oven, uncover it, and nestle the carrots and potatoes around the roast. Spoon a little of the hot liquid over the vegetables, then cover again and return the pot to the oven for 1 hour 10 minutes to 1 hour 30 minutes, until the carrots are tender and the beef gives almost no resistance when pierced with a fork. If you want a little more browning on top, uncover the pot for the final 20 minutes.
Step 9: Check for tenderness, not just temperature.
9. Insert an instant-read thermometer into the thickest part of the roast. You are looking for a center temperature somewhere around 195°F to 205°F, but the fork test matters more here: the meat should feel soft and relaxed, not tight. If it still resists, keep roasting in 15-minute increments.
This is where people get impatient. Don’t. Chuck roast earns its tenderness in the last stretch, not in the middle.
Rest, Strain, and Turn the Juices Into Gravy

Step 10: Rest the beef and vegetables.
10. Transfer the roast, carrots, and potatoes to a large serving platter and tent them loosely with foil. Rest for 20 minutes. Skip this and the juices run onto the board instead of staying in the meat.
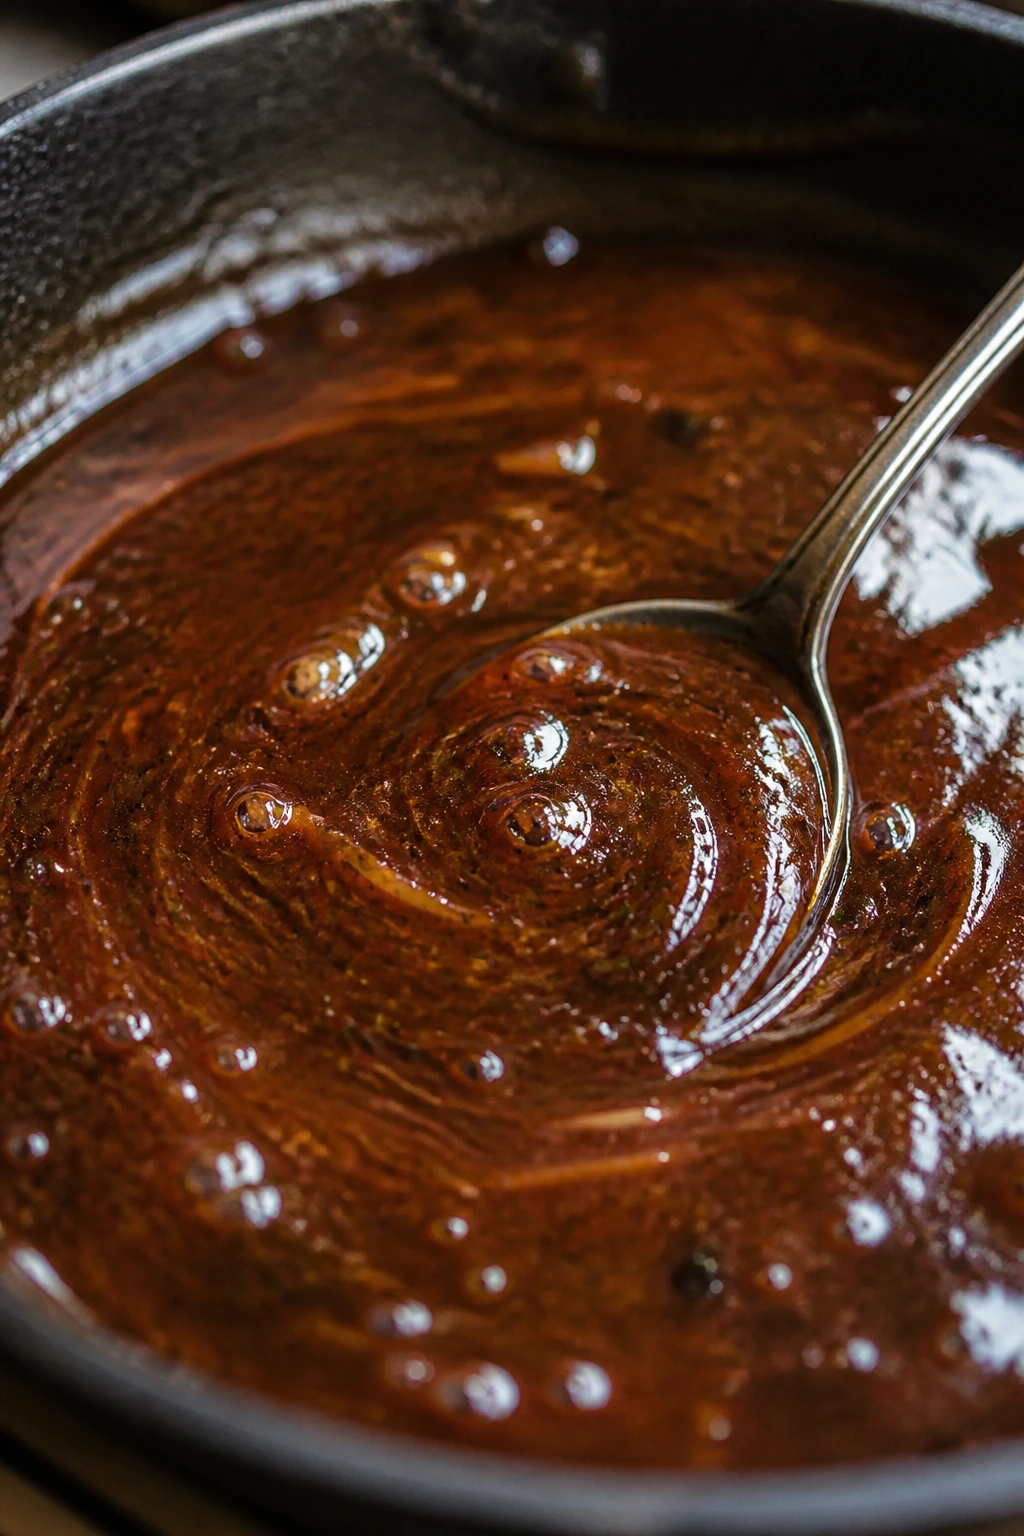
Step 11: Make the gravy.
11. Strain the cooking liquid into a saucepan, pressing lightly on the onions and herbs to capture the flavor without forcing in grit. Skim off excess fat with a spoon or fat separator, then simmer the liquid over medium heat for 8 to 12 minutes until it reduces by about one-third and lightly coats the back of a spoon. Whisk in the butter and red wine vinegar, taste, and add a pinch more salt or pepper if needed.
Step 12: Slice and serve.
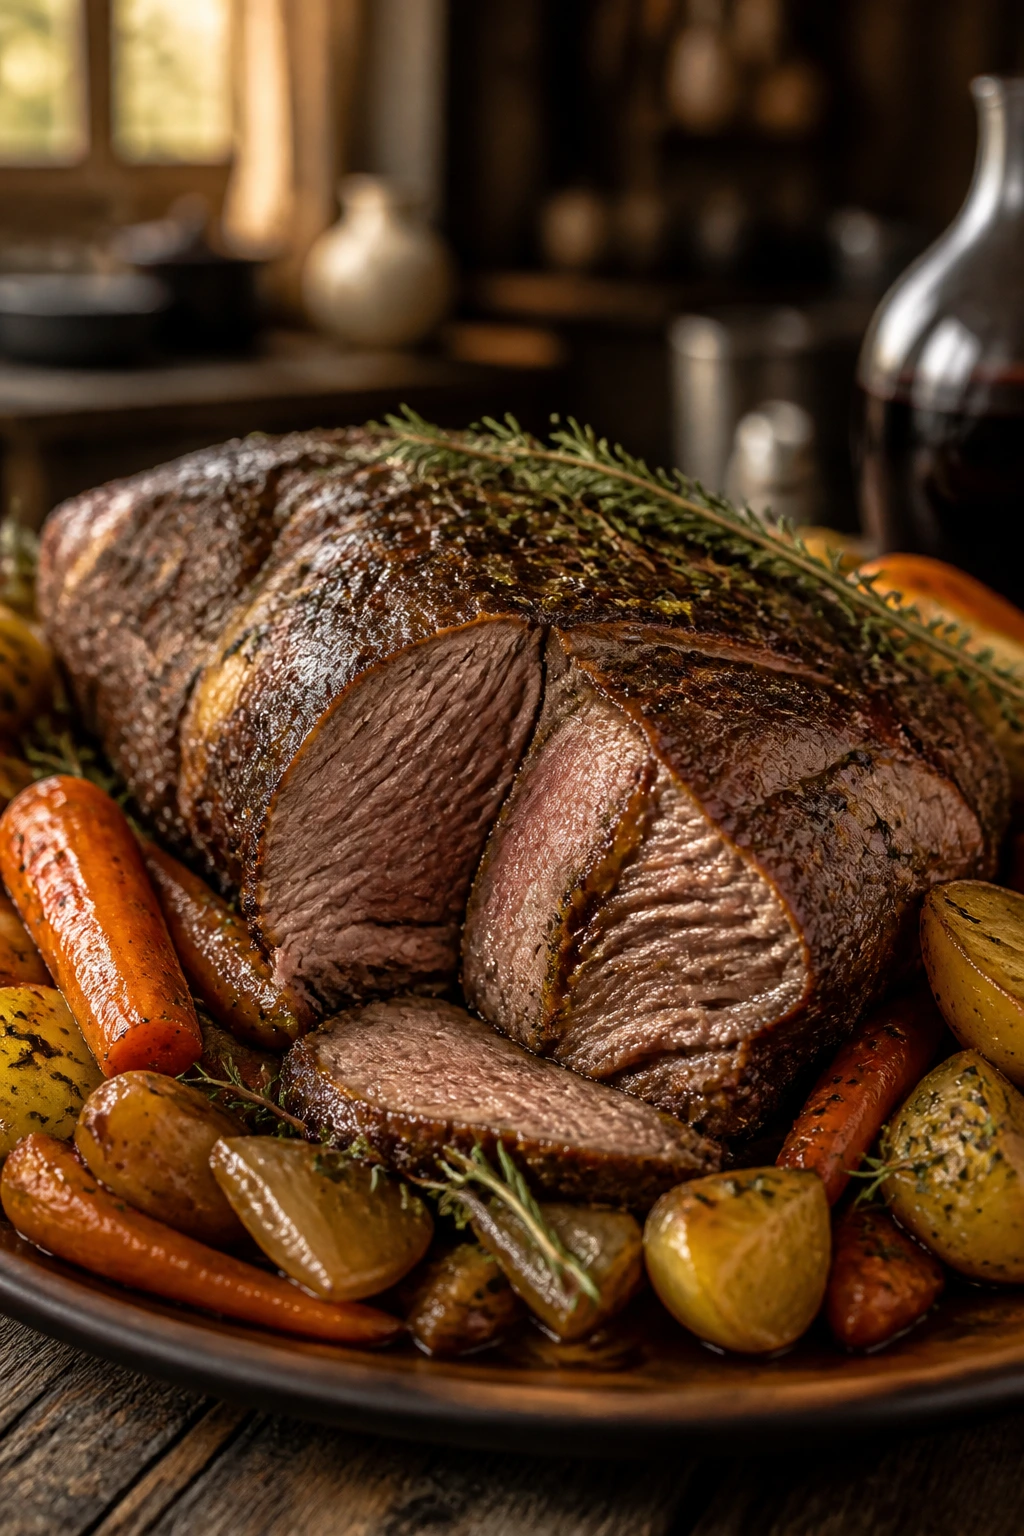
12. Slice the roast against the grain into ½-inch pieces, or pull it into thick chunks if the center is especially soft. Spoon the gravy over the beef, scatter the parsley on top, and serve while everything is still hot.
How to Plate Roast Beef for a Hearty Dinner
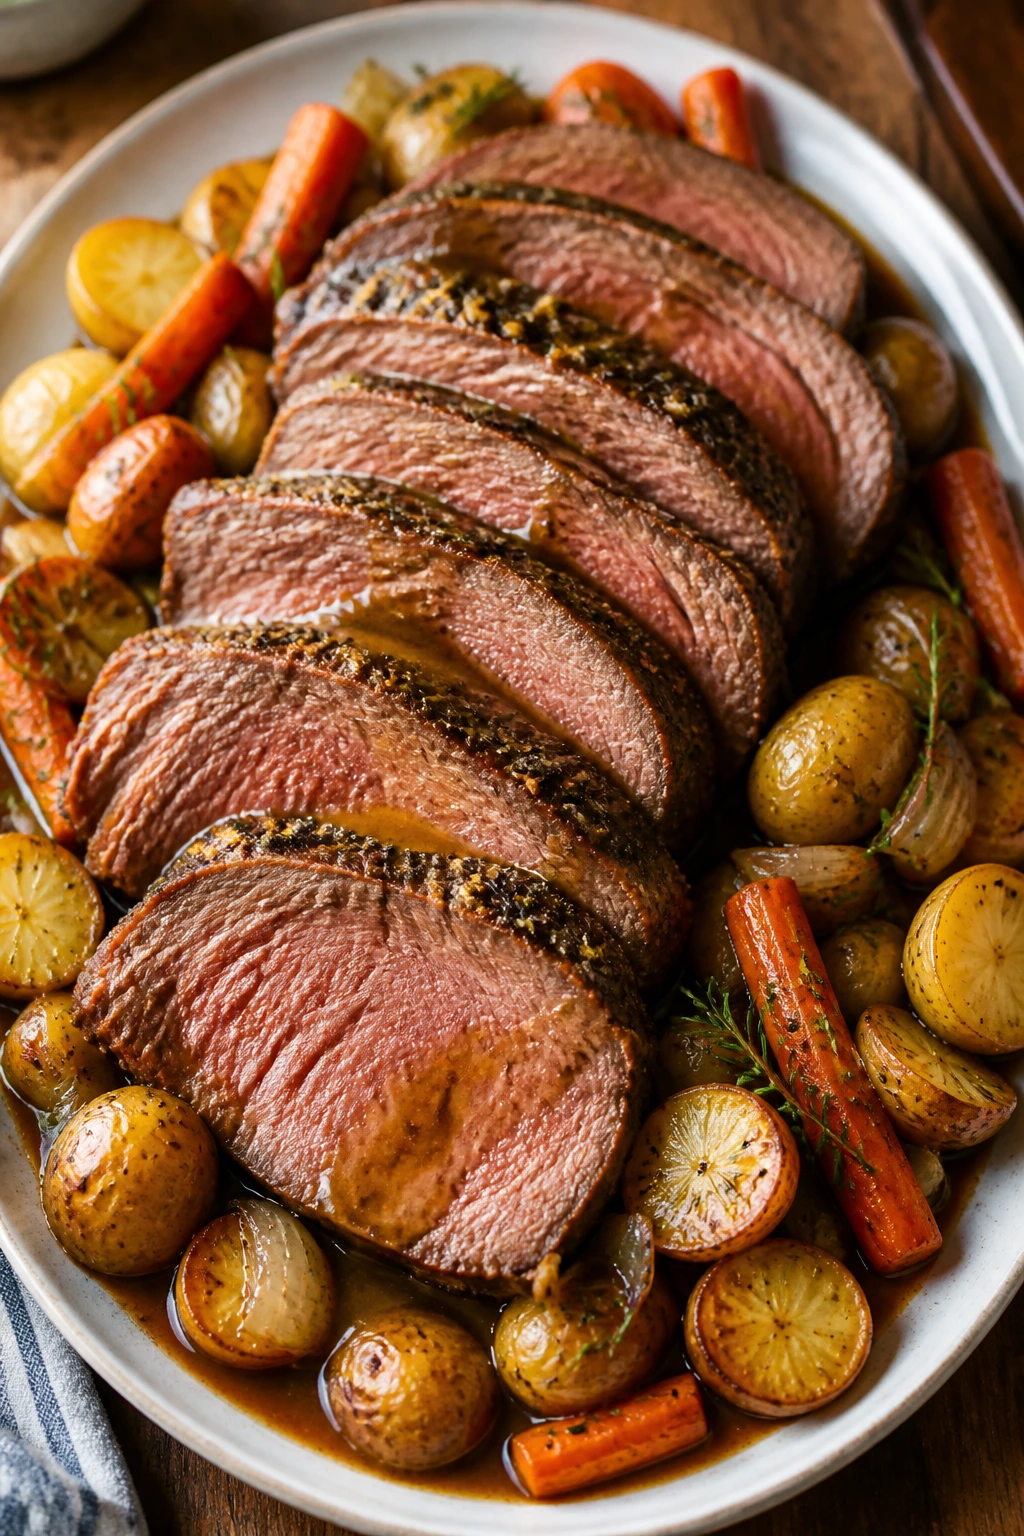
Presentation: Slice the roast on a slight diagonal and fan the pieces across a warm platter, then tuck the carrots and potatoes around the edges so the gravy can run into the gaps. A few spoonfuls over the beef is enough; drown it and you lose the browned crust that did so much work in the first place.
Accompaniments: Mashed potatoes are the obvious choice, but they are not required if the roast already came with Yukon Golds. A sharp green side helps: buttered green beans, roasted Brussels sprouts, or a simple salad with mustardy dressing all cut through the richness. Crusty bread is worth putting on the table because the gravy will not survive the first round untouched.
Portions: A 3½ to 4 lb chuck roast feeds 6 hungry people or 8 moderate eaters, especially when the carrots and potatoes stay in the pot. If you are serving a crowd with side dishes, slice the beef a little thinner; if the meal is the whole event, go thick and generous.
Beverage Pairing: A dry red wine such as cabernet sauvignon, merlot, or a sturdy syrah fits the beef without fighting the gravy. If beer is more your thing, reach for something dark and malty rather than bitter. A cold glass of sparkling water with lemon is plain, but it works better than a sugary drink here.
Little Moves That Make This Roast Better
Flavor Enhancement: Stir a teaspoon of soy sauce or a splash of fish sauce into the gravy after straining. It disappears into the background, but the sauce tastes deeper and meatier, which is useful when the roast has a lot of carrots and potatoes around it.
Time-Saver: Cut the onions, carrots, and potatoes before you start the sear, then keep them in separate bowls. Once the pot is hot, the whole process moves cleanly, and you are not hunting for a carrot while the garlic sits there burning.
Cost-Saver: Chuck roast usually costs less than prime rib or a lean roast cut, and it gives you more forgiveness for the price. That is one of the few places where the cheaper cut can genuinely be the better dinner.
Make-It-Yours: If you like a sharper finish, whisk in 1 teaspoon of Dijon mustard with the butter at the end. If you prefer a sweeter pan gravy, add a few whole mushrooms with the carrots and let them soak up the wine and stock.
Serving Suggestions: A little chopped parsley is useful, but fresh thyme leaves, a spoonful of horseradish cream, or a few flakes of coarse salt on the sliced beef all help the final plate feel finished instead of merely served.
The Mistakes That Leave Roast Beef Tough

-
Pulling it at steak temperature: A chuck roast that reaches 145°F may be safe, but it will still feel firm and stringy. The fix is to keep cooking until the center is closer to 195°F to 205°F and the fork slides in without resistance.
-
Skipping the sear because you are in a hurry: Pale beef tastes flat, and the gravy starts out weaker because the pot never builds those browned bits. Sear the roast until the crust is dark brown on each side, even if it takes a few extra minutes.
-
Adding the carrots and potatoes too early: If they go in at the beginning, they can break apart before the meat is tender. Wait until the roast has already had about 2 hours in the oven, then add the vegetables for the final stretch.
-
Boiling the gravy hard after the butter goes in: A hard boil can make the sauce greasy or split. Keep the simmer gentle and whisk the butter in at the end, off the hottest part of the burner if needed.
-
Carving with the grain: Beef sliced along the grain stays stringy, even when it is perfectly cooked. Turn the roast so you can cut across the grain into thick, easy slices.
-
Treating the pot like a soup pot: If the liquid covers the roast, you are closer to braising soup than roasting meat. The liquid should come partway up the sides, not drown the beef.
Variations That Fit Different Kitchens

Garlic-Rosemary Sunday Roast
Double the garlic to 12 cloves and add an extra rosemary sprig. This version leans herbal and sharp, which is useful if you like the gravy to taste more savory than sweet.
Mushroom and Onion Gravy Roast
Add 8 ounces of sliced cremini mushrooms after the onions soften and let them cook until they lose their moisture and start to brown. The mushrooms thicken the sauce naturally and make the gravy taste earthier.
Beer-Braised Beef Roast
Replace the red wine with 1 cup of amber ale or stout and keep the stock the same. The flavor shifts toward malt and toast, which is nice with a pile of mashed potatoes and a little extra black pepper on top.
Mustard-Finish Roast Beef
Stir 1 tablespoon of Dijon mustard into the gravy during the final simmer. It gives the sauce a sharper edge and keeps the beef from tasting too heavy, especially if you are serving it with buttery sides.
Root-Cellar Vegetable Swap
Use parsnips, turnips, or celery root in place of some or all of the potatoes and carrots. They hold up well in the pot and bring a sweeter, more old-fashioned flavor that fits this roast naturally.
Make-Ahead, Storage, and Reheating
Roast beef like this keeps well, but only if you treat the meat and gravy with a little care. Once the platter cools, pack the beef, vegetables, and gravy separately or at least keep the slices coated in sauce. Beef left out at room temperature should not sit for more than 2 hours.
Refrigerator: Store the roast beef and vegetables in an airtight container for 3 to 4 days. The gravy usually tastes even better on day two because the onion and herb flavors settle in.
Freezer: Freeze sliced beef with some of the gravy for up to 2 months. The gravy protects the meat from drying out, which matters a lot more here than with leaner cuts.
Reheating: Warm leftovers in a covered baking dish at 300°F (150°C) with a few spoonfuls of gravy or beef stock until heated through, usually 20 to 30 minutes depending on portion size. For smaller amounts, reheat gently on the stove over low heat. The microwave works in a pinch, but only if the beef is chopped or sliced thin and covered with gravy so it does not turn leathery.
Make-Ahead: You can season the roast the night before and keep it uncovered in the fridge for a better crust. The onions and carrots can be cut a day ahead, and the whole roast can even be cooked a day early, chilled, then reheated in its gravy. If anything, the flavor settles in more deeply overnight.
Roast Beef Questions People Ask First
Can I use a different cut if I do not have chuck roast?
Yes, but the result changes. Top round or bottom round will slice more neatly, yet they need a shorter cook and a little more attention so they do not turn dry. If tenderness is the goal, chuck is still the safer pick.
Do I really need the wine?
No. The roast still works with more beef stock and a teaspoon of red wine vinegar at the end. The wine adds depth and a little acidity, but it is not carrying the whole dish.
How do I know when the roast is tender enough?
The thermometer helps, but the fork test is the real judge. If a fork slides into the center with almost no push and the meat feels relaxed rather than tight, you are there.
Can I make this in a slow cooker instead of the oven?
Yes, though you lose some of the crust. Sear the roast and cook the onions on the stove first, then move everything to the slow cooker and cook on low until the meat is tender, usually 8 to 9 hours. Add the carrots and potatoes during the last 2 to 3 hours so they do not collapse.
Why is my gravy greasy?
Chuck roast can throw off a fair bit of fat, especially if the cap was thick. Skim the fat from the top after straining, and if needed, let the liquid sit for 5 minutes so the fat rises before you spoon it off.
Can I make this ahead for guests?
Yes, and it is one of the nicer dishes to do that with. Cook the roast the day before, chill it in the gravy, then reheat it covered at 300°F until hot through. That gives you less pressure when people arrive and the beef stays moist.
What if the roast still feels tough after the suggested cooking time?
It probably needs more time, not more heat. Keep the oven at 325°F and give it another 15 to 20 minutes, then test again. Chuck roast often crosses from firm to tender in a narrow window, and pulling it too early is the mistake that causes most disappointment.
The Roast Worth Repeating
A roast like this earns its keep because it behaves like a full meal and a small project at the same time. There is enough hands-on work to make the house smell alive, but not so much that you need to hover over the stove all afternoon. Once the beef is seared and tucked into its onions, the oven takes over and the kitchen starts doing that slow, satisfying thing where time feels useful.
What stays with me most is the gravy. Not the meat alone, not the vegetables alone, but the way the whole pot turns into something spoonable and complete. That is the part that makes people go back for a second slice with just a little more sauce on the plate than they planned.
Tender Roast Beef for a Hearty Dinner — Recipe Card
Recipe Name: Tender Roast Beef for a Hearty Dinner
Description: A slow-roasted beef chuck roast with onions, carrots, potatoes, red wine, herbs, and a rich pan gravy. The meat turns fork-tender, and the vegetables soak up all the good stuff from the pot.
Prep Time: 25 minutes
Cook Time: 3 hours 20 minutes
Total Time: 3 hours 45 minutes, including resting
Course: Main Course
Cuisine: American
Servings: 6 to 8 servings
Calories: About 520 kcal per serving
Ingredients
For the Roast and Braise:
- 3½ to 4 lb boneless beef chuck roast
- 2½ teaspoons kosher salt
- 1½ teaspoons freshly ground black pepper
- 2 tablespoons neutral oil, such as avocado or canola
- 2 medium yellow onions, cut into ½-inch wedges
- 6 garlic cloves, smashed
- 2 tablespoons tomato paste
- 2 tablespoons all-purpose flour
- 1 cup dry red wine
- 2½ cups low-sodium beef stock
- 2 tablespoons Worcestershire sauce
- 2 sprigs fresh rosemary
- 4 sprigs fresh thyme
- 2 bay leaves
- 1 pound carrots, peeled and cut into 2-inch pieces
- 1½ pounds Yukon Gold potatoes, halved if large
For Finishing:
- 2 tablespoons unsalted butter
- 1 teaspoon red wine vinegar
- 2 tablespoons chopped fresh parsley
Instructions
-
Preheat the oven to 325°F (165°C) and pat the chuck roast dry. Season it with kosher salt and black pepper.
-
Heat the oil in a Dutch oven over medium-high heat. Sear the roast on all sides until deeply browned, then transfer it to a plate.
-
Add the onions to the pot and cook until softened and browned at the edges. Add the garlic, tomato paste, and flour, stirring until the paste darkens and the flour looks cooked.
-
Pour in the wine and scrape up the browned bits. Stir in the stock and Worcestershire sauce.
-
Return the roast to the pot and add the rosemary, thyme, and bay leaves. Cover and roast for 2 hours.
-
Add the carrots and potatoes around the roast. Cover again and roast for 1 hour 10 minutes to 1 hour 30 minutes, until the beef is fork-tender and the vegetables are done.
-
Transfer the roast and vegetables to a platter and let them rest for 20 minutes.
-
Strain the cooking liquid into a saucepan, skim off excess fat, and simmer until reduced by about one-third. Whisk in the butter and red wine vinegar.
-
Slice the roast against the grain, spoon the gravy over the top, and finish with parsley.
Notes: Chuck roast gets tender from time and covered heat, not from a fast oven. If the gravy seems thin, simmer it a few minutes longer before serving.