
Teenagers do not do small dinners. They come home hungry enough to eat a sandwich, then ask what else there is, and dinner ideas for hungry teenagers need to answer that question with some confidence.
A tiny plate and a polite garnish will not cut it. What works is food with weight: pasta that clings to sauce, chicken with browned edges, rice bowls with something crunchy on top, potatoes loaded until they barely hold together. I’m a big fan of meals that look generous the second they hit the table, because that first glance buys you a little peace before the forks start moving.
There’s a pattern here that matters. Teenagers usually want a meal that feels like a real meal, not a snack pretending to be dinner. Give them protein, a solid starch, some salt, a little heat, and one bright finish — lime, pickle, salsa, herbs, a sharp cheese — and you’ve got dinner that disappears fast for the right reasons.
Why These Dinner Ideas for Hungry Teenagers Hit the Mark
- Built for second helpings: Every recipe here has a starch anchor — pasta, rice, potatoes, buns, tortillas, or noodles — so the plate doesn’t feel skimpy.
- Easy to customize: A teen who wants extra cheese can pile it on, and a teen who hates tomatoes can skip them without wrecking the whole meal.
- Friendly to real schedules: Sheet pans, skillets, casseroles, and bowls keep cleanup from becoming its own evening project.
- Leftovers that hold up: Saucy, cheesy, and rice-based dinners reheat better than delicate meals that go limp in the fridge.
- Budget-aware staples: Chicken thighs, ground beef, pasta, beans, tortillas, and potatoes show up again and again because they feed people without making the grocery bill sting.
- Picky-eater proofing: Most of these dinners let you keep toppings separate, which is a small thing that saves a lot of complaining.
1. Sheet-Pan Chicken Fajita Bowls
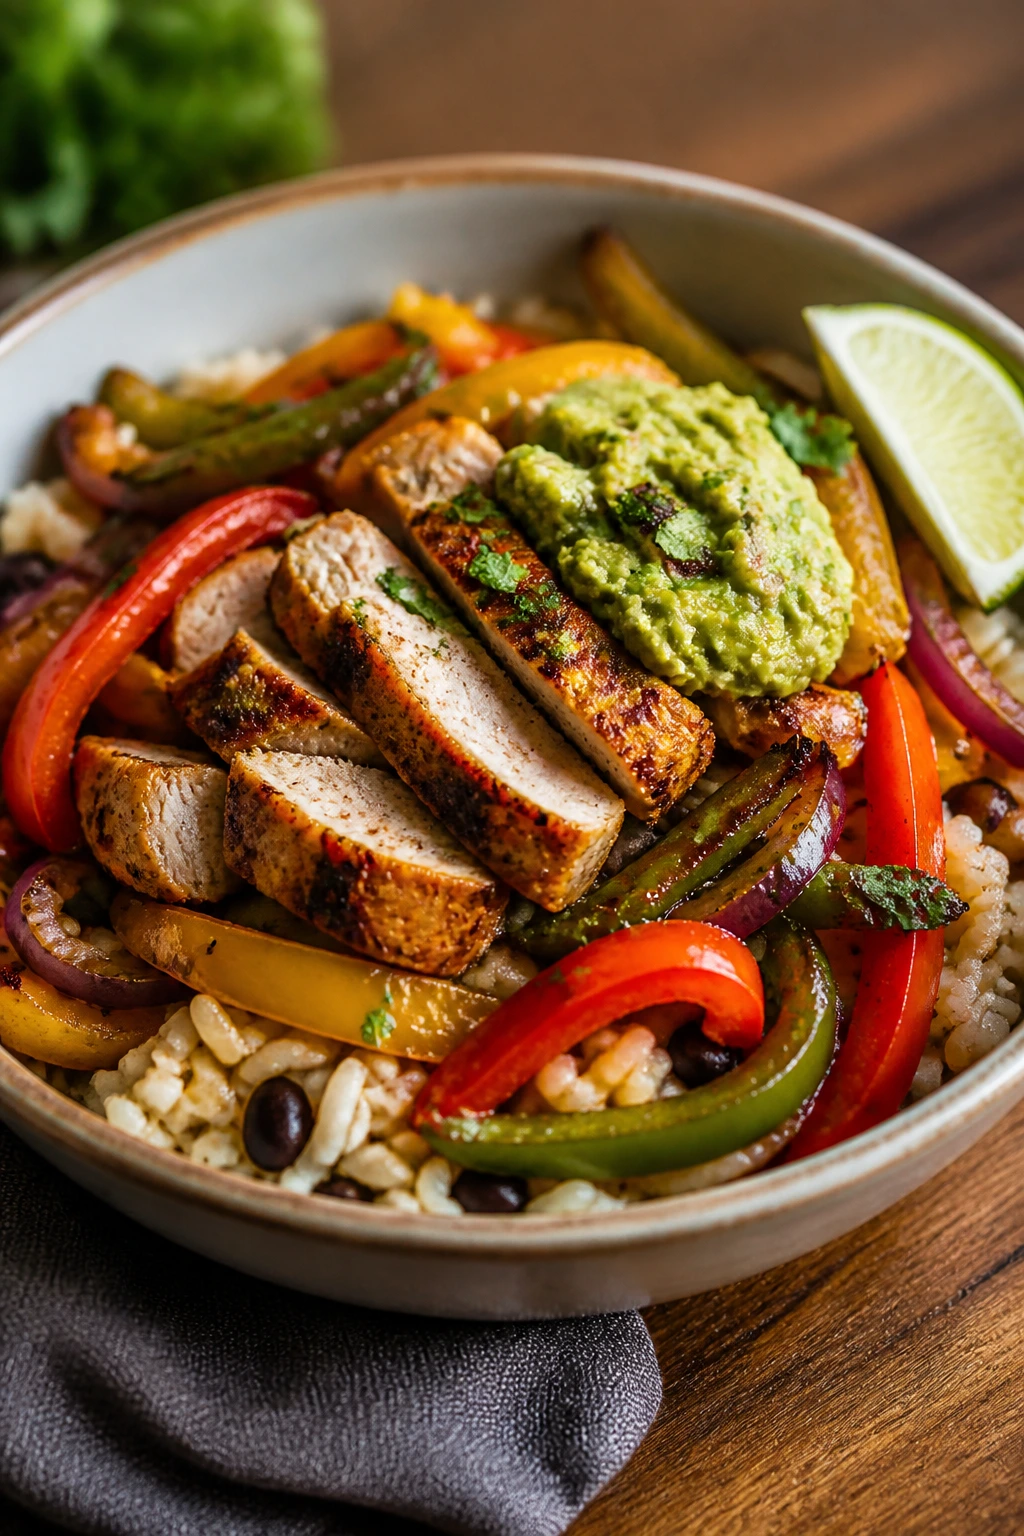
The first time these hit the table, they look like a weeknight answer to a restaurant plate. Charred peppers, browned chicken, a pile of rice, and a little shower of cheese go a long way when somebody has the appetite of a small moving truck.
I like this dinner because it has built-in drama. The edges of the peppers blacken a little, the onion softens and sweetens, and the chicken picks up all that fajita spice in the oven. Teenagers tend to trust meals that smell loud.
Why It Works
Sheet-pan dinners make sense for hungry teenagers because the tray does half the work and the bowl does the rest. Chicken thighs stay juicy under high heat, and the peppers keep enough bite to stop the whole thing from tasting soft and samey. Add rice and beans, and the meal turns from “light dinner” into “I’m not getting up for a snack later.”
Key Ingredients
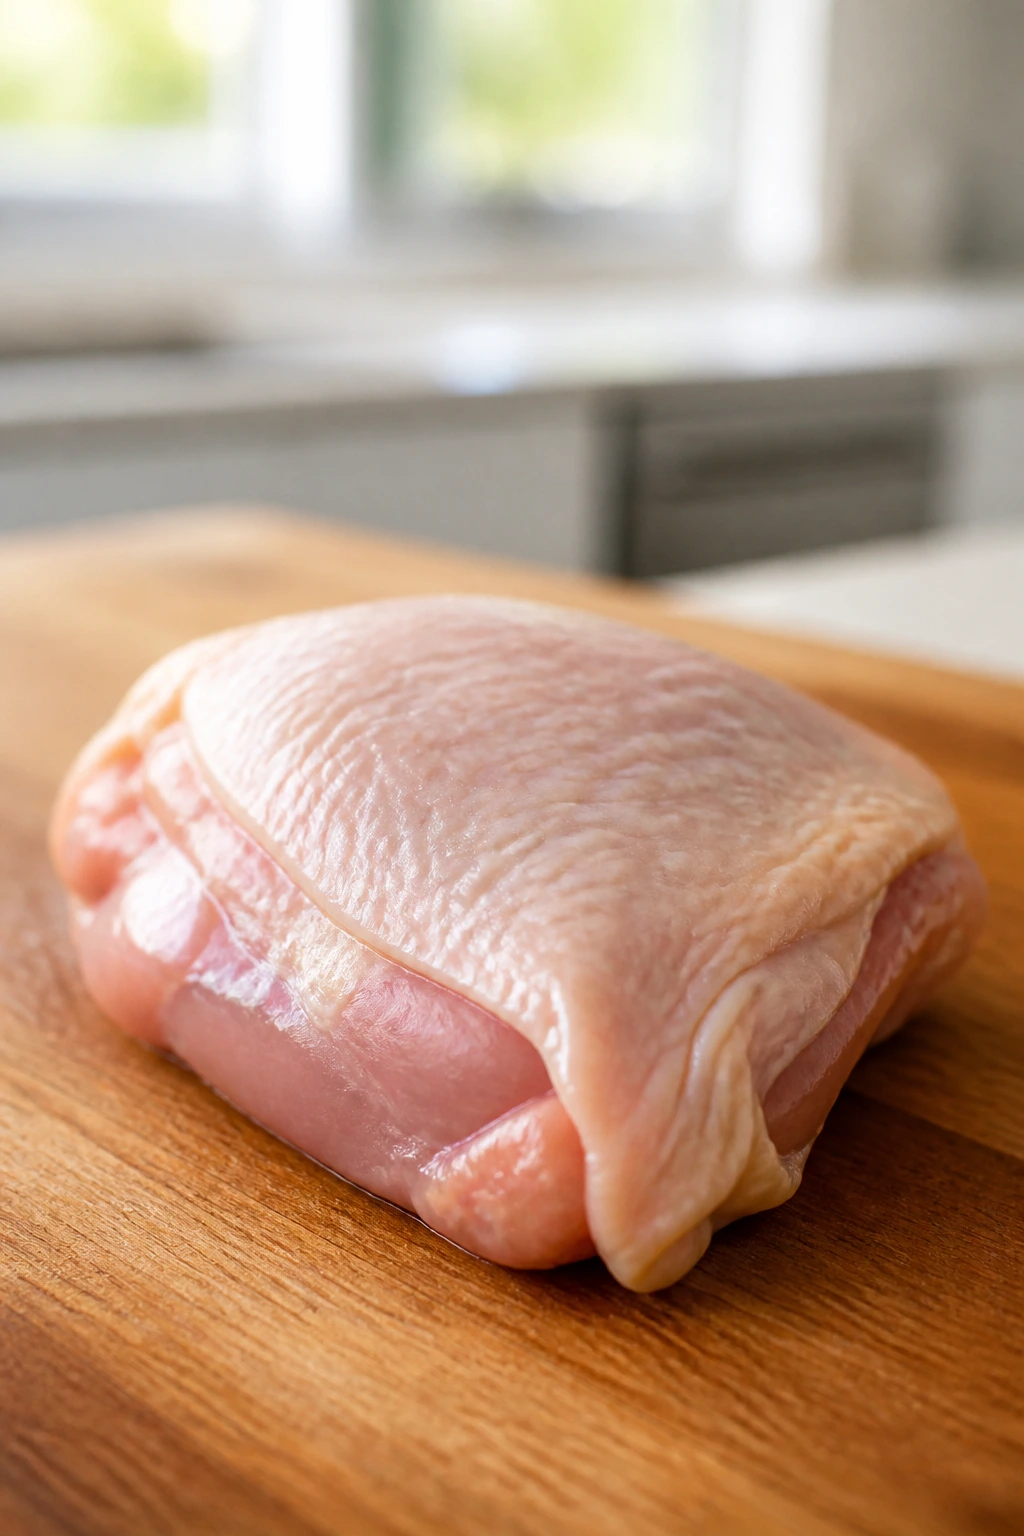
- 1 1/2 pounds boneless, skinless chicken thighs, sliced into 1/2-inch strips — thighs stay tender and handle the hot oven well.
- 3 bell peppers, sliced into strips — use a mix of colors for sweeter, brighter flavor.
- 1 large yellow onion, sliced — it softens into the chicken juices and rounds out the seasoning.
- 2 tablespoons olive oil — helps the spice cling and keeps the vegetables from drying out.
- 2 tablespoons fajita seasoning — use a store-bought blend or your own mix of chili powder, cumin, paprika, and garlic powder.
- 2 cups cooked rice — white rice is classic, but brown rice works if you have it ready.
- 1 (15-ounce) can black beans, drained and rinsed — adds bulk and makes the bowl more filling.
- 1 cup salsa — spoon this on at the end for moisture and sharpness.
- 1 lime, cut into wedges — the acid wakes everything up.
- 1/2 cup shredded Monterey Jack or cheddar — a little cheese makes the bowl feel complete.
Quick Steps
- Preheat and prep: Heat the oven to 425°F (220°C) and line a sheet pan with foil or parchment for easier cleanup.
- Season the chicken and vegetables: Toss the chicken, peppers, and onion with olive oil and fajita seasoning until everything looks evenly coated and shiny.
- Roast: Spread the mixture in one layer and bake for 18 to 22 minutes, stirring once halfway through, until the chicken reaches 165°F (74°C) and the peppers have browned edges.
- Warm the base: Heat the rice and black beans in the microwave or in a small saucepan with a splash of water until hot all the way through.
- Build the bowls: Divide the rice among bowls, pile the chicken and vegetables on top, then add beans, salsa, cheese, and lime.
- Finish with contrast: Squeeze lime over the top right before serving so the whole bowl tastes brighter and less heavy.
Tips and Variations
- Use thighs, not breasts, if you can. They stay juicier and forgive a few extra minutes in the oven.
- Turn it into taco night. Warm flour tortillas and let everyone make wraps instead of bowls.
- Add avocado at the end. That creamy bite makes the bowl feel richer without much extra work.
2. Cheeseburger Pasta Skillet
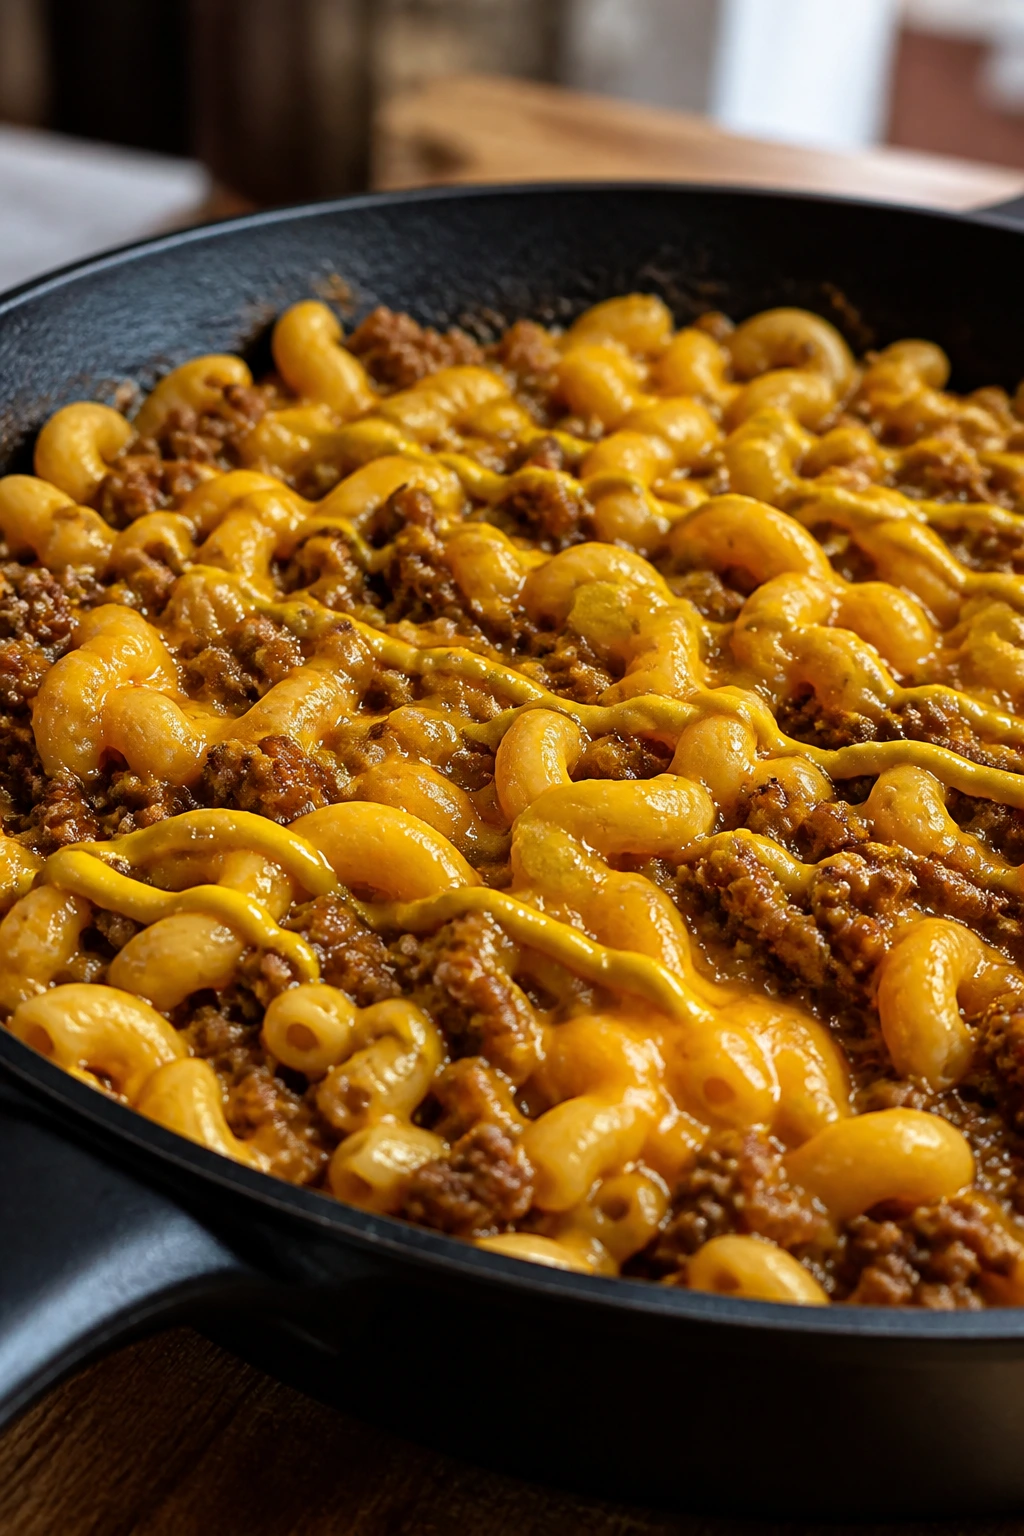
This one tastes like a drive-thru burger and a boxed mac-and-cheese had a smart kid. It’s beefy, saucy, and just sharp enough from the mustard and cheddar to keep each bite from blending into mush.
I make versions of this when I want dinner to disappear quickly. The pasta grabs the sauce, the beef gives it weight, and the pickles on top add that little burger-shop bite teenagers tend to love more than they admit.
Why It Works
Cheeseburger pasta works because it gives you the exact comfort-food profile many teens are chasing: salt, fat, starch, and a little tang. The pasta cooks right in the sauce, which means the starch thickens everything while it absorbs flavor. That also keeps the whole thing feeling unified instead of like beef sitting on top of noodles.
Key Ingredients
- 1 pound ground beef, 85/15 — enough fat for flavor without turning the skillet greasy.
- 1 small yellow onion, finely diced — softens into the beef and makes the sauce taste less one-note.
- 2 garlic cloves, minced — adds depth under the cheese.
- 2 tablespoons tomato paste — brings that cooked-down burger-sauce flavor.
- 1 tablespoon yellow mustard — gives the dish its cheeseburger edge.
- 2 cups elbow macaroni — small pasta shapes hold the sauce best.
- 3 cups beef broth — cooks the pasta and forms the base of the sauce.
- 1 cup whole milk — makes the skillet creamy instead of watery.
- 1 1/2 cups shredded cheddar — the main cheese, and the part everybody notices.
- 1/4 cup chopped dill pickles or relish — optional, but worth it if you want that burger finish.
Quick Steps
- Brown the beef: Cook the ground beef and onion in a large skillet over medium-high heat for 6 to 8 minutes, until the beef is no longer pink and the onion looks soft.
- Build the flavor base: Stir in the garlic, tomato paste, and mustard for 30 seconds until the paste darkens slightly and smells sweet.
- Add the pasta and liquid: Pour in the macaroni, broth, milk, salt, and pepper, then bring the pan to a gentle boil.
- Simmer: Reduce the heat to medium-low and cook for 10 to 12 minutes, stirring often, until the pasta is tender and the sauce coats the back of a spoon.
- Melt the cheese: Turn off the heat and stir in the cheddar until it melts into a glossy sauce. Do not boil after the cheese goes in or it can turn grainy.
- Finish like a burger: Spoon into bowls and top with pickles or relish if you want that sharp, salty edge.
Tips and Variations
- Use rotini if elbow macaroni is out. Any small shape with curves or ridges will catch the sauce.
- Add chopped bacon. A few crisp pieces on top make the burger flavor louder.
- Skip the pickles for picky eaters. The dish still lands without them.
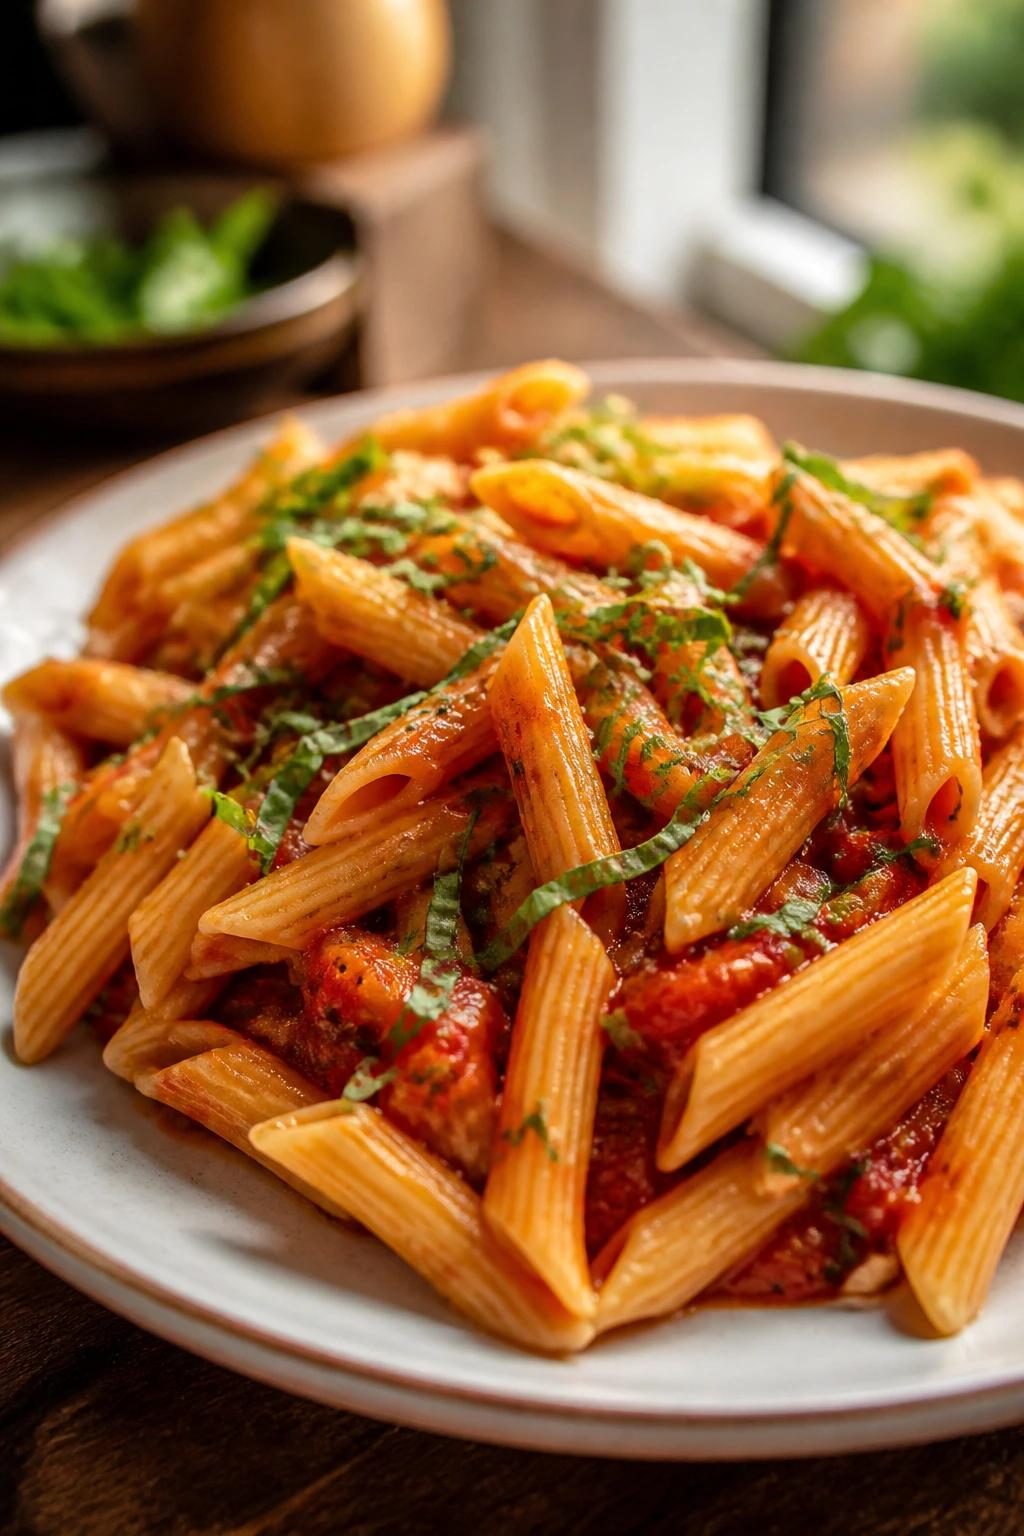
3. Baked Ziti with Sausage and Mozzarella
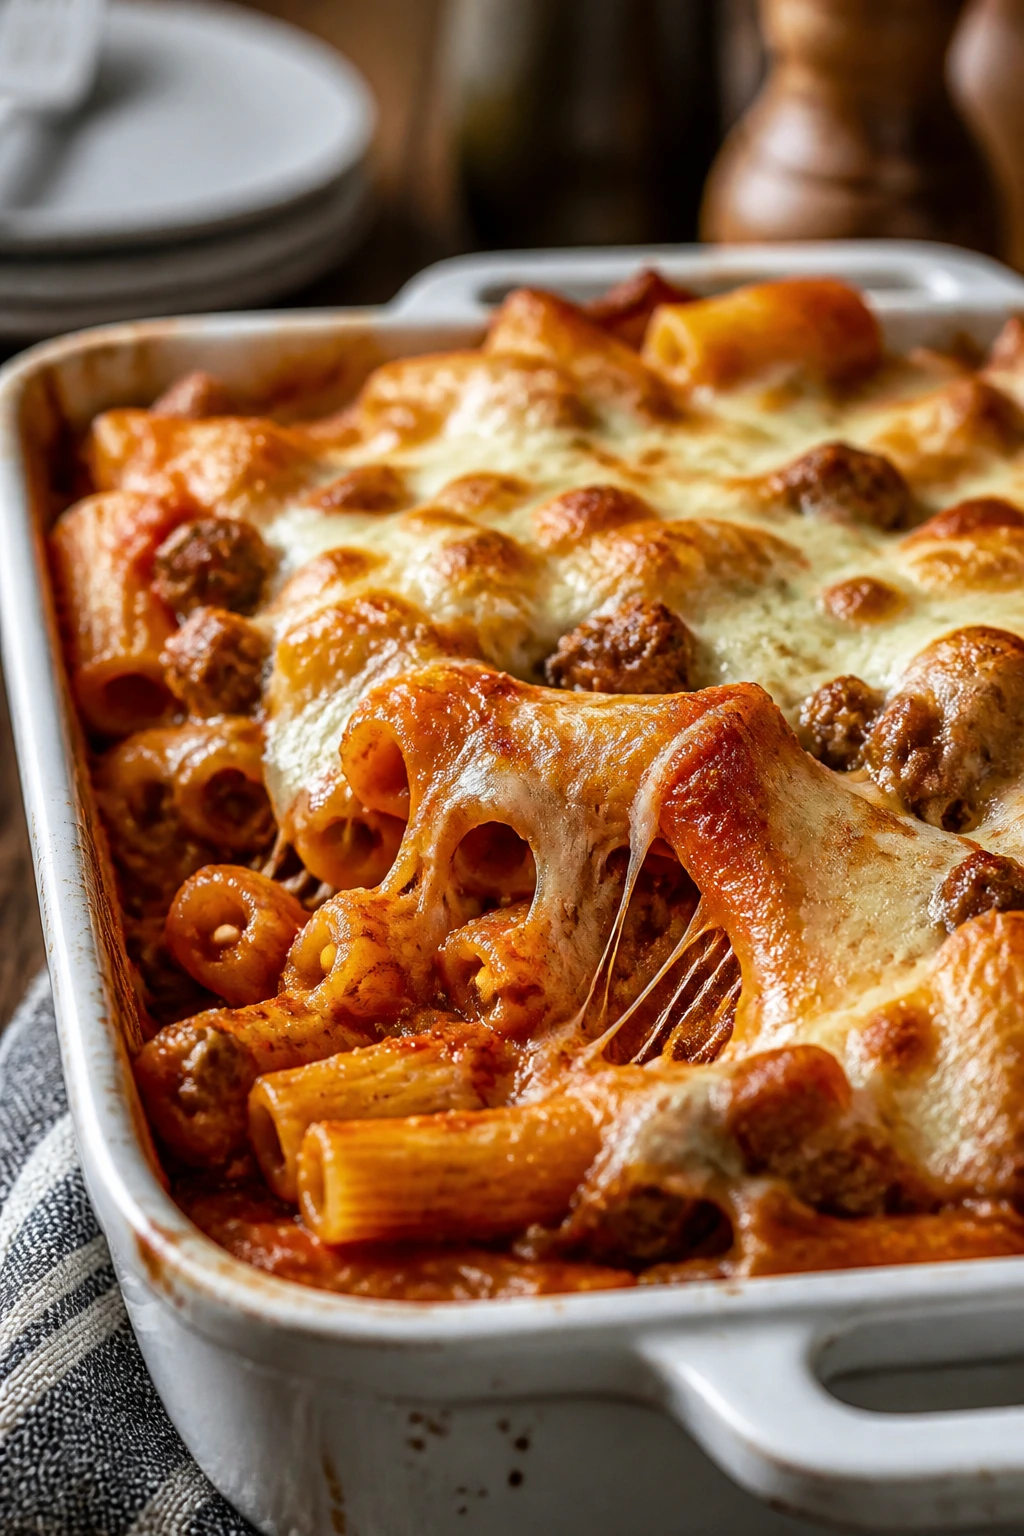
Baked ziti is the sort of dinner that makes a full table go quiet for a minute. The top turns browned and bubbly, the middle stays saucy, and every scoop brings cheese that stretches in long, satisfying strings.
This is one of my favorite answers to a hungry crowd because it doesn’t feel stingy. It’s pasta, meat, tomato sauce, ricotta, and mozzarella — basically everything a teen already knows is worth eating, stacked in one pan.
Why It Works
Baked ziti stays popular for a reason: it feeds a lot of people, holds heat well, and gets better as the cheese melts into the sauce. Italian sausage adds enough seasoning that you do not need to fight the dish with a bunch of extras. The ricotta keeps the center creamy, which is what makes each bite feel fuller than plain pasta.
Key Ingredients
- 1 pound ziti or penne — a sturdy pasta shape that stands up to baking.
- 1 pound Italian sausage, casings removed — mild or hot both work.
- 1 small onion, diced — adds sweetness to the sauce.
- 3 garlic cloves, minced — gives the baked pasta a deeper, richer smell.
- 1 (24-ounce) jar marinara sauce — keep the sauce simple and let the sausage do some of the work.
- 1 cup ricotta cheese — makes the center creamy.
- 1 large egg — helps the ricotta mixture set a little.
- 2 cups shredded mozzarella — the melt and stretch factor.
- 1/2 cup grated parmesan — adds a salty finish.
- 2 tablespoons chopped basil — optional, but it freshens the top.
Quick Steps
- Boil the pasta: Cook the ziti in salted water until just shy of al dente, about 2 minutes less than the package says, then drain.
- Cook the sausage: Brown the sausage and onion in a large skillet over medium heat for 8 to 10 minutes, breaking up the meat as it cooks.
- Add garlic and sauce: Stir in the garlic for 30 seconds, then pour in the marinara and simmer for 5 to 7 minutes.
- Mix the ricotta layer: Stir together the ricotta, egg, parmesan, and a pinch of salt in a bowl.
- Assemble: Toss the pasta with the sauce, fold in half the mozzarella, and spread everything into a greased 9×13-inch baking dish. Dollop the ricotta mixture over the top and scatter the rest of the mozzarella on top.
- Bake: Cook at 400°F (205°C) for 20 to 25 minutes, until the sauce bubbles at the edges and the top has browned spots.
- Rest before serving: Let it sit for 10 minutes so the layers set instead of sliding apart.
Tips and Variations
- Freeze one pan before baking. Wrap it tightly and freeze for a future night when no one wants to cook.
- Swap in ground turkey. Add a little extra olive oil if the meat is very lean.
- Use hot sausage if your crowd likes heat. It keeps the dish interesting without extra work.
4. Crispy Chicken Ranch Wraps
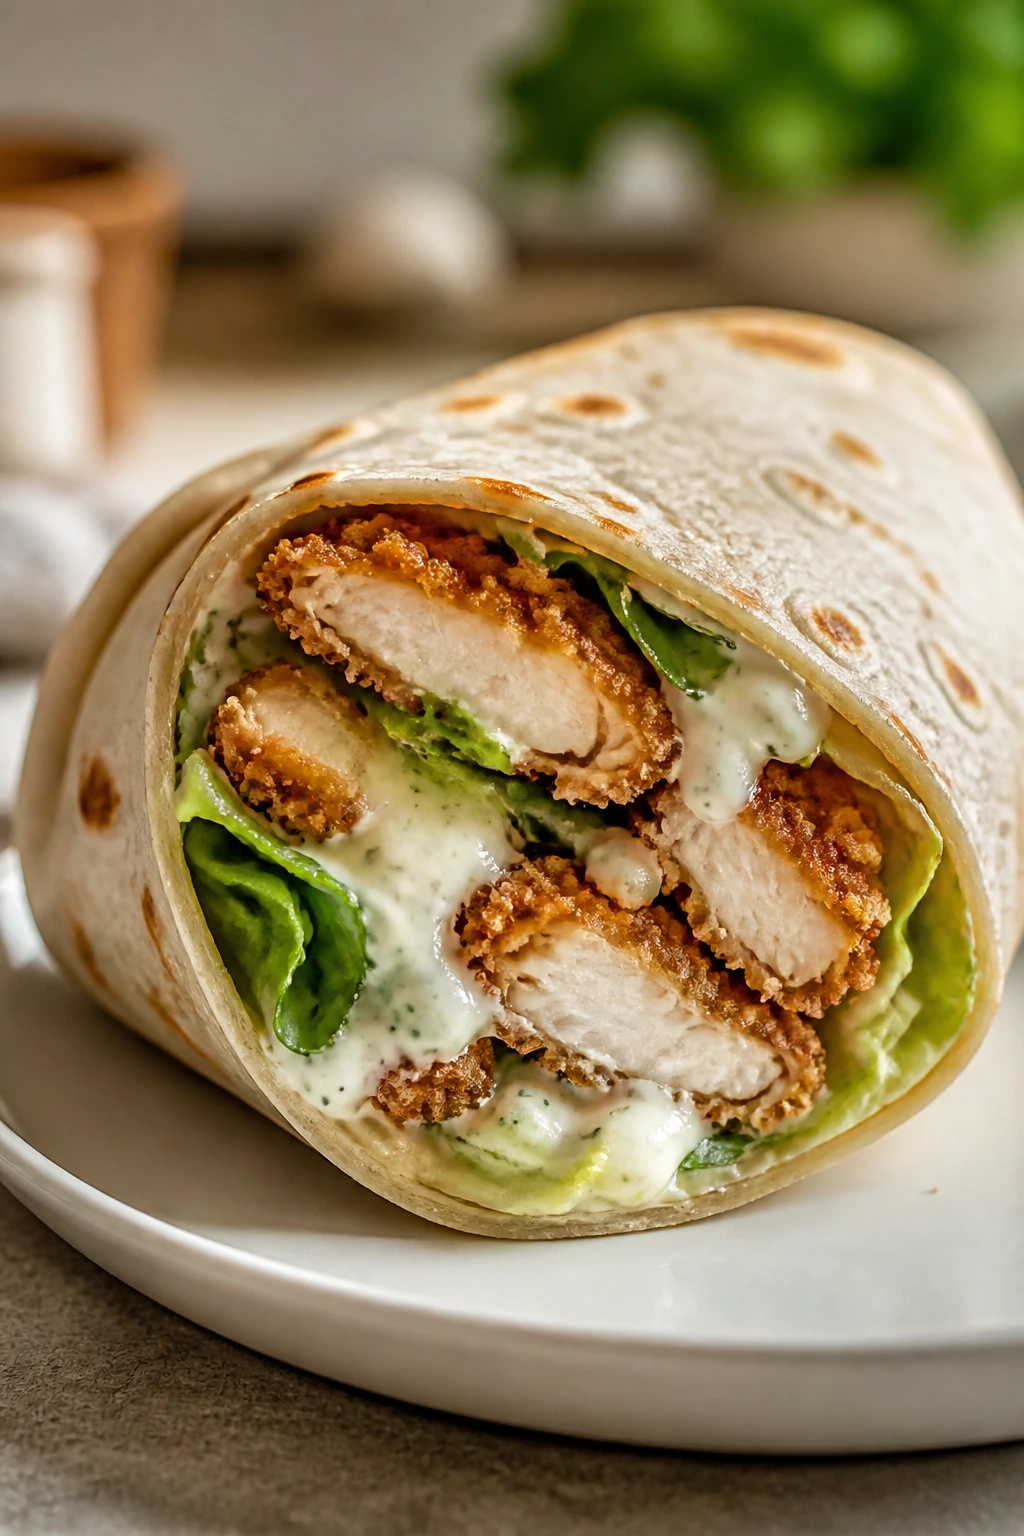
These wraps taste like lunch truck food made at home, which is not an insult. Crispy chicken, cool ranch dressing, crunchy lettuce, and soft tortillas hit a sweet spot that teenagers seem to understand immediately.
The best part is the contrast. Hot chicken against cool lettuce. Creamy ranch against crisp coating. If you want a meal that feels casual but still reads as dinner, this is a strong move.
Why It Works
Wraps are easy to scale, easy to hold, and easy to customize. That matters when one teen wants tomatoes and another acts like they’re a personal attack. The crunchy chicken gives the wrap enough substance that it does not collapse into dressing and bread, which is the fate of weaker wraps.
Key Ingredients
- 1 1/2 pounds chicken tenders or thin cutlets — thinner pieces cook faster and stay crisp.
- 1/2 cup all-purpose flour — helps the breading stick.
- 2 large eggs, beaten — the glue layer.
- 1 cup panko breadcrumbs — gives the chicken a louder crunch than regular crumbs.
- 1 teaspoon paprika — adds color and a little warmth.
- 1 teaspoon garlic powder — keeps the coating from tasting flat.
- 4 large flour tortillas — burrito-size tortillas hold everything better.
- 1/2 cup ranch dressing — the cool, creamy part.
- 2 cups shredded lettuce — use romaine for a sturdier bite.
- 1 tomato, diced — adds freshness.
- 1 cup shredded cheddar — optional, but good if you want more heft.
Quick Steps
- Set up the breading station: Put the flour in one bowl, the beaten eggs in another, and the panko mixed with paprika, garlic powder, salt, and pepper in a third.
- Coat the chicken: Dredge each piece in flour, dip it in egg, then press it firmly into the panko until coated all over.
- Cook until crisp: Bake at 425°F (220°C) for 18 to 20 minutes, or air fry at 400°F (205°C) for 10 to 12 minutes, until the chicken is golden and reaches 165°F (74°C).
- Warm the tortillas: Heat them in a dry skillet for 20 seconds per side so they fold without cracking.
- Assemble: Spread ranch down the middle of each tortilla, add lettuce, tomato, cheese, and sliced chicken.
- Roll tightly: Fold the sides in, roll firmly, and set seam-side down for a minute in a dry skillet if you want the wrap sealed.
Tips and Variations
- Use leftover chicken tenders if you have them. This becomes a 10-minute assembly job.
- Add hot sauce to the ranch. Teenagers who like heat tend to ask for more than you expect.
- Skip the tortilla and serve it as a bowl. Same flavors, fewer messes.
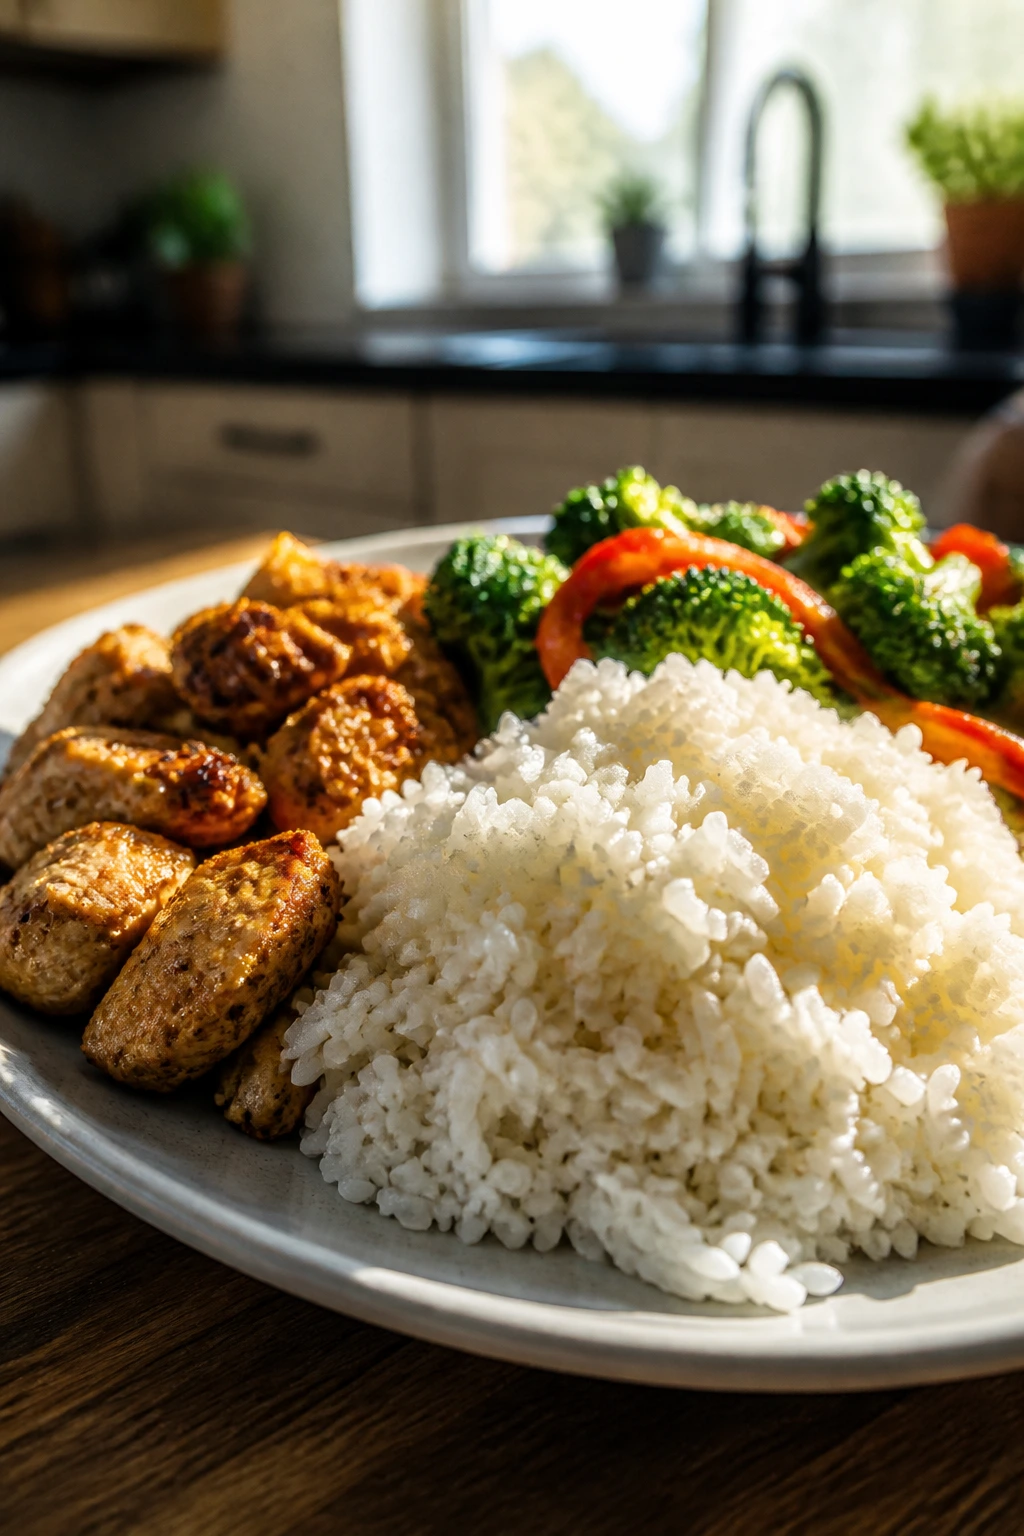
5. Beef and Broccoli Rice Bowls
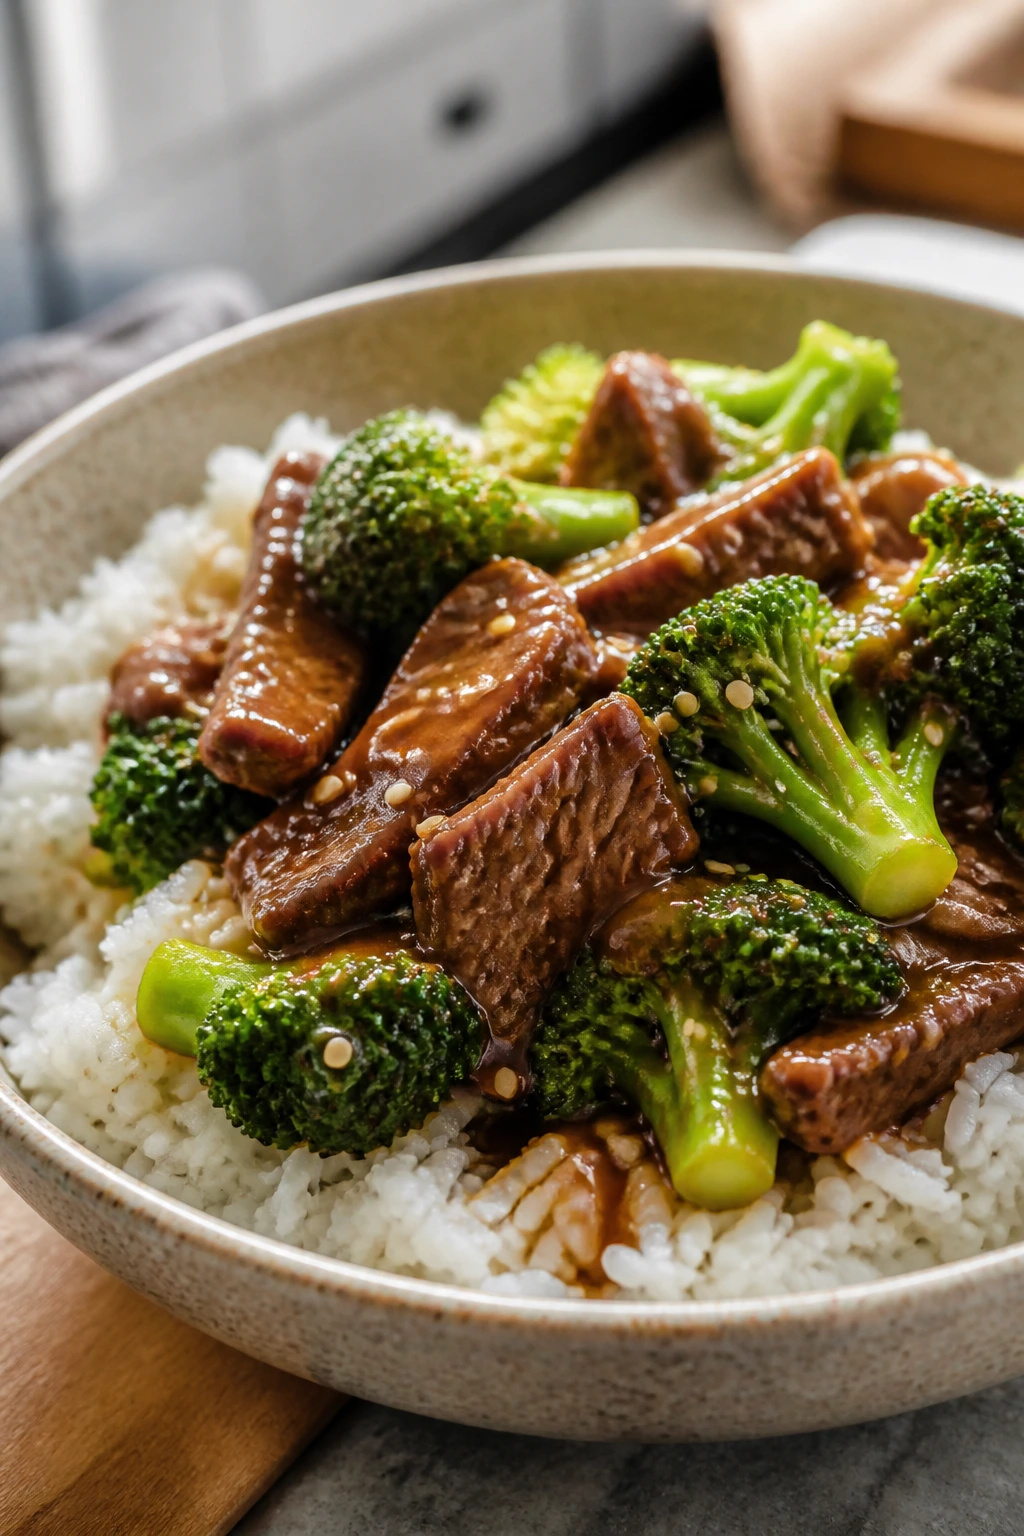
This is the dinner that makes takeout feel unnecessary. The sauce is glossy, the broccoli stays bright and a little crisp, and the beef gets coated in that salty-sweet glaze that tends to disappear fast.
I like this one because it tastes like effort even when it is not a big production. You can get the rice going, sear the beef, toss the broccoli, and end up with something that looks like you planned ahead.
Why It Works
Beef and broccoli bowls bring together protein, vegetables, and rice in a way that feels balanced without feeling restrained. The sauce clings to the meat because a little cornstarch goes in early, which means every bite tastes seasoned instead of coated at the end. It’s also one of the rare dinners where frozen broccoli can work just fine if that’s what you’ve got.
Key Ingredients
- 1 1/4 pounds flank steak, sliced very thin against the grain — thin slices stay tender.
- 4 cups broccoli florets — fresh is best, but frozen florets work in a pinch.
- 2 cups cooked white rice — jasmine rice gives a nice texture.
- 1/4 cup soy sauce — the salty backbone.
- 2 tablespoons brown sugar or honey — gives the sauce a rounded sweetness.
- 2 tablespoons oyster sauce — optional, but it adds depth.
- 2 teaspoons cornstarch — helps the sauce thicken.
- 2 teaspoons sesame oil — use it at the end for aroma.
- 3 garlic cloves, minced — essential, not optional.
- 1 tablespoon grated ginger — adds the sharp, clean finish.
- 2 scallions, sliced — for color and bite.
Quick Steps
- Make the sauce: Stir the soy sauce, brown sugar, oyster sauce, cornstarch, sesame oil, garlic, and ginger together in a bowl.
- Cook the rice: Get the rice hot and fluffy before you start the stir-fry so you’re not chasing three pans at once.
- Sear the beef: Heat a large skillet or wok over high heat with a little oil, then cook the beef in one layer for 1 to 2 minutes per side until browned but still juicy. Remove it from the pan.
- Stir-fry the broccoli: Add the broccoli with a splash of water and cook for 3 to 4 minutes, just until it turns bright green and the stems begin to soften.
- Bring it together: Return the beef to the pan, pour in the sauce, and stir for 1 to 2 minutes until everything looks glossy and the sauce thickens.
- Serve over rice: Spoon the beef and broccoli over the rice and top with scallions.
Tips and Variations
- Slice the steak while it’s cold. It cuts cleaner and stays tender in the pan.
- Add carrots or snap peas. A little extra crunch works well here.
- Double the sauce if your crowd likes extra rice. Hungry teenagers rarely object to more sauce.
6. Buffalo Chicken Quesadillas
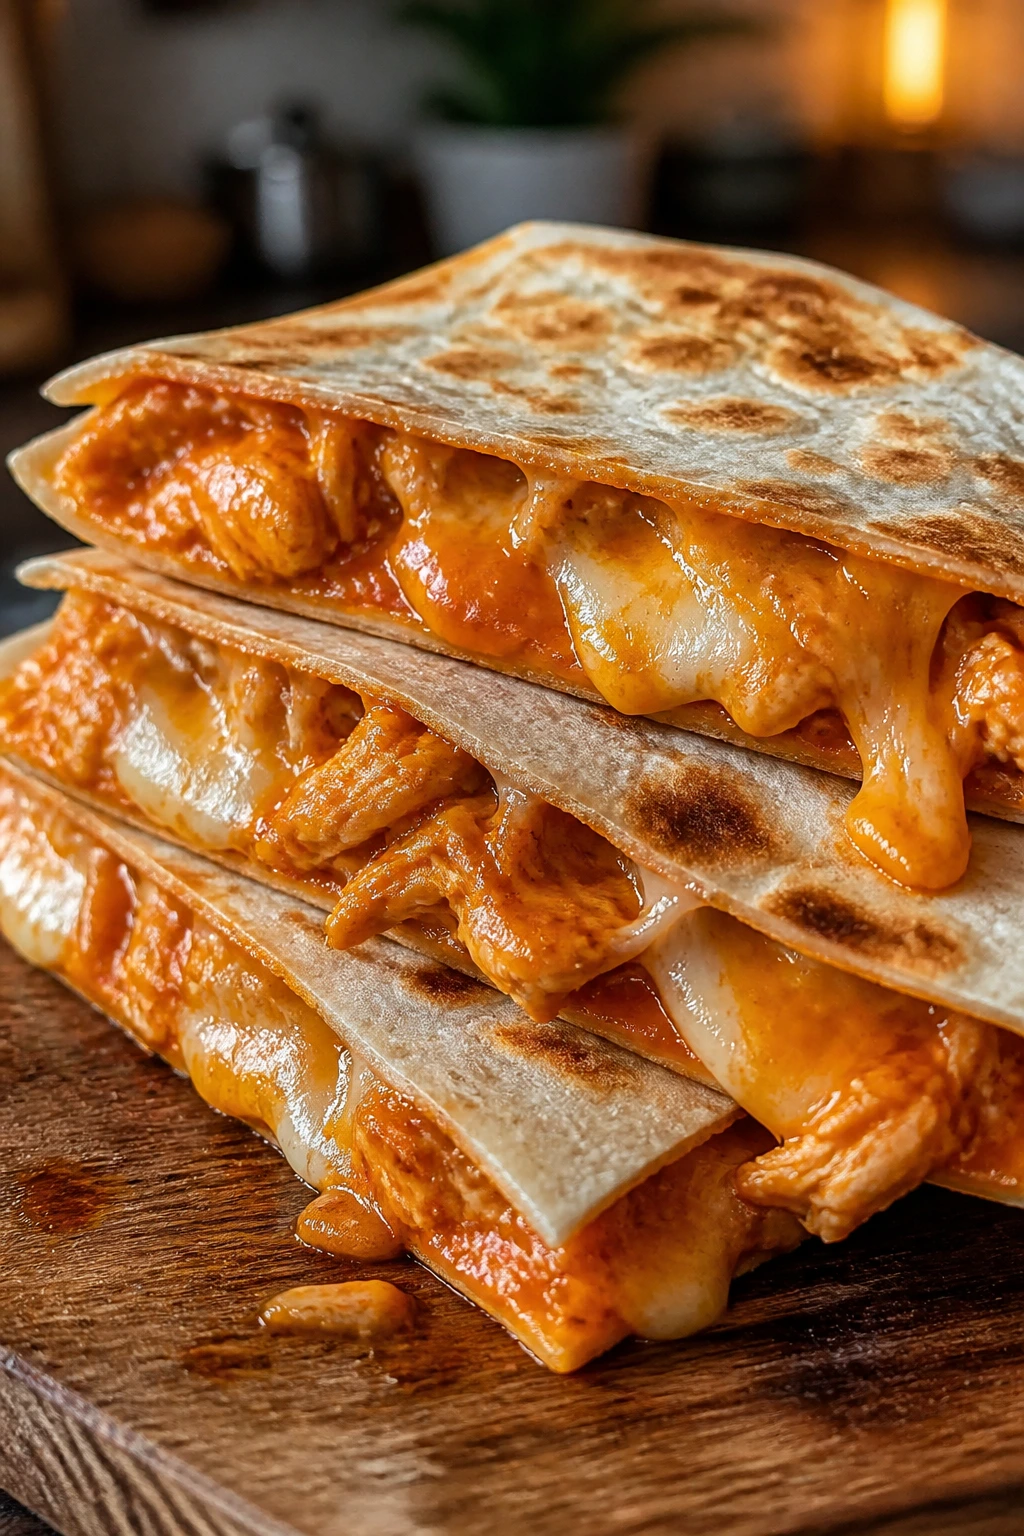
These are loud in the best way. Spicy chicken, melted cheese, and a crisp tortilla create the kind of dinner that gets eaten standing up if you are not careful.
They’re also a useful rescue meal. Leftover chicken becomes something new, buffalo sauce does the heavy lifting, and a skillet turns it into dinner before anyone has time to ask whether there are “real plans” for the evening.
Why It Works
Quesadillas solve the teen-dinner problem because they’re handheld, fast, and packed with enough cheese to feel like a full meal. Buffalo sauce gives the filling heat and tang, while a little cream cheese keeps it from drying out. The skillet browns the tortilla into something that sounds good when you cut into it.
Key Ingredients
- 3 cups shredded cooked chicken — rotisserie chicken is a solid shortcut.
- 1/3 cup buffalo sauce — use more if your crowd likes heat.
- 2 tablespoons cream cheese, softened — smooths out the filling.
- 1 1/2 cups shredded cheddar — for flavor.
- 1 1/2 cups shredded Monterey Jack — for melt.
- 4 large flour tortillas — the bigger the better.
- 2 tablespoons butter or neutral oil — helps the tortilla crisp.
- 2 scallions, sliced — optional, for a fresh finish.
- Ranch dressing, for serving — a cooling dip that fits the flavor.
Quick Steps
- Mix the filling: Stir the shredded chicken, buffalo sauce, cream cheese, and scallions together until the chicken is evenly coated.
- Build the quesadillas: Lay two tortillas on the counter and divide the cheese and chicken mixture between them, keeping the filling on one half of each tortilla.
- Fold and cook: Heat a skillet over medium heat and add butter or oil. Cook each quesadilla for 2 to 3 minutes per side, pressing lightly with a spatula, until the tortilla is golden and the cheese has melted.
- Let them rest briefly: Wait 1 minute before cutting so the filling doesn’t spill out all over the cutting board.
- Slice and serve: Cut into wedges and serve with ranch dressing, celery sticks, or both.
Tips and Variations
- Use less buffalo sauce for younger eaters. You can always put more on the table.
- Add crumbled blue cheese if you like it. Some people do, and they are not wrong.
- Bake several at once on a sheet pan. Good if you’re feeding a crowd and do not want to babysit the stove.
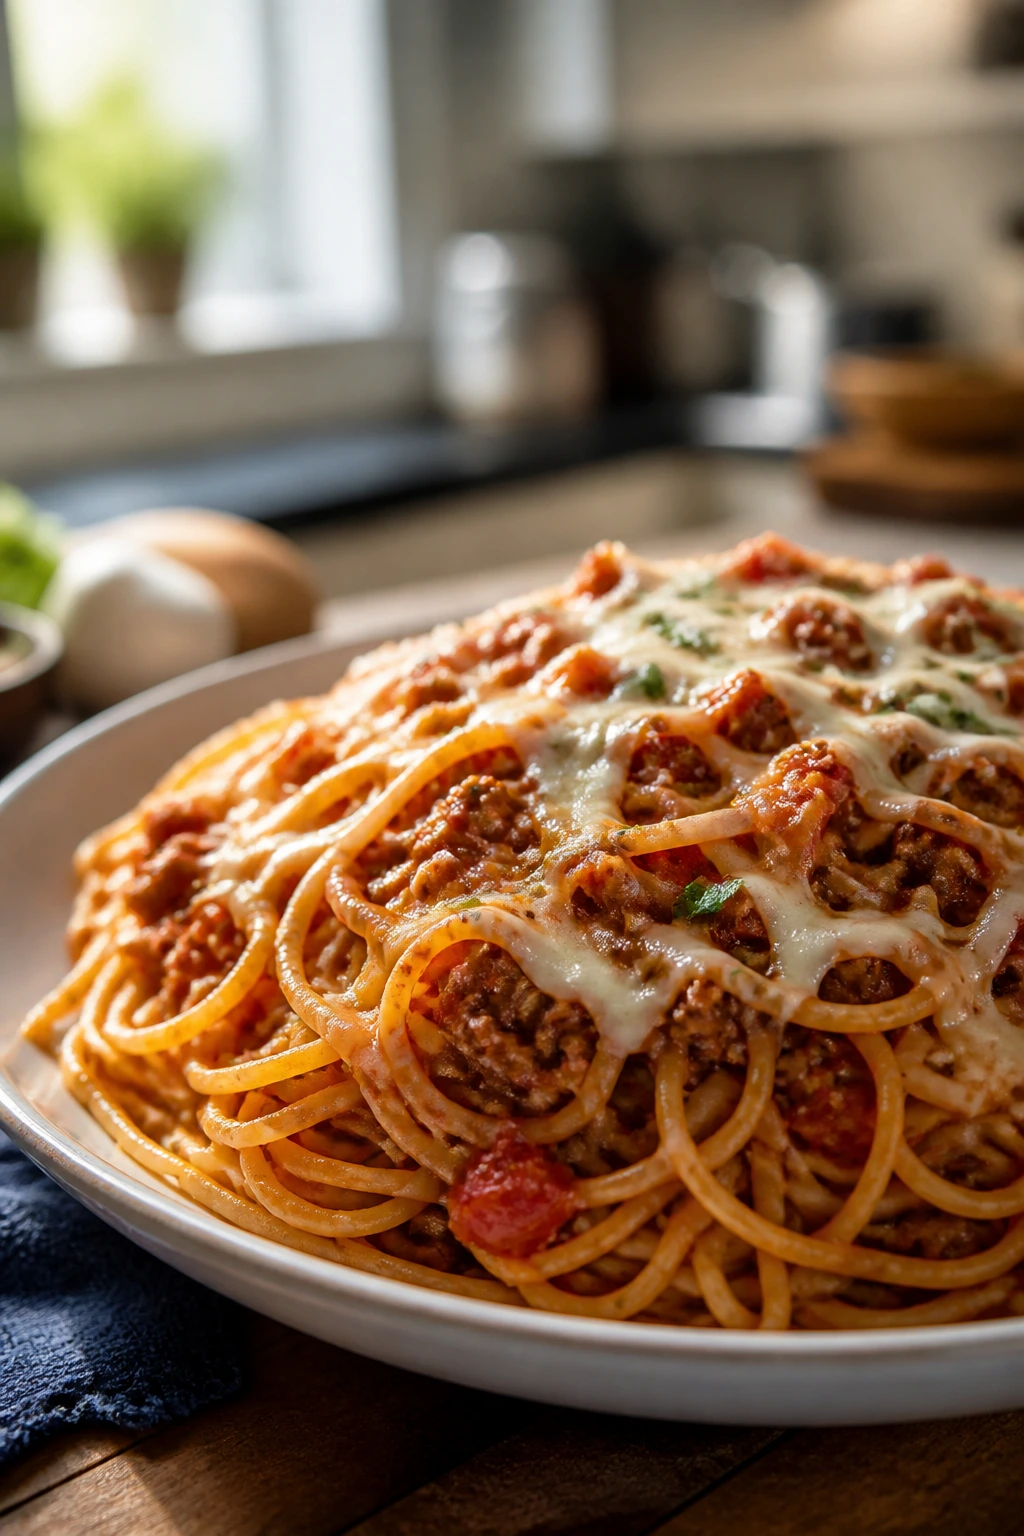
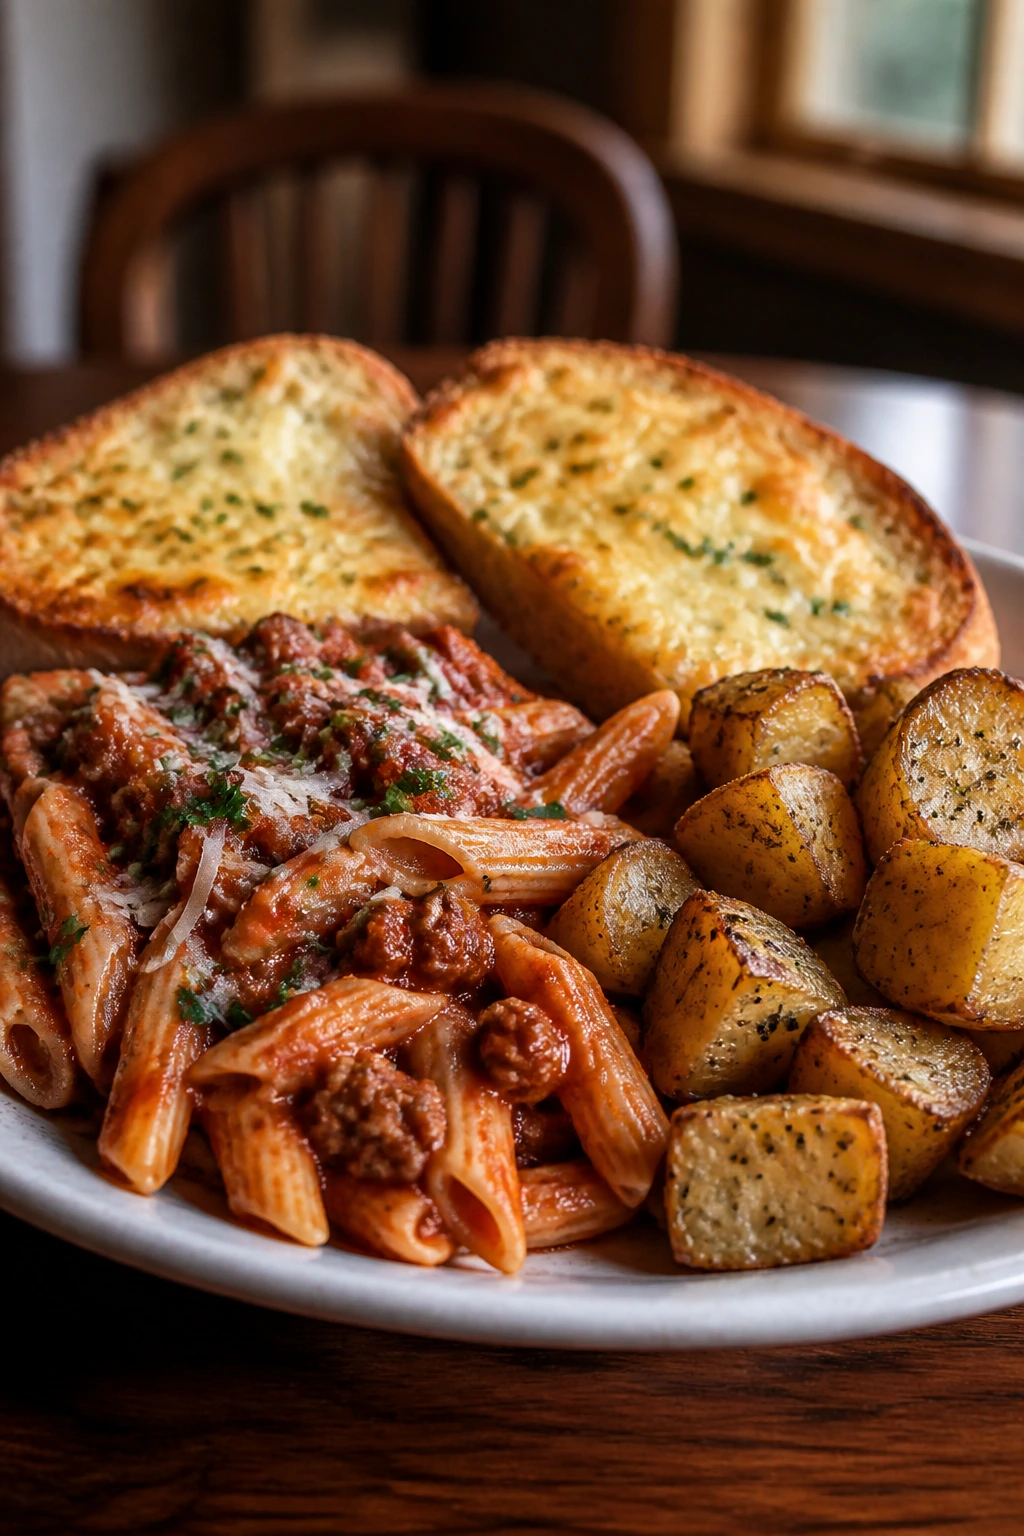
7. Spaghetti with Meat Sauce and Garlic Bread
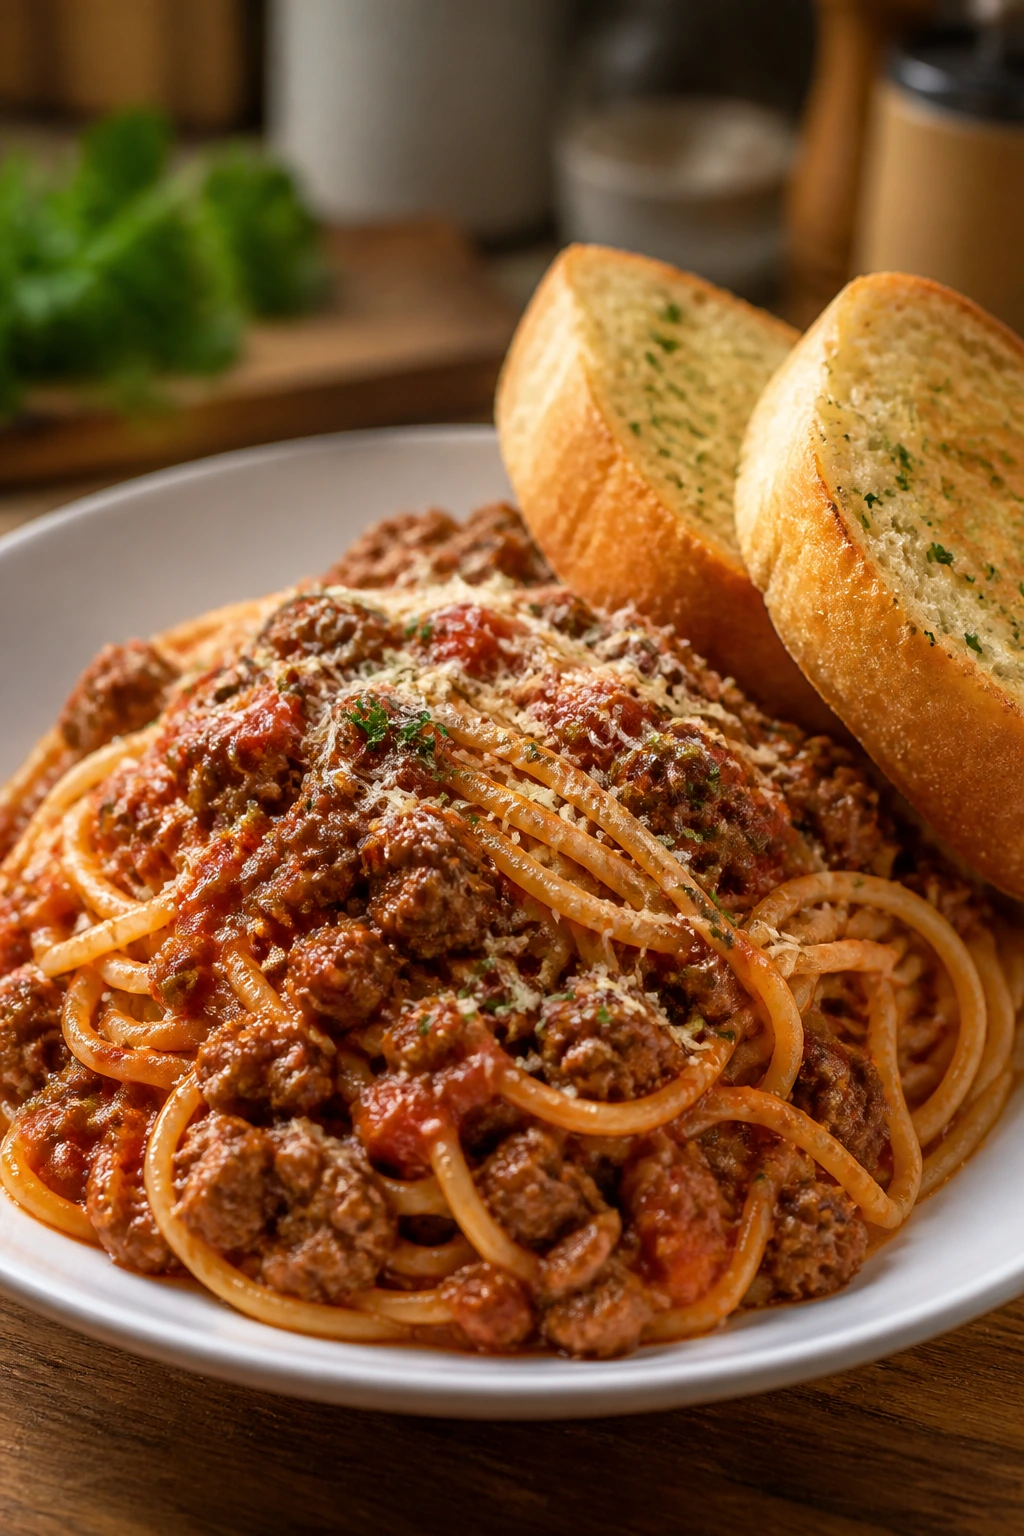
There’s a reason this dinner survives every food trend. It’s filling, familiar, and reliable in the way a heavy blanket is reliable when the house feels cold and everyone is hungry at once.
The garlic bread matters here. A lot. Without it, spaghetti can feel like a single-note bowl of pasta. With it, the whole meal becomes something teenagers can lean into with both hands.
Why It Works
Meat sauce turns simple pasta into a proper dinner because the beef, tomatoes, and herbs build flavor while the noodles absorb it. Spaghetti is cheap, easy to cook in bulk, and familiar enough that even picky eaters usually stop arguing. Garlic bread gives the meal a second carbohydrate, which is not subtle, but it works.
Key Ingredients
- 1 pound spaghetti — a pantry staple that feeds a crowd.
- 1 pound ground beef — use 85/15 or 90/10.
- 1 small onion, diced — adds body to the sauce.
- 3 garlic cloves, minced — because meat sauce needs garlic.
- 1 (28-ounce) can crushed tomatoes — the main sauce base.
- 2 tablespoons tomato paste — deepens the tomato flavor.
- 1 teaspoon Italian seasoning — oregano, basil, and thyme in one move.
- 1/2 cup water or beef broth — helps the sauce simmer without getting too thick.
- 1/2 cup grated parmesan — for serving.
- 1 loaf Italian bread — the garlic bread base.
- 4 tablespoons butter, softened — for the bread.
- 1 garlic clove, finely grated — for the bread spread.
Quick Steps
- Start the sauce: Brown the beef and onion in a pot over medium heat for 8 to 10 minutes, breaking the meat into small pieces.
- Add the garlic and paste: Stir in the garlic and tomato paste for 1 minute, until the paste darkens and sticks a little to the pot.
- Simmer: Add the crushed tomatoes, Italian seasoning, water or broth, salt, and pepper. Let it simmer gently for 20 to 25 minutes, stirring now and then.
- Cook the pasta: Boil the spaghetti in salted water until al dente, then drain and toss with a spoonful of sauce so it does not stick together.
- Make the garlic bread: Mix butter with grated garlic, spread it on the bread, and bake at 425°F (220°C) for 8 to 10 minutes until the edges are crisp.
- Serve: Pile the sauce over the pasta, add parmesan, and bring the bread to the table while it is still crackly.
Tips and Variations
- Grate a carrot into the sauce. It melts in and gives a little sweetness.
- Use half ground beef and half Italian sausage. The flavor gets bigger fast.
- Cook extra pasta. Leftover sauce on spaghetti makes a strong lunch.
8. BBQ Pulled Pork Sliders with Crunchy Slaw
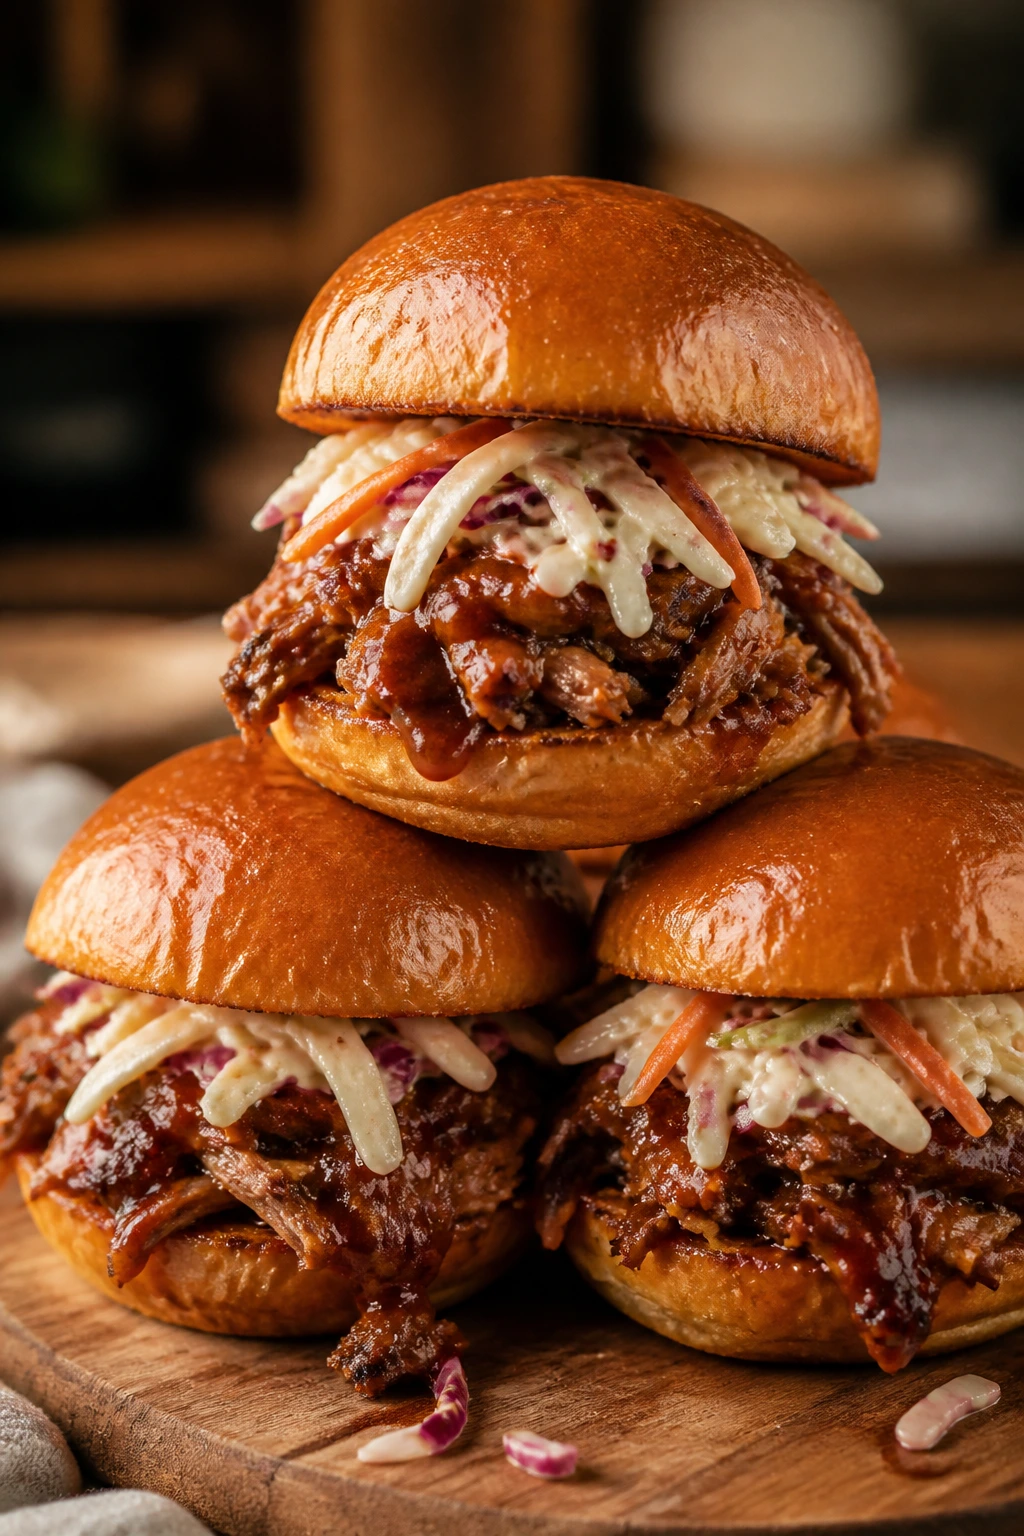
These sliders are a little sticky, a little messy, and exactly the sort of thing hungry teenagers take seriously. Soft buns, smoky pork, and crunchy slaw make a combination that feels bigger than the sum of its parts.
I like this meal for nights when you want something that can sit in the oven without becoming sad. It feeds a crowd, holds well, and gives everyone permission to build their own slider stack.
Why It Works
Pulled pork is a strong choice for big appetites because it’s rich, easy to pile high, and makes sense with bread. The slaw matters more than people think; it cuts through the richness and keeps the sliders from turning into one long soft bite. A little acid in the pork and the slaw keeps the whole thing from tasting heavy.
Key Ingredients
- 3 pounds boneless pork shoulder — the best cut for shredding.
- 1 tablespoon kosher salt — seasons the meat all the way through.
- 2 teaspoons smoked paprika — gives the pork a barbecue-style color and flavor.
- 1 teaspoon black pepper — basic, but necessary.
- 1 large onion, sliced — sits under the pork and melts into the juices.
- 1 cup chicken broth — keeps the roast from drying out.
- 1 cup barbecue sauce — use your favorite style.
- 12 slider buns — soft buns hold the filling best.
- 3 cups coleslaw mix — the crunchy topping.
- 1/4 cup mayonnaise — for the slaw dressing.
- 1 tablespoon apple cider vinegar — sharpens the slaw.
- 1 teaspoon honey — balances the vinegar.
Quick Steps
- Season the pork: Pat the pork shoulder dry and rub it with salt, paprika, and black pepper.
- Build the roasting pan: Spread the sliced onion in the bottom of a Dutch oven or deep baking dish and set the pork on top. Pour in the broth.
- Cook low and slow: Cover tightly and roast at 300°F (150°C) for 3 1/2 to 4 hours, until the pork is fork-tender and shreds easily.
- Shred and sauce: Pull the pork apart with two forks, then mix in the barbecue sauce while it’s still hot.
- Make the slaw: Stir the coleslaw mix with mayonnaise, vinegar, honey, and a pinch of salt.
- Assemble the sliders: Split the buns, pile on the pork, add slaw, and serve while warm.
Tips and Variations
- Toast the buns lightly. They hold up better against the sauce.
- Use pulled chicken if pork is not your thing. The same slaw still works.
- Keep extra sauce on the side. Teenagers tend to ask for more after the first bite.
9. Creamy Taco Mac
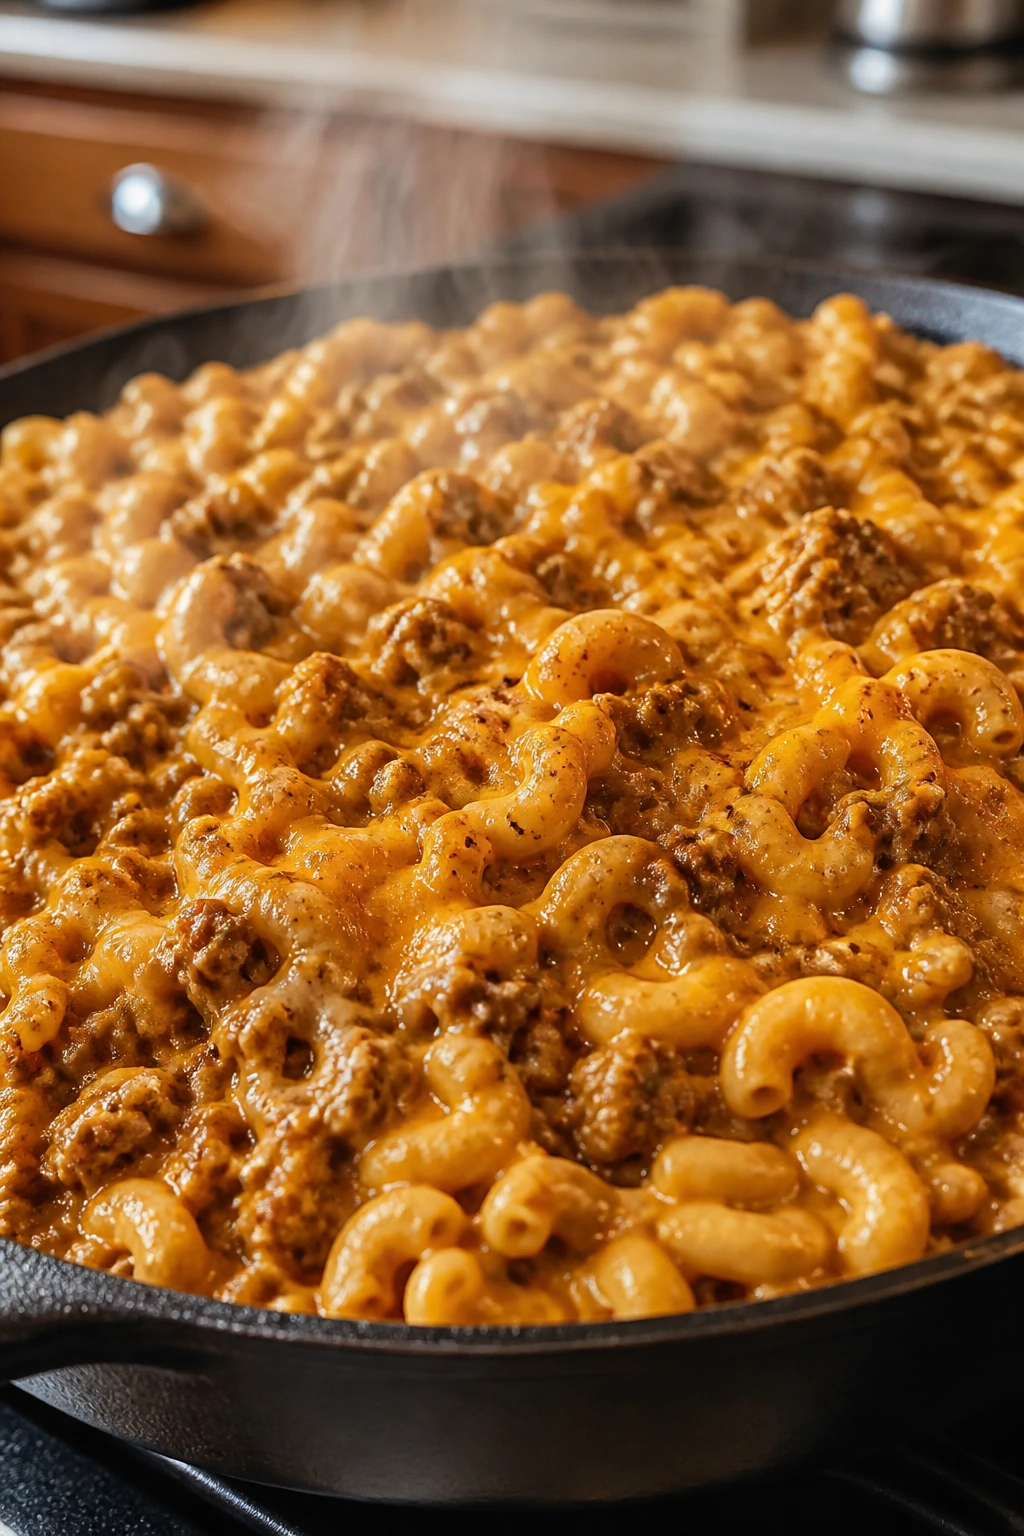
This is the dinner I make when I want pasta, but I also want taco night energy. It’s rich, savory, slightly spicy, and just cheesy enough to make everyone at the table a little less dramatic.
The best part is how easily it stretches. If the pan looks small, it’s usually because the pasta is swallowing the sauce and the meat, which is exactly what should happen.
Why It Works
Creamy taco mac is the kind of hybrid that wins because it takes two familiar comfort foods and makes them louder together. The taco seasoning gives the beef a salty, spiced edge, while cream cheese smooths the sauce into something the noodles can carry. A little corn adds sweetness and breaks up the richness.
Key Ingredients
- 1 pound ground beef or ground turkey — beef tastes fuller; turkey is lighter.
- 1 small onion, diced — builds flavor underneath the seasoning.
- 2 tablespoons taco seasoning — enough to season the whole pan.
- 2 cups elbow macaroni — small pasta keeps the bite easy.
- 1 (10-ounce) can diced tomatoes with green chilies — brings moisture and a little heat.
- 3 cups beef broth — cooks the pasta right in the skillet.
- 4 ounces cream cheese, softened — creates the creamy sauce.
- 1 1/2 cups shredded cheddar — the main cheese.
- 1 cup frozen corn — optional, but good for sweetness and texture.
- 1/4 cup chopped cilantro — bright finish, if you like it.
Quick Steps
- Brown the meat: Cook the beef and onion in a deep skillet over medium heat for 6 to 8 minutes, until the meat is browned and the onion is soft.
- Season it well: Stir in the taco seasoning and let it toast for 30 seconds.
- Add pasta and liquid: Pour in the macaroni, tomatoes, broth, and corn, then bring the pan to a simmer.
- Cook through: Reduce the heat and simmer for 10 to 12 minutes, stirring often, until the pasta is tender and most of the liquid has been absorbed.
- Make it creamy: Stir in the cream cheese until it melts, then add the cheddar and keep stirring until the sauce turns smooth and thick.
- Serve hot: Spoon into bowls and top with cilantro, crushed tortilla chips, or a little hot sauce.
Tips and Variations
- Use a deep skillet. This gets thick fast and can overflow in a shallow pan.
- Add black beans if you want more bulk. They fit the taco flavor naturally.
- Keep the heat gentle after the cheese goes in. High heat can make the sauce split.
10. Teriyaki Salmon Rice Bowls
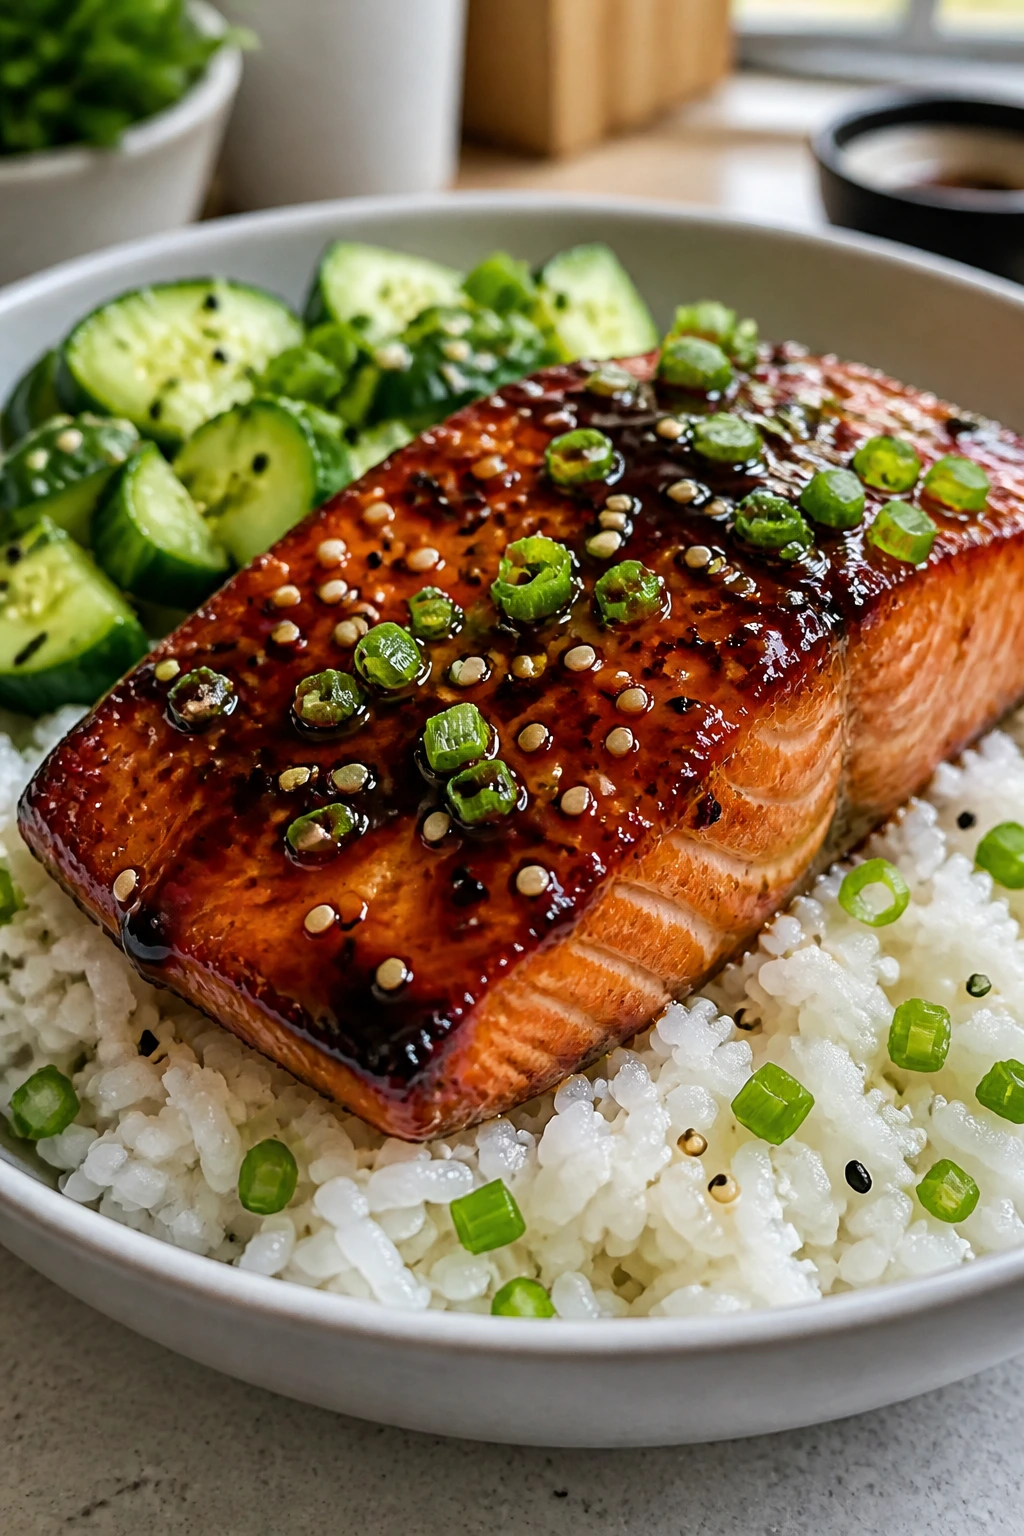
Salmon bowls can sound a little too polished for a hungry teenager. Then you set them down with rice, cucumber, and a sticky teriyaki glaze, and suddenly the plate starts disappearing like everybody’s been waiting for it.
What I like here is the balance. The salmon is rich, the rice is plain in the best way, and the fresh vegetables keep it from feeling heavy. It’s one of the few dinners in this list that tastes bright and filling at the same time.
Why It Works
Salmon brings enough fat and flavor to satisfy a bigger appetite, especially when it’s glazed with something salty-sweet. Rice gives the bowl its base, and the crunchy vegetables keep the texture moving. If you need a dinner that feels a little fresher without turning into a salad, this is the move.
Key Ingredients
- 4 salmon fillets, about 6 ounces each — choose fillets with similar thickness.
- 1/4 cup soy sauce — the salty base of the glaze.
- 2 tablespoons honey — helps the glaze caramelize.
- 1 tablespoon rice vinegar — keeps the sauce from getting too sticky-sweet.
- 1 teaspoon grated fresh ginger — gives the glaze warmth.
- 2 garlic cloves, minced — a small amount goes a long way.
- 2 cups cooked rice — jasmine or sushi rice both work.
- 1 cucumber, thinly sliced — cool crunch.
- 1 carrot, shredded — adds color and bite.
- 1 tablespoon sesame seeds — for finishing.
- 2 scallions, sliced — fresh, sharp top note.
Quick Steps
- Mix the glaze: Stir together the soy sauce, honey, vinegar, ginger, and garlic in a small bowl.
- Prepare the salmon: Place the fillets on a lined baking sheet and brush them generously with the glaze.
- Bake: Cook at 400°F (205°C) for 12 to 15 minutes, depending on thickness, until the salmon flakes easily and the center is just opaque. Do not overcook it or the fish will turn dry fast.
- Broil briefly if you want color: Give the fillets 1 minute under the broiler for a darker, stickier top.
- Assemble the bowls: Divide the rice among bowls, add salmon, cucumber, and carrot.
- Finish: Sprinkle with sesame seeds and scallions, then spoon any extra glaze over the top.
Tips and Variations
- Use frozen salmon if that’s what you have. Thaw it fully and pat it dry before glazing.
- Swap in trout or chicken thighs. The same glaze still works.
- Add a little sriracha to the glaze. Heat and sweetness play well together here.
11. Loaded Chili Baked Potatoes
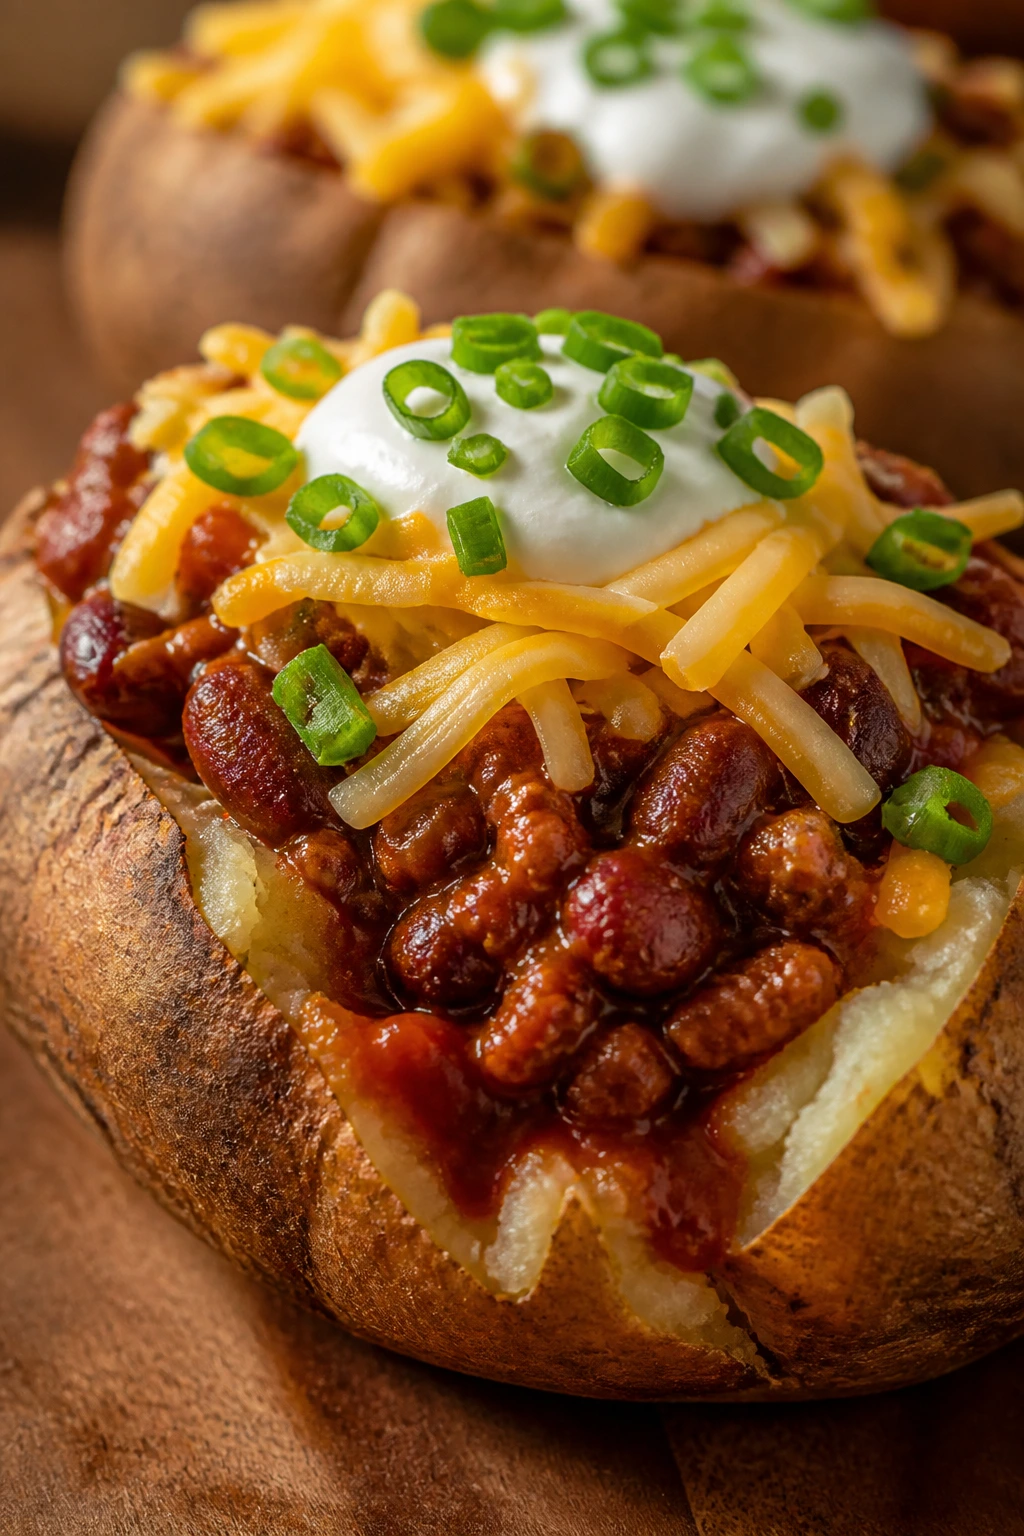
There’s a special kind of satisfaction in a baked potato that is almost too full to pick up. Chili, cheese, sour cream, and scallions turn a basic potato into a meal that feels blunt and generous.
This is one of the easiest ways to feed a teenager who wants something hot and filling. Potatoes do not pretend to be elegant. They just show up, hold the toppings, and disappear.
Why It Works
A baked potato gives you a sturdy base that can handle a heavy topping without collapsing. Chili adds protein and a little spice, while cheese and sour cream round out the whole thing. The potato skin also brings texture, which keeps each bite from feeling soft all the way through.
Key Ingredients
- 4 large russet potatoes — russets bake up fluffy inside and crisp outside.
- 1 tablespoon olive oil — for rubbing the potato skins.
- 1 pound ground beef — the base of the chili.
- 1 small onion, diced — adds sweetness.
- 2 garlic cloves, minced — rounds out the chili.
- 1 can kidney beans, drained and rinsed — makes the chili more substantial.
- 1 can diced tomatoes — the saucy part.
- 2 tablespoons chili powder — the main seasoning.
- 1 teaspoon cumin — warms up the flavor.
- 1 cup beef broth — keeps the chili spoonable.
- 1 cup shredded cheddar — melts over the top.
- 1/2 cup sour cream — cool finish.
- 2 scallions, sliced — for color and freshness.
Quick Steps
- Bake the potatoes: Heat the oven to 425°F (220°C), rub the potatoes with oil and salt, and bake for 50 to 60 minutes until the skins are crisp and a knife slides in easily.
- Cook the chili base: Brown the beef and onion in a pot over medium heat for 6 to 8 minutes.
- Season and simmer: Stir in the garlic, chili powder, cumin, tomatoes, beans, and broth. Simmer for 20 to 25 minutes until thickened.
- Split the potatoes: Cut a long slit across the top of each potato and gently squeeze the ends to open them up.
- Load them up: Fluff the insides with a fork, spoon over the chili, then add cheddar and a spoonful of sour cream.
- Finish: Scatter scallions over the top and serve immediately.
Tips and Variations
- Bake extra potatoes. Cold baked potatoes reheat well for lunch.
- Use turkey if you want a lighter chili. You may need a touch more salt.
- Add jalapeños for heat. They fit the rest of the topping pile naturally.
12. Chicken Parmesan Subs
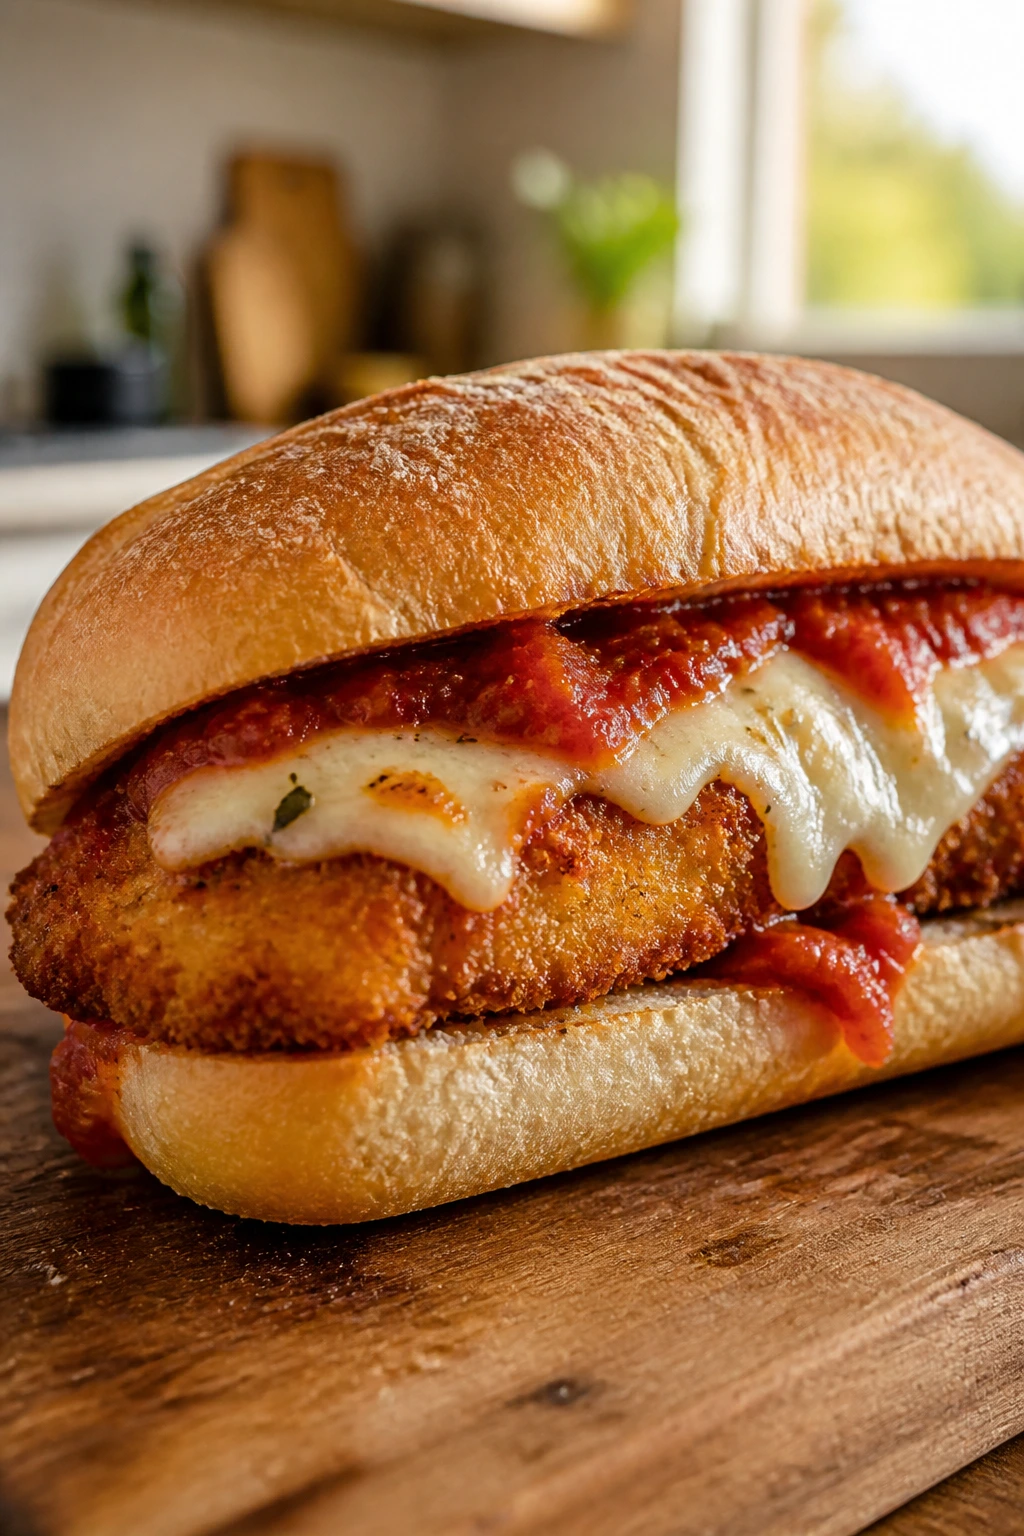
These subs are messy in the best way. Crispy chicken, red sauce, and melted mozzarella tucked into a roll give you all the flavor of chicken parm without the fuss of a knife and fork.
Teenagers like food that feels portable. This is portable, yes, but still heavy enough to count as dinner. That balance is the whole game.
Why It Works
Chicken Parmesan Subs work because they keep the parts people love most: crunchy coating, tangy marinara, stretchy cheese, and bread that can actually hold the filling. Baking or frying the chicken first gives you that crisp edge, and then the broiler melts everything into one hot layer. A sandwich like this feels like a reward, which never hurts at dinnertime.
Key Ingredients
- 1 1/2 pounds chicken cutlets — thin pieces cook quickly and stay tender.
- 1/2 cup all-purpose flour — the first layer in the breading.
- 2 large eggs, beaten — helps the breadcrumbs stick.
- 1 cup seasoned breadcrumbs — the crunchy coating.
- 1/2 cup grated parmesan — mixed into the breading for more flavor.
- 1 cup marinara sauce — use a sauce you like eating on its own.
- 1 1/2 cups shredded mozzarella — for the melt.
- 4 sub rolls — sturdy rolls hold the chicken best.
- 2 tablespoons olive oil — helps with browning if you bake the chicken.
- Fresh basil, optional — a little green goes a long way.
Quick Steps
- Bread the chicken: Dredge the cutlets in flour, dip them in egg, then press them into the breadcrumb-parmesan mix.
- Cook the cutlets: Fry in a thin layer of oil for 3 to 4 minutes per side, or bake at 425°F (220°C) for 18 to 20 minutes, until golden and cooked through.
- Warm the sauce: Heat the marinara in a small saucepan until steaming.
- Top the chicken: Spoon sauce over each cutlet and cover with mozzarella.
- Melt the cheese: Broil the chicken for 1 to 2 minutes until the cheese bubbles and spots of brown appear. Watch the broiler closely — it can go from perfect to burned fast.
- Assemble the subs: Nestle the chicken into split rolls, spoon on a little extra sauce, and finish with basil.
Tips and Variations
- Toast the rolls first. They stay firmer under the sauce.
- Use eggplant instead of chicken. The same breading and sauce still work.
- Serve with a simple salad. The sandwich is rich enough that a crisp side helps.
13. Stir-Fried Beef Noodles
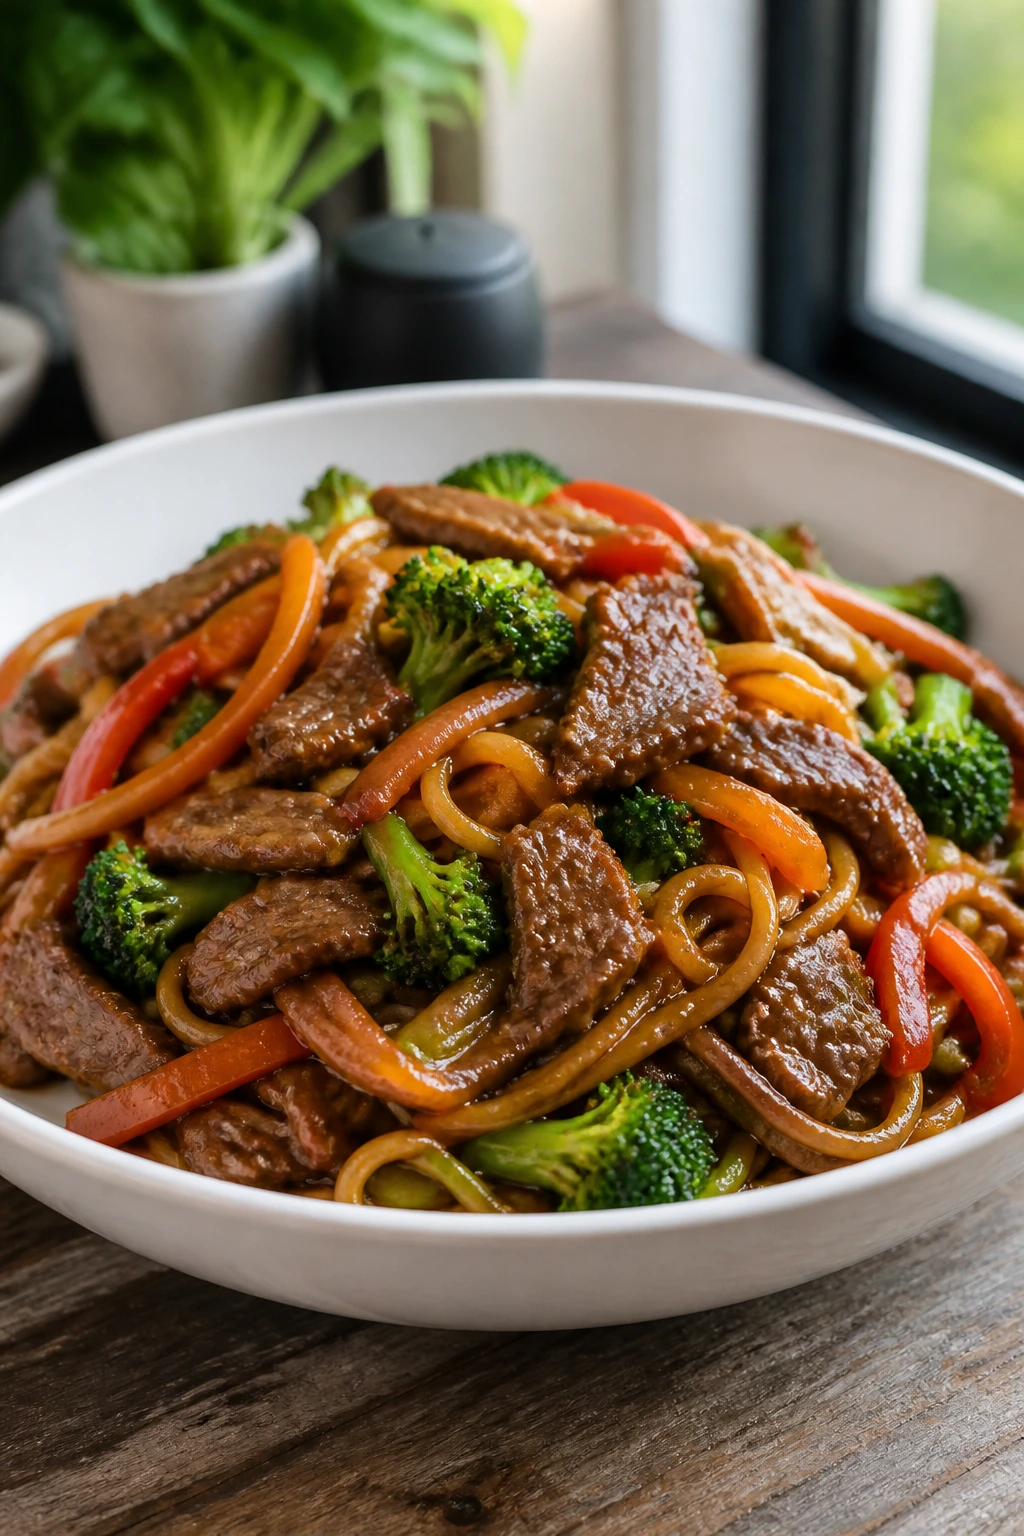
This is one of those dinners that feels fast without tasting rushed. The noodles are slick, the beef is savory, and the vegetables stay crisp enough to keep each bite from blurring together.
I love this when everyone is hungry at once and patience is thin. A hot wok or skillet, a bowl of sauce, and noodles ready to toss can get dinner on the table before the mood turns ugly.
Why It Works
Noodles absorb sauce faster than rice, which means every strand or ribbon gets a good coating. Beef adds heft, while the vegetables give the dish a little snap and keep it from turning heavy. This is one of the easiest ways to stretch a small amount of steak into a dinner that feels substantial.
Key Ingredients
- 1 1/4 pounds flank steak, thinly sliced — slice against the grain for tenderness.
- 12 ounces lo mein noodles or spaghetti — either one works.
- 3 cups broccoli slaw or mixed stir-fry vegetables — a fast shortcut.
- 1/4 cup soy sauce — the main salt and flavor source.
- 2 tablespoons oyster sauce — deepens the savory note.
- 1 tablespoon brown sugar — balances the soy sauce.
- 2 garlic cloves, minced — essential.
- 1 teaspoon grated ginger — brings freshness.
- 2 teaspoons sesame oil — use at the end.
- 2 tablespoons neutral oil — for stir-frying.
- 2 scallions, sliced — for garnish.
Quick Steps
- Cook the noodles: Boil them until just tender, drain, and rinse briefly with warm water so they don’t clump.
- Make the sauce: Stir together the soy sauce, oyster sauce, brown sugar, garlic, ginger, and sesame oil.
- Sear the beef: Heat the oil in a large skillet or wok over high heat and cook the beef for 1 to 2 minutes, just until browned. Remove it from the pan.
- Stir-fry the vegetables: Add the vegetables and cook for 2 to 4 minutes until crisp-tender.
- Toss everything together: Return the beef and noodles to the pan, pour in the sauce, and toss for 1 to 2 minutes until coated and glossy.
- Serve immediately: Top with scallions. Do not let the noodles sit in the pan too long or they’ll soak up the sauce and go heavy.
Tips and Variations
- Use broccoli slaw for speed. It softens quickly and saves chopping.
- Add chili oil at the table. Some teenagers want heat; some do not.
- Swap in chicken thighs. The same sauce still works.
14. Breakfast Tacos with Potato Hash and Eggs
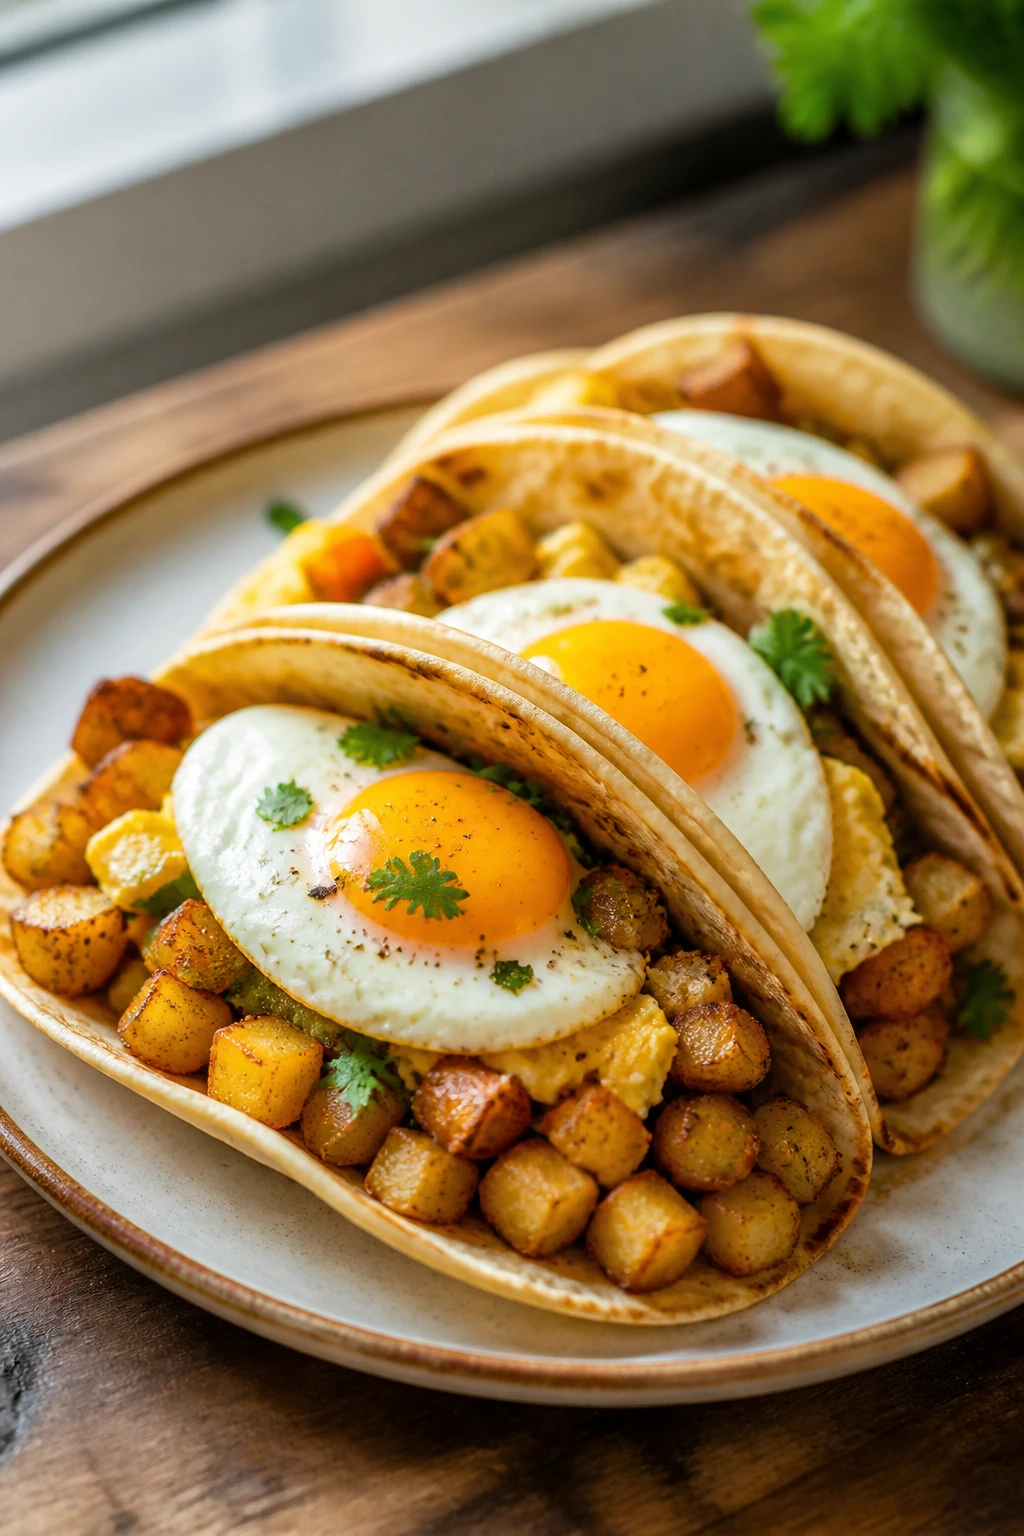
Breakfast for dinner is not a compromise. It’s a smart move. Potatoes, eggs, sausage, cheese, and tortillas create a plate that feels friendly and filling without needing a long explanation.
There’s something nice about the way breakfast tacos let people build their own. One teen wants salsa. Another wants extra cheese. Somebody wants four tacos. Fine. It all works.
Why It Works
Eggs give the tacos protein, potatoes add bulk, and tortillas make the meal feel casual enough that nobody has to overthink it. A little crisp on the potatoes is important; without it, the filling can get soft fast. This is also a good use for whatever breakfast meat you already have hanging around.
Key Ingredients
- 1 1/2 pounds russet potatoes, peeled or unpeeled and diced small — small pieces crisp faster.
- 2 tablespoons oil — for the hash.
- 8 ounces breakfast sausage — or bacon if that’s what you prefer.
- 8 large eggs — enough to fill eight tacos generously.
- 8 small corn or flour tortillas — choose the size you can actually fold.
- 1 cup shredded cheddar or pepper jack — for melting over the eggs.
- 1/2 cup salsa — the brightness.
- 1 avocado, sliced, optional — creamy finish.
- 1/4 cup diced onion or bell pepper — adds color and texture.
Quick Steps
- Cook the potatoes: Heat oil in a large skillet over medium-high heat and cook the diced potatoes for 15 to 20 minutes, stirring often, until browned and tender.
- Add the sausage: Push the potatoes to one side or remove them briefly, then cook the sausage until browned and cooked through.
- Scramble the eggs: In a separate pan, scramble the eggs over medium-low heat until just set and still soft.
- Warm the tortillas: Heat them in a dry skillet for 20 seconds per side or wrap them in foil in the oven.
- Build the tacos: Fill each tortilla with potato hash, sausage, eggs, cheese, and salsa.
- Serve hot: Add avocado if you want it. The eggs are best when they’re still soft and shiny, not dry and rubbery.
Tips and Variations
- Use hash browns instead of diced potatoes. Faster, yes, but not as textured.
- Make a vegetarian version with black beans. The tacos still feel full.
- Offer hot sauce on the side. Some people want breakfast tacos with a little bite.
15. Enchilada Casserole
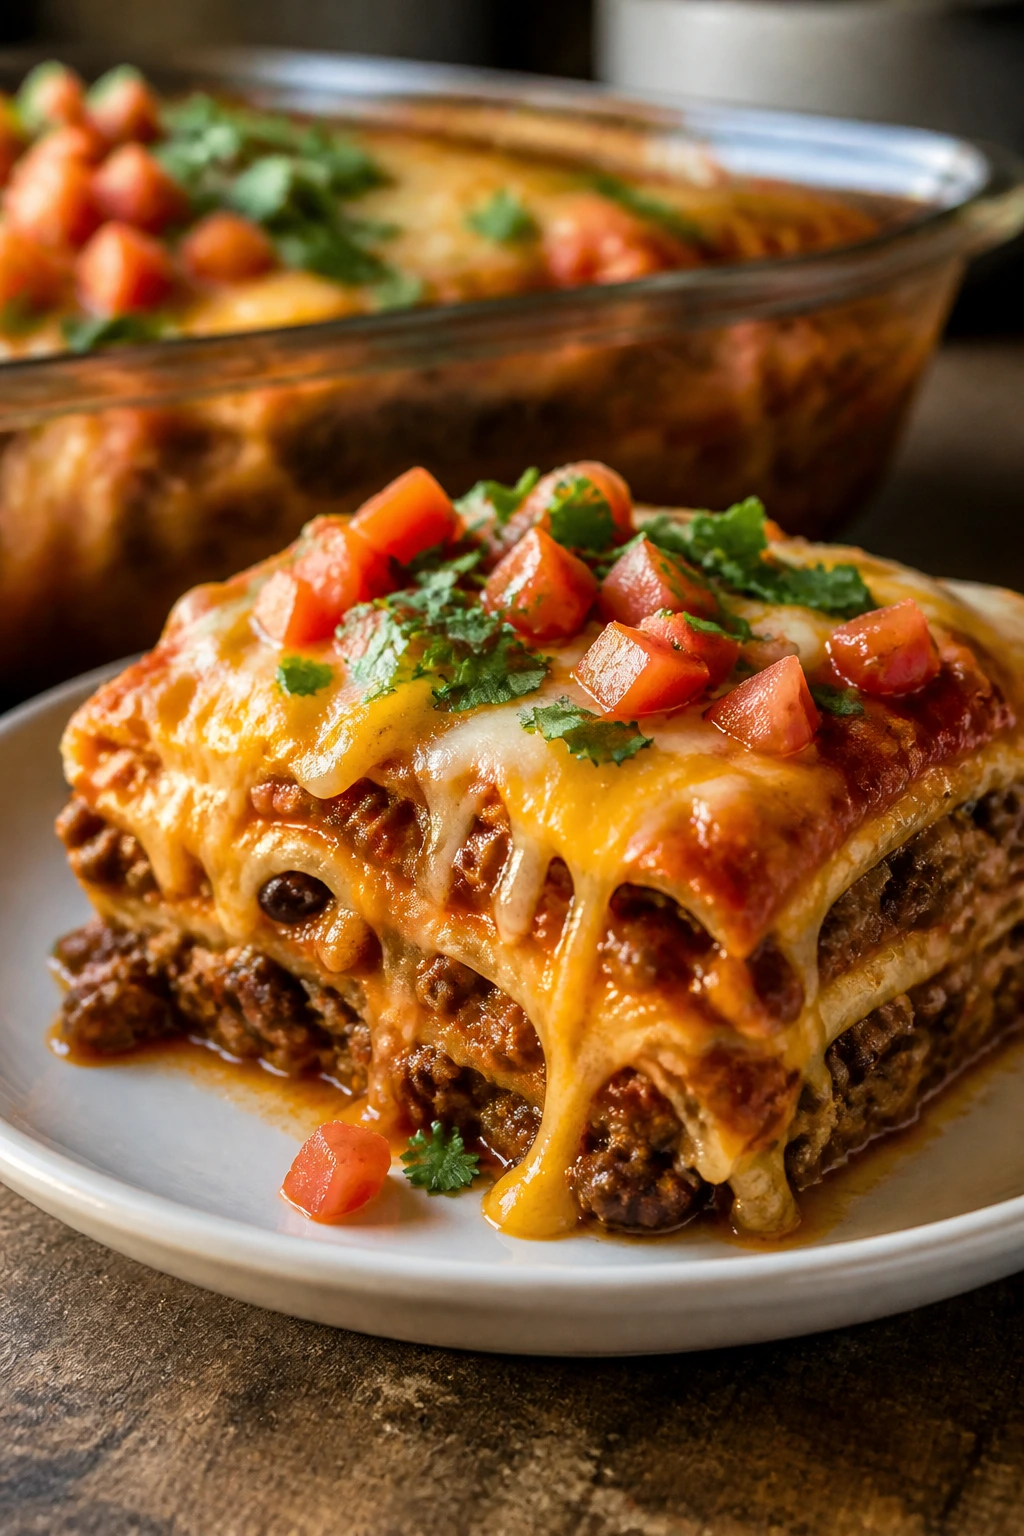
This casserole tastes like the best part of enchiladas without the hassle of rolling each one. Layers of tortillas, sauce, meat, beans, and cheese bake into a pan that cuts cleanly and feeds a lot of people.
It’s a good dinner for a hungry crowd because each slice feels dense and complete. The tortillas soften into the sauce, the cheese pulls everything together, and the edges get a little crisp if you bake it long enough.
Why It Works
Casseroles are smart for teen dinners because they pack a lot into one pan. Enchilada sauce gives the whole dish a deep chili flavor, while beans and corn make the filling go further. The layered structure also means you get a little bit of everything in each bite, which is half the point.
Key Ingredients
- 1 pound ground beef or ground chicken — both work well.
- 1 small onion, diced — for flavor.
- 2 cups enchilada sauce — red or green, depending on what you like.
- 1 can black beans, drained and rinsed — for substance.
- 1 cup corn — frozen or canned.
- 8 small corn tortillas — cut into strips or quarters.
- 2 cups shredded Mexican blend cheese — the melt and top layer.
- 1/2 cup sour cream — for serving.
- Fresh cilantro, optional — a fresh finish.
Quick Steps
- Cook the filling: Brown the meat and onion in a skillet over medium heat for 6 to 8 minutes.
- Season and stir: Add the beans, corn, and 1/2 cup of enchilada sauce, then cook for 2 minutes.
- Layer the casserole: Spread a thin layer of sauce in a greased 9×13-inch baking dish, add tortillas, meat mixture, cheese, and repeat until everything is used, finishing with cheese on top.
- Bake: Cook at 400°F (205°C) for 25 to 30 minutes, until the center is hot and the top is bubbling.
- Rest: Let it sit for 10 minutes so the layers firm up before slicing.
- Serve: Add sour cream and cilantro. If you cut too soon, the layers slide around and the whole pan gets messy in a bad way.
Tips and Variations
- Use rotisserie chicken for a shortcut. It skips the browning step.
- Add sliced jalapeños between layers. They bring some heat without much effort.
- Freeze a baked pan in portions. It reheats well for another night.
16. Pizza Pita Melts
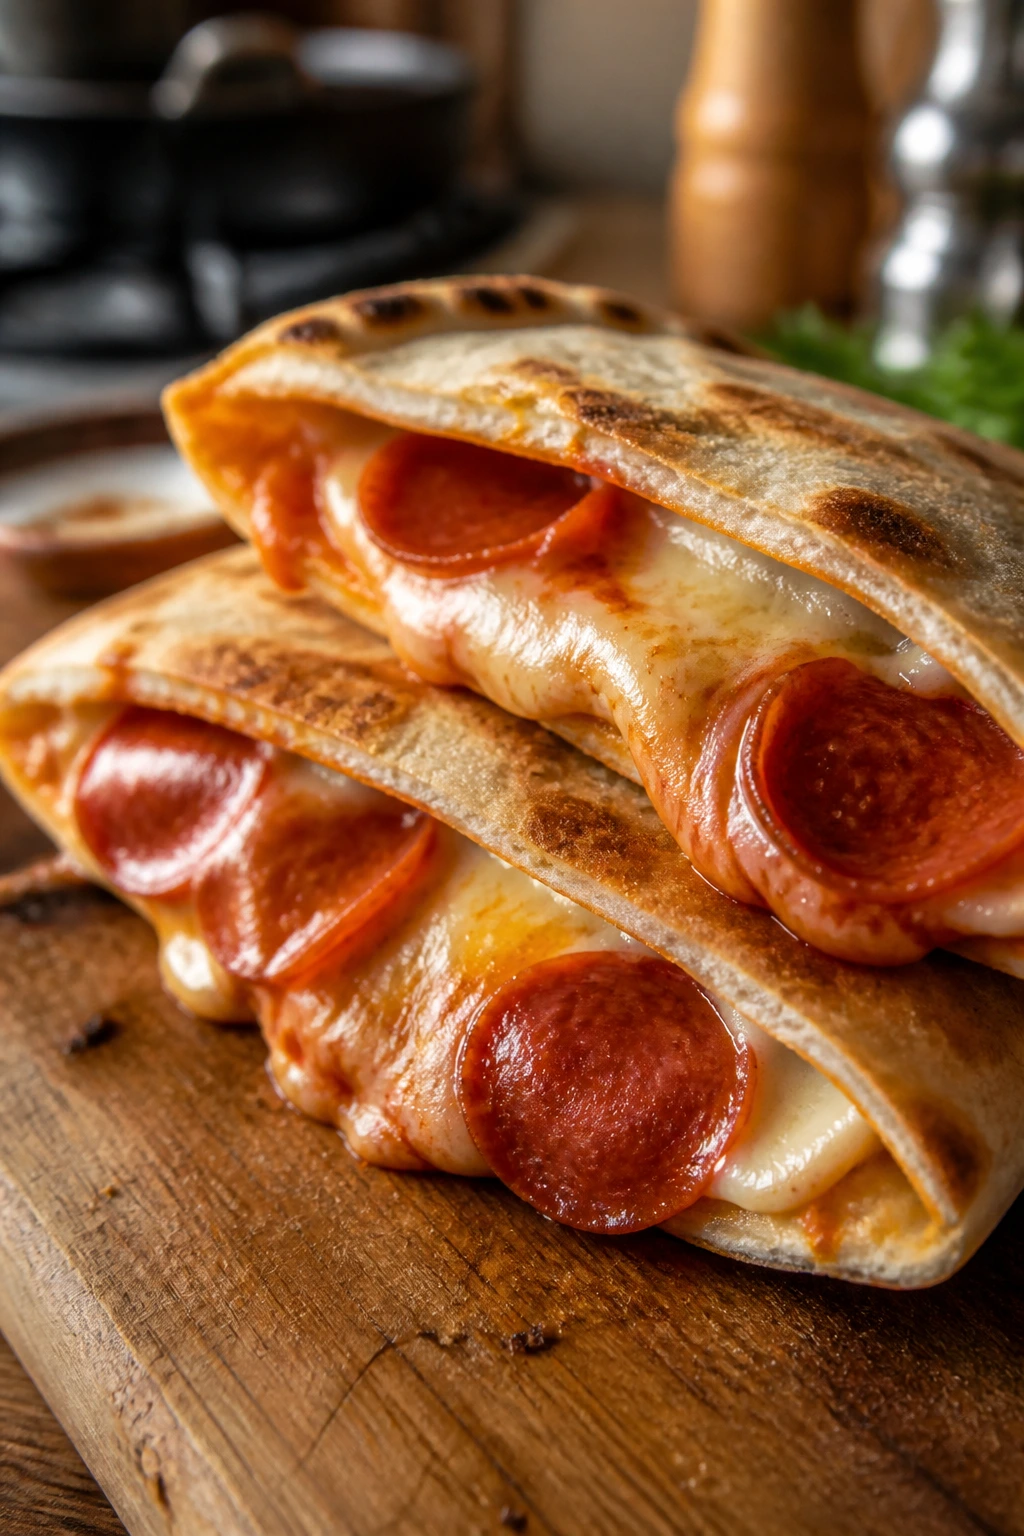
This is the kind of dinner that saves the evening when everyone wants food fast and nobody wants to hear a speech about patience. Crispy pita, sauce, cheese, and pepperoni make a meal that feels like pizza without the wait.
I like that it lets you get dinner on the table in about the time it takes to argue about what to order. That alone is worth a lot on a busy night.
Why It Works
Pizza pita melts work because they scratch the pizza itch with pantry ingredients and a short bake time. The pita gets crisp around the edges while the cheese bubbles, so the texture stays interesting instead of turning floppy. You can build a whole tray with different toppings, which is handy when tastes in the house are all over the place.
Key Ingredients
- 8 pita halves or 4 whole pitas split open — sturdy enough to hold the toppings.
- 1 cup pizza sauce — use enough to coat, not drown.
- 2 cups shredded mozzarella — the melt.
- 1 cup pepperoni slices or diced vegetables — pick one or mix them.
- 1/4 cup grated parmesan — adds a salty finish.
- 1 teaspoon Italian seasoning — gives the top a little more perfume.
- 1 tablespoon olive oil — optional, for brushing the pita edges.
- Crushed red pepper, optional — for people who want heat.
Quick Steps
- Preheat the oven: Set it to 425°F (220°C) and line a baking sheet with parchment.
- Prep the pita: Arrange the pita halves on the sheet and brush the edges lightly with olive oil if you want extra crispness.
- Add toppings: Spread a thin layer of pizza sauce over each pita, then top with mozzarella, pepperoni or vegetables, parmesan, and Italian seasoning.
- Bake: Cook for 8 to 10 minutes, until the cheese is melted and the edges are crisp. If you want a little browning, broil for 30 to 60 seconds at the end.
- Slice and serve: Cut into wedges or leave them whole. Give them a minute to cool so the cheese does not slide off in one hot sheet.
Tips and Variations
- Set up a topping bar. Teenagers are more likely to eat dinner if they picked some of the toppings.
- Use naan instead of pita. It makes the base a little softer and richer.
- Add a salad on the side if you want balance. The melts carry the meal either way.
Why Big, Filling Dinners Keep the Peace
A hungry teenager does not want a dainty plate and a lecture on portion control. They want dinner that feels like it can survive a hard day: protein, starch, salt, sauce, maybe something crisp at the edge. That’s why these meals lean on pasta, rice, potatoes, tortillas, noodles, buns, and cheese. Those are the things that make a plate look full and make a second trip to the fridge less likely.
A lot of families get tripped up by serving dinner that is technically balanced but emotionally small. A bowl of plain chicken and vegetables might be sensible. It is also the sort of plate that sends people hunting for chips later. These dinners work because they pair the lean stuff with something grounding — and yes, sometimes that grounding is a pile of cheese or a good sauce. That is fine. Dinner is allowed to be satisfying.
The other reason these meals work is texture. Teenagers notice texture more than people think. Crunchy chicken, crispy potatoes, toasted bread, charred vegetables, sticky glaze, melted cheese — those details keep the food alive on the plate. If a meal is soft all the way through, it gets tired fast.
And then there’s the leftover factor. A saucy pasta bake or a rice bowl can come back the next day without falling apart. That matters more than it gets credit for.
Essential Equipment for These Recipes

- Large sheet pan — useful for fajita bowls, chicken cutlets, and pizza pitas.
- 12-inch skillet or sauté pan — the workhorse for pasta skillets, stir-fries, and quesadillas.
- Deep skillet or Dutch oven — best for taco mac, pulled pork, chili, and casseroles.
- 9×13-inch baking dish — needed for ziti, enchilada casserole, and big-batch bakes.
- Medium saucepan — handy for sauces, warming salsa, or melting cheese gently.
- Large pot for pasta — use a roomy one so noodles boil evenly.
- Instant-read thermometer — the easiest way to keep chicken and salmon from drying out.
- Tongs — useful for turning cutlets, tossing noodles, and serving hot meat.
- Mixing bowls — for sauces, breading, slaw, and quick marinades.
- Sharp chef’s knife — thin slices matter for steak, peppers, onions, and potatoes.
- Cutting board — one dedicated board for produce and one for meat keeps things calmer.
- Box grater — fresh-shredded cheese melts better than pre-shredded in many of these dishes.
- Foil or parchment paper — makes sheet-pan cleanup much easier.
- Airtight containers — leftovers stay better when they are portioned fast.
Smart Shopping for Hungry Teenagers
A store run for teen dinners goes smoother when you buy with the final plate in mind, not just the ingredient list. Start with proteins that stay forgiving: chicken thighs, ground beef, sausage, pork shoulder, salmon, and rotisserie chicken are all useful here because they handle strong seasoning and hold up to reheating.
Look at the starch first. Pasta shapes with ridges, rice, russet potatoes, slider buns, tortillas, pitas, and sub rolls are the base pieces that make these dinners feel substantial. If the bread or pasta is flimsy, the whole meal can feel underpowered. I also like buying one extra starch than I think I need. Teenagers eat in ways that make math look foolish.
For pantry items, low-sodium broth, soy sauce, crushed tomatoes, beans, enchilada sauce, and pizza sauce are worth having around. They keep the recipes flexible and stop everything from tasting too salty by the end. Shredding cheese from a block takes a little longer, but it melts cleaner and usually tastes better. Canned beans and frozen vegetables are not cheating; they are practical.
On the produce side, buy onions, garlic, peppers, limes, scallions, cucumbers, potatoes, and cabbage with a little overlap between recipes. That is how you reduce waste. If you only need half an onion, use the rest in a wrap or stir-fry the next night. Teen dinners work better when shopping feels like building a system instead of starting from zero every time.
How to Serve These Recipes
Presentation: Pile food high and keep the components visible. Bowls, sliders, wraps, and casseroles all look better when there is a clear top layer — cheese, scallions, herbs, sauce, or crunchy crumbs — instead of a flat, pale surface.
Accompaniments: Keep the sides simple: a green salad, sliced fruit, cucumber salad, roasted broccoli, garlic bread, tortilla chips, or a few pickle spears. For the richer dinners, something crisp and acidic on the side helps keep the meal from feeling too heavy.
Portions: Most of these recipes serve 4 to 6, but hungry teenagers often behave as if the recipe count is a suggestion. If the crowd is large or very active, add a side of rice, bread, or potatoes before you increase everything else. That is the cheapest way to stretch dinner.
Beverage Pairing: Iced tea, sparkling water, lemon-lime soda, milk, or cold water with lime all fit these meals well. For spice-heavy dishes, something cold and plain is usually better than a sweet drink that adds more weight.
Additional Tips and Flavor Boosters
Flavor Enhancement: A finishing hit of acid changes a lot of these dinners. Lime on fajitas, vinegar in slaw, pickles on cheeseburger pasta, or a squeeze of lemon on salmon wakes the whole plate up and keeps the richness from flattening out.
Customization: Put toppings on the table instead of hiding them in the pan. Hot sauce, scallions, herbs, sour cream, shredded lettuce, crushed tortilla chips, and extra cheese let each person steer the meal a little. That matters more than it sounds.
Serving Suggestions: Add one crunchy thing to anything soft. Toasted bread with spaghetti, slaw with sliders, tortilla chips on taco mac, or sesame seeds on rice bowls gives the plate some life. A dinner with nothing crisp in it tends to get boring faster.
Make-It-Yours: For a milder house, lean on cheese, rice, potatoes, and mild sauces. For a heat-loving crew, keep jalapeños, buffalo sauce, chili flakes, and hot sauce within reach. For dairy-free diners, salsa, avocado, olive oil, and seasoned beans can carry a lot of the flavor load without needing a cheese-heavy finish.
Make-Ahead, Storage, and Reheating Guidance
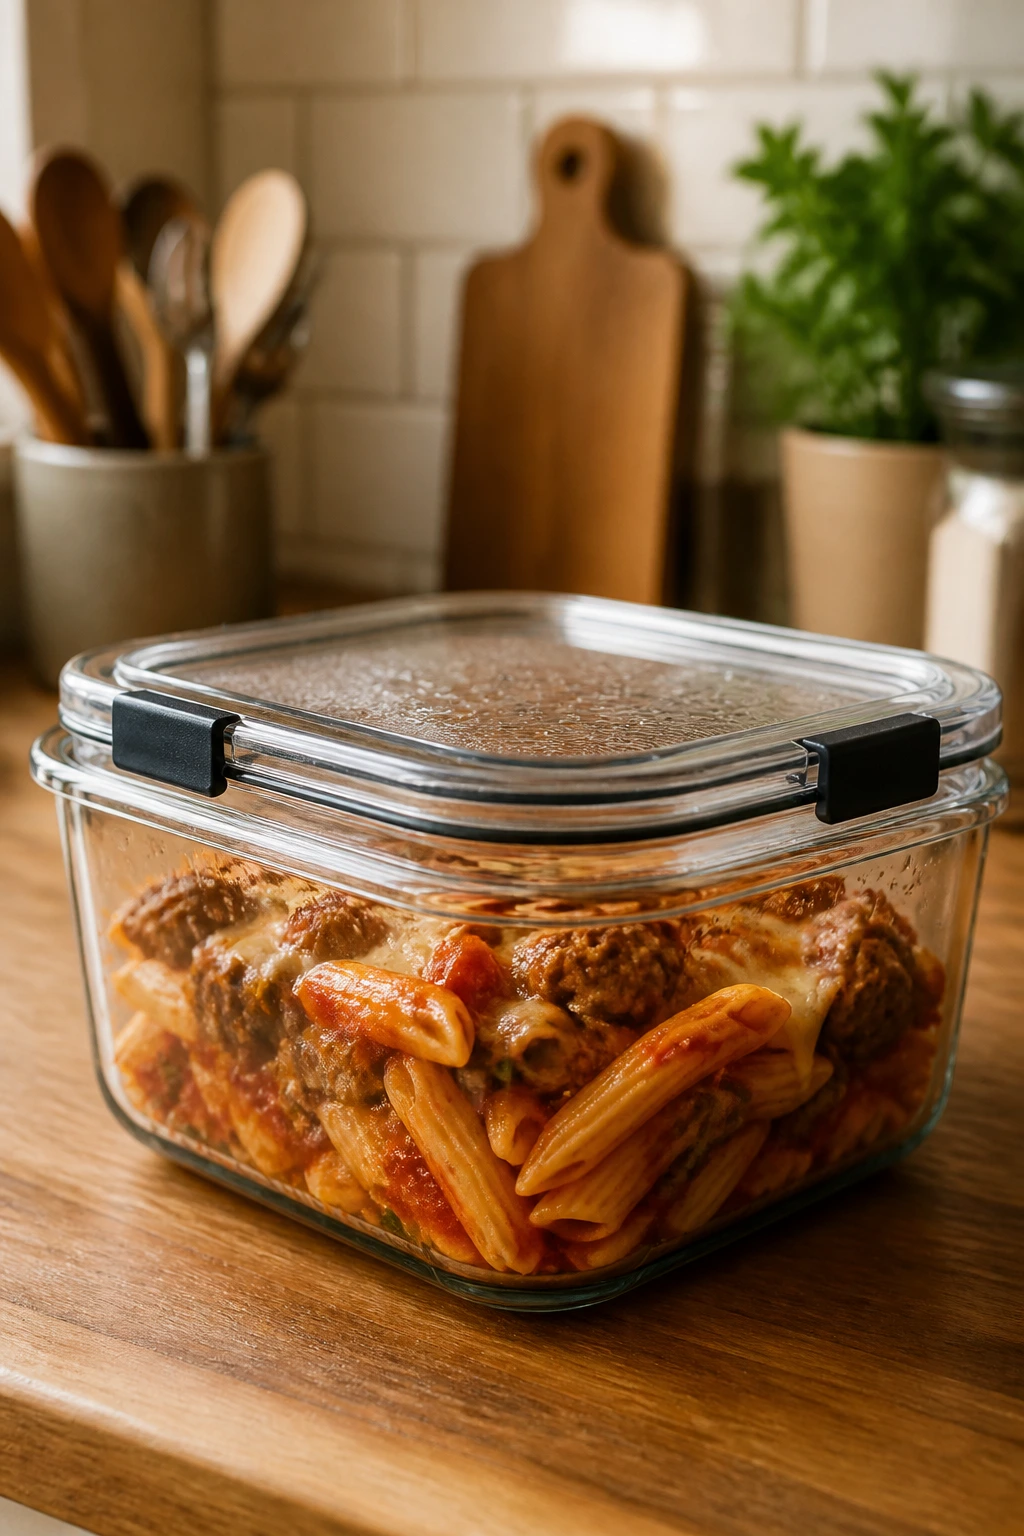
Most of these dinners keep well, but they do not all behave the same way. Saucy pasta dishes like baked ziti, spaghetti with meat sauce, taco mac, and enchilada casserole usually hold 3 to 4 days in the fridge when stored in airtight containers. They also freeze well for up to 2 months, though the texture of the pasta gets softer after thawing.
Rice bowls and stir-fries are best if you store the parts separately. Keep rice, protein, and vegetables in different containers for 3 to 4 days refrigerated so the vegetables do not go limp and the rice does not turn dense. Reheat rice with a tablespoon of water and cover it loosely; that little bit of steam helps bring it back without drying it out.
Wraps, quesadillas, sliders, and subs are fine for short storage, usually 1 to 2 days in the fridge. Reheat chicken wraps and quesadillas in a skillet or air fryer if you want the outside to crisp again. Microwaves work, but they soften the tortilla and the bread, and there’s no elegant way around that.
Pulled pork and chili are the strongest make-ahead winners in the bunch. Pulled pork keeps 4 days in the fridge and up to 3 months in the freezer if you pack it with some of its sauce. Chili also freezes well in individual portions, which is useful when one teen is hungry and the rest of the house is behaving like it has suddenly become a monastery.
Loaded baked potatoes are best fresh, but the chili topping can be made ahead and reheated on the stovetop. If you want the potatoes to hold up, re-crisp them in the oven at 400°F (205°C) for a few minutes instead of microwaving them into a sad, soft middle.
Variations and Adaptations to Try
Gluten-Free Plate Swap: Use gluten-free pasta in the skillet meals, corn tortillas in the enchiladas and breakfast tacos, and tamari instead of regular soy sauce in the stir-fry bowls. Most of the recipes here adapt cleanly because the flavor is coming from seasoning, sauce, and technique rather than flour-heavy extras.
Dairy-Light Version: Skip the cheese where it is not essential, or use a smaller amount as a finishing layer instead of baking it into the dish. Salsa, olive oil, avocado, and well-seasoned beans can carry a lot of flavor in their place. The food will taste a little sharper, which is not a bad thing.
Vegetarian Night In: Swap the meat in taco mac, enchilada casserole, chili potatoes, or cheeseburger pasta for black beans, lentils, chopped mushrooms, or a meatless crumble. Use broth with good flavor and add a little extra cumin, smoked paprika, or tomato paste so the pan still tastes full.
Lower-Sodium Pantry Fix: Choose low-sodium broth, no-salt-added tomatoes, reduced-sodium soy sauce, and a lighter hand with cheese and seasoning blends. Then lean on garlic, onion, citrus, vinegar, and herbs to keep the food from tasting flat. You can get a lot of flavor back that way.
Spice-Lover Upgrade: Add jalapeños, chipotle in adobo, hot sauce, crushed red pepper, or pepper jack cheese to the recipes that can take heat. The easiest places to turn up the heat are fajita bowls, buffalo quesadillas, taco mac, and enchiladas. Heat should be a layer, not a dare.
Extra-Big Appetite Build: Put out rice, bread, chips, or potatoes alongside the main dish so anyone with a serious appetite can pile on without you doubling the entire recipe. That is cheaper than overcooking extra protein, and it gives the table a little more flexibility.
Common Mistakes to Avoid
Making the plate too small: Teen dinners need a real starch anchor. If you serve only protein and vegetables, the meal can feel unfinished and the snack hunt starts early. The fix is simple: build in rice, pasta, tortillas, potatoes, bread, or noodles.
Overcooking the proteins: Chicken breasts, salmon, and thin steak all dry out fast if you walk away. Use an instant-read thermometer and pull chicken at 165°F (74°C), salmon when it flakes but still looks moist, and steak while it is still a little pink in the center if that’s the cut. A thermometer is cheaper than replacing dinner.
Forgetting acid and crunch: Rich food without a sharp edge gets muddy. Add lime, vinegar, pickles, salsa, slaw, scallions, or crisp vegetables at the end so the whole plate tastes awake instead of heavy.
Using one texture over and over: A pan of soft food can feel filling and dull at the same time. The fix is a topping or side that brings contrast — toasted bread, tortilla chips, browned cheese, cucumber slices, or a crisp salad.
Trying to stretch sauce too far: Thin sauce over too much pasta or rice leaves the meal looking generous but tasting weak. If the sauce seems light, reduce it a little longer or add a spoonful of cheese, cream cheese, or tomato paste so it coats instead of puddling.
Not planning leftovers: A lot of these meals are better if you portion them right away. Put leftovers into shallow containers while the food is still warm, and the next-day reheat will be far better. Leave a giant pot in the fridge and it cools unevenly; that is how dinner loses its charm.
Frequently Asked Questions

What makes a dinner filling enough for a teenager?
A filling teen dinner usually needs protein plus a real starch. Rice, pasta, potatoes, noodles, tortillas, or bread make the meal feel complete, and a sauce or topping keeps it from eating dry.
How do I keep chicken or beef from drying out when I reheat it?
Reheat gently and add moisture back in. Cover chicken with foil in the oven, warm beef with a spoonful of sauce, and use the stovetop or air fryer when you want crisp edges again.
Can I make these dinners ahead of time?
Yes, and some of them improve after resting. Baked ziti, meat sauce, chili potatoes, pulled pork, taco mac, and enchilada casserole all hold up well when made earlier in the day or even the day before.
What if my teen does not like vegetables?
Hide the vegetables in familiar places. Finely diced onion in sauces, peppers roasted with fajitas, broccoli slaw in noodles, and shredded lettuce in wraps usually slip in without a fight. Put the more obvious vegetables on the side instead of forcing them into the main pan.
Can I swap ground turkey for beef in these recipes?
Usually, yes. Ground turkey works well in taco mac, chili potatoes, enchilada casserole, and even cheeseburger pasta if you season it well. Add a little olive oil if the turkey is very lean so the pan does not taste dry.
What is the best way to stretch one dinner to feed more people?
Add a cheap starch before you add more meat. Extra rice, pasta, tortillas, potatoes, or buns stretches the meal better than trying to squeeze a little more protein out of the pan.
How do I keep wraps and quesadillas from getting soggy?
Use less sauce than you think you need, let hot fillings cool for a minute before assembly, and serve them right away. If you need to hold them, keep the wet ingredients separate and add them at the table.
Can I use an air fryer or sheet pan instead of frying on the stove?
Absolutely. Chicken cutlets, fajita vegetables, salmon, and pizza pita melts all do well on a sheet pan, and the air fryer is great for anything you want to crisp fast. Just avoid crowding the basket or the food steams instead of browning.
The Table Gets Quiet
A good teen dinner does not need to be fancy, and honestly, I trust it more when it isn’t. What matters is that it looks full, tastes bold, and survives the last-minute requests for “a little more cheese” or “another piece of bread” without falling apart.
Pick one of these, keep the ingredients on hand, and make the easy swaps that fit your house. The best dinners for hungry teenagers are the ones that feel generous before the first bite and still hold up when someone asks for leftovers later.