
Memorial Day dinners for a crowd have a way of exposing every weak point in a host’s plan. The food has to survive a hungry line, a moving patio conversation, and at least one person who shows up with a plus-one and a folding chair. It also has to taste like the day itself: smoky, generous, a little relaxed, and worth lingering over when the sun drops low and the plates come back empty.
That is why crowd dinners need a different kind of thinking. A dish that looks elegant on a photo can fall apart fast when it sits for ten minutes. A fragile cut of meat can dry out while you’re still hunting for serving tongs. The recipes that matter here are the ones with a bit of built-in forgiveness: pork that shreds instead of slices, chicken thighs that stay juicy, baked pastas that hold heat, and one-pan meals that don’t ask for constant babysitting.
I lean toward recipes that make the table look full without making the cook feel trapped. That means plenty of make-ahead room, sensible ingredients, and enough flavor to carry a big room. It also means a few dishes that can be served hot, warm, or at room temperature without turning sad. That’s the real test.
Why You’ll Love These Crowd-Size Memorial Day Dinners

- Built for big appetites: Every recipe here feeds a dozen people or scales up without drama, so you’re not stuck doubling a dish at the last minute.
- Friendly to busy grills and crowded ovens: Some recipes live on the stove, some on the grill, and some are perfectly happy waiting their turn in a hot oven.
- Easy to prep ahead: Several of these dinners taste better after a little rest, which is exactly what you want when the door keeps opening.
- Comfort food without boredom: You get smoky barbecue, bright citrus, baked pasta, sliders, bowls, and one-pot meals that hold interest all the way to the last bite.
- Good at standing around: These are the dishes that can sit for a few minutes while you set out plates, refill drinks, or locate the serving spoon someone walked off with.
- Flexible for mixed crowds: Meat lovers, pasta people, and the one vegetarian who always gets handed corn can all land on something satisfying here.
1. Slow Cooker Smoky BBQ Pulled Pork Sandwiches

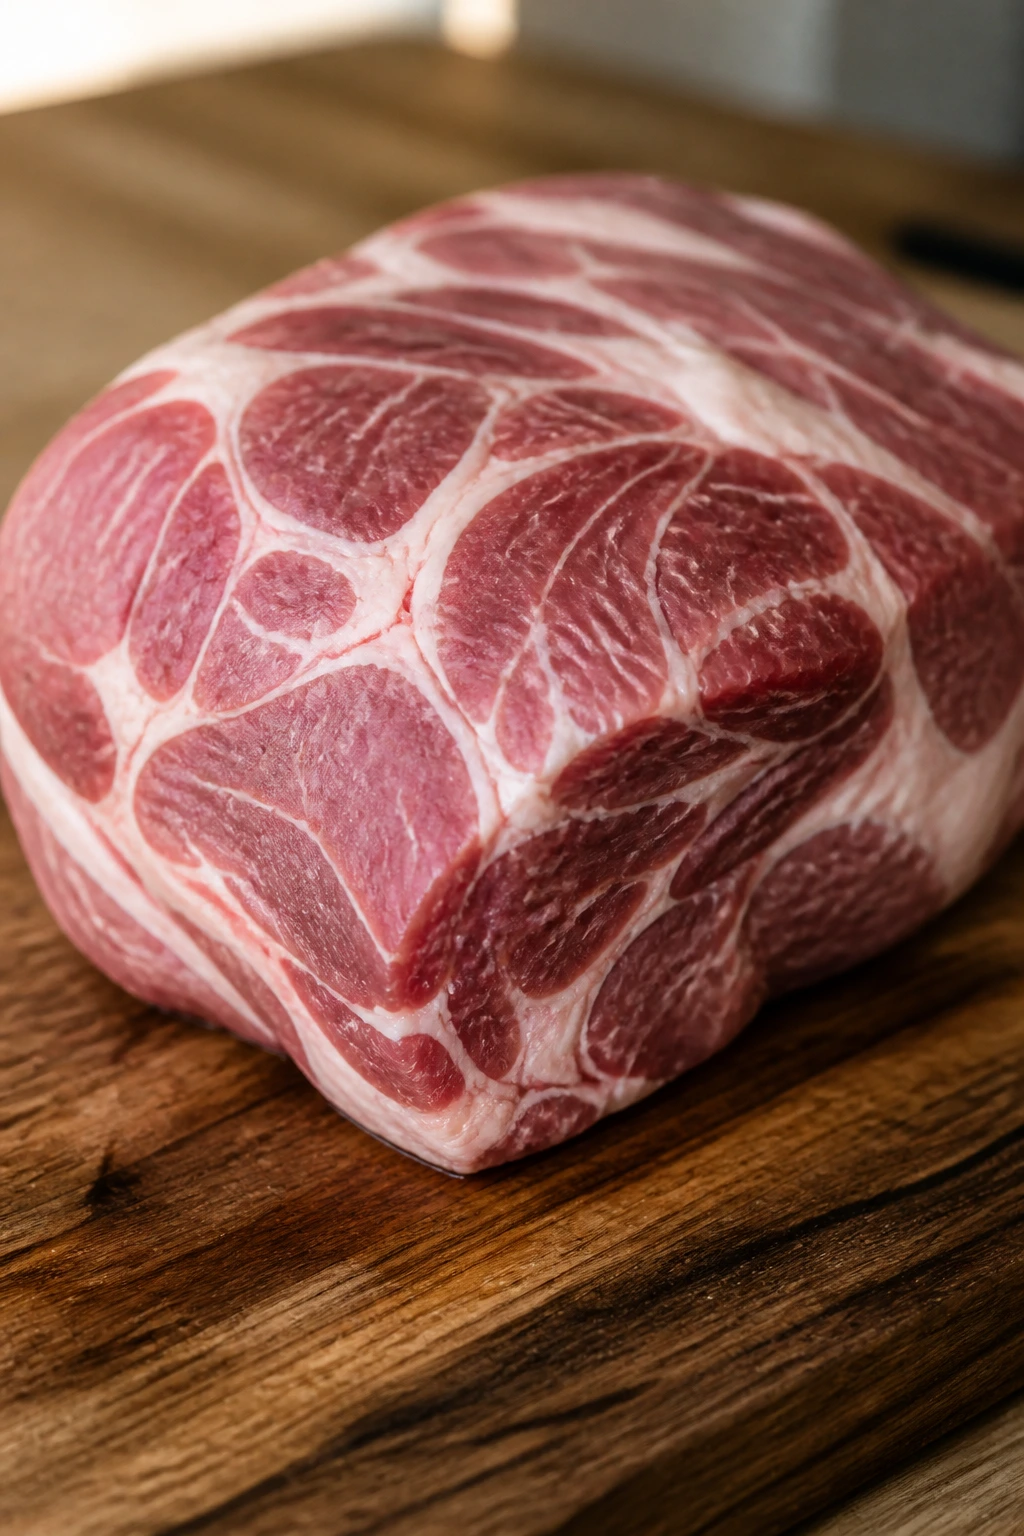
Pulled pork is the easiest way to make a table look full without making yourself miserable. The whole point is softness, smoke, and a pile of meat that shreds into glossy strands and soaks up sauce like it was born for the job. On a holiday table, that matters.
What I like most is how little attitude this recipe has. Pork shoulder does not need a perfect grill mark or a delicate hand. It needs seasoning, time, and a lid that stays on. Feed it enough salt and a little vinegar, and it turns into the kind of filling people keep piling onto buns long after they said they were done.
Why It Works
Pork shoulder is marbled enough to handle long, gentle cooking, which is exactly why it stays juicy after 8 hours in a slow cooker. The fat melts, the connective tissue loosens, and the meat turns tender enough to pull apart with two forks. A little apple cider vinegar keeps the flavor bright so the barbecue sauce does not taste flat or sweet-heavy. The result is sturdy enough for a crowd and forgiving enough for a host who is juggling seven other things.
Key Ingredients
- 1 (4 1/2- to 5-pound) boneless pork shoulder, trimmed of excess surface fat; this is the main event and the cut that gives you the best shreds.
- 2 tablespoons packed brown sugar; just enough to round out the smoke without turning the rub sweet.
- 1 tablespoon kosher salt; the pork needs a proper salt level if you want the inside to taste seasoned, not merely sauced.
- 2 teaspoons smoked paprika; this gives the meat that deep barbecue color and a warm, campfire note.
- 1 teaspoon garlic powder and 1 teaspoon onion powder; both support the rub without burning.
- 1 cup apple cider vinegar; the acid keeps the pork lively and balances the sauce.
- 1/2 cup low-sodium chicken broth; it creates steam and keeps the slow cooker from running dry.
- 1 cup barbecue sauce, plus more for serving; use one you actually like eating straight from the spoon.
- 12 soft sandwich buns; sturdy, but not so crusty they fall apart under the meat.
- 3 cups coleslaw or quick slaw; this gives the sandwich crunch and a cold, sharp contrast.
Quick Steps
- Mix the rub: Stir together the brown sugar, salt, smoked paprika, garlic powder, onion powder, black pepper, and cayenne in a small bowl.
- Season the pork: Pat the pork shoulder dry, rub it all over with the spice mix, and press the seasoning into the surface so it sticks.
- Set up the slow cooker: Scatter the sliced onion in the bottom of a 6- to 8-quart slow cooker, pour in the vinegar and broth, then place the pork on top.
- Cook low and slow: Cover and cook on low for 8 to 9 hours, or until the pork shreds easily with a fork and reaches about 195°F to 205°F in the thickest part. Do not rush this on high heat; you want tenderness, not dry edges.
- Shred and sauce: Transfer the pork to a bowl, remove any large pockets of fat, shred it, then stir in the barbecue sauce and a few spoonfuls of the cooking liquid if it looks dry.
- Assemble the sandwiches: Split and warm the buns, pile on the pork, top with slaw, and add extra sauce on the side for people who like it messier.
Tips and Variations
- Make-ahead move: Cook the pork a day early, chill it in its juices, and reheat it gently in a covered pot over low heat.
- Heat option: Add more cayenne or a spoonful of chipotle in adobo to the rub if your crowd likes smoke with a little bite.
- Serving trick: Toast the buns lightly so they do not collapse under the sauce.
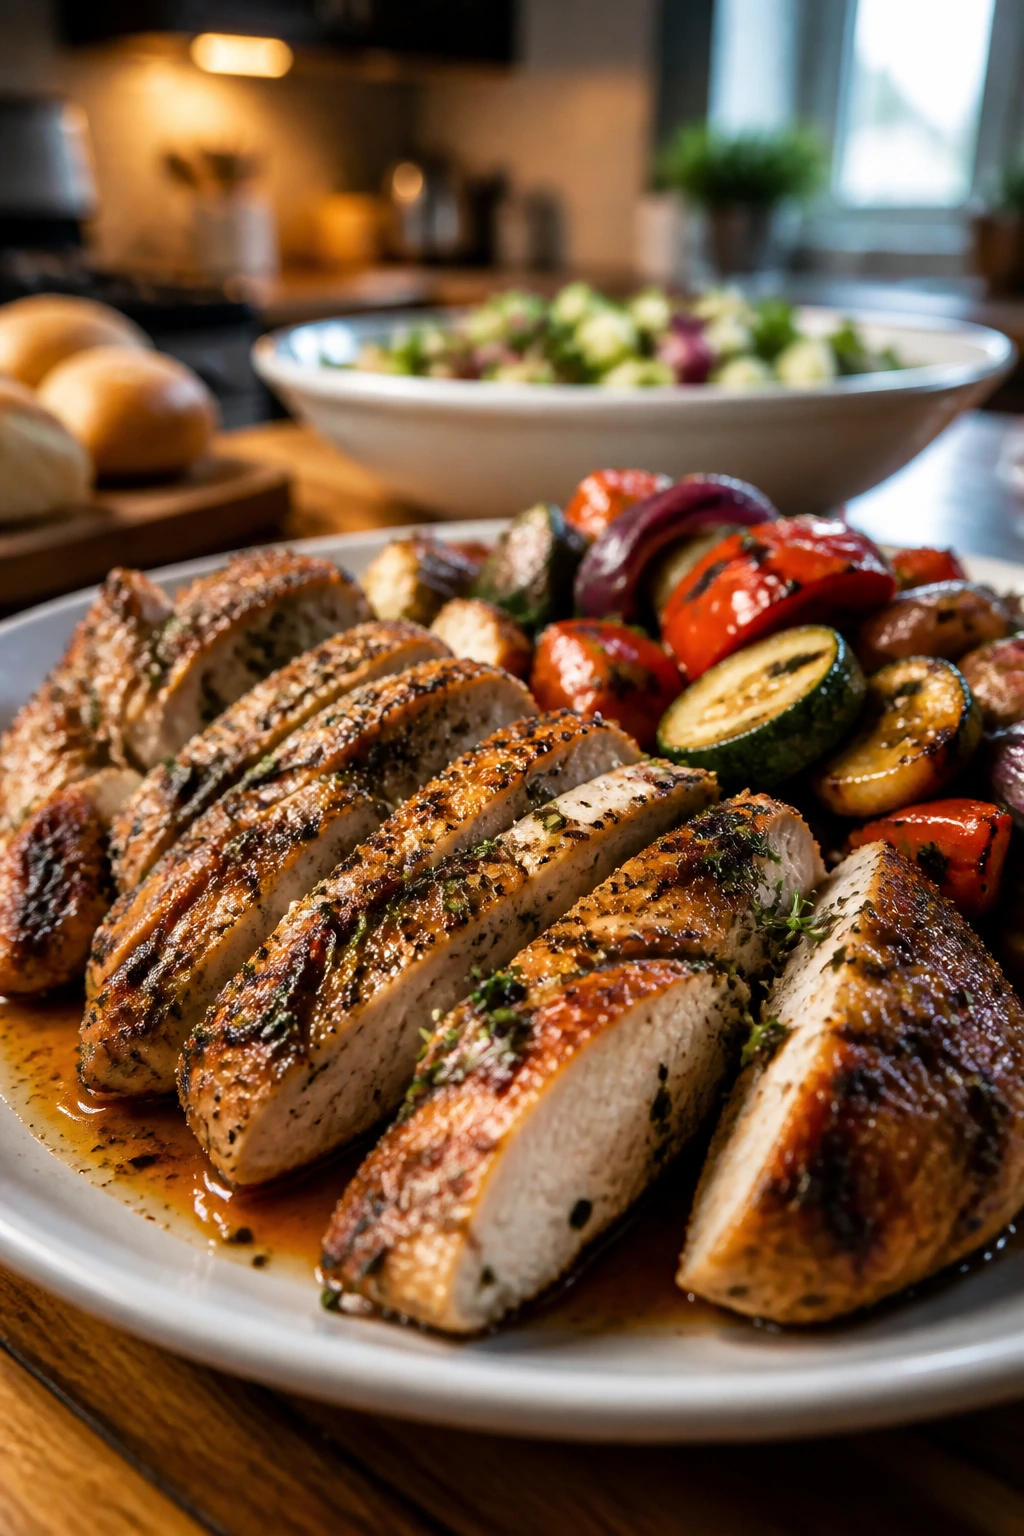
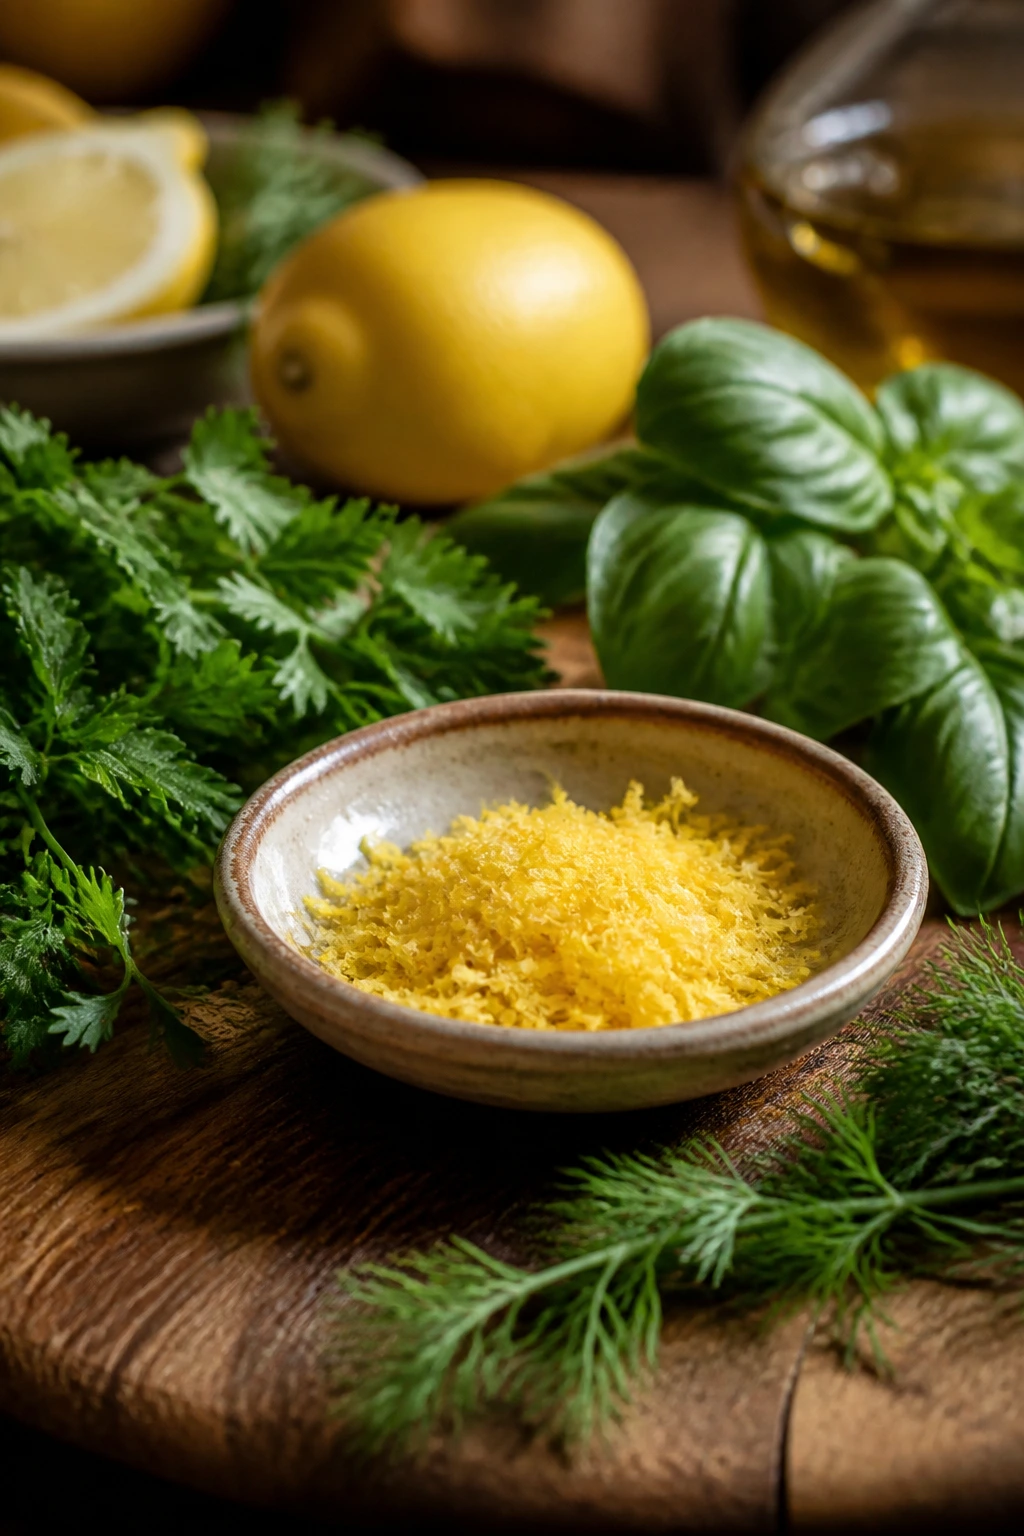
2. Grilled Lemon-Herb Chicken Thighs
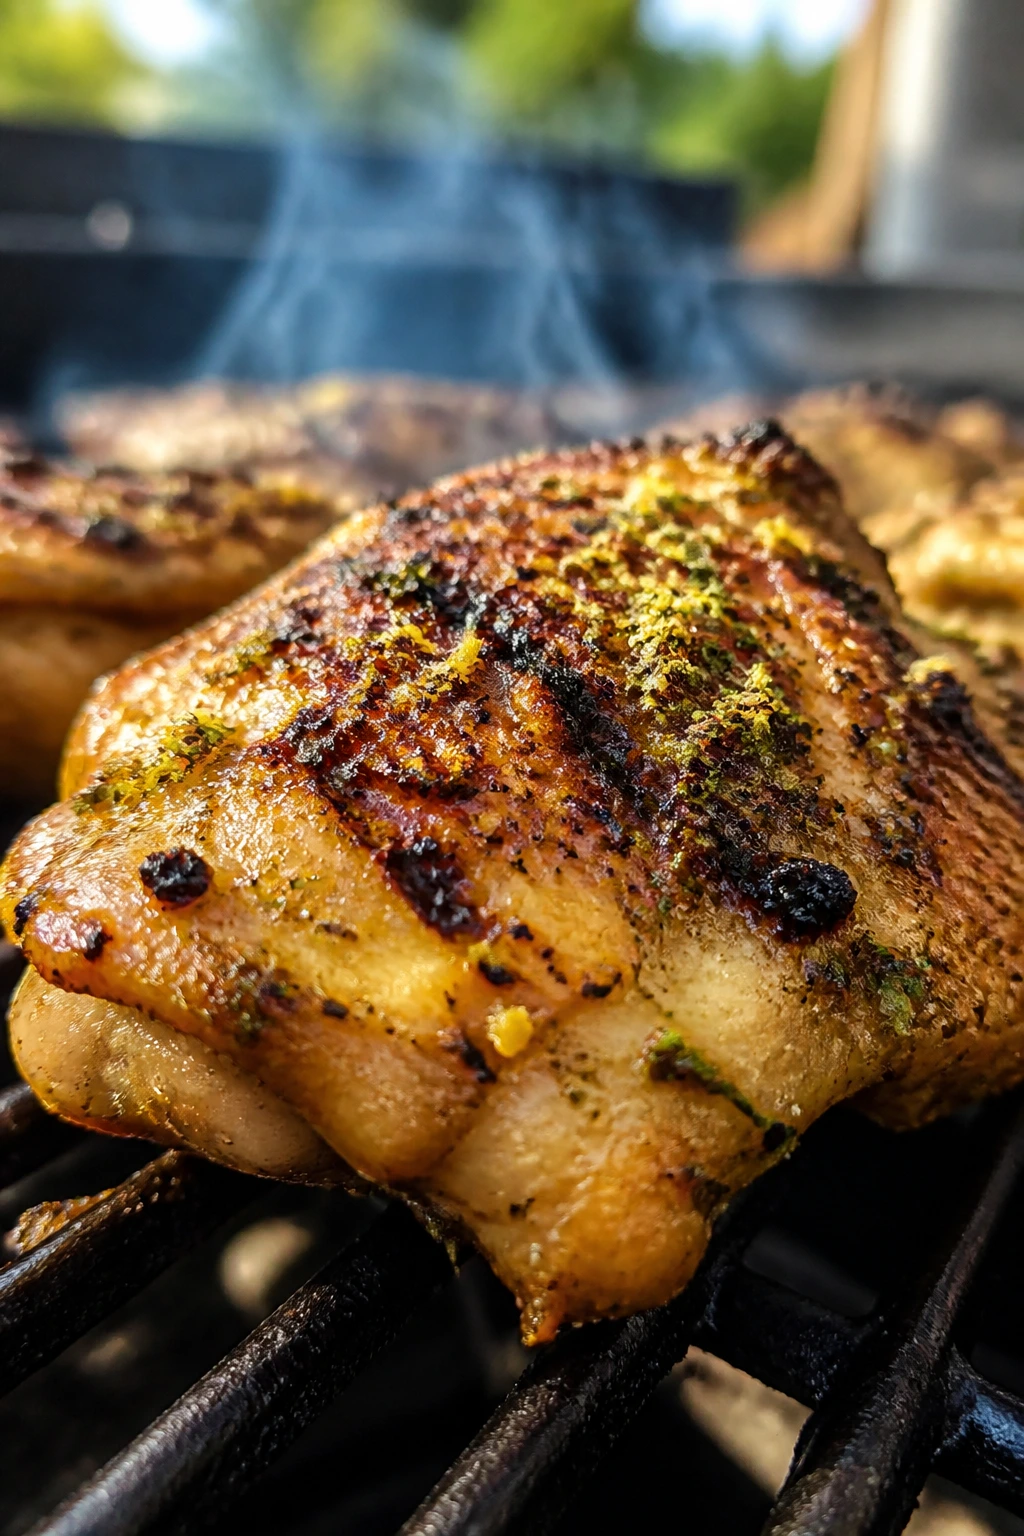
What do you feed people when the grill is busy and the clock is already nudging past dinner? Chicken thighs, if you know what you’re doing. They are the friendlier cut, the one that can take a little char without drying out into disappointment.
Lemon, garlic, rosemary, and thyme give the meat that bright backyard smell that turns heads before the platter lands. The skin gets crisp, the fat renders, and the edges pick up just enough smoke to feel earned. This is the sort of chicken that disappears fast because it tastes like someone paid attention.
Why It Works
Bone-in, skin-on chicken thighs are built for a crowd because they keep their texture even if they sit for ten minutes after grilling. The skin protects the meat, the dark meat stays juicy, and the lemon-herb marinade keeps the flavor clean instead of heavy. Grilling over medium heat lets the skin crisp while the inside cooks through to 175°F without drying out. It is one of those recipes that feels more generous than the ingredient list suggests.
Key Ingredients
- 4 pounds bone-in, skin-on chicken thighs, patted dry; dry skin is the difference between crisp and rubbery.
- 3 tablespoons olive oil; it carries the herbs and helps the skin brown.
- Zest and juice of 2 lemons; use both for brightness and a little bite.
- 4 garlic cloves, grated or minced; grated garlic clings better to the chicken than chopped garlic.
- 1 tablespoon Dijon mustard; it helps the marinade stay emulsified and adds depth.
- 2 teaspoons kosher salt and 1 teaspoon black pepper; simple seasoning, done properly.
- 2 teaspoons chopped fresh rosemary and 2 teaspoons chopped fresh thyme; these are the herb backbone.
- 1 tablespoon chopped parsley; add it at the end for a fresh finish.
- Lemon wedges for serving; people always want one more squeeze.
Quick Steps
- Make the marinade: Whisk olive oil, lemon zest, lemon juice, garlic, Dijon, salt, pepper, rosemary, and thyme in a large bowl.
- Coat the chicken: Add the chicken thighs and turn them until every piece is glossy and well coated. Chill for at least 30 minutes or up to 4 hours.
- Preheat the grill: Set the grill for medium heat, around 375°F to 400°F, and oil the grates well.
- Grill skin-side down first: Lay the thighs skin-side down and cook for 6 to 8 minutes, until the skin is deeply golden and releases easily.
- Finish on the second side: Flip the thighs and grill 8 to 10 minutes more, with the lid closed, until the thickest part hits 175°F and the juices run clear.
- Rest and serve: Let the chicken rest 5 to 10 minutes, sprinkle with parsley, and send it out with lemon wedges.
Tips and Variations
- If the grill is crowded: Start the thighs on a hot oven-safe tray, then finish them on the grill for color.
- Flavor move: Add a pinch of crushed fennel seed to the marinade for a quieter, almost sausage-like warmth.
- Serving trick: Slice one thigh before serving to check the color if you are unsure about doneness.
3. Sheet-Pan Garlic Butter Steak and Potatoes
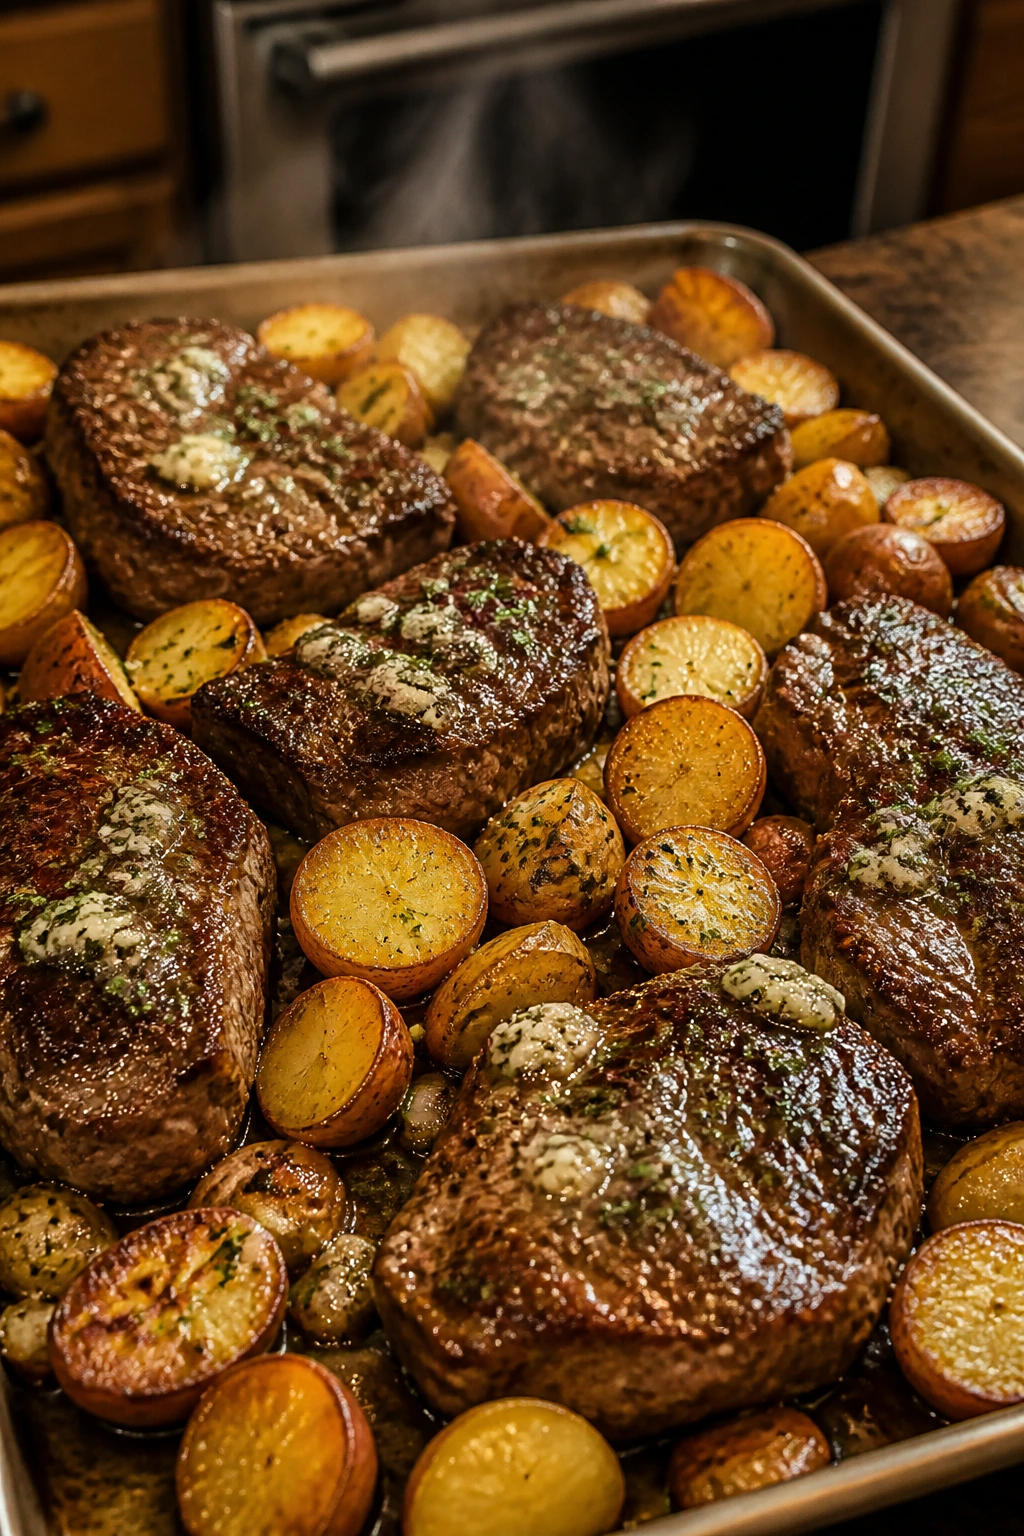
A sheet pan of steak and potatoes has a useful, almost unfair quality: it looks like effort, but the oven does most of the heavy lifting. The potatoes get crisp edges, the steak stays juicy if you time it properly, and the garlic butter seeps into every corner. That is a crowd dinner I can get behind.
This is also the recipe for hosts who want something a little more substantial than burgers without standing over a flame all night. It feels hearty in the best way. Not fancy. Just satisfying.
Why It Works
Sirloin gives you good beef flavor without the cost and fuss of a premium cut, and cutting it into pieces means faster cooking and easier serving. The potatoes go in first because they need a head start to become crisp and tender, while the steak joins later and cooks quickly in the hot pan. Garlic butter is added at the end so it perfumes the meat instead of burning in the oven. The green beans or asparagus keep the tray from feeling heavy, which matters when the rest of the table is already full of rich food.
Key Ingredients
- 3 pounds baby Yukon Gold potatoes, halved; their waxy texture holds up better than russets in a sheet-pan roast.
- 2 1/2 pounds sirloin steak, cut into 1 1/2-inch cubes; choose a cut with visible marbling.
- 3 tablespoons olive oil; this helps the potatoes crisp before the butter goes in.
- 4 tablespoons unsalted butter, melted; the finish should taste rich but not greasy.
- 4 garlic cloves, minced; add at the end of cooking for the best aroma.
- 2 teaspoons kosher salt and 1 teaspoon black pepper; season the potatoes well.
- 2 teaspoons Italian seasoning; it pulls the pan together.
- 1 pound green beans, trimmed; they roast quickly and add color.
- 1 tablespoon chopped parsley; it brightens the finished tray.
Quick Steps
- Heat the oven: Preheat to 425°F and line a large sheet pan with parchment or foil for easier cleanup.
- Roast the potatoes first: Toss the potatoes with olive oil, half the salt, pepper, and Italian seasoning, then spread them cut-side down on the sheet pan. Roast for 20 minutes.
- Season the steak: Toss the steak cubes with the melted butter, garlic, and the remaining salt.
- Add the green beans and steak: Pull the pan from the oven, flip the potatoes, add the steak and green beans, and spread everything in one layer. If the pan is packed too tightly, use a second sheet pan; overcrowding makes steam.
- Finish roasting: Return the pan to the oven for 10 to 12 minutes, until the steak is browned and the potatoes are tender at the center.
- Rest briefly and serve: Let the tray sit for 5 minutes, then sprinkle parsley over the top and serve straight from the pan.
Tips and Variations
- Doneness note: If you prefer medium, pull the steak when it reaches 135°F; it will climb a little while resting.
- Flavor upgrade: Stir a teaspoon of Dijon into the melted butter for a faint tang.
- Shortcut: Use pre-cut steak tips if you are short on knife time, but keep the pieces large enough not to overcook.
4. Classic Cheeseburger Sliders with Secret Sauce
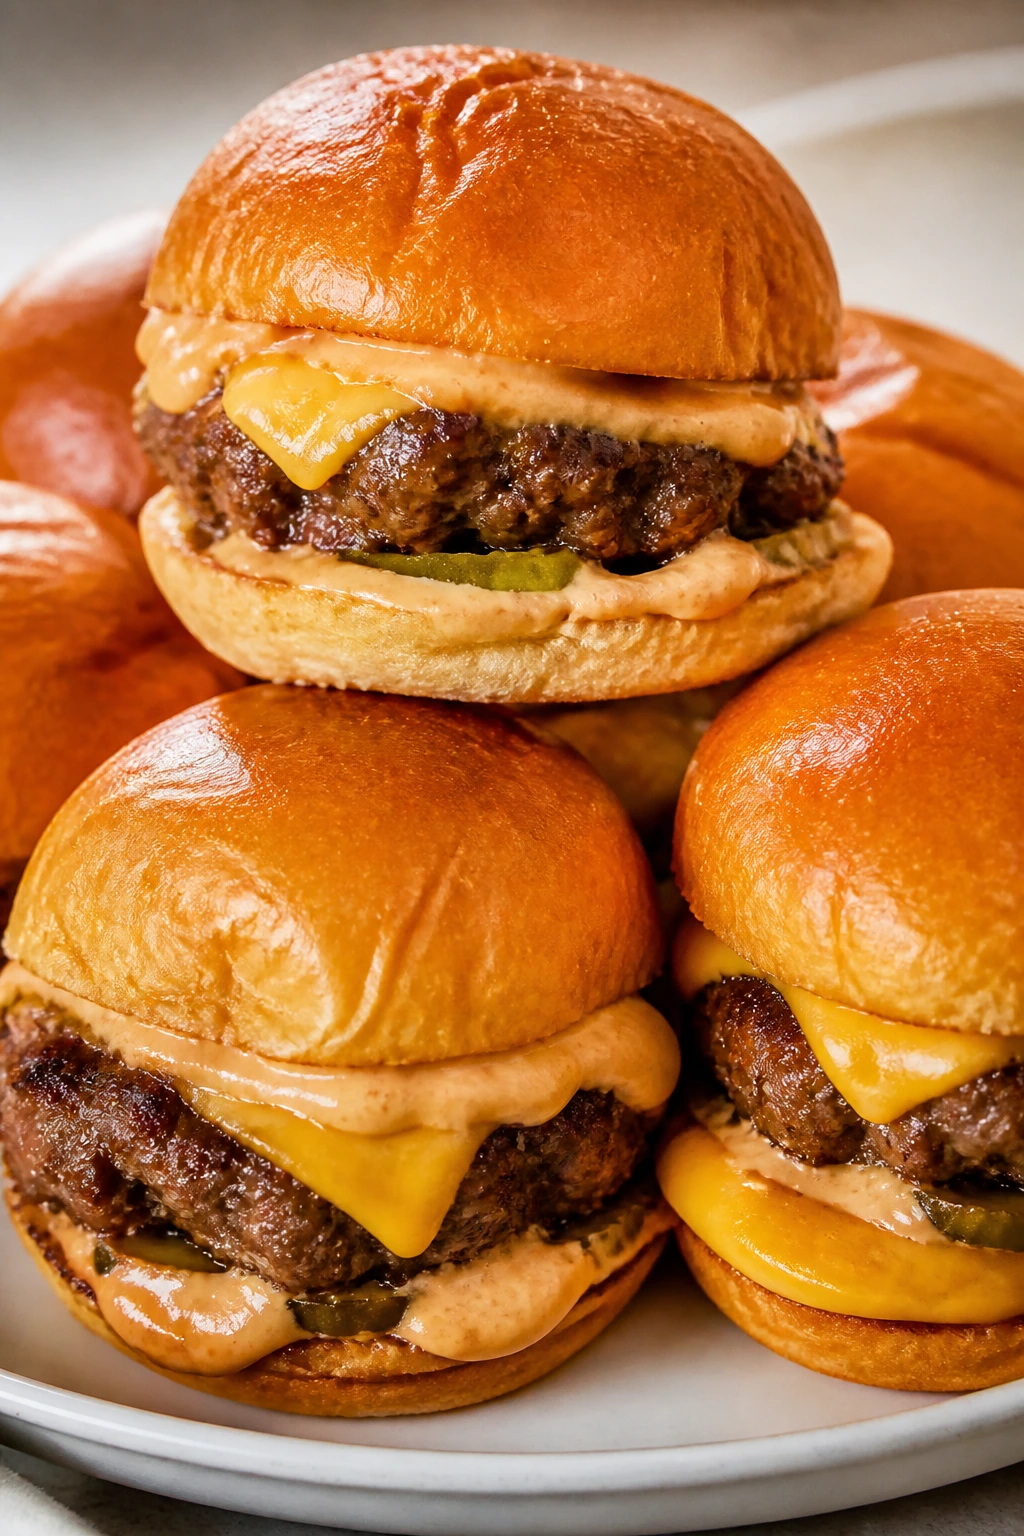
Sliders are often treated like filler food. That misses the point. A good slider gives you a burger with the focus dialed in: juicy beef, melted cheese, a soft bun, and enough sauce to make the whole thing feel complete in three bites.
For a crowd, they are hard to beat because people can grab two without needing a fork or a sit-down moment. They also play nicely with other dishes on the table. A plate of sliders next to a bowl of slaw and a stack of napkins is basically a holiday table in shorthand.
Why It Works
Ground beef cooks fast, and forming smaller patties gives you more control over the final texture. Using 80/20 beef keeps the meat juicy instead of dry, while the cheese melts fast enough to bind everything together. The secret sauce brings in the pickle-mayo-ketchup flavor profile people already expect from a good burger, so the sliders taste familiar without being dull. They are also easy to scale, which is the real trick when guests arrive in waves.
Key Ingredients
- 3 pounds 80/20 ground beef; the fat content matters here.
- 1 small yellow onion, grated; it adds moisture and a little sweet sharpness.
- 1 tablespoon Worcestershire sauce; this deepens the beef flavor.
- 2 teaspoons kosher salt and 1 teaspoon black pepper; season the meat mix evenly.
- 18 slider buns; choose soft buns that do not crack when pressed.
- 12 slices cheddar or American cheese; both melt cleanly.
- 3 tablespoons butter, melted; useful for toasting the buns.
- 1 teaspoon sesame seeds; optional, but they make the tops look finished.
For the Secret Sauce:
- 1/2 cup mayonnaise
- 2 tablespoons ketchup
- 1 tablespoon dill pickle relish
- 1 teaspoon yellow mustard
- 1 teaspoon pickle juice
Quick Steps
- Mix the sauce: Stir together the mayonnaise, ketchup, relish, mustard, and pickle juice until smooth, then chill.
- Form the patties: Divide the beef into 18 portions and shape them into thin patties slightly wider than the buns.
- Season just before cooking: Sprinkle both sides with salt and pepper right before the patties hit the heat.
- Cook the burgers: Grill or sear the patties over medium-high heat for 2 to 3 minutes per side, until the centers reach 160°F. Do not press them with a spatula or you’ll lose the juices.
- Melt the cheese and toast the buns: Add cheese to the patties for the last minute, then brush the buns with melted butter and toast the cut sides briefly.
- Assemble fast: Spread sauce on both bun halves, add a patty and pickles, then close and serve while the cheese is still soft.
Tips and Variations
- Batch-cooking trick: Cook the patties on two sheet pans in a hot oven if the grill is already busy.
- Flavor twist: Swap cheddar for pepper jack if you want a little heat.
- Crowd note: Keep the patties thin; thick sliders turn into tiny cheeseburgers that are harder to serve cleanly.
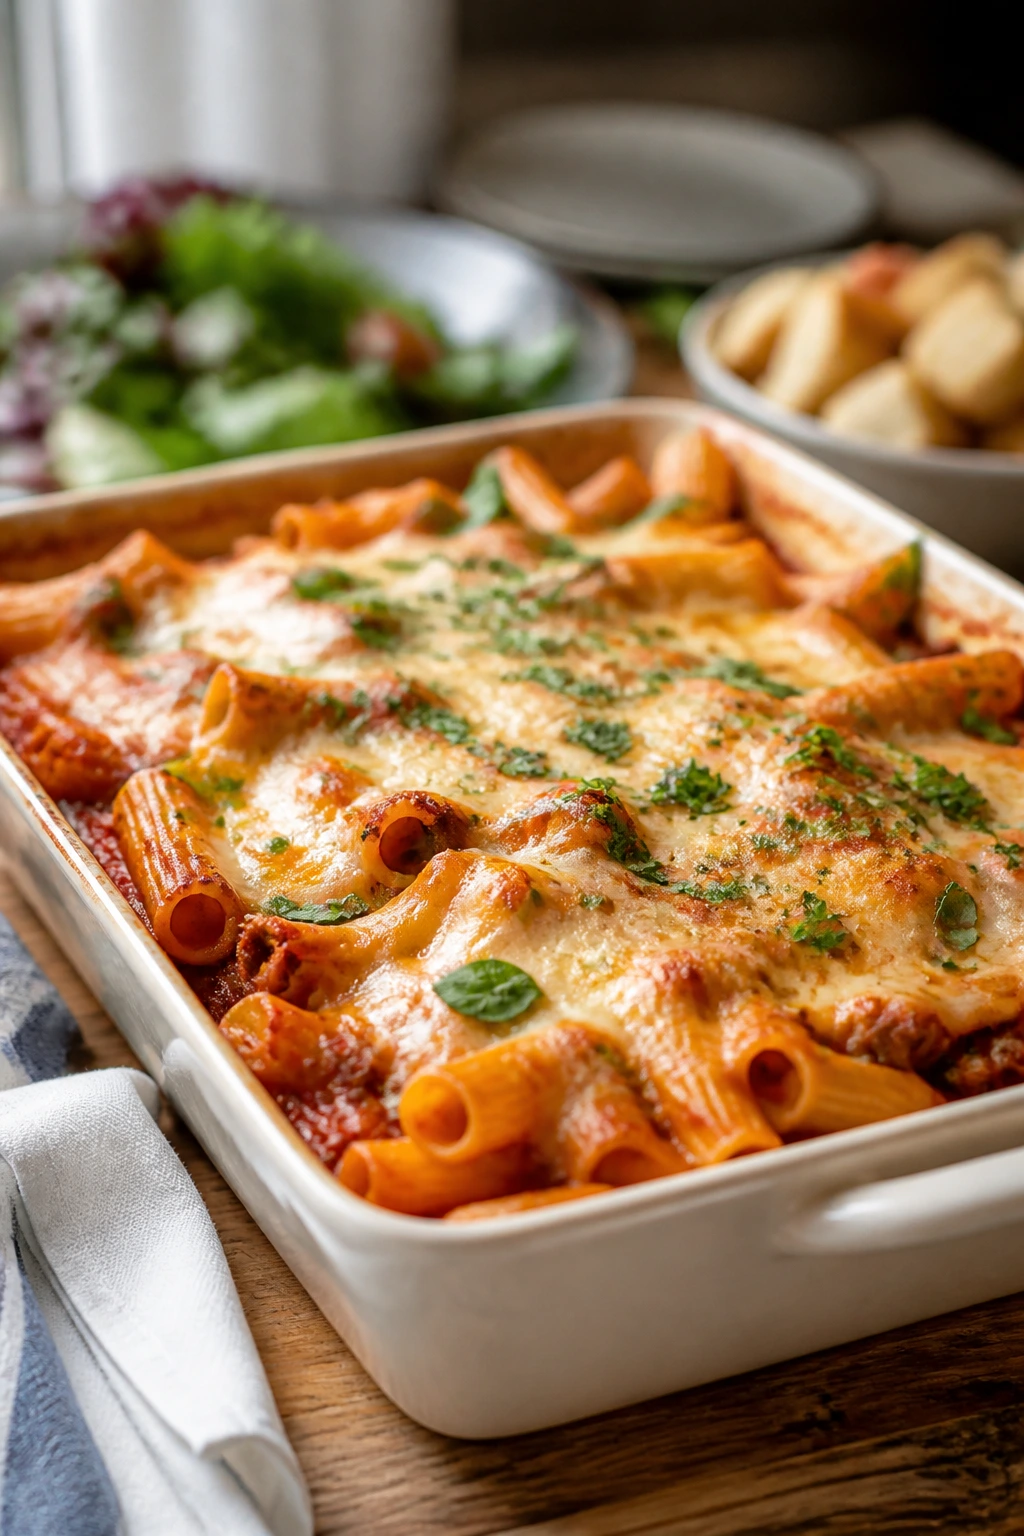
5. Baked Ziti with Italian Sausage and Spinach
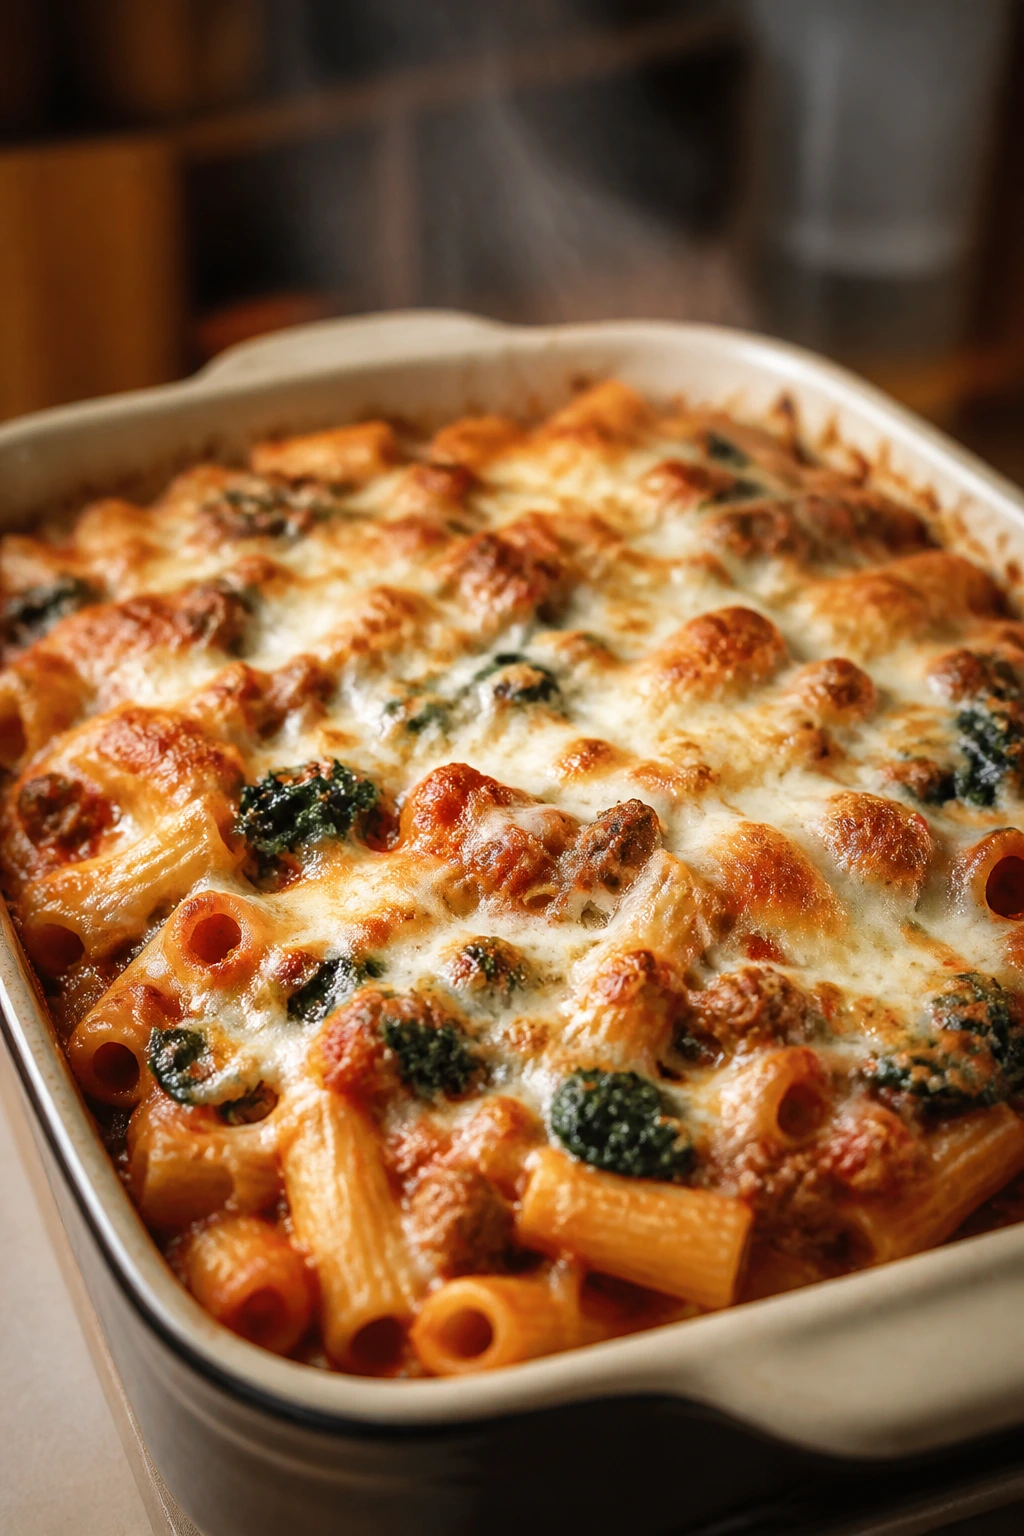
Baked ziti smells like oregano, garlic, and browned cheese the moment it comes out of the oven. That scent alone can quiet a backyard. It is one of those dishes that feels almost rude in its generosity: pasta, sausage, sauce, ricotta, mozzarella, and enough spinach to let you pretend balance is happening.
I like baked ziti for holiday dinners because it behaves. You can assemble it early, slide it into the oven when the rest of the menu is already moving, and serve it in square, dependable scoops. No drama. No chasing the sauce across the platter.
Why It Works
Italian sausage carries the flavor here, so you do not need to build a complicated sauce from scratch. The ricotta mixture keeps the interior creamy, while the mozzarella on top turns blistered and browned in the oven. Spinach softens into the pasta without announcing itself too loudly, which is useful when you want a little green in the pan without making the dish taste like a health project. It is a sturdy casserole that improves after a short rest, which is a gift during a busy meal.
Key Ingredients
- 2 pounds ziti; the tube shape catches sauce well.
- 2 pounds Italian sausage, casings removed; mild or hot both work.
- 1 large onion, diced; it gives the sauce a sweet base.
- 4 garlic cloves, minced; enough to make the whole dish smell alive.
- 2 (24-ounce) jars marinara sauce; choose one with a tomato flavor you like straight from the jar.
- 1 (15-ounce) container ricotta
- 2 large eggs; these help the ricotta set.
- 1 cup grated Parmesan; adds salt and depth.
- 4 cups shredded mozzarella, divided; use part in the mix, part on top.
- 6 ounces baby spinach; it melts down neatly.
- 2 teaspoons dried oregano
- 1 teaspoon red pepper flakes; optional, but welcome.
Quick Steps
- Cook the pasta: Boil the ziti in salted water for 2 minutes less than the package suggests, then drain.
- Build the sausage sauce: Brown the sausage in a large skillet over medium-high heat, add the onion, then stir in garlic and oregano until fragrant. Pour in the marinara and let it simmer for 5 minutes.
- Mix the ricotta layer: Stir the ricotta, eggs, Parmesan, and half of the mozzarella in a bowl.
- Combine with spinach and pasta: Fold the hot pasta, sauce, and spinach together until the leaves start to wilt.
- Assemble and bake: Spread half the pasta mixture into a greased 9×13-inch baking dish, dollop over the ricotta mixture, then add the remaining pasta and top with the rest of the mozzarella. Bake at 375°F for 25 to 30 minutes until bubbling and browned at the edges.
- Rest before serving: Let the pan sit for 10 to 15 minutes. If you cut it too early, the cheese layer slides.
Tips and Variations
- Make-ahead move: Assemble the whole dish up to a day ahead, chill it covered, and add 10 extra minutes to the bake time.
- Texture note: Underboil the pasta a little. It finishes cooking in the oven and stays firmer.
- Cheese tip: If you like a darker top, broil the pan for 1 to 2 minutes at the end, watching it closely.
6. Slow Cooker Hawaiian Chicken Sliders
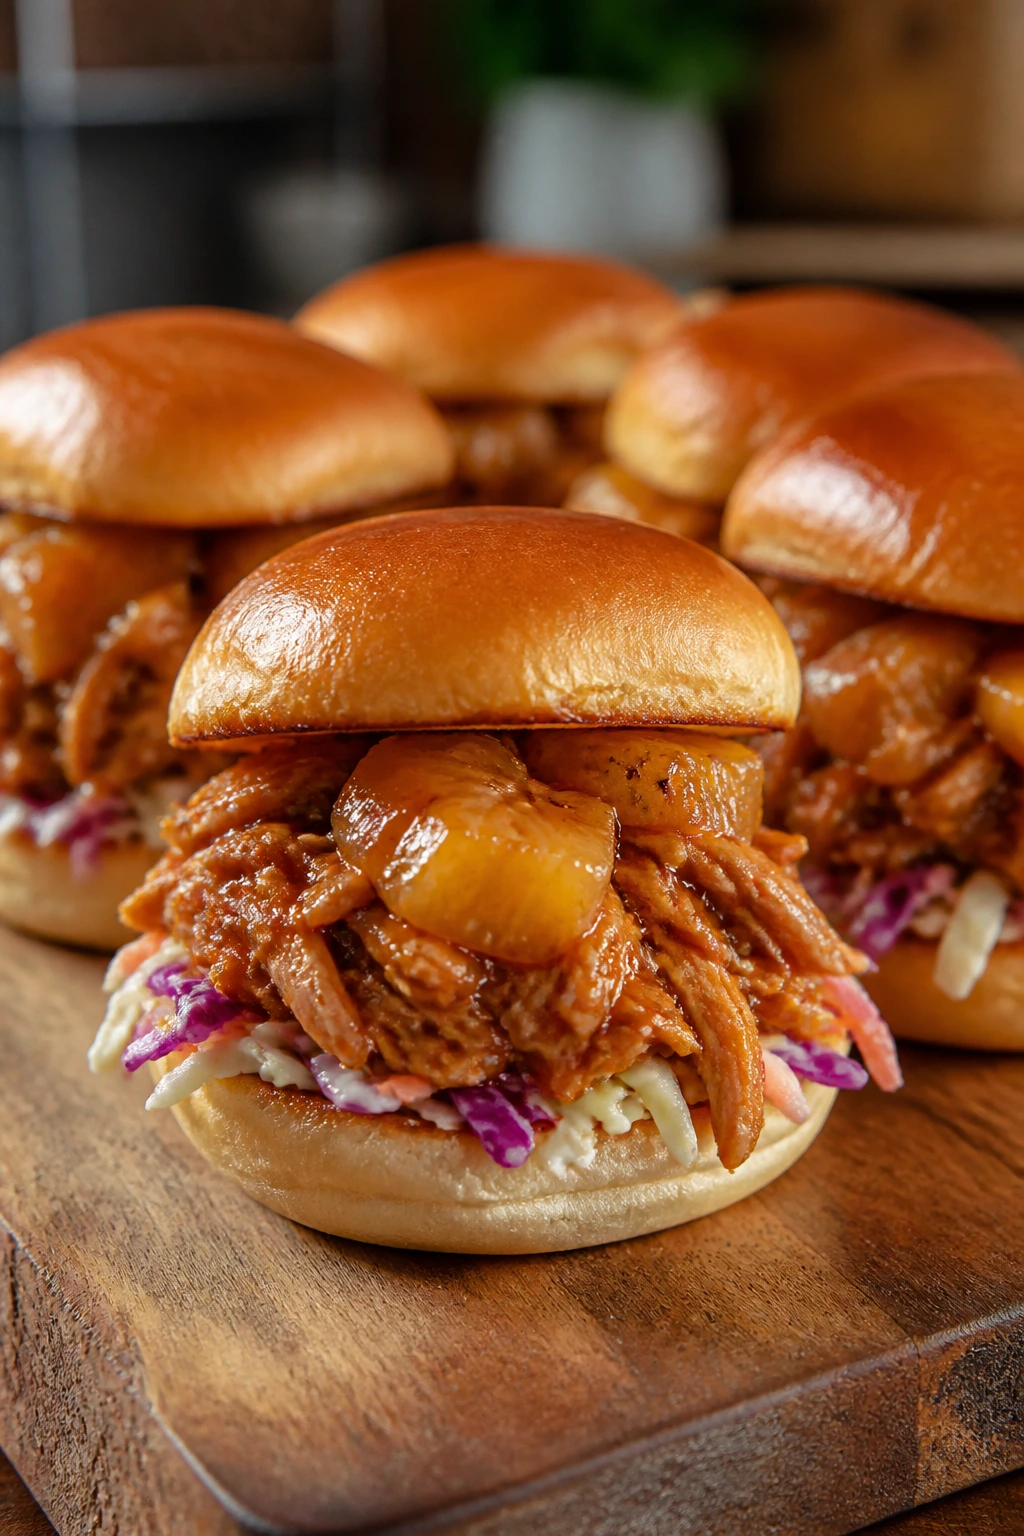
Hawaiian chicken is one of those dishes that looks sweet on paper and then wins people over with the first bite. Pineapple juice, soy sauce, barbecue sauce, and ginger sound almost too friendly together, but the result is savory, sticky, and a little tropical in a way that feels right for a holiday table. Especially when the weather is warm and people are drifting between the kitchen and the yard.
The bun matters here. Soft rolls, a little slaw, and shredded chicken that carries just enough sauce turn this into one of the easiest crowd sandwiches in the collection. It’s casual food, but not careless food.
Why It Works
Chicken thighs hold up better than breasts in a slow cooker, which is why they stay juicy even after hours of gentle heat. The pineapple juice and brown sugar balance the soy sauce, while ginger and garlic keep the flavor from drifting into syrup territory. Once shredded, the chicken absorbs the sauce instead of leaking it, so every slider tastes seasoned all the way through. The recipe is also easy to stretch with extra rolls and a second bag of slaw, which makes it a smart choice for a bigger group.
Key Ingredients
- 3 pounds boneless, skinless chicken thighs; they stay tender after long cooking.
- 1 cup pineapple juice
- 1/2 cup low-sodium soy sauce
- 1/2 cup barbecue sauce
- 1/3 cup packed brown sugar
- 4 garlic cloves, minced
- 1 tablespoon grated fresh ginger
- 1 small red onion, sliced
- 1 tablespoon cornstarch mixed with 2 tablespoons water; optional, for thickening the sauce.
- 12 Hawaiian rolls
- 3 cups coleslaw
- 1 cup pineapple tidbits or grilled pineapple rings; optional, but nice.
Quick Steps
- Load the slow cooker: Put the chicken thighs and sliced onion into the slow cooker.
- Mix the sauce: Whisk together pineapple juice, soy sauce, barbecue sauce, brown sugar, garlic, and ginger, then pour it over the chicken.
- Cook until shreddable: Cover and cook on low for 5 1/2 to 6 1/2 hours, until the chicken pulls apart easily.
- Shred and thicken: Remove the chicken, shred it, then stir it back into the sauce. If the sauce is loose, simmer it with the cornstarch slurry for 2 to 3 minutes until it lightly coats a spoon.
- Toast the rolls: Split the Hawaiian rolls and warm them cut-side down in a skillet or oven for a minute or two.
- Build the sliders: Add chicken, top with coleslaw and pineapple if using, and serve right away.
Tips and Variations
- Flavor move: Add a splash of rice vinegar if you want the sauce sharper.
- Serve-it-smart note: Put the slaw on last so the rolls stay dry enough to hold.
- Make-ahead shortcut: Shred the chicken earlier in the day and rewarm it in the sauce before serving.
7. One-Pot Chicken, Sausage, and Shrimp Jambalaya
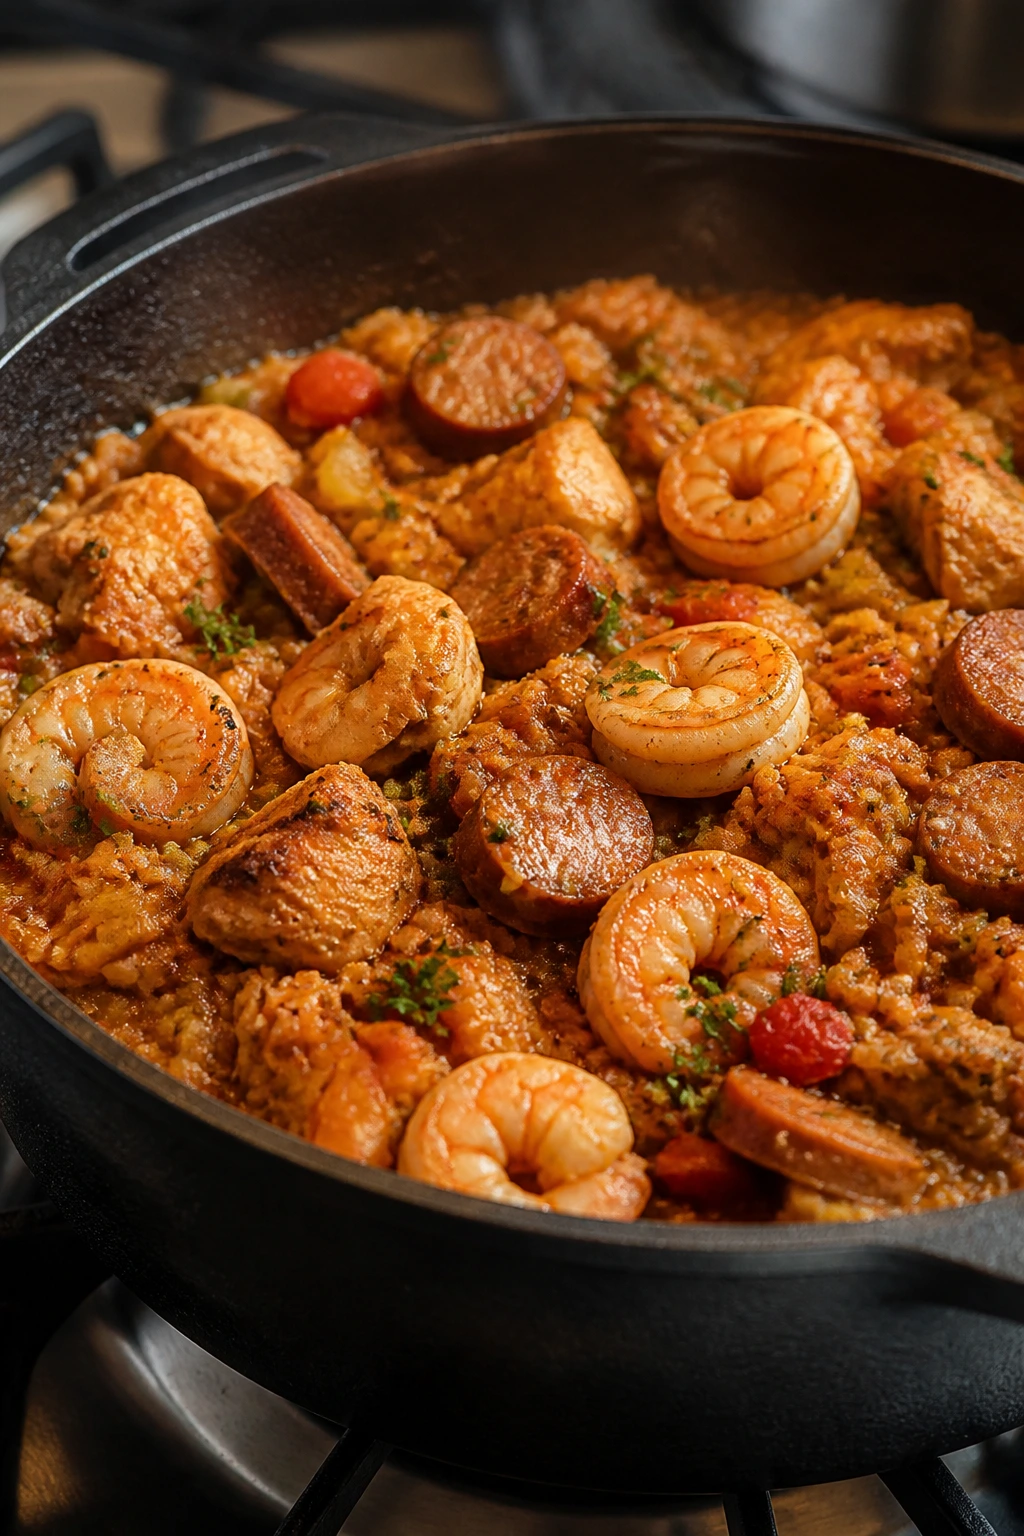
Jambalaya is the sort of one-pot dinner that makes a crowd go quiet for a minute. There is smoke from the sausage, sweetness from the peppers, and that deep rice flavor that only shows up when everything cooks together in one pot. It feels festive without needing any decoration.
This is the meal I reach for when I want dinner to look like I tried harder than I did. The pot does the work. You do the stirring, the timing, and the final shrimp toss. That’s enough.
Why It Works
Jambalaya feeds a lot of people because rice stretches the proteins without making the dish feel thin. Browning the chicken and sausage first builds flavor at the bottom of the pot, and the rice absorbs every bit of it as it simmers. Shrimp goes in at the end so it stays tender instead of turning chalky. The dish also holds well for a short period, which is useful when the first plates are served before the second round is ready.
Key Ingredients
- 1 1/2 pounds boneless chicken thighs, cut into bite-size pieces; thighs stay juicier than breasts.
- 12 ounces andouille sausage, sliced; this gives the dish its smoky backbone.
- 1 pound large shrimp, peeled and deveined; add them at the end.
- 2 tablespoons oil
- 1 onion, diced
- 1 green bell pepper, diced
- 2 celery stalks, diced
- 4 garlic cloves, minced
- 2 tablespoons tomato paste
- 1 1/2 cups long-grain white rice
- 1 can diced tomatoes, 14.5 ounces
- 4 cups chicken broth
- 1 tablespoon Creole seasoning
- 2 bay leaves
- 3 green onions, sliced
- Hot sauce and parsley for serving
Quick Steps
- Brown the meats: Heat oil in a wide Dutch oven over medium-high heat. Brown the sausage first, then the chicken pieces until lightly colored. Remove both to a plate.
- Cook the vegetables: In the same pot, sauté onion, bell pepper, and celery for 5 to 7 minutes, until softened. Stir in the garlic and tomato paste.
- Add the rice and liquid: Stir in the rice, diced tomatoes, broth, Creole seasoning, and bay leaves, scraping up the browned bits from the bottom.
- Simmer gently: Return the chicken and sausage to the pot, cover, and cook on low heat for 18 to 22 minutes, until the rice is tender and the liquid is mostly absorbed.
- Add the shrimp: Nestle the shrimp into the hot rice, cover again, and cook for 4 to 5 minutes, until pink and just firm.
- Finish and rest: Remove the bay leaves, scatter green onions over the top, and let the pot sit for 5 minutes before serving.
Tips and Variations
- Heat warning: Keep the simmer low once the rice goes in; a hard boil breaks the grains.
- Flavor option: Add a teaspoon of smoked paprika if you want the pot a little deeper and redder.
- Crowd trick: Use a very wide Dutch oven if you can. Rice cooks more evenly in a shallower layer.
8. Grilled Salmon with Dill Yogurt Sauce and Charred Corn

Whole salmon on the grill looks intimidating until you have done it once. Then it turns into one of those dishes that earns respect with very little actual fuss. The fish gets just enough char, the yogurt sauce cools everything down, and the corn brings the sweet crunch that makes the plate feel complete.
I like this as a holiday dinner because it keeps the meal from tilting too far into heavy barbecue territory. A platter of salmon with herbs and lemon feels clean and generous. Nobody at the table mistakes it for diet food, either.
Why It Works
Salmon is rich enough to satisfy a crowd, and grilling it skin-side down keeps it from sticking while the flesh gently cooks. Dill and yogurt make a sauce that cuts through the oiliness of the fish without overpowering it. Corn on the grill picks up a little sweetness and smoke, which gives the whole plate a late-spring feel. The dish also gives you a built-in sauce and side in the same cooking window, which is never a bad thing.
Key Ingredients
- 4 pounds skin-on salmon fillet(s); two side fillets are easier to handle than many small pieces.
- 2 tablespoons olive oil
- Zest and juice of 1 lemon
- 2 teaspoons kosher salt and 1 teaspoon black pepper
- 8 ears corn, husks removed
- 1 1/2 cups plain Greek yogurt
- 2 tablespoons chopped dill
- 1 small garlic clove, finely grated
- 1 tablespoon olive oil
- Salt for the sauce
- Lemon wedges for serving
Quick Steps
- Mix the sauce: Stir the yogurt, dill, garlic, olive oil, lemon juice, and a pinch of salt together. Chill until serving.
- Prep the salmon: Brush the fish with olive oil and season with lemon zest, salt, and pepper.
- Heat the grill: Set it to medium heat and oil the grates well.
- Grill the corn: Cook the corn for 10 to 12 minutes, turning every few minutes until lightly charred.
- Cook the salmon: Place the salmon skin-side down and grill with the lid closed for 10 to 12 minutes, until the thickest part flakes and reaches about 125°F to 130°F for medium or 140°F if you want it more done. Do not force the fish to move if it sticks; give it another minute.
- Serve immediately: Slide the salmon onto a platter, spoon over a little yogurt sauce, and set the rest on the side.
Tips and Variations
- Simple backup: Cook the salmon on a foil-lined sheet pan under the broiler if the grill is crowded.
- Flavor move: Add chopped cucumber to the yogurt sauce for extra cool crunch.
- Serving note: Keep the sauce cold until the fish hits the platter.
9. Chili-Lime Chicken Fajita Bar
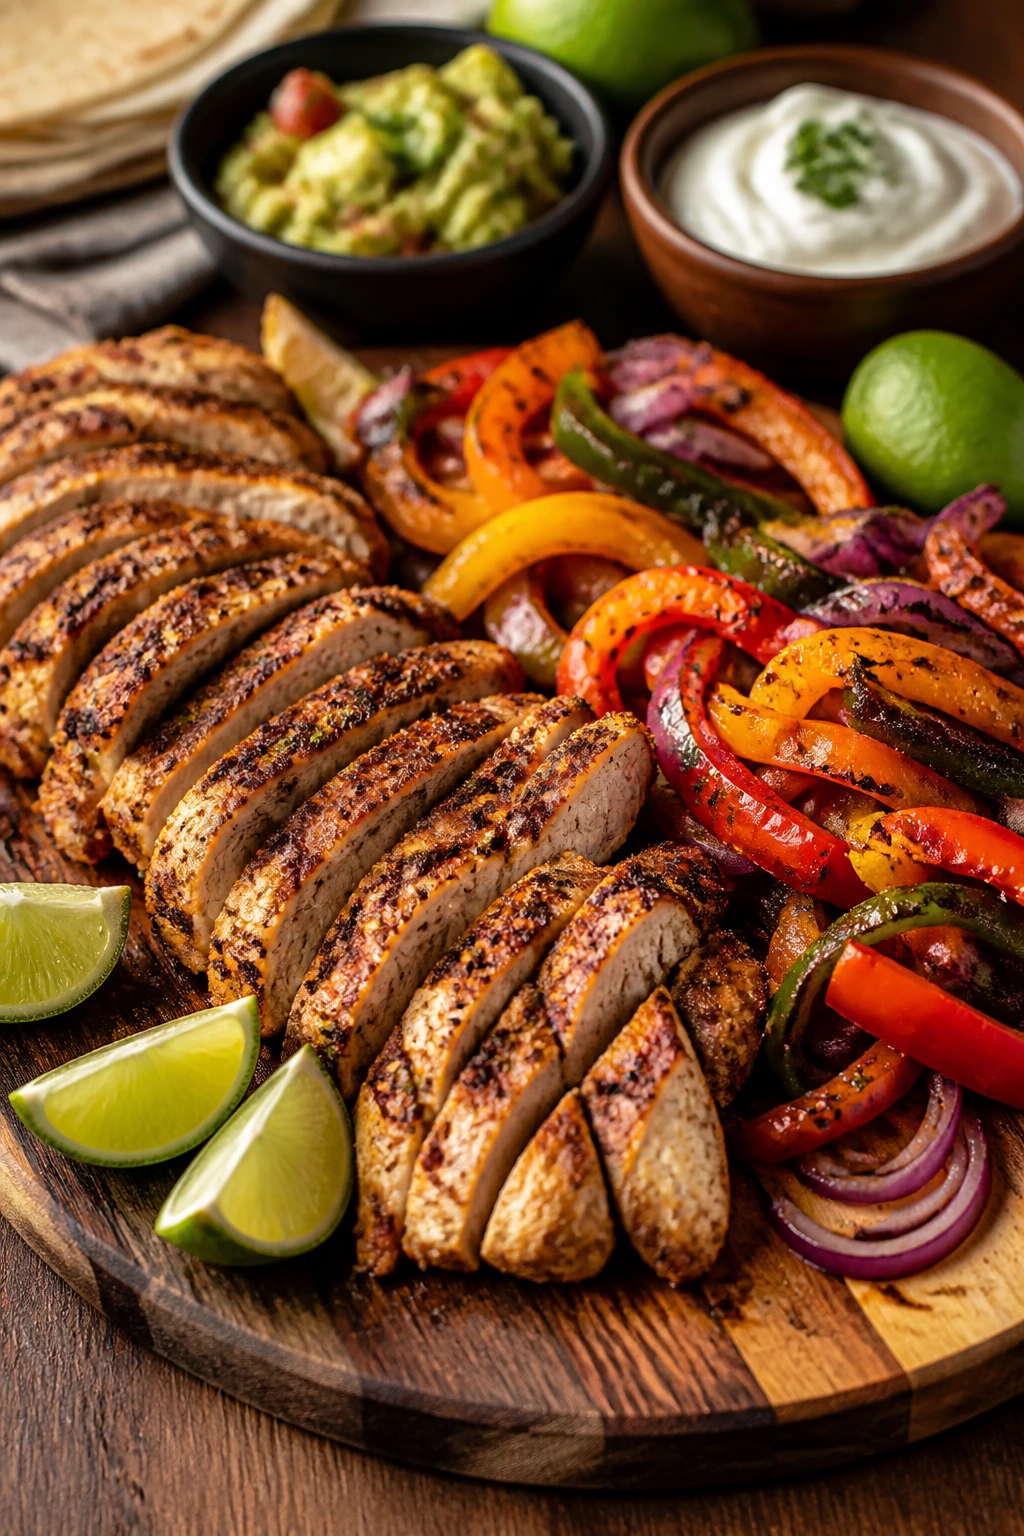
Need a dinner that doubles as a build-your-own station? Fajitas are hard to beat. The chicken comes off the heat smelling like lime, cumin, and charred spice, and the peppers go soft at the edges while staying bright enough to look cheerful on the table.
What I like most is the flexibility. People can load tortillas the way they want, which cuts down on the “I don’t eat that” drift that happens around a big table. One pan of chicken, one pan of vegetables, and a pile of toppings can feed a crowd with very little ceremony.
Why It Works
Chicken thighs hold up well to the high heat needed for fajitas, and the lime-chili marinade gives them flavor all the way through. Cooking the vegetables separately keeps them from turning soggy before the chicken is done. A fajita bar also solves the serving problem before it starts: everyone builds their own plate, so you spend less time assembling and more time eating. That’s not laziness. That’s good hosting.
Key Ingredients
- 4 pounds boneless, skinless chicken thighs or breasts, sliced into strips; thighs stay juicier, breasts cook faster.
- 3 bell peppers, sliced
- 2 large onions, sliced
- 3 tablespoons oil
- 1/4 cup lime juice
- Zest of 1 lime
- 2 tablespoons chili powder
- 2 teaspoons cumin
- 1 teaspoon smoked paprika
- 1 teaspoon kosher salt and 1/2 teaspoon black pepper
- 24 small flour or corn tortillas
- Sour cream, salsa, guacamole, cilantro, and shredded cheese for topping
Quick Steps
- Marinate the chicken: Toss the chicken with oil, lime juice, lime zest, chili powder, cumin, paprika, salt, and pepper. Let it sit for 20 to 30 minutes.
- Cook the vegetables: Heat a large skillet or grill pan over medium-high heat and cook the peppers and onions until softened and lightly charred at the edges, about 8 to 10 minutes.
- Cook the chicken: In the same pan or on the grill, cook the chicken strips until browned and the thickest pieces reach 165°F, about 6 to 8 minutes total for strips.
- Rest and slice if needed: Give the chicken 5 minutes to rest, then slice any thicker pieces thinner.
- Warm the tortillas: Wrap them in foil and warm in the oven, or heat them directly on the grill for a few seconds per side.
- Set up the bar: Put the chicken, vegetables, and toppings in separate bowls so everyone can build their own plate.
Tips and Variations
- Flavor twist: Add a spoonful of adobo sauce to the marinade if you want smoky heat.
- Vegetable note: Mushrooms or zucchini can join the peppers if you want more bulk.
- Best move: Keep tortillas warm in a clean towel so they stay soft.
10. Big-Batch Lasagna with Meat Sauce and Ricotta
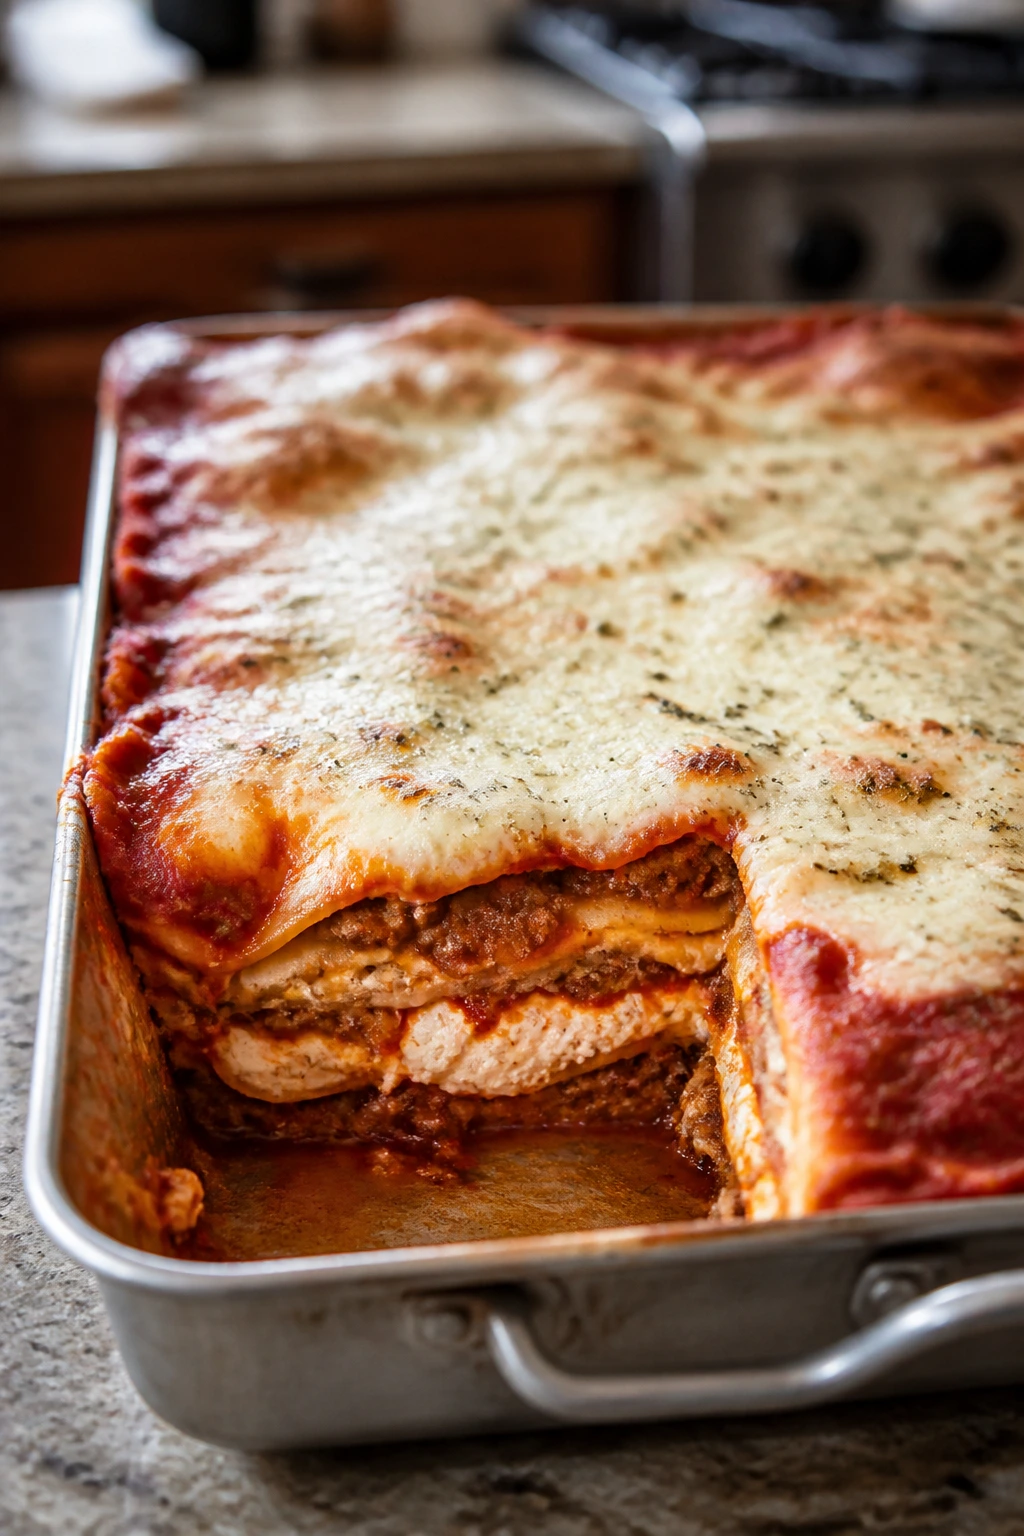
Lasagna gets called heavy as though that’s a flaw. On a busy holiday table, heavy can be useful. It means slices hold together, leftovers are worth keeping, and nobody leaves hungry.
This version leans classic: beef, sausage, ricotta, mozzarella, and a tomato sauce that has enough body to support the layers without turning watery. It is the kind of dish you can bring out in a big pan and watch people go back for a second square. That is useful information.
Why It Works
A mix of ground beef and Italian sausage gives the sauce both structure and fat, which matters when you are baking a layered dish for a crowd. The ricotta, egg, and Parmesan mixture sets up into a creamy middle that does not slide apart. No-boil noodles save time and soak up moisture from the sauce while baking, which keeps the texture tender without getting mushy. Lasagna also reheats well, so you are not gambling on timing the way you are with grilled food.
Key Ingredients
- 2 pounds ground beef
- 1 pound Italian sausage, casings removed
- 1 large onion, diced
- 5 garlic cloves, minced
- 2 tablespoons olive oil
- 2 (24-ounce) jars marinara sauce
- 1 cup water
- 16 no-boil lasagna noodles
- 32 ounces ricotta
- 2 large eggs
- 1 cup grated Parmesan
- 5 cups shredded mozzarella
- 2 tablespoons chopped parsley
- 1 teaspoon kosher salt and 1 teaspoon black pepper
Quick Steps
- Make the meat sauce: Brown the beef, sausage, and onion in olive oil over medium-high heat. Stir in the garlic and cook for 30 seconds, then add the marinara and water and simmer for 10 minutes.
- Mix the ricotta filling: Stir ricotta, eggs, Parmesan, parsley, salt, and pepper in a bowl until smooth.
- Prep the pans: Grease two 9×13-inch baking dishes or one extra-deep lasagna pan.
- Layer the lasagna: Spread a thin layer of sauce on the bottom, add noodles, ricotta, mozzarella, more sauce, and repeat until the pans are full, ending with sauce and mozzarella on top.
- Bake covered, then uncovered: Cover with foil and bake at 375°F for 35 minutes, then uncover and bake 15 to 20 minutes more until bubbling and browned.
- Rest before cutting: Let the lasagna sit for 20 minutes. If you slice too early, you get soup, not squares.
Tips and Variations
- Make-ahead move: Assemble the pans a day before and bake from cold with an extra 10 to 15 minutes.
- Flavor option: Add a pinch of red pepper flakes to the sauce for a little heat.
- Leftover note: The slices hold together better the next day, which is one reason people love leftover lasagna.
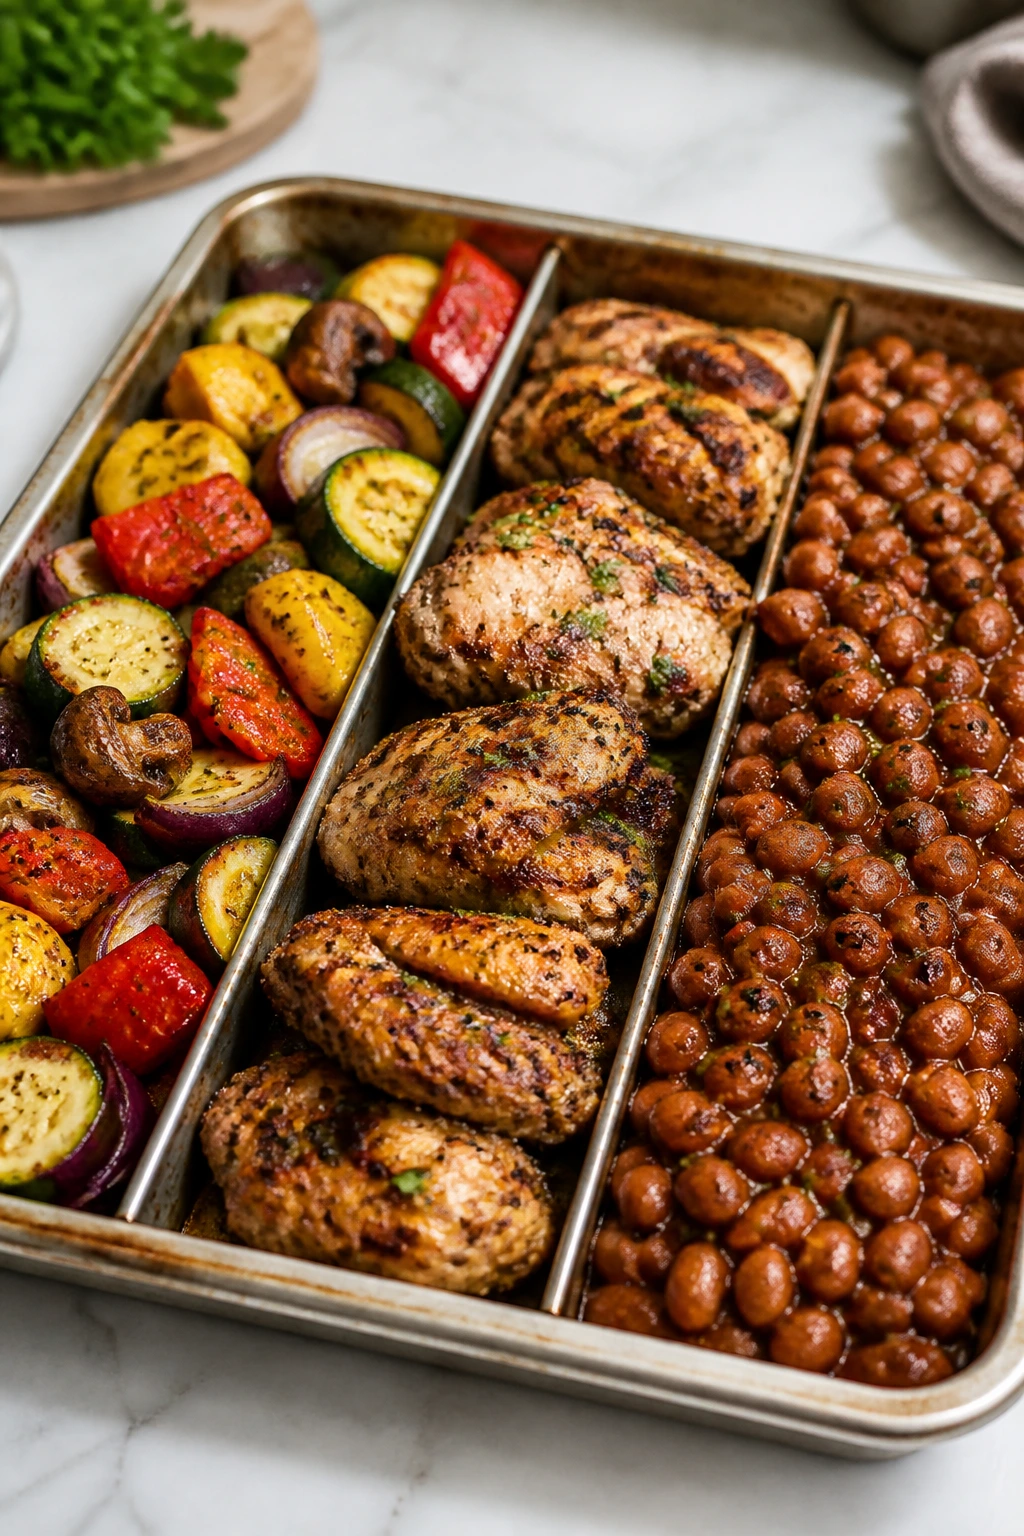
11. BBQ Chicken Drumsticks with Skillet Baked Beans
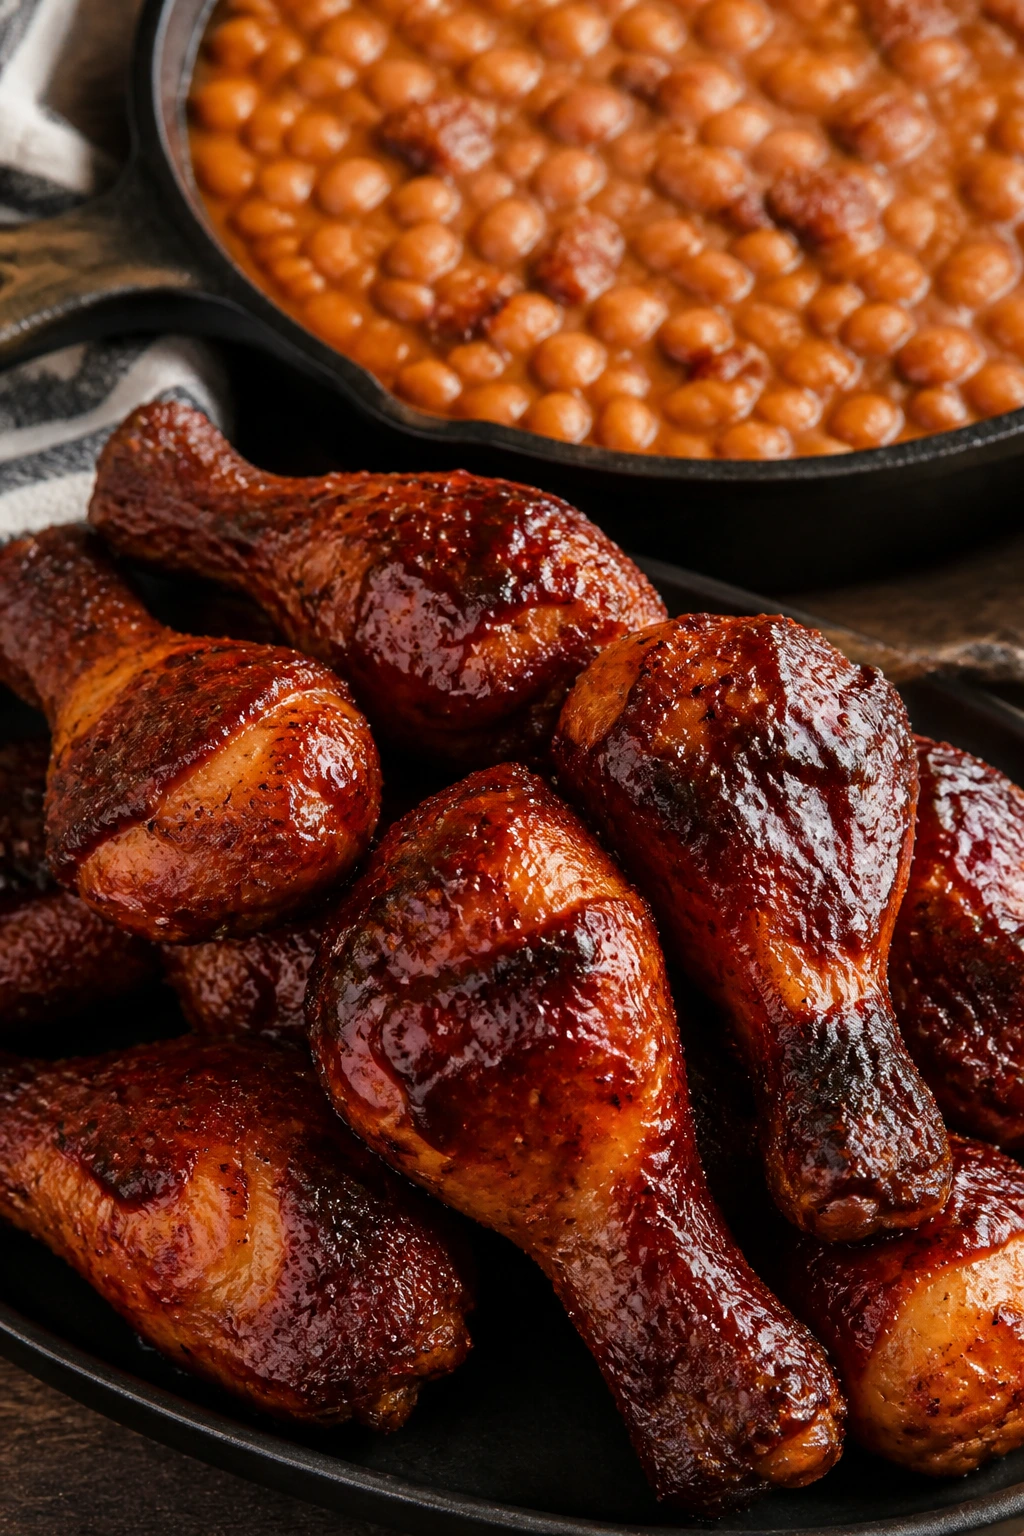
Drumsticks glazed with barbecue sauce smell like summer as soon as they hit the oven. They are cheap enough to feed a crowd without panic, and they have the useful quality of being naturally portioned. No carving. No slicing. Just hand people a stack of napkins and let the bones disappear.
I like them with baked beans that have a little bacon and molasses in the mix. That combination makes the plate feel complete and gives you something that can simmer while the chicken roasts. The whole dinner has a backyard cookout rhythm to it.
Why It Works
Chicken drumsticks stay juicy in the oven because they have enough fat and connective tissue to handle a longer roast. A dry rub gives you flavor under the glaze, while barbecue sauce gets sticky and lacquered under a short broil at the end. The beans bring sweetness, smoke, and softness that balance the crispy chicken skin. This is a straightforward crowd meal that does not need plating tricks to feel satisfying.
Key Ingredients
- 5 pounds chicken drumsticks
- 2 tablespoons neutral oil
- 2 tablespoons paprika
- 1 tablespoon brown sugar
- 1 tablespoon kosher salt
- 1 teaspoon black pepper
- 1 teaspoon garlic powder
- 1 teaspoon onion powder
- 1/2 teaspoon cayenne, optional
- 2 cups barbecue sauce
For the Baked Beans:
- 4 slices bacon, diced
- 1 small onion, diced
- 2 cans baked beans, 28 ounces each
- 2 tablespoons ketchup
- 2 tablespoons molasses
- 1 tablespoon yellow mustard
- 1 tablespoon apple cider vinegar
Quick Steps
- Season the chicken: Pat the drumsticks dry, rub them with oil, then coat them with the paprika, brown sugar, salt, pepper, garlic powder, onion powder, and cayenne.
- Start the beans: Cook the bacon in a skillet until crisp, add the onion, and cook until softened. Stir in the beans, ketchup, molasses, mustard, and vinegar, then simmer on low or bake in a 375°F dish for 25 minutes.
- Roast the drumsticks: Arrange the chicken on a foil-lined sheet pan and bake at 400°F for 35 to 40 minutes, turning once halfway through.
- Glaze the chicken: Brush the drumsticks with barbecue sauce and roast for 8 to 10 minutes more.
- Broil for shine: Broil for 1 to 2 minutes until the glaze looks sticky and dark at the edges. Watch closely; barbecue sauce burns fast.
- Serve with beans: Pile the chicken on a platter and spoon the beans into a bowl or skillet.
Tips and Variations
- Charcoal flavor move: Finish the glazed drumsticks on the grill for 2 to 3 minutes if you want more smoke.
- Family note: Pull a few pieces out before glazing if you need a milder version for kids.
- Texture tip: Let the chicken rest for 5 minutes before serving so the skin stays on.
12. Sausage and Peppers Hoagie Tray
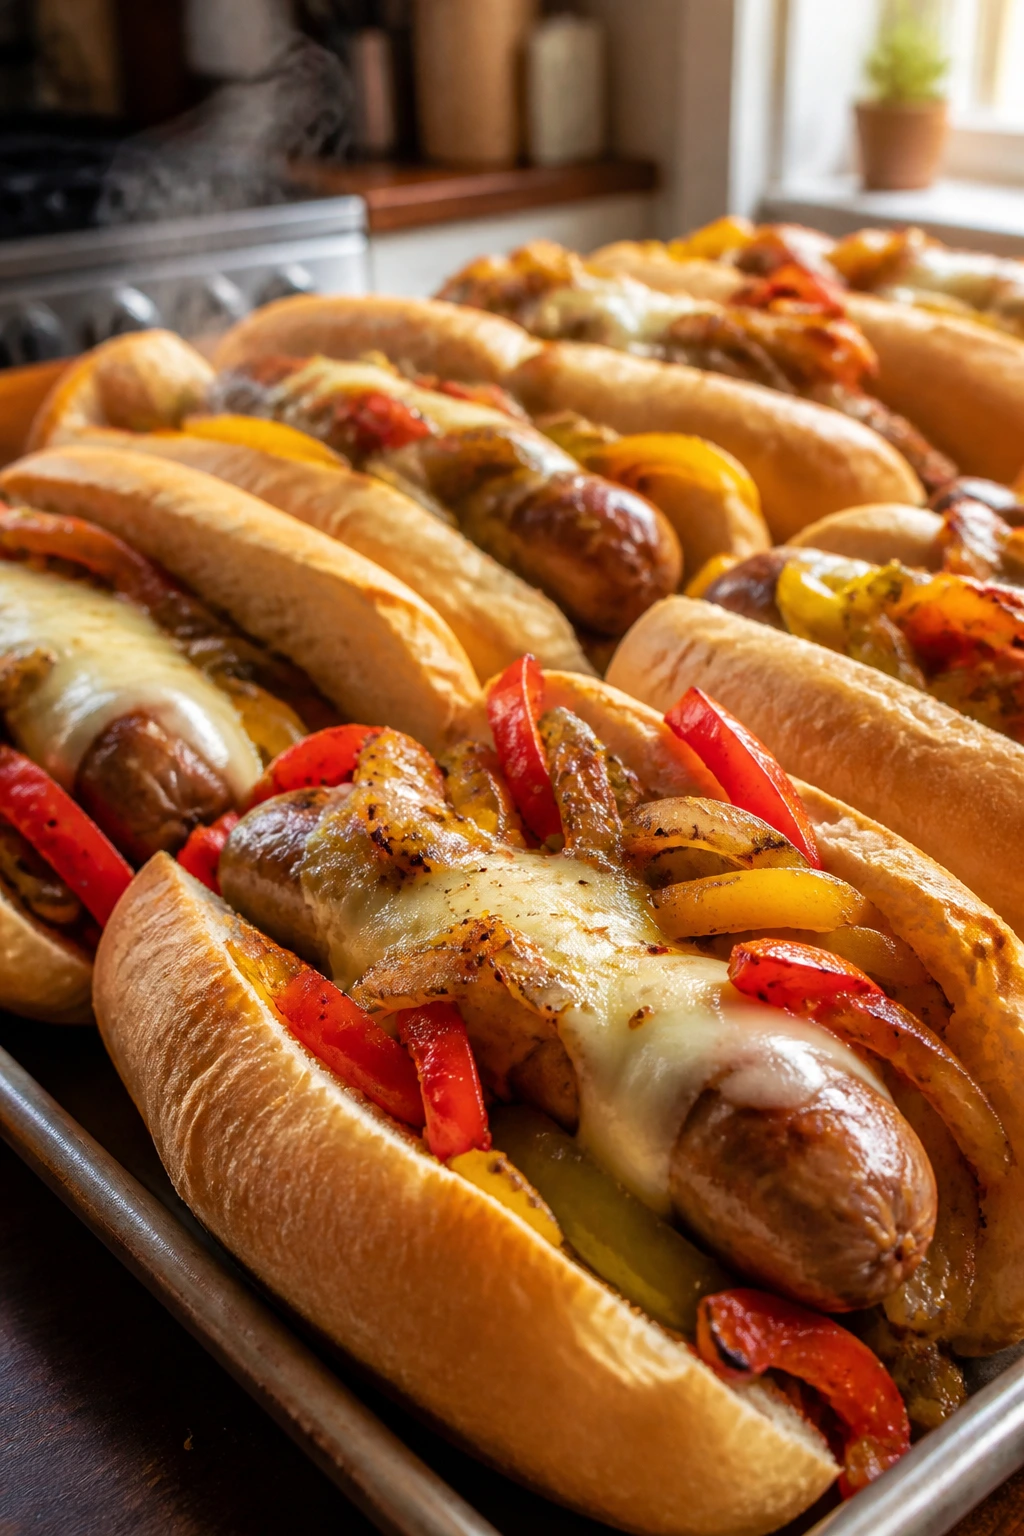
Hoagie trays are what I make when I need deli-counter energy without the deli line. There is something comforting about sausage, peppers, onions, and melted provolone tucked into a roll that can hold its own. It feels casual, but not flimsy.
This is a meal that makes sense in a big group because everyone understands how to eat it. The filling is saucy enough to taste rich, but not so wet that the bread disintegrates immediately. That little detail matters more than people admit.
Why It Works
Italian sausage brings salt, fat, and spice, so the peppers and onions can stay simple and still taste complete. Roasting the filling instead of frying it all in batches makes the job easier for a crowd, and the sheet pan catches the juices that become the sandwich sauce. A little marinara ties the filling together without turning it into pasta sauce. The rolls soak up flavor, the cheese melts, and the whole tray disappears in the kind of way that tells you the meal was a good idea.
Key Ingredients
- 3 pounds Italian sausage links
- 4 bell peppers, sliced
- 2 large onions, sliced
- 3 tablespoons olive oil
- 4 garlic cloves, minced
- 1 teaspoon dried oregano
- 1 teaspoon kosher salt and 1/2 teaspoon black pepper
- 1 1/2 cups marinara sauce
- 12 hoagie rolls
- 12 slices provolone
- Chopped parsley, optional
Quick Steps
- Heat the oven: Preheat to 400°F and line a large sheet pan with foil.
- Roast the sausage and vegetables: Toss the peppers and onions with olive oil, garlic, oregano, salt, and pepper. Spread them on the pan with the sausage links and roast for 20 to 25 minutes.
- Turn the sausages: Flip the sausage halfway through so they brown evenly.
- Slice the sausage: When the links are cooked through, cut them into 2-inch pieces.
- Toss with sauce: Return the sausage to the pan, add the marinara, and stir with the peppers and onions until coated.
- Build the hoagies: Split the rolls, fill them with the sausage mixture, top with provolone, and broil for 1 to 2 minutes until the cheese melts.
Tips and Variations
- Serving trick: Keep the filling in a warm slow cooker if the sandwiches need to be built in batches.
- Flavor move: Use sweet sausage if the crowd runs mild, or hot sausage if they do not.
- Cleanup note: Line the sheet pan well; the cheese and sauce can stick at the edges.
13. Tex-Mex Taco Pasta Bake
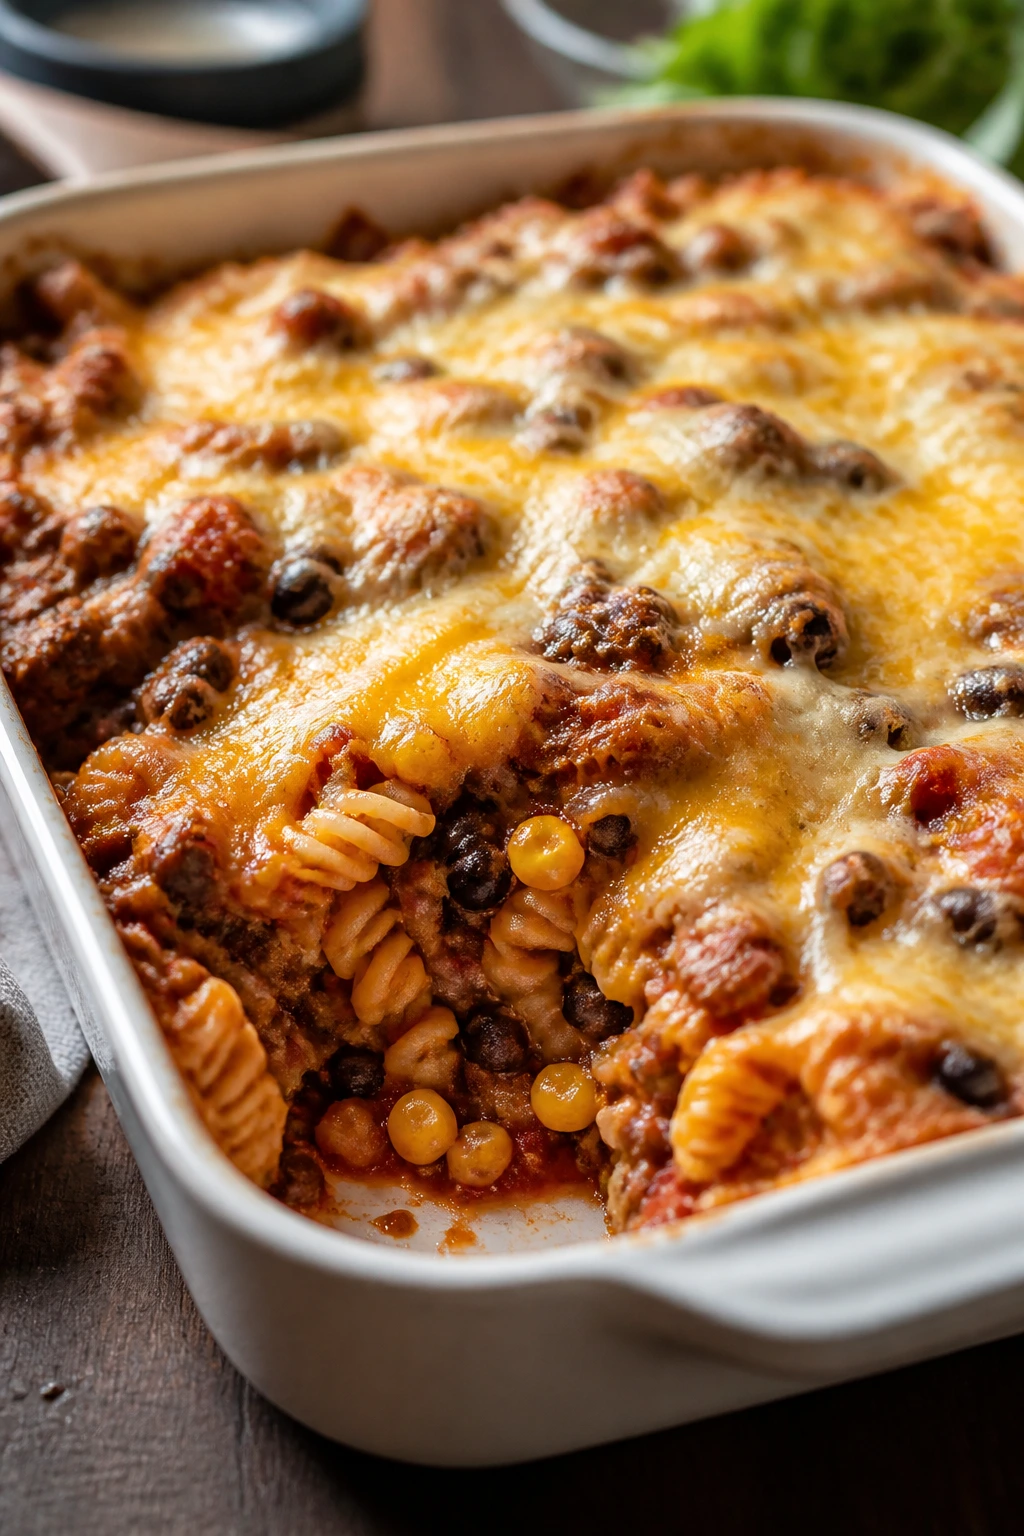
Taco pasta bake is the kind of thing that disappears faster than you’d think. It looks like comfort food, tastes like a taco night with better manners, and stretches ground meat into a dish that can feed a very hungry group. That is a useful skill.
The combination of salsa, cheese, beans, and pasta gives you something sturdy enough for potluck serving. It also scratches the itch for a dinner that feels fun without requiring a toppings bar the size of a diner counter. There’s enough spice to keep it awake, but not so much heat that half the table takes a pass.
Why It Works
Pasta gives the dish body, while taco seasoning and salsa bring enough seasoning that you do not need to fuss with a separate sauce. Black beans and corn add texture and bulk, which makes the casserole feel more complete and less like noodles with extras. Cream cheese melts into the mixture and turns the sauce glossy, which is a nice trick when you want the finished bake to feel cohesive. It is also easy to reheat in one pan, which is a gift if the guests wander in waves.
Key Ingredients
- 2 pounds rotini or penne
- 2 pounds ground beef or ground turkey
- 1 tablespoon oil
- 1 onion, diced
- 3 garlic cloves, minced
- 2 tablespoons taco seasoning
- 1 cup salsa
- 1 can black beans, drained and rinsed
- 2 cups corn
- 8 ounces cream cheese, cubed
- 2 cups shredded cheddar
- 1 cup shredded Monterey Jack
- Chopped cilantro, for finishing
Quick Steps
- Cook the pasta: Boil until just shy of al dente, then drain.
- Brown the meat: Cook the beef or turkey with oil and onion over medium-high heat until browned, then stir in garlic and taco seasoning.
- Build the sauce: Add salsa, black beans, corn, and cream cheese. Stir until the cream cheese melts into the mixture.
- Combine with pasta: Fold the cooked pasta into the skillet or a large bowl, then stir in half the cheddar and half the Monterey Jack.
- Bake the casserole: Spread the mixture into a greased 9×13-inch dish, top with the remaining cheese, and bake at 375°F for 20 minutes until bubbling.
- Finish and serve: Let it sit for 10 minutes, then scatter cilantro over the top.
Tips and Variations
- Heat move: Add chopped pickled jalapeños if the crowd likes a little bite.
- Shortcut: Use rotisserie chicken instead of ground meat if you want a faster version.
- Texture note: Keep the pasta a bit firm before baking; it will soften in the oven.
14. Greek Chicken Pita Platters
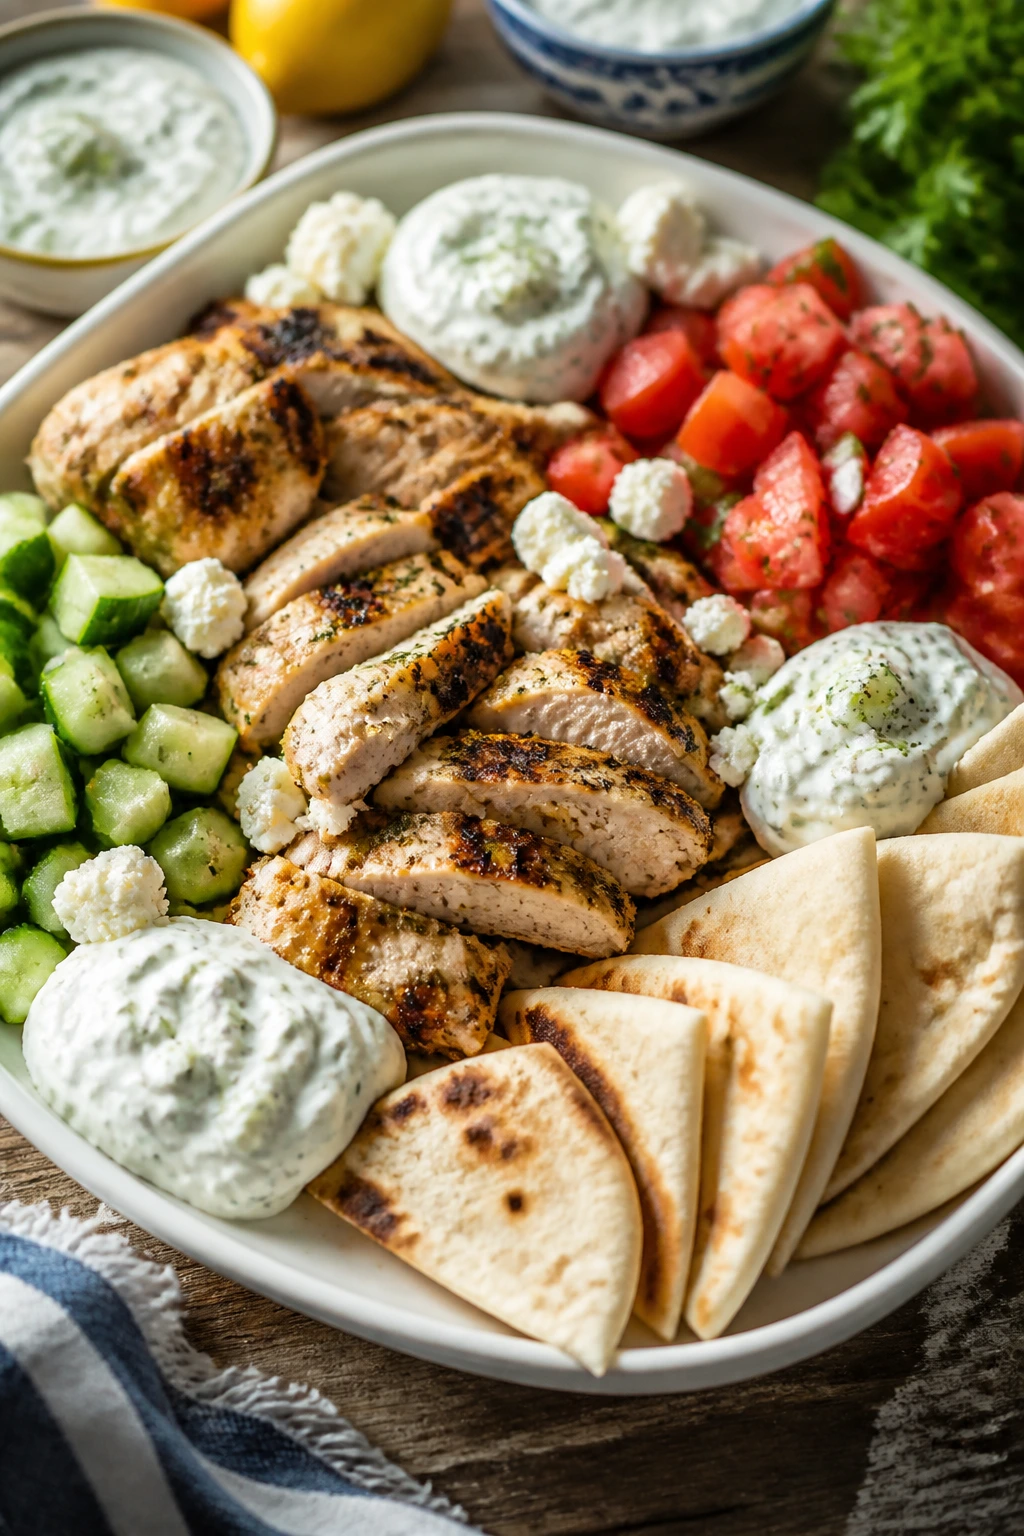
How do you feed people who want something fresh after a few smoky mains? Greek chicken platters are a clean answer. Lemon, garlic, and oregano give the chicken a bright edge, while cucumbers, tomatoes, and tzatziki keep the plate cool and crisp.
This one works especially well when the table already has heavy food on it. The pitas are soft, the chicken is savory, and the toppings let people build a plate that feels lighter without feeling skimpy. That is harder to pull off than it sounds.
Why It Works
Chicken thighs soak up the lemon-herb marinade and stay tender on the grill, which is why they suit a big platter so well. The toppings are mostly fresh, so you get contrast: warm meat, cool cucumber, creamy tzatziki, and salty feta. Pita bread makes the whole thing hand-held if you want it to be, but the components also look good arranged family-style. It is one of the least fussy ways to make a crowd feel like they are eating something intentional.
Key Ingredients
- 4 pounds boneless, skinless chicken thighs
- 1/4 cup olive oil
- 1/4 cup lemon juice
- 4 garlic cloves, minced
- 2 tablespoons dried oregano
- 2 teaspoons kosher salt and 1 teaspoon black pepper
- 24 pita rounds
- 2 cucumbers, diced
- 3 tomatoes, diced
- 1 red onion, thinly sliced
- 2 cups tzatziki
- 1 cup crumbled feta
- Kalamata olives, optional
Quick Steps
- Marinate the chicken: Whisk the olive oil, lemon juice, garlic, oregano, salt, and pepper, then coat the chicken. Let it sit for at least 30 minutes or up to 4 hours.
- Grill the chicken: Cook over medium-high heat for 5 to 7 minutes per side, until the thickest pieces reach 165°F.
- Rest and slice: Let the chicken sit for 5 minutes, then slice into strips.
- Warm the pitas: Toast them briefly on the grill or in a dry skillet until soft and warm.
- Set out the toppings: Arrange cucumbers, tomatoes, onion, tzatziki, feta, and olives in bowls or on a large platter.
- Build the plates: Fill pitas or create bowls with chicken and toppings, then spoon over extra tzatziki.
Tips and Variations
- Freshness move: Add chopped mint to the topping bowl if you want a cooler finish.
- Serving trick: Keep the chicken warm in a covered dish, not directly over heat, or it tightens up.
- Diet note: Serve everything over lettuce if some guests want to skip the pita.
15. Honey-Garlic Meatballs over Rice
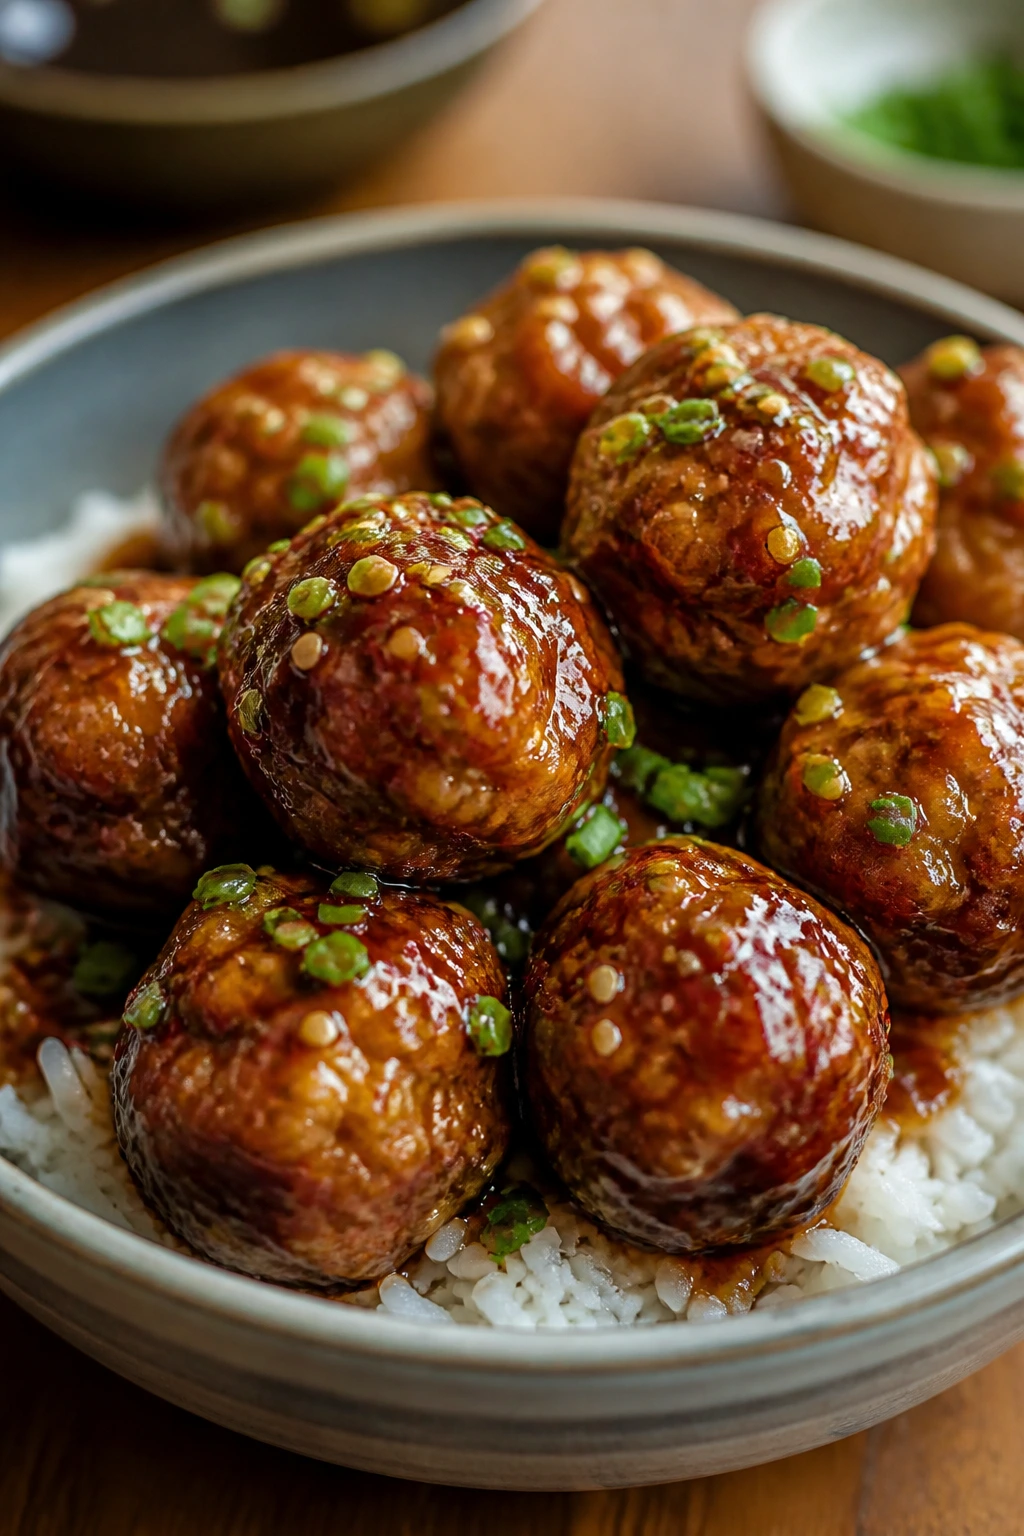
Honey-garlic meatballs do not stay on the platter for long. That sauce has the right pull: sweet, salty, sticky, with enough garlic to keep it from drifting into dessert territory. Over rice, the whole thing becomes a meal people can plate quickly and eat without juggling too many parts.
This is a nice one for a crowd because it feels more polished than it is. The meatballs can bake while the sauce simmers, and the rice handles the rest. It’s a useful kind of dinner.
Why It Works
A mix of beef and pork gives the meatballs good flavor and a softer texture than beef alone. Breadcrumbs and eggs keep them tender, while the oven browns them evenly without the hassle of pan-frying in batches. The sauce comes together on the stove in a few minutes and clings to the meatballs because it has honey, soy sauce, and a little starch from the simmer. Rice soaks up the extra sauce, which is exactly what you want from a dinner like this.
Key Ingredients
- 2 pounds ground beef
- 1 pound ground pork
- 1 cup breadcrumbs
- 2 large eggs
- 1/2 cup grated onion
- 3 garlic cloves, minced
- 2 tablespoons soy sauce
- 1 teaspoon kosher salt and 1/2 teaspoon black pepper
For the Sauce:
- 1/2 cup honey
- 1/3 cup soy sauce
- 3 tablespoons ketchup
- 2 tablespoons rice vinegar
- 2 garlic cloves, minced
- 1 teaspoon grated ginger
- 1 teaspoon sesame oil
- 4 cups cooked rice
- Sliced scallions and sesame seeds, for finishing
Quick Steps
- Heat the oven: Preheat to 425°F and line a sheet pan with parchment.
- Mix the meatballs: Combine the beef, pork, breadcrumbs, eggs, onion, garlic, soy sauce, salt, and pepper until just mixed. Do not overwork it.
- Shape and bake: Roll into 1 1/2-inch meatballs and place on the sheet pan. Bake for 15 to 18 minutes, until browned and cooked through.
- Make the sauce: Simmer honey, soy sauce, ketchup, rice vinegar, garlic, ginger, and sesame oil in a saucepan for 3 to 4 minutes.
- Glaze the meatballs: Toss the baked meatballs in the sauce until coated and glossy.
- Serve over rice: Spoon the meatballs and extra sauce over bowls of warm rice, then top with scallions and sesame seeds.
Tips and Variations
- Shortcut: Frozen fully cooked meatballs work if you are in a hurry; warm them in the sauce until hot.
- Heat option: Add a teaspoon of chili flakes or a squirt of sriracha to the sauce.
- Texture note: Let the meatballs rest 5 minutes after baking so they stay tender when sauced.
16. Backyard Paella with Chicken and Chorizo
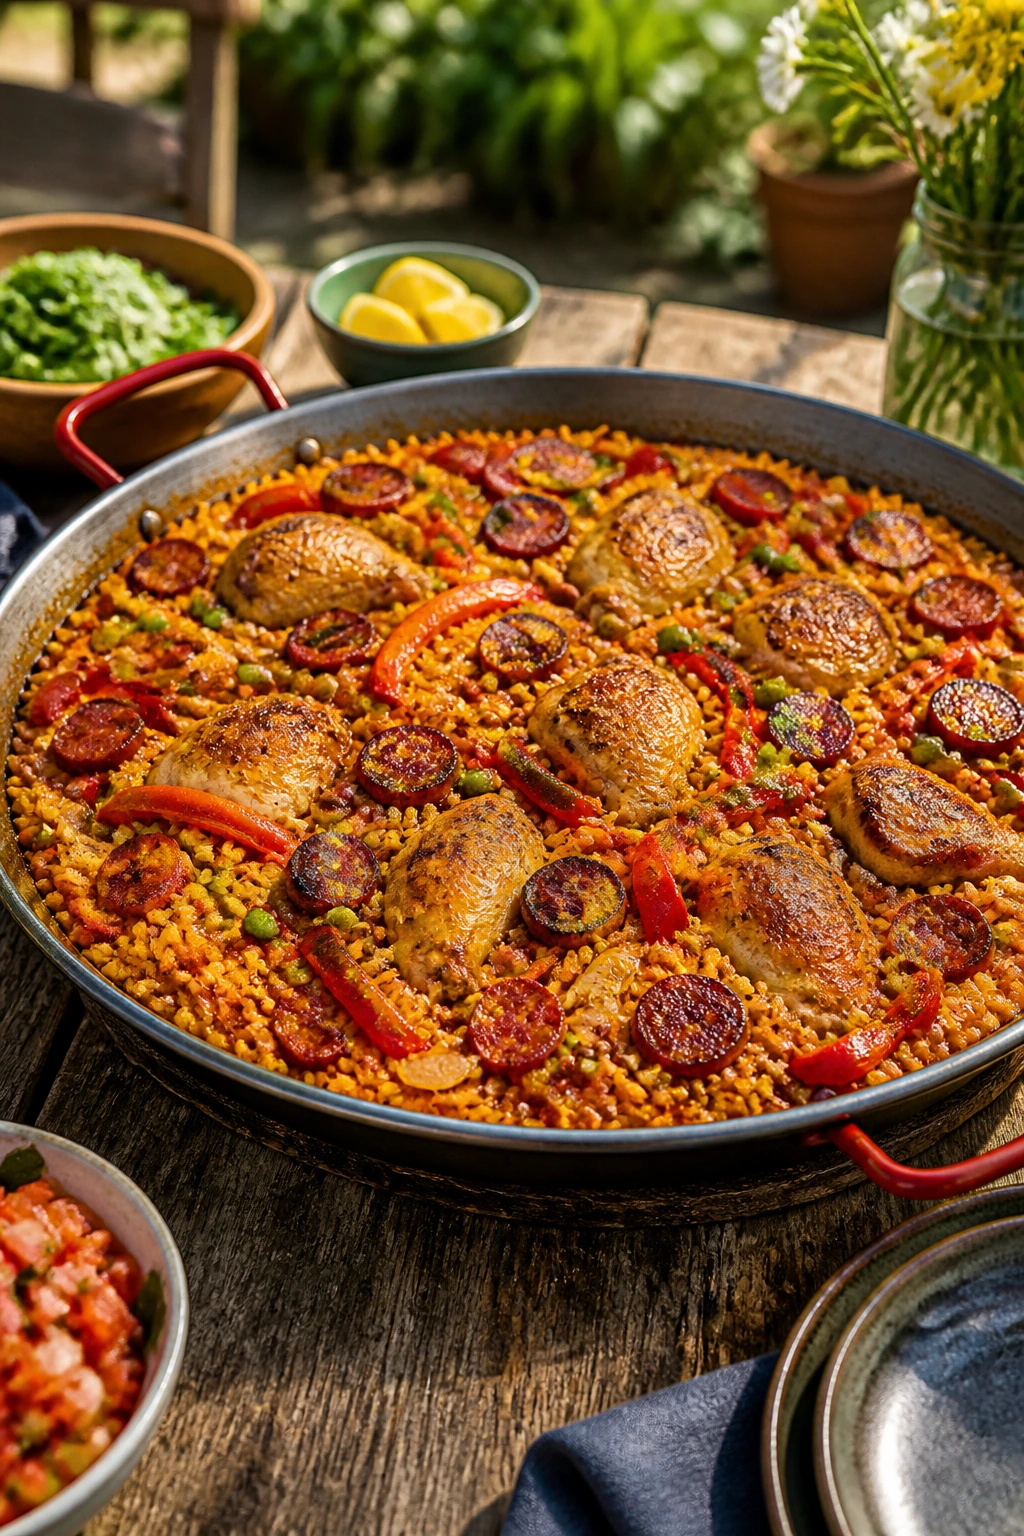
Paella looks elaborate from a distance. Up close, it’s mostly good timing and one wide pan. Chicken, chorizo, rice, peppers, and broth cook together into something with crisp edges, deep color, and a savory smell that usually gets people circling the stove or grill.
I like paella for a crowd because it feels like a centerpiece instead of a pile of components. People lean in. They ask questions. Then they eat more than they planned. That is the mark of a useful dinner.
Why It Works
A wide pan lets the rice spread out, which helps it cook evenly and develop the lightly toasted bottom layer people always hope for. Chicken thighs bring richness, and Spanish chorizo adds smoke, paprika, and fat that season the whole pan. Because the broth is added all at once and the rice is left alone to simmer, the structure stays intact instead of turning mushy. The peas and lemon finish keep the dish from feeling too dense.
Key Ingredients
- 2 pounds bone-in chicken thighs, cut in half if large
- 12 ounces Spanish chorizo, sliced
- 2 tablespoons olive oil
- 1 onion, diced
- 1 red bell pepper, diced
- 1 green bell pepper, diced
- 4 garlic cloves, minced
- 1 1/2 teaspoons smoked paprika
- Pinch of saffron threads or 1 teaspoon turmeric
- 2 cups bomba or other short-grain rice
- 5 cups warm chicken broth
- 1 cup frozen peas
- 1 lemon, cut into wedges
- Chopped parsley, for serving
Quick Steps
- Brown the meats: Heat oil in a wide paella pan or large skillet. Brown the chicken on both sides, then add the chorizo and cook until the edges darken a little.
- Cook the vegetables: Stir in the onion and peppers and cook until softened, then add the garlic, smoked paprika, and saffron.
- Add the rice: Stir in the rice so each grain gets coated in the oil and spices.
- Pour in the broth: Add the warm broth, bring it to a gentle simmer, and spread the ingredients into an even layer. Do not stir after this point; paella needs to settle.
- Simmer until done: Cook uncovered for about 18 to 22 minutes, until the liquid is mostly absorbed and the rice is tender. Add the peas during the last 5 minutes.
- Rest and finish: Turn off the heat, cover the pan loosely with foil, and let it rest for 10 minutes. Garnish with parsley and lemon wedges.
Tips and Variations
- Pan note: Use the widest pan you have; a cramped pan gives you uneven rice.
- Flavor move: Add a few shrimp in the last 5 minutes if you want a seafood note.
- Serving trick: Bring the whole pan to the table. It has the right kind of drama.
17. Portobello Mushroom Burgers with Crunchy Slaw
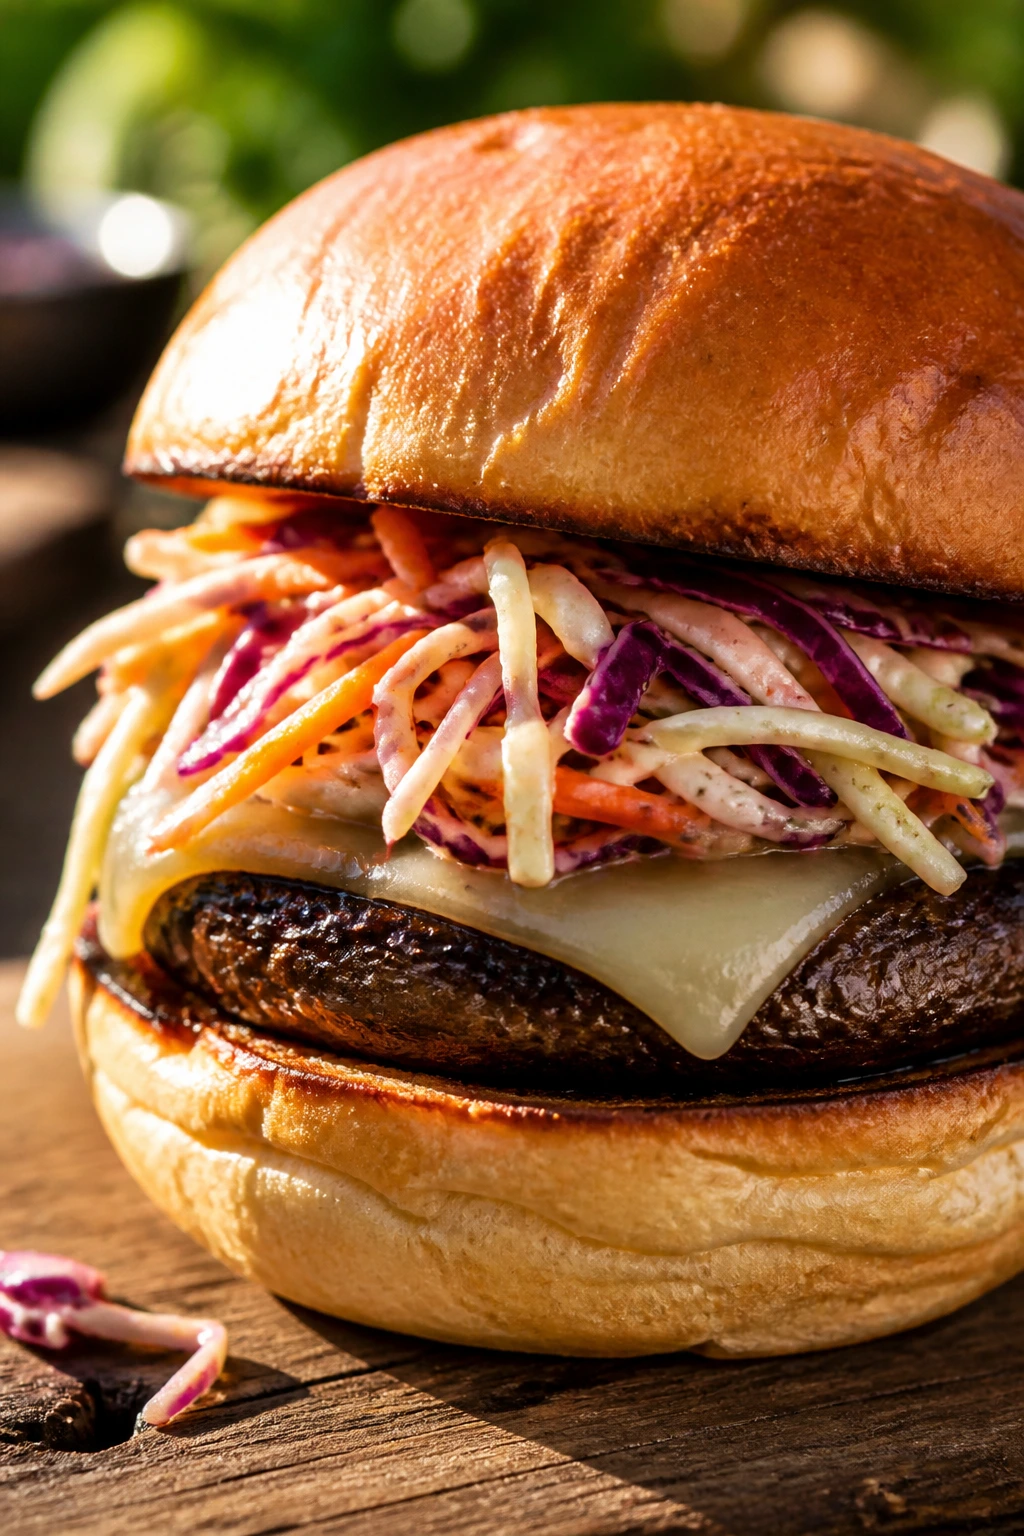
Portobello burgers are not a second-choice vegetarian move when they’re done well. The mushrooms soak up marinade, grill into something meaty and savory, and hold up under cheese and slaw without collapsing. That gives you a dinner that stands on its own instead of leaning on apology.
This is also one of the best ways to keep a mixed crowd happy. Meat eaters can grab one because it sounds good, not because they have to. That is a better outcome than forcing a separate menu.
Why It Works
Portobello caps have enough size and structure to act like a burger base, and their natural umami deepens when they hit hot grill grates. A balsamic-soy marinade gives the mushrooms salt, acidity, and color, which makes them taste substantial instead of watery. The slaw adds crunch and keeps the sandwich from becoming soft in the middle. With a little cheese and a toasted bun, the whole thing feels satisfying enough to hold its place at a holiday table.
Key Ingredients
- 8 large portobello caps, stems removed and gills scraped out
- 1/3 cup balsamic vinegar
- 3 tablespoons olive oil
- 2 tablespoons soy sauce
- 4 garlic cloves, minced
- 1 teaspoon black pepper
- 8 burger buns
- 8 slices Swiss or provolone
- 1 small head cabbage, shredded
- 1 carrot, shredded
- 1/3 cup mayonnaise or Greek yogurt
- 2 tablespoons apple cider vinegar
- 1 teaspoon sugar
- Avocado slices, optional
Quick Steps
- Marinate the mushrooms: Whisk balsamic vinegar, olive oil, soy sauce, garlic, and pepper. Brush or toss it over the mushrooms and let them sit for 20 to 30 minutes.
- Make the slaw: Stir cabbage, carrot, mayo or yogurt, vinegar, sugar, and a pinch of salt together.
- Grill the mushrooms: Cook over medium-high heat for 4 to 5 minutes per side, until tender and well marked.
- Add the cheese: Top each mushroom with a slice of cheese during the last minute so it melts.
- Toast the buns: Warm the buns cut-side down on the grill or in a skillet.
- Assemble the burgers: Stack mushroom, slaw, and avocado if using, then close the bun and serve immediately.
Tips and Variations
- Flavor move: Add a spoonful of Dijon to the marinade if you want a sharper edge.
- Texture note: Scrape out the dark gills so the burgers do not go muddy.
- Serving trick: Keep the slaw crisp by dressing it just before serving.
18. Grilled Veggie and White Bean Grain Bowls
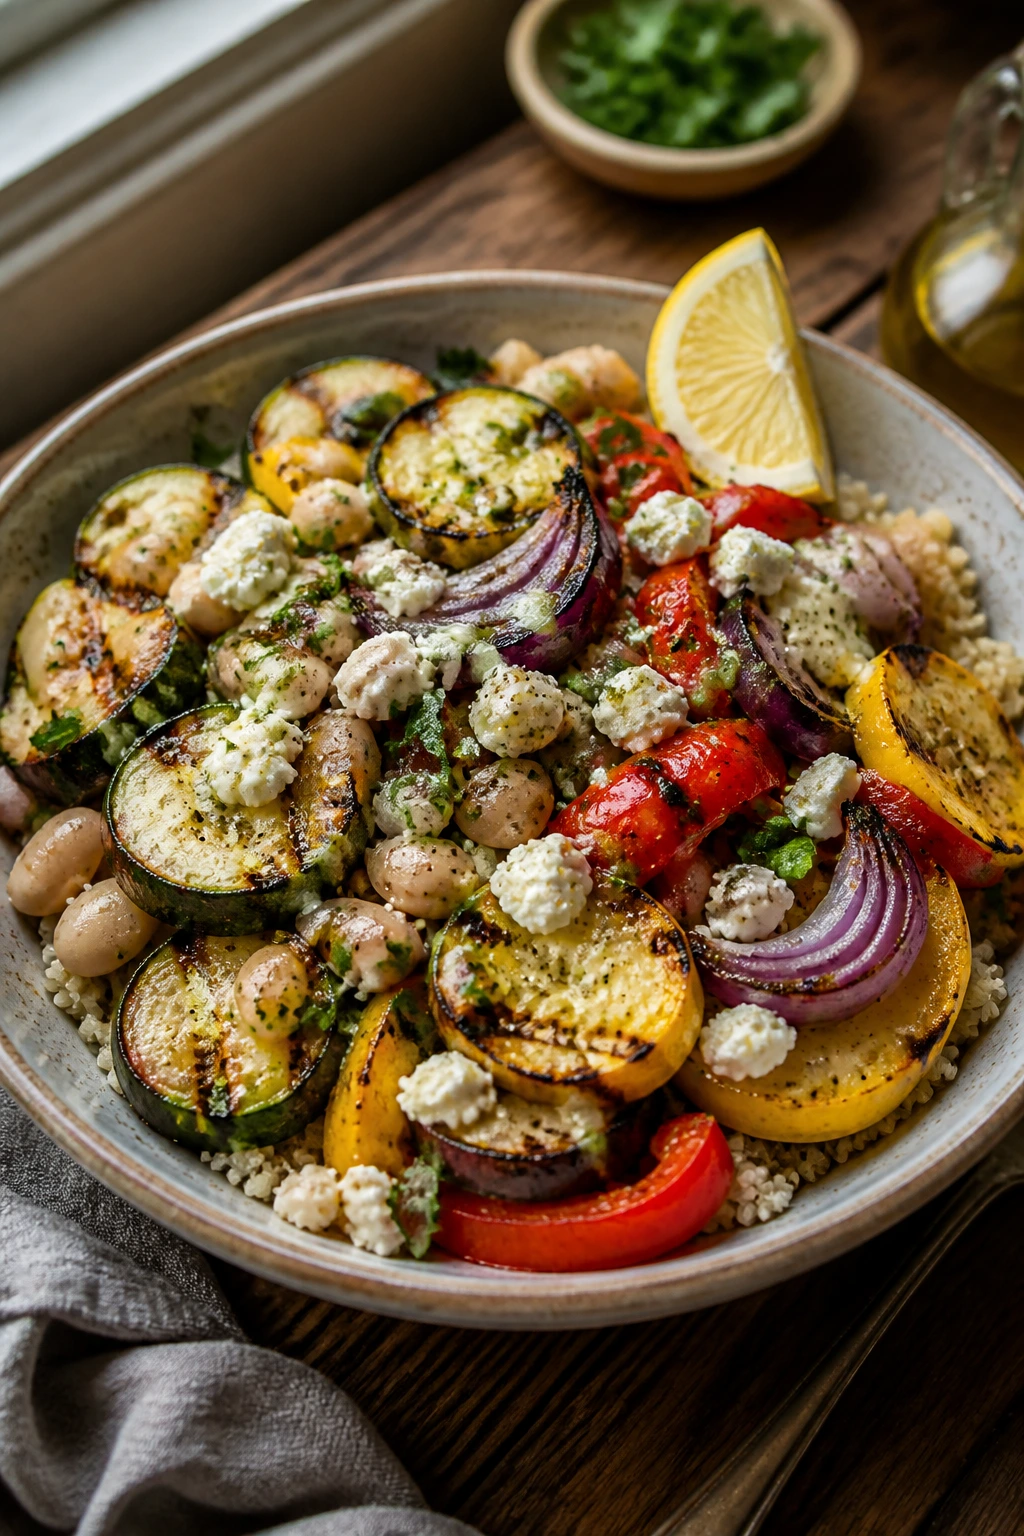
Grain bowls earn their place when the table already has a lot of rich food. They bring color, freshness, and a little breathing room. The roasted or grilled vegetables soften and char at the edges, the beans give you staying power, and the lemon dressing keeps the whole bowl awake.
This is the kind of vegetarian dinner that does not feel like a compromise. You get substance from farro or quinoa, creaminess from feta and beans, and enough herb brightness to make the plate look intentional. That matters when you are feeding a mixed group.
Why It Works
Farro or quinoa gives the bowl a sturdy base that can sit for a short time without turning mushy. Grilled vegetables pick up sweetness and smoke, while white beans make the dish feel like dinner instead of a side salad. The lemon-Dijon dressing pulls all the parts together, and feta adds enough salt to keep each bite interesting. It is the sort of meal that can be served warm, room temperature, or somewhere in between, which makes hosting easier.
Key Ingredients
- 2 cups farro or quinoa
- 4 cups water or broth
- 2 zucchini, sliced lengthwise
- 2 yellow squash, sliced lengthwise
- 2 bell peppers, quartered
- 1 red onion, cut into thick wedges
- 2 tablespoons olive oil
- 1 teaspoon kosher salt and 1/2 teaspoon black pepper
- 2 cans cannellini beans, drained and rinsed
- 1 cup crumbled feta
- 1/2 cup chopped parsley and mint
For the Dressing:
- 1/4 cup lemon juice
- 1/4 cup olive oil
- 1 teaspoon Dijon mustard
- 1 teaspoon honey
- 1 garlic clove, grated
Quick Steps
- Cook the grain: Simmer farro or quinoa in water or broth until tender, then fluff and set aside.
- Make the dressing: Whisk lemon juice, olive oil, Dijon, honey, garlic, salt, and pepper until smooth.
- Grill the vegetables: Toss zucchini, squash, peppers, and onion with olive oil, salt, and pepper, then grill over medium-high heat until tender and marked.
- Warm the beans: Toss the beans with a few spoonfuls of dressing so they taste seasoned, not plain.
- Build the bowls: Spoon grain into bowls, top with vegetables and beans, then scatter feta and herbs over the top.
- Finish with dressing: Drizzle the remaining dressing over the bowls and serve while the vegetables are still warm.
Tips and Variations
- Protein move: Add grilled chicken or shrimp for guests who want more heft.
- Flavor upgrade: A spoonful of chopped olives turns the bowl sharper and saltier.
- Serving note: Keep the dressing separate until the end if you want the vegetables to stay bright.
Why These Crowd Dinners Hold Up So Well
The common thread here is not just flavor. It is structure. Crowd dinners need a little backbone, because they spend time waiting—on a counter, under foil, or in a serving line where one person keeps asking, “Is there more coming?” Dishes that survive that wait tend to have moisture, fat, acid, and enough seasoning to stay awake after a few minutes out of the oven or off the grill.
That is why I like combinations rather than lone heroes. Pork with slaw. Chicken with lemon. Pasta with sausage and cheese. Rice with shrimp. Beans with grilled vegetables. Each one gets a little cushion from something else in the dish, and that cushion is what keeps the last serving from feeling like leftovers before it ever leaves the pan.
Essential Equipment for These Recipes
- Large grill or grill pan — Useful for chicken, salmon, fajitas, and vegetables when you need quick heat and a little char.
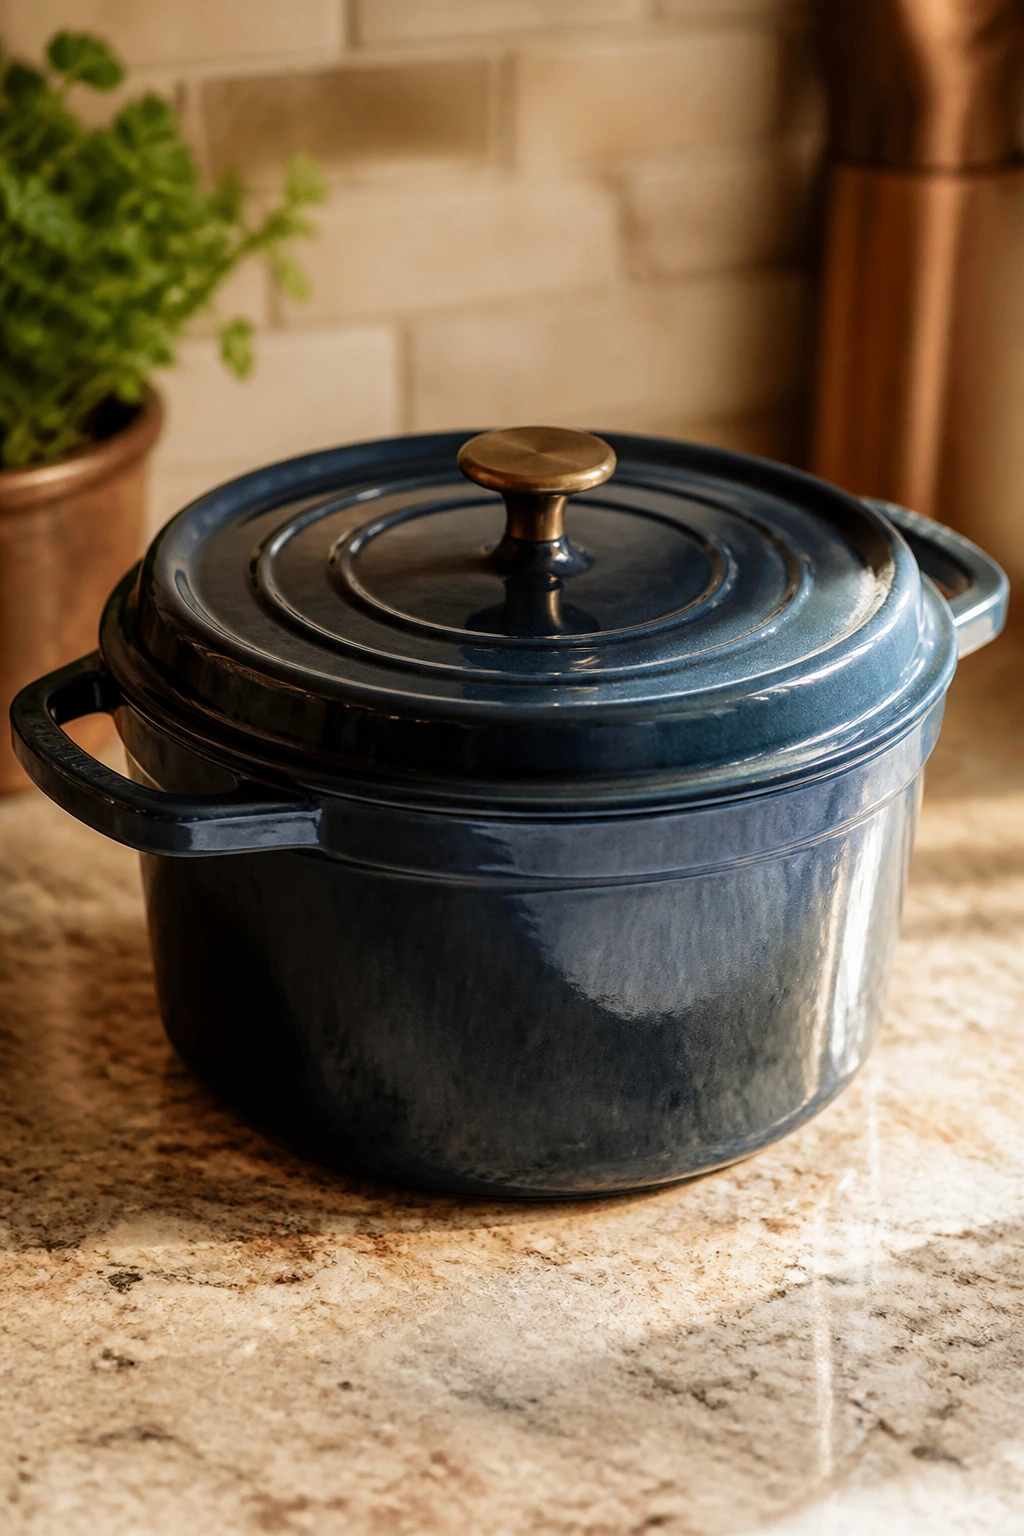
- Slow cooker, 6 to 8 quarts — Best for pulled pork and Hawaiian chicken when you want the cooker to do the heavy lifting.
- Large Dutch oven or heavy pot — Ideal for jambalaya and any one-pot dinner that needs steady heat.
- Two or three rimmed sheet pans — You will use these for steak and potatoes, drumsticks, sausage and peppers, and mushroom burgers.
- 9×13-inch baking dishes, preferably two — Essential for lasagna, ziti, taco pasta bake, and other casseroles that feed a room.
- Instant-read thermometer — The easiest way to keep chicken, pork, and salmon from guessing wrong.
- Sharp chef’s knife and cutting board — You will need both for all the slicing, dicing, and trimming.
- Tongs and a sturdy spatula — Critical for moving chicken, burgers, sausage, and vegetables without tearing them apart.
- Large mixing bowls — Handy for marinades, slaw, sauces, and big-batch pasta.
- Foil and parchment paper — Great for lining pans, covering casseroles, and easing cleanup after a long meal.
- Serving platters, bowls, and heat-safe spoons — The recipes here move better when the serving gear is ready before the food is.
Smart Shopping and Ingredient Tips for Feeding a Group
Buying for a crowd is mostly about choosing ingredients that behave under pressure. For meat, I like cuts with a little fat and some forgiveness: pork shoulder instead of loin, chicken thighs instead of breasts, and 80/20 beef instead of ultra-lean ground meat. Those choices matter more than fancy seasoning because they keep the food from drying out when the timing gets messy.
When you buy cheese, buy a little more than you think you need. Shred your own mozzarella and cheddar if you can; it melts better than the bagged stuff, and it tastes fresher in baked pasta and taco bakes. For canned items, pick low-sodium broth and beans when possible, then season them yourself. That gives you more control, which is the whole point when you are feeding a dozen people with different salt preferences.
Buns and rolls deserve more respect than they usually get. Soft hamburger buns, Hawaiian rolls, and hoagie rolls should be sturdy enough to hold filling, but not so dry that they crack the second you pick them up. If the bread looks flimsy in the bag, buy one extra pack. The same goes for tortillas, which always vanish faster than you predict.
Produce should work in your favor, not against you. Choose bell peppers with firm walls, onions that feel heavy for their size, lemons that have some give when pressed, and herbs that still look perky, not wilted. For corn, fresh ears are nice, but frozen corn holds up fine in casseroles and grain bowls. For shrimp, buy peeled and deveined if you are already cooking for a crowd; that one shortcut pays for itself in saved time and less shell cleanup.
How to Serve These Recipes
Presentation: Put the food where people can see it. Big platters, shallow bowls, and casserole dishes carried to the table in one piece make the meal feel fuller than it is. Garnish with something fresh and green at the end—parsley, dill, cilantro, scallions, lemon wedges, or sliced herbs—so the whole spread looks cared for, not merely cooked.
Accompaniments: Most of these dinners are complete on their own, but a few smart sides help. A simple slaw, grilled corn, potato salad, fruit salad, crusty bread, or a tray of pickles can carry the gaps between rich dishes. If you are serving multiple mains, keep the sides plain enough that they do not fight the seasoning already on the table.
Portions: For a big holiday meal, plan on 6 to 8 ounces of cooked protein per adult, a bit less if there are several mains, and more if the recipe is the only anchor on the table. Pasta bakes usually serve 10 to 12 from a standard 9×13-inch pan. Sliders, hoagies, and grain bowls are easiest to scale because people self-portion without a lot of help.
Beverage Pairing: I like iced tea, sparkling water with lemon, pale beer, or a crisp rosé with this kind of spread. For richer dishes like lasagna, pulled pork, or drumsticks, something cold and lightly bitter cuts through the sauce. For salmon, grain bowls, and Greek platters, lemony drinks and bright white wines keep the meal from feeling weighed down.
Additional Tips and Flavor Boosters
Flavor Enhancement: A finishing squeeze of citrus, a spoonful of herb oil, or a scatter of fresh herbs can wake up almost every recipe in this collection. That tiny last step matters more than people think, especially on dishes with rich meat or cheese.
Customization: Use the same framework and shift the personality. Swap sausage types in the pasta dishes, turn the fajita bar into steak fajitas, add shrimp to the paella, or throw grilled zucchini into the Greek platters. The structure stays useful even when the ingredients change.
Serving Suggestions: Warm sauces in small bowls, keep cold toppings cold, and set out enough napkins to survive the first five minutes. People appreciate a sauce spoon, a tray of lemon wedges, and a labeled bowl of toppings more than a decorative flourish.
Make-It-Yours: For gluten-free guests, use gluten-free buns, tortillas, or pasta where needed. For dairy-free plates, skip the cheese in the grain bowls and tacos, then lean harder on herbs, lemon, olives, and sauces. For spice-sensitive guests, keep the heat elements separate so people can choose their own level.
Make-Ahead, Storage, and Reheating Guidance
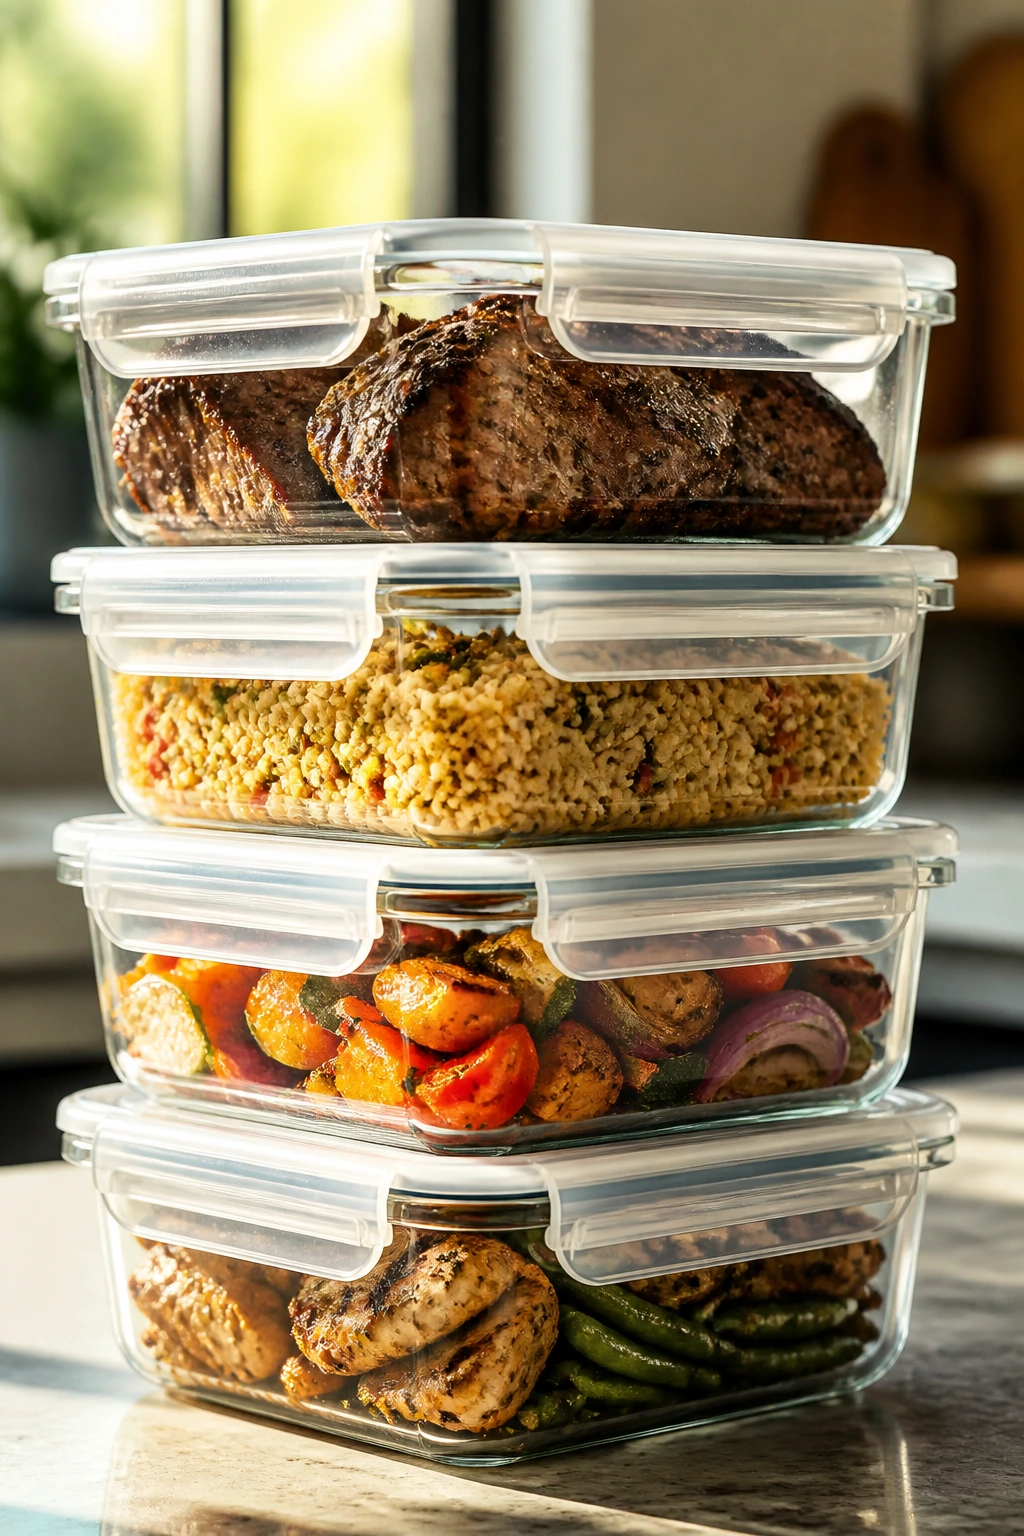
A crowd dinner gets easier the moment you stop pretending everything has to be finished at the last second. Pulled pork, lasagna, baked ziti, taco pasta bake, meatballs, jambalaya, and paella all give you some make-ahead flexibility. In most cases, the flavors hold well for 3 to 4 days refrigerated in airtight containers, and several of the baked dishes freeze for up to 2 months without turning sad.
For the saucier recipes—pulled pork, Hawaiian chicken, meatballs, and sausage-and-pepper filling—reheat gently over low heat with a splash of broth or water so the sauce loosens instead of tightening. For casseroles, cover with foil and rewarm in a 325°F oven until hot in the center, usually 20 to 30 minutes for a chilled portion and a bit longer for a full pan. If the top starts getting dark before the middle is hot, keep the foil on and finish slowly.
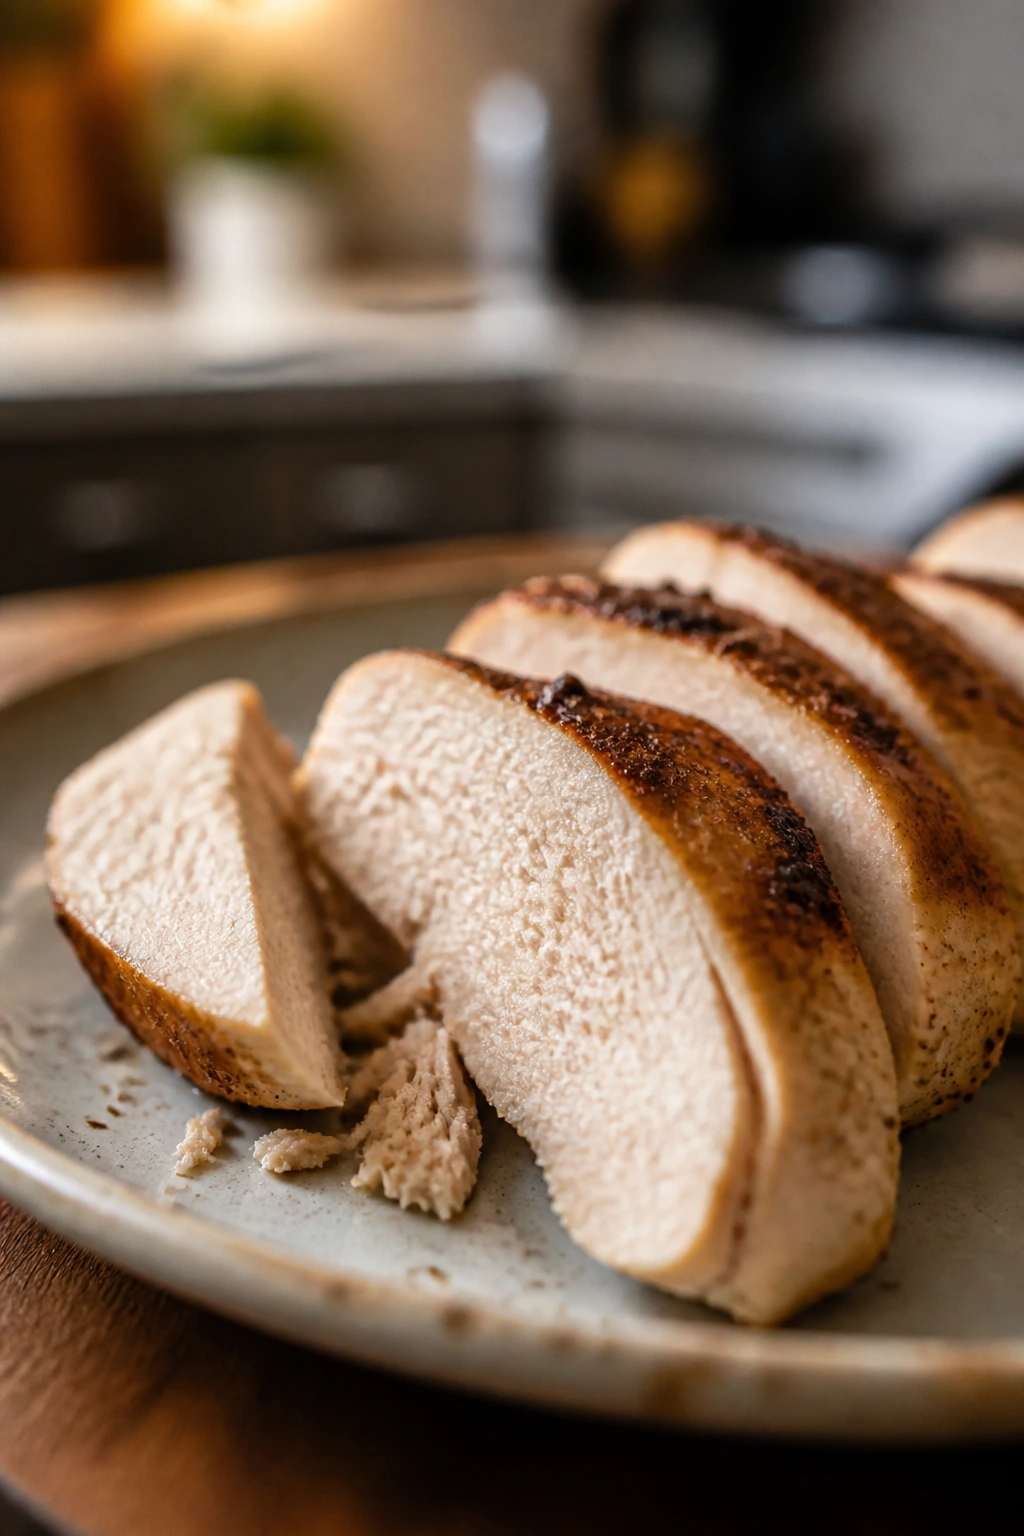
Grilled proteins are best cooked close to serving time, but you can marinate them earlier in the day. Chicken thighs, fajita chicken, Greek chicken, and salmon all benefit from that head start. Leftover grilled chicken keeps for 3 to 4 days in the fridge; leftover salmon is better within 2 days. Reheat grilled meat gently in a covered skillet or low oven, because high heat turns it dry and tough before you can blink.
Rice and grain bowls need a little more caution. Cool rice quickly, store it in shallow containers, and reheat it until steaming hot. That helps texture and food safety both. Beans, slaw components, and sauces can usually be made a day ahead and held separately, which makes assembly faster when guests are already standing near the food.
Variations and Adaptations to Try
Smoke-Free Backup Menu: If grilling weather turns unfriendly, move the menu indoors without changing the spirit of it. Chicken thighs can roast on sheet pans, salmon can broil, sausage and peppers can finish in the oven, and burgers can cook in cast iron. The flavors stay the same; the heat source changes.
Budget Pantry Switch: Swap in chicken thighs instead of steak, use pasta bakes and pulled pork more often than salmon, and lean on beans, rice, and tortillas to stretch protein further. That keeps the spread generous without loading every dish with expensive cuts. A crowd usually remembers whether the food was good, not whether the steak was ribeye.
Lower-Salt Spread: Choose low-sodium broth, keep soy sauce modest, and use acid—lemon, vinegar, lime, pickles—to make the food taste lively without piling on salt. Fresh herbs help too. They give you the sense of brightness that people often chase with more seasoning than they need.
Vegetarian Anchor Night: Build around the portobello burgers, grain bowls, and a meatless baked ziti if you want a table that serves everyone with no side-eye. Add grilled corn, slaw, and a bean dish or two, and the meal still feels complete. A vegetarian spread works best when it is planned as a main course, not as a token bowl in the corner.
Heat-Lover’s Table: Add chipotle, jalapeños, pepper jack, hot sauce, or cayenne to the rubs and sauces, but keep the heat on the side for mixed groups. That way the spice fans can go farther without turning the whole meal into a dare. The safer move is always to make the base dish tasty first, then let people chase fire if they want it.
Extra-Comfort Version: If your crowd wants the richest possible spread, pair the lasagna, baked ziti, pulled pork, and drumsticks with simple slaw and grilled vegetables. That gives you a heavy, satisfying table that still has some lift from acid and crunch. Too much softness in one meal gets dull fast.
Common Mistakes to Avoid
Underbuying food: Crowds eat more than you think, especially when the food smells good and people are outside. Plan for seconds, late arrivals, and the one guest who treats a holiday plate like a personal challenge. If you are unsure, lean a little high on bread, pasta, and protein.
Forgetting the holding plan: A dish can be cooked perfectly and still disappoint if it sits uncovered in a dry spot. Keep foil ready, use warm ovens at low heat, and hold saucy dishes in covered pans or slow cookers. Food loses texture much faster than hosts expect.
Overcooking lean proteins: Chicken breast, salmon, and burgers need close attention. Pull them at the right temperature and let them rest, because the carryover heat finishes the job. That one thermometer reading can save a full platter from drying out.
Making everything at once: A crowd menu needs staggered timing. Cook the casseroles first, the proteins next, and the grilled items last if you want the meal to land hot without a panic spiral. Nothing ruins the mood faster than trying to flip chicken while pasta is drying out on the counter.
Choosing dishes that fight each other: A table full of only creamy, rich food gets heavy fast. Mix in a salad, grain bowl, slaw, or grilled vegetable platter so the whole spread has contrast. People notice balance even if they never use that word.
Skipping the garnish and finishing acid: A little lemon, herb, pickle, or fresh onion can rescue a rich dish that tastes flat after resting. That last minute of attention is often the difference between “good enough” and “this disappeared fast.”
Frequently Asked Questions

How much food should I plan per person for a crowd dinner?
For main dishes, 6 to 8 ounces of cooked protein per adult is a useful target, with a bit more if the menu is simple. For pasta or grain-based dinners, one generous portion usually lands around 1 1/2 to 2 cups per person.
Which recipes here can be made the day before?
Pulled pork, lasagna, baked ziti, taco pasta bake, meatballs, and the sausage-and-pepper filling all hold up well after a night in the fridge. In fact, several of them taste better after resting because the sauce settles and the seasoning evens out.
What if I do not have a grill?
You can still make most of this list. Chicken thighs, burgers, salmon, sausage, and vegetables all work in a hot oven or on a stovetop grill pan. The flavor changes a little, but the structure of the meal stays intact.
How do I keep food hot without drying it out?
Use foil, covered pans, and low oven heat around 200°F to 250°F for short holding. Saucy dishes do better in a slow cooker or covered Dutch oven, while grilled meats should rest briefly and then move to a warm, covered platter.
Can I scale these recipes up for more than a dozen guests?
Yes, but scale the pan size and holding plan with the recipe. A double batch of pulled pork or pasta bake is easier than doubling a delicate grilled fish recipe, so favor the dishes that tolerate volume. Large sheet pans and extra 9×13 dishes become the bottleneck before the ingredients do.
What is the safest way to handle chicken and pork at a big gathering?
Use an instant-read thermometer. Chicken should reach 165°F, pork shoulder should become tender enough to shred, and ground beef should reach 160°F. Guessing at doneness is a bad party trick.
Which recipes travel best to a potluck?
Baked ziti, lasagna, taco pasta bake, pulled pork, meatballs, and sausage-and-pepper filling travel well because they reheat cleanly and do not rely on a final sear. Bring sauces and buns separately whenever you can; that keeps bread from getting soggy in the car.
How do I keep one vegetarian guest from feeling like an afterthought?
Pick one or two dishes that are genuinely satisfying on their own, not just side salads. The portobello burgers and grain bowls here work because they carry enough texture, fat, and seasoning to stand beside the meat dishes instead of hiding under them.
The Table by the Yard
A good crowd dinner does not need to be complicated. It needs to hold together, taste like more than the sum of its parts, and leave you with enough energy to sit down after everyone else has finished eating. That is the real luxury on a holiday weekend: not perfection, but food that lets the evening keep going.
These recipes are built for exactly that. Some are smoky and loud, some are bright and fresh, and some are the dependable middle ground that keeps a mixed group happy. Pick the ones that suit your setup, mix in one make-ahead dish, and let the rest of the menu do its job.