
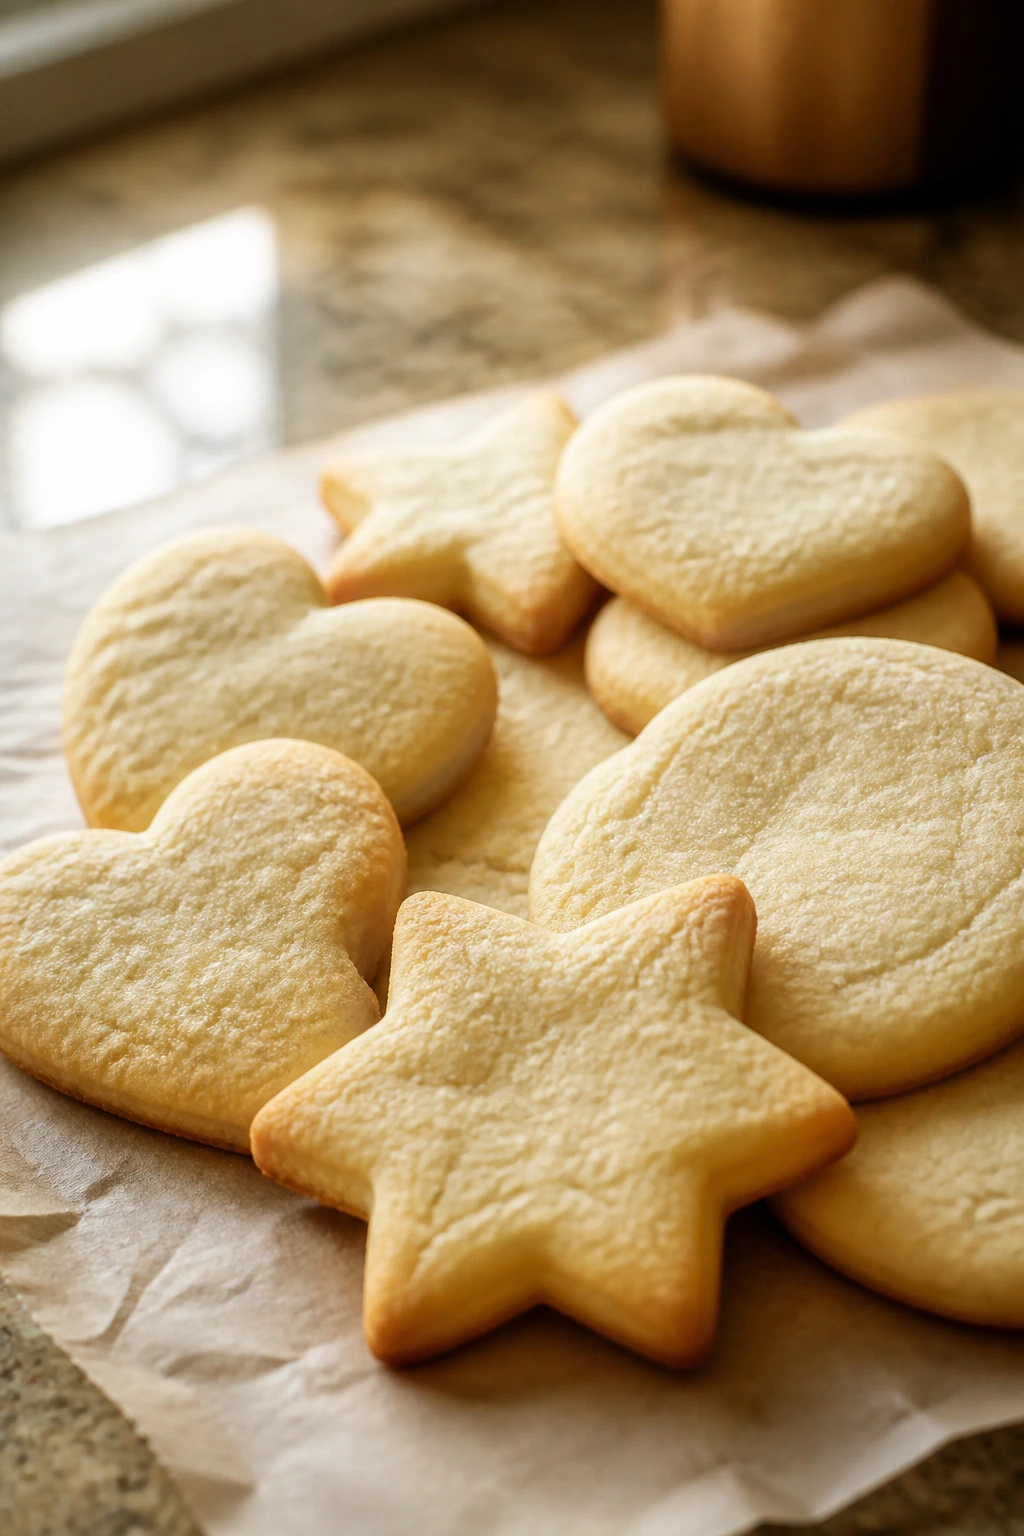
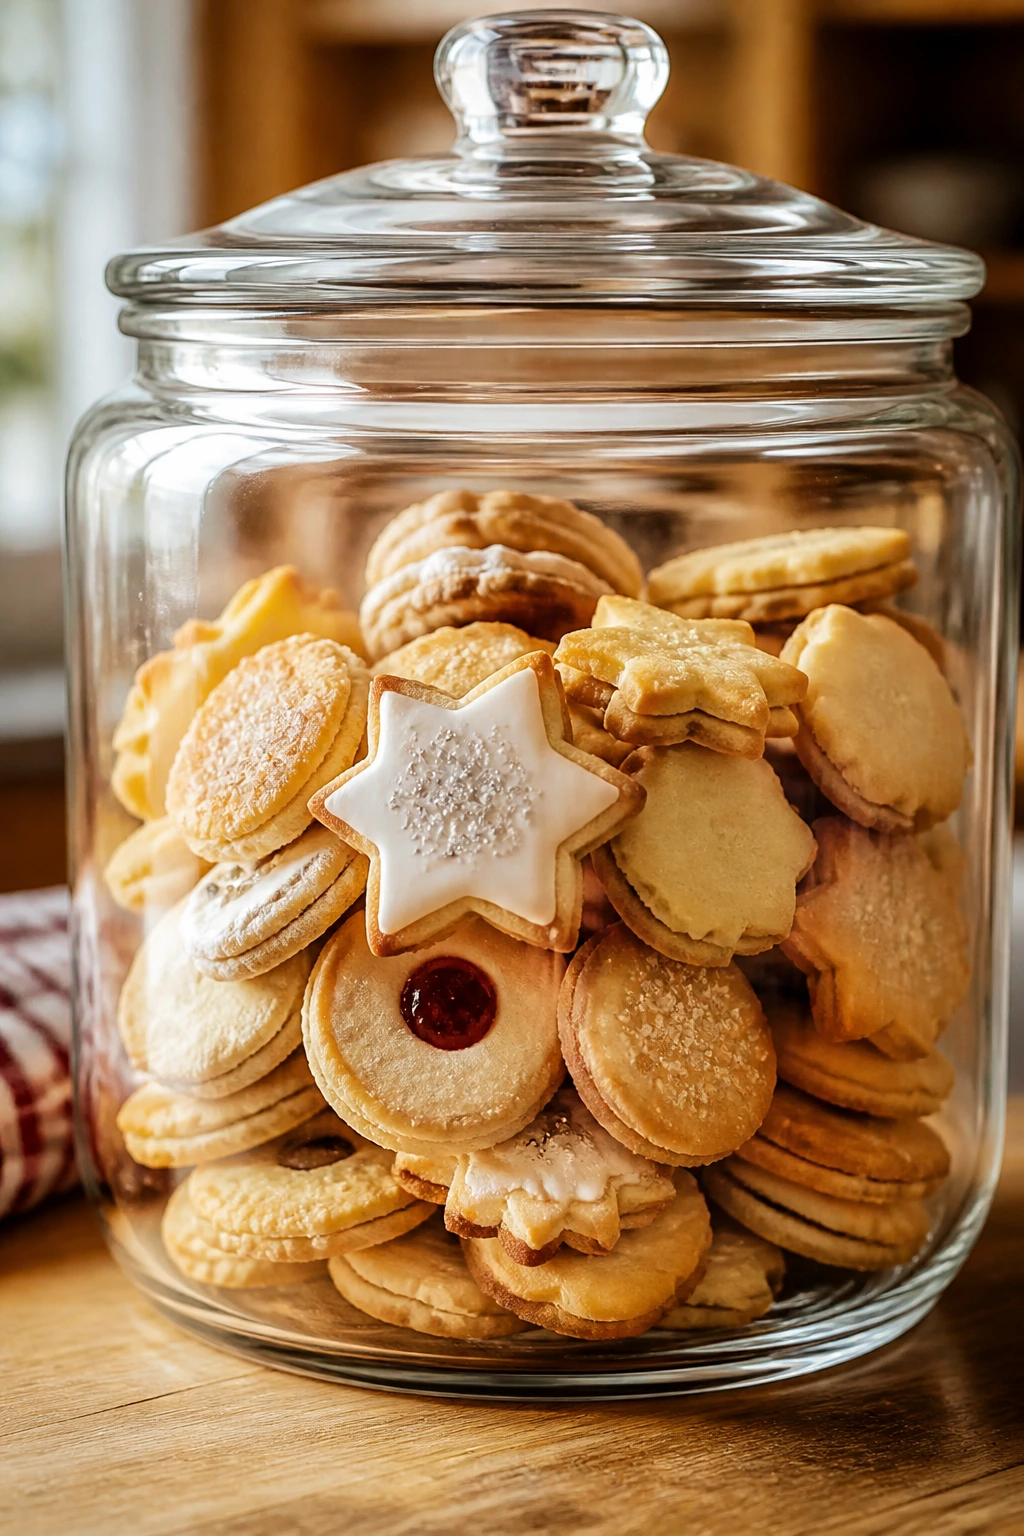
Shaped cookies are at their best when the outline looks neat and the bite still gives a little under your teeth. A star that turns dry on day two is a disappointment, especially when the cutter, the chill time, and the glazing all did their jobs. The fix is a mix of small things done on purpose: more brown sugar than white, a spoonful of cornstarch, dough rolled thick enough to protect the center, and an oven that sets the edges before the middle loses its softness.
What I like about soft shaped cookies is that they don’t punish you for baking ahead. A tray of hearts, leaves, or pinwheels can sit in a tin and still taste plush the next afternoon, which is a very different experience from those brittle, overbaked sugar cookies that crack when you try to twist one out of the box. The shapes matter, but the texture is the part people remember. Thin cookies go stale fast. Thick ones, chilled before baking and pulled while the centers still look a little pale, stay pleasant for days.
The 30 cookies below lean on different shaping methods — cut-outs, spritz, thumbprints, pinwheels, sandwiches, twists, drops, and domes — but they all follow the same soft-bake rule: stop before they look fully done. That tiny hesitation is where the tenderness lives.
Why These Shapes Stay Soft After Day One
- Brown sugar does the quiet work: It holds more moisture than white sugar, so these cookies stay bendy instead of turning brittle once they cool.
- Cornstarch keeps the crumb short: A tablespoon or two softens the bite without making the cookies cakey or heavy.
- Thicker shapes buy time: A 1/4-inch cut-out or a rounded scoop stays tender longer than a thin rolled cookie.
- Fat coats the flour early: Butter, cream cheese, tahini, or peanut butter slows dryness and gives the cookies that soft, rich center.
- A slightly pale center is the goal: If you wait for deep color all over, you’ve already gone too far.
- Airtight storage matters more than frosting does: These cookies keep their softness best when they’re packed snugly, layered with parchment, and sealed before air can get to them.
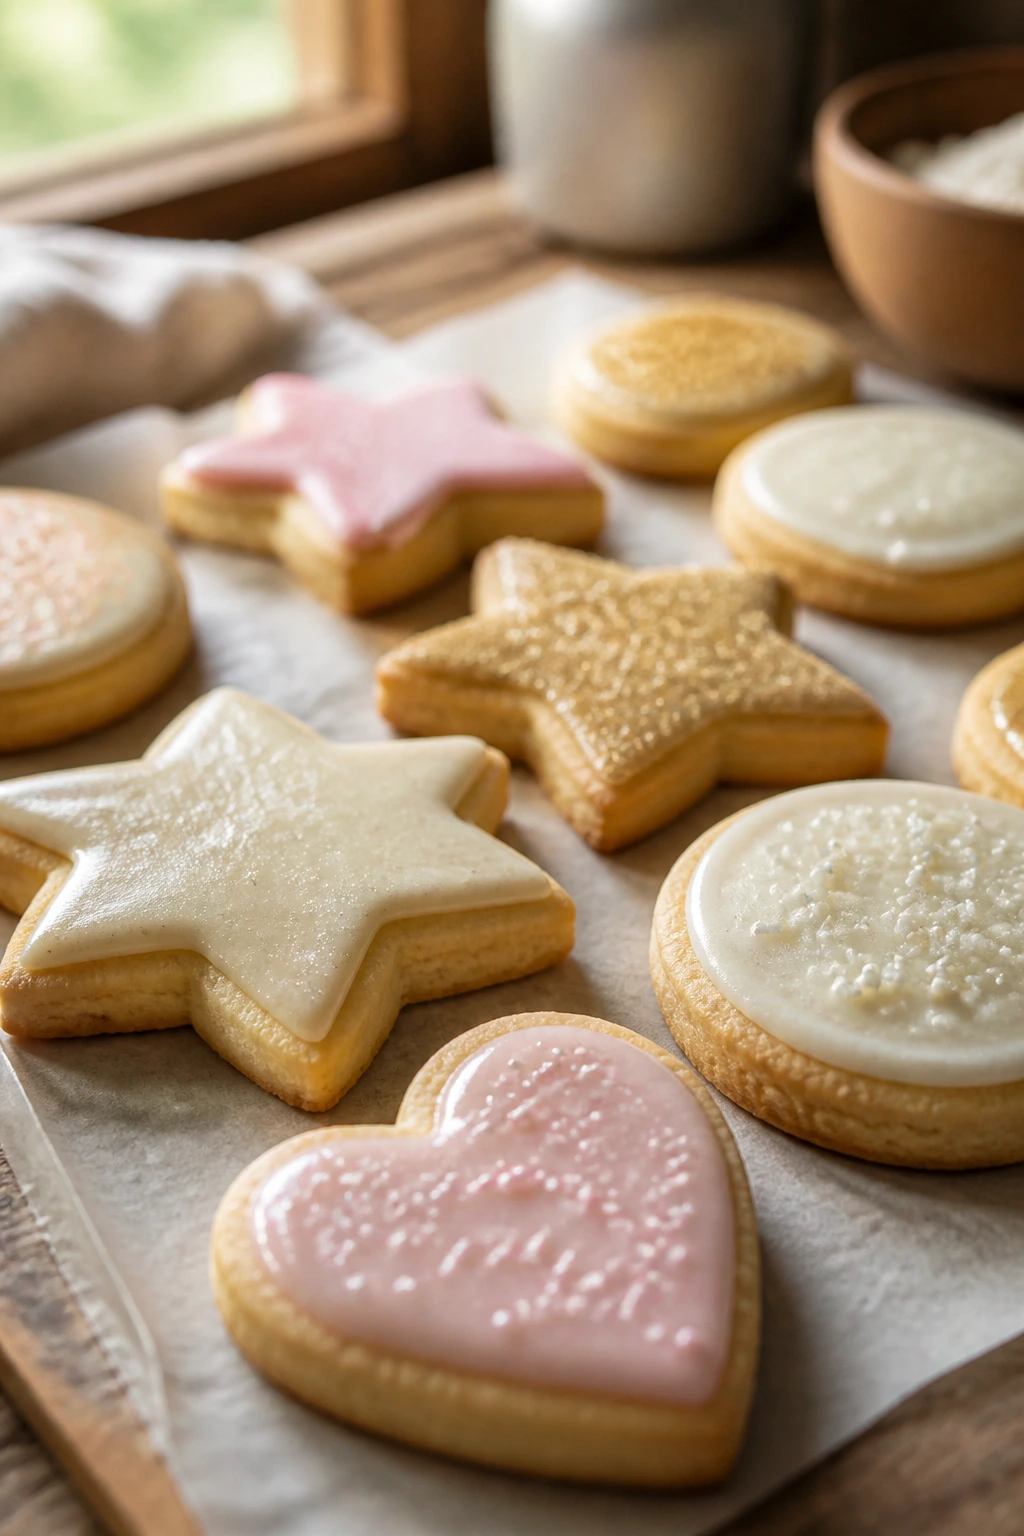
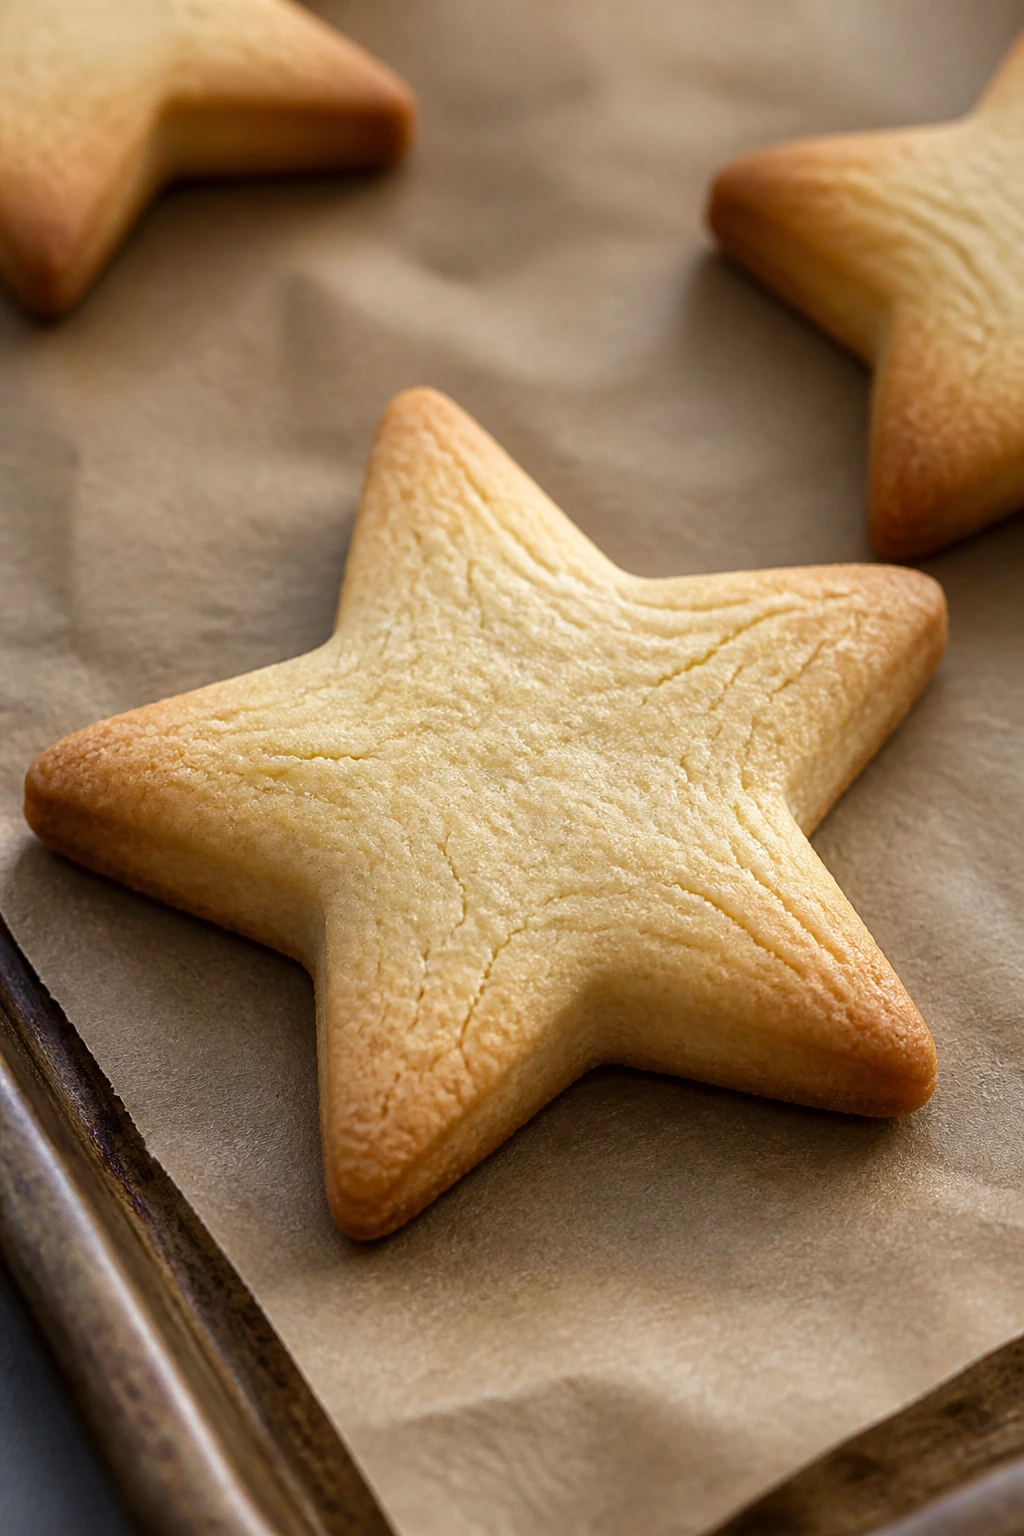
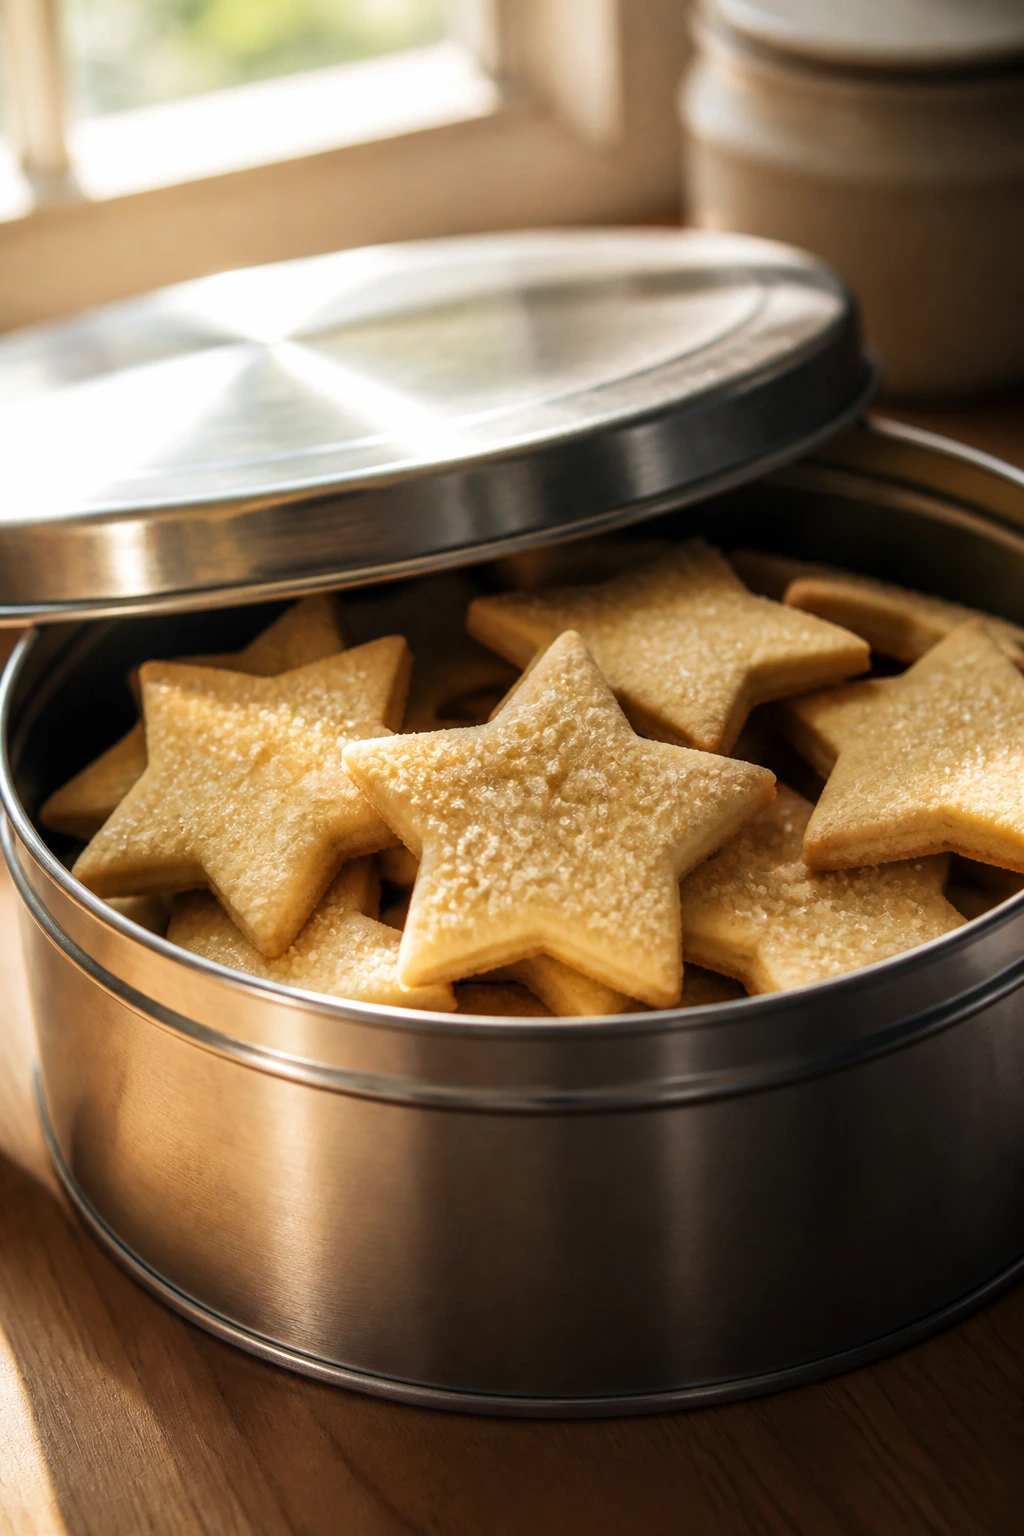
1. Brown Sugar Vanilla Stars
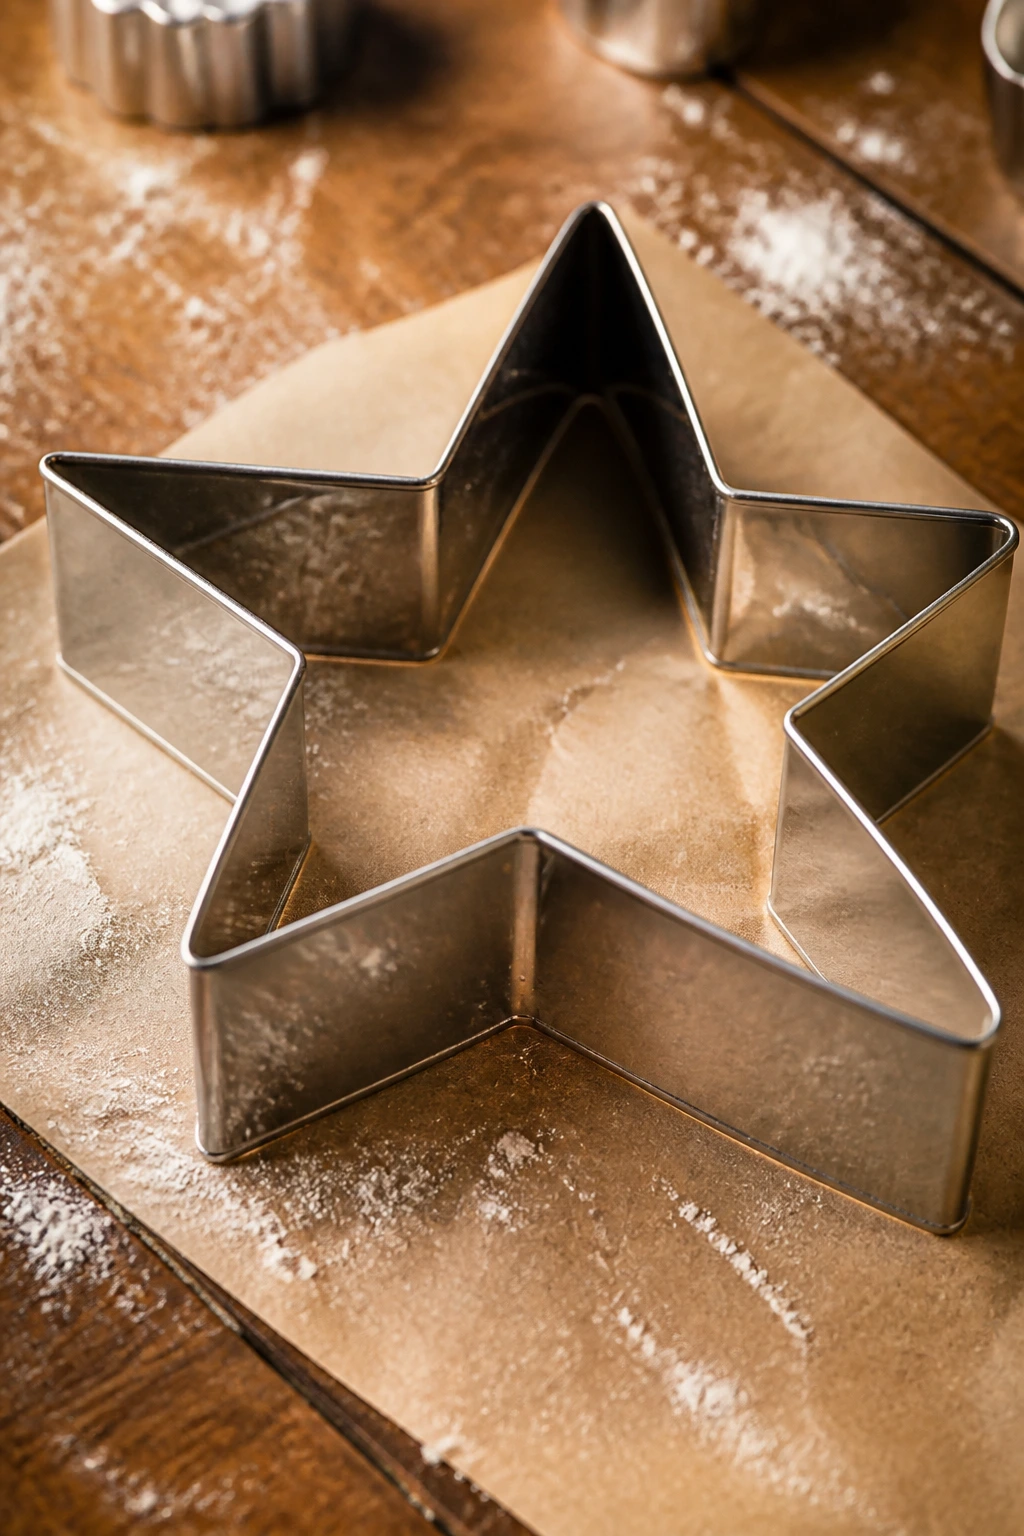
Intro: Star cutters can be brutal. This dough handles them well because the brown sugar and cornstarch keep the crumb soft even when the edges set into a clean point.
Why It Works: The mix of butter, brown sugar, and a little cornstarch keeps the dough tender, while chilling it for 30 minutes stops the stars from spreading into blobs. Bake them at 325°F and pull them while the centers still look a shade lighter than the edges.
Key Ingredients:
- 2 1/4 cups all-purpose flour
- 1 tbsp cornstarch
- 1 tsp baking powder
- 1/2 tsp fine salt
- 3/4 cup unsalted butter, softened
- 3/4 cup packed light brown sugar
- 1 large egg
- 2 tsp vanilla extract
Quick Steps:
- Whisk the flour, cornstarch, baking powder, and salt in a bowl.
- Beat the butter and brown sugar for 2 minutes until fluffy, then add the egg and vanilla.
- Mix in the dry ingredients just until the dough comes together.
- Chill 30 minutes, roll to 1/4 inch, and cut out stars.
- Bake at 325°F for 9 to 11 minutes, until the edges are set and the centers still look soft. Cool 5 minutes on the pan.
Equipment for This Recipe:
- Mixing bowl and hand mixer
- Rolling pin
- Star cookie cutter
- Parchment-lined sheet pan
How to Serve This Dish: Stack them in a shallow tin with parchment between layers. They go well with tea, cold milk, or a plain coffee that won’t bully the vanilla.
Pro Tips for This Recipe:
- Roll the dough between parchment so you don’t dust it in extra flour.
- Chill the cut stars on the tray for 10 minutes before baking for cleaner points.
- Brush the tops with milk and sprinkle sanding sugar if you want a little sparkle.
Variations on This Dish:
- Lemon Starry Swap: Replace 1 tsp vanilla with 1 tbsp lemon zest for a brighter cookie.
- Cinnamon Edge Stars: Roll the cut dough in cinnamon sugar right before baking.
Common Mistakes to Avoid with This Dish:
- Don’t roll the dough thinner than 1/4 inch; thin stars dry out fast.
- Don’t wait for full browning. Pale centers are the whole point here.
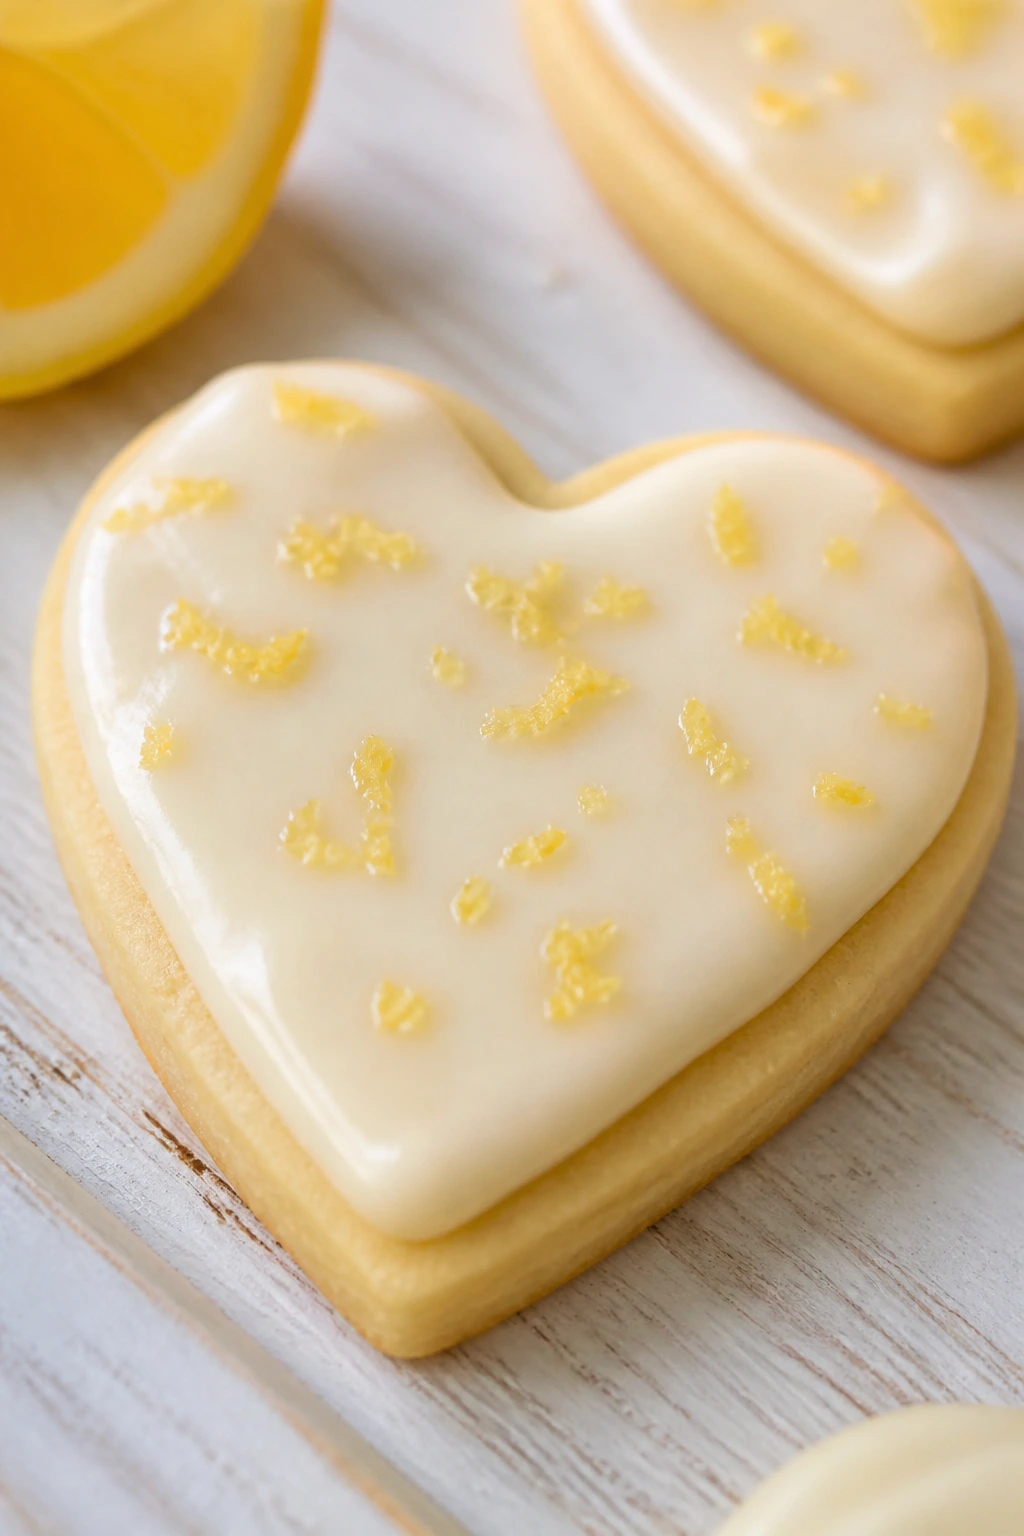
2. Lemon Cream Hearts
Intro: These have a soft, almost plush bite that feels a little richer than a standard sugar cookie. The cream cheese and lemon zest keep the center tender and the flavor clean.
Why It Works: Cream cheese adds moisture without making the dough sticky, and lemon zest gives the cookies enough lift that they don’t taste heavy. A short chill keeps the hearts tidy, and a quick glaze seals the surface just enough to help them stay soft.
Key Ingredients:
- 2 cups all-purpose flour
- 1 tbsp cornstarch
- 1/2 tsp baking powder
- 1/2 tsp fine salt
- 1/2 cup unsalted butter, softened
- 4 oz cream cheese, softened
- 3/4 cup granulated sugar
- 1 large egg
- 1 tbsp lemon zest
- 1 tsp vanilla extract
- 1 cup powdered sugar
- 2 tbsp lemon juice
Quick Steps:
- Whisk the flour, cornstarch, baking powder, and salt.
- Beat the butter, cream cheese, and sugar until smooth, then add the egg, zest, and vanilla.
- Mix in the dry ingredients and chill 30 minutes.
- Roll to 1/4 inch, cut hearts, and bake at 325°F for 10 to 12 minutes.
- Stir the powdered sugar and lemon juice into a thin glaze, then drizzle over cooled cookies.
Equipment for This Recipe:
- Hand mixer
- Heart cookie cutter
- Small whisk
- Cooling rack
How to Serve This Dish: These work well on a white plate where the glaze can puddle a little at the edges. Serve them with strawberries or alongside Earl Grey tea.
Pro Tips for This Recipe:
- Use fresh lemon zest; bottled juice alone tastes flat here.
- Chill the dough long enough that the cutter lifts cleanly.
- Glaze the cookies only after they’re fully cool, or the tops will go tacky.
Variations on This Dish:
- Orange Cream Hearts: Swap lemon for orange zest and juice.
- Lavender-Lemon Hearts: Add 1/2 tsp dried culinary lavender to the sugar.
Common Mistakes to Avoid with This Dish:
- Don’t overwork the dough after the flour goes in; it makes the cookies tough.
- Don’t glaze warm cookies. The glaze will slide off and disappear.
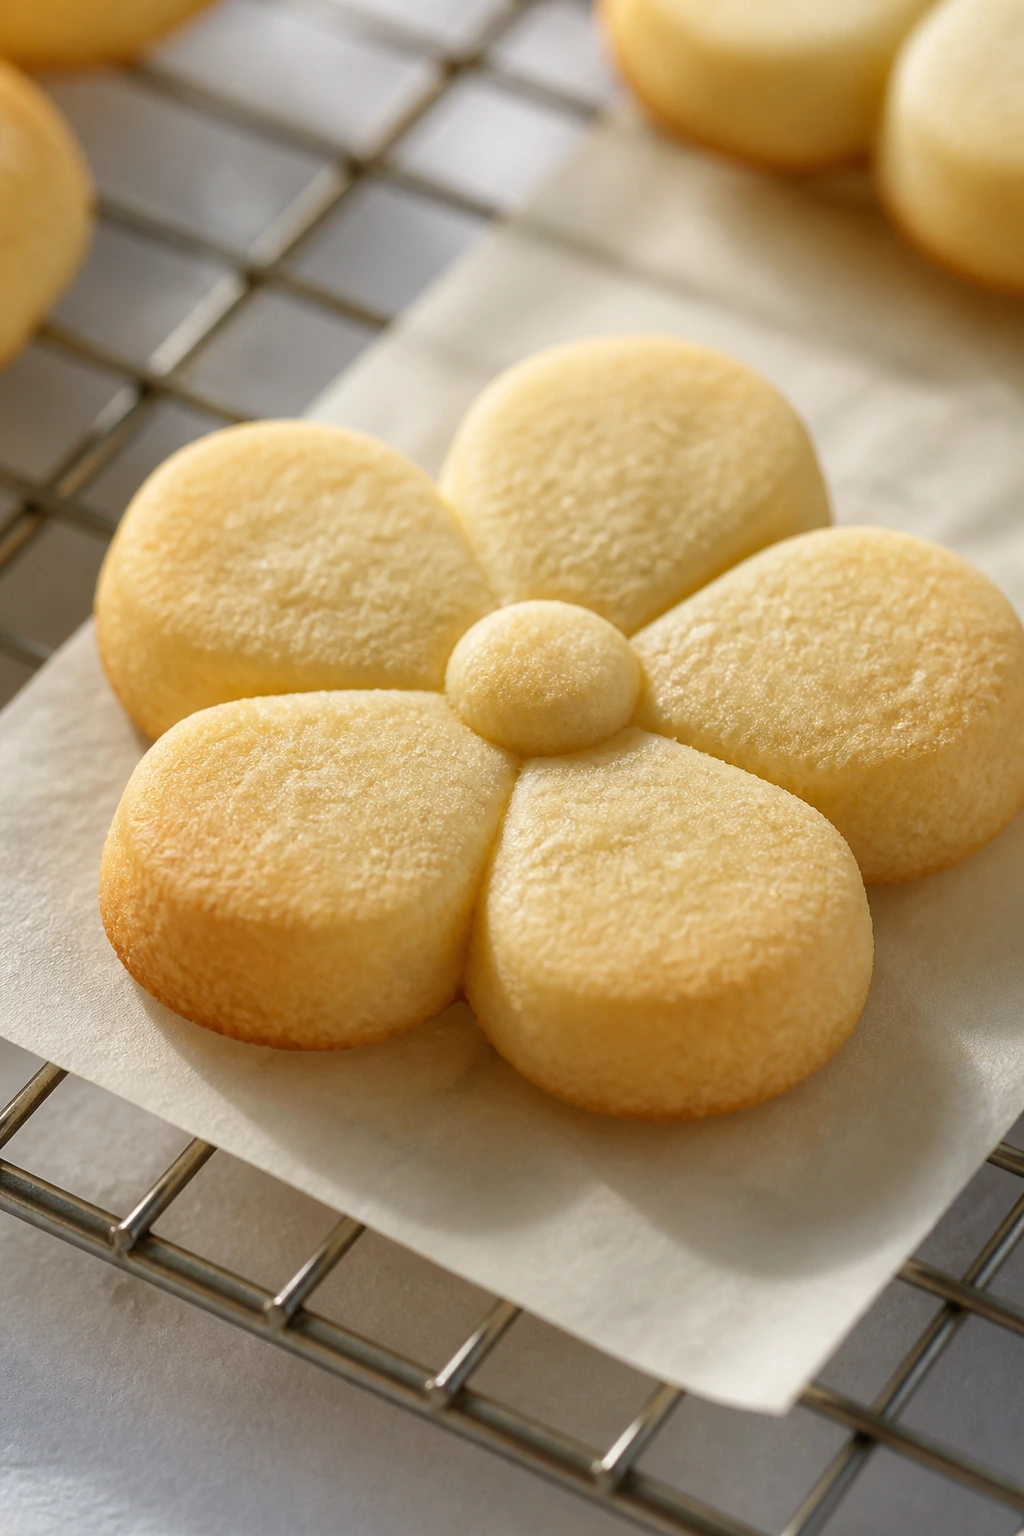
3. Cream Cheese Flower Cut-Outs
Intro: Flower cutters look fussy until you bake them with cream cheese in the dough. Then the petals hold their shape and the crumb stays soft enough to bend instead of snap.
Why It Works: Cream cheese brings moisture and a little tang, which keeps these flower-shaped cookies from tasting sugary and one-note. The dough is easiest to cut when it’s cold, and a low bake protects the petal edges from drying out.
Key Ingredients:
- 2 1/4 cups all-purpose flour
- 1 tbsp cornstarch
- 1/2 tsp baking powder
- 1/2 tsp fine salt
- 1/2 cup unsalted butter, softened
- 4 oz cream cheese, softened
- 2/3 cup granulated sugar
- 1 large egg yolk
- 1 tsp vanilla extract
- 1 tsp almond extract
Quick Steps:
- Whisk the flour, cornstarch, baking powder, and salt.
- Beat the butter, cream cheese, and sugar for 2 minutes.
- Mix in the egg yolk, vanilla, and almond extract.
- Add the dry ingredients, chill 45 minutes, then roll and cut flowers.
- Bake at 325°F for 9 to 10 minutes, until the edges are set and the petals look matte, not wet.
Equipment for This Recipe:
- Mixing bowl
- Flower cutter
- Parchment paper
- Offset spatula
How to Serve This Dish: I like these dusted with powdered sugar and stacked in a loose cluster, petals overlapping. They’re nice with black tea or a cup of milk if you want the almond note to come forward.
Pro Tips for This Recipe:
- Keep the dough cold between rolling sessions.
- If the cutter sticks, dip it in flour, then shake off the excess.
- A light brush of milk before baking helps sanding sugar stick.
Variations on This Dish:
- Vanilla Bean Garden: Swap almond extract for 1 scraped vanilla bean.
- Berry Blossom Tops: Press a tiny dot of thick jam into the center before baking.
Common Mistakes to Avoid with This Dish:
- Don’t use softened cream cheese that’s almost liquid; the flowers spread.
- Don’t bake until the edges brown hard. That steals the softness.
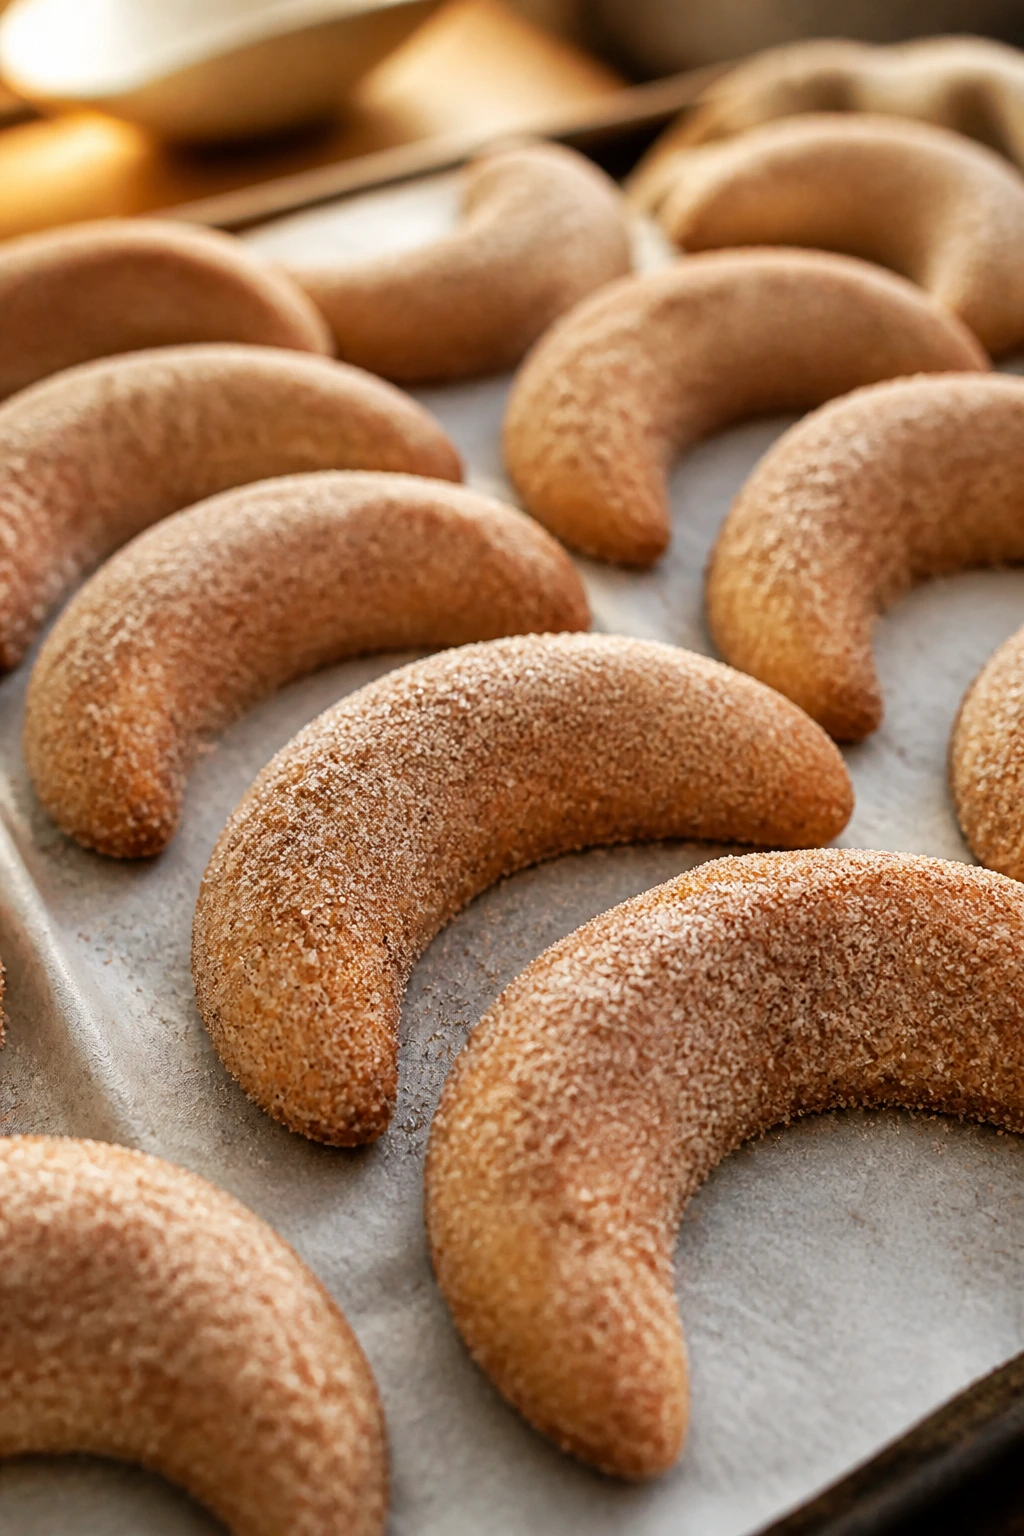
4. Cinnamon Crescent Moons
Intro: Crescents are an old-fashioned shape for a reason. They’re easy to make by hand, and the curved form bakes up with a soft middle and a light, tender edge.
Why It Works: Sour cream keeps the dough pliable and adds moisture without making it greasy. A cinnamon-sugar finish gives the outside a little texture, but the center stays soft because the cookies bake thick and short.
Key Ingredients:
- 2 cups all-purpose flour
- 1 tbsp cornstarch
- 1 tsp baking powder
- 1/2 tsp fine salt
- 1/2 cup unsalted butter, softened
- 1/2 cup sour cream
- 2/3 cup granulated sugar
- 1 large egg
- 1 tsp vanilla extract
- 2 tsp ground cinnamon
- 1/4 cup granulated sugar, for coating
Quick Steps:
- Whisk flour, cornstarch, baking powder, salt, and cinnamon.
- Beat butter and sugar, then add the egg, sour cream, and vanilla.
- Mix in the dry ingredients and chill 30 minutes.
- Shape 1 1/2-inch balls, roll each into a rope, and curve into crescents.
- Bake at 350°F for 9 to 11 minutes, then roll warm cookies in cinnamon sugar.
Equipment for This Recipe:
- Mixing bowl
- Sheet pan
- Small bowl for cinnamon sugar
- Cooling rack
How to Serve This Dish: Serve them in a simple pile so the crescent shape reads clearly. They’re especially good with coffee and a little salted butter on the side, though they don’t need anything.
Pro Tips for This Recipe:
- Shape them a little plumper than you think; thin crescents dry faster.
- Roll them in cinnamon sugar while still warm so the coating sticks.
- If your kitchen runs warm, chill the shaped crescents 10 minutes before baking.
Variations on This Dish:
- Orange-Cinnamon Moons: Add 1 tbsp orange zest to the dough.
- Maple Crescents: Replace 2 tbsp sugar with 2 tbsp maple syrup and reduce the sour cream slightly.
Common Mistakes to Avoid with This Dish:
- Don’t flatten the crescents on the pan; they’ll lose their soft center.
- Don’t overbake in search of a deep golden color. These are better a little pale.
5. Peanut Butter Fork-Marked Rounds
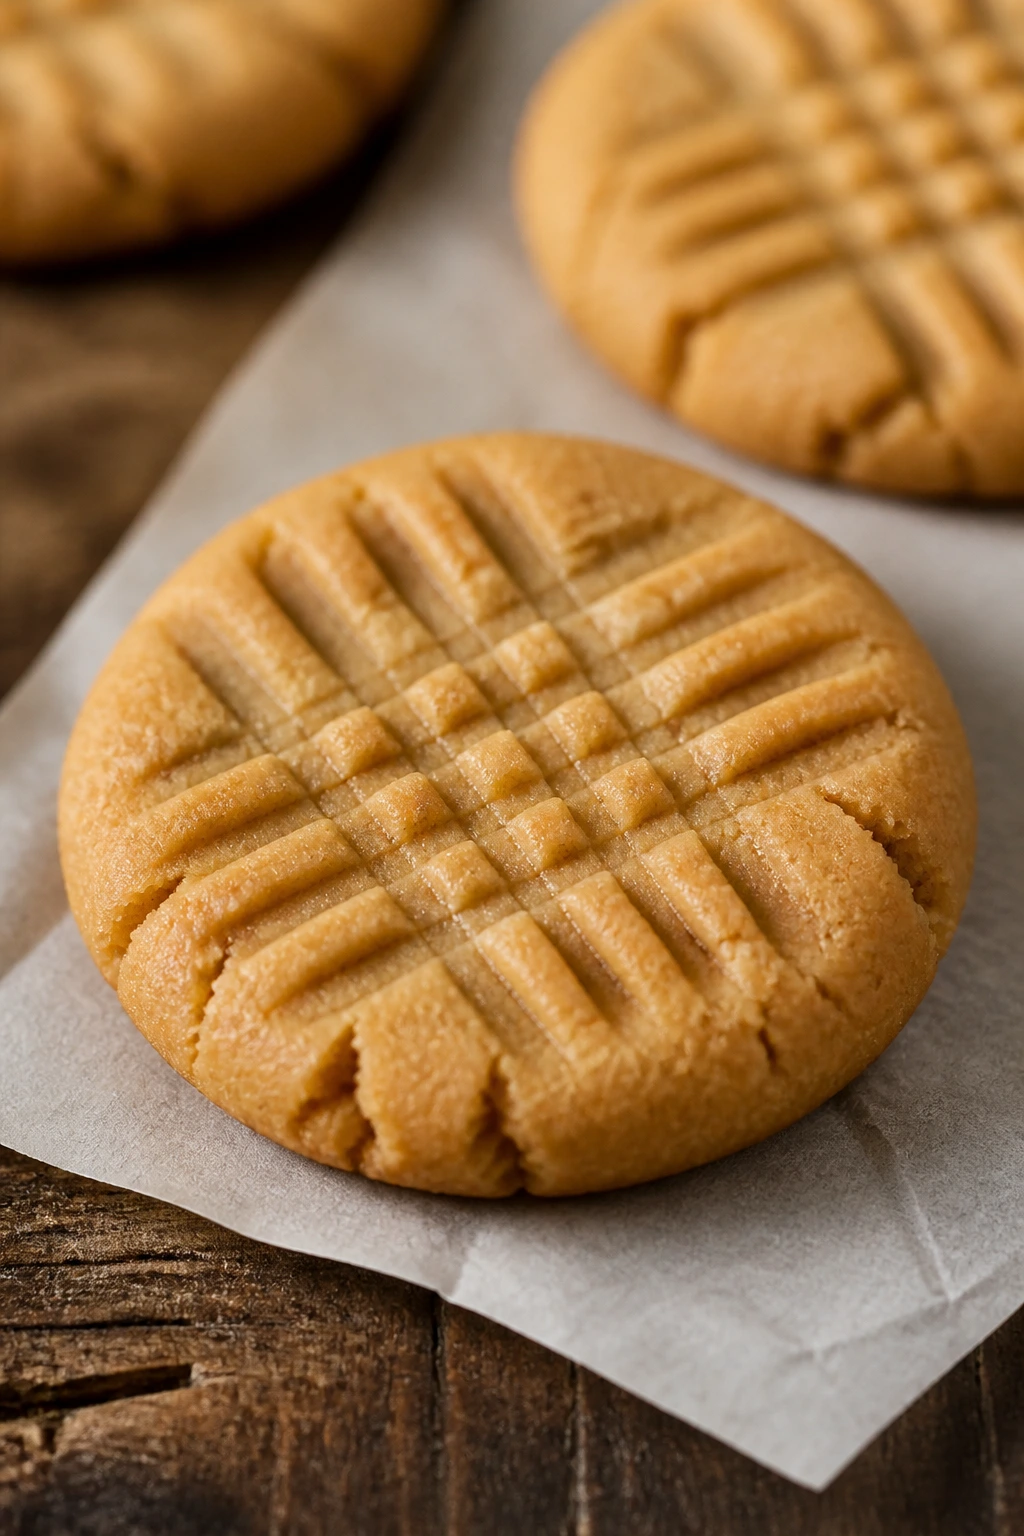
Intro: Some cookies should look humble. Peanut butter rounds with fork marks are one of those cases, and the soft center is exactly why they’ve stayed around so long.
Why It Works: Peanut butter already brings fat and moisture, so the dough doesn’t need much fuss. Brown sugar helps the texture stay chewy, while the fork marks flatten the tops just enough for even baking.
Key Ingredients:
- 1 cup creamy peanut butter
- 1/2 cup unsalted butter, softened
- 3/4 cup packed light brown sugar
- 1 large egg
- 1 1/4 cups all-purpose flour
- 1/2 tsp baking soda
- 1/4 tsp fine salt
- 1 tsp vanilla extract
Quick Steps:
- Beat the peanut butter, butter, and brown sugar until smooth.
- Add the egg and vanilla.
- Mix in the flour, baking soda, and salt.
- Scoop 1 1/2-tablespoon portions, roll into balls, and press with a fork in a crisscross pattern.
- Bake at 350°F for 9 to 10 minutes, until the edges are set and the centers still look slightly underdone.
Equipment for This Recipe:
- Mixing bowl
- Fork
- Cookie scoop
- Parchment-lined sheet pan
How to Serve This Dish: These belong with a cold glass of milk, full stop. They also work well crumbled over vanilla ice cream if you want a softer, peanutty topping.
Pro Tips for This Recipe:
- Use creamy peanut butter, not the natural kind that separates.
- Pull them early; they keep cooking on the hot pan.
- Sprinkle with flaky salt if you want the peanut flavor to read a little louder.
Variations on This Dish:
- Chocolate Chip Rounds: Fold in 1/2 cup mini chocolate chips.
- Honey Peanut Cookies: Replace 2 tbsp brown sugar with 2 tbsp honey for a softer finish.
Common Mistakes to Avoid with This Dish:
- Don’t over-flour the dough. Dry peanut butter cookies go crumbly fast.
- Don’t skip the fork marks; they help the cookies bake evenly.
6. Double Chocolate Crinkle Circles
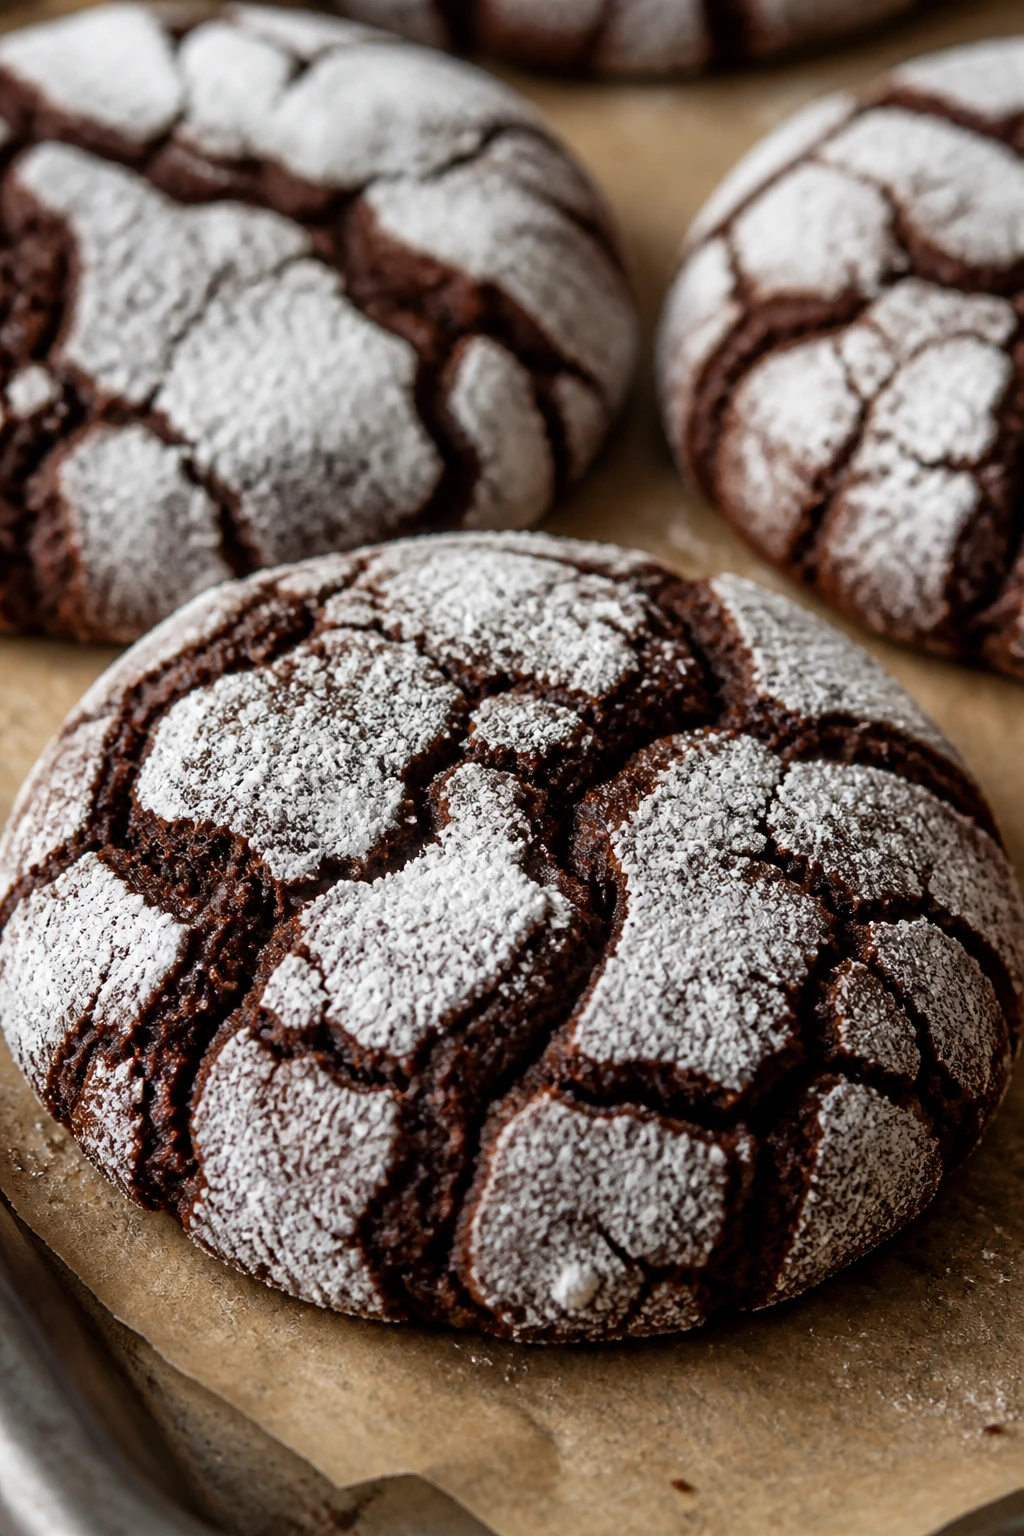
Intro: Crinkles are one of the few cookies that look dramatic without any decoration at all. The cracked sugar shell hides a soft, brownie-like middle that stays tender for days.
Why It Works: Cocoa powder gives the cookies depth, melted chocolate keeps the crumb plush, and powdered sugar on the outside acts like a dry little jacket. Underbaking by a minute matters here; it’s the difference between fudgy and dry.
Key Ingredients:
- 1 cup all-purpose flour
- 1/2 cup unsweetened cocoa powder
- 1 tsp baking powder
- 1/2 tsp salt
- 1/2 cup unsalted butter, melted
- 3/4 cup granulated sugar
- 2 large eggs
- 4 oz semisweet chocolate, melted
- 1 tsp vanilla extract
- 1/2 cup powdered sugar
Quick Steps:
- Whisk flour, cocoa, baking powder, and salt.
- Stir together melted butter, granulated sugar, eggs, melted chocolate, and vanilla.
- Mix in the dry ingredients, then chill the dough 1 hour.
- Scoop 1 1/2-tablespoon portions, roll in powdered sugar, and place on the tray.
- Bake at 350°F for 9 to 10 minutes, until the tops crack and the centers still look soft.
Equipment for This Recipe:
- Mixing bowl
- Cookie scoop
- Small bowl for powdered sugar
- Sheet pan with parchment
How to Serve This Dish: These look best piled high, because the cracked tops catch the light. Serve them with black coffee or a scoop of vanilla ice cream if you want the chocolate to feel even more plush.
Pro Tips for This Recipe:
- Chill the dough or the cookies will spread too fast.
- Roll the dough balls heavily in powdered sugar; a light dusting disappears.
- Let them cool on the tray for 5 minutes before moving them.
Variations on This Dish:
- Peppermint Crinkles: Add 1/4 tsp peppermint extract and use crushed candy on top.
- Orange Chocolate Crinkles: Add 1 tbsp orange zest to the dough.
Common Mistakes to Avoid with This Dish:
- Don’t skip the chill. Warm dough bakes flat and greasy.
- Don’t wait for the tops to look fully set. The center should still feel soft.
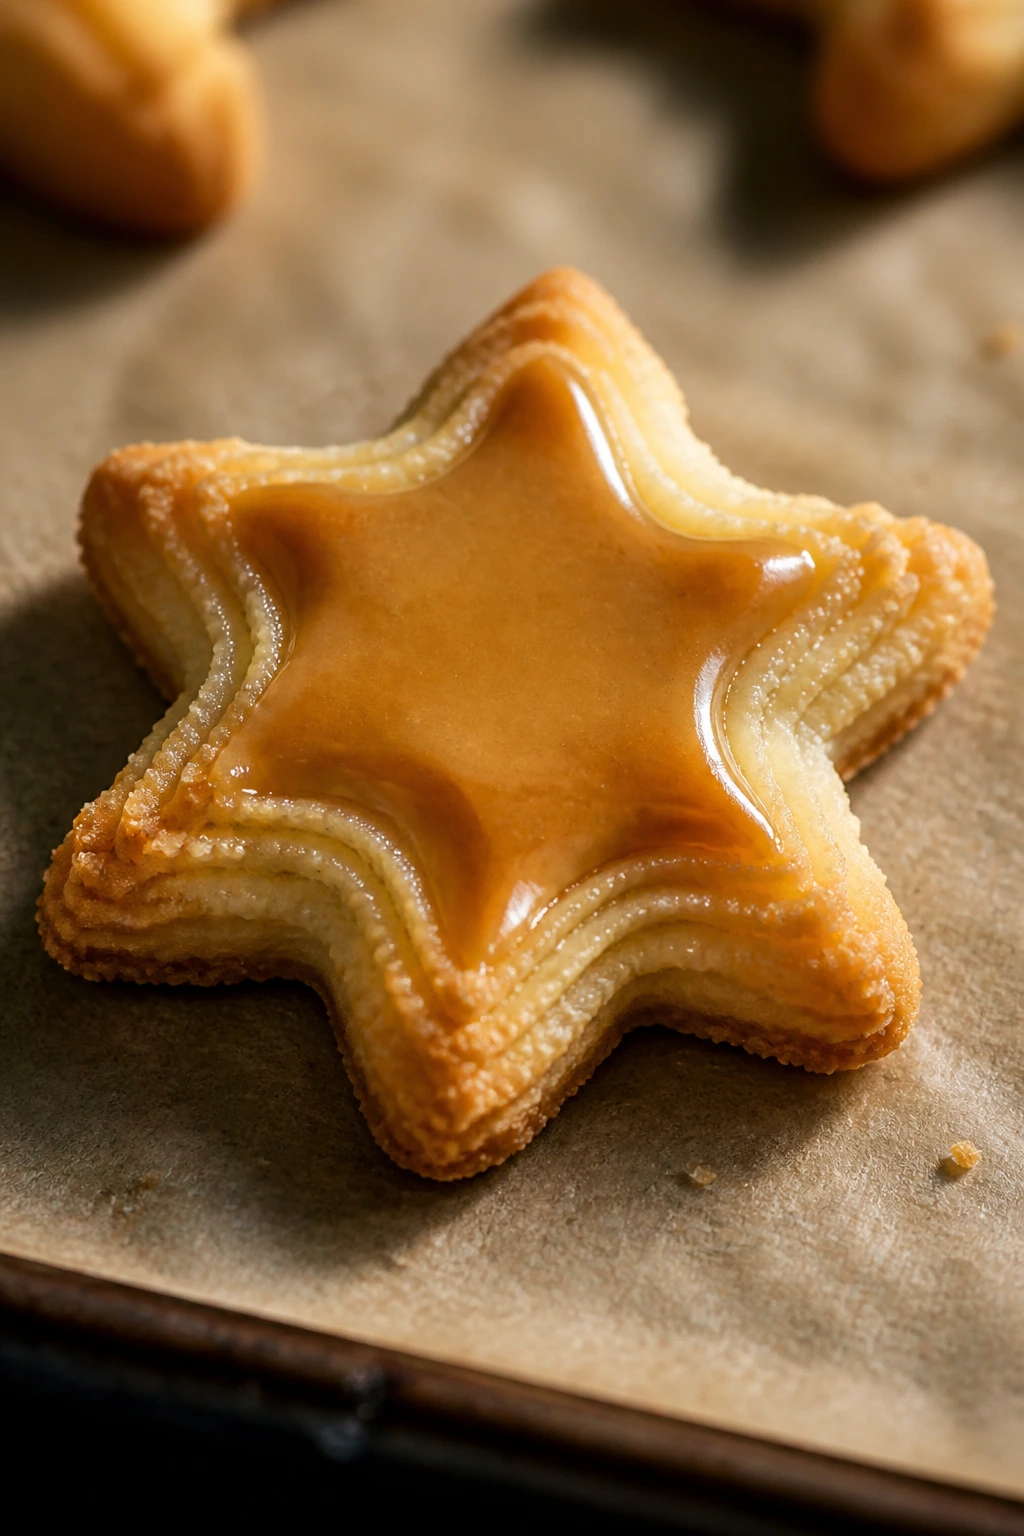
7. Maple Leaf Cut-Outs
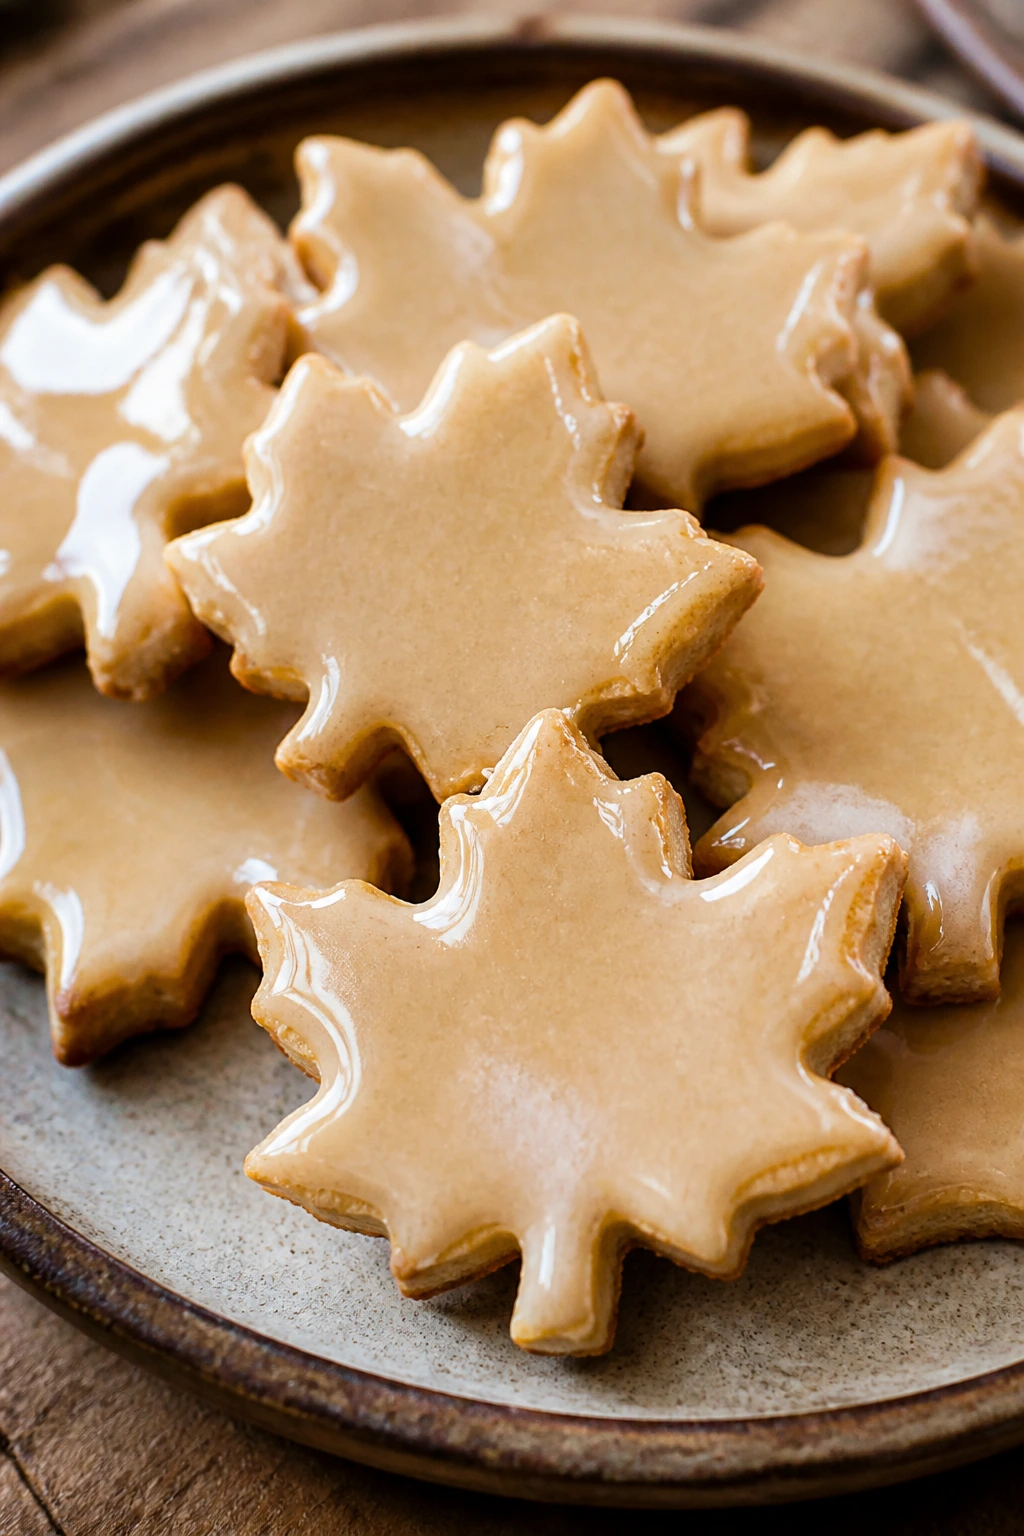
Intro: Maple leaf cutters are only worth it if the cookie inside tastes like more than plain sugar. Real maple syrup solves that problem fast.
Why It Works: Maple syrup adds moisture and a deeper sweetness than granulated sugar alone, which helps the cookies stay soft after cooling. A maple glaze at the end seals in the flavor and keeps the surface from drying into a dusty finish.
Key Ingredients:
- 2 1/4 cups all-purpose flour
- 1 tbsp cornstarch
- 1/2 tsp baking powder
- 1/2 tsp salt
- 3/4 cup unsalted butter, softened
- 2/3 cup packed light brown sugar
- 1/4 cup pure maple syrup
- 1 large egg
- 1 tsp vanilla extract
- 1 cup powdered sugar
- 2 tbsp maple syrup, for glaze
Quick Steps:
- Whisk flour, cornstarch, baking powder, and salt.
- Beat butter and brown sugar, then mix in the maple syrup, egg, and vanilla.
- Add the dry ingredients and chill 30 minutes.
- Roll to 1/4 inch, cut leaves, and bake at 325°F for 10 minutes.
- Stir the glaze ingredients and drizzle once the cookies are cool.
Equipment for This Recipe:
- Mixing bowl
- Leaf cutter
- Rolling pin
- Small whisk
How to Serve This Dish: These are nice on a plate with the glaze dripped in thin lines and a few toasted pecans nearby. They pair well with coffee, but I like them most with tea that has a little milk in it.
Pro Tips for This Recipe:
- Use pure maple syrup, not pancake syrup.
- Chill the cut shapes before baking so the leaf veins stay clear.
- A pinch of flaky salt in the glaze gives the maple flavor more contrast.
Variations on This Dish:
- Brown Butter Maple Leaves: Use brown butter in place of plain softened butter.
- Pecan Maple Leaves: Add 1/2 cup finely chopped pecans to the dough.
Common Mistakes to Avoid with This Dish:
- Don’t add too much flour while rolling; it dries the dough quickly.
- Don’t overbake the edges. Pale leaves keep their softness longer.
8. Orange Spritz Shells
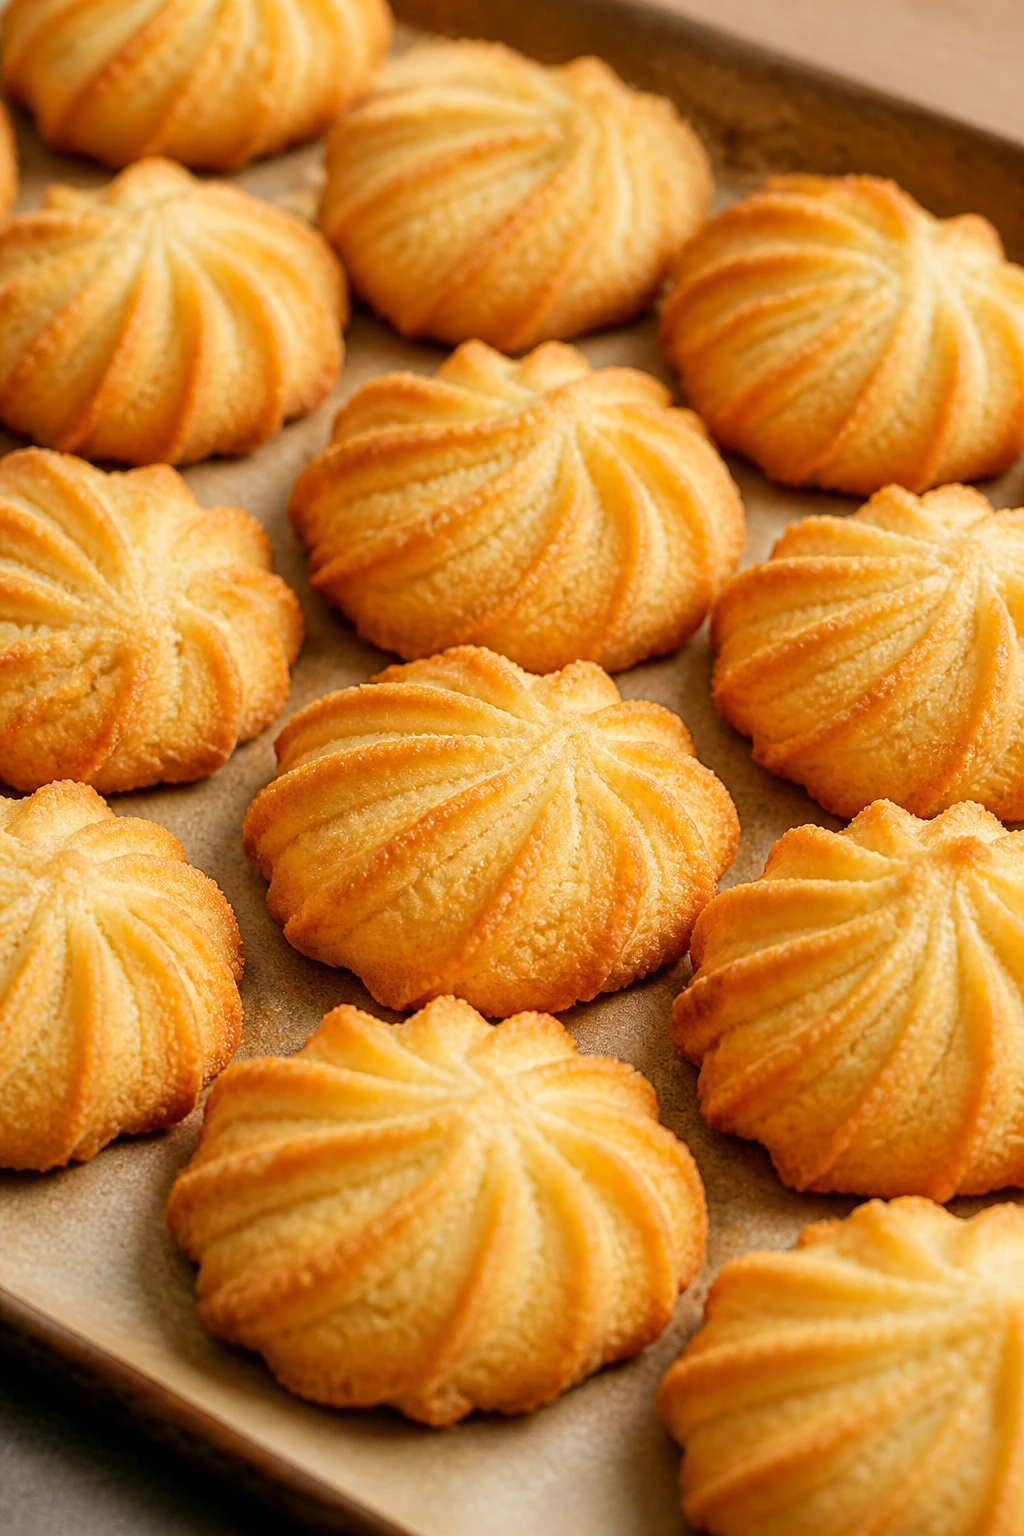
Intro: Spritz cookies can go brittle if you rush them, but they don’t have to. The trick is a dough that’s rich enough to pipe cleanly and soft enough to stay tender after a few days.
Why It Works: Butter, powdered sugar, and cornstarch give spritz dough a fine crumb, while orange zest keeps the flavor bright. A cookie press makes the shells consistent, and that consistency is part of why they bake evenly without getting dry spots.
Key Ingredients:
- 1 cup unsalted butter, softened
- 3/4 cup powdered sugar
- 1 large egg yolk
- 1 tbsp orange zest
- 1 tsp vanilla extract
- 2 cups all-purpose flour
- 1 tbsp cornstarch
- 1/4 tsp fine salt
Quick Steps:
- Beat butter and powdered sugar until creamy, then add the yolk, zest, and vanilla.
- Mix in flour, cornstarch, and salt just until the dough comes together.
- Fill a cookie press and press shells onto an ungreased sheet pan.
- Bake at 350°F for 8 to 10 minutes, until the bottoms are just pale gold.
- Cool on the pan for 5 minutes before moving them.
Equipment for This Recipe:
- Cookie press
- Mixing bowl
- Unlined sheet pan
- Cooling rack
How to Serve This Dish: Put them in a low bowl instead of stacking them high; the shell shape reads better that way. Orange tea, Earl Grey, or even a light hot chocolate all work nicely.
Pro Tips for This Recipe:
- Use an ungreased pan or the dough won’t grip enough to release cleanly.
- If the dough feels stiff, let it sit at room temperature for 5 minutes.
- Bake one test tray first; spritz presses behave a little differently from one brand to another.
Variations on This Dish:
- Lemon Press Shells: Swap orange zest for lemon zest.
- Almond Shells: Replace vanilla with almond extract and add sliced almonds on top.
Common Mistakes to Avoid with This Dish:
- Don’t overbake until the edges darken. Spritz should stay pale.
- Don’t use too much flour when mixing; the press will fight you.
9. Raspberry Thumbprint Blossoms
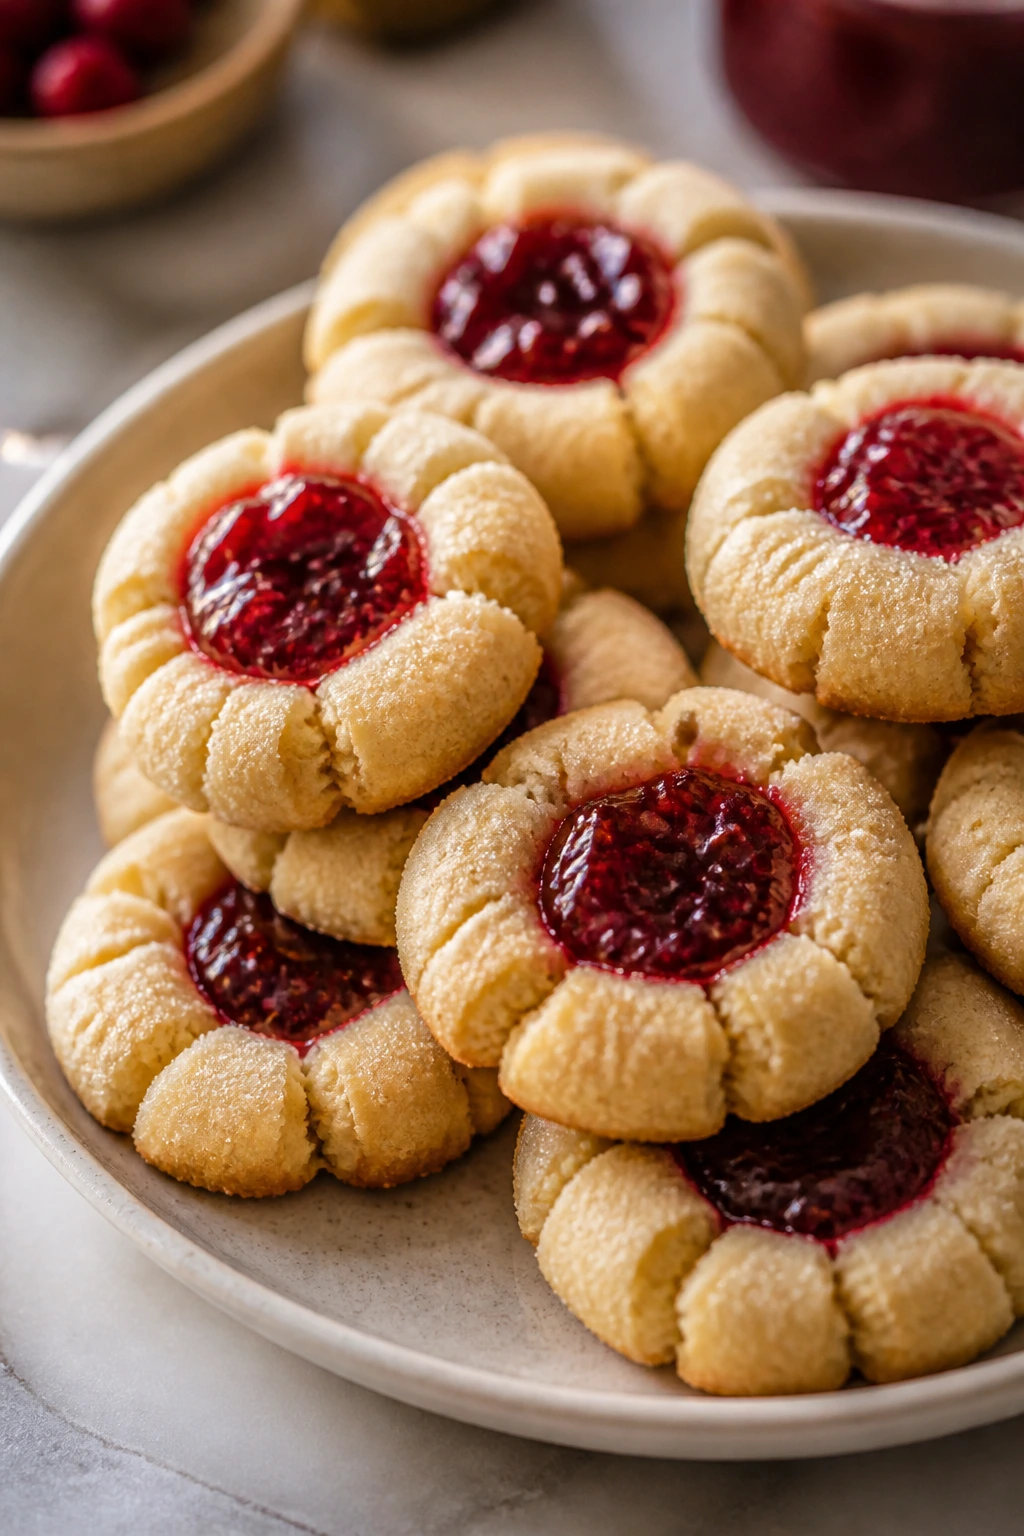
Intro: Thumbprints are the friendliest shaped cookies in the lot. They look homemade on purpose, and a spoonful of jam in the center keeps the cookie soft where it matters.
Why It Works: The jam adds moisture in the middle, which helps the cookie stay tender even after the outer edges set. A dough with cornstarch and brown sugar gives the base enough softness to balance the bright filling.
Key Ingredients:
- 2 cups all-purpose flour
- 1 tbsp cornstarch
- 1/2 tsp baking powder
- 1/4 tsp salt
- 3/4 cup unsalted butter, softened
- 2/3 cup packed light brown sugar
- 1 large egg yolk
- 1 tsp vanilla extract
- 1/2 cup thick raspberry jam
Quick Steps:
- Whisk the flour, cornstarch, baking powder, and salt.
- Beat the butter and brown sugar, then add the egg yolk and vanilla.
- Mix in the dry ingredients and chill 30 minutes.
- Roll into 1 1/2-inch balls, press a thumb or spoon into each, and fill with jam.
- Bake at 325°F for 10 to 12 minutes, until the edges are set and the centers are still soft.
Equipment for This Recipe:
- Mixing bowl
- Baking sheet
- Measuring spoon
- Small spoon or thumb press
How to Serve This Dish: Serve these with the jam center facing up; that’s the whole show. They’re good with a pot of tea and even better next to sliced pears or a cheese plate.
Pro Tips for This Recipe:
- Use thick jam, not runny jelly, or the centers will spill over.
- Re-press the indent gently after chilling if it puffs back up.
- Let them cool fully before stacking so the jam doesn’t smear.
Variations on This Dish:
- Apricot Thumbprints: Use apricot preserves for a softer, less tart filling.
- Chocolate Thumbprints: Fill the centers with chocolate hazelnut spread.
Common Mistakes to Avoid with This Dish:
- Don’t overfill the center; jam bubbles can burn.
- Don’t bake them until the tops look dry all over. They should still feel a little soft.
10. Chocolate-Orange Pinwheels
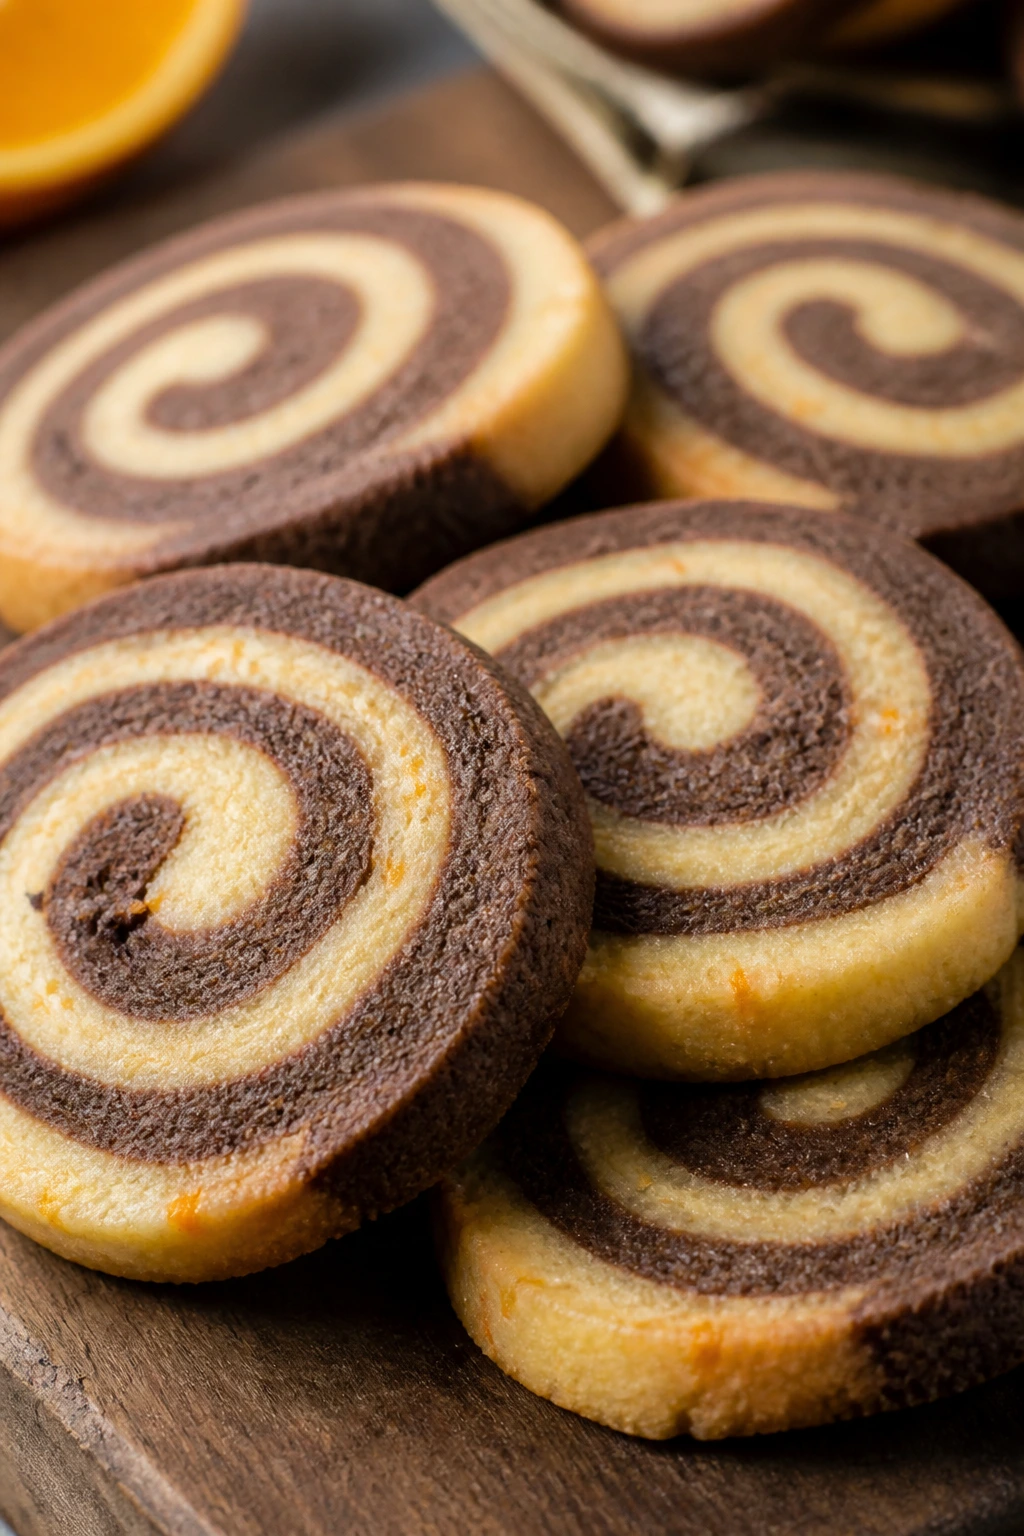
Intro: Pinwheels look fancier than they are. A vanilla dough and a cocoa dough rolled together make a tidy spiral that slices cleanly and stays soft if you keep the cookies thick.
Why It Works: Splitting the dough keeps the structure tender, and the orange zest keeps the chocolate side from tasting heavy. Chilling the rolled log before slicing is what gives you those neat swirls without compressing the layers.
Key Ingredients:
- For the Vanilla Dough:
- 1 1/4 cups all-purpose flour
- 1/2 tbsp cornstarch
- 1/4 tsp baking powder
- 1/4 tsp salt
- 1/2 cup unsalted butter, softened
- 1/3 cup sugar
- 1 large egg yolk
- 1 tsp vanilla extract
- For the Chocolate Dough:
- 1/2 cup all-purpose flour
- 2 tbsp cocoa powder
- 1 tbsp sugar
- 1 tsp orange zest
- 1 tbsp milk
Quick Steps:
- Make the vanilla dough and the chocolate dough in separate bowls.
- Roll each one between parchment into a rectangle about 1/4 inch thick.
- Stack and roll them together into a tight log, then chill 45 minutes.
- Slice 1/4-inch rounds and place them on a lined pan.
- Bake at 325°F for 9 to 10 minutes, until the edges are set but the centers still look soft.
Equipment for This Recipe:
- Two mixing bowls
- Rolling pin
- Parchment paper
- Sharp knife
How to Serve This Dish: Set the pinwheels flat so the spiral shows. They’re good with orange tea or coffee, and they make a clean-looking addition to a dessert tray.
Pro Tips for This Recipe:
- Roll both doughs to the same thickness so the swirl stays even.
- Chill the log until it feels firm, not frozen solid.
- Use a sharp knife and clean it between cuts for tidier spirals.
Variations on This Dish:
- Peppermint Pinwheels: Swap orange zest for peppermint extract in the chocolate dough.
- Mocha Pinwheels: Add 1 tsp espresso powder to the cocoa dough.
Common Mistakes to Avoid with This Dish:
- Don’t roll the log too loosely or the slices will unfurl.
- Don’t slice the dough warm; the spiral smears and loses definition.
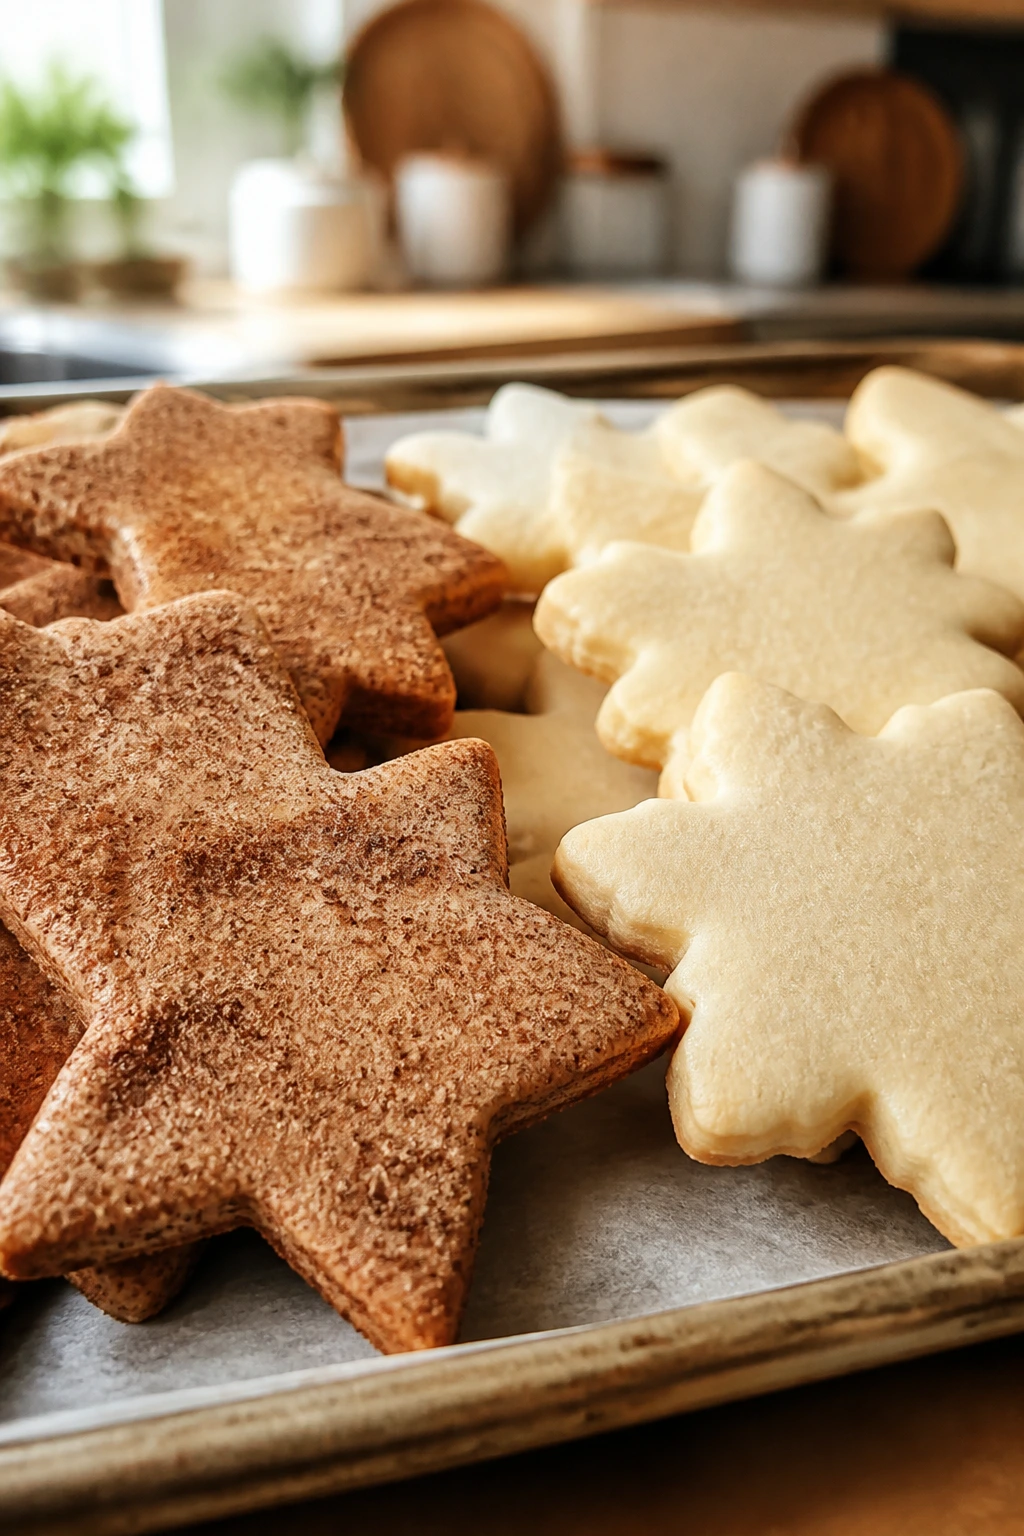
11. Soft Gingerbread People
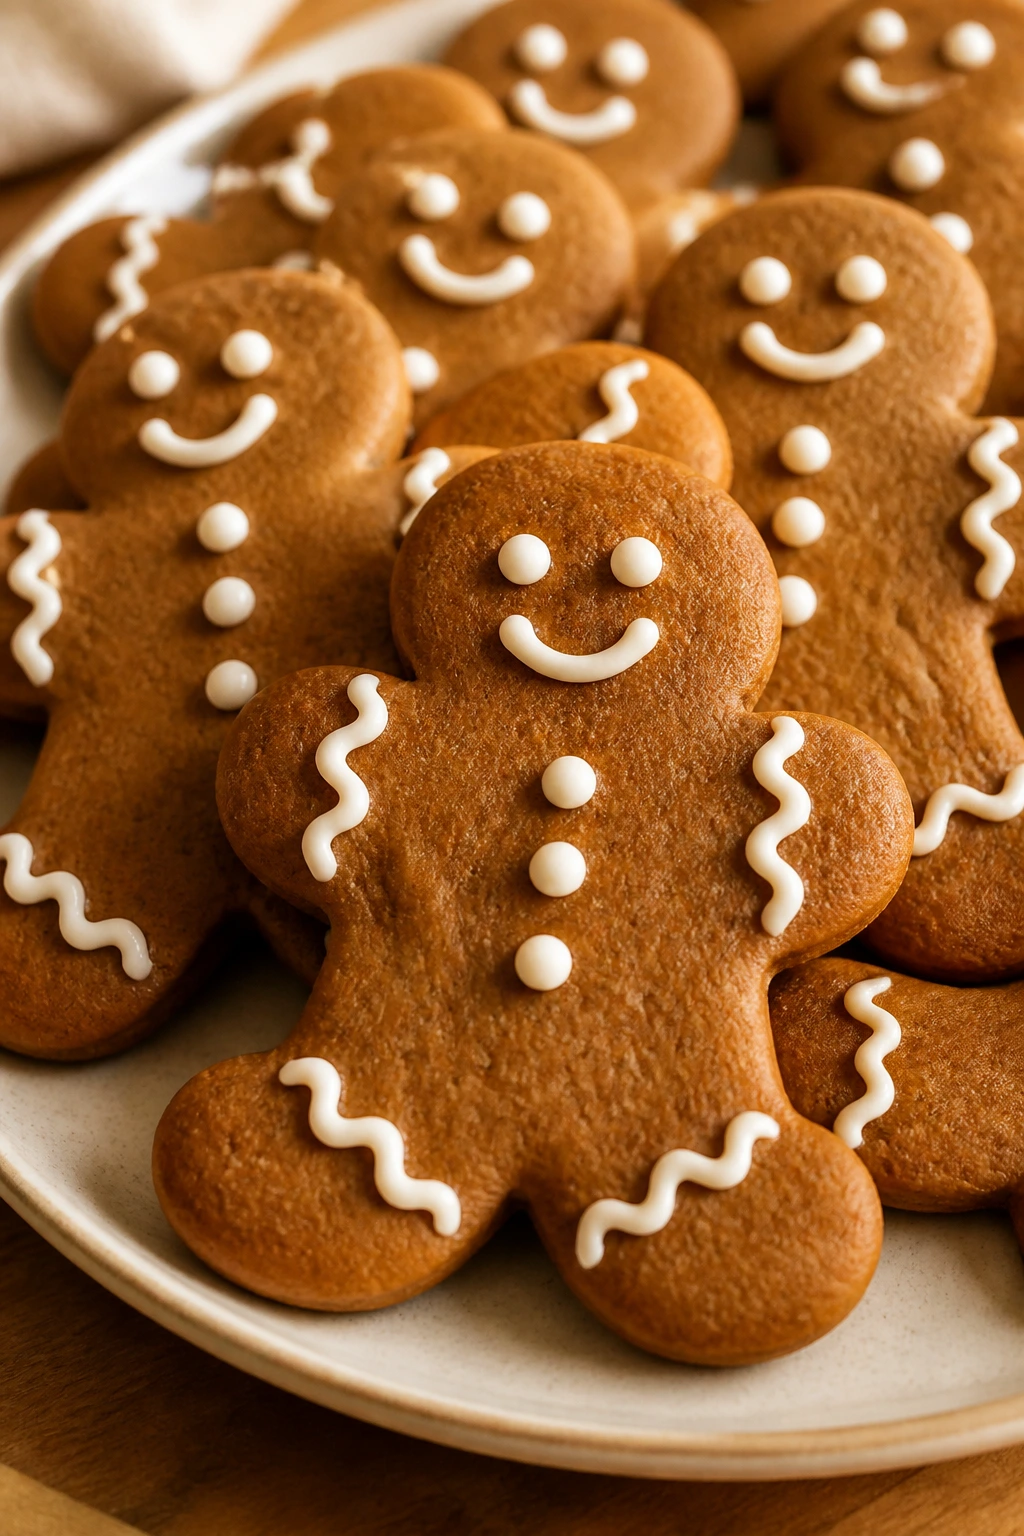
Intro: Gingerbread people should smell warm before they even hit the oven. This version stays soft because the molasses, brown sugar, and thick cut-outs keep the cookie from drying into a snap.
Why It Works: Molasses traps moisture and gives the dough that deep spice-cabinet flavor. A shorter bake at 325°F keeps the little arms and legs from hardening, which is where too many gingerbread cookies go wrong.
Key Ingredients:
- 2 1/2 cups all-purpose flour
- 1 tbsp cornstarch
- 1 tsp baking soda
- 1 tsp ground ginger
- 1 tsp ground cinnamon
- 1/4 tsp cloves
- 1/2 tsp salt
- 1/2 cup unsalted butter, softened
- 3/4 cup packed dark brown sugar
- 1/3 cup molasses
- 1 large egg
Quick Steps:
- Whisk flour, cornstarch, baking soda, spices, and salt.
- Beat butter and brown sugar, then add molasses and egg.
- Mix in the dry ingredients and chill at least 45 minutes.
- Roll to 1/4 inch, cut people shapes, and bake at 325°F for 9 to 11 minutes.
- Cool on the pan before decorating with icing.
Equipment for This Recipe:
- Mixing bowl
- Gingerbread cutter
- Rolling pin
- Sheet pan lined with parchment
How to Serve This Dish: These are best arranged standing up or leaning against each other on a platter. A plain vanilla icing line works well, but so does leaving them undecorated and letting the spice carry them.
Pro Tips for This Recipe:
- Dark brown sugar gives better moisture than light brown sugar here.
- Don’t add too much flour while rolling; gingerbread dough gets stiff fast.
- If you want clean edges, chill the cut shapes for 10 minutes before baking.
Variations on This Dish:
- Extra-Soft Molasses Men: Add 1 tbsp honey to the dough.
- Orange Gingerbread People: Add 1 tbsp orange zest and cut the cloves in half.
Common Mistakes to Avoid with This Dish:
- Don’t bake until the cookies feel crisp; they should still bend a little.
- Don’t decorate warm cookies, or the icing will slide.
12. Red Velvet Hearts

Intro: Red velvet can go bland fast if you treat it like dyed sugar dough. The cocoa, buttermilk, and cream cheese glaze keep these hearts soft and give them enough character to earn the color.
Why It Works: A little cocoa keeps the flavor grounded, while buttermilk adds tenderness and a slight tang. The cream cheese glaze sits on top like a soft finish, which helps seal the surface without turning the cookies dry.
Key Ingredients:
- 2 cups all-purpose flour
- 1 tbsp cornstarch
- 1 tbsp cocoa powder
- 1/2 tsp baking powder
- 1/2 tsp salt
- 1/2 cup unsalted butter, softened
- 3/4 cup granulated sugar
- 1 large egg
- 1/4 cup buttermilk
- 1 tsp vanilla extract
- Red food coloring, a few drops
- 2 oz cream cheese
- 1 cup powdered sugar
Quick Steps:
- Whisk flour, cornstarch, cocoa, baking powder, and salt.
- Beat butter and sugar, then add the egg, buttermilk, vanilla, and food coloring.
- Mix in the dry ingredients and chill 30 minutes.
- Roll to 1/4 inch, cut hearts, and bake at 325°F for 10 minutes.
- Beat the cream cheese and powdered sugar into a glaze, then spread on cooled cookies.
Equipment for This Recipe:
- Mixing bowl
- Heart cutter
- Offset spatula
- Small bowl for glaze
How to Serve This Dish: These look best with a clean glaze line and nothing too fussy beside them. Put them on a pale plate so the red shows, then serve with coffee or cold milk.
Pro Tips for This Recipe:
- Use gel coloring if you want a deeper red without thinning the dough.
- Chill the dough after mixing; buttermilk dough can get sticky.
- Glaze only the cooled cookies or the topping will melt into the surface.
Variations on This Dish:
- Berry Red Velvet Hearts: Replace part of the buttermilk with 2 tbsp raspberry puree.
- White Velvet Hearts: Skip the cocoa and use vanilla bean paste instead.
Common Mistakes to Avoid with This Dish:
- Don’t add too much food coloring. The dough gets soft and hard to handle.
- Don’t overbake in search of a dry surface. The centers should stay plush.
13. Almond Snowflakes
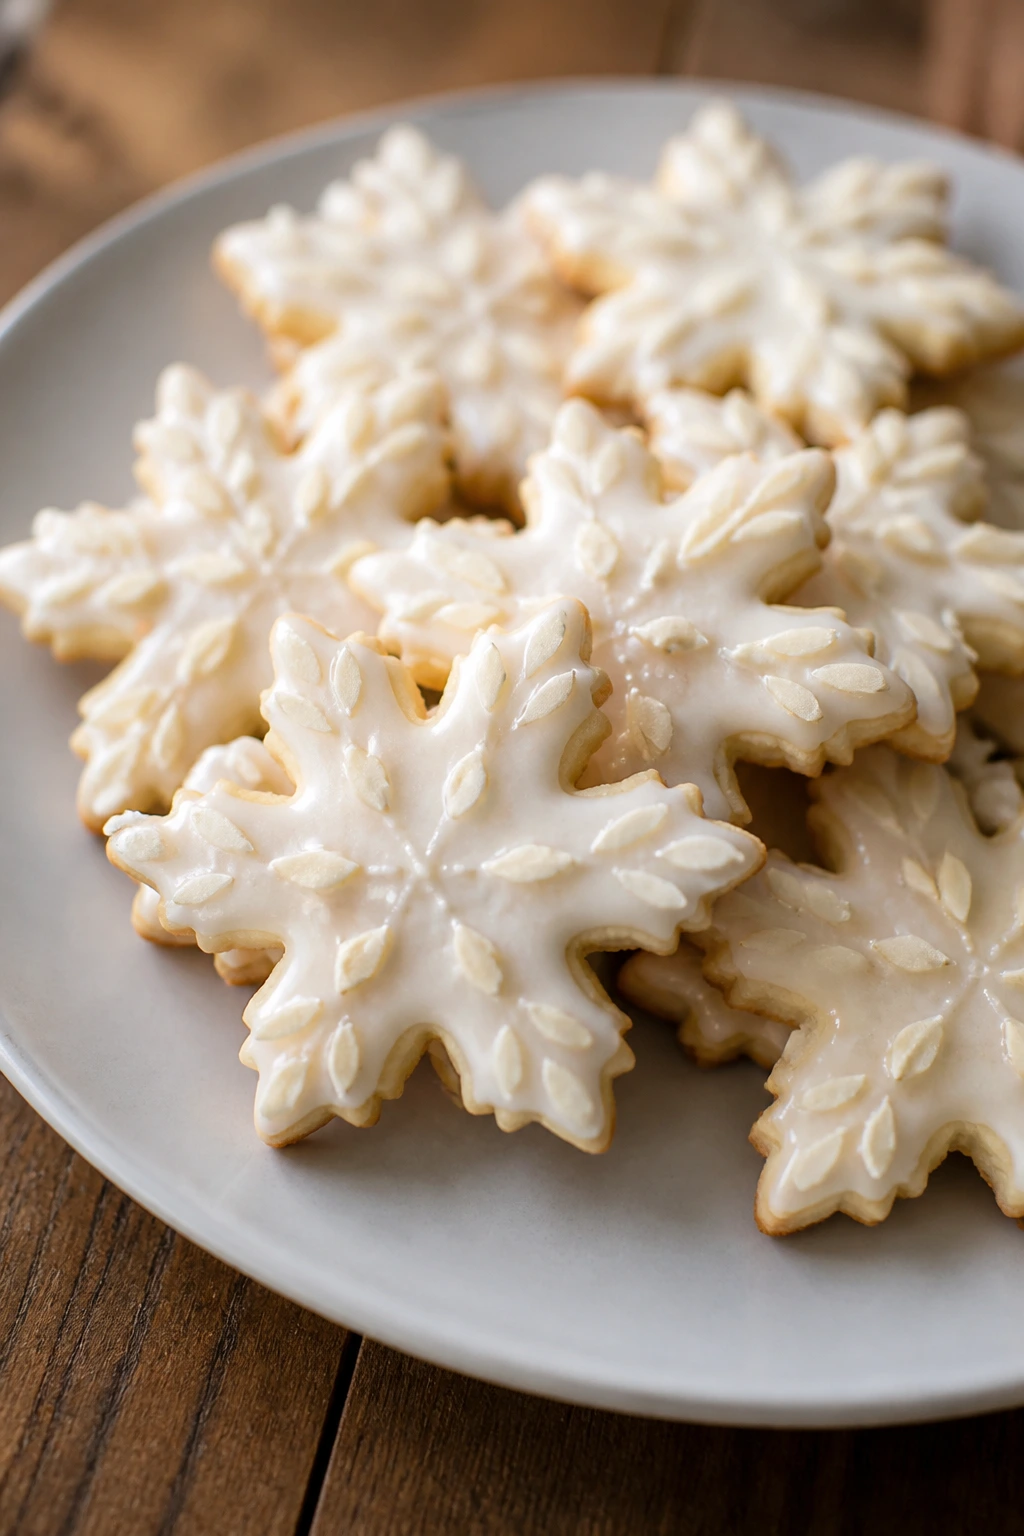
Intro: Snowflake cutters need a dough that won’t crack at the tips. Almond extract and a soft butter base make these cookies taste a little richer than plain cut-outs, which helps them stay interesting even after the first day.
Why It Works: Almond extract has a strong enough flavor that you don’t need to overbake for color or perfume. Cornstarch keeps the crumb fine, and a simple glaze gives the surface a thin shell without drying the inside.
Key Ingredients:
- 2 1/4 cups all-purpose flour
- 1 tbsp cornstarch
- 1/2 tsp baking powder
- 1/2 tsp salt
- 3/4 cup unsalted butter, softened
- 3/4 cup granulated sugar
- 1 large egg
- 1 1/2 tsp almond extract
- 1 cup powdered sugar
- 2 to 3 tbsp milk
Quick Steps:
- Whisk the flour, cornstarch, baking powder, and salt.
- Beat butter and sugar, then mix in the egg and almond extract.
- Add the dry ingredients and chill the dough 30 minutes.
- Roll to 1/4 inch, cut snowflakes, and bake at 325°F for 9 to 10 minutes.
- Stir the glaze and drizzle over cooled cookies.
Equipment for This Recipe:
- Mixing bowl
- Snowflake cutter
- Rolling pin
- Wire rack
How to Serve This Dish: These are nice when stacked in a staggered fan so the points don’t all blur together. Serve them with tea, or pair with berries if you want the almond flavor to taste a little brighter.
Pro Tips for This Recipe:
- Keep the dough cold to protect the tiny points.
- Add milk to the glaze a teaspoon at a time; you want it thin, not runny.
- If the cutter gets sticky, dip it in flour and tap off the excess.
Variations on This Dish:
- Vanilla Snowflakes: Swap almond extract for vanilla bean paste.
- Citrus Snowflakes: Add 1 tbsp lemon or orange zest to the dough.
Common Mistakes to Avoid with This Dish:
- Don’t roll the dough too thin. The delicate arms dry out first.
- Don’t glaze warm cookies or the details will soften and blur.
14. Cardamom Wreath Cookies
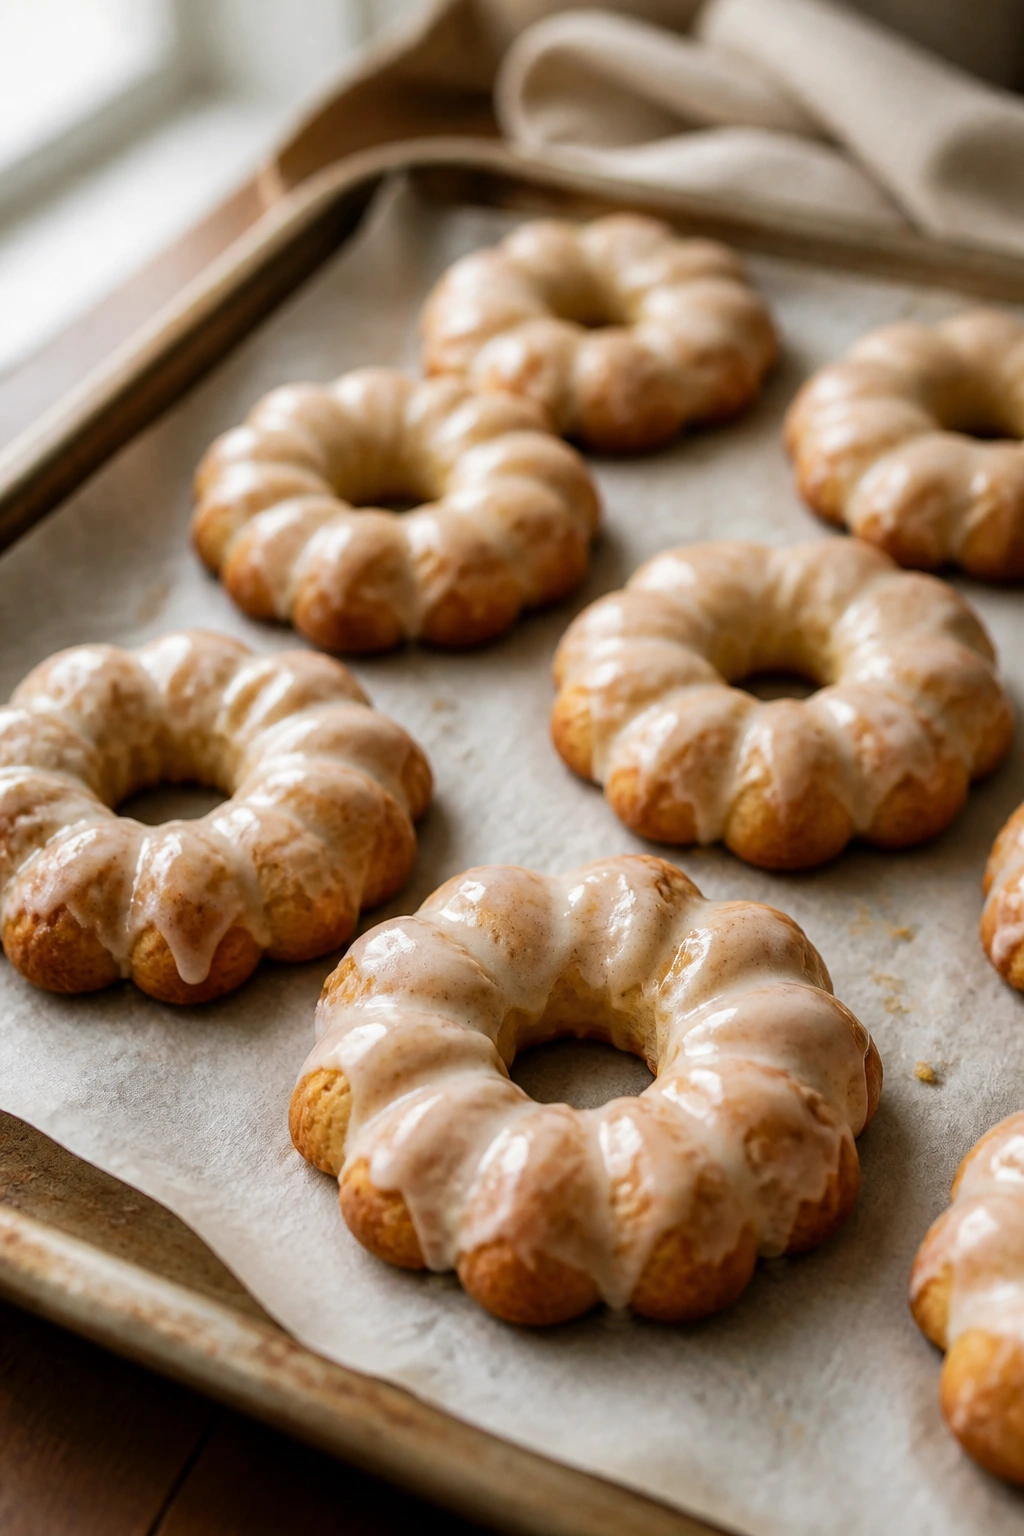
Intro: Wreaths sound decorative, but they’re just a smart ring shape with a little spice. Cardamom gives the cookies a warm, floral edge that stays noticeable even after the second day.
Why It Works: Cardamom holds up better than some delicate spices, and the ring shape bakes evenly because the center hole helps the heat move through the cookie. A quick sugar glaze keeps the surface soft rather than dusty.
Key Ingredients:
- 2 cups all-purpose flour
- 1 tbsp cornstarch
- 1/2 tsp baking powder
- 1/2 tsp salt
- 3/4 cup unsalted butter, softened
- 2/3 cup granulated sugar
- 1 large egg
- 1 tsp ground cardamom
- 1 tsp vanilla extract
- 1 cup powdered sugar
- 2 tbsp milk
Quick Steps:
- Whisk flour, cornstarch, baking powder, salt, and cardamom.
- Beat butter and sugar, then add the egg and vanilla.
- Mix in the dry ingredients and chill 30 minutes.
- Roll to 1/4 inch, cut ring shapes, and bake at 325°F for 9 to 10 minutes.
- Drizzle with glaze after cooling.
Equipment for This Recipe:
- Mixing bowl
- Ring cutter or two round cutters
- Rolling pin
- Parchment-lined tray
How to Serve This Dish: Put them on a flat platter with the glaze draped lightly over the top, then tuck a few toasted pistachios around them. They go well with black tea or a milky latte.
Pro Tips for This Recipe:
- Cardamom is strong; measure it level or the flavor can turn sharp.
- Keep the centers open and even so the wreath shape stays crisp-looking.
- Chill the cut rings before baking if the dough feels sticky.
Variations on This Dish:
- Pistachio Wreaths: Add 1/3 cup finely chopped pistachios to the dough.
- Orange Cardamom Wreaths: Add 1 tbsp orange zest and skip the glaze.
Common Mistakes to Avoid with This Dish:
- Don’t make the ring holes too small. They close up in the oven.
- Don’t bake until dark gold; cardamom cookies taste better a little pale.
15. Oatmeal Raisin Moons
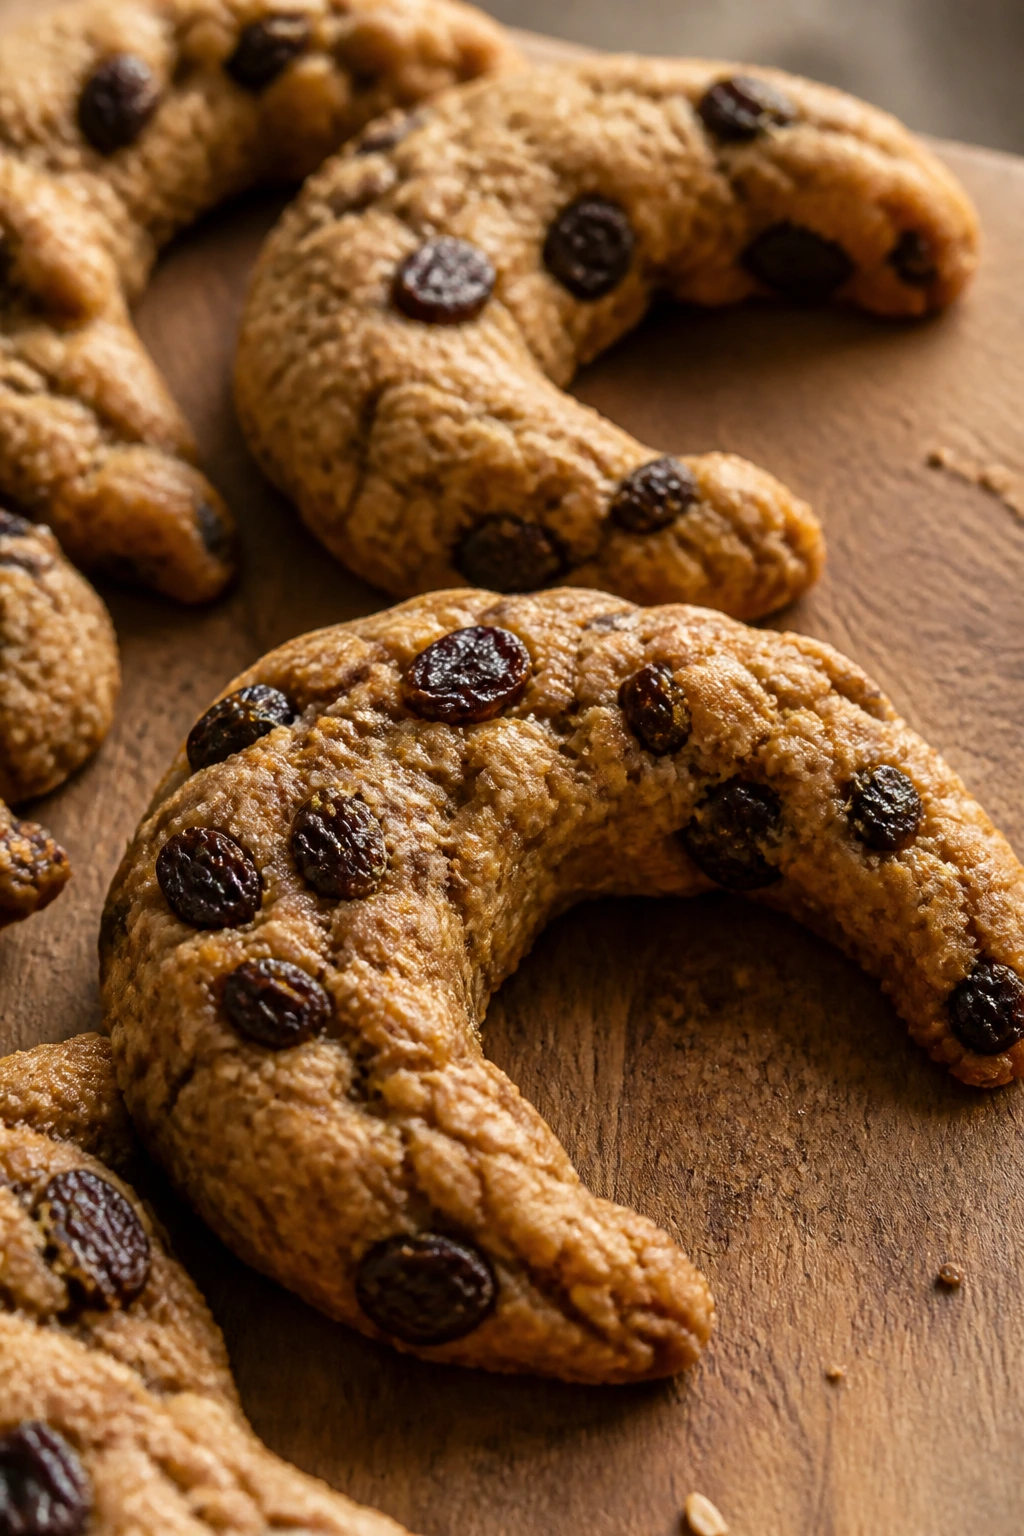
Intro: Oatmeal raisin cookies can go dusty if they’re overbaked, but shaped into moons and kept thick, they stay soft and chewy in the middle. The oats give them body without making them heavy.
Why It Works: Brown sugar and a touch of molasses keep the dough moist, while oats hold the shape well once chilled. Shaping them into crescents instead of scoops gives the batch a cleaner look and helps the edges bake evenly.
Key Ingredients:
- 1 1/2 cups all-purpose flour
- 1 1/2 cups old-fashioned oats
- 1/2 tsp baking soda
- 1 tsp cinnamon
- 1/2 tsp salt
- 1/2 cup unsalted butter, softened
- 3/4 cup packed light brown sugar
- 1 large egg
- 1 tbsp molasses
- 3/4 cup raisins
- 1 tsp vanilla extract
Quick Steps:
- Whisk flour, oats, baking soda, cinnamon, and salt.
- Beat butter and brown sugar, then add the egg, molasses, and vanilla.
- Mix in the dry ingredients and fold in the raisins.
- Shape into small crescents and chill 20 minutes.
- Bake at 350°F for 10 to 11 minutes, until the edges are set and the centers are still soft.
Equipment for This Recipe:
- Mixing bowl
- Sheet pan
- Spoon or cookie scoop
- Cooling rack
How to Serve This Dish: These are fine plain, but a little salted butter on the side makes them taste almost like oatmeal toast in cookie form. Good with coffee, milk, or even a strong cup of black tea.
Pro Tips for This Recipe:
- Soak the raisins in warm water for 10 minutes, then drain if yours are dry.
- Shape the moons with damp hands if the dough feels sticky.
- Pull them before the oats look toasted all over.
Variations on This Dish:
- Cranberry Oat Moons: Swap raisins for dried cranberries.
- Date Oat Moons: Use chopped dates and a pinch more cinnamon.
Common Mistakes to Avoid with This Dish:
- Don’t let the dough sit uncovered too long before baking; oats dry it out.
- Don’t bake until the cookies feel firm in the center. They set as they cool.
16. Matcha Checkerboard Squares
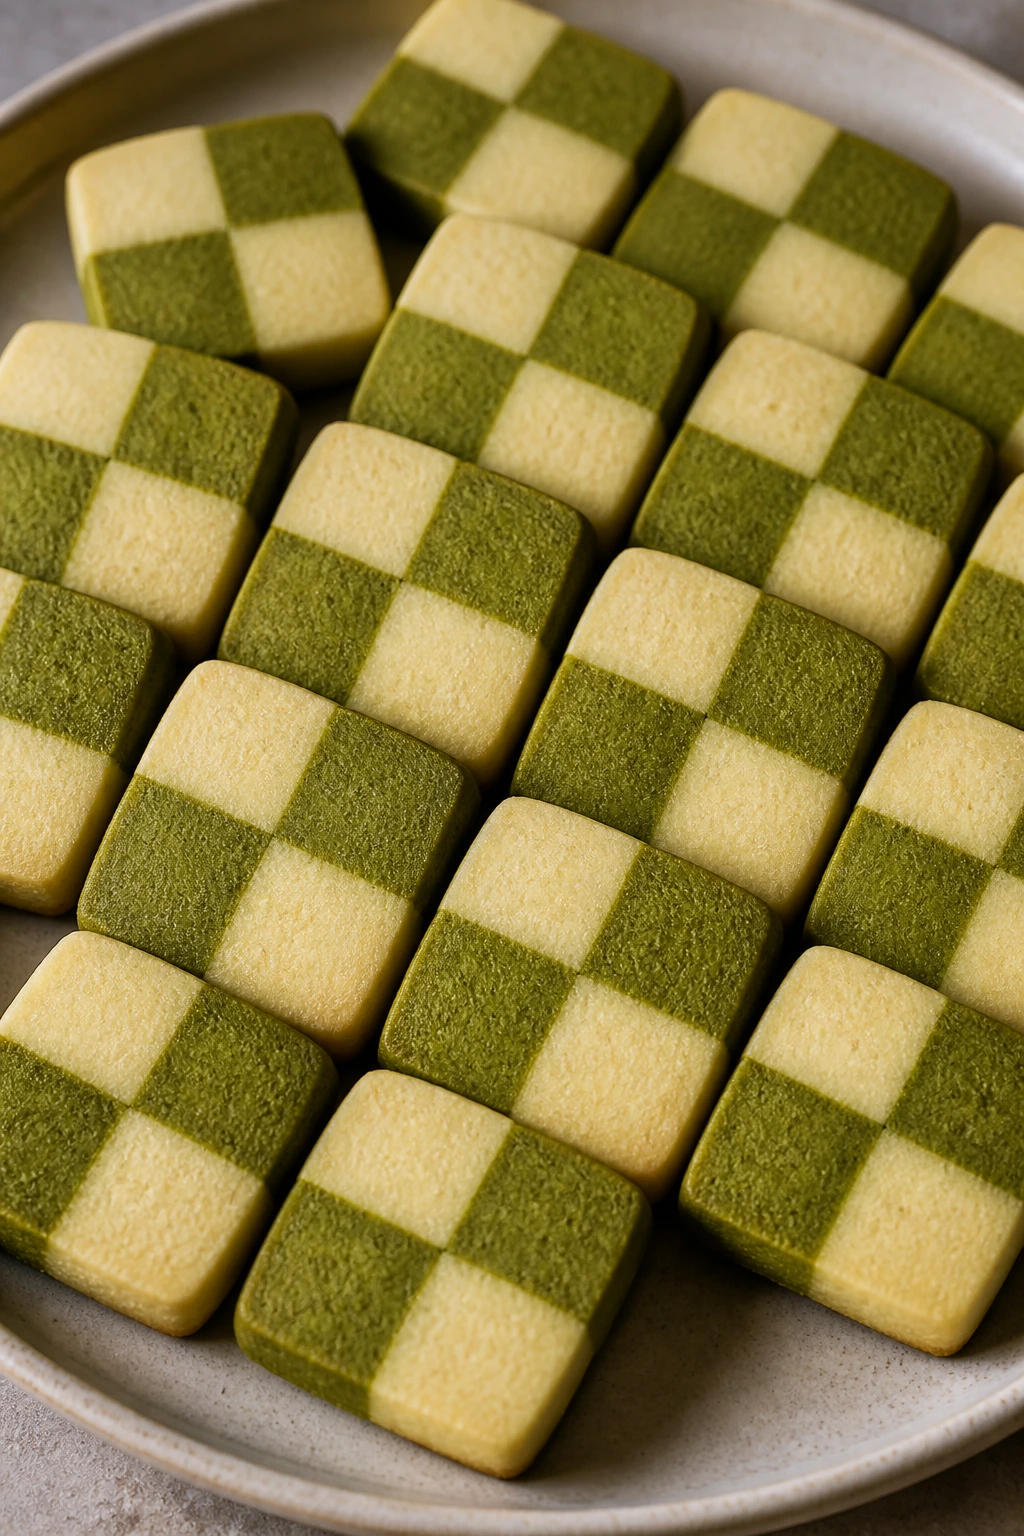
Intro: Checkerboards look elaborate, but the effect is just two doughs stacked with patience. Matcha gives the green squares a clean, grassy note that stays clear against the vanilla half.
Why It Works: The soft-bake base keeps both colors tender, while cornstarch reduces spread so the pattern stays sharp. Slicing the log after a proper chill is what turns a simple dough into neat little squares instead of muddy edges.
Key Ingredients:
- For the Dough:
- 2 1/2 cups all-purpose flour
- 1 tbsp cornstarch
- 1/2 tsp baking powder
- 1/2 tsp salt
- 1 cup unsalted butter, softened
- 3/4 cup granulated sugar
- 1 large egg
- 1 tsp vanilla extract
- For the Matcha Half:
- 1 1/2 tbsp matcha powder
- 1 tbsp milk
Quick Steps:
- Make the base dough, then divide it in half.
- Stir matcha and milk into one half until evenly green.
- Roll both halves into equal rectangles, stack them, and cut into strips.
- Rebuild the strips into a checkerboard log and chill 45 minutes.
- Slice 1/4-inch squares and bake at 325°F for 9 to 10 minutes.
Equipment for This Recipe:
- Mixing bowl
- Parchment paper
- Sharp knife
- Baking sheet
How to Serve This Dish: These are best laid out in a tidy grid so the pattern shows. Matcha or jasmine tea is the obvious pairing, but a simple milk coffee works too.
Pro Tips for This Recipe:
- Weigh or measure the two halves carefully so the log stays even.
- Press the strips together just enough to hold; don’t mash the design.
- Chill the assembled log until it slices without squishing.
Variations on This Dish:
- Cocoa Checkerboards: Replace matcha with cocoa powder and an extra teaspoon of milk.
- Sesame Checkerboards: Use black sesame paste in one half for a darker look.
Common Mistakes to Avoid with This Dish:
- Don’t slice the log while warm; the squares will slump.
- Don’t bake until the edges brown hard. Color hurts the soft texture here.
17. Molasses Buttons

Intro: Buttons are plain in the best way. They’re round, quick to shape, and the molasses gives them that old-school chew that hangs around long after they cool.
Why It Works: Dark molasses locks in moisture and gives the cookies a deep, almost smoky sweetness. A short bake and a sugar roll on the outside keep the surface from drying out while the center stays soft.
Key Ingredients:
- 2 cups all-purpose flour
- 1 tbsp cornstarch
- 1 tsp baking soda
- 1 tsp cinnamon
- 1/2 tsp ginger
- 1/2 tsp salt
- 1/2 cup unsalted butter, softened
- 3/4 cup packed dark brown sugar
- 1/3 cup molasses
- 1 large egg
- 1/4 cup granulated sugar, for rolling
Quick Steps:
- Whisk flour, cornstarch, baking soda, spices, and salt.
- Beat butter and brown sugar, then add the molasses and egg.
- Mix in the dry ingredients and chill 30 minutes.
- Roll into balls, coat in granulated sugar, and flatten slightly.
- Bake at 325°F for 10 to 11 minutes, until the tops crack and the centers still look soft.
Equipment for This Recipe:
- Mixing bowl
- Cookie scoop
- Parchment-lined sheet pan
- Small bowl for sugar
How to Serve This Dish: Stack them in a small pile so the cracked tops and sugar sparkle show through. They’re very good with coffee and even better with cold milk after dinner.
Pro Tips for This Recipe:
- Use dark molasses for the fullest flavor.
- Let the dough chill; otherwise the cookies spread too much.
- Pull them before the tops go fully matte.
Variations on This Dish:
- Orange Molasses Buttons: Add 1 tbsp orange zest to the dough.
- Clove Buttons: Increase cloves to 1/4 tsp for a sharper spice note.
Common Mistakes to Avoid with This Dish:
- Don’t overbake until they feel firm all the way through.
- Don’t skip the sugar coating; it gives the tops a little texture and helps with the look.
18. Coconut Macaroon Domes
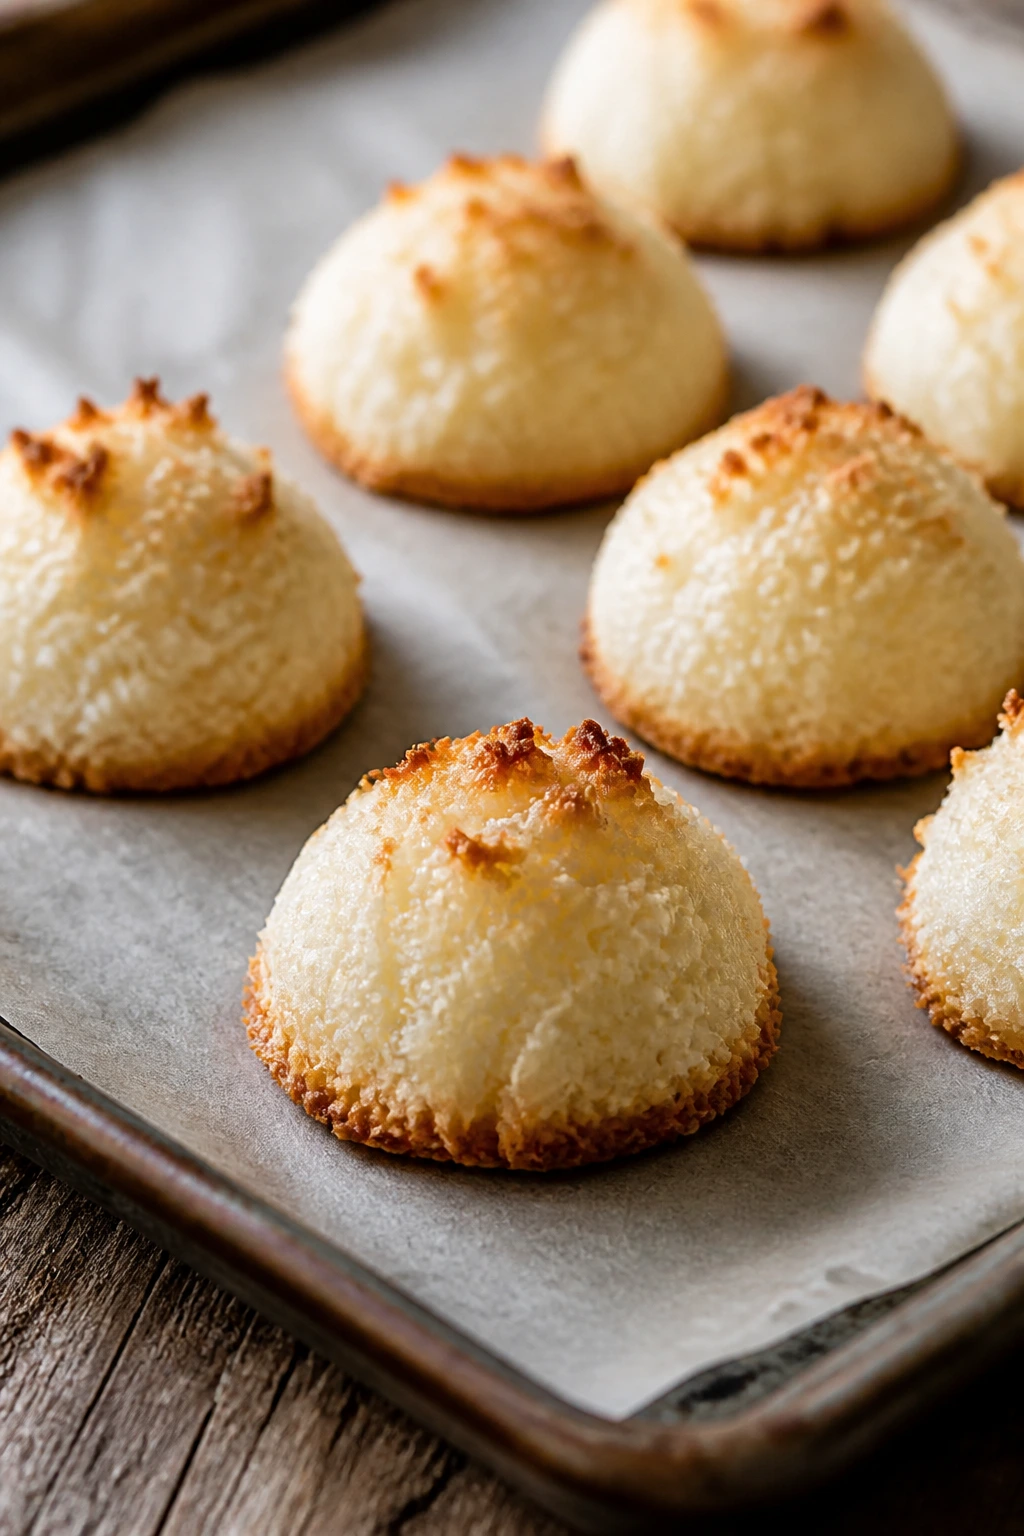
Intro: Macaroons are already soft by nature, so the job here is mostly to keep them moist and well-shaped. The dome form bakes into a chewy little mound that holds together for days.
Why It Works: Sweetened condensed milk binds the coconut and keeps everything tender, while egg whites help the mounds hold their shape without going dry. A short bake leaves the centers chewy instead of brittle.
Key Ingredients:
- 4 cups sweetened shredded coconut
- 1/2 cup sweetened condensed milk
- 2 large egg whites
- 1/4 cup granulated sugar
- 1 tsp vanilla extract
- 1/4 tsp salt
- 2 oz white chocolate, melted, optional for drizzling
Quick Steps:
- Stir coconut, condensed milk, vanilla, and salt together.
- Beat the egg whites to soft peaks, then fold them into the coconut.
- Scoop into small domes on a lined tray.
- Bake at 325°F for 14 to 16 minutes, until the bottoms are lightly golden.
- Cool completely, then drizzle with melted white chocolate if you want.
Equipment for This Recipe:
- Mixing bowl
- Cookie scoop
- Parchment paper
- Small spoon for drizzling
How to Serve This Dish: These are sweet enough to stand alone, so keep the plate simple. A little dark coffee or unsweetened tea balances them well.
Pro Tips for This Recipe:
- Pack the coconut loosely when measuring; smashed coconut makes dense domes.
- Let the bottoms color a little; that’s where the flavor lives.
- Cool fully before moving them, or the domes can break apart.
Variations on This Dish:
- Chocolate-Dipped Domes: Dip the bottoms in dark chocolate after cooling.
- Lime Coconut Domes: Add 1 tbsp lime zest for a fresher edge.
Common Mistakes to Avoid with This Dish:
- Don’t overbeat the egg whites; stiff peaks can make the texture dry.
- Don’t bake past light gold. Coconut goes from chewy to brittle fast.
19. Tahini Sesame Coins

Intro: Tahini cookies are a little nutty, a little savory, and very good at staying soft. The coin shape suits them because they spread just enough to look finished without losing their tidy edges.
Why It Works: Tahini brings fat and depth, which makes the crumb tender without needing a lot of extra sugar. Sesame seeds on the outside add a light crunch that doesn’t overwhelm the soft center.
Key Ingredients:
- 1/2 cup tahini
- 1/2 cup unsalted butter, softened
- 3/4 cup light brown sugar
- 1 large egg
- 1 3/4 cups all-purpose flour
- 1 tbsp cornstarch
- 1/2 tsp baking soda
- 1/2 tsp salt
- 1/3 cup sesame seeds
Quick Steps:
- Beat tahini, butter, and brown sugar until smooth.
- Add the egg.
- Mix in flour, cornstarch, baking soda, and salt.
- Scoop into coins, press the tops lightly into sesame seeds, and chill 20 minutes.
- Bake at 350°F for 9 to 10 minutes, until the edges are set and the centers still look soft.
Equipment for This Recipe:
- Mixing bowl
- Cookie scoop
- Small bowl for sesame seeds
- Baking sheet
How to Serve This Dish: These look best spread out so the sesame coating is visible. They’re good with coffee, but I also like them with a cup of strong mint tea.
Pro Tips for This Recipe:
- Stir the tahini well before measuring so the oil and paste are combined.
- Keep the dough a little cool; tahini dough can get loose fast.
- Press the tops gently into sesame seeds rather than rolling them hard.
Variations on This Dish:
- Honey Tahini Coins: Add 1 tbsp honey for a softer finish.
- Chocolate Tahini Coins: Fold in 1/2 cup chopped dark chocolate.
Common Mistakes to Avoid with This Dish:
- Don’t use runny tahini that’s separated badly; the dough can slide.
- Don’t overbake until the centers look dry. They firm as they cool.
20. Strawberry Linzer Hearts
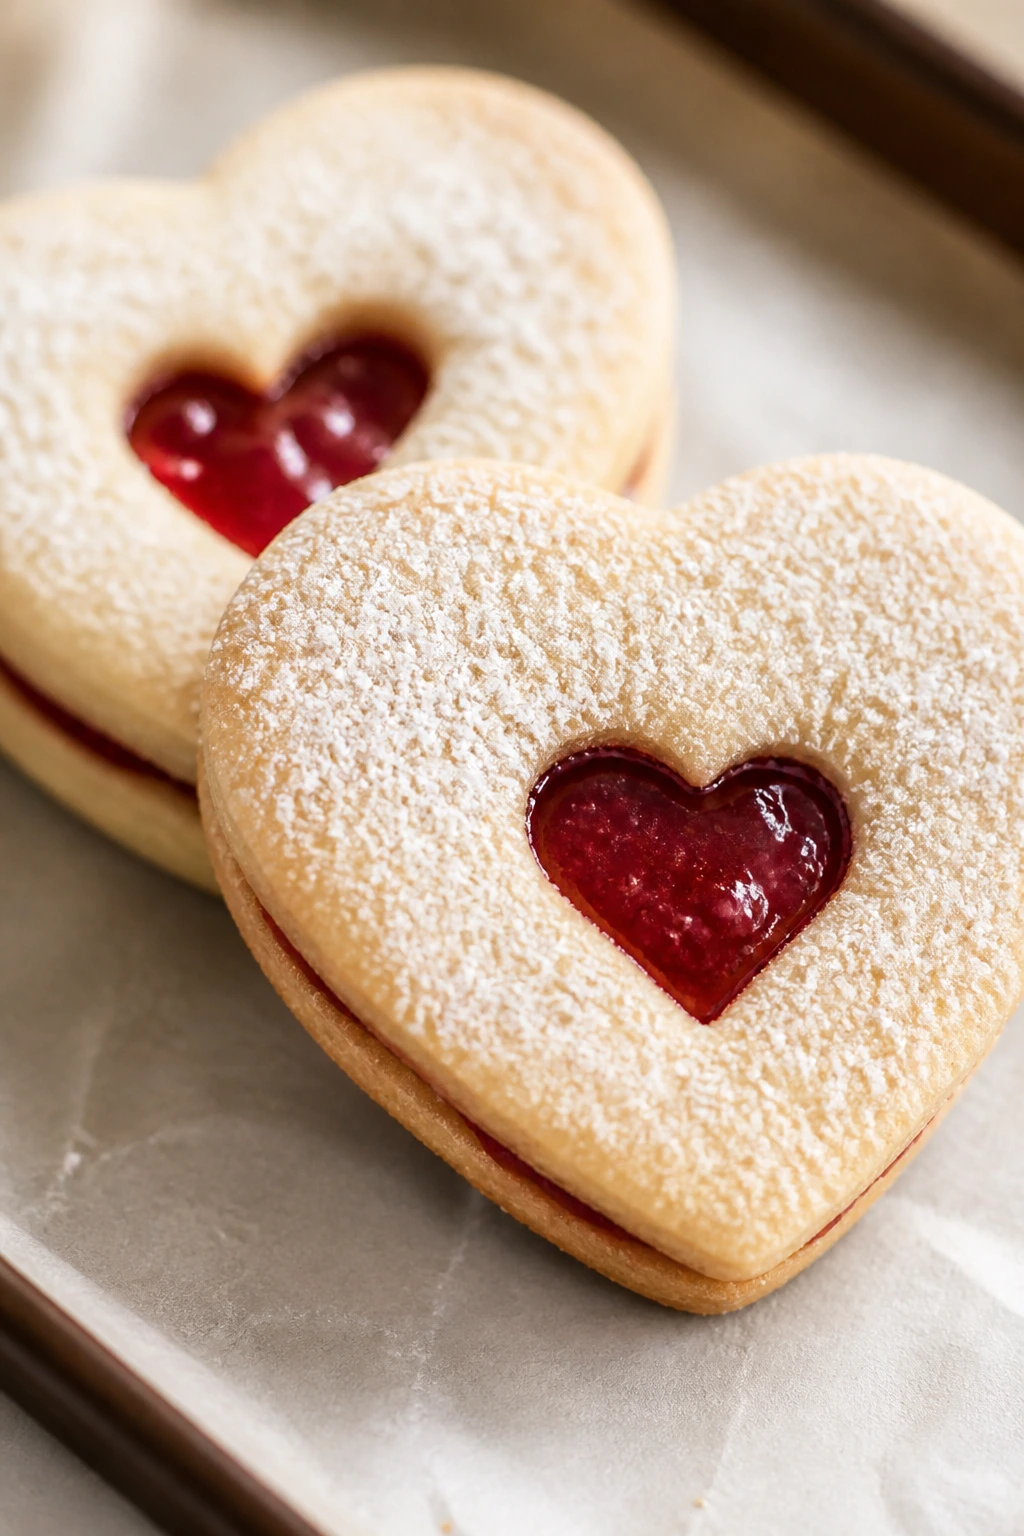
Intro: Linzers are a little more work, but the payoff is a sandwich cookie that stays soft because the jam sits between two tender layers. Hearts make them feel friendly instead of formal.
Why It Works: Almond flour adds tenderness, and the jam filling protects the inner crumb from drying out. A dusting of powdered sugar on the top cookie gives the whole thing that classic bakery look without making the texture fragile.
Key Ingredients:
- For the Cookies:
- 1 1/2 cups all-purpose flour
- 1/2 cup almond flour
- 1 tbsp cornstarch
- 1/2 tsp salt
- 3/4 cup unsalted butter, softened
- 2/3 cup granulated sugar
- 1 large egg yolk
- 1 tsp vanilla extract
- For the Filling:
- 3/4 cup thick strawberry jam
- 1/4 cup powdered sugar, for dusting
Quick Steps:
- Beat the butter and sugar, then add the egg yolk and vanilla.
- Mix in the flours, cornstarch, and salt, then chill 30 minutes.
- Roll to 1/4 inch and cut hearts; cut a small window in half of them.
- Bake at 325°F for 9 to 10 minutes, then cool completely.
- Spread jam on the solid hearts, top with the window hearts, and dust with powdered sugar.
Equipment for This Recipe:
- Mixing bowl
- Heart cutter with small center cutter
- Rolling pin
- Fine sieve for sugar
How to Serve This Dish: These are the prettiest when the jam window faces up and the sugar is dusted lightly, not heavily. They pair well with tea and are very good in a gift box because they travel well.
Pro Tips for This Recipe:
- Use thick jam; loose jam leaks out the sides.
- Let the cookies cool completely before sandwiching.
- A brief chill after assembling helps the filling set.
Variations on This Dish:
- Raspberry Linzers: Swap strawberry jam for raspberry preserves.
- Apricot Linzers: Use apricot jam and a little orange zest in the dough.
Common Mistakes to Avoid with This Dish:
- Don’t overfill the sandwich; the jam will squeeze out.
- Don’t dust the tops too early or the sugar will dissolve into the jam.
21. Pumpkin Spice Pumpkins
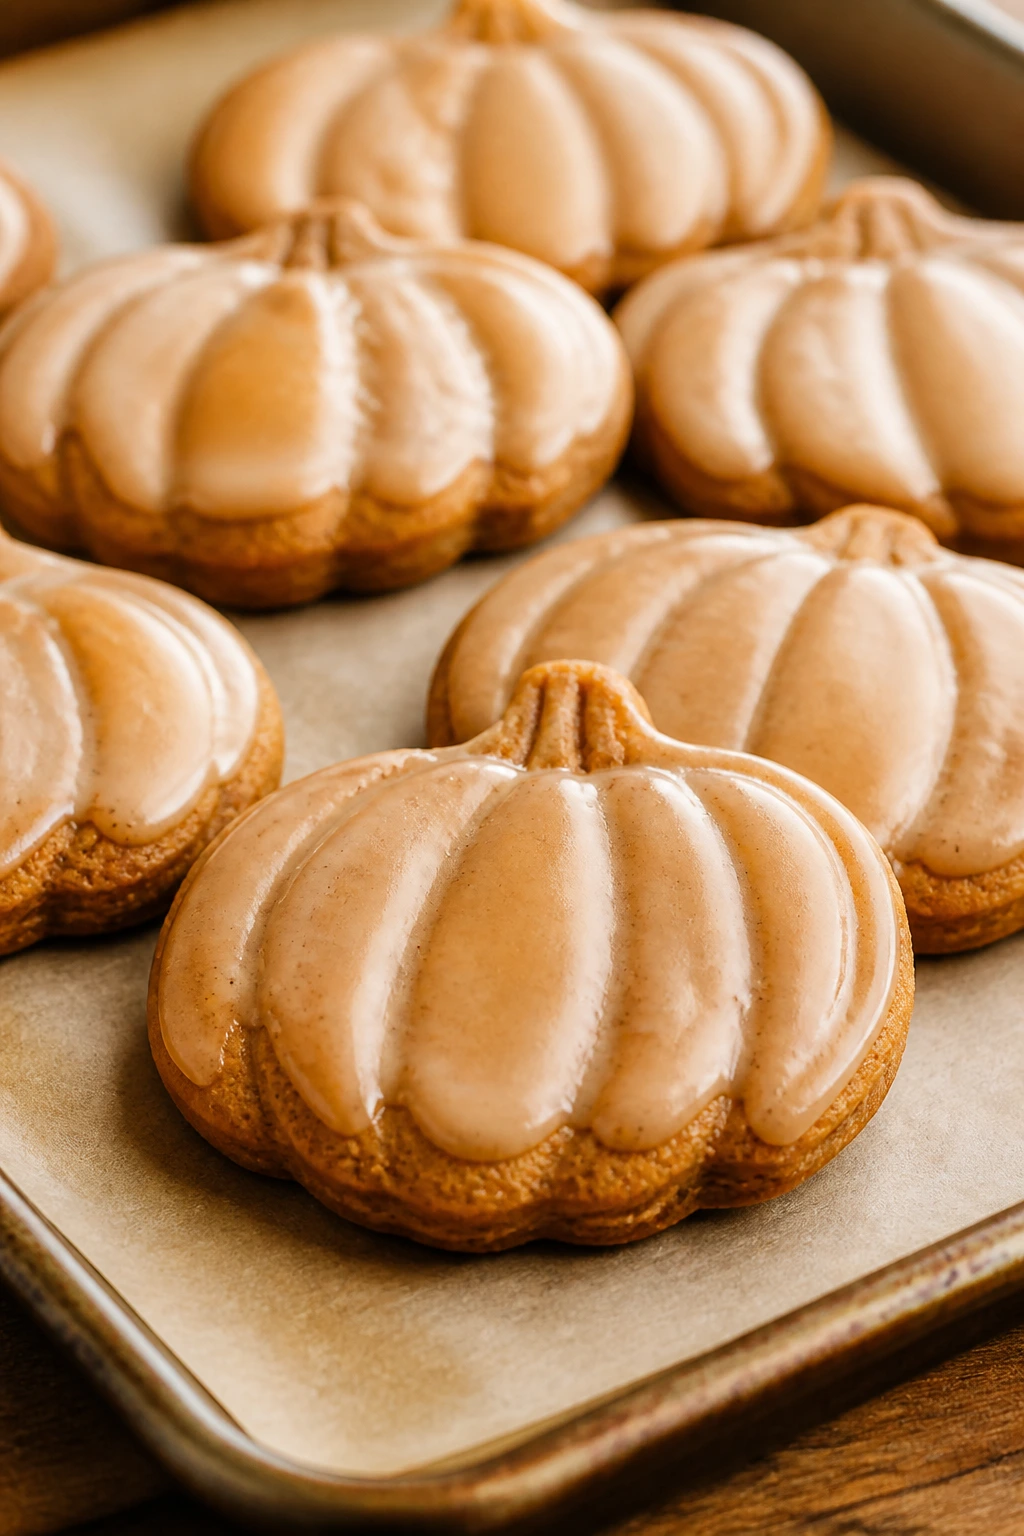
Intro: Pumpkin cookies often get too cakey, which sounds good until they taste dry. This version keeps the shape neat and the bite soft by using just enough pumpkin puree to flavor the dough without flooding it.
Why It Works: Brown sugar and pumpkin puree hold moisture, while the spices give the cookies enough backbone that they don’t taste like sweet bread. A glaze or simple icing keeps the pumpkin shape visible and adds another soft layer on top.
Key Ingredients:
- 2 1/4 cups all-purpose flour
- 1 tbsp cornstarch
- 1 tsp baking powder
- 1/2 tsp salt
- 1/2 cup unsalted butter, softened
- 2/3 cup packed light brown sugar
- 1 large egg yolk
- 1/3 cup pumpkin puree
- 1 tsp vanilla extract
- 1 tsp pumpkin pie spice
- 1 cup powdered sugar
- 2 tbsp milk
Quick Steps:
- Whisk flour, cornstarch, baking powder, salt, and spice.
- Beat butter and brown sugar, then add the yolk, pumpkin puree, and vanilla.
- Mix in the dry ingredients and chill 30 minutes.
- Roll to 1/4 inch, cut pumpkins, and bake at 325°F for 10 minutes.
- Stir together the glaze and drizzle over cooled cookies.
Equipment for This Recipe:
- Mixing bowl
- Pumpkin cutter
- Parchment-lined sheet pan
- Small whisk
How to Serve This Dish: These look nice arranged like a patch, with the glaze traced into little stems. They go well with coffee or chai, and the spice profile is warm enough for both.
Pro Tips for This Recipe:
- Blot extra moisture from canned pumpkin with a paper towel if it seems watery.
- Keep the dough cold so the pumpkins hold their edges.
- A tiny pinch of extra salt in the glaze keeps the spice from tasting flat.
Variations on This Dish:
- Maple Pumpkin Cookies: Add 1 tbsp maple syrup to the dough.
- Cream Cheese Pumpkin Tops: Pipe a thin cream cheese frosting line on cooled cookies.
Common Mistakes to Avoid with This Dish:
- Don’t use too much pumpkin puree or the cookies get dense and cakey.
- Don’t bake until the bottoms brown hard. That ruins the soft center.
22. Espresso Hazelnut Twists
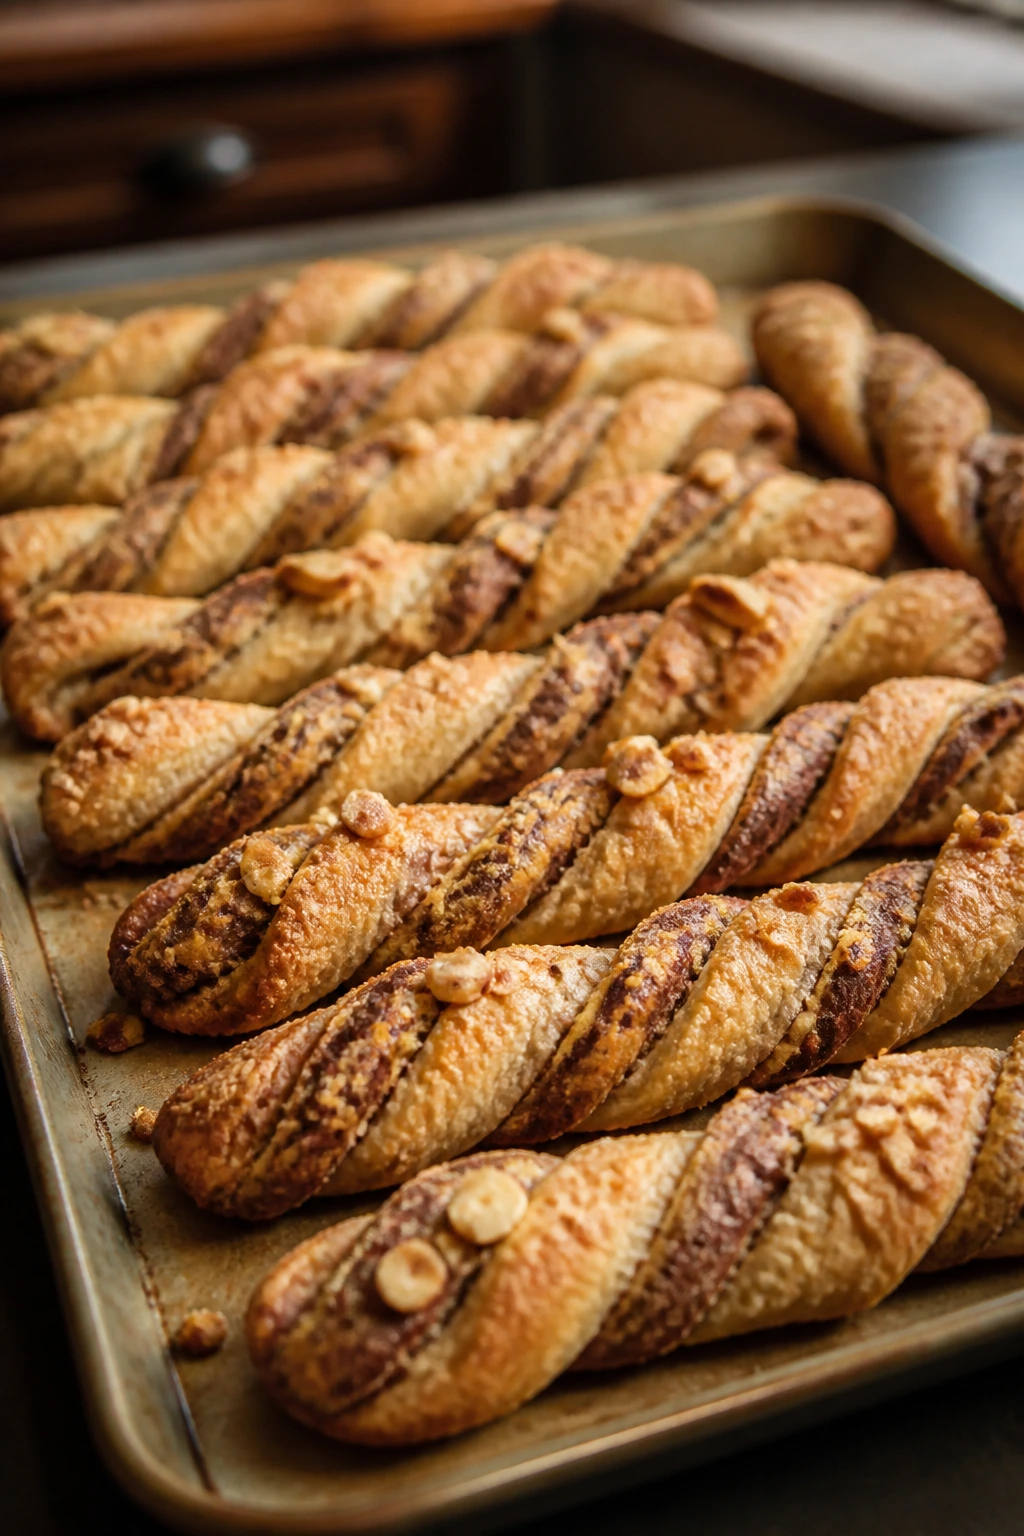
Intro: Twists are a nice change from flat cut-outs because the shape does some of the visual work for you. Espresso and hazelnut make the dough smell like a bakery before it even goes into the oven.
Why It Works: Espresso powder sharpens the chocolatey, nutty notes without turning the cookies bitter, and the twist shape creates crisp ridges that bake evenly. A tender dough with a little extra butter stays soft inside even as the edges darken.
Key Ingredients:
- 2 1/4 cups all-purpose flour
- 1 tbsp cornstarch
- 1/2 tsp baking powder
- 1/2 tsp salt
- 3/4 cup unsalted butter, softened
- 2/3 cup brown sugar
- 1 large egg
- 1 tbsp espresso powder
- 1 tsp vanilla extract
- 1/2 cup finely chopped hazelnuts
Quick Steps:
- Whisk flour, cornstarch, baking powder, salt, and espresso powder.
- Beat butter and brown sugar, then add the egg and vanilla.
- Mix in the dry ingredients and hazelnuts.
- Roll the dough into ropes, twist into spirals, and chill 20 minutes.
- Bake at 350°F for 9 to 11 minutes, until the ridges are set and the centers still look soft.
Equipment for This Recipe:
- Mixing bowl
- Baking sheet
- Bench scraper
- Cooling rack
How to Serve This Dish: Twists look best laid in parallel so the ridges catch the eye. They’re good with coffee, obviously, but also with plain milk if you want the hazelnut note to show up more.
Pro Tips for This Recipe:
- Chop the hazelnuts finely so the dough doesn’t split while twisting.
- Chill the ropes before baking; it keeps the shape cleaner.
- If the dough feels dry, add 1 teaspoon milk rather than more flour.
Variations on This Dish:
- Mocha Twists: Add 1 tbsp cocoa powder to the dry ingredients.
- Chocolate-Hazelnut Twists: Fold in 1/3 cup chopped chocolate.
Common Mistakes to Avoid with This Dish:
- Don’t twist too tightly or the dough can tear.
- Don’t bake until crisp all the way through. The center should stay soft.
23. Black Sesame Flowers
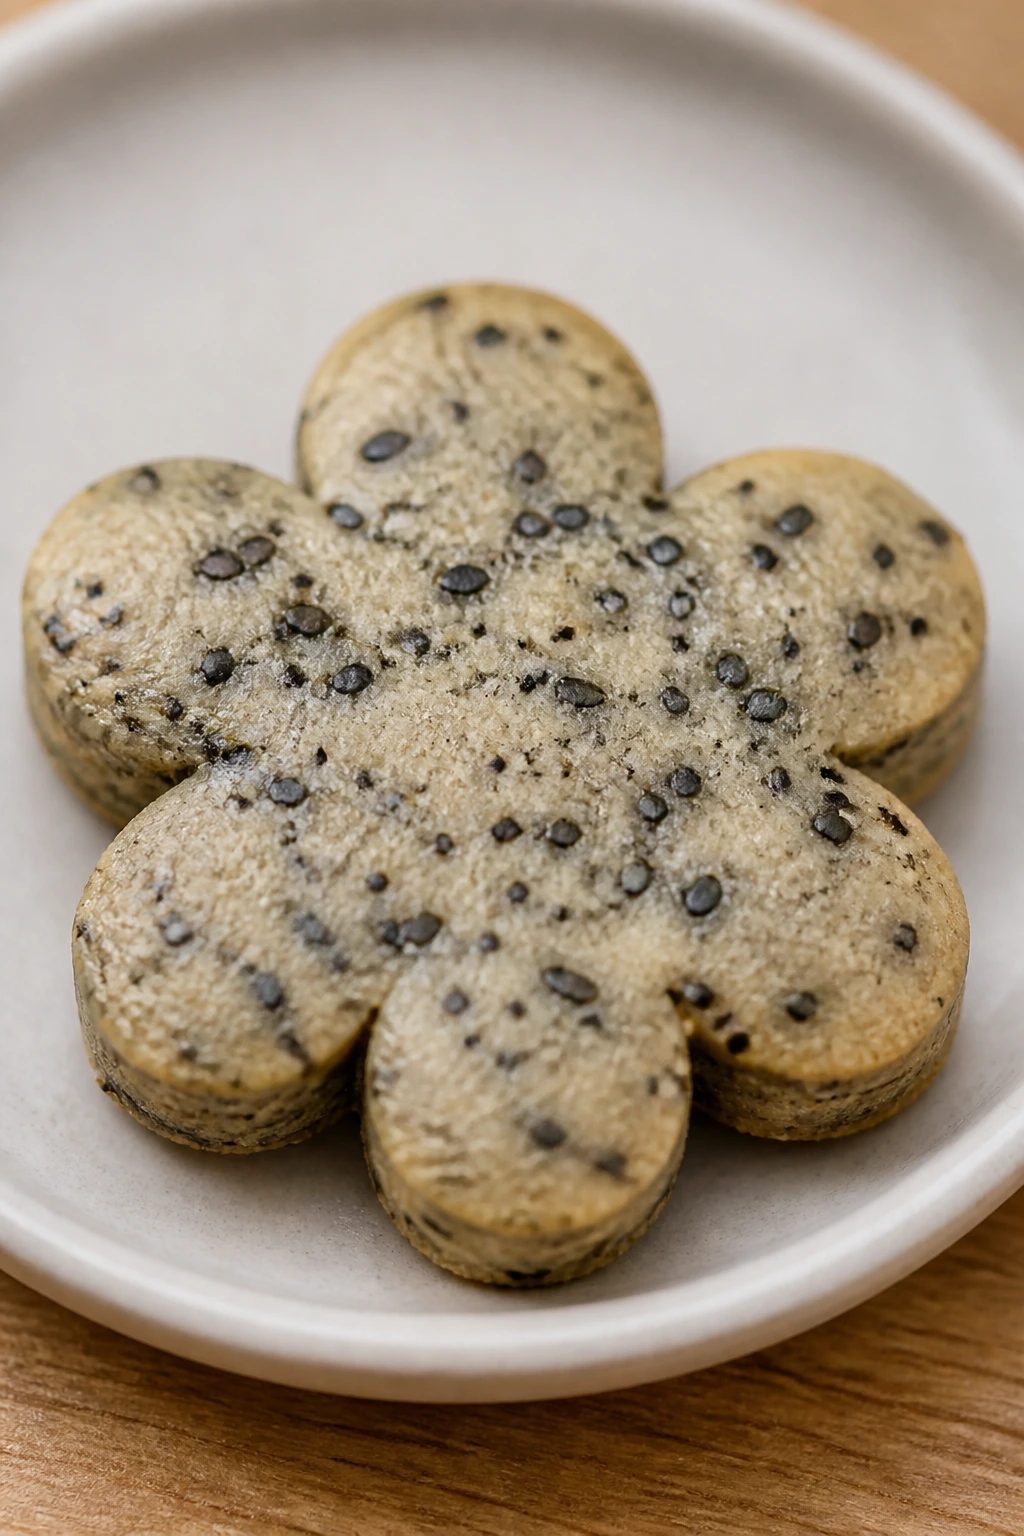
Intro: Black sesame cookies have a deep, almost toasted-nut flavor that stands up well to a floral shape. They look dramatic, but the recipe is really just a soft butter cookie with a bold seed flavor.
Why It Works: Ground black sesame adds richness and a little texture, while butter and brown sugar keep the cookie tender. A flower cutter gives the edges enough personality that you don’t need much decoration.
Key Ingredients:
- 2 cups all-purpose flour
- 1 tbsp cornstarch
- 1/2 tsp baking powder
- 1/2 tsp salt
- 3/4 cup unsalted butter, softened
- 2/3 cup packed light brown sugar
- 1 large egg
- 1/4 cup ground black sesame seeds
- 1 tsp vanilla extract
Quick Steps:
- Whisk flour, cornstarch, baking powder, salt, and ground sesame.
- Beat butter and brown sugar, then add the egg and vanilla.
- Mix in the dry ingredients and chill 30 minutes.
- Roll to 1/4 inch, cut flowers, and bake at 325°F for 9 to 10 minutes.
- Cool before serving, or brush with a light honey glaze if you want shine.
Equipment for This Recipe:
- Mixing bowl
- Flower cutter
- Rolling pin
- Baking sheet
How to Serve This Dish: These belong on a pale plate so the dark sesame color stands out. They’re excellent with green tea or a simple latte.
Pro Tips for This Recipe:
- Grind the sesame seeds finely; whole seeds make the dough harder to roll.
- Chill the dough well, because sesame dough can spread a little.
- A tiny pinch of flaky salt on top sharpens the flavor.
Variations on This Dish:
- Tahini Flowers: Replace part of the butter with tahini.
- Vanilla-Sesame Flowers: Keep the sesame but add more vanilla and skip the glaze.
Common Mistakes to Avoid with This Dish:
- Don’t overbrown them; the flavor turns flat.
- Don’t add too much sesame seed or the dough crumbles.
24. Honey Lavender Ovals
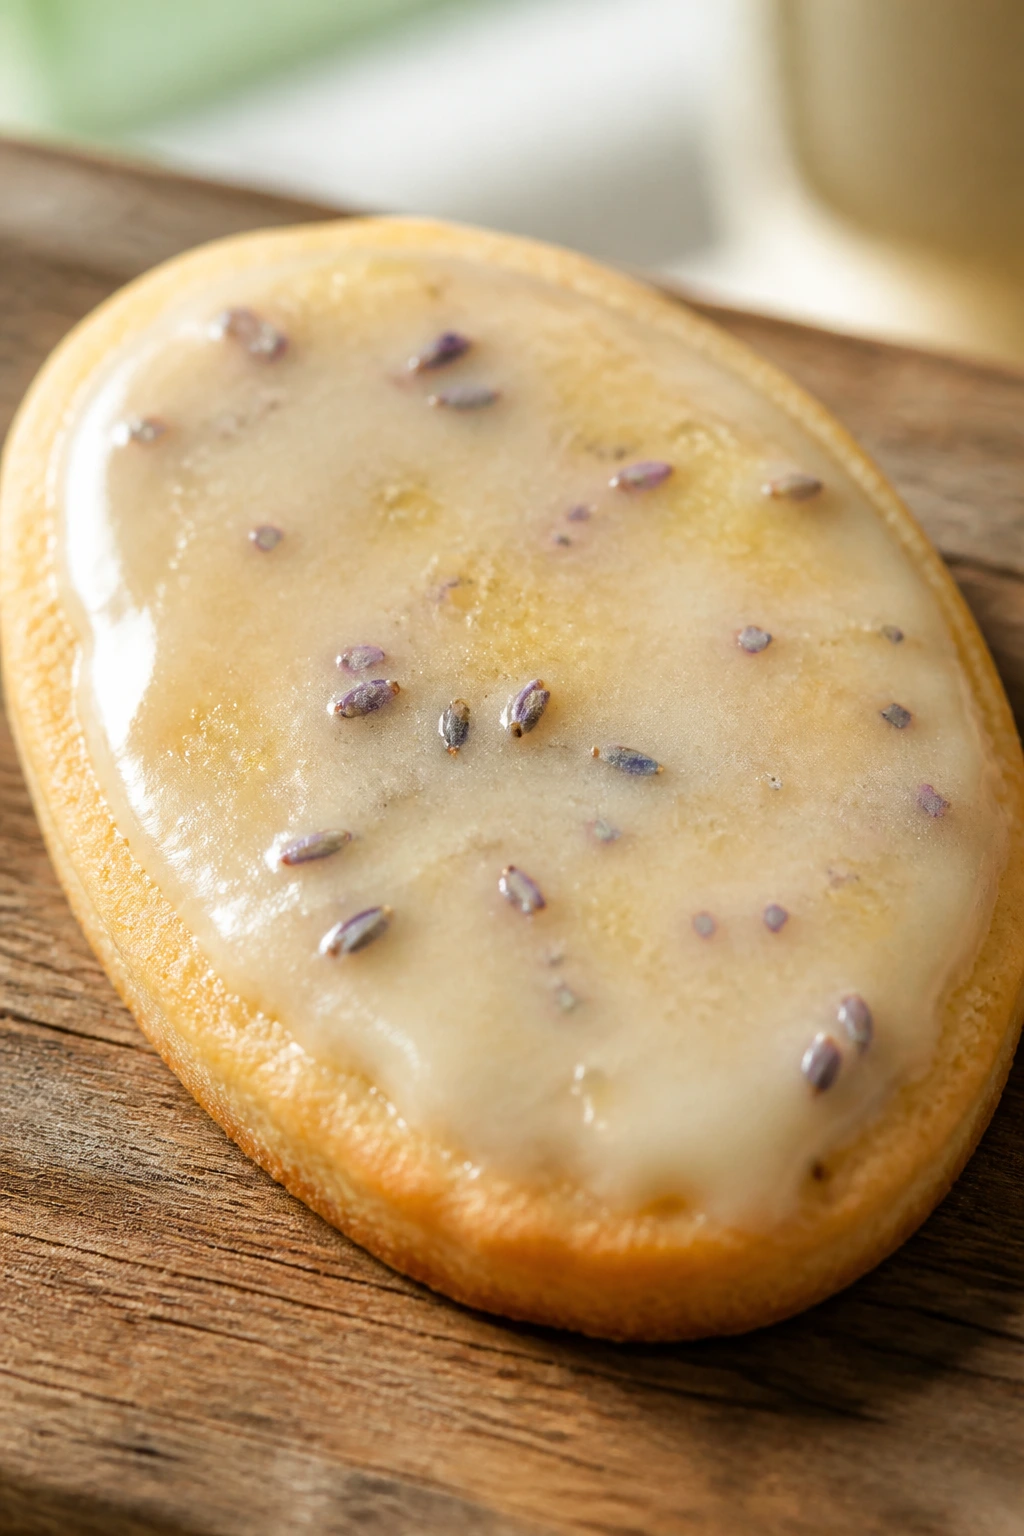
Intro: Lavender cookies can go soapy if you use too much. In a soft oval cookie, a little goes a long way, and the honey makes the flavor feel rounded rather than sharp.
Why It Works: Honey pulls moisture into the dough and keeps the center soft, while the oval shape gives you a clean surface for a thin glaze. The trick is using a light hand with the lavender so the cookie tastes calm, not perfumed.
Key Ingredients:
- 2 1/4 cups all-purpose flour
- 1 tbsp cornstarch
- 1/2 tsp baking powder
- 1/2 tsp salt
- 3/4 cup unsalted butter, softened
- 1/2 cup granulated sugar
- 1/4 cup honey
- 1 large egg
- 1 tsp vanilla extract
- 1/2 tsp culinary lavender, finely crushed
- 1 cup powdered sugar
- 2 tbsp milk
Quick Steps:
- Whisk flour, cornstarch, baking powder, salt, and lavender.
- Beat butter and sugar, then add honey, egg, and vanilla.
- Mix in the dry ingredients and chill 30 minutes.
- Roll to 1/4 inch, cut ovals, and bake at 325°F for 9 to 10 minutes.
- Drizzle with a thin glaze once cool.
Equipment for This Recipe:
- Mixing bowl
- Oval cutter
- Small whisk
- Cooling rack
How to Serve This Dish: These look elegant with just a thin glaze line and maybe a few edible flower petals if you have them. They pair well with herbal tea, especially chamomile or mint.
Pro Tips for This Recipe:
- Crush the lavender finely so the pieces don’t feel woody.
- Don’t overdo the honey or the cookies will spread too much.
- Let the cookies cool fully before glazing; honey dough can stay warm longer than you expect.
Variations on This Dish:
- Lemon Lavender Ovals: Add 1 tbsp lemon zest.
- Rose Honey Ovals: Replace lavender with a few drops of food-safe rose water.
Common Mistakes to Avoid with This Dish:
- Don’t use decorative lavender meant for sachets; use culinary lavender only.
- Don’t overbake to dark gold. Honey cookies taste best a little pale.
25. Butterscotch Drop Stars
Intro: These are a little playful — star-shaped in a way that feels more piped than cut. Butterscotch gives them a warm, caramel note, and the soft dough stays tender if you keep the stars on the small side.
Why It Works: Melted butterscotch chips and brown sugar bring extra moisture, which helps the stars stay soft longer than standard sugar cookies. A star piping tip or a sturdy cookie press forms the ridges without needing a lot of flour.
Key Ingredients:
- 1 cup all-purpose flour
- 1 tbsp cornstarch
- 1/2 tsp baking powder
- 1/4 tsp salt
- 1/2 cup unsalted butter, softened
- 1/2 cup packed brown sugar
- 1 large egg
- 1/2 cup butterscotch chips, melted and cooled slightly
- 1 tsp vanilla extract
Quick Steps:
- Whisk flour, cornstarch, baking powder, and salt.
- Beat butter and brown sugar, then add the egg, melted butterscotch, and vanilla.
- Mix in the dry ingredients until smooth.
- Pipe or press small stars onto a lined sheet pan.
- Bake at 350°F for 8 to 9 minutes, until the edges are set and the centers are still soft.
Equipment for This Recipe:
- Piping bag with star tip or cookie press
- Mixing bowl
- Sheet pan
- Cooling rack
How to Serve This Dish: These are fun as a top layer in a tin because the ridges hold their shape. They’re good with milk, and a little melted chocolate drizzle never hurts.
Pro Tips for This Recipe:
- Let the melted butterscotch cool before mixing it in.
- Keep the stars small; big piped cookies spread unevenly.
- If the dough feels too stiff for piping, let it sit 3 to 5 minutes at room temperature.
Variations on This Dish:
- Chocolate Butterscotch Stars: Add 1 tbsp cocoa powder.
- Pecan Butterscotch Stars: Fold in 1/3 cup finely chopped pecans.
Common Mistakes to Avoid with This Dish:
- Don’t use hot butterscotch; it melts the butter and ruins the texture.
- Don’t overbake trying to dry the tops. Soft is the whole point.
26. Miso Caramel Sandwich Coins
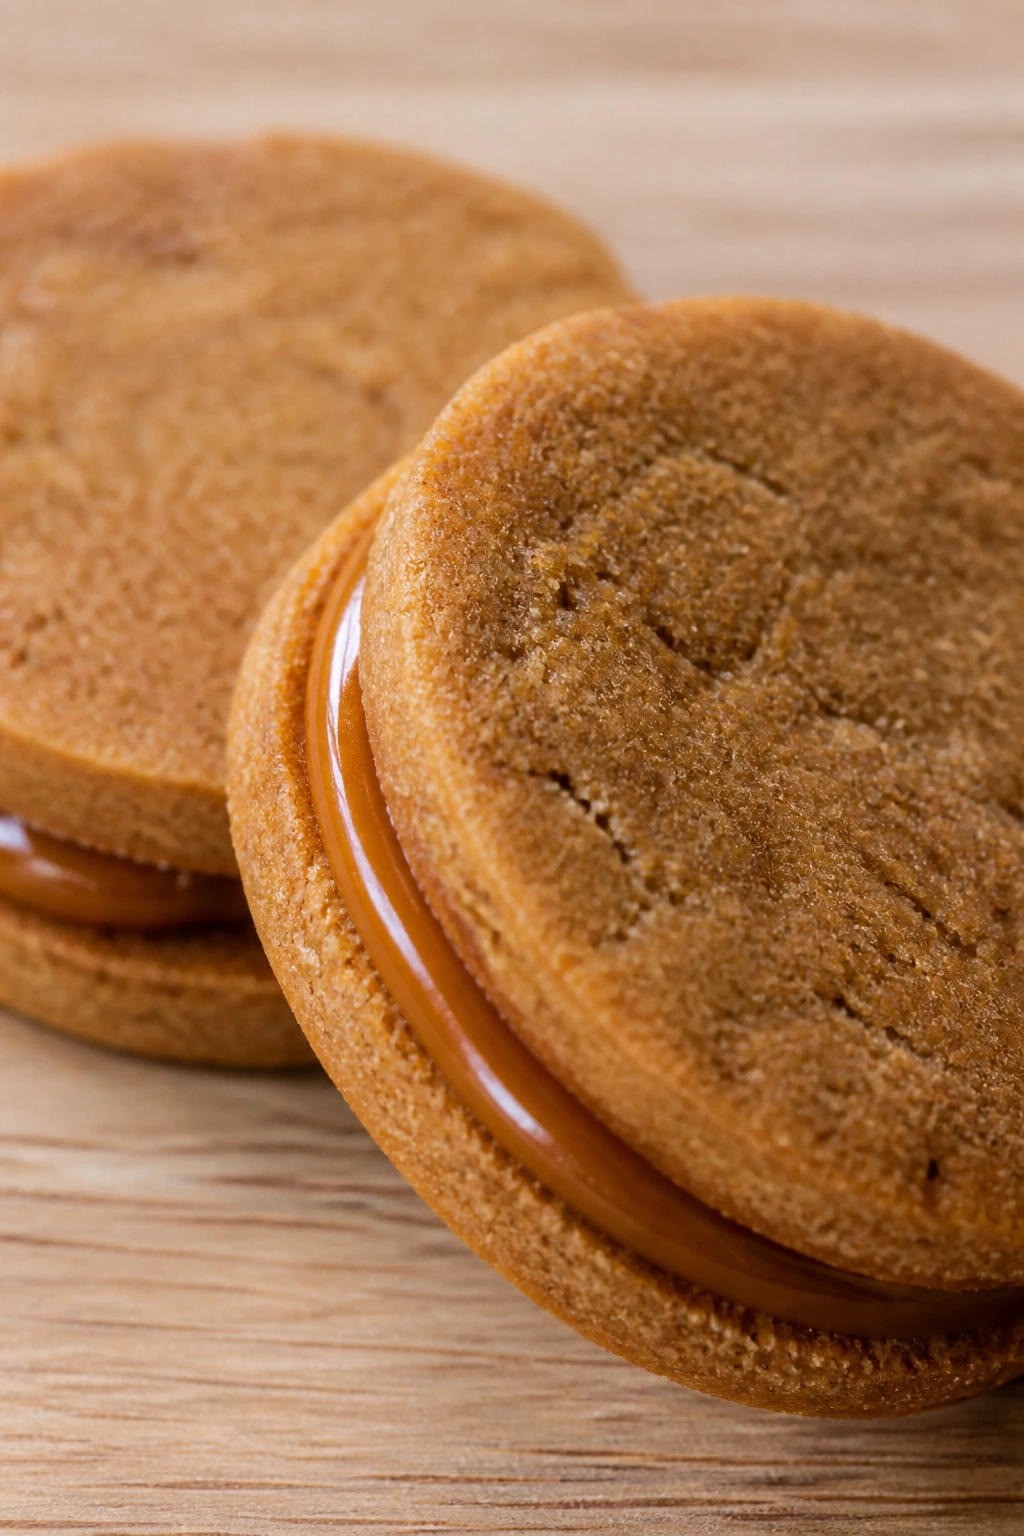
Intro: This is the one I’d bring to a cookie swap if I wanted people to ask questions. The miso in the caramel tastes salty and deep, which keeps the sandwich from drifting into plain sweetness.
Why It Works: The cookies themselves are soft brown-sugar rounds, and the filling adds a glossy middle that protects the crumb from drying out. Miso brings enough salt to sharpen the caramel without turning the whole thing savory.
Key Ingredients:
- For the Cookies:
- 2 cups all-purpose flour
- 1 tbsp cornstarch
- 1/2 tsp baking powder
- 1/2 tsp salt
- 3/4 cup unsalted butter, softened
- 3/4 cup brown sugar
- 1 large egg
- 1 tsp vanilla extract
- For the Filling:
- 1/2 cup soft caramel sauce
- 1 tsp white miso
- 1 tbsp powdered sugar
Quick Steps:
- Beat butter and brown sugar, then add the egg and vanilla.
- Mix in flour, cornstarch, baking powder, and salt, then chill 30 minutes.
- Roll and cut small rounds, then bake at 325°F for 9 to 10 minutes.
- Stir the caramel, miso, and powdered sugar together.
- Sandwich the cooled cookies with the filling.
Equipment for This Recipe:
- Mixing bowl
- Round cutter
- Small bowl for filling
- Offset spatula or spoon
How to Serve This Dish: These are rich, so keep the portions modest and the plate clean. Serve them with coffee or strong black tea; they need something plain beside them.
Pro Tips for This Recipe:
- Use soft caramel, not hard candy caramel.
- Taste the filling before assembling; miso strength varies.
- Let the cookies cool completely so the filling doesn’t slide.
Variations on This Dish:
- Salted Vanilla Sandwich Coins: Skip the miso and add flaky salt instead.
- Chocolate Miso Coins: Add 1 tbsp cocoa to the cookie dough.
Common Mistakes to Avoid with This Dish:
- Don’t overfill the sandwich; the caramel will squeeze out.
- Don’t use a filling that’s too hot or thin.
27. White Chocolate Cranberry Wreaths
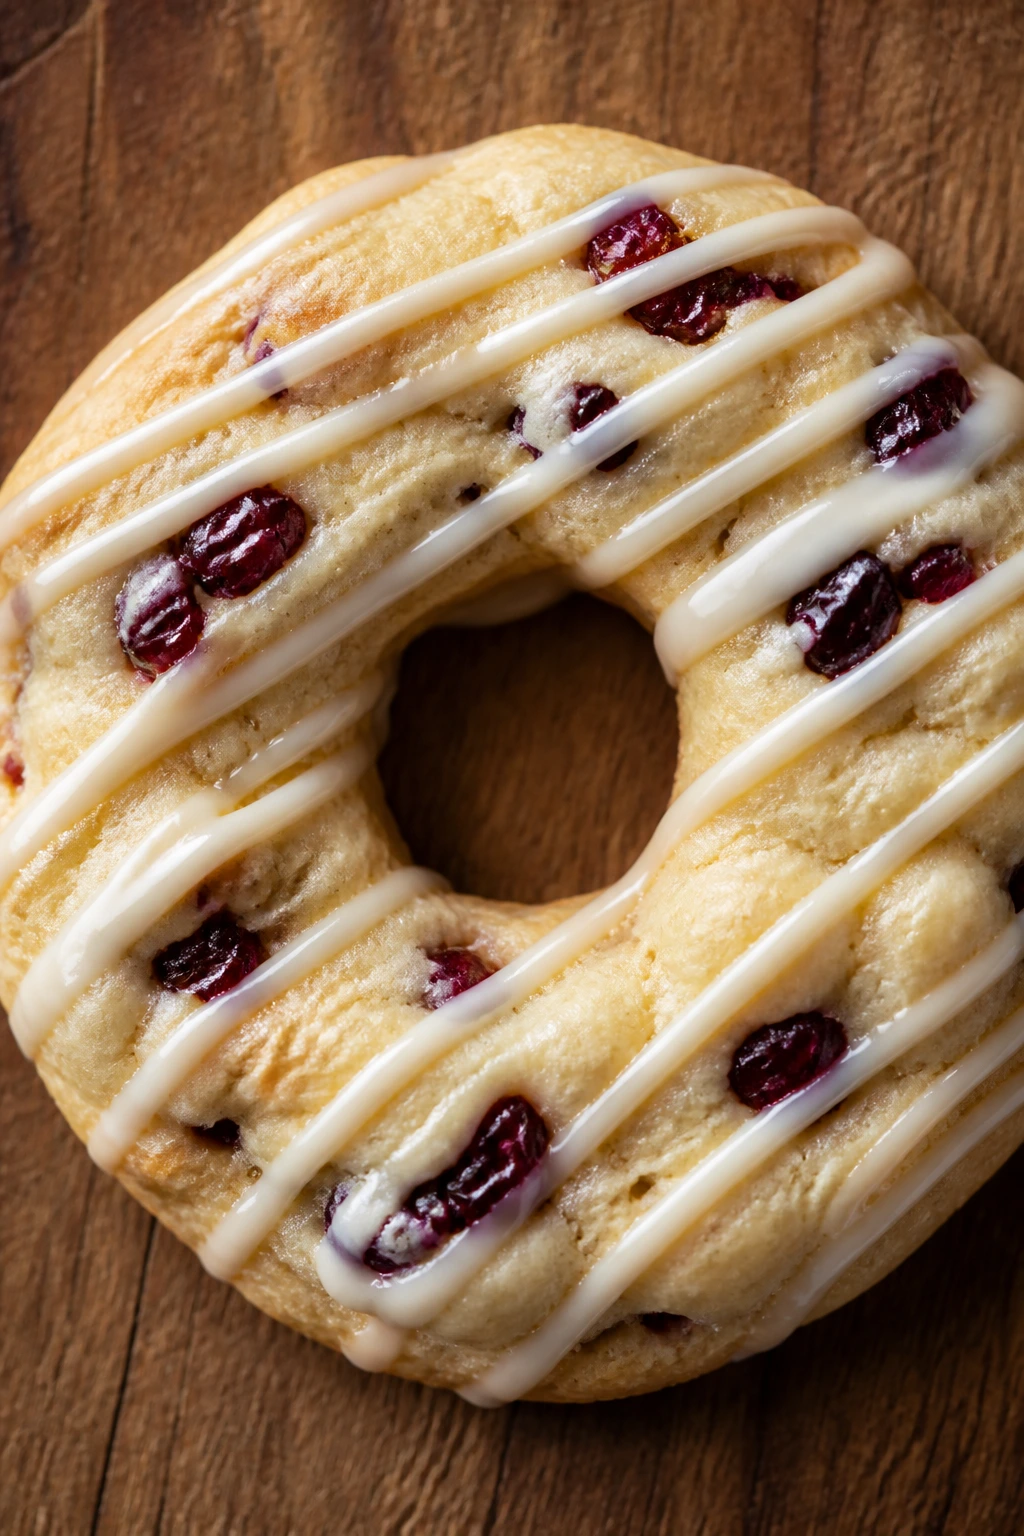
Intro: These wreaths have a holiday look, but the flavor works any time you want something sweet-tart and soft. Cranberries add chew, white chocolate adds richness, and the ring shape keeps things tidy.
Why It Works: Dried cranberries hold moisture better than a lot of mix-ins, so the cookies stay chewy instead of crumbly. A light white-chocolate drizzle helps the tops stay soft and gives the wreath shape a little shine.
Key Ingredients:
- 2 1/4 cups all-purpose flour
- 1 tbsp cornstarch
- 1/2 tsp baking soda
- 1/2 tsp salt
- 3/4 cup unsalted butter, softened
- 3/4 cup brown sugar
- 1 large egg
- 1 tsp vanilla extract
- 3/4 cup dried cranberries
- 1/2 cup white chocolate chips, melted
Quick Steps:
- Whisk flour, cornstarch, baking soda, and salt.
- Beat butter and brown sugar, then add the egg and vanilla.
- Mix in the dry ingredients and fold in cranberries.
- Shape into rings, chill 20 minutes, and bake at 350°F for 9 to 10 minutes.
- Drizzle with melted white chocolate once cooled.
Equipment for This Recipe:
- Mixing bowl
- Sheet pan
- Small spoon
- Parchment paper
How to Serve This Dish: These work well stacked in a wreath-like circle on the plate, which sounds obvious because it is. They pair well with tea, cider, or coffee.
Pro Tips for This Recipe:
- Chop the cranberries a little if they’re very large.
- Chill the shaped rings so they don’t spread into ovals.
- Drizzle the chocolate lightly; too much makes the surface sticky.
Variations on This Dish:
- Orange Cranberry Wreaths: Add 1 tbsp orange zest to the dough.
- Pistachio Cranberry Wreaths: Add 1/3 cup chopped pistachios.
Common Mistakes to Avoid with This Dish:
- Don’t bake until the rings brown hard; they’ll dry out fast.
- Don’t skip the chill if you want the wreath hole to stay open.
28. Chai-Spiced Slices
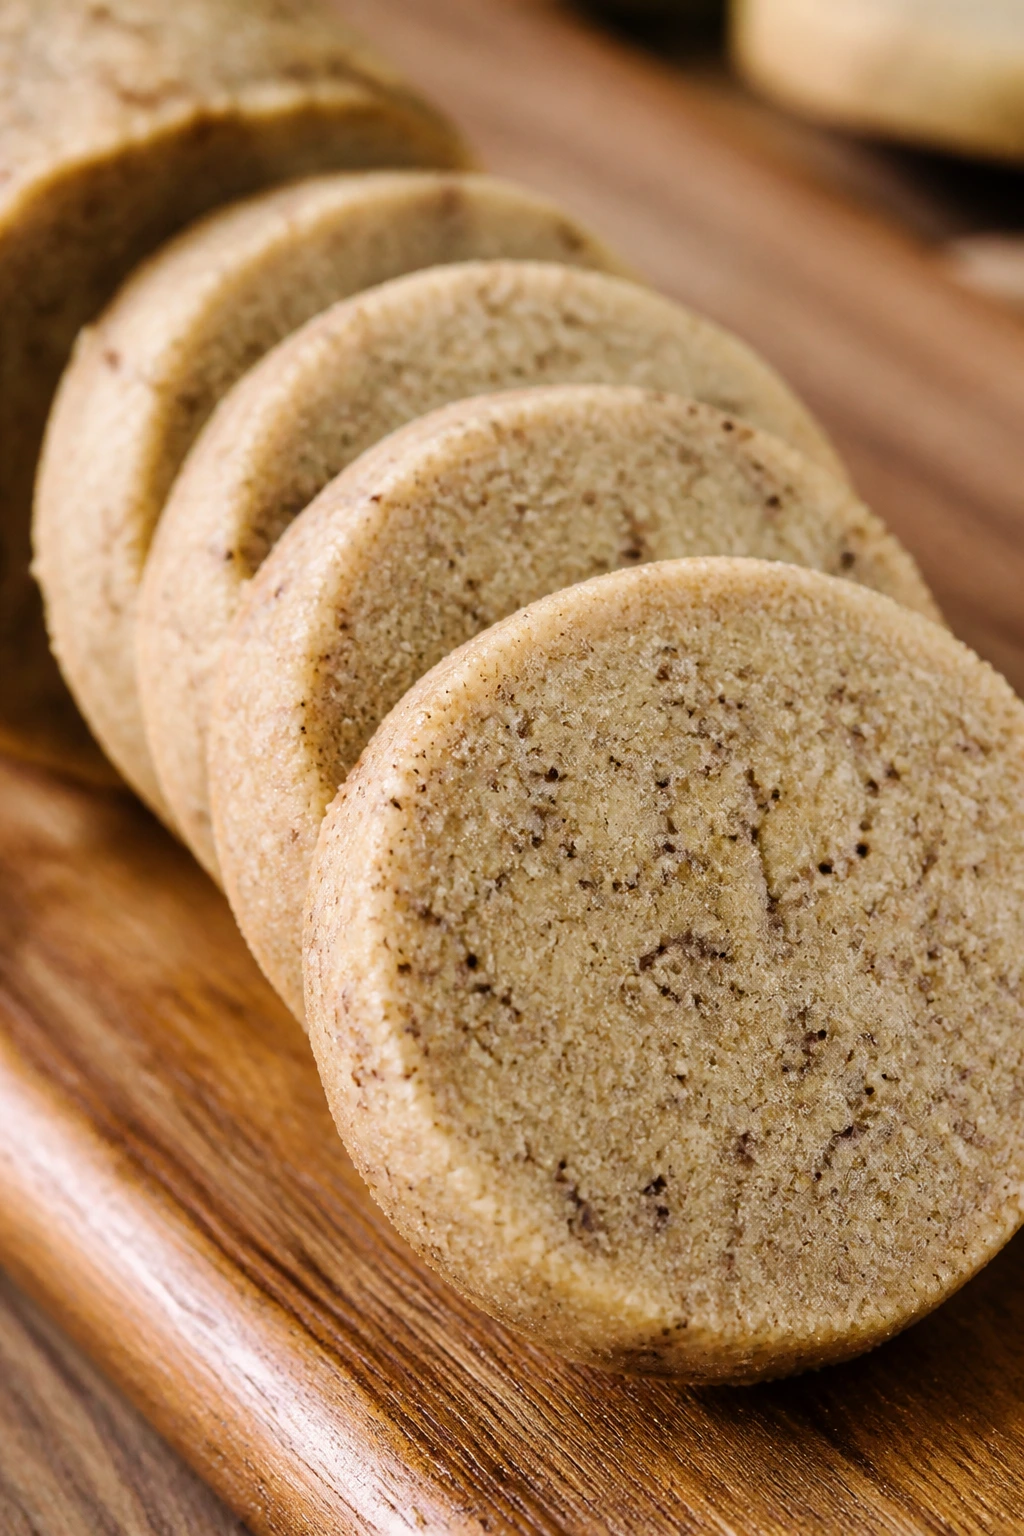
Intro: Slice-and-bake cookies are one of the easiest ways to get neat shapes without cutters. Chai spice gives the rounds a warm, layered flavor that still feels soft after the log spends time in the fridge.
Why It Works: The dough stays uniform because every slice is the same thickness, and a butter-heavy base keeps the rounds tender. Chai spice reads best in a simple cookie, where the cardamom, cinnamon, and ginger can actually be tasted.
Key Ingredients:
- 2 1/4 cups all-purpose flour
- 1 tbsp cornstarch
- 1/2 tsp baking powder
- 1/2 tsp salt
- 3/4 cup unsalted butter, softened
- 2/3 cup sugar
- 1 large egg
- 1 tsp vanilla extract
- 2 tsp chai spice blend
Quick Steps:
- Beat butter and sugar, then add the egg and vanilla.
- Mix in flour, cornstarch, baking powder, salt, and chai spice.
- Shape into a log, wrap tightly, and chill 1 hour.
- Slice 1/4-inch rounds and place on a lined tray.
- Bake at 325°F for 9 to 10 minutes, until the edges are set and the centers still feel soft.
Equipment for This Recipe:
- Mixing bowl
- Plastic wrap or parchment
- Sharp knife
- Baking sheet
How to Serve This Dish: Stack the rounds in a straight line or a low pile; the clean slices are part of the appeal. They go well with chai tea, predictably enough, but they also work with a simple latte.
Pro Tips for This Recipe:
- Chill the log until it’s firm enough to slice cleanly.
- Rotate the log once while chilling so it doesn’t flatten on one side.
- If the slices crack, let the log sit 5 minutes at room temperature.
Variations on This Dish:
- Chocolate Chai Slices: Add 1 tbsp cocoa powder to the dough.
- Orange Chai Slices: Add 1 tbsp orange zest for a brighter finish.
Common Mistakes to Avoid with This Dish:
- Don’t slice too thick; 1/4 inch is enough for softness and shape.
- Don’t let the log thaw too long or the rounds lose their edges.
29. Apricot Almond Rings
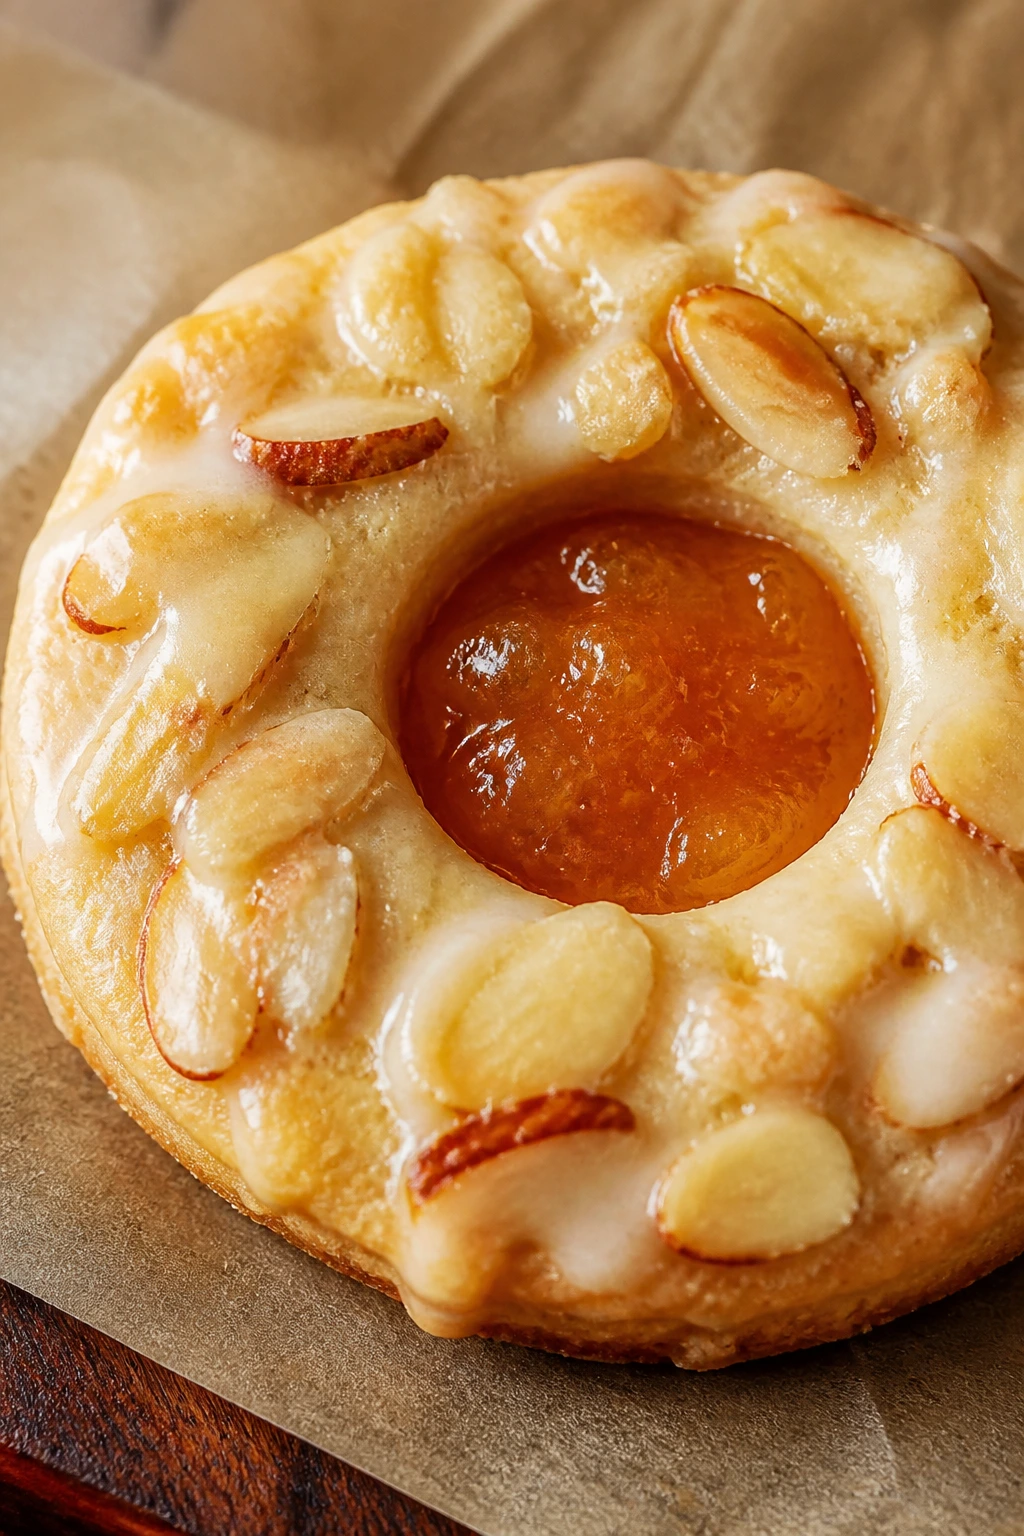
Intro: Rings are underrated. They’re tidy, easy to glaze, and the apricot center gives each one a soft, bright note that keeps the almond cookie from tasting heavy.
Why It Works: Almond extract and almond flour make the dough tender, while apricot jam brings a little moisture to the center. The ring shape bakes evenly, and the jam in the middle protects the softer parts from drying out too fast.
Key Ingredients:
- 1 1/2 cups all-purpose flour
- 1/2 cup almond flour
- 1 tbsp cornstarch
- 1/2 tsp salt
- 3/4 cup unsalted butter, softened
- 2/3 cup granulated sugar
- 1 large egg yolk
- 1 tsp almond extract
- 1/2 cup apricot jam
- 1/2 cup powdered sugar
- 1 to 2 tbsp milk
Quick Steps:
- Beat butter and sugar, then add the egg yolk and almond extract.
- Mix in the flours, cornstarch, and salt, then chill 30 minutes.
- Roll to 1/4 inch, cut rings, and bake at 325°F for 9 to 10 minutes.
- Cool completely, then fill the centers with apricot jam.
- Drizzle with a thin powdered sugar glaze if you want a softer-looking finish.
Equipment for This Recipe:
- Mixing bowl
- Ring cutter
- Small spoon
- Parchment-lined pan
How to Serve This Dish: These are nice arranged in a circle on the plate because the shape echoes the cookie itself. Serve with tea or sparkling water if you want the apricot and almond to stay clean and bright.
Pro Tips for This Recipe:
- Use thick jam so the filling stays put.
- Chill the cut rings before baking if the dough feels loose.
- A tiny bit of orange zest in the glaze works well with apricot.
Variations on This Dish:
- Cherry Almond Rings: Swap apricot jam for cherry preserves.
- Vanilla Almond Rings: Skip the jam and finish with vanilla glaze only.
Common Mistakes to Avoid with This Dish:
- Don’t overfill the centers or the jam will bubble over.
- Don’t bake until deeply golden. The almond flavor stays softer and nicer when pale.
30. Double Vanilla Sandwich Hearts
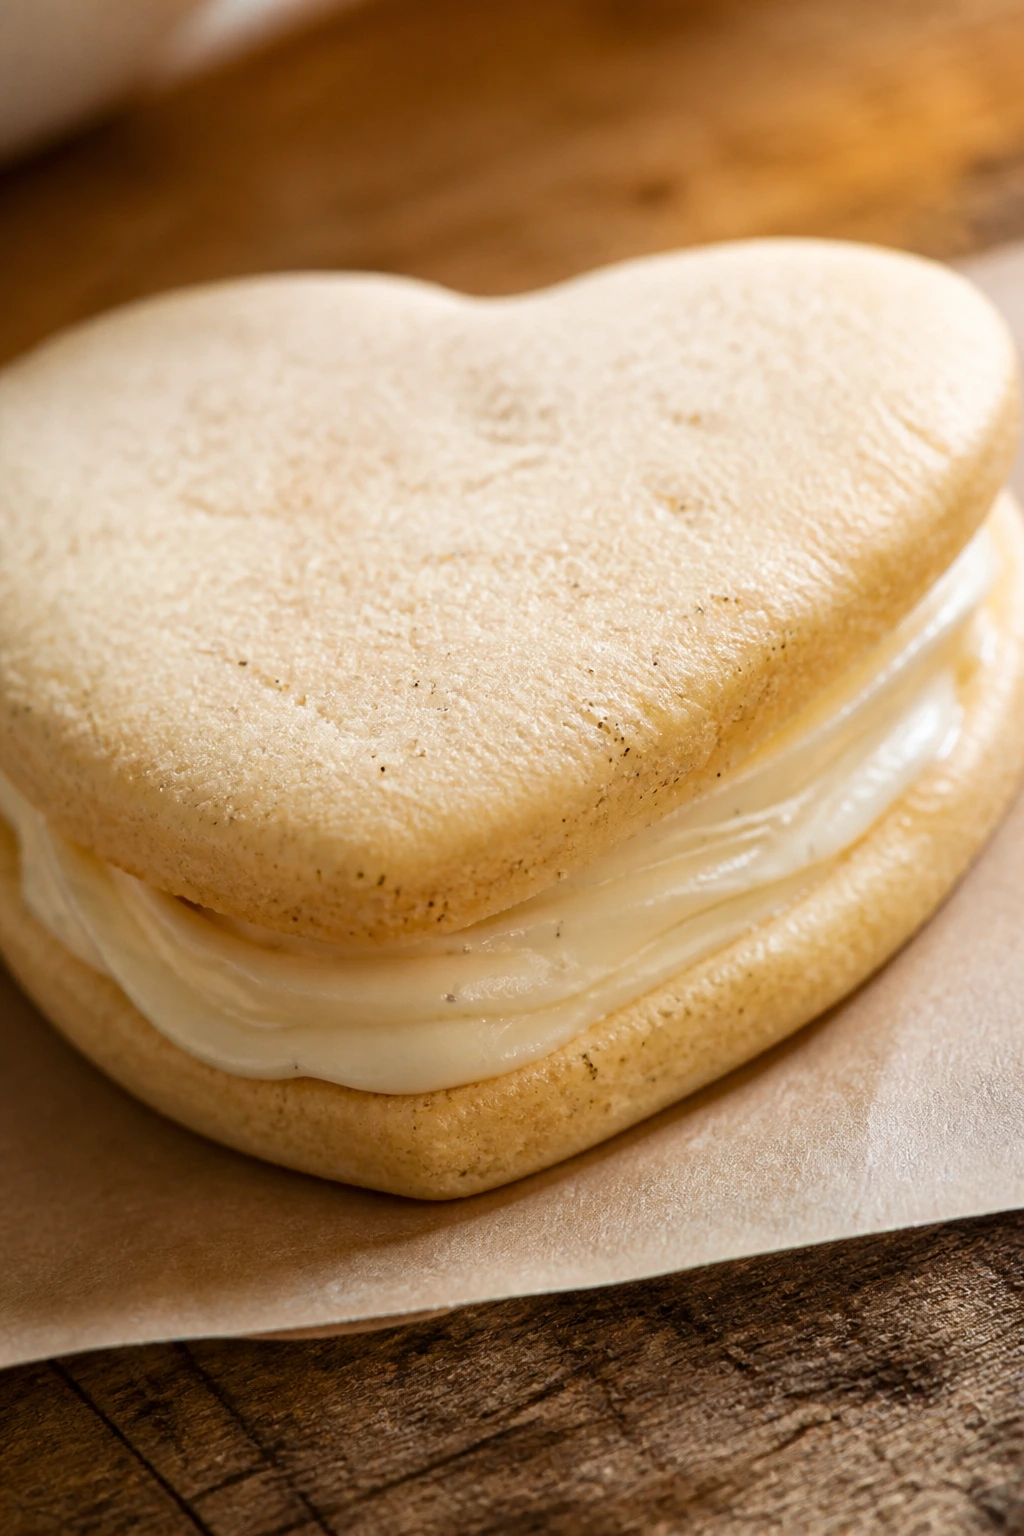
Intro: This is the softest, most straightforward ending to the batch. Vanilla in the cookie, vanilla in the filling, and a heart shape that feels familiar without being plain.
Why It Works: A butter-rich dough with cornstarch stays tender, and the creamy filling keeps the cookies soft even after they’ve been assembled. Using two kinds of vanilla — extract and bean paste, if you have it — makes the flavor read clearly without needing extra sugar.
Key Ingredients:
- For the Cookies:
- 2 1/4 cups all-purpose flour
- 1 tbsp cornstarch
- 1/2 tsp baking powder
- 1/2 tsp salt
- 3/4 cup unsalted butter, softened
- 2/3 cup granulated sugar
- 1 large egg
- 2 tsp vanilla extract
- For the Filling:
- 1/2 cup unsalted butter, softened
- 1 1/2 cups powdered sugar
- 1 tsp vanilla bean paste or 2 tsp vanilla extract
- 1 tbsp milk
Quick Steps:
- Beat the butter and sugar, then add the egg and vanilla.
- Mix in the flour, cornstarch, baking powder, and salt, then chill 30 minutes.
- Roll to 1/4 inch, cut heart shapes, and bake at 325°F for 9 to 10 minutes.
- Beat the filling ingredients until smooth.
- Sandwich cooled cookies with the filling and press gently so the edges meet.
Equipment for This Recipe:
- Mixing bowl
- Heart cutter
- Hand mixer
- Small offset spatula
How to Serve This Dish: These are the ones to put in the center of the tray because the filling does most of the talking. They pair well with milk or a mild coffee and look tidy when stacked in pairs.
Pro Tips for This Recipe:
- Cool the cookies fully before filling them.
- Keep the filling thick enough to hold its shape but soft enough to spread.
- If the dough warms while rolling, chill it again for 10 minutes.
Variations on This Dish:
- Chocolate Vanilla Hearts: Add 1 tbsp cocoa to the cookie dough.
- Berry Vanilla Hearts: Swap part of the filling for a thin layer of raspberry jam.
Common Mistakes to Avoid with This Dish:
- Don’t oversandwich them with too much filling. It squeezes out and makes a mess.
- Don’t bake until the tops brown hard. Soft vanilla cookies should stay pale.
Why Soft Cookies Keep Their Shape Better Than You’d Think
A lot of people assume soft cookies and crisp shapes are enemies. They aren’t. The real battle is between moisture and spread, and you can control both if you stop thinking in terms of “bake until done” and start thinking in terms of “bake until set.”
The practical tricks are boring on paper and useful in the kitchen. Chill the dough long enough for the butter to firm up. Roll it thick enough that the center survives the oven heat. Pull the tray when the edges have set but the middle still looks a shade lighter. Then let the cookies finish on the hot pan for a few minutes instead of dragging them around too early. That last bit matters more than people expect.
I also like a slight bias toward brown sugar, honey, molasses, cream cheese, tahini, or jam. They all hold moisture in different ways. Not identical ways, either. Brown sugar gives chew, molasses gives depth, cream cheese gives a soft dairy note, and jam creates a moist center that protects the rest of the cookie. That’s why the shapes here can stay pretty without going dry.
Essential Equipment for These Cookies
- Mixing bowls in two sizes: One for the dough, one for glazes or fillings.
- Hand mixer or stand mixer: Creams butter and sugar fast enough to keep the dough smooth.
- Rolling pin: Needed for cutters, pinwheels, and slice-and-bake logs.
- Cookie cutters: Stars, hearts, flowers, leaves, wreaths, and whatever shape fits the batch.
- Cookie scoop: Keeps rounds and domes the same size so they bake evenly.
- Cookie press or piping bag with star tip: Useful for spritz and piped star cookies.
- Parchment paper or silicone mats: Stops sticking and helps the bottoms stay pale.
- Sheet pans with low rims: Let the cookies bake evenly and make removal easier.
- Cooling rack: Keeps steam from softening the bottoms after baking.
- Fine whisk and spatula: Good for glazes, fillings, and scraping the bowl clean.
Smart Shopping and Ingredient Tips
Buy butter that smells clean and sweet when you open it. That sounds obvious, but it matters more in soft shaped cookies than in crisper ones, because butter is carrying both flavor and texture here. If you’re using unsalted butter, add the salt the recipe asks for; if you use salted butter, cut the added salt a little and taste the dough where it makes sense.
Brown sugar should feel soft inside the bag or box. If it’s gone hard, it won’t cream well and the cookies will lose some of their tenderness. For jam-filled cookies, choose preserves that look thick when you spoon them out — the kind that hold a mound on the spoon instead of running flat. For citrus cookies, zest the fruit yourself. The pre-bottled stuff never gives the same bright oil.
Flour matters too. All-purpose flour is fine for most of these, but if a dough feels a little tough after mixing, a spoonful of cornstarch does more for softness than another splash of liquid ever will. And if you’re buying matcha, cocoa, spices, or espresso powder, smell them before using them. Stale spices make soft cookies taste dull, which is its own kind of loss.
How to Serve These Cookies

Presentation: Put the shapes in loose groups so the outlines stay visible. Stars and flowers look better scattered, wreaths and rings look better in a circle, and sandwich cookies need a little space so the filling doesn’t smear the plate.
Accompaniments: Cold milk is the easy answer, but tea does better with the citrus, spice, and floral cookies. Coffee works with the chocolate, peanut butter, tahini, and molasses batches. If you’re serving a tray, add fresh berries or a few toasted nuts so the softer cookies have something sharp next to them.
Portions: Two cookies per person is a normal serving if you’re putting them out after dinner. For a cookie tin or bake sale, plan on three to four smaller cookies per person and one larger sandwich cookie if that’s the type you’re serving. Scale the size of the cutters and scoops rather than piling on extra dough.
Beverage Pairing: Earl Grey, black coffee, chai, and plain milk cover almost everything here. For the more floral cookies, chamomile or jasmine tea keeps the flavors tidy.
Additional Tips and Flavor Boosters
Flavor Enhancement: A tiny pinch of flaky salt on maple, caramel, or chocolate cookies makes the sweetness taste cleaner. On the citrus and floral cookies, a teaspoon of finely grated zest in the glaze wakes everything up without changing the dough.
Customization: If you like stronger spice, move the cinnamon, cardamom, ginger, or chai blend up by 1/4 teaspoon at a time. If you like a gentler cookie, shave that same amount off and let the filling or glaze do more of the work.
Serving Suggestions: Brush cut-outs with milk and sprinkle sanding sugar before baking for a little texture. For sandwich cookies, roll the edges in chopped nuts, coconut, or mini chocolate chips so they look finished without much extra work.
Make-It-Yours: Gluten-free bakers should use a 1:1 baking blend with xanthan already included. Dairy-free bakers can swap in a good plant butter stick, and egg-free bakers will usually get the best texture from a flax egg in the denser doughs, not the delicate spritz.
Make-Ahead, Storage, and Reheating Guidance
Most of these cookies keep well for 3 to 5 days at room temperature in an airtight container. Line the container with parchment and tuck a second sheet between layers so the shapes don’t rub together. Sandwich cookies and jam-filled cookies belong in the fridge if your kitchen runs warm; they’ll keep for up to 1 week chilled and taste best after sitting at room temperature for 15 to 20 minutes.
Baked cookies freeze well for up to 2 months if you pack them tightly and keep out as much air as possible. Freeze them in a single layer first, then move them to a freezer bag or tin. Thaw at room temperature still wrapped, so condensation forms on the paper, not on the cookies. That matters more than people think. Moisture on the cookie surface can make the decorations smudge or the glaze go tacky.
Dough freezes well too, especially for cut-outs, pinwheels, and slice-and-bake logs. Freeze shaped dough on a tray, then bag it once solid. Bake straight from frozen with 1 to 3 extra minutes, watching for the same visual cue: set edges, pale centers. If you need to bring back a cookie that has gone a little firm, a 5-second microwave burst or 3 minutes in a 300°F oven can soften it, but only after it’s on a plate and not stacked with others.
Variations and Adaptations to Try
Gluten-Free Soft Batch: Use a 1:1 gluten-free baking flour for the cut-outs, rounds, and sandwich cookies. The dough usually needs a 10-minute rest before rolling so the flour can hydrate and stop feeling sandy.
Dairy-Free Tray: Swap in a plant butter stick that stays firm when cold, not a soft tub spread. That swap works best in the star, heart, and moon cookies where the dough already gets chilled before baking.
Lower-Sugar Comfort Batch: Replace part of the granulated sugar with brown sugar or honey, then bake on the shorter end of the time range. The texture stays softer, though the cookies will look a little less crisp around the edges.
Spice-Forward Holiday Batch: Take the cinnamon, ginger, cardamom, or chai cookies and add 1/4 teaspoon more spice at a time, not a full spoonful. That keeps the flavor focused instead of muddy.
Kid-Friendly Decorating Batch: Pick the plainest shapes — stars, hearts, flowers, rounds — and let the glaze do the decorating after baking. Kids do better with a small bowl of sprinkles and a spoon than with a piping bag they’ll squeeze everywhere.
Filled-Cookie Upgrade: If you want the softest possible result, choose thumbprints, sandwich cookies, or jam-centered rings. The filling acts like insurance against staleness, and those are the batches I’d make a day ahead without worrying.
Common Mistakes to Avoid
Rolling the dough too thin: Thin cookies dry out before the shape even looks finished. Keep most cut-outs at about 1/4 inch, and for scoop cookies aim for a size that looks a little plump on the tray.
Baking until the tops look fully done: That’s the fastest route to a hard cookie. Pull the tray when the edges are set and the centers still look a shade too light; they keep baking on the pan.
Adding too much flour while shaping: Extra flour makes the dough easier to handle for about 30 seconds, then it turns the cookie dry and chalky. Chill the dough instead of dusting it heavily.
Using warm pans for the next batch: A hot sheet pan makes the dough spread before the oven sets it. Let the pan cool between batches or use two pans and rotate them.
Overfilling thumbprints and sandwiches: Jam and caramel leak, smear, and make the cookies sticky. A small amount is enough, and the filling should sit inside the shape rather than spill over the edges.
Storing them open to the air: Even a good soft cookie loses its edge if it sits uncovered. Seal it up the same day it’s baked.
Frequently Asked Questions
Can I freeze the dough for these shaped cookies?
Yes, and I’d freeze most of the dough before I froze the baked cookies. Cut-outs, pinwheel logs, and slice-and-bake dough freeze especially well, and you can bake them straight from frozen with a minute or two added to the oven time.
Why do my shaped cookies spread more than yours?
Usually the butter was too warm, the dough wasn’t chilled long enough, or the pan was still hot from the last batch. Shape the cookies, chill them until firm, and start each tray on a cool sheet pan.
Do these cookies need to be frosted to stay soft?
No. Frosting helps some cookies, but it isn’t the thing holding them together. The real softness comes from the dough formula, the bake time, and sealed storage.
What’s the best flour for soft shaped cookies?
All-purpose flour works fine for nearly all of them, but a spoonful of cornstarch softens the crumb in a way regular flour can’t. If a recipe uses cream cheese, tahini, or molasses, that extra tenderness comes through even more.
Can I make the dough a day ahead?
Absolutely. In fact, a lot of these doughs cut better after an overnight rest in the fridge. Just let the dough sit on the counter for a few minutes before rolling if it gets too hard to move.
What if the centers still seem underbaked when I pull them?
That’s usually a good sign. Soft cookies should look a little pale in the middle, and they finish setting on the hot tray. If they jiggle like raw batter, they need more time; if they feel firm in the oven, they were probably in too long.
How do I keep sandwich cookies from getting soggy?
Use a thick filling and let the cookies cool completely before assembly. If the filling is very soft, chill the finished cookies for 15 minutes so the middle can set before they’re stacked.
Can I make these without a mixer?
Yes, for many of them. A sturdy spoon and some patience will handle the butter-and-sugar step, though spritz dough and very smooth fillings are easier with a mixer. The softer the butter, the easier the hand-mixing.
Which shapes are best for gifting?
Stars, hearts, wreaths, rings, and sandwich cookies travel best because they have a sturdy shape and hold their softness for a few days. Pack them in one layer if you can, or separate layers with parchment so the tops stay clean.
The Tin You’ll Reach For First
A good shaped cookie does two jobs at once. It looks tidy enough to hand to someone, and it still tastes tender after the tray has cooled and the kitchen has gone quiet.
That’s the part I care about most here. Not just the cutter. Not just the glaze. The bite. If you keep the dough thick, stop baking before the color gets too dark, and seal the cookies up once they’re cool, you get that soft, almost plush texture that makes people reach for a second one before they’ve finished the first.
If you want the easiest place to start, bake one batch of the vanilla stars or the peanut butter rounds first. Then put a few in a tin and wait until the next day. That’s when the whole idea proves itself.