
The fastest way to make a kitchen smell like a serious stir-fry line is to heat garlic, ginger, scallions, soy, and sesame oil until they stop tasting separate and start acting like one thing. That is the whole promise of a good homemade Asian sauce: the aroma hits first, the gloss shows up second, and the bottled, one-note aftertaste never gets a chance to settle in.
Most store-bought stir-fry sauces lean hard on salt and sugar, then stop. They’re useful in the same way a flashlight is useful in a power cut, but they rarely smell alive. A sauce built from scratch has more moving parts: the sweet edge of brown sugar, the clean snap of rice vinegar, the dark depth of oyster sauce, the round nuttiness of toasted sesame oil, and that little white-pepper sting that whispers “restaurant kitchen” instead of shouting it.
I like sauces like this because they solve dinner without pretending dinner is effortless. A bowl of broccoli and chicken thighs turns glossy. Tofu stops tasting like a blank cube. Noodles get a sheen that clings to every ridge and curl. That’s the point here: not a generic sauce, but one with enough aroma and body to make plain ingredients taste like they were cooked with intent.
Why This Homemade Asian Sauce Gets a Spot in the Fridge
- It smells like food, not packaging: The garlic-ginger base blooms in oil for less than a minute, and that short bloom is what gives the sauce its first real hit of aroma.
- It works on more than one dish: Spoon it over stir-fried vegetables, toss it with noodles, or pour it over rice bowls; the same base plays all three roles without tasting confused.
- The balance is built in: Soy brings salt and depth, rice vinegar keeps the sauce awake, and brown sugar keeps the edges from feeling sharp or thin.
- It finishes glossy, not gluey: Cornstarch thickens the liquid enough to coat a spoon without turning it into paste.
- You control the salt and heat: A low-sodium soy sauce and a small amount of chili crisp let you steer the sauce instead of fighting a bottle’s idea of balance.
Yield: Makes about 1 1/2 cups, enough for 4 to 6 servings
Prep Time: 10 minutes
Cook Time: 5 minutes
Total Time: 15 minutes
Difficulty: Beginner — the work is mostly measuring, whisking, and watching the heat so the garlic stays pale and fragrant.
Best Served: Warm, right after cooking, or tossed with hot stir-fry ingredients straight from the pan
For the Sauce:
- 1 tablespoon neutral oil, such as avocado, grapeseed, or canola
- 3 cloves garlic, finely minced or grated
- 1 tablespoon fresh ginger, finely grated
- 2 scallions, thinly sliced, whites and greens separated
- 1/2 cup low-sodium soy sauce or tamari for gluten-free
- 1/3 cup chicken stock or water
- 2 tablespoons oyster sauce or vegetarian mushroom sauce
- 3 tablespoons rice vinegar
- 1 tablespoon packed light brown sugar or honey
- 1 tablespoon toasted sesame oil
- 1/4 teaspoon white pepper
- 1 teaspoon chili crisp or 1/4 teaspoon red pepper flakes, optional
- 1 tablespoon cornstarch
- 2 tablespoons cold water
The Soy-Sesame Backbone of the Sauce
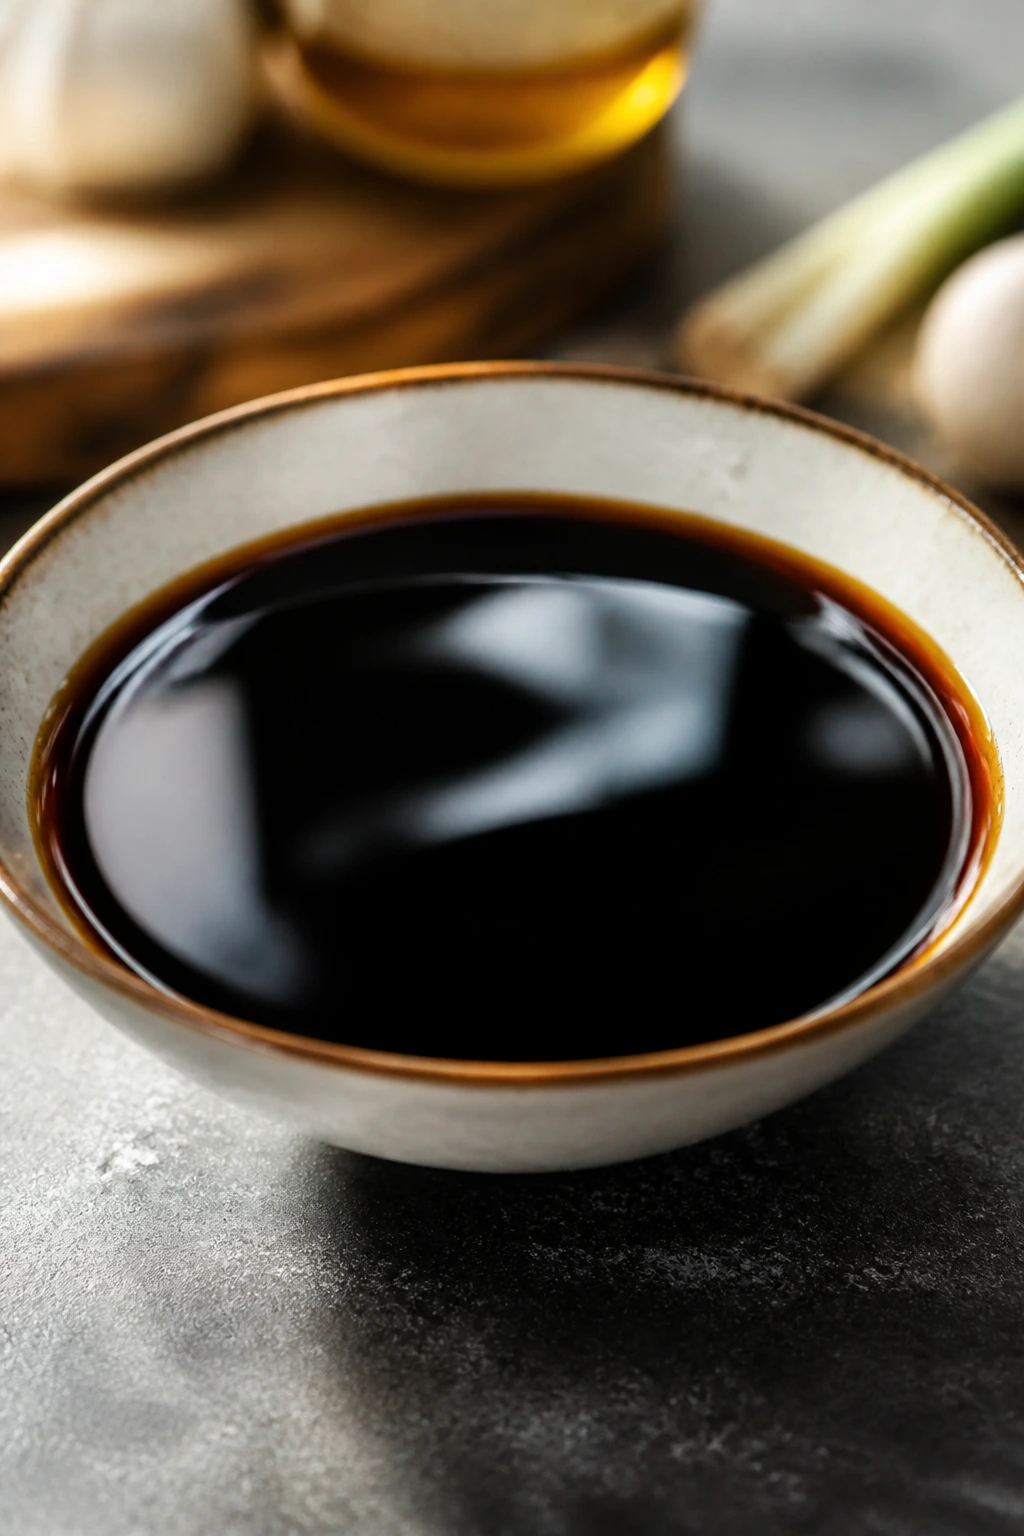
The sauce needs a base that can carry everything else without tasting blunt, and soy sauce does most of that work. I prefer low-sodium soy sauce here because the pan reduces the liquid quickly, and a full-salt bottle can turn the first taste into a salt hit before the aromatics even have a chance to speak. Oyster sauce adds the dark, savory depth people often chase in takeout stir-fries, while stock or water keeps the sauce from becoming too thick or too intense.
What to use: 1/2 cup low-sodium soy sauce, 2 tablespoons oyster sauce, and 1/3 cup chicken stock or water.
Preparation: Measure these liquids before you turn on the heat. Once the garlic hits the pan, you want to move fast, not stand there searching for the oyster sauce cap with one greasy hand.
Substitutions: Tamari works well if you need a gluten-free sauce. Vegetarian mushroom sauce gives the same deep, savory tone as oyster sauce, and plain water is fine when the rest of the meal already has broth, meat juices, or a rich cooking sauce of its own.
Tips: Use low-sodium soy because the sauce reduces for a minute or two, and reduction tightens the salt. If your stock is already salted, cut the soy by a tablespoon and taste again before the sauce goes into the pan.
The important thing here is control. Bottle sauces often taste like they were designed to survive a long shelf life before they were designed to taste good on a spoon. This version starts with ingredients that already know how to behave under heat.
Garlic, Ginger, and Scallion: The Aromatic Trio
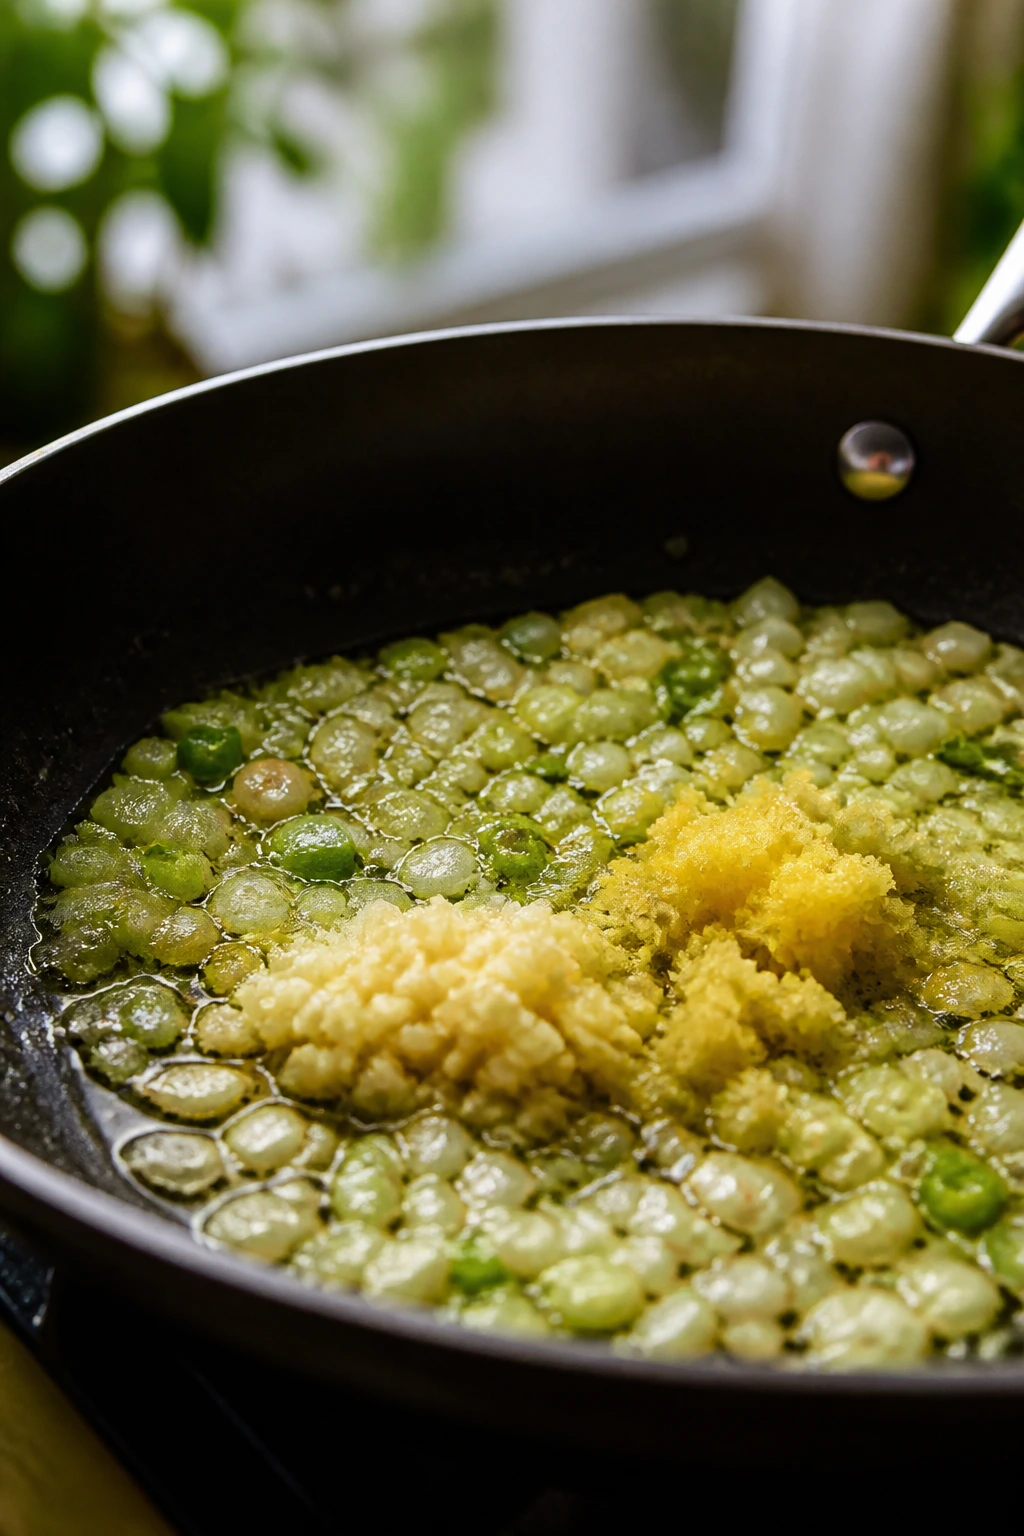
The smell you get when garlic and ginger hit warm oil is the whole reason this sauce earns its keep. It should be warm and sweet at the edges, not sharp and raw. Scallion whites come first because they soften quickly and lose that sting you get from a raw onion bite; the greens wait until the very end so the sauce still smells fresh when it lands on rice or noodles.
What to use: 3 cloves garlic, 1 tablespoon fresh ginger, and 2 scallions, sliced with the whites and greens separated.
Preparation: Grate the garlic and ginger on a microplane or mince them very finely so they melt into the sauce instead of floating around in bits. Slice the scallions thin enough that the whites soften in seconds and the greens look bright, not bruised.
Substitutions: Garlic paste and ginger paste work in a pinch, though the aroma is a little flatter. Shallot can stand in for scallion whites, and chives can replace the greens if that’s what you have in the fridge.
Tips: Bloom the aromatics in oil for only 30 to 45 seconds. If the garlic turns tan, the sauce tips from fragrant to bitter fast, and there’s no fixing that with extra sugar.
A lot of home sauces skip this part and then wonder why the result tastes like soy sauce with a label on it. That extra half-minute in the pan matters.
Rice Vinegar, Brown Sugar, and Sesame Oil: Sweet, Sharp, and Nutty
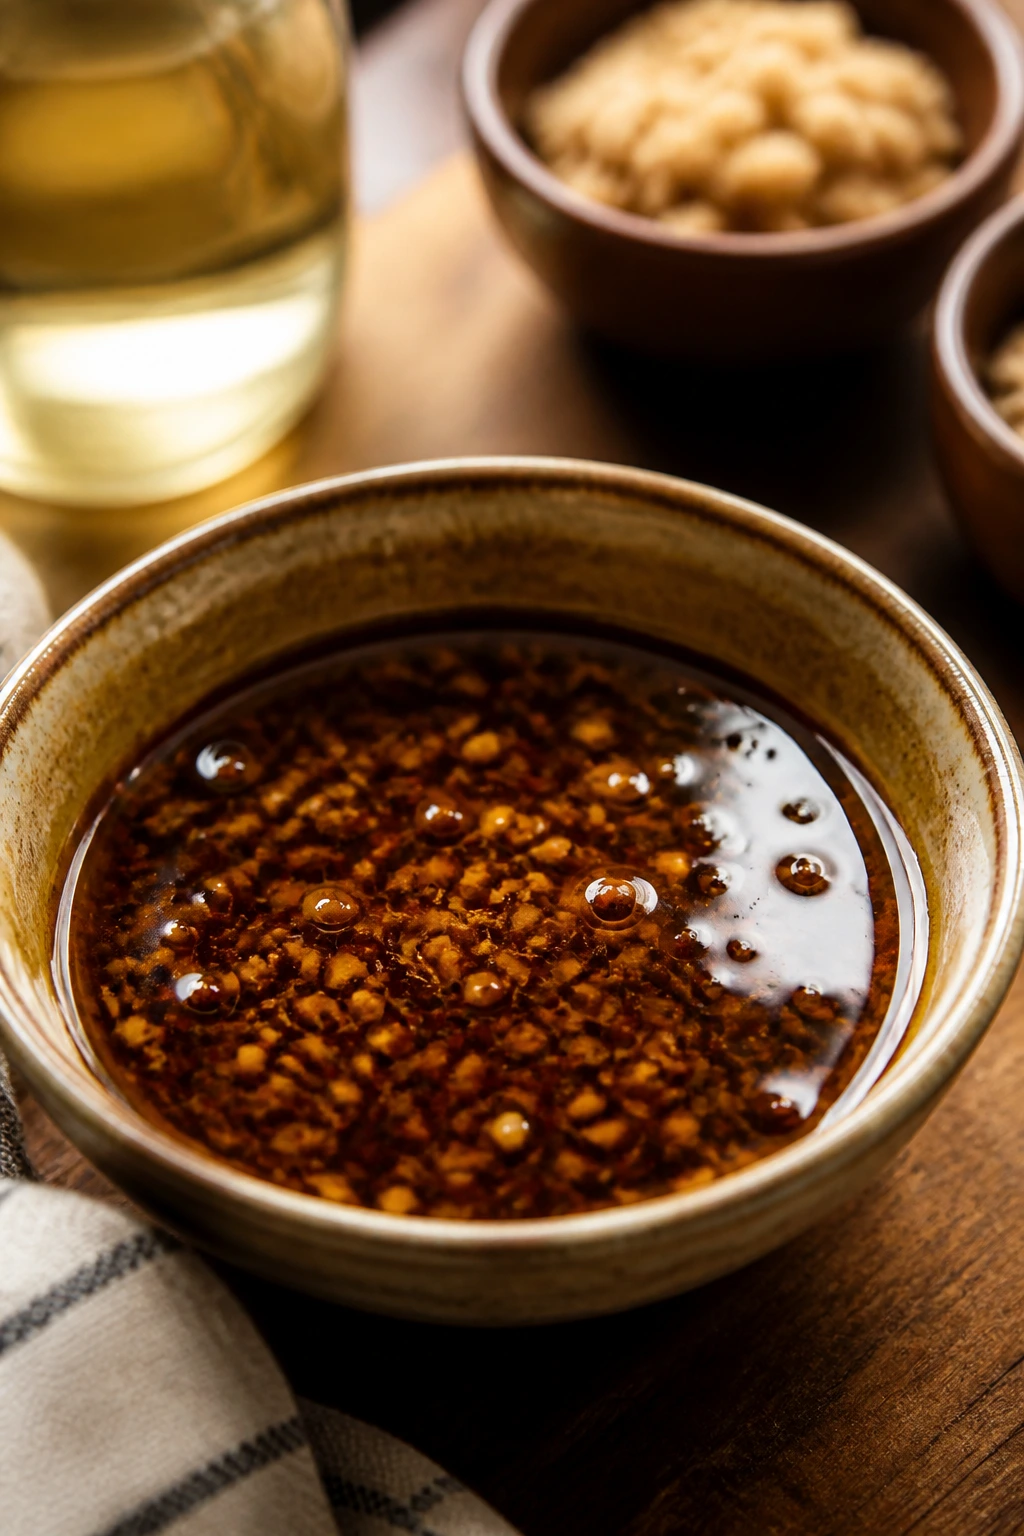
This is where the sauce stops tasting flat. Rice vinegar gives it lift, brown sugar rounds off the edges, and toasted sesame oil leaves a finish that reads as nutty before it reads as oily. White pepper adds the faint restaurant note that people often notice without being able to name it. That little peppery hum is part of the reason a takeout-style sauce feels familiar.
What to use: 3 tablespoons rice vinegar, 1 tablespoon packed light brown sugar or honey, 1 tablespoon toasted sesame oil, 1/4 teaspoon white pepper, and 1 teaspoon chili crisp if you want heat.
Preparation: Measure the vinegar and sugar together so you can taste the balance as the sauce simmers. Keep the sesame oil for the final stir; it gives more aroma that way, and the smell stays louder.
Substitutions: Chinkiang vinegar gives a darker, deeper tang if you like a more savory finish. Honey can replace the brown sugar, and black pepper can stand in for white pepper, though the flavor is a little less classic and a little more blunt.
Tips: Add the sesame oil near the end, not at the start. Heat flattens it, and sesame oil is one of those ingredients that earns its place by smell as much as taste.
There’s a simple rule here: sweetness should support the sauce, not coat it. If the first thing you taste is sugar, the balance is off.
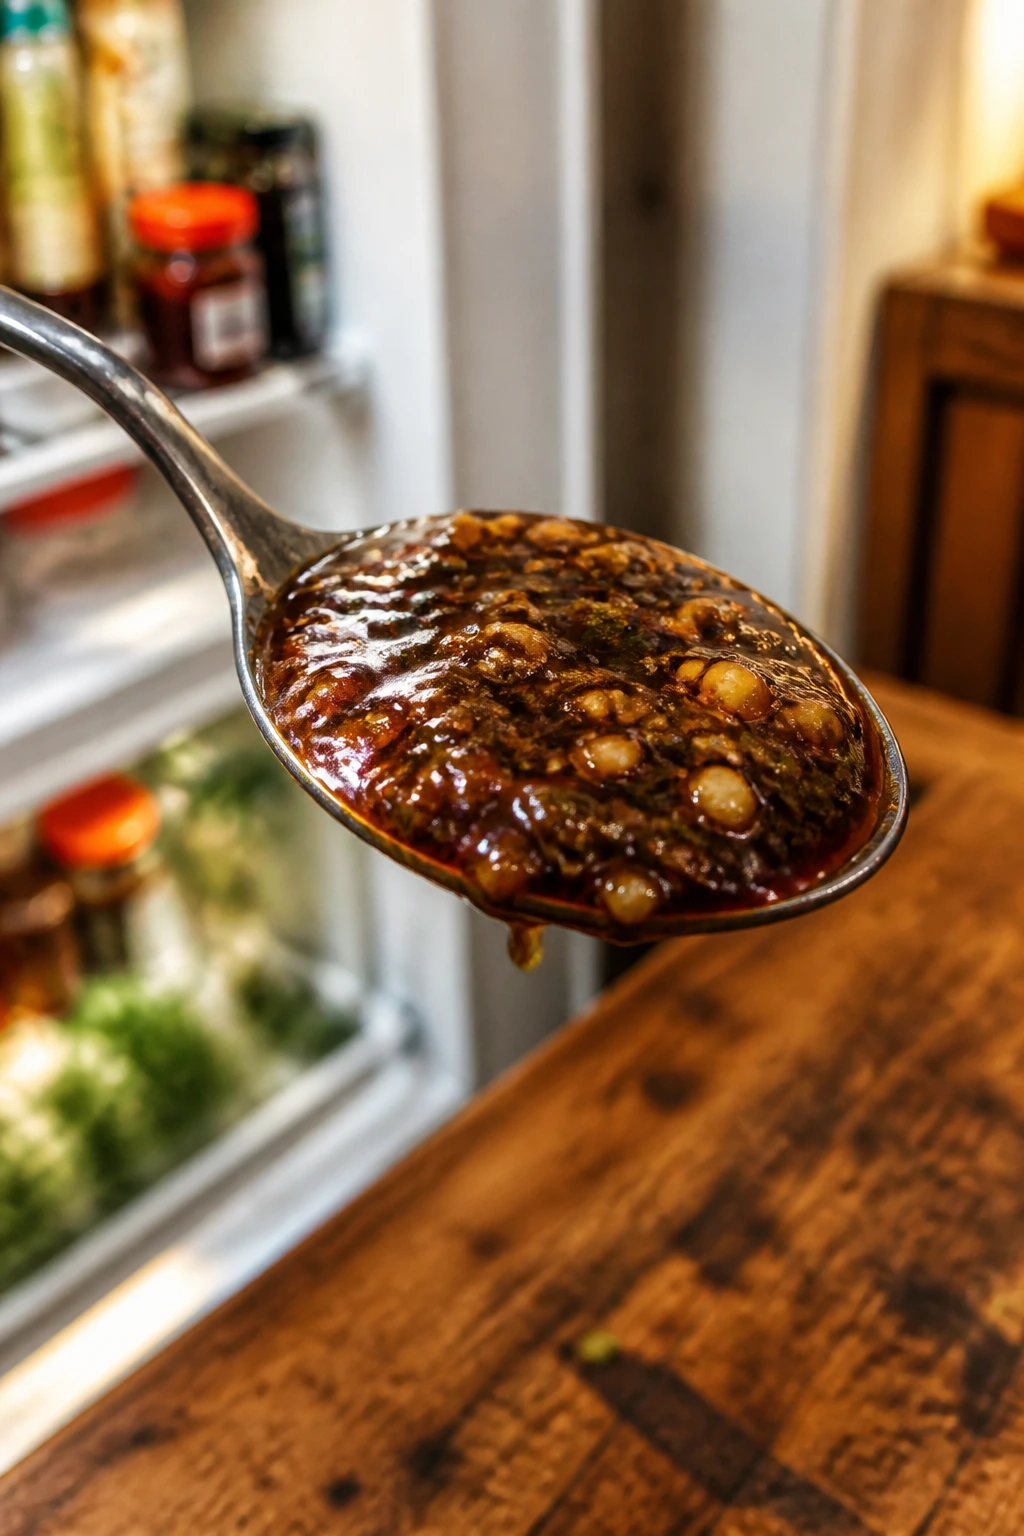
How Cornstarch Gives This Asian Sauce Its Gloss
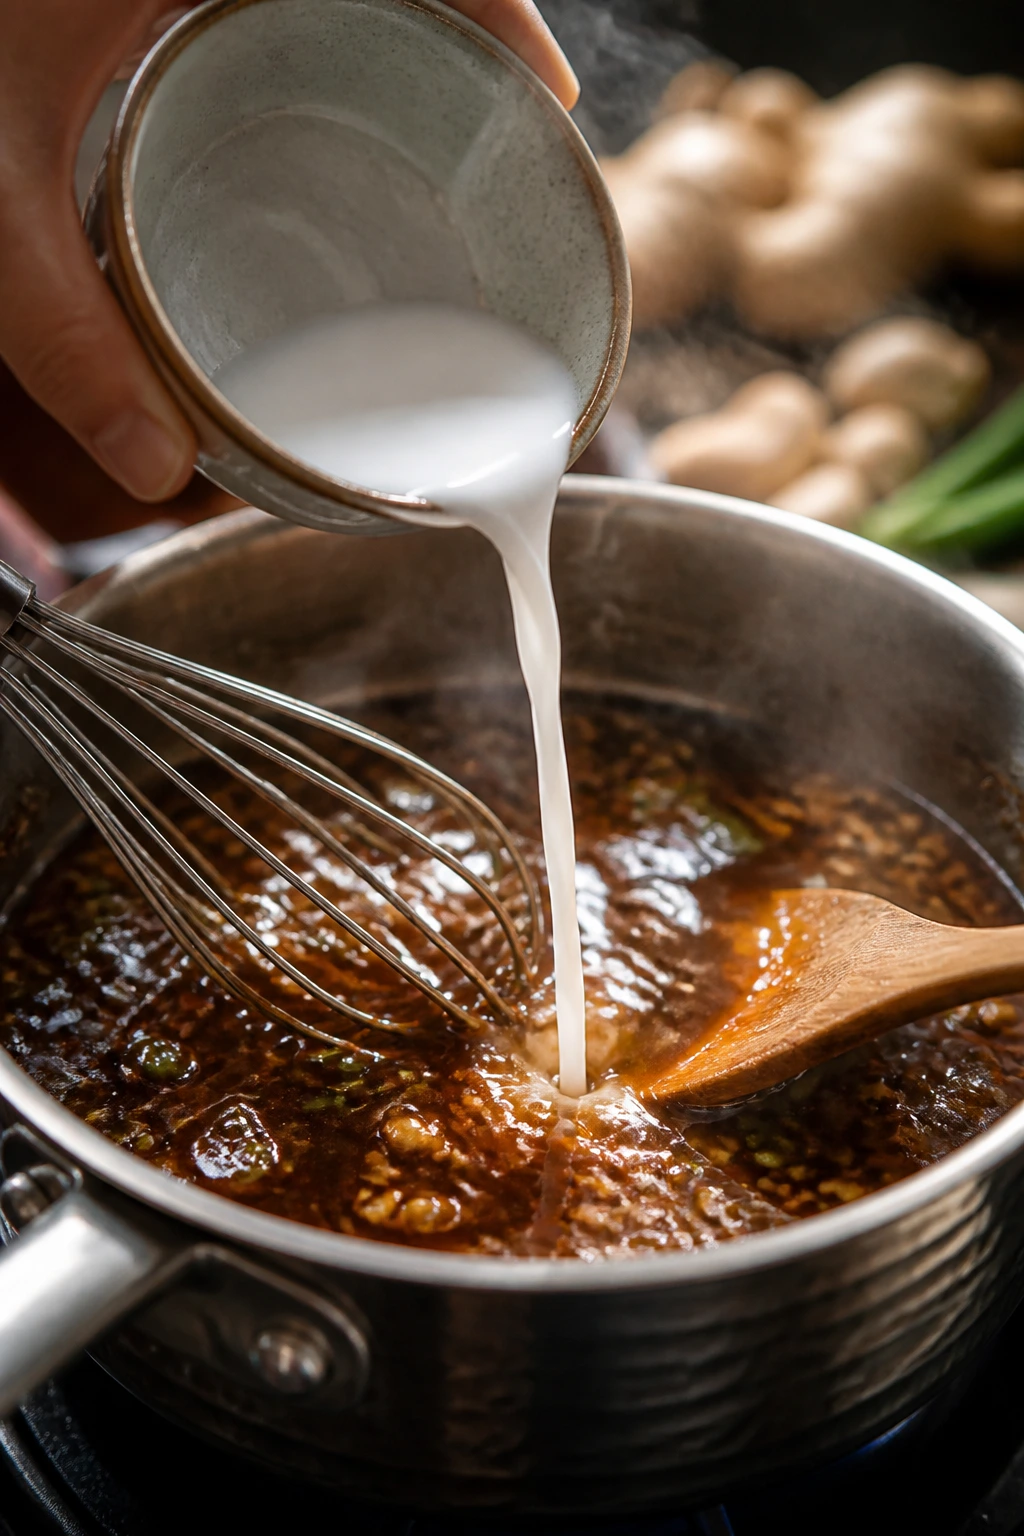
Cornstarch is what turns the liquid from “seasoned broth” into an actual sauce. Too little, and the sauce runs right off the vegetables. Too much, and it turns gummy on the spoon and sticky in the pan. The sweet spot is a thin slurry whisked into a simmering liquid, where the starch granules swell and give you that glossy takeout sheen.
What to use: 1 tablespoon cornstarch mixed with 2 tablespoons cold water.
Preparation: Stir the cornstarch and water until the mixture looks milky and completely smooth. Any dry pockets left in the bowl will show up later as tiny lumps in the sauce.
Substitutions: Arrowroot makes a slightly clearer sauce, and tapioca starch works too, though it thickens fast and can feel a little stretchier. If you use arrowroot, keep the simmer gentle and do not boil the sauce hard after thickening.
Tips: Add the slurry only when the sauce is at a gentle simmer. Pouring it into a rolling boil can create soft little starch clumps that never fully dissolve, and no amount of whisking will make them disappear completely.
I like the way cornstarch behaves when it’s handled properly. It doesn’t need drama. It needs heat, movement, and a few seconds to do its job.
The Small Stack of Tools That Makes the Sauce Easy
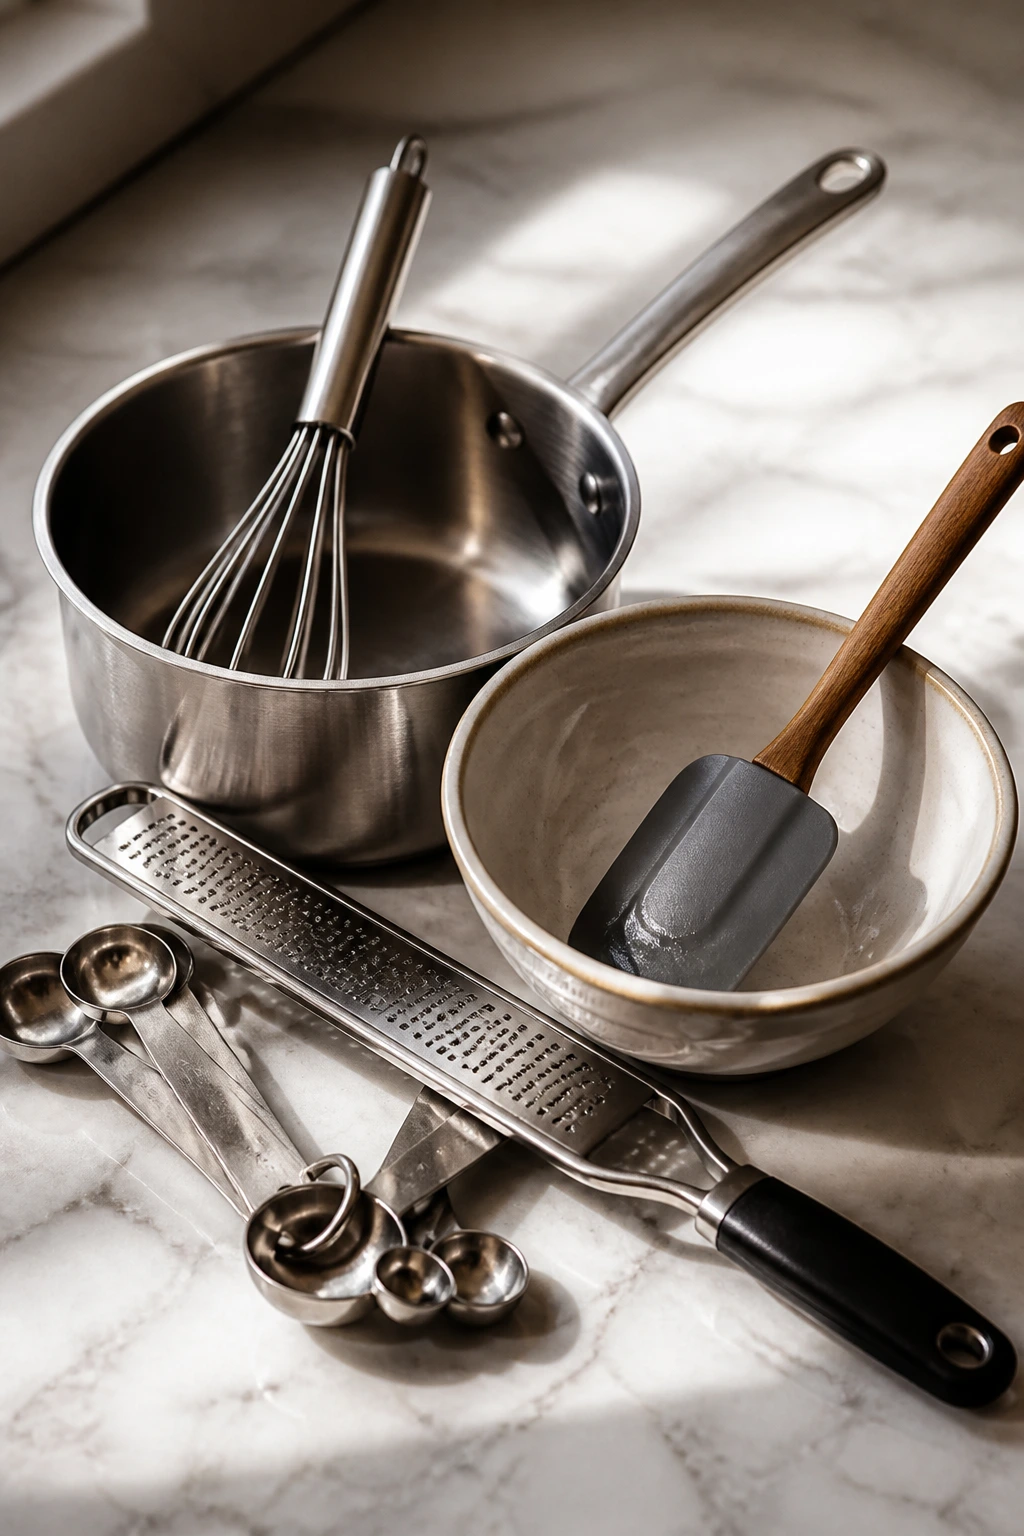
You do not need a pile of gadgets to make this work. A small saucepan and a whisk carry most of the load. Everything else just makes the process cleaner, quicker, or slightly less sticky on the counter.
- Small saucepan, 1 to 2 quarts: Big enough for the sauce to bubble without splattering, small enough that you’re not chasing a thin layer of liquid around a giant pan.
- Whisk: Essential for the cornstarch slurry and for keeping the sauce smooth once the liquids hit the heat.
- Microplane or fine grater: The best way to turn garlic and ginger into a soft paste that disappears into the sauce.
- Measuring cups and spoons: This is not the kind of sauce I eyeball; tiny shifts in soy and vinegar change the balance fast.
- Small mixing bowl: Useful for the slurry so the cornstarch has a chance to dissolve before it meets heat.
- Silicone spatula or wooden spoon: Good for scraping the pan and stirring the scallion greens in at the end.
- Fine-mesh strainer, optional: Handy if you want a very smooth finish with no visible bits of garlic or ginger.
A wok is nice if you already own one. It is not required. This recipe behaves well in a plain saucepan.
How to Make the Sauce, Step by Step
Phase 1: Make the slurry and wake up the aromatics
-
In a small bowl, whisk 1 tablespoon cornstarch with 2 tablespoons cold water until the mixture looks smooth and cloudy. Set it beside the stove.
-
Place a small saucepan over medium heat and add 1 tablespoon neutral oil. Add the scallion whites, garlic, and ginger, then stir for 30 to 45 seconds until the garlic smells sweet and the scallions look glossy. Do not let the garlic brown.
Phase 2: Build the liquid base
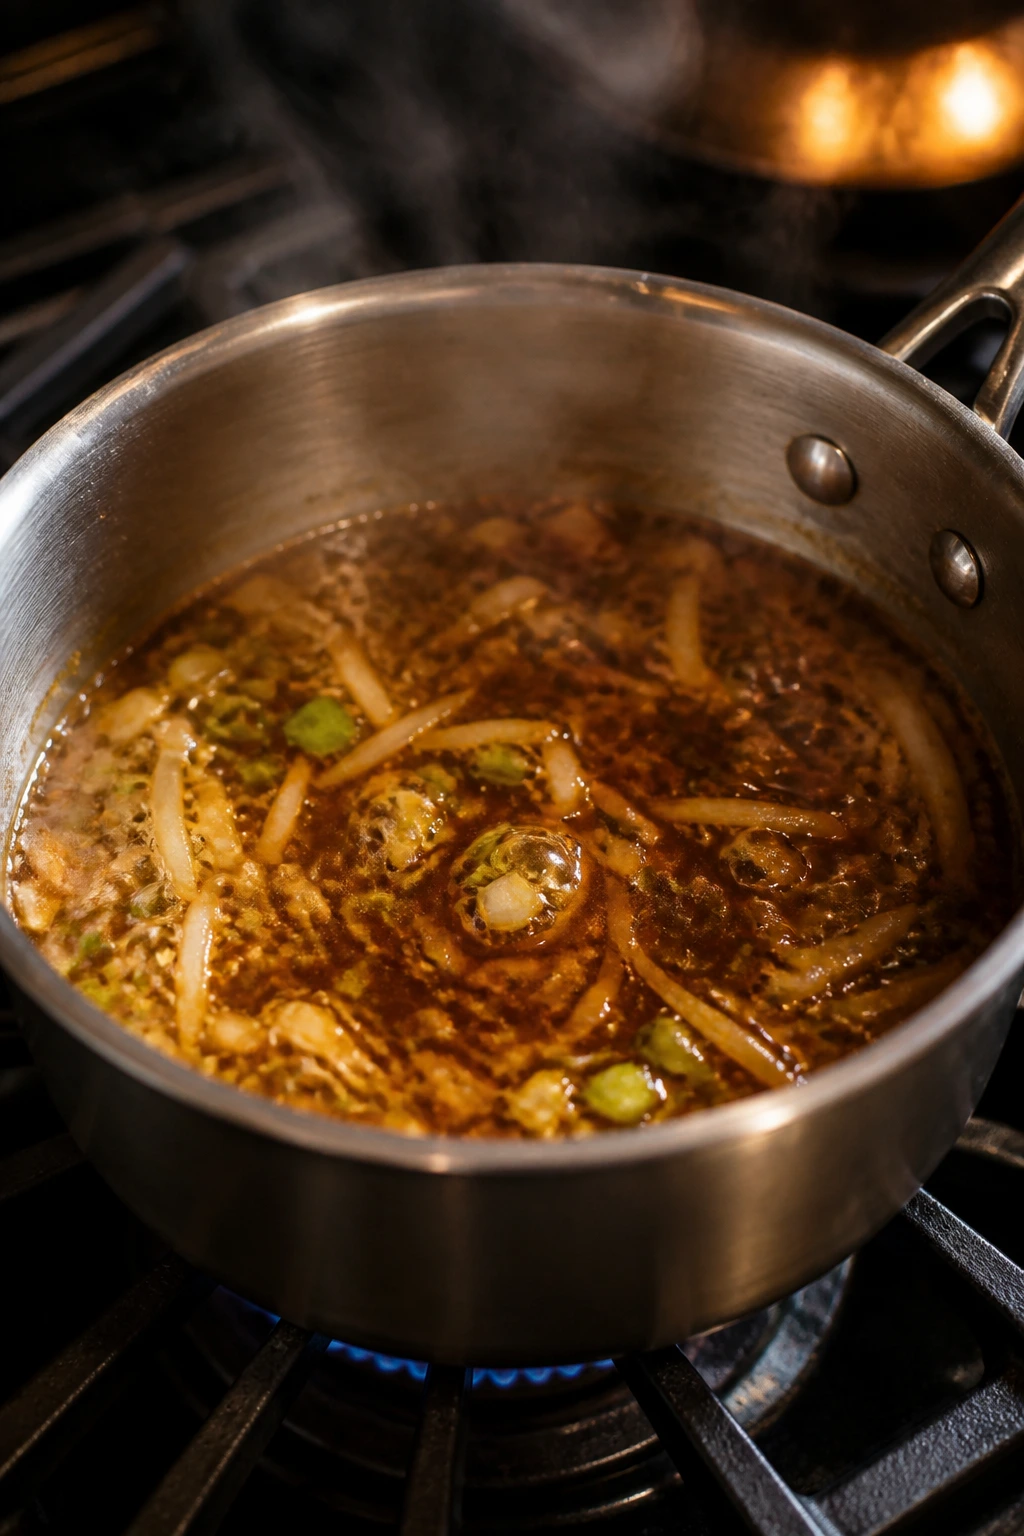
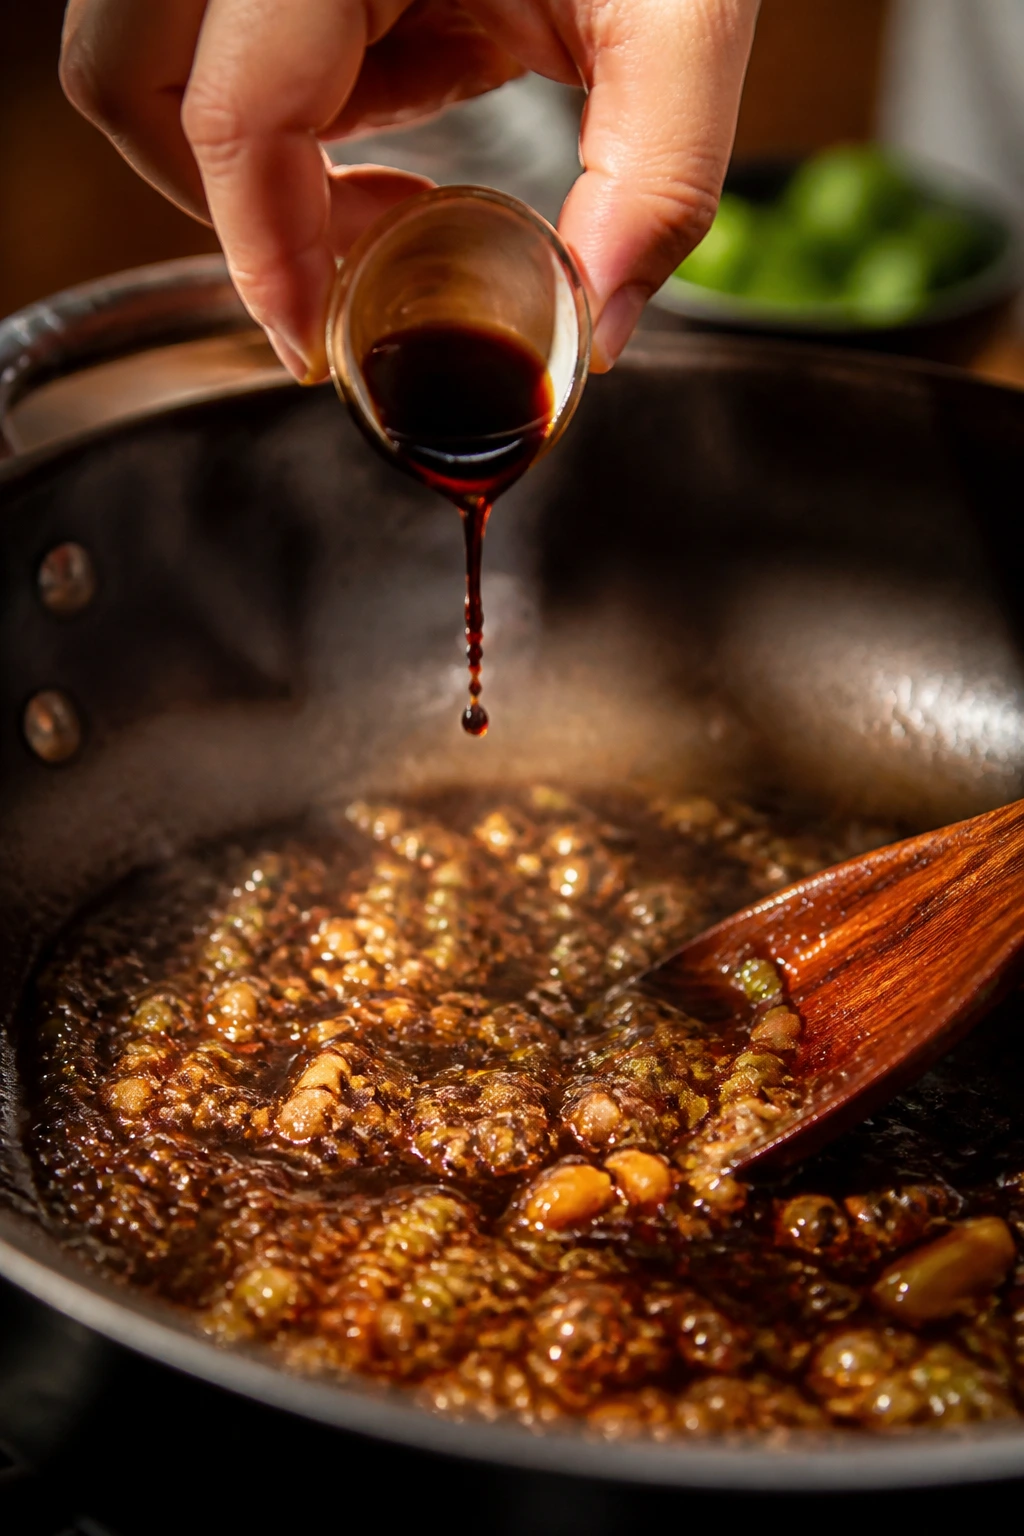
-
Pour in the soy sauce, stock, oyster sauce, rice vinegar, brown sugar, and white pepper. Whisk for 20 to 30 seconds until the sugar dissolves and the sauce turns evenly brown.
-
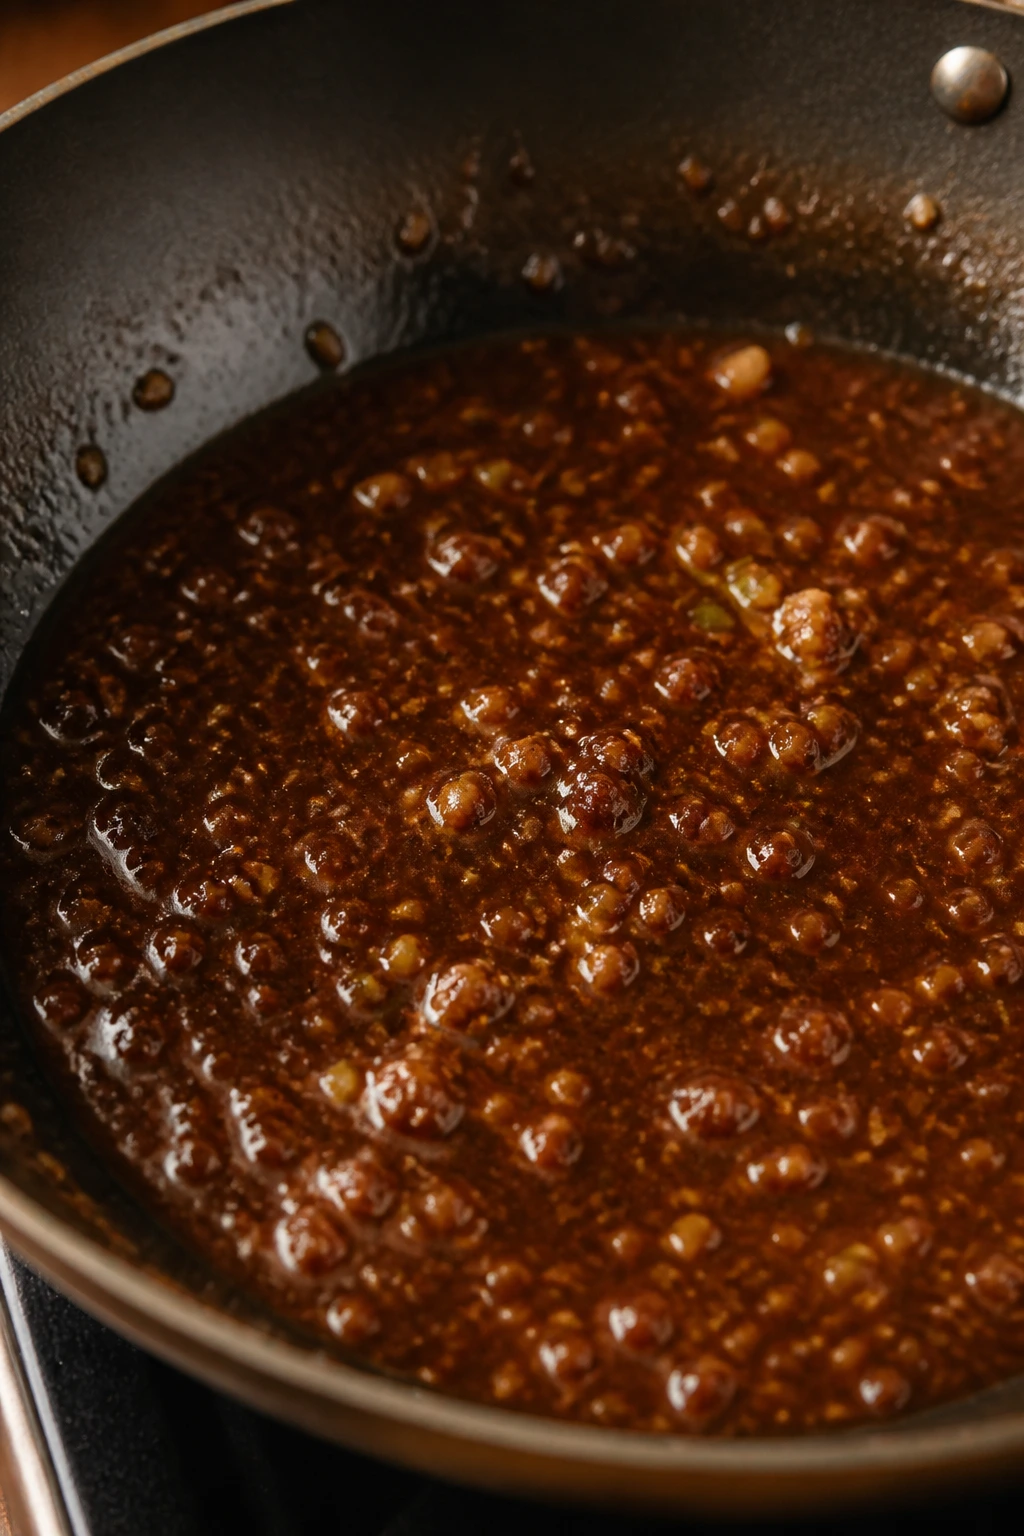
Bring the mixture to a gentle simmer and let it bubble for 1 to 2 minutes. You want tiny bubbles around the edge, not a hard boil in the center. A fierce boil can push the salt level too high and make the sauce taste sharp.
Phase 3: Thicken and finish
-
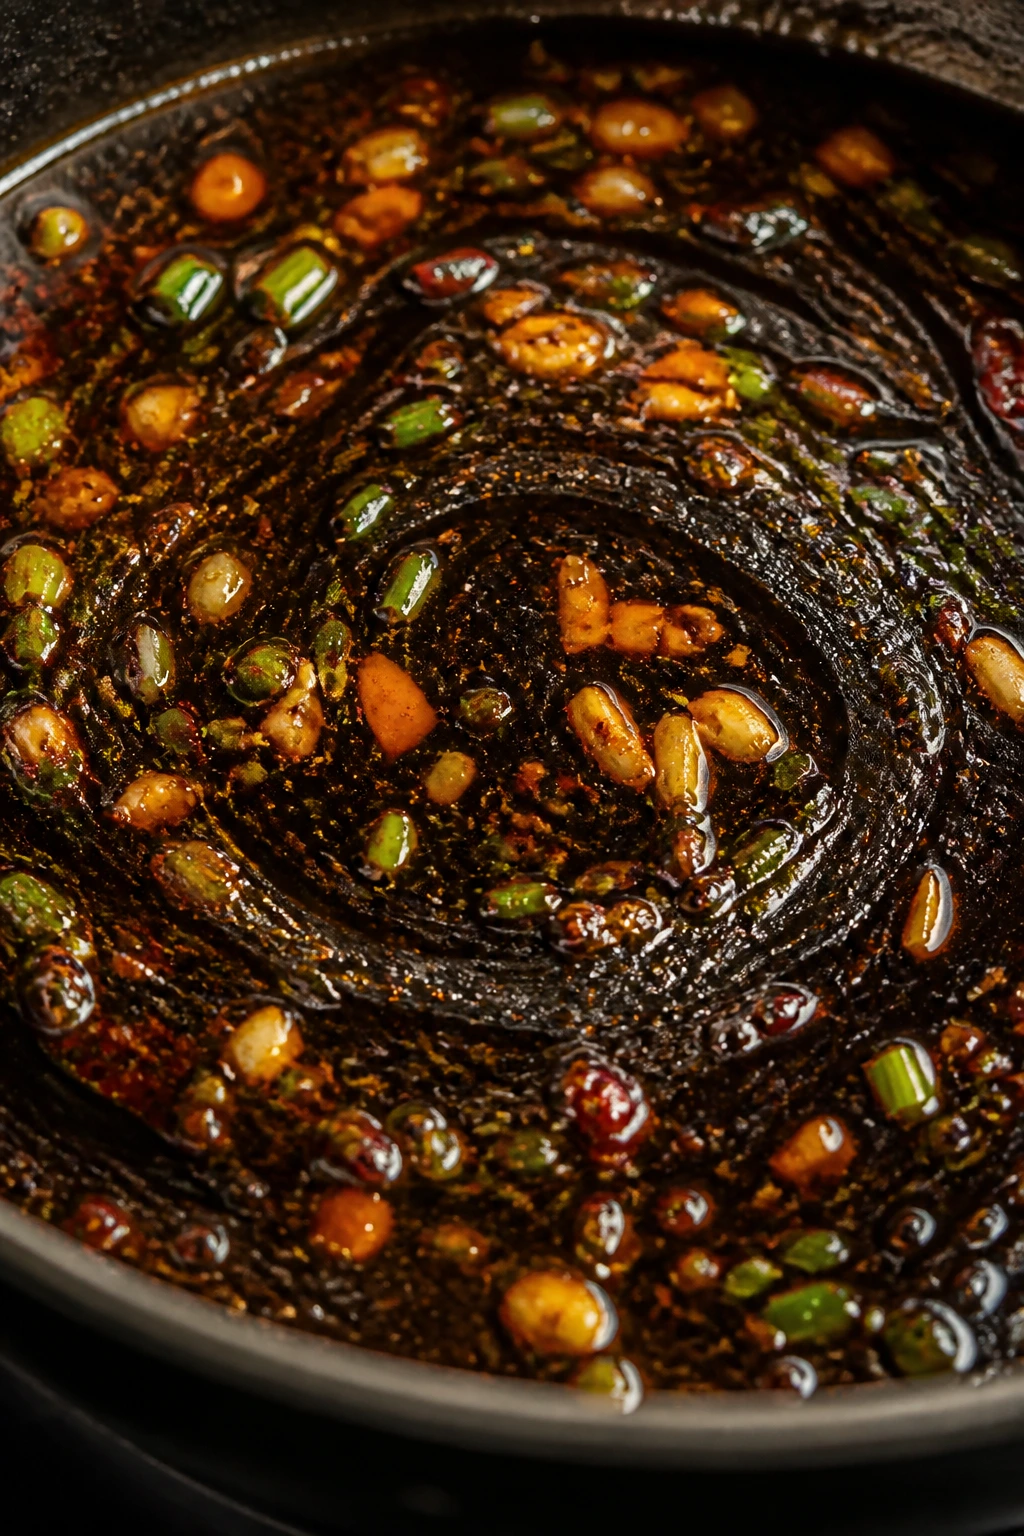
Whisk the slurry once more, then stream it into the simmering sauce in a thin line while whisking constantly. Cook for 45 to 60 seconds until the sauce turns glossy and coats the back of a spoon in a clean, even layer.
-
Turn off the heat. Stir in the toasted sesame oil, the scallion greens, and the chili crisp, if using. Taste and adjust with a teaspoon of water if the sauce feels tight, or a half-teaspoon of vinegar if you want more lift. If you’re using it right away on a stir-fry, toss it with hot food immediately so it clings instead of sitting in a puddle.
That is the whole thing. No resting, no fancy reduction, no coaxing.
How to Use This Asian Sauce on Stir-Fries, Noodles, and Bowls

For stir-fries: Cook the protein and vegetables first, then add the sauce at the end when the pan is still hot and the vegetables are crisp-tender. For 1 pound of chicken, tofu, shrimp, or mixed vegetables, use about 1/2 to 3/4 cup sauce, depending on how saucy you want the final pan. Toss for 30 to 60 seconds until everything shines and the sauce sticks to the edges instead of pooling at the bottom.
For noodles: Cook 8 ounces of noodles and reserve a few tablespoons of noodle water before draining. Toss the noodles with 1/3 to 1/2 cup sauce, then loosen with 1 to 2 tablespoons noodle water if the sauce grabs too tightly. The starch from the pasta water helps the sauce slide over every strand, and the result feels more like a real noodle bowl than sauced-up leftovers.
For rice bowls and vegetables: Spoon 2 to 3 tablespoons over a bowl of steamed rice, then add a fried egg, roasted broccoli, or seared tofu on top. If you want the vegetables to stay bright, roast or blanch them first and finish with the sauce right before serving.
Do not pour this over cold ingredients and expect magic. Heat wakes the sauce up. Cold food makes it dull.
How to Serve It with Rice, Greens, and a Cold Drink
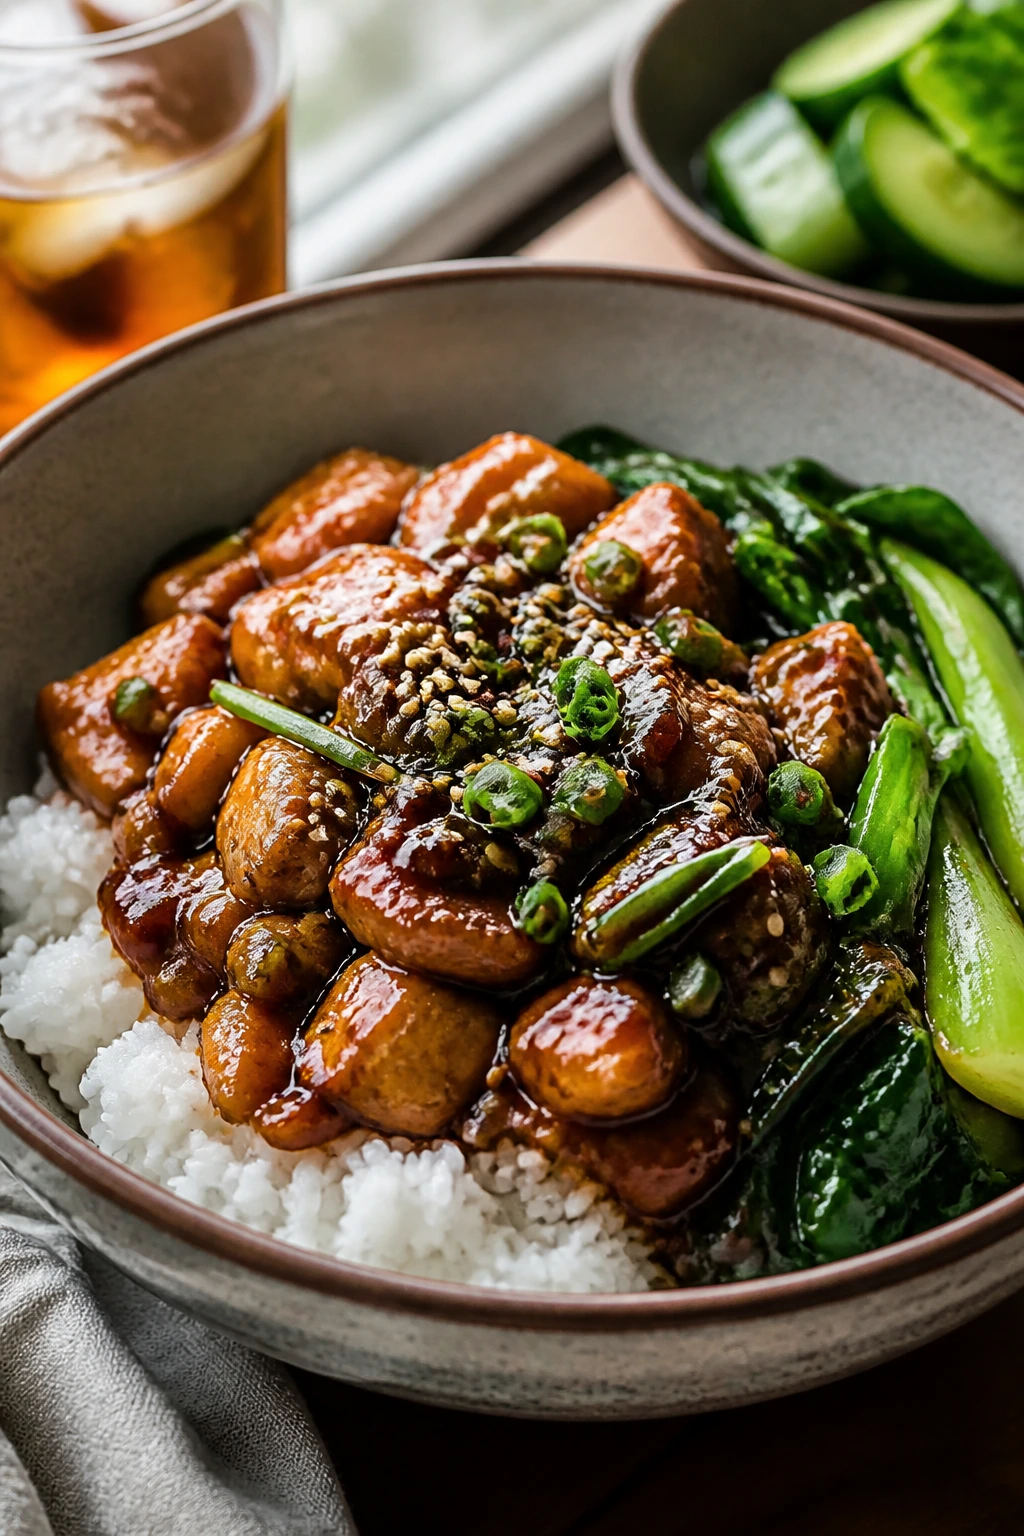
Presentation: Spoon the sauce over the center of the dish, not around the rim. That glossy brown surface looks best when it clings to the food in the middle, then gets a finish of scallion greens, sesame seeds, or a few drops of chili oil.
Accompaniments: Steamed jasmine rice is the easiest landing spot, but this sauce also works with fried rice, lo mein noodles, blanched bok choy, charred broccoli, snap peas, and crisp cucumbers dressed with rice vinegar. A plain side dish is fine. The sauce carries enough flavor to make a simple plate look finished.
Portions: Plan on 2 to 3 tablespoons per person for a rice bowl and 1/4 to 1/3 cup per serving when it’s coating a full stir-fry. If you’re serving a crowd, make the sauce first and keep it warm over the lowest heat while the rest of dinner comes together.
Beverage Pairing: A cold jasmine tea keeps the meal clean and bright, while a dry lager or a chilled riesling handles the soy and sesame without fighting them. I like the tea when the dish leans vegetable-heavy and the lager when there’s chicken or tofu with a good sear.
Extra Tips and Flavor Boosters
Flavor Enhancement: Stir in 1 teaspoon Chinkiang vinegar at the end if you want a darker, rounder tang. It tastes deeper than rice vinegar and gives the sauce a little more restaurant-style shadow.
Time-Saver: Grate the garlic and ginger directly into the saucepan so you do not dirty a cutting board or lose any of the juice. That little paste melts fast and keeps the aromatics from drying out before they hit the oil.
Cost-Saver: Use water instead of stock if that’s what you have on hand. Oyster sauce and soy sauce already provide most of the flavor, so stock is a bonus, not a requirement.
Make-It-Yours: Use tamari for a gluten-free version, mushroom sauce for a vegetarian version, and extra chili crisp if you want heat that lingers on the lips. If you like a little crunch, finish the finished dish with toasted sesame seeds or crushed peanuts.
I also like adding a pinch more scallion greens at the table. Fresh green onion on top makes the sauce smell brighter in the bowl than it does in the pan.
Mistakes That Make Takeout-Style Sauce Fall Flat
-
Browning the garlic: If the garlic turns tan before the liquids go in, the sauce picks up bitterness. Keep the heat at medium, stir constantly, and move on the second the garlic smells sweet.
-
Adding cornstarch dry: Dry starch dumped into hot liquid makes clumps that look like little dough pebbles. Always whisk the cornstarch with cold water first, and whisk the slurry again right before it goes into the pan.
-
Boiling it too hard after thickening: A hard boil can make the sauce over-reduced, salty, and sticky in the wrong way. Hold it at a gentle simmer and pull it off once it coats a spoon smoothly.
-
Using sesame oil as a cooking oil: Toasted sesame oil has a delicate smell that fades under heat. Save it for the end, where it can actually taste like something.
-
Ignoring soy sauce strength: Some bottles are much saltier than others. Taste the finished sauce before serving, and if it leans too salty, a teaspoon or two of water plus a splash more vinegar usually brings it back into balance.
-
Leaving the sauce on the stove too long: The gloss tightens fast, and the sauce can go from silky to tacky in under a minute. Once it coats the spoon, it is ready.
None of these mistakes is dramatic. They’re small. That’s what makes them annoying.
Variations and Alternatives
Spicy Chili Crisp Version: Add 1 to 2 teaspoons chili crisp at the end and skip the red pepper flakes. The chili oil gives you heat, texture, and a little garlic crunch, which is nice on noodles or tofu.
Vegetarian Mushroom Version: Swap the oyster sauce for vegetarian mushroom sauce and use vegetable stock or water. The result stays dark and savory, with enough depth to stand in for the takeout version without tasting thin.
Orange-Ginger Shine: Replace 1/3 cup stock with 1/4 cup orange juice and add 1 teaspoon orange zest. This one leans brighter and works well with chicken or shrimp, especially when you want the sauce to read a little more glossy-sweet than savory-dark.
Black Vinegar and Pepper Version: Replace 1 tablespoon rice vinegar with Chinkiang vinegar and increase the white pepper to 1/2 teaspoon. The sauce turns deeper and less sharp, which is exactly what I want over mushrooms, broccoli, or pork.
Lower-Sodium Pantry Blend: Use tamari, water instead of stock, and 1 extra tablespoon rice vinegar to keep the flavor awake without leaning on salt. A squeeze of lemon at the end also helps if your soy bottle runs heavy.
Each variation keeps the same core shape. That matters. A good sauce can bend without breaking.
Make-Ahead, Storage, and Reheating
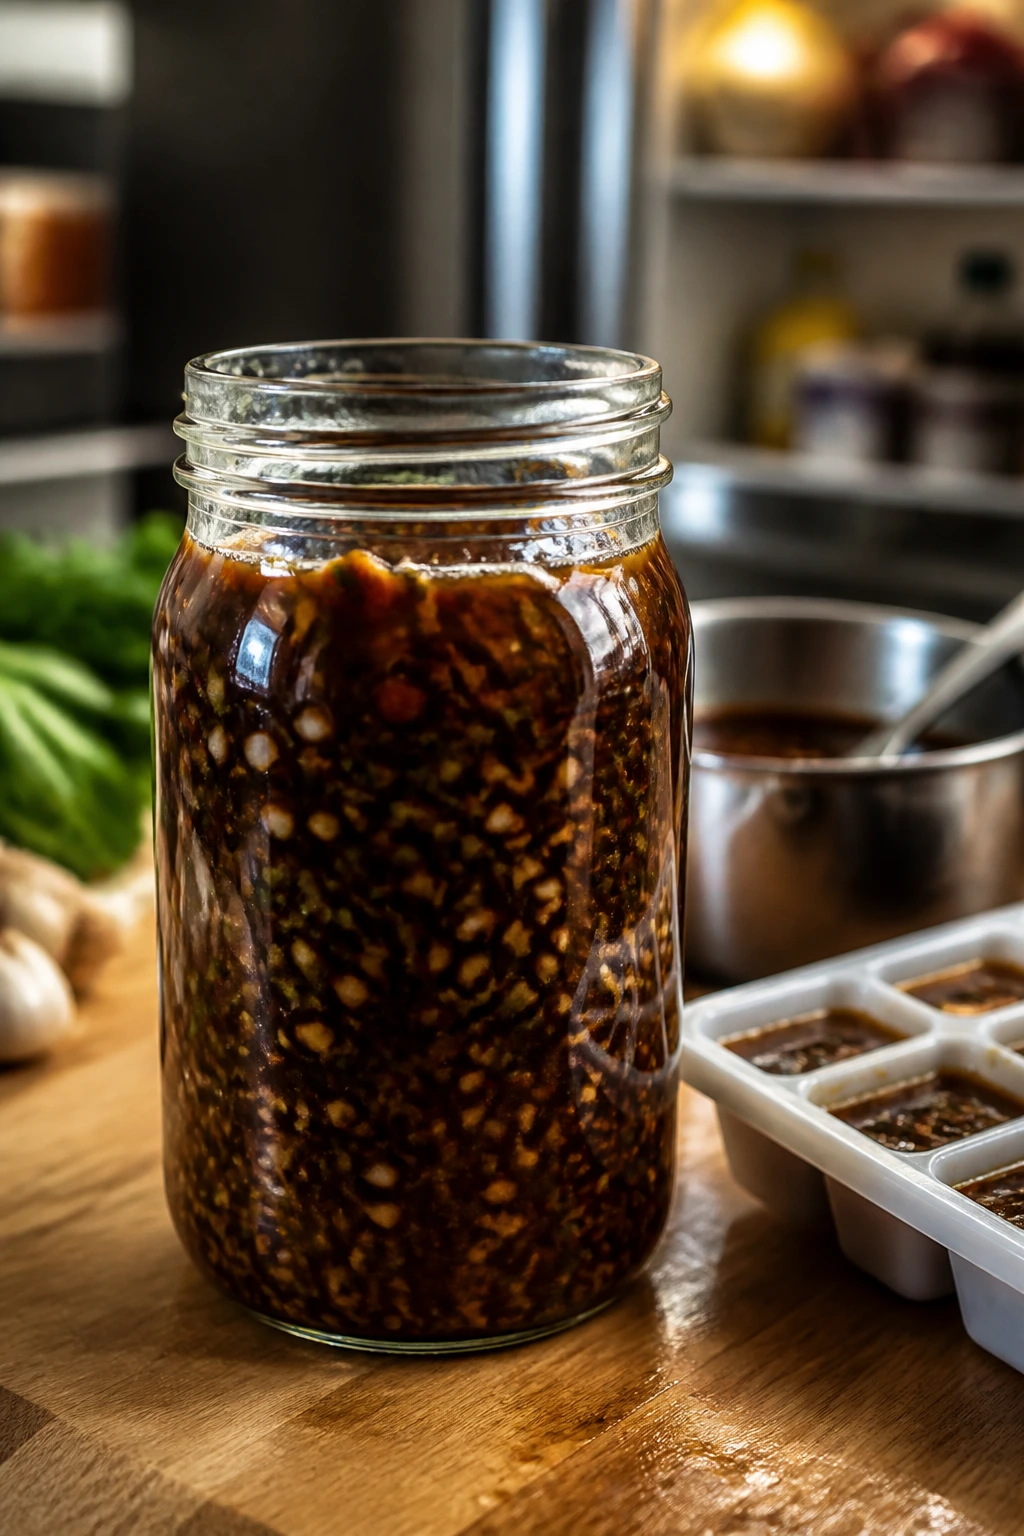
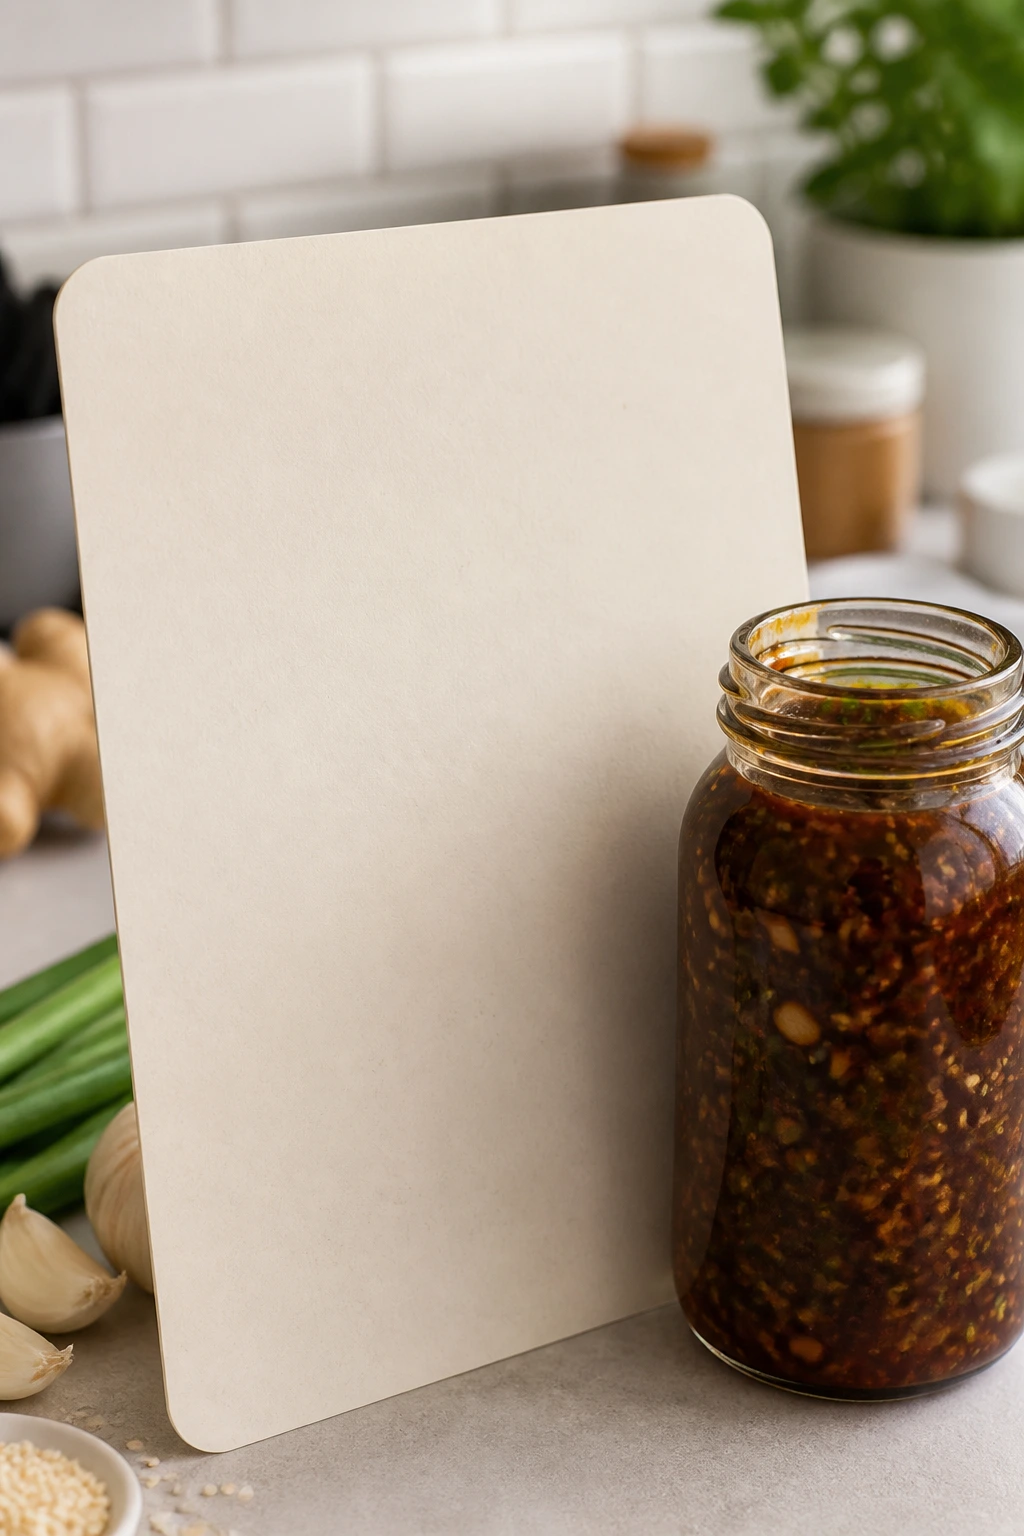
Refrigerator: Let the sauce cool, then store it in an airtight jar in the fridge for 4 to 5 days. The garlic and ginger mellow a little overnight, which I think actually helps the flavor.
Freezer: Freeze the sauce for up to 2 months in a small freezer container or in ice cube trays. I like the cube method for weeknight use because you can thaw only what you need instead of defrosting the whole batch.
Reheating: Warm the sauce gently in a small saucepan over low heat or in the microwave at 50% power in short bursts. Stir between bursts, and add 1 to 2 teaspoons water if it thickens too much in the fridge. A whisk helps bring the gloss back fast.
Make-ahead note: The sauce is good the day it’s made, but it often tastes even better after a few hours in the fridge because the ginger, garlic, and soy settle into each other. If you know you’ll use it later, hold back a few fresh scallion greens and stir them in after reheating for a brighter finish.
Do not leave it out on the counter for hours. Two hours is the outside edge, and less is better if your kitchen runs warm.
Questions People Ask Before They Cook It

Can I make this sauce gluten-free?
Yes. Use tamari instead of soy sauce and choose a gluten-free oyster sauce or mushroom sauce. Check the stock label too, because some cartons sneak in wheat-based flavoring.
What can I use if I don’t have oyster sauce?
The closest stand-in is vegetarian mushroom sauce. If that is not available, use 1 1/2 tablespoons hoisin sauce and cut the brown sugar to 2 teaspoons, since hoisin is sweeter and thicker.
Why did my sauce turn too salty?
Usually the soy sauce was too strong, or the sauce reduced a little too far. Add 1 to 2 tablespoons water and 1 teaspoon rice vinegar, then taste again before adding more salt or sauce.
Can I make it thinner for noodles?
Yes. Skip the cornstarch, or make the full sauce and thin the finished version with a few spoonfuls of hot noodle water. Noodle water helps it cling without turning watery.
Can I use it as a marinade?
You can, but I’d leave out the cornstarch if the sauce is going straight onto raw chicken, tofu, or vegetables. A thin version marinates better, while the thick version is better as a finishing sauce.
How do I fix a sauce that got gummy?
It probably had too much cornstarch or boiled too hard after thickening. Whisk in 1 tablespoon hot water at a time and keep the heat low until it loosens and looks glossy again.
Can I double the recipe?
Yes, and it scales cleanly. Use a wider saucepan so the aromatics don’t steam, and expect the thickening step to take about 15 to 20 seconds longer because there’s more liquid in the pan.
Does it work with frozen vegetables?
It does, but the vegetables need to lose their ice first or the sauce gets watered down. Sauté or roast the vegetables until the surface moisture cooks off, then toss with the sauce at the end.
Is white pepper necessary?
Not strictly, but it gives the sauce that faint takeout aroma people notice without being able to name. If you skip it, use a small pinch of black pepper so the sauce still has a little heat in the background.
A Jar Worth Keeping Around
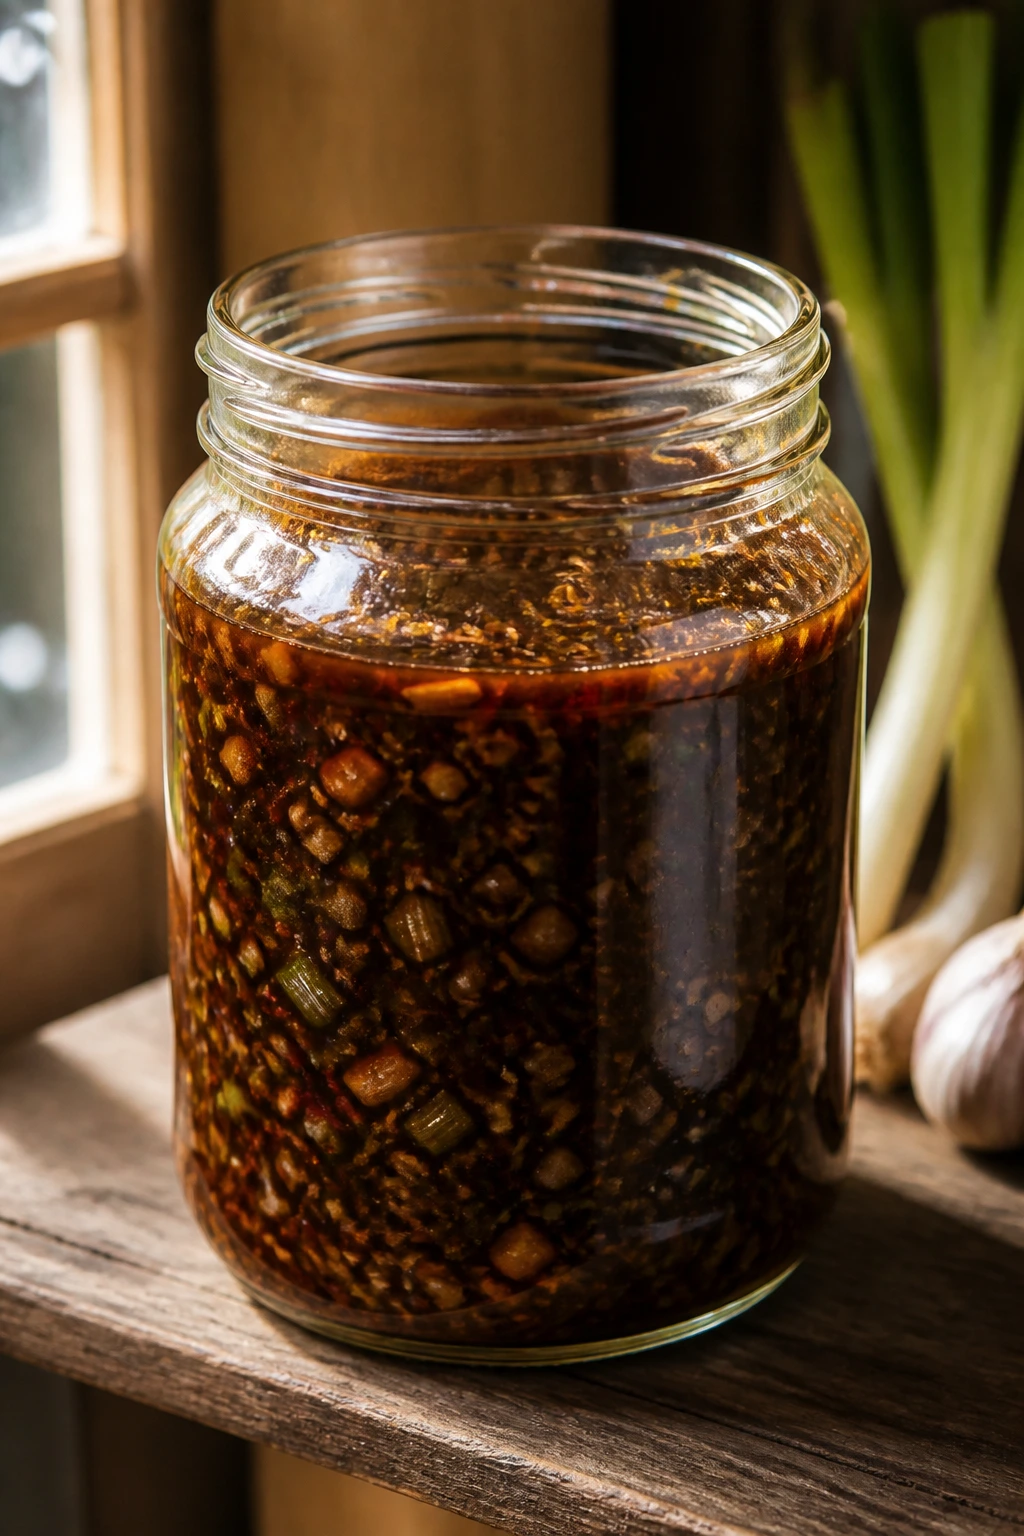
The best sauces do more than taste good on day one. They make dinner easier on day three, rescue plain rice without effort, and give vegetables enough personality that nobody complains about another broccoli night. This one does all of that, and it does it without a long ingredient list or a fussy technique.
I like having a jar of this in the fridge because it changes the shape of a meal. Chicken thighs, tofu, mushrooms, noodles, cabbage, snap peas — they all become a little more deliberate when this sauce hits the pan. Make it once, and there’s a good chance you’ll start keeping the ingredients on hand without thinking about it.
Aromatic Homemade Asian Sauce — Recipe Card
Recipe Name: Aromatic Homemade Asian Sauce
Description: A glossy, ginger-garlic, soy-based sauce with oyster sauce, rice vinegar, and toasted sesame oil. It tastes savory, bright, and deeply aromatic over stir-fries, noodles, rice bowls, and vegetables.
Prep Time: 10 minutes
Cook Time: 5 minutes
Total Time: 15 minutes
Course: Sauce / Condiment
Cuisine: Chinese-Inspired
Servings: Makes about 1 1/2 cups, 4 to 6 servings
Calories: About 70 kcal per serving
Ingredients
For the Sauce:
- 1 tablespoon neutral oil, such as avocado, grapeseed, or canola
- 3 cloves garlic, finely minced or grated
- 1 tablespoon fresh ginger, finely grated
- 2 scallions, thinly sliced, whites and greens separated
- 1/2 cup low-sodium soy sauce or tamari for gluten-free
- 1/3 cup chicken stock or water
- 2 tablespoons oyster sauce or vegetarian mushroom sauce
- 3 tablespoons rice vinegar
- 1 tablespoon packed light brown sugar or honey
- 1 tablespoon toasted sesame oil
- 1/4 teaspoon white pepper
- 1 teaspoon chili crisp or 1/4 teaspoon red pepper flakes, optional
- 1 tablespoon cornstarch
- 2 tablespoons cold water
Instructions
-
Whisk the cornstarch and cold water in a small bowl until smooth. Set aside.
-
Heat the neutral oil in a small saucepan over medium heat. Add the scallion whites, garlic, and ginger, then stir for 30 to 45 seconds until fragrant. Do not let the garlic brown.
-
Add the soy sauce, stock, oyster sauce, rice vinegar, brown sugar, and white pepper. Whisk until the sugar dissolves and the sauce looks even.
-
Bring the sauce to a gentle simmer and cook for 1 to 2 minutes, with small bubbles around the edges.
-
Whisk the slurry again, then stream it into the simmering sauce while whisking constantly. Cook for 45 to 60 seconds until glossy and thick enough to coat a spoon.
-
Turn off the heat and stir in the toasted sesame oil, scallion greens, and chili crisp if using. Taste and adjust with a teaspoon of water or a splash more vinegar if needed.
Notes: For gluten-free sauce, use tamari and a gluten-free oyster or mushroom sauce. The sauce thickens as it cools, so loosen with a teaspoon or two of hot water when reheating.