
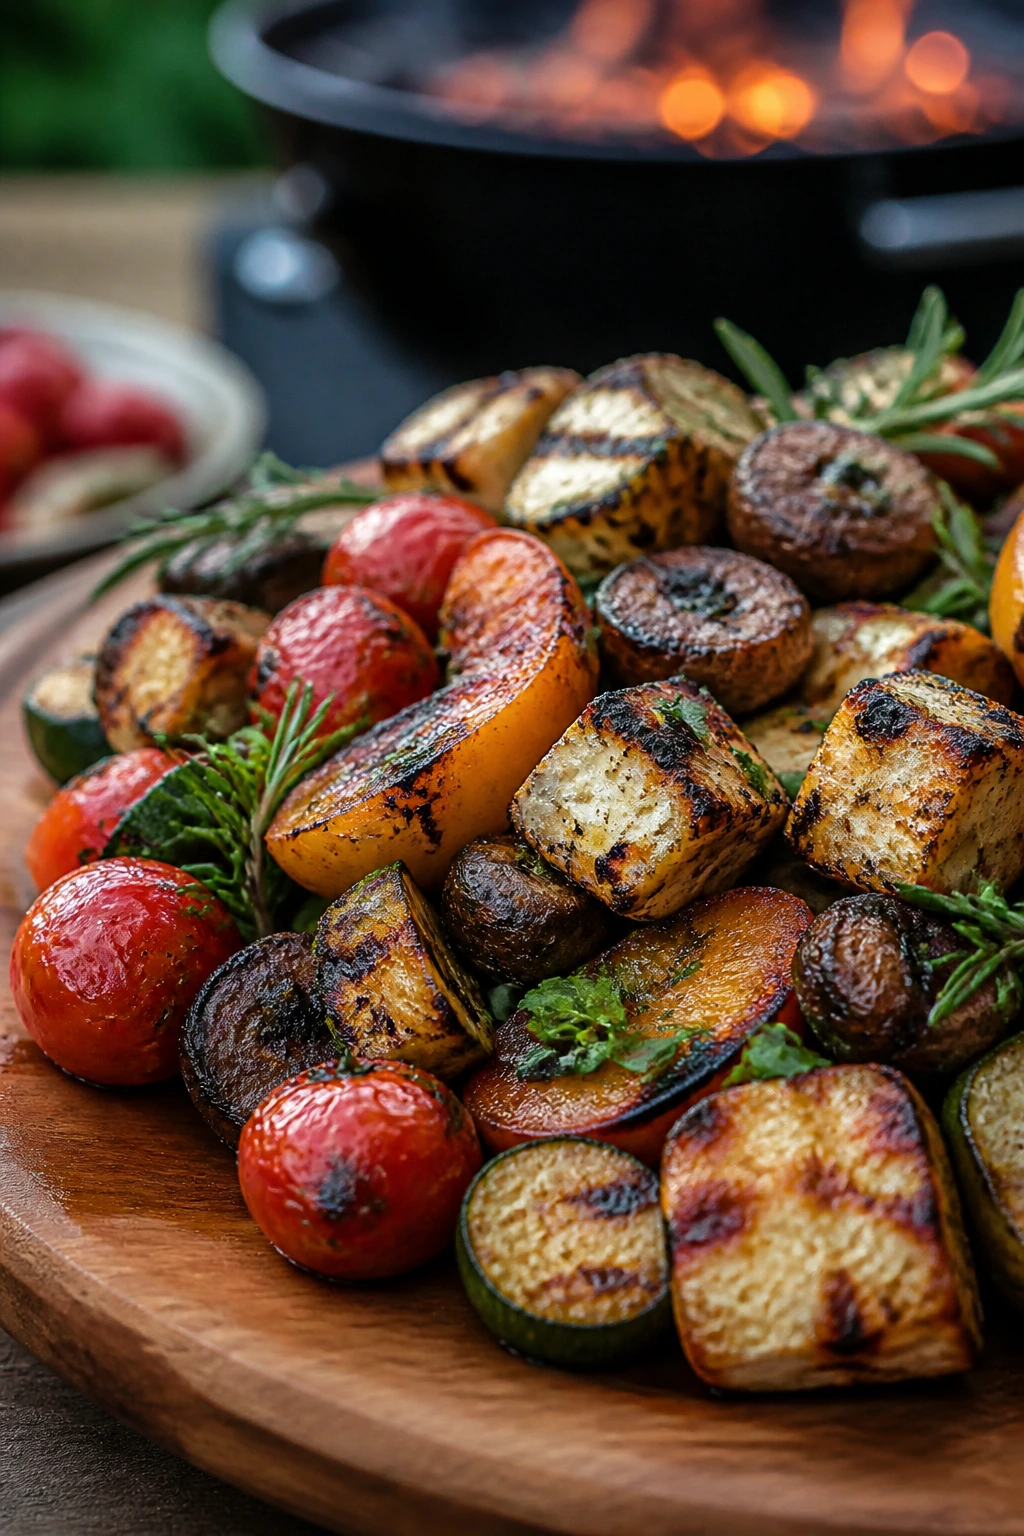
The best thing on a cookout table is often the first thing people eat with their fingers. Charred picnic bites for backyard cookouts hit that sweet spot where smoke, salt, and a little bit of browning do more work than any elaborate sauce ever could. A peach wedge with blackened edges. A cube of halloumi that squeaks when you bite it. Shrimp with a snap and a whisper of garlic. A piece of sausage with the outside crisped just enough to leave a little grease on the plate. That’s the good stuff.
Char is not the same thing as burnt. Burnt tastes bitter and distracted; charred tastes focused. When you give small pieces direct heat, you get fast caramelization, a stronger crust, and a better chance of serving food that still feels lively when the burgers are nowhere near done. That matters on a backyard grill, where the crowd keeps circling, the tongs keep moving, and somebody always arrives hungry before the first round is finished.
The shape of the food matters more than people think. Bite-size food sounds casual, but it’s a little technical in practice. Too small and it dries out before it picks up any real color. Too large and it stops being a bite at all. The sweet spot is food that can be turned once or twice, pulled at the right moment, and eaten without a knife. That’s the lane where cookout food gets memorable.
Why Charred Picnic Bites Earn Their Place at a Cookout
A tray of charred picnic bites does one job better than almost any other cookout food: it keeps people happy while the rest of the menu catches up. Burgers need more time than anyone admits. Chicken needs checking. Corn needs rotating. Small grilled bites let you feed the room in waves instead of asking everyone to stand around with an empty plate.
- One-hand eating: The best bites can be picked up with fingers or a fork and eaten while standing near the grill, which matters when chairs are scarce and the ice bucket is already crowded.
- Fast turnover: Most of these pieces cook in 2 to 10 minutes, so you can move through shrimp, vegetables, and sausage without babysitting a huge roast.
- Better crust, same tenderness: Smaller pieces expose more surface area to heat, which means more browning per mouthful and less dead, steamed middle.
- Easy to mix and match: A single platter can hold chicken, fruit, vegetables, bread, and cheese without feeling random, as long as the heat and timing are handled with a little care.
- Less waste, more flexibility: If one item runs short, the platter still works because the menu is built from pieces that stand on their own.
The other reason these bites work is that they match how people actually eat outdoors. Nobody at a cookout wants a plate that requires a full sitting posture and a three-step cutting ritual. A few smoky bites, a cold drink, and a napkin that gets a little too busy — that’s the rhythm. These pieces fit that rhythm without asking for much from the guest.
The Best Picnic Bites Are Small, but Not Fragile
How small should a bite be before it falls apart on the grill? Smaller than a steak, larger than a garnish. That sounds vague, so here’s the practical version: 1 to 1½-inch pieces for meat and tofu, ¾- to 1-inch pieces for sturdy vegetables, and slightly larger cuts for fruit and cheese. That size gives you enough surface for char without turning every flip into a rescue mission.
A good grill bite should survive one turn with tongs. It should not wedge itself through the grate. It should not collapse when you brush it with oil. And it should definitely not turn to mush before the second side gets a chance to brown. If you can’t imagine moving it from tray to grate without a small emotional incident, it’s too delicate.
The 2-inch instinct usually lies
People tend to cut too small because they want faster cooking. Faster is not always better. A tiny zucchini coin or a shrimp that’s been cut down for no reason will dry out before it gets real color. That’s why a little generosity with size usually pays off. The grill rewards shape, not just speed.
Flat surfaces help. Cubes, planks, wedges, and thick rounds all give the grate something to grab. Rounds that roll around, like skinny slices of eggplant or narrow onion rings, are annoying unless you use a basket. The goal is simple: give the fire enough contact to create a crust, but not so much exposure that the center loses its tenderness.
Match the piece to the ingredient
Chicken thighs like 1 to 1½-inch chunks. Shrimp should stay whole. Halloumi needs thick slices or cubes, not wisps. Peaches do better in halves or firm wedges than in thin slices. Corn can be cut into thick coins after grilling, but the cob needs to be cooked first as a whole unit.
That little bit of restraint changes everything. Small does not mean flimsy. Small means manageable.
Build the Grill Around the Food, Not the Other Way Around
A lot of grill trouble starts before the food even hits the grate. The grill needs a plan. Without one, you end up with shrimp racing ahead of chicken, peaches collapsing next to onions, and a pile of half-finished bites that all needed different heat.
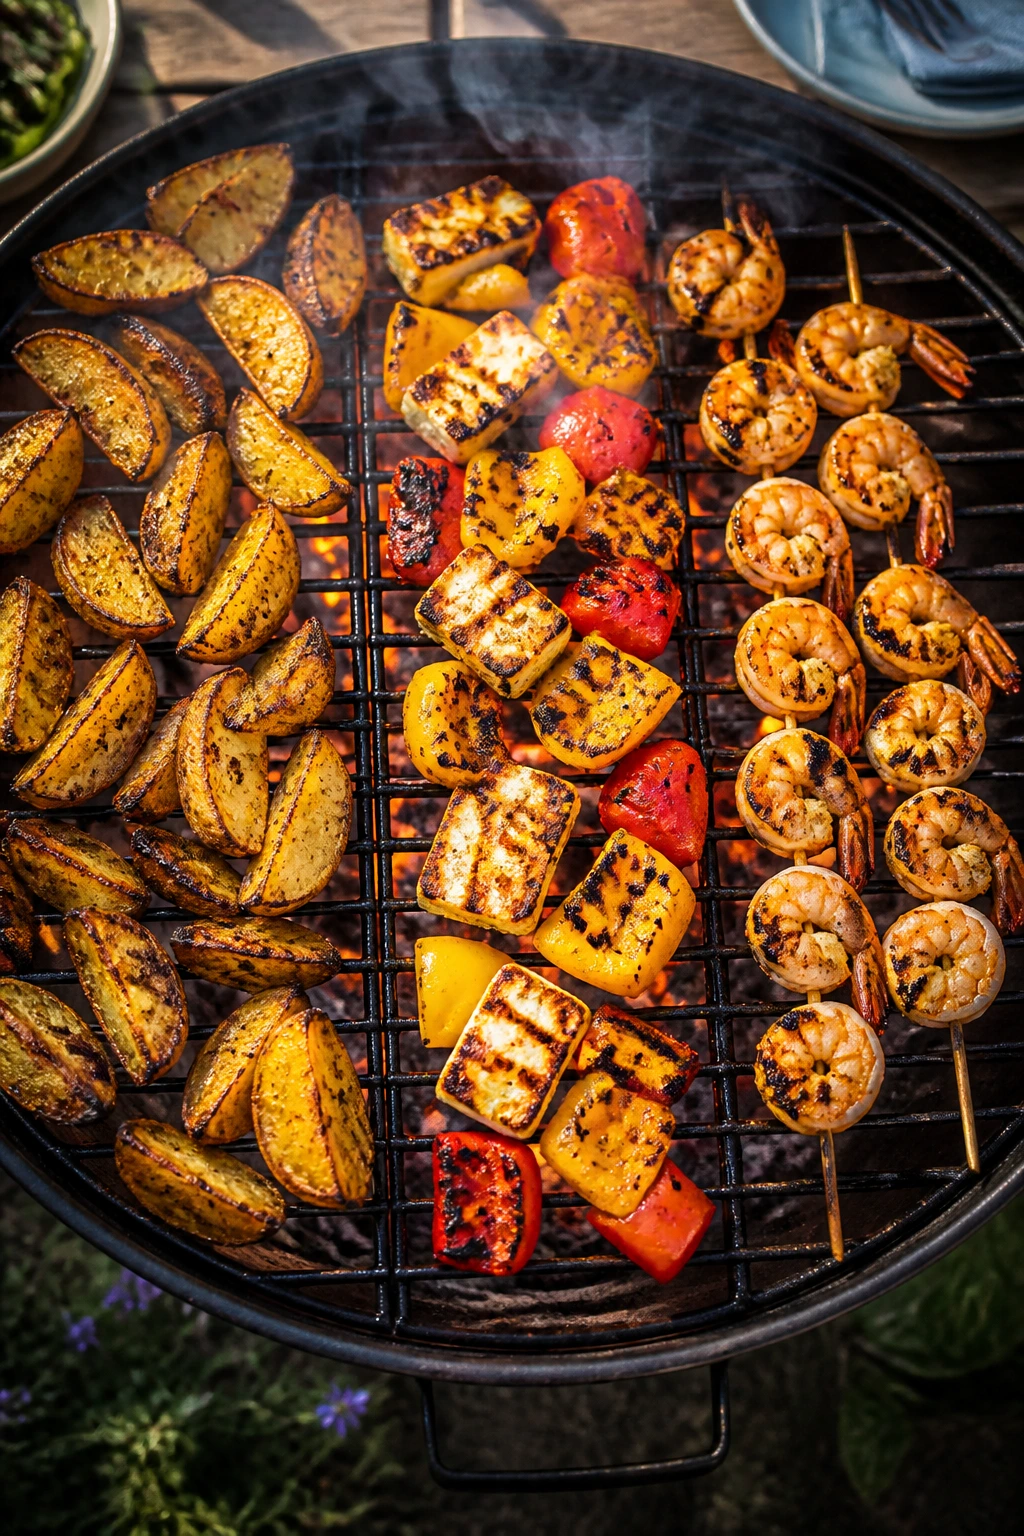
A two-zone setup is the cleanest fix. One side of the grill stays hot for searing. The other side stays cooler for finishing, holding, or rescuing food that picked up color too fast. On a gas grill, that means one burner set higher and one lower. On charcoal, bank the coals to one side and leave the other side clear. Simple. Useful. Worth the extra minute.
Clean, hot, and lightly oiled
Preheat the grill for 10 to 15 minutes before the food goes on. A hot grate is less sticky, and the food will take color faster. Scrape the grates clean, then oil the bars lightly with a high-smoke oil like canola, grapeseed, or avocado oil. If you want the old-school trick, dip a folded paper towel in oil, grip it with tongs, and wipe the bars. Don’t pour oil onto the grill. That way lies flare-ups and regret.
A lukewarm grate is a sticky grate. That’s the whole story.
Charcoal and gas each have a job
Charcoal gives food a deeper smoke note and a little more edge, especially on peaches, corn, and sausage. Gas gives you faster control and easier zone management. Either one can do the job. The difference is not moral, despite what backyard arguments sometimes suggest. Use the grill you know, and make sure it’s hot enough to brown food in under a few minutes.
Basket or grate?
Small pieces need a decision. If the food is chunky enough to stay put — halloumi cubes, chicken thigh bites, thick zucchini planks — go straight on the grate. If it’s shrimp, mushrooms, or cut fruit, a grill basket keeps things from dropping through the bars. A basket gives up a little direct contact, but it saves more food than it costs. I’d rather lose a tiny bit of char than watch dinner vanish into the firebox.
What to Marinate, What to Dry-Rub, and What to Leave Alone
Not every ingredient wants the same treatment. That’s where a lot of cookout menus go sideways. Some bites need oil and acid. Some want dry spice. Some need almost nothing until the very end. Get that part right and the whole platter tastes cleaner.
Wet marinades are for the sturdy stuff
Chicken thighs, tofu, sausage, mushrooms, and some vegetables can handle a marinade. For a pound of food, a good starting point is 2 to 3 tablespoons oil, 1 to 2 tablespoons acid, salt, pepper, and one or two aromatics like garlic, ginger, mustard, or chopped herbs. Give chicken thighs 30 minutes to 8 hours. Tofu can sit longer, especially if it’s been pressed. Mushrooms need less time than people think — 20 to 30 minutes is enough. Too long and they get swampy.
Shrimp is the tricky one. If the marinade is acidic, keep it short: 15 to 30 minutes max. Any longer and the outside can start to tighten before the grill has a chance to do its work. If you want bolder flavor on shrimp, use oil, salt, citrus zest, paprika, and fresh herbs after grilling instead of bathing it in lemon juice for an hour.
Dry rubs are better when the surface should brown hard
Dry rubs work beautifully on steak bites, sausage coins, halloumi, and thicker vegetables. A mix like kosher salt, black pepper, garlic powder, smoked paprika, and a little brown sugar can give you a deep crust. The brown sugar is the catch: it helps with color, but it also burns fast. Keep sugar light if the food will sit directly over high flame.
Dry surfaces brown better than wet ones. That’s not a theory; that’s what you see when the grill is hot and the food goes from gray to bronzed in a minute or two. Pat things dry before seasoning, especially shrimp, tofu, and fruit.
Save glazes for the end
Barbecue sauce, honey glaze, maple, and miso mixtures are all fine — just not too early. Anything with sugar goes on during the last 1 to 2 minutes, or after the food comes off the grill. If you brush it on too soon, the outside turns sticky-black before the inside finishes. That’s not char. That’s burned syrup.
A finishing sauce should look shiny, not crusted. If it clings in a thin layer and softens from the heat, great. If it starts smoking aggressively, you waited too long to pull it.
Proteins That Stay Juicy Under a Hot Flame
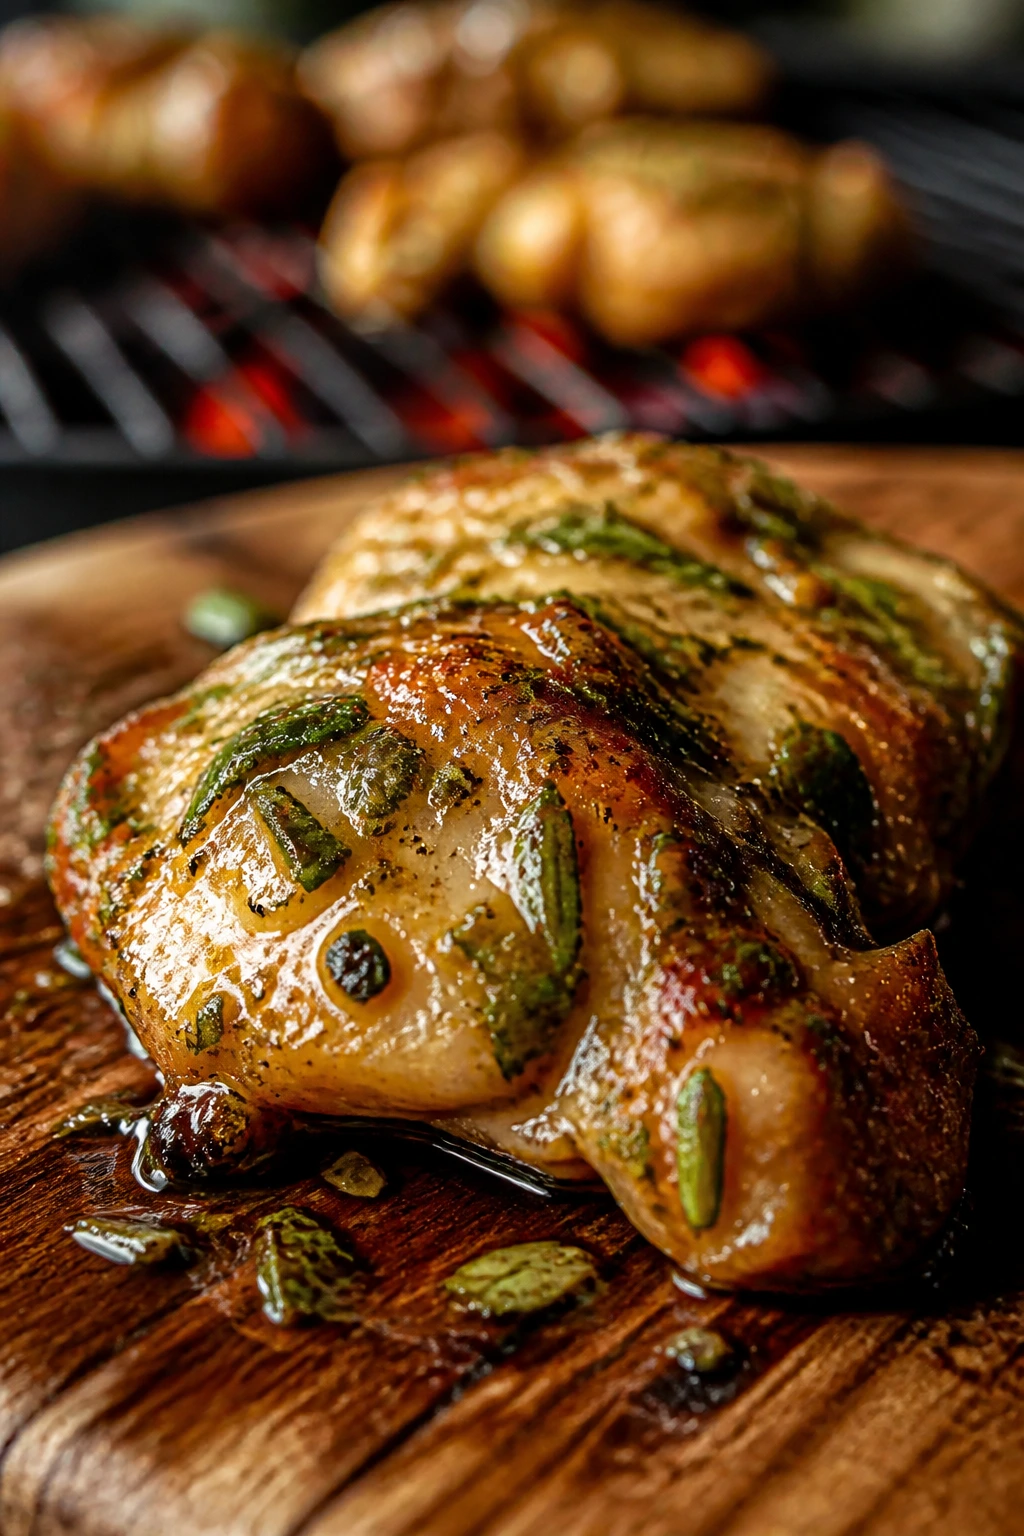
Chicken thighs are the safe bet. Lean chicken breast can work, but it asks for more attention than I want on a busy afternoon, and the difference shows when the platter starts cooling. Thighs have enough fat to tolerate direct heat, enough structure to handle a quick marinade, and enough forgiveness to survive a distracted flip.
Chicken thighs: the easiest crowd-pleaser
Cut boneless, skinless thighs into 1 to 1½-inch chunks. Toss them with oil, salt, pepper, garlic, and a little lemon zest or paprika. Grill over medium-high heat for about 3 to 4 minutes per side, turning once, until the internal temperature reaches 165°F. Pull them off and let them sit for 3 to 5 minutes before serving. The surface should be browned and a little sticky from the marinade, not wet and pale.
Shrimp: fast, sharp, and unforgiving
Use large shrimp — 16/20 count is a nice size for grilling bites. Peel and devein them, pat them dry, and thread them on skewers or tuck them into a grill basket. They usually need 1 to 2 minutes per side over direct heat. The color changes fast: from translucent gray to opaque pink with a firm, C-shaped curl. If they coil into tight little O’s, they’ve gone a step too far.
Shrimp is where a timer matters. So does a thermometer if you want one, though you can get pretty far just by watching the color and feel. They should be springy, not rubbery.
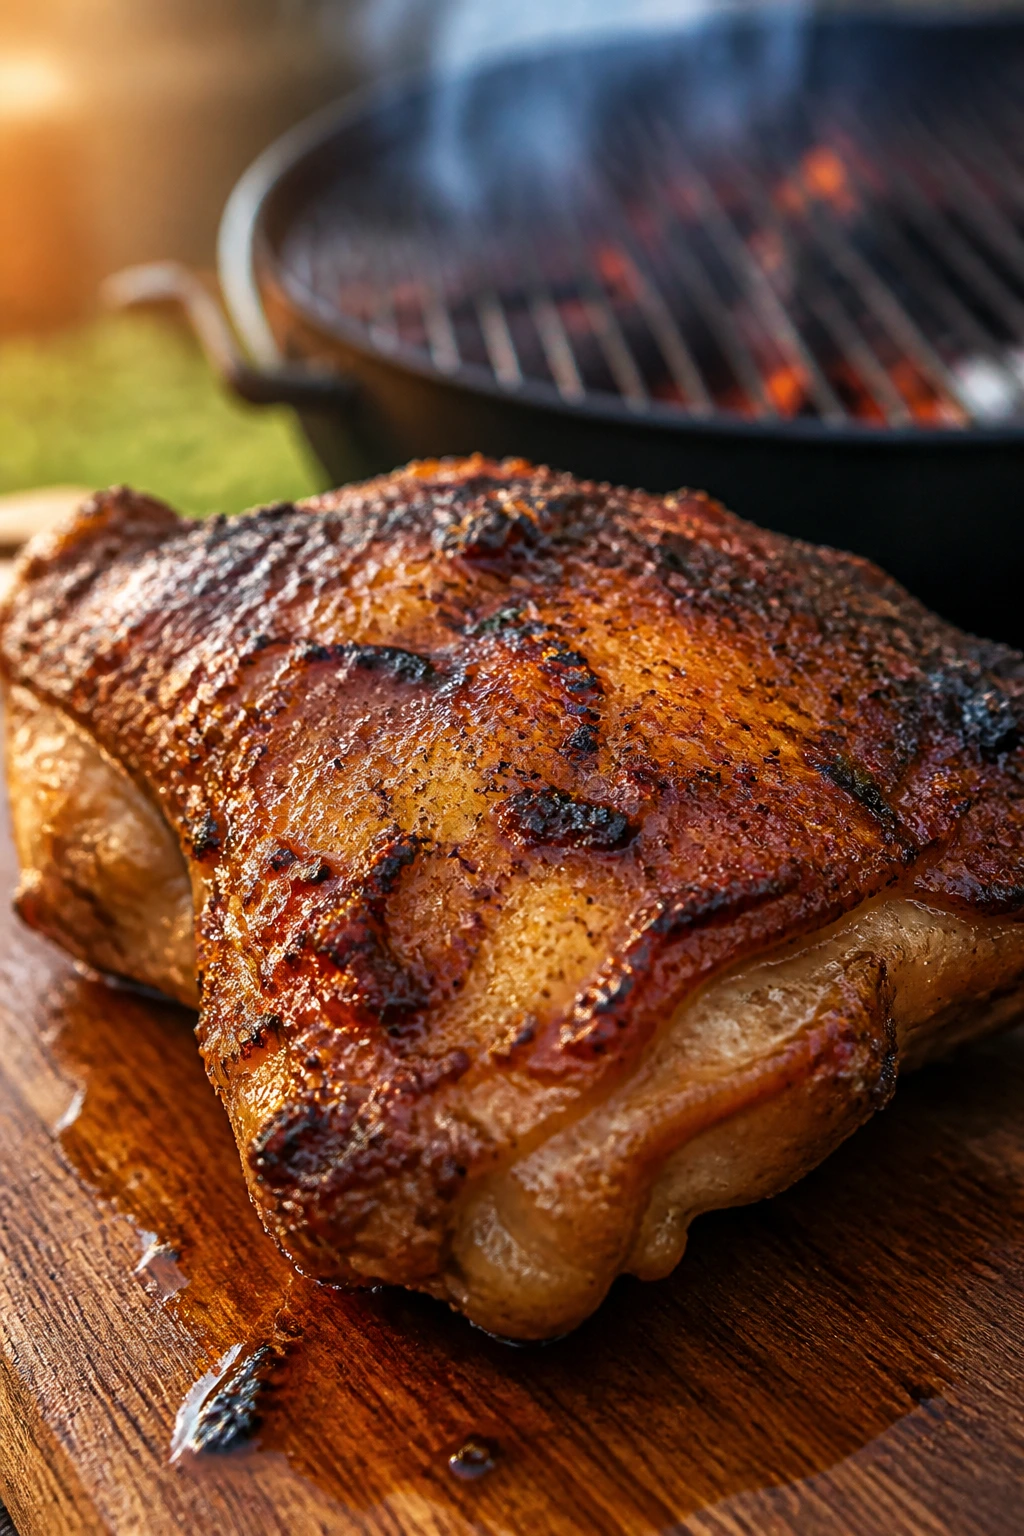
Sausage coins: the easy cheat code
Fully cooked sausage is one of the most reliable grill bites you can put on a platter. Slice it into ¾-inch coins and sear each side for a couple of minutes until the edges get dark and crisp. If you’re using raw sausage links, cook them whole first until nearly done, then slice and finish. Otherwise the outside scorches before the center catches up.
Smoked sausage, kielbasa, and andouille all work. So does a good chicken sausage. Serve with mustard, pickles, or a vinegar-based sauce and people will keep circling back.
Steak bites: small but serious
Sirloin, flap steak, or strip steak cut into 1-inch cubes gives you fast cooking and plenty of flavor. Dry-season them generously with salt and pepper, then grill over high heat for 2 to 3 minutes total, turning to hit each side. Medium-rare runs around 130°F to 135°F after a short rest. If you want medium, push it a little farther, but don’t turn it into leather. That defeats the whole point of bite-size steak.
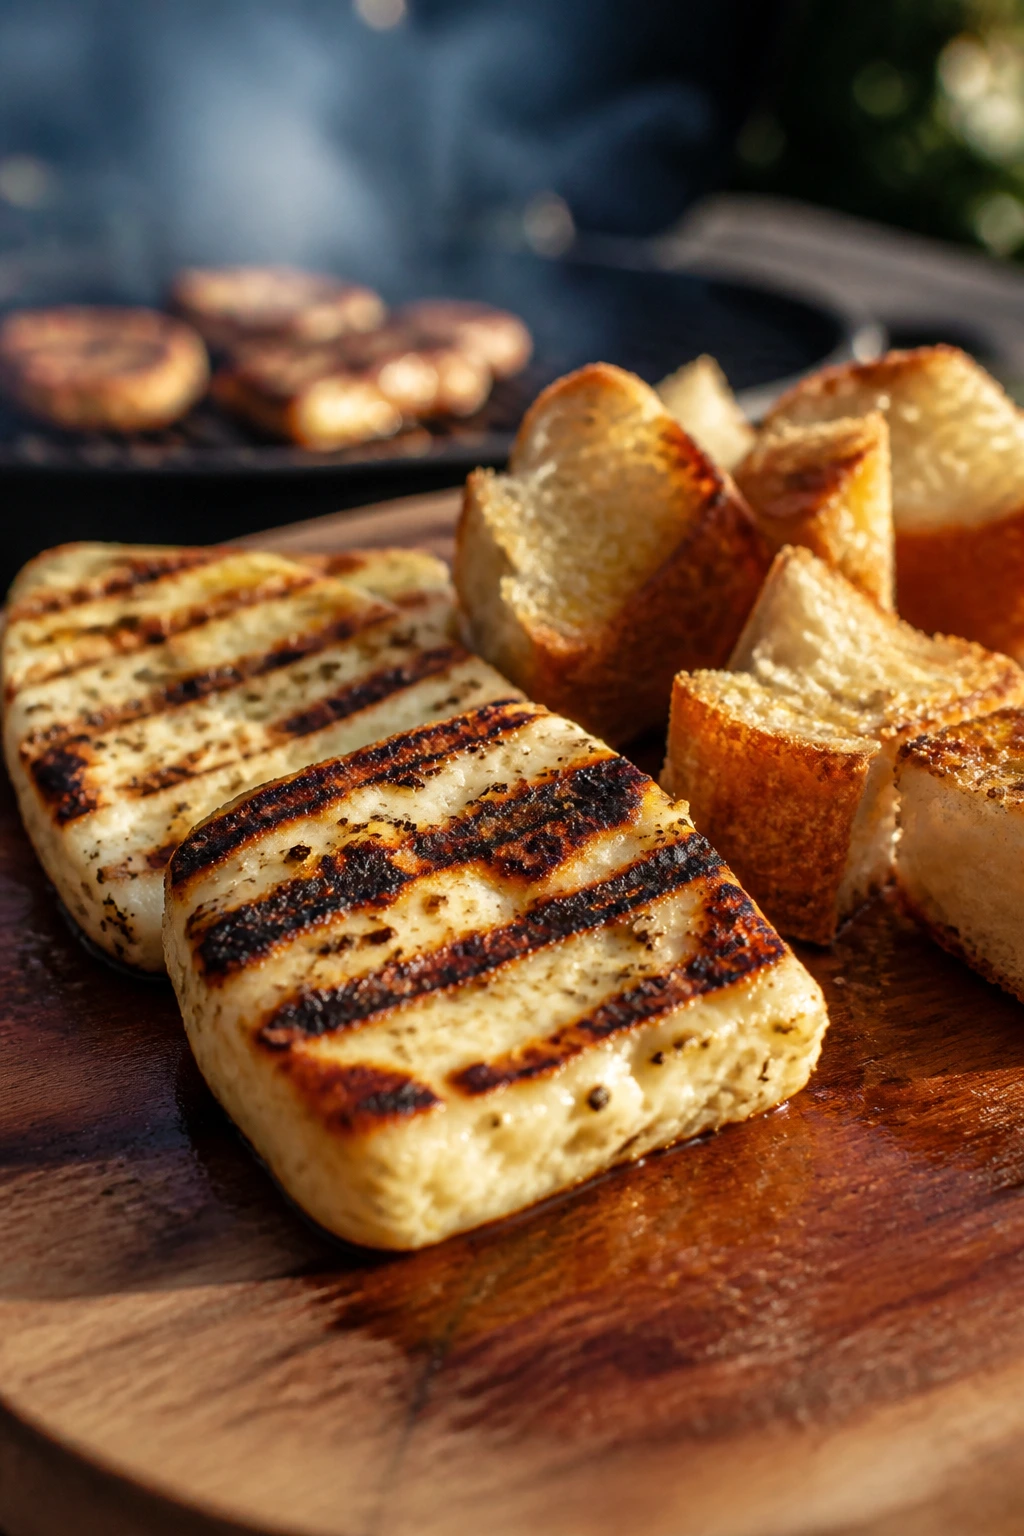
Halloumi and tofu: the meatless anchors
Halloumi likes to be cut into thick cubes or ½-inch slabs, patted dry, and brushed with oil. Grill it for 1 to 2 minutes per side until the outside is bronzed and the center goes soft and salty. Tofu needs more prep: press it, cut it into bite-size pieces, marinate it, and grill it gently so it doesn’t tear. Firm tofu with a little cornstarch dusting gets a better crust than people expect.
USDA food-safety temperatures still matter on the grill, even when the menu feels informal. Chicken should reach 165°F, ground meats 160°F, and pork or beef bites should rest after hitting a safe, doneness-appropriate temperature. A thermometer isn’t fussy. It’s cheaper than overcooked food.
Vegetables and Fruit That Caramelize Instead of Collapsing
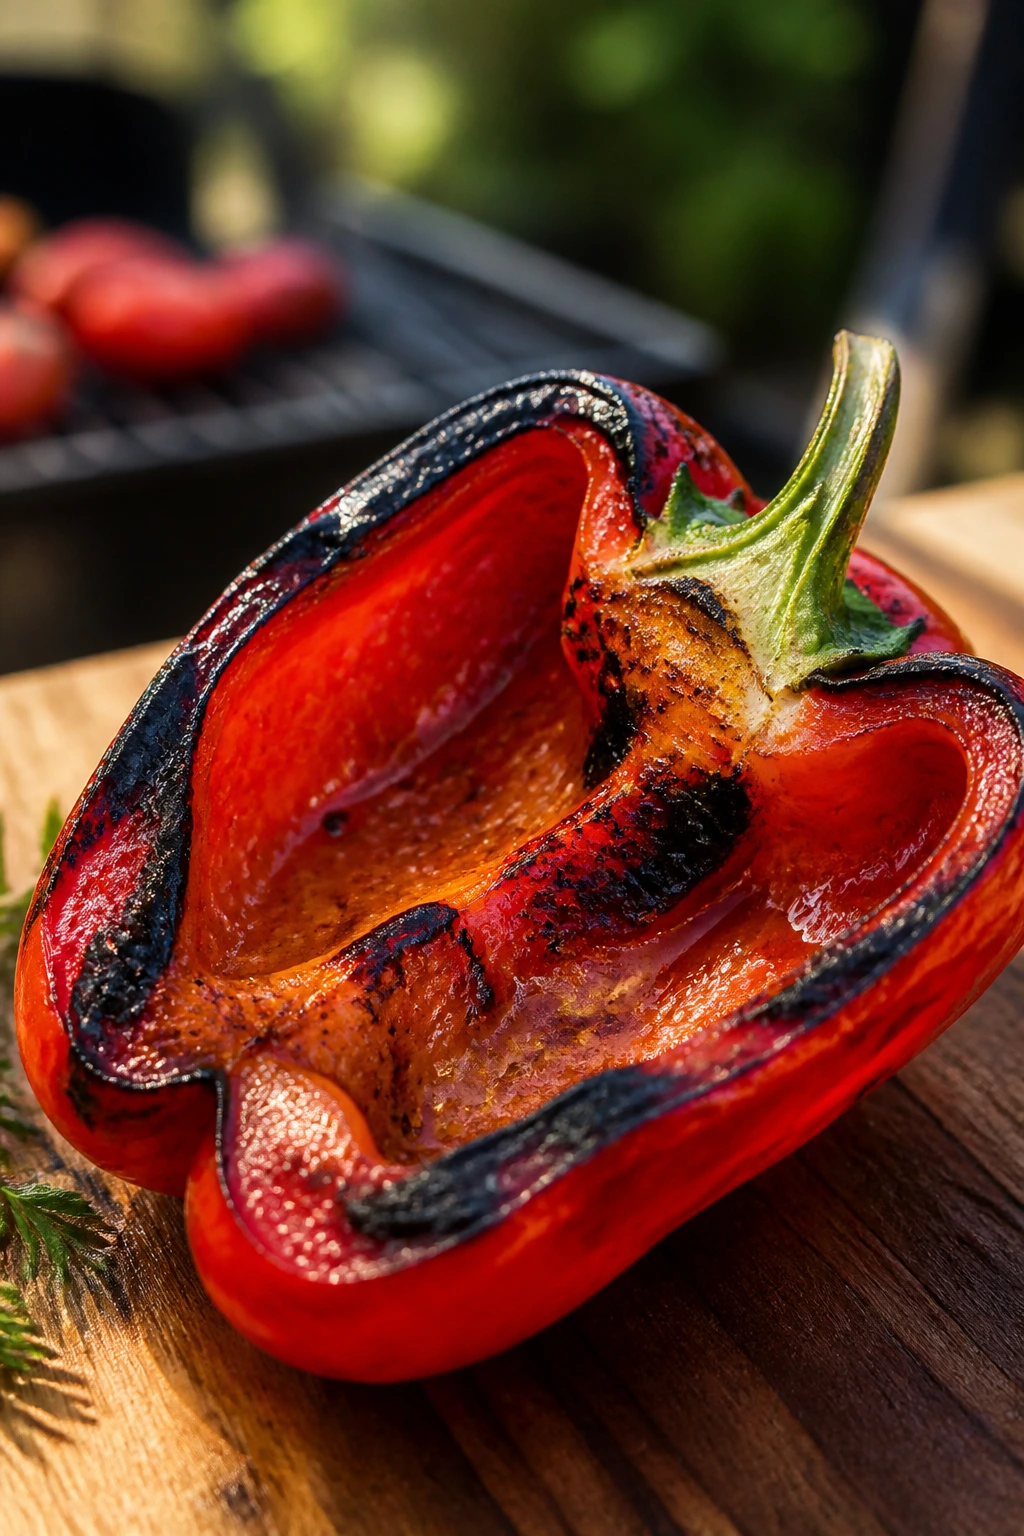
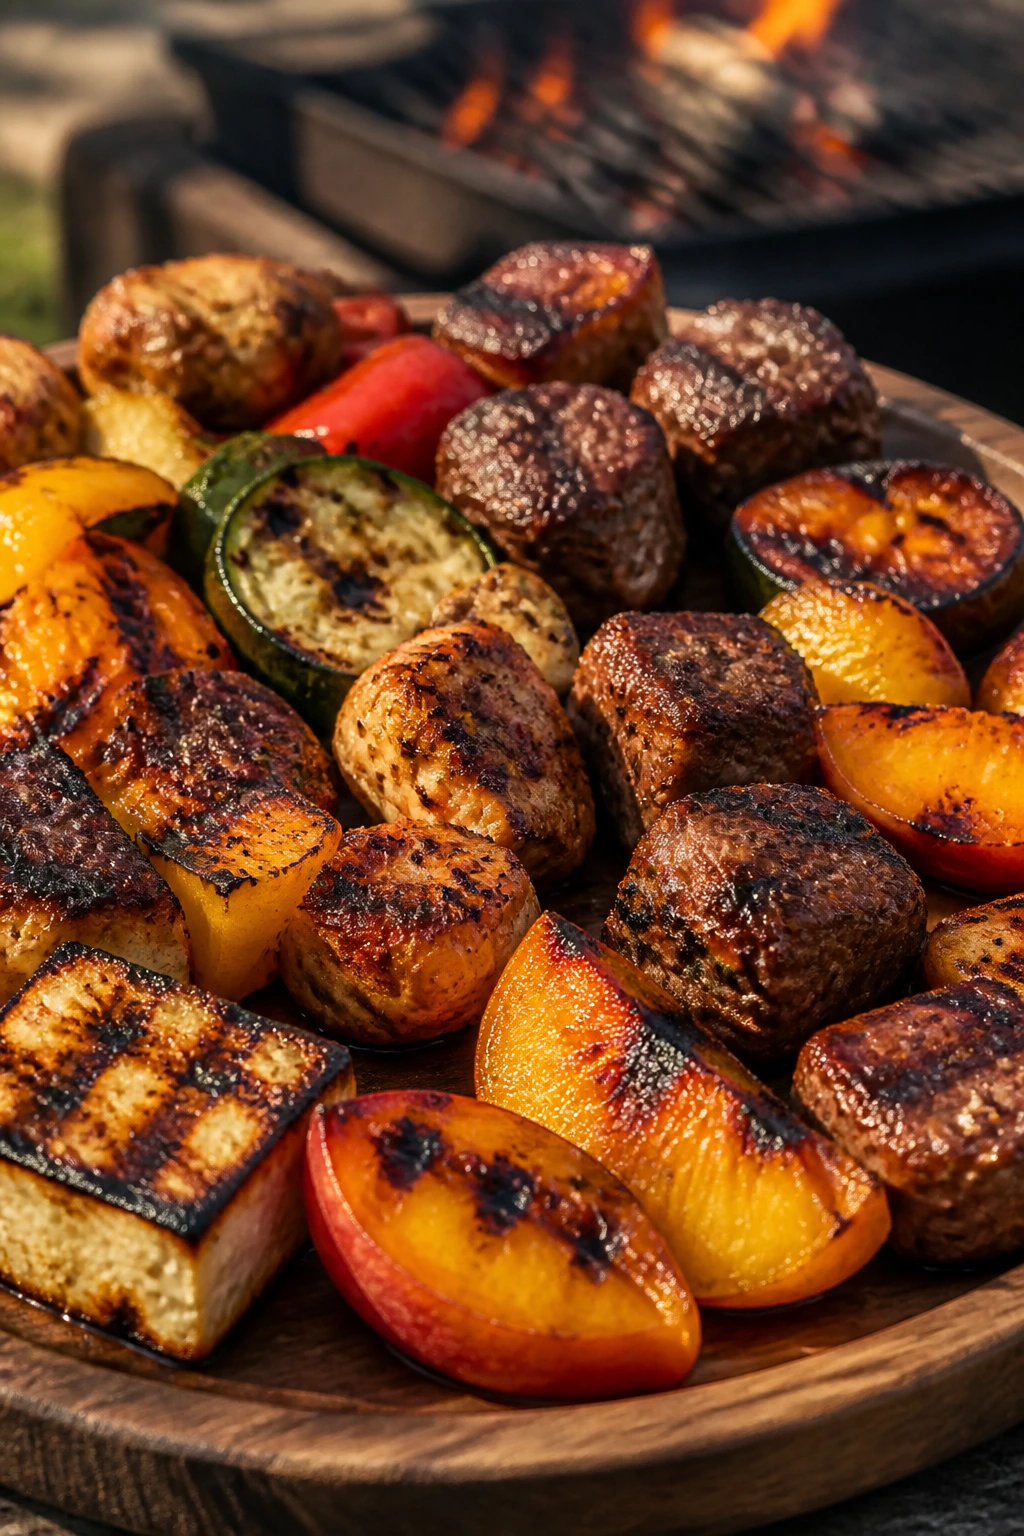
Peppers hiss. Peach juice bubbles at the cut edge. Corn takes on a sweet, toasted smell that has no business being that good. The right vegetables and fruit make charred picnic bites feel generous instead of meat-heavy, and they also keep the platter from tasting one-note.
Sturdy vegetables first
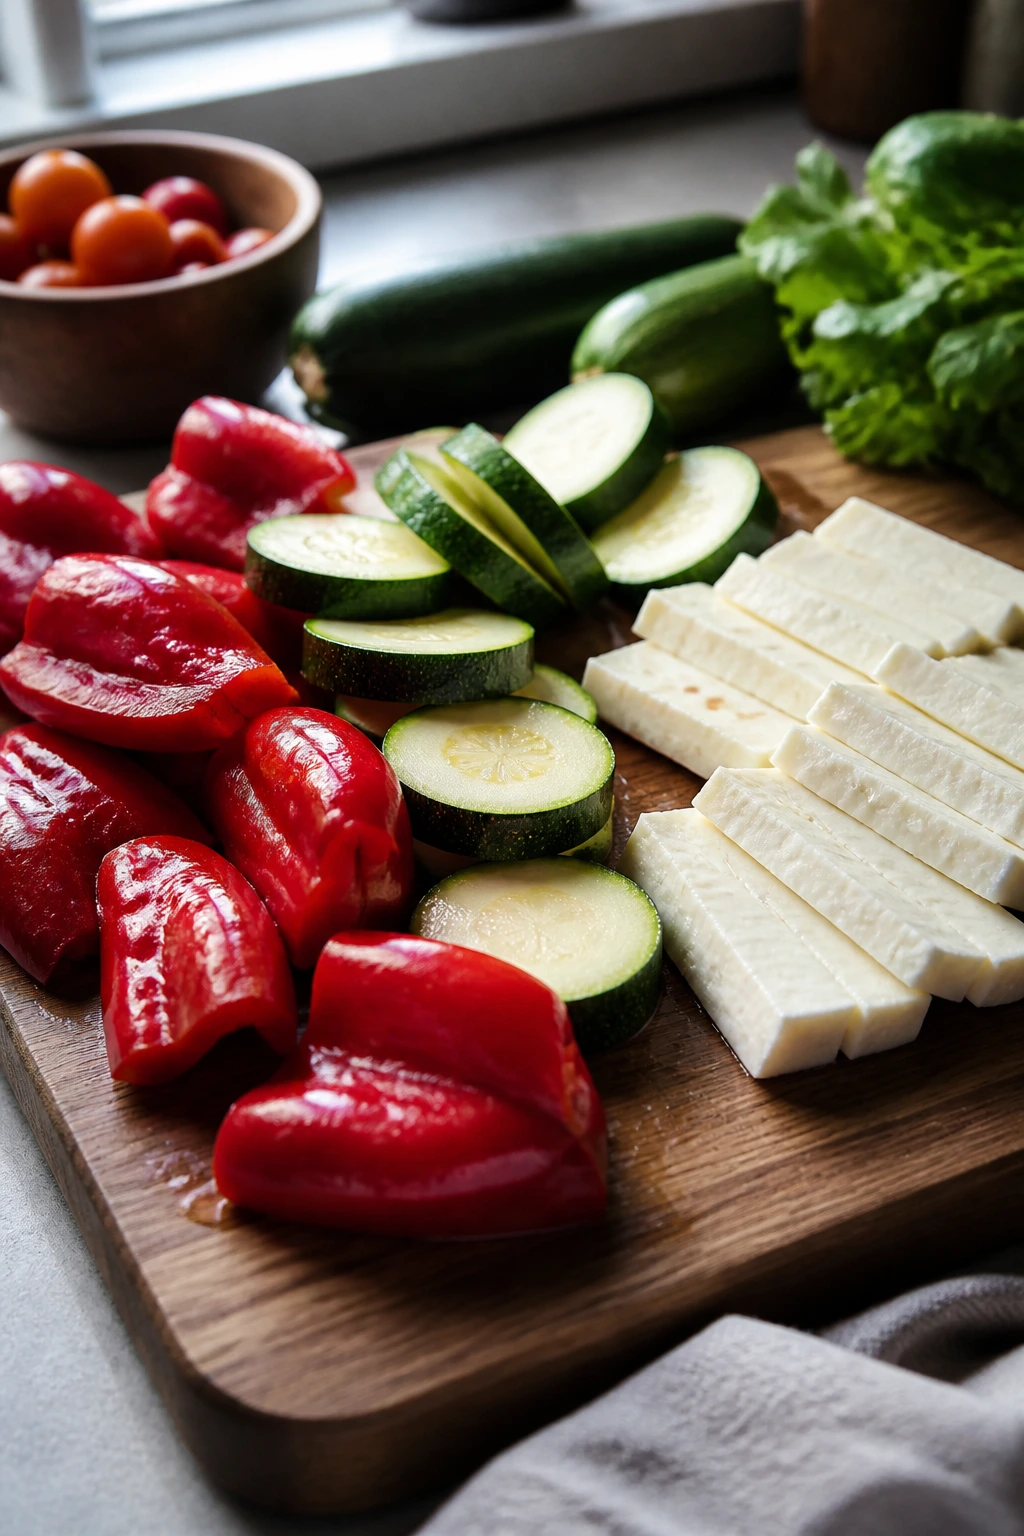
Bell peppers, onions, mushrooms, zucchini, eggplant, asparagus, and corn are the usual suspects, but they all need slightly different handling. Bell peppers like big squares or wide strips. Onions want wedges that keep a little core so the layers do not fall apart. Mushrooms do better when they’re dry and whole or halved, not chopped to bits. Zucchini and eggplant need thicker cuts than people think — ¾-inch planks or chunky half-moons give you enough structure to stay on the grate.
Brush them with oil, salt lightly, and grill until you get dark stripes and softened centers. Usually that’s 2 to 4 minutes per side for zucchini and mushrooms, a little longer for onions, and around 8 to 12 minutes for corn if you’re cooking the whole cob. If the vegetable is watery, keep the seasoning simple and finish with acid after grilling so the tray doesn’t turn soft.
Corn deserves a decision
Corn can be grilled in the husk, grilled naked, or cooked first and sliced into thick rounds after. I like the husk-on method when I want steam and tenderness, then a quick char after peeling. If I want true picnic bites, I’ll grill the cobs whole, let them cool for a minute, then cut them into 1½-inch coins. It’s cleaner than corn ribs and less stressful than trying to hack a cob into fancy shapes while the grill is hot.
Corn ribs work, too, if you’ve got a very sharp knife and a cutting board that doesn’t slide. They’re fun. They’re also a little fussy. I rarely bother unless I’m feeling stubborn.
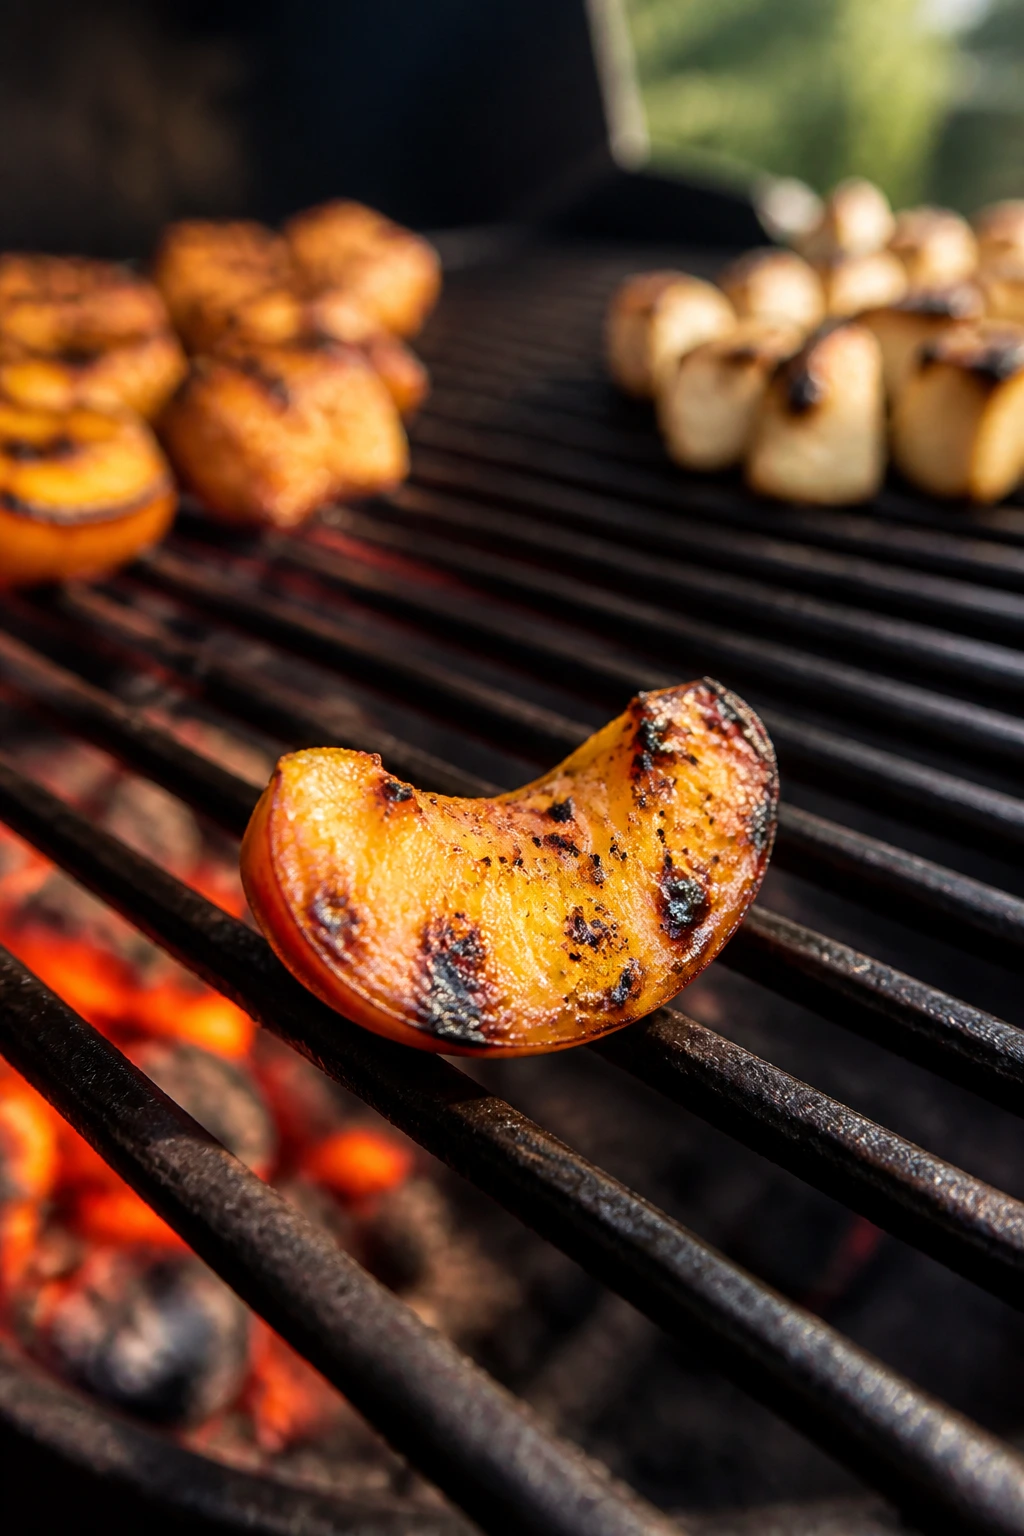
Fruit that likes flame
Pineapple, peaches, plums, and even watermelon can take on real character over the coals. The key is firmness. A peach should give slightly when you press it, not squish. Pineapple can be cut into rings or spears. Brush fruit with a little oil, not a sugar glaze, and grill over medium heat until the cut side darkens and the surface softens — usually 1 to 3 minutes per side.
A little bitterness on the edge of a grilled peach is not a mistake. It’s the point. That faint char balances the sweetness and makes the fruit feel like it belongs next to sausage or cheese instead of sitting off to the side like dessert that got lost.
Bread, Cheese, and Other Grillables That Turn Into Bites
Bread and cheese do not need to be background actors. On a cookout platter, they can carry a lot of flavor and help the more fragile pieces feel complete. A grilled bite with a little crunch under it or a salty, squeaky cheese beside it gives the whole tray a better shape.
Halloumi, paneer, and other firm cheeses
Halloumi is the easiest grill cheese for this job because it holds together and gets those dark striped edges without melting into a puddle. Cut it into ½-inch slices or cubes, blot it dry, and brush with oil. Paneer works too if you treat it gently and season it well. The grill should mark the outside fast while the inside stays soft and milky.
Serve grilled cheese with something sharp — lemon wedges, herbs, pickled onions, or a spoonful of hot pepper jelly if you want a sweet-salty kick. Cheese without a bright finish can feel heavy fast.
Bread that earns its keep
A sliced baguette, sourdough, ciabatta, or flatbread can become a grill bite with almost no effort. Brush the bread lightly with oil, grill it just until toasted, then rub it with a cut garlic clove while it’s still warm. Cut it into 2-inch pieces for topping or tearing. If you’re serving saucy bites, grilled bread becomes the thing people use to scoop up the last bits of everything else.
Flatbread is the fastest route. A minute or two per side is enough. Sourdough takes a little more time and gives you a sturdier crunch. Keep the slices modest. Giant slabs are annoying on a paper plate.
Polenta, baby potatoes, and other quiet winners
Chilled polenta sliced into cubes or thick rounds grills beautifully. It needs enough time to firm up in the fridge first, then it takes 3 to 4 minutes per side to crisp. Baby potatoes are even better if you parboil them for 8 to 10 minutes, drain them, then smash them lightly before grilling. The flattened edges catch char and the centers stay creamy.
These are the bites people underestimate and then keep taking. That’s a good sign.
How to Keep Three Different Cook Times From Turning into Chaos
Order matters. Not in a rigid, joyless way — just enough to keep the food from collapsing into a pile of overcooked scraps and underdone leftovers. A good cookout tray usually contains fast items, medium items, and slow items, and they should not all hit the grate at the same time unless you enjoy stress.
Start with the slowest bites
Potatoes, thick onions, chicken thigh pieces, and raw sausage links need the most time. Put them on first, especially if you’re using indirect heat to get them close to done before the final sear. Move them to a cooler zone if the outside browns faster than the center cooks. That little lane of lower heat is what saves the platter from turning black.
Add the medium-speed foods next
Bell peppers, mushrooms, halloumi, tofu, zucchini planks, and steak bites usually sit in the middle. They need enough heat to mark the surface but not so much that the insides dry out or the structure falls apart. A second sheet pan helps here. I like to keep one pan for raw food and one for finished food so nobody accidentally puts cooked bites back next to the uncooked batch.
Save the fragile stuff for last
Shrimp, fruit, bread, and delicate vegetables go on near the end. They can go from perfect to tired in a blink. Grill them over direct heat, pull them fast, and season after they come off if needed. If you’re making a mixed tray, cook the items in waves and build the platter as you go instead of dumping everything into one bowl at the end.
Hold food the right way
If something finishes early, keep it on the cooler side of the grill or in a 200°F oven, loosely covered with foil. Loose matters. Tight foil traps steam and wipes out the char you worked for. A minute or two of rest is good. A sweaty, sealed container is not.
The cleanest cookout menus are the ones that respect timing instead of pretending everything can be grilled in one dramatic gesture. It can’t. The grill is patient, but only up to a point.
How to Build a Backyard Cookout Platter People Actually Graze From
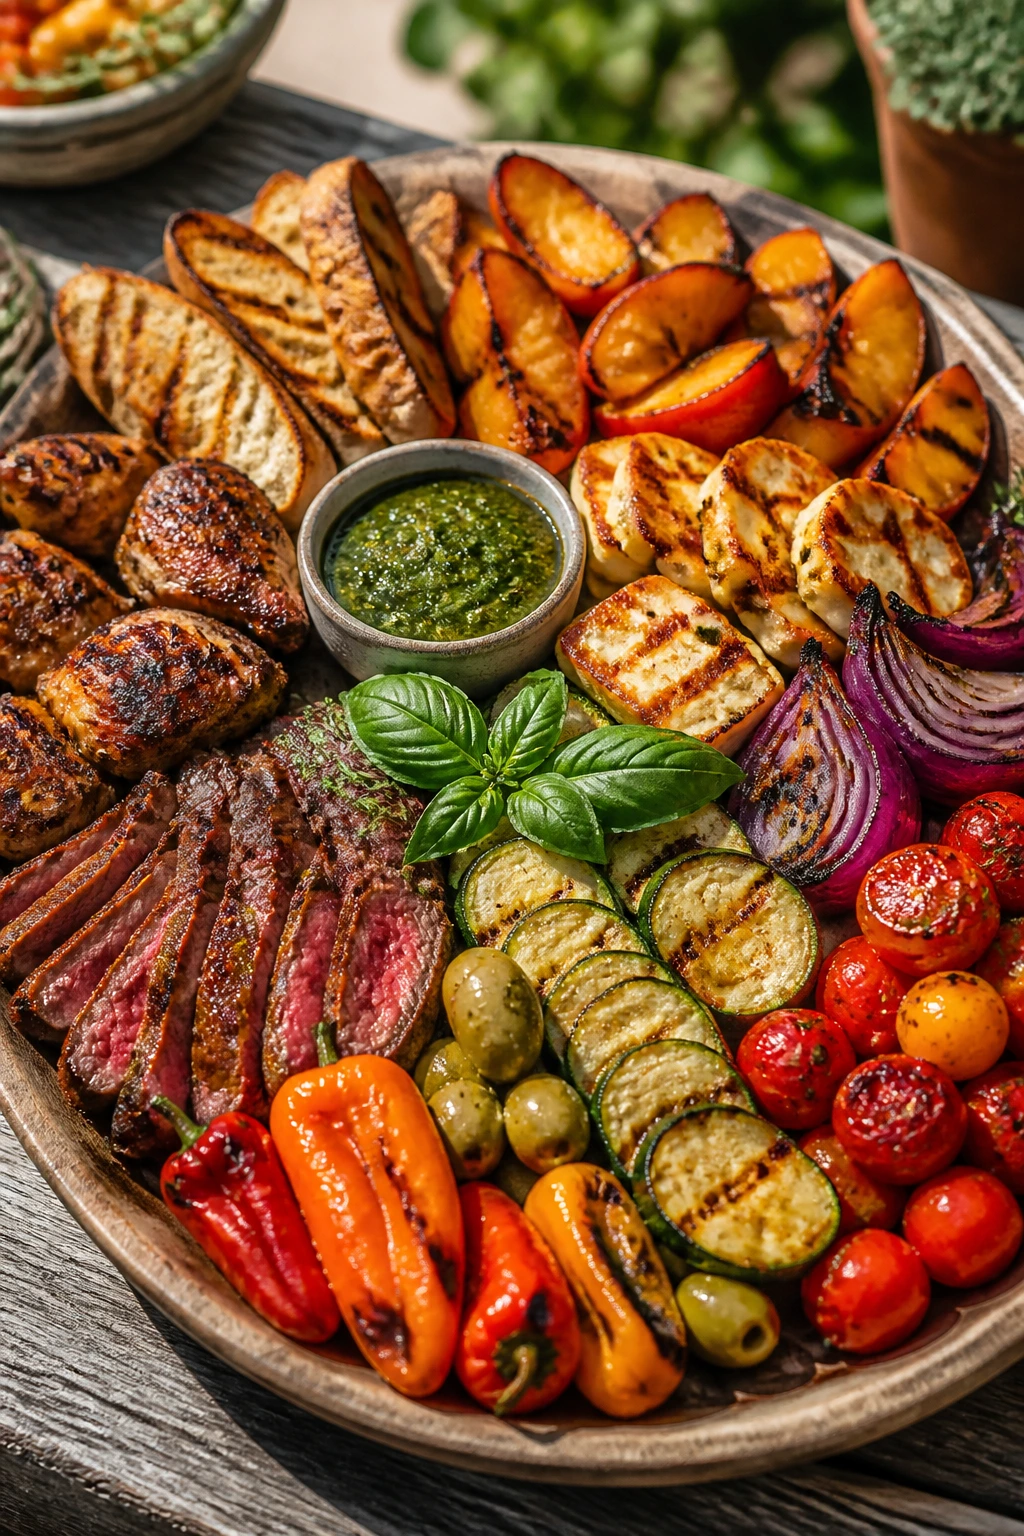
A platter can look generous and still eat badly. The difference is usually in the order, the color, and the amount of room you leave around each bite. If everything is piled into a mound, people have to dig. If the tray is laid out in clear groups, people can choose faster and the food stays cleaner.
Presentation: Use a wide platter or a rimmed sheet pan lined with parchment or a green herb bed if you want the tray to look less bare. Group the items by type — smoky protein, bright vegetables, grilled fruit, cheese, bread — instead of mixing them into one pile. Tuck lemon wedges, herb sprigs, and a small bowl of dipping sauce into the gaps. The platter should look busy enough to feel abundant and organized enough that people can grab without hunting.
Accompaniments: These bites want contrast. Think vinegar slaw, potato salad with mustard, grilled bread, pickles, herb yogurt, chimichurri, ranch with a little lemon, or a quick mustard sauce. Sharp, cold, creamy, and crunchy sides keep the char from feeling heavy. A smoky tray with one creamy dip and one acidic dip usually covers the bases better than three rich sauces.
Portions: As an appetizer spread, plan on 4 to 6 bites per person if there are other foods on the table. As part of the main meal, plan on 10 to 12 mixed bites per person, plus bread or a starchy side. If you’re serving a mixed crowd, make more of the fastest, most flexible items — halloumi, sausage, peppers, and bread disappear first. Shrimp looks fancy, but sausage keeps the platter from running out too soon.
Beverage Pairing: Cold lager, pale ale, sparkling water with lime, iced tea with lemon, or a dry rosé all work with the smoke and salt. If the tray leans sweet — peaches, pineapple, honey glaze — something crisp and acidic keeps it from feeling sticky. Heavy drinks tend to flatten char. Light, cold drinks keep the whole spread sharper.
A good platter should invite the first hand and the second one too. That’s the test.
Essential Tools for Charred Picnic Bites

You don’t need a truckload of gadgets. A few sturdy tools make this style of grilling far easier, and the right ones save food from falling through the grate or sticking in pieces.
- A gas grill, charcoal grill, or grill pan: Any of the three can work, but you need a surface that gets hot enough to brown fast.
- Instant-read thermometer: This is the simplest way to know chicken, sausage, and steak bites are done without slicing them open.
- Long metal tongs: Short tongs put your knuckles too close to the heat, and forks poke out the juices.
- Grill basket or perforated tray: Best for shrimp, chopped vegetables, mushrooms, and fruit pieces that want to slip through the bars.
- Metal skewers or soaked bamboo skewers: Metal skewers are easier; bamboo works fine if you soak them for about 30 minutes first.
- Rimmed sheet pans: Use one for raw food and one for finished food. That separation keeps things tidy.
- Wide platter or serving board: You need room to lay out the bites in groups instead of piling them into a soggy heap.
- Basting brush: Useful for oil, glaze, or a last-minute herb finish.
- Sharp knife and sturdy cutting board: Cutting even pieces is half the battle, and a flimsy board will slide around when you’re trying to move fast.
- Small bowls for sauces and garnishes: Lemon wedges and herb oil deserve their own space, not the bottom of a crowded tray.
Smart Shopping and Prep Before the Grill Gets Hot
The best shopping trip for charred picnic bites starts with one question: which foods can take direct heat, and which ones need help? That question saves money, time, and a lot of soggy disappointment.
Buy for texture first
For protein, choose chicken thighs over breast if you want the easiest route. Look for boneless, skinless thighs with an even thickness. For shrimp, buy large shrimp that are peeled and deveined unless you enjoy fighting shells with tongs. Sausage should be fully cooked if you want speed, or raw only if you’ve got time to manage it. Halloumi should be firm and dry, not sitting in a puddle of brine.
Buy produce that can hold shape
Peppers should feel heavy for their size and look glossy. Zucchini should be medium-sized, not giant, because oversized ones get watery and seedy. Mushrooms should be dry, firm, and not bruised. Corn should have tight husks and pale silk. For fruit, pick peaches, plums, or pineapple that are ripe enough to taste good but not so soft that a knife leaves juice running down the board.
Frozen shrimp and frozen corn are fine if you thaw them properly and dry them well. Water is the enemy of char. A paper towel pressed against shrimp or vegetables before they hit the grill does more than half the seasoning work by helping the surface brown.
Build the pantry around the finish
Kosher salt, black pepper, neutral oil, lemons, vinegar, garlic, smoked paprika, mustard, honey, and fresh herbs can turn a plain tray into something worth repeating. You do not need ten spices. You do need enough acid and salt to keep the food from tasting flat once it cools a little.
Prep before guests arrive
Cut vegetables, mix dry rubs, and make dipping sauces earlier in the day. If you’re marinating chicken or tofu, do it ahead and keep it cold. Shrimp should be patted dry and seasoned close to grilling time. Fruit can be cut shortly before cooking so it doesn’t slump. The fewer things you’re chopping while the grill is hot, the more likely the food ends up browned instead of rushed.
Finishing Touches That Make the Tray Taste Finished

A finished tray needs acid, salt, and one sharp thing. That last part is the one most people forget. Char and smoke can flatten if they don’t get a bright edge at the end.
Flavor Enhancement: A squeeze of lemon over grilled shrimp, a splash of red wine vinegar over peppers, or a spoonful of herb oil over halloumi can wake the whole platter up. If the food tastes a little heavy, it usually needs acid before it needs more salt. Flaky salt sprinkled right before serving also gives the bites a stronger finish under the teeth.
Customization: Add pickled onions for bite, chopped mint or dill for freshness, or a pinch of chili flakes for heat. A tray with one creamy element and one sharp element eats better than a tray with five mild elements. You can also lean sweet with a drizzle of honey on fruit or lean smoky with a little paprika oil on vegetables.
Serving Suggestions: Keep a small bowl of yogurt sauce, mustard sauce, or lemon aioli beside the platter. Scatter herbs over the tray after the food is cooked, not before. For color, I like something green on the board — parsley, basil, dill, scallions, or all of them together if I’m feeling generous.
Make-It-Yours: For gluten-free guests, skip bread and build around potatoes, vegetables, cheese, and skewers. For dairy-free trays, use herb oil, tahini sauce, or a mustard vinaigrette instead of yogurt-based dips. For vegetarian trays, halloumi, tofu, mushrooms, corn, and polenta can carry the whole spread without apology.
Little finishes do more than decorate the plate. They tell the eater where to start.
Make-Ahead, Storage, and Reheating Without Losing the Char

How long can grilled food sit out before it stops being picnic food and starts becoming a food-safety problem? Not long enough for casual guesswork. Perishable food should not sit in the danger zone for more than 2 hours, and if the weather is hot enough that the platter feels warm to the touch, I treat 1 hour as the smarter limit. A shady table helps. Direct sun does not.
Cooked bites keep 3 to 4 days in the refrigerator if they’re cooled quickly and stored in shallow containers. Chicken, sausage, steak bites, tofu, and grilled vegetables all fit that window. Seafood is a little shorter; I try to eat leftover shrimp within 2 to 3 days. Grilled fruit is best the same day or the next day, because its texture softens fast.
Freezing works best for sturdier items. Cooked chicken, sausage, steak bites, tofu, and some vegetables can be frozen for up to 2 months, though the texture gets looser after thawing. Halloumi and bread don’t freeze especially well once grilled. Fruit is the least forgiving; I wouldn’t freeze it unless it’s going into a sauce or compote later.
For reheating, skip the microwave unless you’re dealing with sausage or a sauced item and texture doesn’t matter much. A 375°F oven for 6 to 10 minutes brings most grilled bites back without turning them leathery. A hot skillet works even better for small batches. Chicken and steak bites like a short pan reheat with a tiny splash of oil. Shrimp needs a very short warm-up — one minute too long and it gets tough. Bread should go back in the oven for a few minutes, uncovered, so the crust wakes up again.
If you’re making parts ahead, prep the raw ingredients and sauces first, grill closer to serving, and hold the finished food loosely covered. If you stack hot bites in a closed container, the steam wipes out the char. That’s the fastest way to turn a crisp edge into a limp one.
Common Mistakes That Turn Good Bites Into Ash or Soggy Food
A lot of grill problems are self-inflicted. That’s the annoying part. The good news is that most of them are easy to fix once you know what they look like.
- Cutting pieces too small: The symptom is black edges and dry centers. Fix it by keeping meat around 1 to 1½ inches, vegetables around ¾ to 1 inch, and fruit thick enough to handle a turn.
- Starting on a cold or dirty grate: Food sticks, tears, or picks up old burnt residue. Preheat the grill fully, scrape it clean, and oil the grates lightly before the first batch goes on.
- Using a sugary glaze too early: The outside turns dark before the inside is done, and the flavor goes bitter. Brush on sweet sauces only near the end or after the food comes off.
- Crowding the grate: Food steams instead of browns, which leaves it pale and soft. Give each piece a little room, and cook in batches if you need to.
- Mixing incompatible foods on the same skewer: Shrimp, chicken, onions, and peppers do not all finish together. Skewer like with like, or cook separately and combine on the platter.
- Flipping too soon: If the food resists the tongs, it probably is not ready to release. Wait for a real crust. The grate will tell you when it’s time.
- Skipping the rest: Cutting or serving the food the second it comes off the grill sends juices onto the board instead of into the bite. Give protein a short rest, then finish with salt or acid.
One more thing: use tongs, not a fork. Puncturing meat and shrimp leaks out the good stuff. Forks belong on the table, not over the flame.
Variations and Flavor Paths Worth Trying
You do not need a new menu to make the tray feel different. Change the seasoning, shift the produce, and the same cookout rhythm starts to taste fresh.
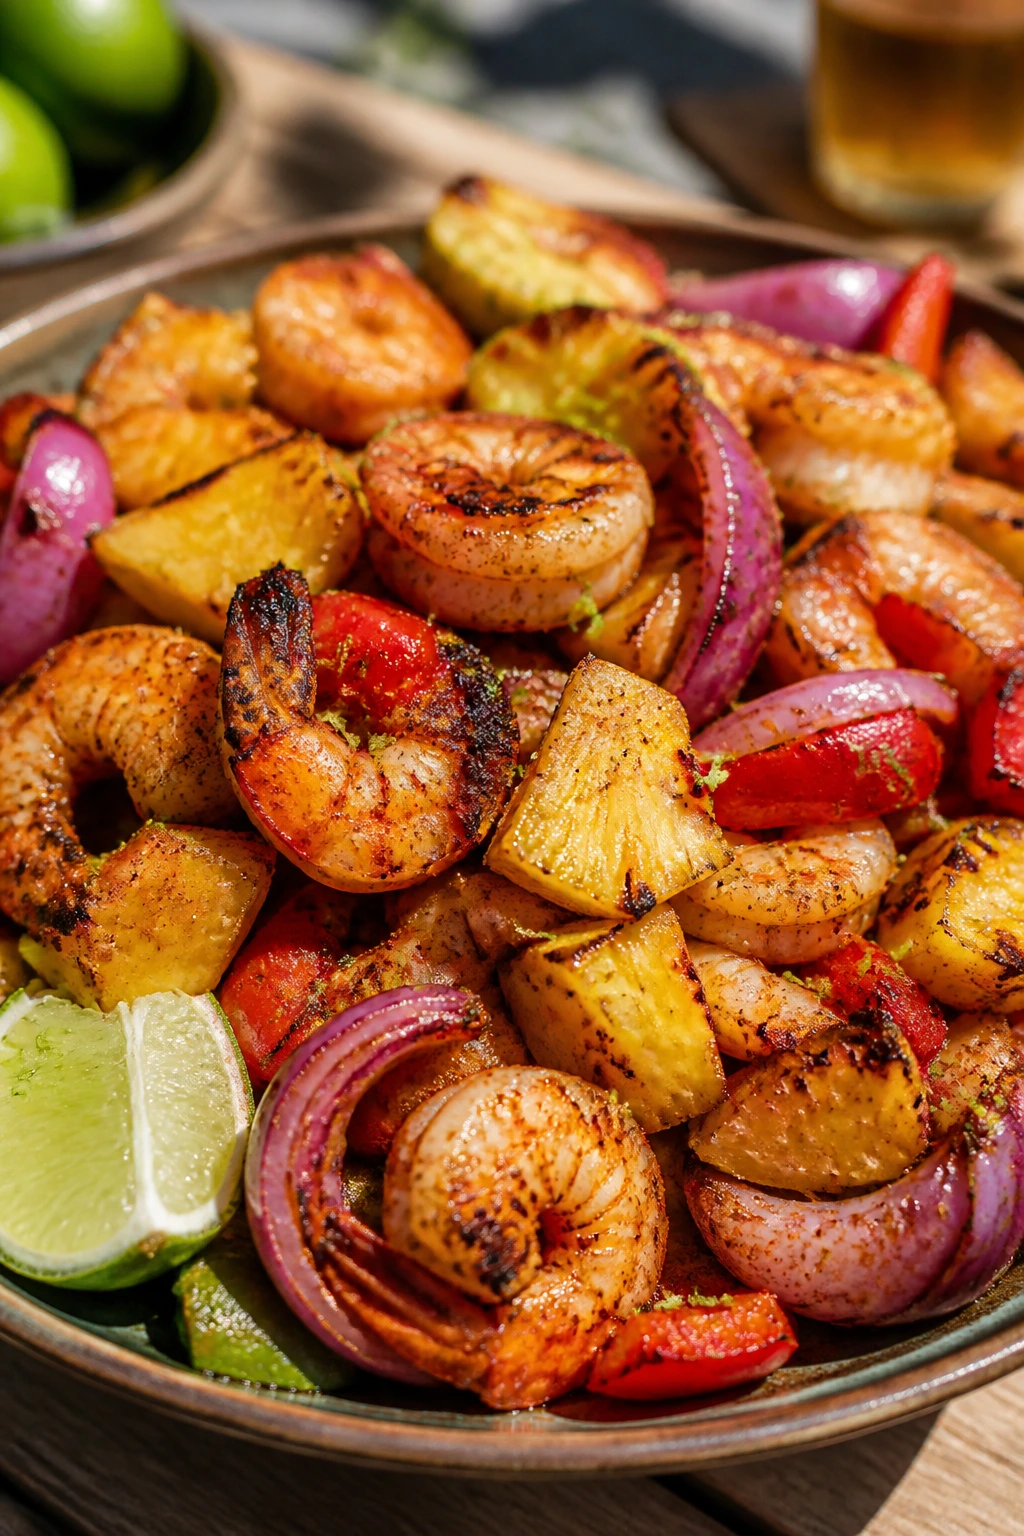
Smoke-and-Citrus Tray: Use shrimp, pineapple, red onion, and bell peppers with lime zest, chili powder, and a little honey brushed on at the end. The sweet fruit and sharp citrus keep the smoke from feeling heavy. This version works especially well when you want one bright, fast-cooking platter.
Herb Garden Mix: Build the tray around halloumi, zucchini, mushrooms, and grilled sourdough. Finish with basil-mint oil, parsley, and lemon. It tastes green and salty in a way that feels more like a picnic than a barbecue, which is nice when the rest of the table is packed with rich food.
Southern Sausage Coins: Use fully cooked smoked sausage, corn, and onion wedges with a mustard-forward glaze or a thin barbecue sauce brushed on at the end. Pickles on the side make it more interesting than it sounds on paper. This one disappears fast because it eats like a snack and a main course at the same time.
Plant-Forward Char Board: Center the platter on tofu, polenta cubes, mushrooms, and peppers. Use smoked paprika, garlic, and a tahini-lemon drizzle to finish. It’s sturdy enough for hungry guests and doesn’t feel like a compromise, which is the important part.
Sweet-Heat Peach Night: Grill peach halves or wedges with chicken thigh bites and a few jalapeño rounds. Finish with honey, thyme, and flaky salt. The heat keeps the peaches from leaning dessert-heavy, and the peaches keep the chicken from feeling too plain.
Frequently Asked Questions
What exactly counts as a picnic bite?
Anything you can pick up and eat in one or two bites without a knife usually qualifies. On the grill, that means pieces small enough to cook quickly but big enough to hold their shape, like chicken cubes, shrimp, sausage coins, vegetable wedges, or grilled cheese.
Can I make charred picnic bites without skewers?
Yes. Skewers help with small or slippery pieces, but a grill basket, a perforated tray, or direct grate cooking works fine for thicker food. For shrimp, mushrooms, and chopped vegetables, a basket often saves more food than it costs in grill marks.
How hot should the grill be?
Medium-high is the sweet spot for most of these bites, with a hot direct zone and a cooler holding zone. Preheat long enough that the grate is fully hot and a light brush of oil sizzles on contact. If the food steams before it colors, the grill is not hot enough.
How do I keep shrimp from overcooking while chicken is still finishing?
Cook them separately. Shrimp needs minutes, not a long wait, and chicken thighs need a lot more time. If you have to mix them on one platter, grill the chicken first, hold it loosely covered, and finish the shrimp right before serving.
Can these be made ahead for a picnic?
Yes, but the timing matters. You can cut vegetables, make sauces, marinate sturdy proteins, and even grill some items earlier in the day. What you should not do is stack hot grilled food in a sealed container and expect it to keep its char. That turns crisp edges into steam.
What if my food keeps sticking to the grate?
The usual causes are a cold grill, dirty grates, wet food, or trying to flip too soon. Preheat fully, clean and oil the grate, pat the food dry, and wait for it to release naturally before turning it. Most sticking problems fix themselves when the surface is actually hot.
Can I use an indoor grill pan or broiler instead?
Yes. A grill pan works for halloumi, vegetables, chicken cubes, and steak bites if you don’t mind cleaning splatters. The broiler is useful for fruit, bread, and thicker vegetables, though it gives you less control than an outdoor grill. Keep the food close enough to brown, but watch it like a hawk.
How do I keep the platter warm without ruining the char?
Use a low oven around 200°F and cover the food loosely, not tightly. If you trap the steam, the surface softens fast. For a long cookout, it’s often better to grill in smaller batches than to try to hold everything at once.
Which vegetarian bites hold up best?
Halloumi, tofu, mushrooms, corn, peppers, zucchini, and polenta all do the job well. The key is choosing ingredients with enough structure to brown instead of collapse. Thin, watery vegetables usually need help from a basket or a shorter cooking time.
The Last Plate at the Table
The best cookout food is not always the biggest food. Sometimes it’s the tray that disappears while people are still talking about whether the burgers need another minute. Charred picnic bites have that effect because they hit fast, eat clean, and leave behind the exact kind of smoke-and-salt memory that makes people wander back near the grill for “one more.”
A good tray is built from small decisions that matter: the right cut, a hot grate, a little restraint with sugar, and a finishing squeeze of acid at the end. Get those pieces right and the food takes care of the rest. No fuss. No drama. Just a plate that keeps emptying itself.
The next time the grill is hot, skip the idea that the side dishes have to stay quiet. Give the vegetables, fruit, cheese, and small bites a little flame, and the whole cookout starts to taste more alive.