
Crispy honey sesame chicken has a way of making a Tuesday night feel less like a chore and more like a decision. A hot skillet, a shallow slick of oil, and a bowl of sticky garlic-sesame glaze can do that fast.
What you want here is contrast. The chicken should crackle when it lands on the plate, then give way to a sauce that tastes like honey with backbone — soy for salt, rice vinegar for bite, toasted sesame oil for that nutty edge that hits your nose before the first bite. If the coating goes soggy, the whole dish loses its shape. If the sauce leans too sweet, it starts tasting flat after two bites.
I reach for chicken thighs because they stay juicy even after a quick fry, and I like a coating built on cornstarch rather than a heavy batter. It fries faster, catches the glaze better, and gives the sesame seeds a rough surface to cling to. That little roughness matters. The whole dish lives in the narrow space between crisp and sticky, and that’s the part worth getting right.
Why This Crispy Honey Sesame Chicken Is Worth the Skillet Time
-
The coating stays light enough to fry fast: Cornstarch and a little flour give you a crust that turns golden in minutes instead of hanging around the oil long enough to soak it up.
-
The sauce has actual balance: Honey brings the gloss, soy sauce brings the salt, rice vinegar keeps the sweetness from flattening out, and sesame oil gives the glaze that toasted smell that makes people wander into the kitchen.
-
It uses small chicken pieces for even cooking: One-inch chunks cook at the same pace, so you’re not dealing with dry edges and raw centers the way you can with thick cutlets.
-
The pan is doing the work, not a deep fryer: A 12-inch skillet and a few inches of oil are enough, which means the cleanup stays manageable and the cooking feels doable on an ordinary evening.
-
It plays well with rice, noodles, or a pile of greens: You can keep the plate simple or add a vegetable side and still end up with dinner that feels complete.
How This Takeout-Style Chicken Keeps Its Crunch
The sauce is not the point. The crunch is.
That sounds harsh, but it’s the truth with honey sesame chicken. Once the chicken goes limp, the dish turns into sticky sweet chicken, which is a different thing entirely. The version that works keeps the crust dry enough to fry cleanly, then coats it fast enough that the outside picks up a glaze without absorbing the whole bowl.
Most restaurant-style versions lean on very small pieces, a cornstarch-heavy coating, and a sauce that gets thick in under two minutes. That’s not an accident. The pieces are tiny because they cook quickly, the coating is dusty and rough because it grabs heat well, and the glaze is kept loose enough to coat rather than bury. Sesame seeds matter too. They aren’t there just to look busy on top. Toasted sesame seeds bring a faint nutty snap that makes the sweet sauce taste deeper.
I prefer thighs here because they stay tender after frying and don’t dry out when you toss them in the sauce. Breasts can work, but they need more attention. Cut them evenly, don’t overcook them, and pull them the second they hit 165°F in the thickest piece. That little thermometer check saves dinner more often than guesswork does.
Yield, Timing, and the Best Moment for Dinner
Yield: Serves 4
Prep Time: 25 minutes
Cook Time: 20 minutes
Total Time: 45 minutes
Difficulty: Intermediate — the steps are straightforward, but the oil temperature and sauce timing matter if you want the coating to stay crisp.
Best Served: Right after saucing, while the glaze is still glossy and the edges still have some bite.
There’s no long rest, no overnight marinade, no complicated breading station. The pace is part of the appeal. Once the chicken is cut and the bowls are set, the rest moves quickly.
If you need to stretch the dish, serve it over rice with a fast vegetable and it comfortably feeds four. If you’re cooking for heavier appetites, add a second side and the same pan of chicken will carry farther than you’d think.
The Ingredient List You’ll Need
For the Chicken
- 1 1/2 pounds boneless, skinless chicken thighs, trimmed and cut into 1-inch pieces
- 1/2 teaspoon fine sea salt
- 1/2 teaspoon black pepper
- 2 large eggs, beaten
- 3/4 cup cornstarch
- 1/2 cup all-purpose flour
- 1 teaspoon baking powder
- 1/2 teaspoon garlic powder
- 1/4 teaspoon cayenne pepper, optional
- 1/2 cup neutral oil, such as canola or vegetable, for shallow frying
For the Honey Sesame Sauce
- 1/2 cup honey
- 1/3 cup low-sodium soy sauce or tamari
- 2 tablespoons rice vinegar
- 3 tablespoons water
- 3 cloves garlic, finely minced
- 1 tablespoon fresh ginger, finely grated
- 1 teaspoon toasted sesame oil
- 1 tablespoon cornstarch
- 2 tablespoons cold water
For the Finish
- 1 tablespoon sesame seeds
- 2 scallions, thinly sliced
Why Each Ingredient Pulls Its Weight
Chicken
What to use: 1 1/2 pounds boneless, skinless chicken thighs cut into 1-inch pieces.
Preparation: Trim off loose fat, pat the meat dry, and cut it into pieces that are as even as you can manage. The closer the size, the more evenly the chicken fries.
Substitutions: Boneless, skinless chicken breasts work if you prefer a leaner cut. Chicken tenders are another option, though they’ll cook a little faster and can dry out if you wander off.
Tips: Thighs are my first choice because they tolerate the quick fry and the quick sauce much better. If you use breasts, keep the pieces small and watch the thermometer; once they hit 165°F, pull them.
The Coating
What to use: 3/4 cup cornstarch, 1/2 cup all-purpose flour, 1 teaspoon baking powder, 1/2 teaspoon garlic powder, 1/4 teaspoon cayenne, plus salt and pepper on the chicken itself.
Preparation: Whisk the dry ingredients together until the baking powder disappears. You want an even mix, not streaks of spice in one bite and plain coating in the next.
Substitutions: Rice flour can replace the all-purpose flour for a gluten-free version. If you don’t want heat, leave out the cayenne and add a pinch more garlic powder.
Tips: Cornstarch is what gives the crust that sharp, brittle edge. Flour adds a bit of structure so the coating doesn’t fall apart the second it meets oil.
The Sauce
What to use: 1/2 cup honey, 1/3 cup low-sodium soy sauce or tamari, 2 tablespoons rice vinegar, 3 tablespoons water, 3 cloves garlic, 1 tablespoon ginger, 1 teaspoon toasted sesame oil, and the cornstarch slurry made from 1 tablespoon cornstarch plus 2 tablespoons cold water.
Preparation: Measure the sauce ingredients before frying the chicken. Once the chicken is out of the oil, the sauce comes together fast, and you do not want to be peeling garlic with hot oil still on the stove.
Substitutions: Tamari gives you a gluten-free sauce. If you’re out of rice vinegar, use apple cider vinegar in a slightly smaller amount; it’s sharper, so don’t pour it in by reflex.
Tips: Keep the sesame oil small. It’s potent, and too much of it starts to taste heavy. It should smell nutty, not oily.
The Finish
What to use: 1 tablespoon sesame seeds and 2 scallions, thinly sliced.
Preparation: Slice the scallions very thin so they sit lightly on top instead of clumping. If your sesame seeds are raw, a quick toast in a dry pan makes them smell deeper and taste less flat.
Substitutions: White sesame seeds, black sesame seeds, or a mix all work. If you’re out of scallions, a little finely sliced chive gives the same clean onion note.
Tips: The garnish is not decoration here. It adds the top layer that keeps the glaze from tasting one-note.
The Tools That Make Frying Simpler
-
12-inch heavy skillet or sauté pan: This is the main event. You want enough surface area to fry in two batches without crowding.
-
Wire rack set over a rimmed baking sheet: Letting the chicken drain on a rack keeps the bottom from steaming itself soft. Paper towels work in a pinch, but they trap more moisture.
-
Two medium mixing bowls: One for the egg wash, one for the dry coating. Small bowls get messy fast.
-
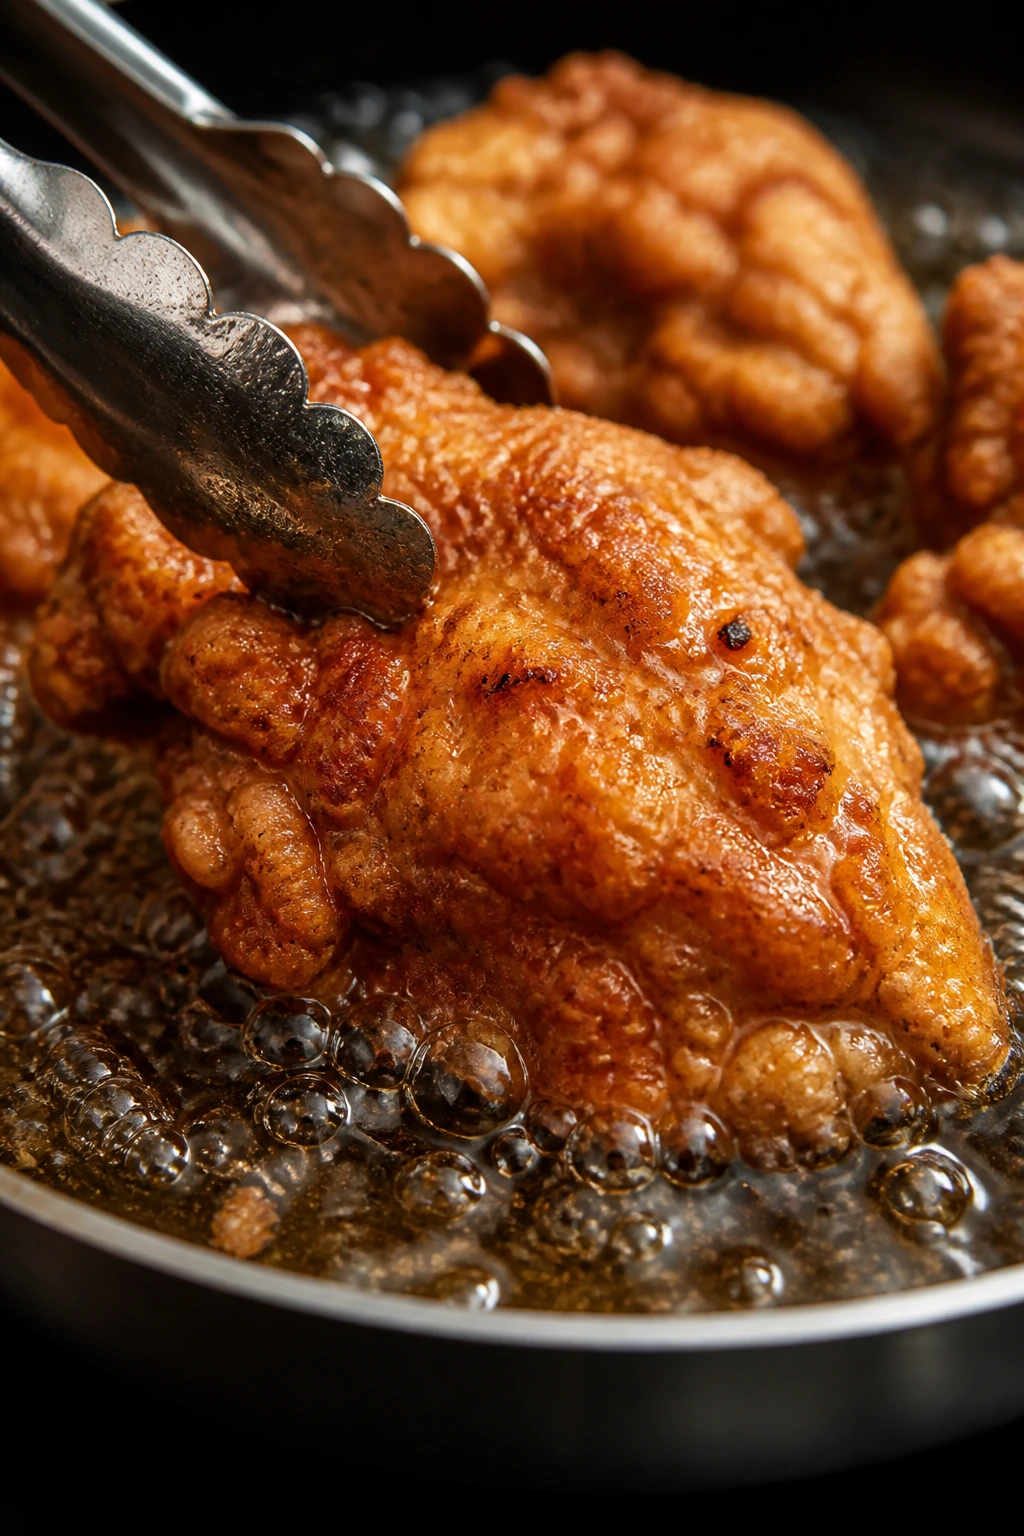
Tongs: The cleanest way to turn the chicken without tearing the crust.
-
Whisk: Needed for the coating and the sauce. A fork will limp through in an emergency, but it won’t do the same job as well.
-
Instant-read thermometer: Not glamorous. Very useful. It tells you when the chicken is done without guessing at the center of a browned piece.
-
Small whisk or spoon for the slurry: The cornstarch and water need a quick stir right before they go into the sauce. If they sit, they settle.
A splatter screen is optional, but I use one when I’m in the mood to avoid wiping sesame oil off the backsplash later.
Step-by-Step: From Coating to Glaze
Prep the Chicken and Set Up the Station:
-
Pat the chicken thighs dry with paper towels and cut them into 1-inch pieces if they aren’t already trimmed and cut. Season them evenly with the salt and black pepper.
-
In one medium bowl, whisk together the cornstarch, flour, baking powder, garlic powder, and cayenne pepper until the mixture looks uniform and slightly fluffy.
-
In a second bowl, beat the eggs until smooth. Set the bowl of chicken, the egg bowl, the dry coating, and a wire rack-lined sheet pan within easy reach. Once you start frying, you want everything close by.
Coat and Fry:
-
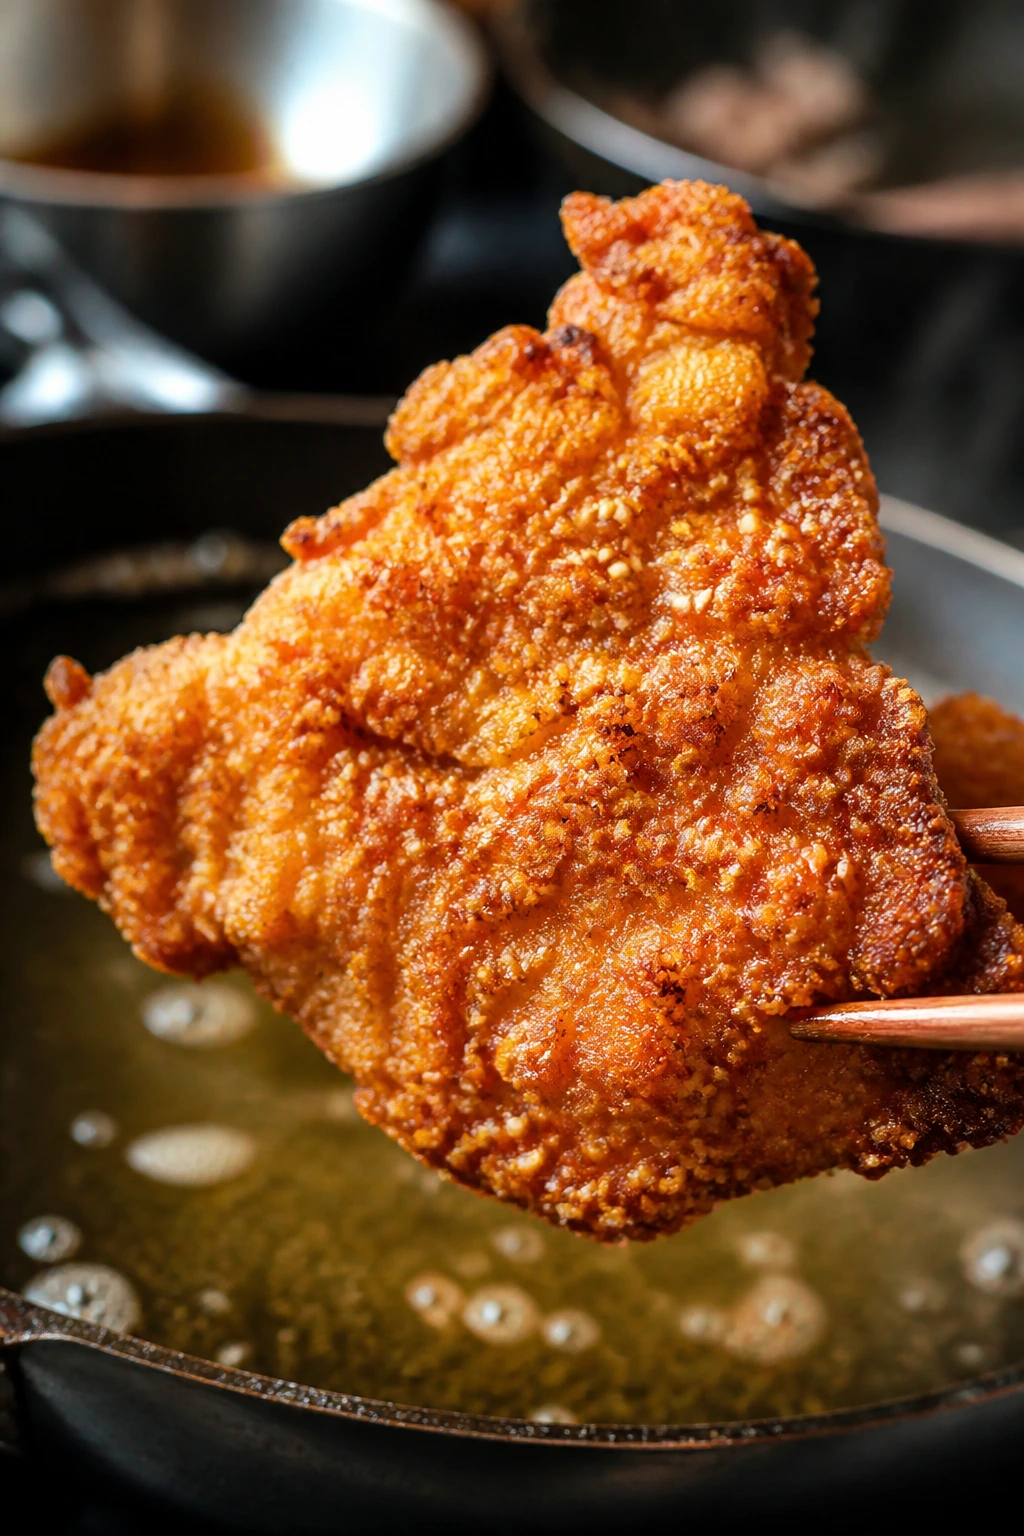
Dip the chicken pieces into the beaten eggs, letting the excess drip off, then toss them in the dry coating until every surface looks dusty and well covered. Press the coating on lightly with your fingers so it sticks. Set the coated pieces on the rack for 5 minutes while you heat the oil; that pause helps the crust cling better.
-
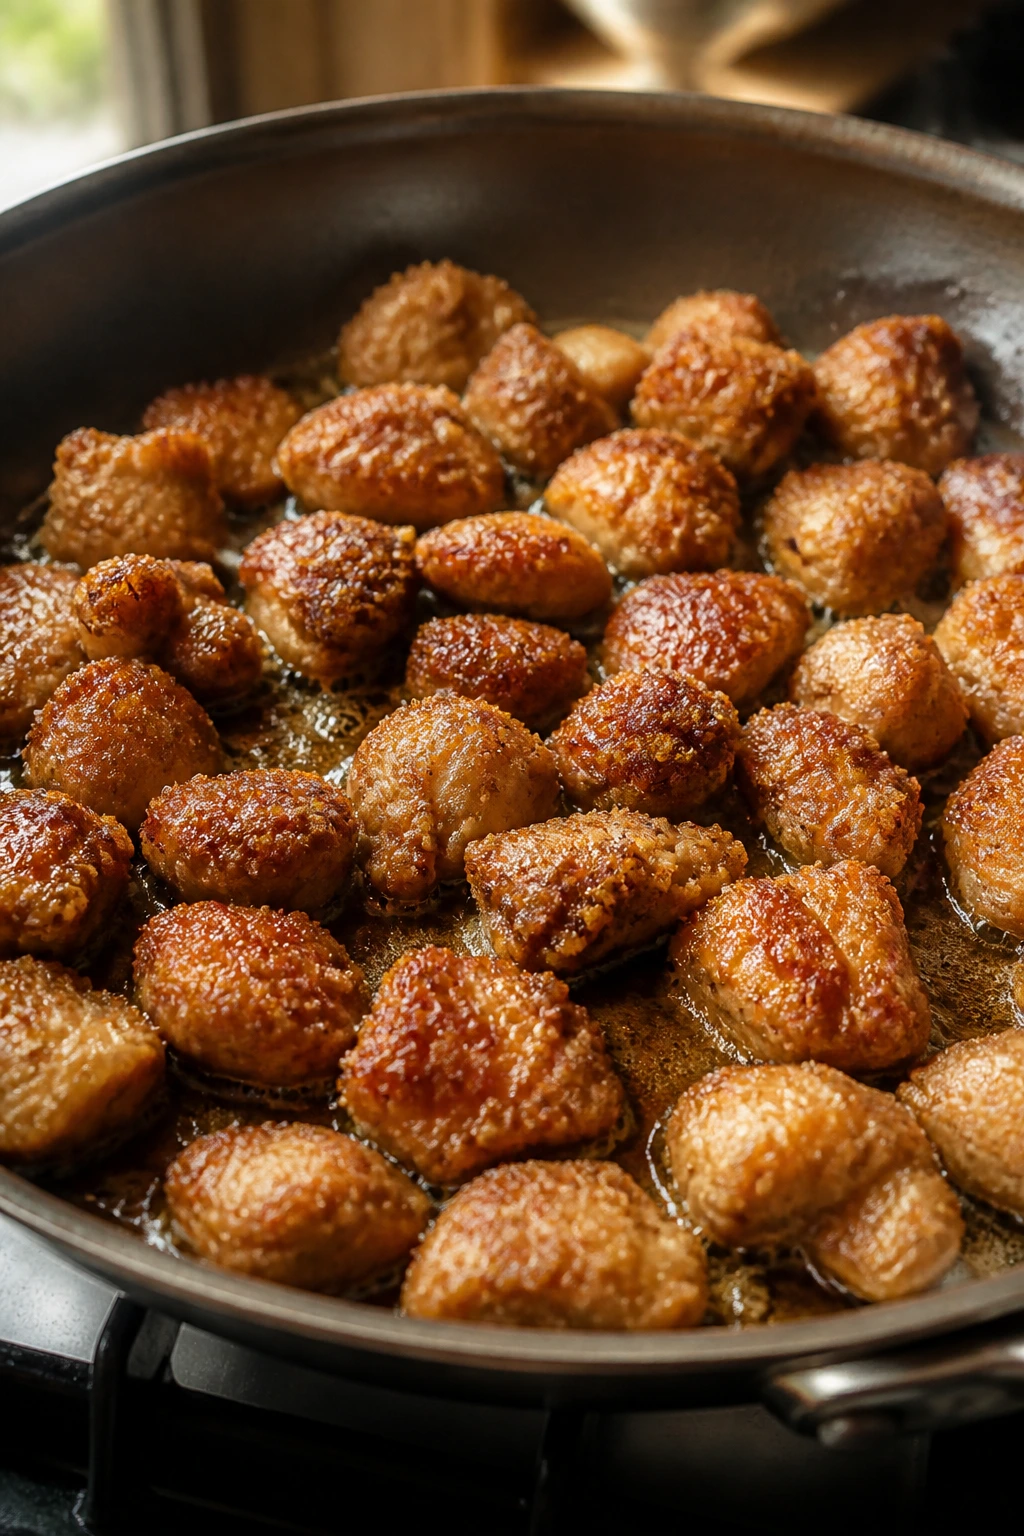
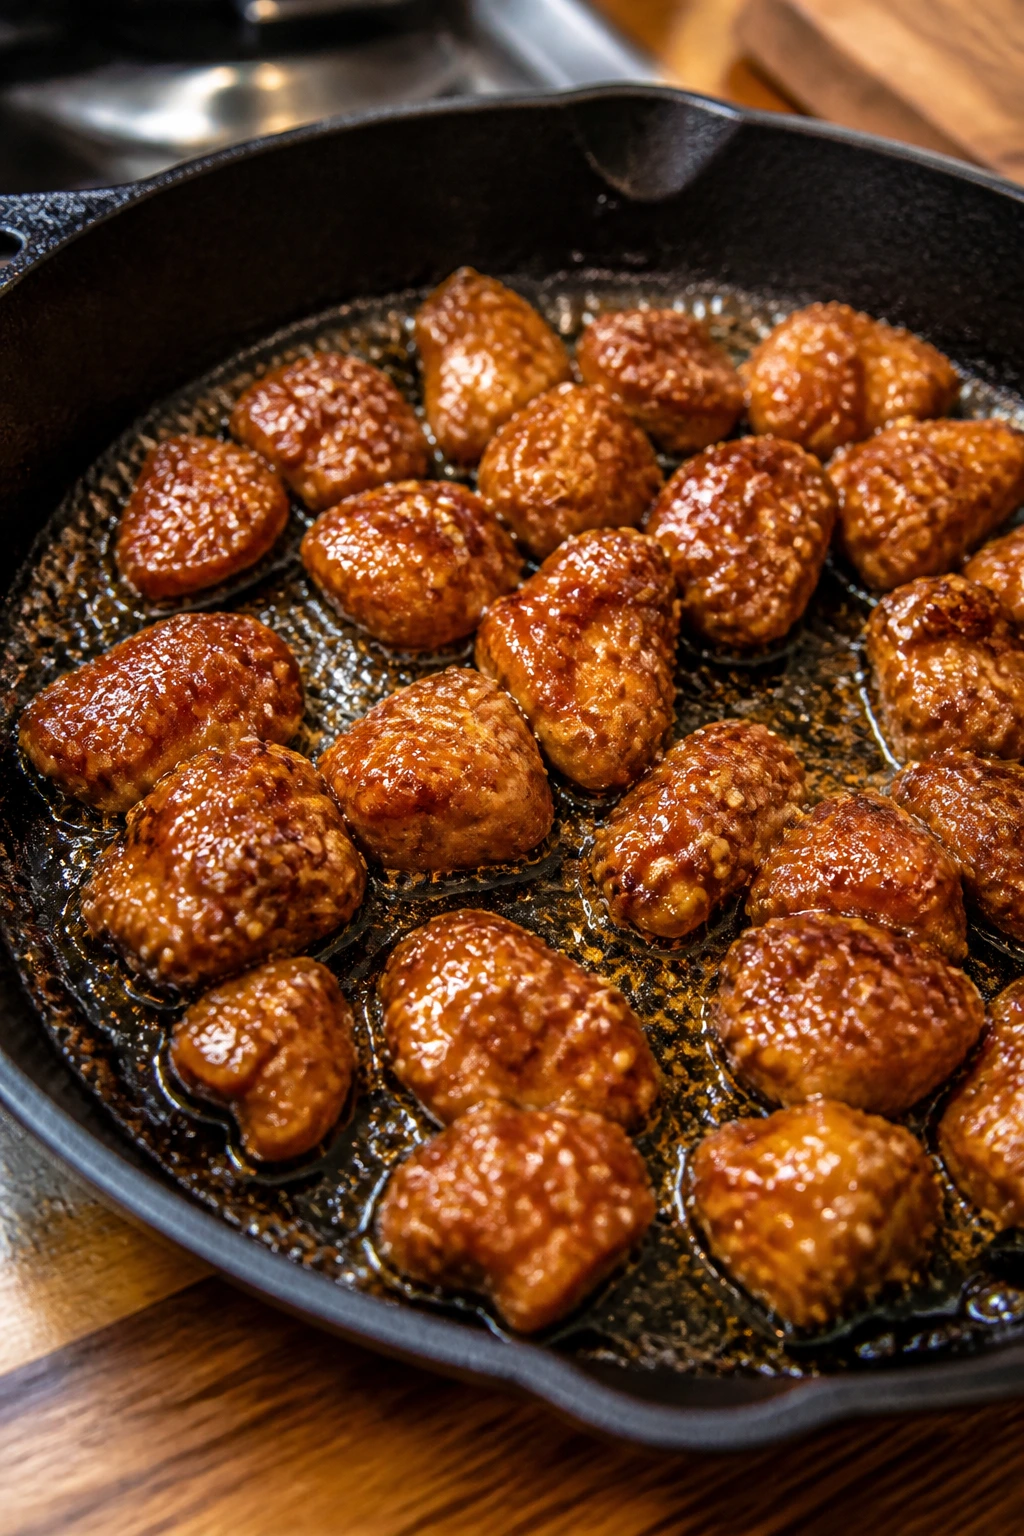
Pour the neutral oil into a 12-inch skillet so it comes up about 1/4 inch deep. Heat it over medium-high until it shimmers and reaches about 350°F on an instant-read thermometer. If you drop in a pinch of coating, it should sizzle immediately, not sit there like it’s thinking about it. Fry the chicken in two batches, turning pieces as they deepen in color, for 5 to 6 minutes total per batch, until the crust is deep golden and the thickest piece registers 165°F. Transfer the cooked chicken to the rack. Do not crowd the pan; crowded chicken steams before it fries.
Build the Sauce and Finish:
-
Carefully pour off all but about 1 tablespoon of oil from the skillet. Lower the heat to medium and add the garlic and ginger, stirring for 20 to 30 seconds until fragrant. Pour in the honey, soy sauce, rice vinegar, water, and sesame oil. Stir and let the sauce bubble gently for 1 to 2 minutes.
-
Stir the cornstarch and cold water together again, then pour the slurry into the simmering sauce. Cook for 30 to 60 seconds, stirring constantly, until the sauce turns glossy and thick enough to coat the back of a spoon. Stop as soon as it thickens; if you boil it too long, the honey gets sticky in a hard, chewy way.
-
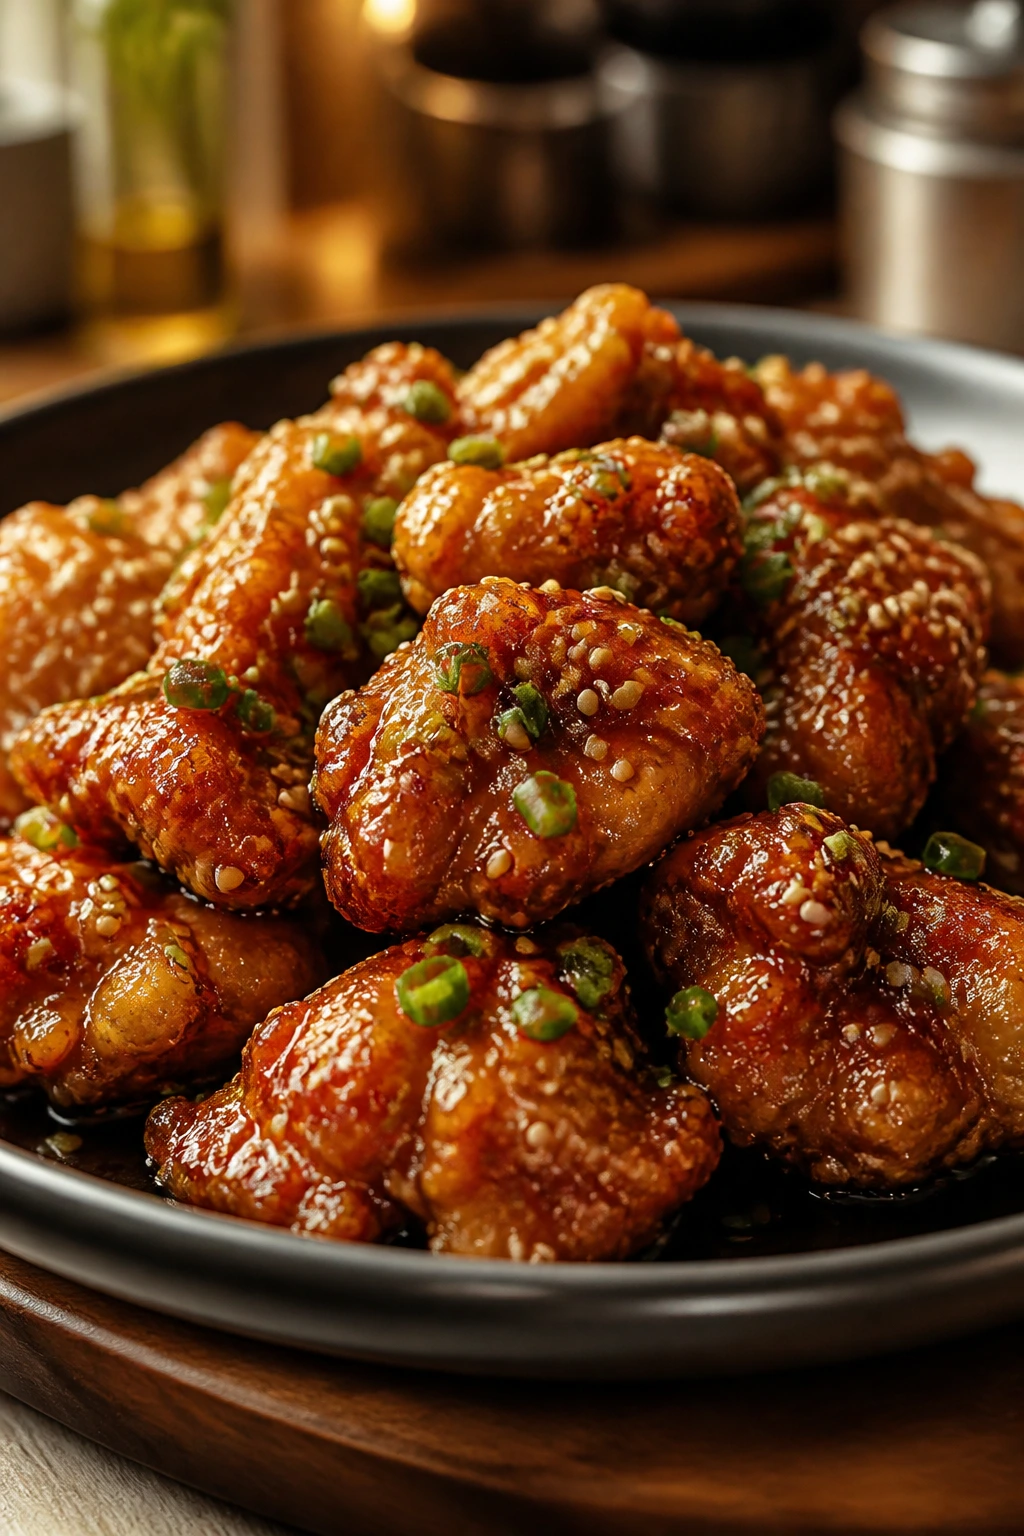
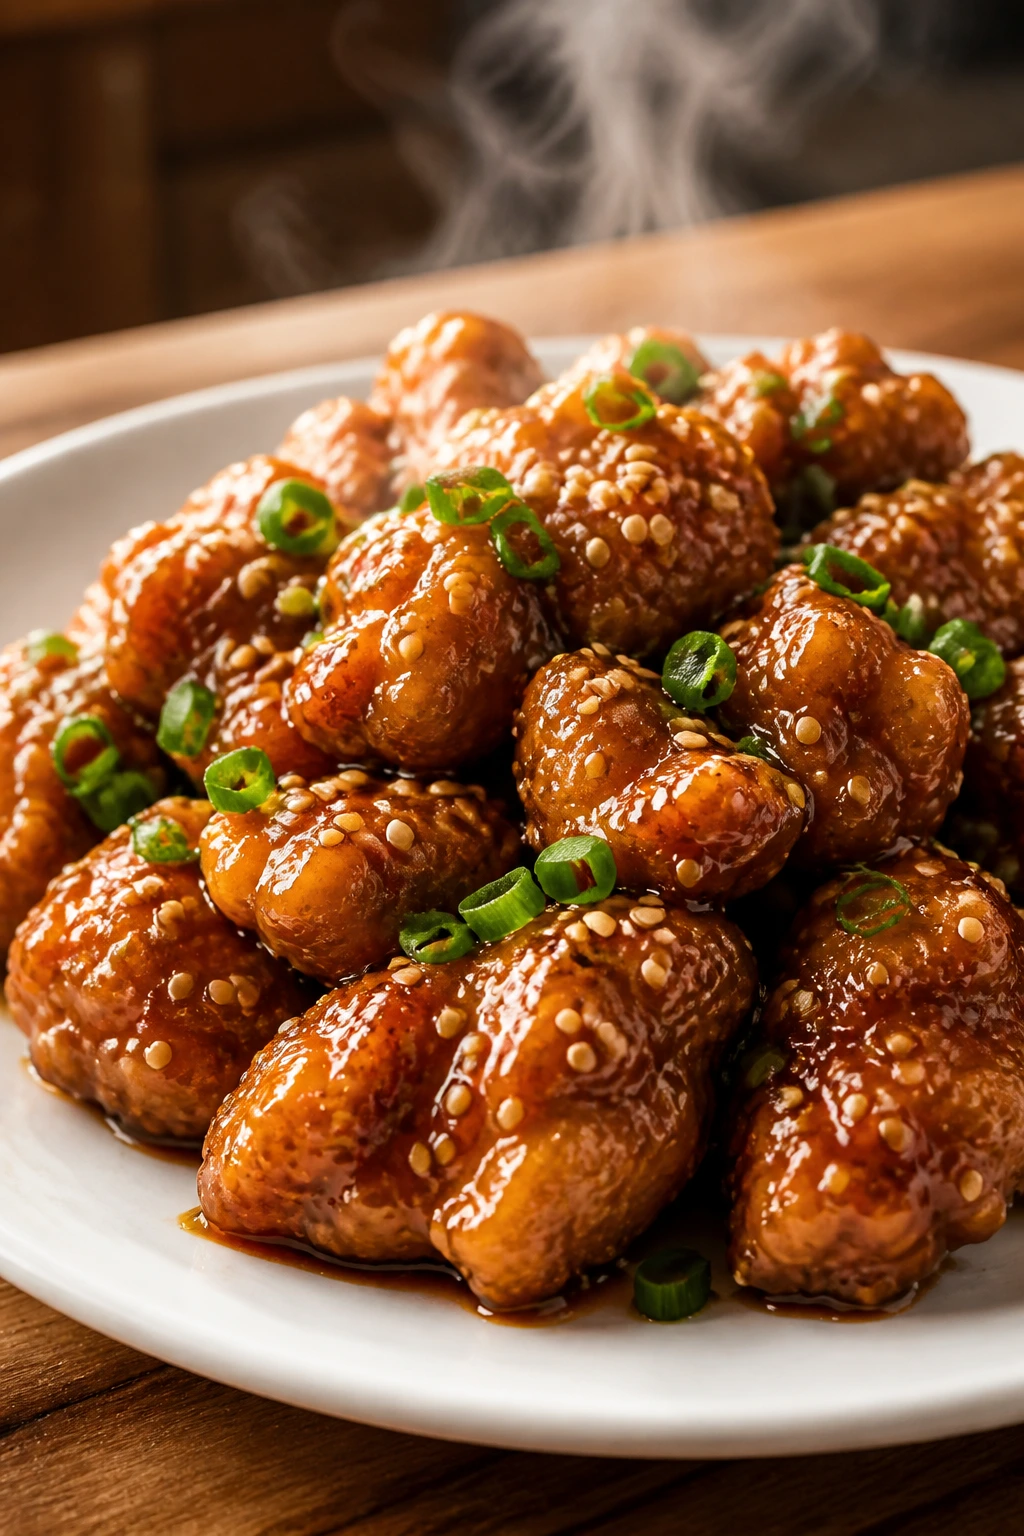
Return the chicken to the skillet and toss just until every piece is coated, about 15 to 20 seconds. Remove the skillet from the heat, scatter on the sesame seeds and scallions, and serve at once. If you want a little extra shine, spoon a small amount of sauce over the top instead of letting the chicken sit in a deep pool.
How to Plate It So the Crunch Stays Sharp
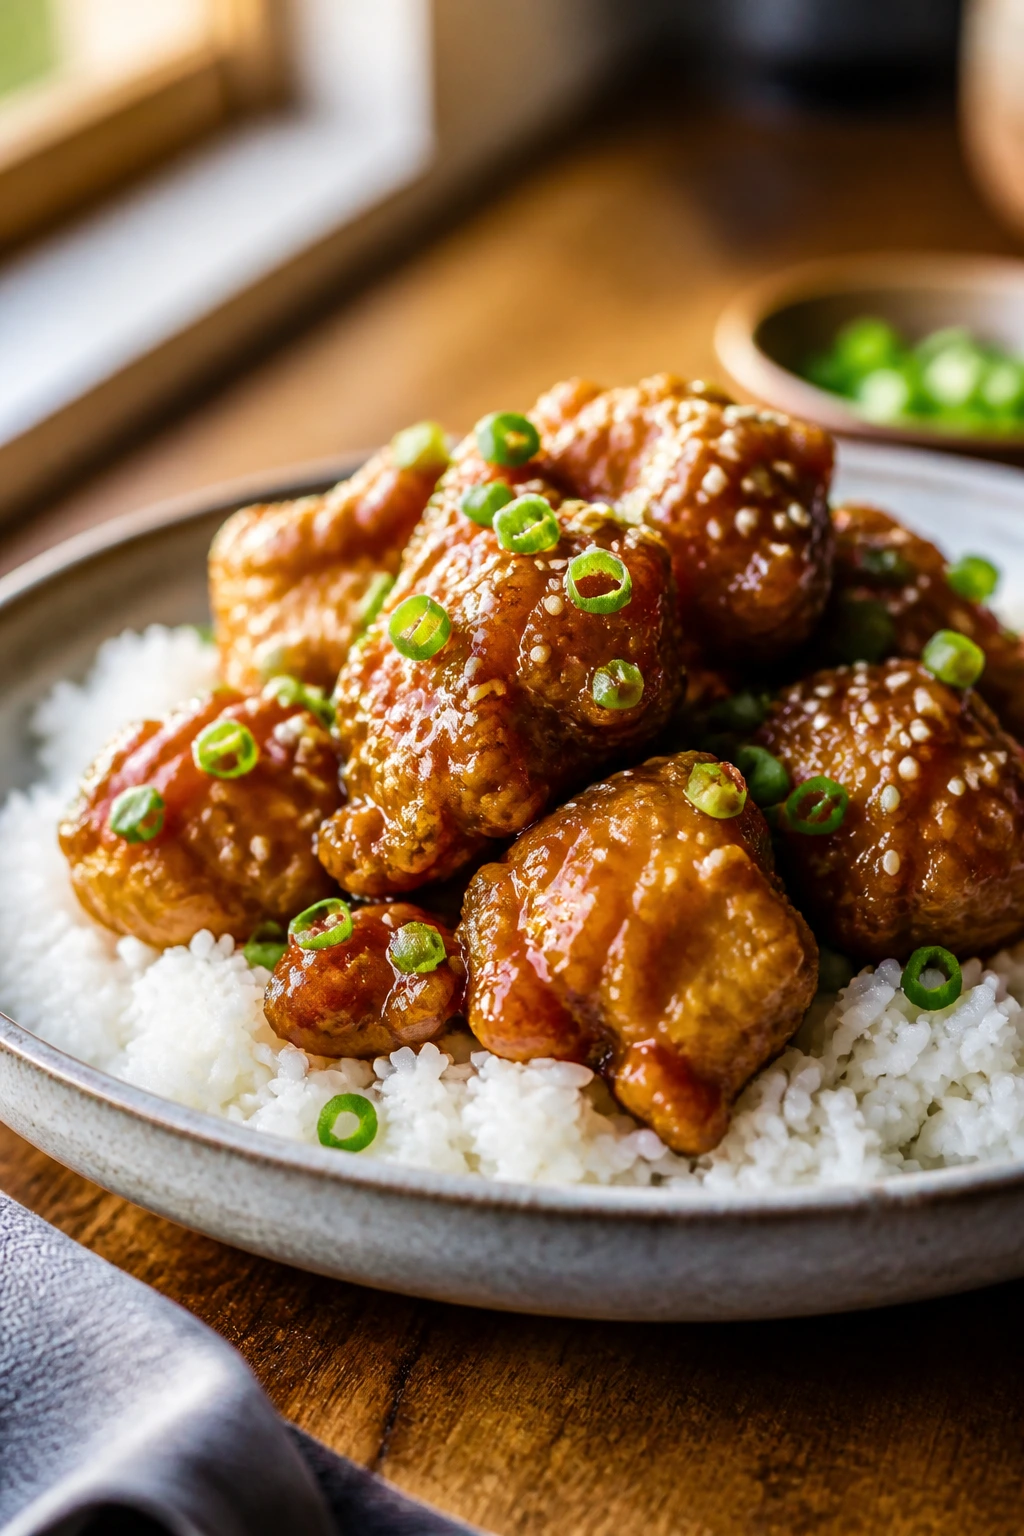
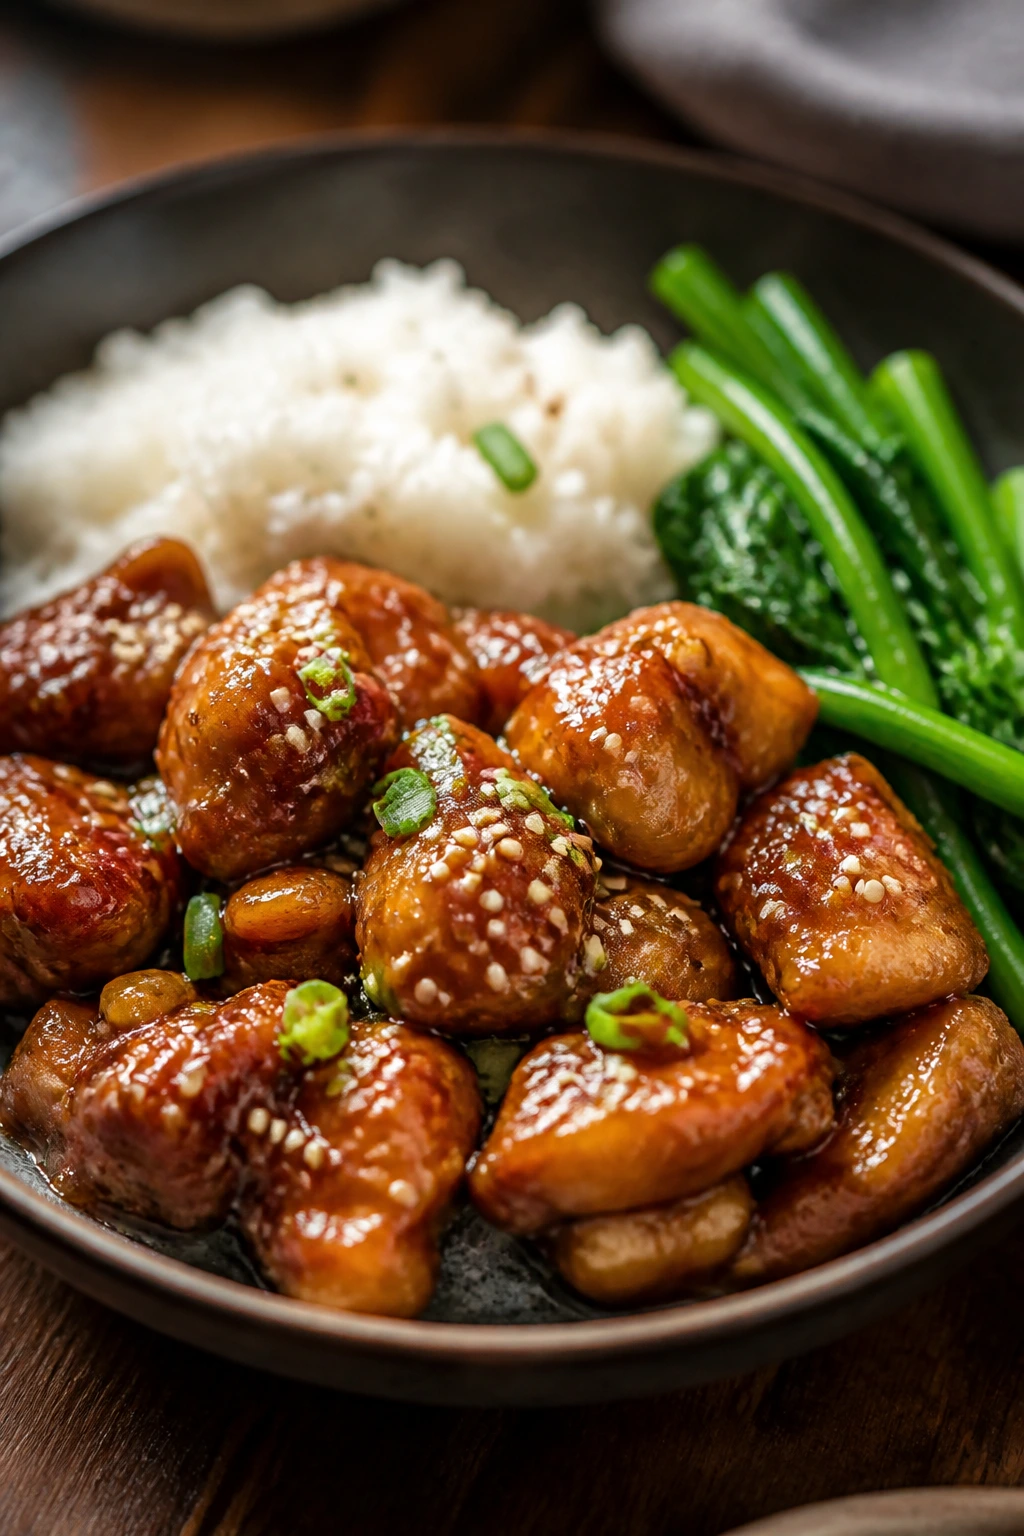
Presentation: Spoon the chicken over warm rice on a wide platter or shallow bowl, then let a few pieces sit high on top so the glossy sauce can catch the light without drowning everything underneath. A scatter of scallions and sesame seeds right before serving gives the dish a fresher look and keeps the garnish from sinking into the glaze.
Accompaniments: Steamed jasmine rice is the default for a reason; it soaks up the extra sauce and keeps each bite balanced. If you want more color on the plate, add quick broccoli, blistered snap peas, or a simple cucumber salad with rice vinegar and salt. I like something cold and crisp next to the chicken because the contrast keeps the dish from feeling heavy.
Portions: Four modest portions come from this recipe if rice is on the side. If you’re feeding bigger appetites, serve it with more vegetables and a second starch, and the same pan of chicken will stretch farther without feeling stingy.
Beverage Pairing: A cold lager works well because it clears the honey off the palate. Unsweetened iced green tea or sparkling water with lime also keeps the sweetness in check. If you’re serving it with alcohol, lean dry rather than sweet.
Small Upgrades That Make the Flavor Brighter
Flavor Enhancement: A small spoonful of orange zest in the sauce adds a top note that cuts through the honey without making the dish taste like citrus chicken. It’s subtle, and that’s the point.
Time-Saver: Mix the sauce before you heat the oil. Once the chicken is in the pan, the clock starts moving fast, and the difference between smooth cooking and kitchen chaos is usually whether the garlic is already minced.
Texture Move: Let the coated chicken sit on the rack for 5 minutes before frying. That tiny pause gives the egg and dry coating time to settle together, which means less flaking in the oil and a tighter crust.
Make-It-Yours: For more heat, stir 1 tablespoon of gochujang or 1 to 2 teaspoons of chili crisp into the sauce. For a deeper sweetness, swap 1 tablespoon of the honey for maple syrup. For a slightly lighter finish, use half honey and half orange juice, then keep the sauce simmer short so it stays glossy.
Serving Suggestions: Toast the sesame seeds in a dry pan for 1 to 2 minutes until they smell nutty, then sprinkle them on at the end. That one tiny move changes the whole smell of the dish.
Mistakes That Turn Crunch Into Softness
-
Starting with wet chicken: If the chicken goes into the egg wash damp from the package, the coating turns patchy and wants to slide off in the oil. Pat it dry first. Really dry. The surface should look matte before it touches the flour mixture.
-
Crowding the skillet: When too many pieces go in at once, the oil temperature drops and the coating starts looking pale and greasy instead of crisp and blistered. Fry in two batches, maybe three if your pan is smaller, and wait for the oil to recover between rounds.
-
Letting the sauce boil too hard: Honey can go from glossy to sticky-fast. If the sauce runs at a hard boil for several minutes, it gets thick in an aggressive way and starts tasting scorched around the edges. Keep it at a gentle simmer and pull it once it coats a spoon.
-
Tossing the chicken too early: If the chicken sits in the sauce while you finish the rest of dinner, the crust loses its edges. Glaze it right before serving, then get it onto plates while the outside still has some texture.
-
Skipping the rack: A plate or paper towel-lined tray seems fine until the underside softens from trapped steam. A wire rack keeps air moving around the chicken, and that buys you a little more crunch.
Variations That Still Taste Like the Dish
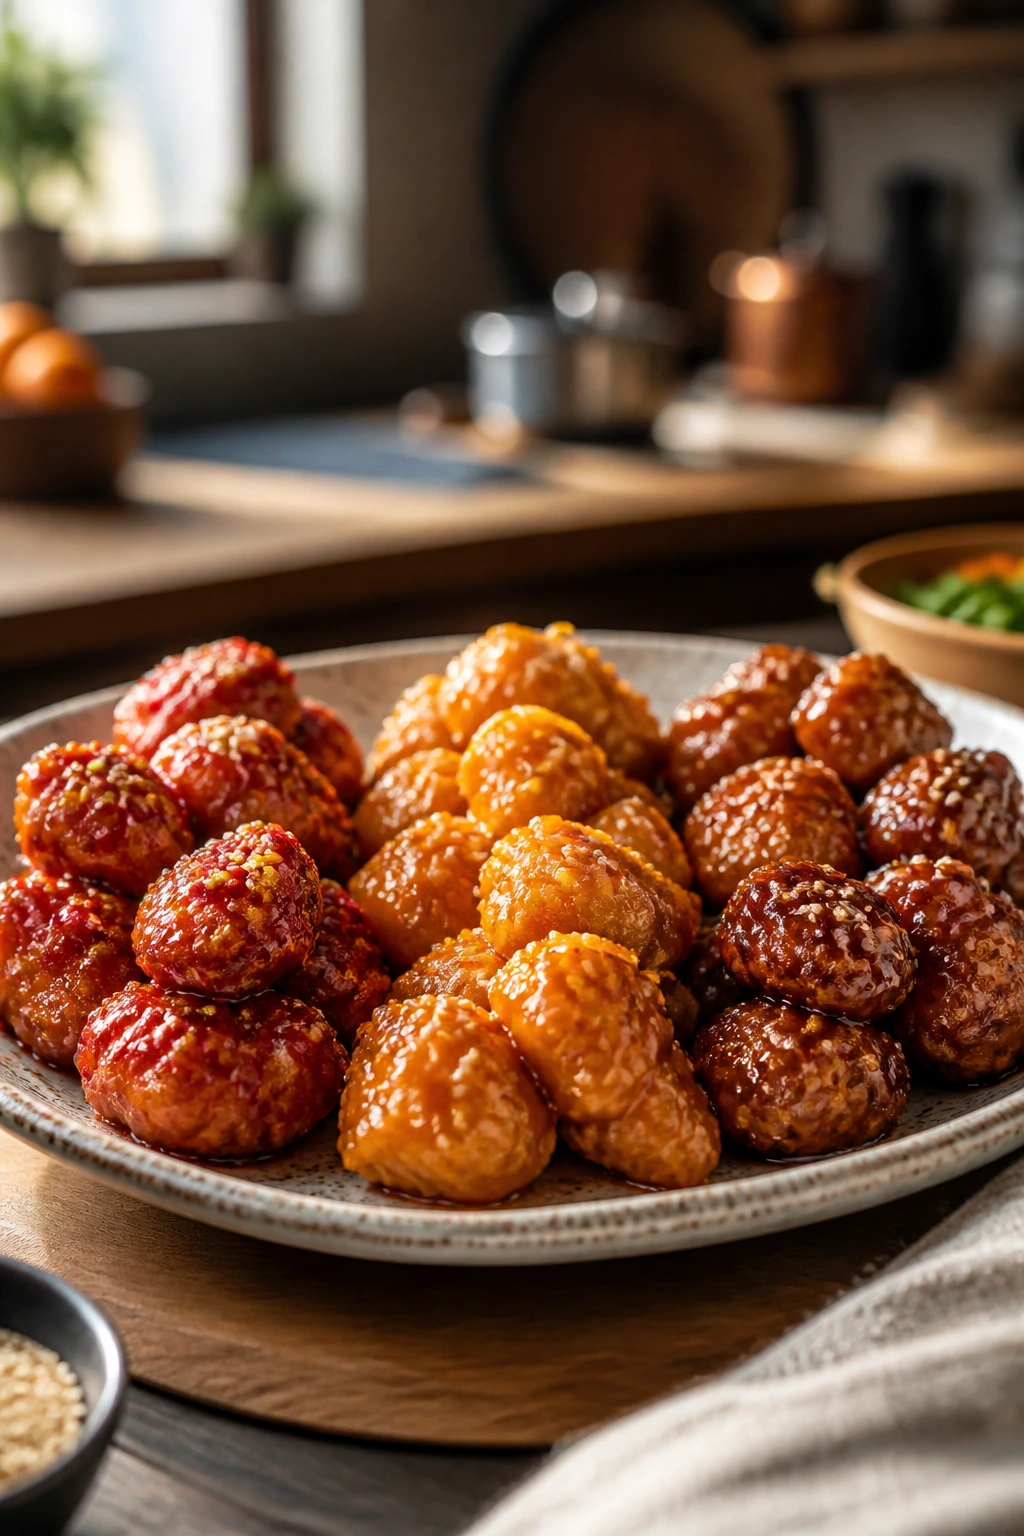
Spicy Chili-Honey Version: Stir 1 tablespoon of gochujang or 2 teaspoons of sriracha into the sauce and cut the honey back by 1 tablespoon. The heat lands late, which keeps the sweet-salty balance intact instead of turning the whole dish sharp from the first bite.
Orange-Sesame Shine: Replace 2 tablespoons of the water with orange juice and add 1 teaspoon of orange zest to the sauce. This version smells brighter and feels a little lighter, which makes sense if you’re serving it with plain rice and a simple green vegetable.
Gluten-Free Crunch Bowl: Swap the all-purpose flour for rice flour and use tamari instead of soy sauce. Rice flour fries up drier and a little craggier, which suits this dish better than a soft batter.
Air Fryer Shortcut: Coat the chicken as written, mist the basket and chicken lightly with oil, then air fry at 400°F for 10 to 12 minutes, flipping halfway, until the pieces read 165°F. Make the sauce on the stovetop and toss the chicken in it only at the very end. You won’t get quite the same rugged crust as skillet-frying, but the result is still solid for a busy night.
Maple-Sesame Twist: Swap 2 tablespoons of the honey for maple syrup and add an extra pinch of black pepper. The flavor turns darker and a touch earthier, which is nice when you want the sauce to taste a little less candy-sweet.
Storing, Reheating, and Making It Ahead
Room Temperature: Don’t leave the finished chicken out for more than 2 hours. After that, the coating softens and food safety becomes the bigger issue.
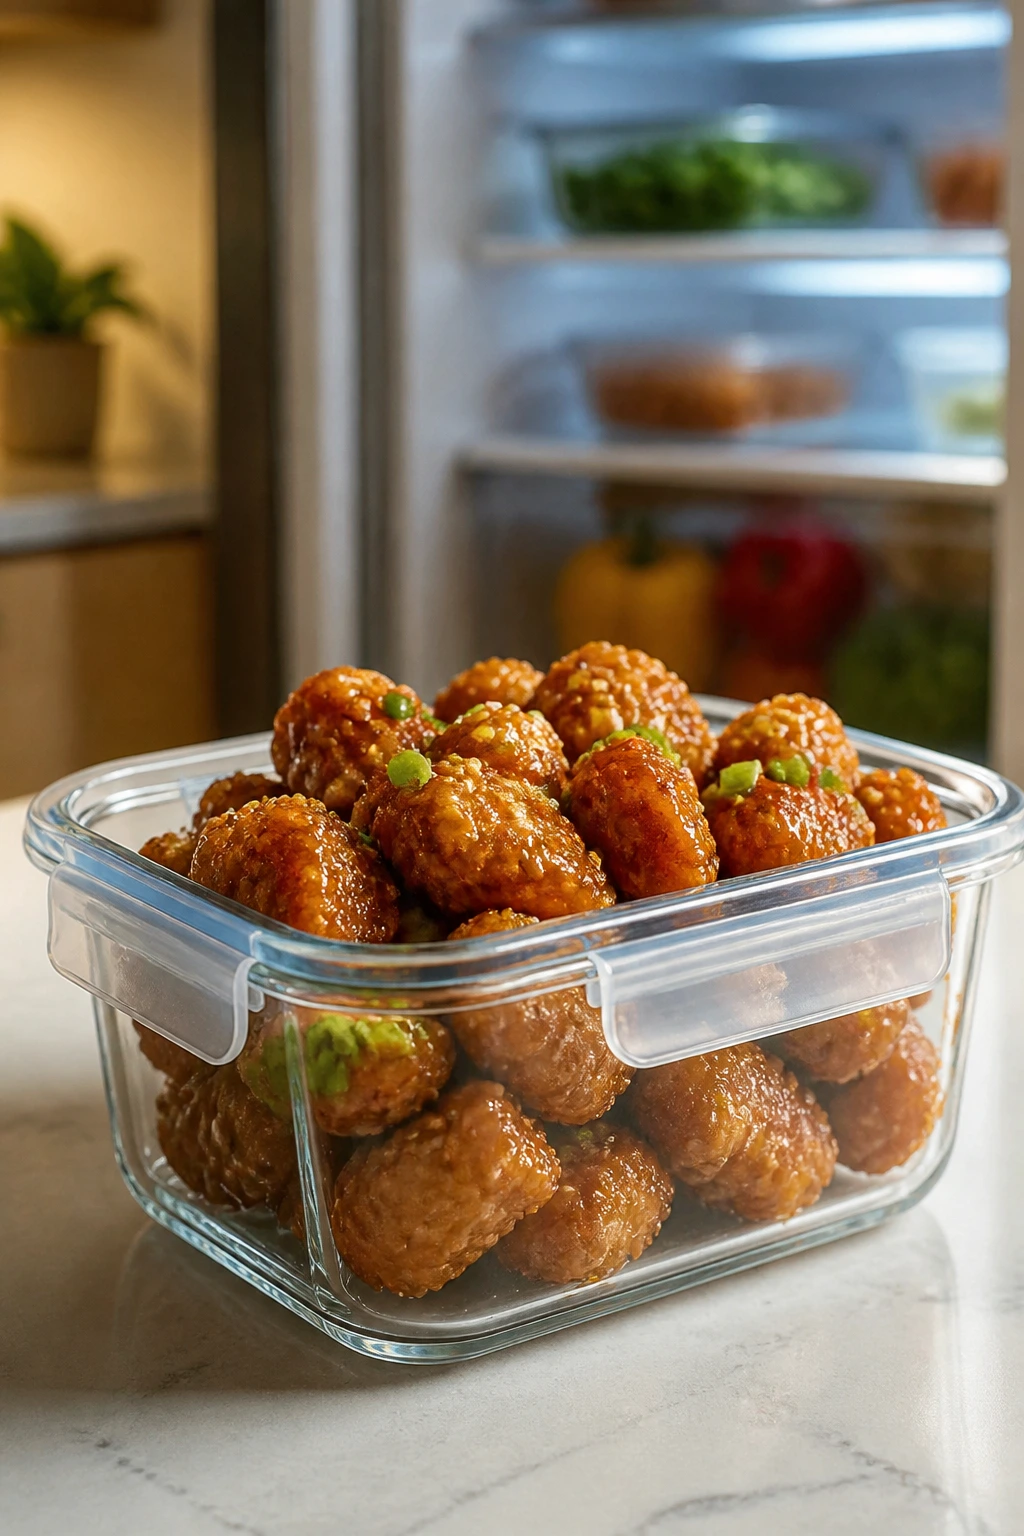
Fridge: Store leftovers in an airtight container for 3 to 4 days. If you can, keep any extra sauce separate from the chicken; the coating holds up better when it isn’t sitting in glaze overnight.
Freezer: For the best texture, freeze the fried chicken pieces without sauce for up to 2 months. Lay them on a sheet pan until solid, then pack them into a freezer bag so they don’t freeze into one sticky clump. The sauce can be frozen too, but it may need a brisk whisk after reheating because the cornstarch can separate a little.
Reheating: The oven is the safest choice for reviving some crunch. Reheat the chicken on a rack set over a sheet pan at 400°F for 8 to 12 minutes, or use an air fryer at 375°F for 5 to 7 minutes. Warm the sauce separately in a small pan over low heat with 1 to 2 tablespoons of water if it has tightened up, then toss or drizzle it on just before serving.
Make-Ahead: You can mix the dry coating and the sauce up to 3 days in advance. Cut the chicken a few hours ahead if needed, but wait to coat and fry it until you’re close to dinner. The coating is at its best when it goes from bowl to skillet without sitting around too long.
Questions Home Cooks Ask Before Frying

Can I use chicken breasts instead of thighs?
Yes, and the recipe still works, but breasts need a little more care. Cut them into even pieces and pull them as soon as they hit 165°F; if they go much past that, they dry out faster than thighs do.
What oil is best for frying this?
A neutral oil with a high smoke point is the easiest choice. Canola, vegetable, peanut, or avocado oil all work; what matters most is that the oil stays hot enough to fry the coating instead of soaking into it.
Can I bake this instead of frying it?
You can, though the crust will be more dry and less rugged. Bake the coated chicken on a well-oiled rack at 425°F until cooked through, then glaze it right before serving so the coating doesn’t go soft in the oven.
Why does my coating fall off in the pan?
Usually because the chicken was wet, the coating was applied unevenly, or the oil wasn’t hot enough. Pat the chicken dry, press the coating on lightly, and wait for that steady sizzle before the first piece goes in.
Can I make the sauce ahead of time?
Yes. Mix the sauce base up to 3 days ahead, then keep the cornstarch slurry separate until the moment you’re ready to cook. If you add the slurry too early, the sauce thickens in the fridge and becomes awkward to reheat.
How do I keep leftovers from turning limp?
Reheat the chicken by itself first, then add sauce after it’s hot. Microwaving the whole dish makes the coating soft quickly, and there’s no clever trick that changes that much.
What if the sauce tastes too sweet?
Add another teaspoon of rice vinegar or a small splash of soy sauce, then taste again. Honey needs acidity to keep its shape, and that tiny adjustment is often enough to bring the flavor back into focus.
One Skillet, Clean Edges
Crispy honey sesame chicken works because it respects texture. The crust needs a little space. The sauce needs a little bite. If you rush either one, the dish turns one-note, and that’s where people start calling takeout instead of making dinner at home.
The nice part is that nothing here is fussy once you know the rhythm. Cut the chicken evenly. Keep the oil hot. Thicken the sauce only until it shines. The rest is just a fast toss and a warm plate waiting on the counter.
Crispy Honey Sesame Chicken for Weeknight Dinners — Recipe Card
Recipe Name: Crispy Honey Sesame Chicken for Weeknight Dinners
Description: Bite-size chicken thighs are fried until golden, then tossed in a glossy honey-soy sesame glaze with garlic and ginger. Best served right away with rice and a quick vegetable side.
Prep Time: 25 minutes
Cook Time: 20 minutes
Total Time: 45 minutes
Course: Dinner, Main Course
Cuisine: Chinese-American
Servings: 4 servings
Calories: About 560 kcal per serving
Ingredients
For the Chicken:
- 1 1/2 pounds boneless, skinless chicken thighs, trimmed and cut into 1-inch pieces
- 1/2 teaspoon fine sea salt
- 1/2 teaspoon black pepper
- 2 large eggs, beaten
- 3/4 cup cornstarch
- 1/2 cup all-purpose flour
- 1 teaspoon baking powder
- 1/2 teaspoon garlic powder
- 1/4 teaspoon cayenne pepper, optional
- 1/2 cup neutral oil, such as canola or vegetable, for shallow frying
For the Honey Sesame Sauce:
- 1/2 cup honey
- 1/3 cup low-sodium soy sauce or tamari
- 2 tablespoons rice vinegar
- 3 tablespoons water
- 3 cloves garlic, finely minced
- 1 tablespoon fresh ginger, finely grated
- 1 teaspoon toasted sesame oil
- 1 tablespoon cornstarch
- 2 tablespoons cold water
For the Finish:
- 1 tablespoon sesame seeds
- 2 scallions, thinly sliced
Instructions
-
Pat the chicken dry and season it with salt and pepper.
-
Whisk the cornstarch, flour, baking powder, and garlic powder. Dip the chicken in the eggs, then coat it in the dry mixture.
-
Heat the oil in a 12-inch skillet over medium-high heat to about 350°F and fry the chicken in batches until golden and cooked through.
-
Whisk the sauce ingredients together, simmer briefly, and add the cornstarch slurry until glossy.
-
Toss the hot chicken in the sauce, then finish with sesame seeds and scallions.
Notes: Fry in batches so the crust stays crisp. If you want extra shine, reserve a spoonful of sauce and drizzle it over the plated chicken instead of soaking all the pieces.