
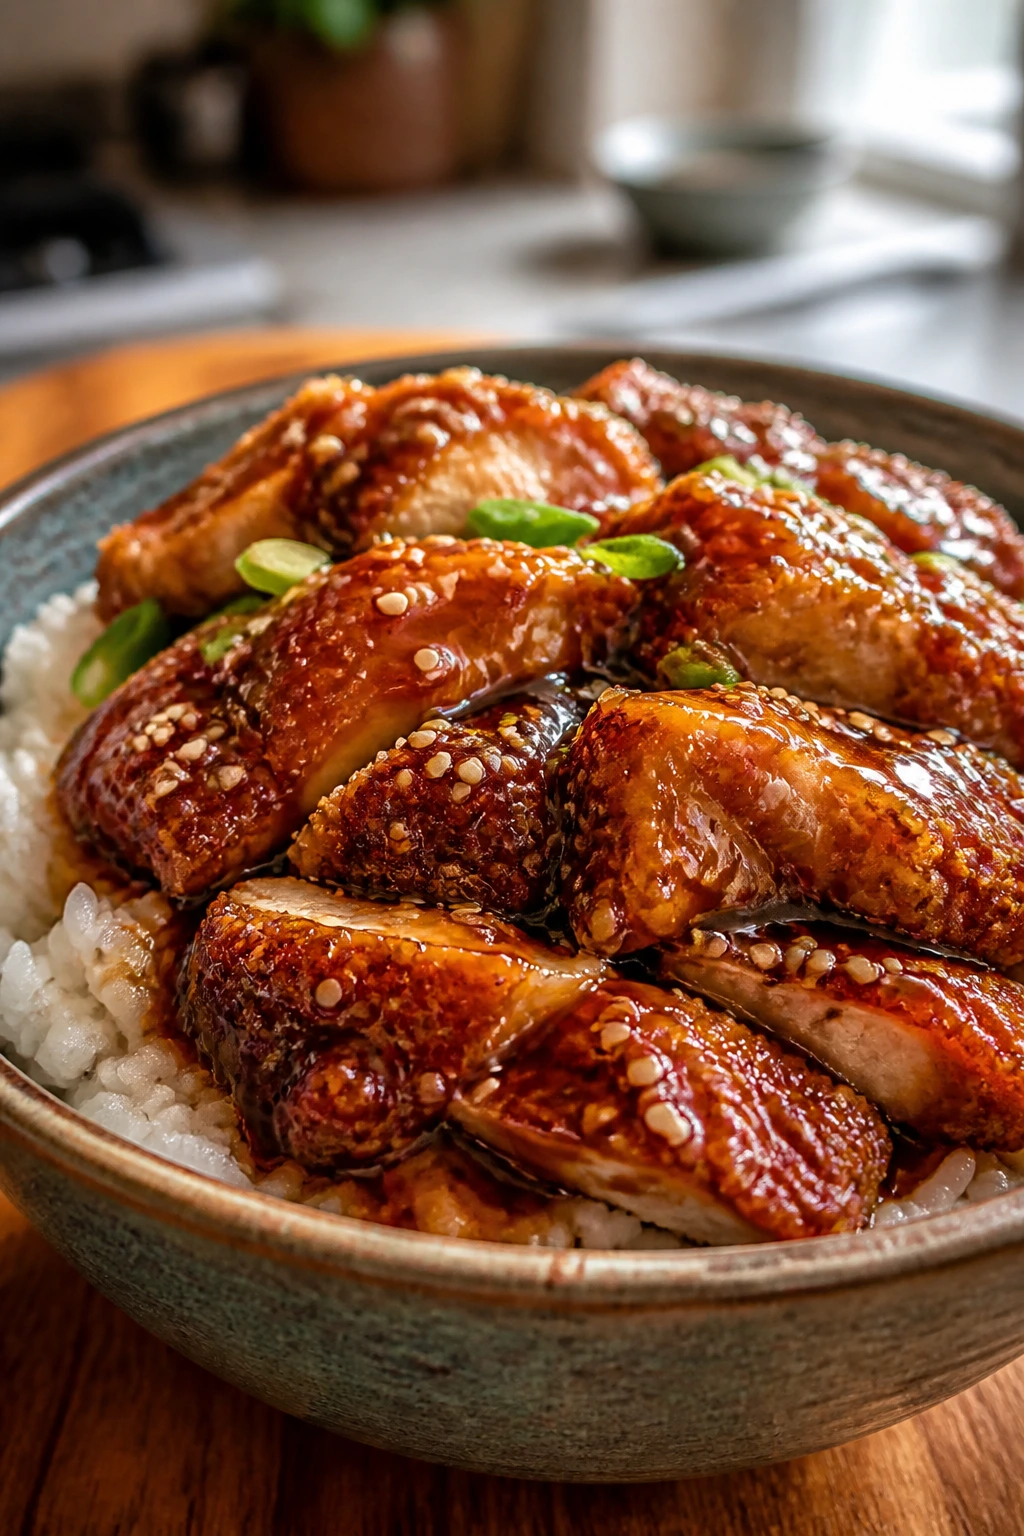
A good bowl of crispy teriyaki chicken rice lands in two beats: first the crackle of the crust, then the glossy sweet-salty glaze sliding into the rice instead of drowning it. That contrast is the whole point. If the chicken is soft before the sauce even touches it, the bowl feels tired. If the rice is too wet, the glaze sinks and disappears. Get the texture right, and this dish stops behaving like a copycat dinner and starts feeling like the thing you meant to order all along.
What makes crispy teriyaki chicken rice so satisfying is how specific it is. You want chicken that stays crisp at the edges, sauce that clings in a thin lacquer, and rice that still has distinct grains when the spoon goes through it. I’m picky about this bowl. Too many versions lean sugary and slick, like the chicken got dressed in pancake syrup. The better version has restraint: a little ginger bite, enough soy for depth, a hint of rice vinegar to keep the sweetness from flattening out, and chicken thighs that stay juicy even after a hard sear.
There’s also a practical reason this dish earns repeat status. A decent teriyaki chicken rice bowl doesn’t ask for rare ingredients or fancy gear, but it does reward a few small decisions that change everything. Dry the chicken. Use a hot pan. Thicken the sauce until it looks almost too glossy. Let the rice rest before fluffing it. Those little moves are the difference between a dinner that tastes like a rushed weekday and one that tastes like somebody actually cared.
Why This Bowl Beats the Takeout Carton
-
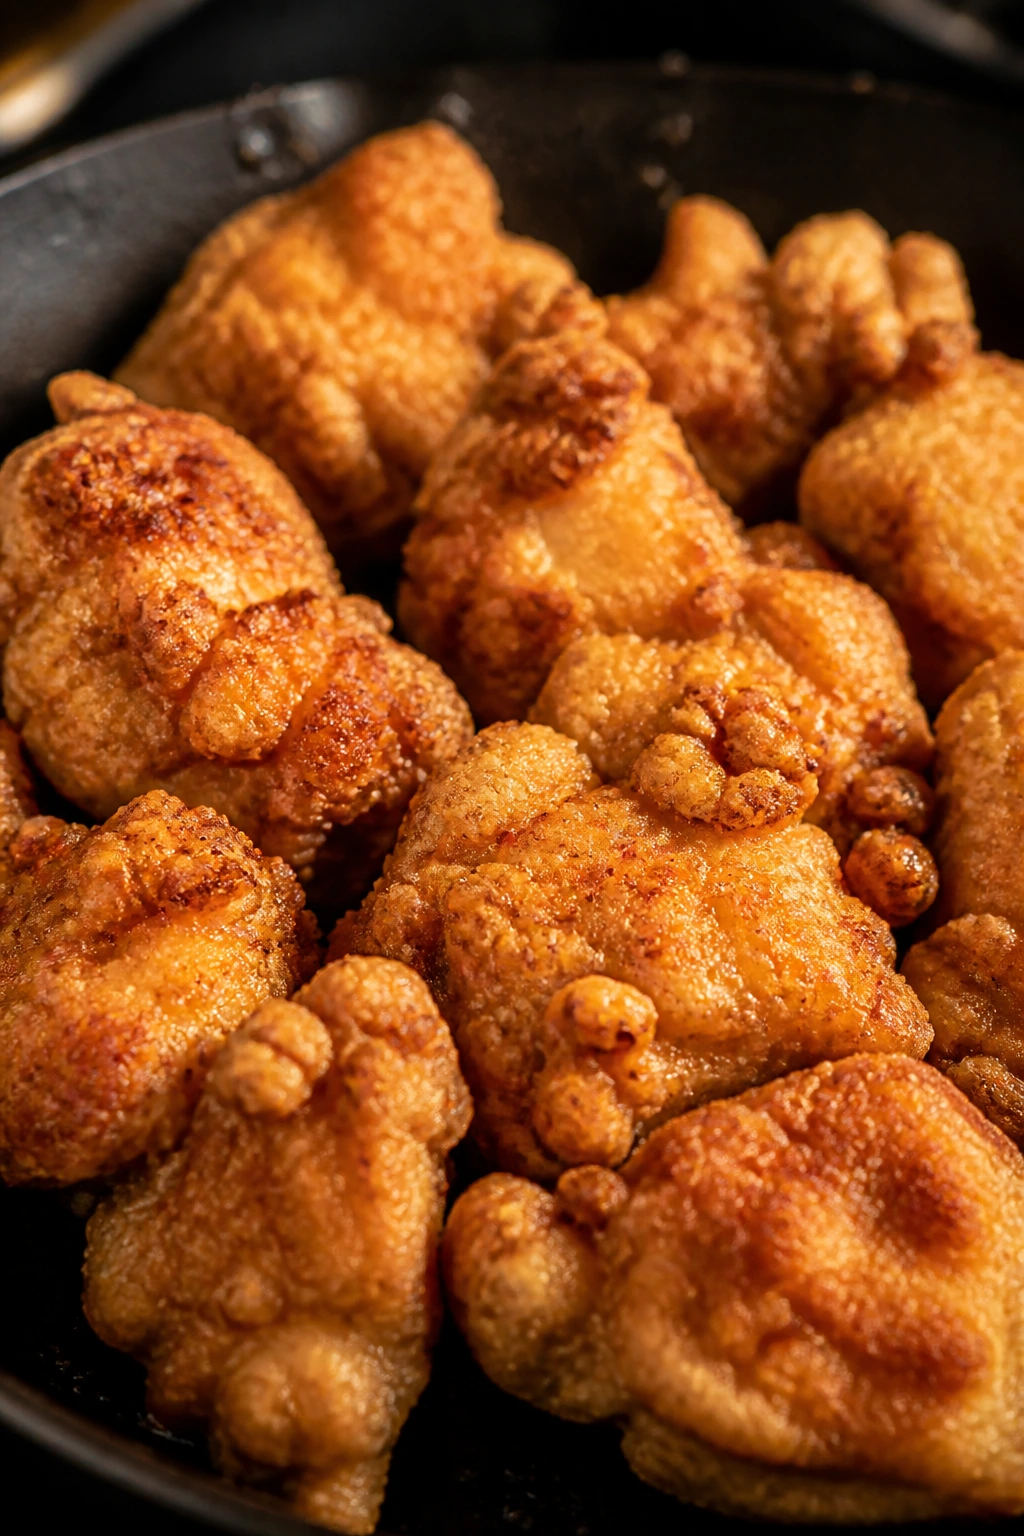
The chicken stays crisp long enough to matter: The crust gets a proper fry before the glaze goes on, so you get crunch at the table instead of sadness in the container.
-
The sauce tastes balanced, not sticky-sweet: Brown sugar and honey give shine, while soy sauce, ginger, and a splash of rice vinegar keep the glaze from turning flat.
-
The rice does its job without getting mushy: Jasmine rice gives you fluffy grains that soak up sauce at the bottom of the bowl without turning into paste.
-
You can control the salt and sweetness: A lot of takeout versions lean heavy on sugar and soy. Here, you can nudge the sauce toward sharper, deeper, or sweeter depending on what you like.
-
It works with a few simple add-ons: Steamed broccoli, cucumber slices, sesame seeds, or scallions slot in without stealing the lead. The bowl holds up to extras.
-
Leftovers have a clear plan: Rice, chicken, and sauce keep better when they’re stored separately, so tomorrow’s lunch doesn’t come out soggy and tired.
Fast Facts for the Skillet
Yield: Serves 4
Prep Time: 20 minutes
Cook Time: 30 minutes
Total Time: 50 minutes
Difficulty: Intermediate — the method itself is straightforward, but crisp chicken and glossy sauce both depend on timing.
Best Served: Right away, while the chicken is still hot and the glaze is fresh.
Chill/Rest Time: 10 minutes for the rice to steam off the heat before fluffing.
Ingredients That Build the Bowl
For the Rice:
- 2 cups jasmine rice, rinsed well
- 3 cups water
- 1/2 teaspoon fine salt
For the Crispy Chicken:
- 1 1/2 pounds boneless, skinless chicken thighs, cut into 1-inch pieces
- 1 teaspoon kosher salt
- 1/2 teaspoon black pepper
- 1/2 teaspoon garlic powder
- 2 large eggs, beaten
- 1 cup cornstarch
- 1/2 cup all-purpose flour
- 1/4 cup neutral oil, for pan-frying
For the Teriyaki Sauce:
- 1/2 cup low-sodium soy sauce
- 1/2 cup water
- 1/4 cup mirin
- 3 tablespoons light brown sugar, packed
- 1 tablespoon honey
- 1 tablespoon rice vinegar
- 2 garlic cloves, finely grated or minced
- 1 teaspoon fresh ginger, finely grated
- 1 teaspoon toasted sesame oil
- 2 teaspoons cornstarch mixed with 2 tablespoons cold water
For Serving:
- 3 scallions, thinly sliced
- 1 tablespoon sesame seeds, toasted if you like
- Steamed broccoli or cucumber slices, optional
Why Each Ingredient Pulls Its Weight
Chicken and Coating
- What to use: 1 1/2 pounds boneless, skinless chicken thighs, cut into 1-inch pieces.
- Preparation: Pat the pieces dry before seasoning. Smaller chunks crisp faster and give you more surface area for the glaze.
- Substitutions: Chicken breast works if that’s what you have, but it dries out faster; extra-firm tofu or cauliflower florets can stand in for a meat-free version.
- Tips: Thighs are the safer choice here. They stay juicy even after a hot fry and a quick toss in sauce, and that matters more than most people admit.
Crisp Coating
- What to use: 1 cup cornstarch, 1/2 cup all-purpose flour, 2 large eggs, plus salt, pepper, and garlic powder.
- Preparation: Keep the dry mix in a shallow bowl and the eggs in another. Coat the chicken in the egg first, then press it into the starch-flour mix so it clings.
- Substitutions: Rice flour can replace the all-purpose flour if you want a lighter, crispier shell; a gluten-free flour blend also works.
- Tips: Cornstarch is what gives you that brittle, takeout-style edge. Flour alone makes a coating that feels soft and bready.
Teriyaki Sauce
- What to use: Low-sodium soy sauce, water, mirin, brown sugar, honey, rice vinegar, garlic, ginger, sesame oil, and a cornstarch slurry.
- Preparation: Whisk everything except the slurry before heating. Keep the slurry separate so the sauce thickens only when you want it to.
- Substitutions: Tamari handles the gluten-free job, and if you don’t have mirin, add 1 extra tablespoon water plus 1 teaspoon sugar. Maple syrup can stand in for honey.
- Tips: The sauce should finish glossy and a little syrupy. If it starts looking thick in the pan, it will set up even more as it cools.
Rice and Finishing Touches
- What to use: Jasmine rice, water, salt, scallions, sesame seeds, and optional broccoli or cucumber.
- Preparation: Rinse the rice until the water runs mostly clear, then cook it covered so the grains steam evenly. Slice the scallions thin so they scatter instead of clump.
- Substitutions: Medium-grain rice works if jasmine isn’t on hand; brown rice can be used, but it needs more water and a longer simmer.
- Tips: Rinsed rice cooks up fluffier and less sticky. That’s useful here because the sauce already carries plenty of weight.
The Coating That Gives You Crunch Without Getting Heavy
The best crispy teriyaki chicken rice bowls don’t rely on a giant batter. They use a thin crust that fries hard, then lets the sauce stick just enough. That’s the sweet spot. Too much coating, and you end up with chicken nuggets wearing teriyaki. Too little, and the glaze slides off into the pan.
Here’s why the cornstarch-and-flour combo works. Cornstarch dries out fast and fries into a crackly shell, while flour adds a little structure so the coating doesn’t shed the minute it hits the oil. If you use only flour, the crust feels more like fried cutlets. If you use only cornstarch, the shell can get brittle in an odd, dusty way. Together, they behave.
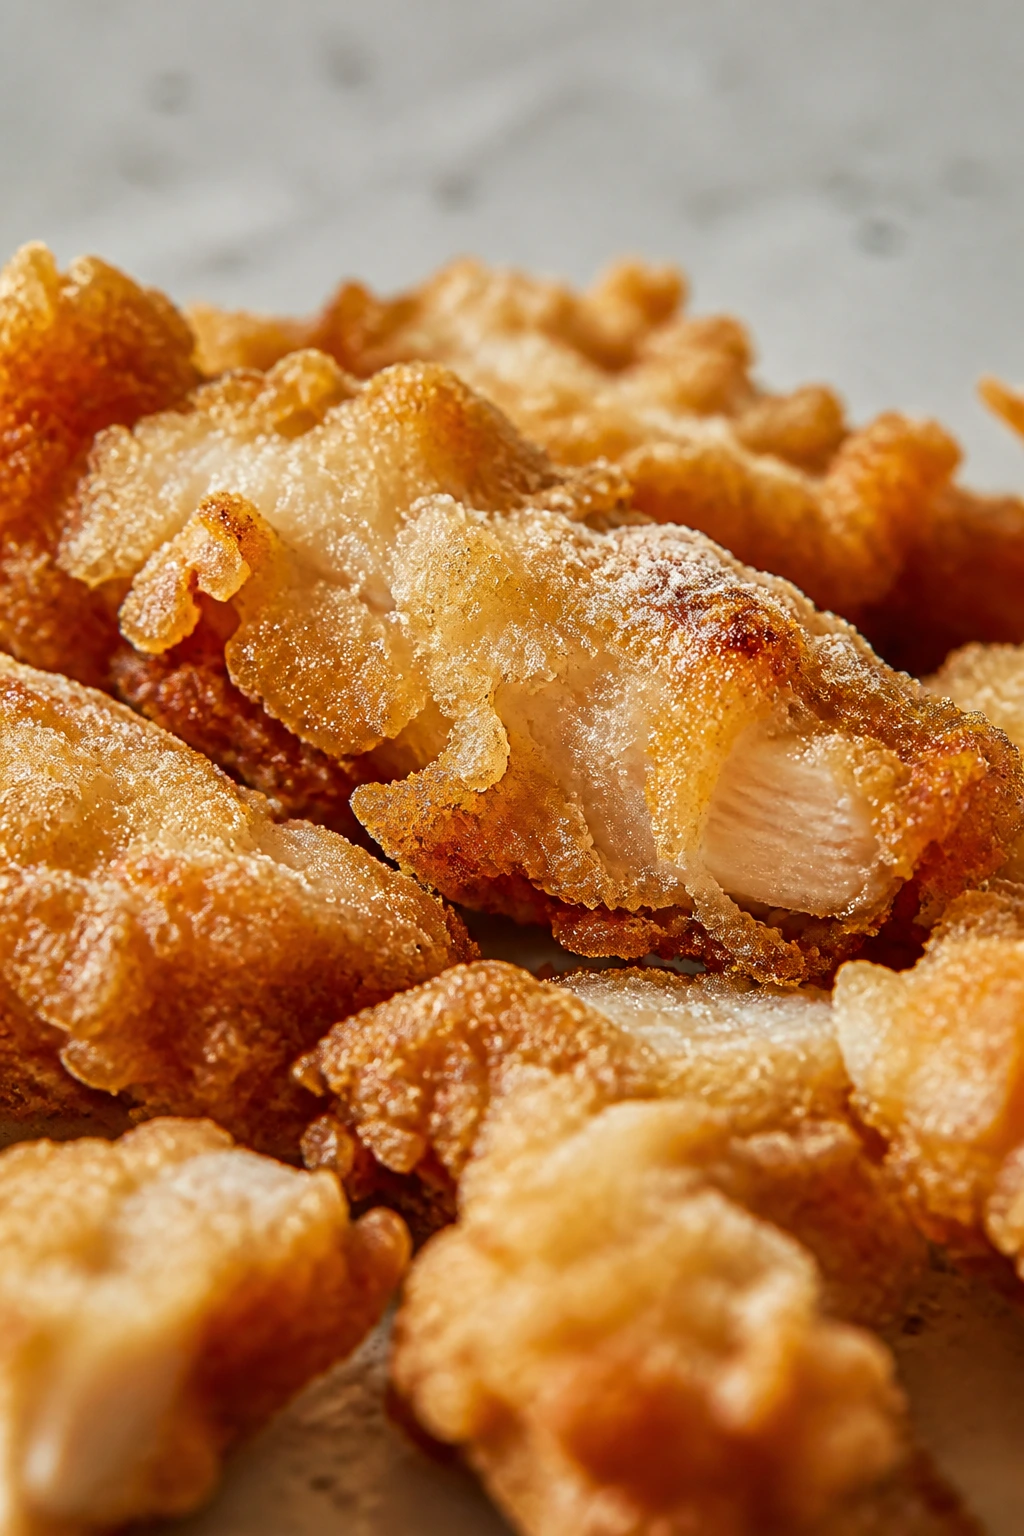
What the coating should look like
The coated pieces should look dry but not chalky. You want a thin, uneven layer with some craggy edges. Those little rough spots are where the oil bites in and turns gold.
Let the coated chicken sit for 5 minutes before frying if you have the patience. That short pause helps the starch hydrate a little so it clings better in the pan. Not mandatory. Helpful, though. Very helpful.
Making the Teriyaki Glaze Glossy Instead of Goopy
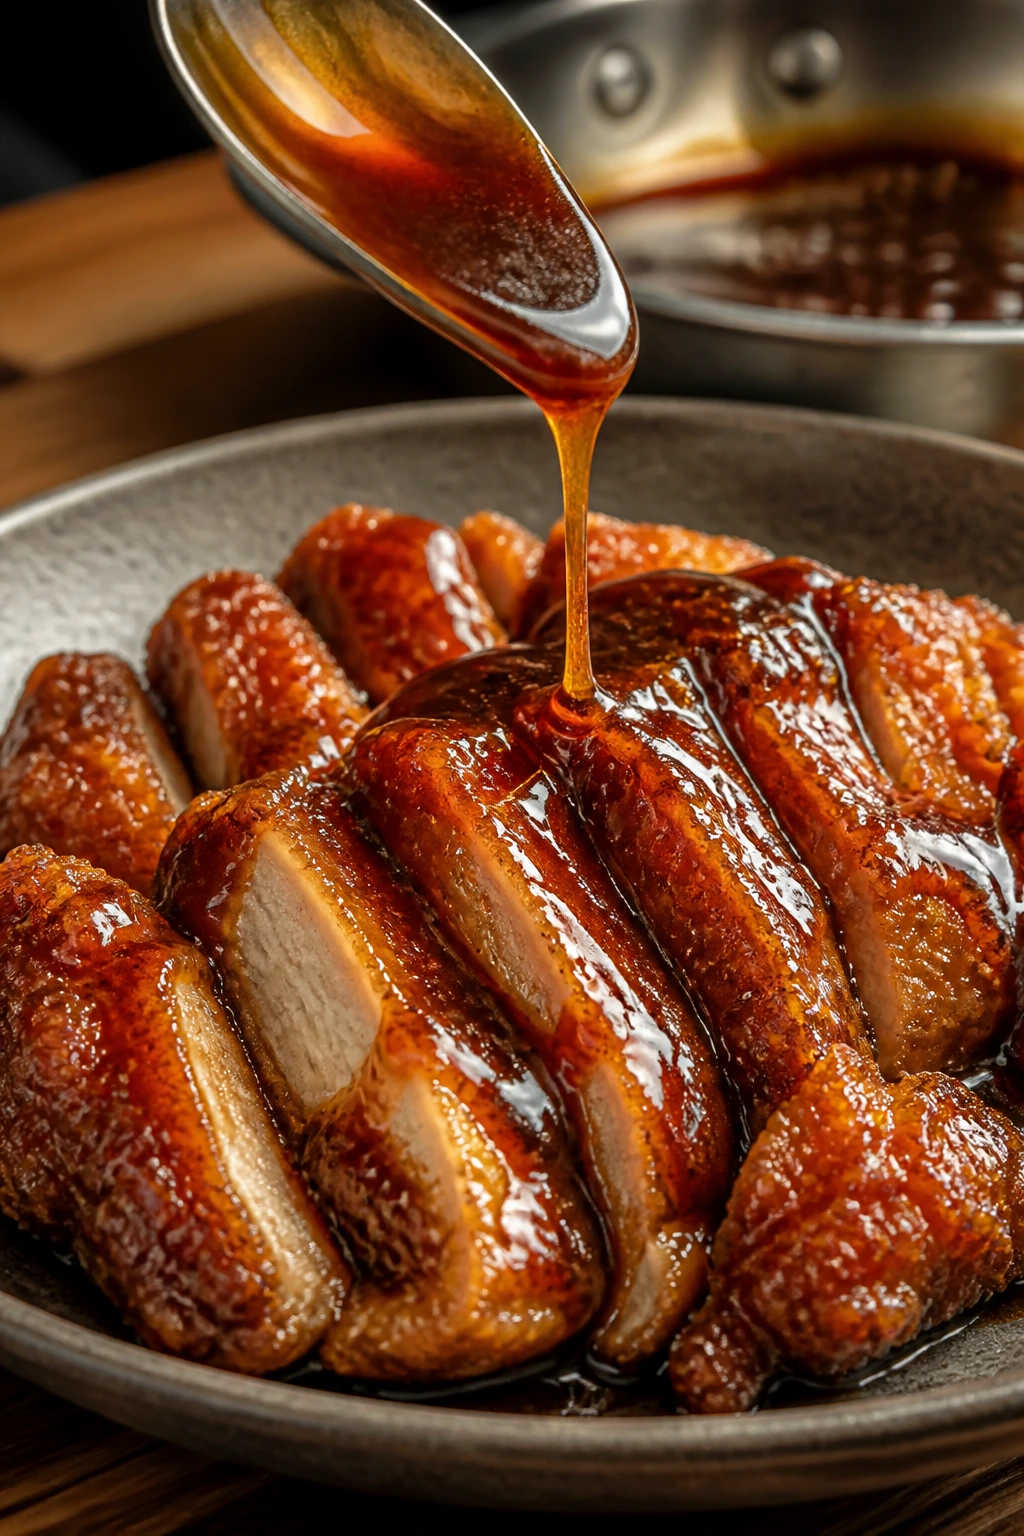
Teriyaki sauce has a bad habit: people either undercook it and get a watery puddle, or they overcook it and end up with sugar glue. The middle path is where the good stuff lives. You want a sauce that coats the back of a spoon and drips in slow ribbons, not syrup that sticks to the pan in hardened streaks.
The balance comes from the mix of soy sauce, mirin, brown sugar, honey, and rice vinegar. Soy gives the savory backbone. Mirin and honey bring shine. Brown sugar rounds the edges. Rice vinegar keeps the sweetness from slamming straight into your teeth. Ginger and garlic do the part that keeps this from tasting flat.
Why the cornstarch slurry matters
A slurry is the easiest way to thicken the sauce without reducing it so far that it tastes scorched. The trick is to whisk the cornstarch with cold water first. If you dump dry cornstarch straight into a hot sauce, it clumps and gives you little cloudy bits that never fully disappear.
When the sauce goes from thin to glossy, move fast. Corntarch thickens as it heats and thickens again as it cools. If it looks perfect in the pan, that usually means it will be too thick five minutes later. Pull it a touch earlier than you think.
Cooking the Rice So It Stays Separate
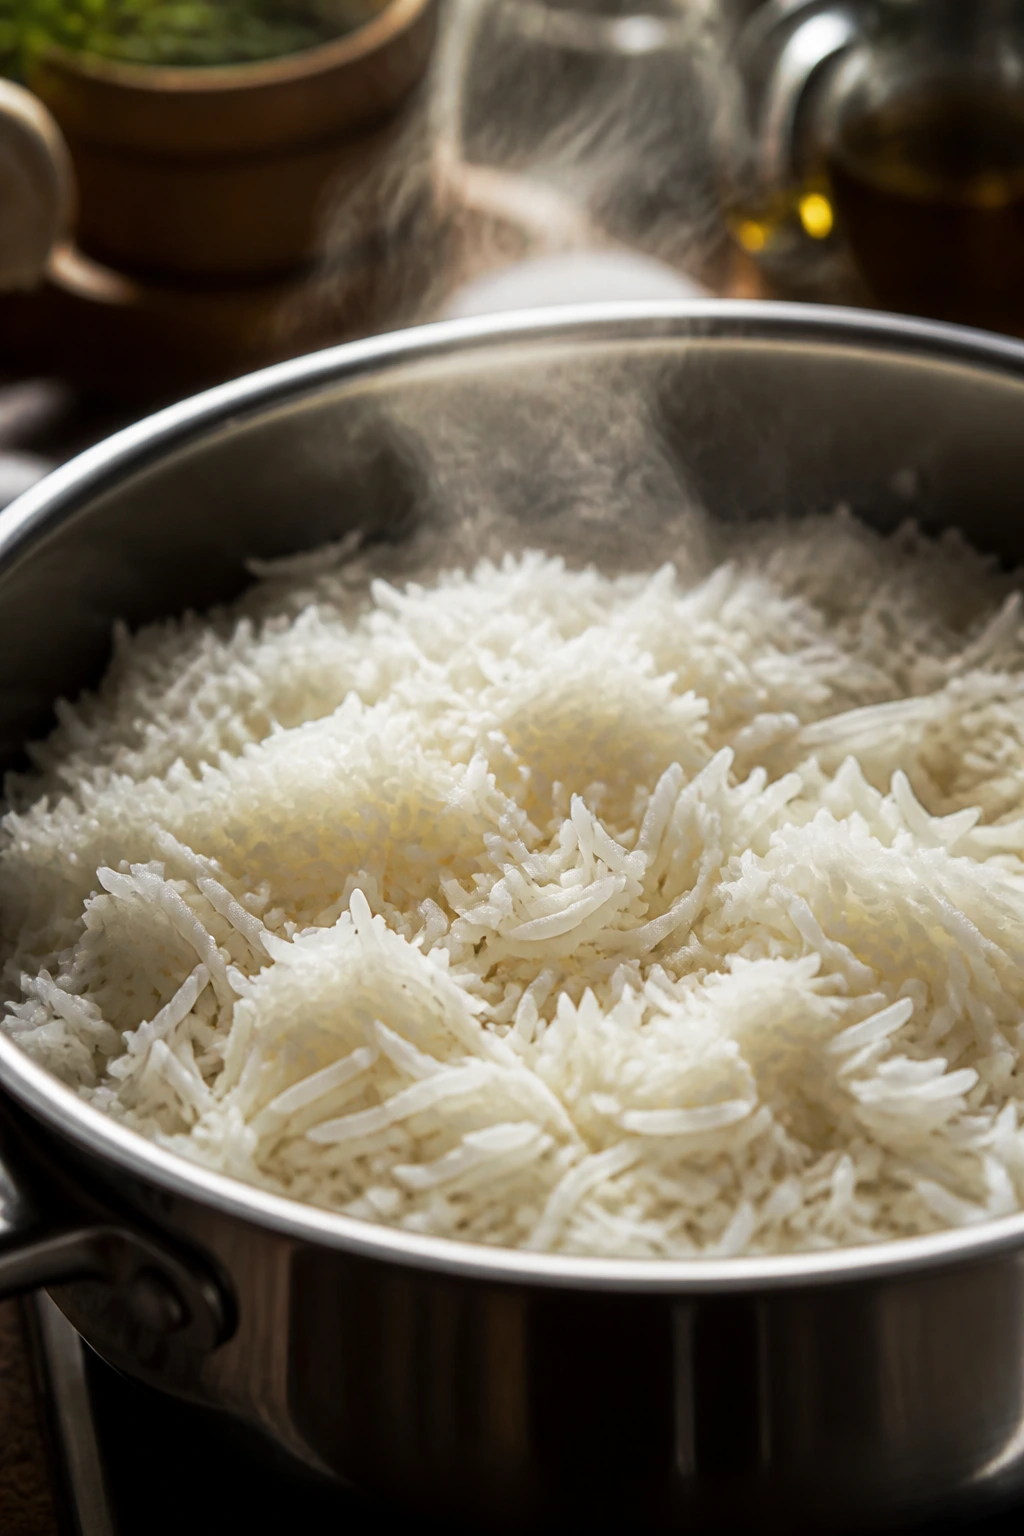
Rice is the part people rush. Then they wonder why the bowl feels heavy. Jasmine rice is a smart choice here because it stays soft and fluffy without turning into sticky cement. But even good rice needs a little respect.
Rinse it. A lot. Three or four changes of water is normal. The water doesn’t need to be crystal clear, but it should stop looking milky. That surface starch is what makes the pot gluey.
After the rice comes to a boil, keep the lid on and the heat low. No peeking. Lifting the lid too early throws off the steam balance, and that’s how you get wet bottoms and dry tops. Once the rice is done, let it rest off the heat for 10 minutes before fluffing. The grains finish settling during that pause.
If you want to make this bowl feel closer to a proper takeout order, use warm rice rather than cold. Cold rice works for leftovers, not for the first serving. Freshly fluffed rice catches the sauce at the edges and gives the chicken a soft landing.
How to Cook the Whole Bowl
Rice First:
-
Rinse the 2 cups jasmine rice in a fine-mesh strainer under cold water until the water runs mostly clear.
-
Combine the rinsed rice, 3 cups water, and 1/2 teaspoon fine salt in a medium saucepan. Bring to a boil over high heat.
-
Reduce the heat to low, cover tightly, and simmer for 15 minutes. Do not lift the lid while it cooks. The steam matters here.
-
Turn off the heat and let the rice sit, covered, for 10 minutes. Fluff with a fork and keep it warm.
Sauce and Chicken Prep:
-
Whisk together the soy sauce, water, mirin, brown sugar, honey, rice vinegar, garlic, ginger, and toasted sesame oil in a small saucepan. In a separate cup, stir the 2 teaspoons cornstarch with 2 tablespoons cold water until smooth.
-
Pat the chicken thighs dry with paper towels and season them with the kosher salt, black pepper, and garlic powder.
-
Beat the eggs in one bowl. In a second shallow bowl, combine the cornstarch and flour.
-
Dip each chicken piece in the egg, let the excess drip off, then coat it in the cornstarch-flour mixture. Press lightly so the coating sticks, but don’t pack it on.
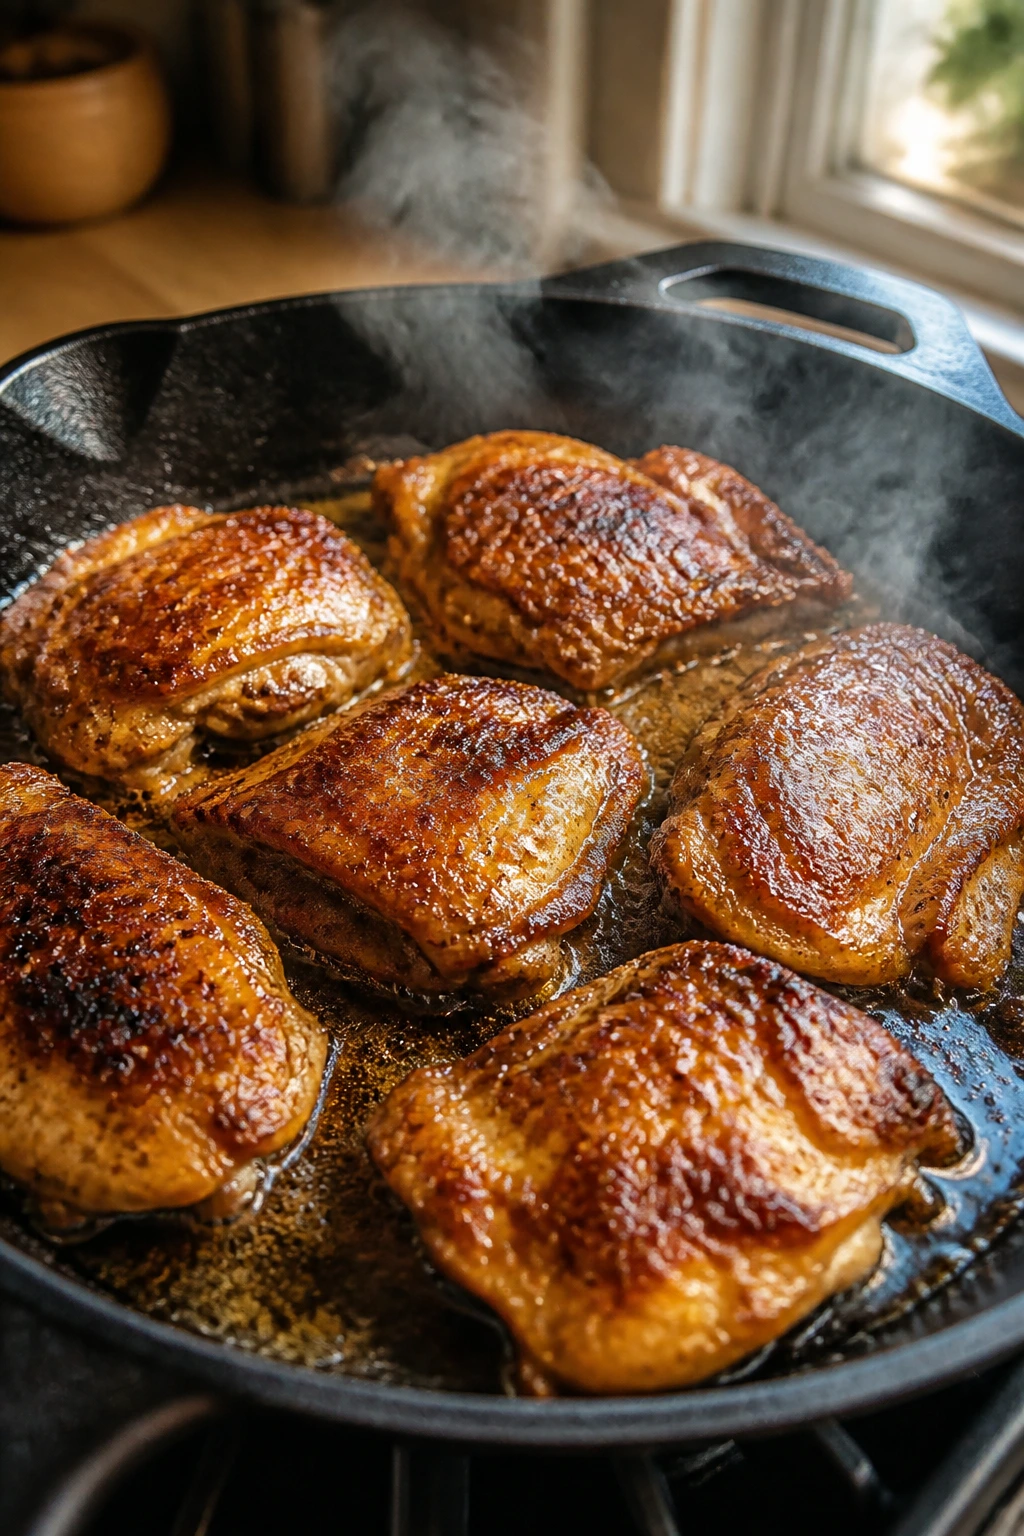
Fry the Chicken:
-
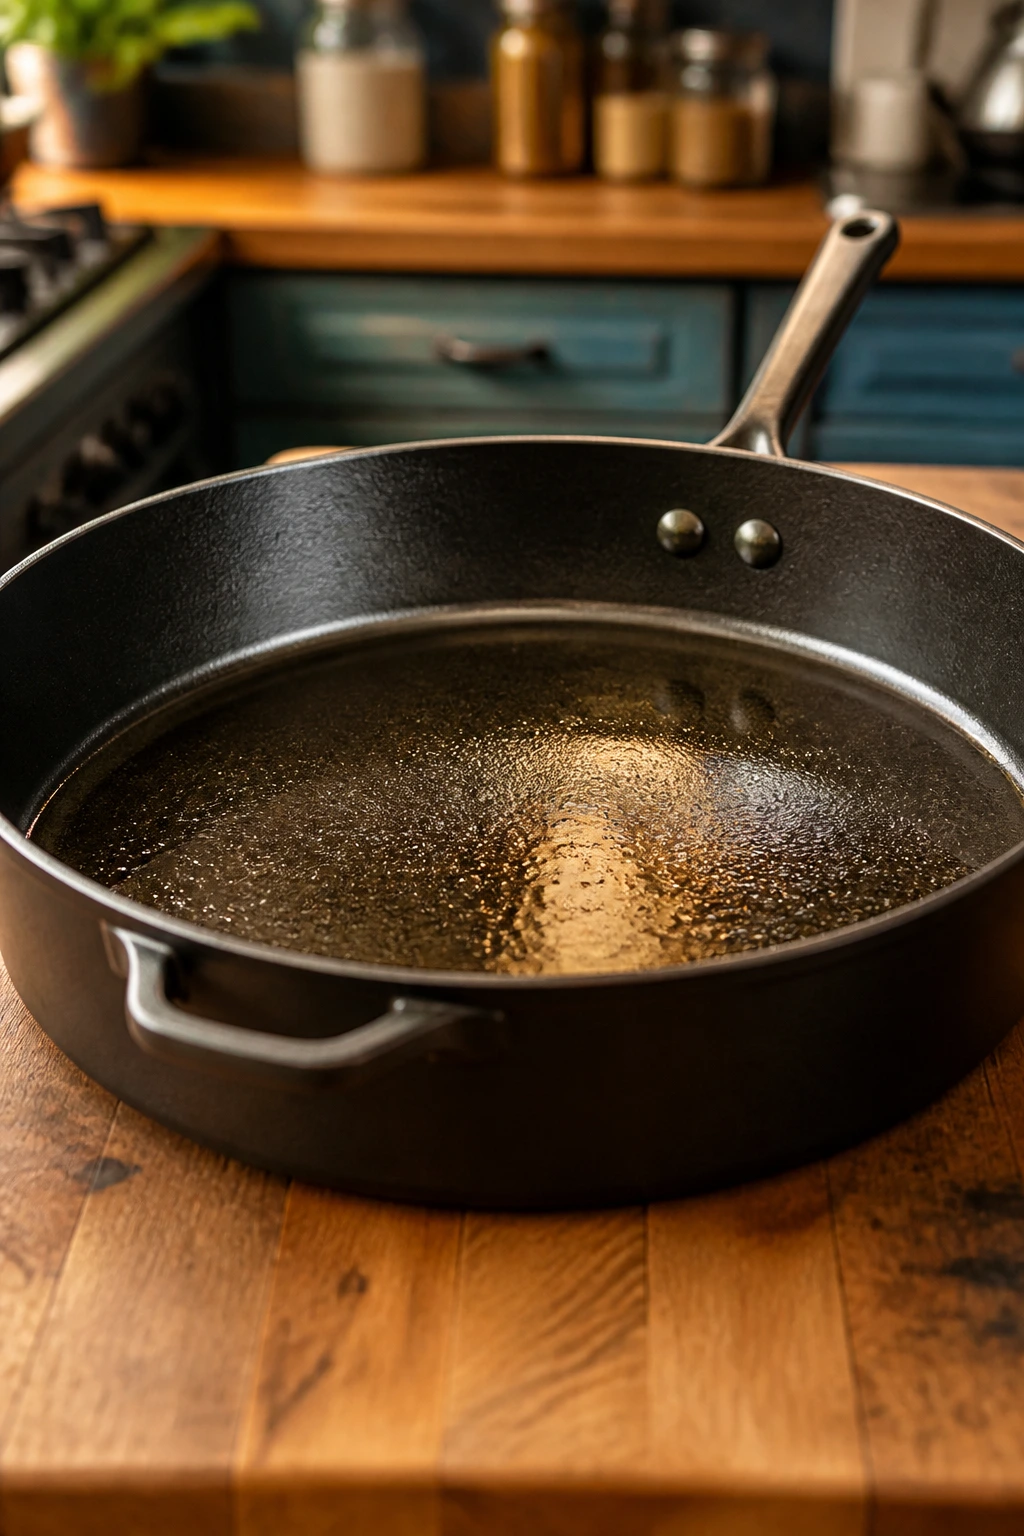
Heat the neutral oil in a 12-inch skillet over medium-high heat until it shimmers. A pinch of coating should sizzle the second it lands in the pan.
-
Fry the chicken in 2 batches, about 4 to 5 minutes per side, until deeply golden and the internal temperature reaches 165°F. Transfer the pieces to a wire rack set over a sheet pan. Paper towels soften the crust.
Glaze and Finish:
-
Pour off all but 1 tablespoon of oil from the skillet. Lower the heat to medium and add the sauce mixture. Bring it to a gentle simmer.
-
Stir in the cornstarch slurry and cook for 30 to 45 seconds, stirring constantly, until the sauce looks glossy and lightly thickened. It should coat the back of a spoon.
-
Return the chicken to the skillet and toss quickly for 20 to 30 seconds, just long enough to coat the pieces. Turn off the heat immediately.
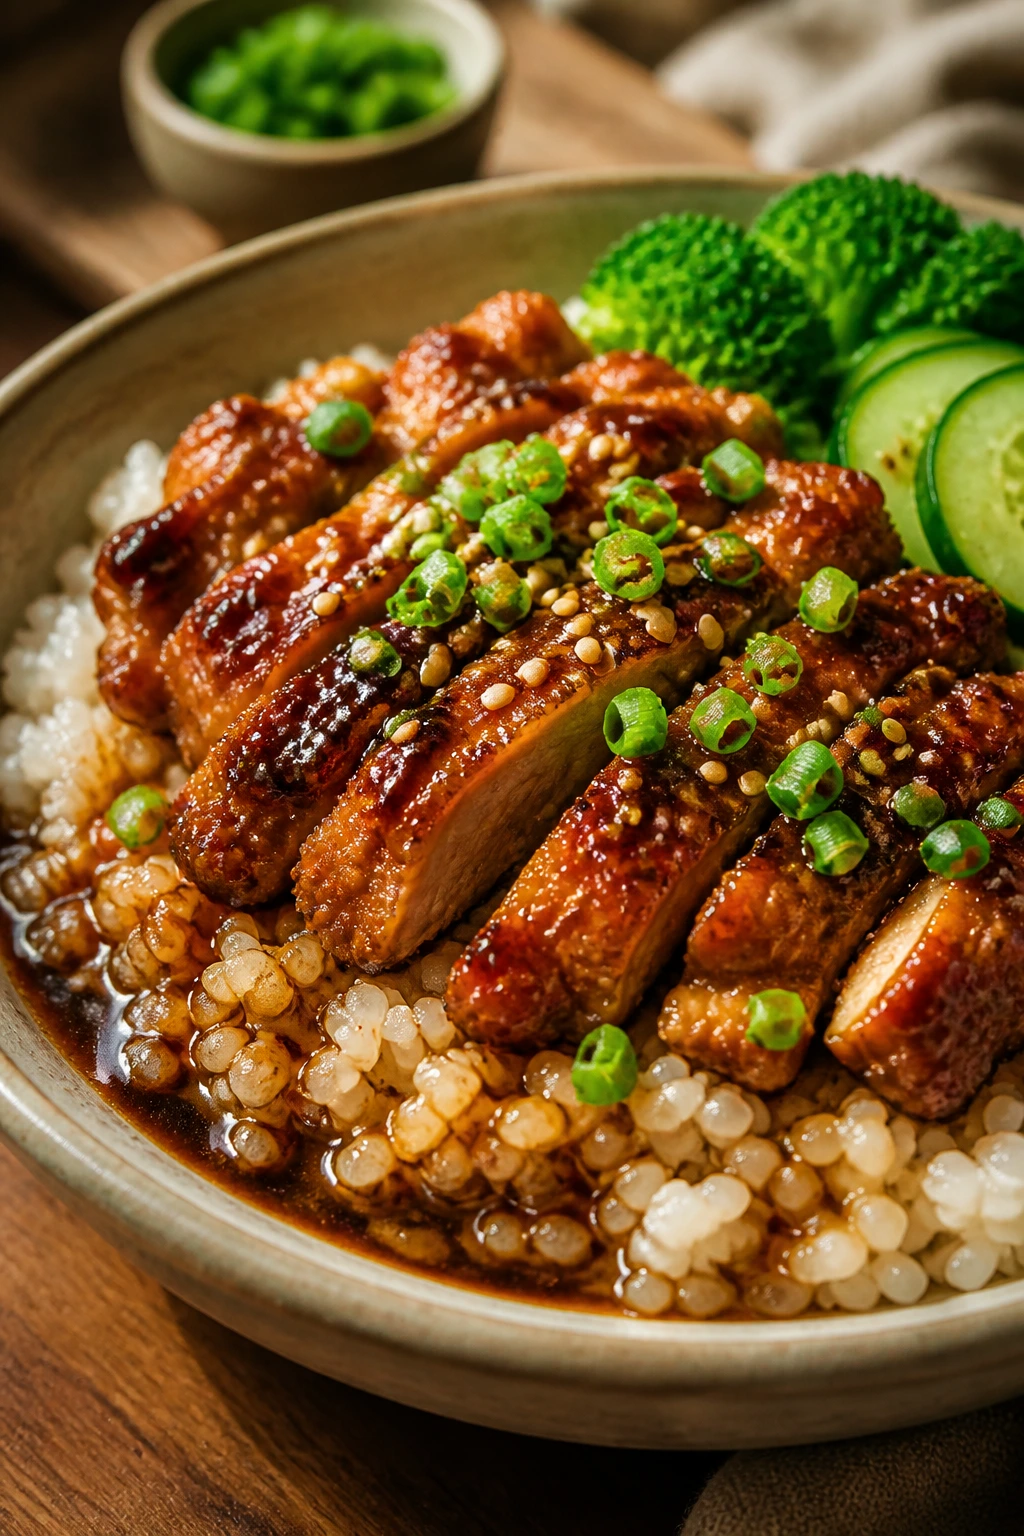
-
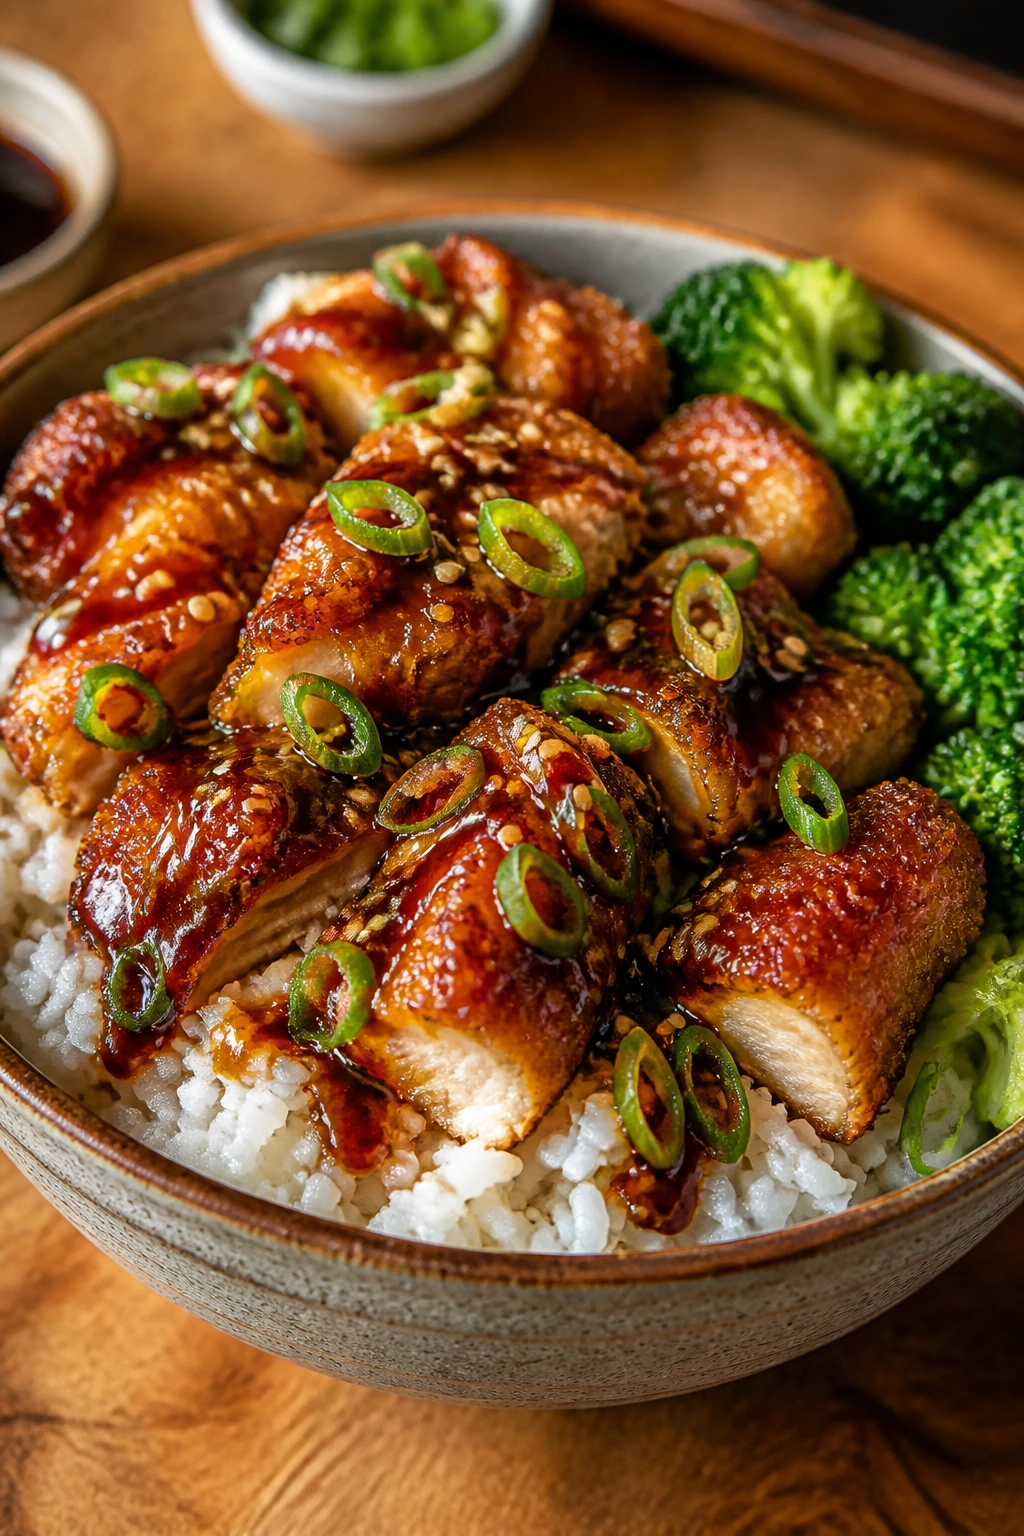
Spoon the rice into bowls, pile the chicken on top, and finish with scallions, sesame seeds, and any vegetables you’re using. Serve right away.
The Gear That Makes It Easier
- 12-inch skillet with straight sides: Big enough to fry in batches without crowding the chicken too badly. A wok works too, but a heavy skillet gives steadier heat.
- Medium saucepan with a tight lid: The rice needs a steady steam trap, not a loose lid that leaks.
- Wire rack set over a sheet pan: This keeps the chicken crisp while you finish the sauce. A cooling rack is worth using here.
- Mixing bowls: One for the eggs, one for the dry coating, one for the sauce. Shallow bowls make dredging less messy.
- Tongs: Easier than a fork, and you won’t tear the crust when you move the chicken.
- Instant-read thermometer: The cleanest way to check for 165°F without slicing the chicken open and losing juices.
- Fine-mesh strainer: For rinsing rice and draining it cleanly.
How to Serve It Like a Real Meal
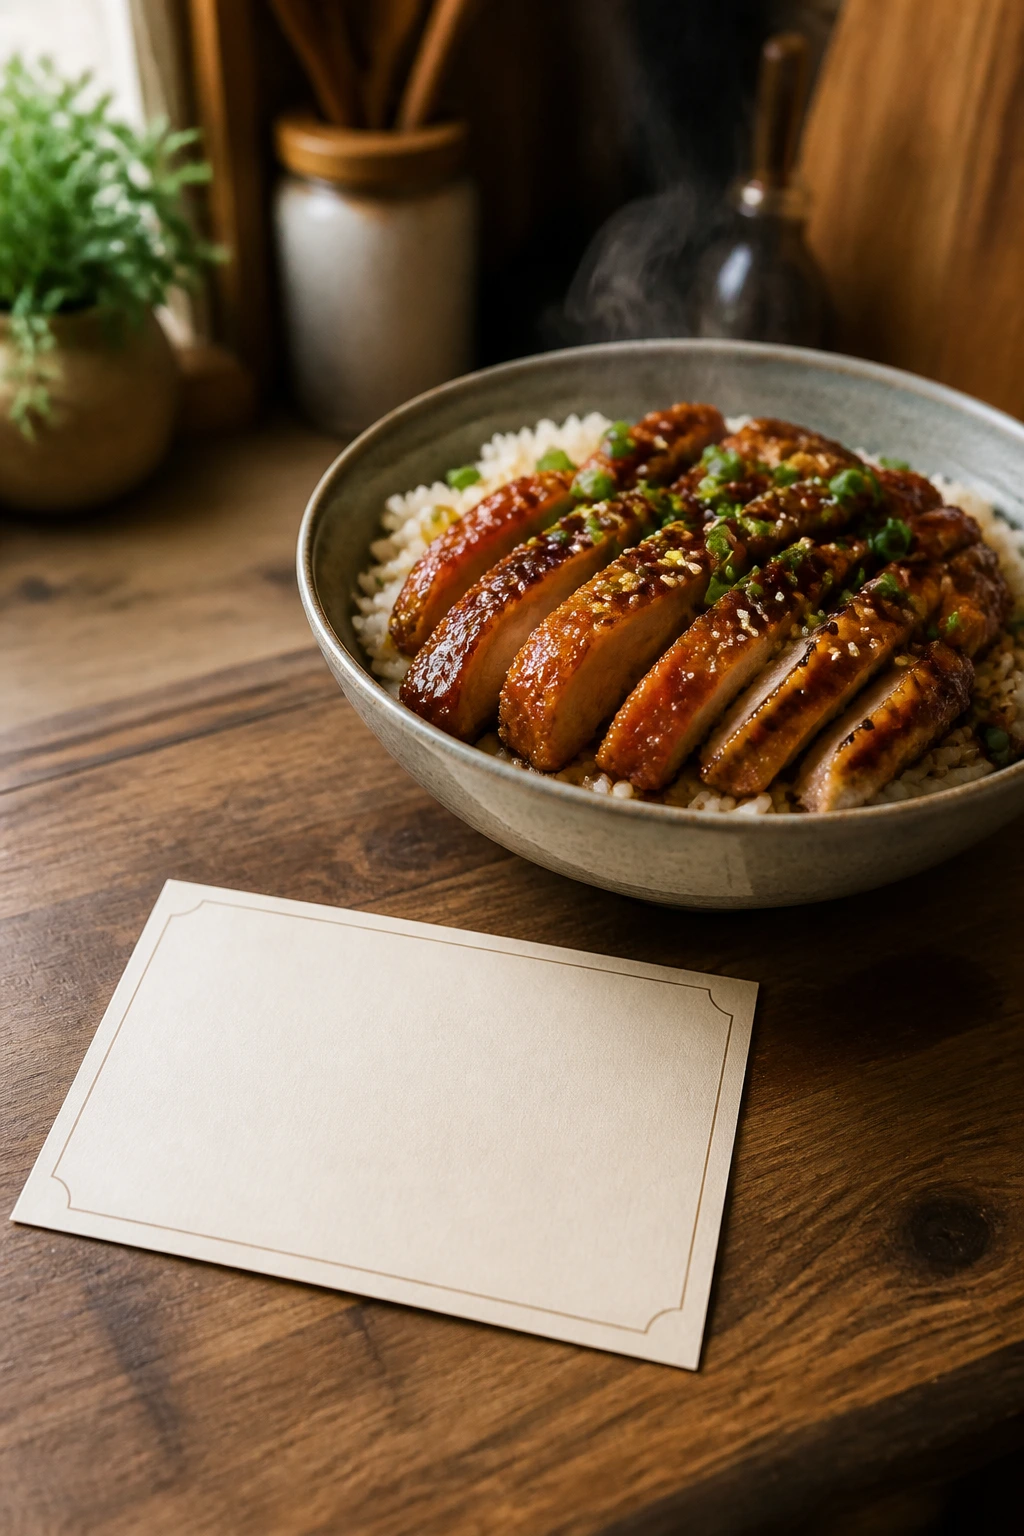
Presentation: Spoon the rice into warm bowls first, not onto cold plates. Pile the chicken slightly off-center, then spoon a little extra glaze around the edges so it soaks into the rice without flooding the top. A scatter of scallions and sesame seeds makes the bowl look finished without trying too hard.
Accompaniments: Steamed broccoli is the obvious choice, and I’m not mad about that. Cucumber slices tossed with a few drops of rice vinegar work well too, especially if you want something cool and sharp next to the sweet glaze. Edamame or quick-sautéed snap peas fit the bowl without making it feel crowded.
Portions: This recipe makes 4 solid dinner bowls, with about 1 1/2 cups rice and a generous scoop of chicken per person. For smaller appetites, stretch it to 5 servings by adding more vegetables. For hungrier people, keep the recipe as written and serve it with extra rice.
Beverage Pairing: I like this with unsweetened iced green tea because the bitterness cuts through the glaze. A light lager works too. If you’re skipping alcohol, cold sparkling water with a squeeze of lime keeps the bowl from feeling too heavy.
Smart Tips for Better Texture and Flavor

Flavor Enhancement: Turn off the heat before you add the final splash of toasted sesame oil in the sauce if you want the aroma to stay sharp and nutty. Heat can flatten it fast. A pinch of chili flakes or a spoonful of chili crisp on the finished bowl gives the sweet sauce some edge.
Time-Saver: Make the rice first and leave it covered while you fry the chicken. If you’ve got day-old rice, even better. It reheats cleanly and takes sauce in a more controlled way than freshly steamed rice does.
Pro Move: Use a wire rack after frying, not a stack of paper towels. The underside of fried chicken steams itself soft almost immediately if it sits flat. That single habit changes the bowl more than most people expect.
Cost-Saver: Chicken thighs are cheaper than breasts, and they’re the better cut here anyway. The sauce is bold enough that you don’t need expensive soy sauce or specialty ingredients to make it taste full.
Make-It-Yours: Add steamed broccoli, shredded cabbage, or blistered green beans if you want more vegetables in the bowl. They can sit under the chicken and catch the extra sauce, which is honestly their best job.
Common Mistakes That Turn Crispy Chicken Soft
-
Wet chicken before coating: If the chicken goes into the egg with surface moisture still clinging to it, the coating slides around and peels off in the pan. Pat the pieces dry first. Seriously. That towel step matters.
-
Crowding the skillet: When too many pieces hit the oil at once, the temperature drops and the coating drinks oil instead of crisping. Fry in batches and keep the first batch on a rack while the rest cook.
-
Sauce that’s too thin: If the glaze looks watery, it will soak the crust instead of sitting on top. Simmer it until it coats a spoon, then stop. It keeps thickening after you remove it from the heat.
-
Leaving chicken in the sauce too long: Tossing for a few seconds is fine. Letting the chicken bathe in the glaze for several minutes is how you erase the crunch you worked for. Sauce, toss, plate.
-
Skipping the rice rest: Rice that comes straight from the pot and gets stirred too soon can collapse into a sticky mass. Give it 10 minutes off the heat, covered, then fluff it gently.
-
Using high heat for the sauce all the way through: A hard boil can make the sugar taste harsh and the garlic bitter. Gentle simmer. That’s the move.
Variations for Heat, Vegetables, and Dietary Swaps
Spicy Chili Crisp Teriyaki: Stir 1 to 2 teaspoons of chili crisp into each bowl just before serving, or whisk 1/2 teaspoon of crushed red pepper into the sauce. The heat sits well against the sweet glaze and keeps the bowl from tasting one-note.
Gluten-Free Tamari Bowl: Swap the soy sauce for tamari and use a gluten-free flour blend or all cornstarch in the coating. Rice flour works especially well if you want a lighter crust. Everything else stays the same.
Air-Fryer Crunch Bowl: Coat the chicken as written, spray the pieces lightly with oil, and air-fry at 400°F for 12 to 14 minutes, shaking halfway through. The texture is a little different from pan-frying — lighter, less shattery — but it still gives you a crisp edge and keeps cleanup easier.
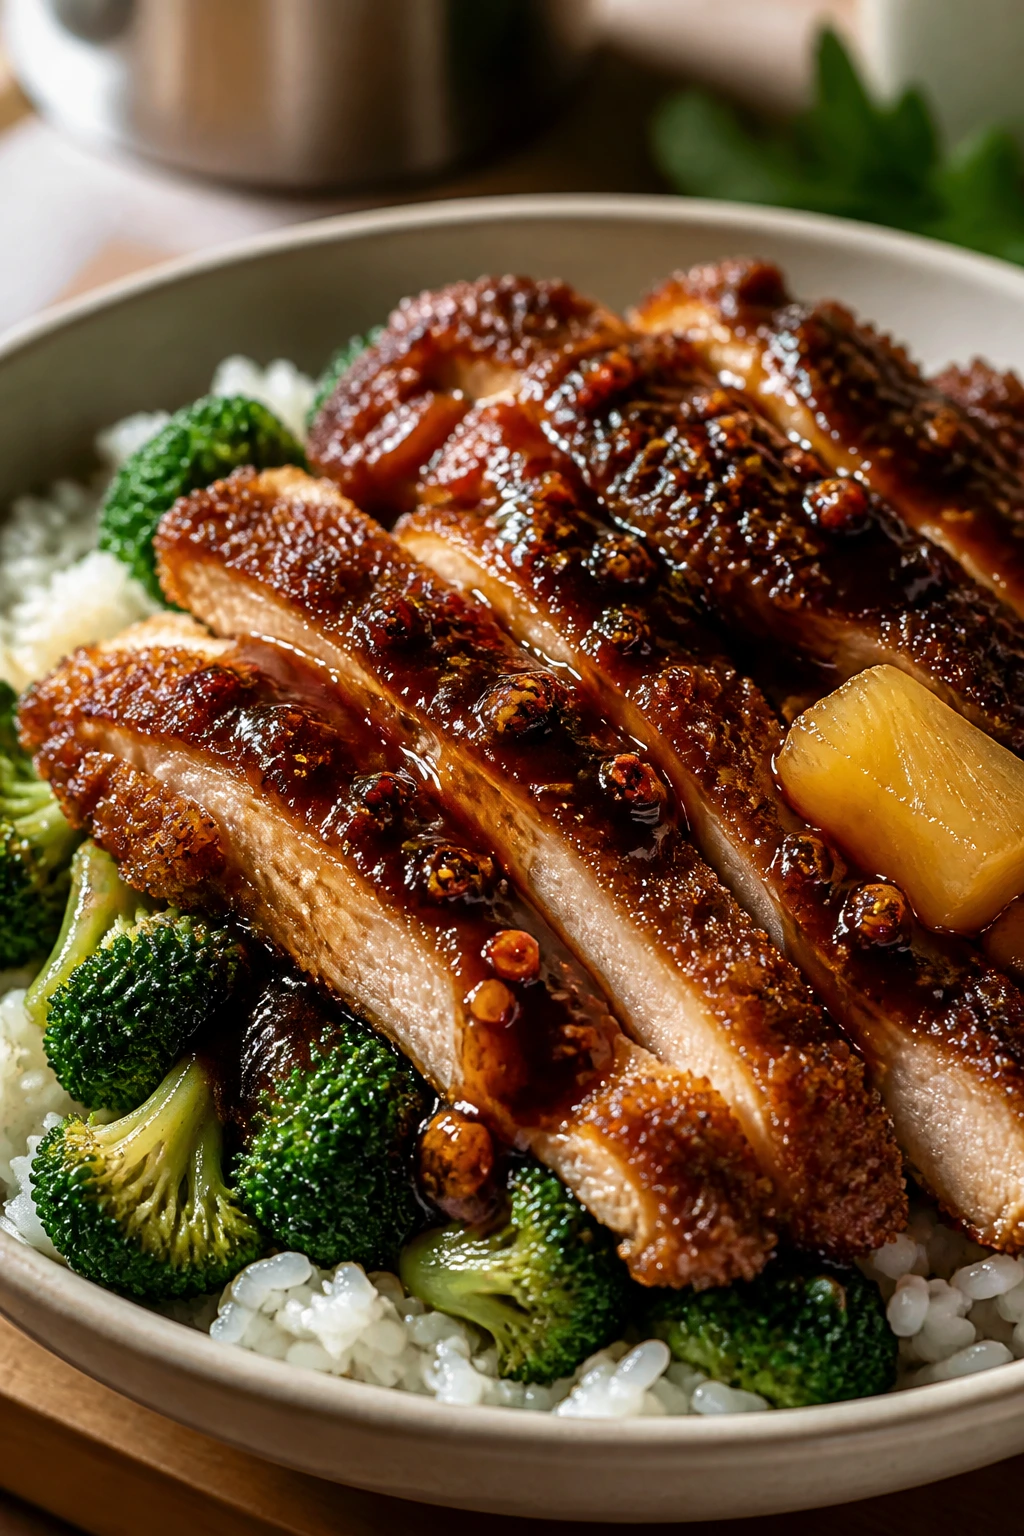
Broccoli-Stuffed Dinner Bowl: Steam 2 cups of broccoli florets and tuck them under the chicken before you pour on the glaze. The broccoli catches sauce in its little nooks, and the bowl feels fuller without needing extra chicken or rice.
Pineapple Teriyaki Version: Replace 1/4 cup of the water in the sauce with pineapple juice and top the finished bowls with a few diced pineapple pieces. The juice pushes the glaze toward sweet and bright, so I’d keep the rice plain and add a little extra rice vinegar to balance it.
Storage, Reheating, and Make-Ahead Timing
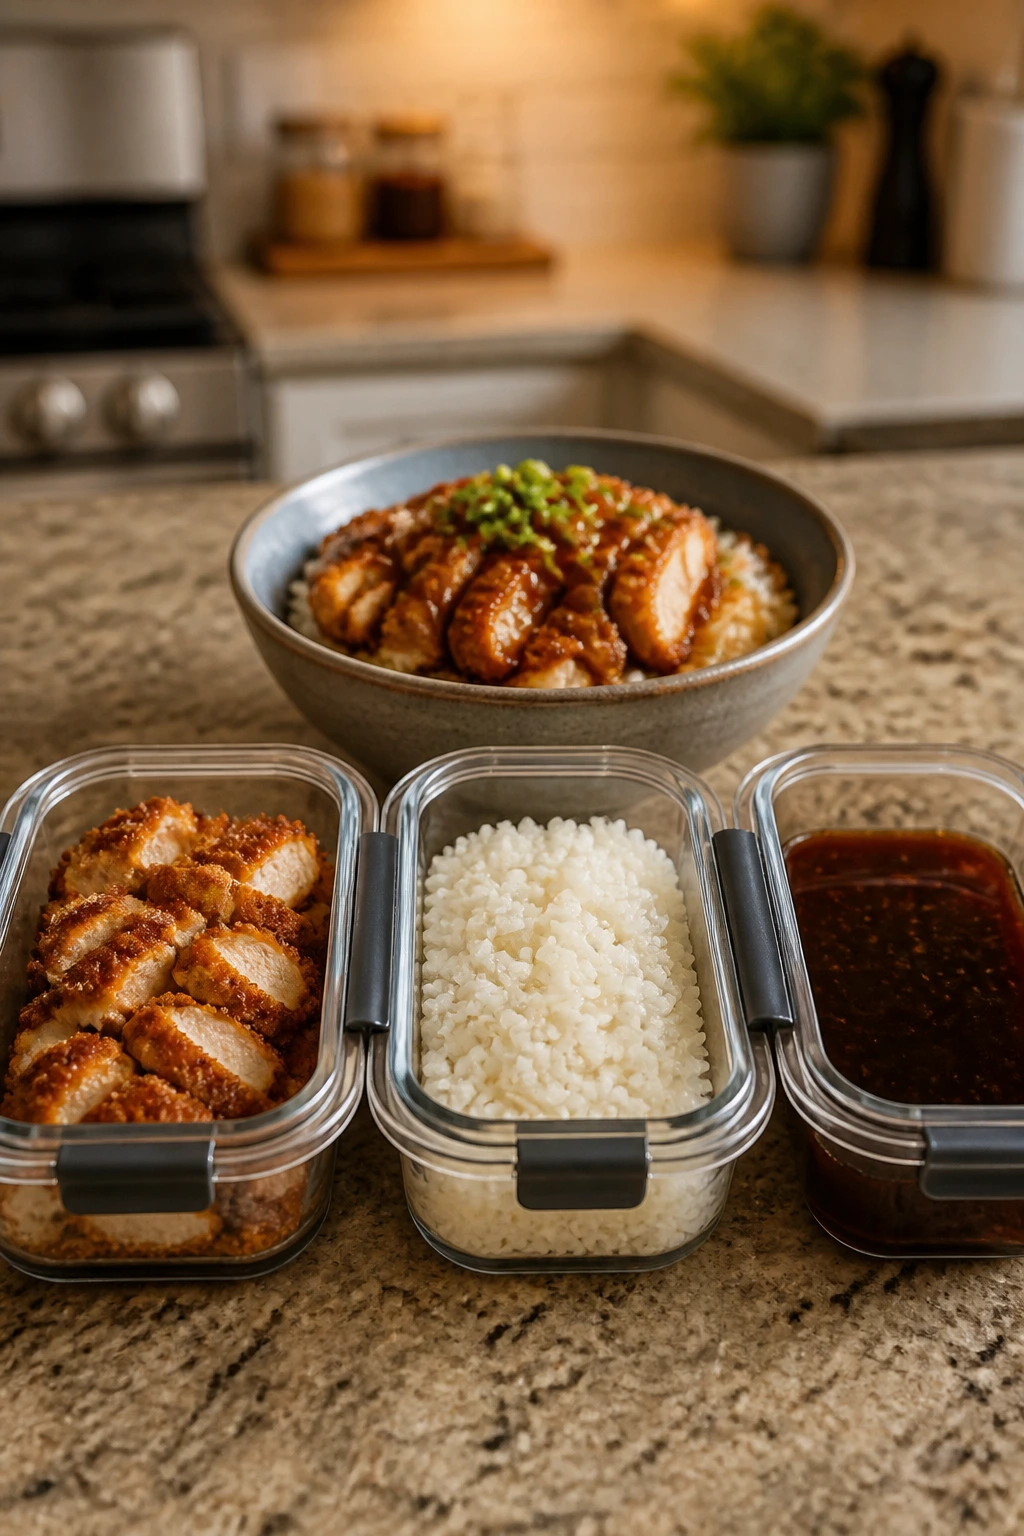
Store the chicken, rice, and sauce in separate containers if you can. That keeps the crust from going limp in the fridge. The chicken and rice will hold for 3 to 4 days refrigerated, while the sauce keeps for up to 5 days in a small sealed container.
Freezing works too, with a caveat. The chicken and sauce can be frozen for up to 2 months, but the chicken will lose some crunch after thawing. Rice freezes for up to 1 month if it’s cooled completely and packed flat in a freezer bag. I do not bother freezing scallions or sesame seeds. They’re garnish, not survival food.
For reheating, the oven or air fryer is better than the microwave if you want any crispness left. Heat the chicken at 375°F for 4 to 6 minutes in an air fryer or 400°F for 8 to 10 minutes in the oven until hot. If the chicken is already sauced, reheat it on a foil-lined tray and expect the coating to soften a bit. Still fine. Still tasty.
Rice likes a splash of water and a lid. Microwave it covered with 1 to 2 teaspoons water per cup of rice for about a minute, then fluff. The steam wakes it back up. Sauce that thickens in the fridge can be loosened with a teaspoon or two of water and warmed over low heat.
For make-ahead work, cook the rice and sauce a day early if that helps. Fry the chicken close to serving time. That’s the part that does not love waiting around.
Crispy Teriyaki Chicken Rice Questions
Can I use chicken breast instead of thighs?
Yes, and the recipe still works, but the margin for error gets smaller. Cut the breast into evenly sized pieces and pull it the moment it hits 165°F so it doesn’t dry out. Thighs stay juicier and handle the glaze better, which is why I prefer them.
How do I keep the chicken crispy after saucing it?
Keep the sauce thick, toss the chicken only for a few seconds, and serve immediately. A wire rack after frying helps a lot too. If you want maximum crunch, spoon some glaze over the rice and leave a few pieces of chicken only lightly coated.
Do I really need mirin?
No, but mirin gives the sauce a gentle sweetness and a clean shine that plain sugar doesn’t quite match. If you skip it, add a tablespoon of water plus a teaspoon of sugar, and the sauce will still taste good. It just won’t have the same roundness.
What rice is best for this bowl?
Jasmine rice is my first choice because it stays fluffy and has a soft aroma that works with soy sauce and ginger. Medium-grain rice also works. Short-grain rice is stickier and can make the bowl feel heavier, though some people like that.
Can I make this ahead for lunches?
Yes, but store the parts separately. Keep the chicken, rice, and sauce in separate containers, then reheat and assemble when you’re ready to eat. If you mix everything together the night before, the coating will go soft.
Why did my sauce turn gummy?
Usually the heat was too high, the slurry went in too early, or the sauce kept cooking after it had already thickened. Pull it from the stove a little earlier than you think, since it continues to tighten as it cools. If it gets too thick, add water a teaspoon at a time.
Can I make this without frying?
You can use an air fryer or a very hot oven, and the bowl will still be good. The texture changes — less deep crunch, more roasted edge — but the sauce and rice still make a solid dinner. Spray the chicken lightly with oil so the coating colors instead of drying out.
A Bowl Worth Making Again
The reason this dish works is not mystery. It’s control. Crisp the chicken first, thicken the sauce to the right point, and give the rice enough structure to hold everything without turning soggy. That’s the whole trick, and it’s a satisfying one.
I like recipes that reward attention without demanding drama, and this is one of them. The frying is quick, the sauce is straightforward, and the bowl looks and tastes like you spent more effort than you did. Once you get the timing into your hands, you’ll stop thinking of it as a copycat dinner and start thinking of it as your version.
Crispy Teriyaki Chicken Rice — Recipe Card
Recipe Name: Crispy Teriyaki Chicken Rice
Description: Crispy chicken thighs tossed in a glossy teriyaki glaze and served over fluffy jasmine rice. Sweet, salty, and sharp at the edges, with enough crunch left in the chicken to make the bowl worth the pan time.
Prep Time: 20 minutes
Cook Time: 30 minutes
Total Time: 50 minutes
Course: Main Course
Cuisine: Japanese-Inspired
Servings: 4 servings
Calories: 720 kcal per serving
Ingredients
For the Rice:
- 2 cups jasmine rice, rinsed well
- 3 cups water
- 1/2 teaspoon fine salt
For the Crispy Chicken:
- 1 1/2 pounds boneless, skinless chicken thighs, cut into 1-inch pieces
- 1 teaspoon kosher salt
- 1/2 teaspoon black pepper
- 1/2 teaspoon garlic powder
- 2 large eggs, beaten
- 1 cup cornstarch
- 1/2 cup all-purpose flour
- 1/4 cup neutral oil, for pan-frying
For the Teriyaki Sauce:
- 1/2 cup low-sodium soy sauce
- 1/2 cup water
- 1/4 cup mirin
- 3 tablespoons light brown sugar, packed
- 1 tablespoon honey
- 1 tablespoon rice vinegar
- 2 garlic cloves, finely grated or minced
- 1 teaspoon fresh ginger, finely grated
- 1 teaspoon toasted sesame oil
- 2 teaspoons cornstarch mixed with 2 tablespoons cold water
For Serving:
- 3 scallions, thinly sliced
- 1 tablespoon sesame seeds, toasted if you like
- Steamed broccoli or cucumber slices, optional
Instructions
-
Rinse the jasmine rice until the water runs mostly clear. Combine it with the water and salt in a saucepan, bring to a boil, cover, reduce to low, and simmer for 15 minutes. Rest off the heat for 10 minutes, then fluff.
-
Whisk the soy sauce, water, mirin, brown sugar, honey, rice vinegar, garlic, ginger, and sesame oil in a small saucepan. Stir the cornstarch with cold water in a separate cup.
-
Pat the chicken dry and season with salt, pepper, and garlic powder. Beat the eggs in one bowl and mix the cornstarch with the flour in another shallow bowl.
-
Dip the chicken in the egg, then coat it in the cornstarch-flour mixture, pressing lightly so it sticks.
-
Heat the oil in a 12-inch skillet over medium-high heat. Fry the chicken in batches for 4 to 5 minutes per side, until golden and cooked through to 165°F. Transfer to a wire rack.
-
Pour off all but 1 tablespoon of oil. Lower the heat to medium, add the sauce mixture, bring it to a gentle simmer, then stir in the cornstarch slurry and cook for 30 to 45 seconds until glossy.
-
Return the chicken to the skillet and toss quickly to coat. Spoon over rice and finish with scallions, sesame seeds, and optional vegetables.
Notes: Fry in batches so the oil stays hot; sauce the chicken only at the end so the crust stays crisp; if the glaze thickens too much, loosen it with 1 to 2 teaspoons of water.