
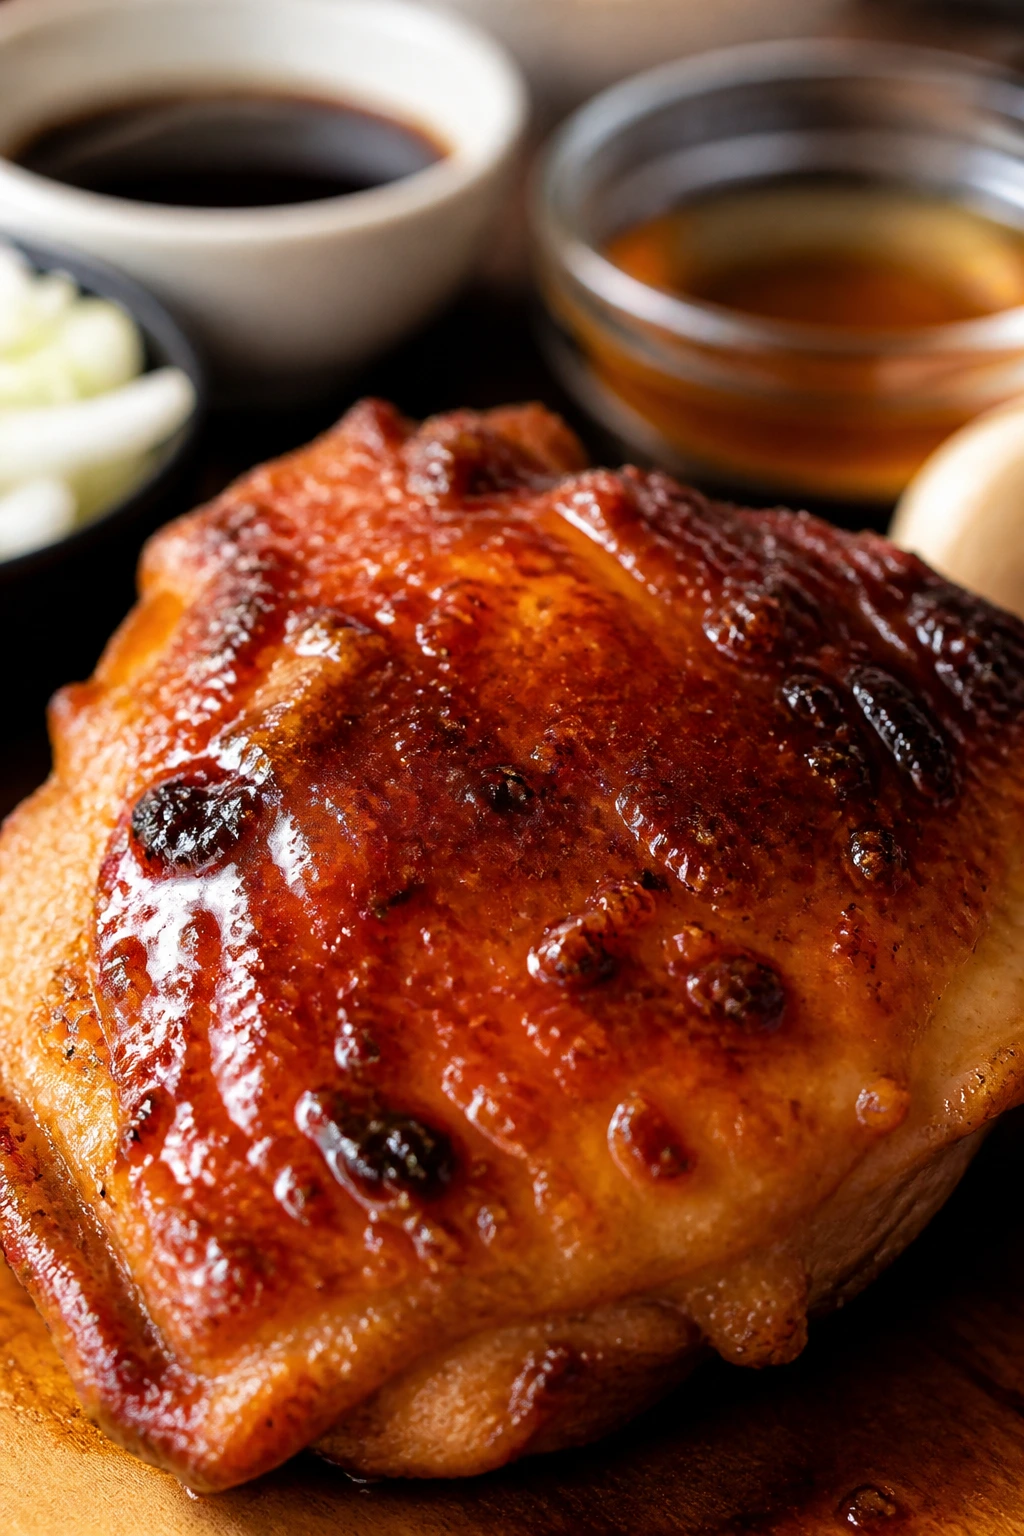
A good Japanese sweet and sour dinner smells like hot oil, rice vinegar, soy sauce, and chicken with browned edges. It’s the kind of smell that makes people drift into the kitchen and ask when you’re eating, even if they were planning to wait politely in the other room. This version keeps the sweet part in check, lets the sourness stay bright, and gives the chicken enough crispness to feel like more than sauced meat.
No limp nuggets. No mystery sauce.
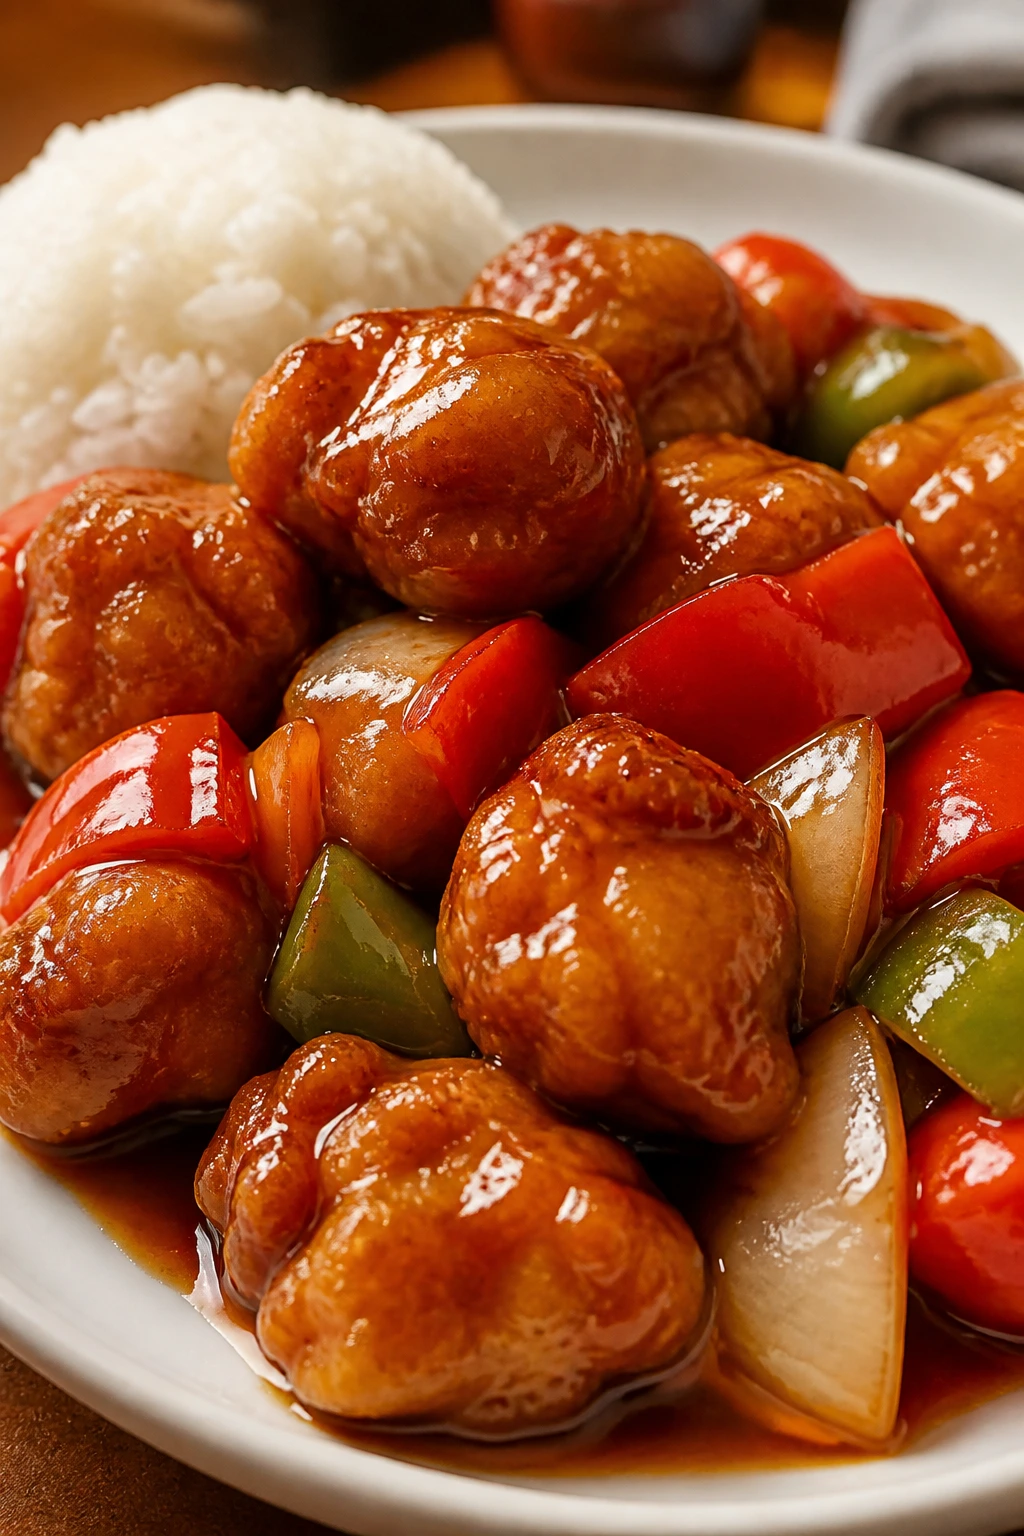
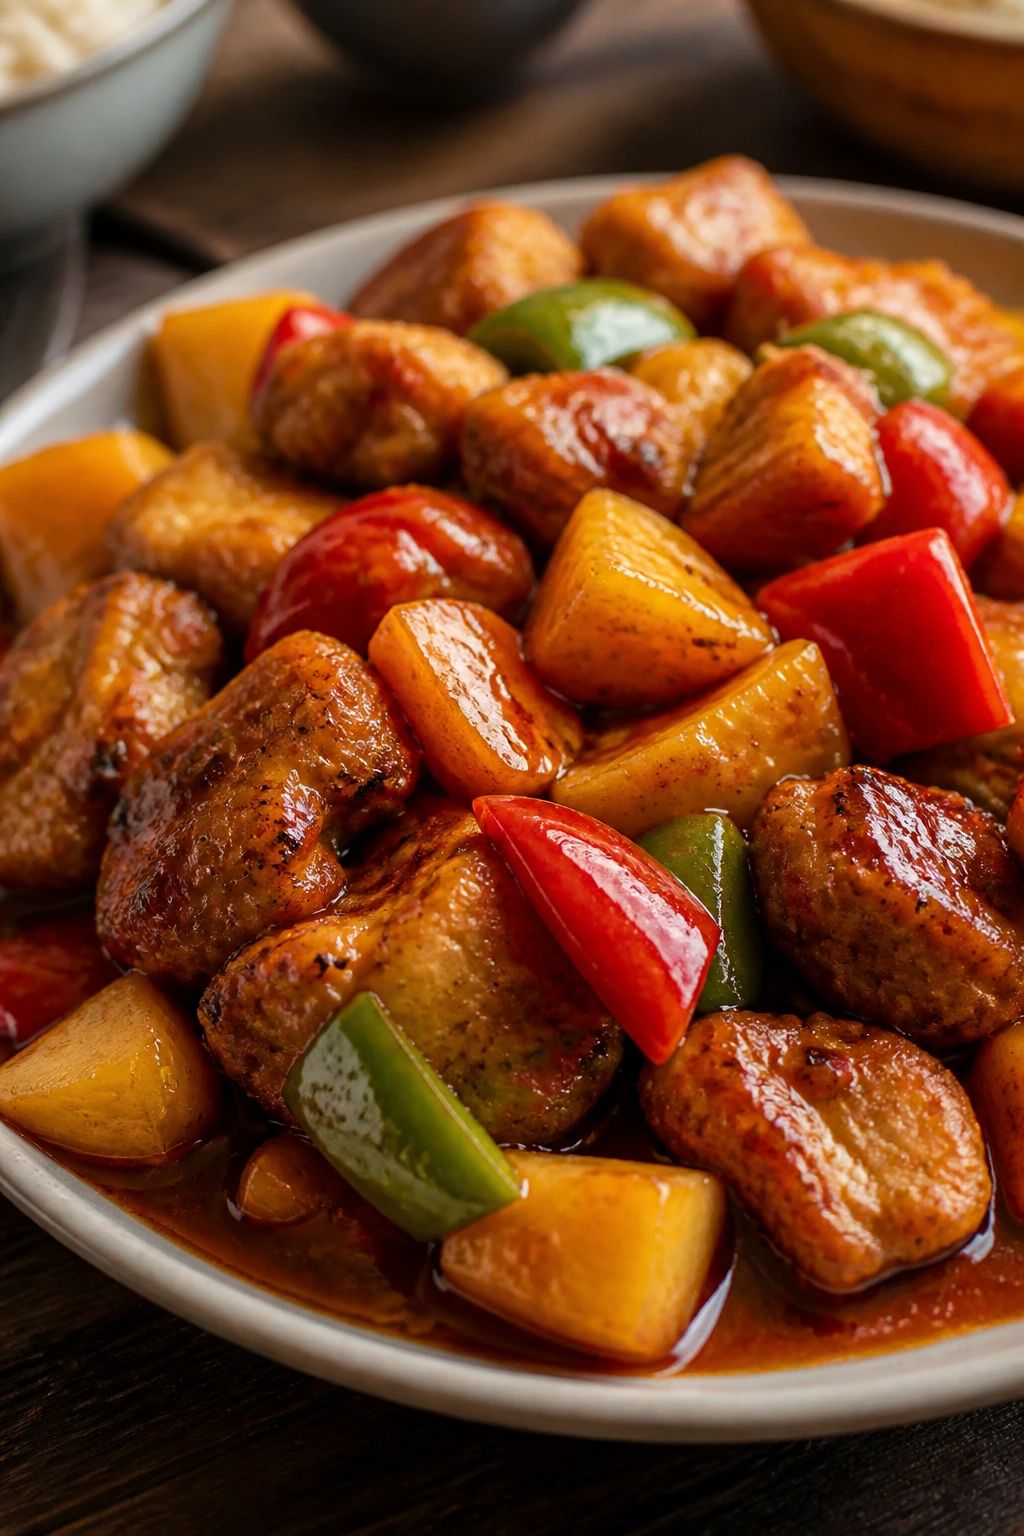
What makes this style worth cooking at home is the texture game. The chicken gets a thin cornstarch coating, so the outside turns a little snappy in the skillet before the glaze lands. The peppers stay vivid and barely tender. The sauce clings in a shiny layer instead of pooling at the bottom of the plate, which is the point, really. Takeout sweet and sour can be fine when it’s fresh, but it often arrives a little too sweet, a little too soft, and already past its best moment. At home, you get to choose the temperature, the thickness, and how far you want the sauce to lean tangy.
Why This Japanese Sweet and Sour Dinner Earns a Place in the Rotation
-
Glossy, not syrupy: The sauce uses ketchup, rice vinegar, soy sauce, mirin, and a small amount of sugar, so it tastes bright first and sticky only at the end.
-
Crisp edges matter here: A cornstarch coating gives the chicken a thin crust that survives the sauce long enough to matter, especially if you serve it right away.
-
The vegetables still have a spine: Onion wedges and bell peppers soften in the pan, but they don’t collapse into mush if you keep the heat up and the pieces big enough.
-
It handles a real dinner plate: Spoon it over rice, tuck it next to shredded cabbage, or serve it with noodles. The sauce has enough body to work with all three.
-
It tastes better than the box once it rests five minutes: The flavors settle fast, and the sauce tightens just enough to coat the rice without soaking it into a swamp.
Where the Flavor Comes From
This dish sits in that comfortable space between Japanese home cooking and Japanese-American restaurant food. It isn’t pretending to be a centuries-old classic from one tidy origin story, and that honesty helps. What most people recognize as Japanese sweet and sour leans on a very specific balance: rice vinegar for clean sharpness, soy sauce for salt and depth, ketchup for tomato sweetness and color, and mirin for a rounded glaze that tastes smoother than plain sugar ever could.
The sauce is the whole argument. If you get that part right, the rest behaves.
The other half of the story is texture. Takeout versions often rely on deep frying, which gives you a big crunch at first but can feel greasy once the sauce sits for even a few minutes. This home version uses a skillet and a lighter coating, so the chicken browns without turning heavy. It’s not fragile, either. A good piece stays juicy inside, with a coating that has enough grip to hold sauce instead of sliding off in one glossy sheet.
There’s also a practical reason this dinner works so well on a weeknight: the vegetables and chicken cook at similar speeds when they’re cut to the right size. Keep the onions in wedges and the peppers in bite-size squares, and you can build the whole thing in one pan without turning the stove into a scene from a disaster movie. That matters more than any fancy technique. Good takeout-style food is usually about rhythm, not drama.
Timing, Yield, and Best Served
Yield: Serves 4
Prep Time: 20 minutes
Cook Time: 25 minutes
Total Time: 45 minutes
Difficulty: Intermediate — the steps are straightforward, but the chicken, sauce, and vegetables all need a little attention so nothing goes soft before its time.
Chill/Rest Time: Optional 10 to 15 minutes for the coated chicken to sit before cooking
Best Served: Hot from the skillet over steamed rice, while the chicken still has a crisp edge
Ingredients for the Chicken, Sauce, and Finish
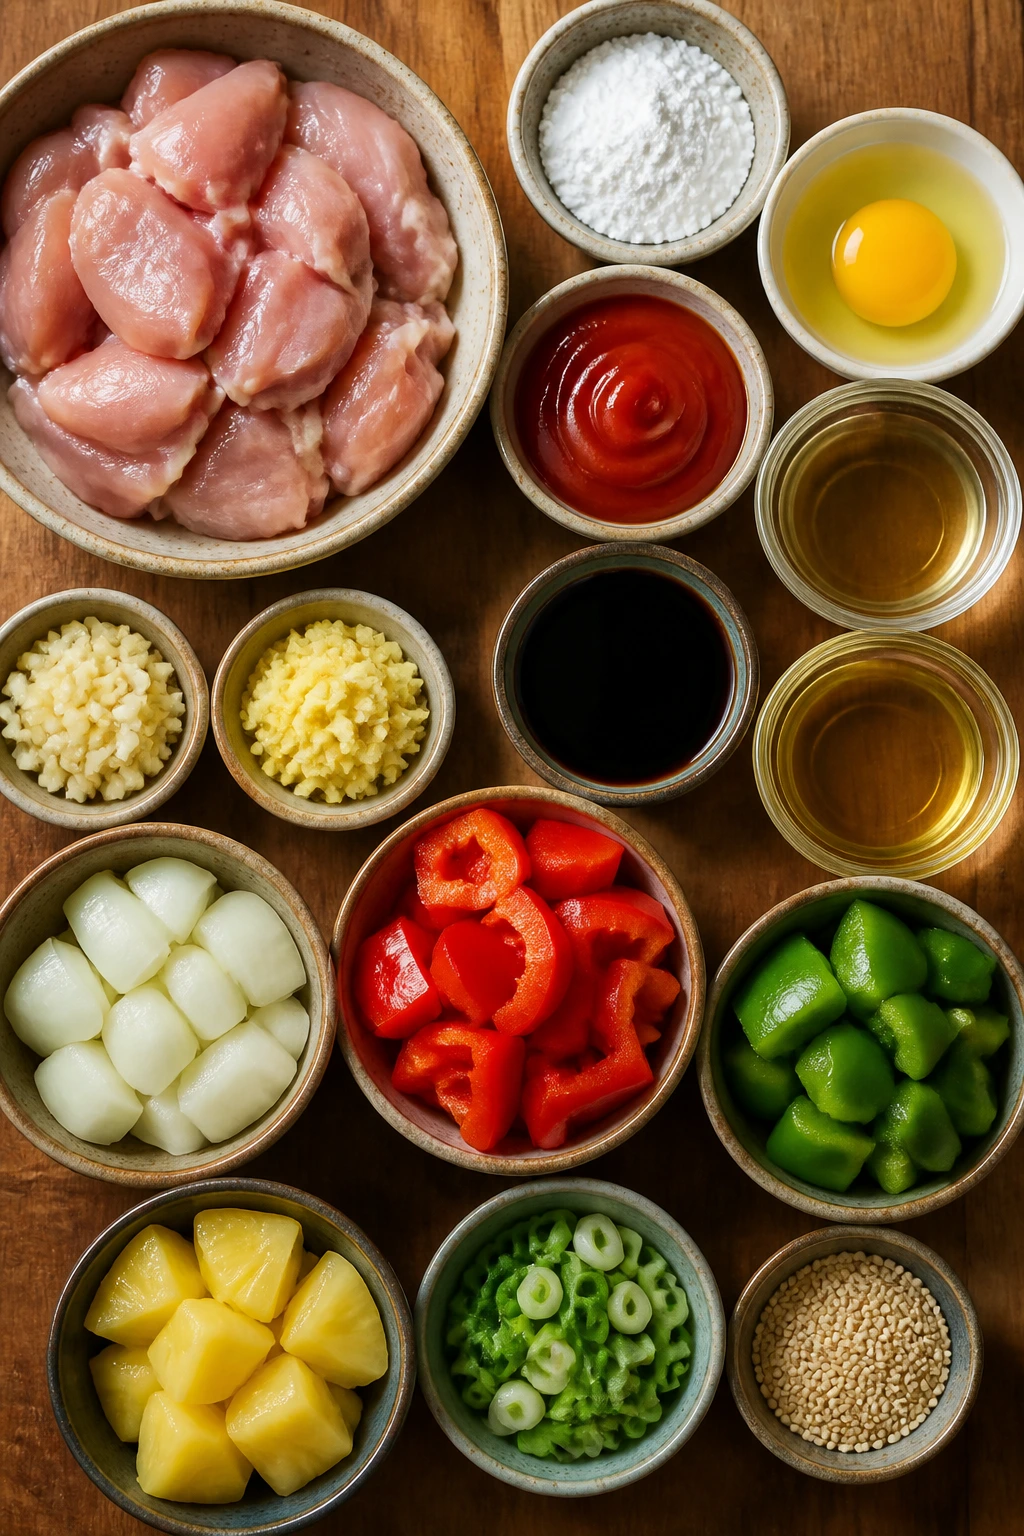
For the Chicken
- 1 1/2 pounds boneless, skinless chicken thighs, cut into 1-inch pieces
- 1 teaspoon kosher salt
- 1/2 teaspoon freshly ground black pepper
- 1 large egg, lightly beaten
- 1/2 cup cornstarch
- 3 tablespoons neutral oil, such as avocado, canola, or grapeseed
For the Sweet and Sour Sauce
- 1/3 cup ketchup
- 1/4 cup rice vinegar
- 3 tablespoons soy sauce or tamari
- 2 tablespoons sugar
- 2 tablespoons mirin
- 1/2 cup water or low-sodium chicken broth
- 2 cloves garlic, finely grated or minced
- 1 teaspoon fresh ginger, finely grated
- 1 tablespoon cornstarch mixed with 1 tablespoon cold water
For the Vegetables and Finish
- 1 medium yellow onion, cut into 1-inch wedges
- 1 red bell pepper, seeded and cut into 1-inch squares
- 1 green bell pepper, seeded and cut into 1-inch squares
- 1 cup pineapple chunks, drained if canned and patted dry
- 2 scallions, thinly sliced
- 1 teaspoon toasted sesame seeds
- 1 teaspoon toasted sesame oil, optional
Why Each Ingredient Matters
Chicken Thighs
What to use: 1 1/2 pounds boneless, skinless chicken thighs cut into 1-inch pieces.
Preparation: Pat the chicken dry before cutting it. Then keep the pieces roughly the same size so they brown at the same speed and finish together.
Substitutions: Chicken breast works if that’s what you have, but cut it a little larger and watch the clock more closely. Firm tofu can also work if you’re making a vegetarian version.
Tips: Thighs stay juicier in a hot skillet, which matters because the sauce goes on at the end and the chicken only has a short window before it loses its edge. If the pieces are wet, the coating slips. Dry chicken is happier chicken.
The Crisp Coating
What to use: 1 large egg and 1/2 cup cornstarch.
Preparation: Beat the egg in a bowl, toss the chicken in it, then coat each piece in cornstarch until it looks lightly dusty rather than caked.
Substitutions: Potato starch gives an even snappier crust if you keep it around. Arrowroot can work in a pinch, though it browns a little less aggressively.
Tips: Coat the chicken right before it hits the pan. If it sits in the starch for too long, the coating gets gummy and starts looking damp before it ever cooks.
The Sweet and Sour Sauce
What to use: 1/3 cup ketchup, 1/4 cup rice vinegar, 3 tablespoons soy sauce, 2 tablespoons sugar, 2 tablespoons mirin, 1/2 cup water or low-sodium chicken broth, 2 cloves garlic, and 1 teaspoon ginger.
Preparation: Whisk everything except the cornstarch slurry in a bowl before you heat the pan. That keeps the sauce moving fast once the vegetables are done.
Substitutions: Tamari can replace soy sauce for a gluten-free version. If you don’t have mirin, add 1 extra teaspoon sugar and 1 tablespoon water, or use a splash of dry sherry if you keep that on hand.
Tips: Taste the sauce before thickening it. If your ketchup is very sweet, the sauce may need a touch more vinegar. If your rice vinegar is especially sharp, another teaspoon of sugar smooths the corners.
Vegetables and Fruit
What to use: 1 medium yellow onion, 1 red bell pepper, 1 green bell pepper, and 1 cup pineapple chunks.
Preparation: Cut the onion into wedges that stay attached at the root end. Slice the peppers into pieces that are easy to spear with chopsticks or a fork. Drain canned pineapple well and blot it dry.
Substitutions: Snap peas, carrot coins, or baby corn can stand in for one of the peppers. If pineapple isn’t your thing, use extra bell pepper and a splash of pineapple juice in the sauce for a softer sweet note.
Tips: Keep the vegetable pieces on the larger side. Tiny cuts disappear into the sauce too fast and turn the whole pan into something closer to stew than stir-fry.
Finishing Touches
What to use: 2 sliced scallions, 1 teaspoon toasted sesame seeds, and 1 teaspoon toasted sesame oil if you want a deeper finish.
Preparation: Slice the scallions just before serving so they stay crisp and bright. Toasted sesame oil should go in at the end, not during the main cook.
Substitutions: Black sesame seeds add a stronger visual contrast. Thin strips of nori can work as a garnish if you want a more Japanese look.
Tips: A final sprinkle of scallion greens gives the sauce a fresher smell right when it hits the table. That little green hit matters more than people think.
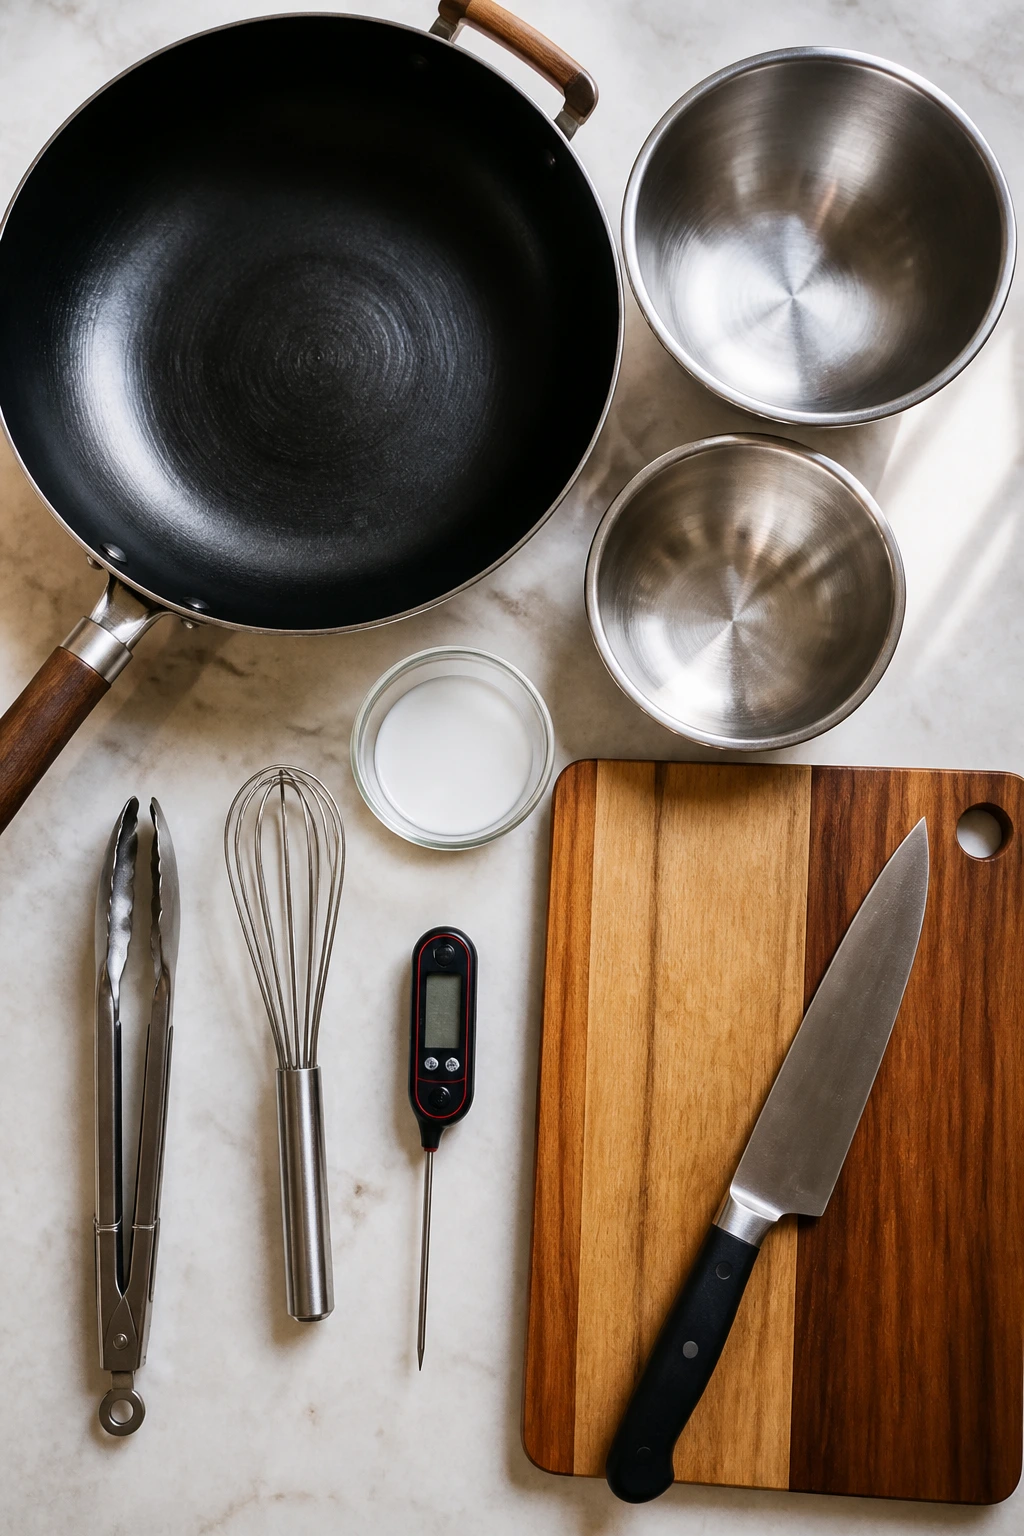
The Tools That Make the Skillet Method Easier
-
12-inch skillet or wok: You need enough surface area for the chicken to brown instead of steam.
-
Two medium mixing bowls: One for coating the chicken, one for whisking the sauce.
-
Small bowl or cup for the slurry: Cornstarch thickens cleanly when it’s mixed with cold water first.
-
Whisk: This keeps the sauce smooth and helps the cornstarch dissolve without lumps.
-
Tongs or a wide spatula: Useful for turning the chicken pieces without scraping off the coating.
-
Instant-read thermometer: Chicken thighs should reach 165°F / 74°C at the thickest point.
-
Cutting board and sharp knife: The vegetables look better and cook more evenly when the pieces are cleanly cut.
The Skillet Method, Step by Step
Prep the Chicken and Coating
-
Pat the chicken thighs dry with paper towels, then cut them into 1-inch pieces. Dry surfaces brown better, and browning matters here because the sauce is sweet enough to flatten weak chicken fast.
-
Season the chicken with the salt and black pepper in a medium bowl. Toss until the pieces look evenly seasoned before you add anything wet.
-
Add the beaten egg and stir until every piece is lightly coated. Sprinkle in the cornstarch and toss again until the chicken looks pale and dusty. Let it sit for 5 to 10 minutes while you make the sauce. Do not let the chicken sit for so long that the coating gets damp and pasty.
Mix the Sauce
-
In a second bowl, whisk together the ketchup, rice vinegar, soy sauce, sugar, mirin, water or broth, garlic, and ginger until the sugar dissolves. The sauce should look loose and smooth, not grainy.
-
Stir the cornstarch with the cold water in a small cup until it turns completely smooth. Set it beside the stove. If the slurry sits too long, give it another quick stir before you use it.
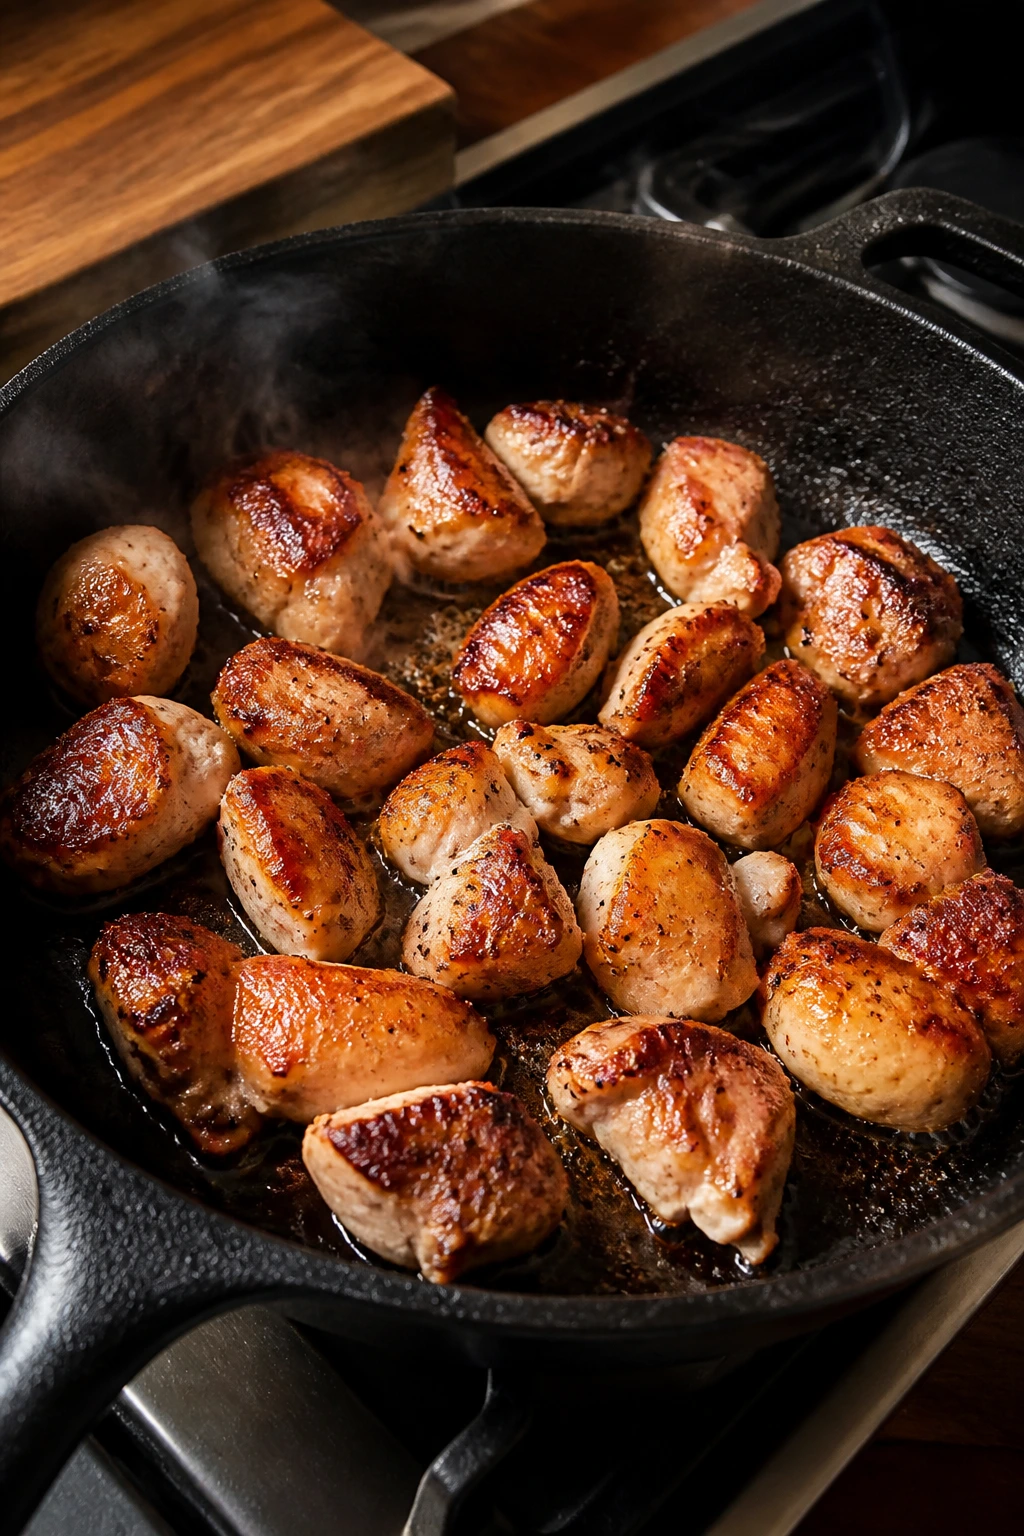
Sear the Chicken
-
Heat 2 tablespoons of the neutral oil in a 12-inch skillet over medium-high heat until it shimmers. Add half the chicken in a single layer and let it cook without touching it for 2 to 3 minutes, until the underside turns golden and the coating looks set.
-
Turn the chicken pieces and cook for another 2 to 3 minutes, until the second side browns and the chicken is nearly cooked through. Transfer it to a plate and repeat with the remaining oil and chicken. Do not crowd the pan; overlapping pieces will steam and lose the crust you just built.
Cook the Vegetables
-
Lower the heat to medium. Add the onion wedges, red bell pepper, and green bell pepper to the same skillet. Cook for 2 to 3 minutes, stirring now and then, until the onion edges start to soften and the peppers look glossy but still firm.
-
If the pan looks dry, add a teaspoon of water or a drizzle of oil. You want the vegetables to pick up the browned bits in the pan, not scorch on a dry surface.
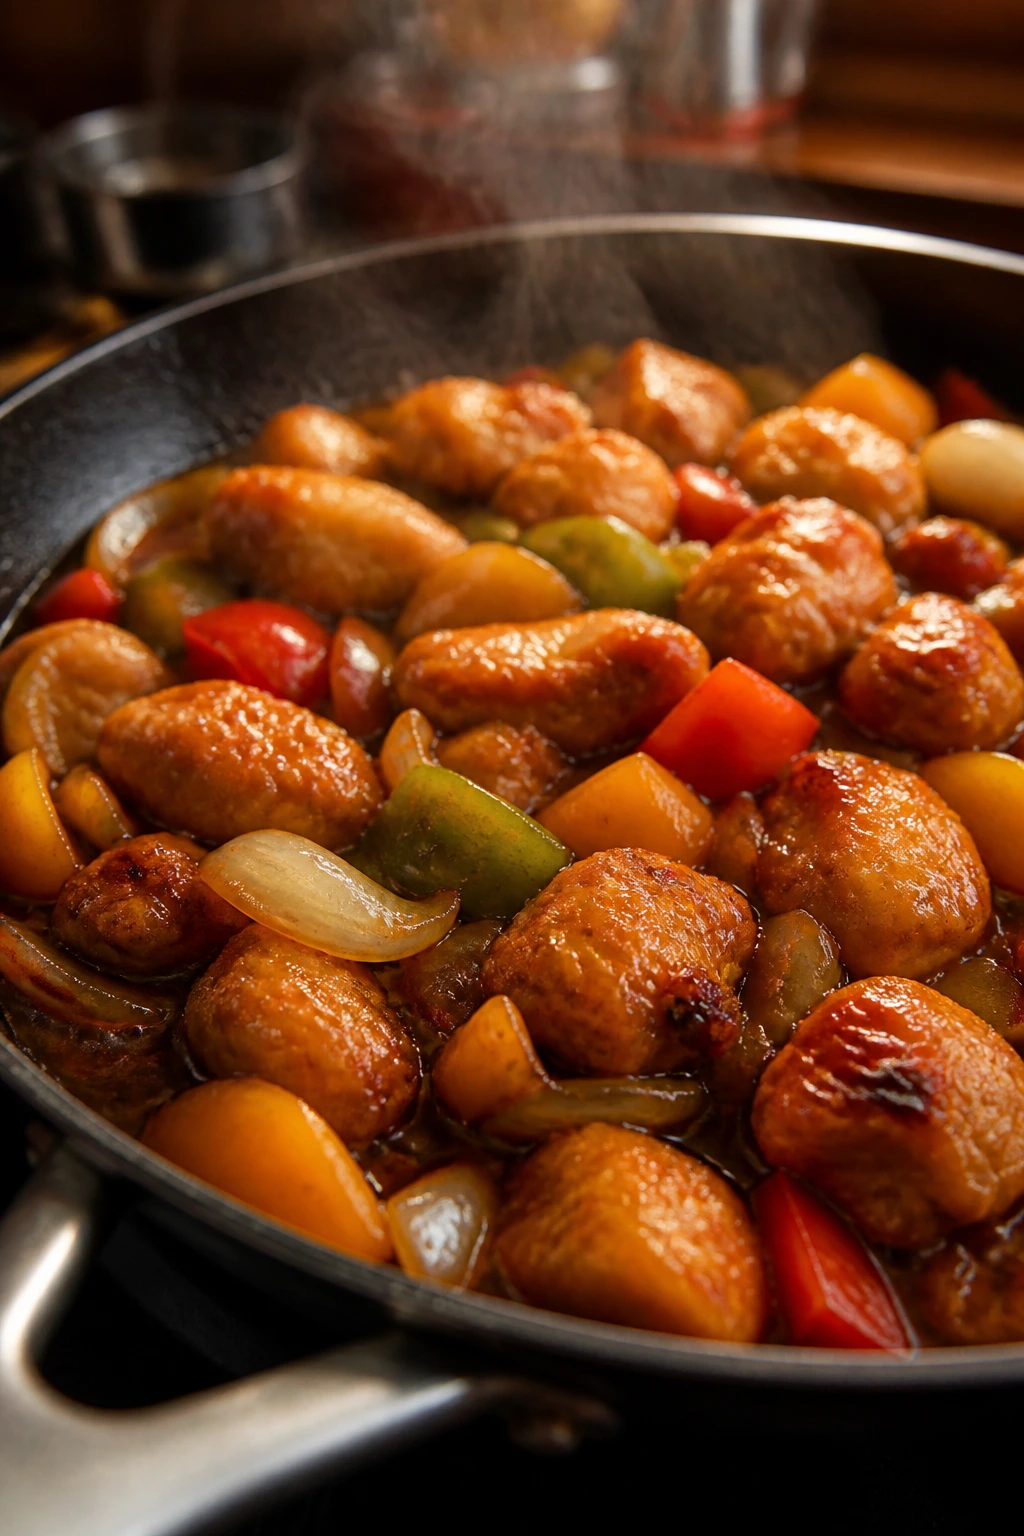
Glaze and Finish
-
Pour in the sauce mixture and bring it to a lively simmer. Stir the cornstarch slurry again, then drizzle it into the pan while stirring. Cook for 30 to 60 seconds, until the sauce turns glossy and thick enough to coat the back of a spoon.
-
Return the chicken and any juices to the skillet along with the pineapple chunks. Toss everything together for 1 to 2 minutes, just until the chicken reaches 165°F / 74°C and the pineapple is hot through. Do not leave the chicken simmering in the sauce for long; the coating softens fast once it starts soaking.
-
Turn off the heat. Stir in the toasted sesame oil if you’re using it, then scatter the scallions and sesame seeds over the top. Taste a spoonful. If it leans too sweet, a teaspoon of rice vinegar sharpens it. If it tastes too sharp, a pinch of sugar rounds it out.
How to Serve It as a Full Dinner
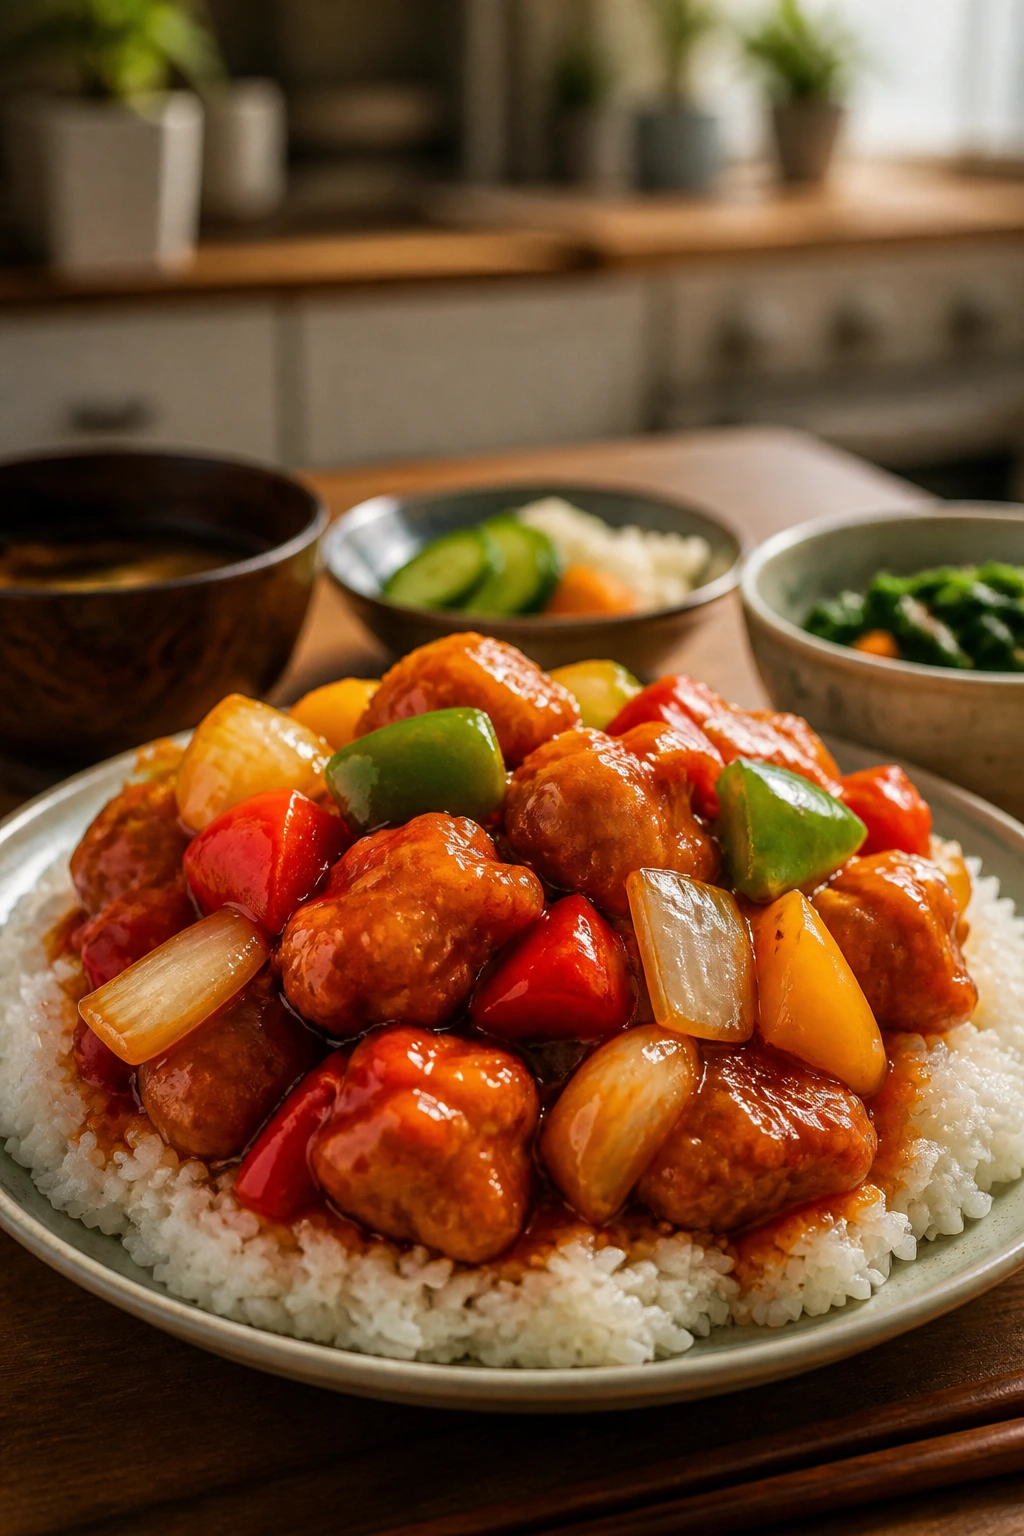
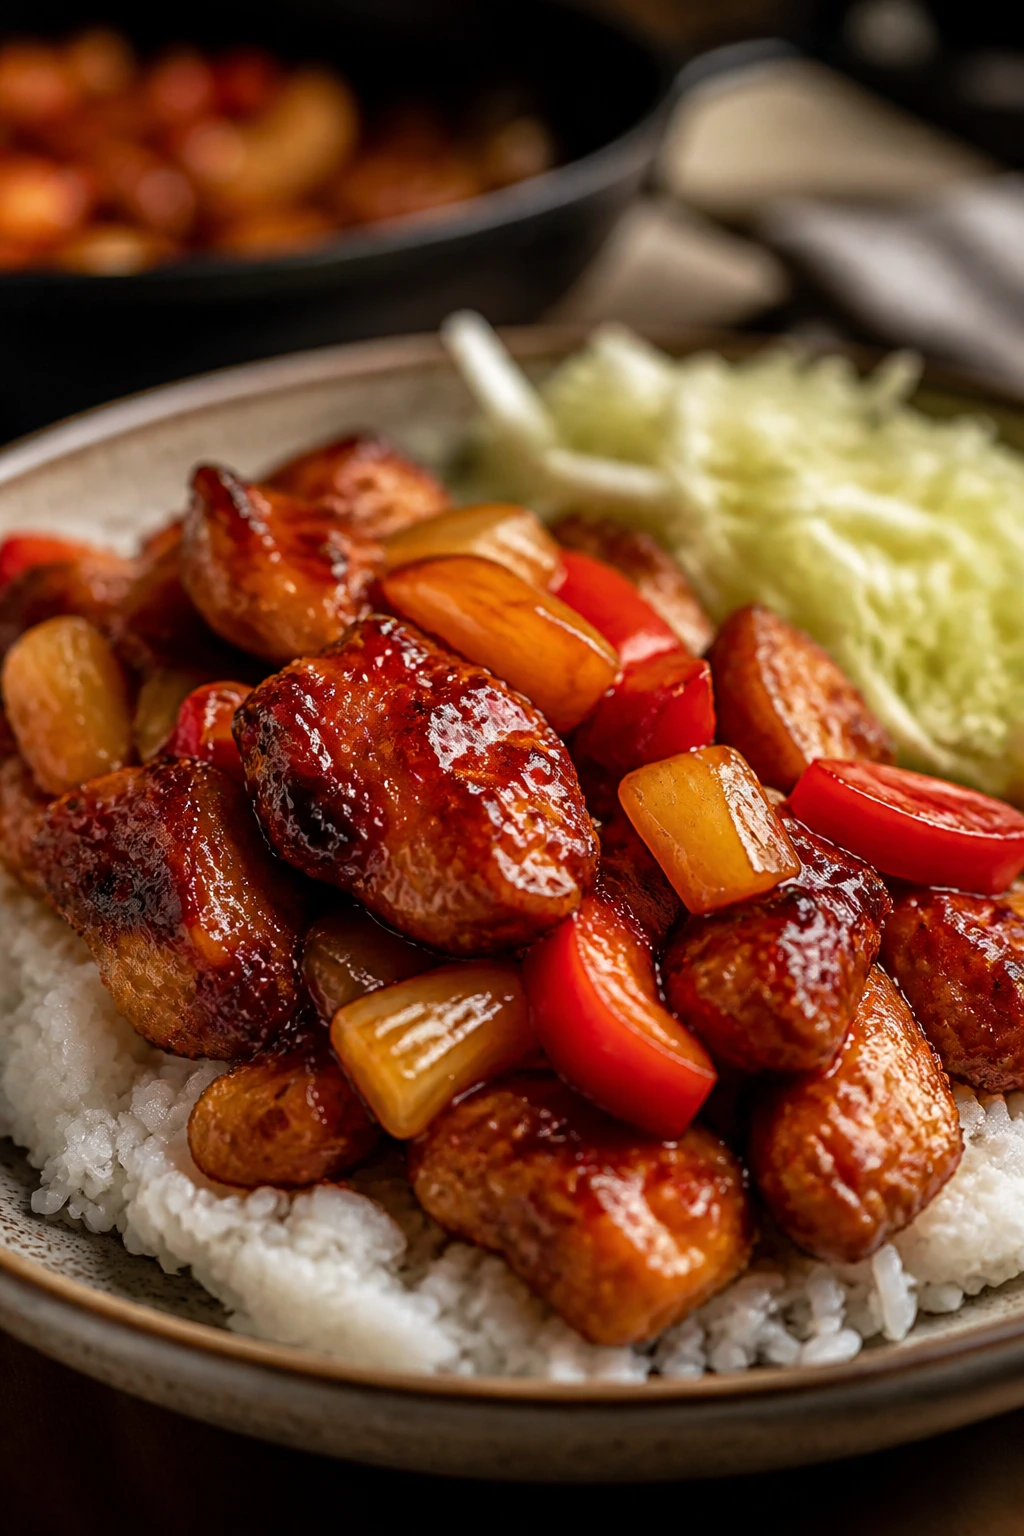
Presentation: Spoon the chicken and vegetables over a mound of hot steamed rice in a shallow bowl. Let a little sauce run around the rice instead of hiding it all under the chicken; that’s what gives each bite a glossy edge. A few extra scallion slices on top make the whole thing look alive instead of brown.
Accompaniments: Plain white rice is the most natural fit, especially short-grain rice or jasmine rice with a light hand on the water. A quick cucumber salad with rice vinegar, a simple miso soup, or a plate of steamed edamame keeps the meal from feeling heavy. If you want something a little more casual, shredded cabbage on the side works well because it stays crunchy against the sauce.
Portions: Plan on about 1 1/4 to 1 1/2 cups of chicken and vegetables per person before the rice. For big eaters, serve closer to 2 cups and keep extra sauce nearby. If you’re stretching the dish, add more rice and a side of greens instead of thinning the sauce too much.
Beverage Pairing: Cold lager, unsweetened green tea, or sparkling water with lime all work. A dry drink is the best counterweight here, because the sauce already carries enough sugar for the plate.
Small Moves That Make It Taste Better
Flavor Enhancement: A teaspoon of toasted sesame oil added after the heat is off gives the sauce a deeper, nutty smell. Keep it subtle. Too much and it starts tasting like a different dinner.
Time-Saver: Whisk the sauce in the morning or the night before and keep it in the fridge. You can also cut the onion and peppers ahead of time, but coat the chicken only when you’re about to cook it.
Pro Move: After the first batch of chicken goes in, leave it alone for a full minute before turning it. That pause helps the coating set, which is the difference between a decent crust and a patchy one that falls off in the pan.
Cost-Saver: Use chicken thighs instead of breasts and frozen pepper strips if that’s what’s in the freezer. Thaw the peppers in a colander first so the extra water doesn’t thin out the sauce.
Make-It-Yours: If you like heat, put chili oil, shichimi togarashi, or thin sliced fresh chilies on the table instead of stirring them into the whole pan. That keeps the base family-friendly and lets each bowl go in a different direction.
Mistakes That Make Sweet and Sour Go Flat
-
Starting with wet chicken: If the chicken goes into the bowl damp, the cornstarch turns paste-like instead of crisp. The coating then sticks to the pan and tears when you flip it. Pat the chicken dry first. It takes 30 seconds and changes the whole texture.
-
Crowding the skillet: Too much chicken in the pan drops the temperature fast, and suddenly you’re steaming pale chicken pieces in a puddle. Cook in batches. A little more time is cheaper than a soggy dinner.
-
Adding the slurry without stirring it again: Cornstarch settles fast. If the slurry sits and you pour only the top watery layer, the sauce won’t thicken evenly and you’ll get weird pockets of thin liquid. Stir it right before it goes in.
-
Overcooking the sauce after the chicken returns: The chicken only needs a minute or two in the sauce to finish. If you leave it simmering too long, the coating softens and the meat tightens. Get it hot, toss, serve.
-
Using pineapple packed in syrup and not draining it: Sweet syrup in the pan pushes the sauce toward candy territory and can make the glaze loose. Drain canned pineapple well and blot it dry. Fresh pineapple works too if you cut it into small, dry pieces.
-
Letting the vegetables disappear: Tiny-cut peppers and onions melt into the sauce before the chicken is done. Keep the cuts chunky enough that they still look like vegetables at the end. That’s part of the dinner’s shape and bite.
Variations That Still Taste Like the Dish
-
Spicy Ginger Kick: Add 1 to 2 teaspoons of chili garlic sauce to the sauce mixture, or finish the plate with a few drops of chili oil. The heat should sit underneath the sweetness, not bulldoze it.
-
Tofu and Pepper Skillet: Swap the chicken for 1 1/2 pounds of extra-firm tofu, pressed for 20 minutes and cut into 1-inch cubes. Coat the tofu lightly in cornstarch, pan-fry until the edges look crisp, then toss it through the same sauce and vegetables.
-
Gluten-Free Bowl Night: Use tamari instead of soy sauce and check that your ketchup is gluten-free. If you want extra insurance, keep the coating to cornstarch only and skip any flour entirely.
-
Pineapple-Forward Version: Increase the pineapple to 1 1/2 cups and add 2 tablespoons of the drained pineapple juice to the sauce. This makes the glaze looser and fruitier, which is useful if you like a softer, brighter sweet note.
-
Vegetable-Heavy Dinner: Add snap peas, carrots cut on the bias, or a handful of blanched broccoli florets. Keep the chicken amount the same and let the vegetables take up more of the pan space.
Storing, Reheating, and Making It Ahead
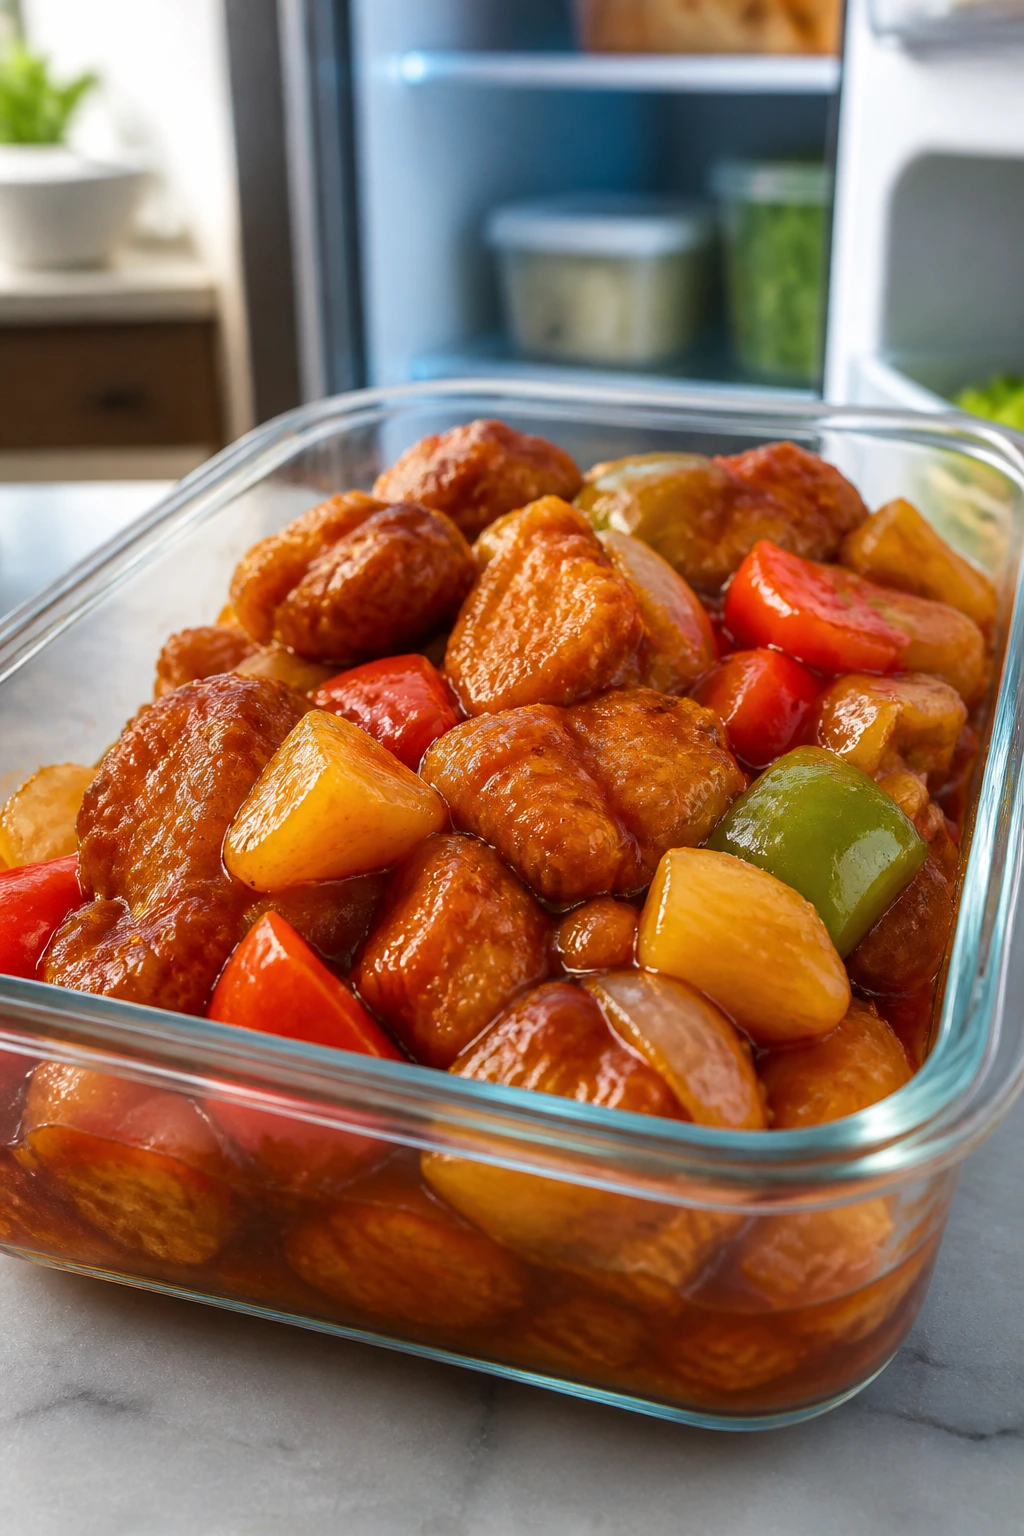
Sweet and sour chicken keeps well in the fridge for 3 to 4 days in a sealed container. The chicken will soften a little, and that’s normal. The sauce clings differently after cooling, but the flavor holds up. Food safety guidance is plain on this one: don’t leave it at room temperature for more than 2 hours, and less if your kitchen runs warm.
Freezing works, but it changes the texture. You can freeze the finished dish for up to 2 months, though the peppers and pineapple will be softer after thawing. If you know you’ll freeze part of it, stop cooking the vegetables a touch earlier so they don’t collapse later. Thaw overnight in the fridge before reheating.
For reheating, a skillet gives the best result. Put the leftovers in a pan over medium heat with a tablespoon or two of water, cover for a minute, then uncover and stir until hot. That keeps the sauce from turning gluey. The microwave works in a pinch, but use 30-second bursts and stir between rounds so the edges don’t dry out while the center stays cold.
The best make-ahead move is to separate the work. Mix the sauce up to 2 days ahead. Chop the vegetables the day before. Cut and season the chicken a few hours ahead if you need to, but don’t coat it in cornstarch until right before cooking or it loses its snap. If you’re hosting, that little bit of staging saves the whole evening.
Questions People Ask Before Cooking It
Can I use chicken breast instead of thighs?
Yes, and it will work fine if you cut the breast into slightly larger pieces and watch the cooking time closely. Breast meat dries out faster, so pull it as soon as it hits 165°F / 74°C and gets no more than a brief toss in the sauce.
What if I don’t have mirin?
Use 1 tablespoon water plus 1 teaspoon sugar, or a splash of dry sherry if you keep that around. Mirin adds a mild sweetness and a soft sheen, so if you skip it, the sauce may need a tiny bit more sugar to feel rounded.
Does the sauce have to be this sweet?
No. If you like a sharper finish, cut the sugar back to 1 tablespoon and add another teaspoon of rice vinegar at the end. The sauce should taste balanced before it lands on the chicken, not like dessert with soy sauce in it.
Can I bake the chicken instead of frying it?
You can. Set the coated chicken on an oiled sheet pan and bake it at 425°F / 220°C for about 15 to 18 minutes, turning once, until the pieces are crisp and the internal temperature reaches 165°F / 74°C. The texture changes a bit, but the sauce still works.
Why did my sauce turn cloudy or lumpy?
Usually the slurry was added too fast, or the cornstarch sat long enough to clump. Whisk the slurry again right before it goes into the pan, then drizzle it in while stirring. If lumps show up, pull the pan off the heat and whisk hard for a few seconds.
Can I make this with tofu or shrimp?
Yes, though the cooking times change. Extra-firm tofu needs to be pressed, dried, and browned first; shrimp cooks fast and should go into the sauce only for the last minute or two so it stays tender.
What sides work if I don’t want rice?
Shredded cabbage, soba noodles, or a simple lettuce-and-cucumber plate all work. The sauce is rich enough that you want something plain and crisp next to it, not another heavy dish fighting for space.
What should I do if the sauce gets too thick in the pan?
Add a tablespoon of water or broth and stir over low heat until it loosens. If it gets too thin, let it simmer for another 30 seconds before deciding it needs more slurry. The sauce changes fast, so small adjustments work better than big ones.
A Better Way to Do Takeout Night

This is the kind of dinner that feels bigger than the effort it asks for. The chicken browns fast, the sauce comes together from pantry pieces, and the vegetables keep the plate from turning monotonous. You get sweetness, sharpness, and a little bit of crunch in the same bite, which is more than most takeout boxes can manage by the time they reach the table.
Make it once and you’ll probably start keeping rice vinegar, cornstarch, and a pack of chicken thighs around without thinking about it. That’s the real trick. Not a shortcut. A habit.
Japanese Sweet and Sour Chicken Dinner — Recipe Card
Recipe Name: Japanese Sweet and Sour Chicken Dinner
Description: Crispy chicken thighs, bell peppers, onion, and pineapple tossed in a glossy sweet and sour sauce made with ketchup, rice vinegar, soy sauce, mirin, and ginger. Best served hot over steamed rice.
Prep Time: 20 minutes
Cook Time: 25 minutes
Total Time: 45 minutes
Course: Main Course
Cuisine: Japanese-inspired
Servings: 4 servings
Calories: About 430 kcal per serving
Ingredients
For the Chicken
- 1 1/2 pounds boneless, skinless chicken thighs, cut into 1-inch pieces
- 1 teaspoon kosher salt
- 1/2 teaspoon freshly ground black pepper
- 1 large egg, lightly beaten
- 1/2 cup cornstarch
- 3 tablespoons neutral oil, such as avocado, canola, or grapeseed
For the Sweet and Sour Sauce
- 1/3 cup ketchup
- 1/4 cup rice vinegar
- 3 tablespoons soy sauce or tamari
- 2 tablespoons sugar
- 2 tablespoons mirin
- 1/2 cup water or low-sodium chicken broth
- 2 cloves garlic, finely grated or minced
- 1 teaspoon fresh ginger, finely grated
- 1 tablespoon cornstarch mixed with 1 tablespoon cold water
For the Vegetables and Finish
- 1 medium yellow onion, cut into 1-inch wedges
- 1 red bell pepper, seeded and cut into 1-inch squares
- 1 green bell pepper, seeded and cut into 1-inch squares
- 1 cup pineapple chunks, drained if canned and patted dry
- 2 scallions, thinly sliced
- 1 teaspoon toasted sesame seeds
- 1 teaspoon toasted sesame oil, optional
Instructions
-
Pat the chicken dry, then cut it into 1-inch pieces. Season with salt and pepper.
-
Toss the chicken with the beaten egg, then add the cornstarch and coat lightly. Let stand 5 to 10 minutes.
-
Whisk the ketchup, rice vinegar, soy sauce, sugar, mirin, water or broth, garlic, and ginger in a bowl. Stir the cornstarch slurry in a separate small cup.
-
Heat 2 tablespoons of the oil in a 12-inch skillet over medium-high heat. Brown half the chicken for 2 to 3 minutes per side, then transfer to a plate. Repeat with the remaining oil and chicken.
-
Lower the heat to medium. Add the onion and bell peppers and cook for 2 to 3 minutes, until slightly softened but still crisp.
-
Pour in the sauce mixture and bring it to a simmer. Stir in the slurry and cook for 30 to 60 seconds, until glossy and thick enough to coat a spoon.
-
Return the chicken and any juices to the skillet with the pineapple. Toss for 1 to 2 minutes, until the chicken reaches 165°F / 74°C and everything is hot.
-
Turn off the heat. Stir in the sesame oil if using, then finish with scallions and sesame seeds. Serve immediately over rice.
Notes: Drain canned pineapple well so the sauce stays glossy; don’t crowd the skillet when browning the chicken; add a teaspoon of rice vinegar at the end if you want more sharpness.