
Dry chicken is rarely a seasoning problem. It’s usually a timing problem.
That’s why juicy make ahead chicken for weeknight dinners works so well when the rest of dinner feels like a race against the clock. You cook the chicken when you’ve got ten quiet minutes and a thermometer in your hand, not when the rice is boiling over and somebody is asking where the forks went. You cool it the right way. You store it the right way. Then, two nights later, you’re not starting from scratch with raw meat and crossed fingers.
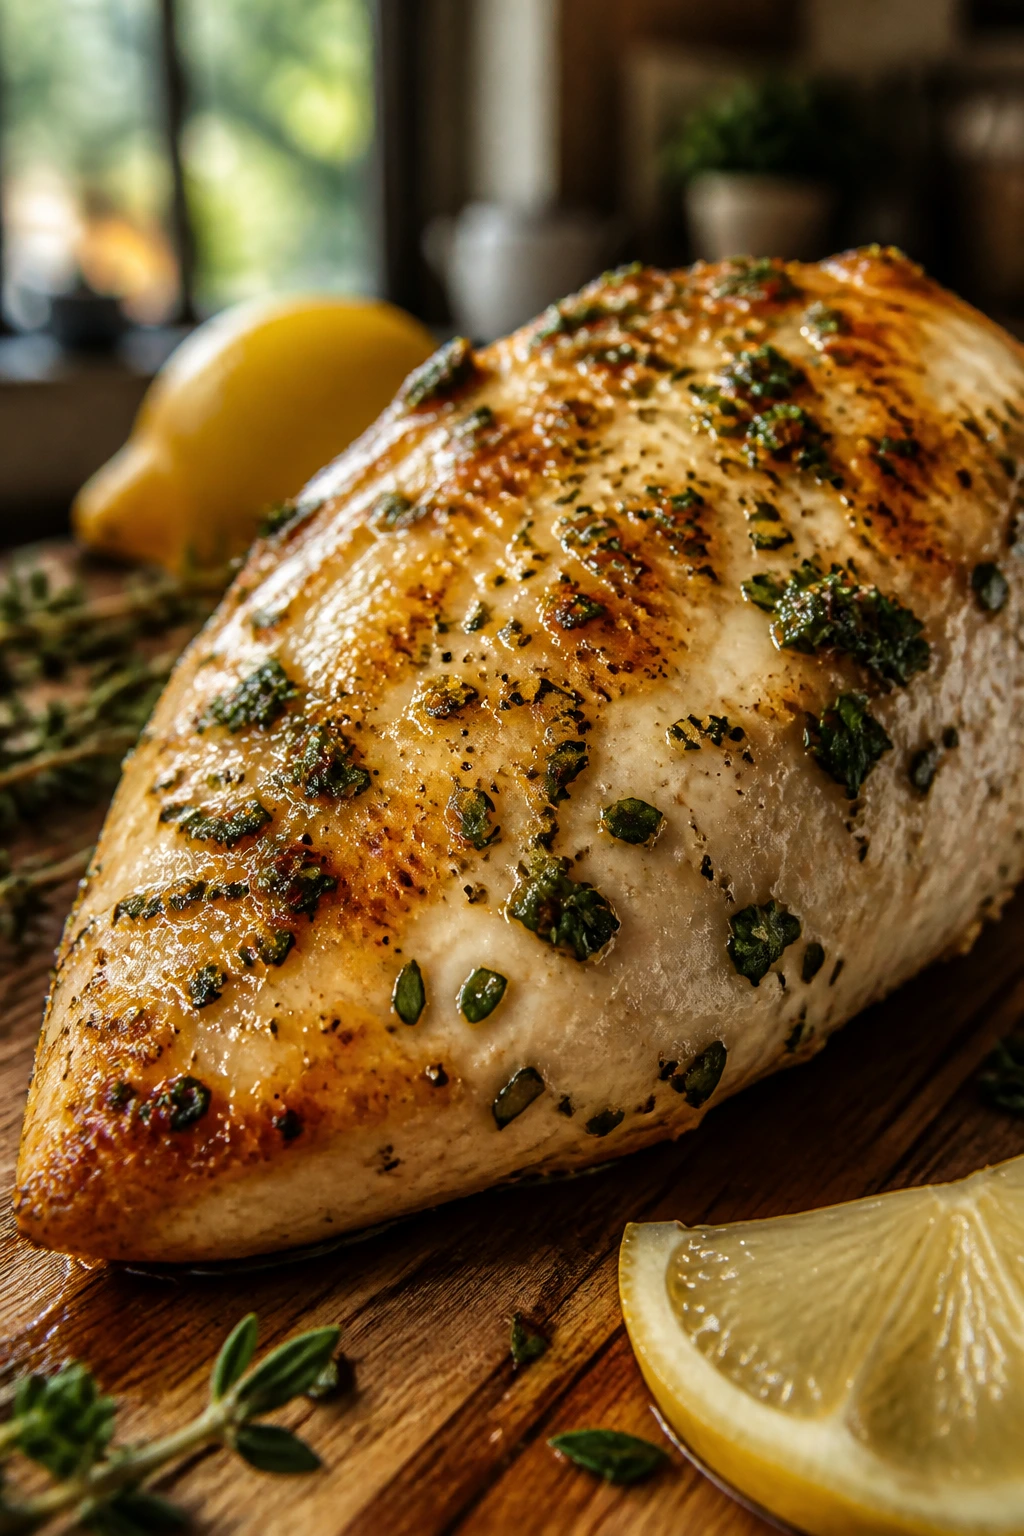
The difference shows up fast. A properly cooked breast stays sliceable and moist instead of chalky. Thighs keep their softness after a night in the fridge. Shredded chicken, when it’s handled well, still tastes like chicken instead of damp paper. That sounds blunt, but if you’ve ever opened a container of badly cooked leftovers and felt your heart sink a little, you know exactly what I mean.
The best part is that you do not need a fussy system. You need the right cut, the right seasoning, steady heat, and a little restraint. Once those pieces click, weeknight dinners stop feeling like separate events and start feeling like one calm batch of work feeding several good meals.
Why Juicy Make-Ahead Chicken Works So Well on Busy Nights
-
It saves the part that usually goes wrong: the chicken is cooked when you can actually watch the temperature, which means you’re not guessing while trying to finish a side dish at the same time.
-
It gets better with planning: a simple dry brine or short marinade gives the salt time to move into the meat, so the flavor isn’t sitting only on the surface.
-
It stretches farther than one dinner: one batch turns into tacos, salads, pasta, fried rice, rice bowls, wraps, soup, or sandwich filling without a second round of raw prep.
-
It survives reheating better: chicken that starts out gently cooked and properly cooled holds on to more moisture than chicken that was blasted until it squeaked.
-
It lets you choose the right cut for the job: breasts, thighs, and shredded chicken each behave differently in the fridge, and that matters more than most people think.
-
It trims the mental load: when the protein is done, dinner becomes assembly instead of cooking from zero, and that is a very different feeling at 6:30 p.m.
Chicken is one of those ingredients that can be wonderfully forgiving or infuriatingly dry. The gap between those outcomes is often five minutes and one bad reheating choice. That’s not dramatic. It’s the whole game.
Choosing the Right Cut for Chicken That Will Be Reheated
If you want chicken that still tastes good after a night or two in the fridge, start with the cut. People love to argue about sauces and spice blends, but the cut decides how much room you have for error. Thin, lean pieces ask for precision. Fatty ones give you breathing room.
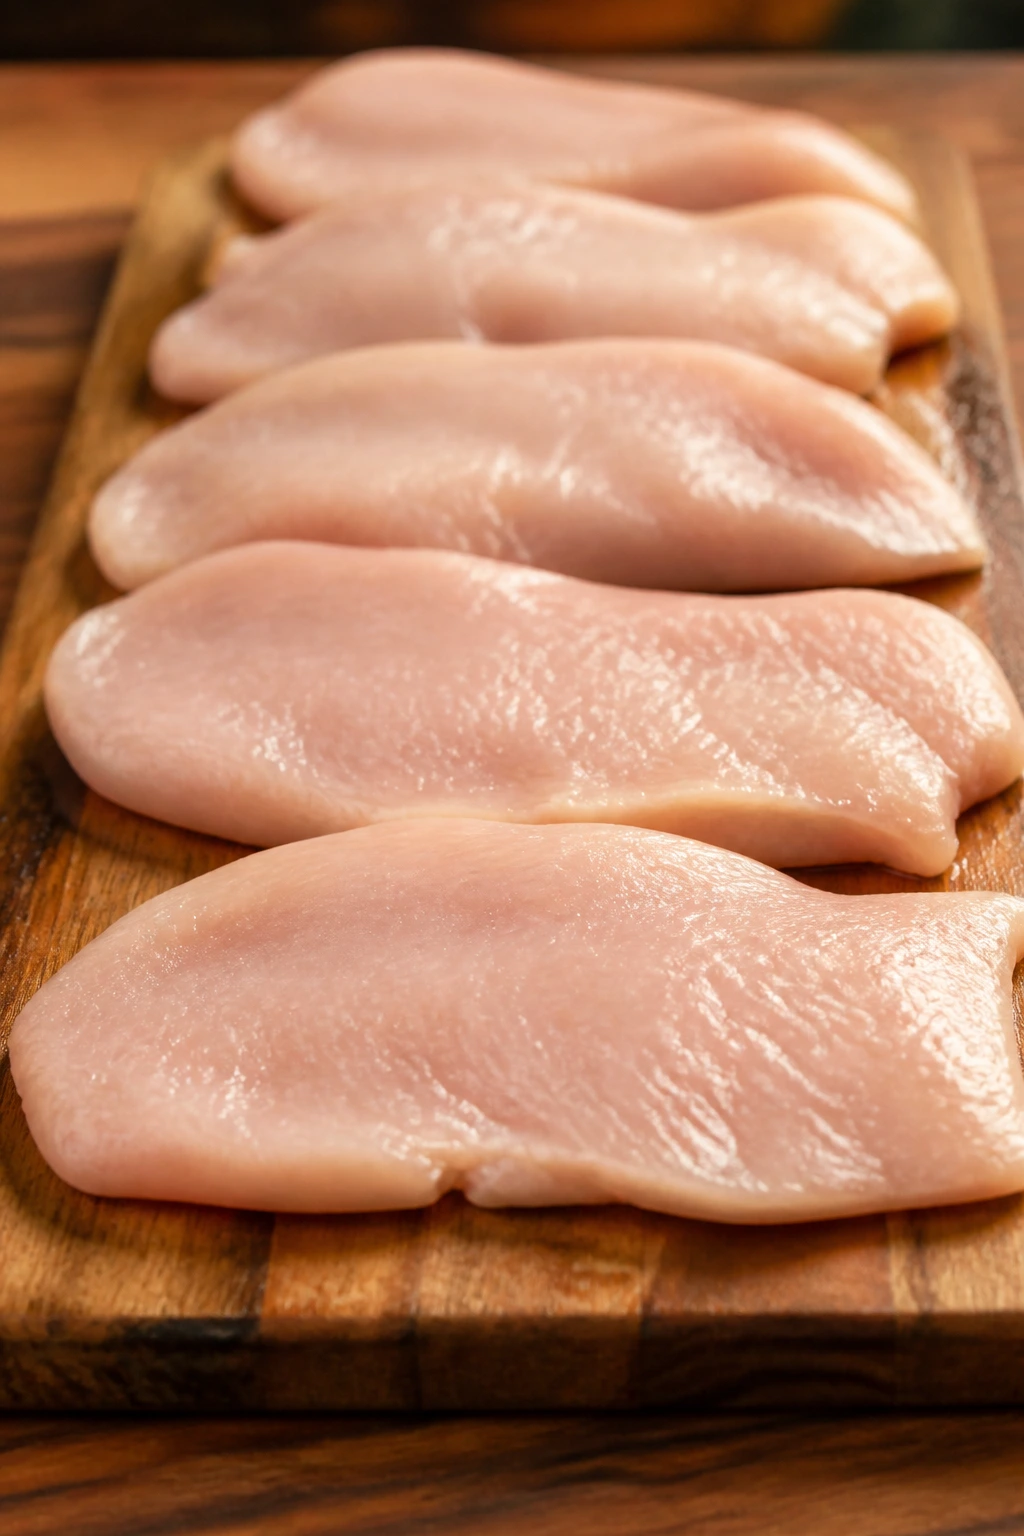
Boneless, Skinless Chicken Breasts
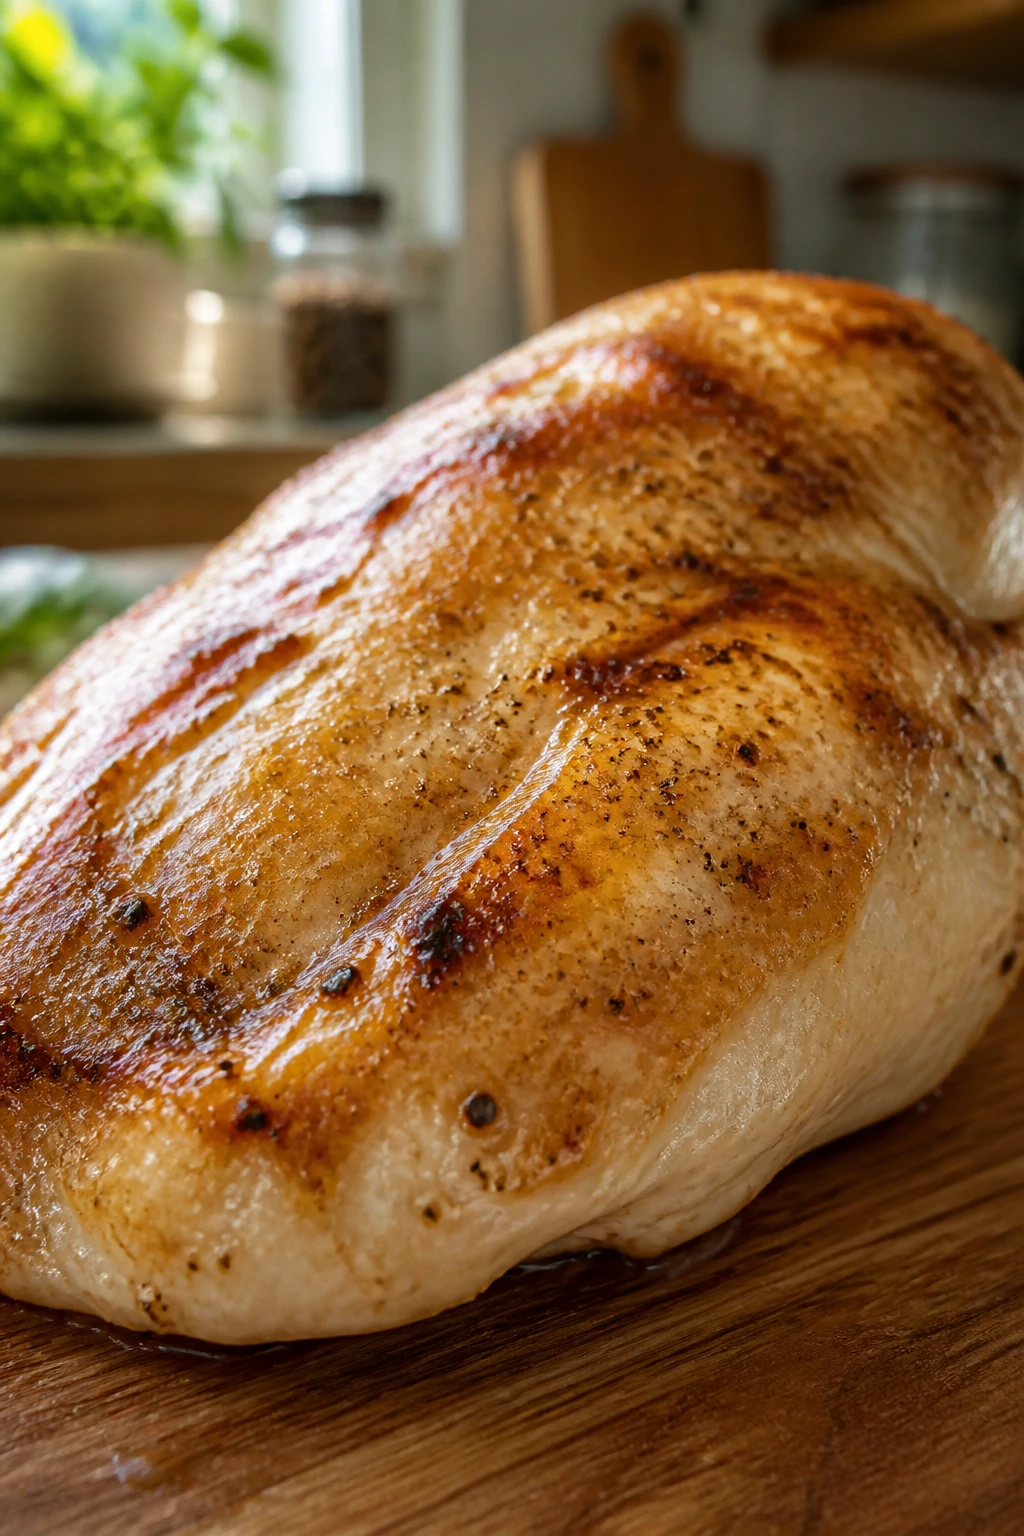
Breasts are the cleanest blank canvas. They take seasoning well, slice neatly, and move easily into salads, grain bowls, and wraps. The catch is obvious: they dry out faster than thighs, especially if you cook them all the way to a hard, white center and then reheat them on high.
If I’m using breasts for meal prep, I pound them to an even thickness first. A breast that’s thick on one end and skinny on the other cooks unevenly, so the thin side turns stringy while the thick side is still catching up. Half an inch to three-quarters of an inch is the sweet spot for fast weeknight use.
Boneless, Skinless Chicken Thighs
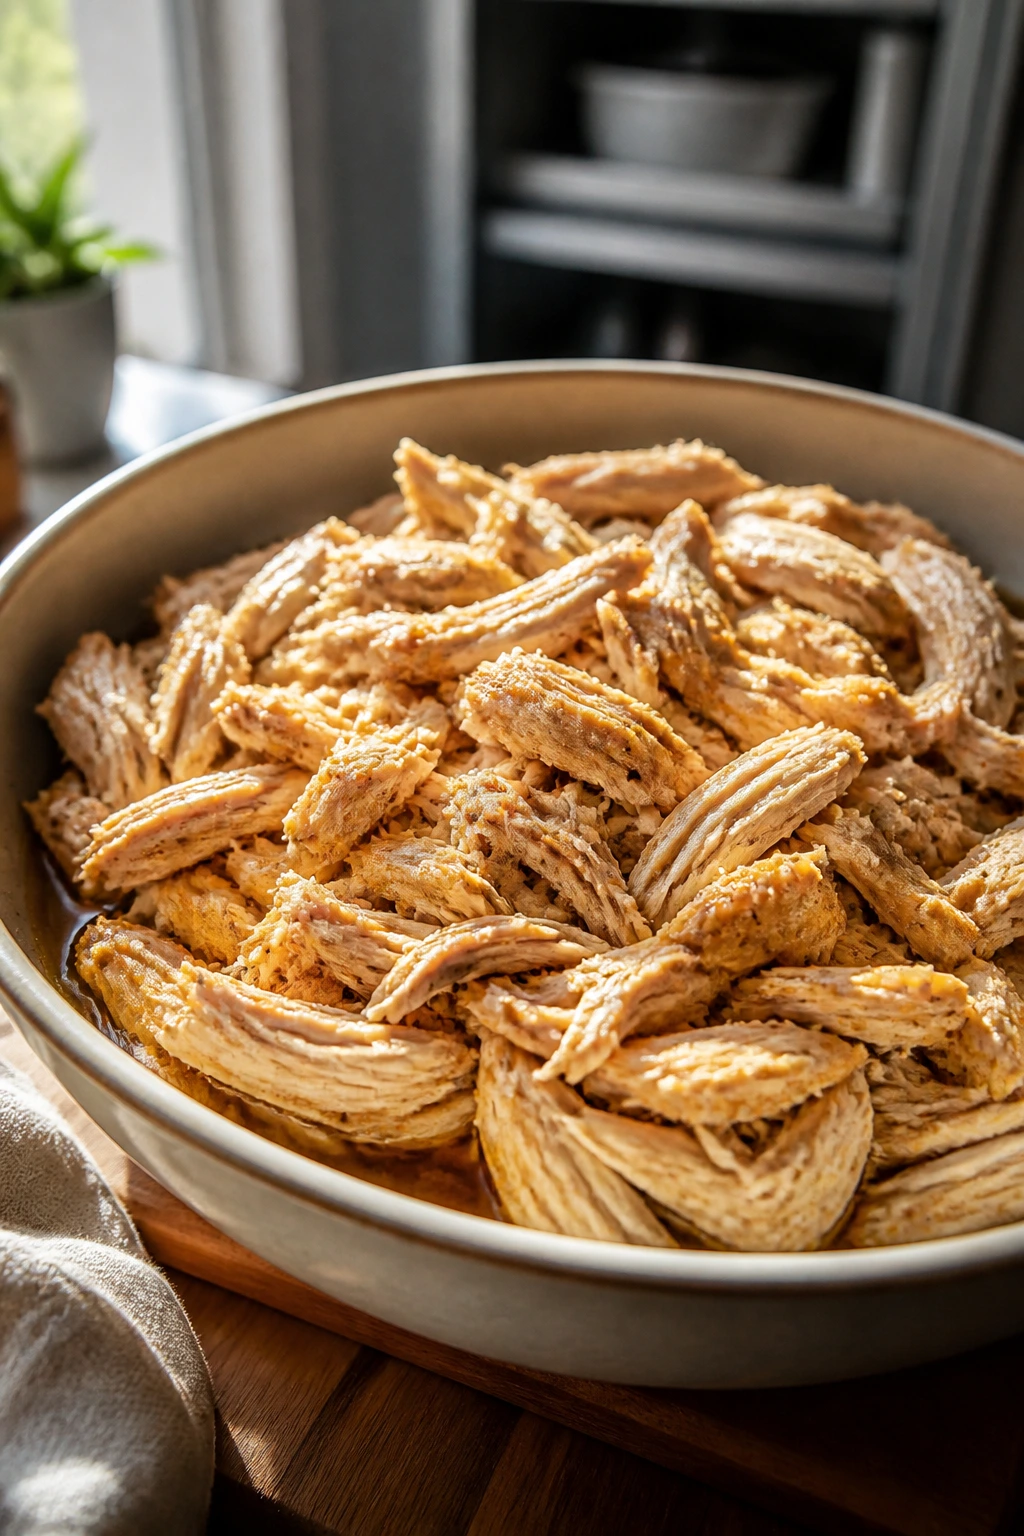
If you asked me to pick one cut for make-ahead chicken, thighs would win most of the time. They have more fat, more flavor, and more tolerance for reheating. They also shred beautifully after chilling, which makes them a better fit for tacos, rice bowls, and saucy dishes.
Thighs are my choice when I know the chicken will be eaten cold or gently warmed later. They don’t tighten up the way breasts can. They stay soft even after a few days in the fridge, and they tolerate a little extra browning without punishing you for it.
Chicken Tenders and Cutlets
Tenders cook fast, which is useful when you want lunch-sized portions in a hurry. Cutlets are another good option if you slice breasts horizontally into thinner pieces. They’re useful for sandwiches and quick skillet dinners.
The drawback is texture. Tenders are lean and small, so they can go from juicy to dry in a narrow window. That makes them better for same-day use or for dishes where they’ll be tucked into sauce, soup, or dressing rather than eaten plain.
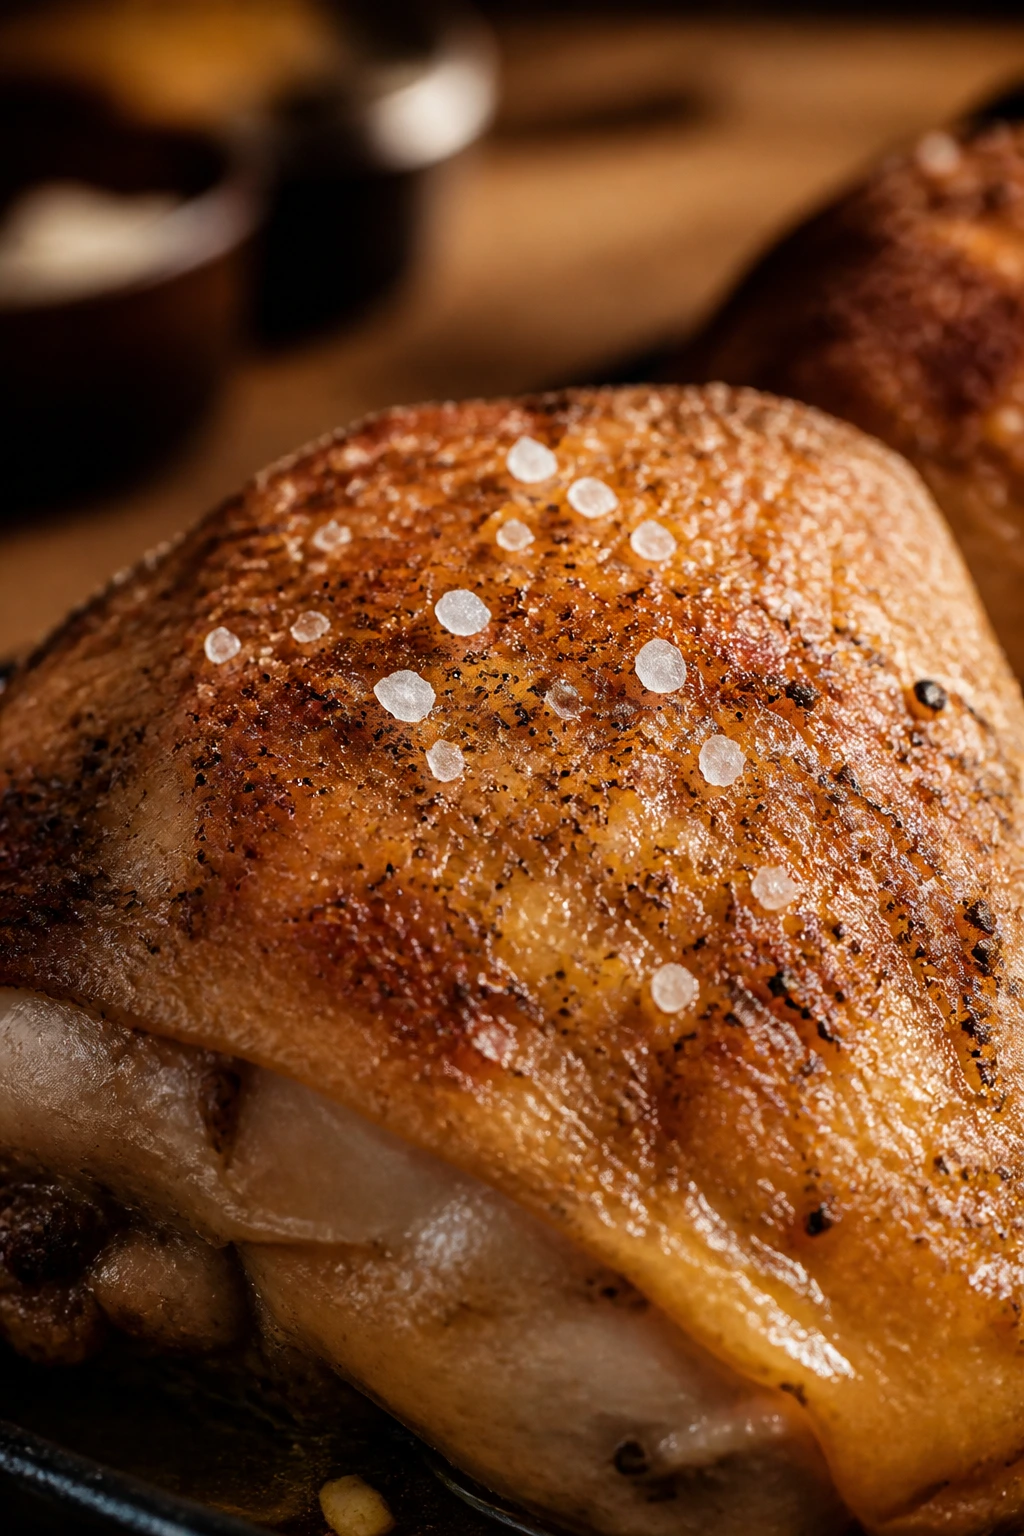
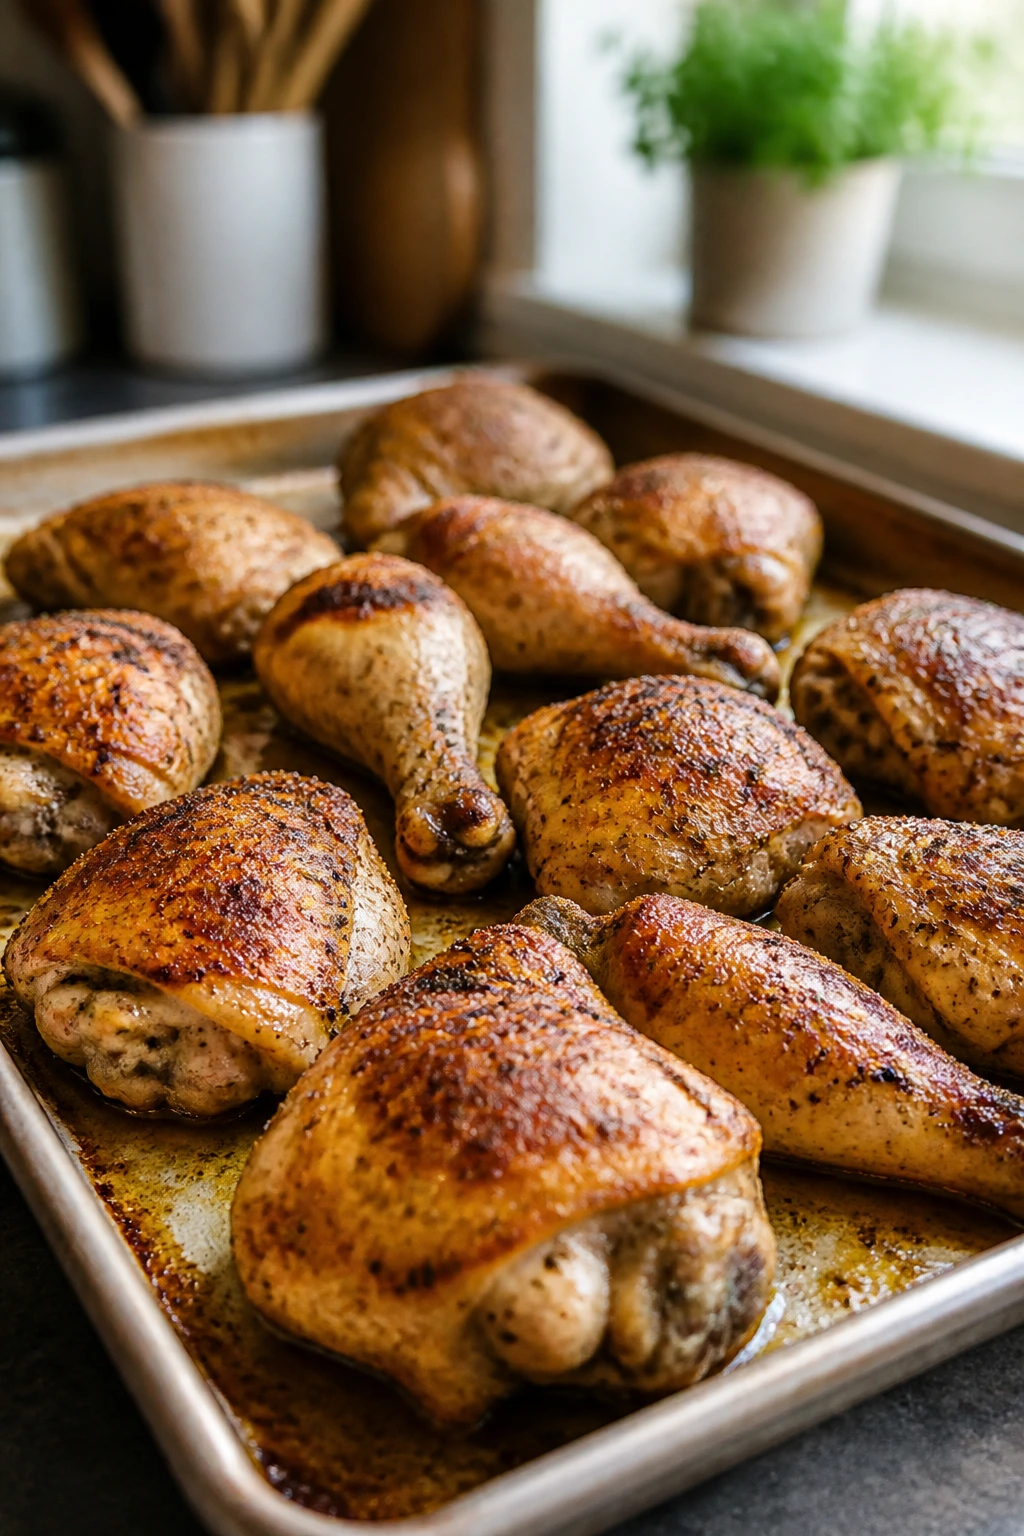
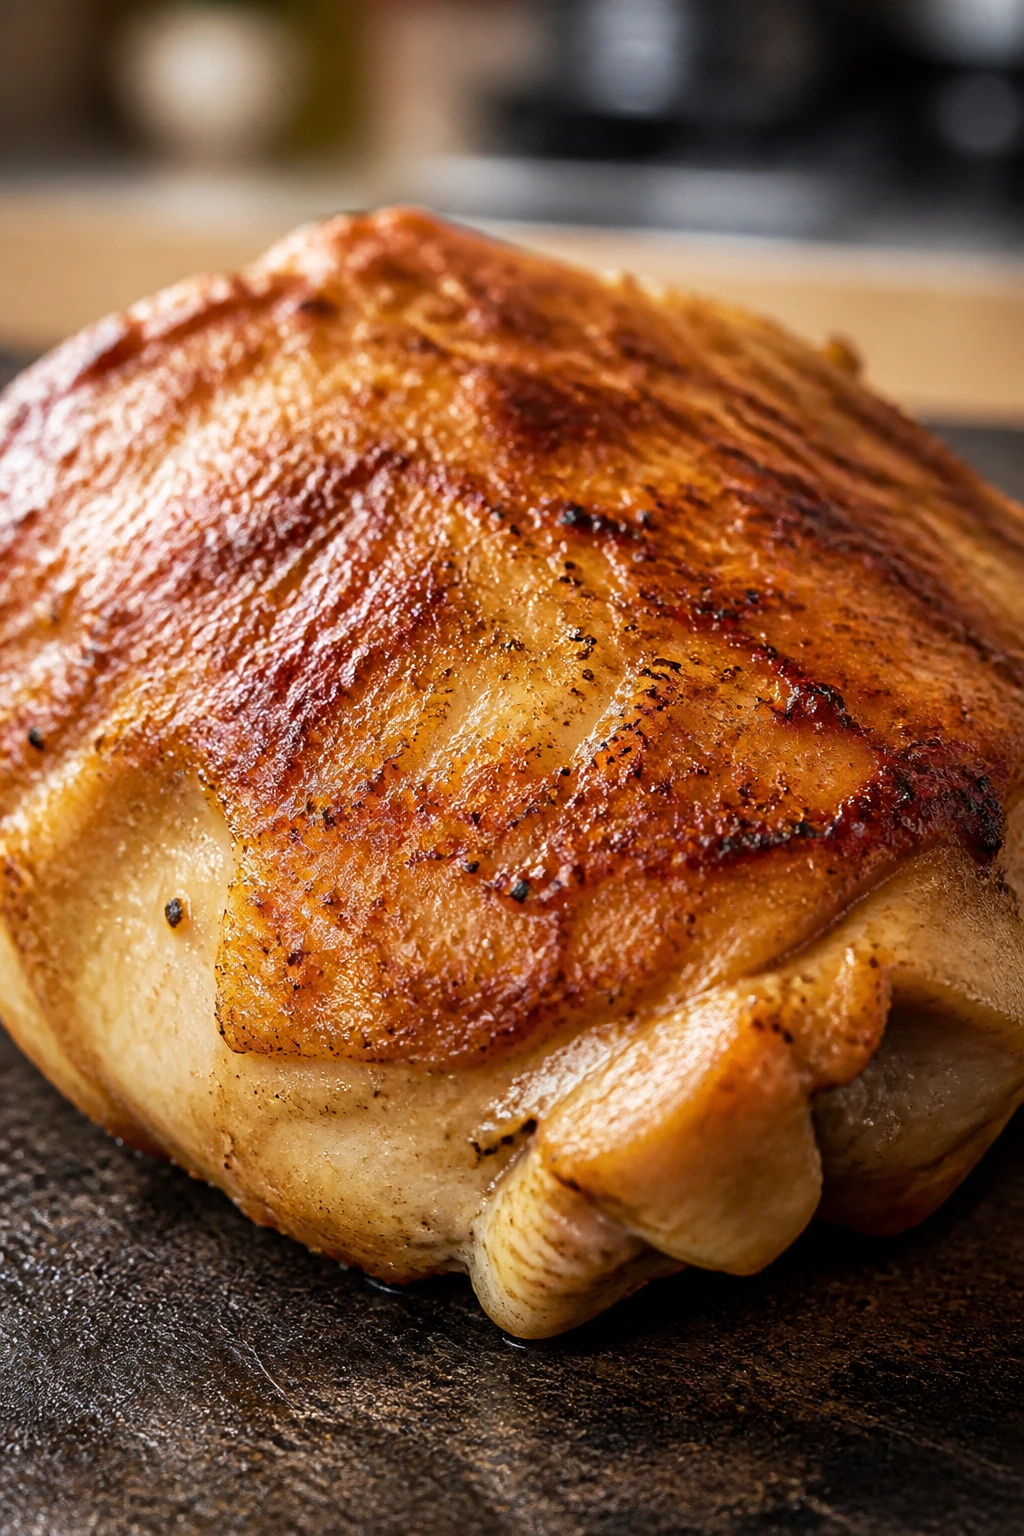
Bone-In Pieces and Whole Chicken
Bone-in thighs, drumsticks, and whole roasted chicken bring more flavor to the table. The bones slow down the cooking slightly and help protect the meat. That matters if you’re serving the chicken fresh.
For meal prep, though, bone-in pieces are a little less nimble. You spend more time separating meat from bones, and the skin loses its crisp edge once it’s stored. I like this route when I’m making a Sunday roast and know the leftovers will become soup, sandwiches, or a more rustic skillet meal.
Short version: for the fridge, thighs are the safest bet. For neat slices and lighter meals, breasts work if you’re careful. For soups and shredded chicken, the cut matters less than your cooking temperature and cooling routine.
Salt, Marinade, or Brine: What Actually Helps the Meat Stay Moist
What actually changes the meat: salt, acid, or just a good rub? Salt does most of the real work. A marinade can help with flavor and surface tenderness, but if you want chicken that holds onto moisture through cooking and reheating, the salt is the part you should not skip.
Dry Brine: The Easiest Win
A dry brine is just salt, maybe a little pepper, and time. Use about 1 to 1¼ teaspoons kosher salt per pound of chicken, then leave the pieces uncovered or lightly covered in the fridge for at least 4 hours and up to 24 hours. The surface dries a bit, which helps browning, and the salt moves inward where it can do more than sit on top.
This is my favorite method for weeknight meal prep because it’s clean and practical. No bowl of liquid. No splashing. No drippy bag to manage. You season the chicken, park it in the fridge, and cook it later.
Wet Brine: Good, But Messier
A wet brine uses salt water to season the chicken more aggressively. For lean breasts that have been trimmed thin, a short wet brine can help if you’re nervous about dryness. Use about 1/4 cup kosher salt per quart of water, then brine breasts for 30 to 60 minutes and thighs for a little longer if needed.
The downside is that wet brines add one more container to wash, and the benefit is not always worth the trouble for a simple weeknight batch. I reach for this when I’m rescuing supermarket breasts that look a little pale and dry to begin with.
Marinade: Flavor First, Moisture Second
A marinade is best when you want the chicken to taste like something specific — lemon herb, garlic soy, yogurt spice, taco seasoning, and so on. Oil helps carry flavor, and salt still matters, but acid is the ingredient people overdo. Too much lemon juice or vinegar for too long can make the surface soft in a strange, mealy way.
Keep acidic marinades modest. A few tablespoons of acid mixed with oil, herbs, garlic, and salt is enough for most batches. For breasts, 30 minutes to 4 hours is usually plenty. For thighs, you can push it longer without nearly as much risk.
Yogurt and Buttermilk: Soft, Tangy, and Useful
Yogurt and buttermilk work nicely for baked or grilled chicken, especially if you want tenderness plus a little tang. They cling to the surface and help the meat stay plush. This is one of the better moves if you plan to serve the chicken cold the next day in wraps or salad bowls.
The key is not to drown the chicken. A thick coating is enough. Let the chicken sit long enough for the flavor to settle in, then scrape off any excess before it hits the pan or oven.
If you want the shortest path to juicy chicken that reheats well, use salt first, marinade second. Salt changes the meat. Marinade dresses it.
The Best Cooking Methods for a Batch That Won’t Dry Out Later
The chicken doesn’t need to be exciting on the first day. It needs to be well-cooked, evenly done, and gentle enough that it still has a pulse after refrigeration. That’s the real standard.
Oven Roasting on a Sheet Pan
Roasting is the easiest batch method when you want multiple portions at once. Set the oven to 425°F, arrange the chicken in a single layer on a rimmed sheet pan, and give each piece a little breathing room. Crowding makes steam. Steam makes pale chicken with soft edges.
For boneless breasts, I usually start checking at 18 minutes if they’re pounded thin and at 20 to 22 minutes if they’re thicker. Thighs usually need 22 to 28 minutes. Pull the chicken when the center reads 160°F to 163°F for breasts or around 170°F to 175°F for thighs, then let carryover finish the job while it rests.
A sheet pan also makes it easy to roast vegetables around the chicken if you want the whole dinner ready in one shot. Just keep watery vegetables from crowding the pan, or the chicken will steam instead of roast.
Skillet-Searing and Finishing in the Oven
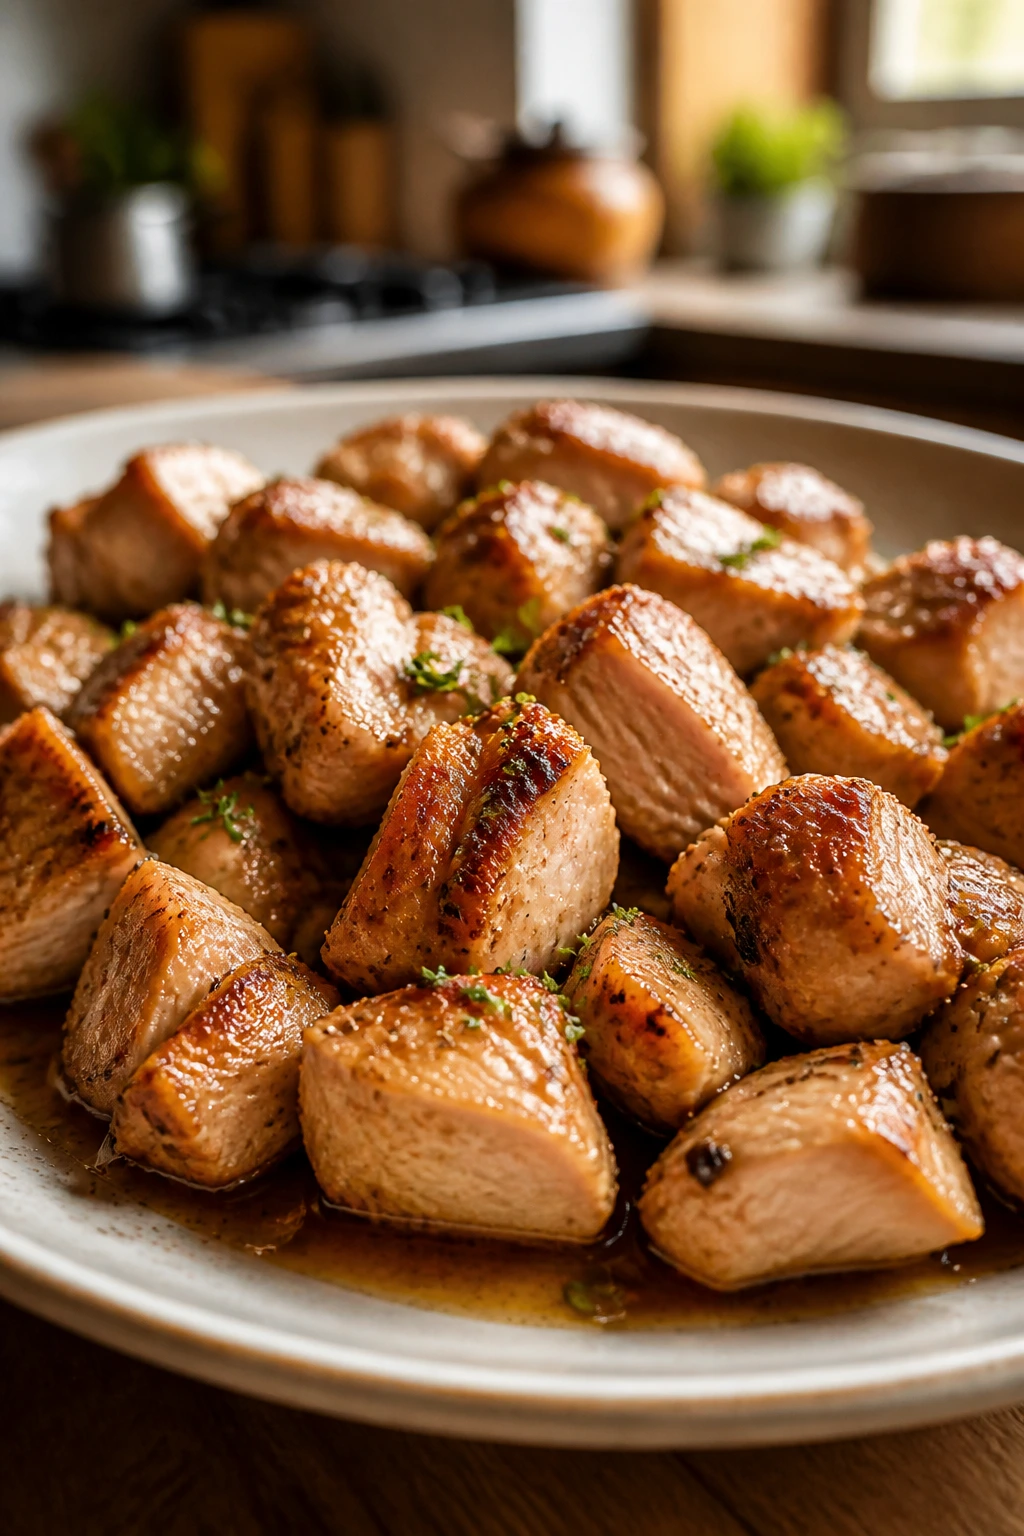
This is my favorite method for cutlets and smaller batches. Sear the chicken in a hot skillet with a thin film of oil until the first side is deeply golden, then finish in the oven so the center cooks without the outside taking on that dry, overcooked edge.
Use medium-high heat for the sear. Give the first side 3 to 4 minutes, flip, then move the skillet to a 375°F oven for another 5 to 8 minutes depending on thickness. The chicken should feel firm but not hard when pressed.
The skillet route gives you better flavor than plain poaching and better texture than overworking the chicken in a crowded pan. It does take a little more attention, though. You can’t wander off and answer messages while the oil gets too hot.
Gentle Poaching for Shredded Chicken
Poaching gets unfairly dismissed because people imagine gray chicken in a pot of sad water. That’s not the move. Good poached chicken is cooked in liquid that barely quivers, not a rolling boil. Use broth, water, or a mix with onion, garlic, peppercorns, and a bay leaf, then keep the liquid around 175°F to 185°F.
Breasts usually need 12 to 18 minutes depending on thickness. Thighs can take a little longer. The chicken is done when it reaches 165°F in the thickest part and the fibers separate cleanly when you pull at them.
The real trick is cooling the chicken in its liquid for a few minutes after cooking. That small pause helps the meat stay tender and gives shredded chicken a little more cushion before it goes into the fridge.
A Slow Cooker? Sometimes.
A slow cooker can make decent shredded chicken, especially if you’re feeding a crowd or you want something hands-off. I still think it loses a bit of flavor compared with roasting or gentle poaching, because you don’t get browning. But if dinner has to happen around work calls, school pickups, and a sink full of dishes, it’s a workable path.
Use it for saucy dishes or shredded chicken that will be mixed with salsa, barbecue sauce, or broth later. That way the texture stays protected.
How to Cook the Chicken So It Still Tastes Fresh Two Days Later
The biggest mistake people make is treating make-ahead chicken like a fresh-service chicken. It isn’t. You’re cooking for two moments: the first plate and the reheated plate. That means you want softness, not theatrical over-browning. You want seasoning that survives the fridge. You want enough moisture left in the meat that reheating doesn’t drain the last bit out of it.
Start with Even Thickness
Pound breasts to an even layer, or slice them into cutlets so the thick and thin parts don’t fight each other. Uneven chicken is the fastest path to dry edges and underdone centers. A rolling pin, meat mallet, or even the bottom of a small skillet works.
Even thickness matters more than fancy seasoning. A chicken breast that’s 3/4 inch thick from end to end is easier to cook well than one with a giant hump in the middle and a paper-thin tail on one side.
Cook Gently, Then Stop
Pull the chicken a few degrees before you think it’s done. That sounds risky until you’ve done it once or twice and watched carryover cooking do the rest. For breasts, that usually means pulling at 160°F to 163°F. For thighs, I’m comfortable going a little higher because the texture benefits from it.
Do not keep cooking just because the outside still looks slightly underdone. If the thermometer is right, the rest will happen on the cutting board.
Rest on a Rack, Not in a Puddle
Set the chicken on a wire rack if you can. If you don’t have one, use a plate, but don’t stack the pieces. You want steam to escape instead of condensing under the meat. A loose tent of foil is fine for a few minutes, but don’t wrap it tightly unless you want to trap moisture and soften any browned edges.
Five to ten minutes of rest is enough for most pieces. Bigger breasts may want a little longer.
Save the Juices
If you roast or sear the chicken, there will be juices on the pan or skillet. Don’t throw them away. A spoonful of those juices added back to the container can help the reheated chicken stay more forgiving. It’s a small thing. It matters more than people think.
For shredded chicken, the same idea applies in a different form. Keep a bit of broth with the meat, especially if you know you’ll reheat it later in the microwave or a skillet.
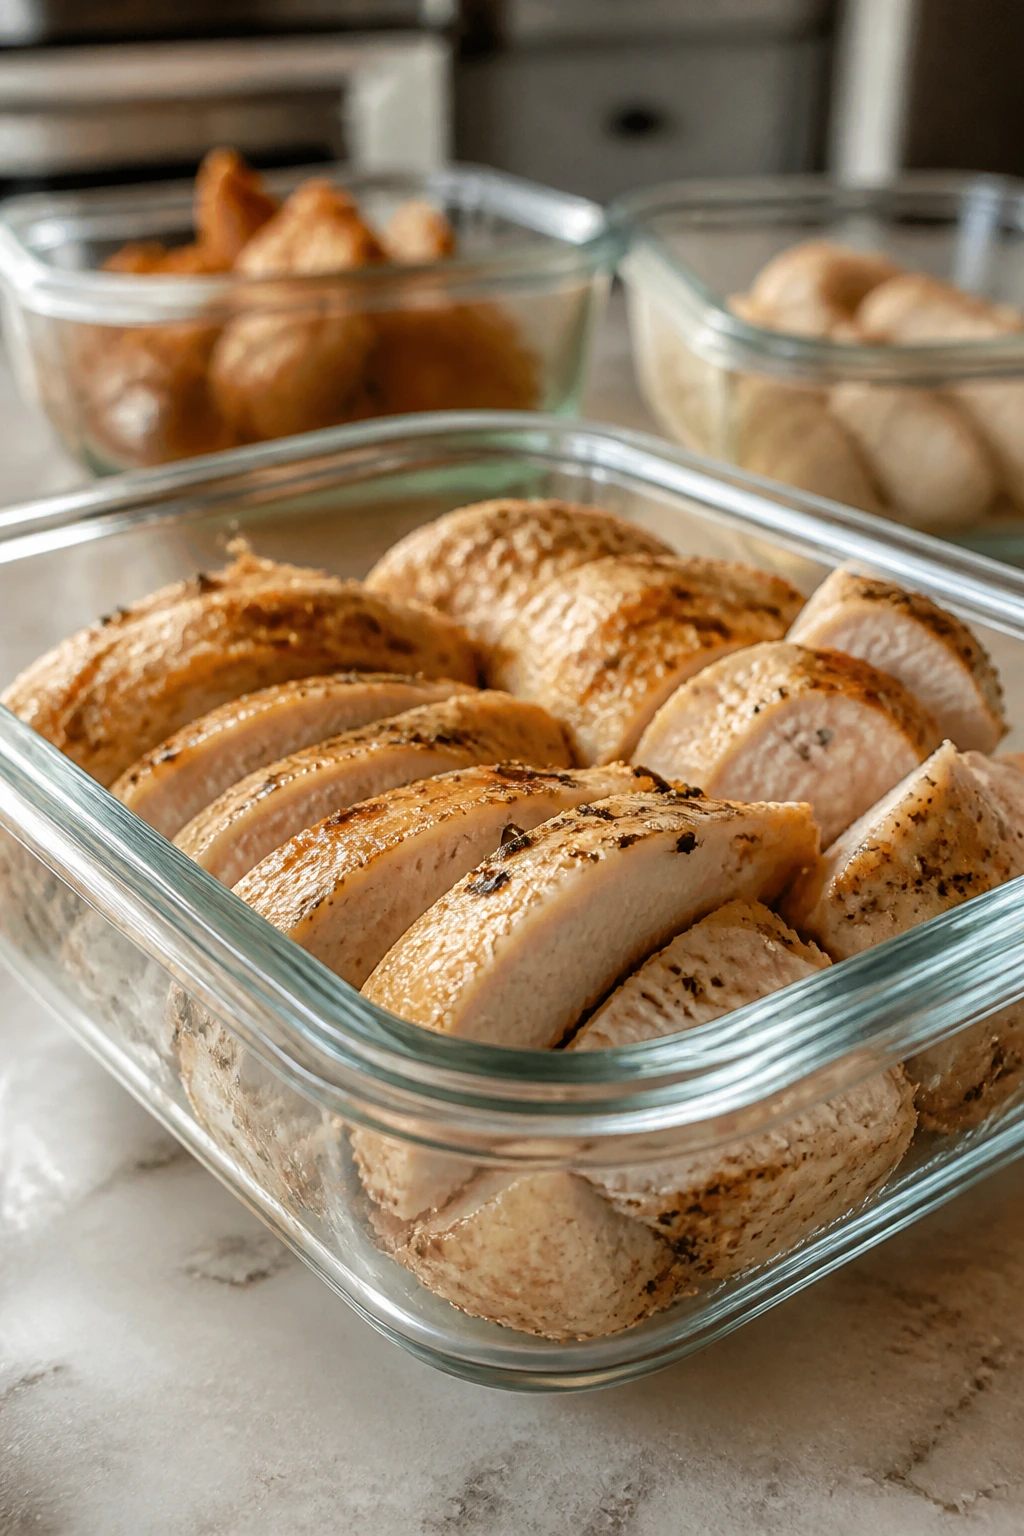
Cooling, Slicing, and Portioning Without Losing the Juices
Hot chicken does one thing beautifully: it steams itself. That’s fine for the first five minutes. After that, it starts working against you.
The goal here is not to shock the chicken cold. The goal is to get it out of the danger zone quickly enough that food safety stays solid, but not so fast that it loses all its internal moisture to the cutting board. Spread the pieces out in a shallow layer. If you’ve got a huge batch, divide it into two containers. A deep pile traps heat and makes the bottom pieces sweaty.
The general food safety rule is simple: get cooked chicken into the fridge within 2 hours, and within 1 hour if your kitchen is running warm enough that the food sits in a hot little cloud. You do not need to wait until it is stone-cold before refrigerating it. That myth causes more problems than it solves.
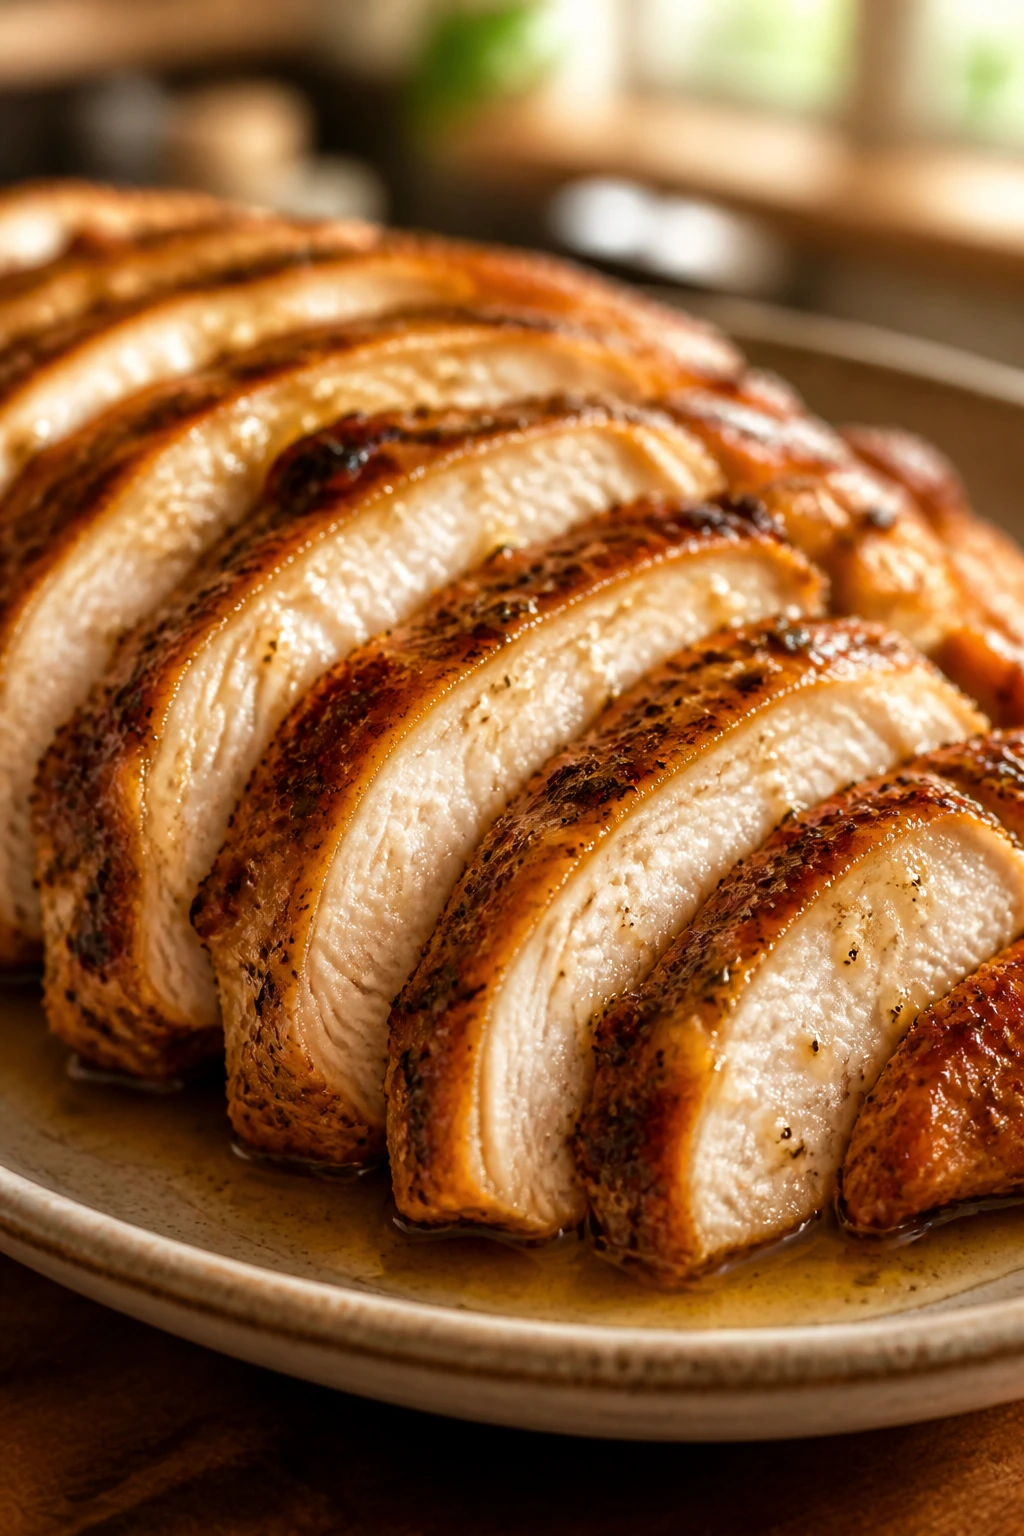
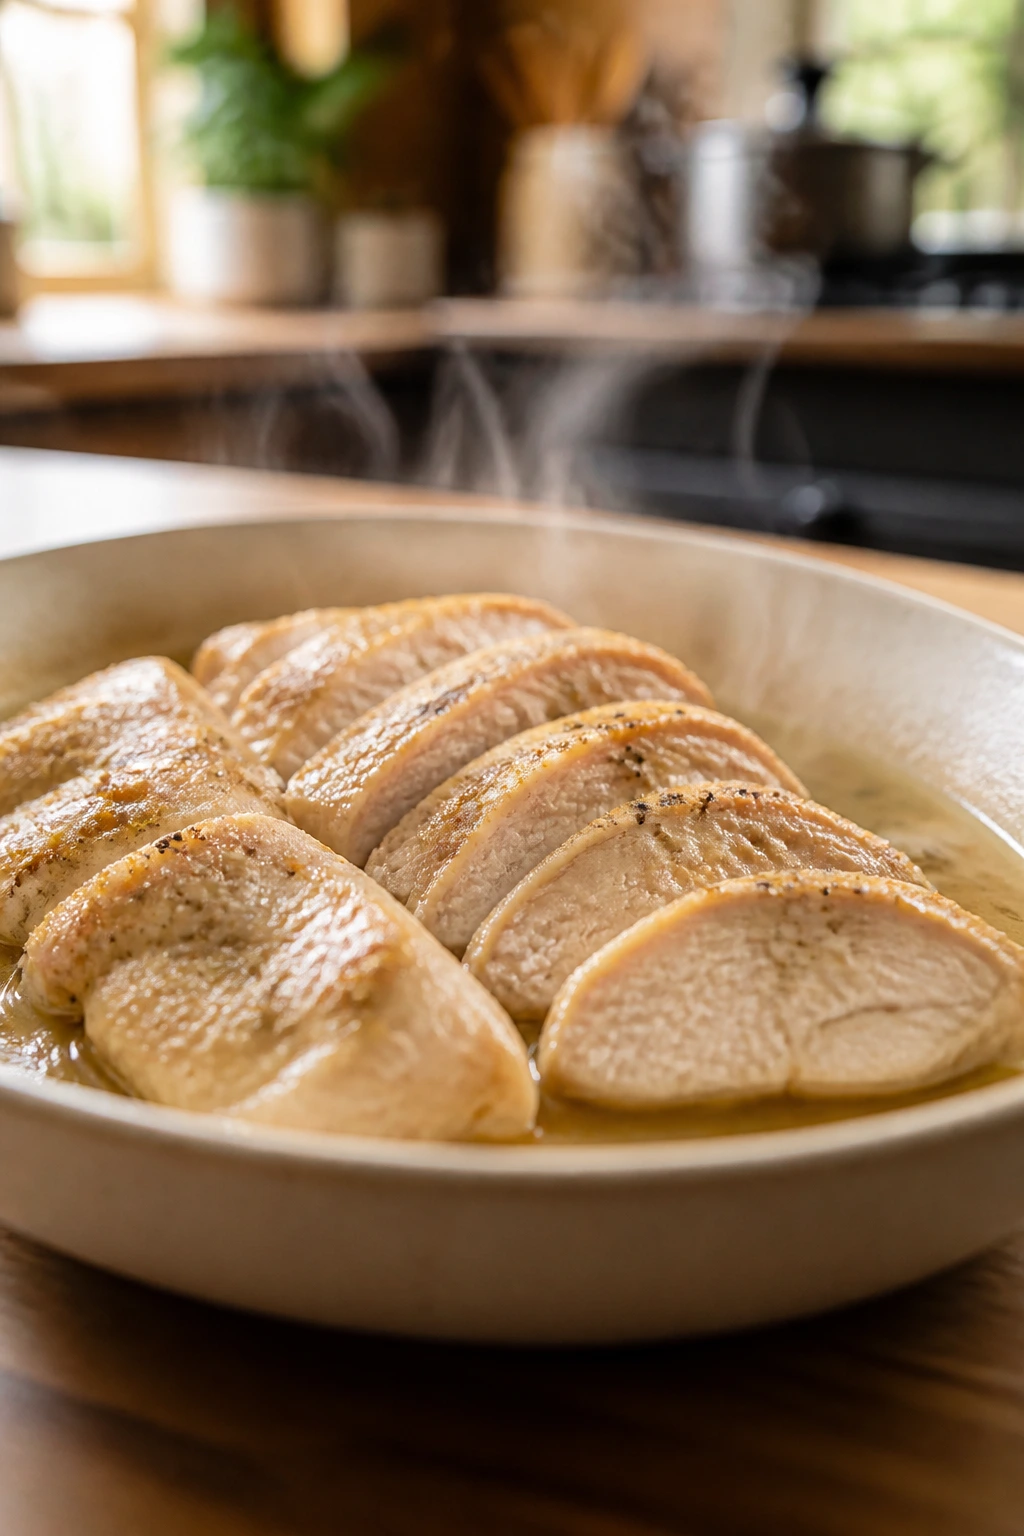
Slice It the Right Way
If the chicken will be served cold or tucked into wraps, slice it after it has rested but before it has fully chilled. Cut across the grain into strips about 1/4 to 1/2 inch thick. That shortens the muscle fibers and keeps each bite from feeling stringy.
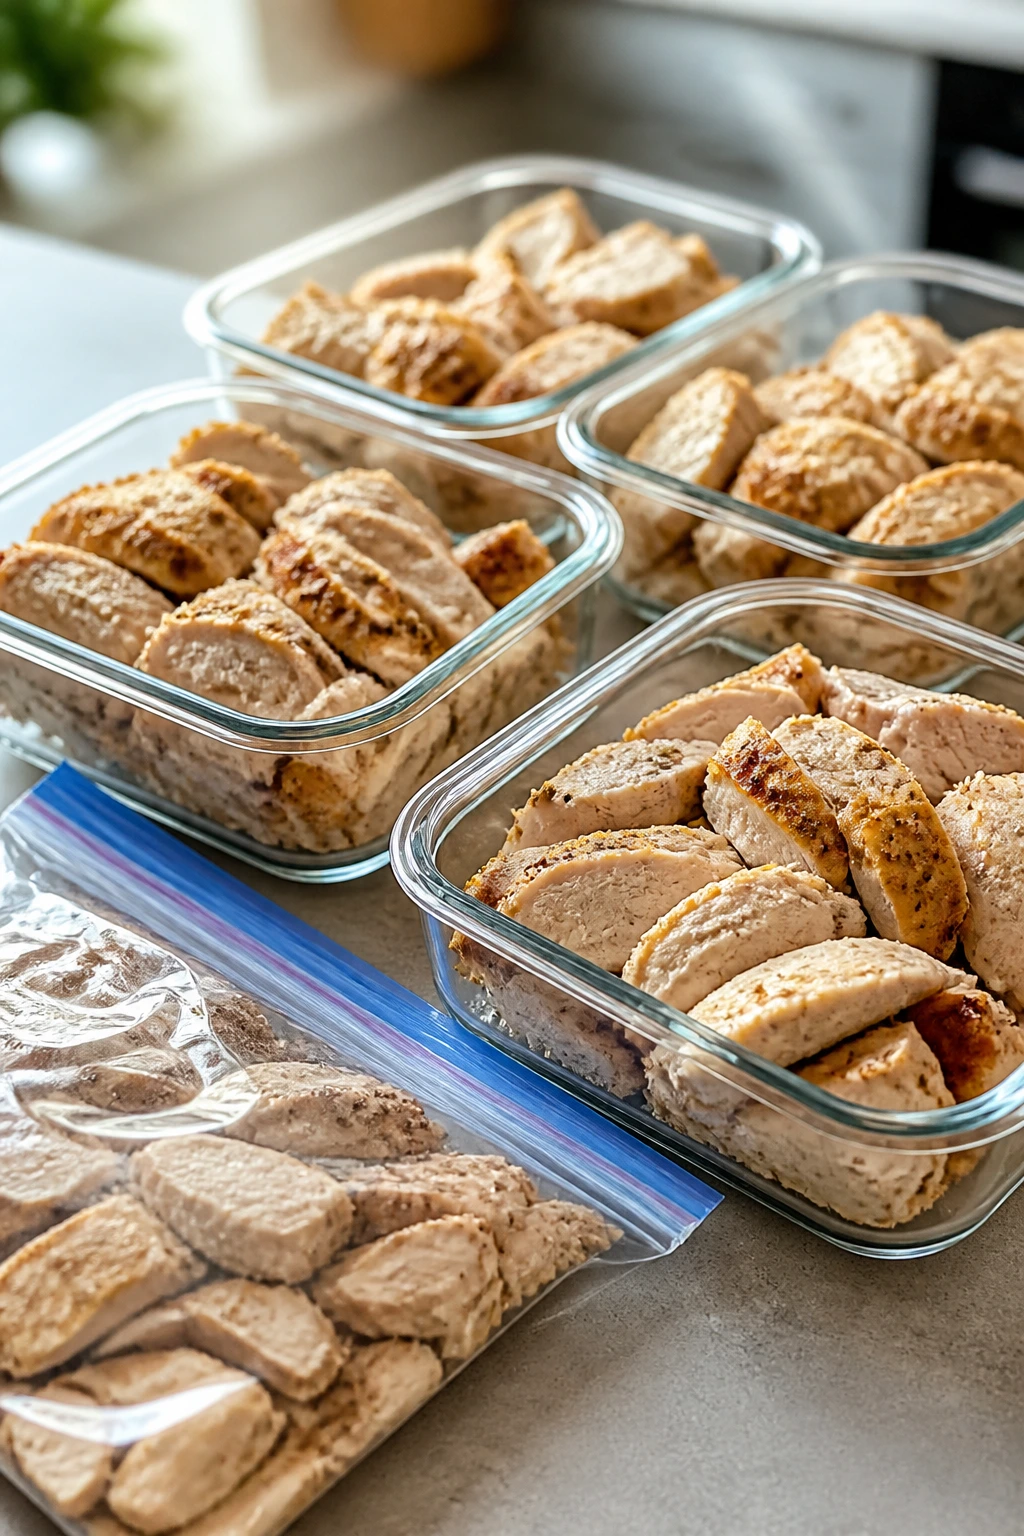
For bowls and sandwiches, I like to keep half the batch in larger pieces and slice the rest. Whole pieces hold moisture better in storage. Sliced pieces are easier to assemble fast. Having both in the fridge gives you options without more work.
Portion for Real Meals
A useful default is 4 to 6 ounces of cooked chicken per person for a standard dinner, a little less if it’s going into pasta or soup and a little more if it’s the main event on a salad. Portion it into containers based on the meals you actually make, not on abstract “servings.”
I also like to label containers by use, not just by weight. One container for tacos. One for salads. One for soup. That keeps the chicken from sitting around because nobody felt like figuring out what to do with it.
Keep Sauces Separate
If the chicken is going into a saucy dinner later, store the sauce separately when you can. Sauce is helpful during reheating, but if it sits on the chicken for days, the texture can go soft and oddly spongy. A little broth or pan juice in the chicken container is enough. The full sauce can wait until dinner.
Reheating Chicken Without the Rubber-Band Texture
Reheating is where good make-ahead chicken earns its keep or falls apart. High heat is the enemy. Dry air is the enemy. Bare microwave blasts are the enemy. Gentle heat, a little moisture, and a short cook time are what you want.
The Microwave Method That Doesn’t Punish You
Use a microwave when speed matters, but don’t throw the chicken in bare and walk away. Put it in a shallow dish with 1 to 2 tablespoons of broth, water, or sauce, then cover it loosely with a lid or microwave-safe wrap so steam can circulate. Heat at 50% power in 45-second bursts for slices or 60- to 90-second bursts for whole pieces.
Check the temperature and stop when the center reaches 165°F. If you overheat it, the edges get firm and the surface starts to taste flat. That is the texture people complain about when they say reheated chicken is always bad. It isn’t always bad. It’s usually just rushed.
The Skillet Method for Better Flavor
For sliced chicken, a skillet is better than a microwave if you can spare three extra minutes. Add a teaspoon or two of oil, a splash of broth, or a spoonful of sauce. Warm over low to medium-low heat, cover with a lid, and stir or flip once or twice until the chicken is hot and glossy.
This method is especially good for chicken that will go into rice bowls, noodles, or stir-fry. The moisture stays on the chicken instead of evaporating into the air. It tastes less like leftovers and more like a quick second meal.
The Oven Method for Bigger Portions
For whole pieces or several portions at once, warm the chicken in a covered baking dish at 300°F. Add a spoonful of broth or sauce to the bottom of the dish, cover tightly with foil, and heat until the chicken reaches 165°F in the center. Thin slices may take 8 to 10 minutes. Thicker pieces can take 12 to 15 minutes.
The oven is slower, but it’s kind. If you’re reheating chicken for a family dinner and you don’t want some pieces hot while others are leathery, this is the better route.
Best Rule for Saucy Meals
If the chicken is heading into soup, stew, curry, enchiladas, or a pasta sauce, warm the liquid first and add the chicken near the end. Let it sit in the hot sauce just long enough to come up to temperature. That keeps the meat from taking a second trip through aggressive heat.
One Batch, Many Dinners
This is the part that makes the whole routine worth it. Once you’ve got cooked chicken in the fridge, dinner stops being a blank page. You’re not staring into the fridge hoping for inspiration. You’re choosing a lane.
Tacos and Quesadillas
Shredded thighs are my favorite here. Toss them with a spoonful of salsa, a pinch of cumin, and a splash of the pan juices, then warm in a skillet for a minute or two. Pile the chicken into tortillas with pickled onions, shredded cabbage, and a little cheese.
For quesadillas, keep the filling modest. Too much chicken makes the tortilla tear before the cheese melts.
Grain Bowls
Sliced breast or thigh both work. Put the chicken over rice, farro, or quinoa, then add something cool and crisp — cucumbers, shredded carrots, cabbage, or chopped herbs. A sharp sauce matters here, like lemon-tahini, yogurt-garlic, or a thin sesame dressing.
The trick is contrast. Warm chicken on a warm grain gets dull fast. Add one cold thing and one bright thing, and the bowl wakes up.
Pasta and Noodles
Chicken in pasta needs a little liquid to stay supple. Add sliced chicken to a skillet with garlic, olive oil, broth, and a handful of spinach, then toss with hot pasta and Parmesan. If you’re using a cream sauce, keep the heat gentle and add the chicken right at the end.
For noodles, a quick soy-ginger sauce or peanut sauce does the same job. The chicken soaks up just enough flavor without turning to mush.
Salads That Feel Like Dinner
Cold chicken earns its keep in a real salad, not the sad kind with a few tomato wedges and dry greens. Use romaine, arugula, shredded kale, or chopped cabbage. Add a crunchy vegetable, something salty, and a dressing with enough acid to cut through the meat.
A sliced breast over chopped salad can be excellent if the chicken is seasoned well and chilled properly. A thigh gives you more wiggle room if the salad is loaded with heavier toppings.
Sandwiches, Wraps, and Melts
Thinly sliced chicken is perfect for lunch-style dinners. Layer it on toasted bread with mayo, mustard, pickles, and lettuce, or roll it into a wrap with hummus and greens. For melts, tuck the chicken under cheese and broil just long enough to bubble the top.
The bread matters here. Soft bread can go soggy if the chicken is too wet, so toast it first.
Soup Rescue
Leftover chicken can save a soup night in about ten minutes. Warm broth, add vegetables, drop in cooked chicken near the end, and season hard enough to wake the whole pot. This is one of the best uses for chicken that’s a little too plain on its own.
Small Flavor Moves That Make a Big Difference
Flavor Enhancement: A squeeze of lemon, a spoonful of herb oil, or a drizzle of pan juices after reheating does more than another shake of dry seasoning. Fresh acid wakes up refrigerated chicken in a way that salt alone cannot.
Time-Saver: Split the batch into two piles before you refrigerate it: one left in larger pieces for dinner plates, the other sliced or shredded for quick assembly. That tiny bit of sorting saves you from chopping through cold chicken with dinner waiting.
Cost-Saver: Buy thighs when they’re the better price, cook a bigger batch, and freeze half in meal-sized portions. Thigh meat handles freezing and reheating better than many people expect, especially if you freeze it with a little broth or sauce.
Texture Fix: If a piece seems a little dry after storage, don’t force it to stand alone. Chop it and fold it into rice, noodles, soup, or a creamy sauce. Smaller pieces pick up moisture faster than whole slices.
Make-It-Yours: Keep one seasoning style mild — salt, pepper, garlic, parsley — and make a second batch more specific with paprika, cumin, ginger, or chili flakes. That way one batch can feed two different dinners without making the whole fridge taste the same.
Serving Suggestions: A handful of herbs on top, a spoon of yogurt, pickled onions, or a thin drizzle of olive oil can make refrigerated chicken feel intentional instead of merely convenient. Tiny finishing touches matter more here than big garnishes.
Mistakes That Leave Make-Ahead Chicken Dry or Bland
The biggest dry-chicken mistake is overcooking it for the sake of certainty. People wait until the meat is bone-white and tight, then wonder why it feels stringy two days later. Pull the chicken a few degrees early and let the rest happen off the heat. That small shift changes the texture more than a new spice blend ever will.
Crowding the pan is another easy way to lose moisture. If the pieces are touching, they steam. Steamed chicken can still be cooked through, but the flavor gets flat and the surface stays pale. Give each piece room or use two pans. It’s worth washing one extra sheet pan later.
Skipping salt is a quiet mistake because the chicken may still look fine. It just tastes thin after storage. Dry brining or at least seasoning well before cooking gives the meat a deeper, more even flavor that survives chilling and reheating. Plain chicken plus hot sauce later is not the same thing.
Then there’s the reheating problem. High heat turns decent chicken into a rubber band. If you microwave it uncovered, or blast it in a hot oven without moisture, you strip out what little juiciness is left. Cover it. Add broth or sauce. Heat it until it’s hot, not until it’s punished.
Slicing too soon is the mistake that makes the cutting board look like a disaster zone. A short rest keeps the juices in the meat where they belong. If you cut too early, the liquid runs out, and by the time you reheat the slices they’ve already lost their cushion.
Finally, don’t drown the chicken in sauce before storage unless you know that texture is what you want. Some sauces are fine — especially tomato, curry, or broth-based ones — but a thick creamy sauce can turn heavy overnight. In many cases, the better move is plain chicken stored with a little cooking liquid, then sauce added when you reheat.
Flavor Variations for Different Meals and Taste Preferences
Lemon-Herb Batch Chicken
Use garlic, lemon zest, black pepper, parsley, and a little olive oil. This is the version I reach for when I want chicken that works in salads, pasta, and grain bowls without fighting the side dishes. Keep the lemon juice modest so the texture stays clean.
Smoky Taco Chicken
Rub the chicken with cumin, smoked paprika, chili powder, garlic, and salt, then shred it after cooking. Thighs are the better cut here because the spices and a little extra fat make the filling taste richer. Use it for tacos, burrito bowls, nachos, or stuffed sweet potatoes.
Ginger-Soy Chicken
Mix soy sauce, grated ginger, garlic, a touch of honey, and sesame oil for a savory batch that tastes built for rice and vegetables. This one reheats well in a skillet with a splash of water. It’s especially useful when the rest of dinner is plain rice and frozen vegetables that need help.
Creamy Yogurt Herb Chicken
Coat the chicken in yogurt, garlic, dill, and salt before roasting or grilling. The yogurt keeps the meat tender and gives it a tangy finish that works cold or warm. This is one of the nicest choices for wraps and pita sandwiches.
Simple Poached Shredded Chicken
Poach the chicken in broth with onion, bay leaf, peppercorns, and a little salt, then shred it while warm. It’s not the most dramatic version, but it’s the cleanest blank slate for soups, casseroles, enchiladas, and quick skillet dinners. If you need one batch to go in five different directions, this is the one.
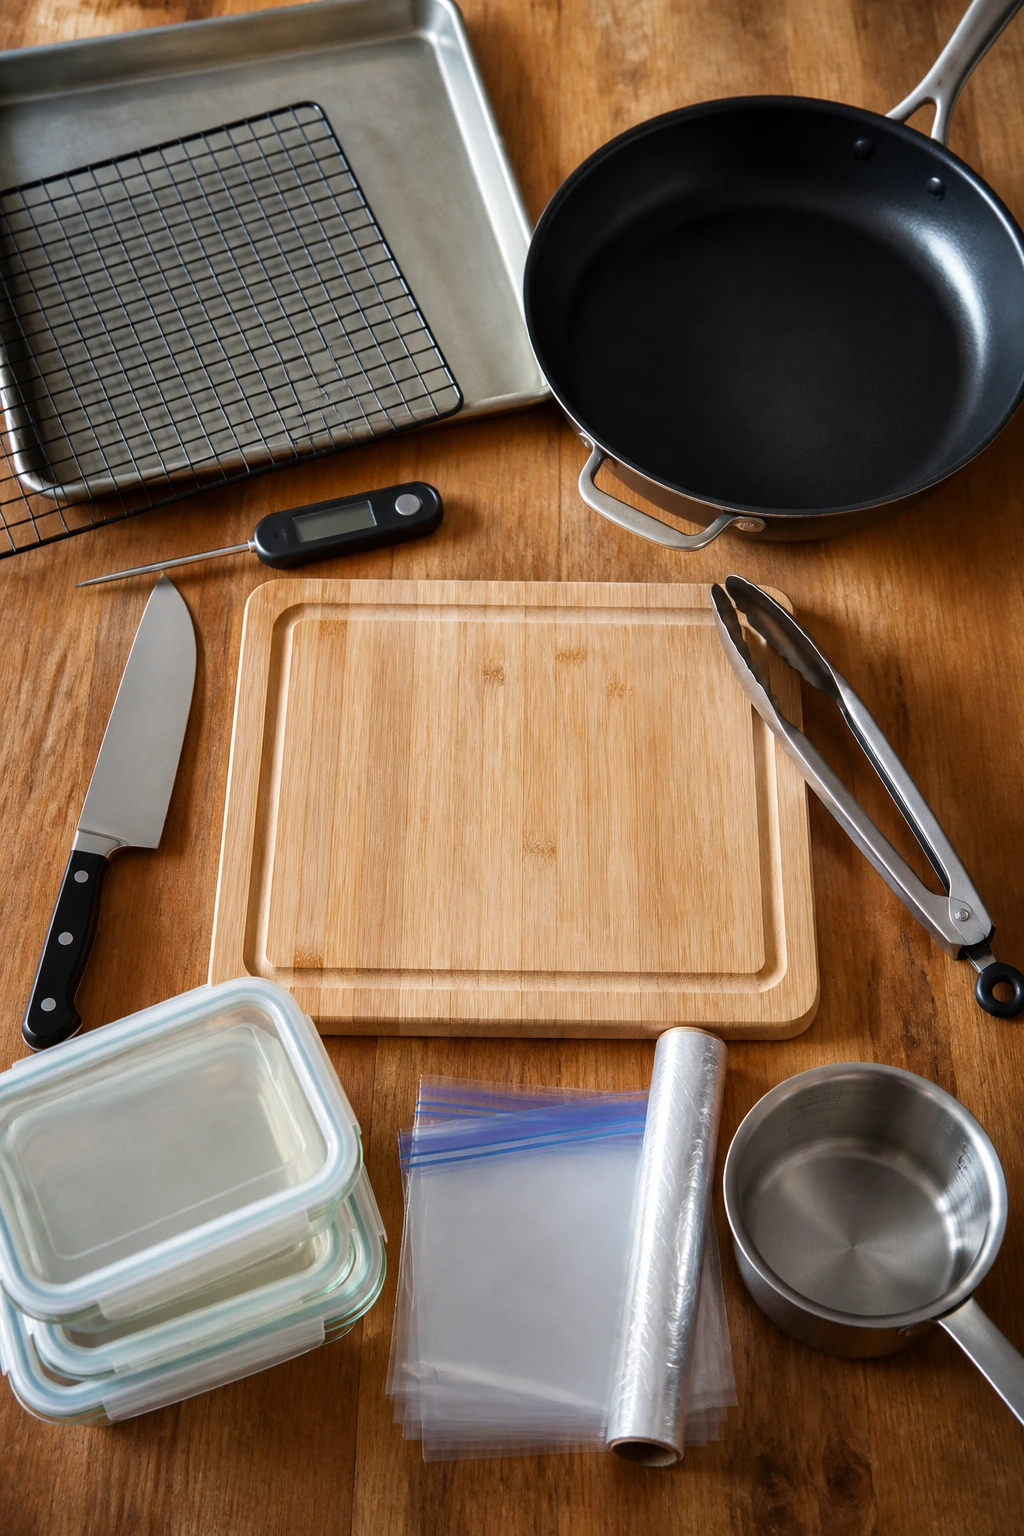
Tools and Equipment That Make Batch Cooking Easier
-
Instant-read thermometer — This is the one tool I would not skip; it keeps you from overcooking chicken by guesswork.
-
Rimmed sheet pan — Best for roasting several pieces at once without juices running off the edge.
-
Wire rack — Helps the chicken cool without steaming the bottom; optional, but useful.
-
Heavy skillet or sauté pan — Ideal for searing cutlets or finishing chicken in the oven.
-
Tongs — Easier and safer than stabbing the meat with a fork and losing juices.
-
Sharp chef’s knife — Needed for clean slicing, especially if you’re portioning breasts for wraps or salads.
-
Cutting board with a juice groove — Keeps the board from flooding with resting juices.
-
Shallow airtight containers — Better than one deep container because they cool faster and store more evenly.
-
Freezer bags or wrap — Good for freezing meal-sized portions flat so they thaw quickly.
-
Small saucepan or measuring cup — Handy for broth if you’re reheating in liquid or poaching chicken.
How to Store, Freeze, and Plan the Week Ahead
Chicken that sits around too long in a deep container is not meal prep. It’s a gamble. The whole point is to cool it fast, store it well, and use it before the texture starts to slide.
For the fridge, cooked chicken holds best for 3 to 4 days in airtight shallow containers. If you’ve sliced it, tuck a spoonful of broth or pan juices into the container so the edges don’t dry out. Keep sauces separate when possible. They can be added later, and your chicken will thank you for it.
For the freezer, aim to use cooked chicken within 2 to 3 months for the best texture. It will still be safe beyond that if properly frozen, but the meat gets drier and the flavor dulls with time. Freeze portions flat in sealed bags, press out the air, and label them by cut and seasoning style. “Thighs, taco” is much more useful than “chicken mystery bag.”
Thaw frozen chicken overnight in the fridge if you can. If you need it faster, use a sealed bag in cold water and change the water every 30 minutes. Don’t thaw chicken on the counter. That shortcut is not worth the risk, and it usually leaves the outer layers soggy while the center stays frozen anyway.
The easiest weekly rhythm is to cook one batch, use half in the first two days, and freeze the rest in smaller portions before it gets lost in the back of the fridge. If you know a portion is headed for soup or sauce, freeze it with a little broth or pan juice. If it’s for salads or wraps, freeze it plain and season after reheating.
One small habit makes a huge difference: write the cooking date on the container. Not because you need a perfect system. Because mystery leftovers are where good chicken quietly goes to die.
Frequently Asked Questions About Juicy Make-Ahead Chicken
Is chicken breast or thigh better for meal prep?
Thighs are more forgiving and stay juicier after reheating, which makes them my first choice for batch cooking. Breasts can still work well, especially if you pound them evenly and pull them a little early, but they ask for more attention.
How do I keep cooked chicken from drying out in the fridge?
Cool it in a shallow layer, store it in airtight containers, and keep a spoonful of broth or pan juices with it if you can. The biggest issue is not the fridge itself — it’s overcooking first and then leaving the chicken exposed to air.
Can I freeze cooked chicken after slicing it?
Yes, and sliced chicken actually freezes neatly if you separate the layers with a little parchment or freeze it in a flat bag. It’s best for future wraps, bowls, soups, and pasta because it thaws fast and reheats evenly.
What’s the best way to reheat chicken for wraps or salads?
For wraps, I like a covered skillet with a splash of broth so the chicken warms gently and stays soft. For salads, you can eat it cold straight from the fridge if it was cooked and cooled properly; in that case, the seasoning matters more than the reheating method.
Can I use rotisserie chicken instead of cooking my own batch?
Absolutely. It’s a useful shortcut when the goal is speed, though the texture will be slightly different and the seasoning usually leans saltier. Pull the meat while it’s still a little warm, store it in shallow containers, and use it within a few days.
How do I know when the chicken is done without cutting it open?
Use an instant-read thermometer and stop guessing. Breasts are ready around 160°F to 165°F after resting, and thighs usually feel best a little higher, around 170°F to 175°F. The thermometer takes the drama out of it.
Can I cook chicken ahead in a slow cooker and still keep it juicy?
Yes, especially for shredding, but go easy on the liquid and avoid overcooking it into strings. Slow cooker chicken is best when it’s headed for tacos, casseroles, soups, or saucy dishes that will bring moisture back to the meat.
What should I do if the chicken already came out dry?
Don’t serve it plain and hope for the best. Chop it smaller, add broth, sauce, or a little fat, and fold it into something wet like soup, rice, pasta, or a skillet dish. Dry chicken can still be useful if you stop expecting it to stand alone.
Can I reheat chicken more than once?
Try not to. Reheating repeatedly pulls more moisture out each time, and the texture gets tired fast. Reheat only the portion you plan to eat, then leave the rest cold until the next meal.
A Weeknight Chicken Habit That Sticks
Good make-ahead chicken is not about one heroic cooking session. It’s about making dinner feel less fragile. One calm batch gives you a small pile of ready protein that can become a bowl, a wrap, a soup, or a skillet meal without much ceremony.
The details matter more than the hype. Salt early. Cook gently. Cool shallow. Reheat with moisture. Do those four things consistently and the chicken stops being the part of dinner you have to worry about.
Keep the seasoning simple enough to go anywhere, but not so bare that it tastes like a blank placeholder. That middle ground is where weeknight dinners get easier in a real, practical way — and the next time you open the fridge at 6:30, a container of properly cooked chicken will feel less like leftovers and more like a very small gift from your past self.