
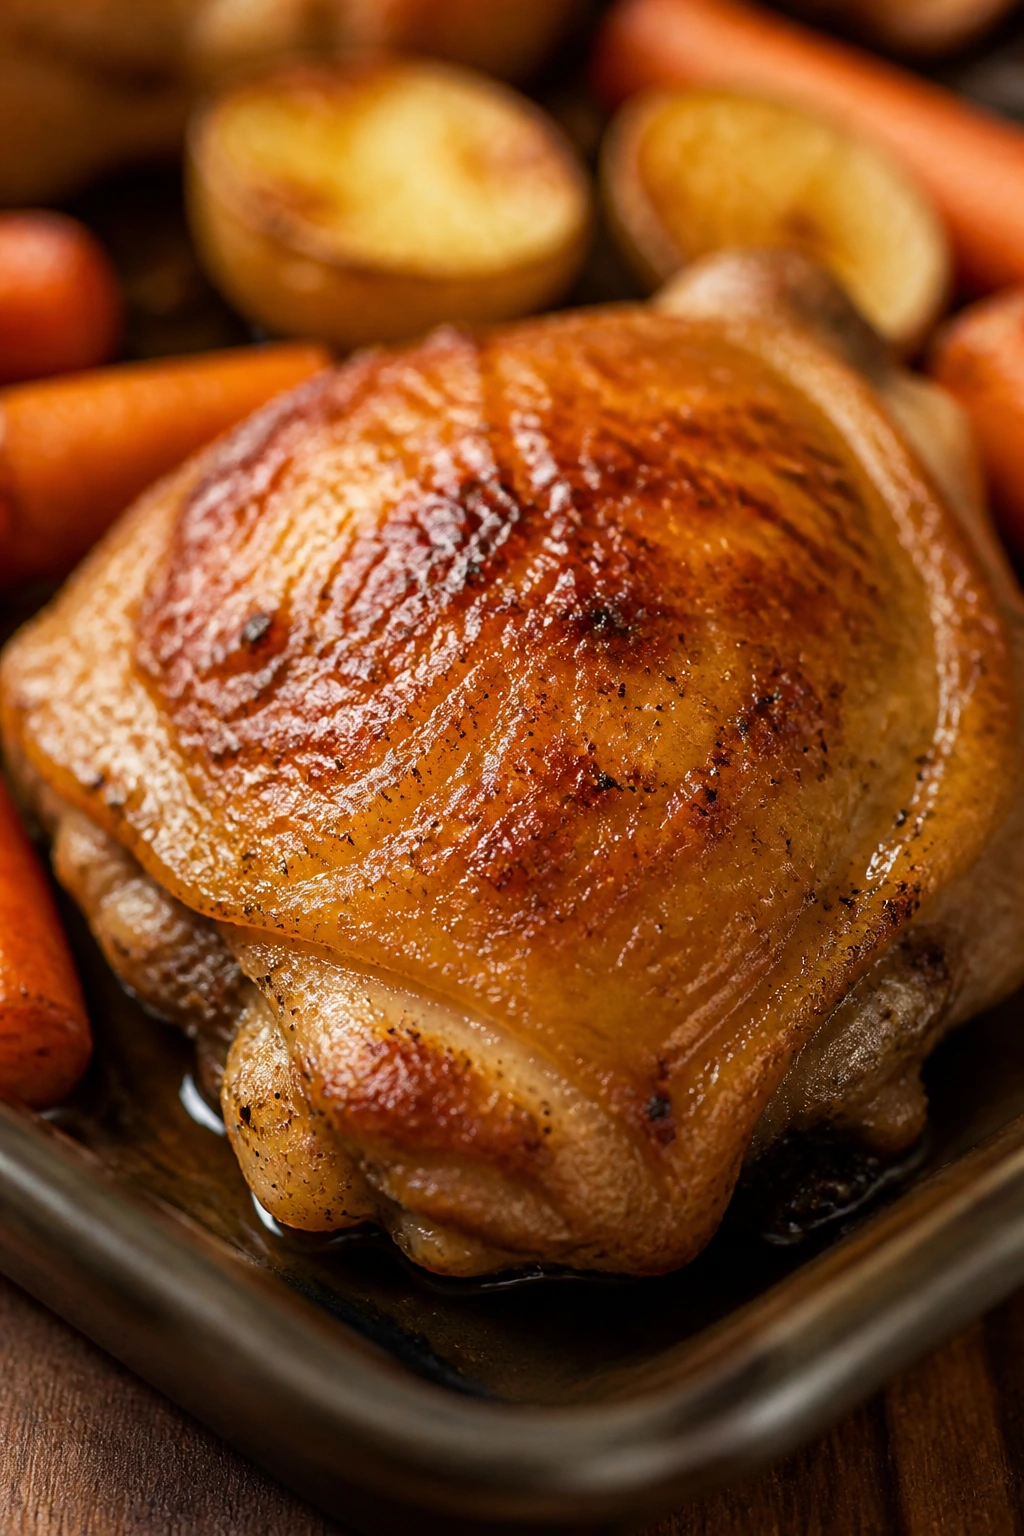
A roasted kid-friendly chicken dinner can go badly in more ways than people like to admit. The chicken is dry, the potatoes are pale, the carrots slump into sadness, and the whole thing tastes like it was made by someone who hoped the oven would do all the work while they answered email. This version avoids that trap. It uses a hot oven, a smart order of operations, and a seasoning blend that stays familiar enough for kids but still tastes like dinner, not cafeteria food.
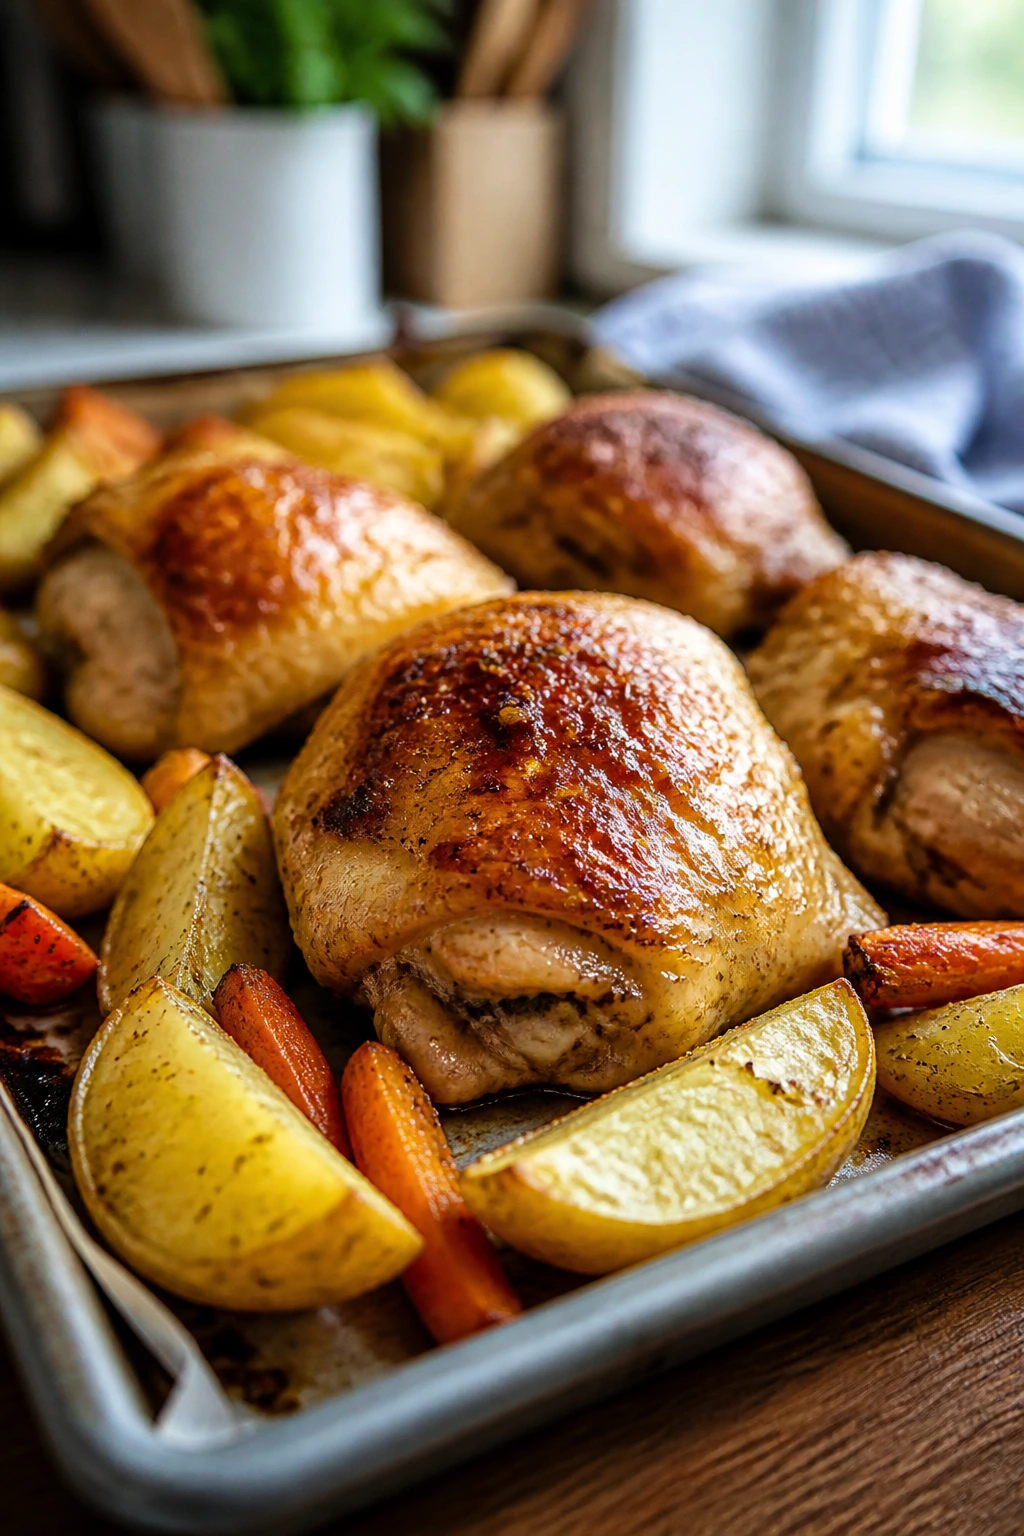
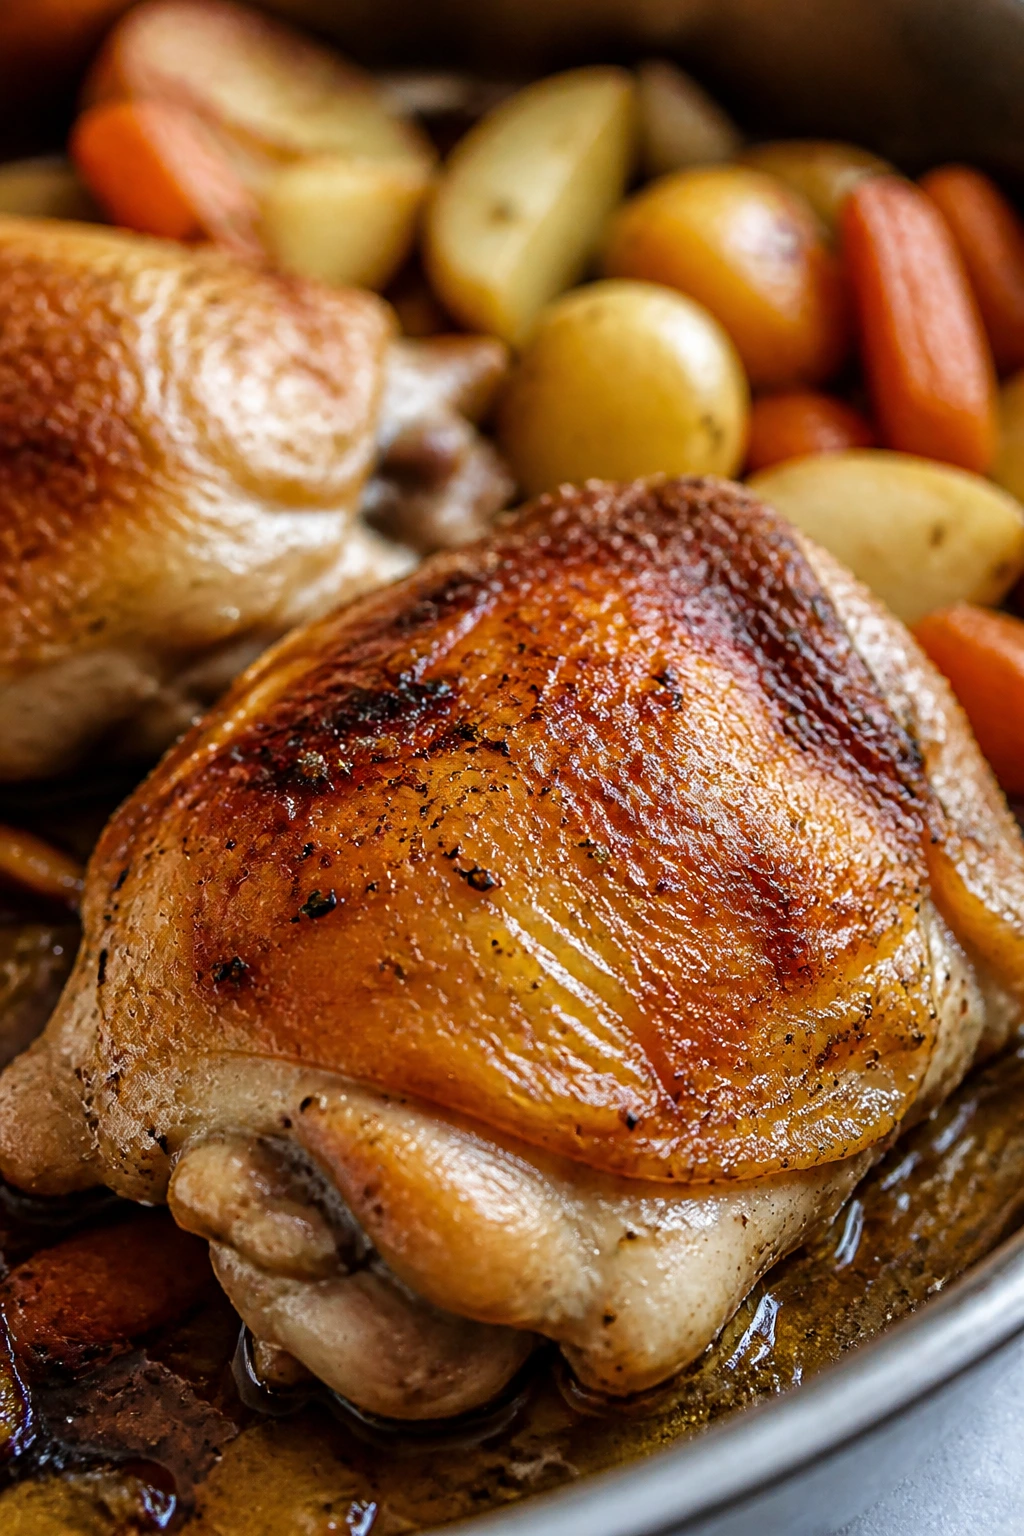
What makes this style of chicken dinner worth keeping around is the balance. The chicken gets browned skin and juicy meat. The vegetables pick up the drippings and soften at the edges without turning mushy. And because the seasoning leans on garlic, paprika, thyme, butter, and a tiny bit of honey, it lands in that sweet spot where kids usually take a bite before they start negotiating.
The best part is that the pan does not ask much from you. There’s no marinade to remember, no breading station, and no skillet babysitting on the stove. You chop, toss, roast, and finish. That’s the whole rhythm. Once you know the order, this becomes one of those dinners you can make on autopilot without the food tasting autopilot-ish.
Why This Roasted Chicken Dinner Keeps the Table Calm
-
Mild seasoning, not bland seasoning: Garlic powder, sweet paprika, thyme, and butter keep the flavor soft and savory, which matters when you are cooking for younger eaters who notice pepper flakes before they notice much else.
-
One pan, one oven, one cleanup job: The chicken and vegetables roast together, so you are not juggling a saucepan of sauce or a separate pan of potatoes while homework papers slide off the counter.
-
The chicken stays juicy even if you miss by a few minutes: Bone-in, skin-on thighs are forgiving. They can take a little extra time without turning into leather, and that flexibility is gold on a weeknight.
-
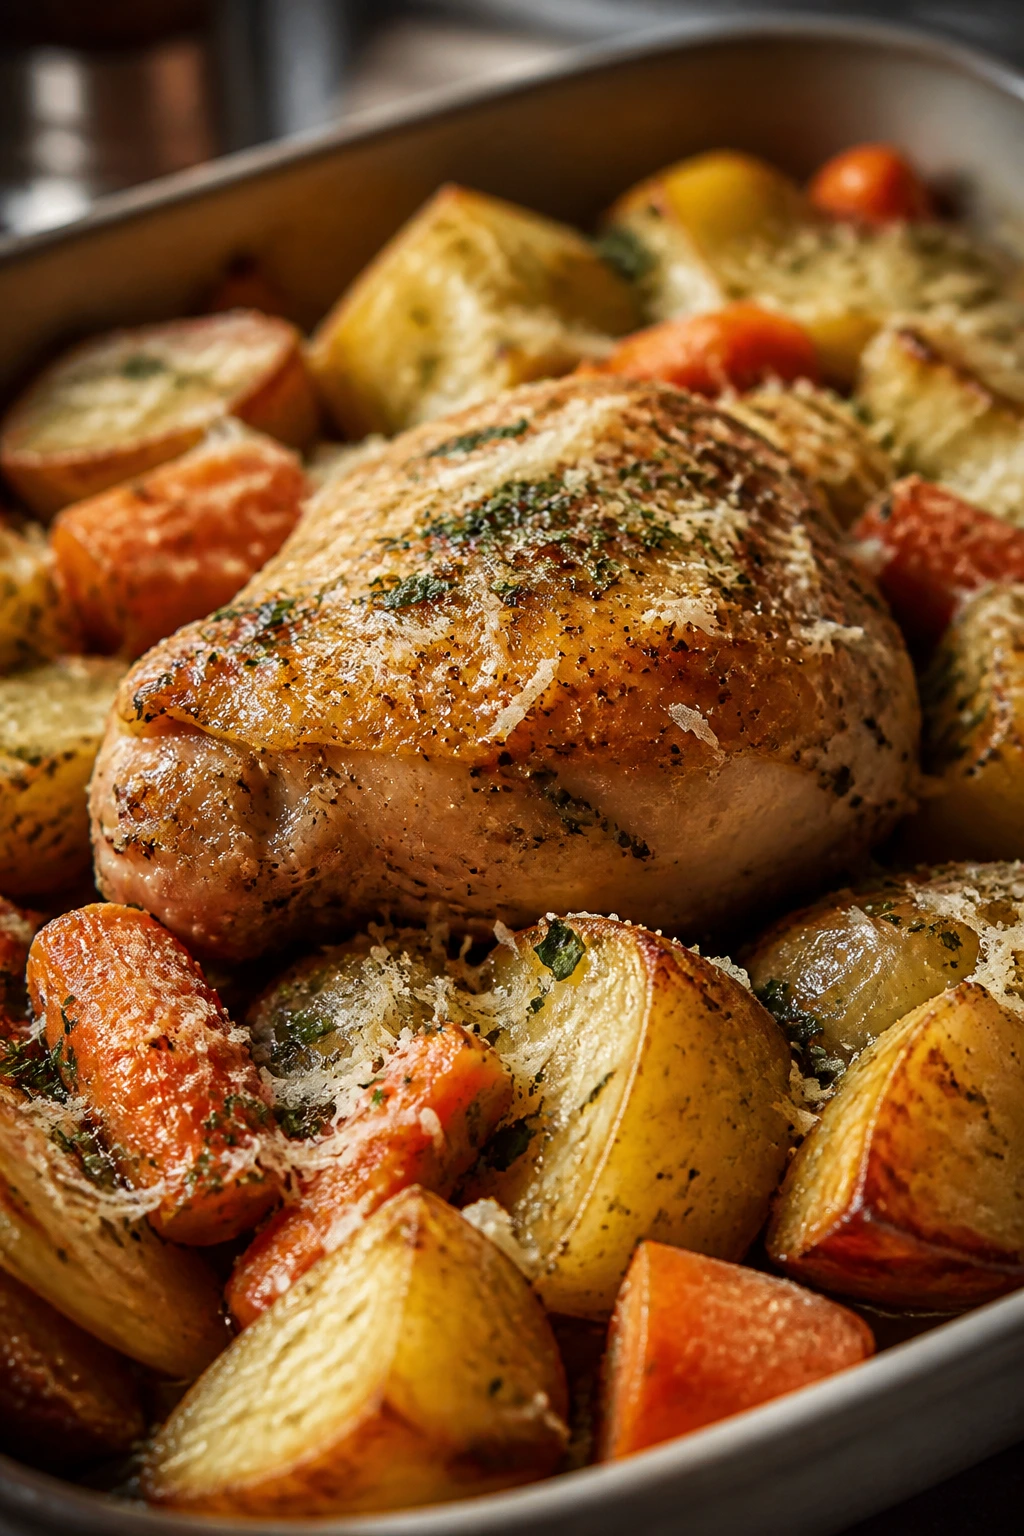
The vegetables taste like part of the meal, not a side note: Potatoes soak up the drippings, carrots sweeten as they roast, and onion wedges get soft and golden at the edges.
-
Leftovers do real work: Cold chicken slices cleanly for lunch boxes, and the vegetables reheat well in a skillet, which is more than I can say for many sheet-pan dinners.
-
You can keep the plates separate if you need to: Some kids want chicken and potatoes apart. Some want everything touching. This dinner plays along either way.
Why a Simple Roast Chicken Dinner Still Feels Like a Smart Move
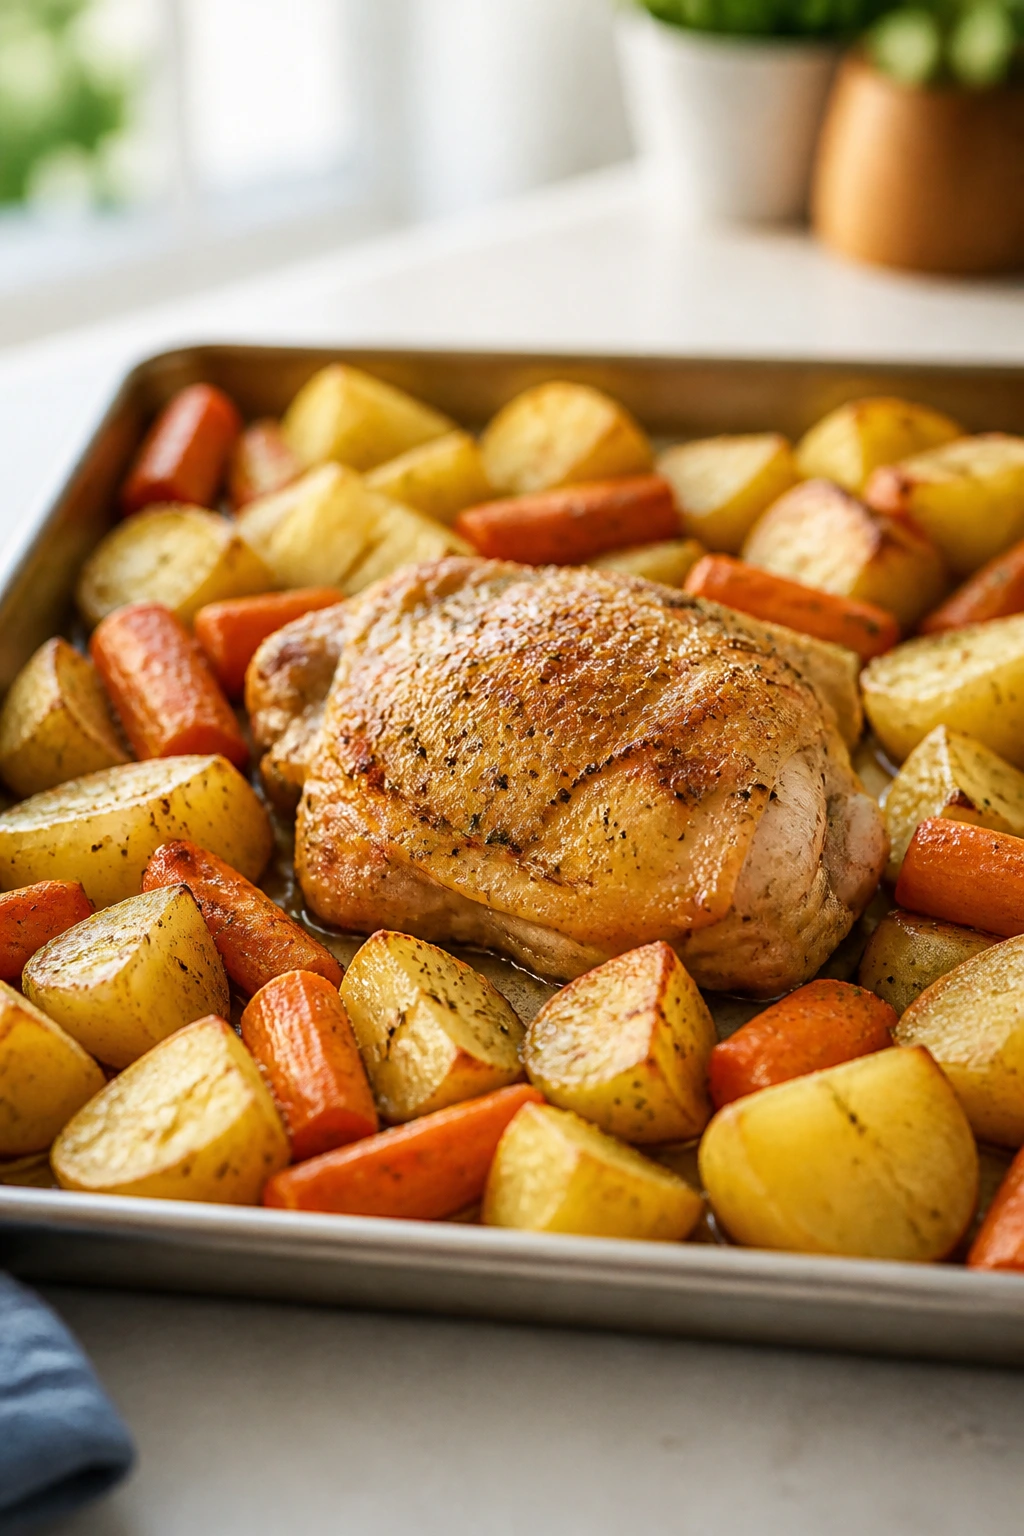
Roast chicken has a reputation for being a Sunday thing. Big bird, long timer, lots of basting, maybe a little kitchen drama. That’s not what’s happening here. This weeknight version is built around smaller pieces, faster roasting, and vegetables that finish in the same window as the chicken instead of waiting around like they missed the bus.
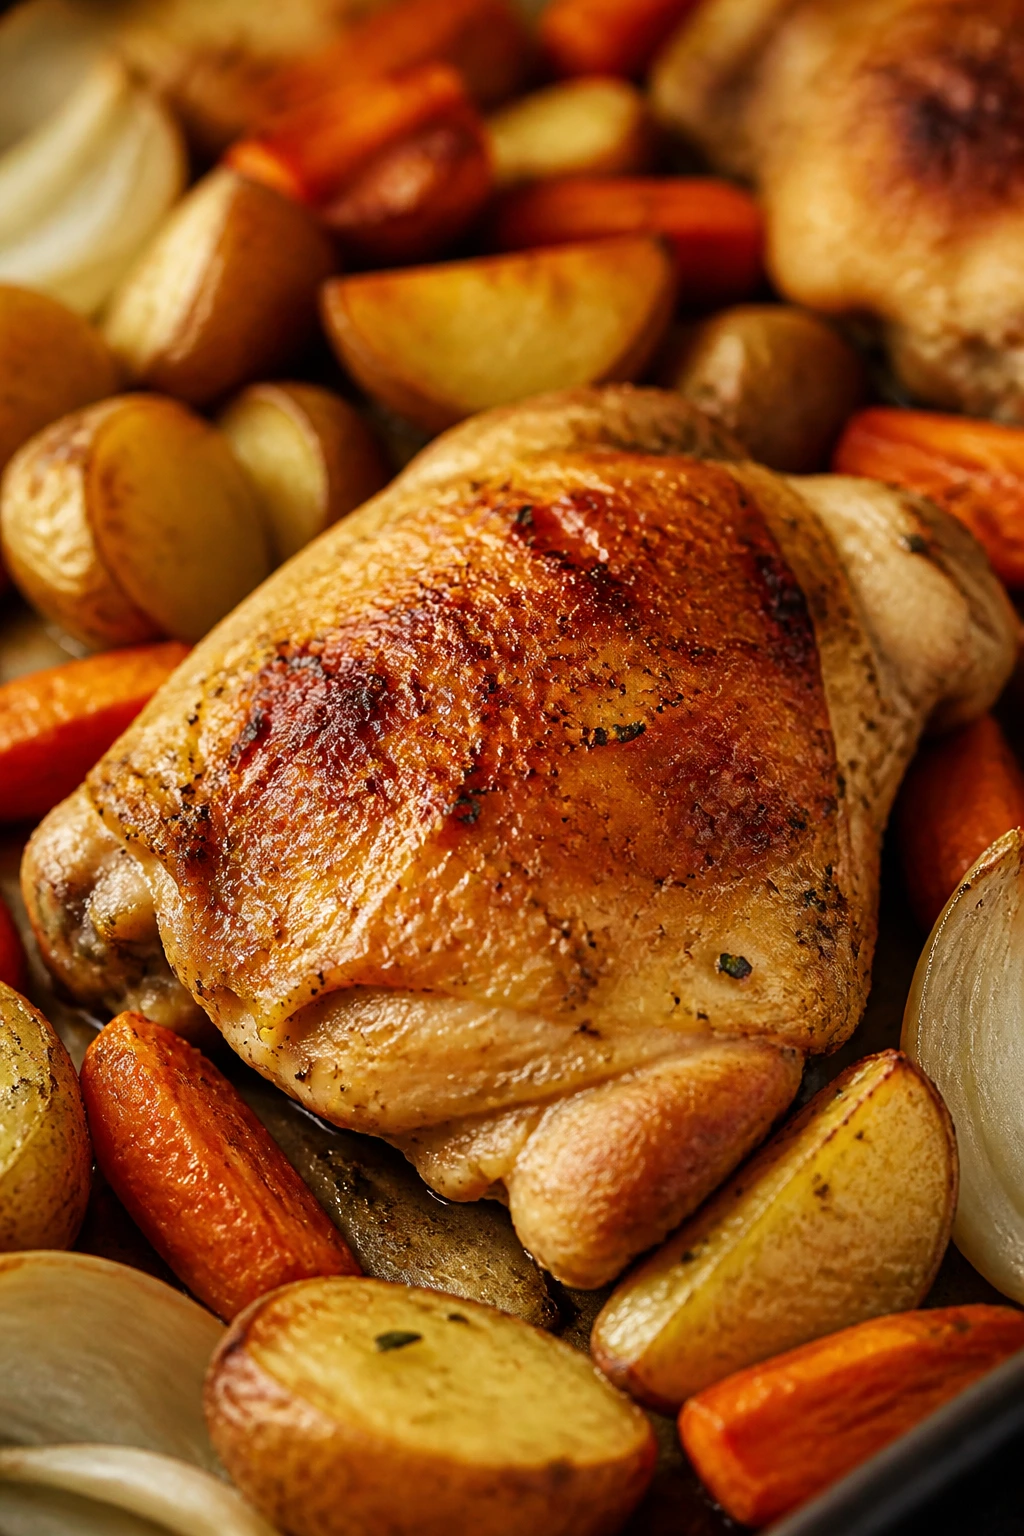
The trick is choosing ingredients that behave well under heat. Chicken thighs or drumsticks stay moist because they have enough fat and connective tissue to forgive a hot oven. Baby Yukon Gold potatoes turn creamy in the middle and crisp on the cut side. Carrots like the same temperature, which is convenient. Onions, cut into thick wedges, go sweet and soft instead of dissolving into strings. All of that matters more than any fancy trick.
And then there’s the seasoning. Kids usually do better with familiar smells and obvious colors. Sweet paprika gives the chicken a warm red-gold look. Garlic powder spreads flavor evenly without sharp bites of raw garlic. A little honey brushed on near the end makes the skin glossy and rounds out the pan juices. It doesn’t taste sugary. It tastes finished.
That’s the part people miss when they try to make a “kid-friendly” dinner. The goal isn’t to strip away flavor until nothing offends. The goal is to build a dinner that looks friendly, smells good, and tastes balanced enough that everyone at the table can live with it. Big difference.
Timing and Yield at a Glance

Yield: Serves 4 to 6
Prep Time: 20 minutes
Cook Time: 45 to 55 minutes
Total Time: 1 hour 5 minutes to 1 hour 15 minutes
Difficulty: Beginner — the steps are straightforward, and the only real skill is keeping an eye on the oven thermometer and the chicken’s internal temperature.
Best Served: Hot from the oven after a 5-minute rest, while the skin is still crisp and the pan juices are glossy.
What Goes Into the Pan
For the Chicken and Vegetables:
- 2 1/2 lb bone-in, skin-on chicken thighs, patted dry
- 1 1/2 lb baby Yukon Gold potatoes, halved if large
- 1 lb carrots, peeled and cut into 2-inch pieces
- 1 medium yellow onion, cut into 8 wedges
- 3 tablespoons olive oil
- 2 teaspoons kosher salt
- 1 teaspoon garlic powder
- 1 teaspoon sweet paprika
- 1/2 teaspoon dried thyme
- 1/2 teaspoon black pepper
- 1 tablespoon honey
- 2 tablespoons unsalted butter, melted
- 1 tablespoon lemon juice
- 2 tablespoons chopped parsley, for serving
Why Each Ingredient Pulls Its Weight
Chicken thighs
- What to use: 2 1/2 lb bone-in, skin-on chicken thighs, usually 4 to 6 pieces depending on size.
- Preparation: Pat them dry with paper towels so the skin can brown instead of steaming.
- Substitutions: Drumsticks work well with nearly the same timing; boneless thighs can work, but they’ll finish sooner and won’t give you the same crispy skin.
- Tips: Thighs are the calmest choice for a weeknight roast. They stay juicy even if the oven runs a little hot or you get distracted for a few minutes.
Potatoes and carrots
- What to use: 1 1/2 lb baby Yukon Gold potatoes and 1 lb carrots cut into chunky pieces.
- Preparation: Keep the potatoes close to the same size so they finish together, and cut the carrots thick enough that they don’t go soft before the chicken is done.
- Substitutions: Baby red potatoes, fingerlings, or peeled russet chunks work in a pinch; parsnips can replace part of the carrots if your family likes their sweeter, earthier flavor.
- Tips: Yukon Golds are the best fit here because they hold their shape and turn creamy instead of mealy.
Onion
- What to use: 1 medium yellow onion cut into 8 wedges.
- Preparation: Leave the root end attached to each wedge if you can; it helps the onion stay intact in the pan.
- Substitutions: Red onion gives a slightly sharper bite, and shallots can be used if you want the onion flavor softer.
- Tips: Big wedges are better than little dice. Tiny onion pieces brown too fast and disappear before the rest of the pan is ready.
Oil, butter, honey, and lemon
- What to use: 3 tablespoons olive oil, 2 tablespoons melted unsalted butter, 1 tablespoon honey, and 1 tablespoon lemon juice.
- Preparation: Mix the honey, butter, and lemon only when you’re ready to finish the dish.
- Substitutions: Maple syrup can replace the honey, and the lemon can be swapped for a splash of apple cider vinegar if that’s what you have.
- Tips: The butter gives you richness, the honey gives the skin a light sheen, and the lemon cuts through the drippings so the pan doesn’t taste heavy.
Seasonings
- What to use: 2 teaspoons kosher salt, 1 teaspoon garlic powder, 1 teaspoon sweet paprika, 1/2 teaspoon dried thyme, and 1/2 teaspoon black pepper.
- Preparation: Stir the seasonings together before you start so you can season evenly and fast.
- Substitutions: Smoked paprika works if you want a deeper, woodier flavor, though sweet paprika keeps the dish more kid-friendly.
- Tips: Garlic powder coats more evenly than fresh minced garlic at this roasting stage. Fresh garlic can burn before the chicken is finished.
The Tools That Make the Roast Go Smoothly
- Rimmed half-sheet pan, 18 x 13 inches: This gives the vegetables room to roast instead of pile up and steam.
- Large mixing bowl: Handy for tossing the potatoes, carrots, and onion with oil and seasonings.
- Small bowl: Use this for mixing the spice blend and the honey-butter finish.
- Tongs: Good for nesting the chicken into the vegetables without tearing the skin.
- Instant-read thermometer: The one tool I would not skip. It takes the guesswork out of dark meat.
- Cutting board and chef’s knife: Basic, but the potato and carrot cuts matter here.
- Pastry brush or spoon: Either one works for brushing the honey-butter over the chicken near the end.
- Parchment paper or foil, optional: Useful for cleanup, though a lightly oiled pan browns the bottoms a little better.
What Each Ingredient Is Doing in the Oven
Chicken, Heat, and Browning
The chicken is the center of the whole dinner, so the cut matters. What to use: bone-in, skin-on thighs are the sweet spot for a family roast because they keep moisture under the skin and stay forgiving if the clock gets away from you. Preparation: dry the skin thoroughly, then season right before roasting so the salt can work without pulling too much moisture to the surface too early. Substitutions: drumsticks give you a fun, kid-handled shape; boneless thighs can work if you want shorter cook time and fewer bones at the table. Tips: thighs are happiest in a hot oven, and they’re best when you let the skin brown fully instead of pulling them too early because the thermometer flashed 165°F for one second.
Potatoes, Carrots, and the Edges That Brown
What to use: baby Yukon Gold potatoes and carrots cut into chunky, even pieces. Preparation: halve the potatoes if they’re larger than a golf ball, and keep the carrots to about 2-inch lengths so they finish at the same pace. Substitutions: red potatoes stay firm, while peeled sweet potatoes give a sweeter version that children sometimes like more than they expect. Tips: cut everything bigger than you think. Tiny pieces go limp before the chicken is done, and limp carrots are not the move.
Onion and the Quiet Sweetness It Brings
What to use: one medium yellow onion cut into wedges. Preparation: tuck the wedges among the vegetables rather than scattering them too finely; that keeps them from scorching. Substitutions: red onion gives a slightly sharper edge, and shallots bring a softer, more delicate sweetness. Tips: onion does not need to dominate the pan to matter. Even a few wedges add a savory base that makes the drippings taste deeper.
Seasonings and the Finish
What to use: kosher salt, garlic powder, sweet paprika, dried thyme, black pepper, butter, honey, and lemon juice. Preparation: mix the dry seasonings in a bowl first so every piece gets the same coating, then save the honey-butter for the end. Substitutions: maple syrup can stand in for honey, and chopped rosemary can replace thyme if your family likes a more piney, roast-chicken flavor. Tips: the final splash of lemon does real work. It keeps the pan juices from tasting flat and helps the chicken taste roasted instead of greasy.
The Roasting Method, Step by Step
Prep the Pan and Heat the Oven:
-
Preheat the oven to 425°F (220°C) and position a rack in the center of the oven.
-
Lightly oil a rimmed half-sheet pan or line it with foil for easier cleanup. If you’re using foil, brush a thin film of oil over it so the potatoes don’t stick.
-
In a large bowl, toss the potatoes, carrots, and onion with 2 tablespoons of the olive oil, 1 teaspoon of the kosher salt, 1/2 teaspoon of the garlic powder, 1/2 teaspoon of the paprika, 1/4 teaspoon of the thyme, and a pinch of the black pepper. Spread the vegetables on the pan in a single layer, leaving a few open patches for the chicken later.
Start the Vegetables First:
- Roast the vegetables for 15 minutes, until the edges look dry and a few potato cut sides are starting to turn pale gold. This head start matters. Raw chicken and raw vegetables added together at the same time usually leave you with one overcooked and the other underdone.
Season the Chicken:
-
While the vegetables roast, pat the chicken thighs dry again if needed. In a small bowl, stir together the remaining 1 tablespoon olive oil, 1 teaspoon kosher salt, 1/2 teaspoon garlic powder, 1/2 teaspoon paprika, 1/4 teaspoon thyme, and the rest of the black pepper. Rub this mixture all over the chicken, including under the edges of the skin if you can lift it gently without tearing.
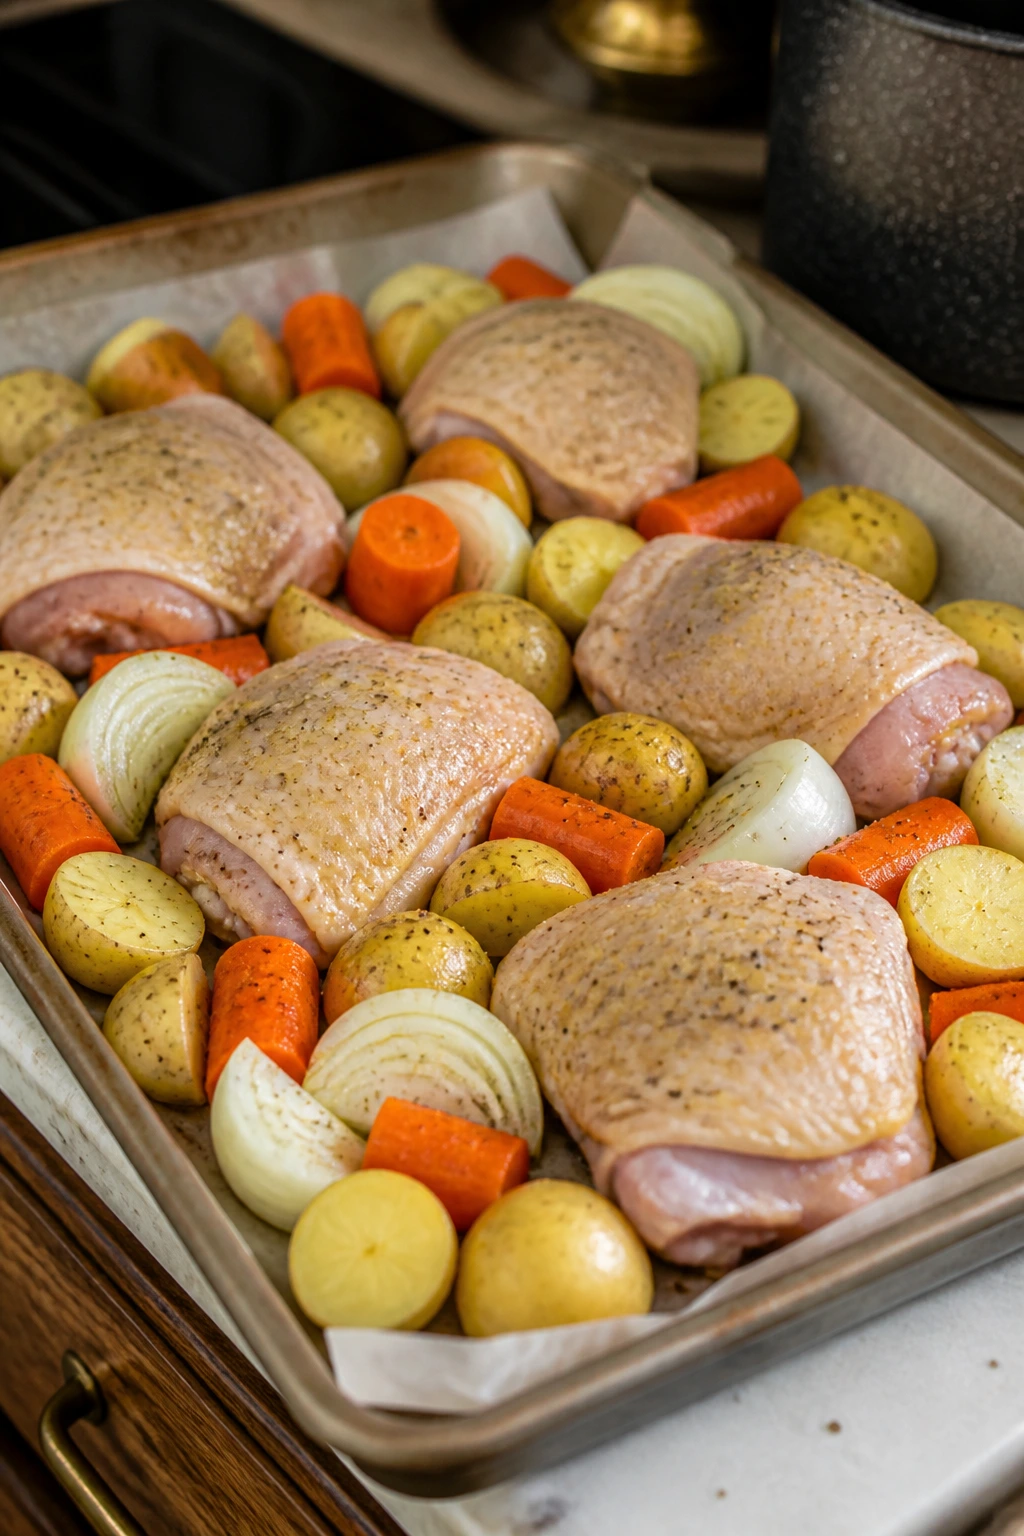
-
Pull the pan from the oven and use tongs to move the vegetables around so they have open spots. Nestle the chicken thighs skin-side up on top of and between the vegetables. Keep the skin exposed. Do not bury the chicken under the potatoes. That traps steam, and steam is the enemy of crisp skin.
Roast Until the Skin Starts to Brown:
-
Roast for 20 minutes, until the chicken skin has started to tighten and the potatoes are taking on color around the cut edges.
-
In a small bowl, whisk together the melted butter, honey, and lemon juice. Brush or spoon about half of this mixture over the chicken skin.
Finish the Glaze and Check for Doneness:
-
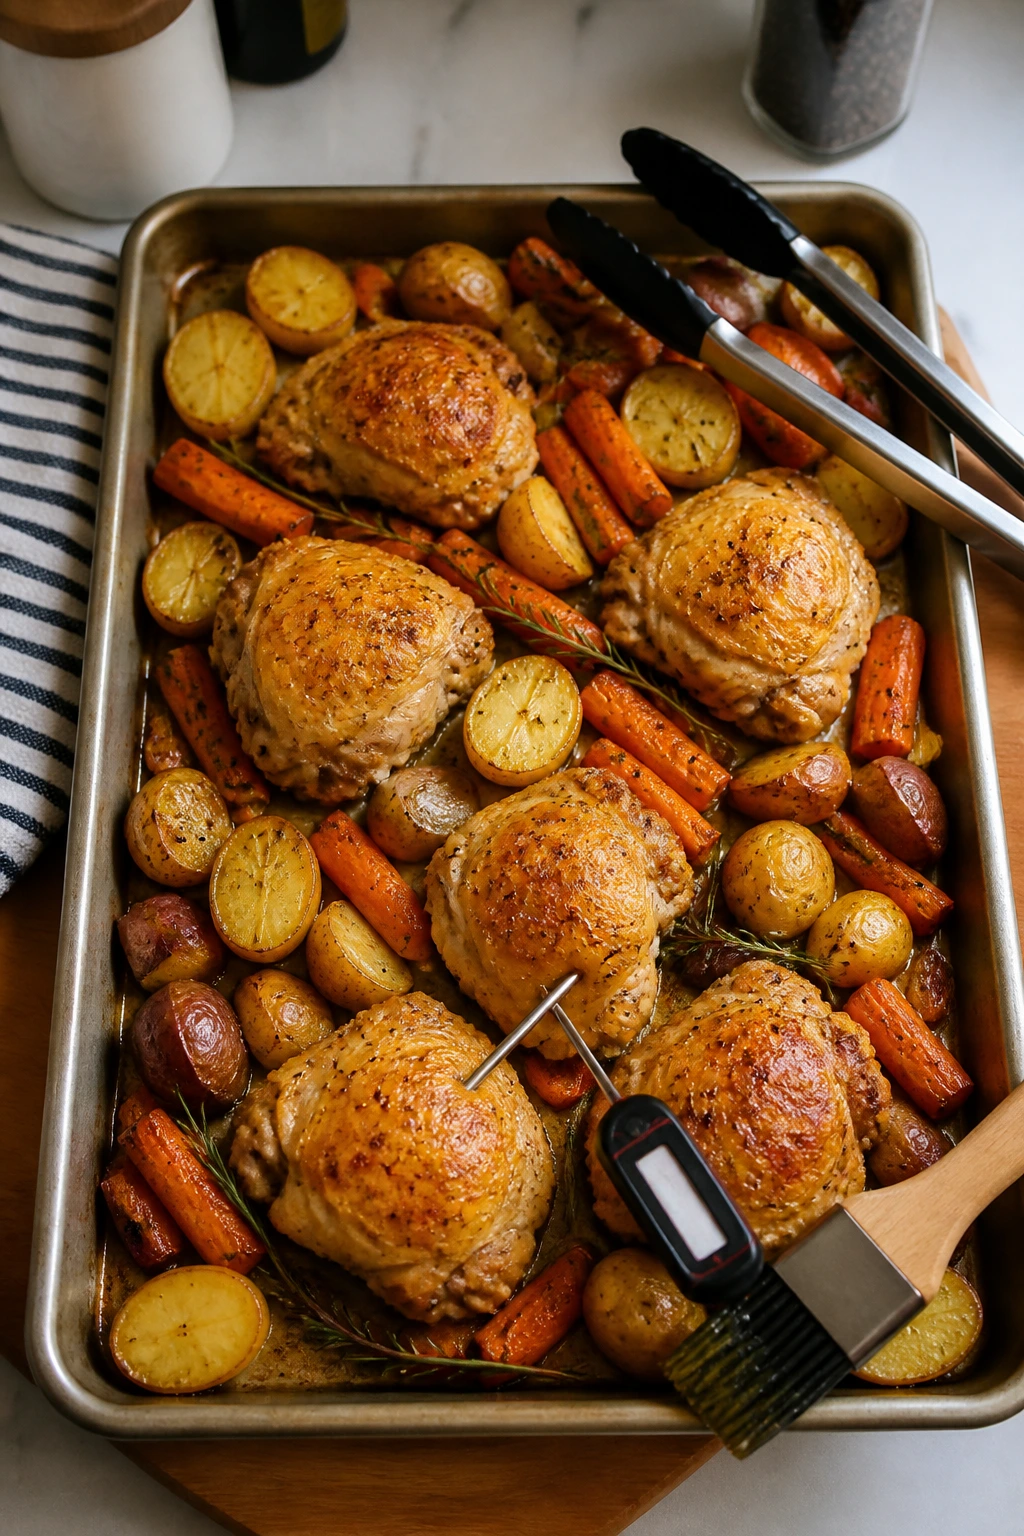
Return the pan to the oven for 10 to 15 minutes, until the chicken reads 175°F to 185°F in the thickest part for the best thigh texture, the skin looks bronzed, and the potatoes are tender enough to break cleanly with the side of a fork. If the top starts to darken too fast, tent loosely with foil for the last few minutes.
-
Remove the pan from the oven and let the chicken rest on the pan for 5 to 10 minutes. Spoon the remaining pan juices over the chicken and vegetables, then scatter the parsley on top. Do not skip the rest. The juices need a minute to settle back into the meat instead of flooding your cutting board.
How to Serve It So Everyone Eats What They Want
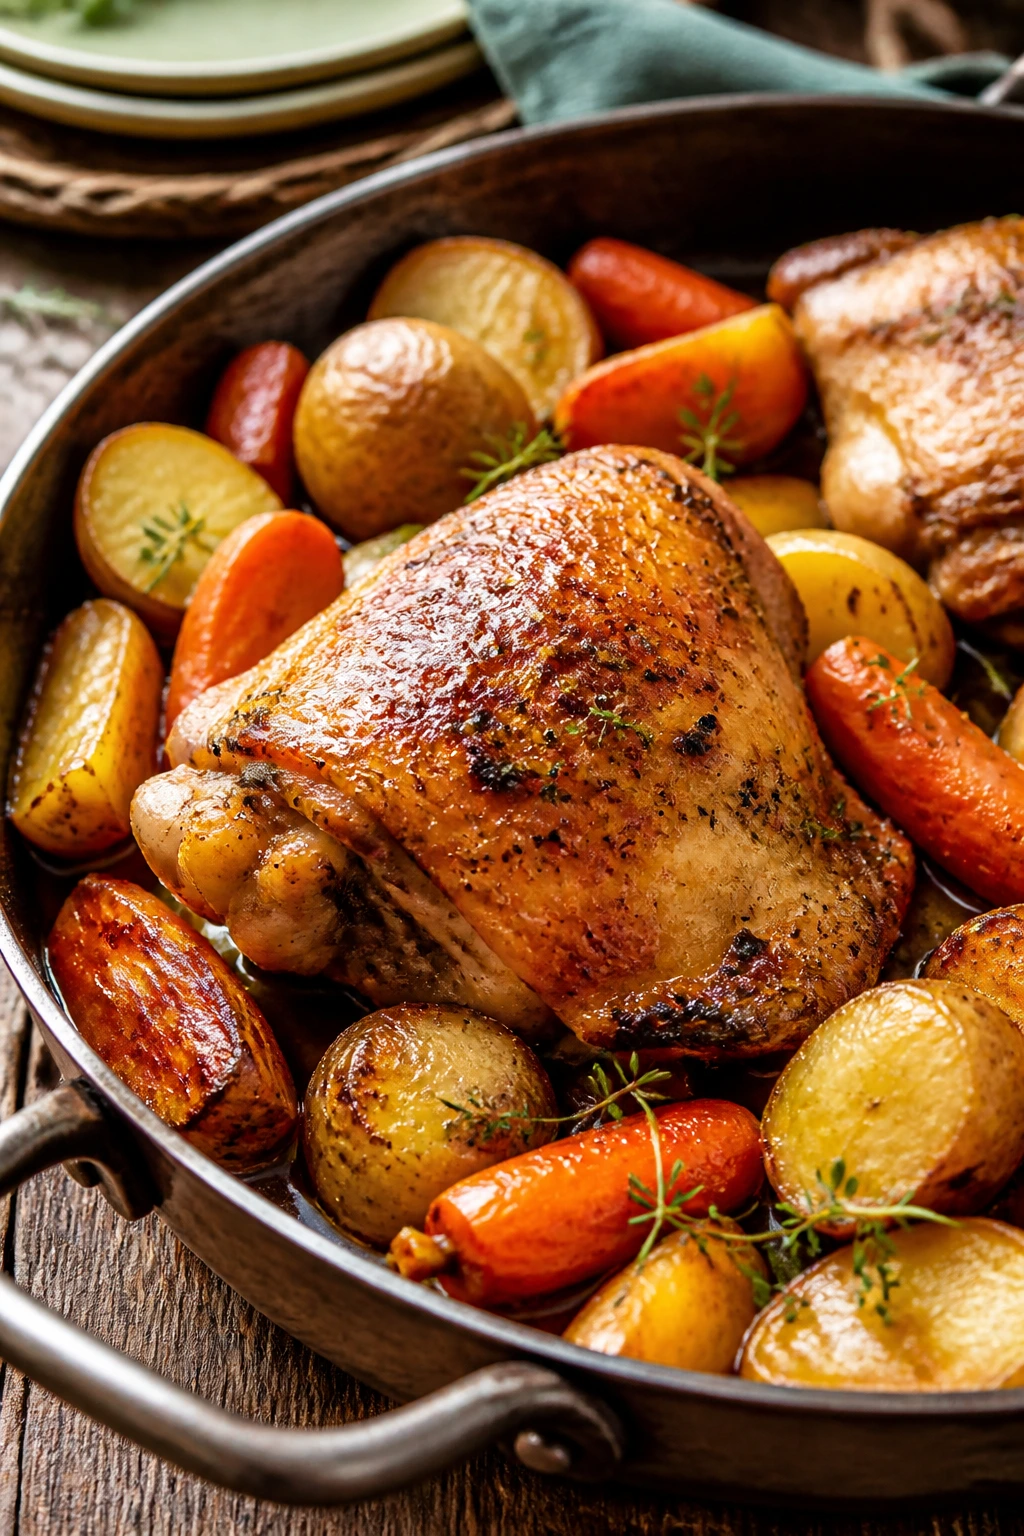
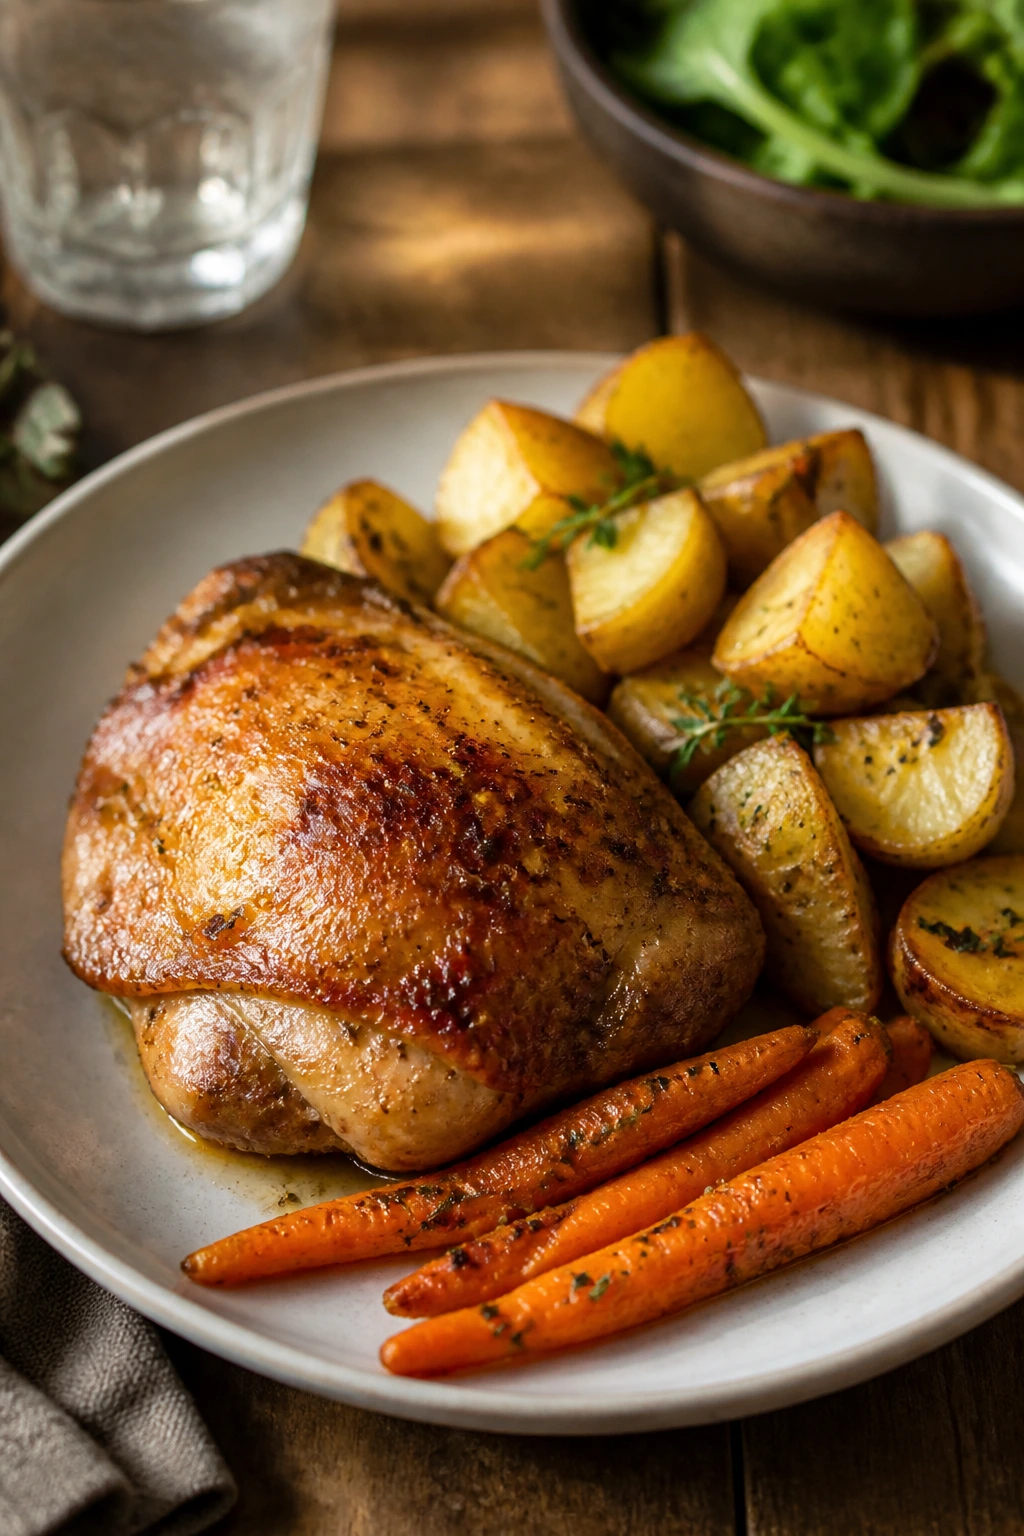
Presentation: I like to bring the whole pan to the table and let the chicken stay tucked into the vegetables. It looks relaxed, which is the correct mood for a weeknight. If you want a cleaner look, pile the potatoes and carrots onto a warm platter first, set the chicken on top, and spoon the glossy pan juices over everything right before serving.
Accompaniments: Because this dinner already has potatoes and carrots built in, keep the extra sides simple. A bowl of buttered peas, a green salad with a sharp vinaigrette, or sliced cucumbers with salt and vinegar works well. A few slices of warm bread are useful too, mostly for the pan juices, which are better than they have any right to be.
Portions: One chicken thigh, a good scoop of vegetables, and a spoonful of pan juices is a satisfying plate for most adults. For smaller kids, cut the chicken off the bone and chop the vegetables into bite-size pieces before serving. If you need to stretch the meal, add a bagged salad and a loaf of bread rather than increasing the chicken too much.
Beverage Pairing: For a family table, sparkling apple cider or lemony sparkling water makes sense. If the adults want wine, a crisp Chardonnay or a dry Riesling handles the garlic, butter, and roasted vegetables without fighting the mild seasoning.
Small Tweaks That Add More Flavor
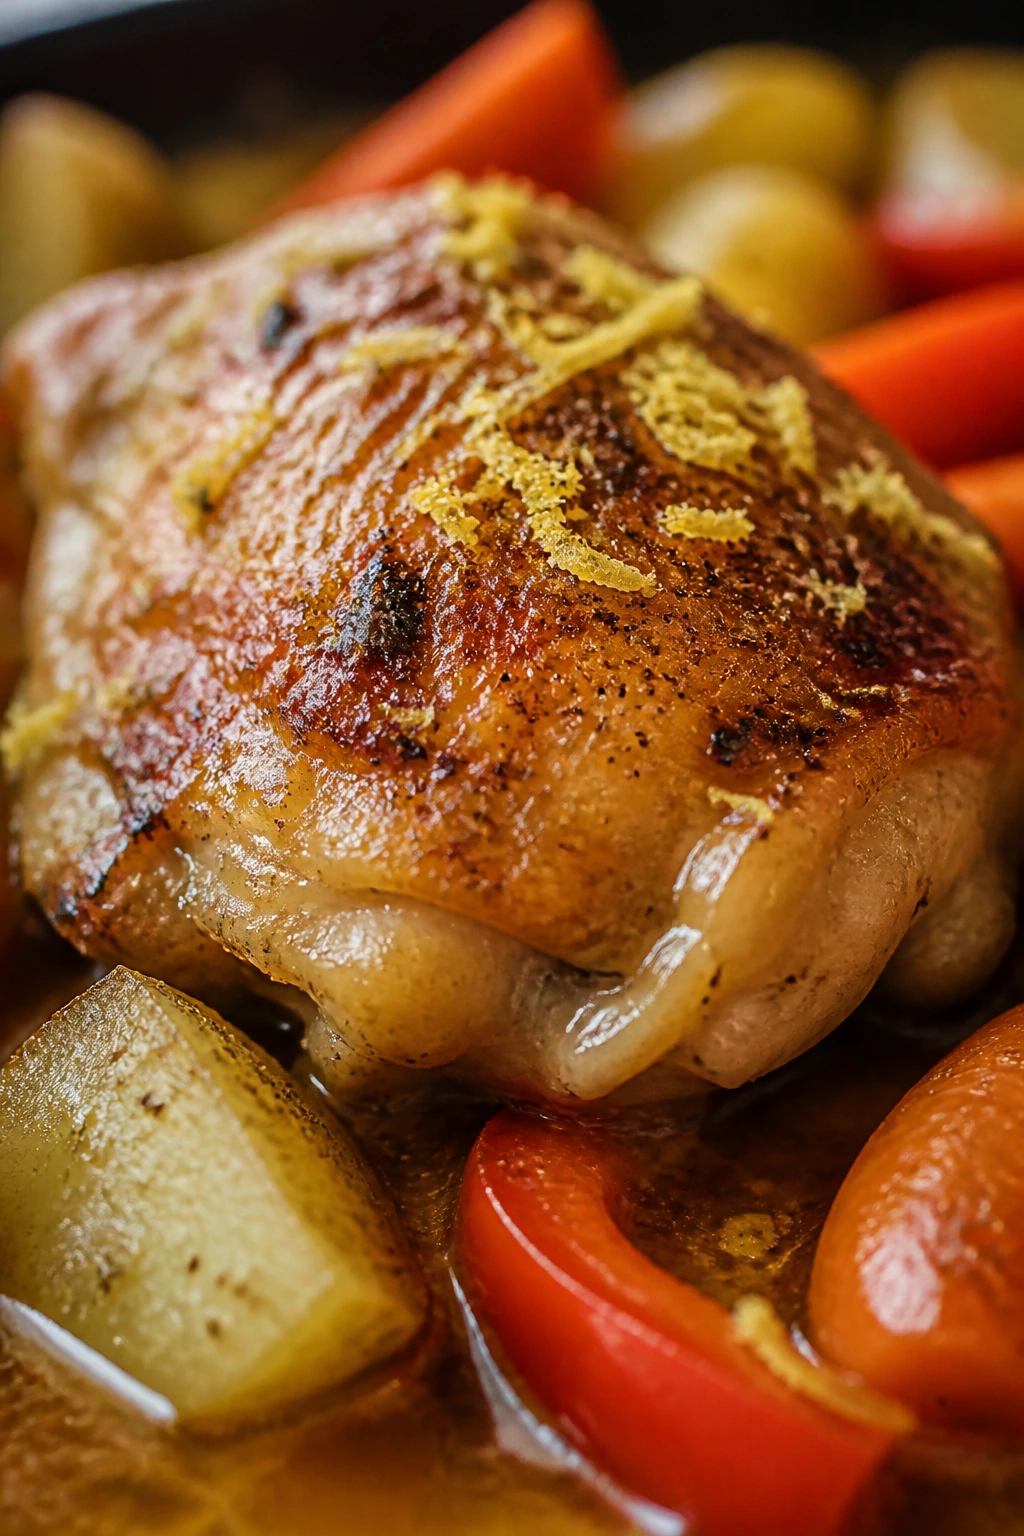
Flavor Enhancement: A final pinch of lemon zest over the pan at the end wakes up the butter and honey without making the dinner taste citrusy. You only need about 1 teaspoon, and it should go on after the chicken rests so the aroma stays bright.
Customization: If your family likes a little more richness, stir 1 teaspoon Dijon mustard into the melted butter. It won’t taste mustardy at all; it just gives the pan juices a little spine. If you want extra color, add a few thick slices of red bell pepper to the vegetables during the last 20 minutes.
Serving Suggestions: A sprinkle of chopped parsley is classic, but chopped chives or dill work too. Dill especially plays well with potatoes. If you want the plate to feel more finished, add a few flakes of coarse salt right before serving. Not a lot. Just enough to catch the light and the tongue.
Make-It-Yours: For dairy-free households, skip the butter and use another tablespoon of olive oil with the honey. For gluten-free meals, nothing needs changing at all, which is one reason this dinner gets made a lot in real kitchens. For a slightly sweeter version that younger kids often accept quickly, swap half the carrots for peeled sweet potato chunks.
The Mistakes That Make Weeknight Roast Chicken Fall Flat
The most common failure is crowding the pan. If the vegetables are piled in a thick heap, they steam instead of roast, and you end up with pale potatoes and soft carrots. Spread everything into a single layer and use two pans if you have to. I mean that. Two pans are better than one overloaded pan.
Another easy mistake is skipping the vegetable head start. Chicken thighs and carrots can be friends in the oven, but they do not brown at the same speed if they start together from cold. The vegetables need that first 15-minute stretch so the potatoes can get a little color before the chicken joins them.
People also tend to add the honey too early. Honey left on the chicken for the full roast can darken too much and taste bitter around the edges. Save it for the end. That last brush of butter and honey should just glaze the skin, not cook for half an hour.
Then there’s forgetting to dry the chicken skin. Wet skin gives you steamed chicken with a slippery top, which is the exact opposite of what you want here. Pat it dry twice if needed. The paper towel will come away damp. That’s good. That’s the whole point.
And finally, cutting the potatoes too small is a classic weeknight move that backfires. Tiny potato pieces brown fast, then collapse before the chicken is done. Keep them chunky, and if one or two pieces are noticeably smaller, tuck them toward the center of the pan where the heat is a little gentler.
Flavor Swaps That Still Fit the Same Dinner
Lemon-Herb Version: Swap the paprika for extra thyme and add 1 teaspoon lemon zest to the butter finish. This version tastes cleaner and a little brighter, which works if your family likes chicken that leans toward roast lemon rather than paprika.
Smoky Paprika Dinner: Use smoked paprika instead of sweet paprika and add a pinch of cumin to the seasoning mix. The flavor gets deeper and warmer, but it still stays mild enough for kids who are okay with roasted chicken but not heat.
Parmesan Finish: After the chicken comes out of the oven, scatter 2 to 3 tablespoons finely grated Parmesan over the vegetables while they’re still hot. It melts into the potato edges and adds a salty finish that’s especially good if you’re serving the meal with a simple salad.
Drumstick Swap: If your household likes hands-on eating, replace the thighs with 8 to 10 chicken drumsticks of similar total weight. The timing stays close, though you’ll want to check the thickest drumstick near the end and give it a few extra minutes if the meat near the bone still looks pink.
Making It Ahead, Storing It, and Reheating It
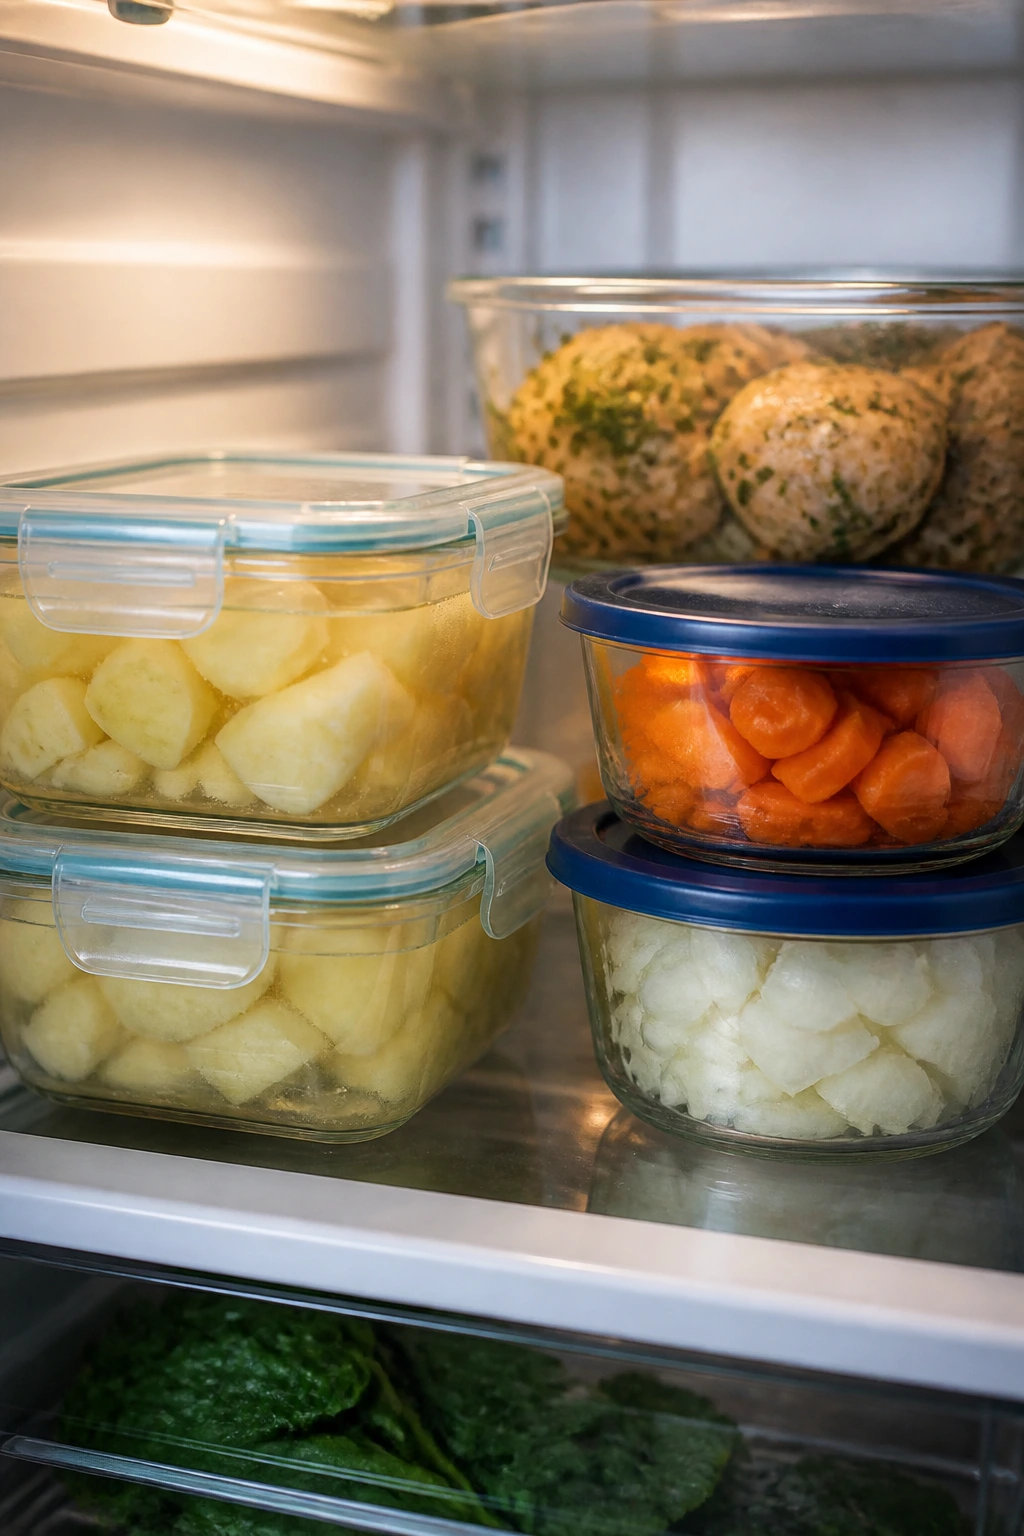
The vegetables can be cut up to 24 hours ahead and stored in a covered container in the fridge. I’d keep the potatoes submerged in cold water if you’re prepping them more than a few hours early, then drain and dry them well before roasting. Carrots and onions don’t need that treatment; they can just sit in the fridge, sealed up, waiting for their turn.
The chicken can be seasoned up to 8 hours ahead, then covered and chilled. That little rest in the fridge actually helps the surface dry a bit, which is useful for browning. If you go much longer than that with salt on the chicken, the texture can turn a little too firm at the edges.
Leftovers keep well in the refrigerator for 3 to 4 days in an airtight container. Store the chicken and vegetables together if you’re planning to reheat everything at once, or separate them if you know you’ll be crisping the chicken in a skillet and warming the vegetables another way. The freezer is less graceful, but still workable for up to 2 months. Wrap the chicken tightly and pack the vegetables in a freezer-safe container so they don’t pick up weird freezer smells.
For reheating, the oven gives the best texture. Warm the chicken and vegetables on a sheet pan at 325°F (165°C) for about 15 to 20 minutes, loosely covered with foil for the first half so the chicken doesn’t dry out. To revive the skin, remove the foil for the last 5 minutes. A skillet works too: set the vegetables in a dry pan over medium heat and warm the chicken gently with a splash of water or broth. The microwave is fine in a pinch, though the skin will soften. If that happens, pull the chicken off the bone and shred it into the vegetables. No one complains about that for long.
Questions Parents Ask Before They Roast the Chicken

Can I use chicken breasts instead of thighs?
Yes, but you’ll need to change the timing. Breasts cook faster and dry out more easily, so I’d add them after the vegetables have already roasted for 20 minutes and pull them as soon as they hit 165°F in the thickest part. Thighs are still the better choice for a weeknight because they stay juicy even if the oven timing wanders.
Do I have to peel the carrots?
Not if the carrots are scrubbed well and the skin is thin. Baby carrots can go straight in after a rinse. If you’re using thicker garden carrots, peeling gives a cleaner texture and keeps the exterior from tasting woody.
How do I keep the potatoes from turning hard?
Cut them evenly and don’t skip the first 15 minutes of roasting before the chicken goes in. If the potatoes are very large, cut them into halves or quarters so the centers have time to soften. Hard potatoes usually mean they were too big or the pan was overcrowded.
Can I add broccoli or green beans?
You can, but don’t roast them from the beginning. Broccoli florets or green beans should go on the pan during the last 12 to 15 minutes or they’ll turn drab and overcooked. I’d keep them separate if you’re feeding picky kids, because roasted green vegetables and roasted carrots are not always treated equally at the table.
What if the chicken is done before the vegetables?
Pull the chicken onto a plate to rest, cover it loosely with foil, and keep roasting the vegetables until they’re tender. That happens more often if your potato chunks are too big or if your pan is crowded. A good rimmed sheet pan usually fixes half the problem right there.
Can I make this without honey?
Absolutely. The honey is a finish, not a structural ingredient. Leave it out and brush the chicken with melted butter and lemon instead. You’ll lose a little sheen and a touch of sweetness, but the dinner still works.
What if the skin doesn’t crisp up?
The usual causes are wet chicken, too much crowding, or a pan that’s packed with steam. Dry the chicken thoroughly, keep the pieces spaced out, and let the oven stay hot. If needed, move the pan to a higher rack for the last few minutes and keep an eye on it so the honey doesn’t darken too far.
The Chicken Dinner Worth Keeping in Rotation
There’s a reason this kind of roasted chicken dinner keeps coming back to the table. It is steady. The flavors are familiar without feeling sleepy, the vegetables finish at the right time, and the chicken gives you enough margin for a normal evening that includes backpacks, lost socks, and somebody asking for a second glass of water after you’ve already sat down.
I like meals that behave in real kitchens, not just in neat recipe photos. This one does. Once you’ve made it a couple of times, the whole thing becomes muscle memory: season, roast, finish, rest. That’s the kind of dinner that earns a permanent spot in the weeknight stack.
Roasted Kid-Friendly Chicken Dinner — Recipe Card
Recipe Name: Roasted Kid-Friendly Chicken Dinner
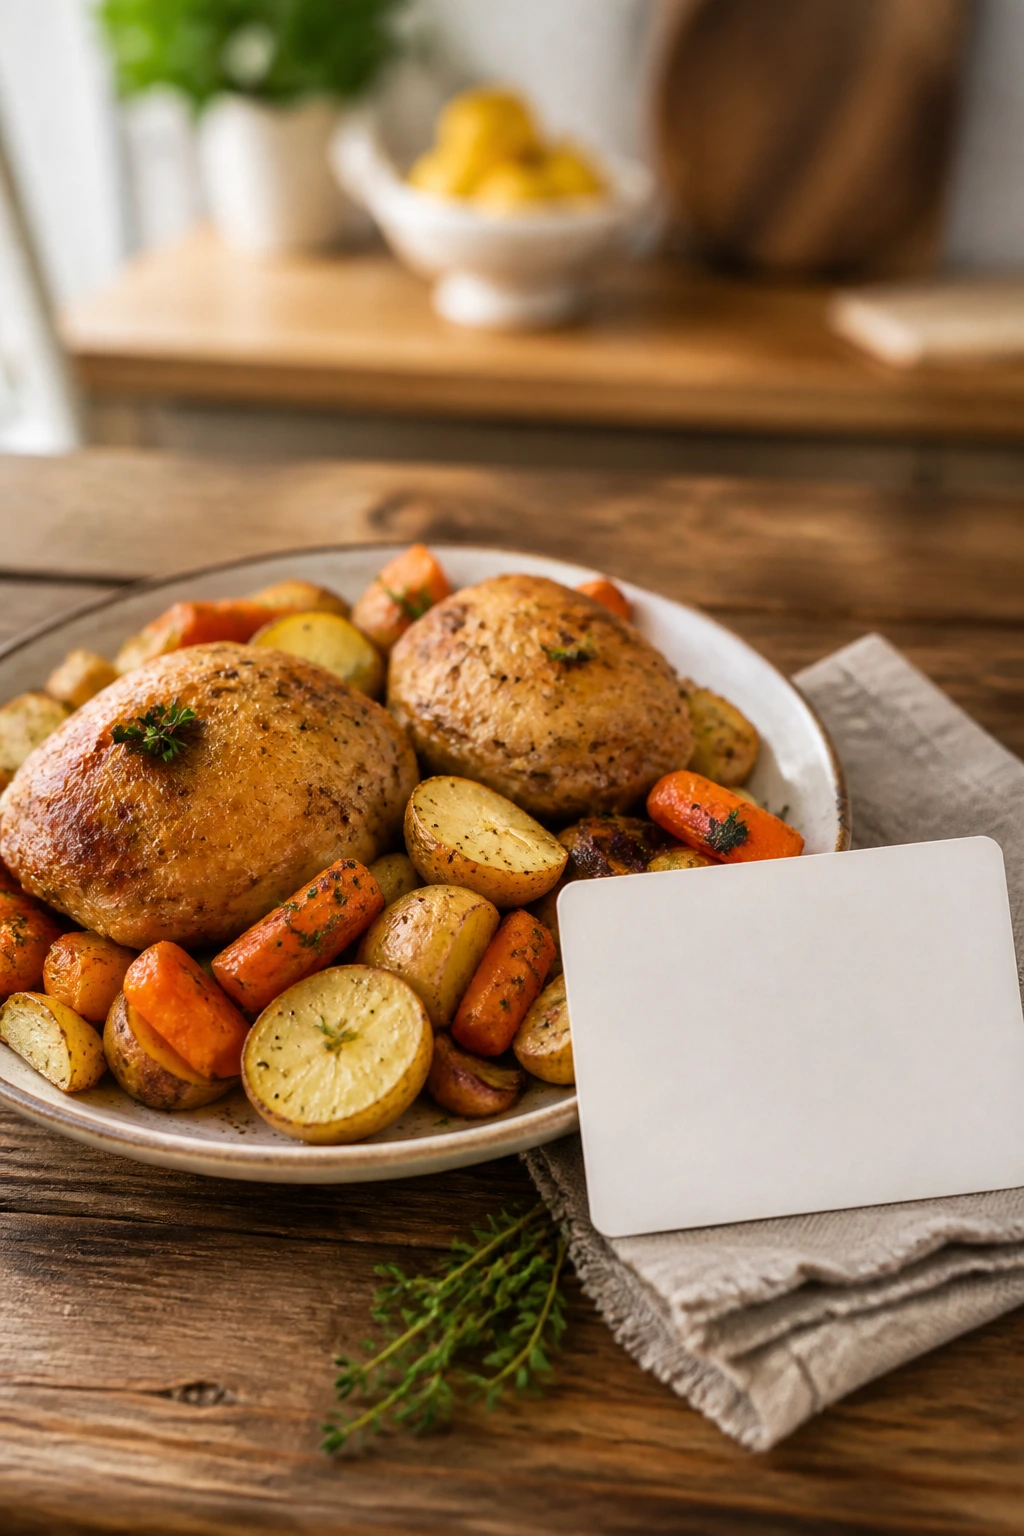
Description: A one-pan roasted chicken dinner with juicy bone-in thighs, buttery potatoes, sweet carrots, and mild seasoning that stays friendly for kids and satisfying for adults. The pan juices turn glossy at the end, so every bite tastes like it had a little more attention than it actually did.
Prep Time: 20 minutes
Cook Time: 45 to 55 minutes
Total Time: 1 hour 5 minutes to 1 hour 15 minutes
Course: Dinner, Main Course
Cuisine: American
Servings: 4 to 6 servings
Calories: About 420 kcal per serving
Ingredients
For the Chicken and Vegetables:
- 2 1/2 lb bone-in, skin-on chicken thighs, patted dry
- 1 1/2 lb baby Yukon Gold potatoes, halved if large
- 1 lb carrots, peeled and cut into 2-inch pieces
- 1 medium yellow onion, cut into 8 wedges
- 3 tablespoons olive oil
- 2 teaspoons kosher salt
- 1 teaspoon garlic powder
- 1 teaspoon sweet paprika
- 1/2 teaspoon dried thyme
- 1/2 teaspoon black pepper
- 1 tablespoon honey
- 2 tablespoons unsalted butter, melted
- 1 tablespoon lemon juice
- 2 tablespoons chopped parsley, for serving
Instructions
-
Preheat the oven to 425°F (220°C) and position a rack in the center.
-
Lightly oil a rimmed half-sheet pan.
-
Toss the potatoes, carrots, and onion with 2 tablespoons olive oil, 1 teaspoon salt, 1/2 teaspoon garlic powder, 1/2 teaspoon paprika, 1/4 teaspoon thyme, and a pinch of black pepper.
-
Spread the vegetables on the pan and roast for 15 minutes.
-
Mix the chicken with the remaining 1 tablespoon olive oil, 1 teaspoon salt, 1/2 teaspoon garlic powder, 1/2 teaspoon paprika, 1/4 teaspoon thyme, and the remaining black pepper.
-
Nestle the chicken skin-side up among the vegetables and roast for 20 minutes.
-
Stir together the melted butter, honey, and lemon juice, then brush half over the chicken.
-
Roast for 10 to 15 minutes more, until the chicken reaches 175°F to 185°F and the vegetables are tender.
-
Rest for 5 to 10 minutes, then finish with the remaining butter mixture and chopped parsley.
Notes: For crispier skin, do not overcrowd the pan. Drumsticks can replace the thighs with nearly the same timing. Leftovers keep for 3 to 4 days in the fridge and reheat best in a 325°F oven.