
Sweet and sour chicken lives or dies on two things: the snap of the coating and the sharp little sting of the sauce. Most takeout versions miss one of them. They come out either too sweet, too pale, or too soggy by the time the lid gets pried off in the car.
The home version has one huge advantage: you can control the timing. Fry the chicken in batches, keep the sauce in a small pan, and don’t let them meet until the last second. That tiny bit of discipline is what keeps the crust craggy and the chicken tasting fresh instead of steamed.
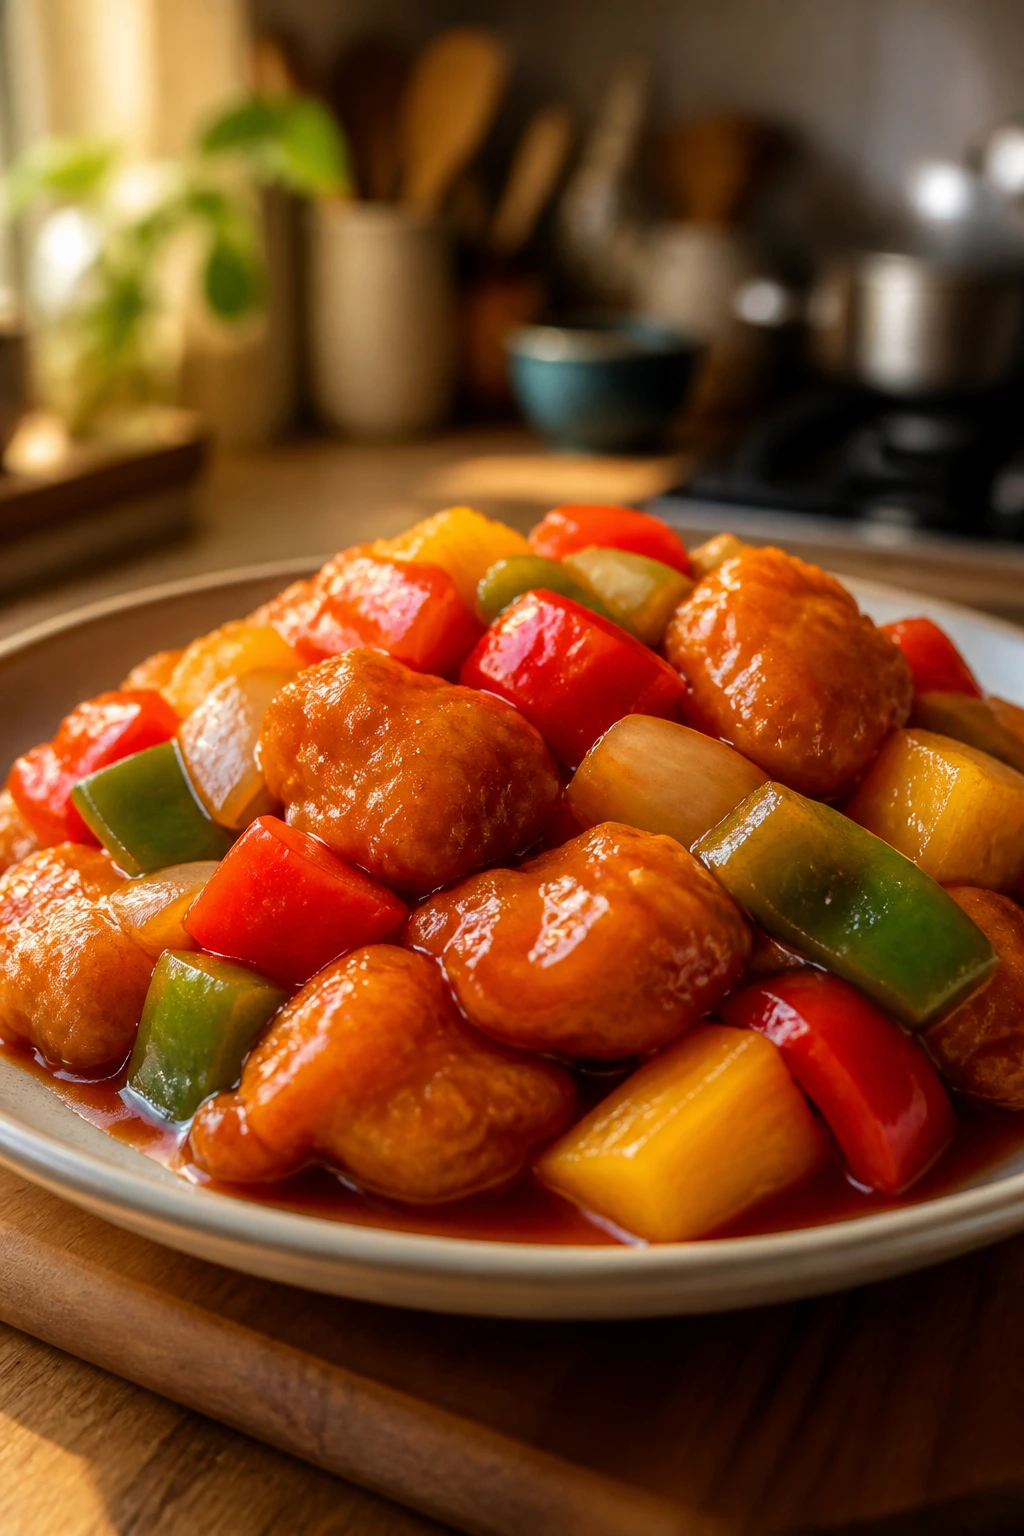
I like this Chinese-American takeout-style dish because it rewards ordinary ingredients used with a little care. Rice vinegar gives you that clean bite. Pineapple juice rounds the edges. Ketchup sounds almost too simple, but in this sauce it brings color, body, and that familiar glossy finish people expect from the box. When those pieces are balanced, you get the whole point of sweet and sour chicken: hot, crisp chicken wearing a bright red-orange glaze without collapsing under it.
Why This Sweet and Sour Chicken Beats the Box
-
Crisp Chicken: The coating gets fried separately, so it lands on the plate with real texture instead of the limp, sticky shell that sits in delivery steam for twenty minutes.
-
Bright Sauce: Rice vinegar, pineapple juice, brown sugar, and ketchup make a sauce that tastes sharp first, then sweet, then lightly savory at the end.
-
Vegetables That Still Bite: Bell peppers and onion get only a short stir-fry, which leaves them tender-crisp instead of soft and gray.
-
No Mysterious Flavors: You know exactly what’s in the sauce, and that matters when many takeout versions taste vaguely sugary without any clean acid to balance them.
-
Works With Pantry Staples: If you keep vinegar, soy sauce, cornstarch, and ketchup around, half the shopping is already done.
-
Better Leftovers, If You Handle Them Right: Store the sauce separately and reheat the chicken in a hot skillet or air fryer; it comes back with enough crunch to be worth eating again.
Yield, Timing, and How Hard It Is
Yield: Serves 4 generous portions
Prep Time: 25 minutes
Cook Time: 25 minutes
Total Time: 50 minutes
Chill/Rest Time: 10 minutes optional for the coated chicken before frying
Difficulty: Intermediate — the steps themselves are plain, but frying in batches and timing the sauce takes attention.
Best Served: Right away, while the chicken is hot and the sauce is glossy
This is the kind of dish that benefits from a calm setup. Have your rice already cooked, your vegetables cut, and a rack or paper towels ready before the oil gets hot. Once the frying starts, the whole thing moves fast. Too fast, if you’re still slicing onions.
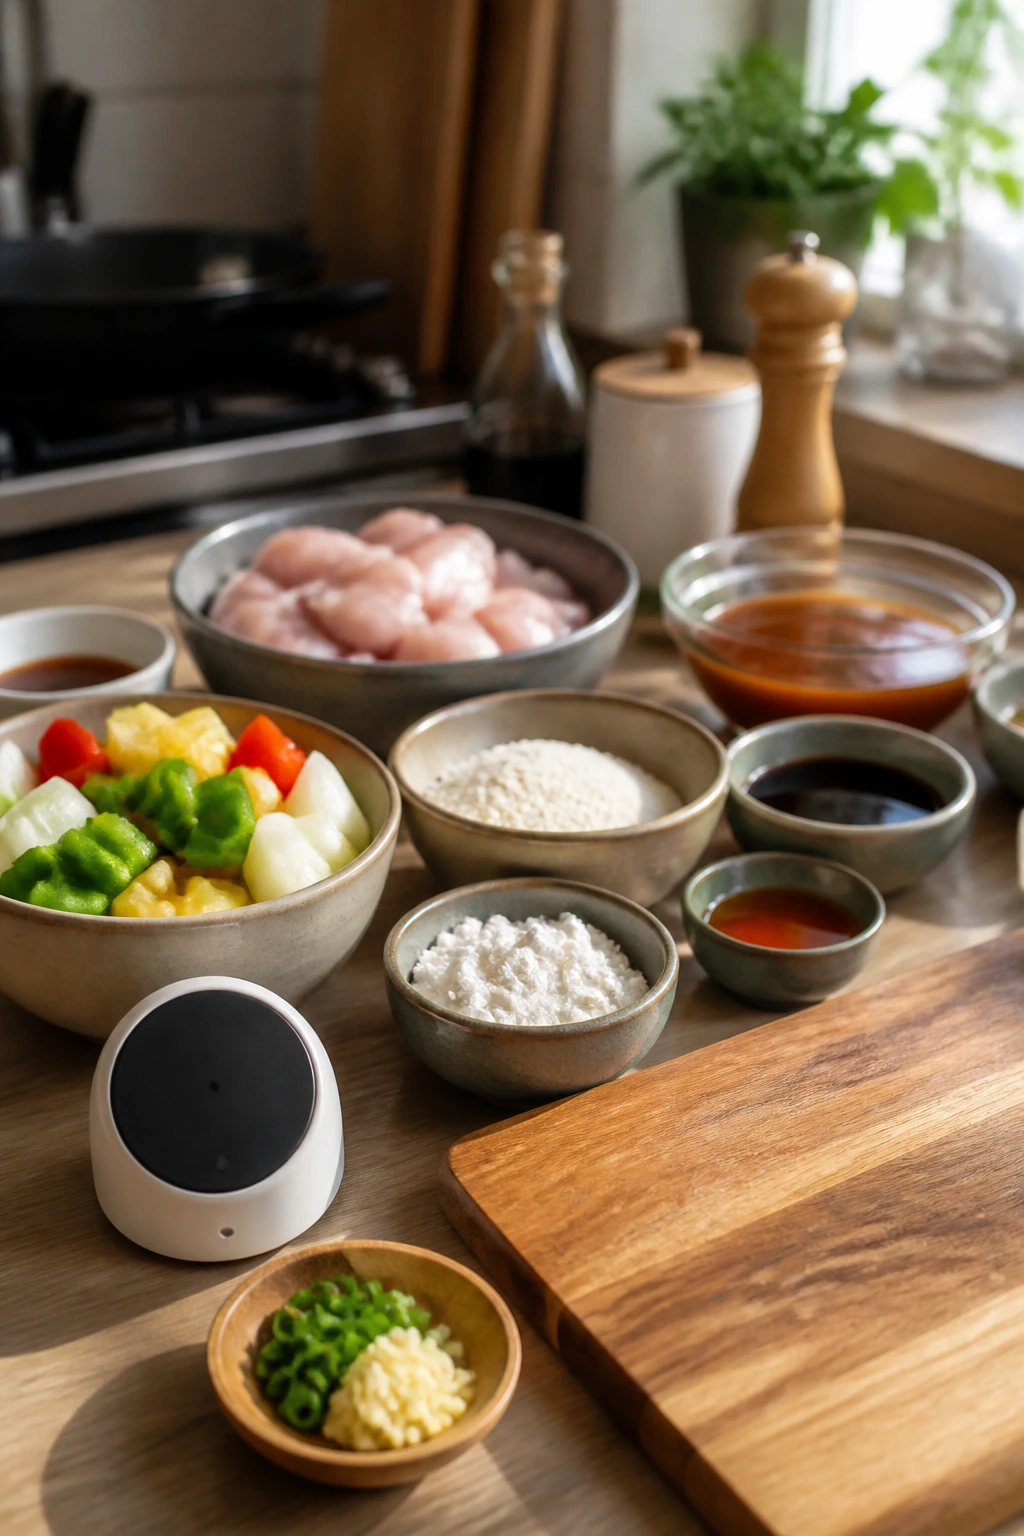
The Shopping List for Sweet and Sour Chicken
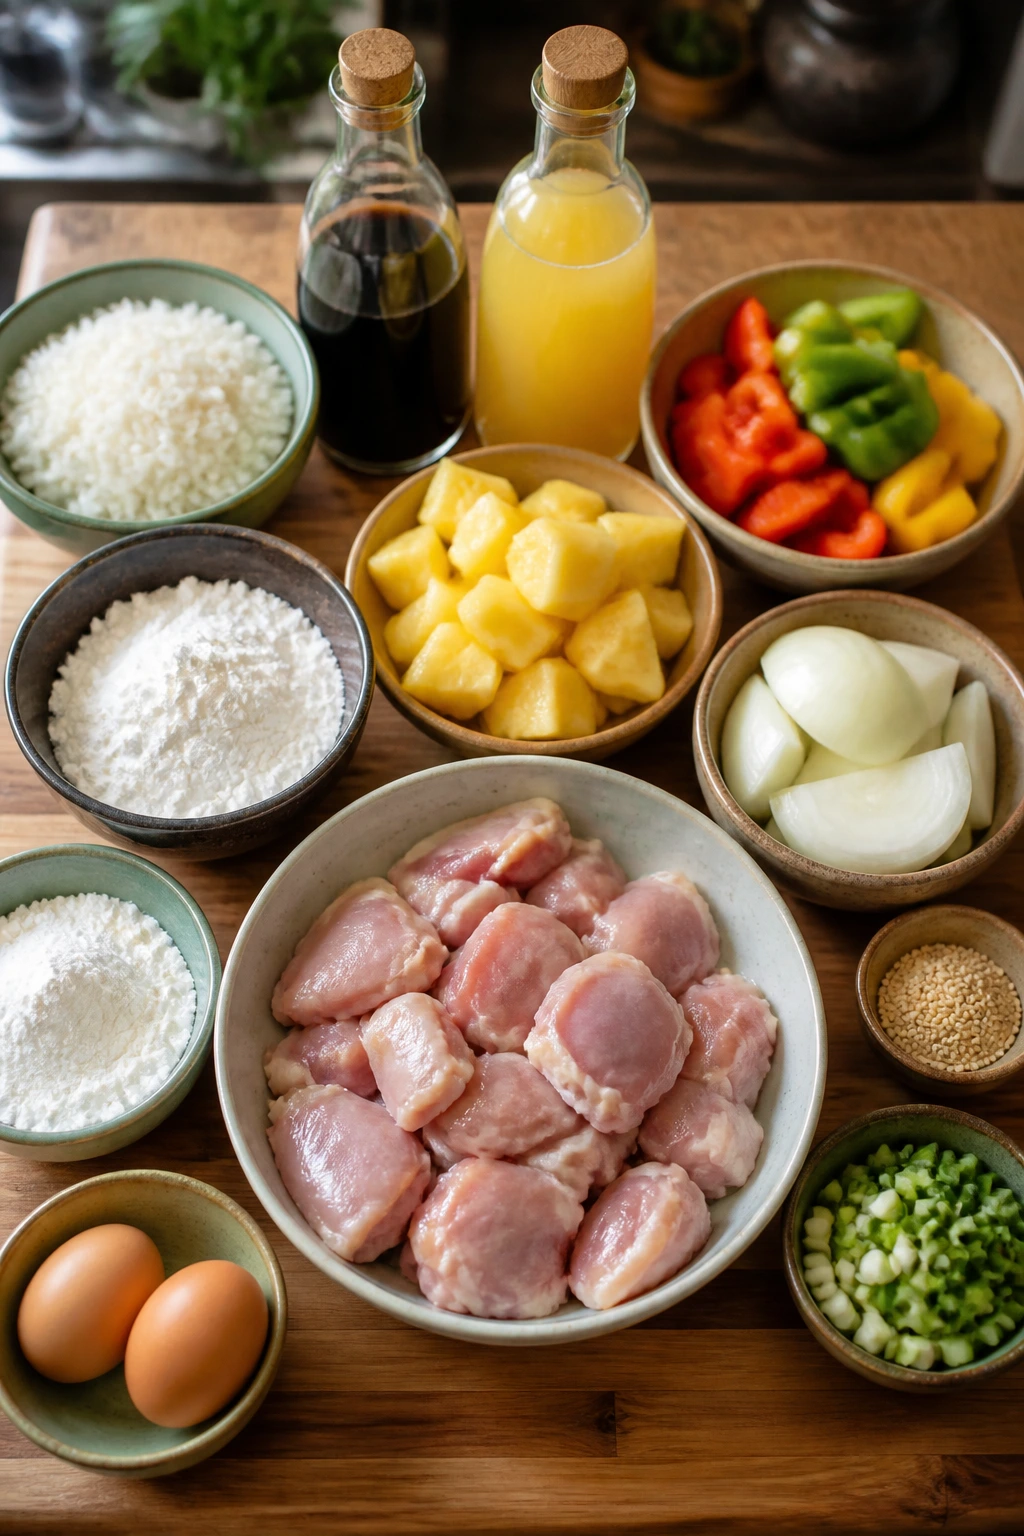
For the chicken and coating:
- 1 1/2 lbs boneless, skinless chicken thighs, trimmed and cut into 1-inch pieces
- 1 tsp kosher salt
- 1/2 tsp white pepper
- 1 cup cornstarch
- 1/2 cup all-purpose flour
- 1 tsp baking powder
- 2 large eggs, beaten
- 3 tbsp cold water
- 1 to 1 1/2 cups neutral oil for shallow frying, such as canola, peanut, or vegetable oil
For the sweet and sour sauce:
- 1/2 cup rice vinegar
- 1/2 cup pineapple juice, from a can or bottled
- 1/3 cup ketchup
- 1/4 cup light brown sugar, packed
- 2 tbsp low-sodium soy sauce
- 2 cloves garlic, minced
- 1 tsp fresh ginger, finely grated
- 1 tbsp cornstarch
- 2 tbsp cold water
For the vegetables and fruit:
- 1 red bell pepper, cut into 1-inch squares
- 1 green bell pepper, cut into 1-inch squares
- 1 small red onion, cut into wedges
- 1 cup pineapple chunks, drained if canned
- 2 scallions, sliced
For serving:
- 3 cups hot cooked jasmine rice
- 1 tbsp toasted sesame seeds
- Extra sliced scallions, if you like
Why Each Ingredient Matters in the Pan
Chicken and Coating
What to use: 1 1/2 lbs boneless, skinless chicken thighs, cut into 1-inch pieces, with 1 cup cornstarch, 1/2 cup flour, 1 tsp baking powder, 2 beaten eggs, and 3 tbsp cold water.
Preparation: Trim away big patches of fat, then cut the chicken into pieces that are roughly the same size so they cook at the same pace. Pat them dry first; wet chicken makes the coating slide right off.
Substitutions: Chicken breast works if that’s what you have, but cut it into slightly larger pieces and fry it only until done. Shrimp is a different dish altogether, though the sauce works on it beautifully.
Tips: Thighs stay juicier under a hot coating, and that matters because the sauce gets added at the end. If you want a thicker crust, let the coated chicken sit for 10 minutes before frying so the flour and cornstarch hydrate a little.
Sweet, Sharp Sauce Base
What to use: 1/2 cup rice vinegar, 1/2 cup pineapple juice, 1/3 cup ketchup, 1/4 cup brown sugar, 2 tbsp soy sauce, 2 cloves garlic, 1 tsp ginger, and a cornstarch slurry made from 1 tbsp cornstarch and 2 tbsp water.
Preparation: Whisk the sauce before it hits the heat so the ketchup dissolves fully and the sugar doesn’t sink to the bottom. Keep the slurry separate until the very end.
Substitutions: If you don’t have rice vinegar, use apple cider vinegar and cut it with a spoonful of water so it doesn’t come off too sharp. Tamari can replace soy sauce for a gluten-free version.
Tips: Pineapple juice is doing more than sweetening. It gives the sauce a round fruit note that plain sugar can’t fake, and it softens the sharp edge of the vinegar without turning the sauce heavy.
Vegetables and Pineapple
What to use: 1 red bell pepper, 1 green bell pepper, 1 small red onion, 1 cup pineapple chunks, and 2 scallions.
Preparation: Cut the peppers into squares that are easy to spear with a fork, and keep the onion pieces big enough to hold their shape in the pan. Drain canned pineapple well so you don’t pour extra syrup into the sauce.
Substitutions: Yellow bell pepper works if that’s what’s in the fridge. You can swap the pineapple chunks for orange segments if you want a different sweet note, though the flavor drifts a little farther from the classic takeout version.
Tips: The vegetables should still look bright when they’re done. If they start going soft, the pan stayed too hot too long or you left them in the sauce while it boiled.
Serving and Finish
What to use: 3 cups cooked jasmine rice, sesame seeds, and extra scallions.
Preparation: Make the rice first or use leftover rice reheated with a splash of water. Hot rice underneath the chicken catches the sauce before it runs off the plate.
Substitutions: White long-grain rice, brown rice, or even plain noodles work. Jasmine rice wins on fragrance, though. It has that soft floral note that fits the sweet-sour sauce better than a firm, dry grain.
Tips: Keep the garnish light. A handful of sesame seeds and a few scallions are enough. Piling on a mountain of garnish distracts from the part people came for: that glossy, sticky coating on the chicken.
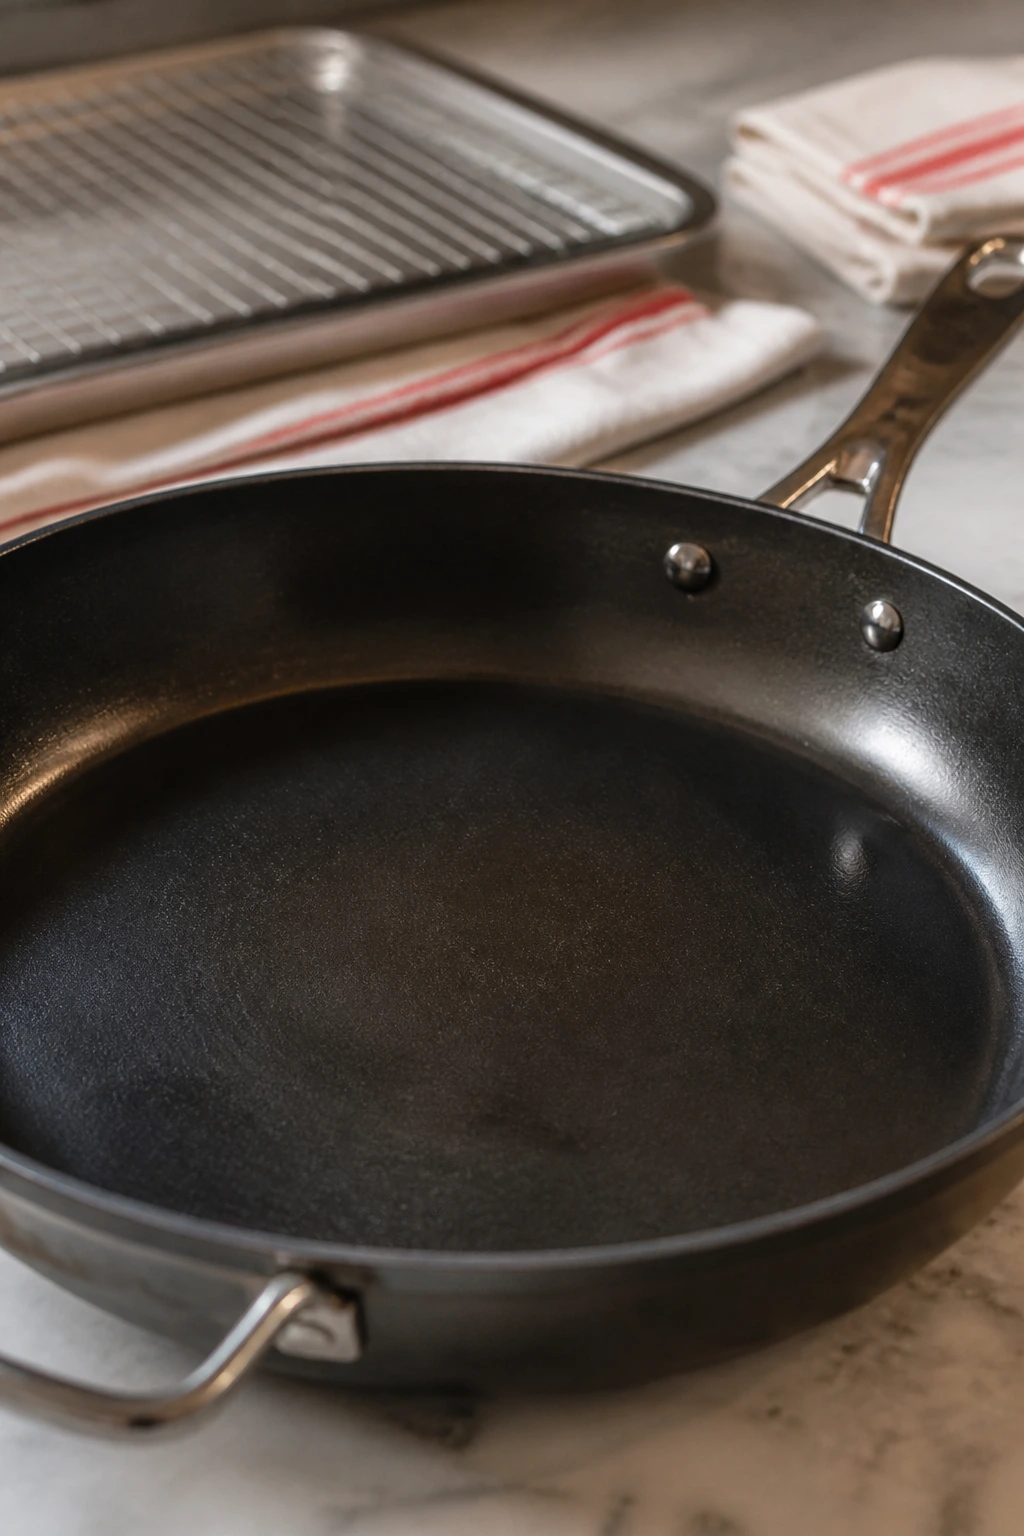
The Tools That Make Frying Less Messy
-
12-inch heavy skillet or wok: Wide enough to fry in batches without crowding the pan.
-
Small saucepan: Best for the sauce so it thickens separately and doesn’t overcook while you fry.
-
Wire rack set over a sheet pan: Keeps the fried chicken crisp while it drains; this is better than a flat paper-towel pile.
-
Instant-read thermometer: Helps you keep the oil near 350°F and makes doneness less guessy.
-
Mixing bowls, 3 total: One for the dry coating, one for the egg mix, and one for the sauce.
-
Whisk: Useful for both the sauce and the egg mixture.
-
Spider strainer or slotted spoon: Lets you lift the chicken out of the oil without tearing the crust.
-
Paper towels: Handy for blotting the pineapple and drying the chicken before coating.
How Sweet and Sour Chicken Comes Together in the Skillet
Make the Sauce First:
-
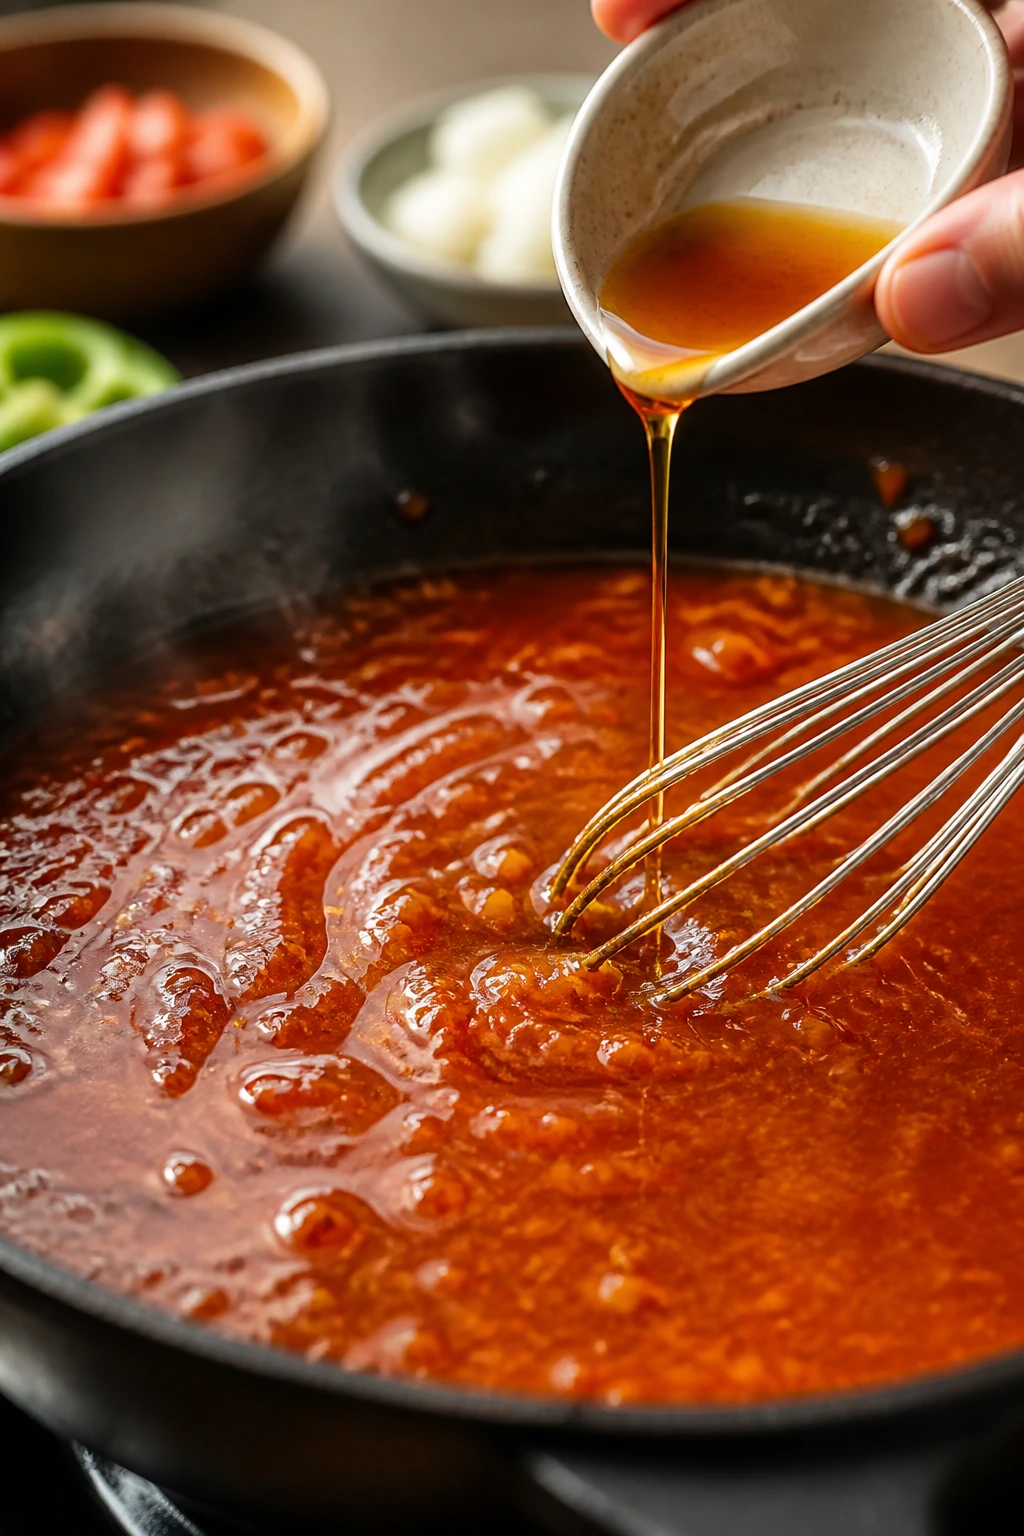
In a small saucepan, whisk together the rice vinegar, pineapple juice, ketchup, brown sugar, soy sauce, garlic, and ginger.
-
Set the pan over medium heat and bring the mixture to a gentle simmer, stirring often, until the sugar dissolves and the sauce looks smooth and glossy, about 3 minutes.
-
In a small bowl, stir the cornstarch and cold water until the slurry is completely smooth. Whisk it into the simmering sauce and cook for 30 to 60 seconds, until the sauce thickens enough to coat the back of a spoon. Remove it from the heat and set it nearby.
Prep the Chicken:
-
Pat the chicken pieces dry with paper towels, then season them with the salt and white pepper.
-
In one bowl, combine the cornstarch, flour, and baking powder. In another bowl, whisk the eggs with the cold water until the mixture looks loose and evenly yellow.
-
Toss the chicken in the dry mixture first, then dip it into the egg mixture, then back into the dry mixture, pressing lightly so the coating clings in rough, craggy bits. Set the coated pieces on a tray and let them sit for 10 minutes if you can spare the time.
Fry and Build the Vegetables:
-
Pour 1 to 1 1/2 cups neutral oil into a 12-inch skillet or wok so it comes about 1/2 inch deep. Heat it over medium-high heat to 350°F.
-
Fry the chicken in batches for 4 to 5 minutes per batch, turning once, until the pieces are deep golden and the centers reach 165°F. Do not crowd the pan — the oil temperature will drop, and the coating will turn heavy instead of crisp.
-
Transfer the fried chicken to a wire rack over a sheet pan. Repeat with the remaining chicken, adding a splash more oil if the pan looks dry.
-
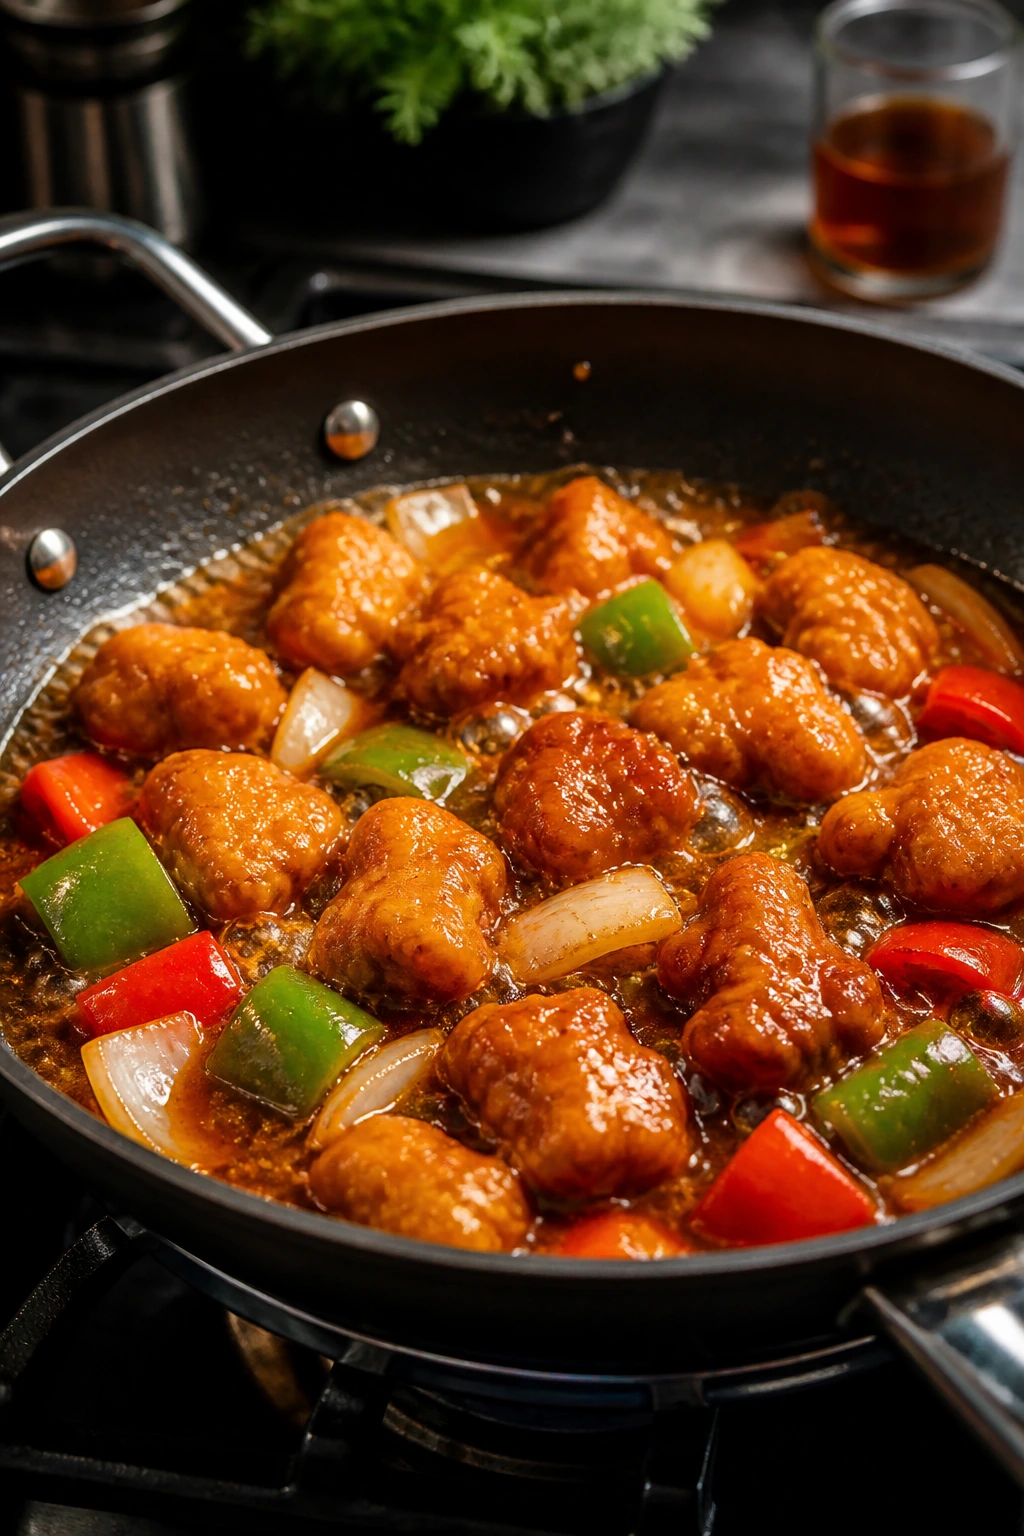
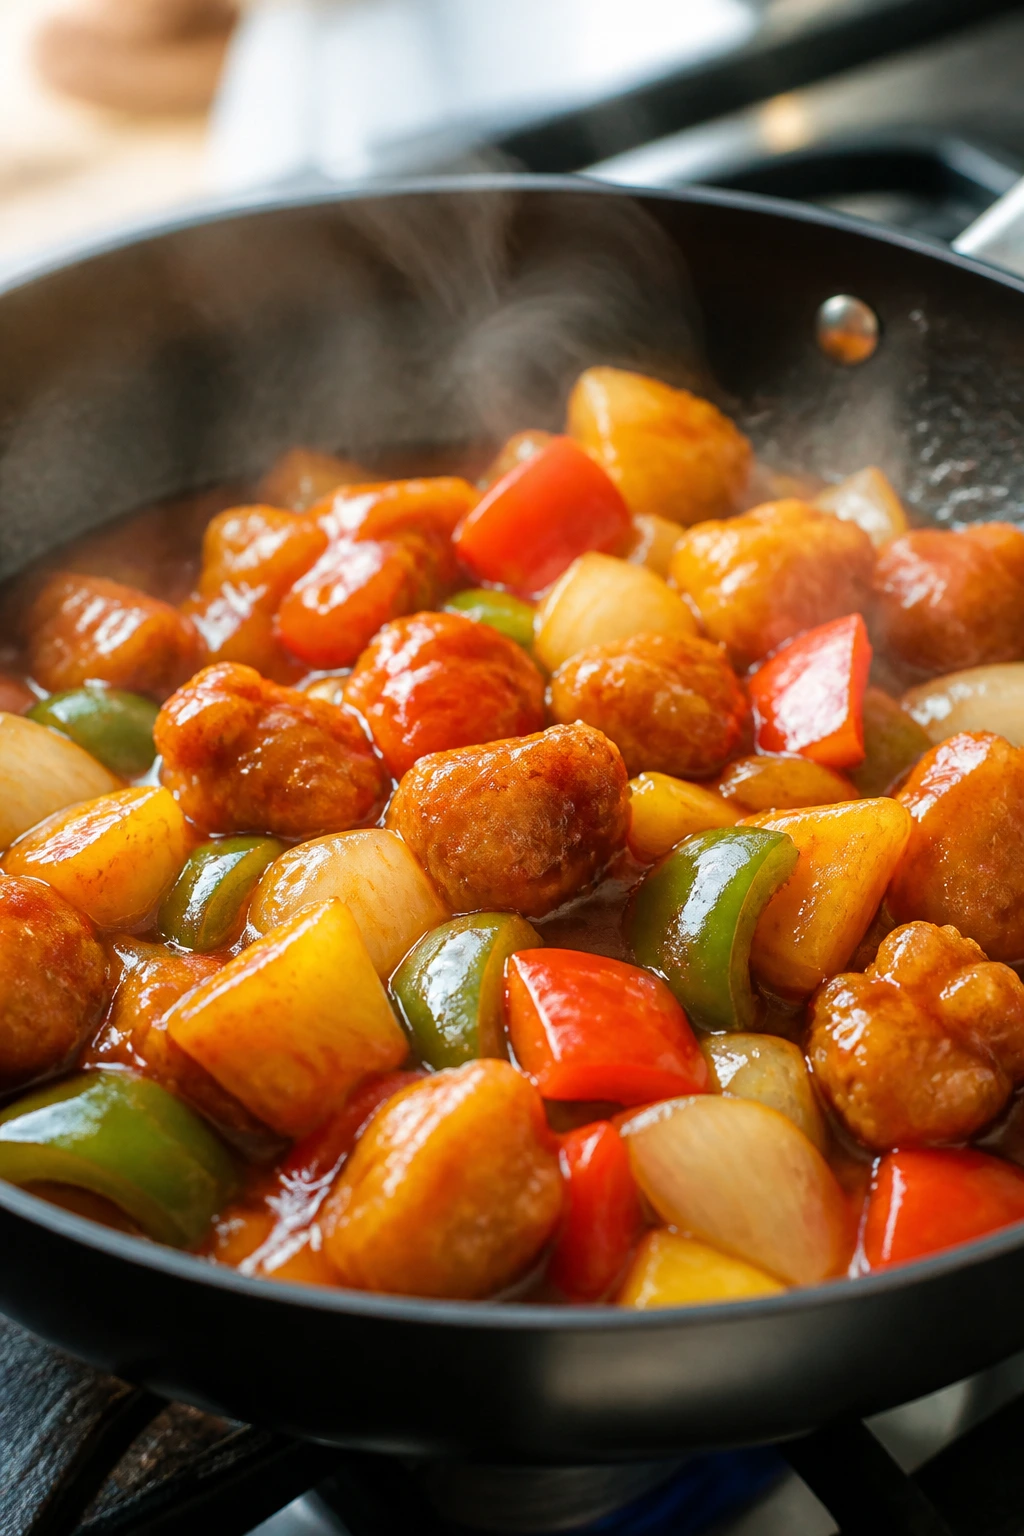
Pour off all but about 1 tablespoon of oil from the skillet. Add the red bell pepper, green bell pepper, and red onion. Stir-fry over medium-high heat for 2 to 3 minutes, just until the vegetables brighten and the onion starts to soften at the edges.
-
Add the pineapple chunks and cook for 30 seconds more, just long enough to warm them through and let the edges take on a little heat.
Finish and Serve:
-
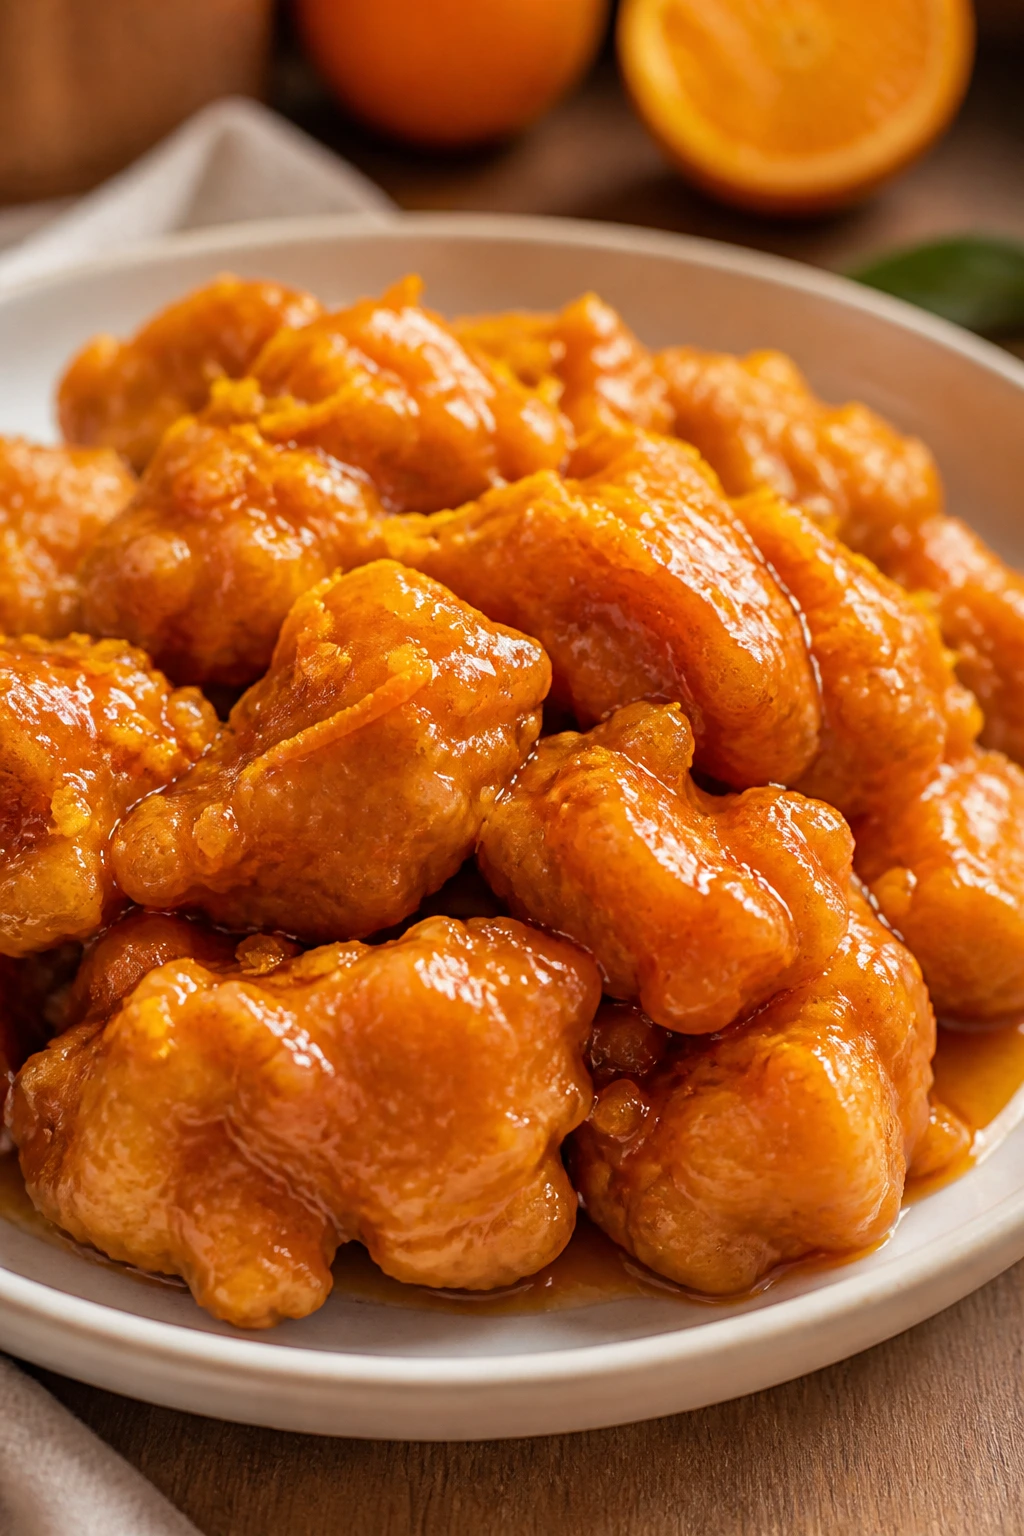
Return the sauce to low heat if it has cooled too much, then pour it into the skillet with the vegetables. Add the fried chicken and toss for 15 to 20 seconds, just until everything is coated in a shiny glaze. Stop as soon as the sauce clings — if you keep tossing, the crust starts to soften.
-
Spoon the sweet and sour chicken over hot jasmine rice, then finish with scallions and sesame seeds. Serve immediately while the coating still has a little bite.
How to Serve It So the Crisp Stays Crisp

Presentation: Use a shallow bowl or a wide dinner plate instead of a deep soup bowl. Spoon the rice first, then pile the chicken and vegetables on top so the sauce runs partly into the rice but doesn’t drown the crust. A few extra scallions on the surface make the plate look alive, not crowded.
Accompaniments: Steamed jasmine rice is the obvious move, and it’s the right one. If you want a second side, keep it plain: steamed broccoli, quick-blanched snow peas, or a cucumber salad with rice vinegar and a pinch of sugar. Strong sides fight with the sauce.
Portions: Four people get a generous dinner serving from this batch. If you’re feeding bigger appetites, add another cup of rice and a vegetable side before you think about doubling the chicken. The dish stretches better that way.
Beverage Pairing: Unsweetened jasmine tea is my first pick because it cleans the sweet glaze off your tongue. If you want something colder, a crisp lager or an off-dry Riesling works well; both handle the vinegar and pineapple without making the meal taste heavier.
Small Moves That Make the Sauce Brighter
Flavor Enhancement: A tiny splash of toasted sesame oil at the very end adds a nutty note, but keep it to 1/2 teaspoon. More than that and the sauce starts tasting muddy, which is the opposite of what you want.
Time-Saver: Cut the peppers and onion earlier in the day, then store them in separate containers lined with a paper towel. Dry vegetables cook faster and don’t spit water into the pan.
Pro Move: If you have a wire rack, hold the fried chicken in a 200°F oven while you finish the sauce and vegetables. The crust stays crisp longer than it would on a plate, especially if your kitchen runs warm.
Cost-Saver: Canned pineapple chunks in juice are usually cheaper than fresh pineapple, and they’re fine here. Drain them well, then use the juice from the can in the sauce instead of buying a separate bottle.
Heat Control: If your burners run hot, keep the skillet a little below medium-high during the final toss. The sauce only needs to coat the chicken, not boil hard around it.
Common Mistakes That Make Sweet and Sour Chicken Flat

-
Crowding the frying pan. The chicken pieces start out pale and then turn greasy instead of crisp because the oil temperature drops too far. Fry in batches, even if it feels slower.
-
Tossing the chicken in sauce too early. If the chicken sits in the glaze while you finish the rest of the dish, the crust softens and loses the point of frying in the first place. Sauce only goes on at the end, and only for a short toss.
-
Using too much pineapple syrup. Canned pineapple in syrup pushes the sauce into candy territory and can make it oddly thick. Drain the chunks well and use juice, not syrup, for the liquid part of the sauce.
-
Letting the sauce boil after it thickens. Once the slurry goes in, the sauce needs only a short simmer. A hard boil can make it look gluey, and the flavor gets dull.
-
Skipping the oil thermometer. Guessing here usually means oil that is too cool, which gives you pale chicken, or too hot, which browns the coating before the chicken cooks through. Aim for 350°F and adjust the burner as you go.
-
Cutting the vegetables too small. Tiny pieces collapse into the sauce and make the dish taste mushy. Keep the peppers and onion in chunky squares and wedges so they still have shape on the plate.
Variations Worth Trying
Orange-Snap Version: Replace the pineapple juice with fresh orange juice and add 1 teaspoon orange zest to the sauce. The result is a little brighter and less tropical, with a cleaner citrus edge that works nicely if you want the sauce to feel less sticky.
Sweet Heat: Stir 1 to 2 teaspoons chili garlic sauce or 1 minced red chile into the sauce before thickening. It doesn’t turn the dish into a fireball; it just pushes the sugar back a little and gives the glaze a sharper finish.
Air-Fryer Shortcut: Coat the chicken as written, spray the pieces with oil, and air-fry at 400°F for 10 to 12 minutes, shaking halfway through. You won’t get the same deep crust as shallow frying, but it’s still crisp enough to hold the sauce for a short toss.
Gluten-Free Bowl: Swap the all-purpose flour for more cornstarch and use tamari in place of soy sauce. The coating comes out lighter and a little more delicate, but the sauce still lands in the same sweet-sharp spot.
Shrimp Night: If you want to use shrimp, skip the frying and cook peeled, deveined shrimp in a hot skillet for 1 to 2 minutes per side before tossing them with the sauce. Shrimp takes the sauce well, though it turns the dish lighter and less crunchy.
Make-Ahead, Storage, and Reheating
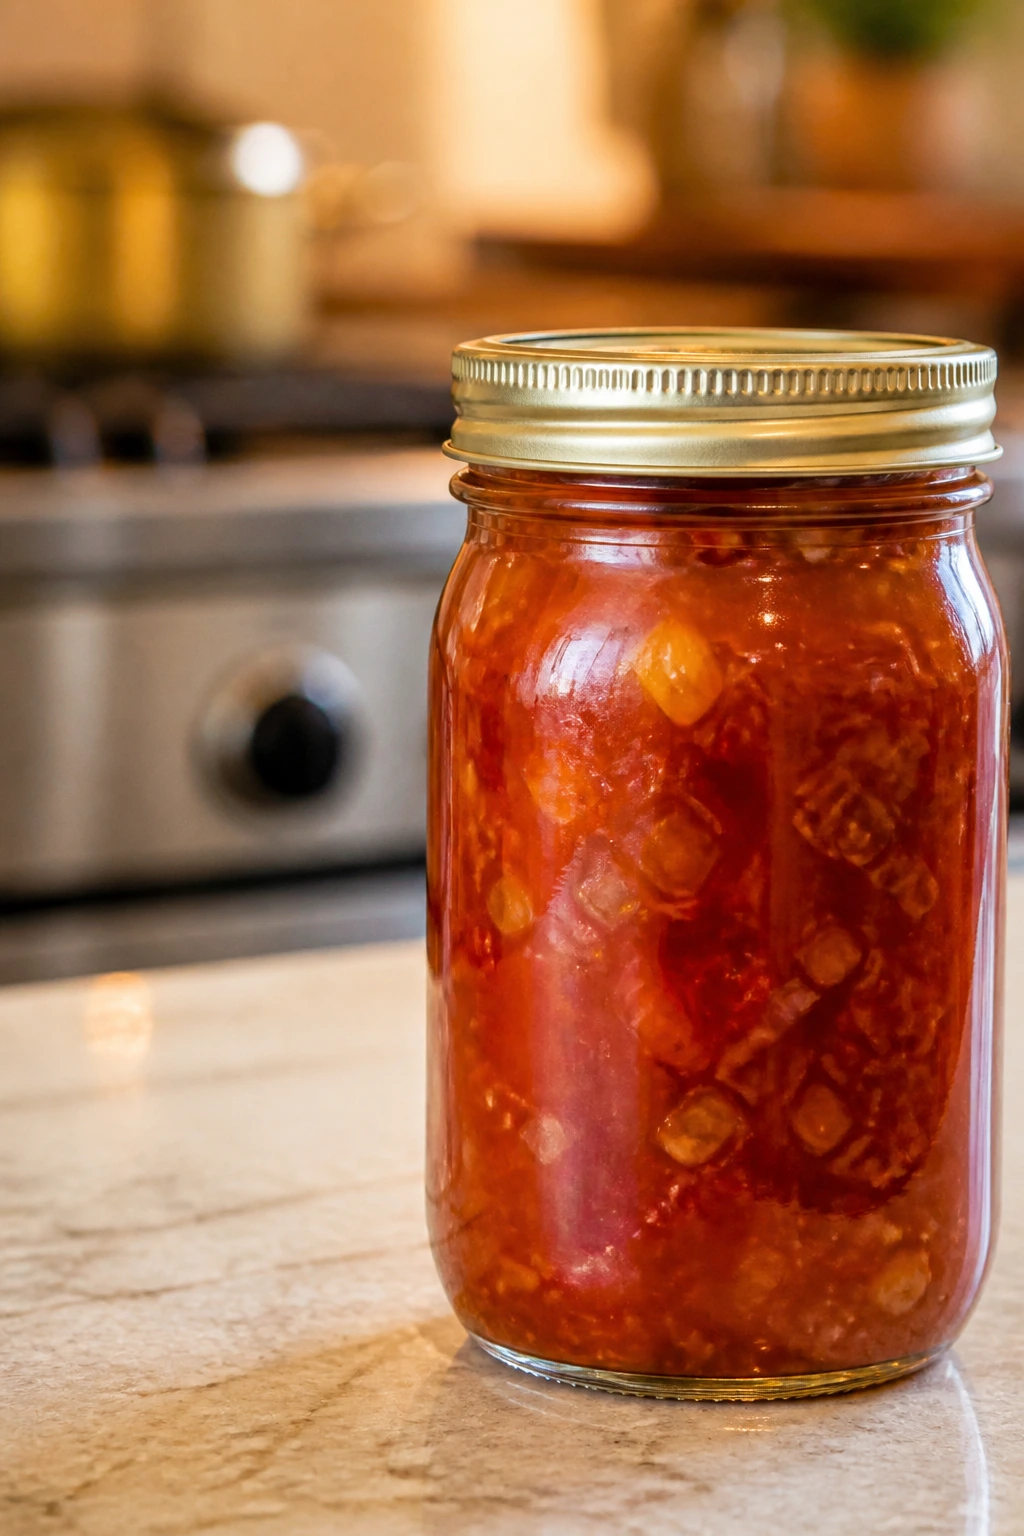
The sauce is the easiest part to make ahead. Cook it, cool it, and keep it in a sealed jar in the fridge for up to 5 days. It will thicken a little as it chills, so loosen it with a teaspoon or two of water when you reheat it.
The fried chicken keeps best when it’s separate from the sauce. If you must store leftovers already combined, they’ll still taste good for 3 to 4 days in the refrigerator, but the coating softens by the second day. For the best texture, store the sauce and chicken in separate containers and add them together only after reheating.
To reheat the chicken, spread it on a wire rack over a sheet pan and warm it in a 400°F oven for 8 to 10 minutes, or use an air fryer at 375°F for 5 to 7 minutes. A skillet over medium heat works too, but give the chicken a small drizzle of oil so the crust doesn’t dry out. Reheat the sauce in a small saucepan over low heat, then toss everything together right before serving.
Freezing is possible, though the texture changes. The sauce freezes well for up to 2 months, and the plain fried chicken can be frozen for about 1 month if you cool it completely first. Thaw it in the fridge, then reheat in a hot oven or air fryer; don’t microwave it unless you’ve made peace with softness.
For make-ahead planning, you can cut the vegetables up to 1 day ahead and keep them dry in the fridge. You can also mix the sauce ingredients, without the cornstarch slurry, a day in advance. Wait to coat and fry the chicken until the day you serve it. That part does not improve with a long wait.
Questions People Ask Before They Cook It

Can I use chicken breast instead of thighs?
Yes, and the recipe still works. Cut the breast into slightly larger pieces so they don’t dry out in the oil, and pull them as soon as they hit 165°F.
Do I have to deep-fry the chicken?
No. Shallow frying in 1/2 inch of oil is enough for this dish, and it’s easier to manage at home. You can air-fry or bake the chicken, but the crust will be lighter and the texture a little less shattery.
Why did my sauce turn cloudy or dull?
Usually it’s from boiling the cornstarch too hard or not dissolving the ketchup and sugar fully at the start. Keep the heat to a gentle simmer and whisk until the sauce looks smooth before the slurry goes in.
Can I make this without pineapple?
You can, though the flavor shifts. Use orange juice or even a little more water with an extra spoonful of brown sugar, but the sauce will lose some of the round fruit note that makes the classic version taste familiar.
What vinegar is closest if I don’t have rice vinegar?
Apple cider vinegar is the easiest swap. White vinegar works in a pinch, but it’s sharper, so use a little less and add a splash of water or extra pineapple juice to keep the sauce from biting too hard.
How do I keep the chicken crisp for a crowd?
Fry the chicken first and hold it on a wire rack in a low oven, then toss it with sauce only when the bowls are nearly ready. If you need to stretch the timing, keep the sauce and chicken separate until the last minute.
Can I make the sauce less sweet?
Yes. Reduce the brown sugar by 1 to 2 tablespoons and add another teaspoon of rice vinegar. That keeps the sauce bright without pushing it into dessert territory.
Can I double the recipe?
Absolutely, but don’t fry twice as much chicken in the same batch. Use a second skillet or fry in smaller rounds, then keep the cooked pieces on a rack in a warm oven while you finish the rest. The sauce doubles cleanly with no real problem.
A Better Takeout Habit

This is one of those dinners that feels familiar the first time you make it and then starts nudging you to stop ordering it out. The sauce is cleaner, the vegetables have some bite, and the chicken keeps its crunch long enough to matter. That alone changes the whole experience.
The small details are where the dish earns its place at the table: hot oil, short sauce time, and a last-second toss that leaves the coating glossy instead of soggy. Once those habits settle in, sweet and sour chicken stops being a greasy backup order and becomes a dish you’ll make on purpose.
Sweet and Sour Chicken — Recipe Card
Recipe Name: Sweet and Sour Chicken
Description: Crispy chicken pieces, bell peppers, onion, and pineapple tossed in a bright red-orange sweet and sour sauce. This Chinese-American takeout-style version keeps the chicken crisp and the sauce sharp.
Prep Time: 25 minutes
Cook Time: 25 minutes
Total Time: 50 minutes
Course: Dinner, Main Course
Cuisine: Chinese-American
Servings: 4 servings
Calories: About 540 kcal per serving
Ingredients
For the chicken and coating:
- 1 1/2 lbs boneless, skinless chicken thighs, trimmed and cut into 1-inch pieces
- 1 tsp kosher salt
- 1/2 tsp white pepper
- 1 cup cornstarch
- 1/2 cup all-purpose flour
- 1 tsp baking powder
- 2 large eggs, beaten
- 3 tbsp cold water
- 1 to 1 1/2 cups neutral oil for shallow frying, such as canola, peanut, or vegetable oil
For the sweet and sour sauce:
- 1/2 cup rice vinegar
- 1/2 cup pineapple juice
- 1/3 cup ketchup
- 1/4 cup light brown sugar, packed
- 2 tbsp low-sodium soy sauce
- 2 cloves garlic, minced
- 1 tsp fresh ginger, finely grated
- 1 tbsp cornstarch
- 2 tbsp cold water
For the vegetables and fruit:
- 1 red bell pepper, cut into 1-inch squares
- 1 green bell pepper, cut into 1-inch squares
- 1 small red onion, cut into wedges
- 1 cup pineapple chunks, drained if canned
- 2 scallions, sliced
For serving:
- 3 cups hot cooked jasmine rice
- 1 tbsp toasted sesame seeds
- Extra sliced scallions, if desired
Instructions
-
Whisk together the rice vinegar, pineapple juice, ketchup, brown sugar, soy sauce, garlic, and ginger in a small saucepan. Bring to a gentle simmer over medium heat.
-
Stir the cornstarch and cold water together in a small bowl until smooth, then whisk it into the sauce. Simmer 30 to 60 seconds until the sauce thickens. Remove from the heat.
-
Pat the chicken dry and season with salt and white pepper.
-
In one bowl, mix the cornstarch, flour, and baking powder. In another bowl, whisk the eggs with the cold water.
-
Coat the chicken in the dry mixture, dip it in the egg mixture, then return it to the dry mixture and press lightly so the coating clings.
-
Heat 1 to 1 1/2 cups neutral oil in a 12-inch skillet or wok to 350°F.
-
Fry the chicken in batches for 4 to 5 minutes per batch, until deep golden and cooked through to 165°F. Drain on a wire rack.
-
Pour off all but about 1 tablespoon of oil. Stir-fry the bell peppers and onion for 2 to 3 minutes, then add the pineapple chunks for 30 seconds.
-
Return the sauce to low heat if needed, add it to the skillet, then toss in the chicken for 15 to 20 seconds until glossy and coated.
-
Serve immediately over jasmine rice with scallions and sesame seeds.
Notes: Fry in batches for the crispiest result. Keep the sauce and chicken separate until the very end. Leftover sauce reheats well; leftover chicken is best reheated in a hot oven or air fryer.