
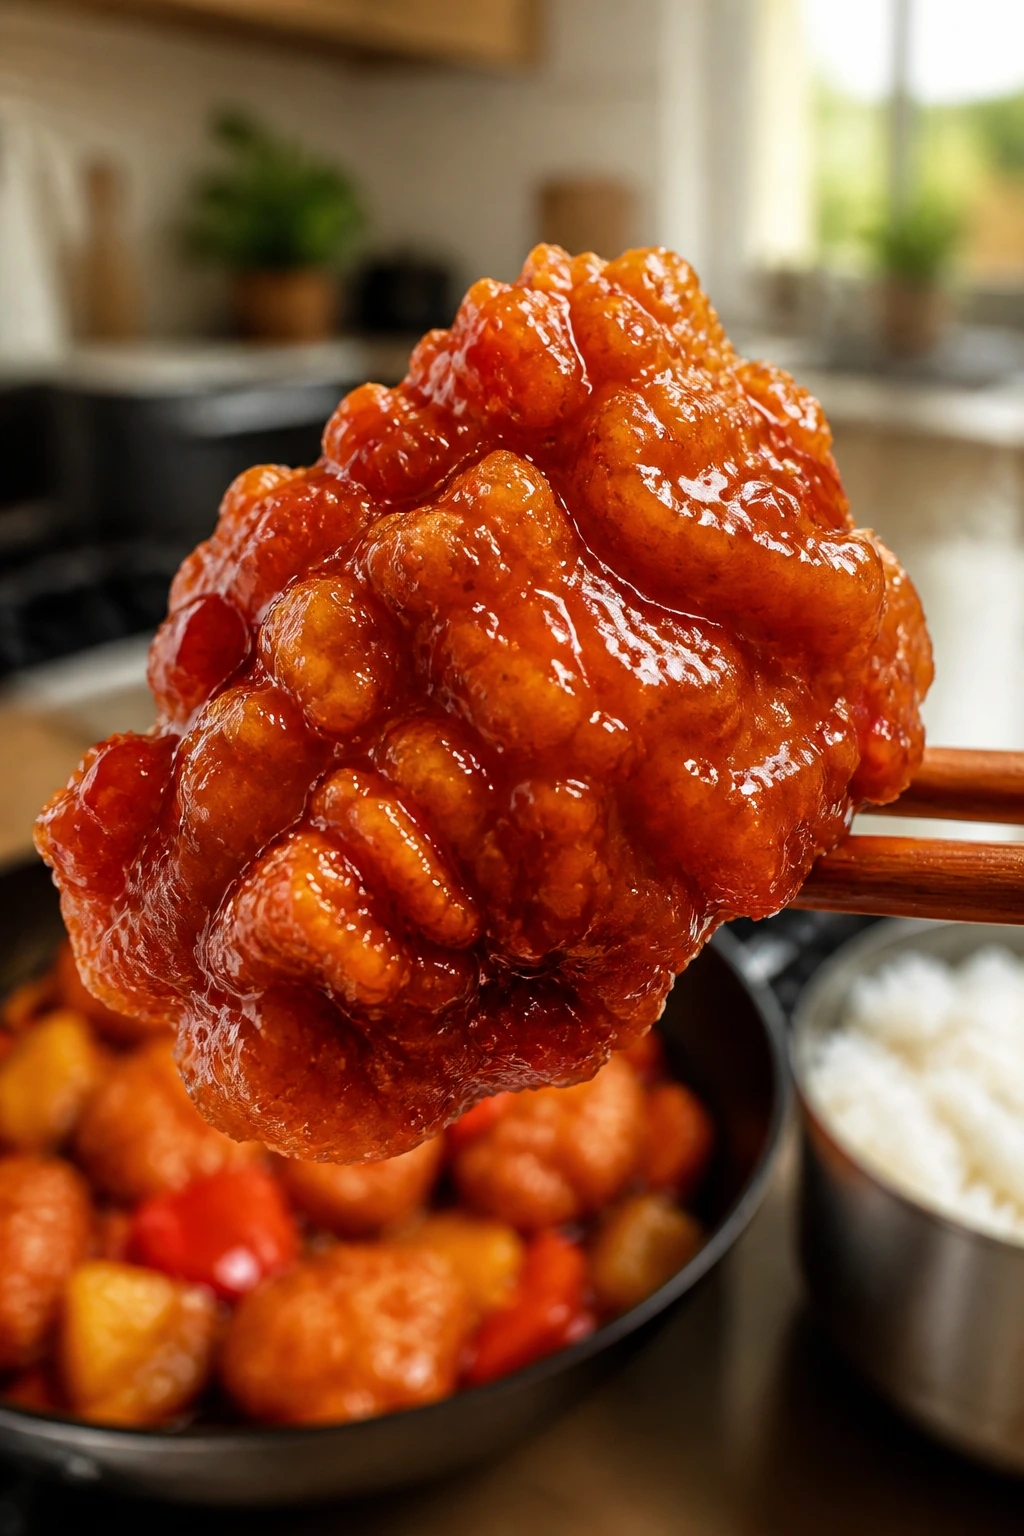
The fastest way to make sweet and sour Chinese takeout worth skipping the box for is to treat the sauce like a bright glaze, not sugar syrup, and the chicken like the main event instead of a vehicle for red goo. That’s the whole trick. When the balance is right, you get crisp edges, tang that wakes up the mouth, a little pineapple perfume, and peppers that still have a snap when you bite through them.
Most restaurant versions lean hard on sweetness because it hides a lot of sins. A glossy sauce can cover overcooked chicken, soft vegetables, and oil that’s been around too long. At home, you don’t need any of that camouflage. You can build the flavor in layers: salt on the chicken, a clean starch coating, vinegar for bite, pineapple juice for fruitiness, ketchup for body, and just enough brown sugar to keep the sauce from tasting sharp and thin.
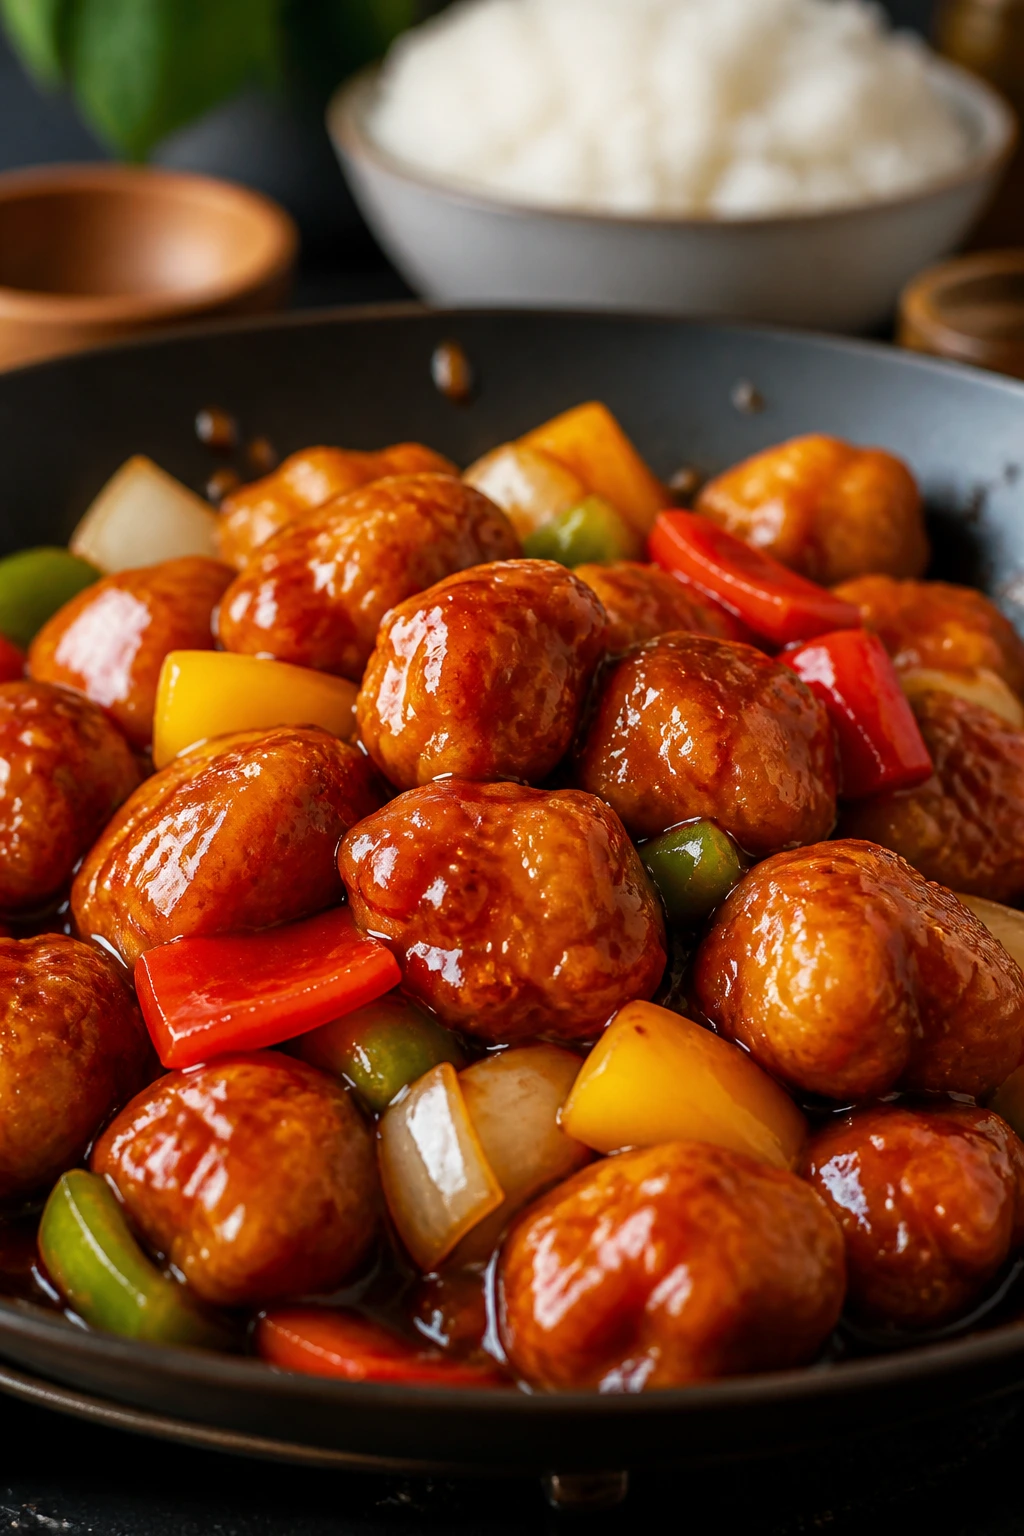
I like this style because it behaves like takeout without tasting like a neon approximation of takeout. The sauce clings. The chicken stays juicy. The peppers still look like peppers instead of faded strips. And if you’re the kind of cook who likes a dish to hit sweet, sour, salty, and savory in one bite, this is one of those recipes that rewards a steady hand more than fancy technique.
Why This Takeout-Style Chicken Beats the Box
- Bright, not cloying: The sauce uses rice vinegar and pineapple juice, so the sweetness has a sharp edge instead of flattening out into candy.
- Crisp chicken matters here: A flour-and-cornstarch coating gives you those fragile, craggy bits that cling to sauce instead of dissolving into it.
- Fast enough for a weeknight: The sauce comes together in one pan, and the chicken fries in batches in about 10 to 12 minutes total.
- Flexible around what you have: Chicken thighs, chicken breast, canned pineapple, or fresh pineapple all work as long as you keep the pieces dry and the pan hot.
- Tastes even better if you pay attention to the sauce: The first spoonful should be a little tangy. If it tastes mild in the pan, it usually tastes dull on the plate.
- Plays well with rice: Jasmine rice, long-grain rice, or even fried rice gives the sauce somewhere to go without turning the whole meal mushy.
Yield: Serves 4
Prep Time: 20 minutes
Cook Time: 25 minutes
Total Time: 45 minutes
Difficulty: Intermediate — the steps are straightforward, but frying in batches and timing the sauce takes a little attention.
Best Served: Right away, while the chicken is crisp and the sauce is still glossy.
What Goes Into the Bowl and Why It Works
For the Chicken:
- 1 1/2 pounds boneless, skinless chicken breasts or thighs, cut into 1-inch pieces
- 1 teaspoon kosher salt
- 1/2 teaspoon black pepper
For the Coating:
- 1/2 cup all-purpose flour
- 1/2 cup cornstarch
- 1/2 teaspoon garlic powder
- 2 large eggs, beaten
For the Sweet and Sour Sauce:
- 1 cup pineapple juice, preferably from canned pineapple in juice
- 1/3 cup rice vinegar
- 1/3 cup ketchup
- 1/4 cup packed light brown sugar
- 2 tablespoons low-sodium soy sauce
- 2 cloves garlic, minced
- 1 teaspoon fresh ginger, finely grated
- 2 tablespoons cornstarch
- 3 tablespoons cold water
For the Stir-Fry:
- 1 tablespoon neutral oil
- 1 red bell pepper, seeded and cut into 1-inch squares
- 1 green bell pepper, seeded and cut into 1-inch squares
- 1 small yellow onion, cut into 1-inch wedges
- 1 cup pineapple chunks, drained if canned
For Serving:
- 3 cups hot jasmine rice or long-grain white rice
- 2 scallions, thinly sliced
- 1 tablespoon toasted sesame seeds
A quick note on the ingredient logic
The chicken is cut small on purpose. Bigger pieces look generous in a photo and eat awkwardly in real life. One-inch chunks cook evenly, fry faster, and catch more sauce on their ridges.
The sauce leans on pineapple juice and rice vinegar because sweet and sour needs contrast. Without acid, you get syrup. Without sugar, you get sharp vinegar on chicken. The ketchup adds tomato depth and the color people expect from this dish, but it also rounds the sauce so the pineapple doesn’t taste thin or one-note.
Cornstarch does two jobs here. It helps the chicken crisp, and it thickens the sauce into that shiny, takeout-style coat. Once the sauce hits a simmer, it should go from thin and shiny to thick enough to lightly nap the back of a spoon in under a minute.
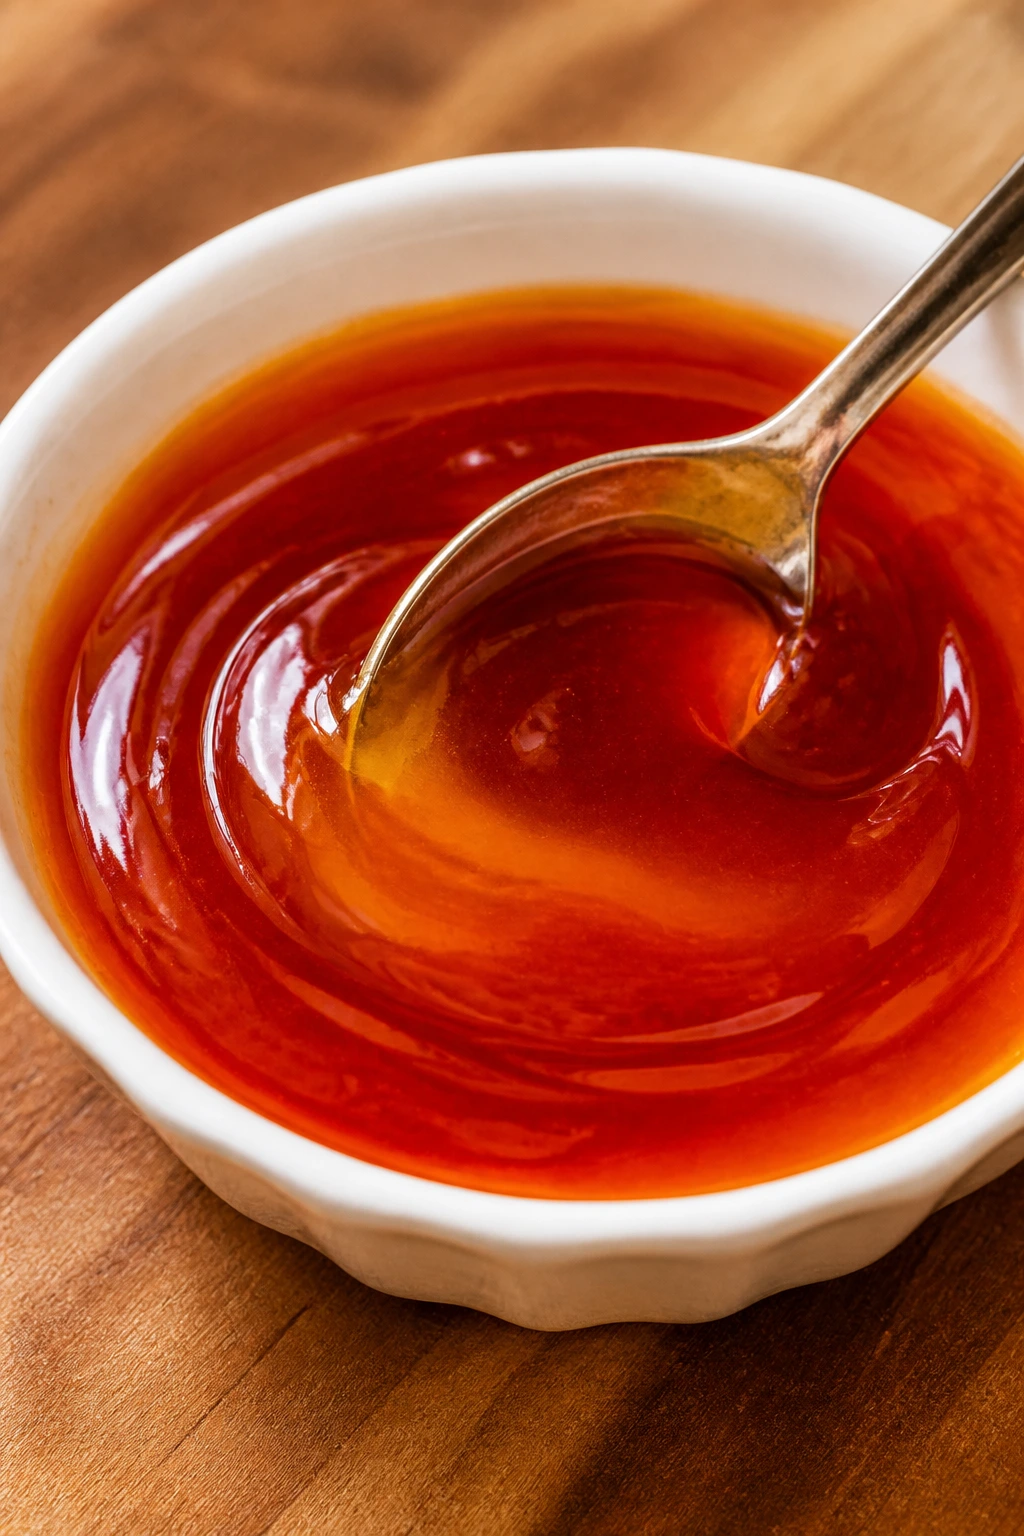
The Sauce Formula That Makes This Dish Taste Like a Real Takeout Favorite
Sweet and sour chicken has a funny reputation. People think it’s all about sugar and food coloring, when the better versions are really about control. The sauce should hit your tongue in layers: first sweet, then acidic, then salty, then a quiet ginger-garlic finish that hangs around for a second before the next bite. That’s what makes it addictive.
The pineapple juice does more than add fruit flavor. It gives the sauce a round, tropical edge that keeps the vinegar from feeling harsh. Rice vinegar is my pick here because it’s gentler than distilled white vinegar; the sauce still wakes up the palate, but it doesn’t smack you in the teeth. If you only have white vinegar, use a little less and taste before adding more.
Chicken
What to use: 1 1/2 pounds boneless, skinless chicken breasts or thighs, cut into 1-inch pieces.
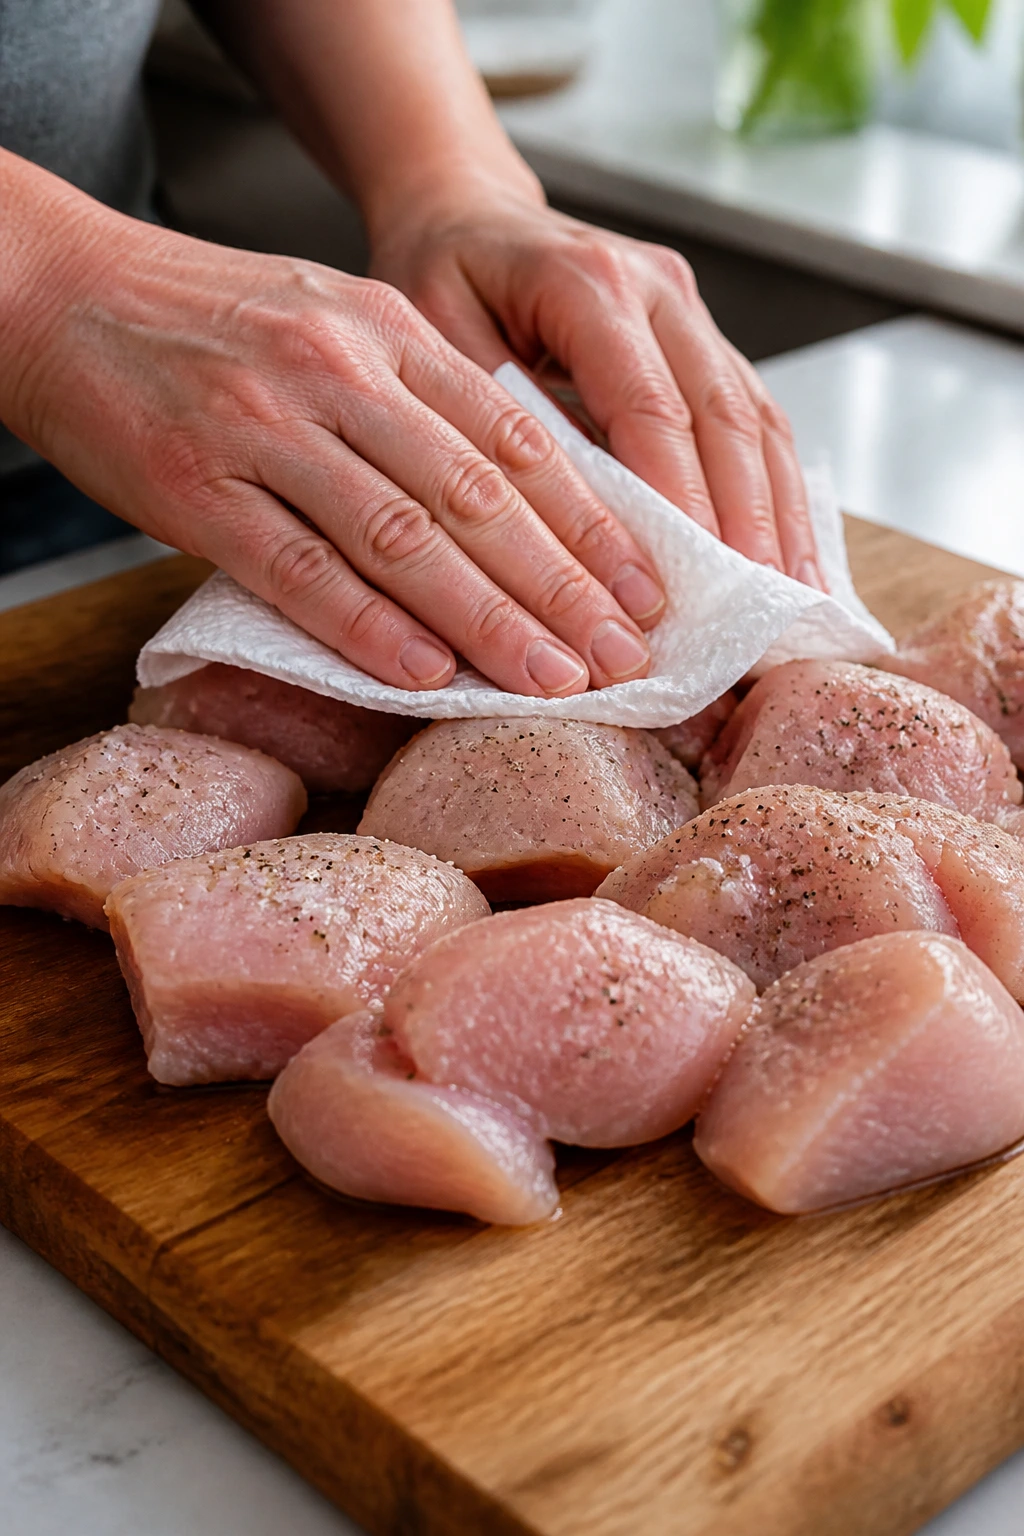
Preparation: Pat the chicken very dry before seasoning. Dry meat picks up the coating better, and it fries instead of steaming.
Substitutions: Chicken thighs give you more forgiveness and stay juicy if you get distracted for a minute. Shrimp can work too, but you’ll need a much shorter cook time and a gentler hand with the sauce.
Tips: If you’re using breasts, cut them into pieces that are as even as you can manage. Uneven chunks make the smaller pieces dry before the larger ones are cooked through.
The Crisp Coating
What to use: 1/2 cup flour, 1/2 cup cornstarch, 1/2 teaspoon garlic powder, and 2 beaten eggs.
Preparation: Mix the flour, cornstarch, and garlic powder in one shallow bowl, and keep the egg in another. That separate setup keeps your fingers from becoming a gluey mess.
Substitutions: Rice flour can replace half the all-purpose flour if you want a lighter, snappier crust. Gluten-free flour blends also work, though the coating will be a little less crackly.
Tips: Press the dry coating onto the chicken after the egg dip. You want ragged, uneven bits on the surface, not a smooth shell. Those rough edges fry up best.
Sweet and Sour Sauce
What to use: 1 cup pineapple juice, 1/3 cup rice vinegar, 1/3 cup ketchup, 1/4 cup light brown sugar, 2 tablespoons soy sauce, 2 cloves garlic, 1 teaspoon ginger, and a cornstarch slurry made from 2 tablespoons cornstarch plus 3 tablespoons cold water.
Preparation: Whisk the sauce base before you start frying the chicken. Once the chicken is done, the sauce should be ready to hit the pan immediately.
Substitutions: Orange juice can replace part of the pineapple juice for a softer citrus note. If you want a more savory profile, reduce the sugar by 1 tablespoon and add an extra teaspoon of soy sauce.
Tips: Make the slurry in cold water only. If you add cornstarch straight into hot liquid, it clumps and you end up chasing little white lumps around the pan.
Peppers, Onion, and Pineapple
What to use: 1 red bell pepper, 1 green bell pepper, 1 small yellow onion, and 1 cup pineapple chunks.
Preparation: Cut everything into roughly the same size so the pan cooks evenly. Bell peppers should be bite-sized, not ribboned thin.
Substitutions: A yellow or orange pepper can stand in for the green pepper if you want a softer, sweeter flavor. Canned pineapple works well here, and honestly, I like it when the fruit is packed in juice rather than syrup.
Tips: Keep the vegetables on the crisp side. The best sweet and sour chicken has peppers that still bend with a little resistance when you bite them.
Serving Base
What to use: 3 cups hot cooked jasmine or long-grain rice, plus scallions and sesame seeds for finishing.
Preparation: Cook the rice before you start frying or keep it warm in a covered pot. Cold rice can make the finished dish feel heavier than it should.
Substitutions: Fried rice, brown rice, or even plain noodles can work if that’s what you have. Jasmine rice is my favorite because the grains stay separate and soak up sauce without going gluey.
Tips: If you want the crispest chicken, serve the sauce over the rice and spoon the chicken on top at the very end.
The Tools That Make the Job Easier
You do not need a deep fryer or a pile of specialty gear, but a few specific tools make this recipe a lot calmer to cook.
- 12-inch skillet or wok: A wide surface helps the chicken brown in batches and gives the sauce room to simmer without boiling over.
- Large mixing bowl: You’ll need one for the chicken and coating, and it should be big enough that the pieces can move around without falling out.
- Two shallow bowls: One for the egg, one for the dry coating. A pie dish works if that’s what you’ve got.
- Tongs or a spider skimmer: Tongs help with turning chicken pieces; a skimmer makes it easier to lift them out of the oil.
- Wire rack set over a sheet pan: This matters more than people think. It keeps the fried coating from sweating on paper towels.
- Small whisk: The sauce and cornstarch slurry need to be smooth before they hit the pan.
- Instant-read thermometer, optional but handy: Chicken should hit 165°F in the center, and oil around 350°F gives you better browning.
Prep the Chicken So the Coating Actually Sticks
Prepare the chicken:
-
Pat the chicken pieces dry with paper towels, then cut them into 1-inch chunks if they are not already trimmed. Sprinkle them with the kosher salt and black pepper, and toss so the seasoning hits all sides.
-
In one shallow bowl, whisk together the flour, cornstarch, and garlic powder. In a second shallow bowl, beat the eggs until the yolks and whites look uniform and pale yellow.
-
Drop the chicken into the dry coating first, then into the eggs, then back into the dry coating. Press the coating on with your fingertips so you get little rough bits and crags. Those ridges are what fry up crisp.
-
Set the coated chicken on a wire rack and let it sit for 5 minutes. That short rest helps the coating hydrate and cling instead of sliding off in the oil.
Mix the sauce:
-
In a medium bowl, whisk together the pineapple juice, rice vinegar, ketchup, brown sugar, soy sauce, minced garlic, and grated ginger until the sugar dissolves. In a separate small cup, stir the cornstarch with the cold water until completely smooth, then set both aside.
-
If you’re cooking rice from scratch, start it now. The finished dish moves quickly once the oil is hot, and there is no graceful way to stop mid-fry because the rice wasn’t ready.
Fry the Chicken Until the Edges Turn Gold
-
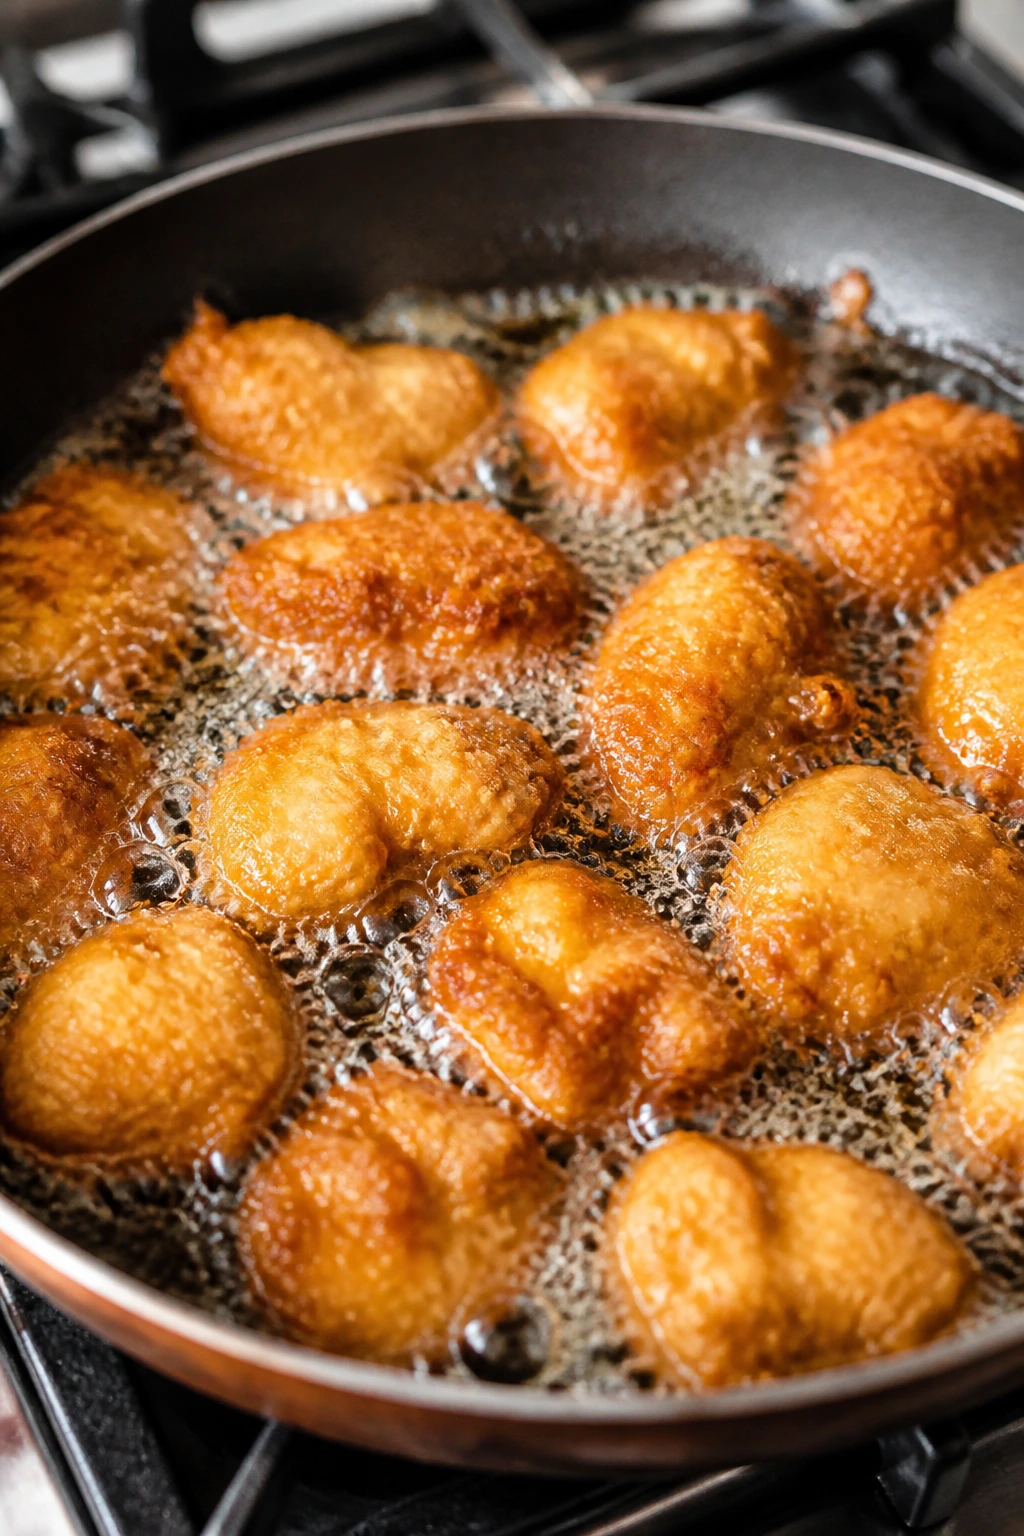
Pour about 1/2 inch of neutral oil into a 12-inch skillet and set it over medium-high heat. Heat the oil until it shimmers and a tiny pinch of flour sizzles on contact, or until it reaches about 350°F.
-
Add the chicken in a single layer, working in batches. Fry for 4 to 5 minutes on the first side, then turn the pieces and fry for another 3 to 4 minutes, until they are deep golden and the thickest piece reads 165°F in the center. Do not crowd the pan. If the pieces sit on top of each other, they’ll steam and the coating turns soft.
-
Transfer the chicken to the wire rack after each batch. If you pile it on a plate, the bottom side goes damp almost immediately, and all that crisp work disappears.
Build the Sweet and Sour Sauce Without Turning It Flat
-
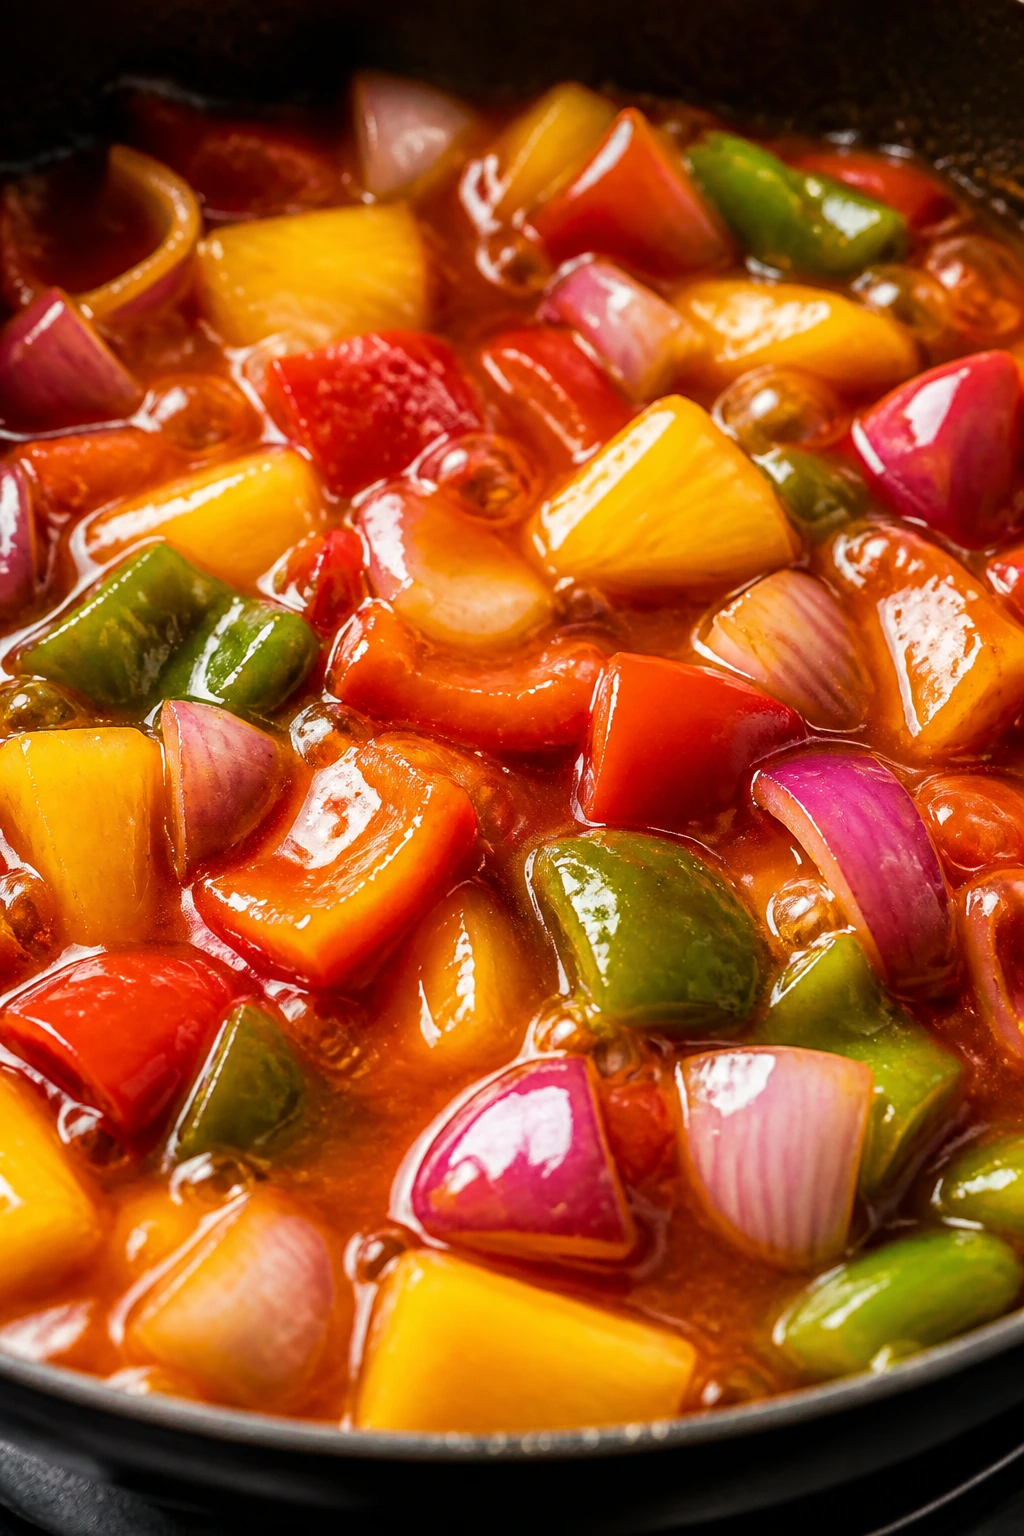
Carefully pour off the oil from the skillet, leaving about 1 tablespoon behind. Return the pan to medium heat and add the bell peppers and onion. Stir-fry for 2 to 3 minutes, just until the vegetables brighten and the onion starts to soften around the edges.
-
Add the pineapple chunks and give everything a quick toss. The fruit only needs to warm through; if you cook it too long, the pieces collapse and bleed into the sauce.
-
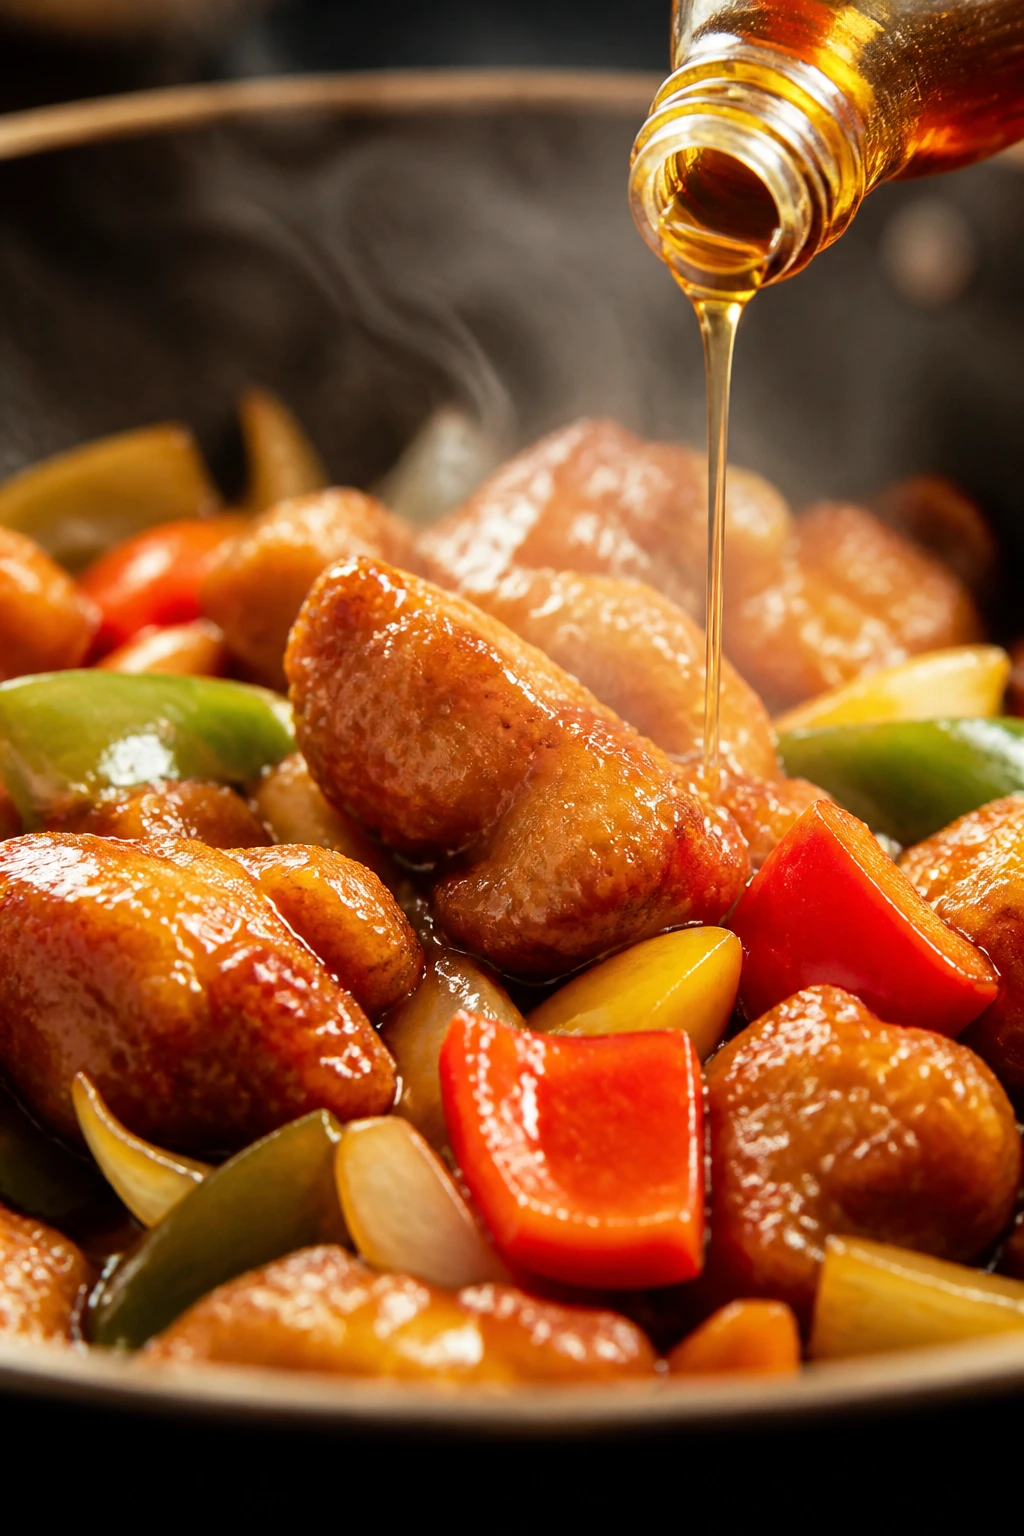
Pour in the pineapple juice mixture and bring it to a gentle simmer. Stir once or twice so the ketchup and sugar dissolve completely, then give the cornstarch slurry a quick stir and drizzle it in while whisking. Let the sauce bubble for 30 to 60 seconds, just until it turns glossy and thick enough to coat a spoon.
-
Taste the sauce. If it feels too sweet, add 1 to 2 teaspoons more rice vinegar. If it’s too sharp, add another teaspoon of brown sugar. The balance should taste lively, not sugary or aggressive.
Toss Everything Together and Serve It Fast
-
Return the chicken to the skillet and toss it through the sauce until every piece is coated and hot, about 30 to 45 seconds. Work quickly here. The longer the chicken sits in the sauce, the more the crust softens.
-
Spoon the sweet and sour chicken over the hot rice, then finish with sliced scallions and toasted sesame seeds. Serve immediately while the sauce is still glossy and the chicken still has some edge to it.
How to Serve It So the Plate Still Has Some Crunch
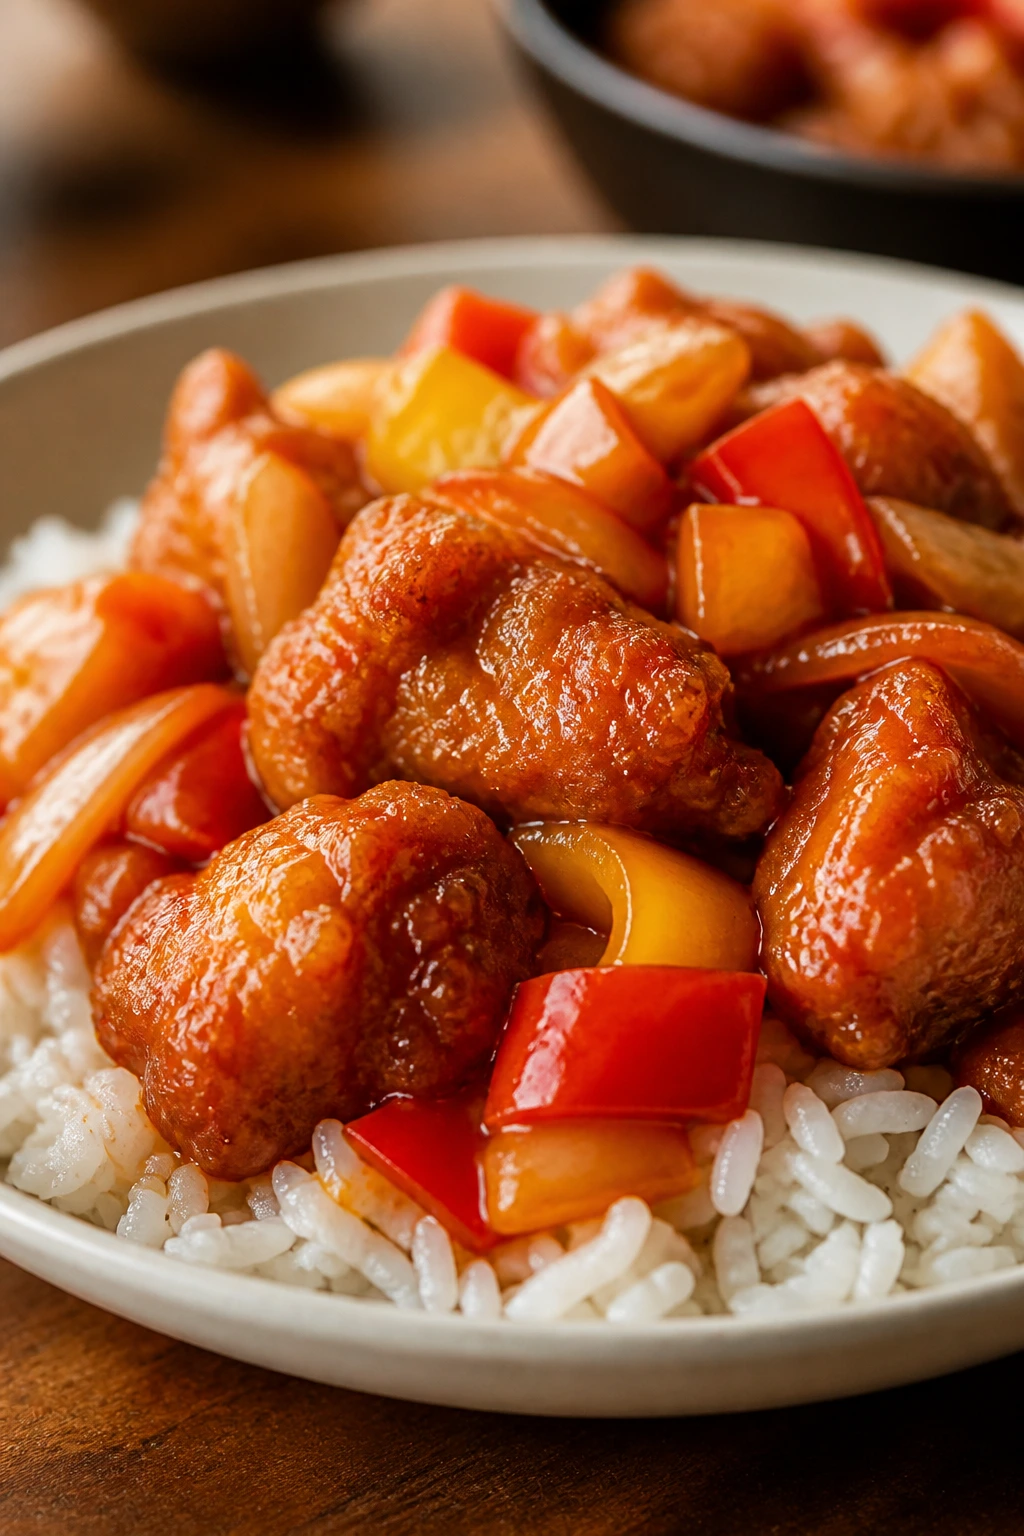
Presentation: Build a mound of rice first, then spoon the chicken and vegetables over the center so the sauce has somewhere to pool. A shallow bowl works better than a flat plate because it keeps the pineapple and peppers from rolling off the sides.
Accompaniments: Steamed broccoli, garlicky bok choy, or a simple cucumber salad gives the meal some bite and keeps the plate from feeling heavy. If you want a bigger spread, add egg rolls or a plain soup, but the chicken really only needs rice and one green vegetable.
Portions: A standard serving is about 1 1/2 cups total per person when paired with rice. If you’re feeding bigger eaters, make extra rice instead of stretching the chicken with more sauce; that keeps the texture intact.
Beverage Pairing: Cold jasmine tea or a light lager plays nicely with the sweet-acid balance. If you want something nonalcoholic with a little sparkle, club soda with a squeeze of lime works better than a sugary drink.
Small Tweaks That Push the Flavor a Little Farther
Flavor Enhancement: A teaspoon of toasted sesame oil at the very end adds a nutty note, but don’t cook it in the sauce for long or it gets muddy. Add it after the chicken goes back in, not before.
Time-Saver: Use canned pineapple chunks in juice and measure the juice straight from the can. That saves one more thing to prep and gives you the exact liquid you need for the sauce.
Texture Fix: If you want a sharper crust, let the coated chicken sit on the rack for 10 minutes instead of 5 before frying. That small pause dries the surface just enough to help the crust hold.
Make-It-Yours: A pinch of white pepper gives the sauce a faint takeout-style warmth that feels familiar but not loud. If you like heat, a spoonful of chili garlic sauce at the end turns the dish from sweet-and-tangy to sweet, tangy, and a little fiery.
Common Mistakes That Make Sweet and Sour Chicken Go Flat

-
Crowding the skillet: If too many chicken pieces go in at once, the oil temperature drops and the coating turns pale and greasy. Fry in batches, even if it takes an extra five minutes.
-
Adding the chicken too soon: Sauce plus chicken is where the crisp coating starts to fade. Wait until the sauce is thick and glossy before you toss the chicken in, and serve right after.
-
Letting the vegetables cook until soft: Bell peppers that go limp taste tired and watery. They should still have some resistance, with the green pepper keeping a little snap in the middle.
-
Using too much cornstarch slurry: A heavy hand makes the sauce feel gluey instead of glossy. Add the slurry gradually, then stop when the sauce coats a spoon in a thin sheen.
-
Skipping the taste test at the end: Pineapple juice, ketchup, and vinegar vary more than people expect. If the sauce tastes sleepy, it probably needs more vinegar; if it bites too hard, add a touch more sugar.
-
Holding the finished dish for too long: Even a good crust softens as it sits in sauce. If you’re making it for guests, keep the rice warm, fry the chicken last, and finish the toss right before the bowl hits the table.
Variations That Still Taste Like the Dish You Wanted
Orange-Forward Version: Swap 1/2 cup of the pineapple juice for fresh orange juice and add 1 teaspoon of orange zest to the sauce. The flavor turns a little rounder and softer, which some people like more than the sharper pineapple edge.
Spicy Chili Crisp Version: Stir 1 to 2 teaspoons of chili crisp or garlic chili sauce into the finished sauce after thickening. The heat should sit in the background, not hijack the whole bowl, so start small and taste before adding more.
Gluten-Free Version: Use tamari instead of soy sauce and swap the all-purpose flour for a gluten-free flour blend or rice flour. The coating won’t be exactly the same as the original, but it still fries up with a nice crunch.
Air Fryer Shortcut: Lightly oil the coated chicken and air-fry at 400°F until crisp and cooked through, turning once halfway, then toss with the sauce in a skillet. You lose a little of that fried richness, but the tradeoff is less oil and less mess.
Extra-Vegetable Version: Add snap peas, zucchini half-moons, or thin carrot coins to the pan with the peppers. Keep the pieces small and the cooking time short so the vegetables stay bright instead of soft.
Storing, Reheating, and Making It Ahead
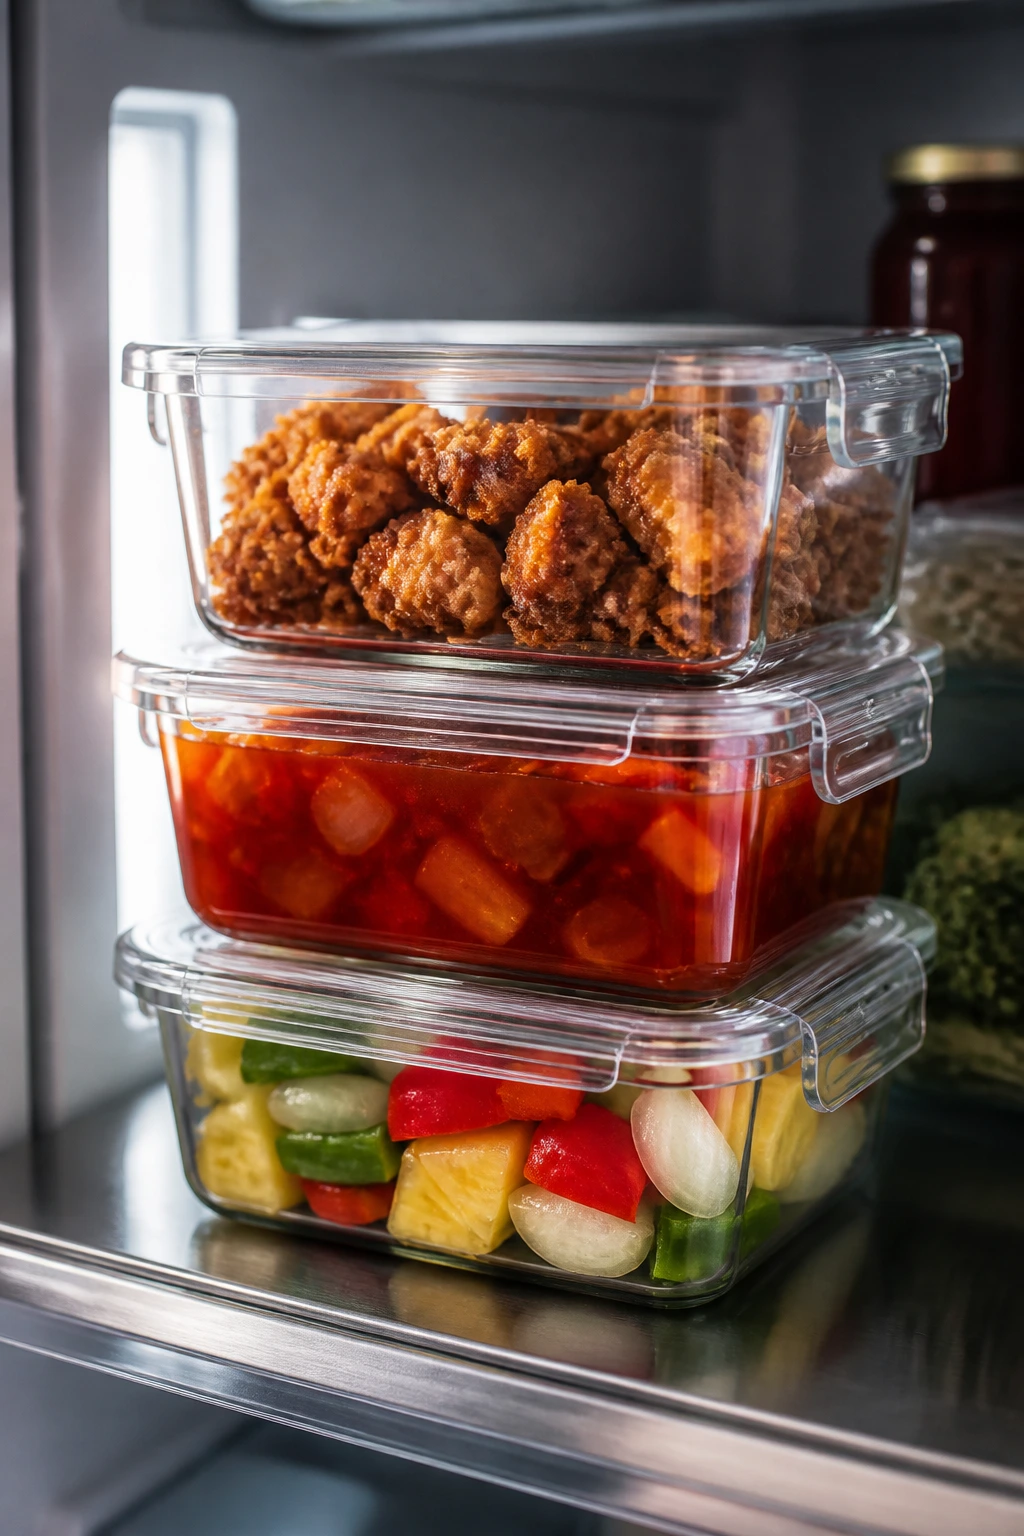
Sweet and sour chicken is one of those dishes that sounds easy to store until you remember the coating. Sauce and crisp batter are not natural friends in the fridge. If you want the best texture, keep the components separate whenever you can.
Store the fried chicken and the sauce in separate airtight containers in the refrigerator for up to 3 days. The vegetables can live in the sauce with no problem, but the chicken holds onto more of its texture if you keep it apart and combine only what you plan to eat. If the dish is already assembled, it still keeps for 3 days, but the crust softens more quickly.
The sauce freezes better than the chicken. Freeze the sauce in a sealed container for up to 2 months, then thaw it in the refrigerator and rewarm it on the stove over low heat. Cooked chicken can be frozen for about 1 month, but I wouldn’t expect a crisp crust after thawing; it works better for a second-round sauced dinner than for serving as if it were fresh.
For reheating, the oven or air fryer wins. Spread the chicken on a sheet pan and heat it at 400°F for 8 to 10 minutes, or until hot and crisp at the edges. An air fryer at 375°F for 5 to 7 minutes also works well. Warm the sauce separately in a small saucepan, then toss the chicken through it right before serving.
If you want to prep ahead, coat the chicken up to 4 hours before cooking and keep it uncovered in the refrigerator on a rack. That dry chill helps the coating set. The sauce can be mixed a day ahead and held in the fridge, though you should whisk it again before it goes into the pan because the cornstarch tends to settle.
Questions People Ask Before They Start Cooking

Can I use chicken thighs instead of chicken breasts?
Yes, and I often prefer thighs because they stay juicy even if the timing runs a little long. Cut them into the same 1-inch pieces and cook until the center reaches 165°F.
Do I have to fry the chicken?
No, but frying gives you the texture people expect from takeout-style sweet and sour chicken. If you want a lighter version, air-fry or bake the coated chicken on a rack, then toss it with the sauce at the end.
What if my sauce tastes too sweet?
Add rice vinegar 1 teaspoon at a time until the sweetness feels balanced. A pinch of soy sauce can help too, because salt sharpens the fruit and keeps the sauce from tasting flat.
Can I make this without pineapple?
You can, though the dish will taste less like classic sweet and sour chicken. Replace the pineapple juice with orange juice or apple juice, and add a little extra vinegar to keep the sauce lively.
Why does my coating fall off in the pan?
Usually the chicken was wet, the oil wasn’t hot enough, or the pieces were moved too soon. Dry the chicken well, let the coated pieces rest for 5 minutes, and wait until the crust naturally releases before turning.
Can I make the whole dish ahead for a party?
You can prep the sauce and fry the chicken earlier in the day, but combine them right before serving. If you toss everything together too soon, the coating softens and the dish starts to lose its personality.
What rice works best here?
Jasmine rice is my first choice because the grains stay fluffy and fragrant under the sauce. Long-grain white rice is a fine backup, and fried rice makes the meal feel fuller if you want something more substantial.
Why This One Earns Repeat Status
There’s a reason sweet and sour chicken keeps showing up on takeout menus: the flavor pattern is easy to love. The version worth making at home keeps that familiar sweet-tangy pull but cleans up the rough edges. The chicken stays juicy, the peppers keep some bite, and the sauce tastes like something made on purpose instead of poured from a bottle.
I like this recipe best when it’s cooked fast and served even faster. Keep the rice warm, fry the chicken in batches, and taste the sauce before the chicken goes back into the pan. Those three habits do more for the final dish than any clever shortcut ever will.
Sweet and Sour Chinese Takeout — Recipe Card

Recipe Name: Sweet and Sour Chicken
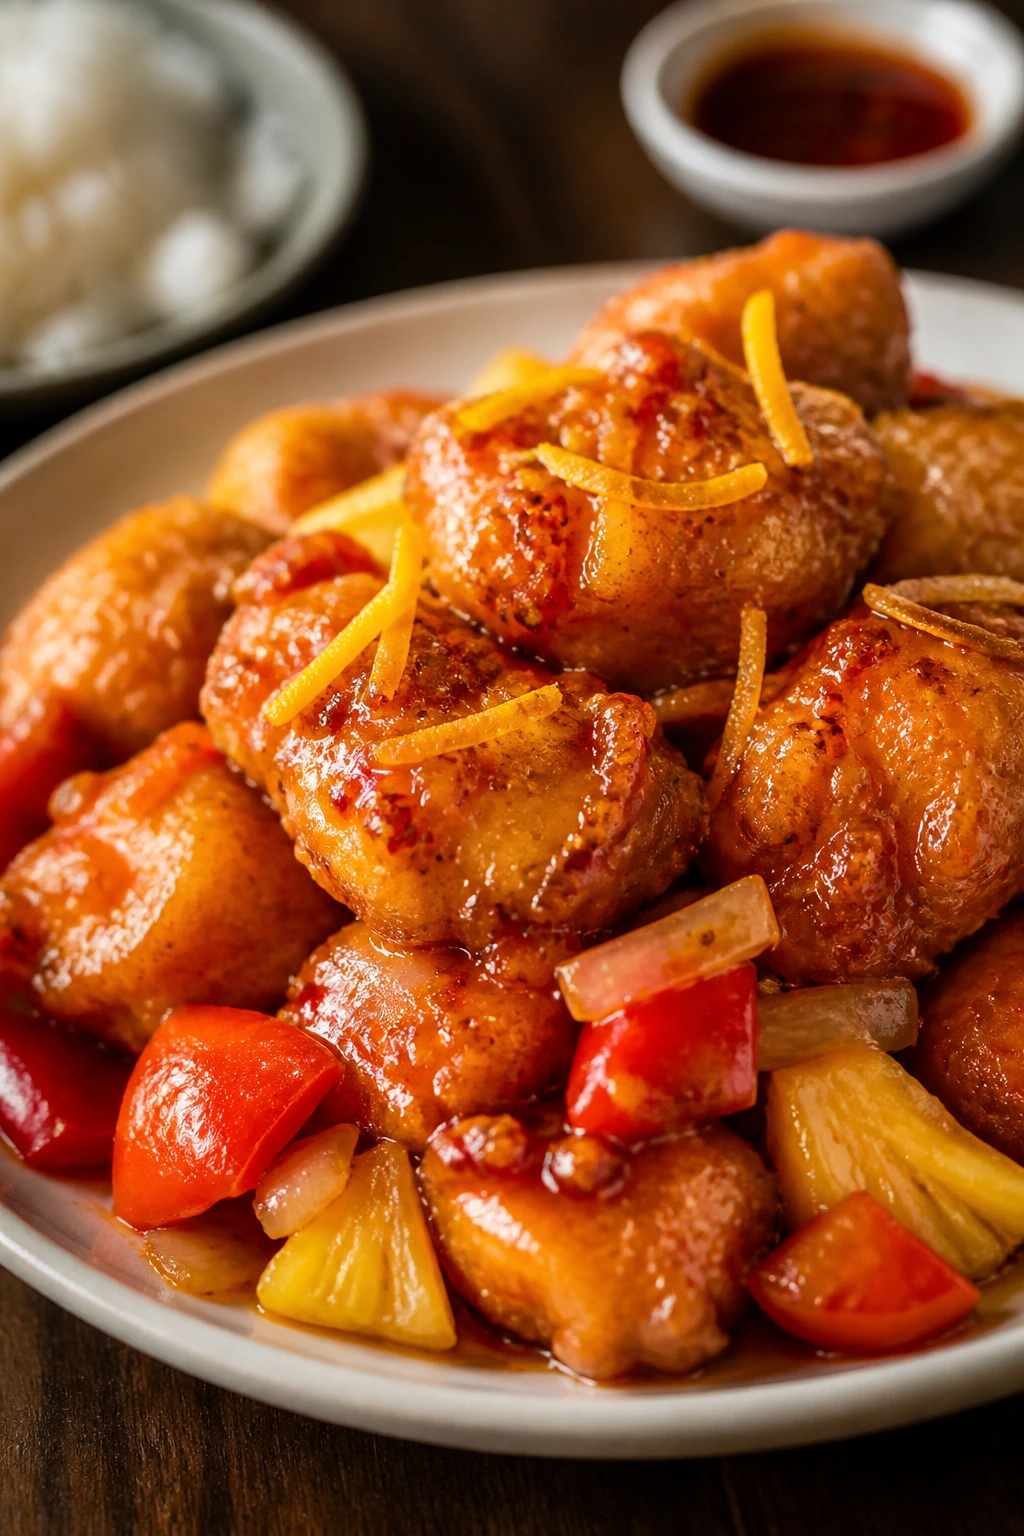
Description: Crisp chicken pieces tossed with bell peppers, pineapple, and a glossy sweet-and-sour sauce made with pineapple juice, rice vinegar, ketchup, and ginger. It tastes like takeout, only brighter and less sugary.
Prep Time: 20 minutes
Cook Time: 25 minutes
Total Time: 45 minutes
Course: Dinner, Main Course
Cuisine: Chinese-American
Servings: 4 servings
Calories: About 480 kcal per serving
Ingredients
For the Chicken:
- 1 1/2 pounds boneless, skinless chicken breasts or thighs, cut into 1-inch pieces
- 1 teaspoon kosher salt
- 1/2 teaspoon black pepper
For the Coating:
- 1/2 cup all-purpose flour
- 1/2 cup cornstarch
- 1/2 teaspoon garlic powder
- 2 large eggs, beaten
For the Sweet and Sour Sauce:
- 1 cup pineapple juice
- 1/3 cup rice vinegar
- 1/3 cup ketchup
- 1/4 cup packed light brown sugar
- 2 tablespoons low-sodium soy sauce
- 2 cloves garlic, minced
- 1 teaspoon fresh ginger, finely grated
- 2 tablespoons cornstarch
- 3 tablespoons cold water
For the Stir-Fry:
- 1 tablespoon neutral oil
- 1 red bell pepper, cut into 1-inch squares
- 1 green bell pepper, cut into 1-inch squares
- 1 small yellow onion, cut into 1-inch wedges
- 1 cup pineapple chunks, drained if canned
For Serving:
- 3 cups hot jasmine rice or long-grain white rice
- 2 scallions, thinly sliced
- 1 tablespoon toasted sesame seeds
Instructions
- Pat the chicken dry, season with salt and pepper, and cut into 1-inch pieces if needed.
- Whisk flour, cornstarch, and garlic powder in one bowl. Beat the eggs in a second bowl.
- Coat the chicken in the dry mixture, dip in egg, then coat again in the dry mixture. Rest on a wire rack for 5 minutes.
- Whisk pineapple juice, rice vinegar, ketchup, brown sugar, soy sauce, garlic, and ginger in a bowl. Mix cornstarch with cold water in a separate cup.
- Heat 1/2 inch neutral oil in a large skillet over medium-high heat until shimmering, about 350°F.
- Fry the chicken in batches for 7 to 9 minutes total, turning as needed, until golden and cooked through. Drain on a wire rack.
- Pour off all but 1 tablespoon oil from the skillet. Add bell peppers and onion and stir-fry for 2 to 3 minutes.
- Add pineapple chunks, then pour in the sauce mixture and bring to a simmer.
- Stir the cornstarch slurry again and add it slowly, cooking until the sauce turns thick and glossy, about 30 to 60 seconds.
- Return the chicken to the skillet and toss to coat. Serve over rice with scallions and sesame seeds.
Notes: Keep the chicken and sauce separate if you’re making it ahead. Add 1 to 2 teaspoons rice vinegar at the end if the sauce tastes too sweet. For extra heat, stir in a little chili crisp or garlic chili sauce.