
Takeout sweet-and-sour chicken has a bad habit of arriving soft, shiny, and already half defeated, which is exactly why sweet and sour homemade Chinese food is worth making at home. The sauce can be bright instead of syrupy, the chicken can stay crisp long enough to matter, and the peppers can still have a little snap when you bite through them. That combination is the whole point.
The part most people get wrong is not the frying. It’s the balance. Too much sugar and the sauce tastes like melted candy. Too much vinegar and it turns sharp in the wrong way, like a dressing that never learned to calm down. The sweet spot is a glossy red-orange glaze that hits your nose with vinegar first, then lands with pineapple and soy, then leaves a savory finish on the tongue. That’s the version that makes a bowl of plain rice disappear fast.
I also like the control you get here. Bell peppers can stay crisp. Pineapple can be real pineapple, not a decorative cube buried in neon sauce. Chicken thighs can get a thin, craggy crust that survives the trip from skillet to plate. If you fry in small batches and keep the sauce waiting until the end, the whole dish tastes sharper and cleaner than the usual paper-box version.
And the smell is half the reward. Garlic softens in the sauce. Vinegar goes from harsh to rounded. The oil gives off that warm, faintly nutty scent that tells you the chicken is browning properly. By the time the sauce starts to gloss over the chicken instead of pooling around it, you’re already past the point where delivery makes much sense.
Why This Sweet and Sour Homemade Chinese Food Tastes Better Than Takeout
The whole trick is contrast. Crispy chicken, bright sauce, crisp vegetables, soft rice. If one part gets mushy, the whole dish loses its shape.
Crisp Chicken, Not Soggy Chicken: A cornstarch-and-flour coating with a little baking powder fries into a lighter shell than a heavy flour breading, so the crust has some texture left when the sauce goes on.
A Sauce With Real Bite: Rice vinegar, pineapple juice, ketchup, and soy sauce make a sauce that tastes balanced instead of flat, with enough acid to wake up the sugar.
Better Control Over Sweetness: At home, you can add one tablespoon more vinegar or sugar and taste the change right away, which matters because sweet and sour is all about small adjustments.
Vegetables That Still Have Structure: Red and green bell peppers, onion, and pineapple stay distinct when they’re cut in 1-inch pieces and cooked for only a few minutes.
Takeout-Style, Not Takeout-Soft: If you fry the chicken in batches and toss it with sauce at the very end, the coating stays crisper than the version that sits in a steam-tight box for 20 minutes.
No Mystery Bottles: You’re using normal pantry ingredients here, and that makes the sauce easier to tweak the next time. Ketchup is not a cheat. It’s the quiet backbone of this style.
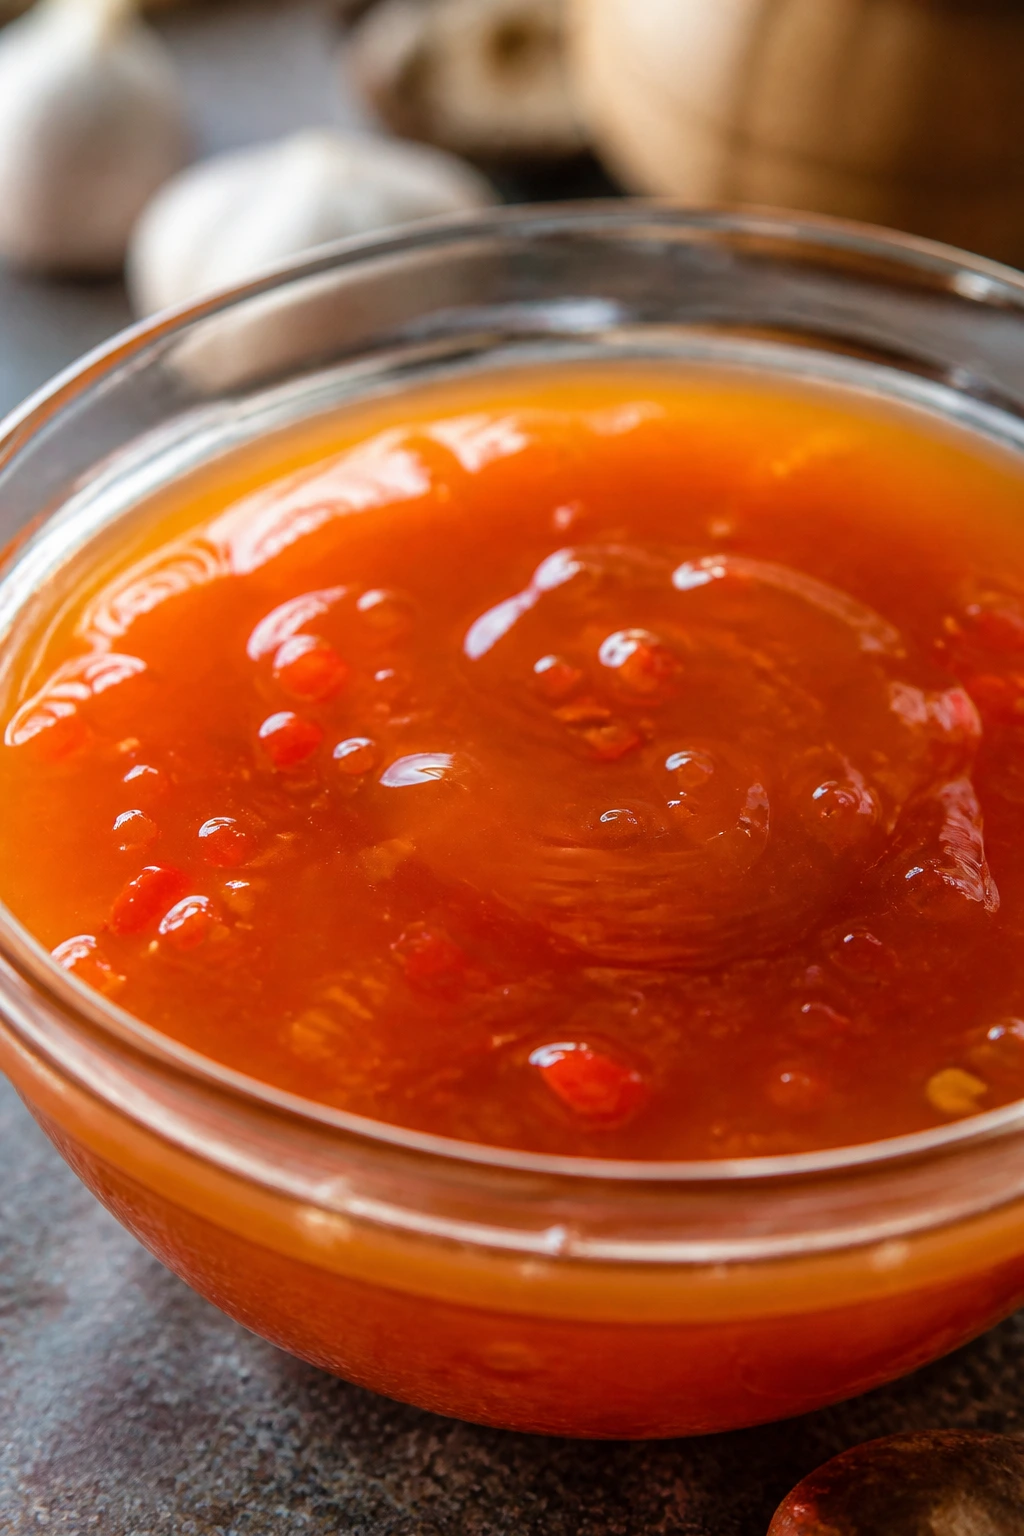
What Sweet and Sour Sauce Needs to Taste Like
What should that sauce actually taste like before it hits the plate? Bright first. Sweet second. Savory at the end.
If it tastes only sweet, it’s flat. If it tastes only sour, it turns thin and a little mean. The version people remember from American Chinese takeout has a rounded tomato note from ketchup, a sharp edge from rice vinegar, and a fruit note from pineapple juice that keeps the whole thing from reading like sugared vinegar. That balance matters more than fancy technique. A sauce with the right backbone will forgive a lot.
I like to think about the aroma before the sauce even thickens. Pineapple juice smells soft and fruity. Vinegar smells sharp and clean. Ketchup adds that cooked tomato base that holds the color and gives the sauce body once the slurry goes in. When those three are cooked together for just a few minutes, the sauce stops tasting like separate ingredients and starts tasting like one complete thing.
There’s a reason this dish works so well with rice. The sauce should cling, not puddle. It should coat the chicken in a thin glossy layer and then leave a little behind on the spoon, not a syrupy smear that sticks to the roof of your mouth. That’s the target. Anything thicker than that starts to feel heavy, and anything thinner slides right off the chicken and disappears into the plate.
Before the Oil Heats: Yield, Time, and Serving Size
A dish like this runs on timing. You want the rice going first, the chicken prepped second, and the sauce waiting quietly at the stove while the chicken drains on a rack. The actual cooking moves fast, and that is part of the appeal. Once the oil is hot, there’s no long simmer to babysit.
Yield: 4 to 6 servings
Prep Time: 25 minutes
Cook Time: 25 minutes
Total Time: 50 minutes
Difficulty: Intermediate — the steps are straightforward, but frying in batches and keeping the sauce balanced takes a little attention.
Rest Time: 10 minutes for the coated chicken
Best Served: Right away, while the chicken is still crisp and the sauce is glossy
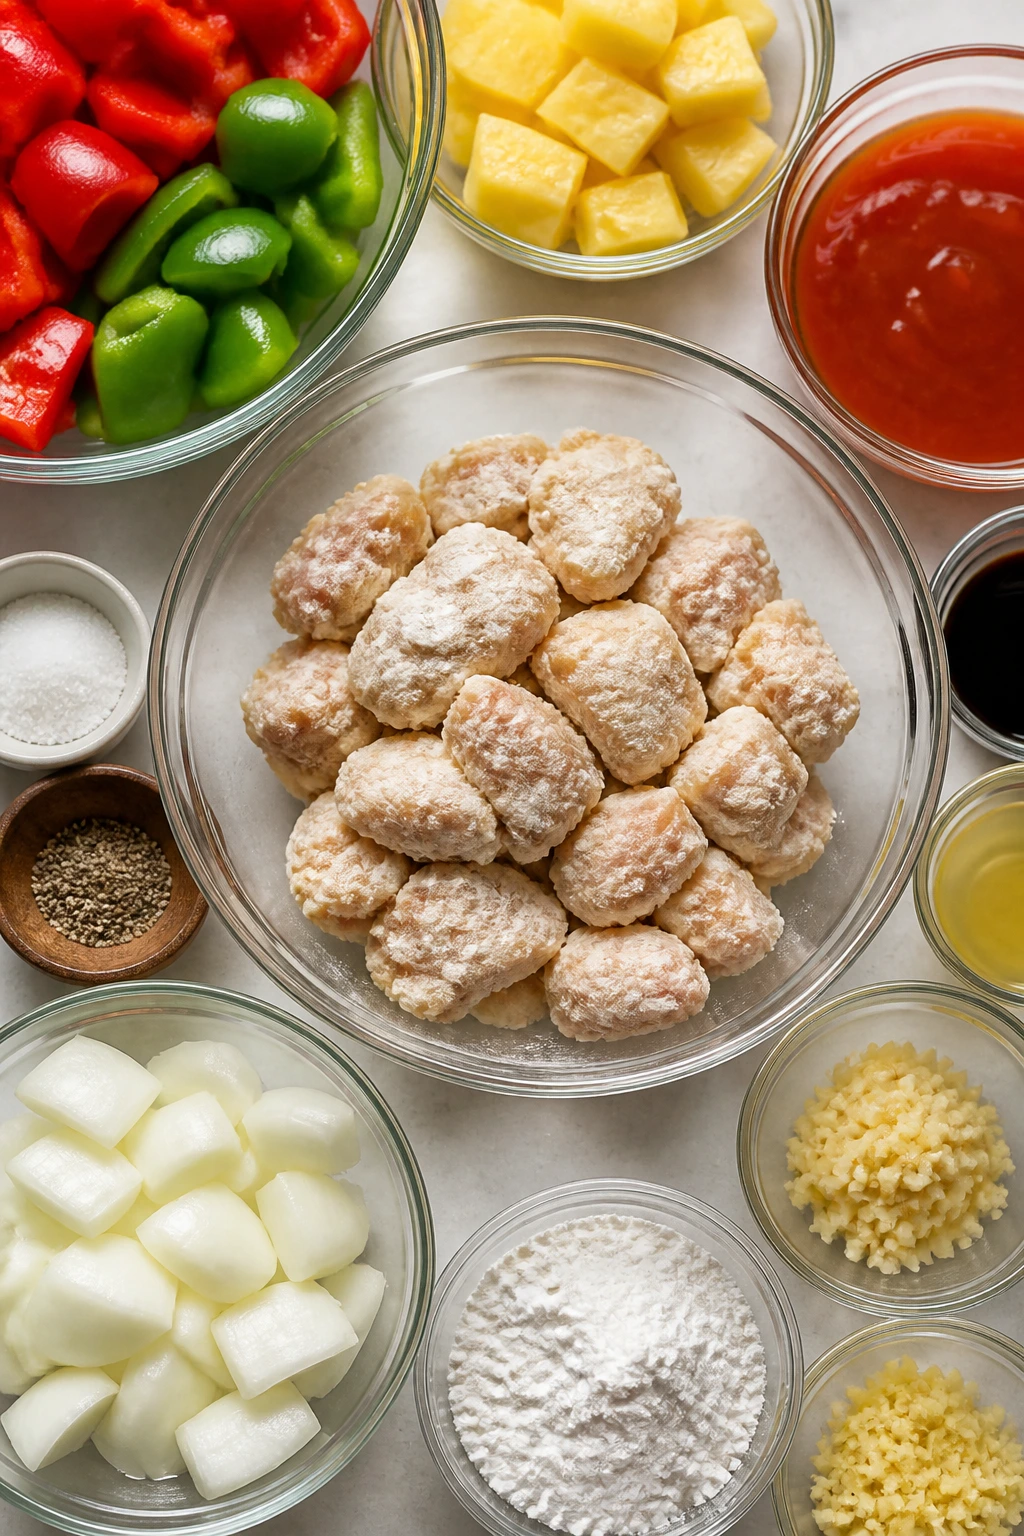
Everything You Need for the Chicken, Sauce, and Vegetables
For the Chicken:
- 1 1/2 lbs boneless, skinless chicken thighs, cut into 1-inch pieces
- 1 large egg, lightly beaten
- 1 tbsp water
- 1/2 tsp fine salt
- 1/4 tsp white pepper
For the Coating:
- 1/2 cup cornstarch
- 1/2 cup all-purpose flour
- 1 tsp baking powder
For Frying:
- 2 cups neutral oil, or enough for a 1/2-inch depth in a 12-inch skillet
For the Sauce:
- 3/4 cup pineapple juice
- 1/2 cup ketchup
- 1/3 cup rice vinegar
- 1/4 cup packed light brown sugar
- 2 tbsp soy sauce
- 2 cloves garlic, minced
- 1 tsp fresh ginger, finely grated
- 1 tbsp cornstarch
- 2 tbsp cold water
- 1 tsp toasted sesame oil, optional
For the Vegetables and Finish:
- 1 red bell pepper, cut into 1-inch pieces
- 1 green bell pepper, cut into 1-inch pieces
- 1 small yellow onion, cut into 1-inch wedges
- 1 cup pineapple chunks, drained if canned
- 2 scallions, thinly sliced
- 1 tsp toasted sesame seeds, optional
Why These Ingredients Work Together
Chicken
What to use: 1 1/2 lbs boneless, skinless chicken thighs, cut into 1-inch pieces.
Preparation: Pat the chicken dry before cutting it. Moisture on the surface makes the coating slide and makes the oil pop more than it should.
Substitutions: Chicken breast works if you cut it a little smaller and fry it a minute less. Firm tofu can stand in if you press it well and fry it in shallow oil until the edges turn crisp.
Tips: Thighs stay juicier after frying and saucing, which is why I prefer them here. Breasts are fine, but they punish overcooking fast.
Coating
What to use: 1/2 cup cornstarch, 1/2 cup all-purpose flour, and 1 tsp baking powder.
Preparation: Mix the dry coating in a separate bowl and let the coated chicken sit for 10 minutes before frying so the crust grabs onto the meat.
Substitutions: A gluten-free all-purpose blend can replace the flour, and rice flour can replace part of it if you want a lighter crackle. Cornstarch should stay in the mix either way.
Tips: Baking powder gives the coating a rougher, craggier surface, which catches sauce in a better way than a smooth flour crust.
Sauce
What to use: 3/4 cup pineapple juice, 1/2 cup ketchup, 1/3 cup rice vinegar, 1/4 cup packed light brown sugar, 2 tbsp soy sauce, 2 cloves minced garlic, 1 tsp grated ginger, and a slurry made from 1 tbsp cornstarch and 2 tbsp cold water.
Preparation: Whisk the sauce base before heating it, and mix the cornstarch with cold water in a separate cup so it doesn’t clump when it hits the pan.
Substitutions: Apple cider vinegar works in a pinch, but rice vinegar is rounder and less harsh. If you do not have pineapple juice, orange juice can step in, though the sauce will taste brighter and less familiar.
Tips: Simmer the sauce only long enough to thicken. A hard boil dulls the color and makes the sweetness feel heavier than it should.
Vegetables and Fruit
What to use: 1 red bell pepper, 1 green bell pepper, 1 small yellow onion, and 1 cup pineapple chunks.
Preparation: Cut the peppers and onion into pieces that are big enough to keep their shape. Drain canned pineapple well so the sauce doesn’t go watery.
Substitutions: Snap peas, baby corn, or small broccoli florets can replace part of the pepper if you want more vegetables. Frozen pineapple can work too, but thaw and pat it dry first.
Tips: Keep the vegetables slightly larger than you think you need. They soften fast once they hit hot sauce, and smaller pieces disappear into mush.
Finishing Touches
What to use: 2 scallions, thinly sliced, plus optional toasted sesame seeds and 1 tsp toasted sesame oil.
Preparation: Slice the scallions at the very end so they stay sharp and green.
Substitutions: If sesame oil isn’t in your cupboard, skip it. Don’t replace it with plain oil and pretend it does the same job.
Tips: A few scallions on top make the dish look brighter and give each bite a fresh, oniony lift.
The Tools That Keep the Frying Neat
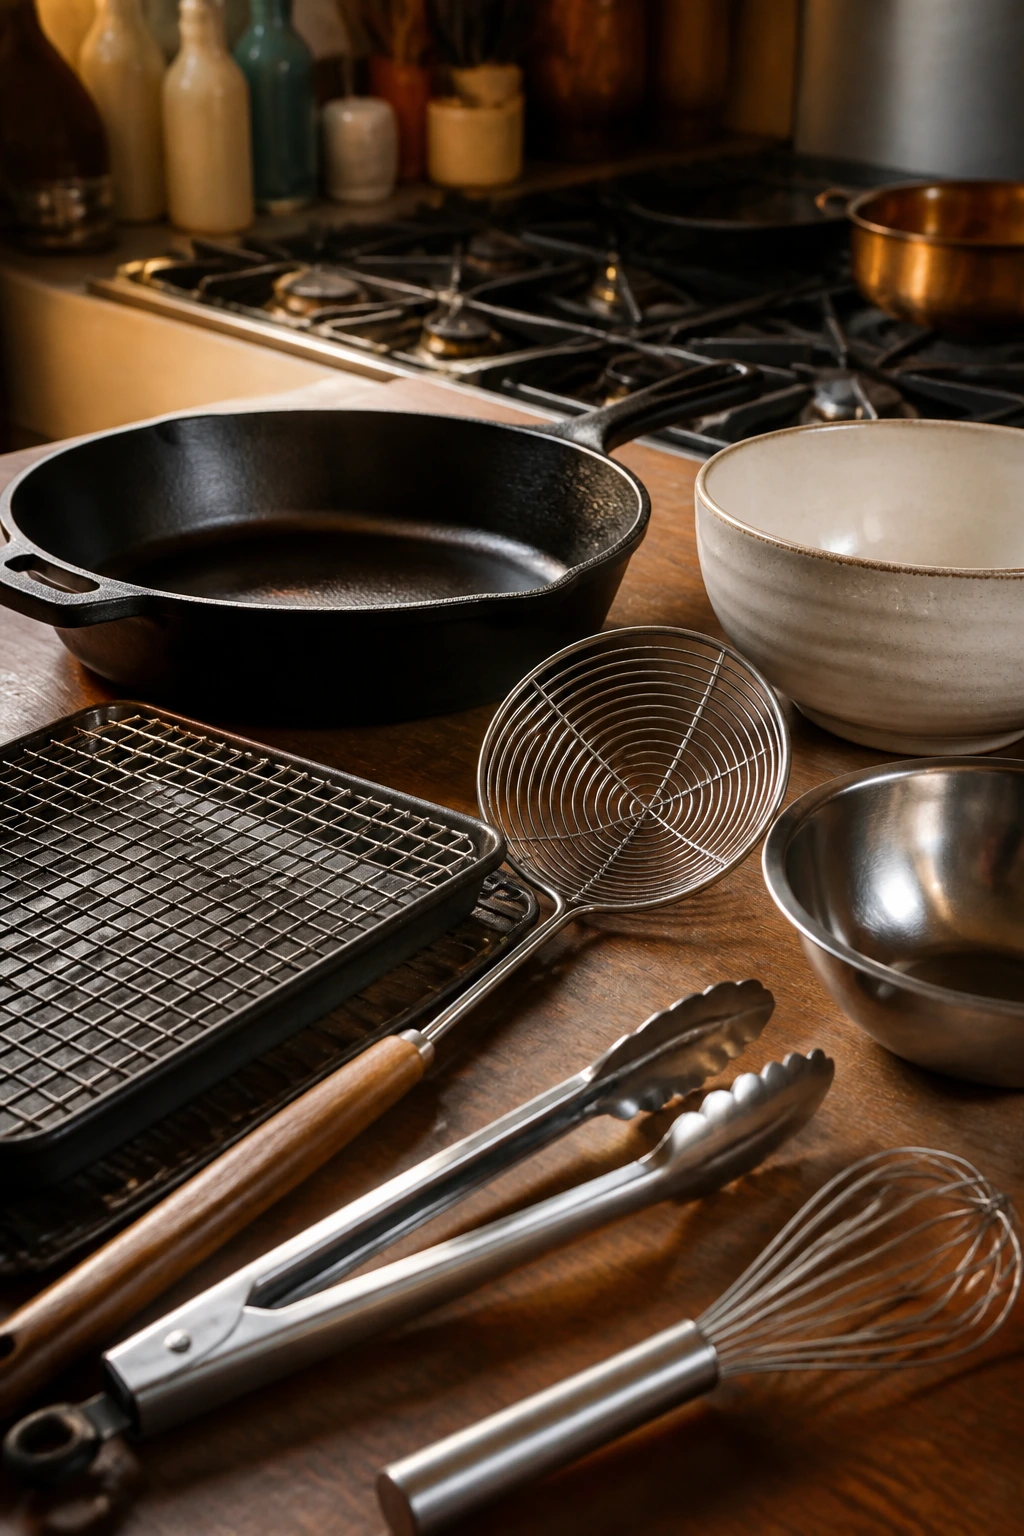
- 12-inch heavy skillet or wok — A heavy pan holds heat better, which keeps the chicken from going pale and greasy between batches.
- Instant-read thermometer — Worth it. You want the oil around 350°F, not “kind of hot.”
- Wire rack set over a rimmed baking sheet — This keeps the chicken crisp while it drains. Paper towels trap steam under the crust.
- Medium saucepan — Cleaner than trying to make the sauce in the frying pan if the oil has gotten dark.
- Spider skimmer or slotted spoon — Helpful for lifting the chicken out of the oil without knocking the coating off.
- Two mixing bowls — One for the wet chicken, one for the dry coating.
- Tongs — Better than forks, which tend to tear the crust.
- Small whisk and measuring spoons — You need these for the sauce slurry, and a sloppy slurry makes a lumpy sauce.
Frying the Chicken Until It Stays Crisp
The chicken is the part that deserves your attention first. Get that right, and the rest of the dish has a chance to shine. Get it wrong, and the sauce can’t rescue anything.
Prep the Chicken and Coating:
-
Pat the chicken dry with paper towels, then cut it into 1-inch pieces if you have not already done so. In a medium bowl, whisk together the egg, 1 tablespoon water, salt, and white pepper until the egg is fully loosened. Add the chicken and toss until every piece has a thin, sticky coating.
-
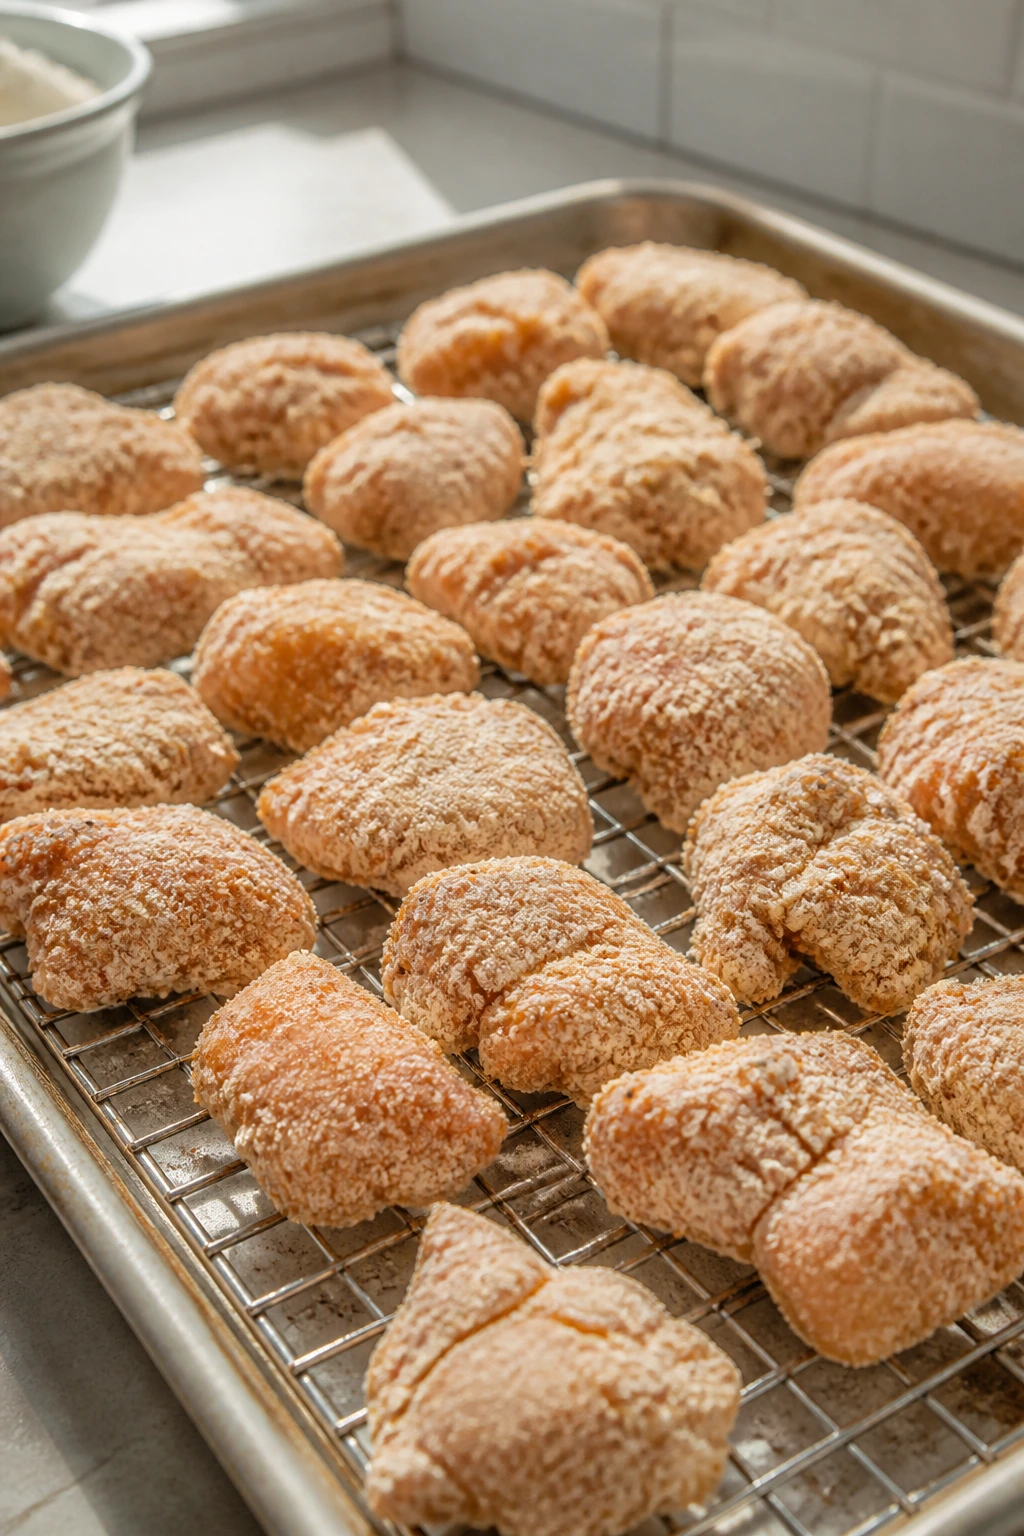
In a second bowl, whisk together the cornstarch, flour, and baking powder until the mixture looks even and a little fluffy. Add the chicken pieces and toss until the coating clings to the outside of each piece. Do not leave wet patches. If a piece looks bare, dust it again. Let the coated chicken rest for 10 minutes so the coating hydrates and grips better.
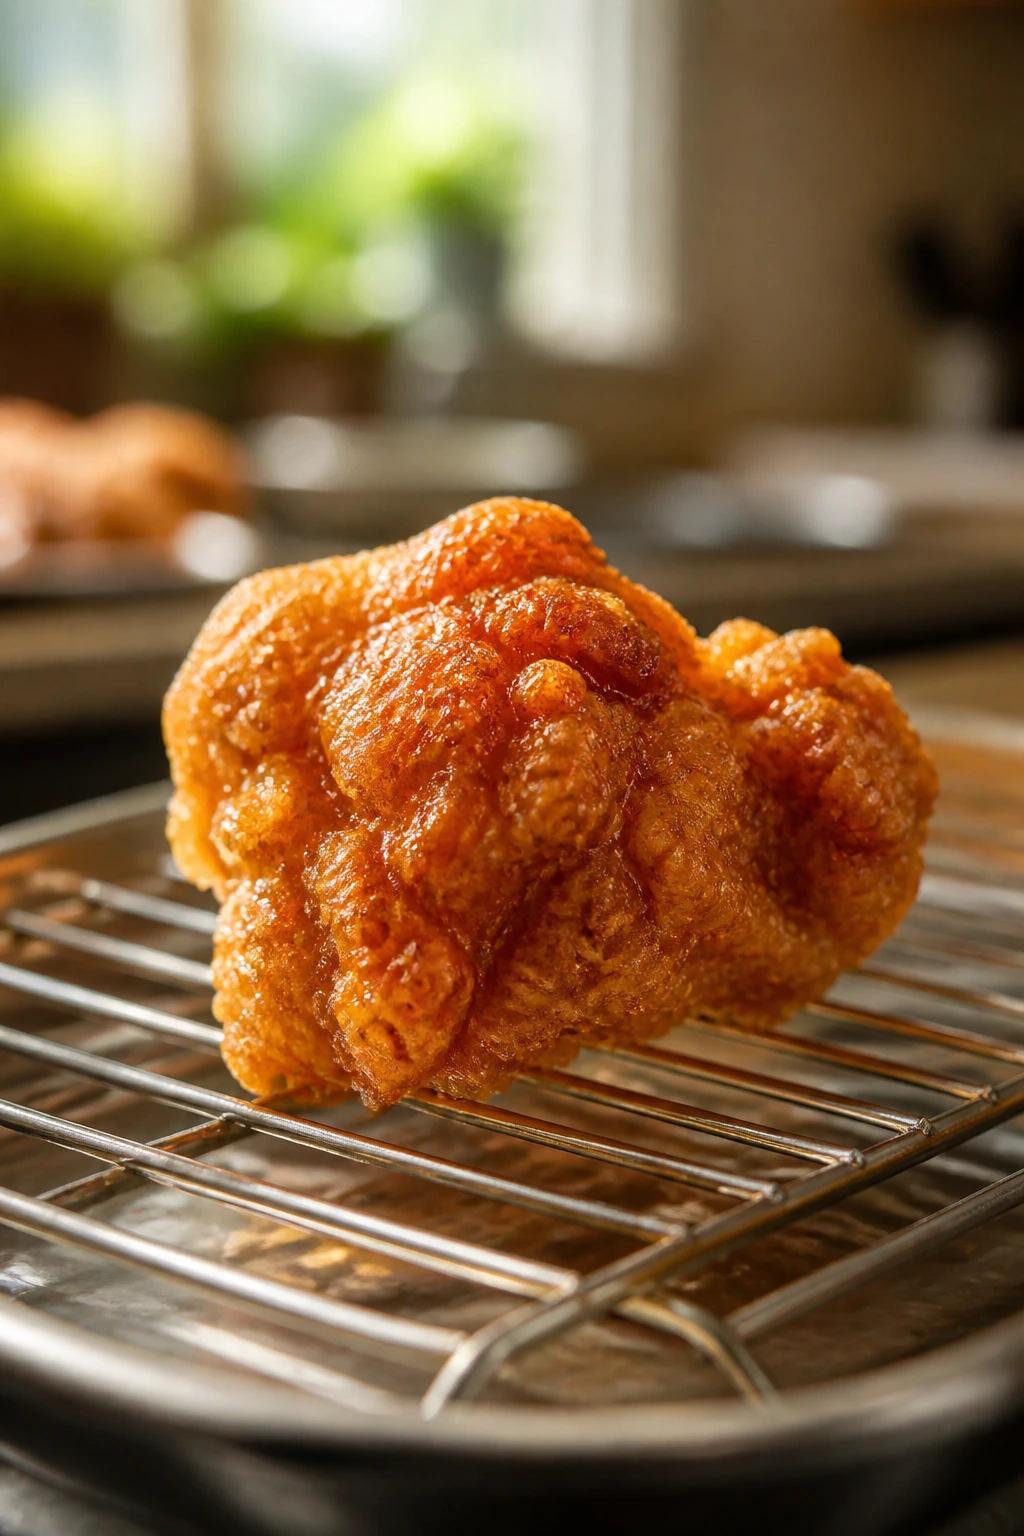
Heat the Oil and Fry in Batches:
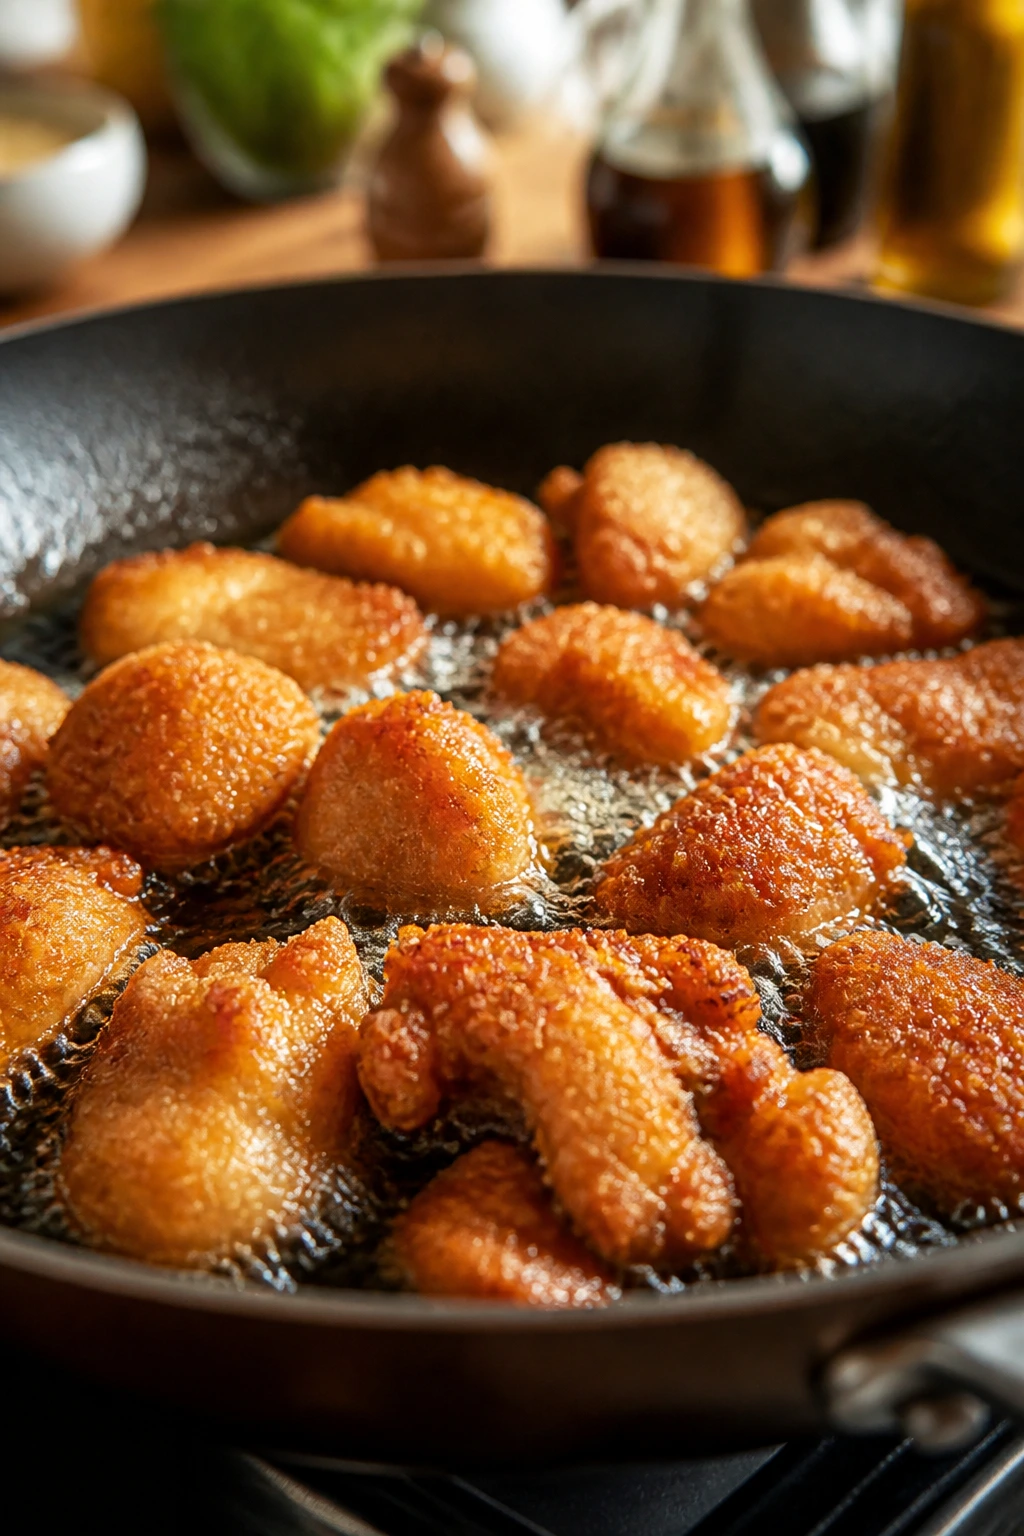
3. Pour the neutral oil into a 12-inch skillet to a depth of about 1/2 inch. Heat over medium-high until the oil reaches 350°F. If you do not have a thermometer, drop in a little bit of coating; it should sizzle right away and float after a second or two.
- Fry the chicken in two batches, about 5 to 6 minutes per batch, turning the pieces once or twice so they brown evenly. The chicken should turn deep golden, not pale beige, and the thickest piece should reach 165°F at the center. Transfer the cooked chicken to a wire rack set over a baking sheet. Do not crowd the pan. If you pack too many pieces in at once, the oil temperature drops and the crust goes soft and greasy.
The sound matters here. You want a steady, active sizzle, not a wild splatter and not a faint hiss. Steady means the oil is doing its job. Wild means the heat is too high. Weak means the pan is too crowded or not hot enough yet.
Building a Sauce That Clings Instead of Pooling
This is where the dish turns from fried chicken into sweet and sour chicken. The sauce needs to thicken, but not so much that it feels sticky and heavy. You want gloss. Not glue.
Mix the Sauce Base:
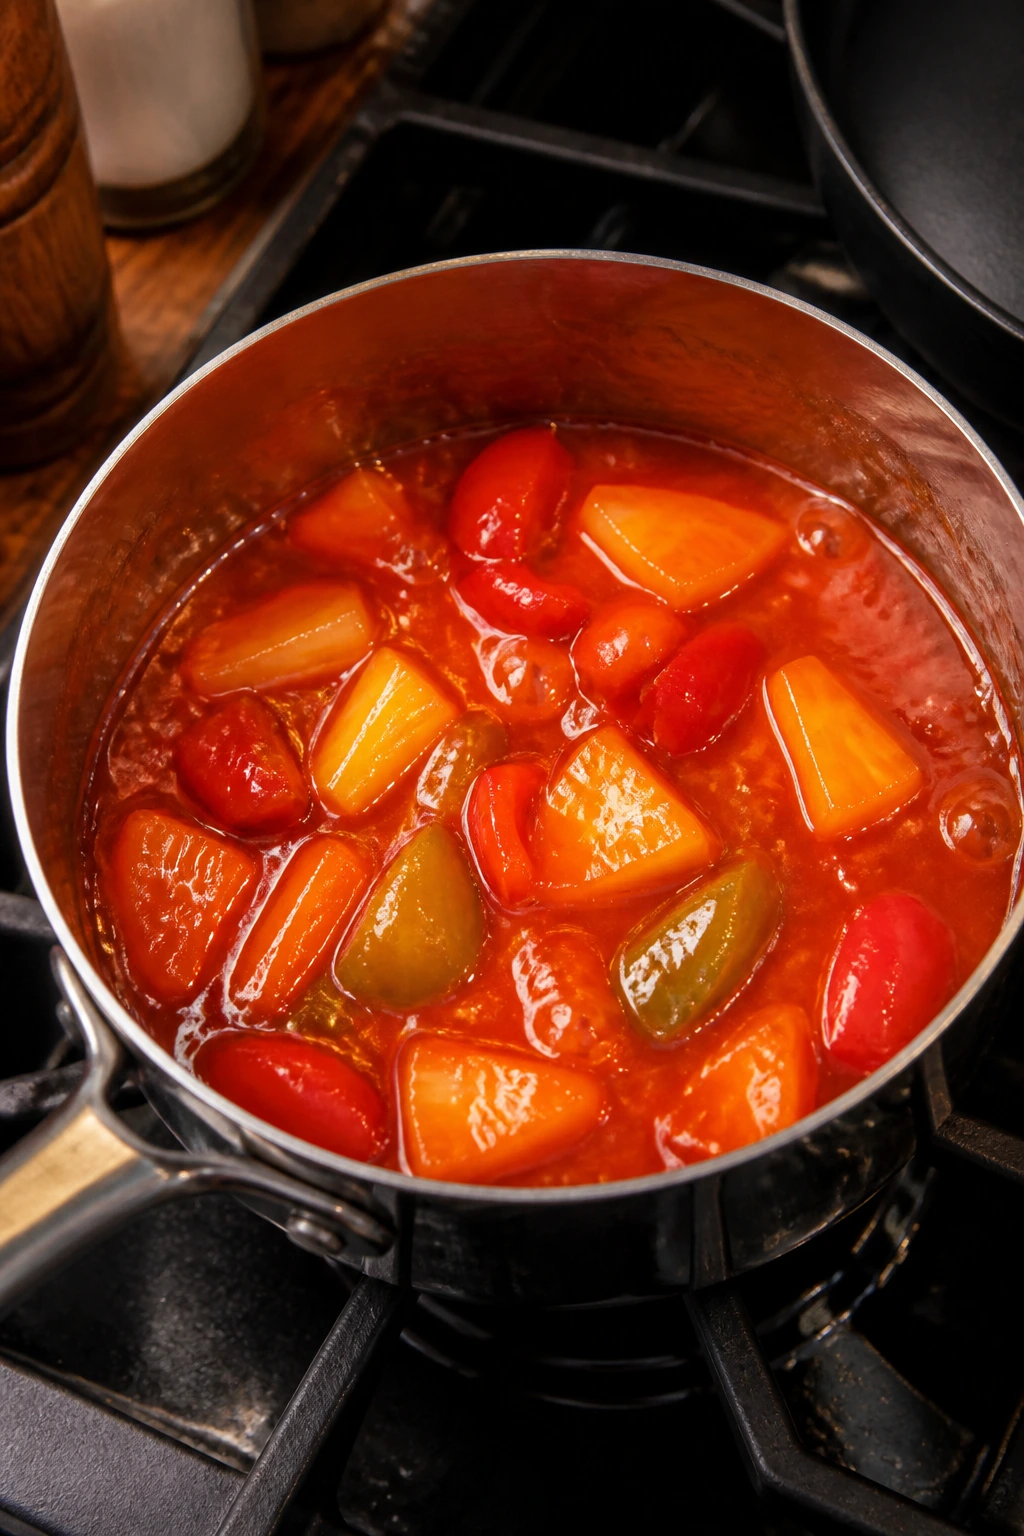
5. In a medium saucepan, whisk together the pineapple juice, ketchup, rice vinegar, brown sugar, soy sauce, minced garlic, and grated ginger. The mixture should look reddish and smooth, with no brown sugar clumps sitting on the bottom.
- In a small cup, stir the cornstarch and cold water together until the slurry is completely smooth. If the slurry sits too long before you use it, give it another quick stir. Cornstarch settles fast, and a settled slurry makes uneven thickening.
Simmer and Thicken:
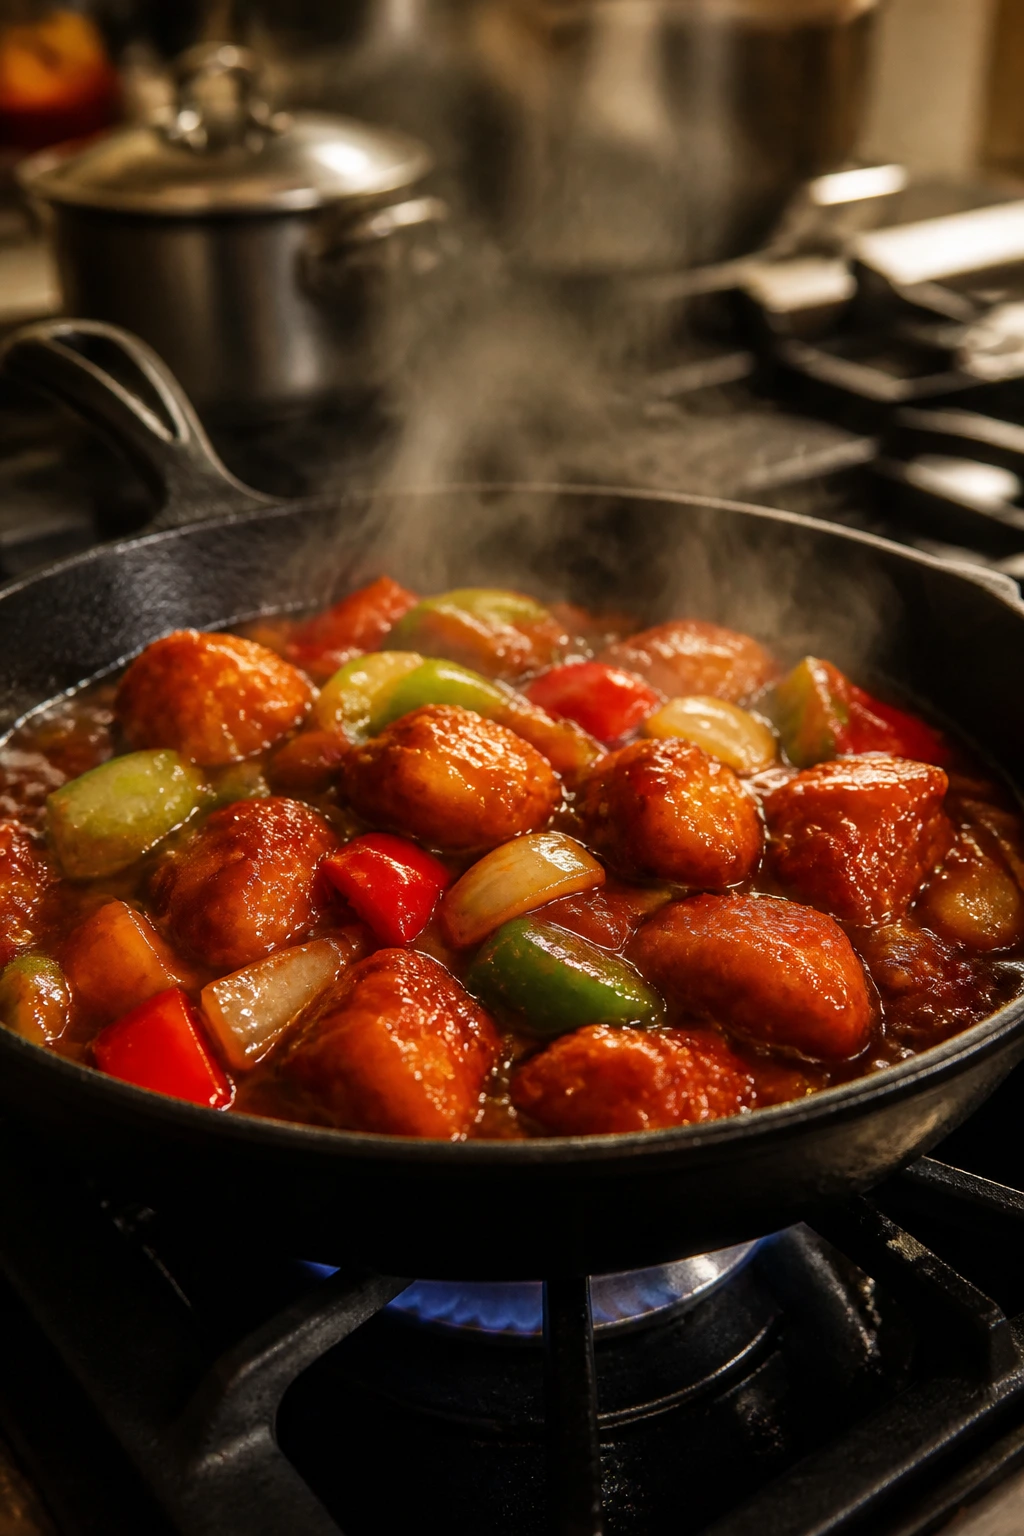
7. Set the saucepan over medium heat and bring the sauce to a gentle simmer. Stir in the cornstarch slurry and cook for 1 to 2 minutes, whisking, until the sauce turns glossy and thick enough to coat the back of a spoon. Add the bell peppers, onion, and pineapple chunks, then cook for another 2 to 3 minutes, just until the vegetables lose their raw edge but still have some bite. Do not boil hard. A hard boil can make the sauce too sticky and flatten the color.
The vegetables should still look lively when they go into the sauce. The peppers should brighten before they soften. The onion should lose its raw sting, not collapse into threads. Pineapple should warm through and taste louder, if that makes sense. That’s the best part of using real fruit here: it doesn’t just sweeten, it wakes up the whole pan.
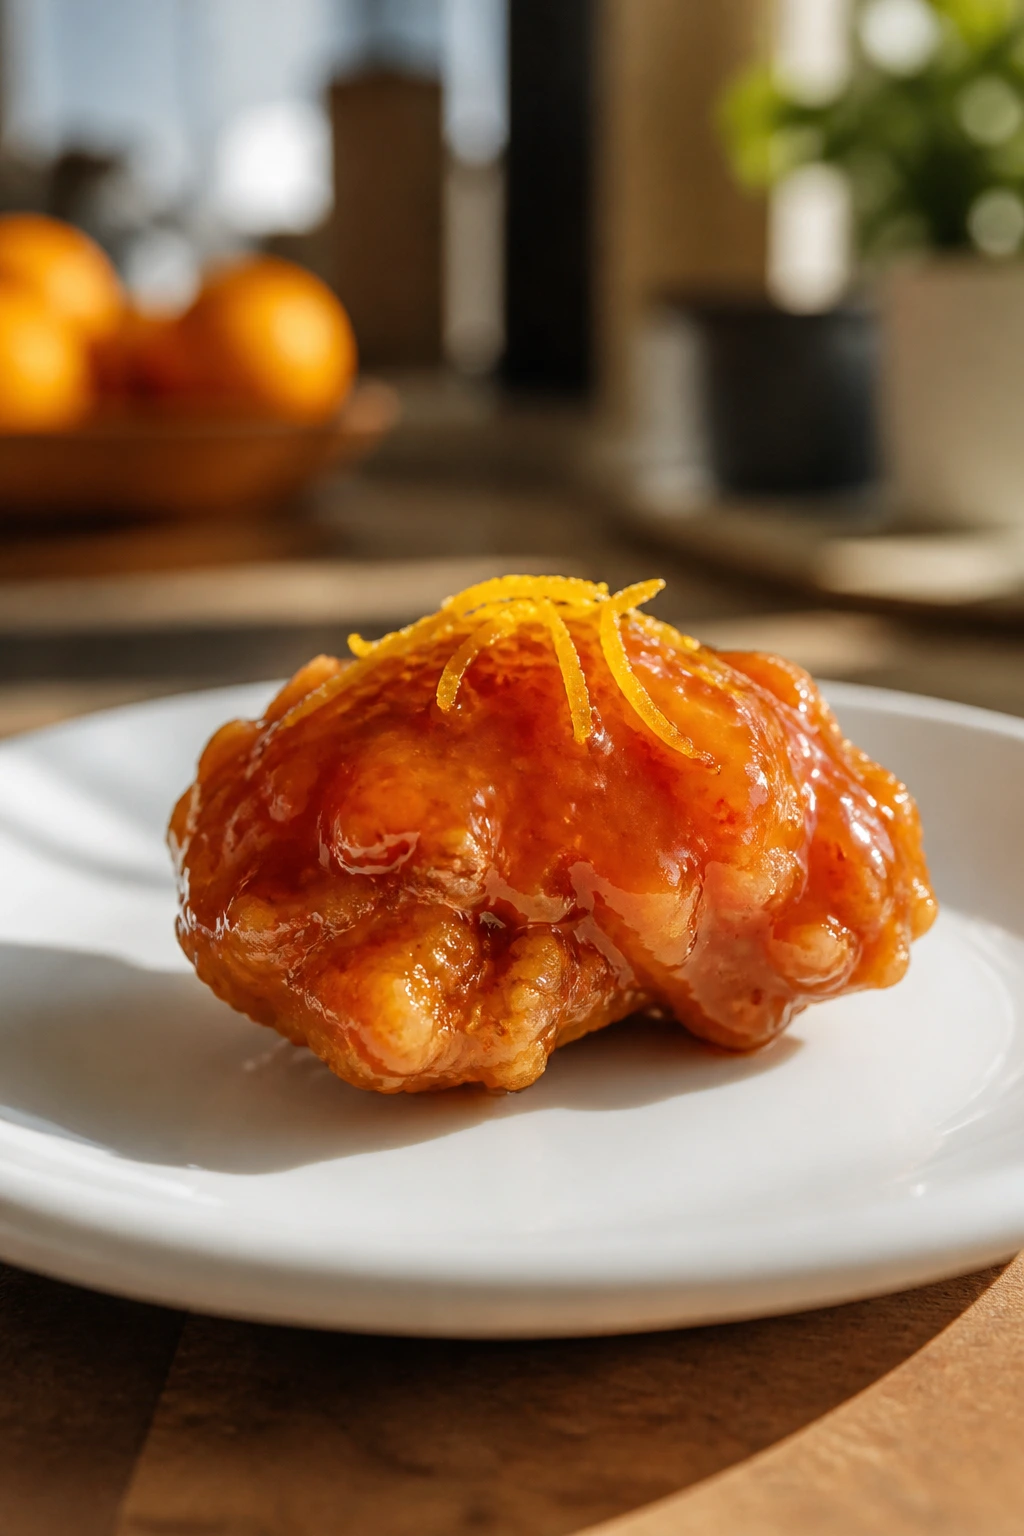
Bringing the Chicken and Sauce Together
Once the sauce is ready, the clock starts. Not a long clock. A short one.
Finish the Dish:
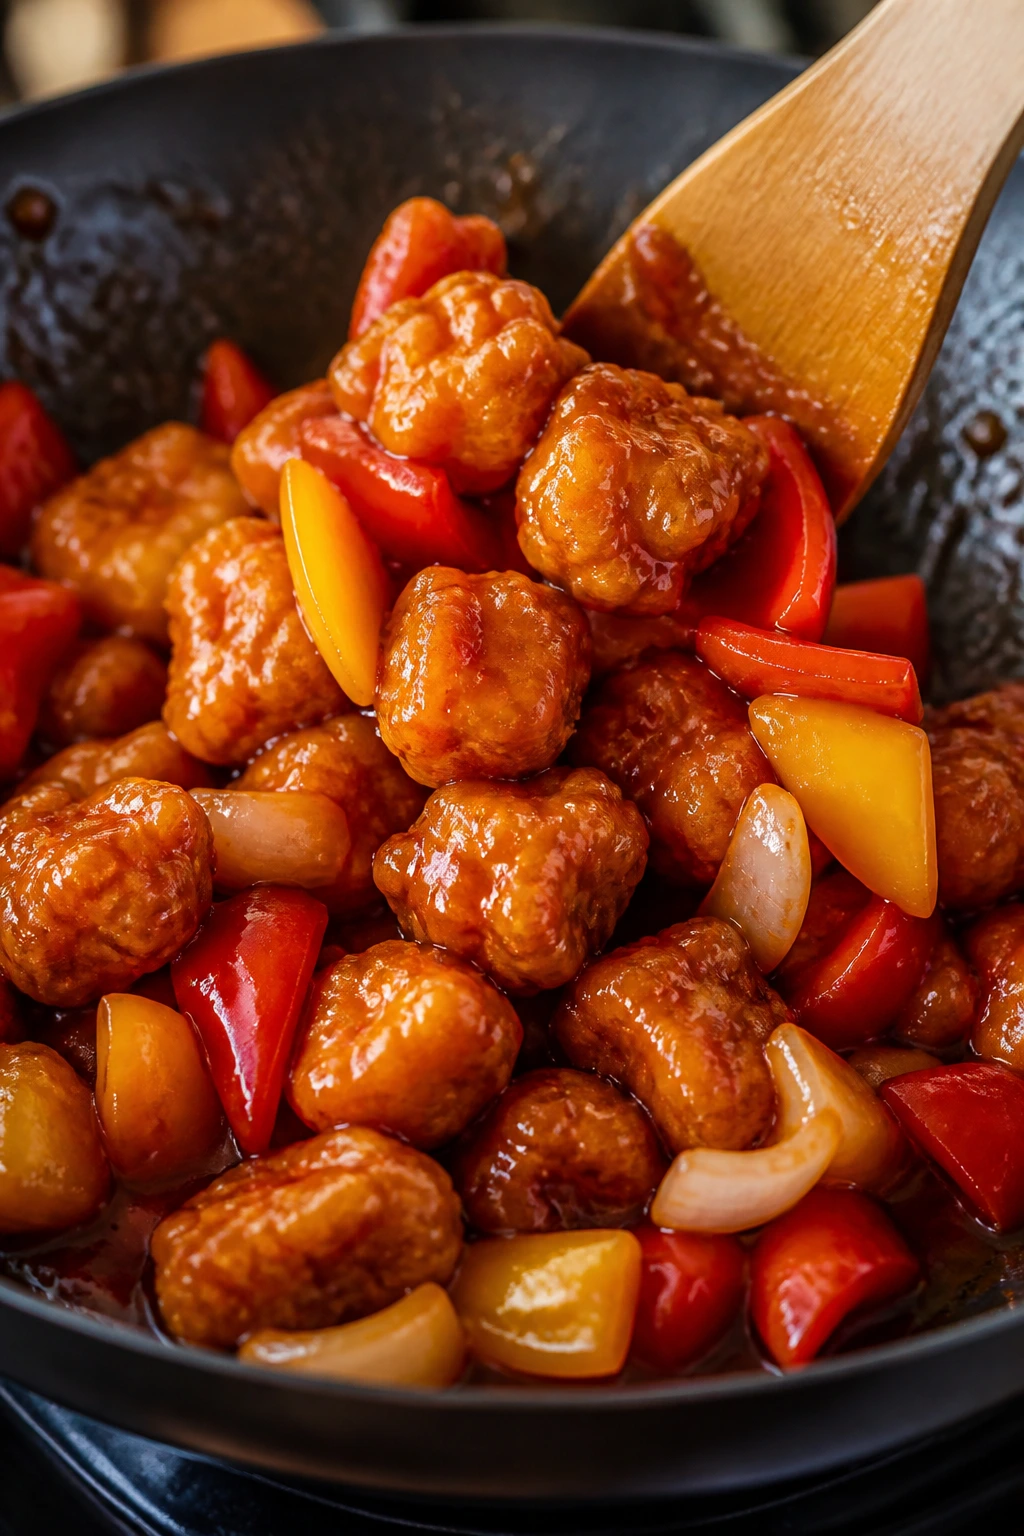
8. Add the fried chicken to the saucepan and toss gently for 30 to 45 seconds, just until every piece gets coated in sauce. If you are nervous about losing crunch, move the chicken and sauce to a large bowl and toss there instead of over direct heat. Finish with toasted sesame oil, if you’re using it, then scatter the scallions and sesame seeds over the top. Serve immediately.
The sauce should cling to the edges of the chicken and leave the center of each bite a little crisp. That’s the target. If you keep stirring for too long, the coating drinks up the sauce and the whole dish softens. Short toss. Fast plate. Done.
I also like to keep a spoonful of sauce on the side for rice, especially if the chicken pieces are on the crispier end. That way the rice gets the flavor it deserves without drowning the crust.
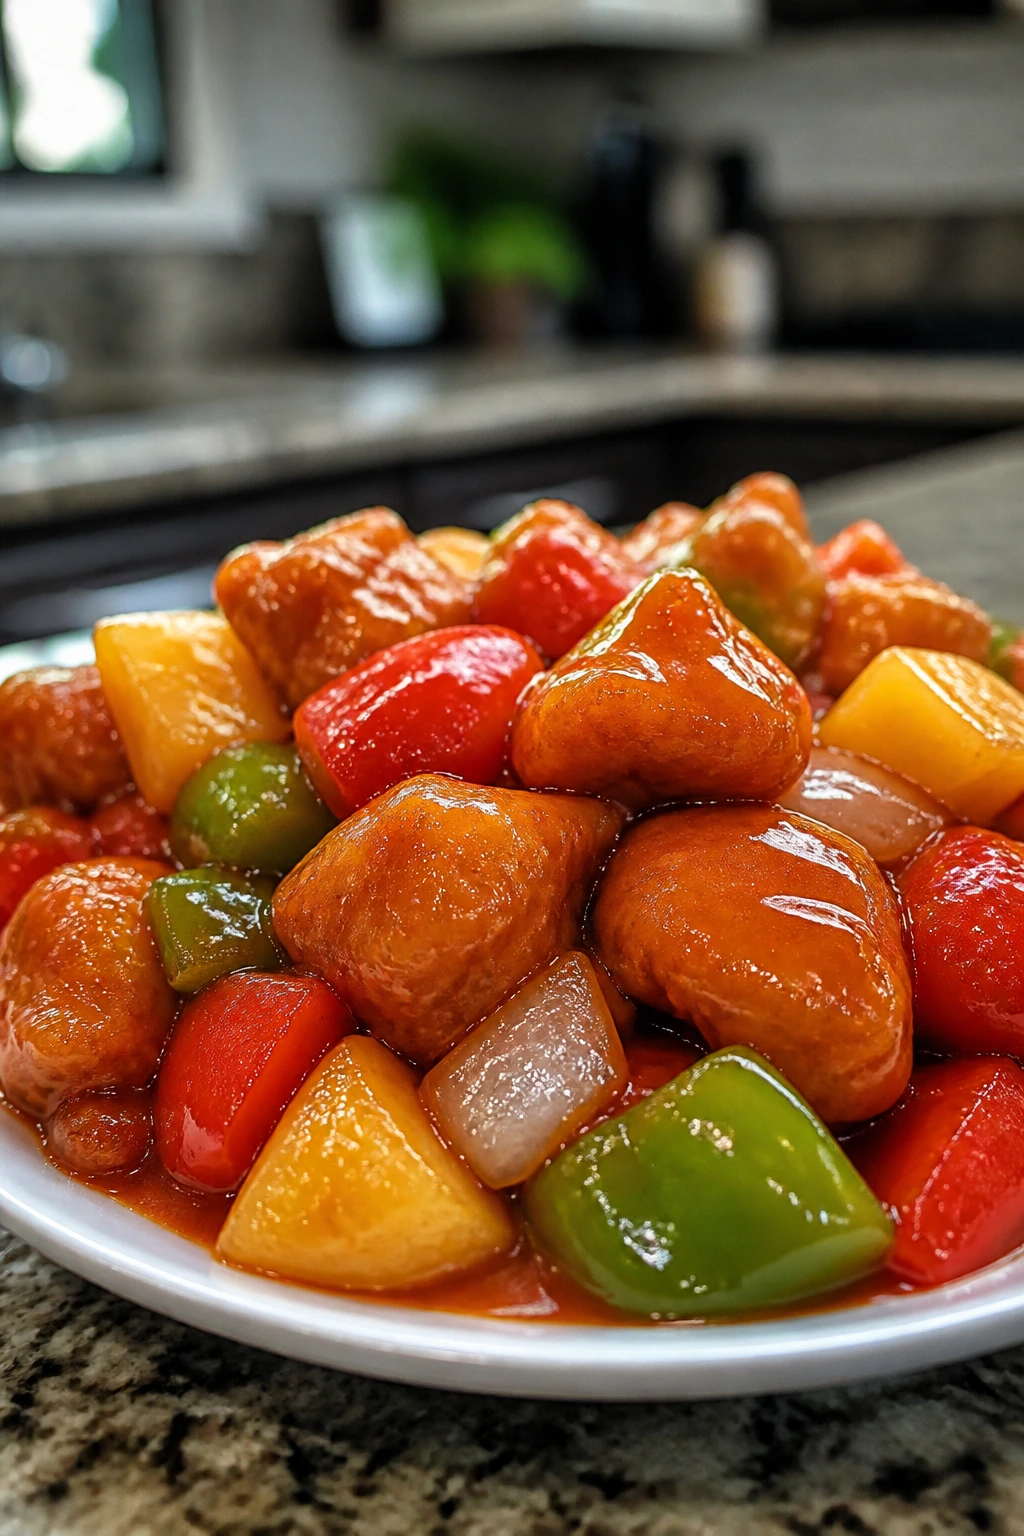
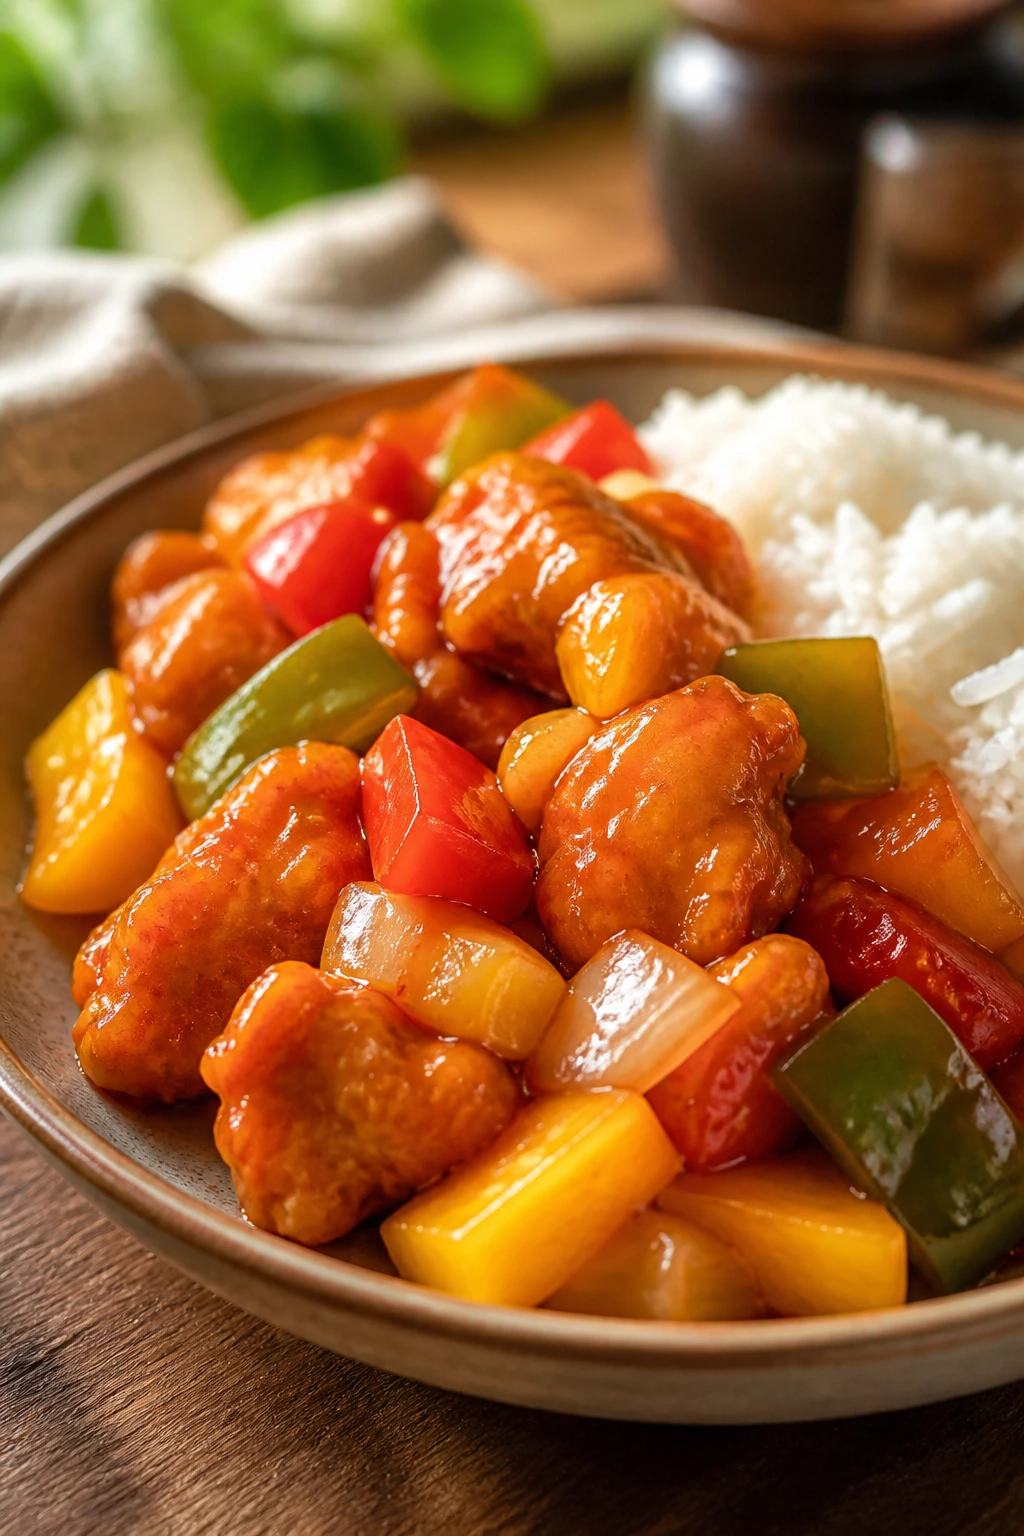
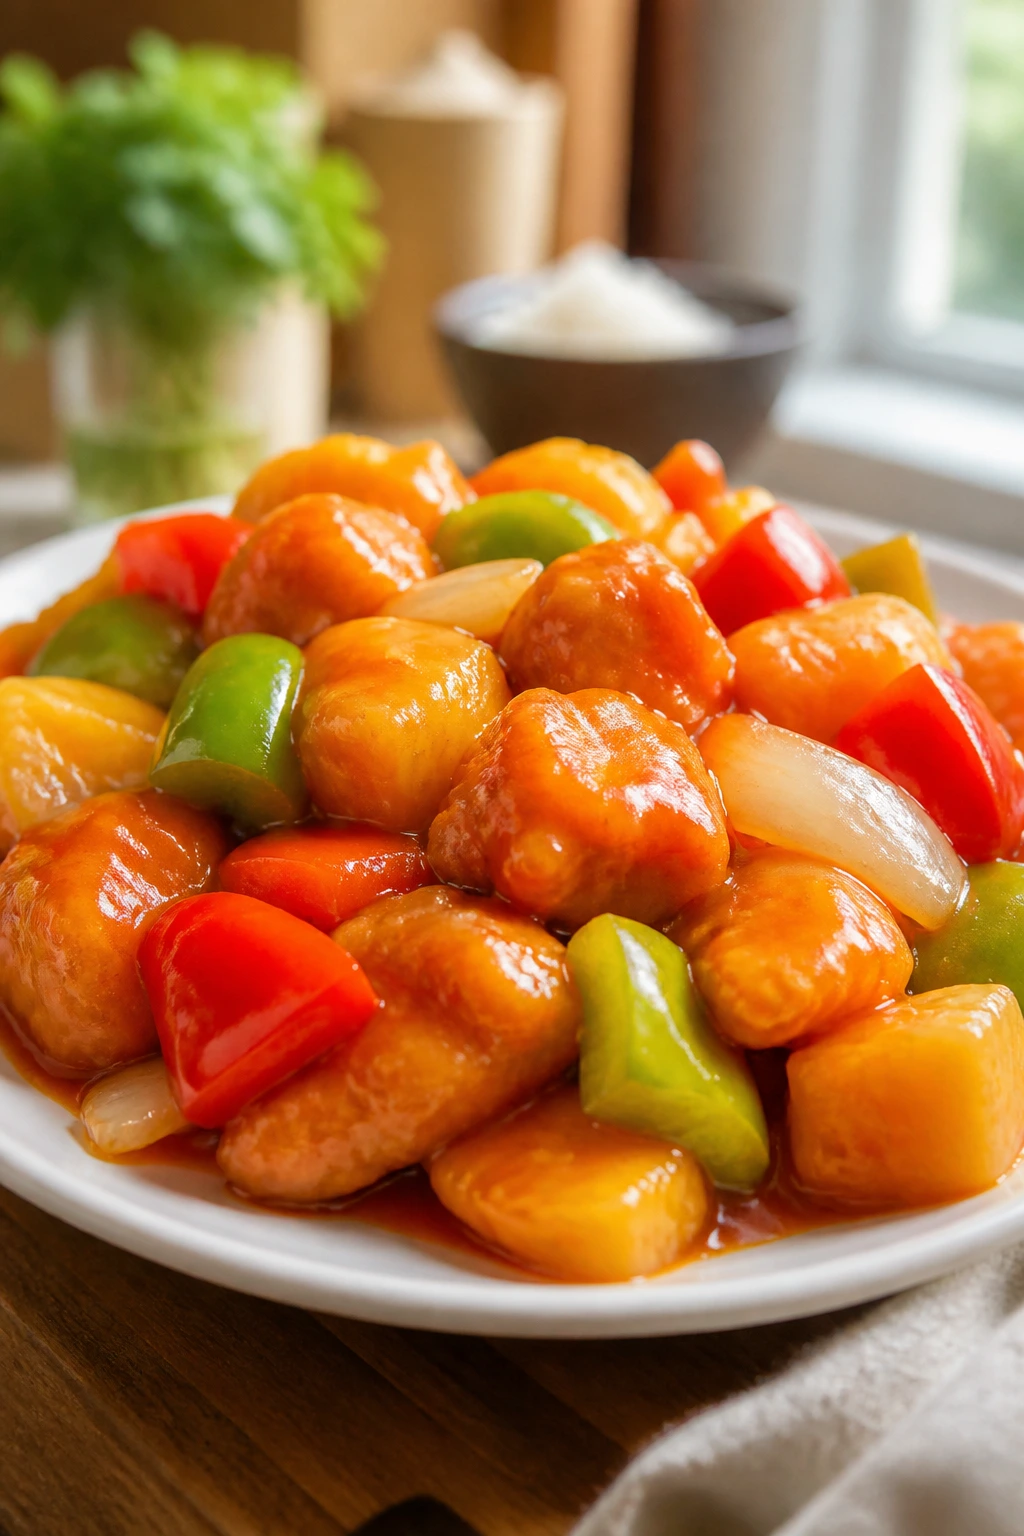
Plating It Like a Proper Takeout Order
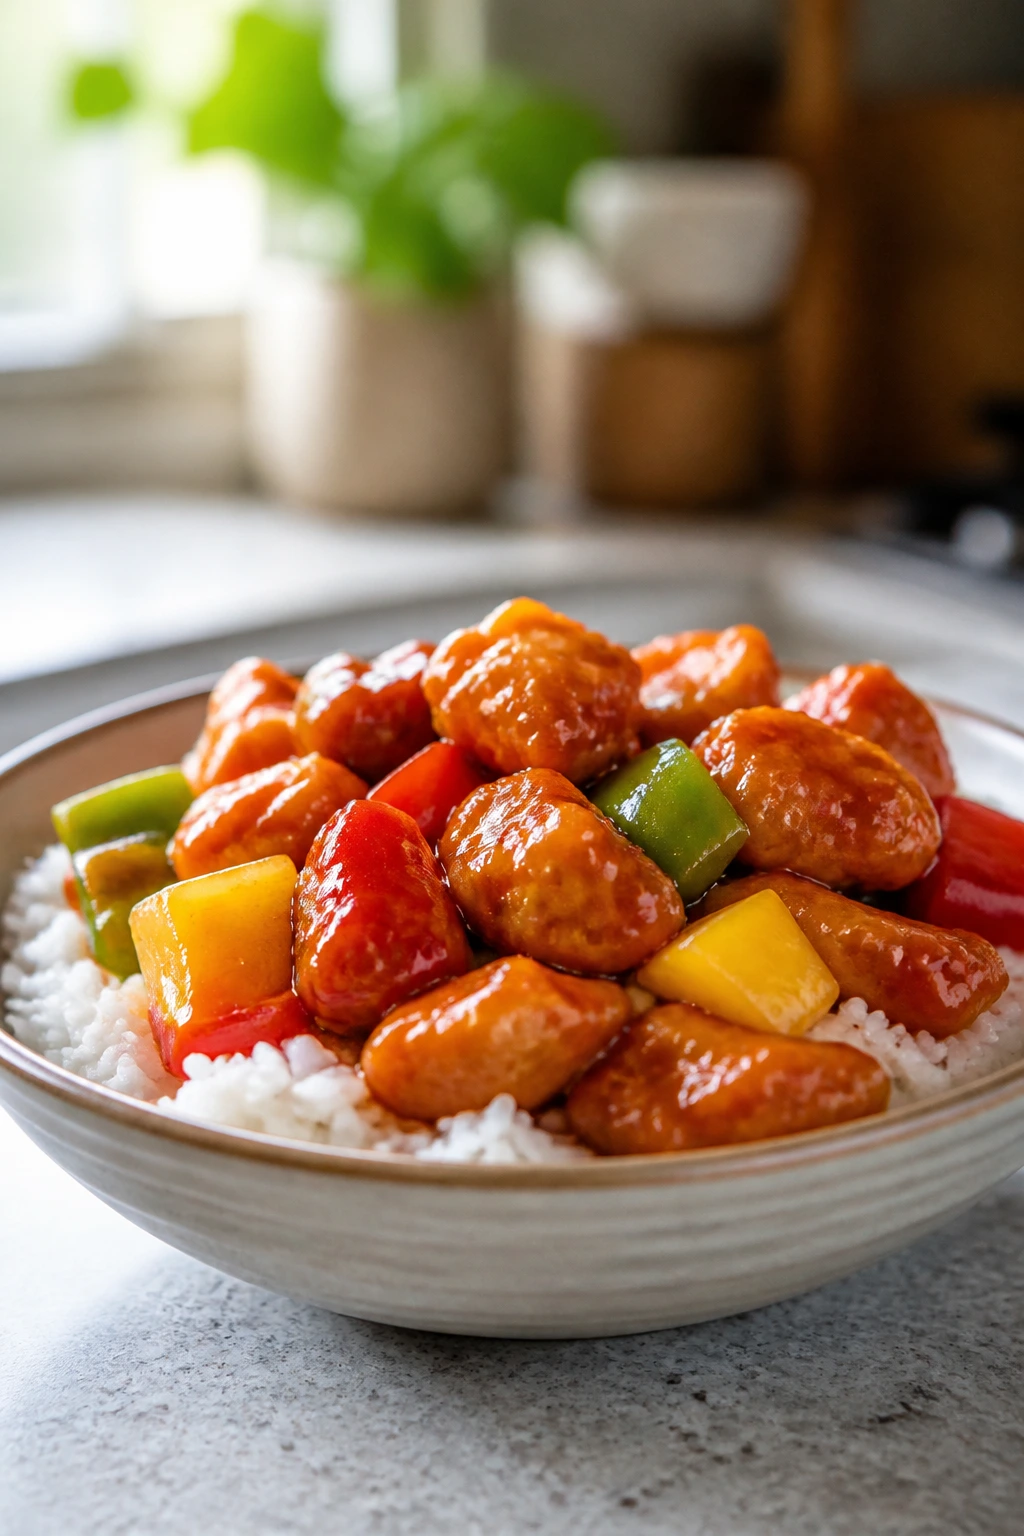
Presentation: Spoon a mound of steamed jasmine rice onto each plate or bowl, then pile the sweet and sour chicken over part of it so some of the rice stays visible. Let the peppers and pineapple sit on top where their color can show through the sauce. A final scatter of scallions gives the plate some sharp green against all that red-gold gloss.
Accompaniments: Steamed broccoli, garlic green beans, or a simple cucumber salad all work because they don’t compete with the sauce. If you want a full takeout spread, fried rice or a plain egg roll fits naturally beside it. I would keep the sides plain. The dish already has enough going on.
Portions: Four people can eat this as a main dish over rice, or six can have smaller portions if there are sides on the table. If you double the recipe, double the sauce too; chicken without enough sauce tastes dry, and too little sauce gets lost once rice joins the party.
Beverage Pairing: Hot jasmine tea keeps the sweetness from feeling heavy. A dry lager works if you want something cold and simple. Sparkling water with lime is a good no-brainer if you want the plate to stay the focus.
Small Tweaks That Make a Big Difference
Flavor Enhancement: Taste the sauce after it thickens, not before. Heat changes the way sugar and vinegar read on the tongue, so the pan is where you find the real balance. If it’s leaning too sweet, add 1 teaspoon vinegar at a time. If it’s too sharp, add 1 tablespoon pineapple juice or 1 teaspoon brown sugar and stir for 20 seconds before tasting again.
Customization: Want more heat? Stir 1 tablespoon of chili crisp into the sauce after it comes off the heat, or add a few thin slices of fresh red chile with the peppers. Want a brighter note? Add a pinch of orange zest right at the end. That tiny bit of citrus scent lifts the whole plate.
Serving Suggestions: Keep extra scallions on the side and add them just before eating, especially if you’re serving guests. A final drizzle of sauce around the edge of the plate looks better than pouring everything on top. It also keeps the chicken a little crisper where it matters most.
Make-It-Yours: For a gluten-free version, swap the flour for a gluten-free all-purpose blend and use tamari instead of soy sauce. For a lower-sugar version, reduce the brown sugar to 3 tablespoons and lean on the pineapple juice for sweetness. For a vegetarian plate, use pressed extra-firm tofu and fry it until the edges turn sharp and gold.
Where This Dish Usually Goes Wrong
The Chicken Sits in the Sauce Too Long: The most common problem is soggy coating. The chicken looks fine for a minute, then the crust turns soft and starts sliding off. The fix is simple: fry, drain on a rack, sauce quickly, and serve. Don’t let the finished dish sit in the pan while you answer a text or hunt for chopsticks.
The Oil Is Too Cool: Pale chicken and oily crumbs are the giveaway. If the pan is not at 350°F, the coating drinks oil instead of browning. Heat the oil properly and fry in smaller batches. Cold oil is one of those mistakes that looks small and tastes huge.
The Sauce Turns Jammy: Too much sugar, too much boiling, or too much cornstarch can make the sauce thick in a gluey way. You want a glossy coat, not a sticky shell. If the sauce gets too tight, whisk in 1 to 2 tablespoons of pineapple juice or water and warm it gently until it loosens.
The Vegetables Go Limp: Bell peppers should still have a little snap. If they sit in the sauce for five or six minutes, they lose their shape and color. Add them late, cook them briefly, and pull the pan from the heat while they still look alive.
The Chicken Pieces Are Uneven: Some pieces overcook while others are still pale because the cuts vary too much. Keep the chicken close to the same size, around 1 inch. That makes the fry time predictable, which is a much bigger deal than people think.
A Few Smart Swaps and Flavor Offshoots
Orange-Zest Brightener: Replace 1/4 cup of the pineapple juice with orange juice and add 1 teaspoon of orange zest at the end. The sauce becomes lighter and a little more fragrant, which works well if you want a cleaner citrus note and less of that classic pineapple-heavy sweetness.
Chili Crisp Heat: Stir 1 to 2 tablespoons of chili crisp into the finished sauce off the heat. It adds heat, garlic, and a little crunch without muddying the sweet-sour balance. This version is good for people who want the dish to bite back a little.
Gluten-Free Crunch: Use a gluten-free flour blend in place of the all-purpose flour and swap soy sauce for tamari. Keep the cornstarch in the coating, because that’s part of the crisp shell. Rice flour can also help if you want a lighter finish and don’t mind a slightly drier crust.
Vegetable-Heavy Bowl: Double the bell peppers and add 1 cup snap peas or broccoli florets. The sauce already has enough body to handle more vegetables, and the extra crunch makes the plate feel less chicken-dominant. This is the version I’d make if the fridge is full of odds and ends.
Less-Sweet Take: Drop the brown sugar to 3 tablespoons and add 1 extra tablespoon of rice vinegar. The sauce will feel sharper and less like takeout-sweet glaze, which some people prefer with rice or noodles. Just keep tasting. A dish like this punishes guessing.
Keeping Leftovers Crisp Enough to Matter
Sweet and sour chicken is at its best in the first 15 minutes. After that, the coating starts to soften. That is not a flaw so much as physics, but you can still make leftovers behave better than most people do.
Room Temperature: Don’t leave the finished dish out for more than 2 hours. If the table gets long and talkative, move the chicken to storage sooner rather than later.
Refrigerator: Store the chicken and sauce separately if you can. The chicken keeps for 3 to 4 days in an airtight container, and the sauce keeps for the same amount of time in its own jar or container. If you’ve already combined them, the dish will still keep for 3 days, but the crust will soften more quickly.
Freezer: The sauce freezes well for up to 2 months. The cooked chicken can also be frozen for up to 2 months, but it is better if you freeze it on a sheet pan first so the pieces don’t stick together in one clump. If the chicken is already sauced, I would not expect magic from the freezer. It will work, but it won’t be thrilling.
Reheating: The best way to reheat the chicken is in a 400°F oven or a 375°F air fryer for 5 to 8 minutes, just until hot and crisp again. Warm the sauce separately in a saucepan with a splash of water or pineapple juice if it has thickened too much. If the chicken and sauce are already combined, reheat them gently in a skillet over medium-low heat and stir only enough to keep the sauce from sticking.
Make-Ahead Notes: You can cut the vegetables and chicken earlier in the day and keep them covered in the fridge. The sauce can be mixed and refrigerated a day ahead, then rewarmed before thickening. I would not fry the chicken too far in advance unless you have a good reheating plan.
Questions Home Cooks Ask Most

Can I use chicken breast instead of thighs?
Yes, and the recipe will still work. Chicken breast just needs a little more care because it dries out faster, so cut the pieces slightly smaller and watch the fry time closely. Pull it the moment the center hits 165°F.
Do I have to deep-fry the chicken?
No, but frying gives the best texture. A shallow fry in 1/2 inch of oil is the easiest home version, and it still beats baking if crispness matters to you. If you want to air-fry it, the coating changes a bit and the texture gets drier, so I treat that as a different variation rather than the main recipe.
What if I only have white vinegar?
Use it sparingly. White vinegar is sharper than rice vinegar, so start with a little less and add to taste after the sauce has thickened. If it feels too hard, a tablespoon of pineapple juice or a small pinch of sugar can round it out.
Can I make the sauce ahead?
Yes. The sauce base can be made a day or two ahead and stored in the fridge. Rewarm it before serving, then add the slurry and vegetables right before you finish the dish so the texture stays lively.
How do I keep the chicken from going soggy?
Drain it on a rack, not paper towels, and toss it with the sauce at the last possible second. If you know the plate will sit for a few minutes, serve the sauce on the side and spoon some over the top at the table. That keeps the crust sharper for longer.
Can I leave out the pineapple?
You can, but the sauce loses part of its shape. Pineapple juice and chunks bring fruit sweetness and acidity, which helps the sauce taste layered instead of one-note. If you skip it, add a little orange juice or a touch more vinegar and taste carefully.
Does this work with tofu or shrimp?
Yes, with a few changes. Extra-firm tofu needs to be pressed and fried or air-fried until the edges are firm; shrimp needs a much shorter cook time and should go into the sauce at the very end. Both versions like the same sauce, but neither wants the same frying time as chicken.
A Hot Skillet Beats a Cold Delivery Box
A good sweet-and-sour plate is not hard to love. It just needs the right contrast, and home cooking gives you the control to keep that contrast sharp. Crisp chicken, a sauce that tastes bright instead of blunt, and vegetables that still have some bite — that’s the part that keeps people going back for another forkful.
The nice thing is that once you make it once, the recipe starts feeling like a pattern you can trust. Fry until crisp. Sauce until glossy. Toss at the last second. That rhythm is simple, and it does more for the dish than a long list of tricks ever could. Keep the rice ready, keep the pan hot, and the delivery box starts looking unnecessary.
Sweet and Sour Chicken — Recipe Card
Recipe Name: Sweet and Sour Chicken
Description: Crispy fried chicken pieces are tossed with a glossy sweet-and-sour sauce, bell peppers, onion, and pineapple for a takeout-style dish with sharper flavor and better texture at home.
Prep Time: 25 minutes
Cook Time: 25 minutes
Total Time: 50 minutes
Course: Dinner, Main Course
Cuisine: American Chinese
Servings: 4 to 6 servings
Calories: About 520 kcal per serving
Ingredients
For the Chicken:
- 1 1/2 lbs boneless, skinless chicken thighs, cut into 1-inch pieces
- 1 large egg, lightly beaten
- 1 tbsp water
- 1/2 tsp fine salt
- 1/4 tsp white pepper
For the Coating:
- 1/2 cup cornstarch
- 1/2 cup all-purpose flour
- 1 tsp baking powder
For Frying:
- 2 cups neutral oil, or enough for a 1/2-inch depth in a 12-inch skillet
For the Sauce:
- 3/4 cup pineapple juice
- 1/2 cup ketchup
- 1/3 cup rice vinegar
- 1/4 cup packed light brown sugar
- 2 tbsp soy sauce
- 2 cloves garlic, minced
- 1 tsp fresh ginger, finely grated
- 1 tbsp cornstarch
- 2 tbsp cold water
- 1 tsp toasted sesame oil, optional
For the Vegetables and Finish:
- 1 red bell pepper, cut into 1-inch pieces
- 1 green bell pepper, cut into 1-inch pieces
- 1 small yellow onion, cut into 1-inch wedges
- 1 cup pineapple chunks, drained if canned
- 2 scallions, thinly sliced
- 1 tsp toasted sesame seeds, optional
Instructions
- Pat the chicken dry, then whisk the egg, water, salt, and white pepper in a bowl. Add the chicken and toss to coat.
- Mix the cornstarch, flour, and baking powder in a second bowl. Coat the chicken in the dry mixture, then let it rest for 10 minutes.
- Heat the neutral oil in a 12-inch skillet to 350°F.
- Fry the chicken in batches for 5 to 6 minutes, turning as needed, until deep golden and cooked through to 165°F. Drain on a wire rack.
- Whisk the pineapple juice, ketchup, rice vinegar, brown sugar, soy sauce, garlic, and ginger in a saucepan.
- Stir the cornstarch and cold water together, then whisk the slurry into the simmering sauce until glossy and thick enough to coat a spoon.
- Add the bell peppers, onion, and pineapple chunks. Cook for 2 to 3 minutes until crisp-tender.
- Add the chicken and toss gently for 30 to 45 seconds until coated. Finish with sesame oil, scallions, and sesame seeds if using, then serve right away.
Notes: Keep the chicken and sauce separate until the last minute if you want the crispiest finish. If the sauce thickens too much, loosen it with 1 to 2 tablespoons pineapple juice or water.